J.P. Hall
-
Posts
58 -
Joined
-
Last visited
Content Type
Profiles
Forums
Articles
Gallery
Downloads
Events
Everything posted by J.P. Hall
-
First solo Tamahagane smelt
J.P. Hall replied to vincentmarche's topic in Smelting, Melting, Foundry, and Casting
I've never been too great at puns; I always just skate by. However this thread is a ray of sunshine. -
I've been practicing scarf welding semi-regularly and I've still got plenty of room for improvement. On 1/2" square, it took my body weight bending parallel to the plane of the weld (the way welded tongs are usually oriented) until the weld failed after bending a bit. Ideally a scarf weld should act like a homogeneous bar, but at what point would you call it good enough? Would you gauge by it holding, or looking like one piece? I have a lot of trouble blending the toe of the scarf, so any advice on that is appreciated. I recently tried "flicking" the molten scale and flux off the bars on the way to the anvil and it seemed to help, although I haven't seen many people do it. Does anybody else find it beneficial?
-
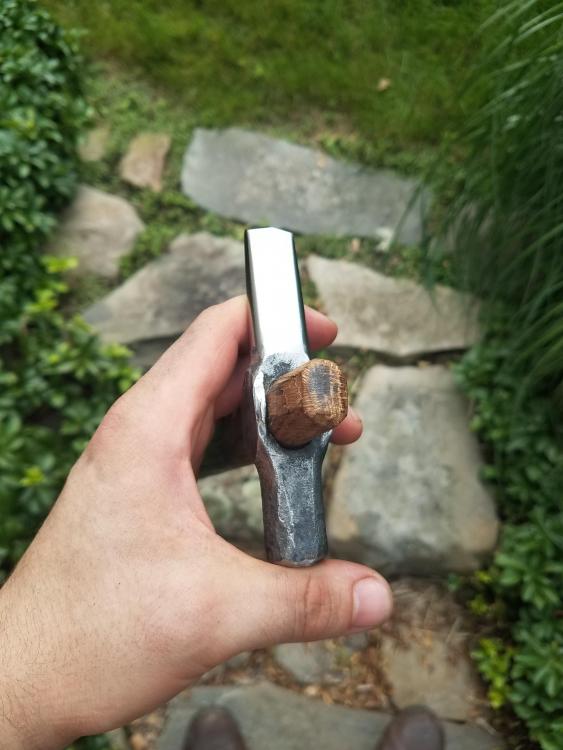
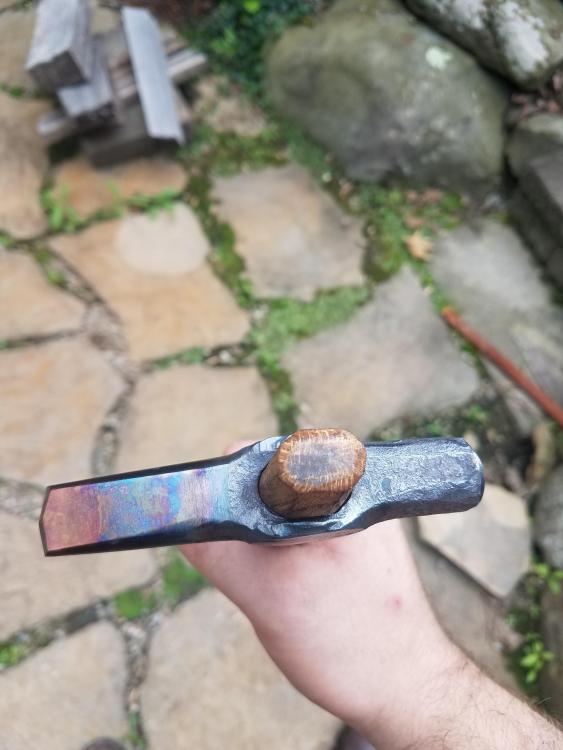
Tested it out yesterday and therr are a few things to iron out. I'd likento taper the eye a but more to get some grip on the handle, and also regrind the tip. The "crosshair" shape of the double ground point is slightly rotated around center. As a result it all looks square when starting a hole but then as the bulk of the punch makes its way through it gives the appearance that the punch is rotating theough the workpiece. All in all those are simple fixes though
-
Old/New, Compact, "Convertible" Solid-Fuel Forge (photo heavy)
J.P. Hall replied to Steamboat's topic in Solid Fuel Forges
Never have I seen even anything so grossly over-engineered. Not even the most advanced propane forge I've seen has had half as much thought put into it. ITC100 in a solid fuel forge? really? It's beautiful and I love it. Could do with a PID and/or arduino or two though. -
Haven't used it yet, but I'm eager to see how it differs from a hand slot punch. It seems pretty well seated on the handle so I may be overthinking it. I've got a hot cut with a much sloppier eye, which has held up fine albeit needing taps to seat the head more frequently. I don't know what size or alloy stock I'll be using this for so I hardened up to and including the eye, which got tempered past blue just in case it would run the risk of deforming under a heavy hammer (probably wouldn't anyway). It also got a healthy dose of thermal cycling. I guess if there's anything I should be worried about it's the striking end, which is soft, but there's not much I can do for that short of annealing.
-
Looks good; definitely gets hot. Your firepot seems to be on the large side. That amount of fuel doesn't quit reach level with the "table", meaning you'd have to angle stock down into the oxidizing zone of the fire to heat it. Two options to remedy this: 1) Use more fuel to pile up above the table (hearth? please correct me if there is a proper term), making a much larger fire, or 2) Resize your firepot to be smaller, allowing you to make a taller fire with less fuel, at the expense of having a smaller diameter fire. Without knowing what stock you're using, I can't give a perfect answer. I'm also assuming that your air supply is strong enough for option 1. Personally, I would prefer option 2 with one addition-- using some firebricks on the side of the fire allows you to pile more fuel vertically without burning more on the edge of the fire. Firebricks are great because they can be placed and rearranged into different configurations, and even removed, very easily, but any refractory material can work.
-
Made my first handled punch from a big masonry chisel. If I were doing it again I'd start with heavier stock. I'm a little worried about the small cheeks getting enough friction on the handle and I need to regrind the point, but overall I'm pretty happy with it.