jlpservicesinc
-
Posts
5,758 -
Joined
-
Last visited
Content Type
Profiles
Forums
Articles
Gallery
Downloads
Events
Everything posted by jlpservicesinc
-

JLP Blacksmith Teaching Center.
jlpservicesinc replied to jlpservicesinc's topic in Building, Designing a Shop
Yes it is.. Especiallly if you go to larger diameter hoses.. My machine will go up to -20 but I won't carry the fittings over -8.. It's an investment in Convenience.. For regular larger rubber hoses I just go to the local hose guy.. Here most hose shops are just that.. Stationery store type shops.. There are a few guys who do road service but even they don't make hydraulic hoses on the spot. -
JLP Blacksmith Teaching Center.
jlpservicesinc replied to jlpservicesinc's topic in Building, Designing a Shop
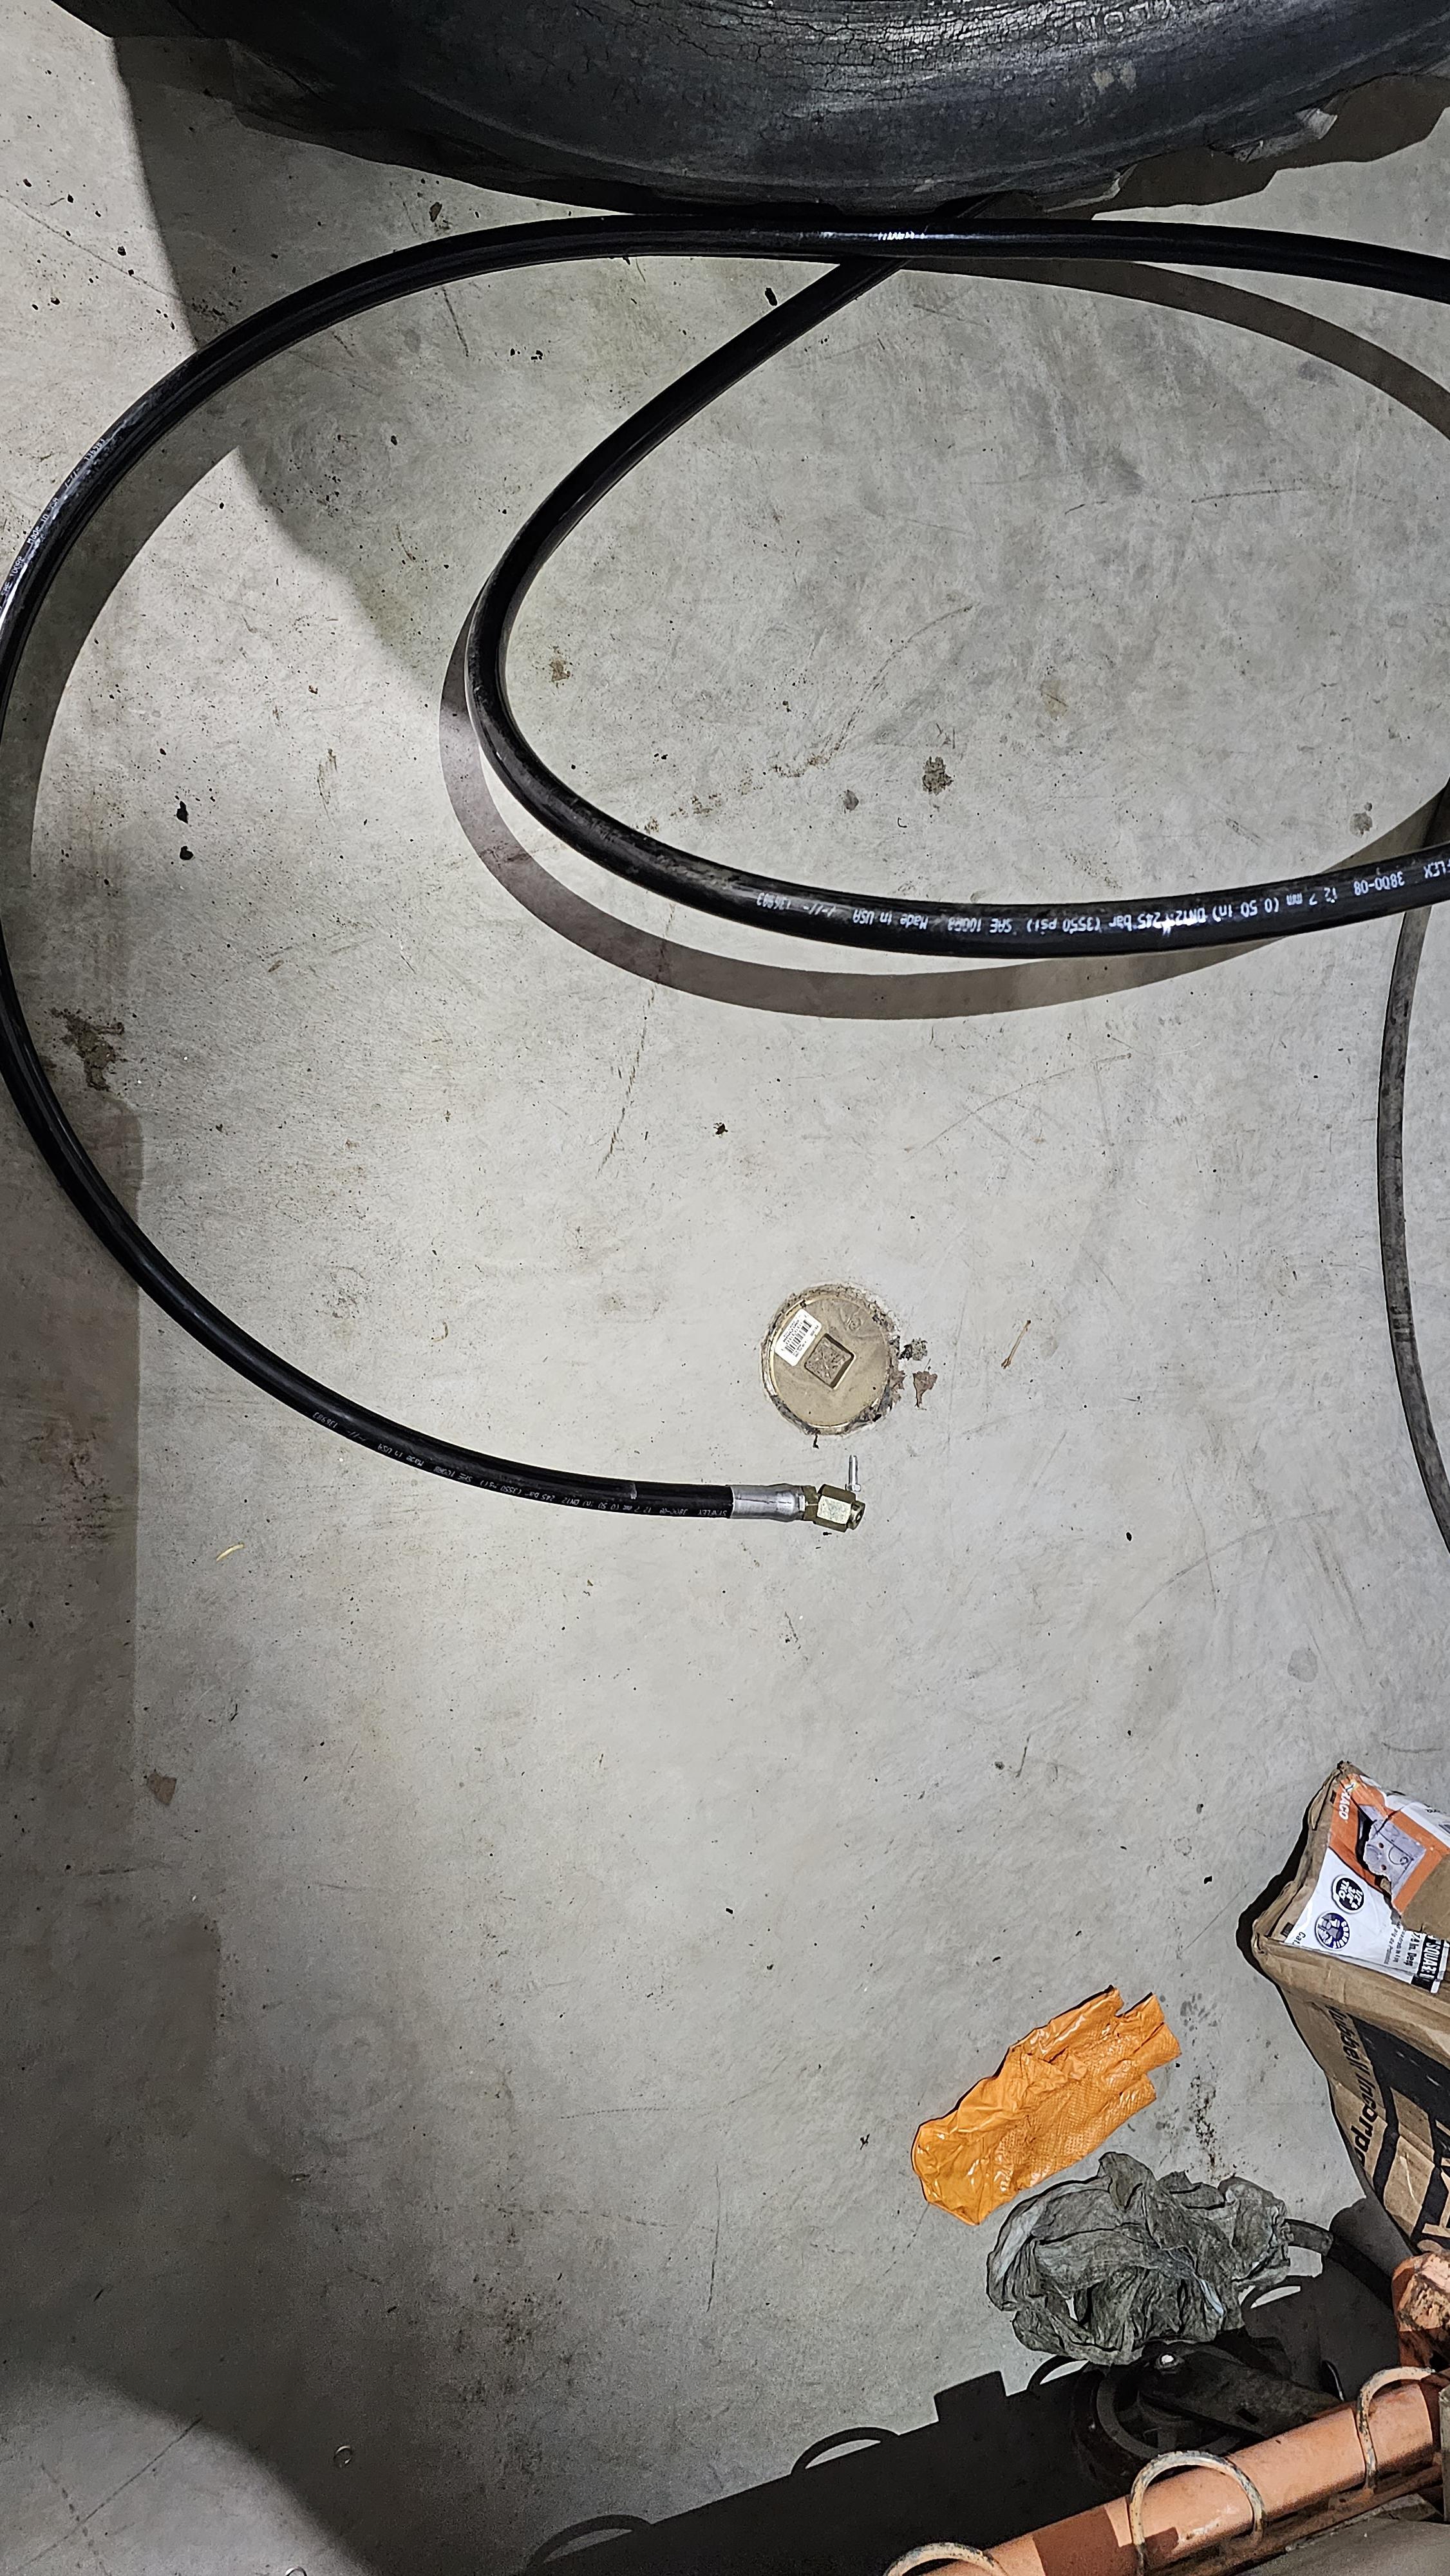
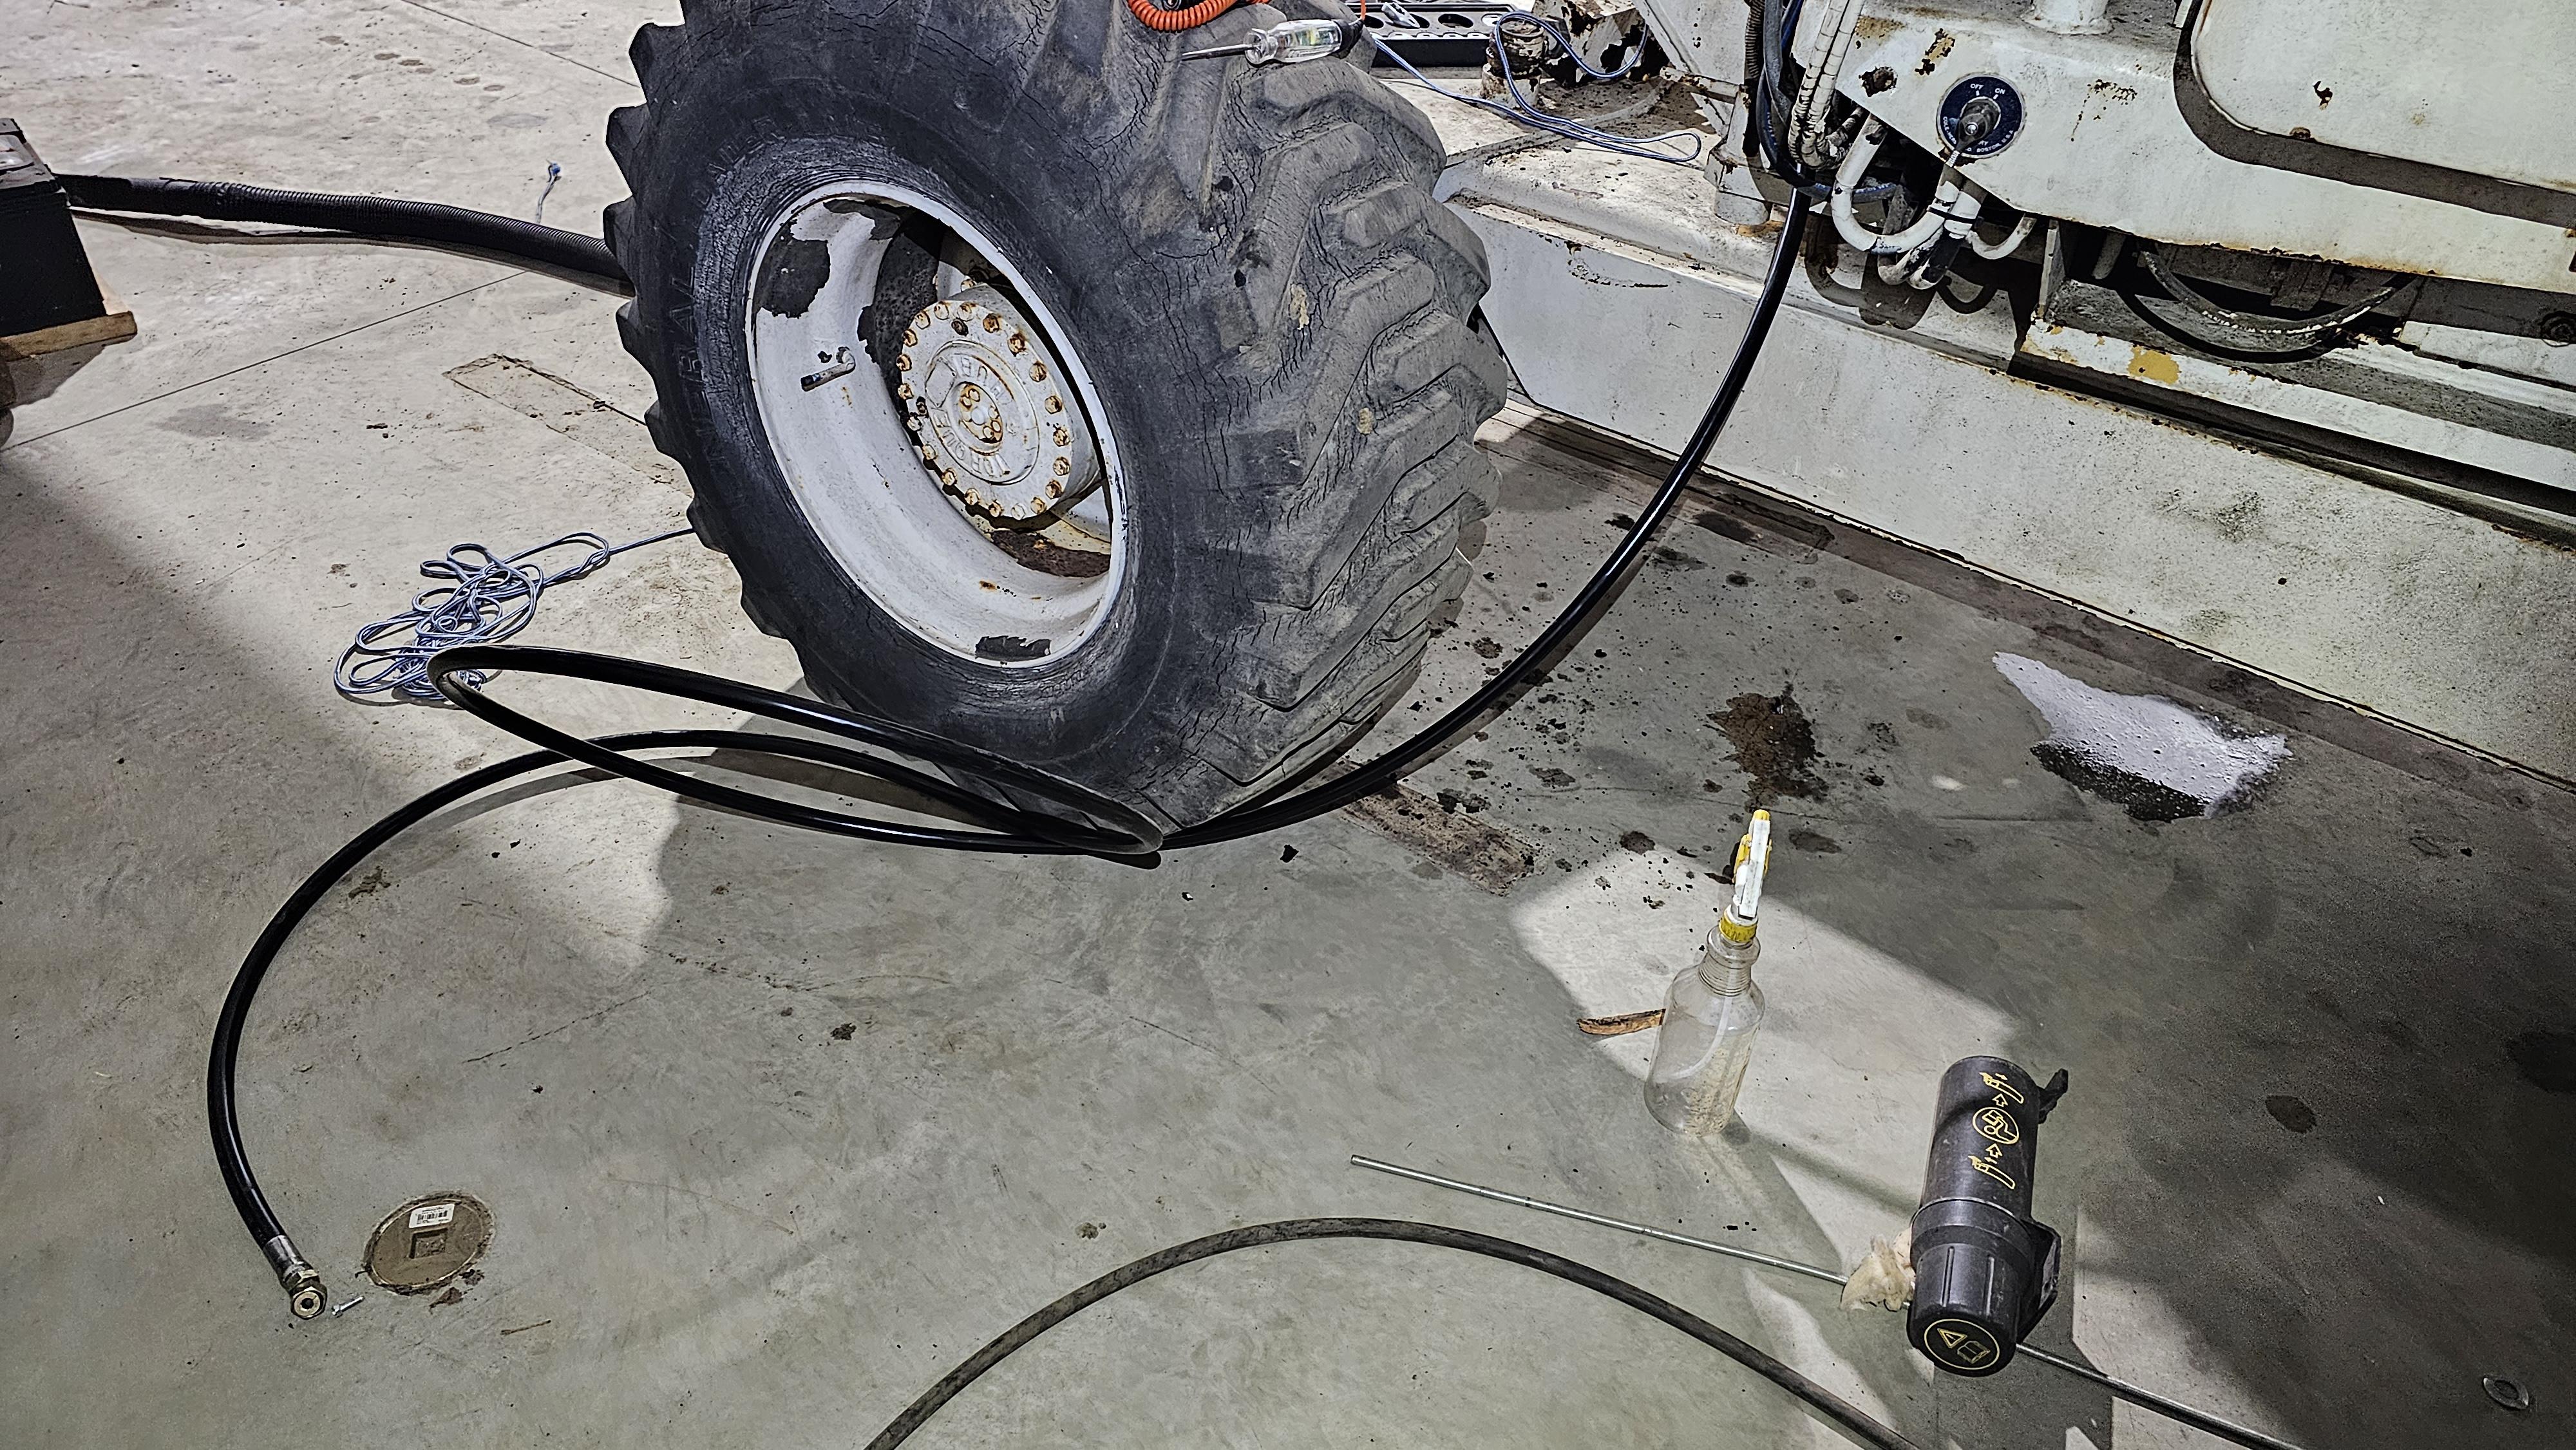
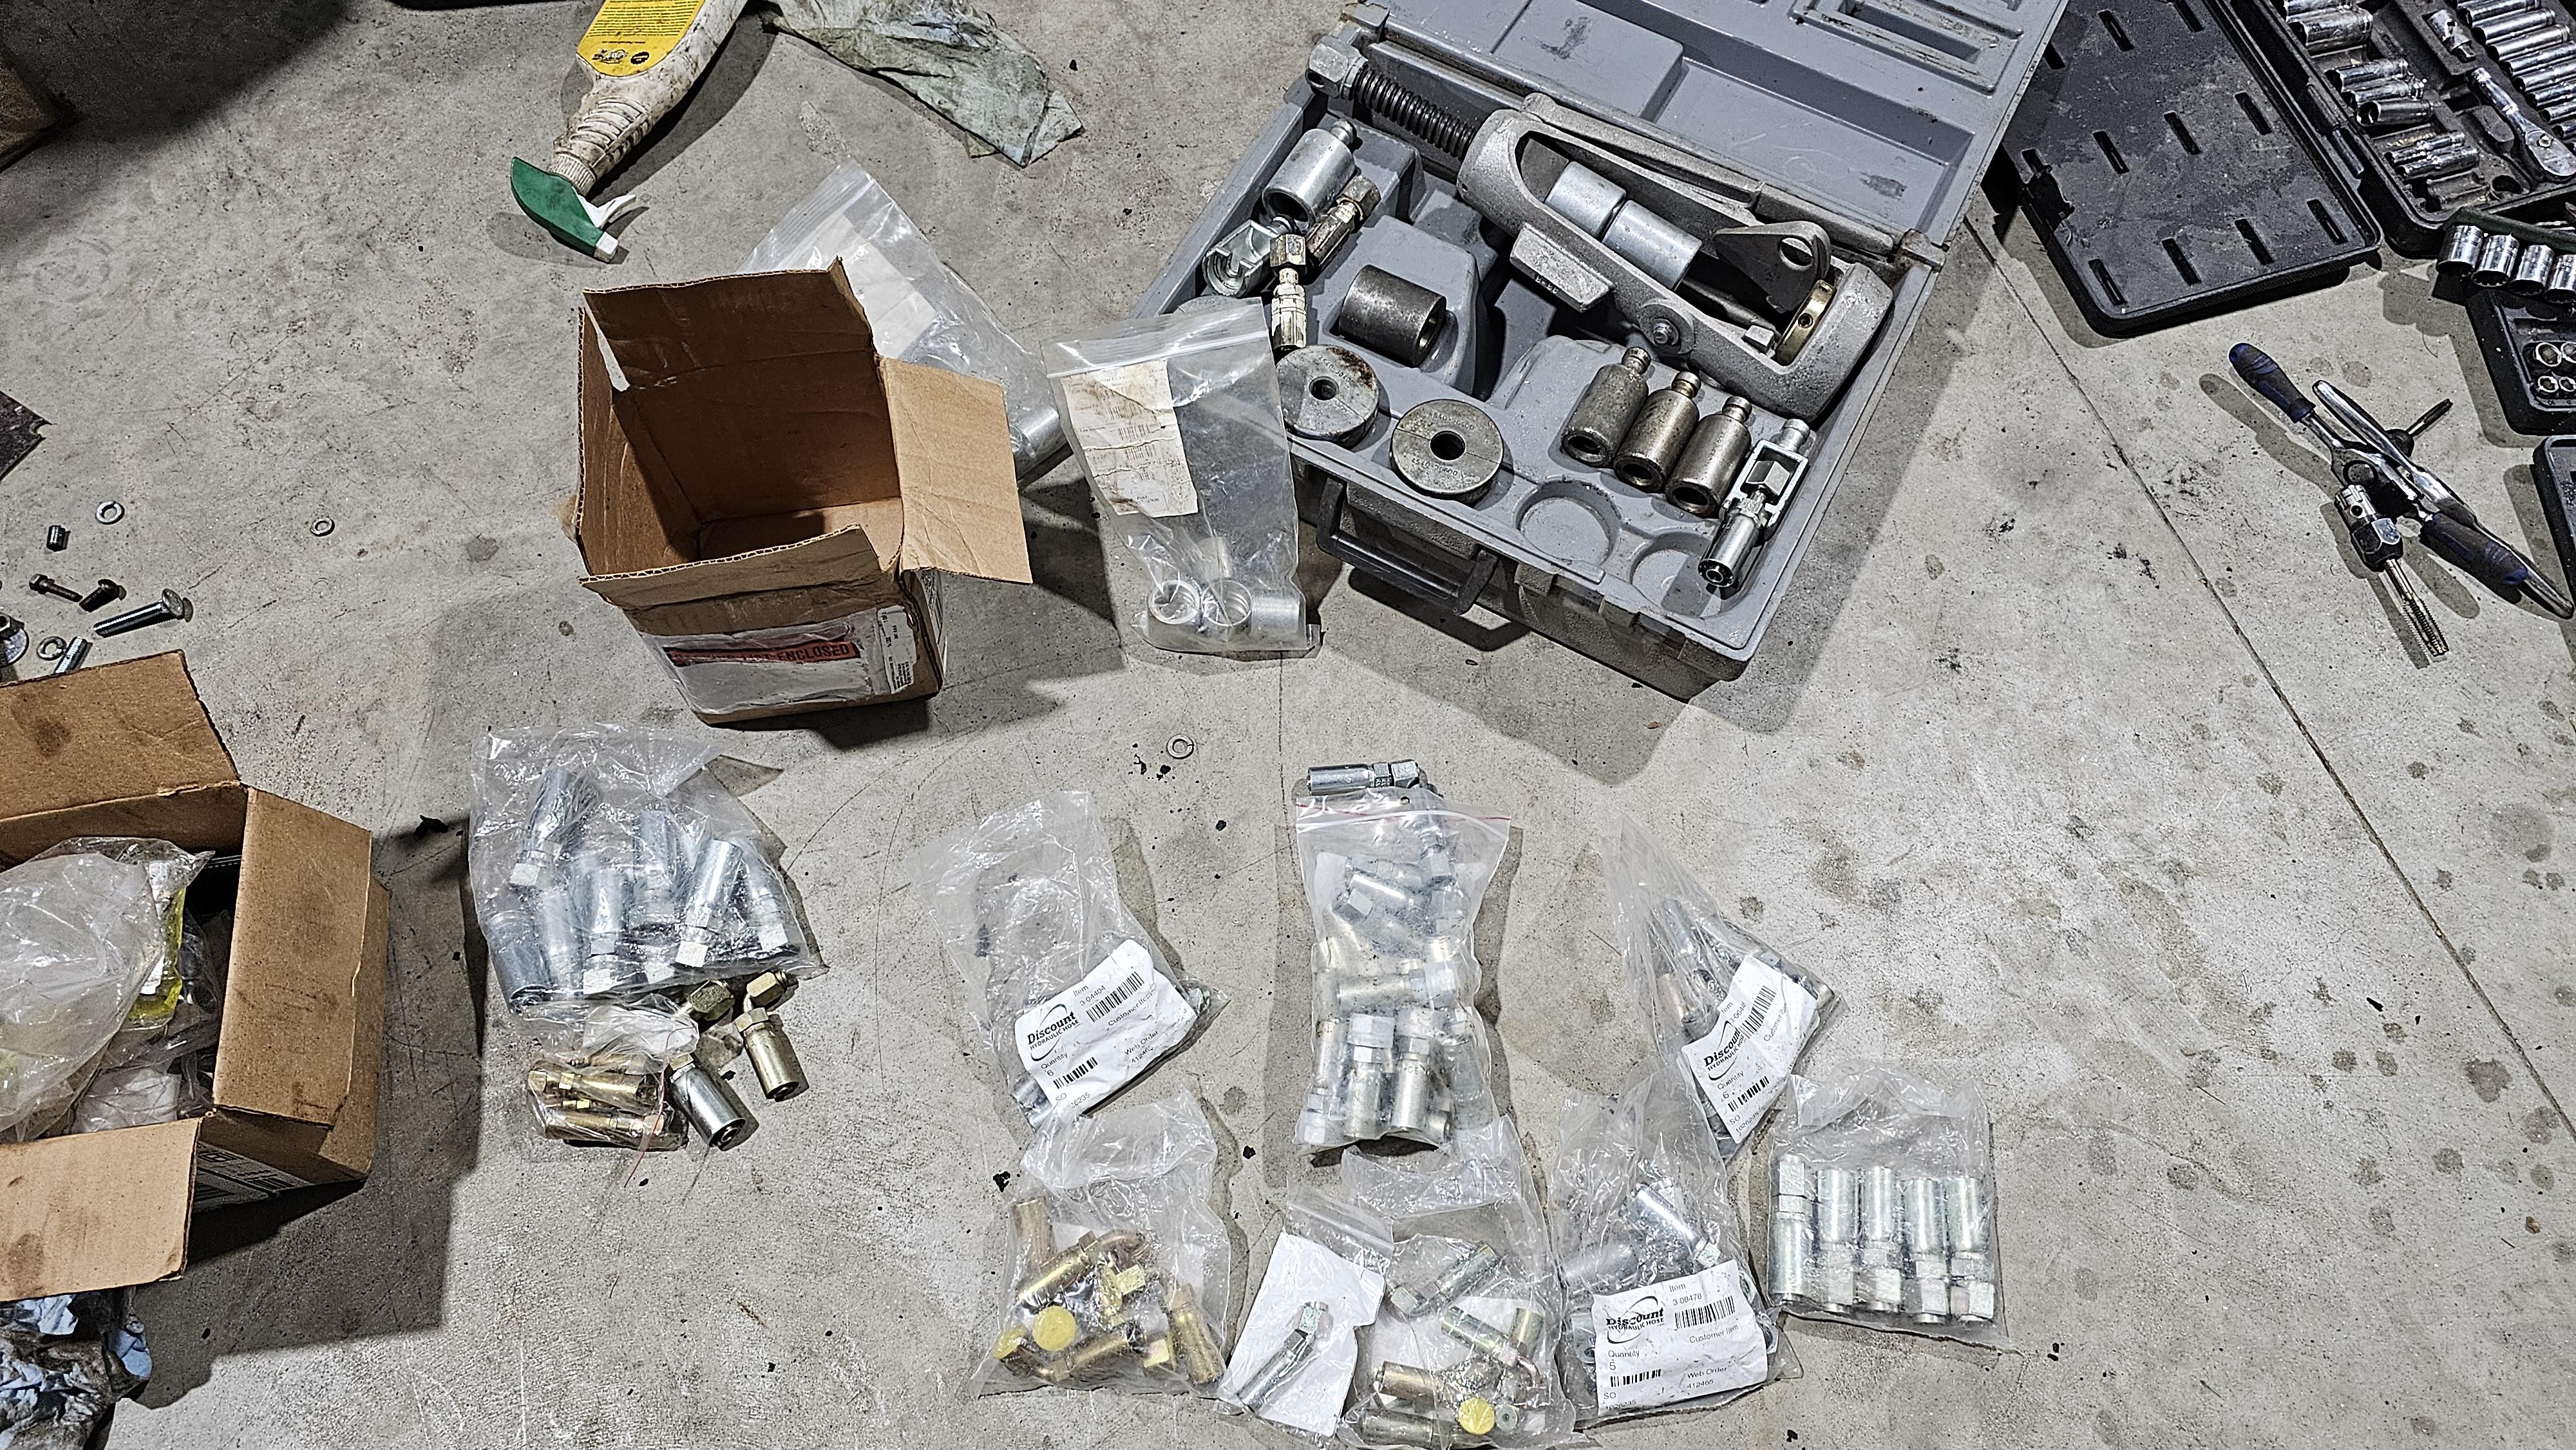
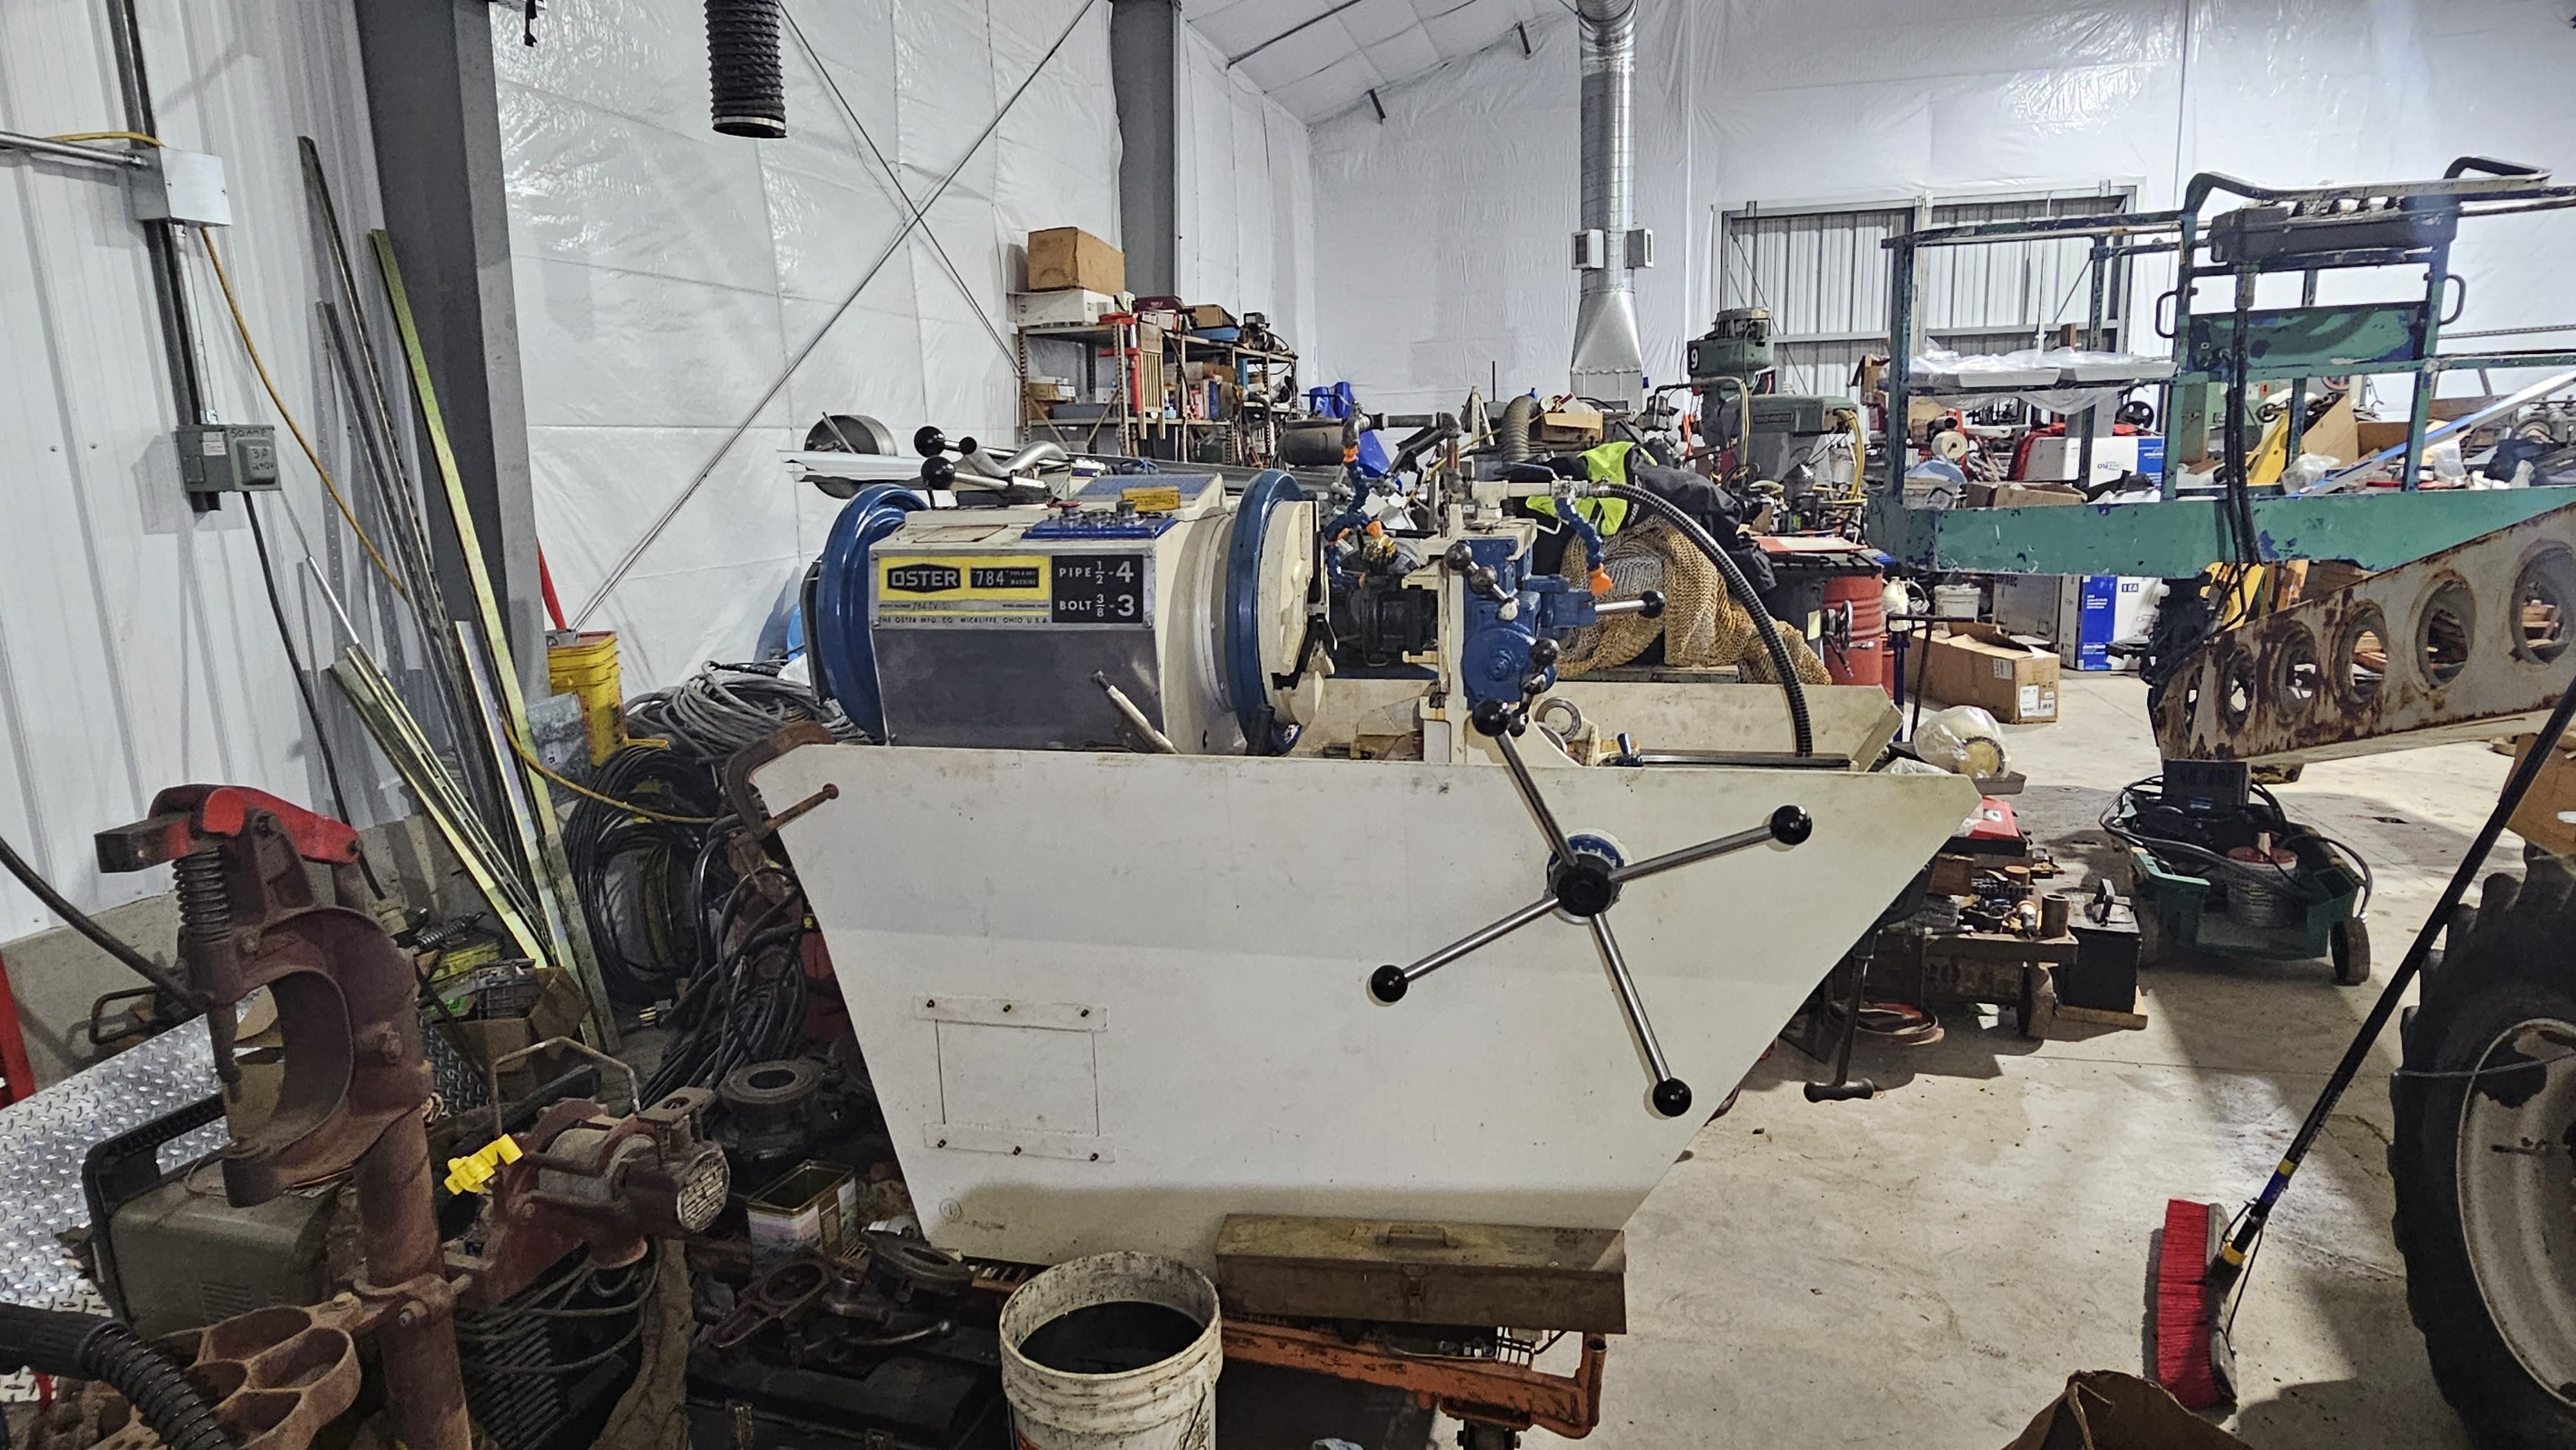
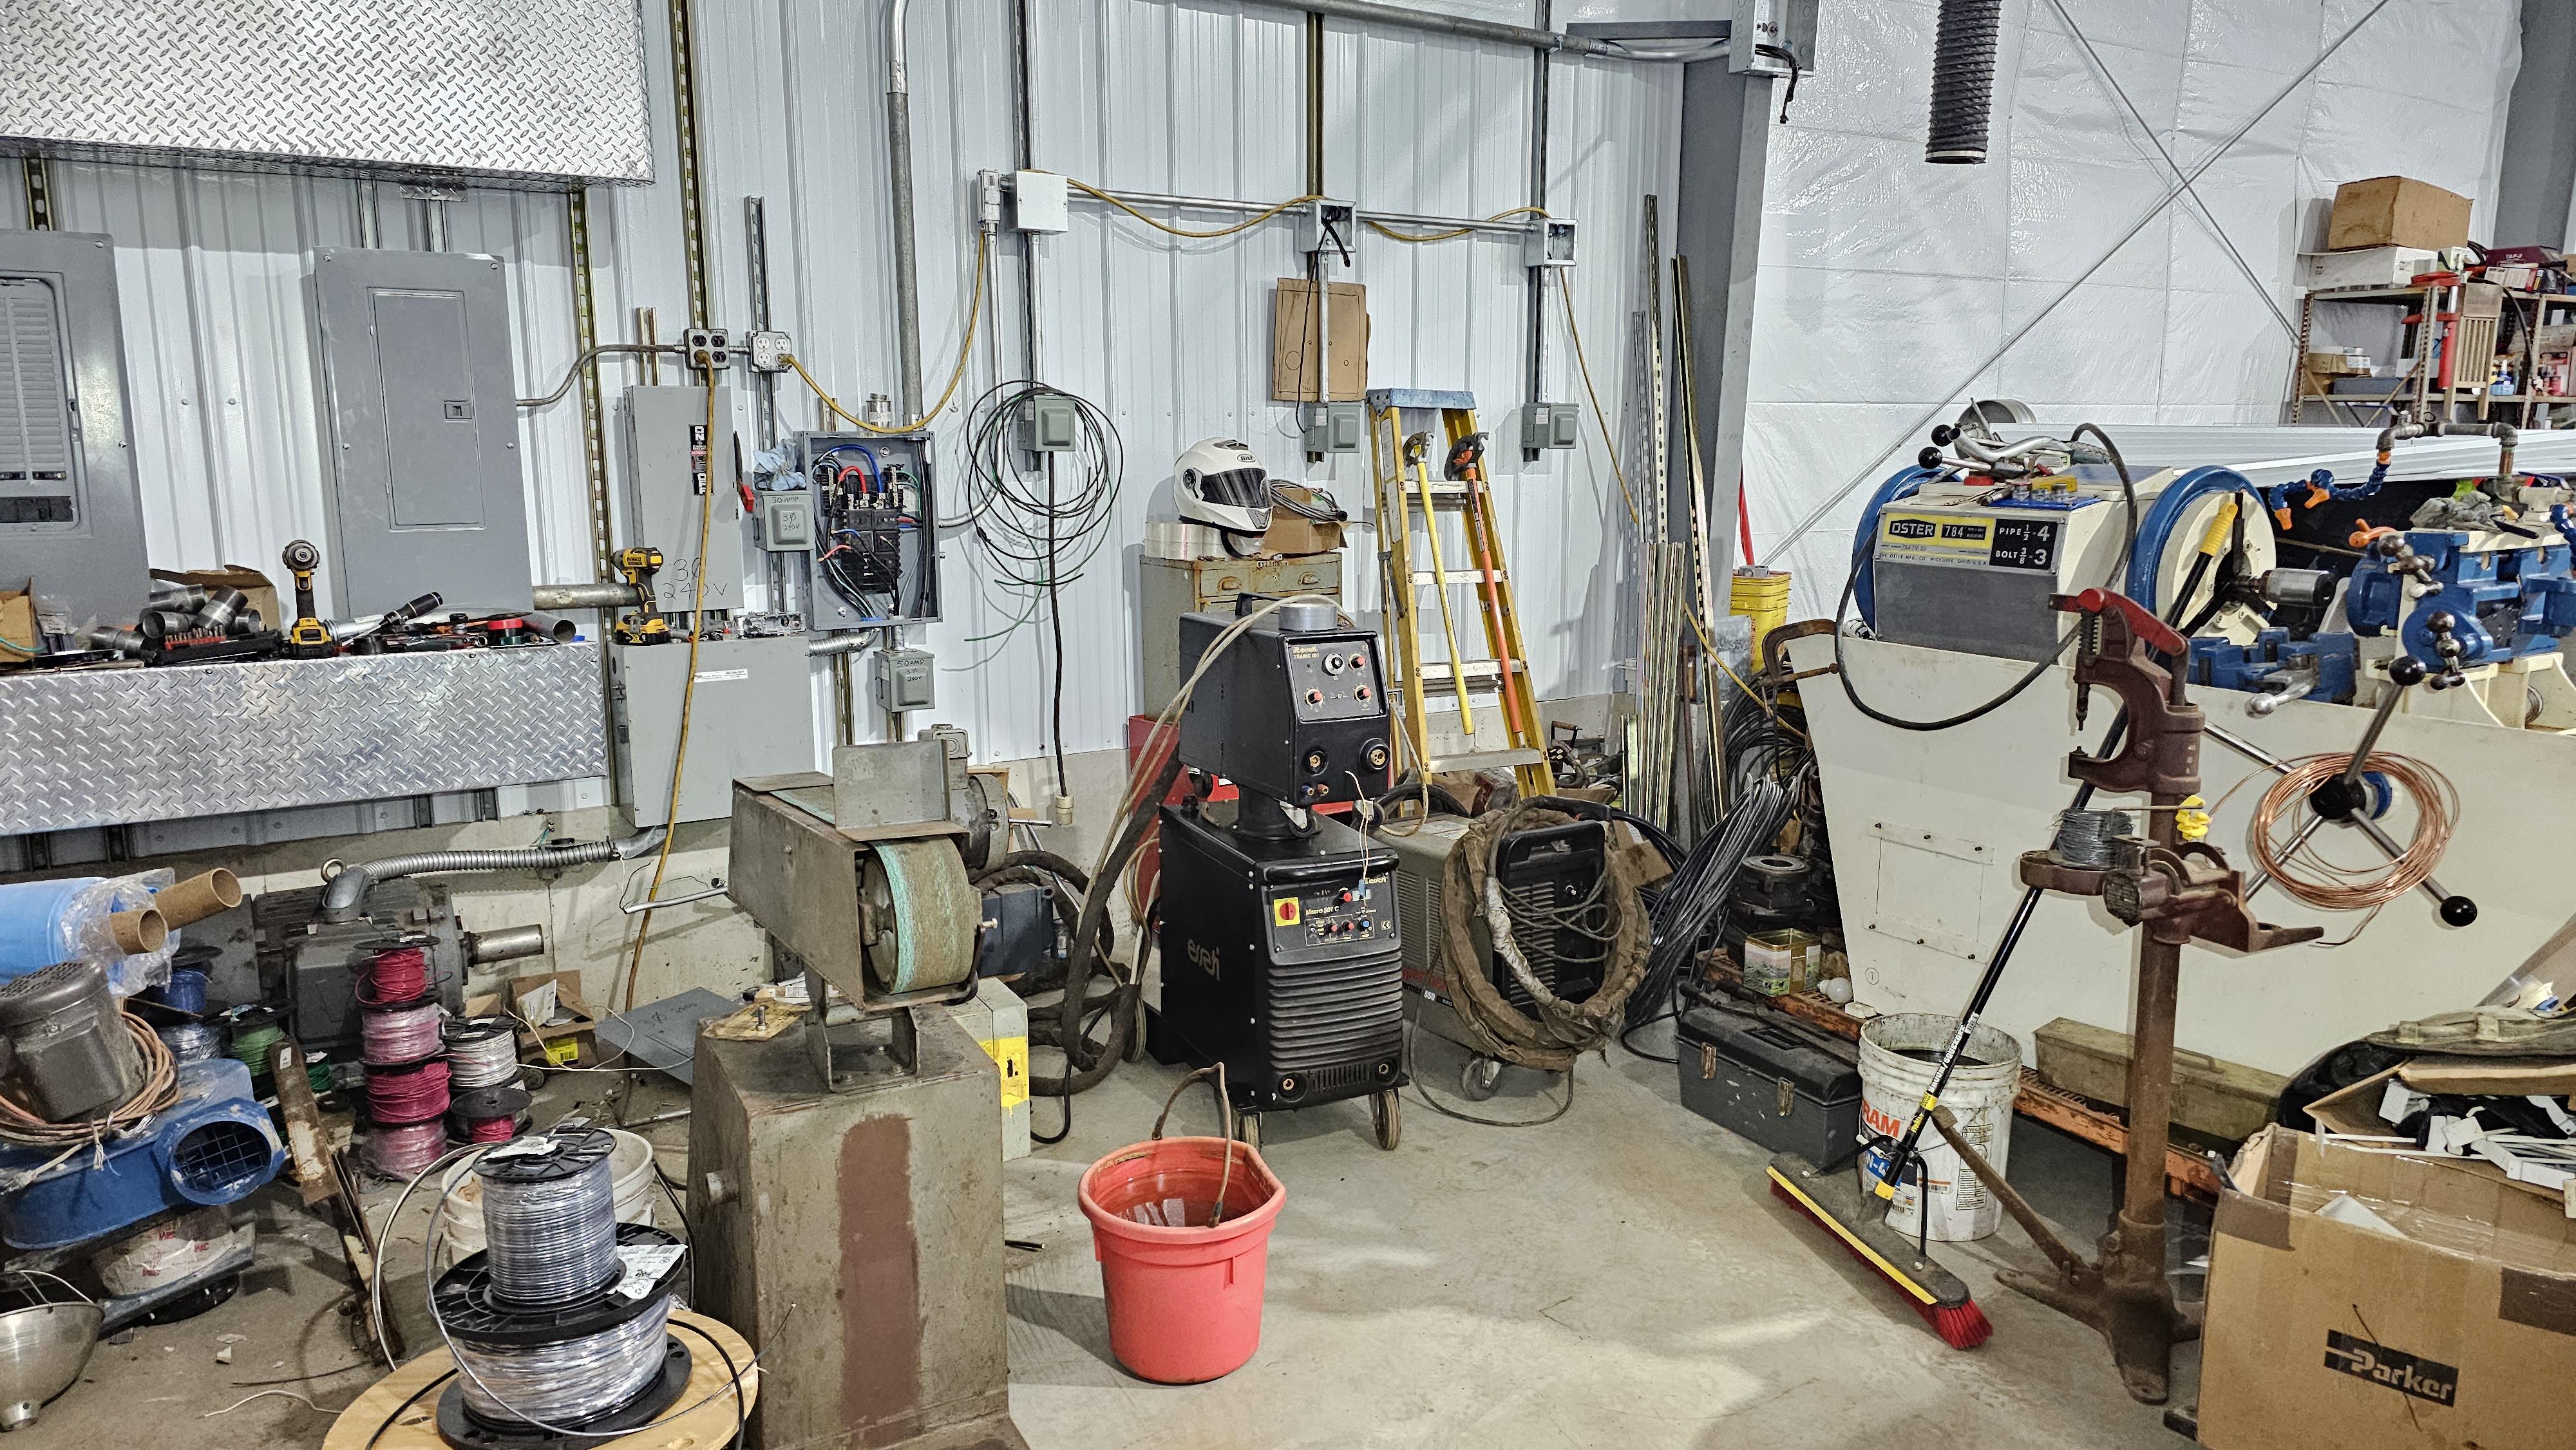
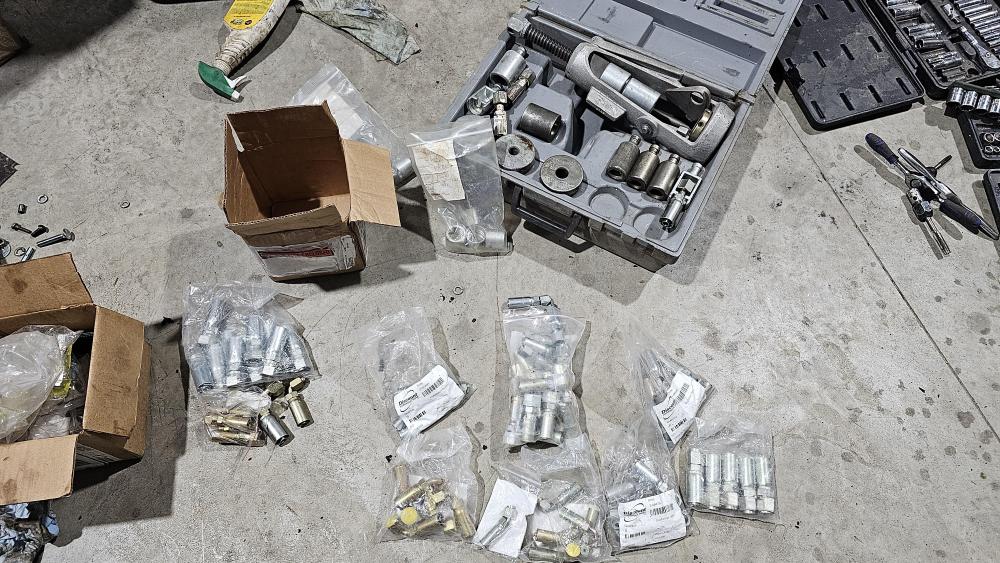
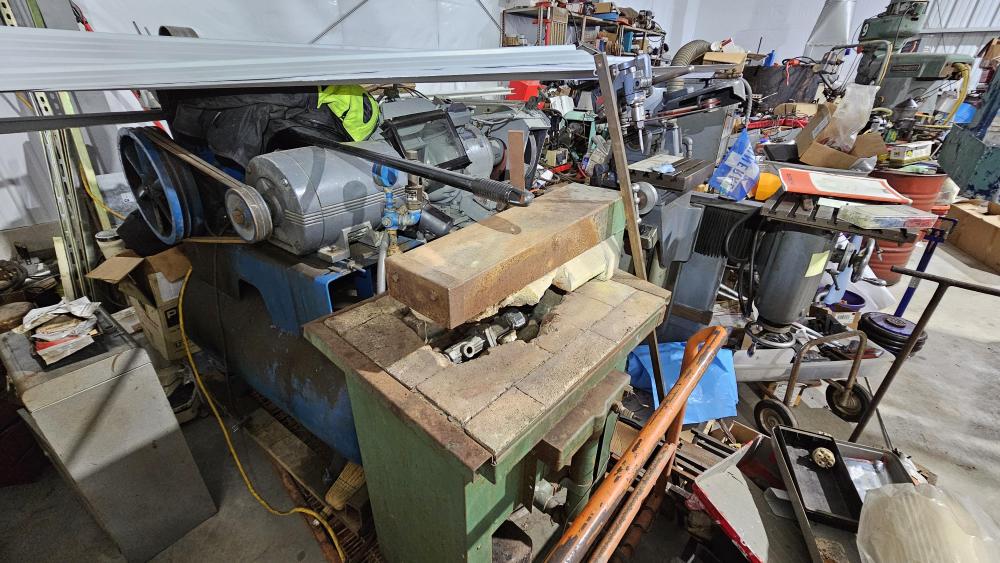
Well the fittings came in for the hydraulic hose.. So last night I made the new Thermoplastic (Eaton synflex) hose with the correct ends.. 100R8 -08 or 1/2". Hoses in hydraulics use the -# system which is based on 1/16" So -4 is 1/4", -5 is 5/16, -6 is 3/8" and -8 is 1/2". The codes for each MFG are different for each fitting and hose series.. If you use Kurt hoses and fittings they, the MFG doesn't really like to mix and match so they spec the hose with a certain fitting.. All the MFG's do the same thing with matching products. What this means is: For every MFG and for the different hoses they make, there is a fitting type that is recommended for that hose and that hose only. There are many hose MFG's.. Kurt, Gates, Parker, Eaton, Weatherhead, Danfoss, Aeroquip, these last 4 are the same parent company. Then there are also "MFG's" that are Not main stream that also produce their own lines of hoses and fittings. Rubber hoses are the most popular and come in different series of construction.. They use a rubber hose and some are 1 wire, 2 wire and 4 or 6 wire, non skived vs skived.. The higher the wire count the stronger the hose is supposed to be, but also the less flexible it becomes. For most MFG's they have recommended fittings for each type or wired hose.. You would not use a 1wire hose fitting on a 4 or 6 wire hose. Nor the other way around. Nearly all heavy equipment that has hydraulics use the rubber hoses.. (backhoes, trucks, tractors, etc) Except.. items that have to have hoses that are light and have to flex a lot.. forklifts, manlifts, etc.. These use Thermoplastic hoses which are much, much lighter with greater flexibility in all temperatures with the same or higher work pressures vs rubber hoses.. Many rubber hose MFG's like Kurt offer higher flexibility rubber hoses which are also smaller to help cross over to the other markets.. Sadly they are still rubber and there are trade offs. For hydraulic rubber hoses they are crimped in special machines that cost A LOT.. The machine i have retails now for 12,000 with no dies.. And guess what.. You need dies for each size of hose. these die sets can be 600.00 each. I have an Eaton FT1380.. Took me about 5 years to find a machine I could afford.. It came with all the dies and I chose this machine because it can crimp any hose up to a -16 and from any MFG. It also has the ability to swage thermoplastic hoses with a couple of adapters.. YES, you read correctly SWAGED.. The 3903 model fittings as well as any of the older thermoplastic hoses are swaged on vs crimped.. What this means is one can build hoses in the field instead of having to go to a specialty hose shop. With this said.. Good luck finding fittings or hose.. I've found both but the hydraulic hose industry keeps tight raps on all of it. Finding any information unless you go thru a distributor is a very, very long road.. When I first started looking there were very few resources for hose or fittings but over the last 5 years there are a few companies now that supply the end user.. Too bad about not sharing businesses unless a direct supporter of the website.. took me a while to find these companies and saved a lot of money.. You would think that Ebay might be a source for fittings.. Not really. Very few of the fittings used in hydraulics are NPT.. JIC is even few on high-pressure hydraulics on newer machines.. ORB(Oring boss), FSO (Face seal Oring) and flange are the winners. If anybody is looking for more information PM me.. The photo with the grey box is the swaging machine for thermoplastic hoses and you can see a few of the fittings I have acquired over a few years.. I got involved with hydraulics because of the Manlift and the miles of hoses it has.. A hose blowing off hours is not only a huge inconvenience but a huge time drain.. So now I keep -4,-6 and -8 hose in stock with the fittings.. I've learned to order the fittings ahead of time.. Since when they are out of stock.. They are out of stock everywhere.. Some of the -8 fitting for FSO are 25.00 each or more if I run to the hydraulic place.. 1/2 that if I order them from the retailers..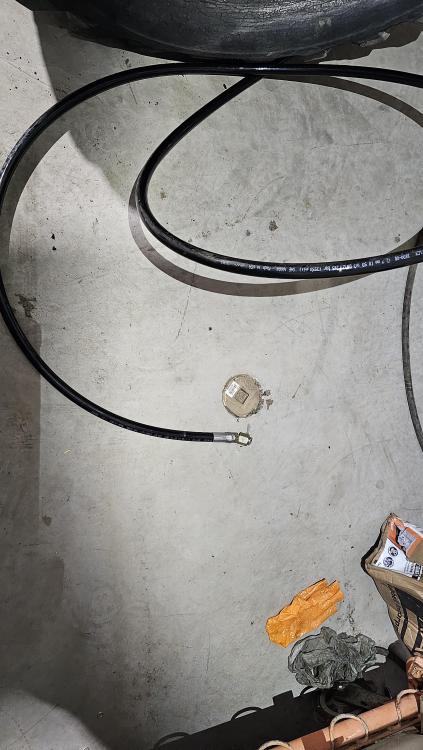

-
What did you do in the shop today?
jlpservicesinc replied to Mark Ling's topic in Blacksmithing, General Discussion
Ive taken 10 of these apart and put back together and they work great sometimes working better depending on how bad the internal gears and bearings are rusted.. On certain models they have a very wide pinion gear but only use 1/2 of it.. So this can be moved around to get better teeth. Once you understand how the gears are aligned and the thought behind making them that way. They can be adjusted just fine but they can be fiddly. It seems the later ones had less adjustments and were set up at the factory and that is that. If they have offset bushing you can paint mark the location or if you are replacing the worn bushings and there is no adjustment which is often the case then it might come back into spec with the new bushings or not.. Either way you are adding life back to the blower.. It just becomes the noise level. I own a metal lathe so can make the bushings offset if need be. One can do this in the drill press as well.. Often times people just want a usable product so won't go the extra steps.. And that's ok too. -
What did you do in the shop today?
jlpservicesinc replied to Mark Ling's topic in Blacksmithing, General Discussion
Beautiful work John. -
Forge Welding resist
jlpservicesinc replied to Latticino's topic in Blacksmithing, General Discussion
Welding socketed tools is a lot easier than most people think. Where most people run into problems is at the junction between whatever the tool is and then the fold over and then not having adequate scarfing or too much scarfing for the weld. That answers a lot of questions but you're also going into one of the easiest types of welds. Everything is held in place for you while you're welding The biggest thing you have to remember is that you have to undersize the socket for whatever your finished socket size is. Also with modern grinders today belt grinders once your sockets welded you can just clean it up on the belt grinder with a slack belt. Forge to finish is what I prefer if possible. You shouldn't have a problem at all. You'll have a great time for sure. -
Forge Welding resist
jlpservicesinc replied to Latticino's topic in Blacksmithing, General Discussion
Hi Dan can you be more specific as to the tube or socket that you're actually trying to weld? Hi Tomahawk sockets are very easy to do because of the size of wrought iron. Depending on the wall thickness will determine what method is best utilized. 1/4-in wall thicknessing up is super easy. 1/8-in size and down is kind of tough. The heat reserves just aren't there for the smaller sizes. If using smaller sizes really the mandrel does need to be heated with the item when welding or else you really have to be fast to get it on the mandrel and be sure to preheat your mandrel. By the way it's nice that you're thinking about these things before the class or before the activity. More than likely the instructor will have a method that they want to use. -
What did you do in the shop today?
jlpservicesinc replied to Mark Ling's topic in Blacksmithing, General Discussion
Gewoon ik.. Desire.. Ah desire.. Here in lies the thing.. for any of it.. Action, learning, etc, etc.. A person has to have a desire.. As children we are forced to go to school to learn.. some have desire and some do not.. Once we are on our own for nearly everything we do.. It takes a desire.. A want or longing.. Your statement reiterates the main stream sentiment.. "Knowledge" can and will give you the best product.. Sure.. If you are in academia.. or a scientific environment. 20 years ago very few people owned Heat treatment ovens.. somehow for over 4000 years items were produced day in and day out that was even by today's standards superior in one way or the other.. Does it mean they are superior to what technology dictates as superior.. it all depends.. This is the aspect that befundles most people.. "It all depends".. This list of "depends" is based on opinion, testing standards, etc, etc.. WE hand forge metals.. The metals themselves have built in faults.. No matter how cleanly they are made they have inclusions and other ingredients that influence the materials.. " There is a best practice".. And I feel this " best practice" is about as good as it gets.. One can not enforce the information into a person.. Even when shown there is a better way. people will still for the most part choose a 50/50 pattern or some percentage there of.. If knowledge is what someone is after then whether it can be applied successfully or not really becomes the ticket. And your are right.. -
What did you do in the shop today?
jlpservicesinc replied to Mark Ling's topic in Blacksmithing, General Discussion
Metal working even today "With all the understanding" is still an archaic undertaking.. Everyone learns and retains information differently and this is reflected in what the person posts or shares.. Someone who is a Metallurgist "working on hardening of carbon steels" would be able to give you the "cleanest" explanation within reason based on what is important to them and then the ability to bring it down in a way that can be understood from a very basic way. With this said, most won't go into the details needed to truly understand "why and what for".. Every book I have read on heat treatment covers the subject from the person's perspective.. It's best to read a few books on the subject and then start to see how the information from each source links together. I own 10 books on metallurgy 5 old books from 1900's or turn of and 5 modern books.. I enjoy the 1900's books more vs the newer books but they speak to me better in a language that makes more sense.. They are written more plainly.. The Modern books.. Knife Steel Nerds has 2 great books out. "The story of knife steel" and "Knife Engineering: Steel, Heat Treating, and Geometry". Great website as well.. Interestingly I will jot down and buy any books the authors reference as their favorites.. Tool Steels Properties and Performance by Rafael Mesquita is one Larrin mentioned.. I've thumbed it.. Still have to read it. On that note.. IIRc also referenced another book that I have been reading and it's fantastic about the items not talked about in detail in other books.. And that is why of the quench and time the quench takes as well as the reasons behind different times with oils and quench media.. It's the information I have been looking for over the last 10 years so is a very interesting read with the information I have not found elsewhere.. "Tool steels 4th edition" George Roberts and Robert Cary.. American Society for Metals. Metallurgy of Steel for Bladesmiths & Others who Heat Treat and Forge Steel. Dr. Verhoeven As a regular blacksmith I only need to know at what temperature the metal is hardneable.. I then also need to know at what color in tempering the hardened metal needs to be to give the best service. Very much A, B, C.. This worked fine for thousands of years.. But, this is different today and with the ease of finding information even with limited understanding or limited retention this is what we have on forums and such.. Simple works for me.. But, I'm also interested in the deeper aspects of Bainite and other properties of which are not main stream.. So the research to find the answers is all on me.. Keep in mind it's only as complex as others make it be.. And people will always share from their perspective. If working with metals (carbon steels) were as complex and as precise as they are made out to be by some. Then it would be impossible to hand forge anything never mind heat treat anything without complete and utter failure every time unless done in a laboratory.. -
Forge Welding resist
jlpservicesinc replied to Latticino's topic in Blacksmithing, General Discussion
Sorry late to the party.. There are actually several different ways.. the one that I use often is to use stainless steel as the mandrel.. If I am doing barrels or the like the mandrel is kept inside the barrel as its coming up to welding temps just shy of the are being welded.. Then just before the tube is brought out it gets driven in some and the weld is made, then mandrel pulled out and trued and put back in.. This mandrel job is done by the helper. Pulling the rod out and straightening and truing it cools it and allows for oxides to form on it before being put back in. Wrought iron is super easy since it's got flux in it.. 2 people knowing the job this can work very quickly.. Very, very quickly. And lastly Using the welding flux can work and is one of the primary things done making hinges.. The hot flux once it oxidizes won't weld to itself.. You can also use clean sand. -
JLP Blacksmith Teaching Center.
jlpservicesinc replied to jlpservicesinc's topic in Building, Designing a Shop
Steve I was reading location can play in too. Mounting the conduit up on the ceiling in the middle of a hot zone. It's going to be a lot hotter and derate versus down at the bottom of the foundation. Not sure if you see this in practice. Just something I read. -
JLP Blacksmith Teaching Center.
jlpservicesinc replied to jlpservicesinc's topic in Building, Designing a Shop
Frosty, I'm thinking 2, 2 gange outlet boxes per work station of 120V 1ph. one very prominent and easy access for tools used at the bench.. then one off to the side some for electric blowers for forges and such. A 240V outlet at the benches would be nice but I'm hoping to have a grinding booth that can be moved around on wheels that will contain the belt grinders. Haven't gotten this all sorted yet.. From what I have seen on others videos that specialize in knife making they will mount 3 2x72 on a small bench. Moving the grinders into a portable grinding booth would help with dust and the associated mess and the ability to move it around would free up space when not in use.. Because of what I'm trying to do in the school keeping things (equipment) accessible and useable (tire benders, tire shrinks, old archaic items) most things will live on wheels or pallet type platforms that can be moved around. I'm thinking for storage for some items they will live on a pallet rack system and only taken down when needed. It's an evolutionary process of figuring it out.. I really enjoy working with the old tools but will see how much of a quest there is for it. On to windows.. I too love windows but not sure if I will be putting any in. -
JLP Blacksmith Teaching Center.
jlpservicesinc replied to jlpservicesinc's topic in Building, Designing a Shop
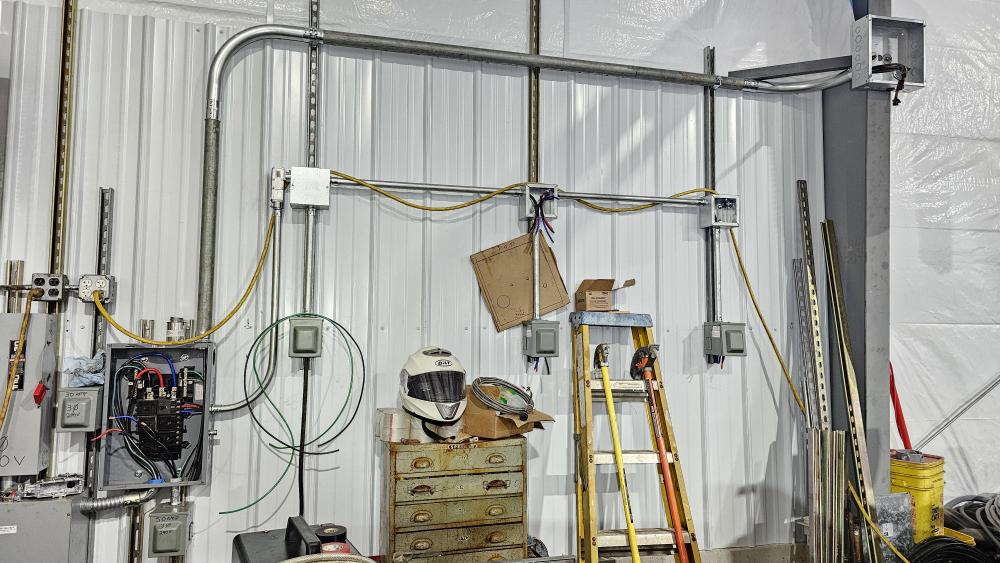
For wire fill that was 16 of the 12awg.. thought I added that part in but it was missing. Thanks Das, You are right.. Since all of this is new to me, I'm flying blind.. I have somewhat of an idea of how the conduit should look in my mind.. I doubt I can pull it off to the level of what I see in my mind.. but I'll give it my best.. It's interesting that I'm nearly complete on the building.. Seems somewhat strange. when I say complete.. I mean I'm about 90% from what I can tell. -
JLP Blacksmith Teaching Center.
jlpservicesinc replied to jlpservicesinc's topic in Building, Designing a Shop
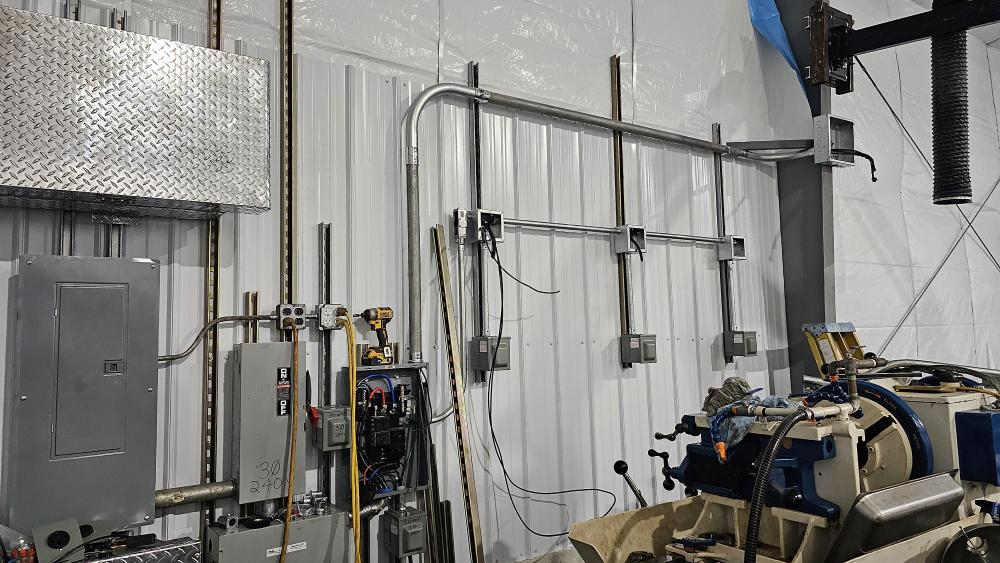
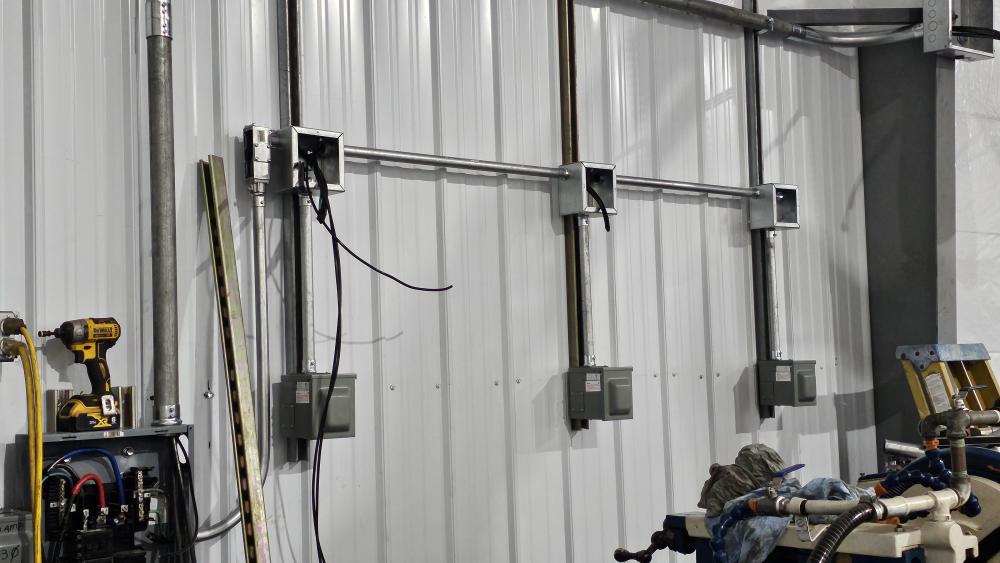
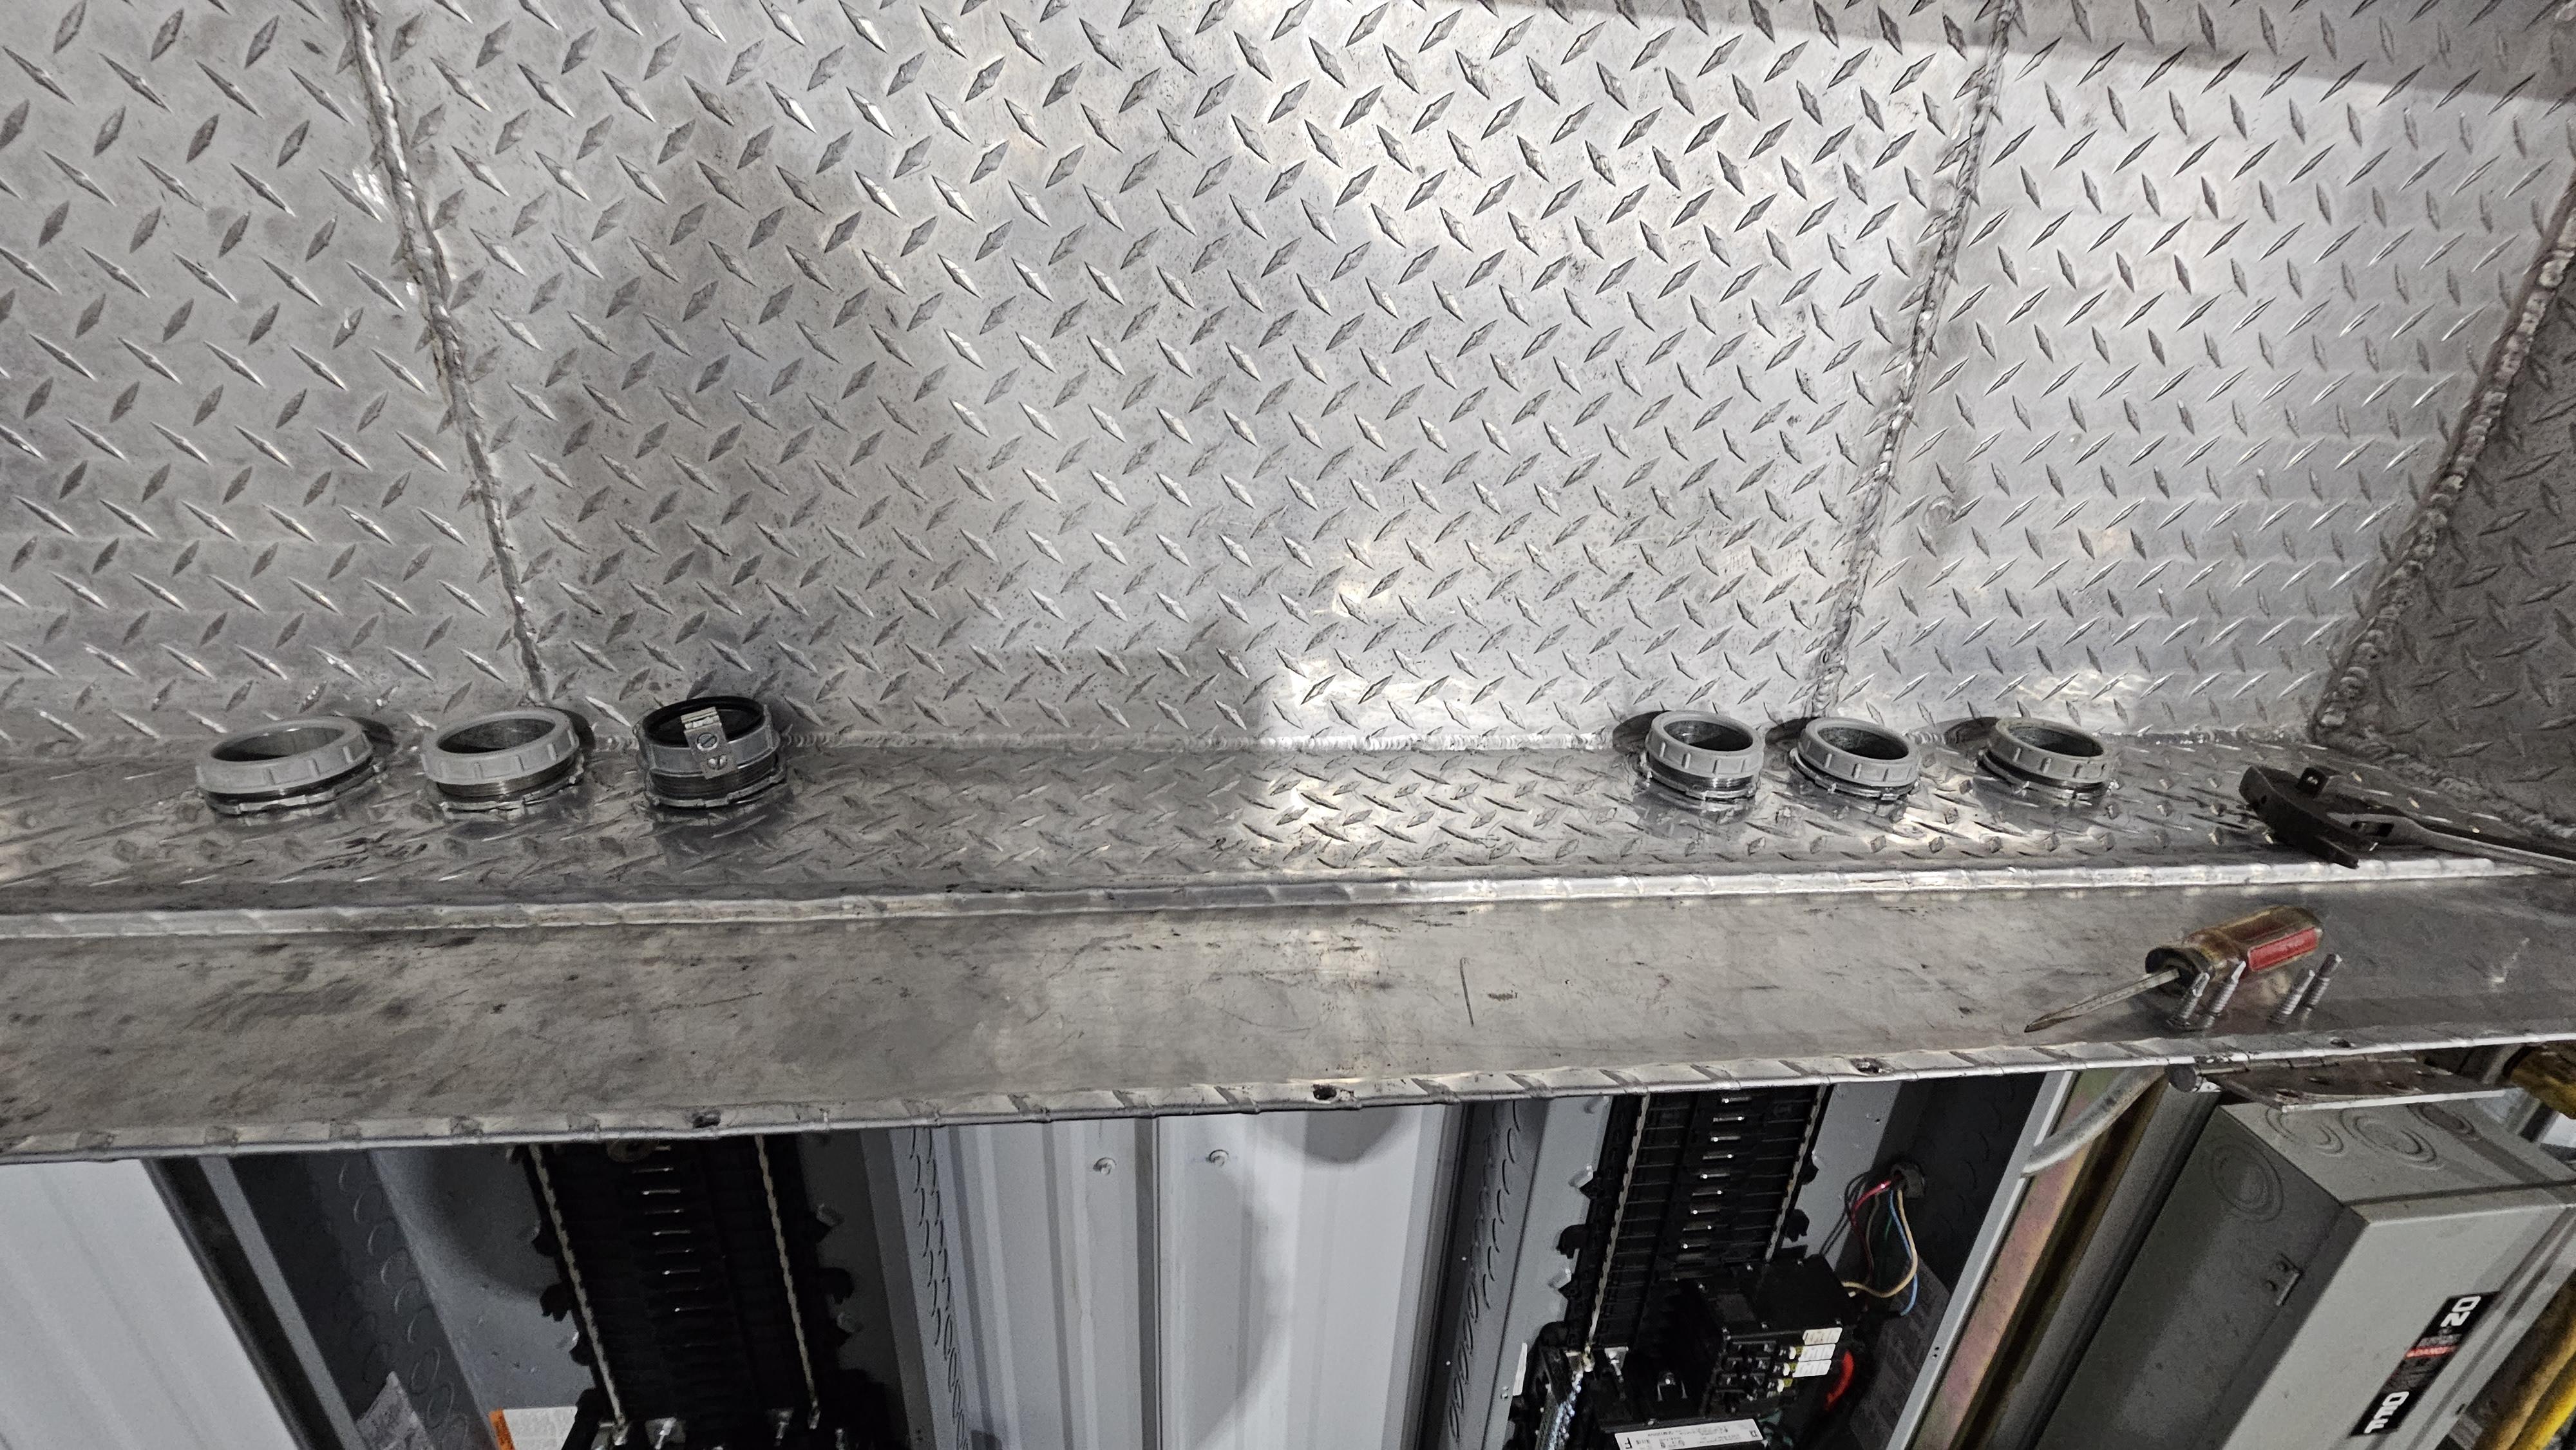
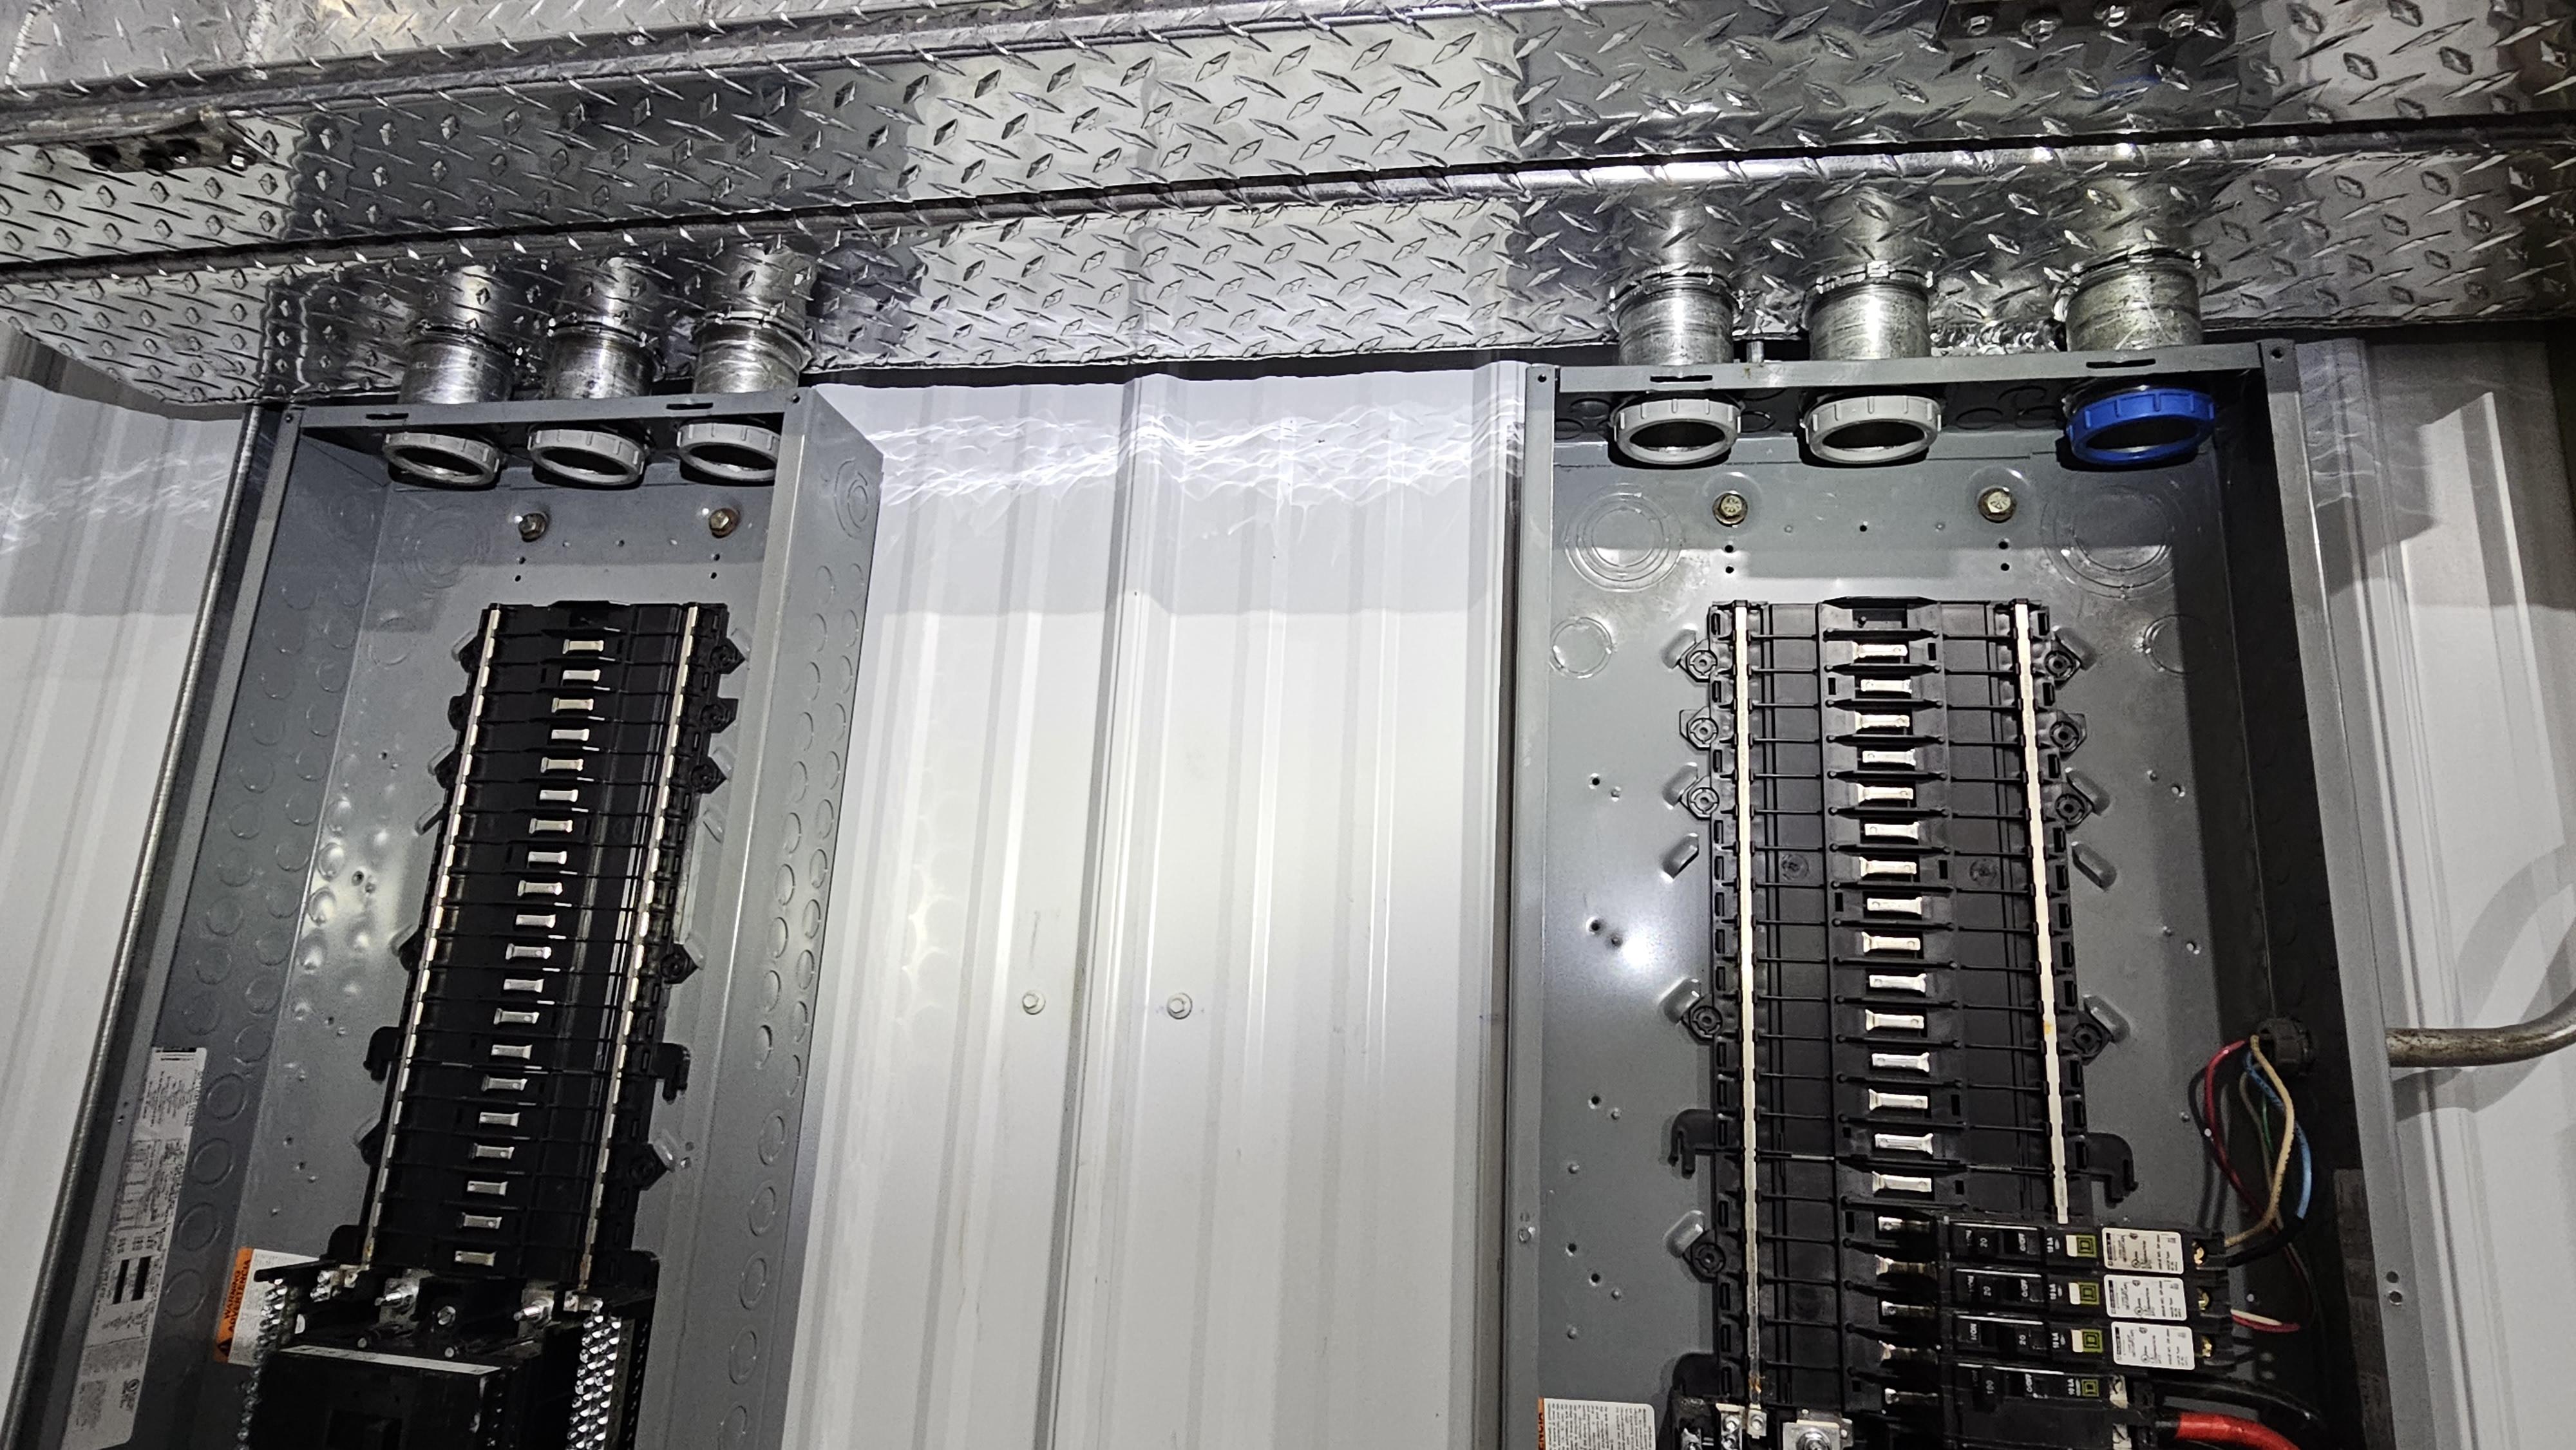
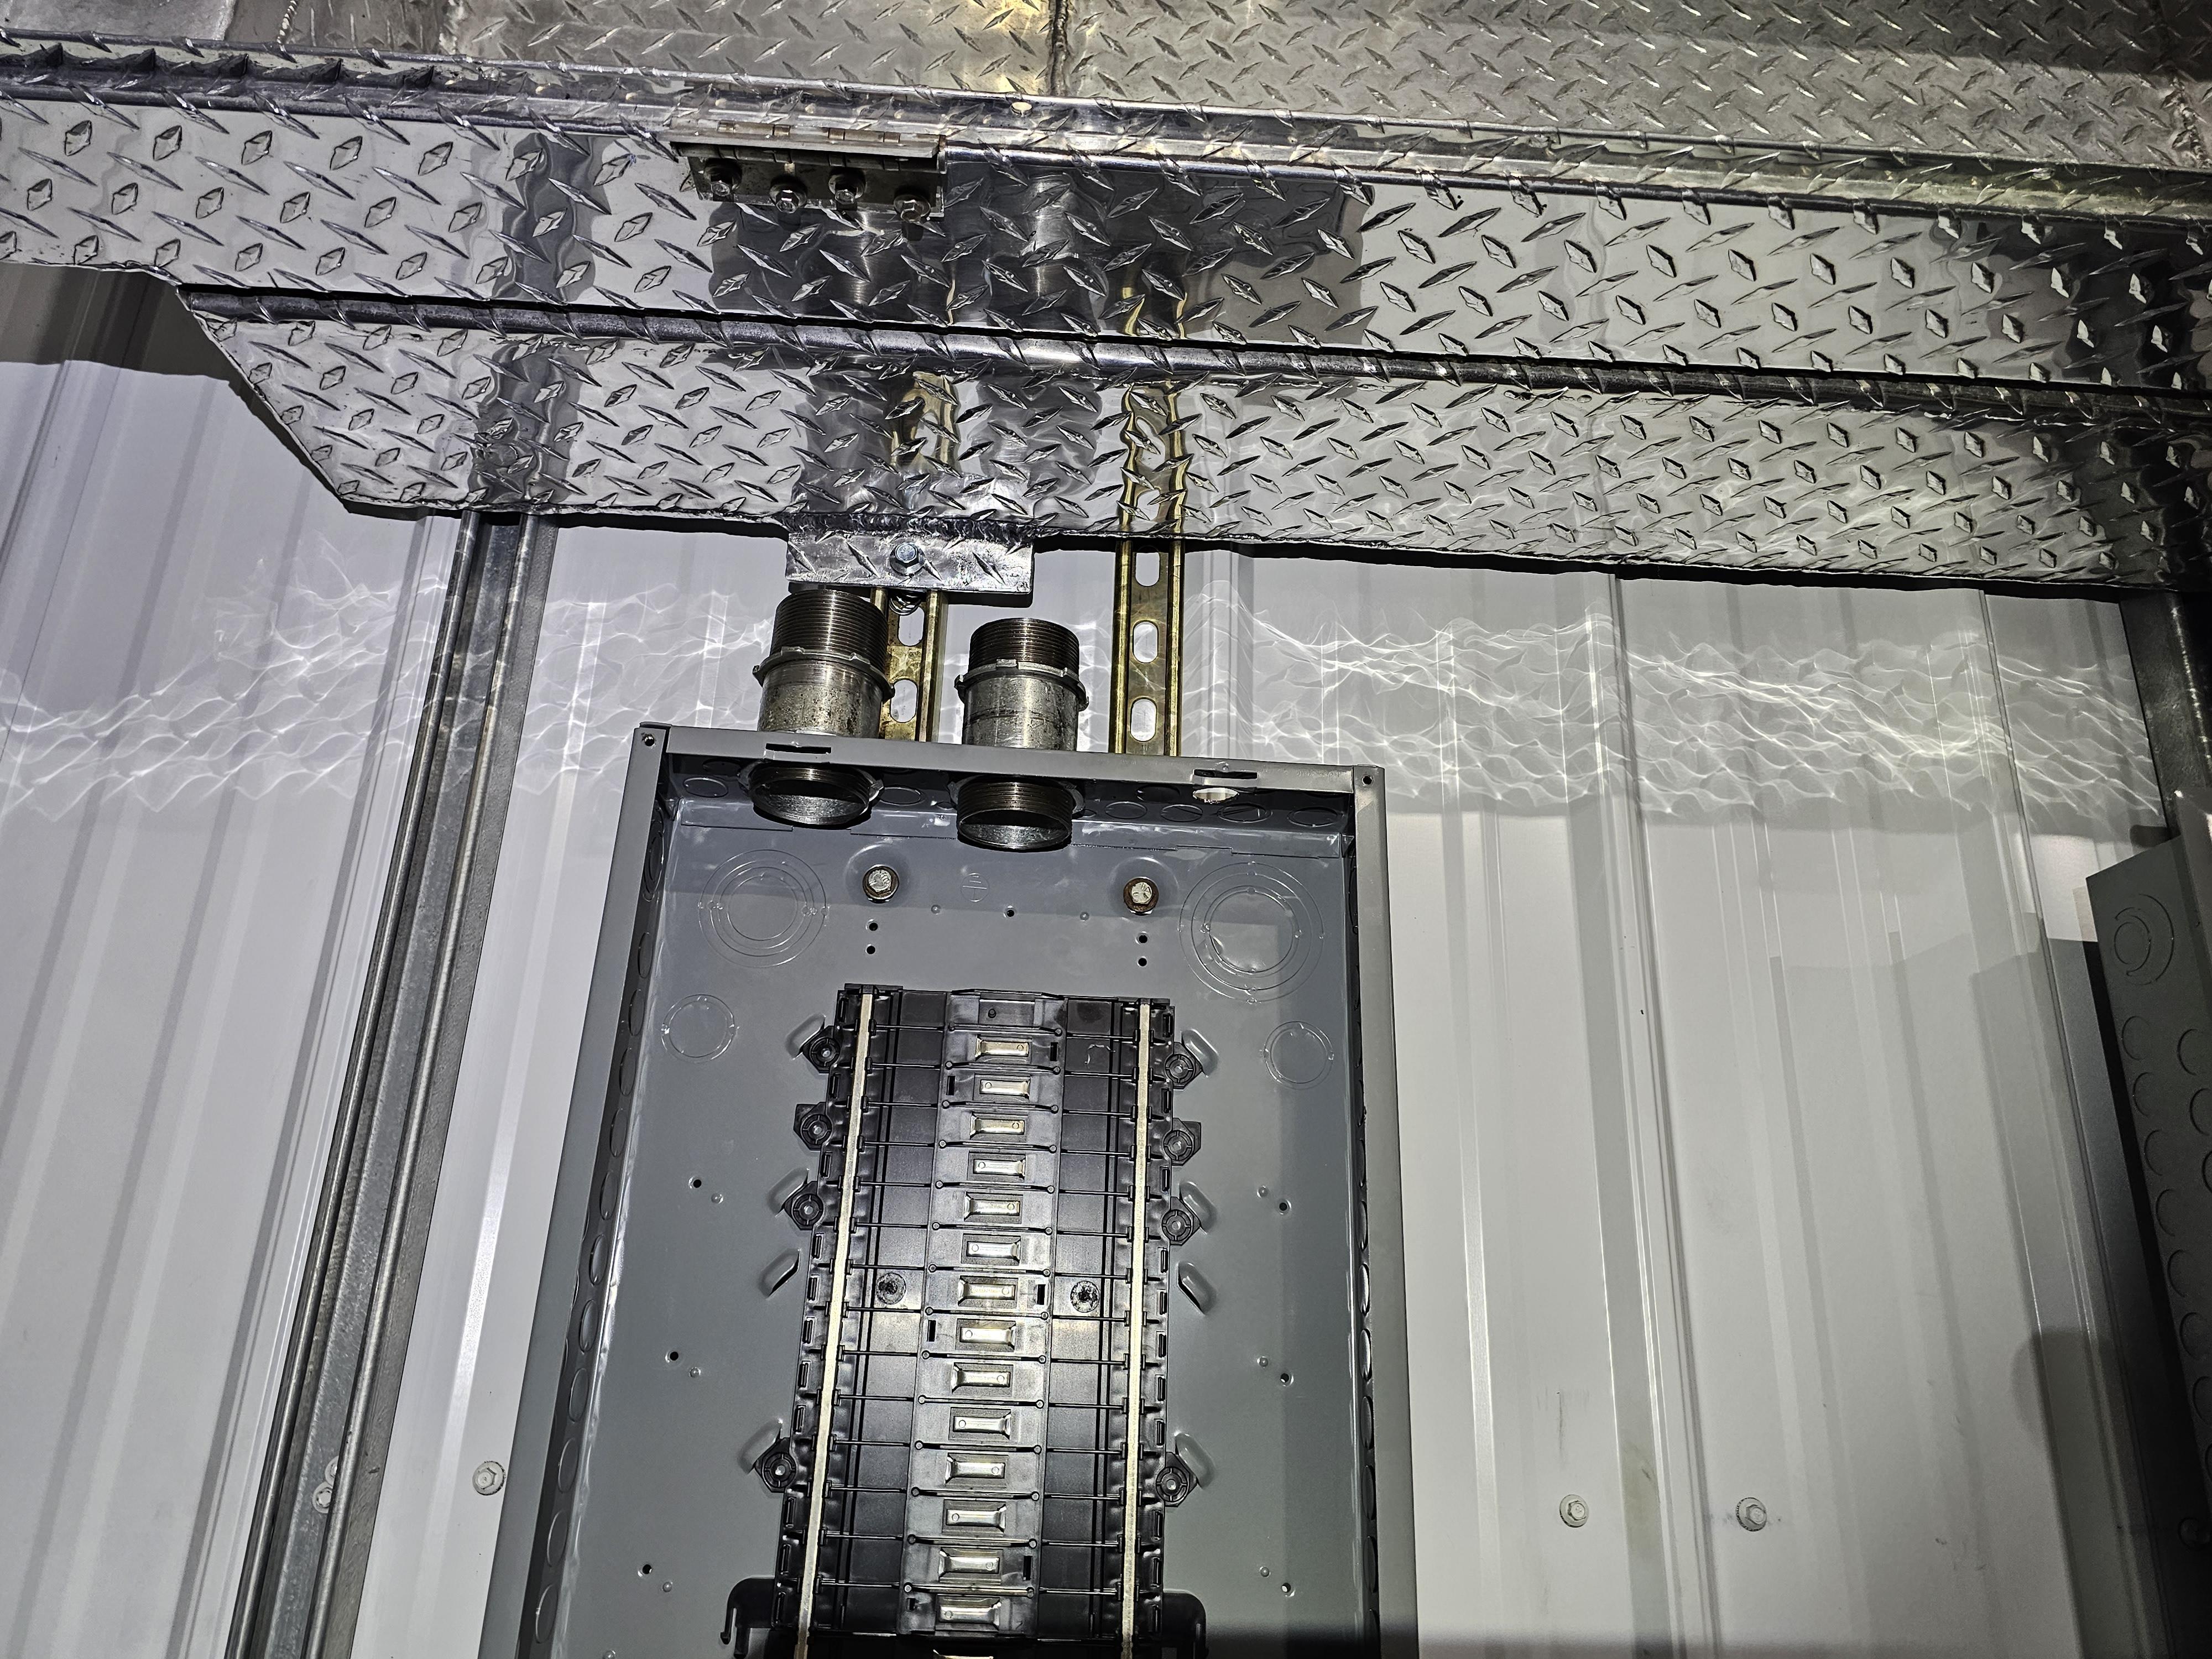
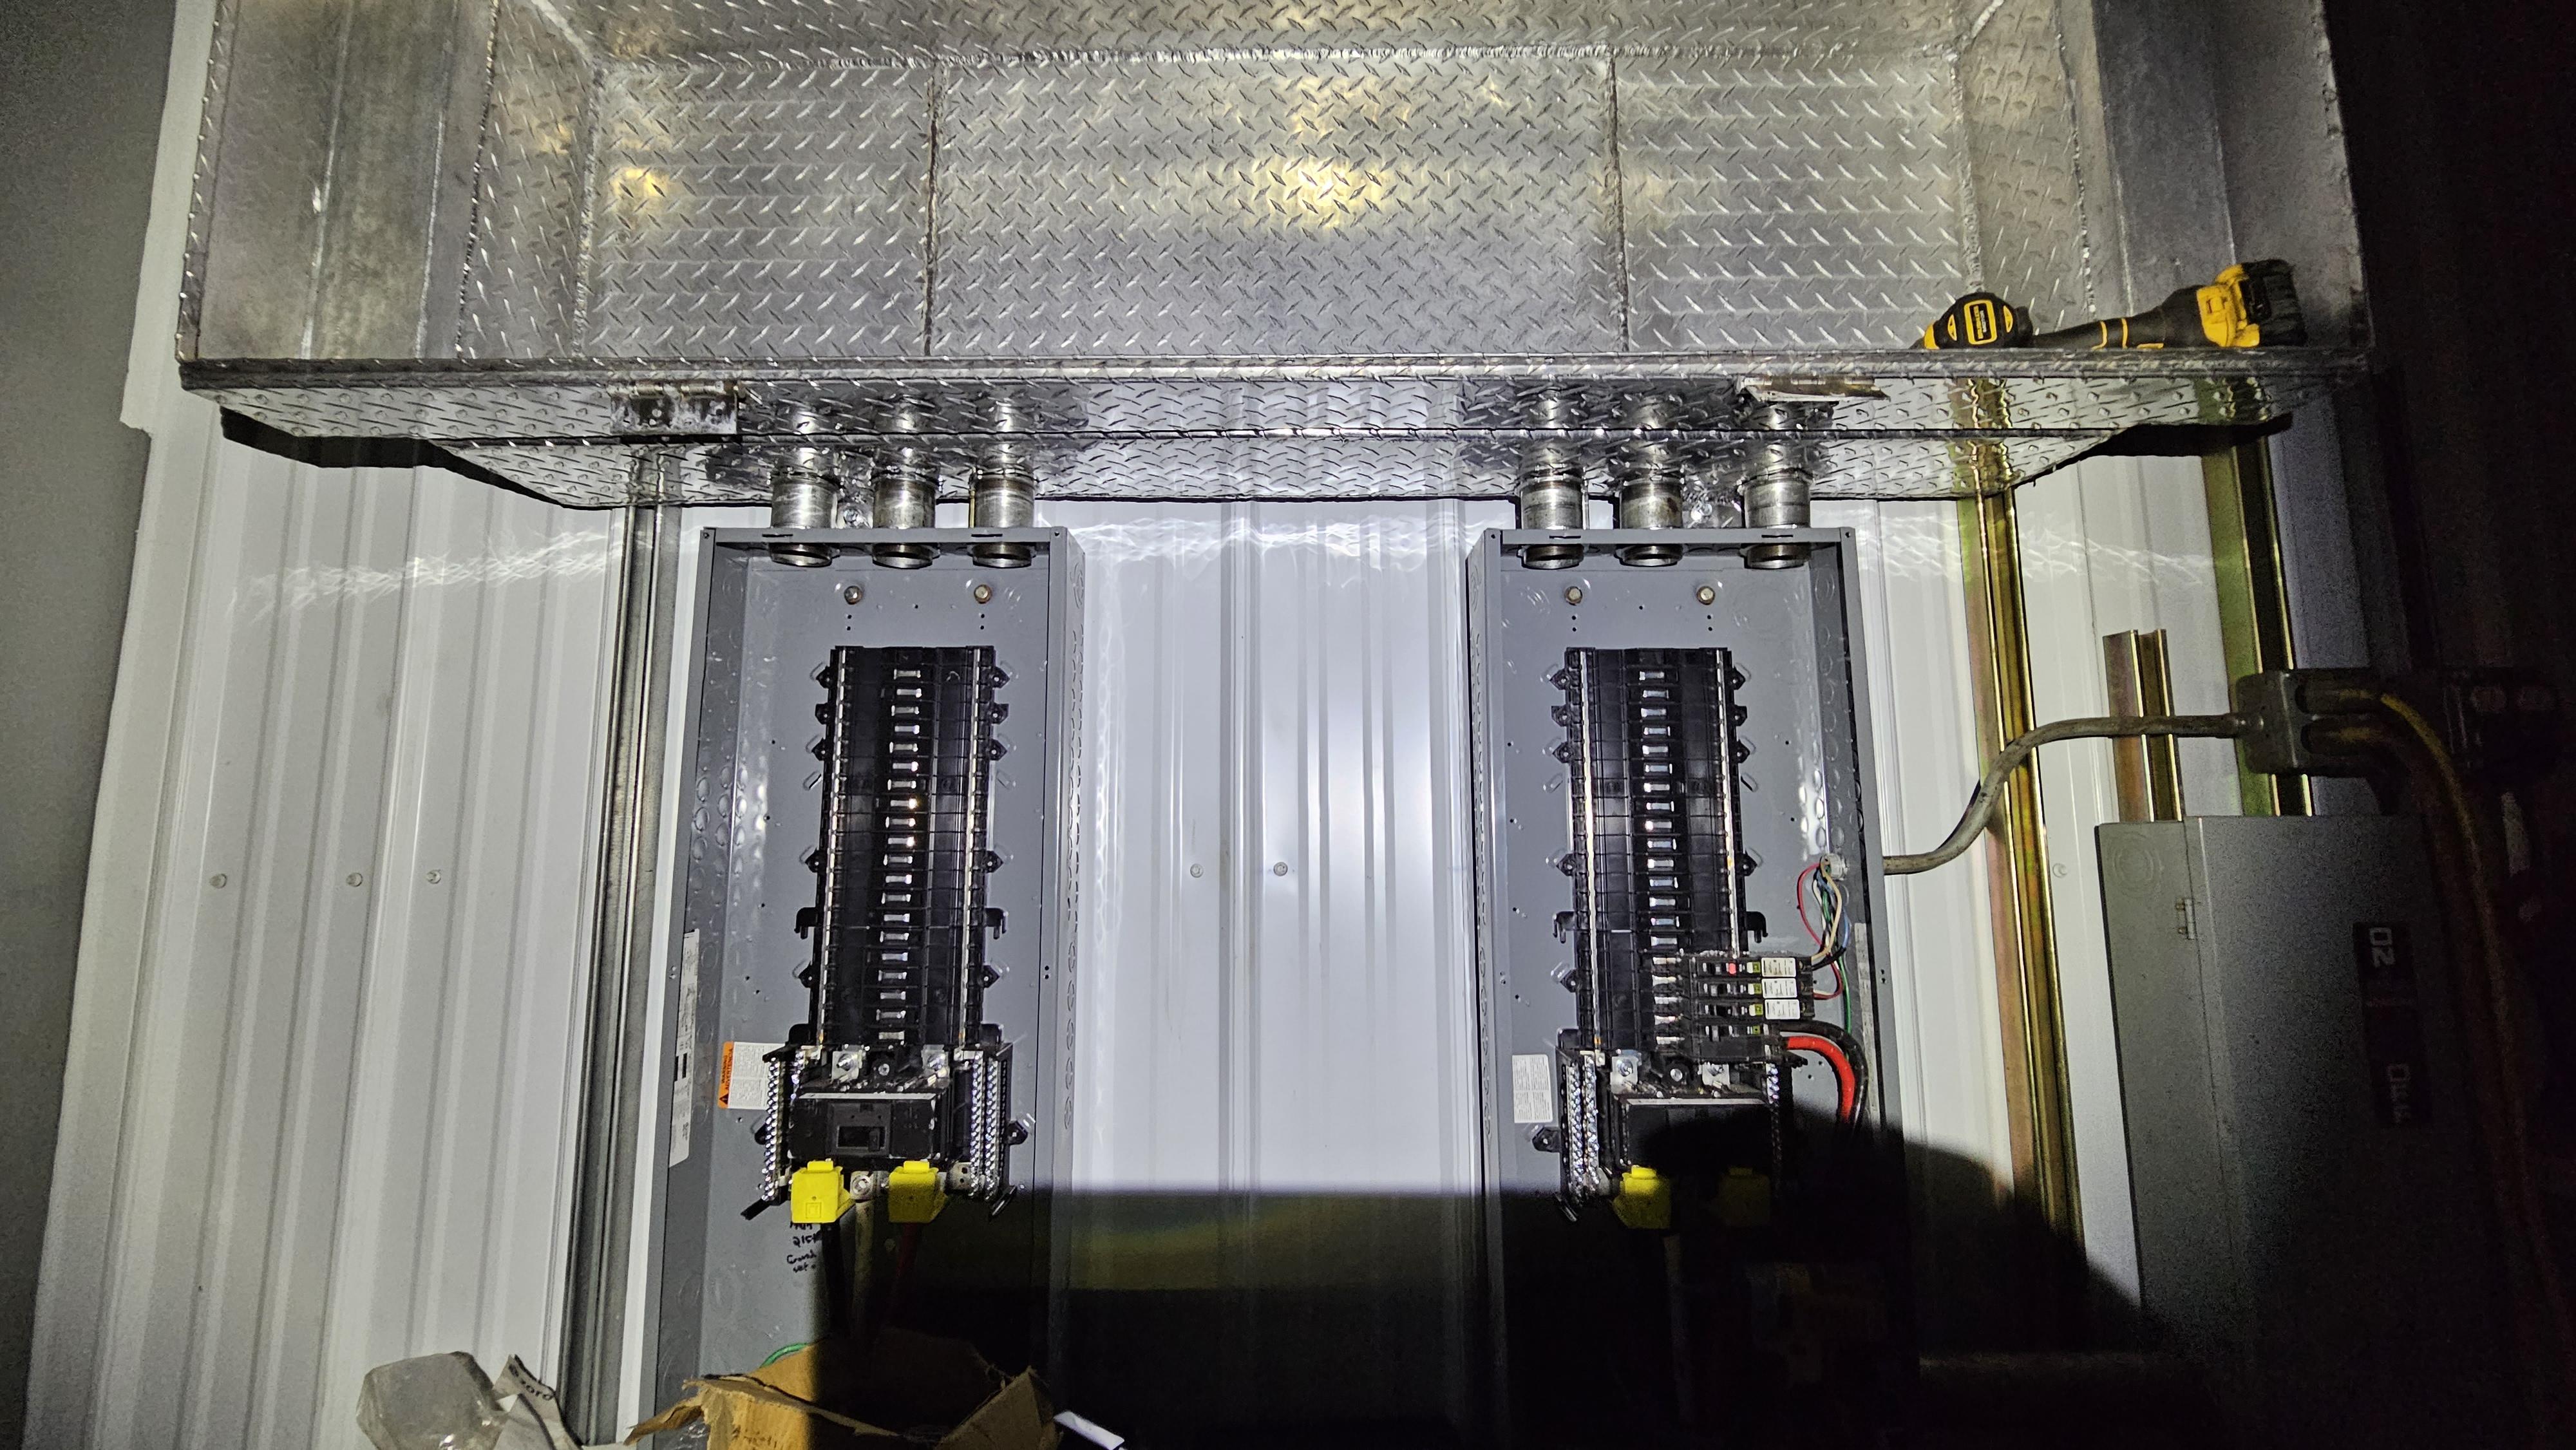
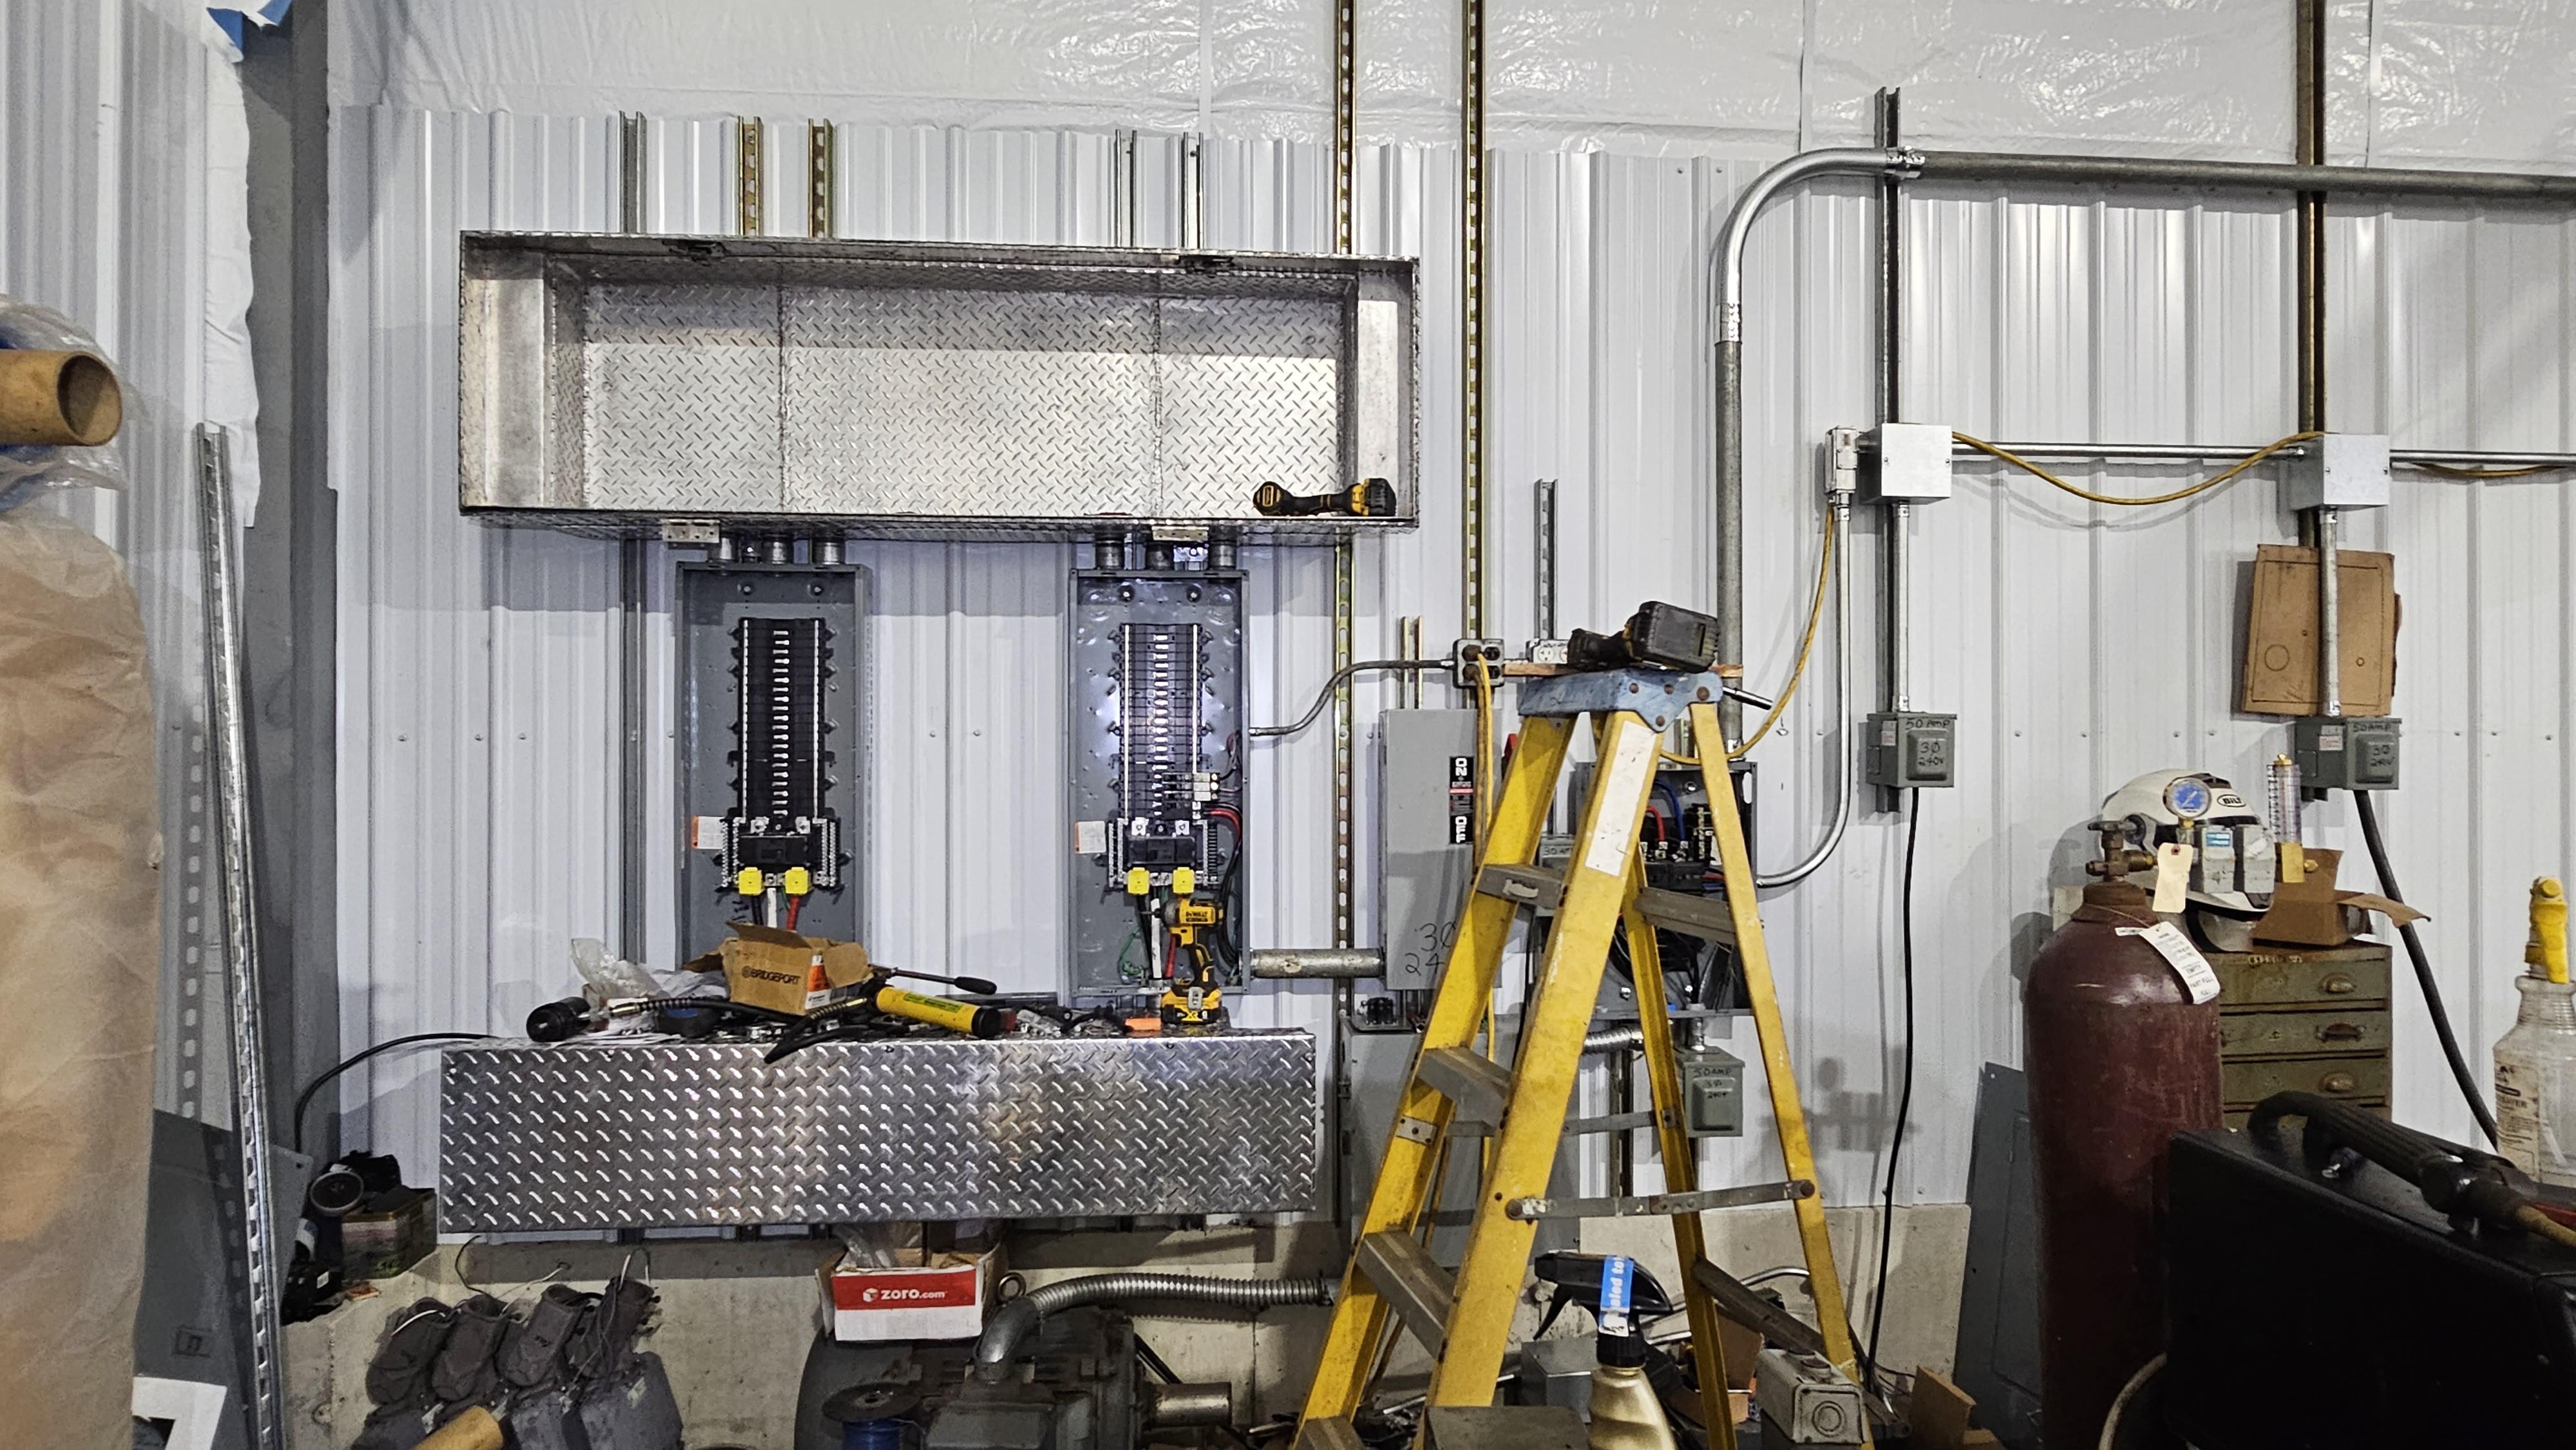
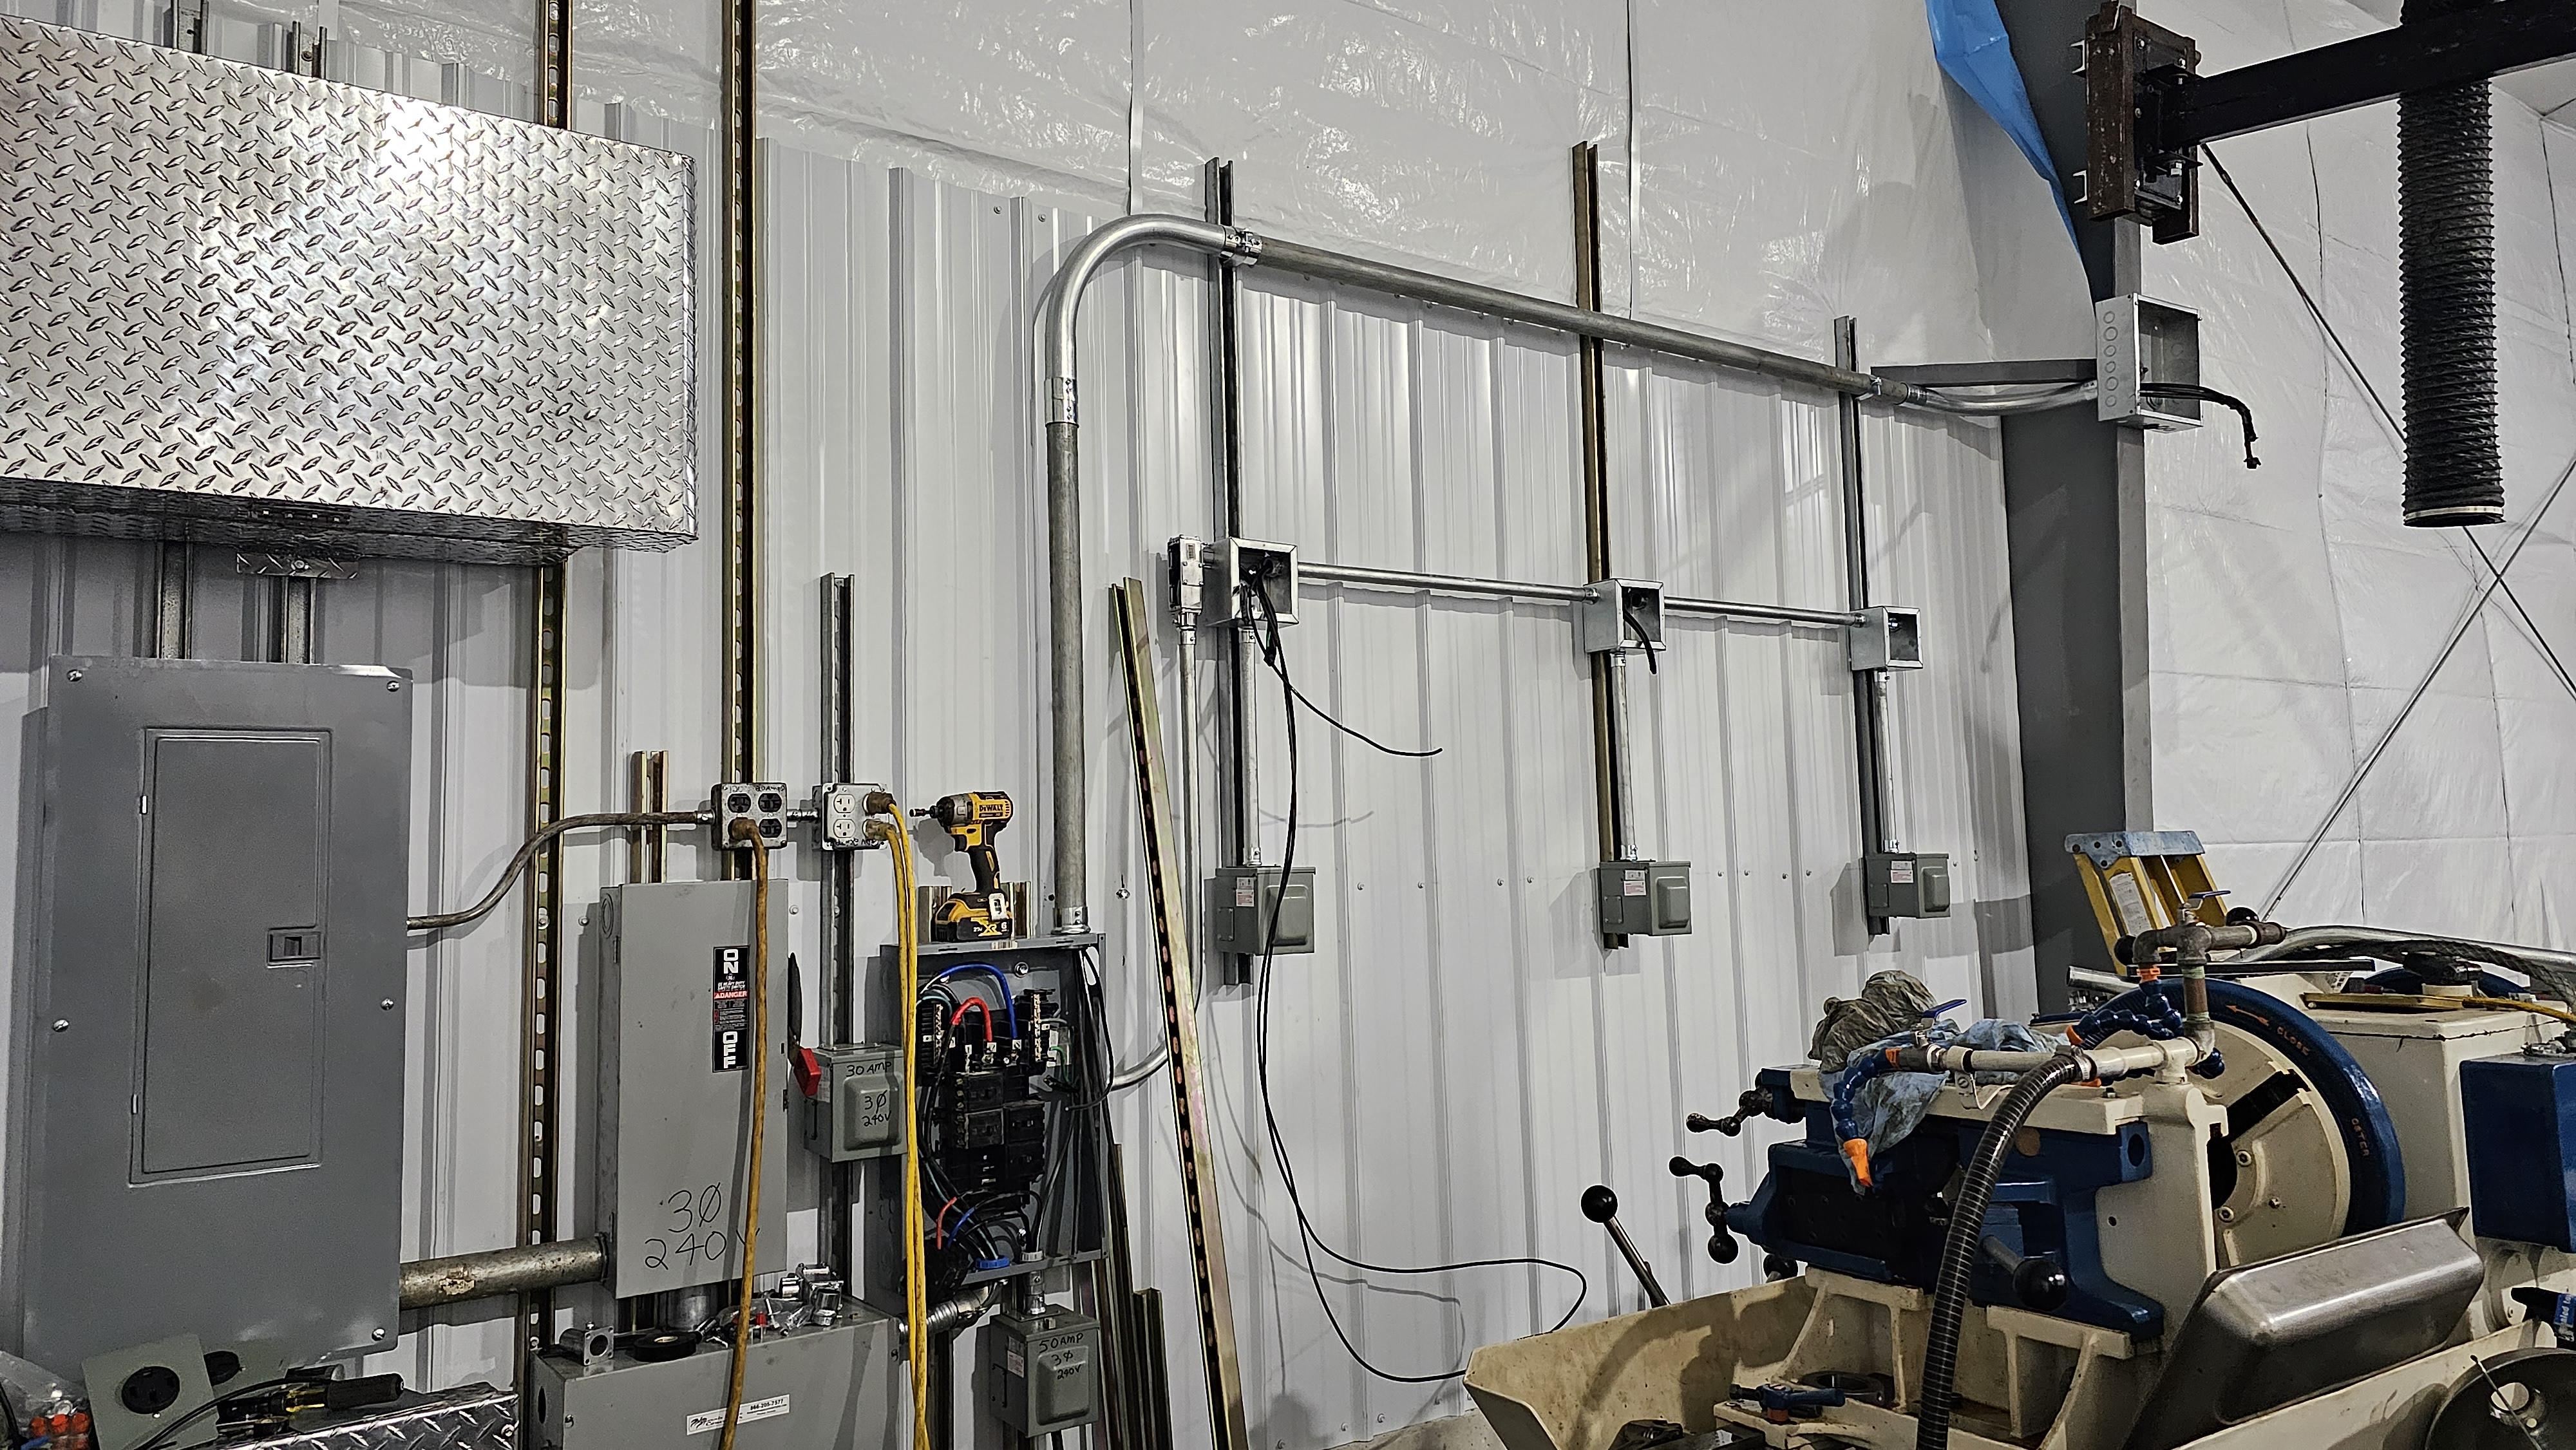
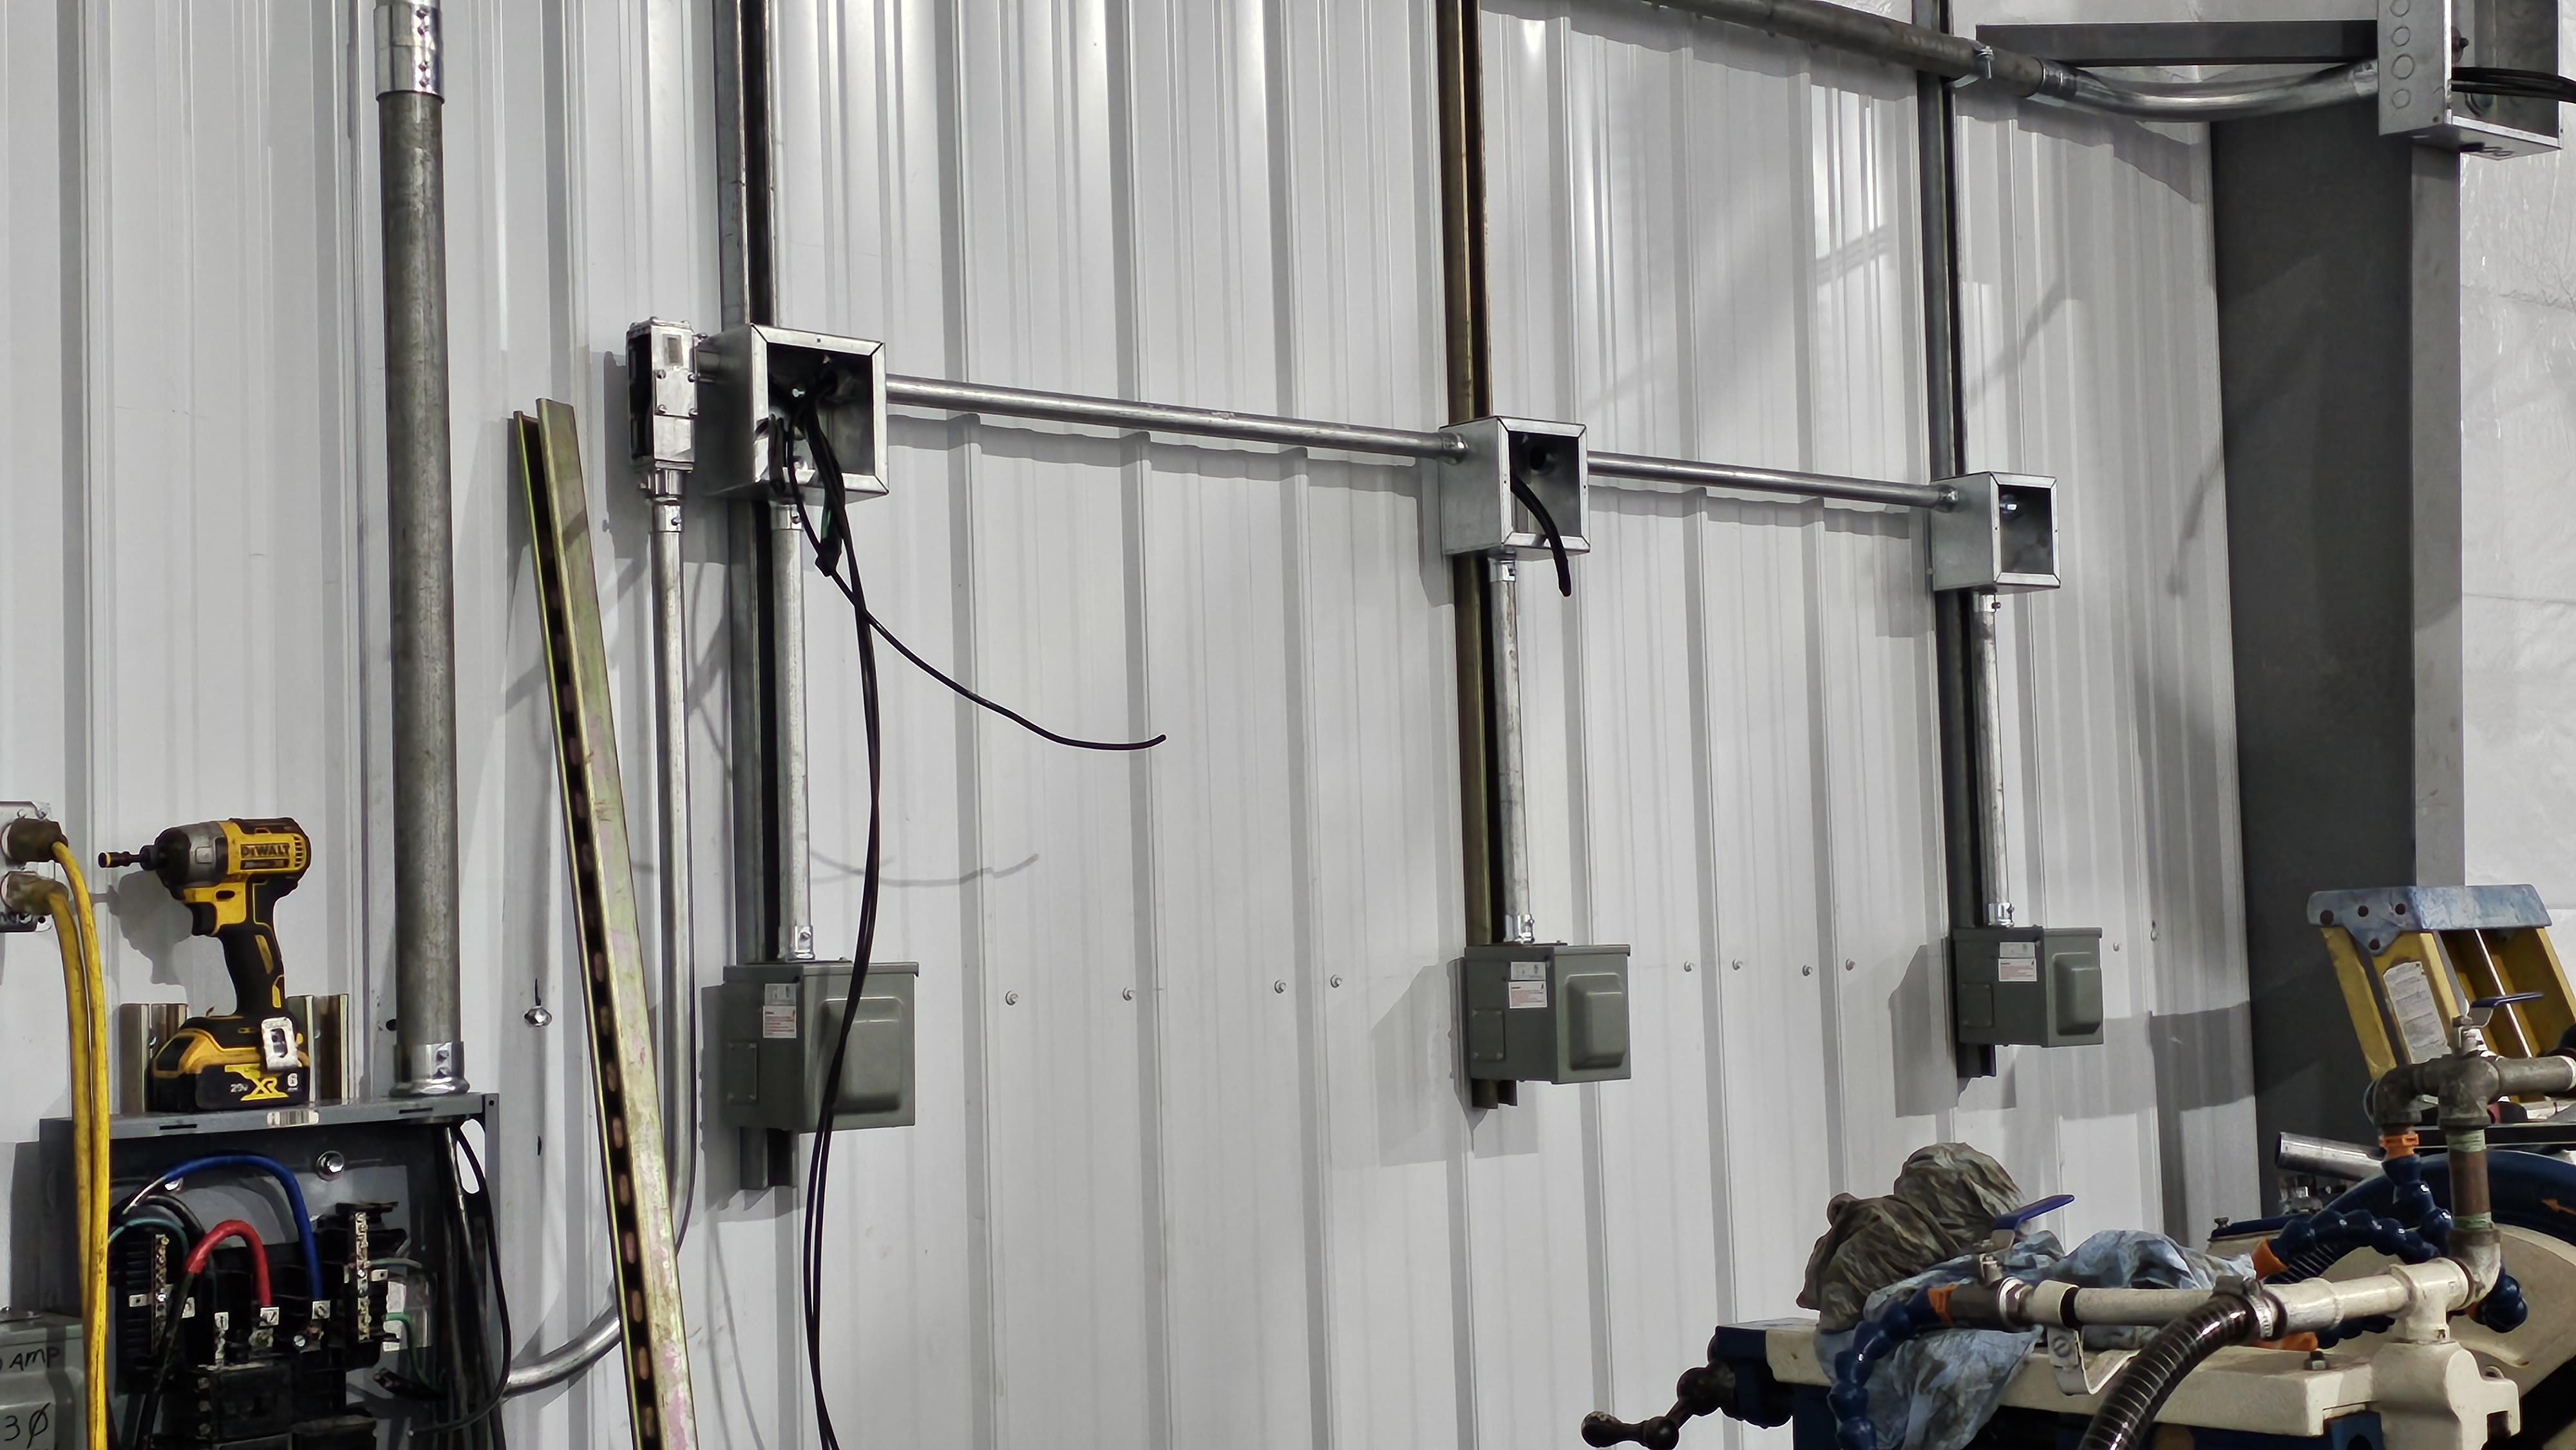
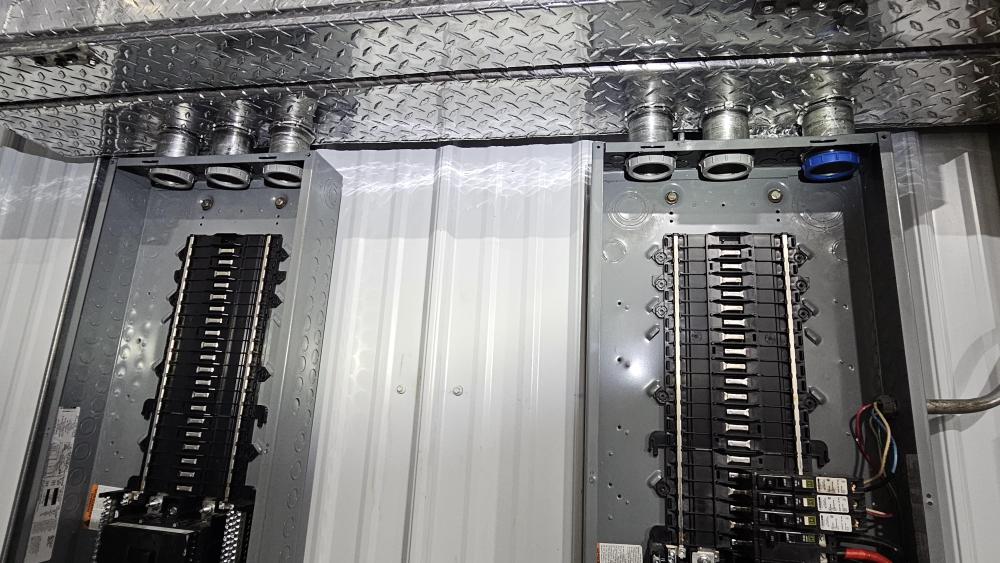
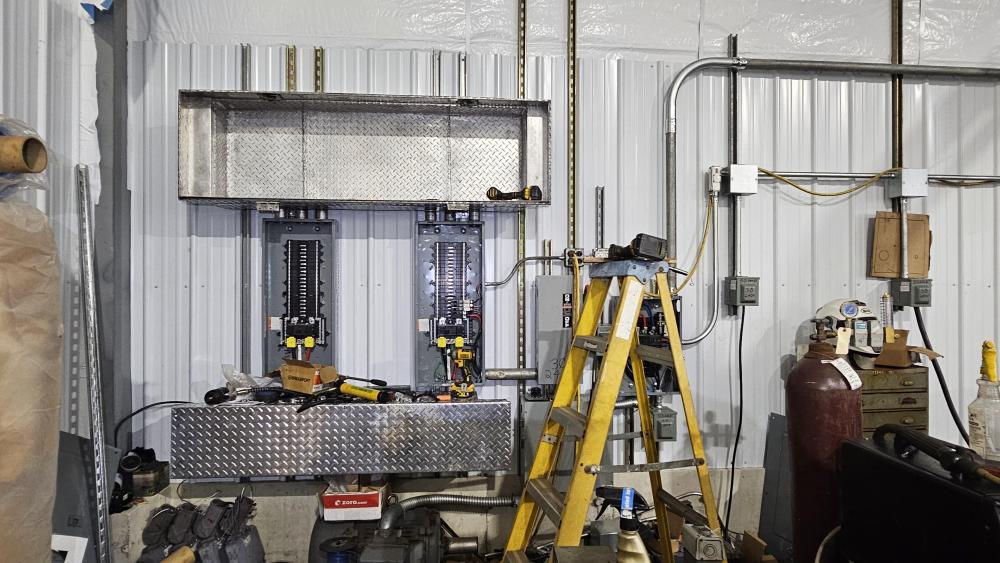
Thanks Larry, From what I've seen of your responses.. I'd say your level of work is very good. I'm hoping the electrical inspector will come in and just nod.. LOL.. I'm sure he was ask me all the important questions.. He's a nice guy but like any of the powers at be.. Well.. You know.. And grit.. yes, yes.. Thanks Steve, The straps are in.. Just can't see them on the 2".. I'm pretty well stocked now.. 3/4" several hundreds, 1" enough to get done.. My primary conduit size will be 3/4". stranded THHN/THWN in 12, 10, 8, 6, 2 awg for their intended purposes.. The only thing I'm short on is straight 2" EMT.. I need 4, 10ft.. I have about 700ft of 3/4" and about 70ft of 1".. From what I can tell I'll use 3/4" for most runs.. 16wires for fill.. I doubt I will even come close to 16 wires.. I'm going to increase the number of runs so can run more dedicated smaller batches of outlets.. The lights will be broken down into 4 switches for the left into 2 and the right into 2.. I'll put up enough strut so i can add conduit if need be in the future.. I know what I have done is overkill with 400amps and dual 200amp panels with 42 each panel.. But.. Anyhow, it's going to look industrial for sure. Finished up the nipples, bushings top and bottom. If the hydraulic parts come in for the manlift I'll do the lights first. If not then it's the 240V 1ph outlets for the welders..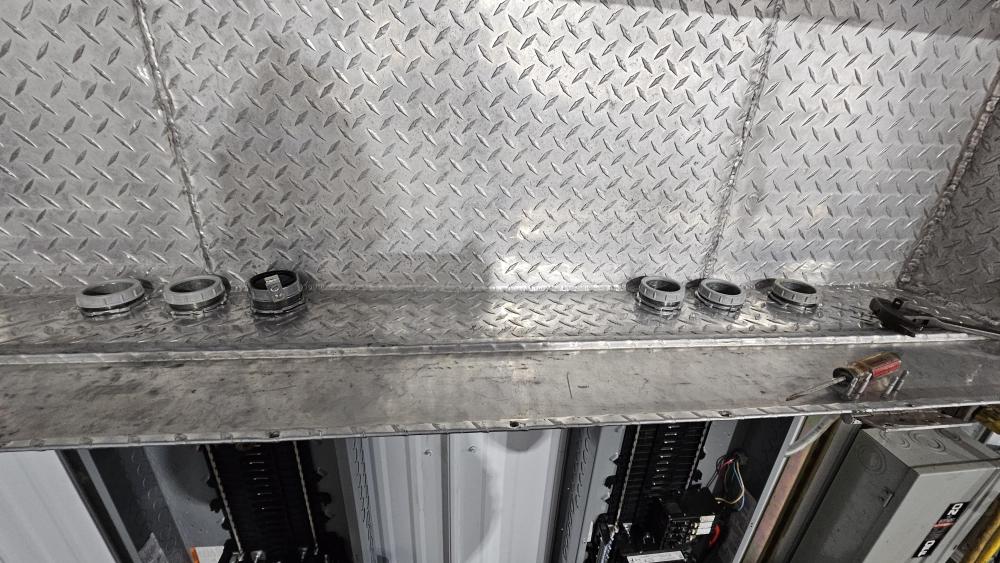
-
JLP Blacksmith Teaching Center.
jlpservicesinc replied to jlpservicesinc's topic in Building, Designing a Shop
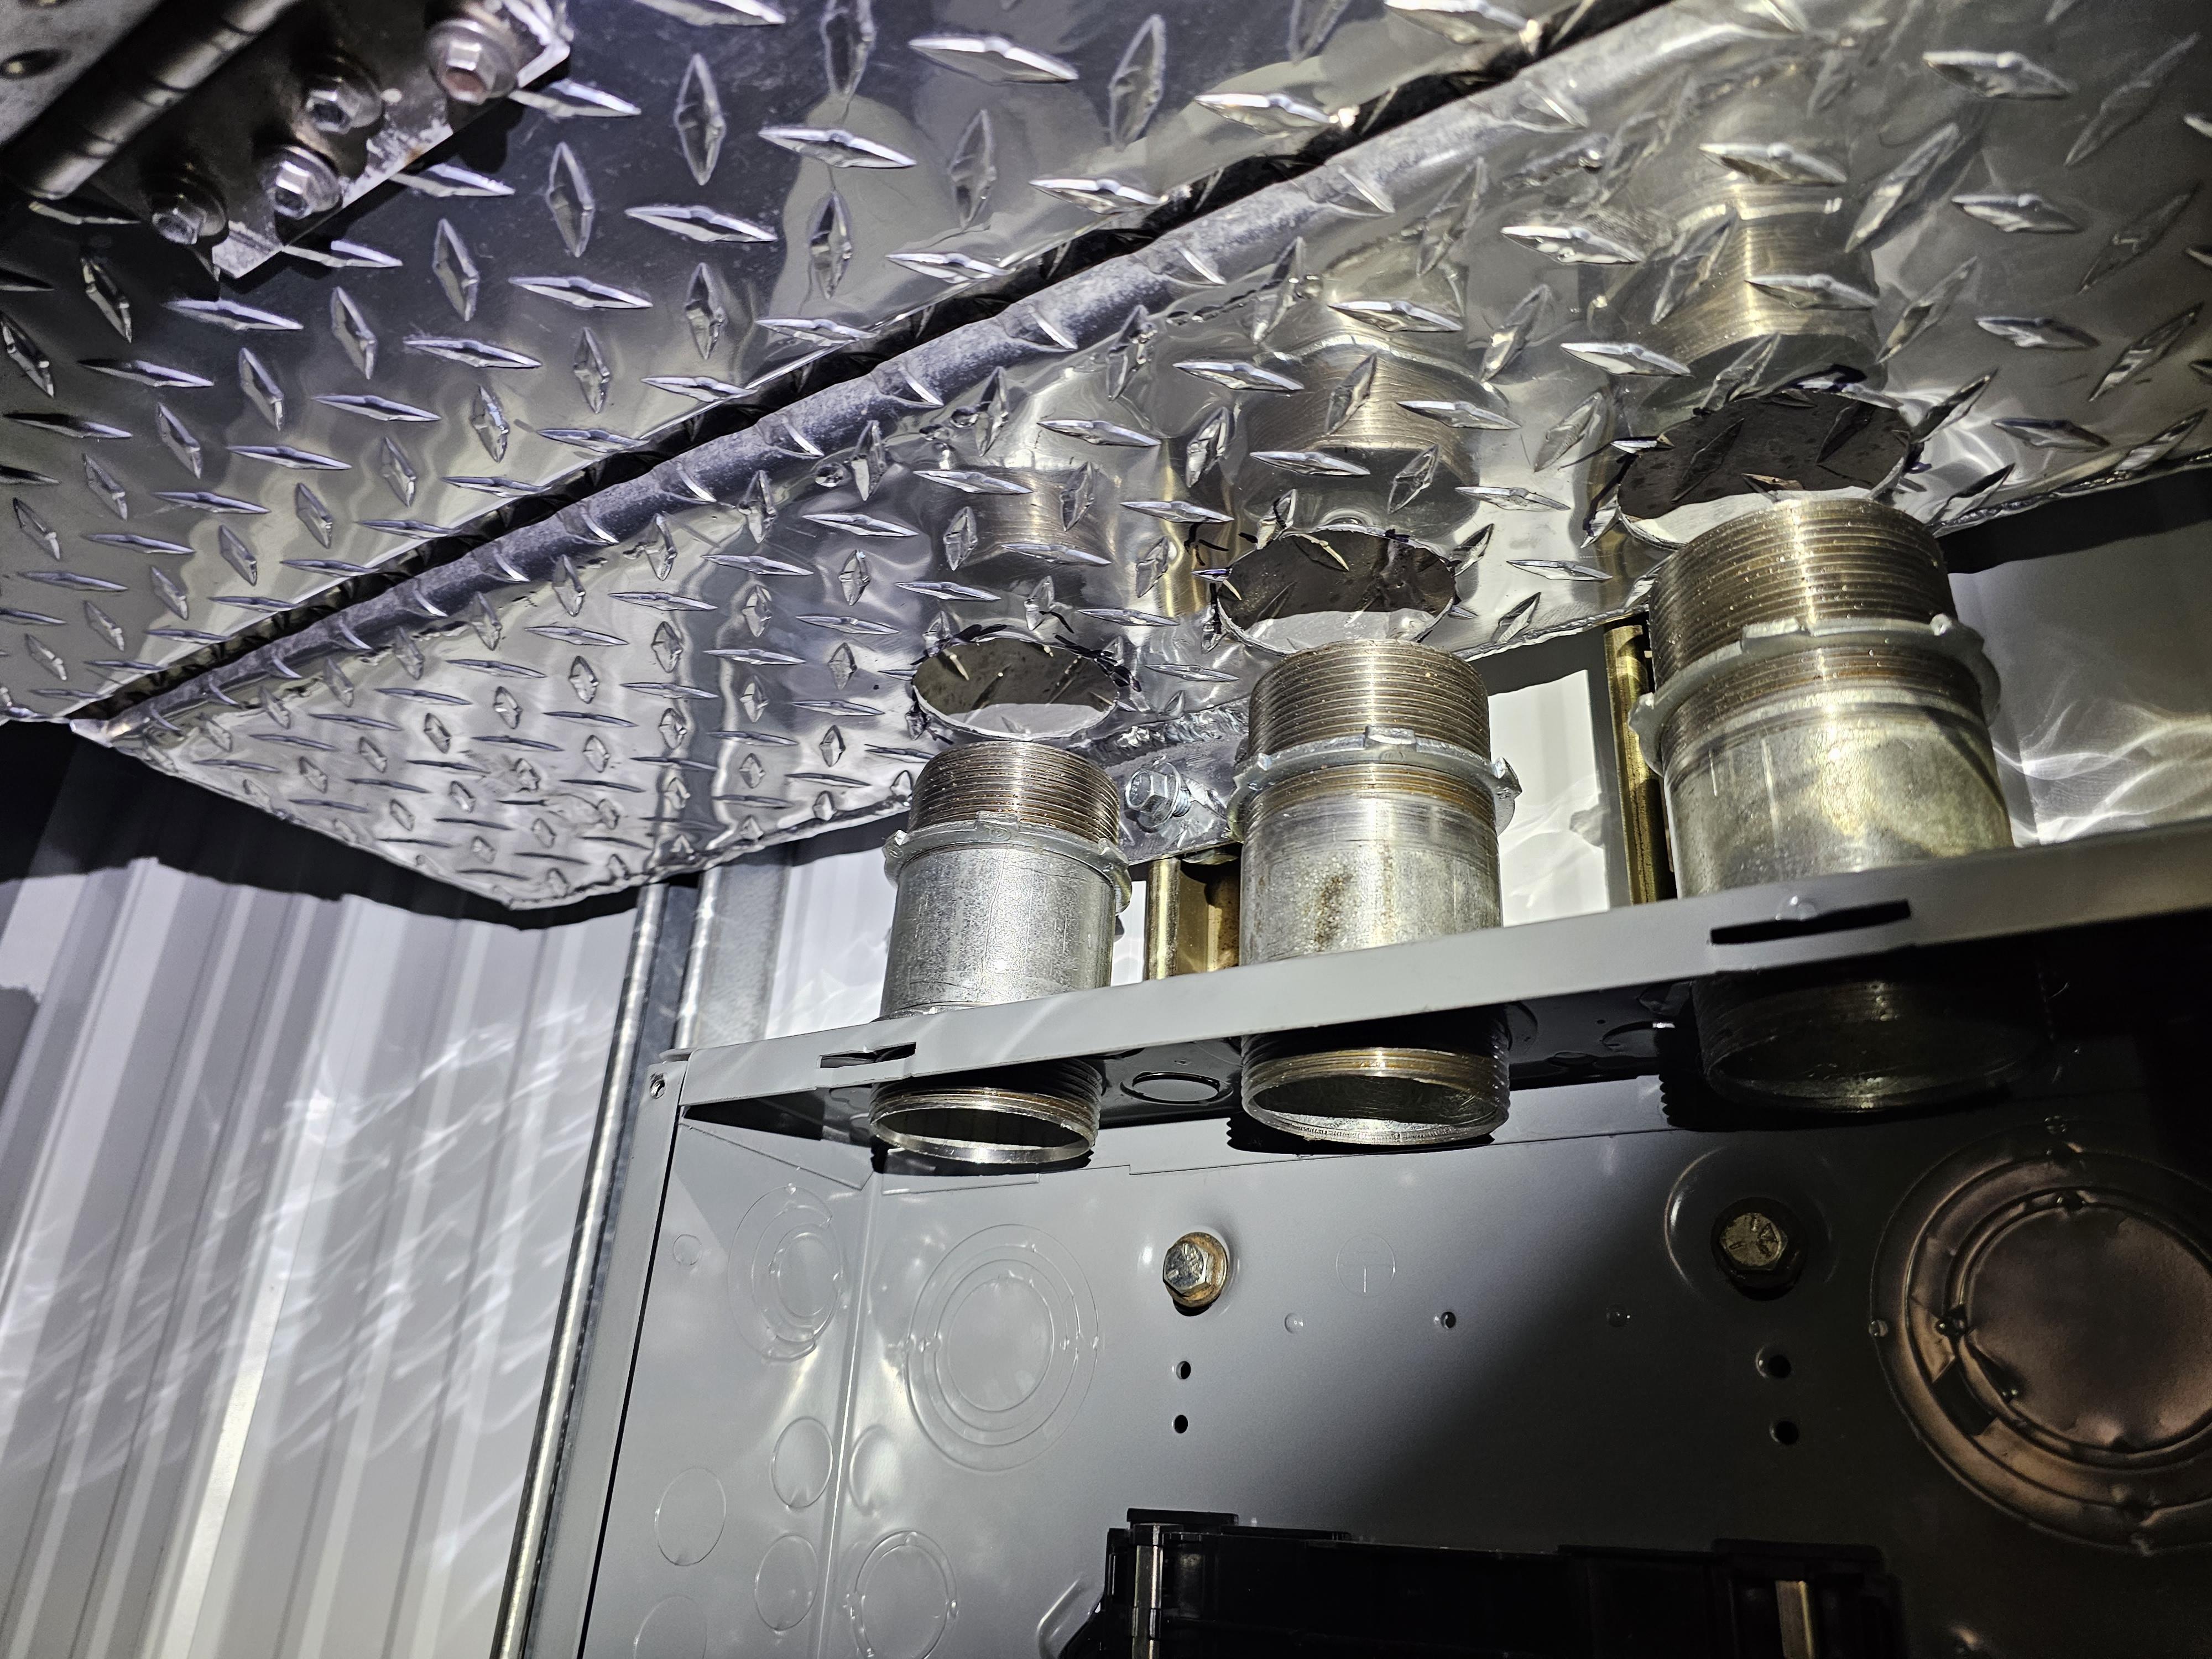
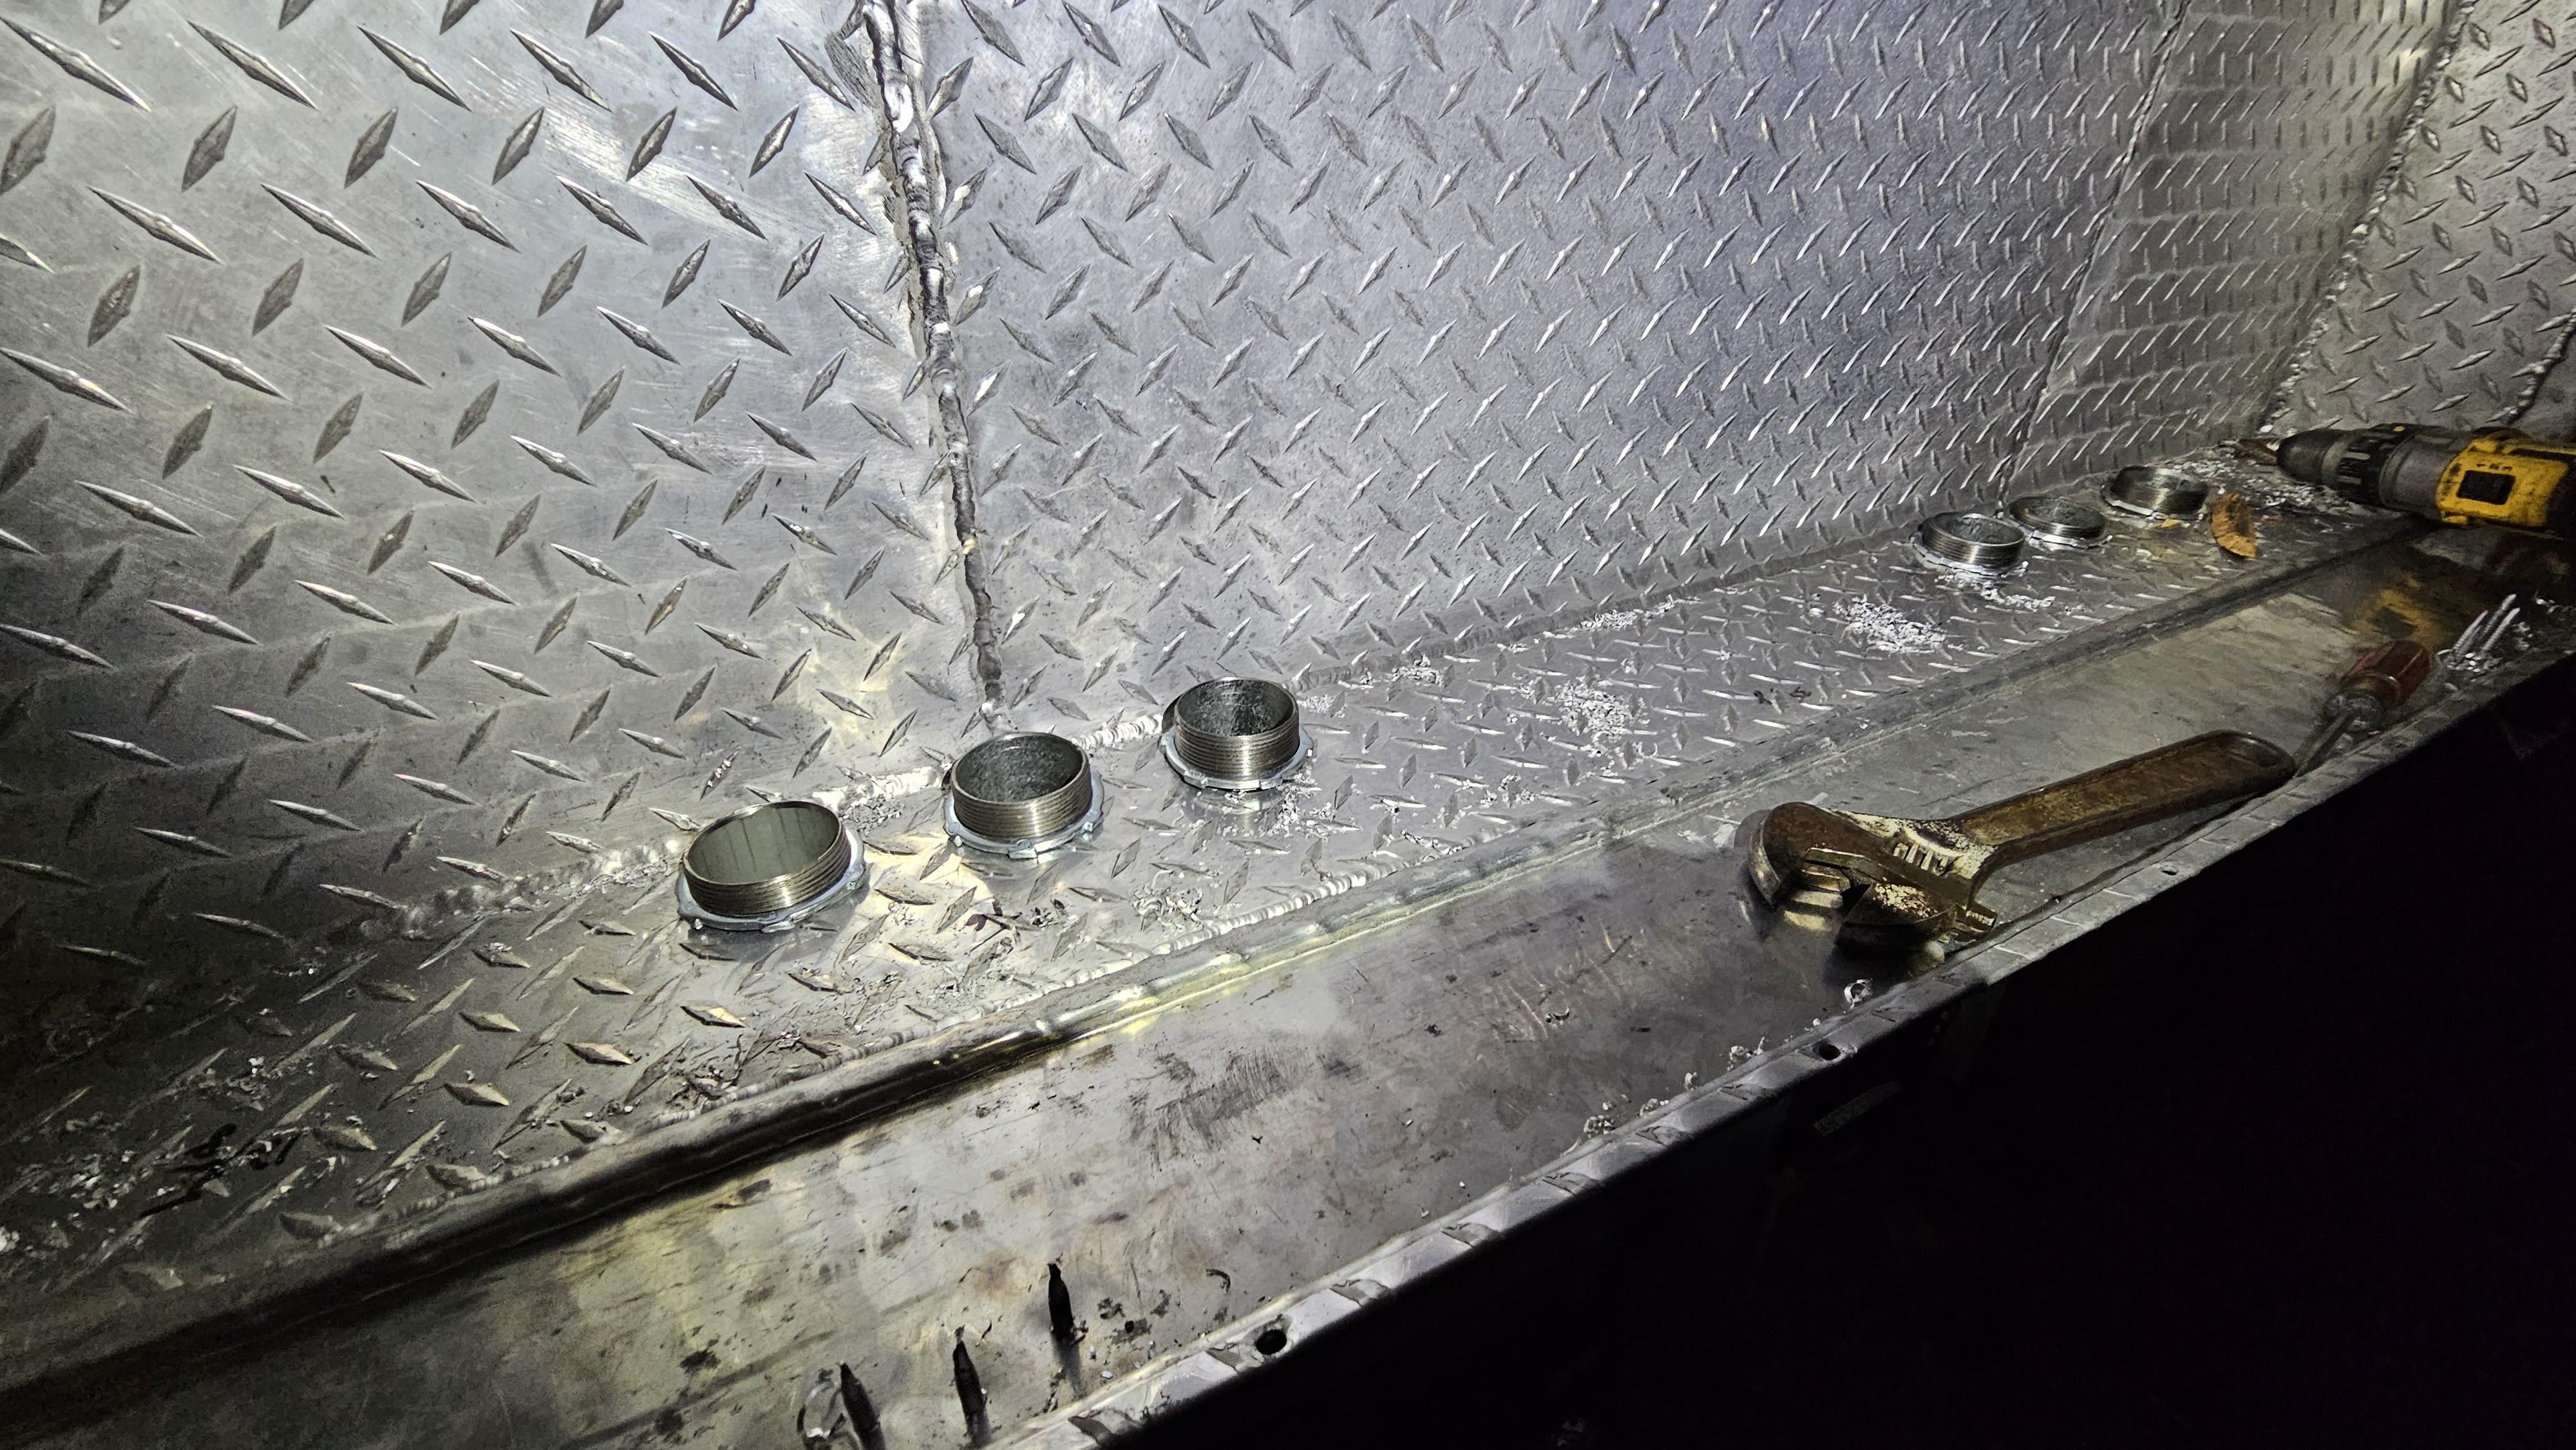
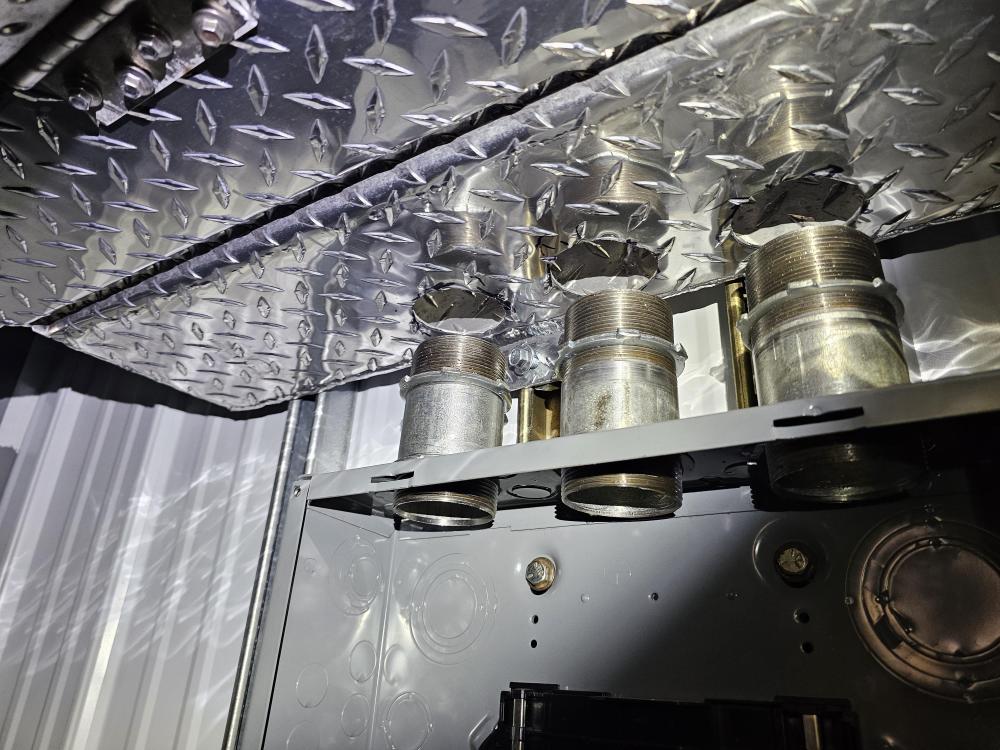
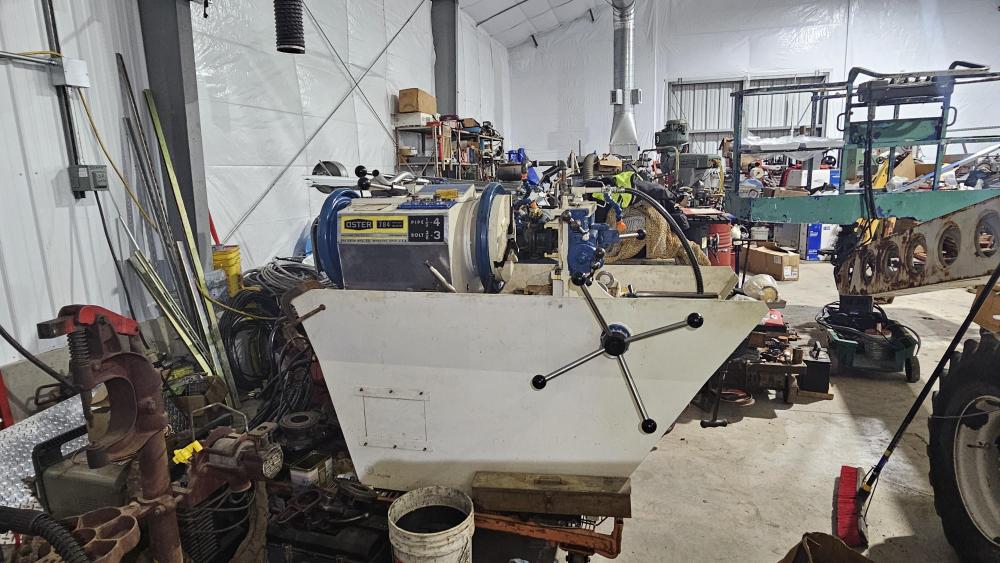
Got some great work done today.. I finished sizing the 2" pipe nipples on the Oster 784. Got the holes punched out in the breaker panels and the wireway.. 3, 2" nipples for each panel. Had a huge influx of appreciation for the abilities I have amassed over the last 55 years.. Nearly everything done is for the first time.. Ability while lacking can be partially made up for with raw grit and a basic concept. Little more finish up and clean up.. Then I can start running 1phase power.. Sadly the hydraulic hose fittings I ordered nearly 2 weeks ago have still not shipped.. So that is the only hang-up.. If the hydraulic fittings don't arrive within the time I get the wireway finished.. Then I will continue to put the siding up inside the building.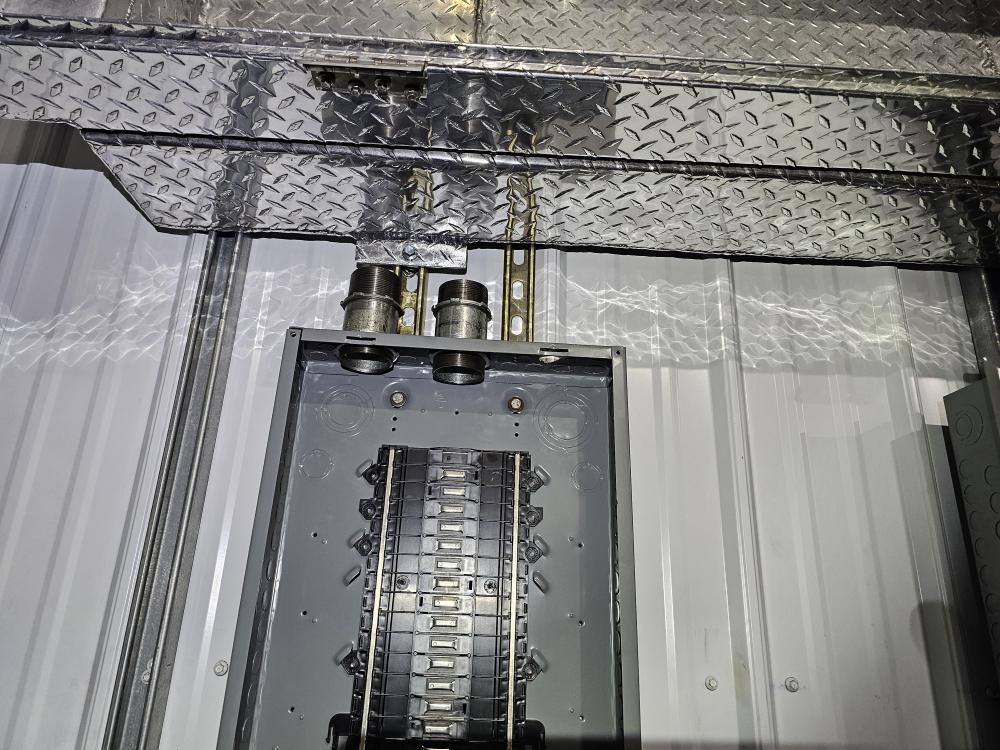


-
What did you do in the shop today?
jlpservicesinc replied to Mark Ling's topic in Blacksmithing, General Discussion
It was a joke of sorts.. I didn't think she was.. You guys can be too literal.. Couldn't you hear the inflection in my voice and my slanted smile on my face.. neighbor'sI can see the neighbors house in the back ground. -
What did you do in the shop today?
jlpservicesinc replied to Mark Ling's topic in Blacksmithing, General Discussion
That looks great.. Is she going to shoot the bottles off the branches? -
True, true.. the owner is a huge supporter of Makers.. Anybody who forges really.. A truly amazing person.. Got to spend some time with him a few years ago at an event..
-
JLP Blacksmith Teaching Center.
jlpservicesinc replied to jlpservicesinc's topic in Building, Designing a Shop
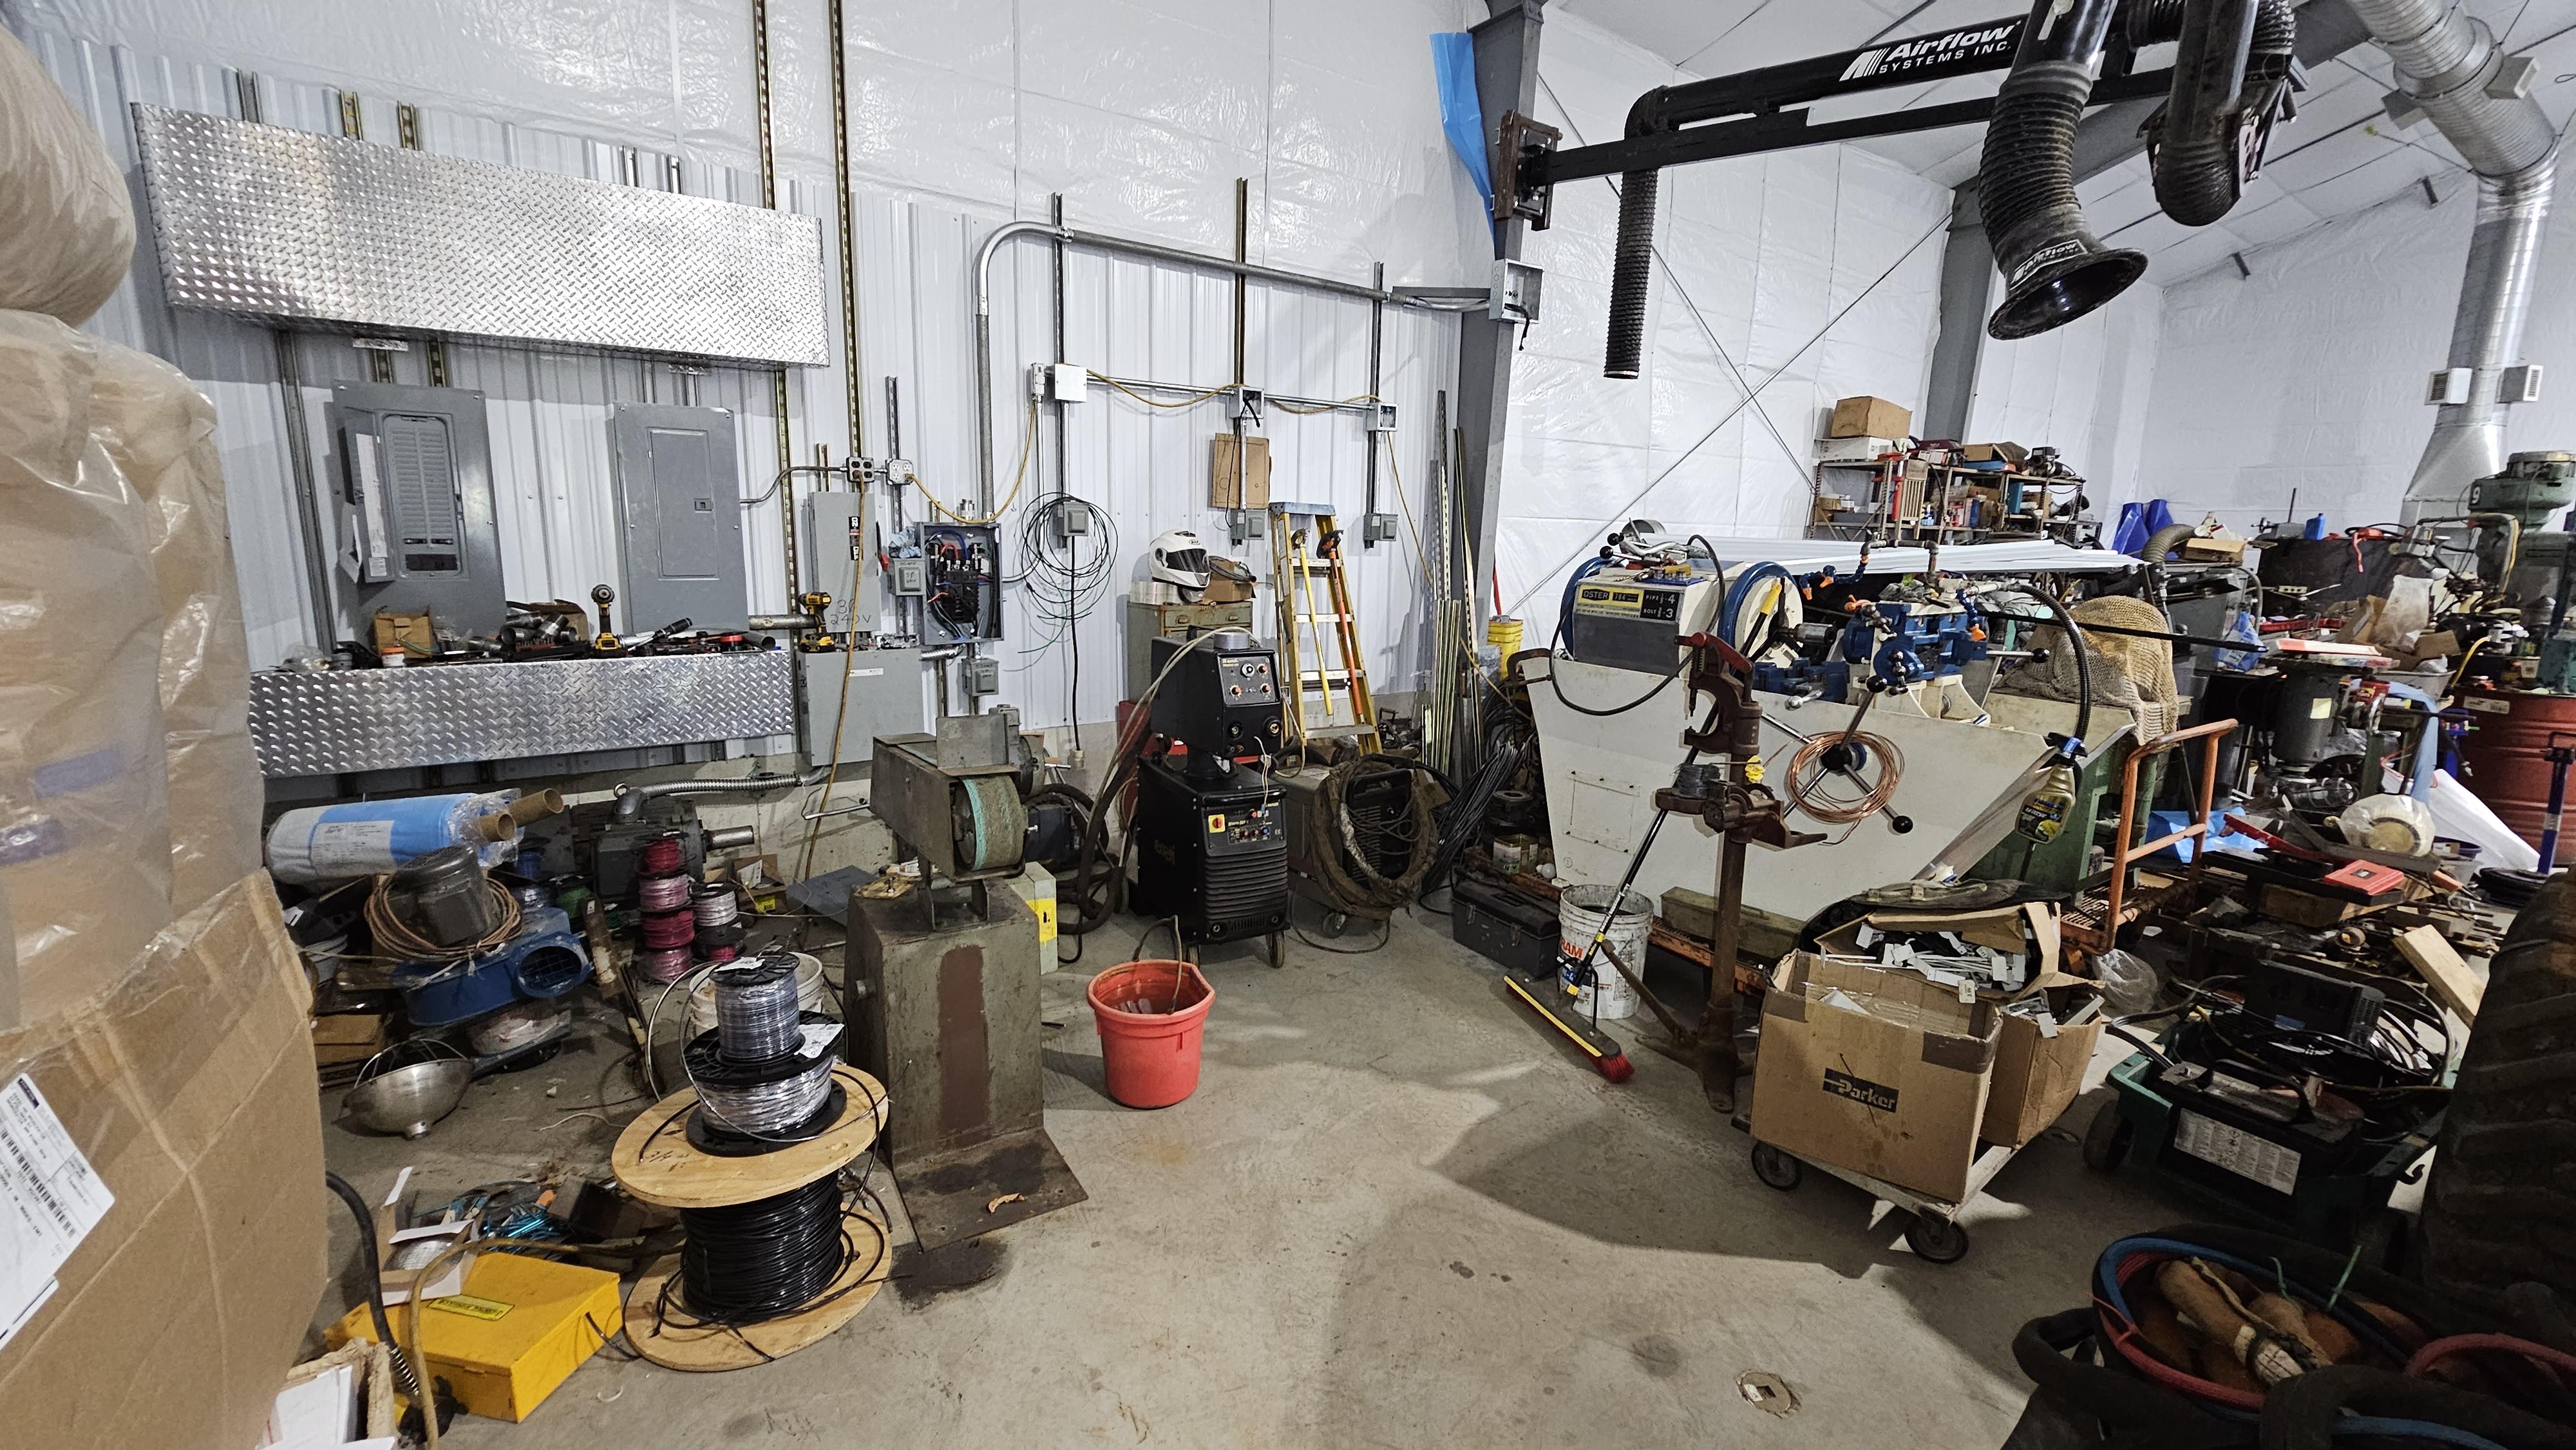
Feels great seeing the Esseti welder and the Thermadyne 1650 in the school and knowing they can be hooked up and used.. A few show and tells on the equipment just in the first bay side. I've broken each section into 6 bays basically 20X20.. I can see the in floor fume extraction connections.. I also ran some more wires.. Waiting on wire splices.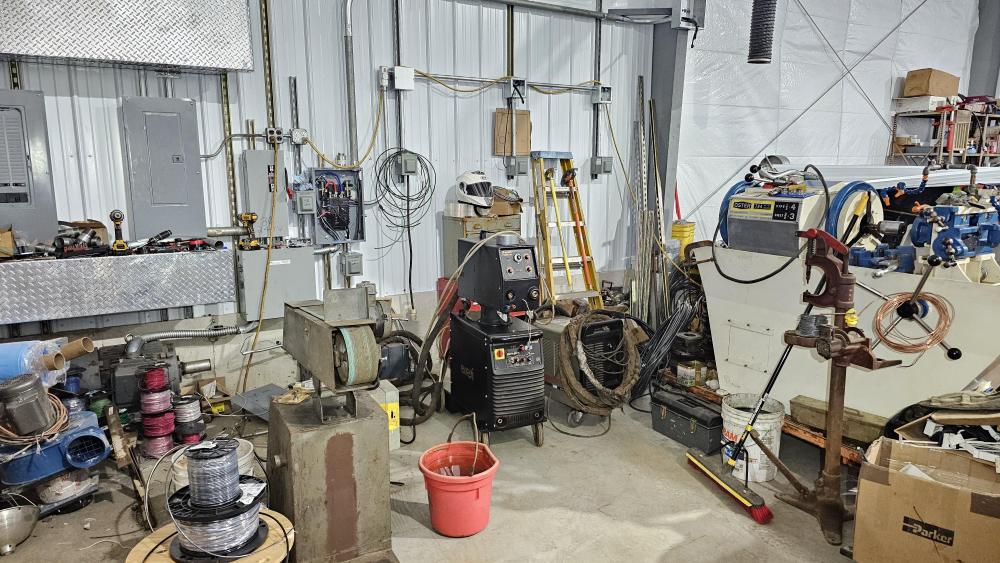


-
RichardC you can't go wrong with the Holland anvil.. I had seen them used at an abana conference and they held up great to new people forging and missing the hot metal hitting the anvil..
-
What did you do in the shop today?
jlpservicesinc replied to Mark Ling's topic in Blacksmithing, General Discussion
Howdy Billy, we got ours too.. We so look forwards to seeing the cards and what wax seal looks like. I purchased a set of compound leverage hoof knippers via Champion 1909.. These are in great shape.. The blades look to have very little use.. Who ever was using them did beat them up some on the backs of the jaws the screws for the cutting edges were peened over and you co8uld see they were using them for beating something.. More than likely opening nail clinches. But I was able to get the knives out and get the threads on the ends cleaned up enough.. I sharpened them and will try them tomorrow. ooh, excuse me 1906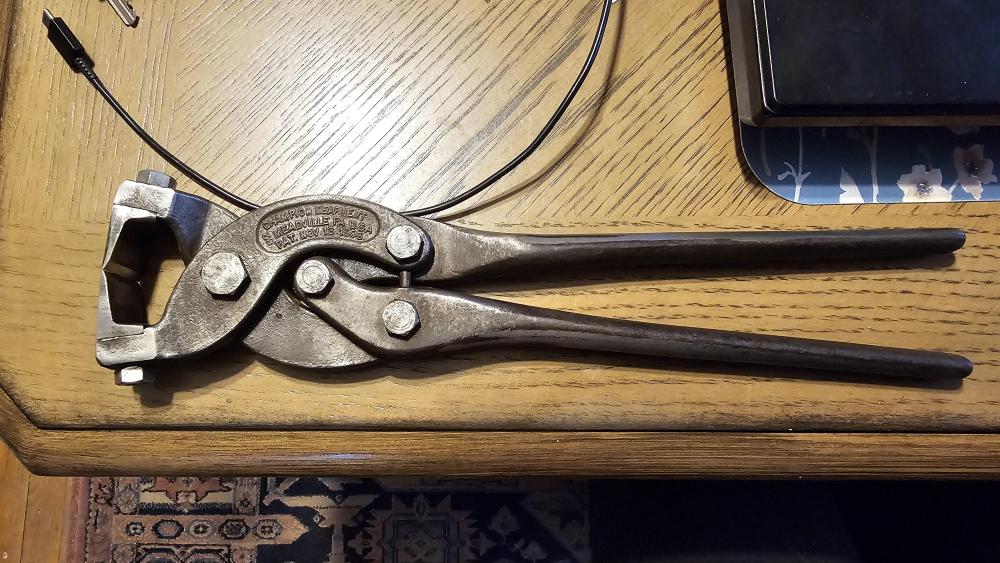
-
What did you do in the shop today?
jlpservicesinc replied to Mark Ling's topic in Blacksmithing, General Discussion
Charcoal always burns about 2 to 3X faster than soft coal. Having a forge designed for charcoal makes a world of difference both in performance and how hungry the forge is. Those look great and will last a few lifetimes. -
What did you do in the shop today?
jlpservicesinc replied to Mark Ling's topic in Blacksmithing, General Discussion
Not sure I posted this photo before.. The last time I was making a hammer handle (few weeks back) for my very first hammer purchased in 1978 (Truevalue cross peen 2.5lbs) I realized the wood was processed completely with only the tools I had made.. From cutting the tree down with the axe, to using the froe to split out a blank, from the draw knife I forged and then from the hammer and handle I made.. It was an interesting moment.. A certain kind of achievement never realized existed.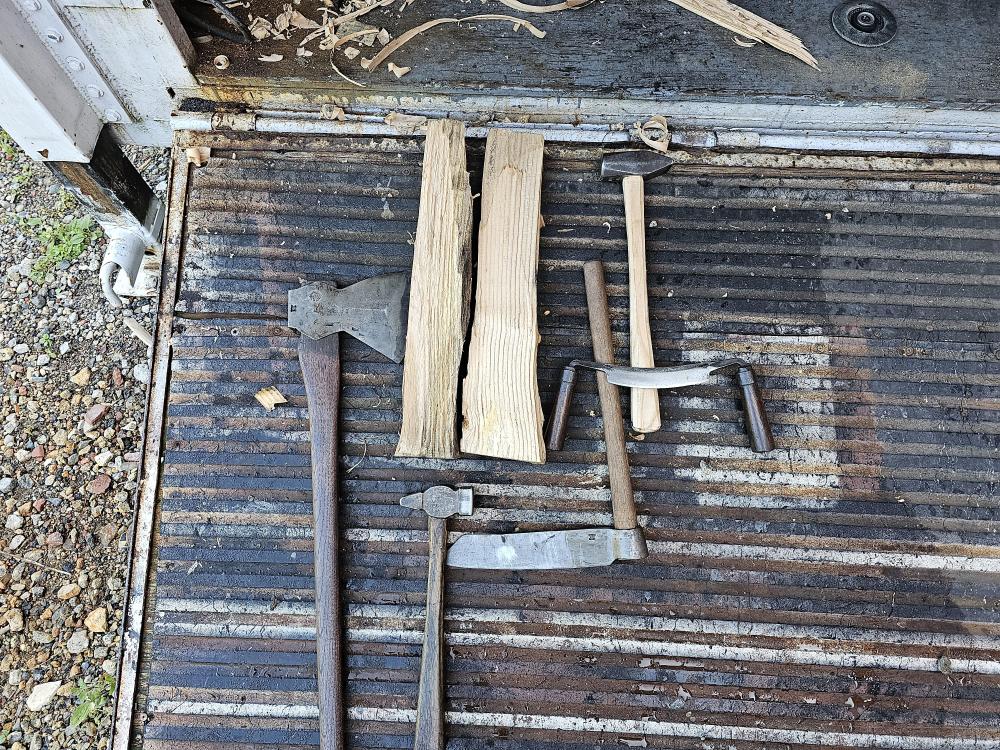
-
What did you do in the shop today?
jlpservicesinc replied to Mark Ling's topic in Blacksmithing, General Discussion
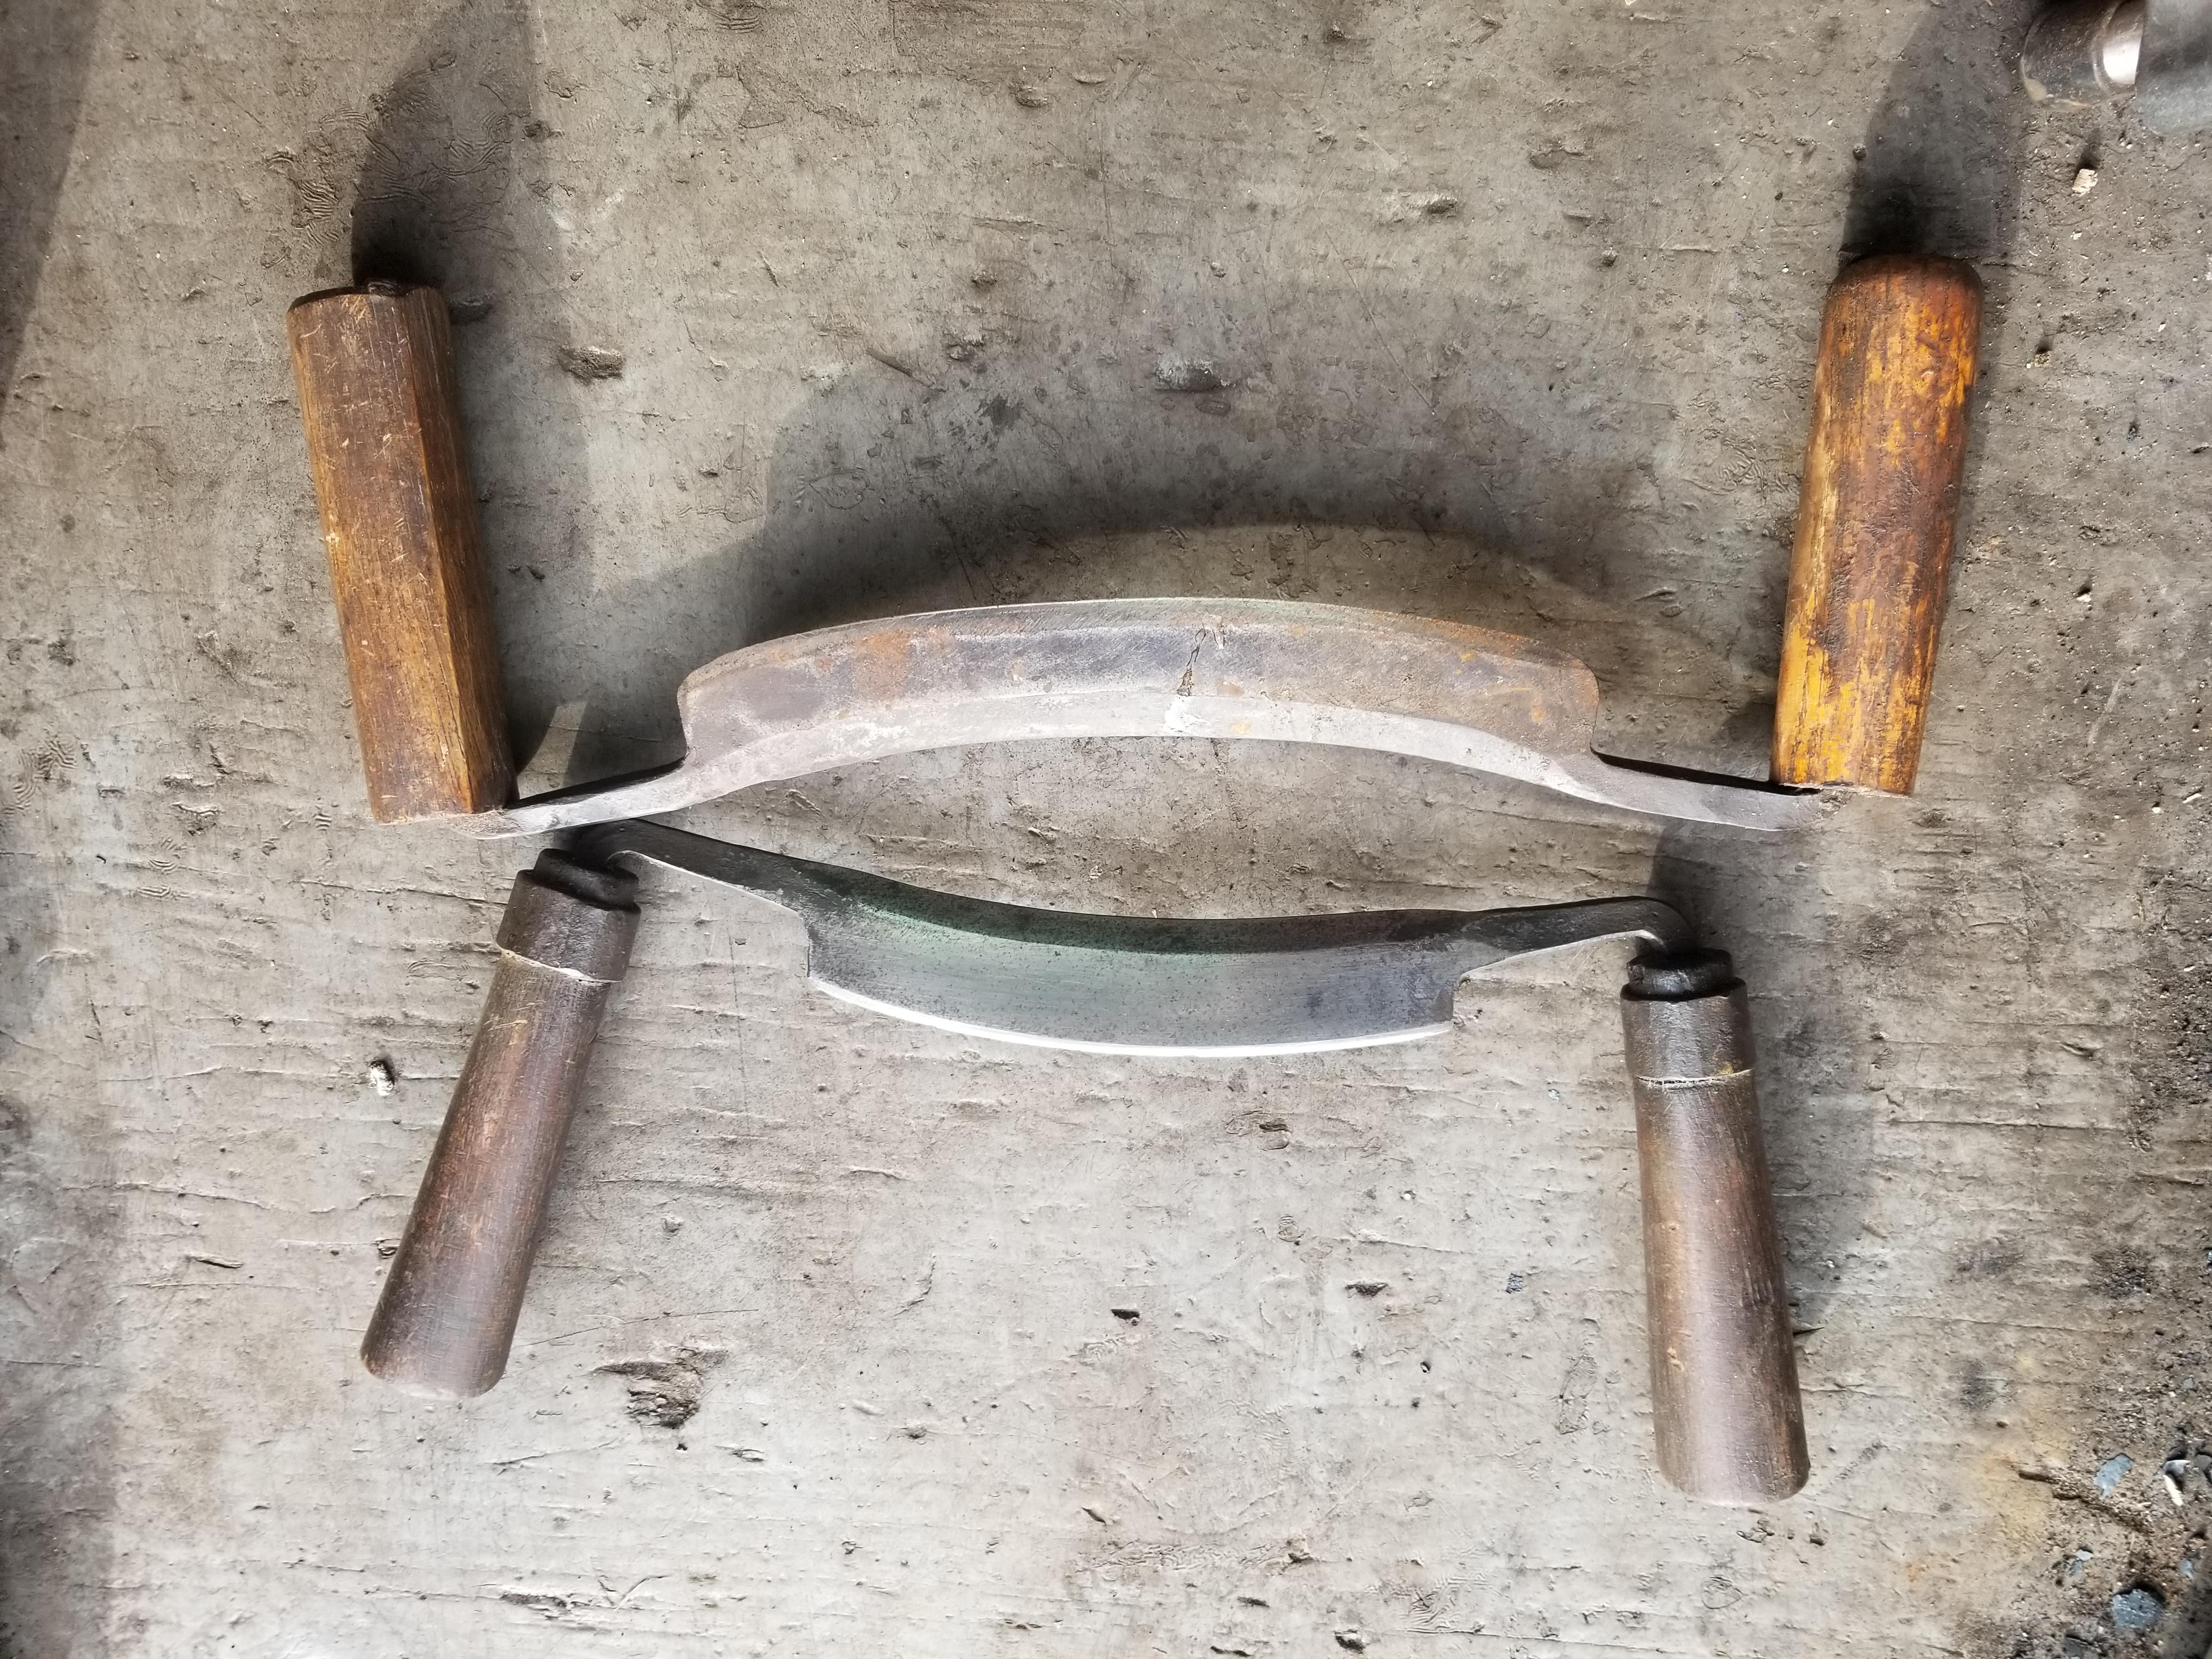
You might not be able to turn a handle on a lathe, but there are a bunch of wood working tools a blacksmith can make.. First photo is from the EAIA demonstration few weeks ago steeled wrought iron with 5160 cutting edge the handles were turned from special wood by the owner of the shop I demonstrated in. .. The other one is of 2 draw knives I made years ago.. The one on the bottom is 5160 with wrought iron furrels and pear wood handles.. The top one that is upside down was my very first one back in 1986.. I forged the blade then took what ever little sections of wood I had for the handles.. One side is the bottom of a sledge hammer I shorted the handle on, the other is from a wood turning chisel that was to long. The original one from 86 still works very well and I use for roughing out work..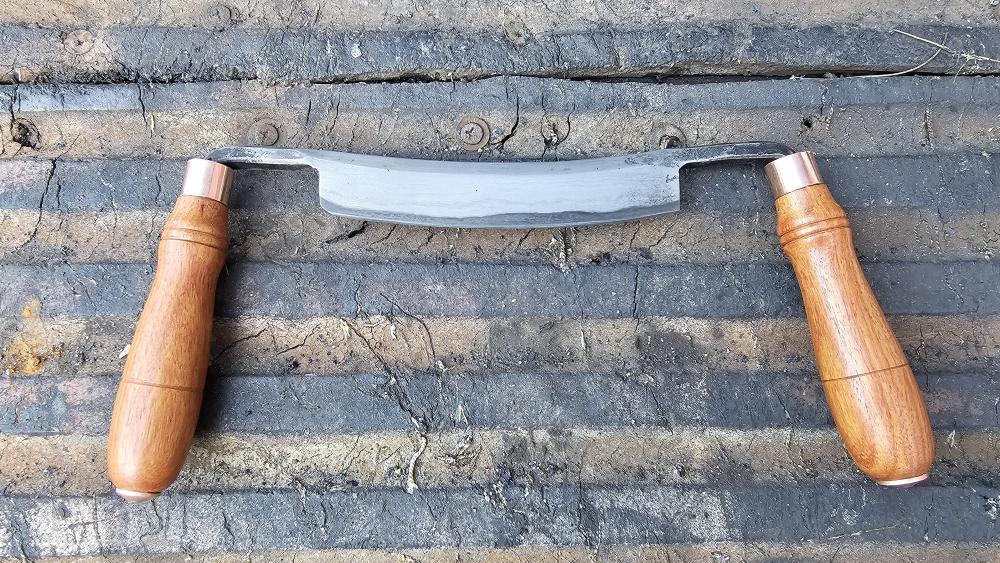

-
What did you do in the shop today?
jlpservicesinc replied to Mark Ling's topic in Blacksmithing, General Discussion
the blacksmith twist unless heavy is a weak design. And yes it looks clunky if don't badly.. Nice thing is since one is a blacksmith the imagination is the only limitation. David aka goods.. I personally struggle with others not keeping track of their time spent at the forge.. I don't understand not keeping track of time and item takes and making notes in a "blacksmiths Journal". I try not to sell anything at any event. I'll throw out some redicouls price simply based on how long it takes to make the item. Even a hook.. It it took 1hr to make then that is the going for the hourly shop rate. But I'm not there to sell.. Only to demonstrate and educate. I'm more likely to have a person come by who shows interesting in an item but hangs or swings back by and just give them the item. Makes it a lot easier when I'm being paid to do the event to be there with a clear conscience. Going and making no money with the cost of fuel and such is a bad business model.. But then again. I'm not exactly that smart when it comes to working smarter vs harder.. -
JLP Blacksmith Teaching Center.
jlpservicesinc replied to jlpservicesinc's topic in Building, Designing a Shop
I had to pull all the 2" conduit and wire back out.. I had thought I might be able to get in there and finished screwing the siding in but no go.. So pulled it all down.. This also allowed for me to adjust the strut up some and to clean up a little bit..