jlpservicesinc
-
Posts
5,758 -
Joined
-
Last visited
Content Type
Profiles
Forums
Articles
Gallery
Downloads
Events
Everything posted by jlpservicesinc
-

What did you do in the shop today?
jlpservicesinc replied to Mark Ling's topic in Blacksmithing, General Discussion
Nicza nice tongs.. -
JLP Blacksmith Teaching Center.
jlpservicesinc replied to jlpservicesinc's topic in Building, Designing a Shop
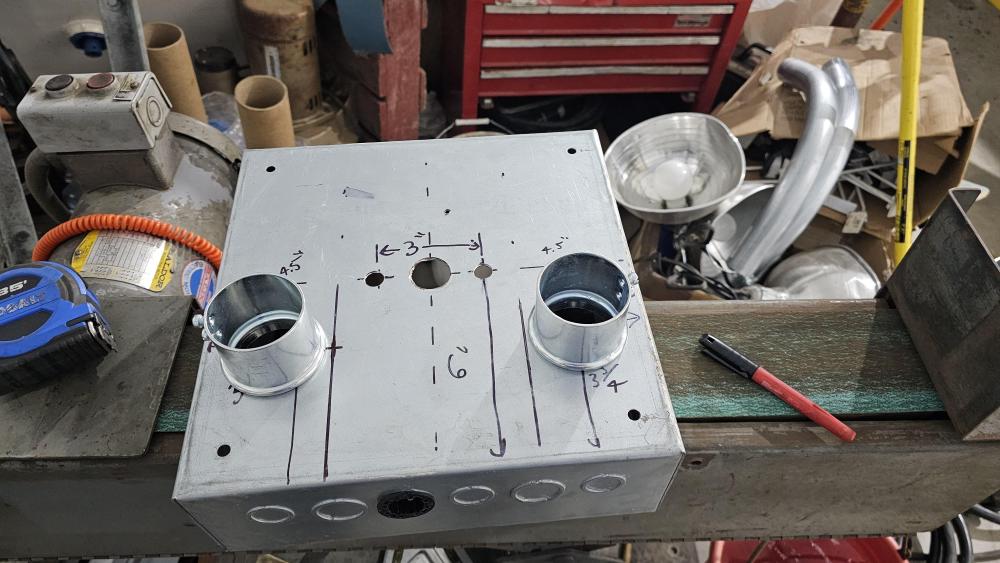
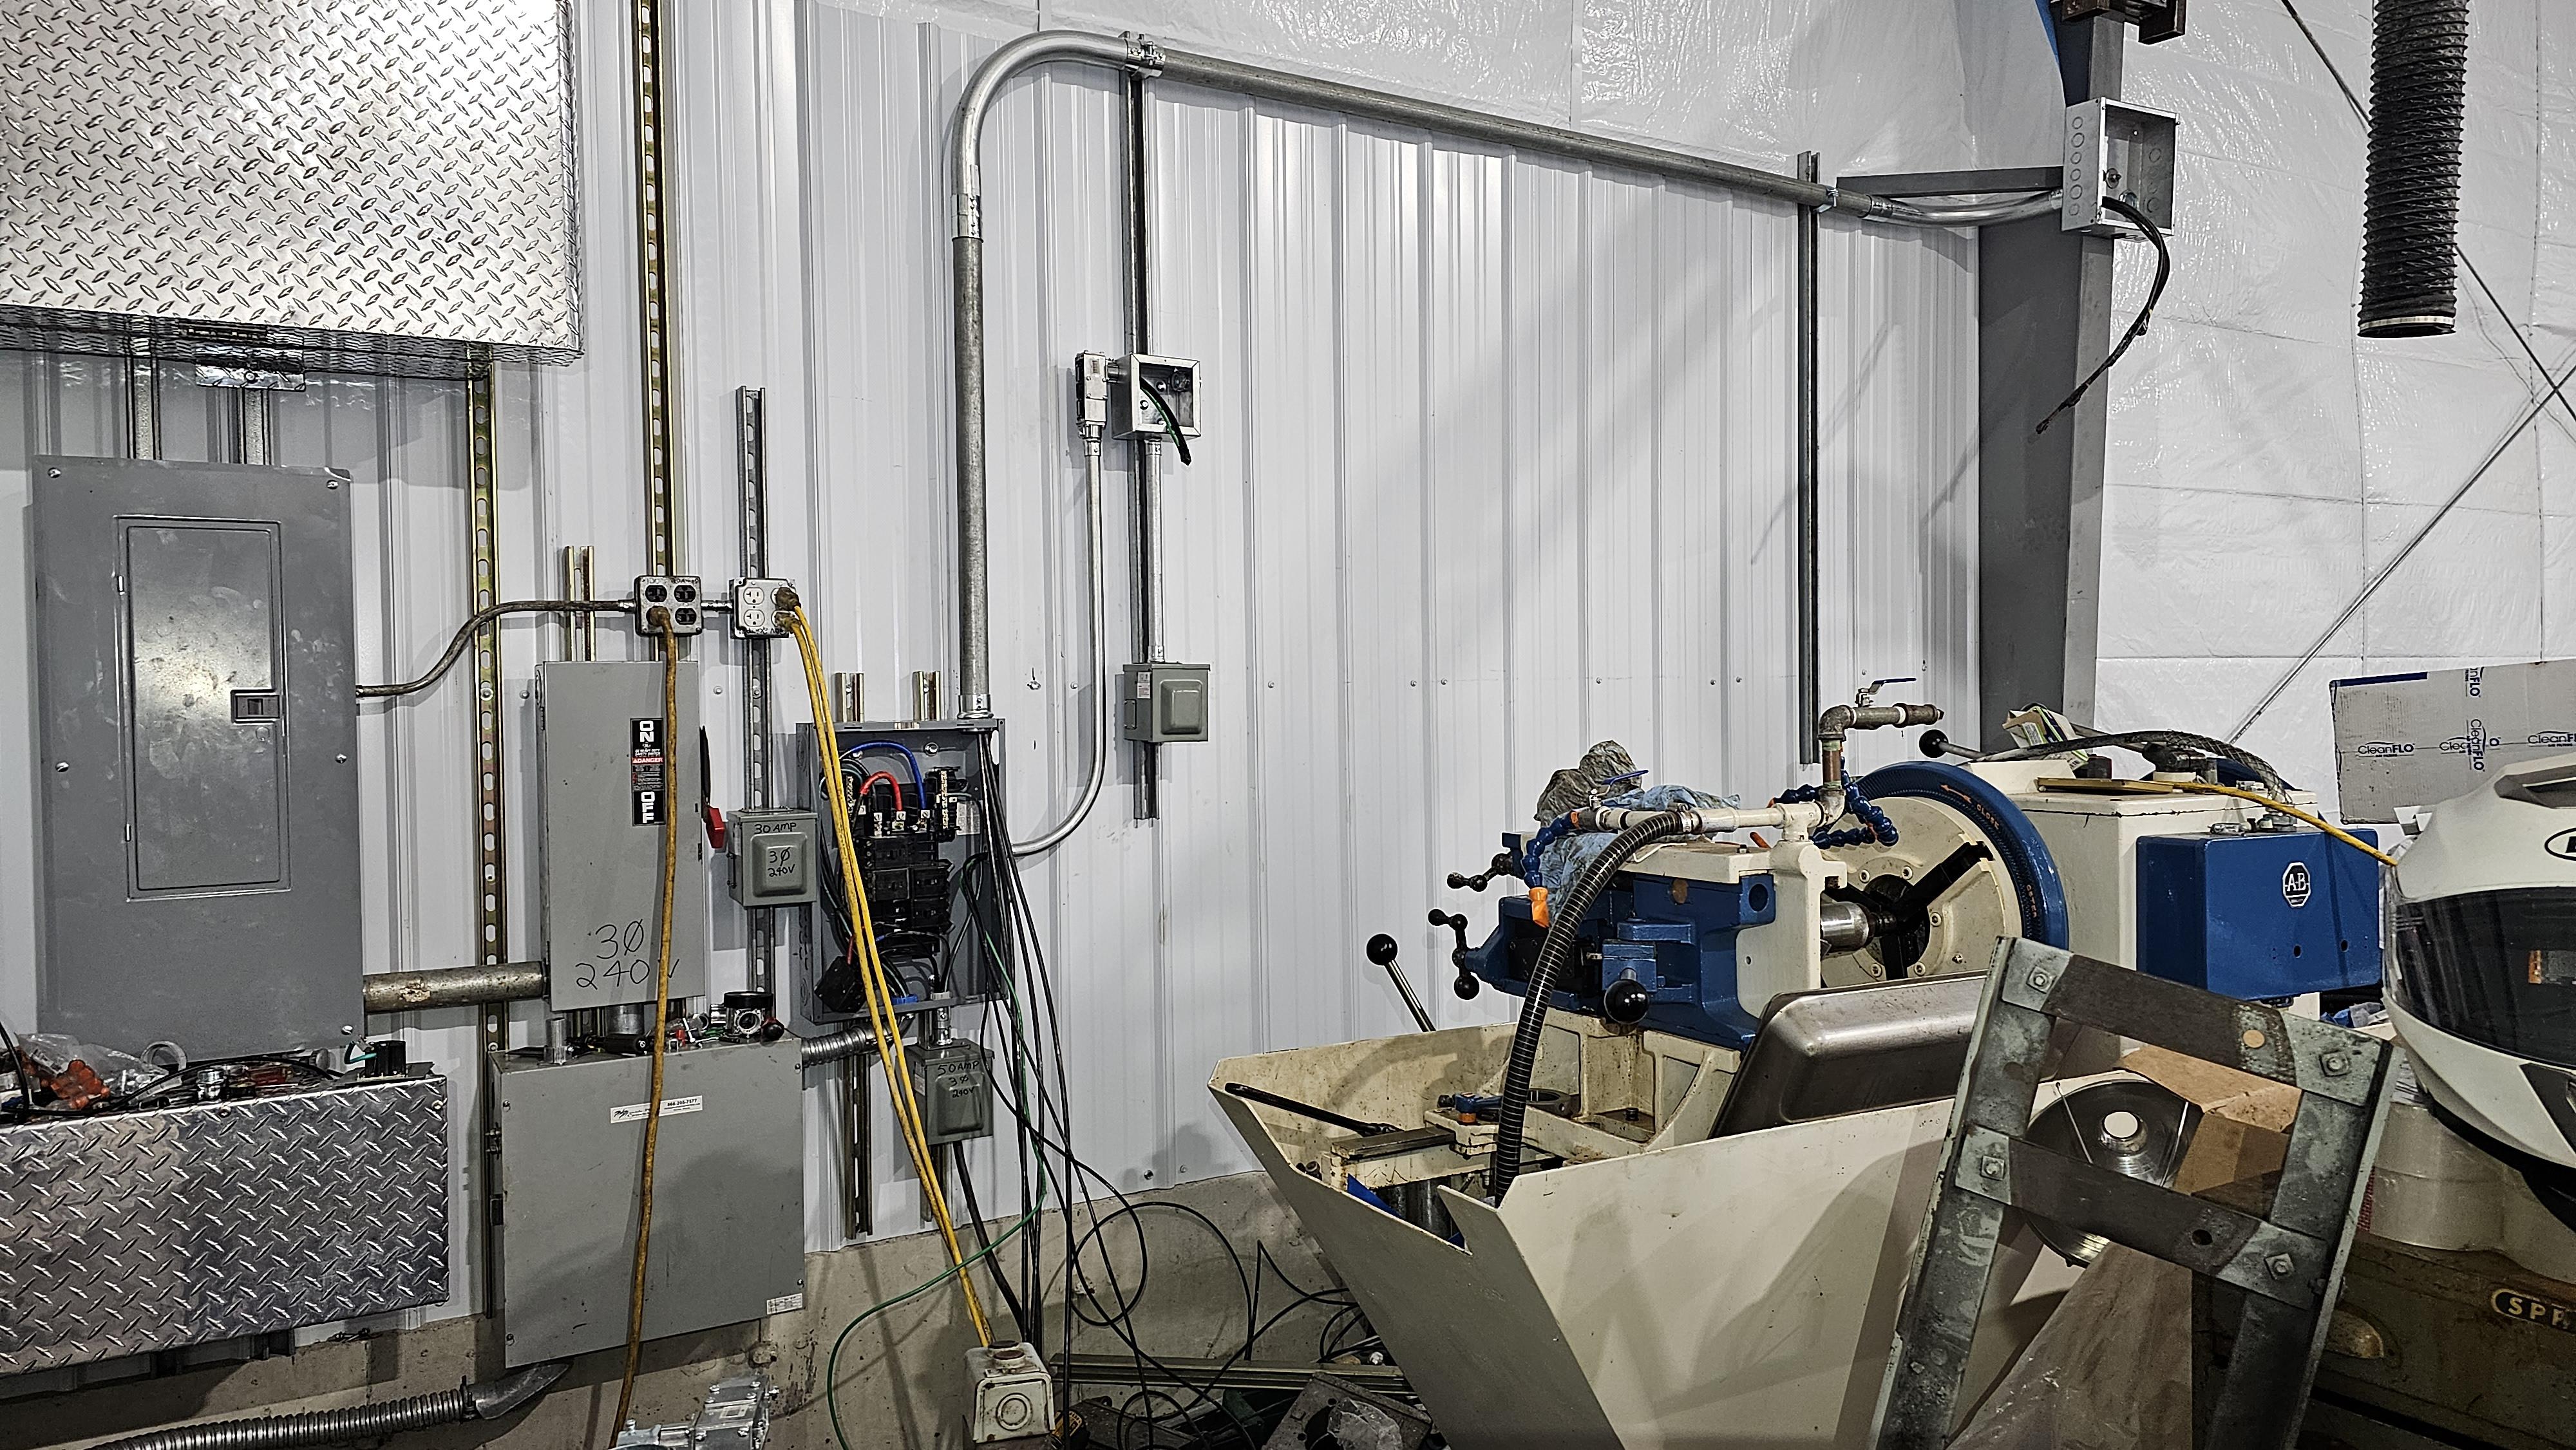
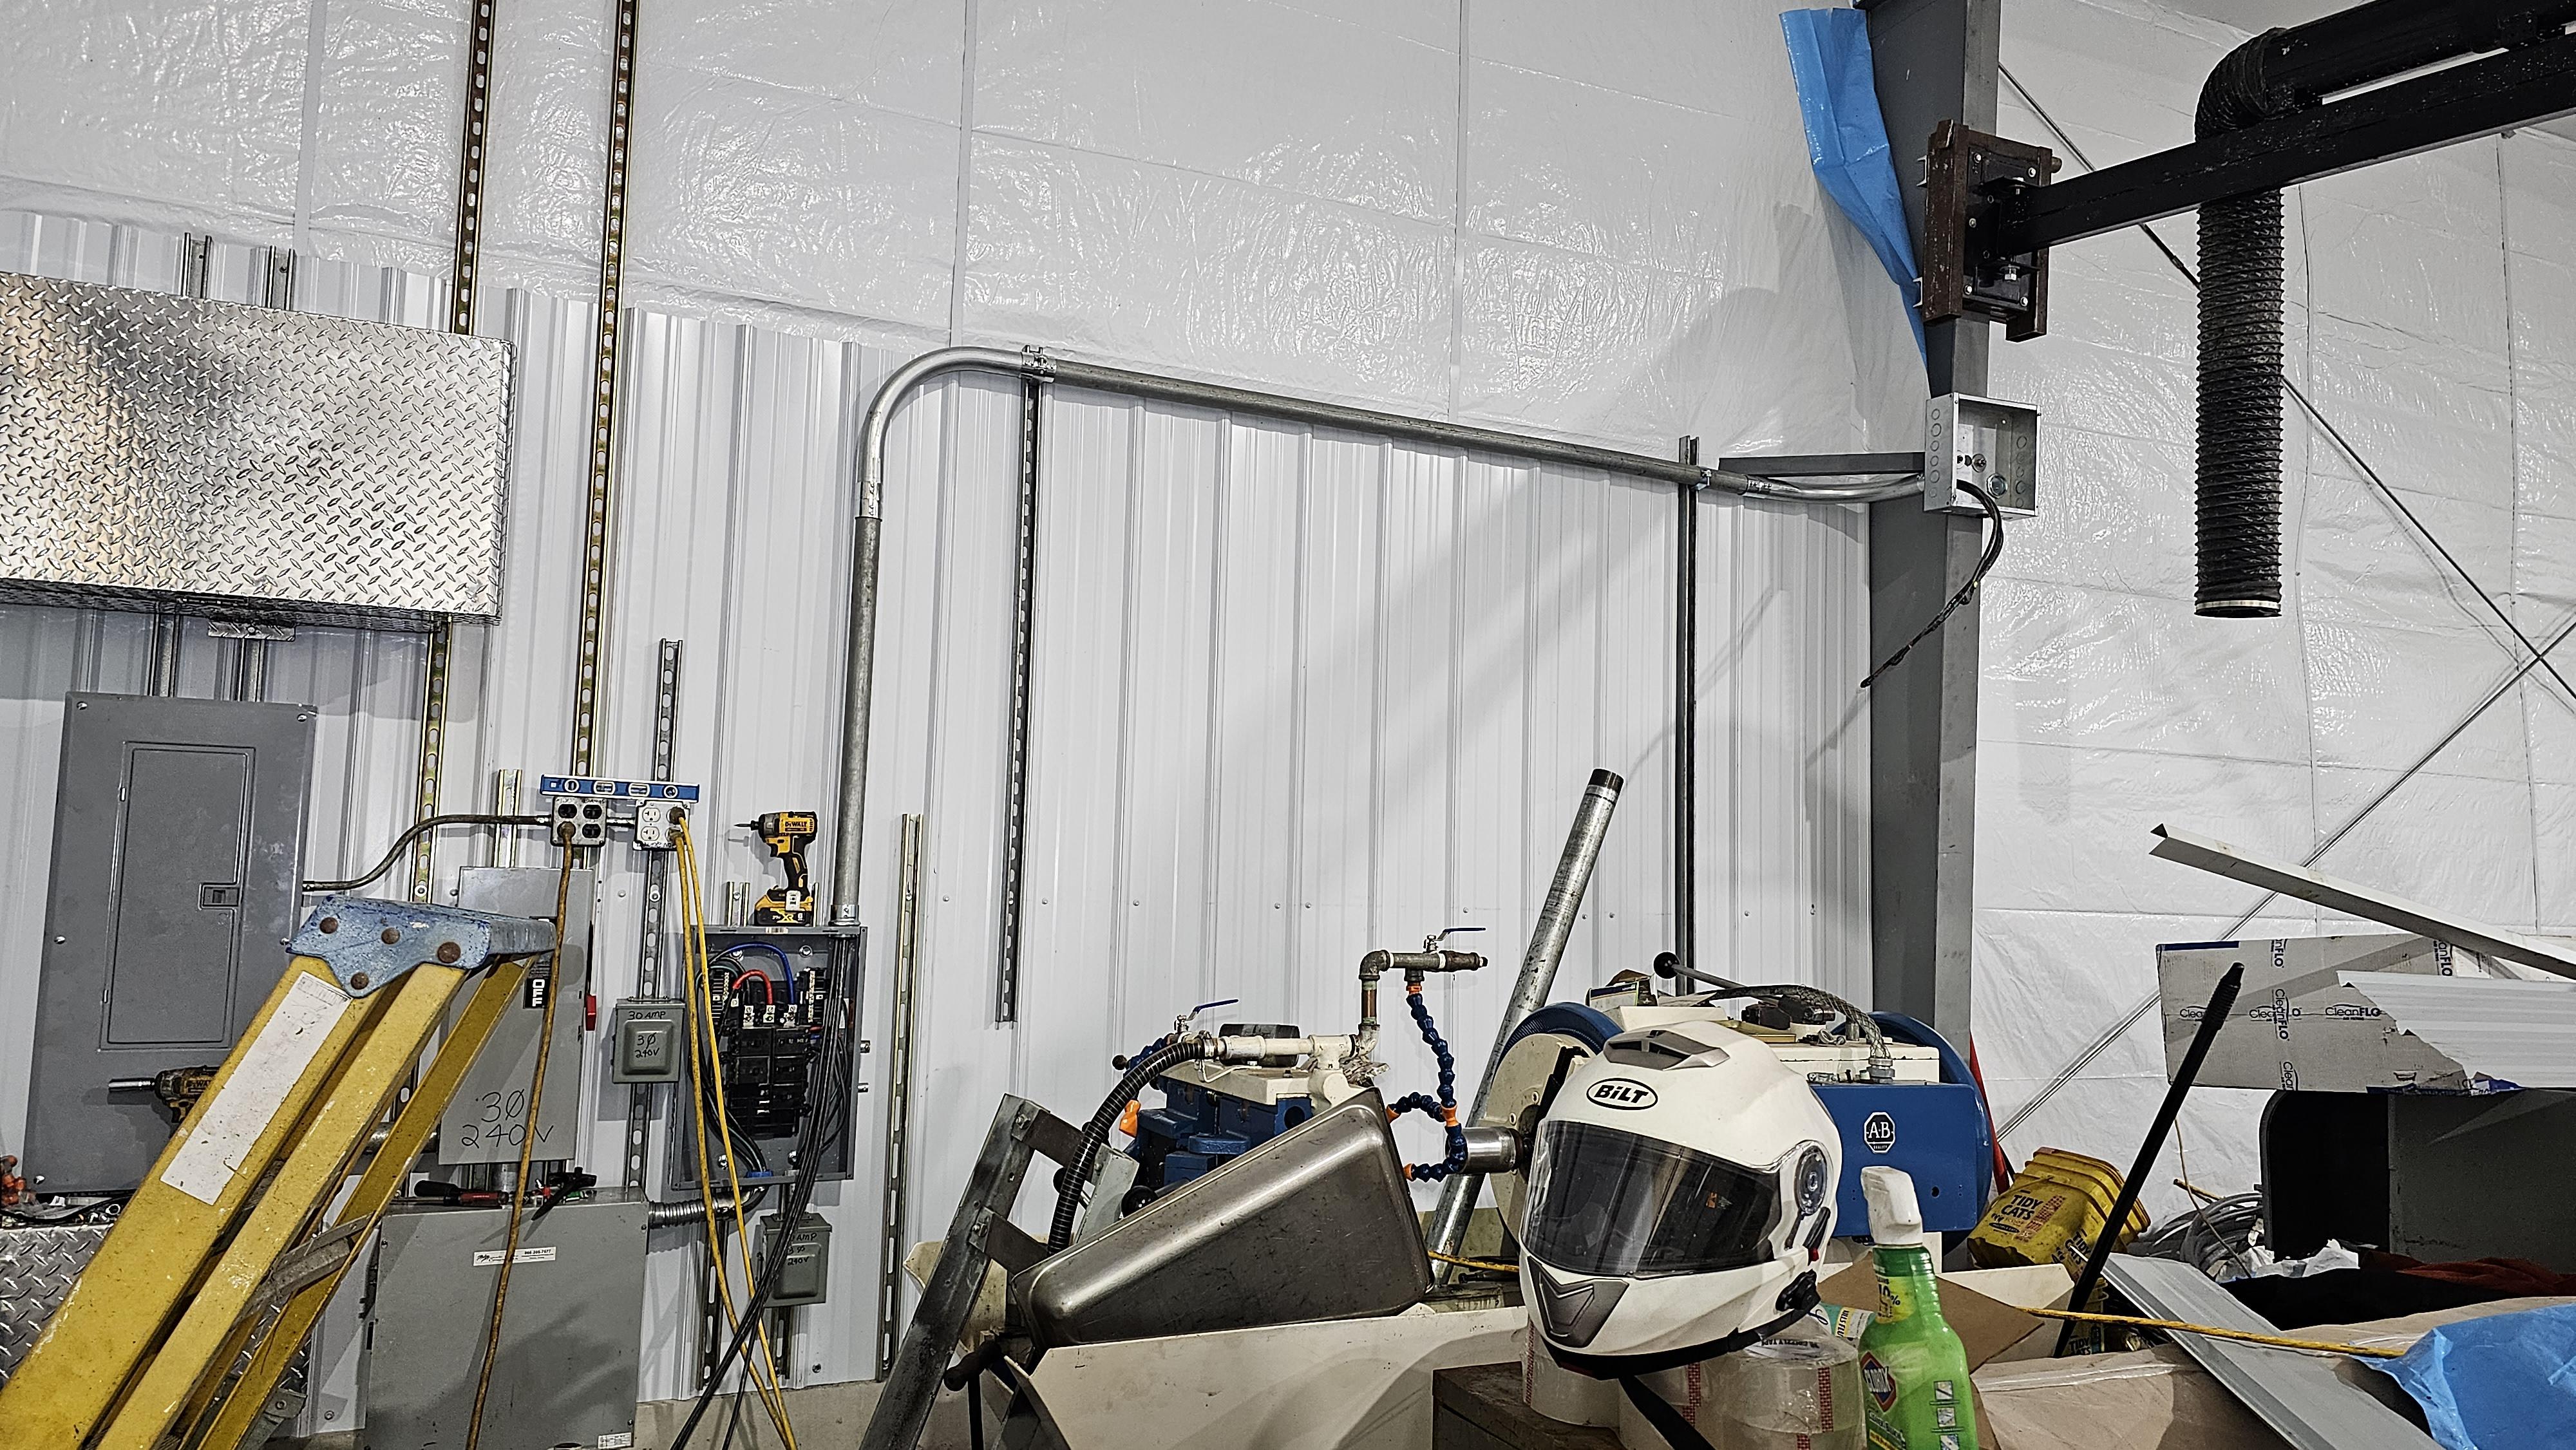
More electric work.. Now onto the 50amp receptacles for welders and plasma cutter. I'm always amazed at how long it takes to get a run started.. Figuring out how to get it to start at the panel is one of the toughest aspects.. Nothing on any of the panels or boxes are a standard width from what I can tell that makes much sense. Once it's figured out it runs fast.. But up to that point.. Ouch.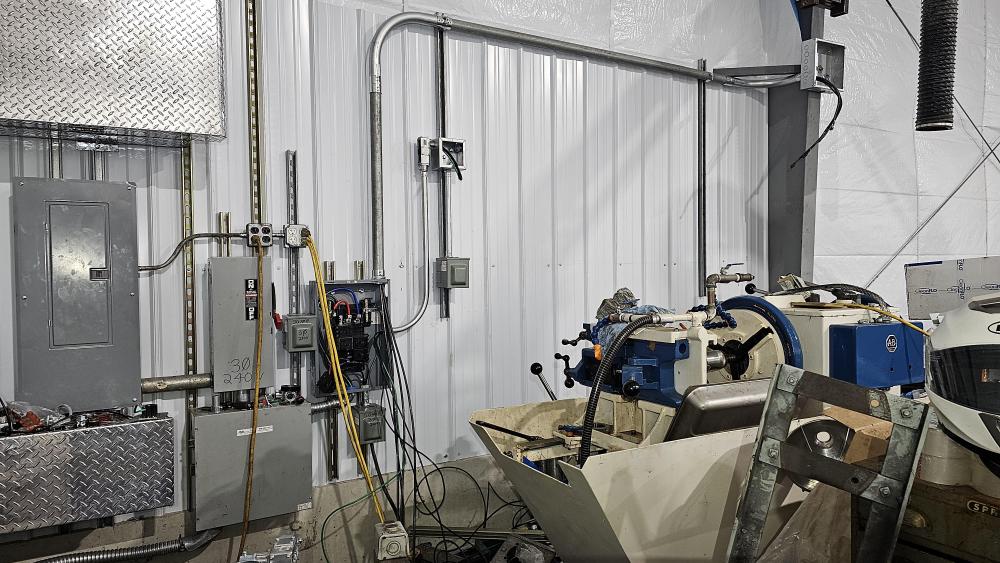
-
JLP Blacksmith Teaching Center.
jlpservicesinc replied to jlpservicesinc's topic in Building, Designing a Shop
Arkie, It's a great very long term wanted addition.. the larger firepot will need a filler box to make it manageable I think.. I might see about keeping it filled with fines and crushed clinker to make the pot smaller.. Time will tell once I start to use it. On that, blew a line in the manlift so waiting on some hose part to make a new one. 2 actually.. I'll replace both lines while I"m in there.. The boom extension and retract lines are the ones I'm replacing. The retract line blew off at the end when I was retracting it while using the ground control.. 1/2" lines so fairly stout in size.. Since I can't use the manlift I moved into more electrical work.. Over the last week I stopped at the electrical supply and picked up some 2" EMT fittings and installed 4, 2AWG lines for the 3ph power run down the side of the building. 2awg will be good up to about 125amps.. As a supply line it will be oversized and will feed a subpanel down the other end of the building where all the Machining equipment is.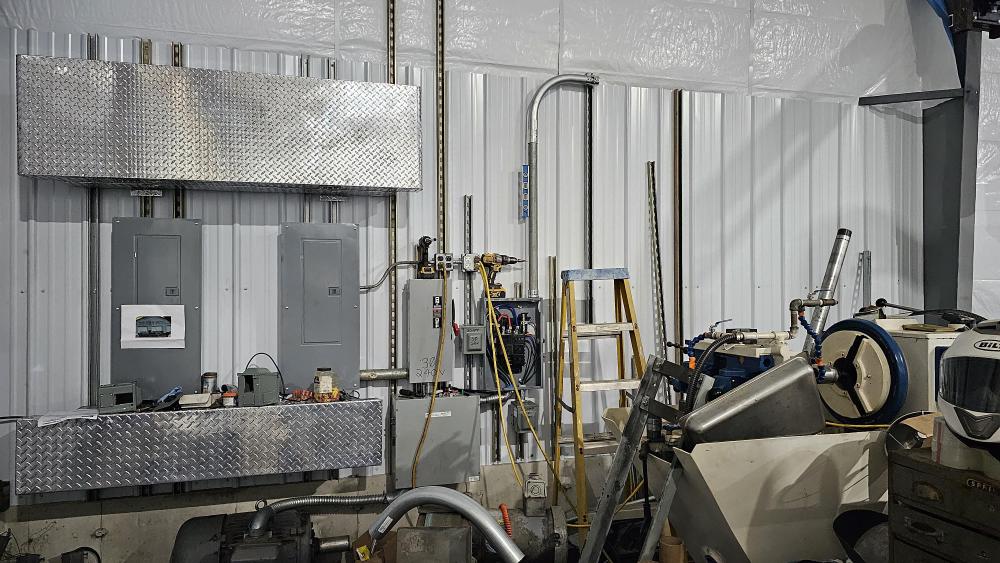

-
What did you do in the shop today?
jlpservicesinc replied to Mark Ling's topic in Blacksmithing, General Discussion
Goods (David) nice work.. Very clean.. are you starting to keep track of how long things take you to make? Journal perhaps? I got in the habit and it was a great habit to have.. It's fun looking thru the old ones and seeing how much faster I was back then. Spring lock 3hrs start to finish.. Now it would be a 6hr project.. -
What did you do in the shop today?
jlpservicesinc replied to Mark Ling's topic in Blacksmithing, General Discussion
Not my hammer or punch rack people.. Savlaka's items.. I built a version of your punch stand 40 years ago using angle iron for the 4 corners.. I used this holder in my demo trailer and it worked well enough. In my shop I used a 6X6 piece of timber frame out of pine.. Drilled holes in the top straight up and down and in the front I went in about 45D.. The hollow punch rack lasted about 10 years being out in the weather but the timber frame one is still going strong and lives in the demo trailer. it's 40 years old.. Funny how certain things just keep on going. -
What did you do in the shop today?
jlpservicesinc replied to Mark Ling's topic in Blacksmithing, General Discussion
M3F.. You bet.. Was one of the rules taught in shop class.. There were a whole bunch of warnings and safety things.. Another one is important and not mentioned often is never lay down your acetylene and then stand it up and try to attach a regulator. It will come out as a liquid.. Its diffuses into a cellular structure that is filled with acetone.. So make sure and let it rest for hours standing upright before attaching a regulator and trying to light it off. -
What did you do in the shop today?
jlpservicesinc replied to Mark Ling's topic in Blacksmithing, General Discussion
Nice space.. Be sure and get those tanks chained up. -
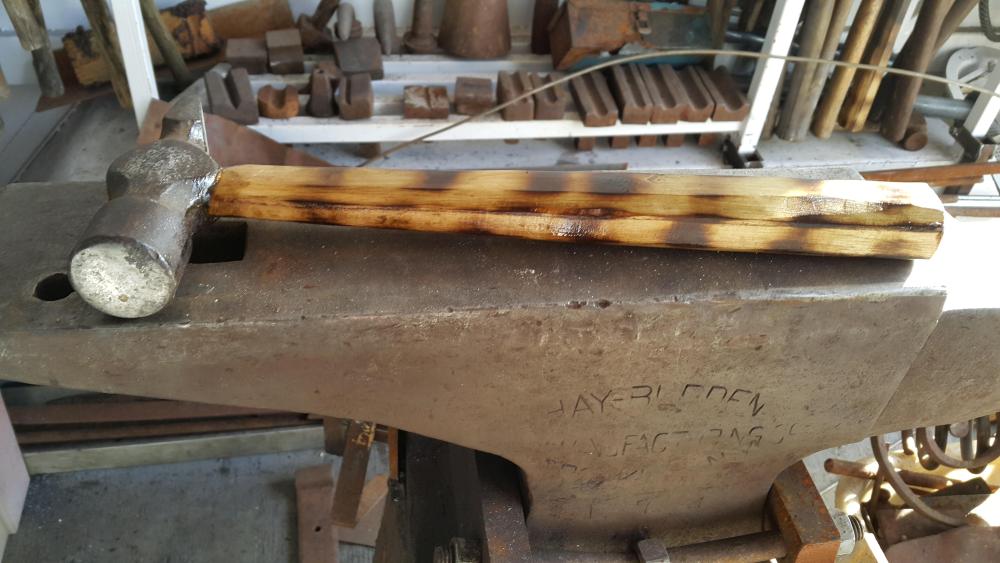
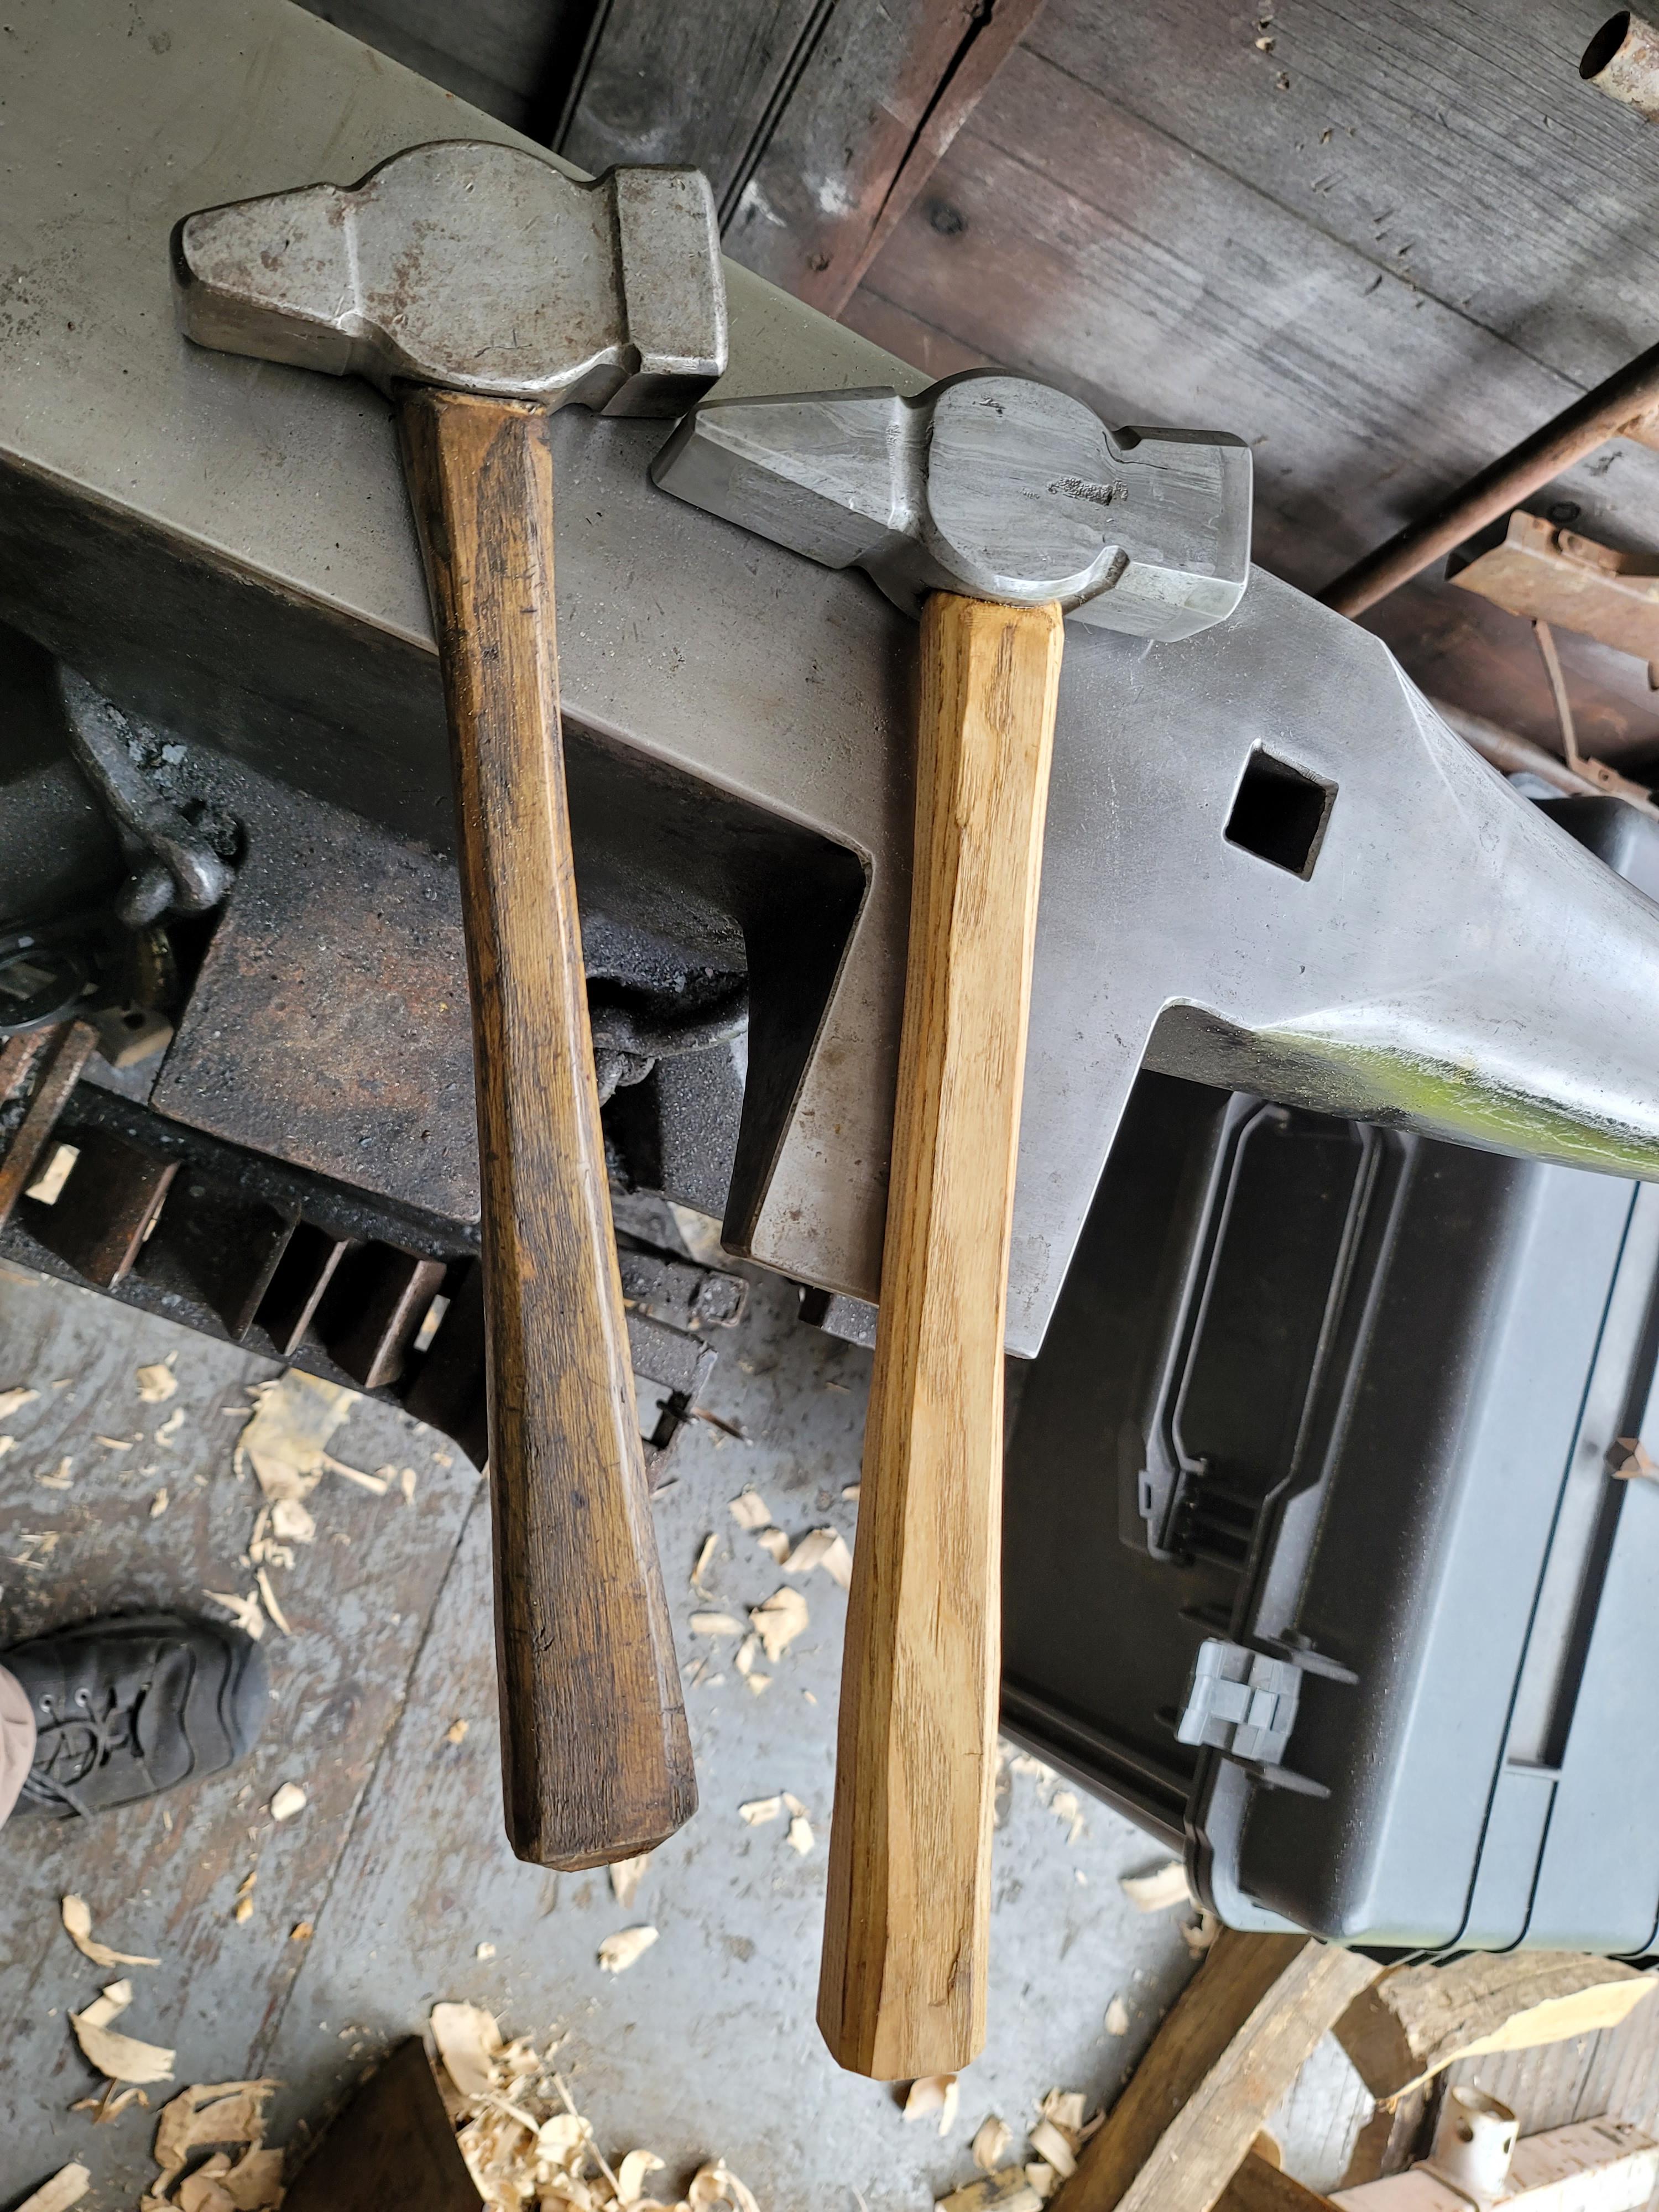
any hammer handle will give someone hot spots in use when not in great condition. I get hot spots on my tong hand from holding the tongs and stock.. When making a bunch of nails my thumb gets a hot spot right on the large crease for the joint. When someone is working enough at the forge with hammer and anvil and tongs there is always a hot spot. It took me about 15 years to find a hammer handle shape I liked.. At the time there were articles about which hammer shape is best.. Skinny with a flat face was a popular one to mess with.. I never liked it.. I tried everything.. Skinny, fat, straight, tapered, round, etc, etc. I finally landed on the hammer shape 15 yrs in and it is the same shape I use today. I like a longish handle with a place for the head to sit that is seamless to the handle itself.. NO abrupt changes in thickness below the head. I also like an eight sided handle.. I landed on this when I was making a new handle and just did not round off the corners to an oval.. I tried this handle shape for about a year and decided it's my favorite handle shape.. Every handle on my main forging handles are exactly the same dimensionally. Only difference is now I leave them eight sided. If I remove the corners and shape into an oval they are the same shape as the original from about 15 years in. At the last NEB meet I asked all the long time full time blacksmiths with 40+ years of experience what hammer and handle shape do they like.. nearly all had the same answer.. Light, skinny and long.. With this said, it was very interesting seeing the handles and hammers they were using and seeing what they explained as "Light, skinny and long".. Each persons defining or definition was different than the others when you see the hammers each one owns and uses. I'm probably not in the norm.. I like a head size that is correct for the metal and action I'm looking to achieve. My oldest hammer which is 2.5lbs has the longest handle based on my original design and is about 2" longer than my 2.75 hammer because to terminate it the same length left a knot that interferes.. Handle length for me does not effect accuracy. Last demo I forged a steeled wrought iron drawknife.. The person who was there and has seem me compete at the fitchburg forge in said it was nice seeing me swing a hammer lightly vs mashing everything.. LOL.. when I hit the metal it moves in a way that is predicted. The engineers cross peen is a shape I like for this type of hammer.. Still 8 sided but a full taper from head to butt. I've now used the same handle shape for 32 years. All my handles are not sanded.. They are split out with an ax or froe, so the grain is straight. I then drawknife the handle to shape nearly completely.. I will then scrape the handle for any rough spots.. Then some linseed oil. I like texture to the handle.. The callus in my tong hand is just now starting to come off.. Last forging session was about 2 weeks ago. The tissues in my hammer hand are thicker overall.. Not just callus.. So this area will blister first.. But the blisters don't hurt anymore.. Kinda like the tissues have changed after all these years.

-
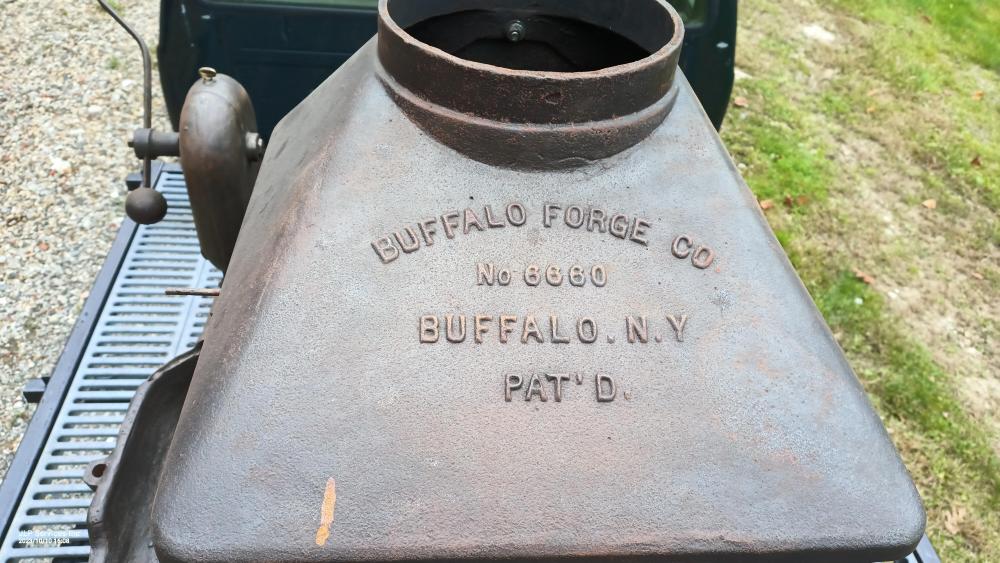
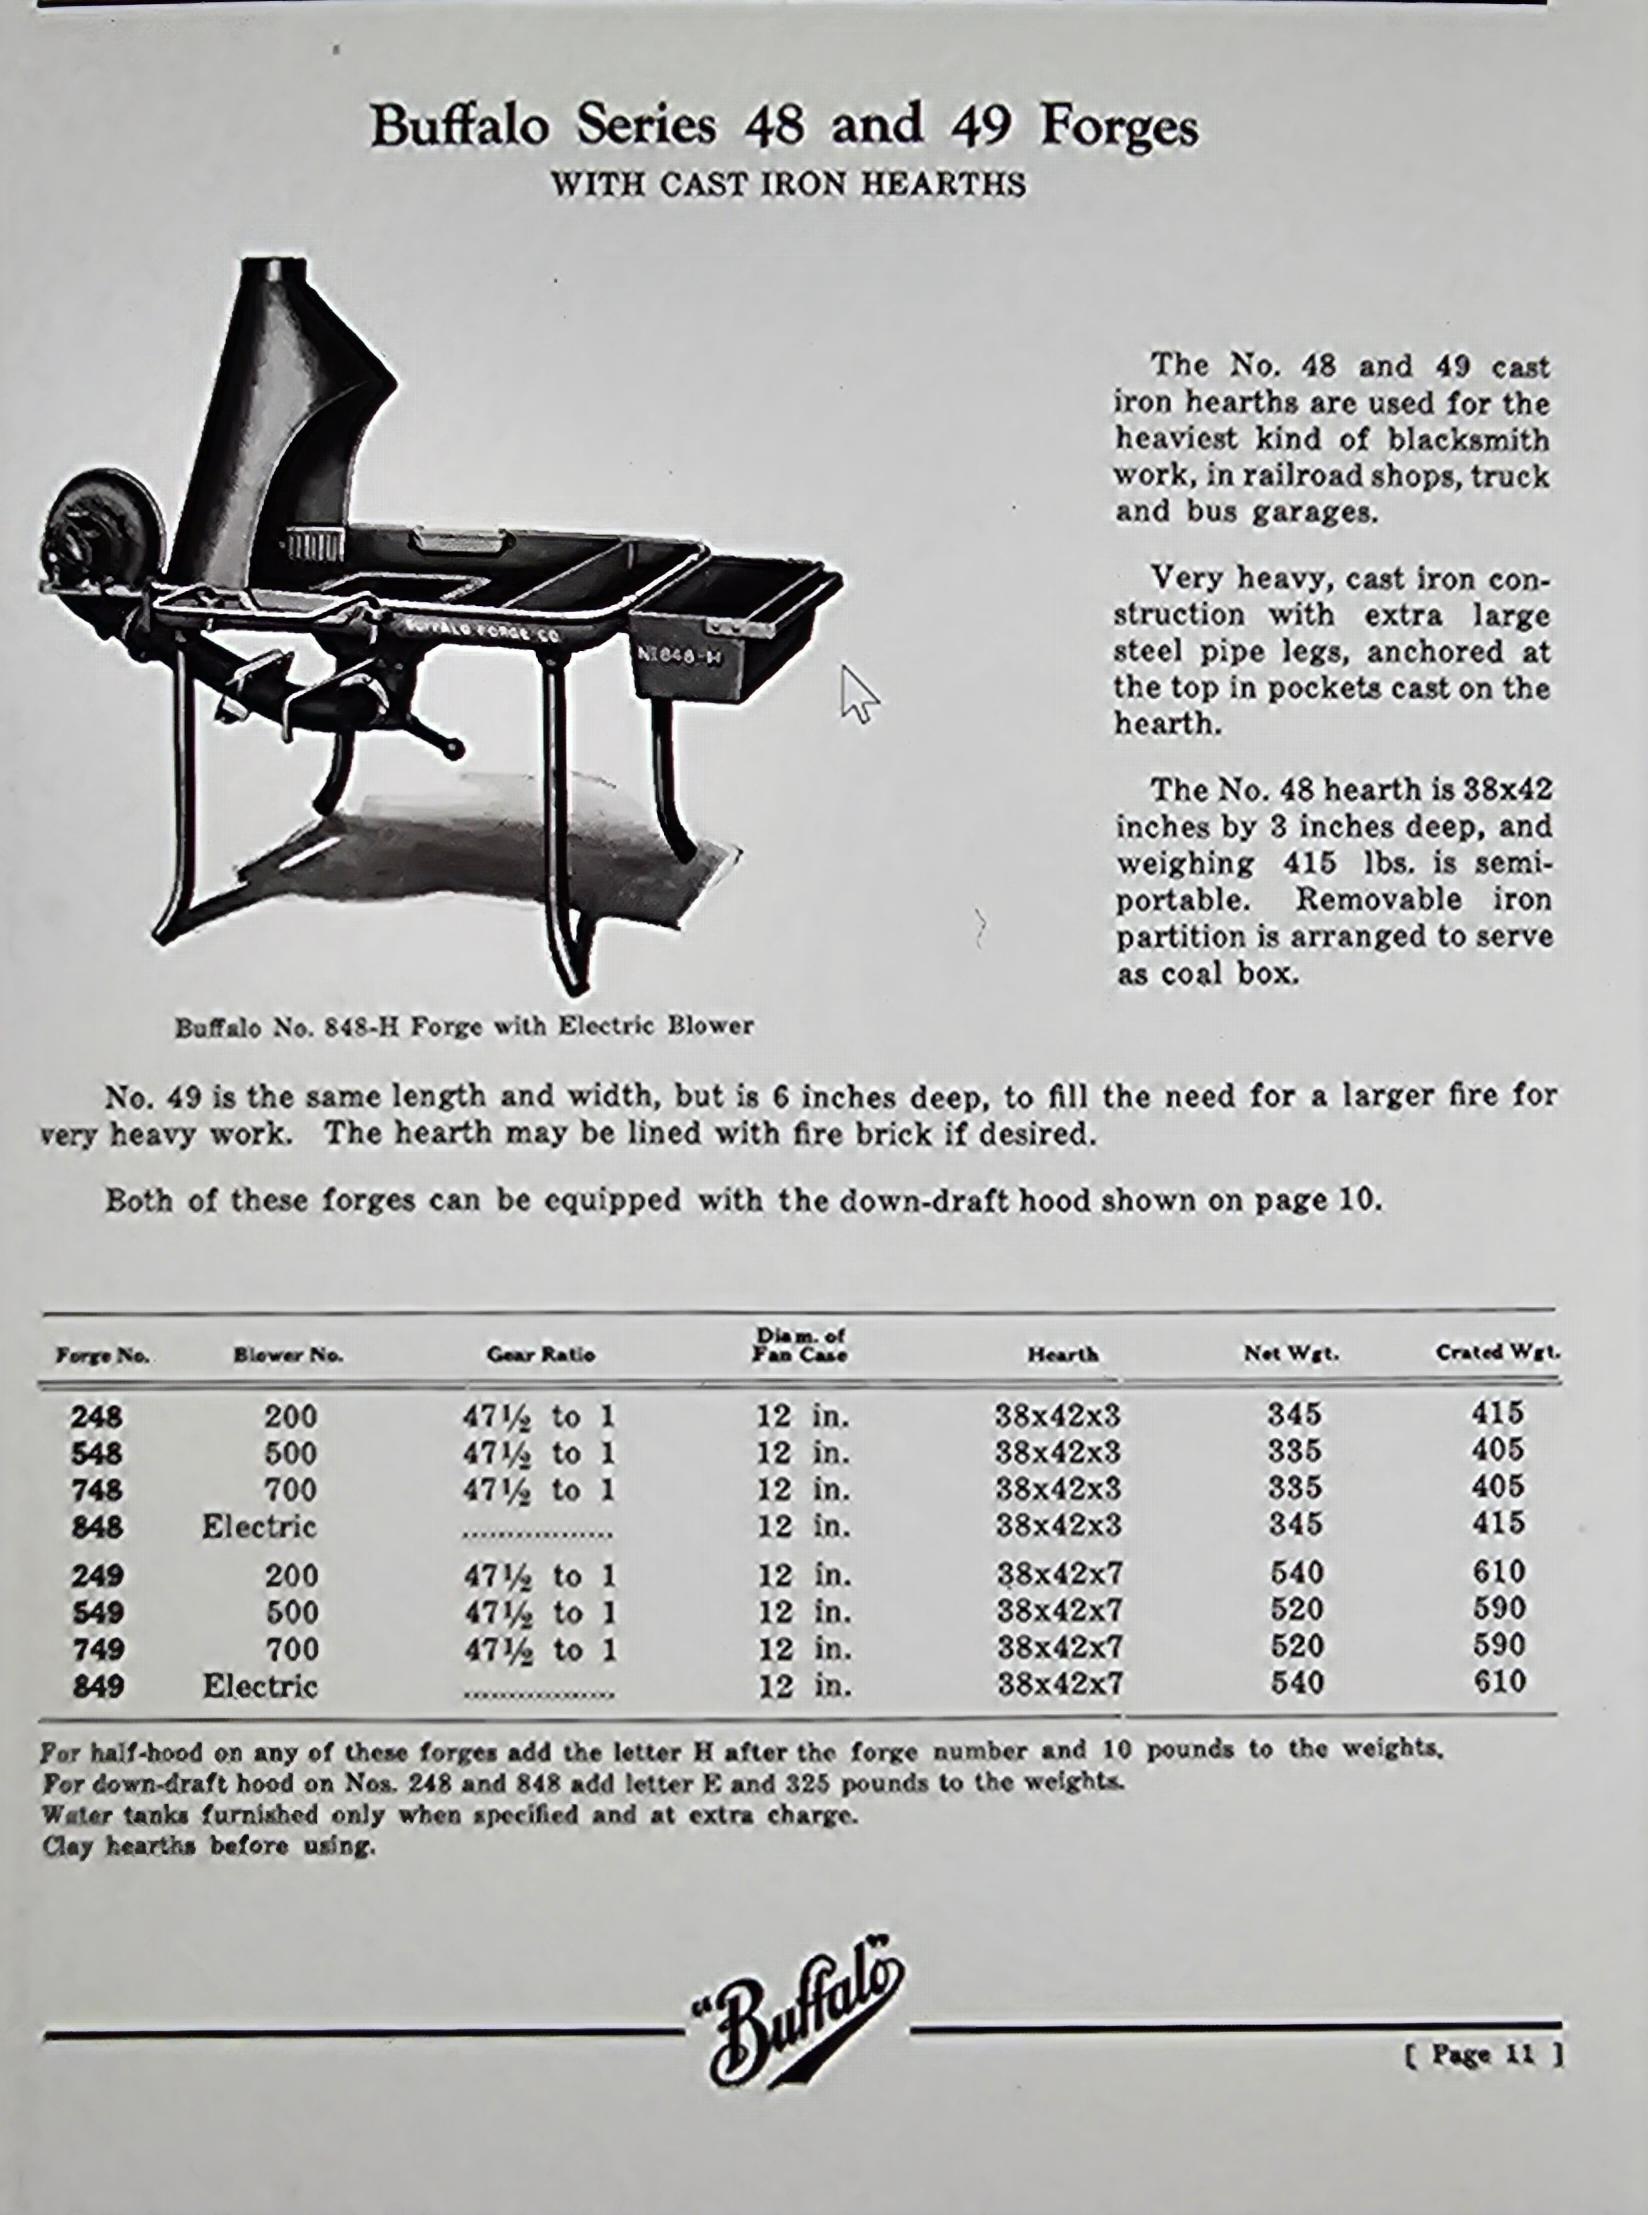
Buffalo 248E with 6660 downdraft hood.
jlpservicesinc replied to jlpservicesinc's topic in Solid Fuel Forges
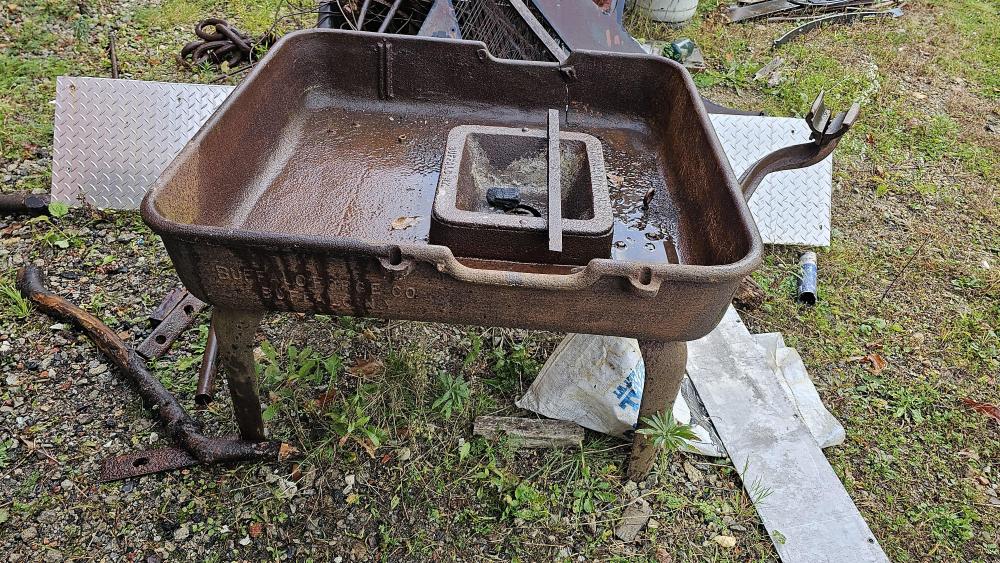
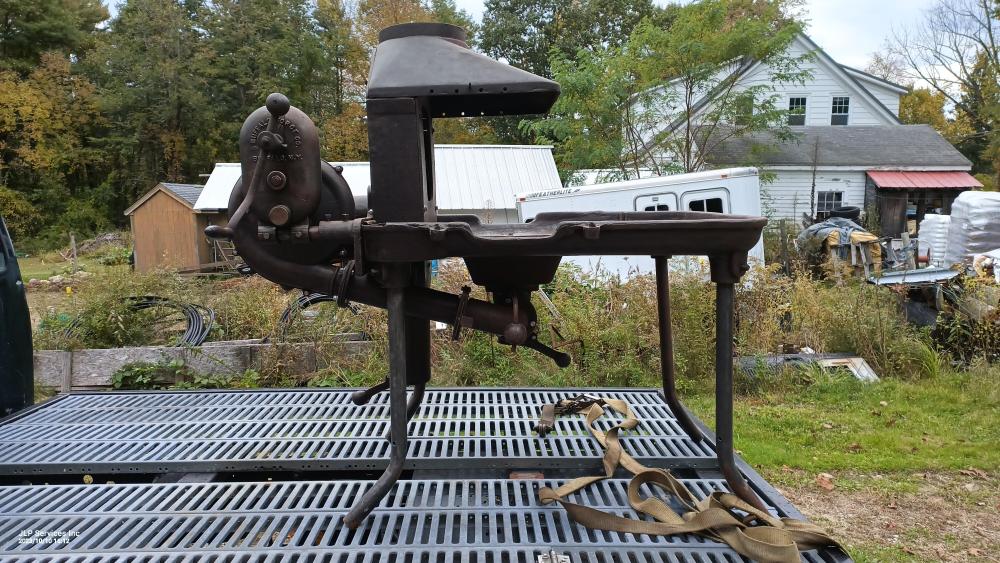
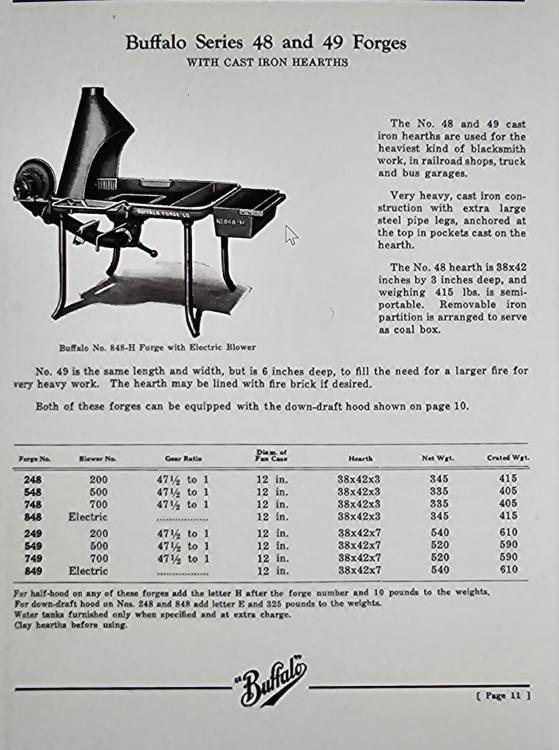
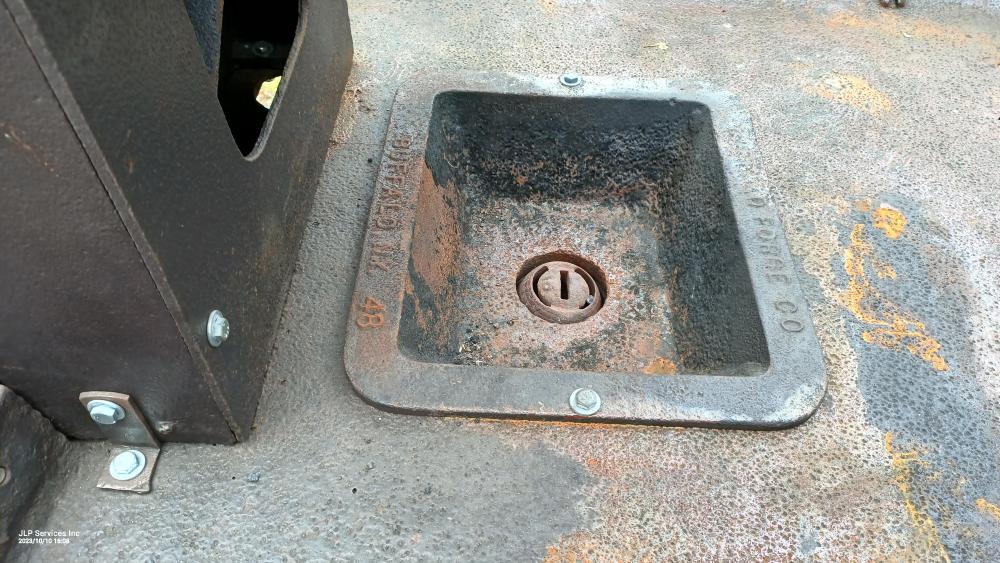
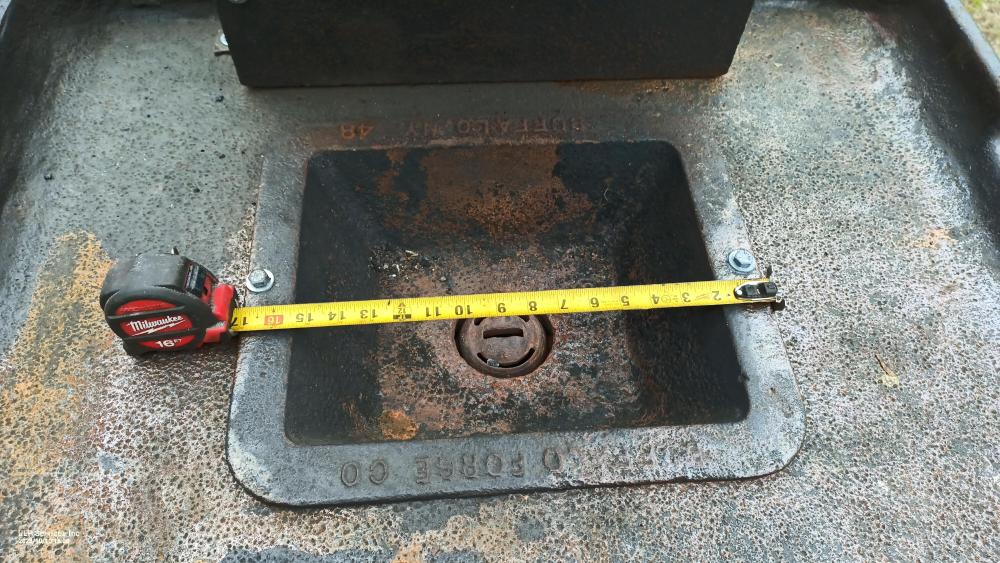
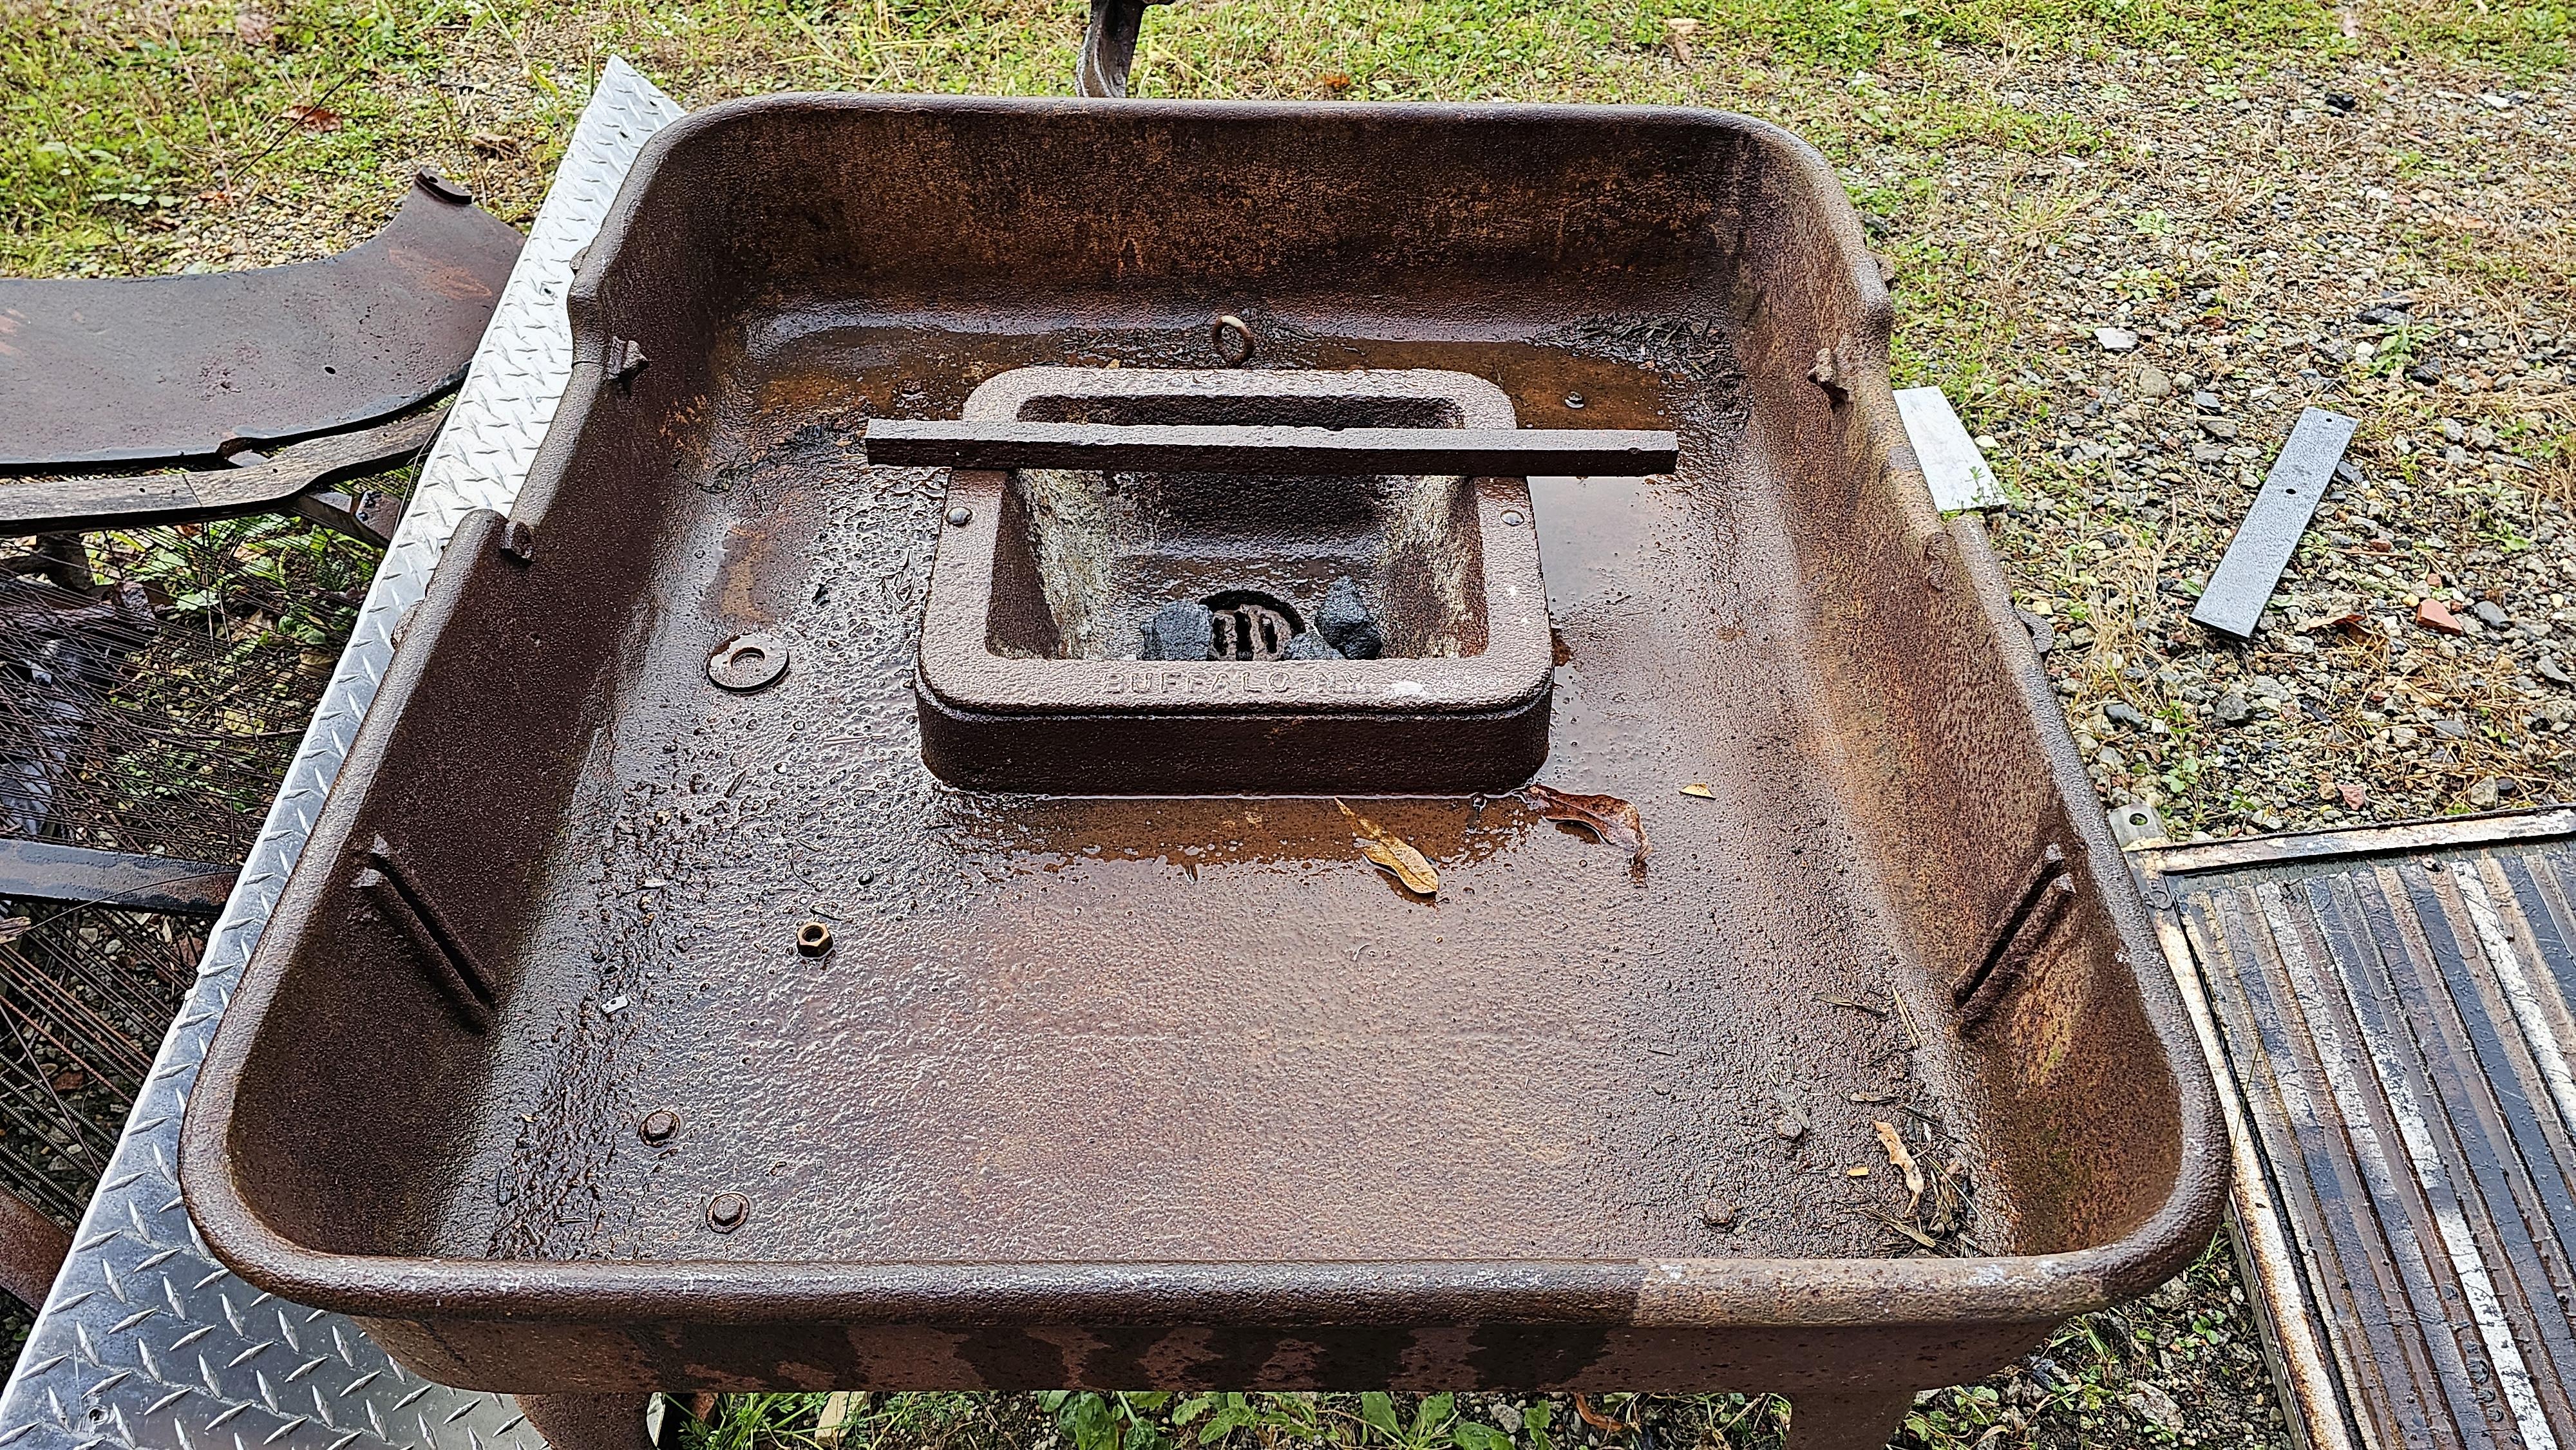
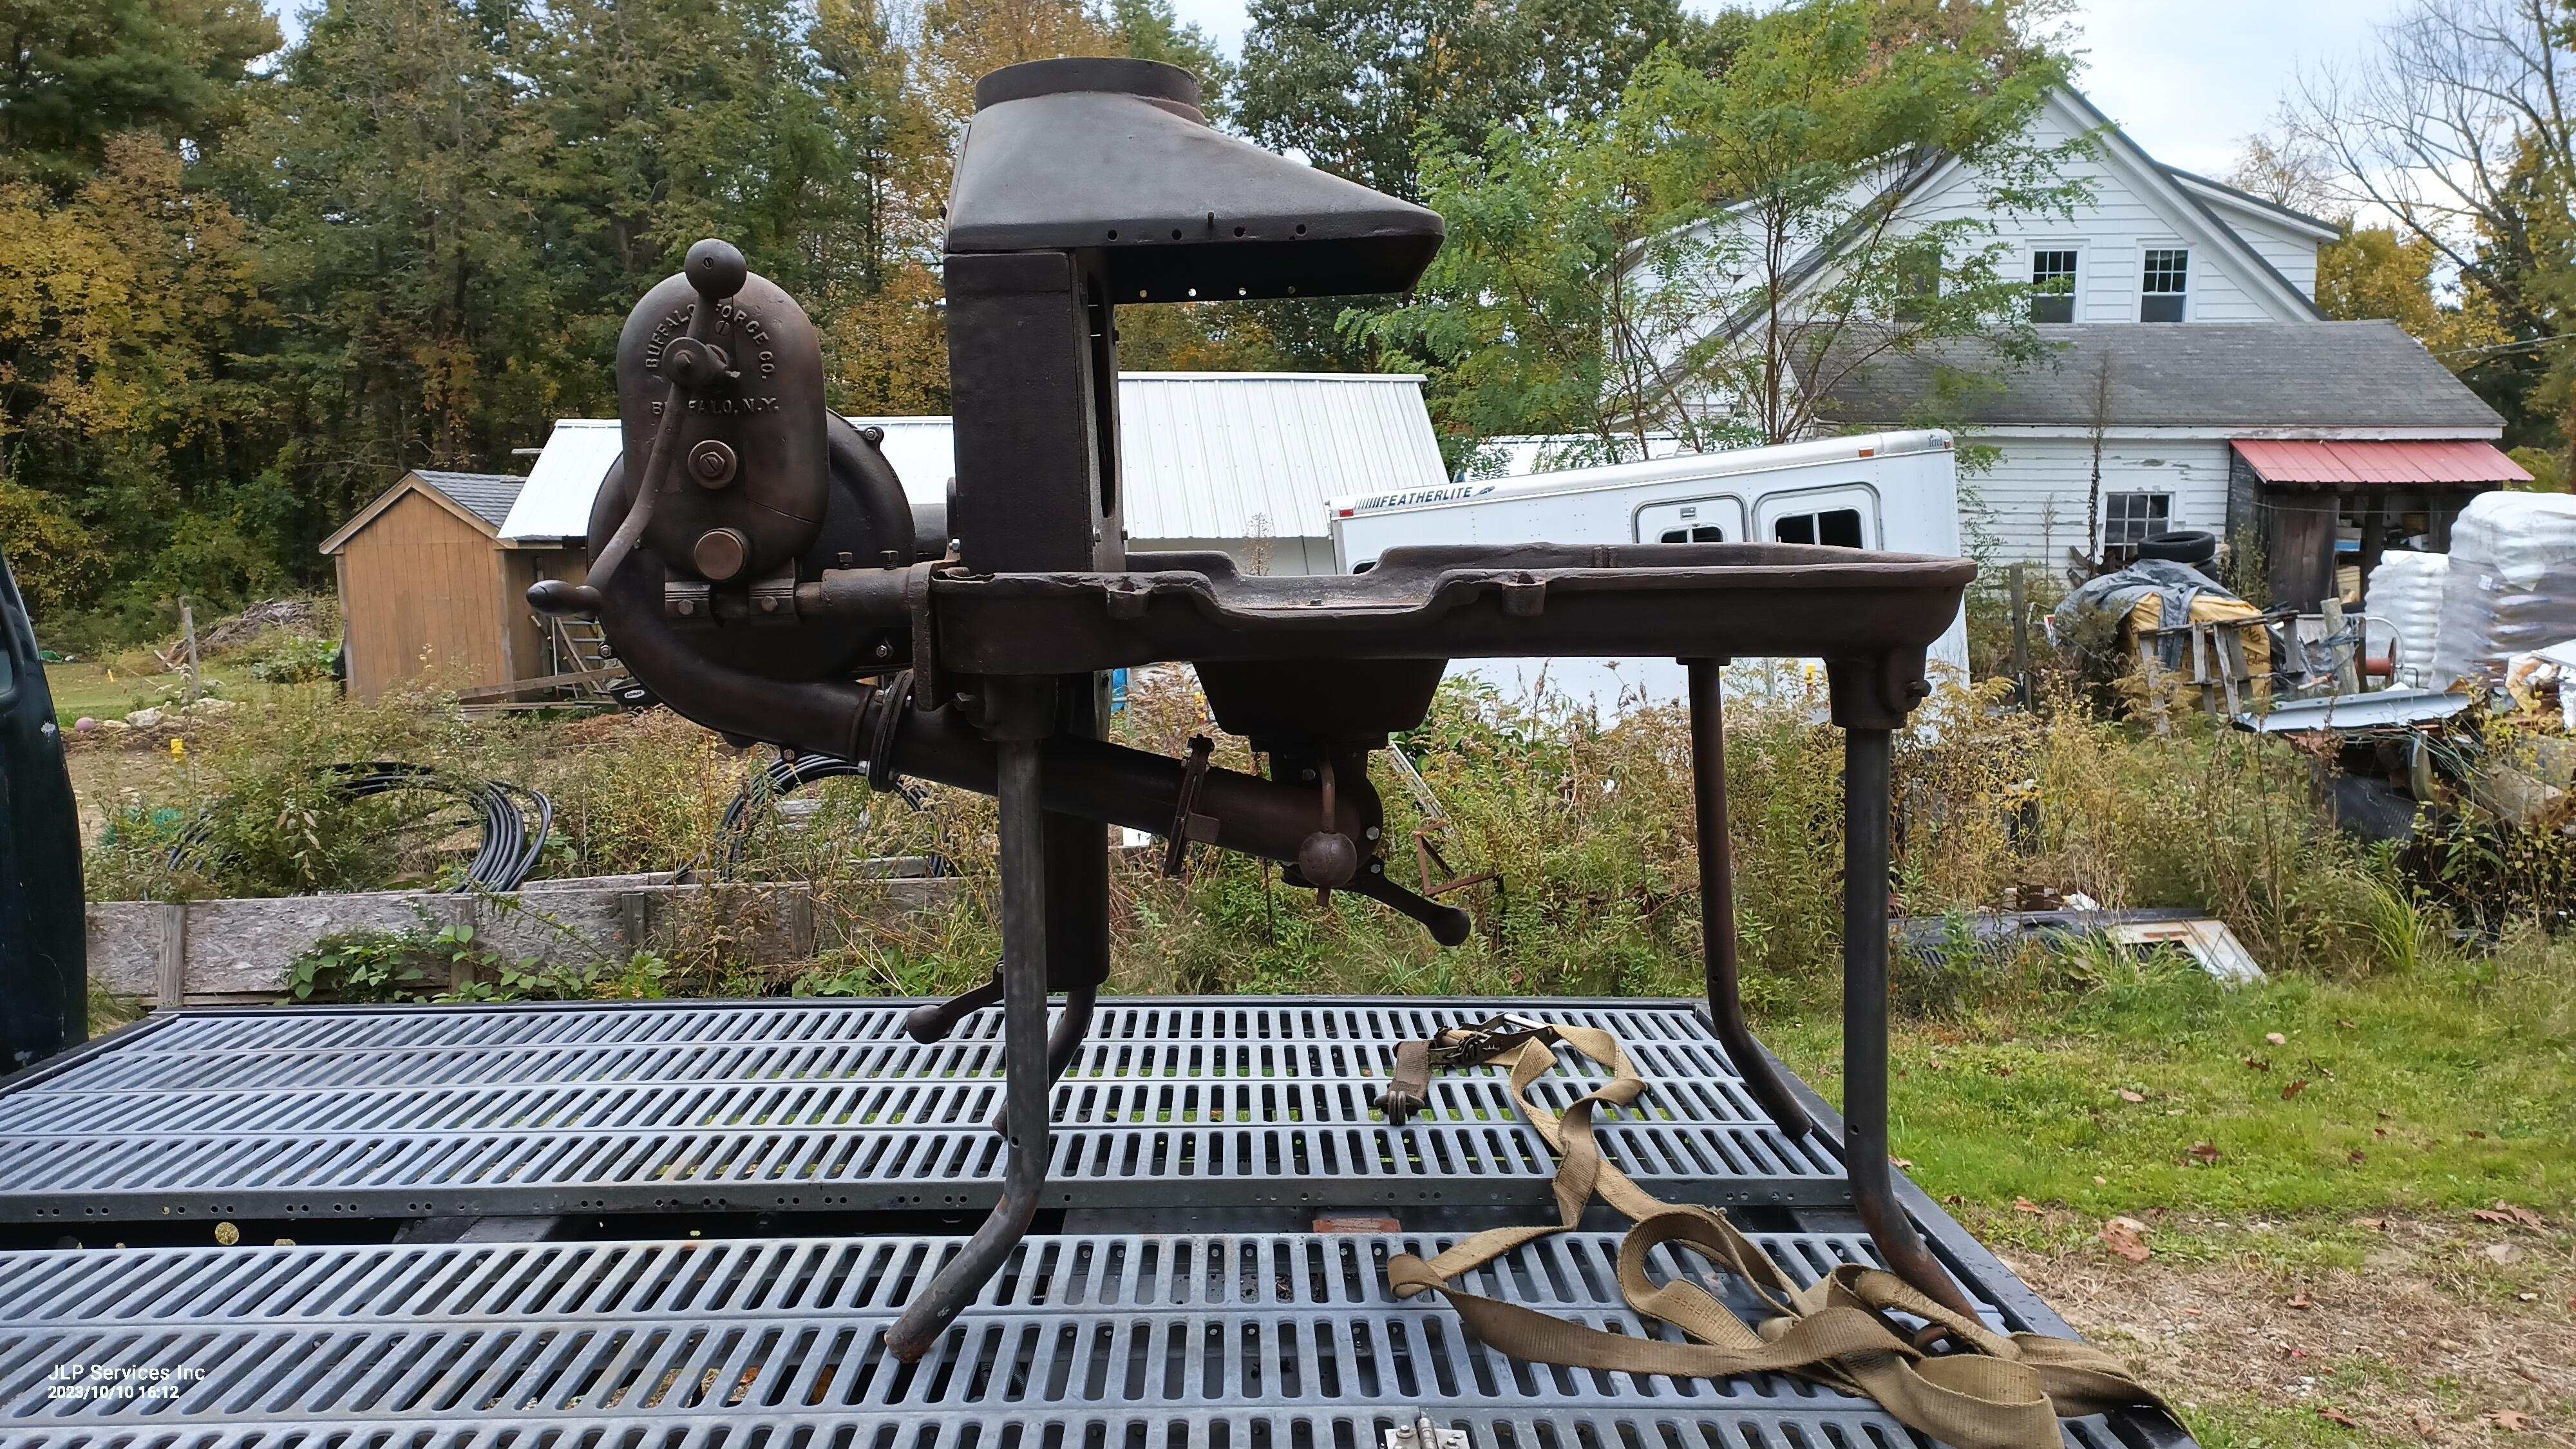
I bought this for it's history.. Meaning the principle of how it works.. With metal plate, pipe benders, welders and such its easy to build something that will work better than this unit. Having never seen one getting to see how or why they did things simplifies the R&D as I want to have regen forges in the school. Lots of these older down draft forges did well.. It was usually with them being left outside and getting flooded and frozen or a tree hitting them that did them in. I also want to have preheated air feeding the fire so the firepots will be hollow with air fed thru them. Yes, it is cool. and Very happy to have it. Here is the 48 with down draft and what I believe to be an early 49.. Cast iron legs vs pipe. The firepots are exactly the same size.
-
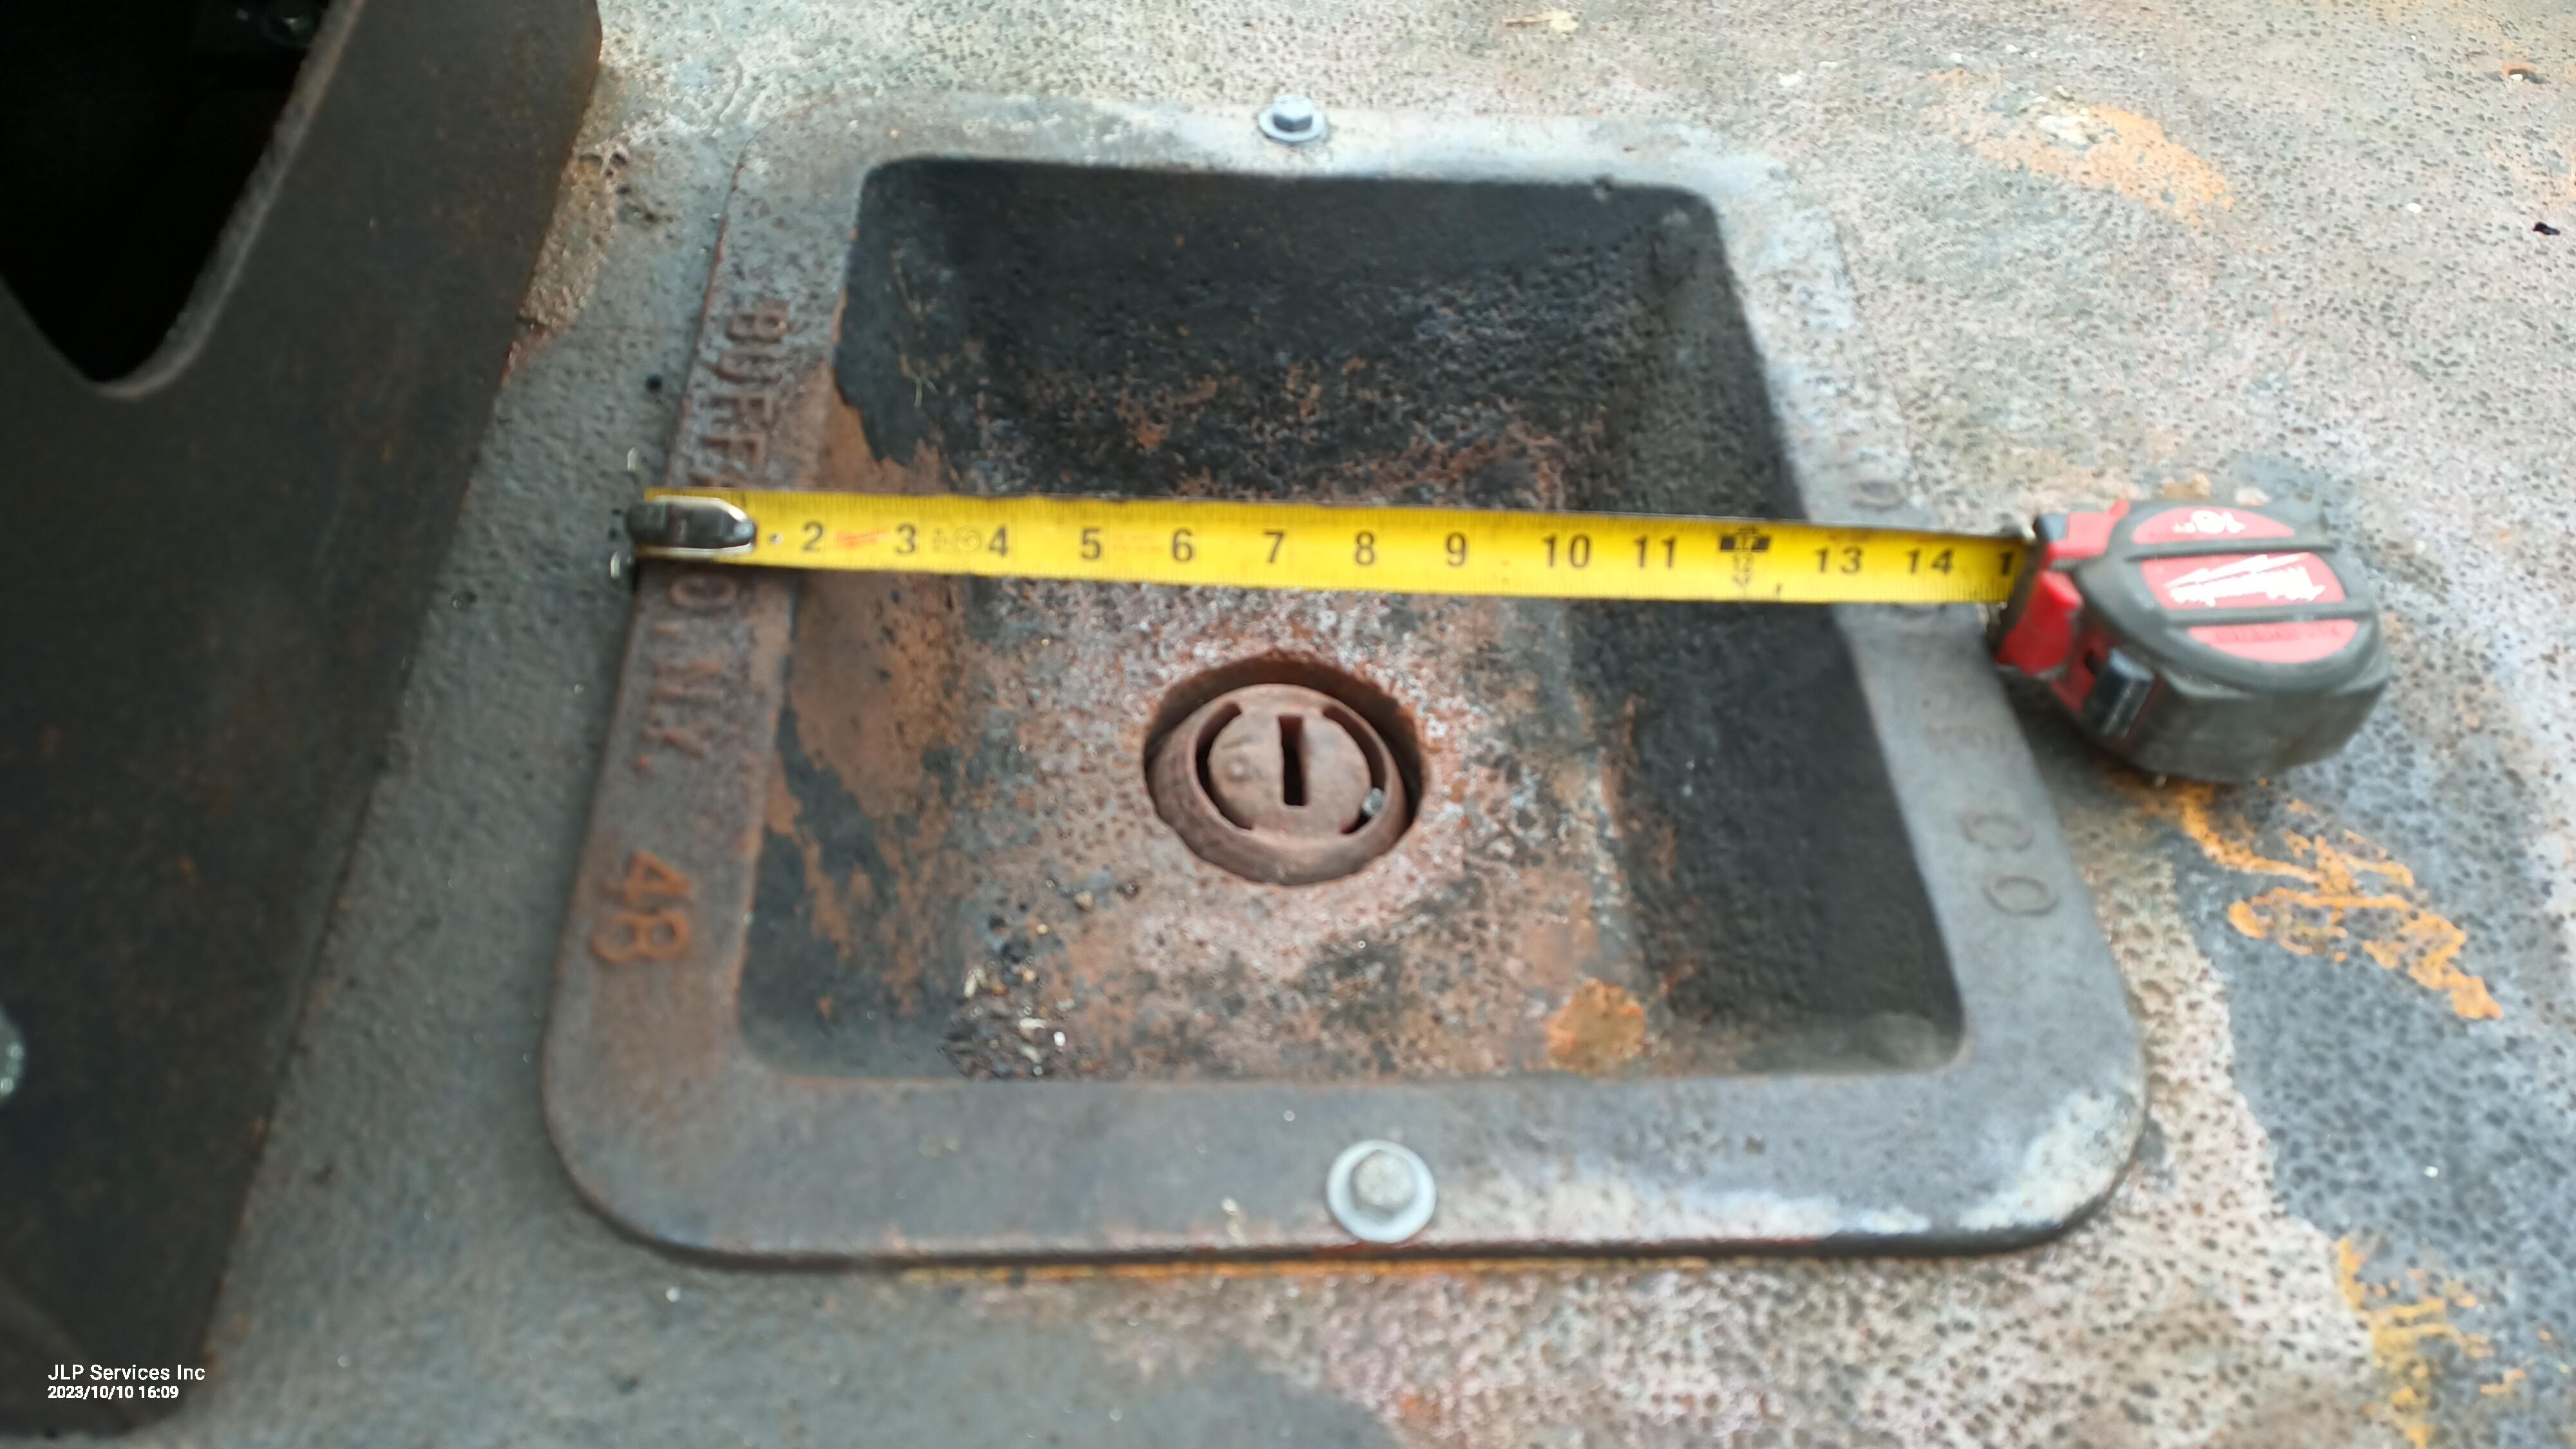
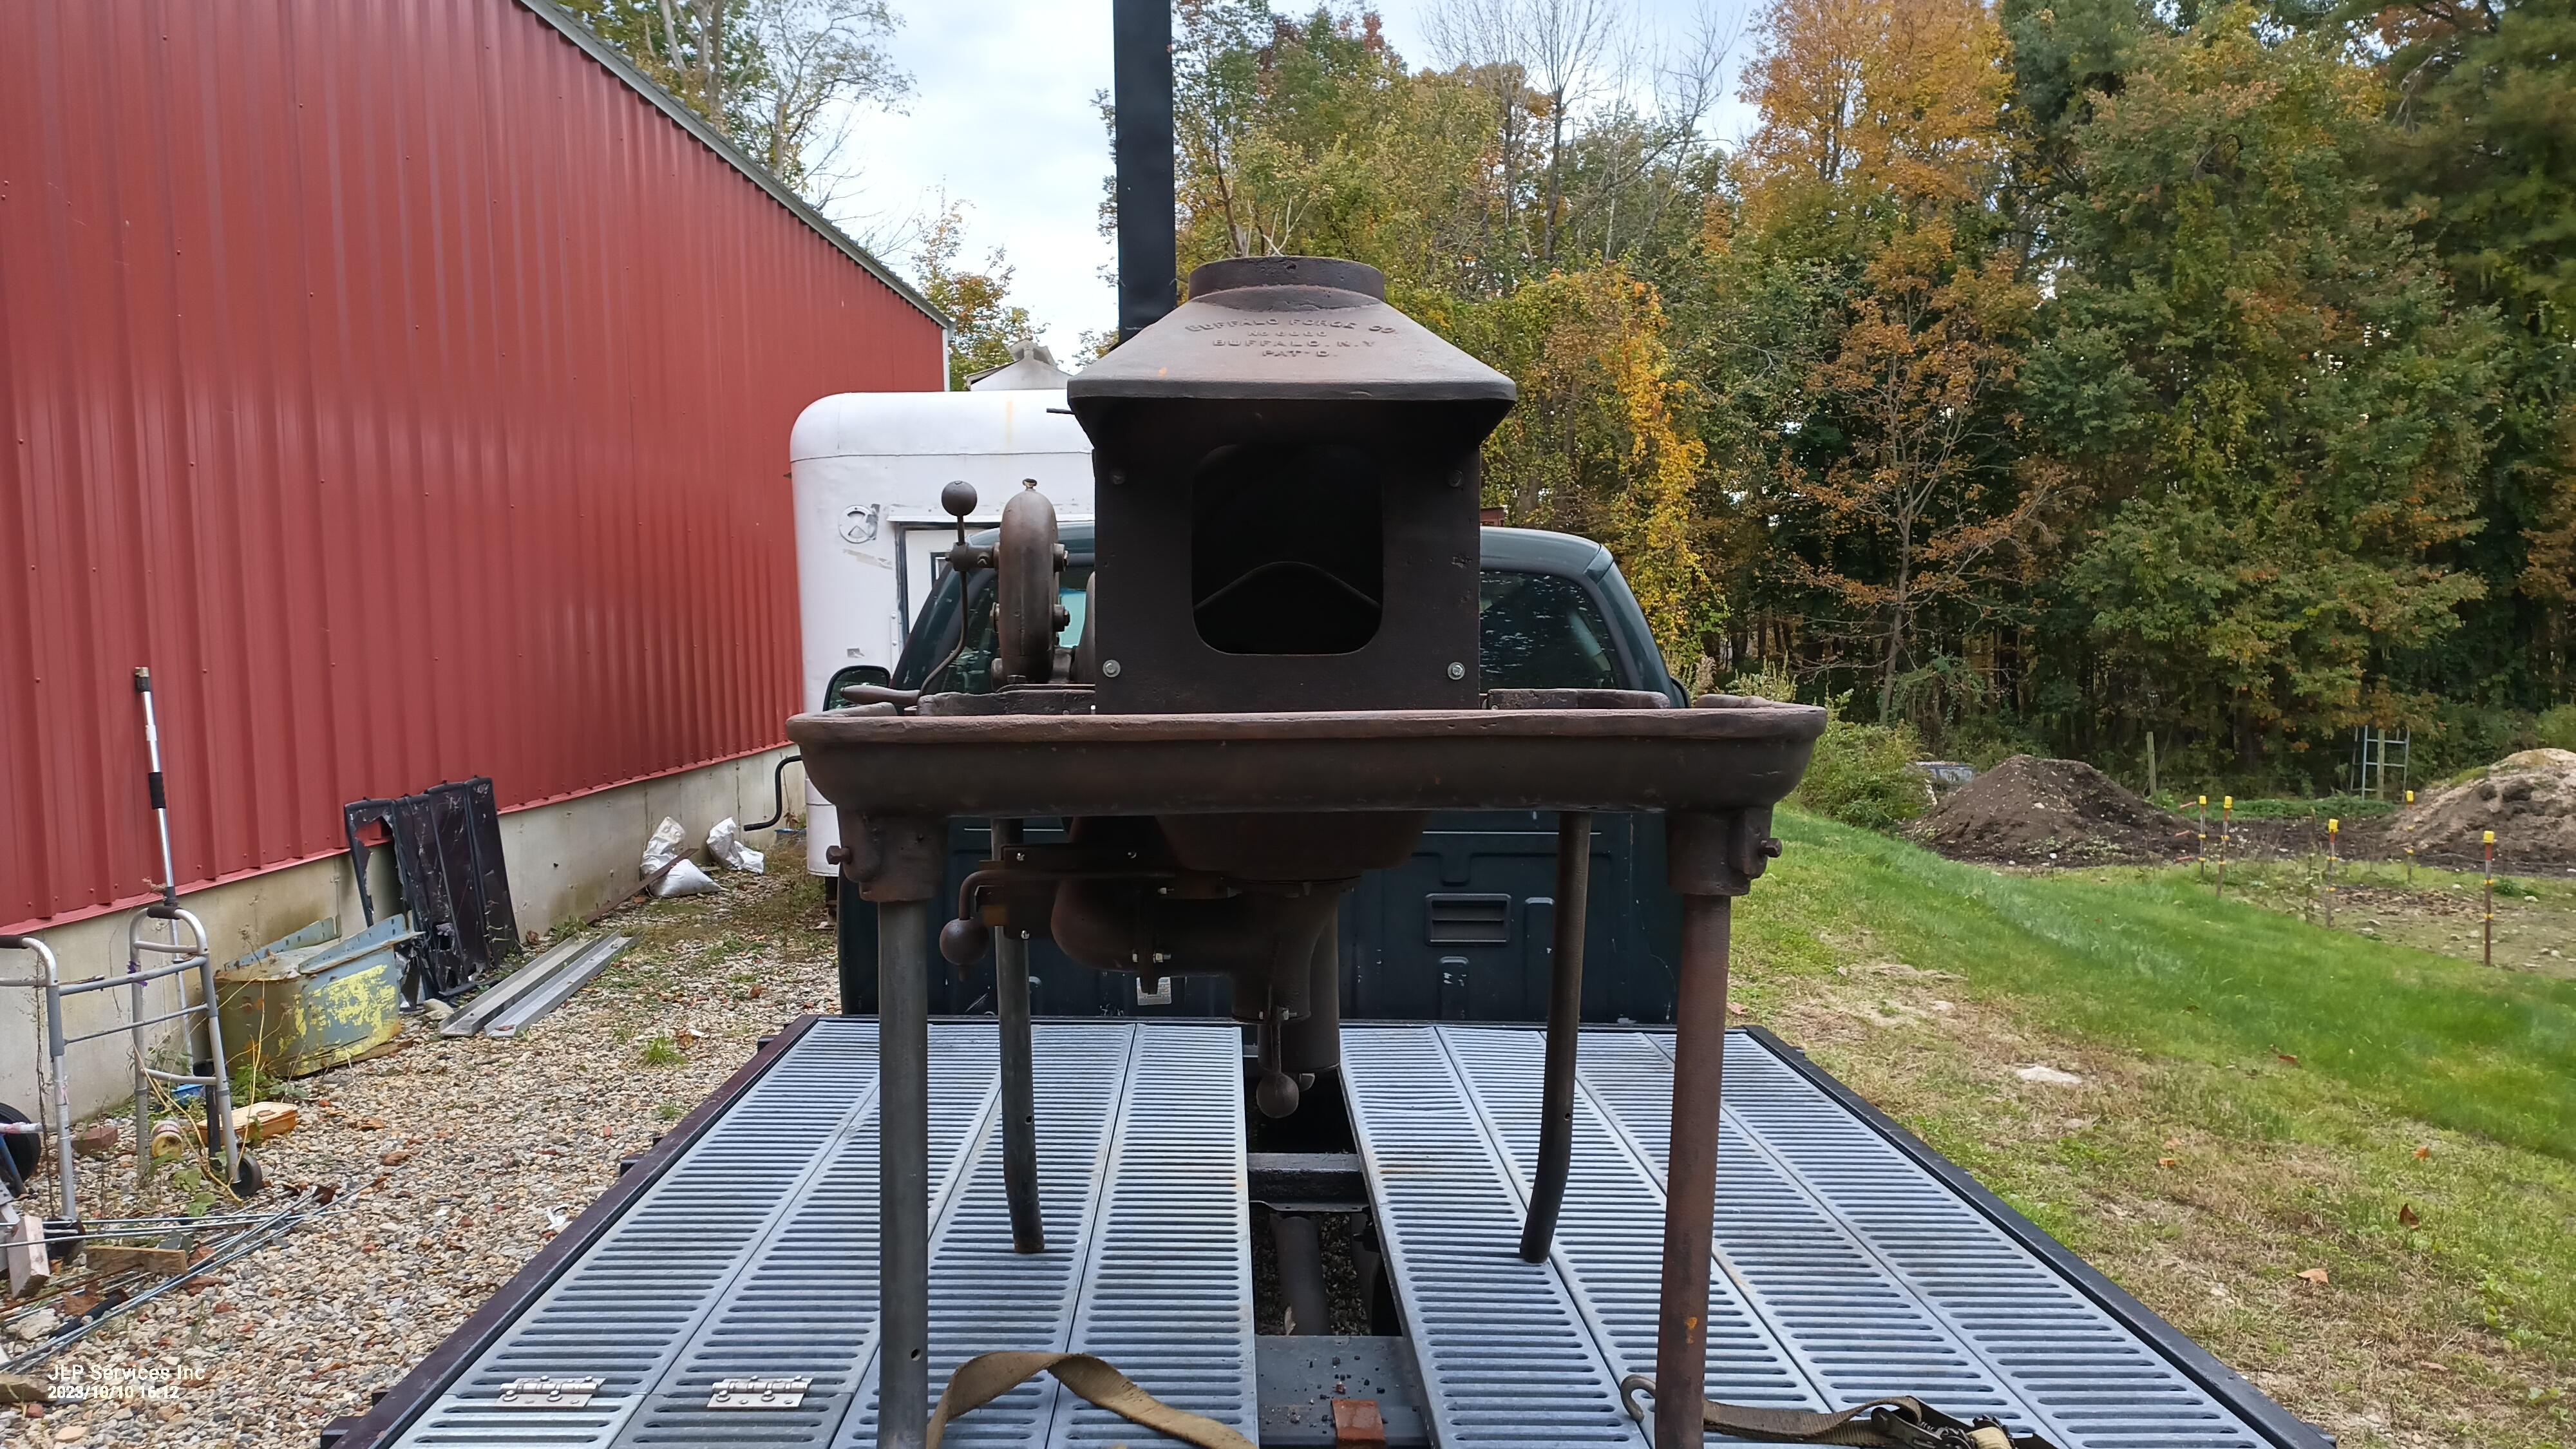
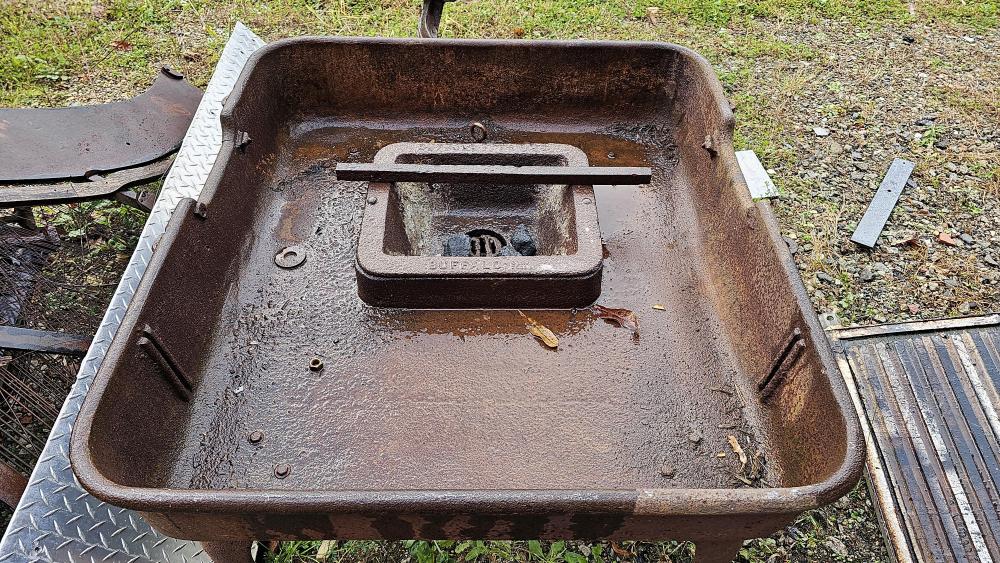
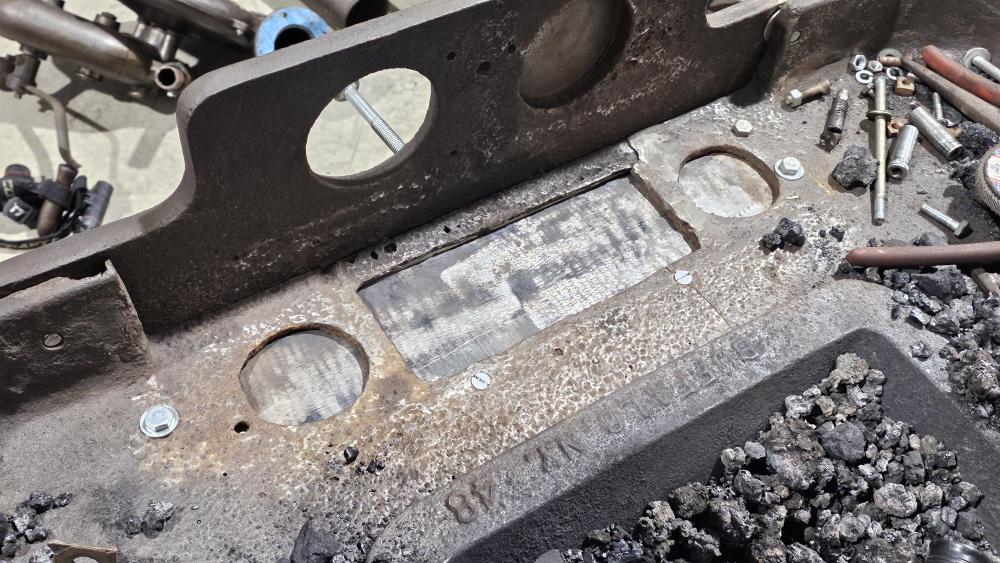
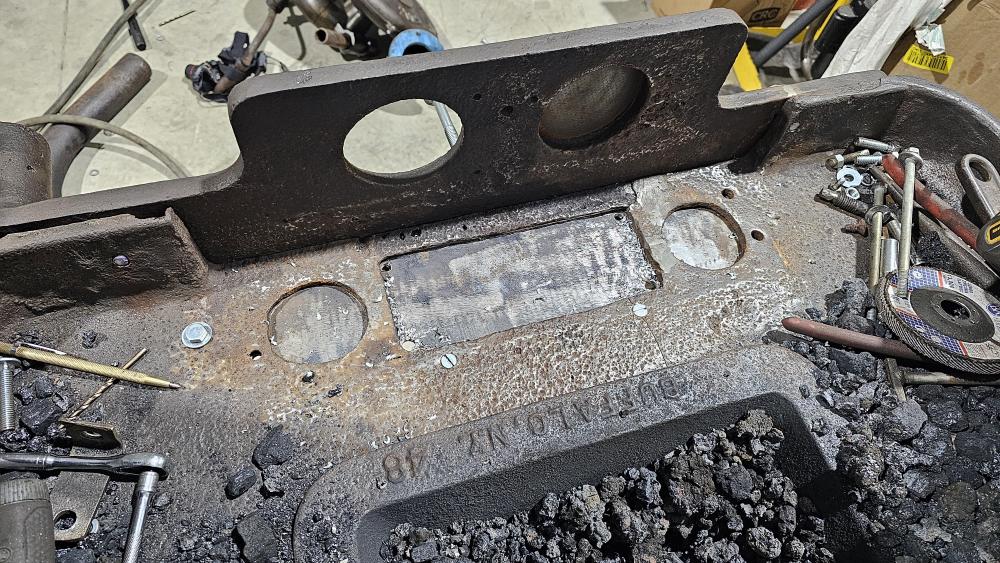
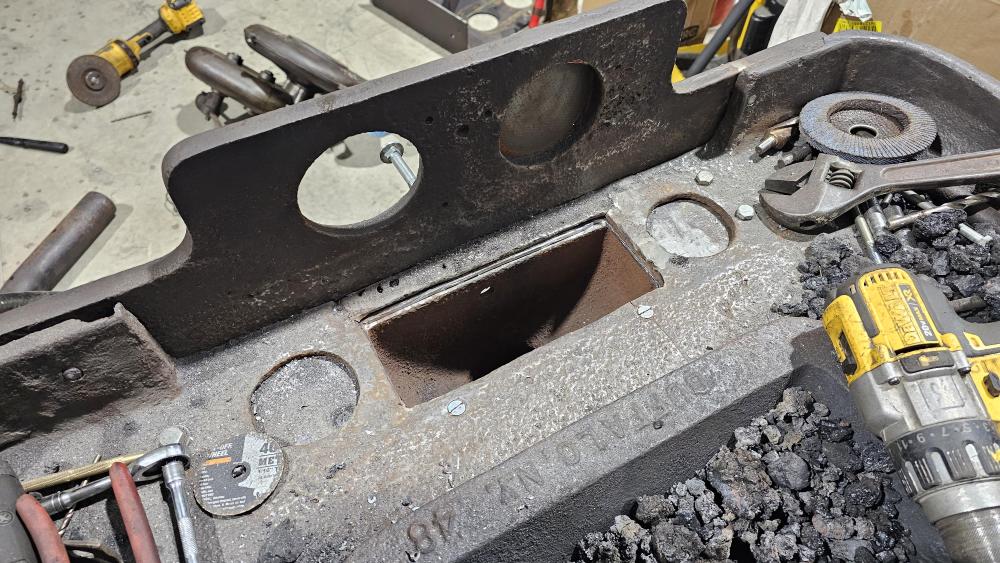
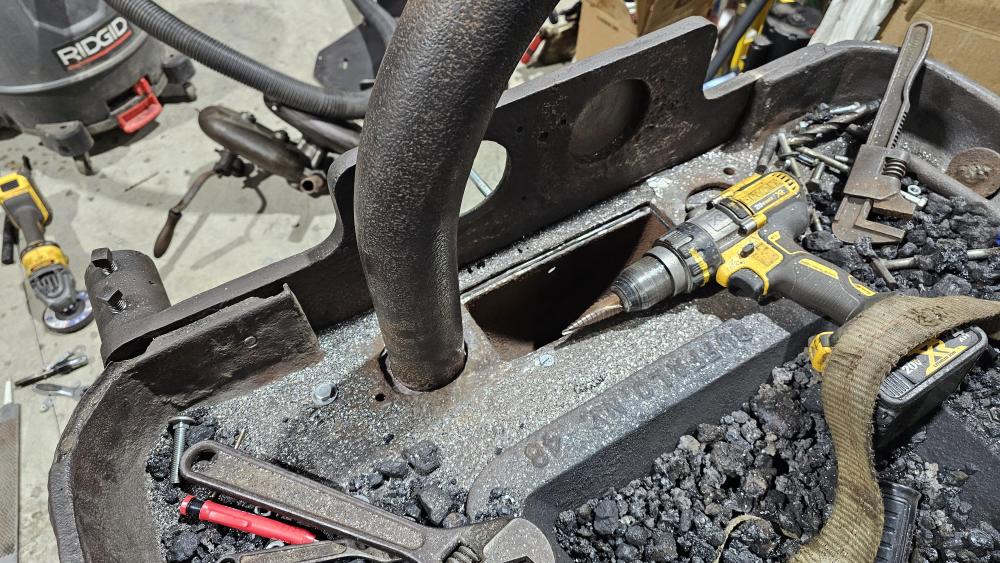
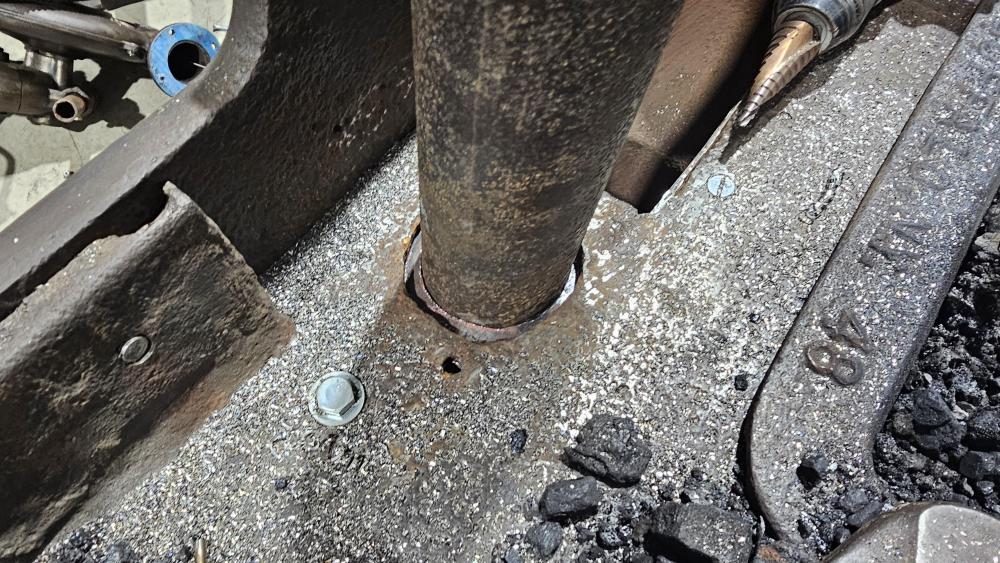
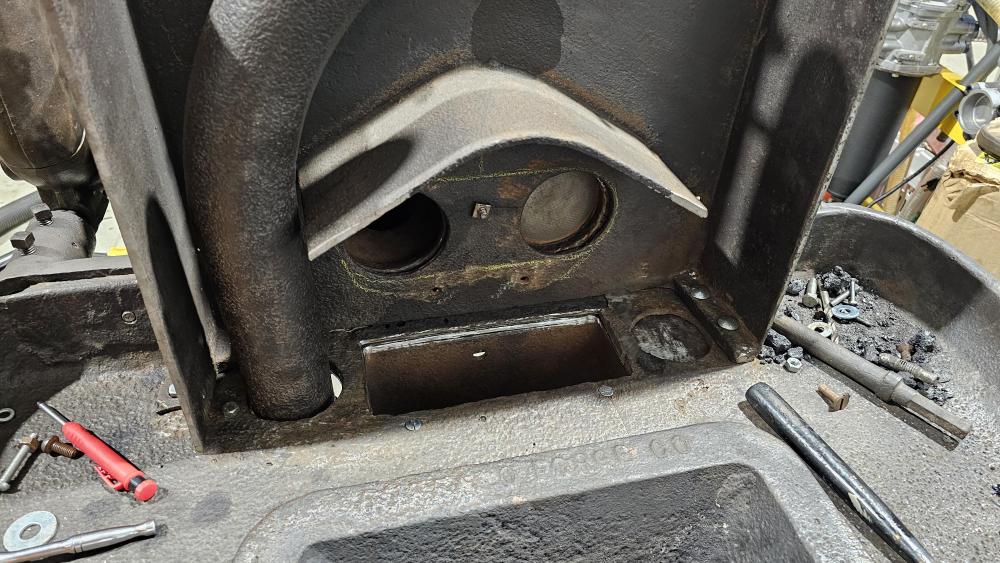
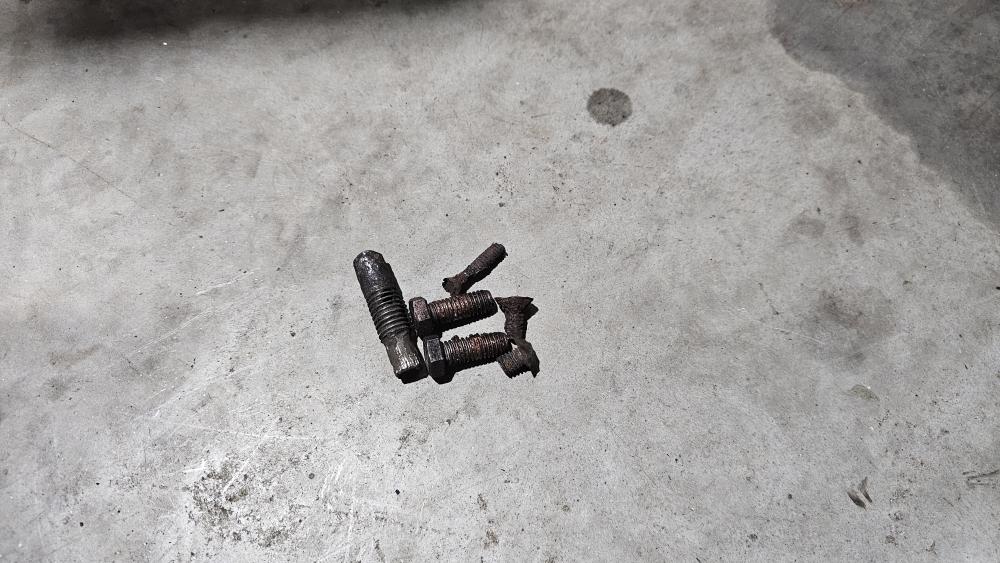
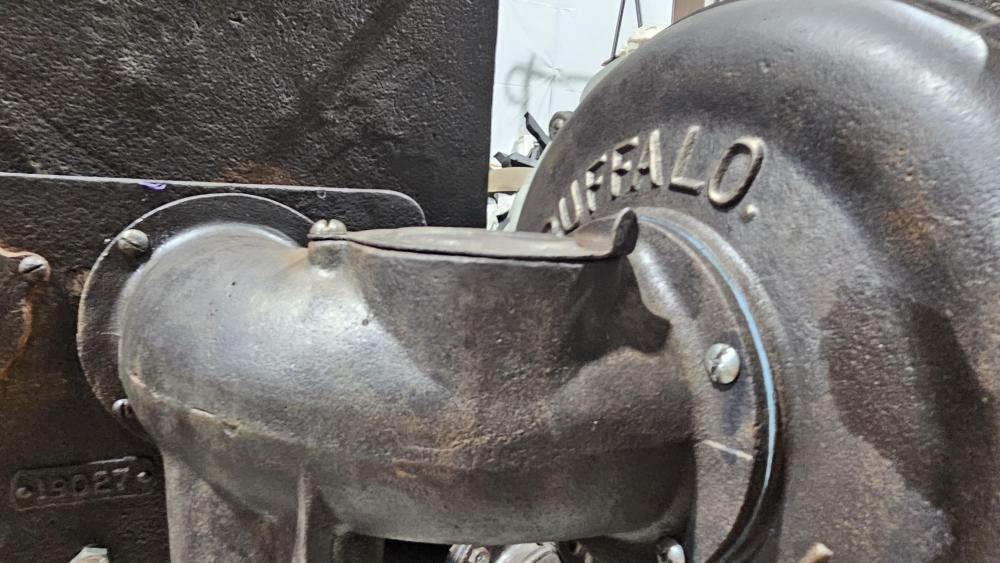
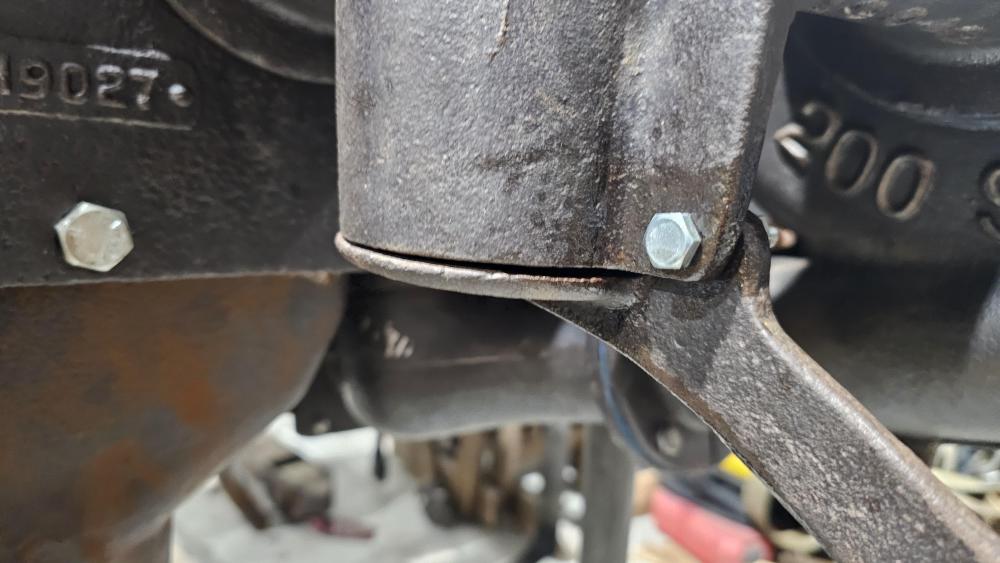
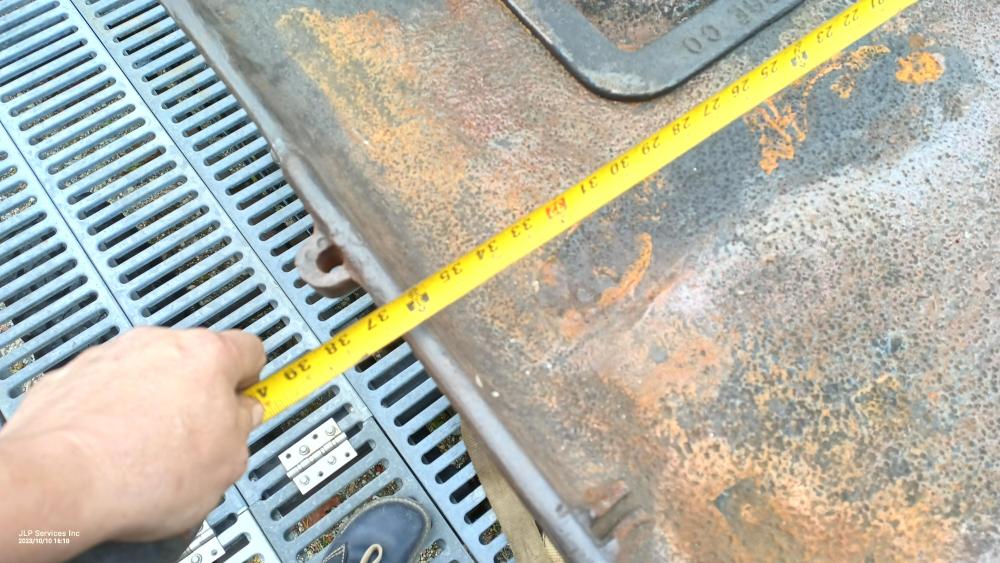
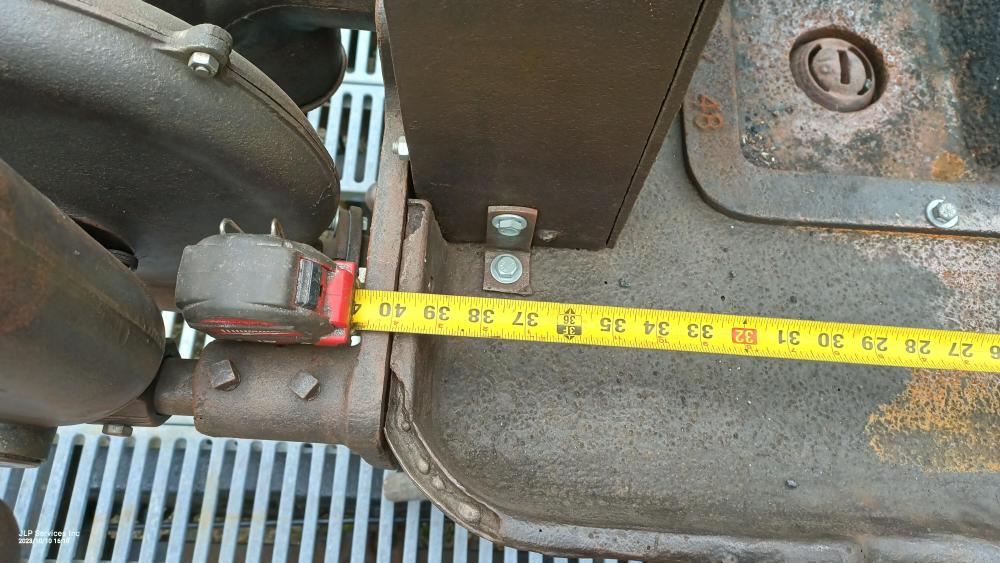
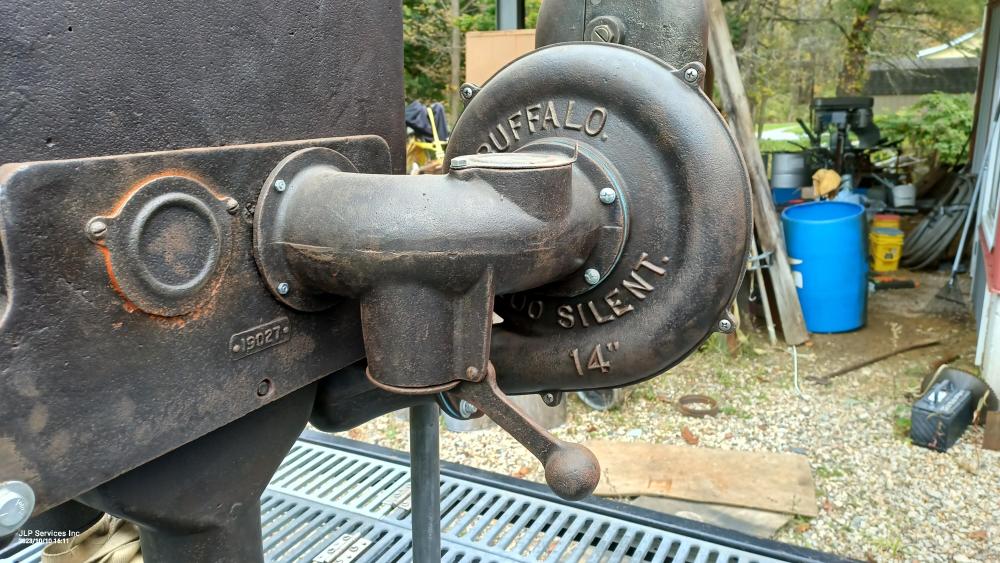
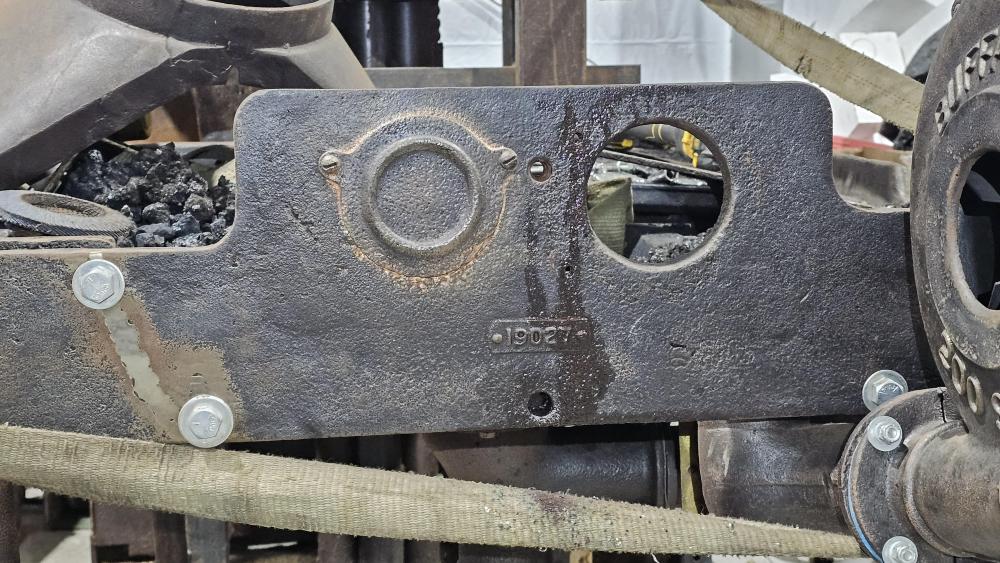
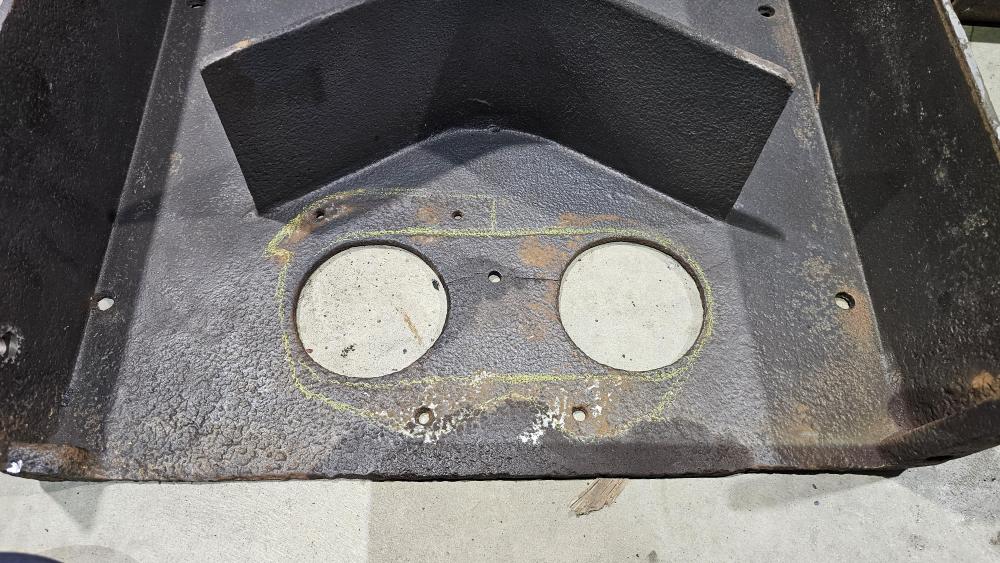
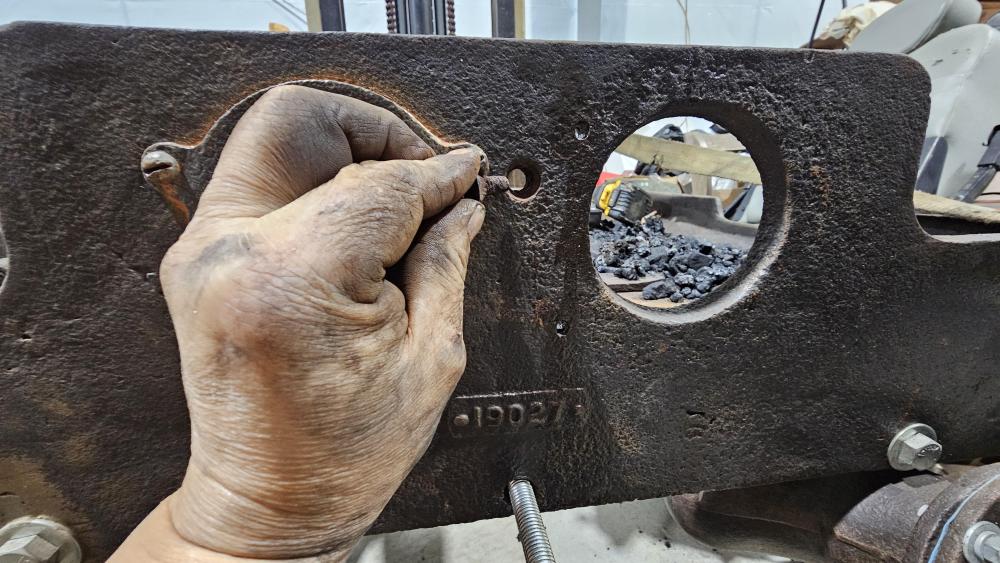
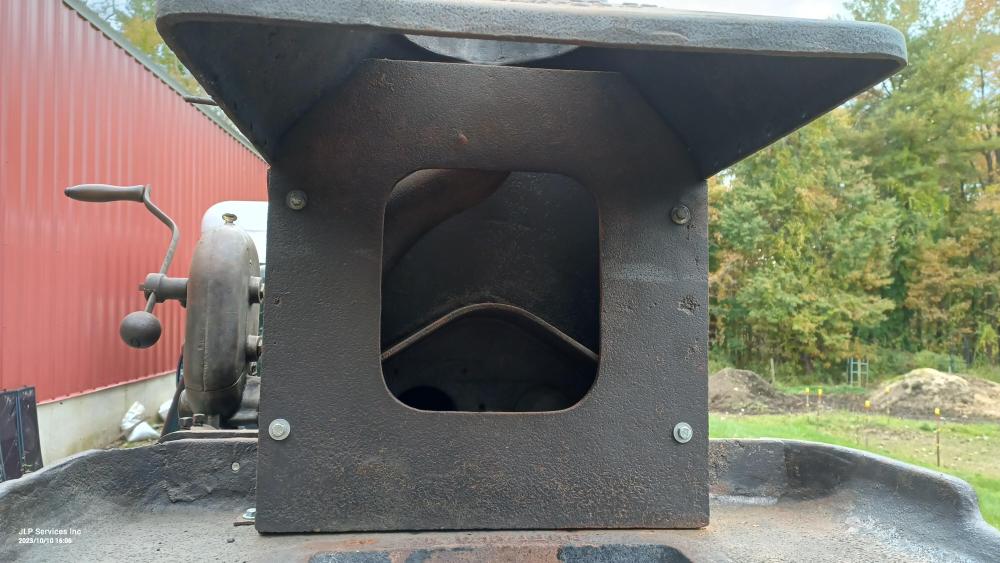
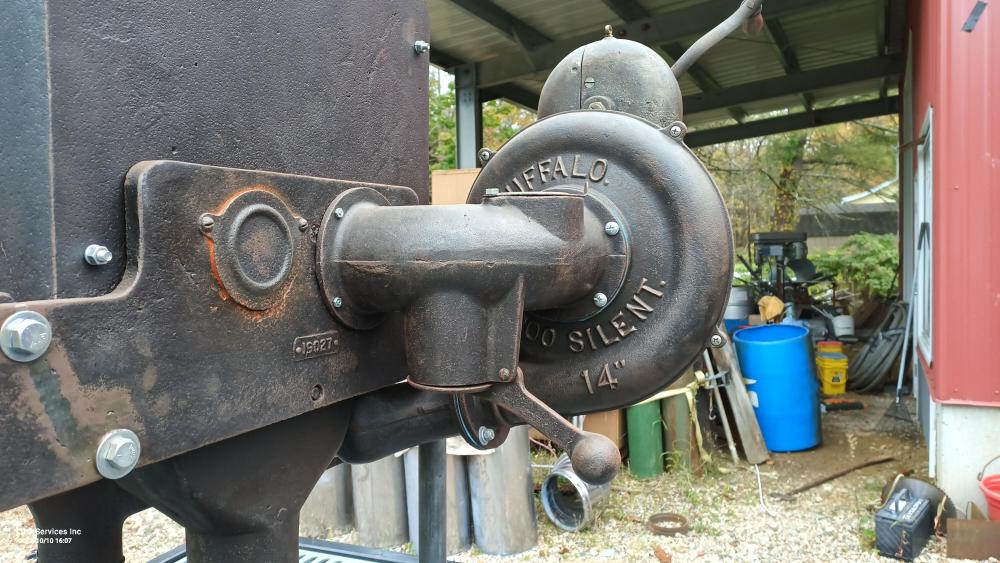
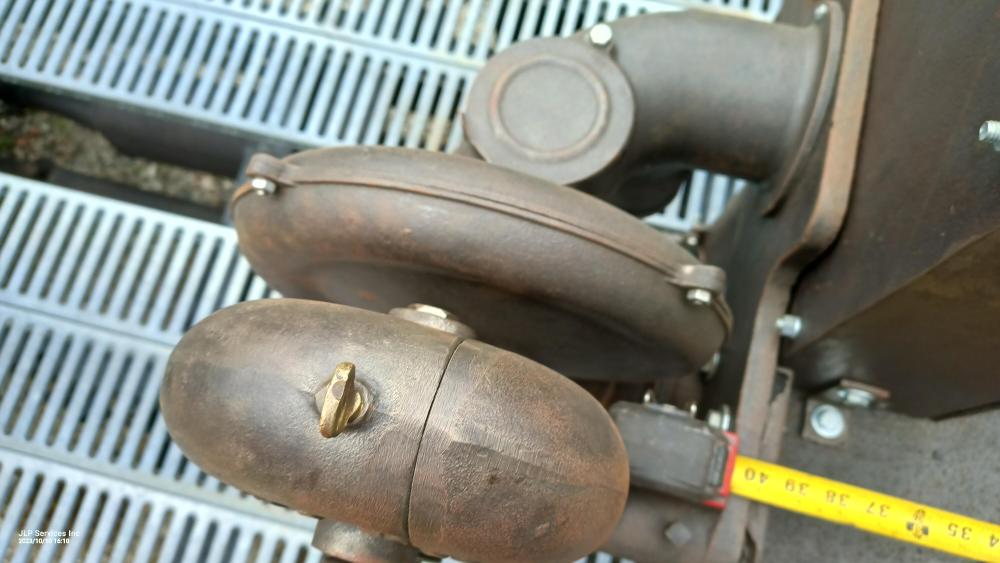
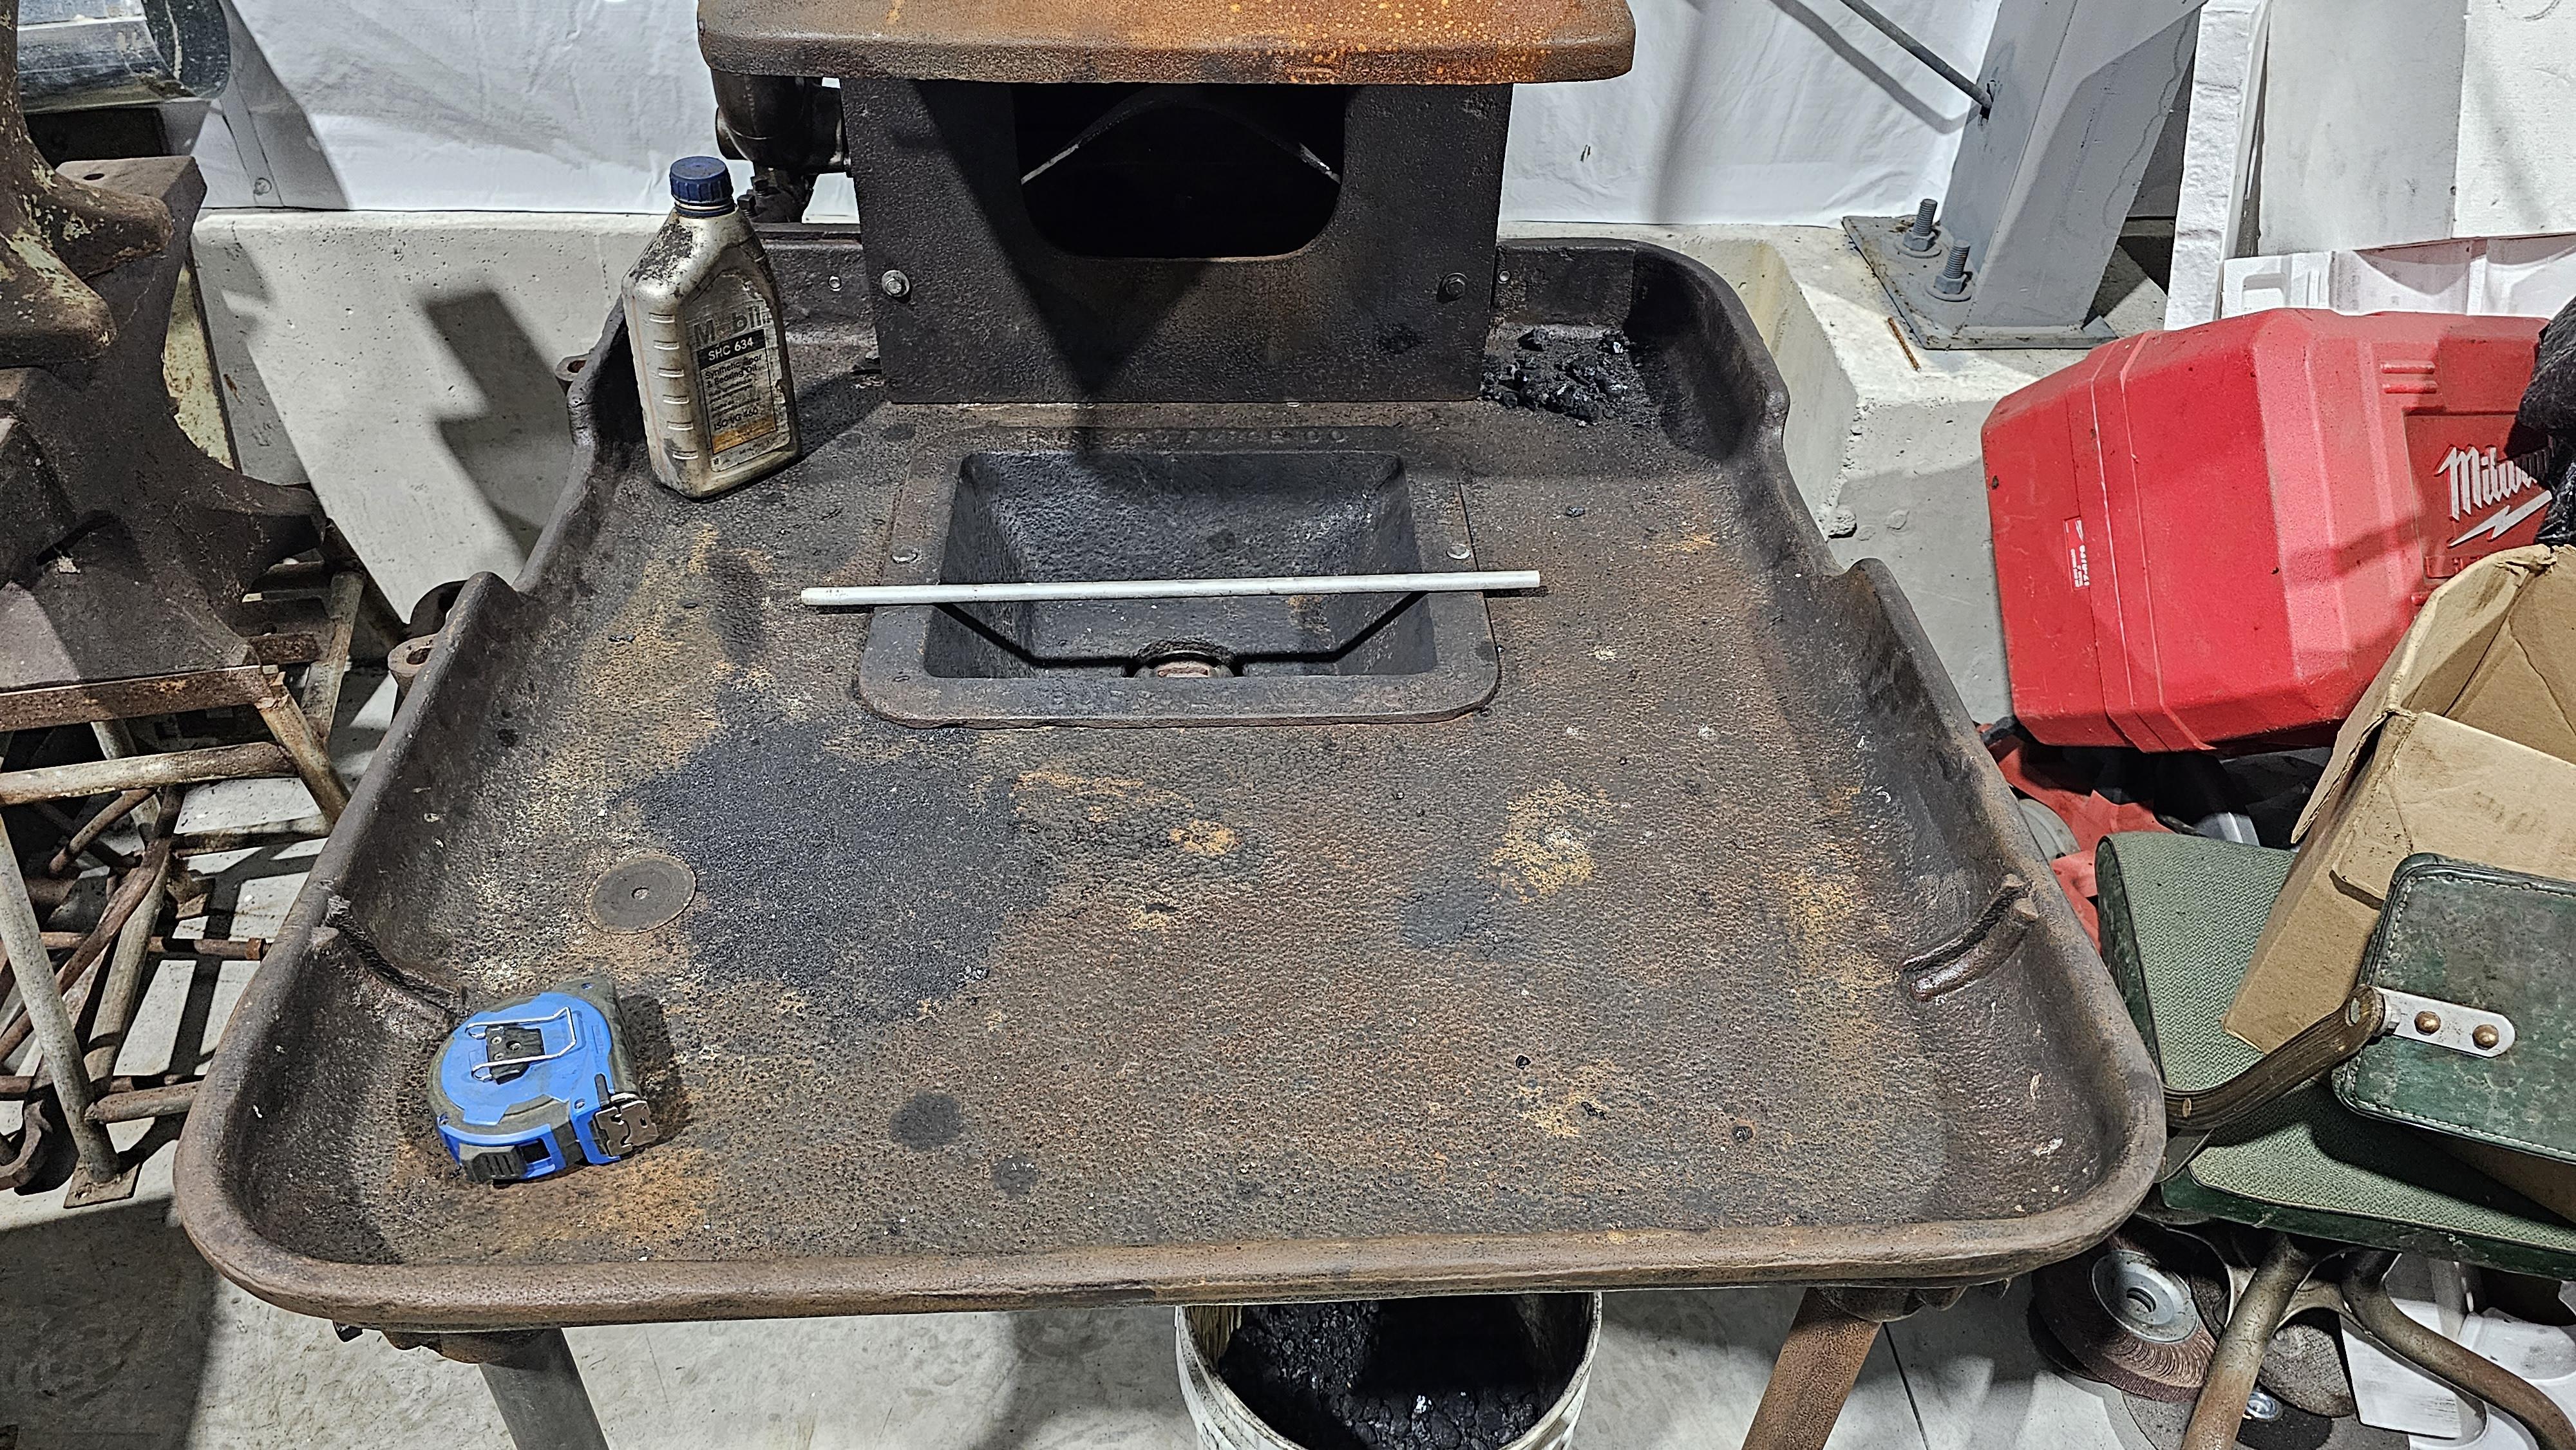
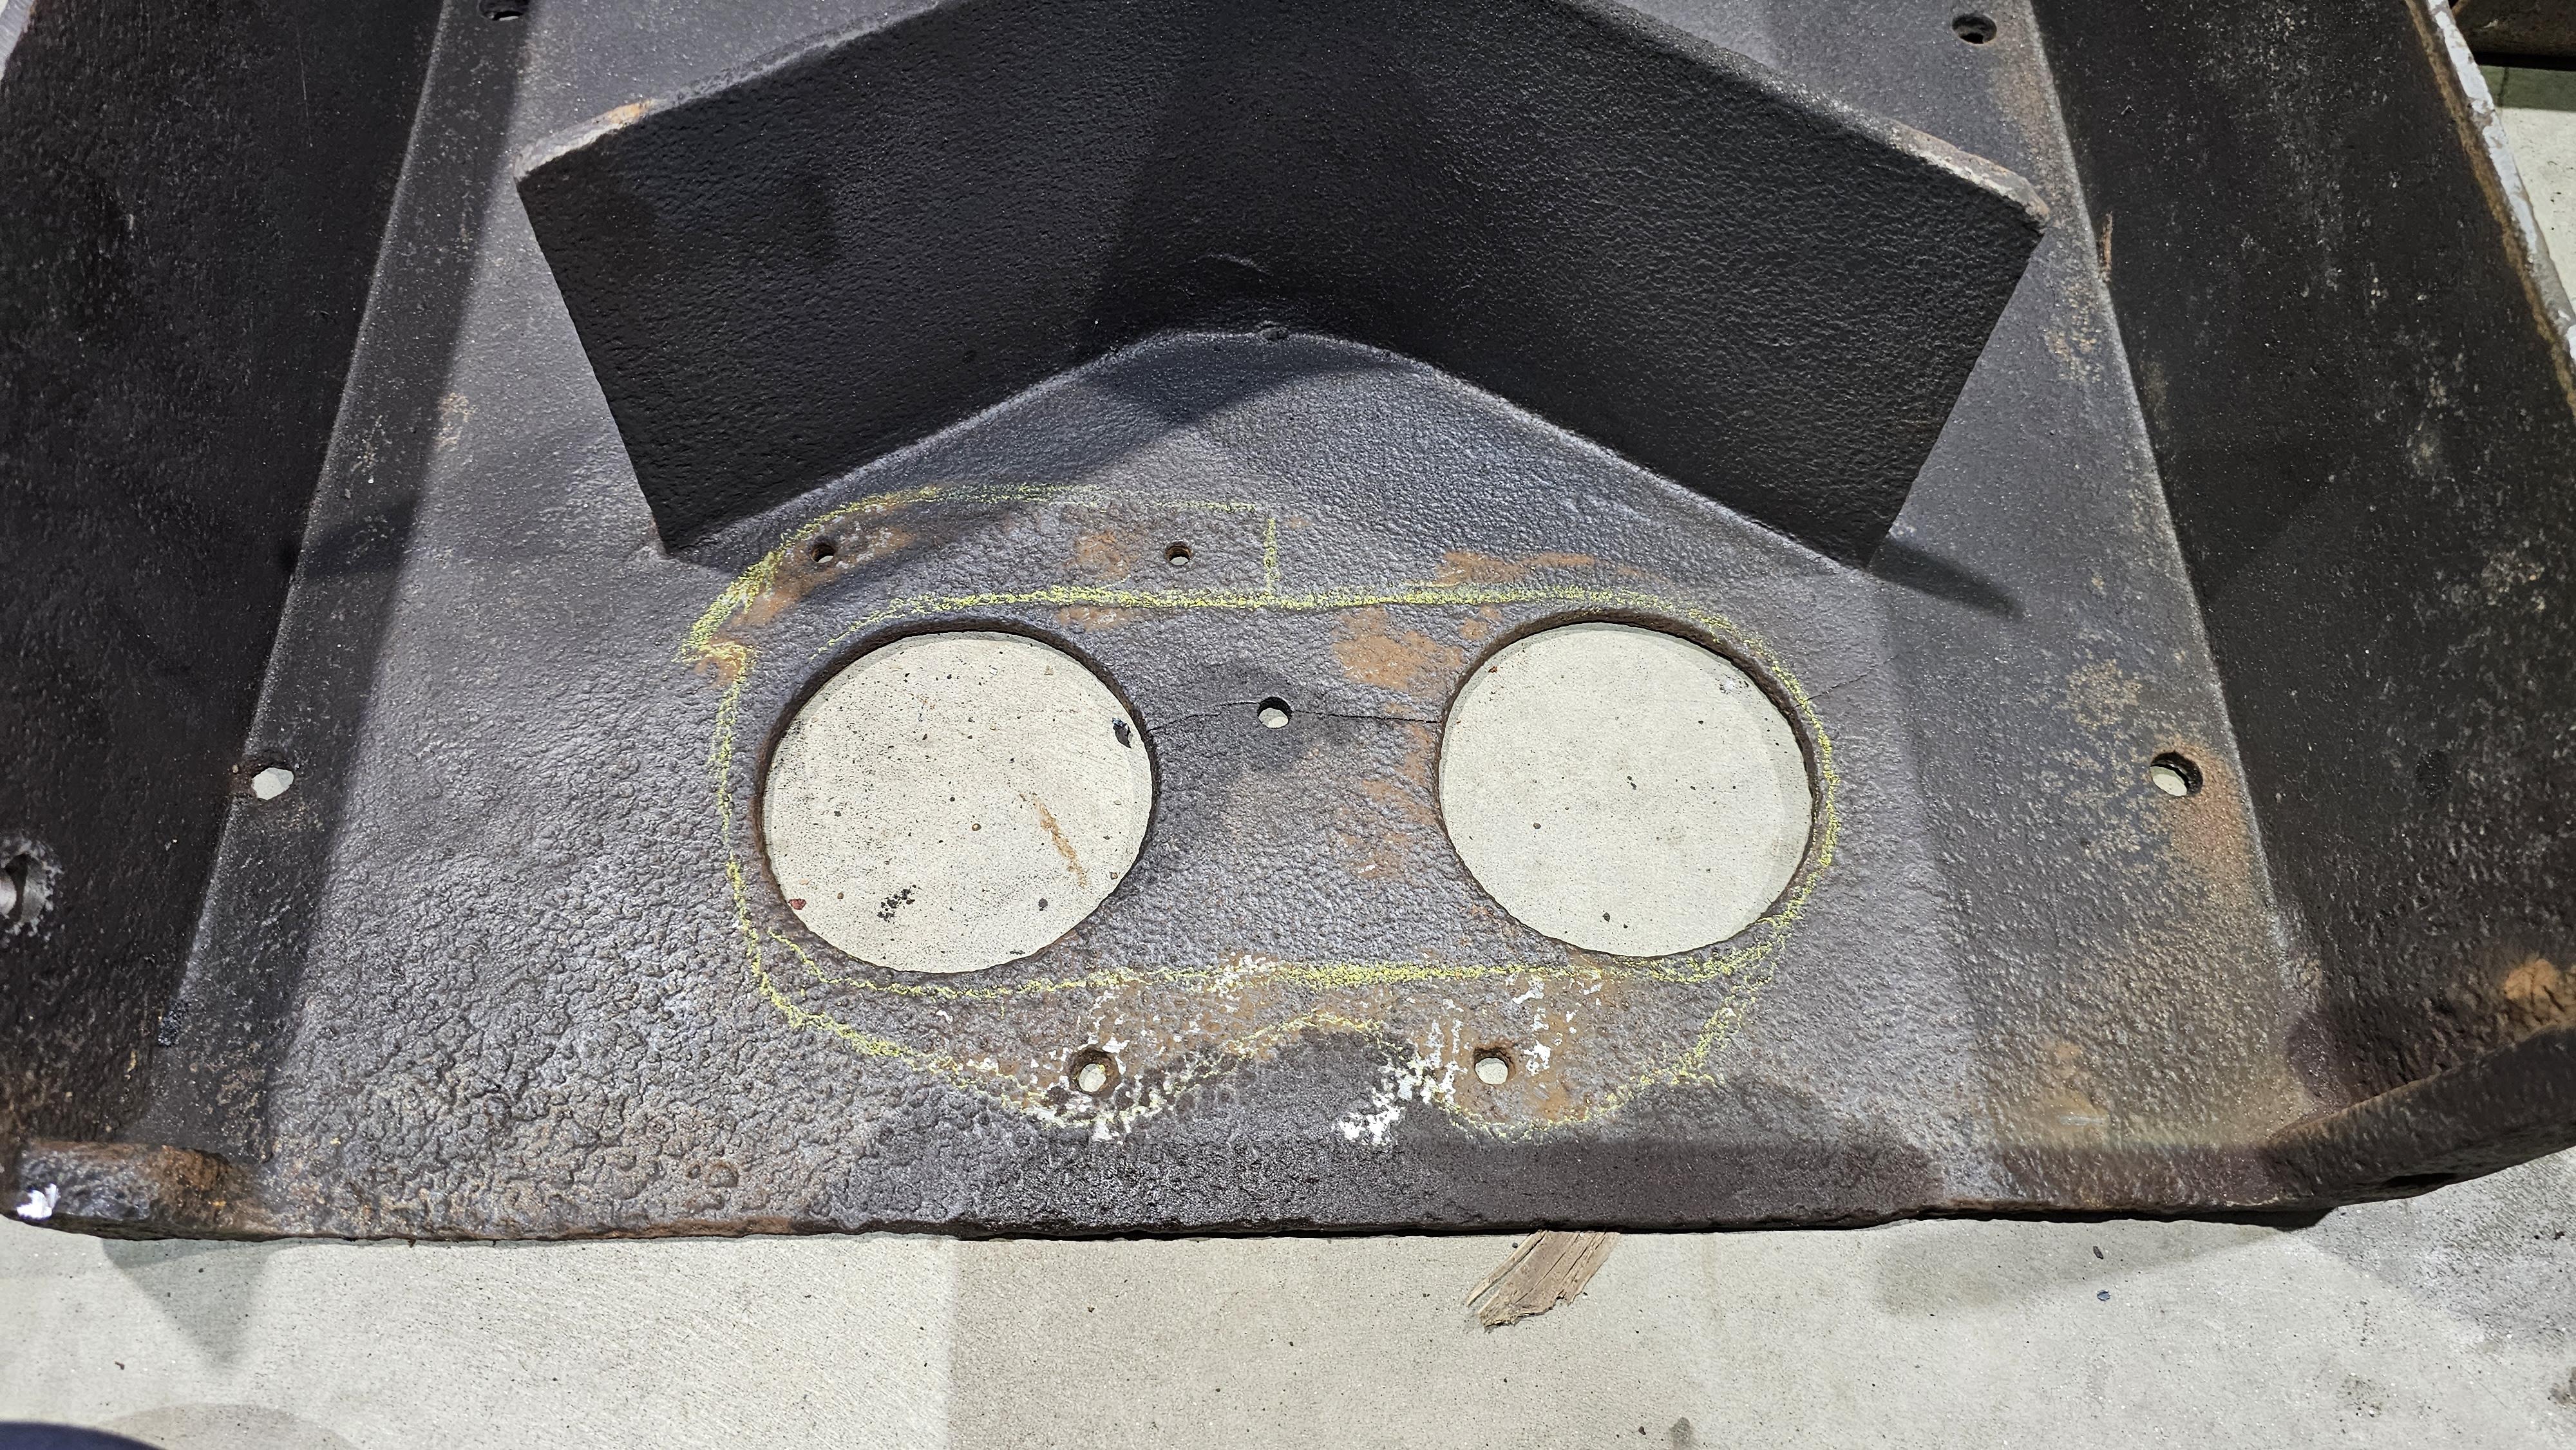
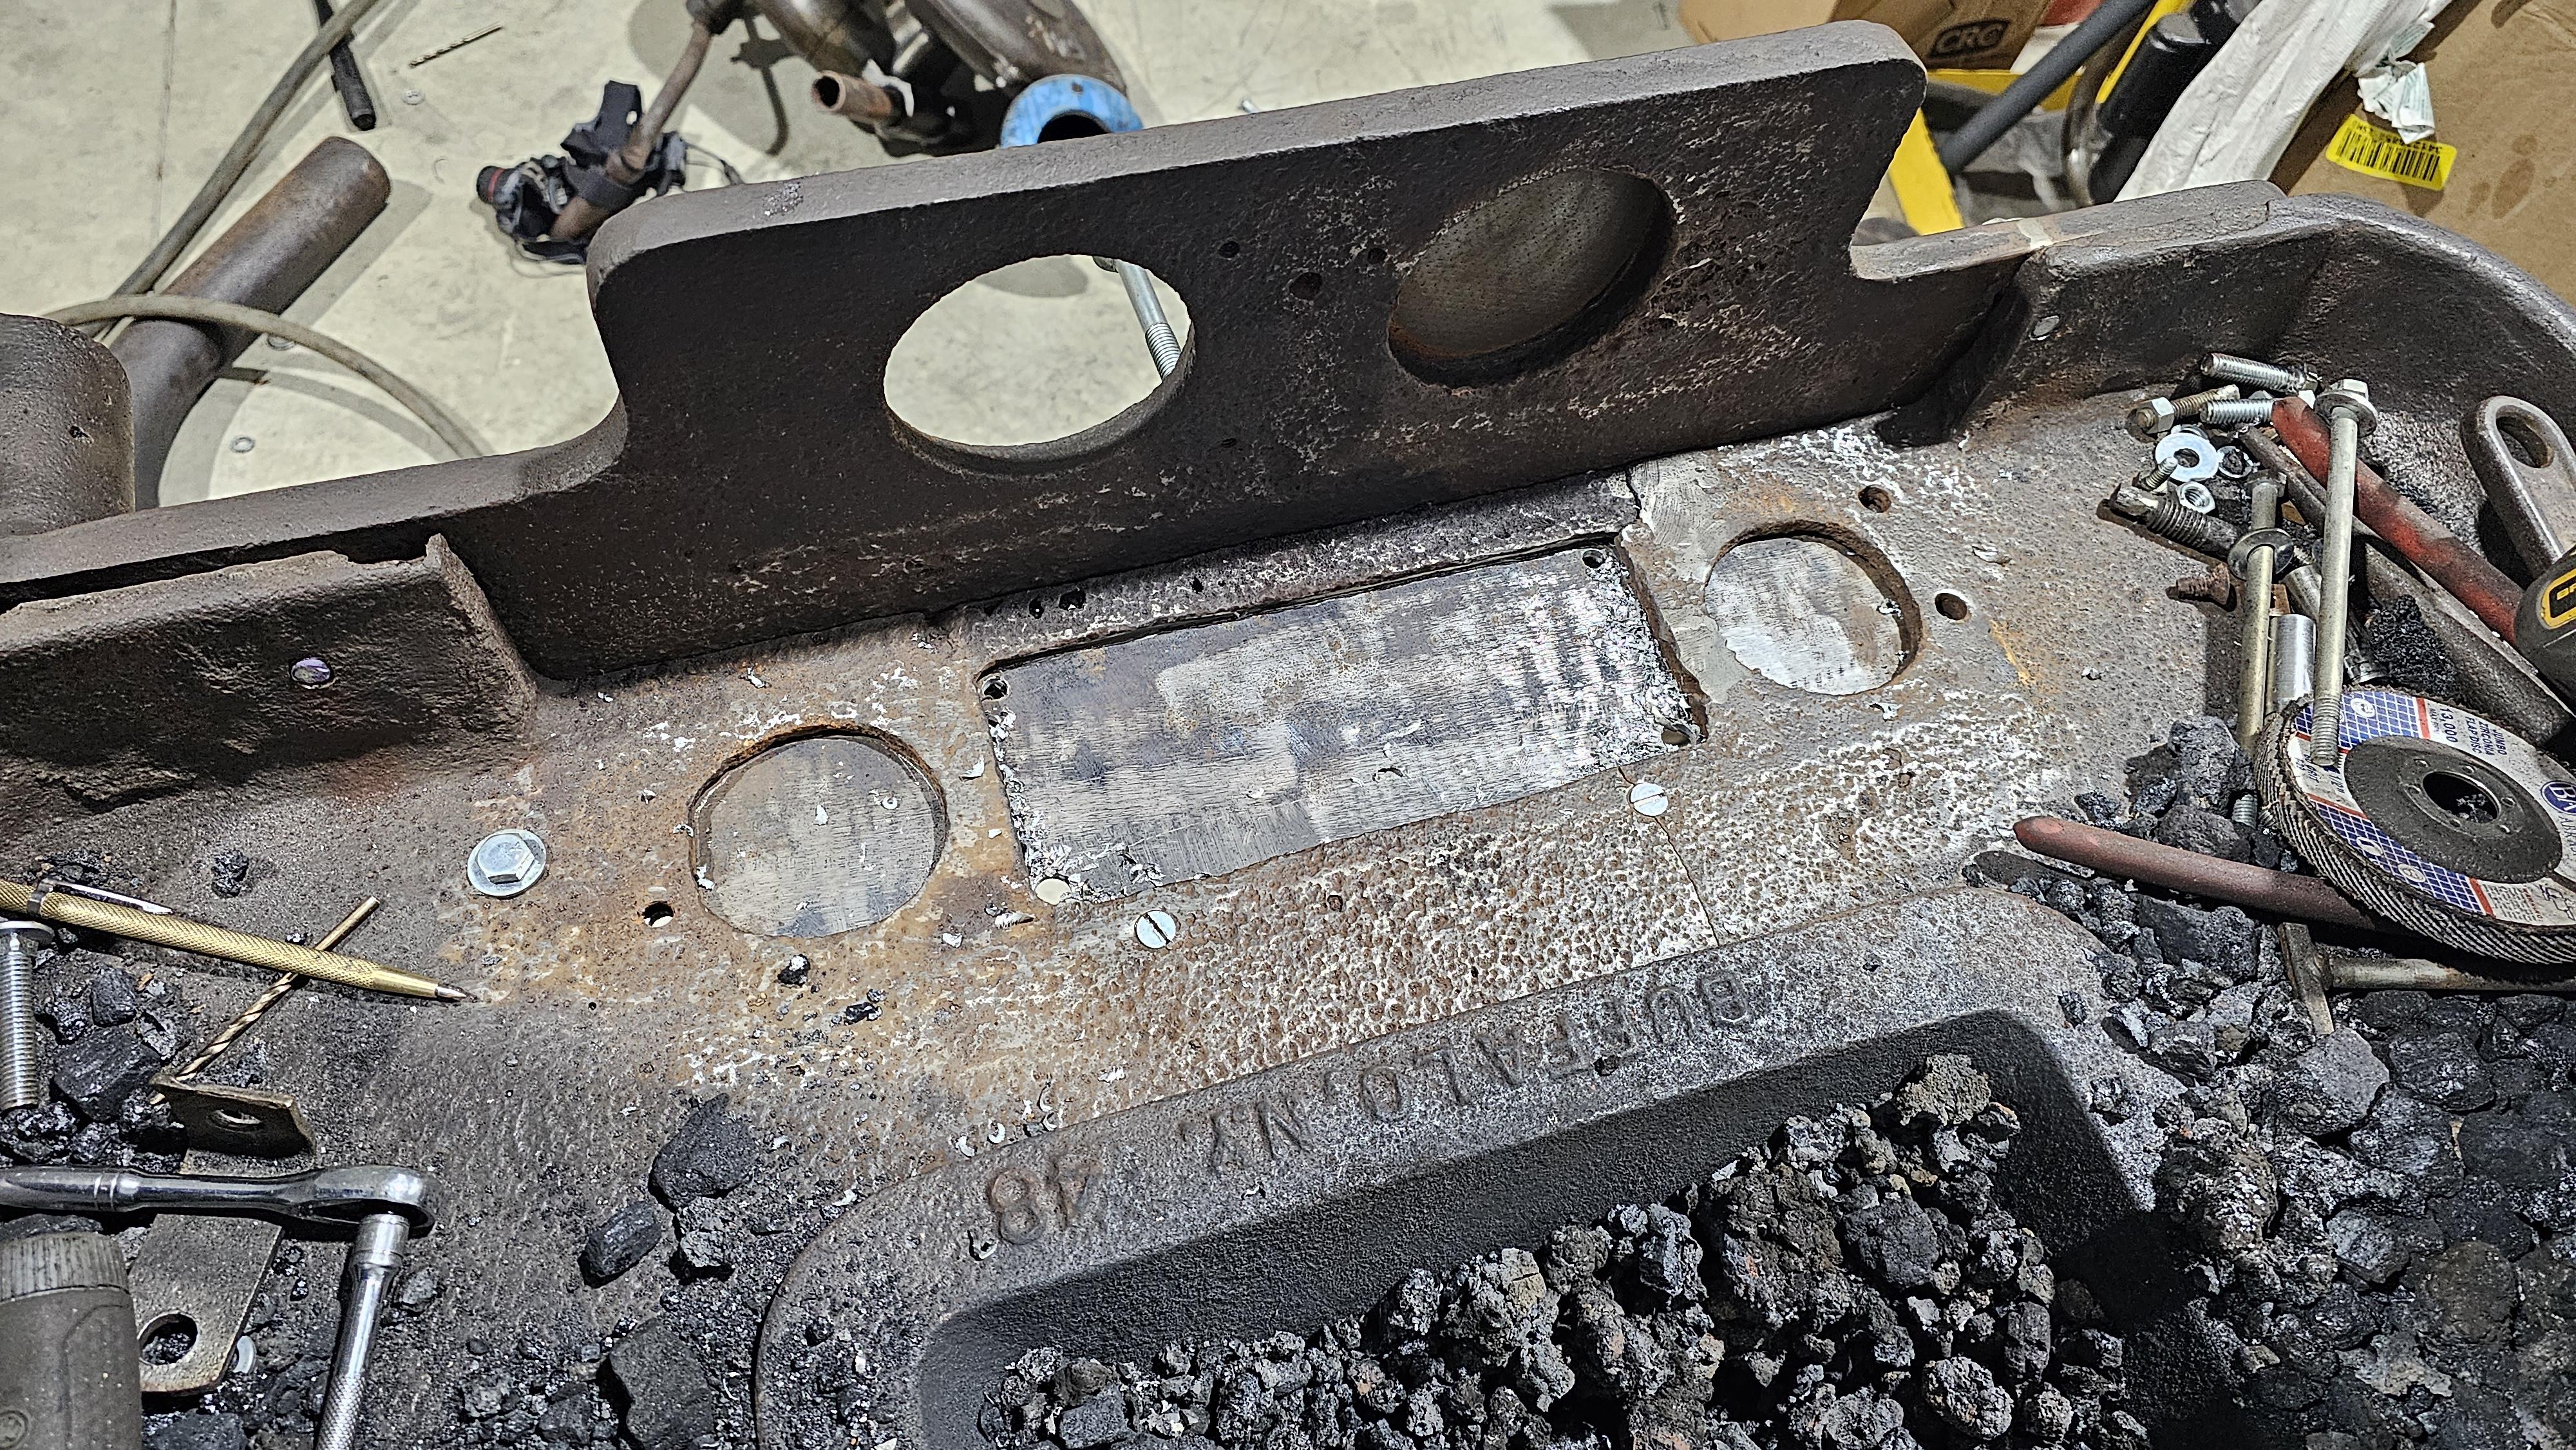
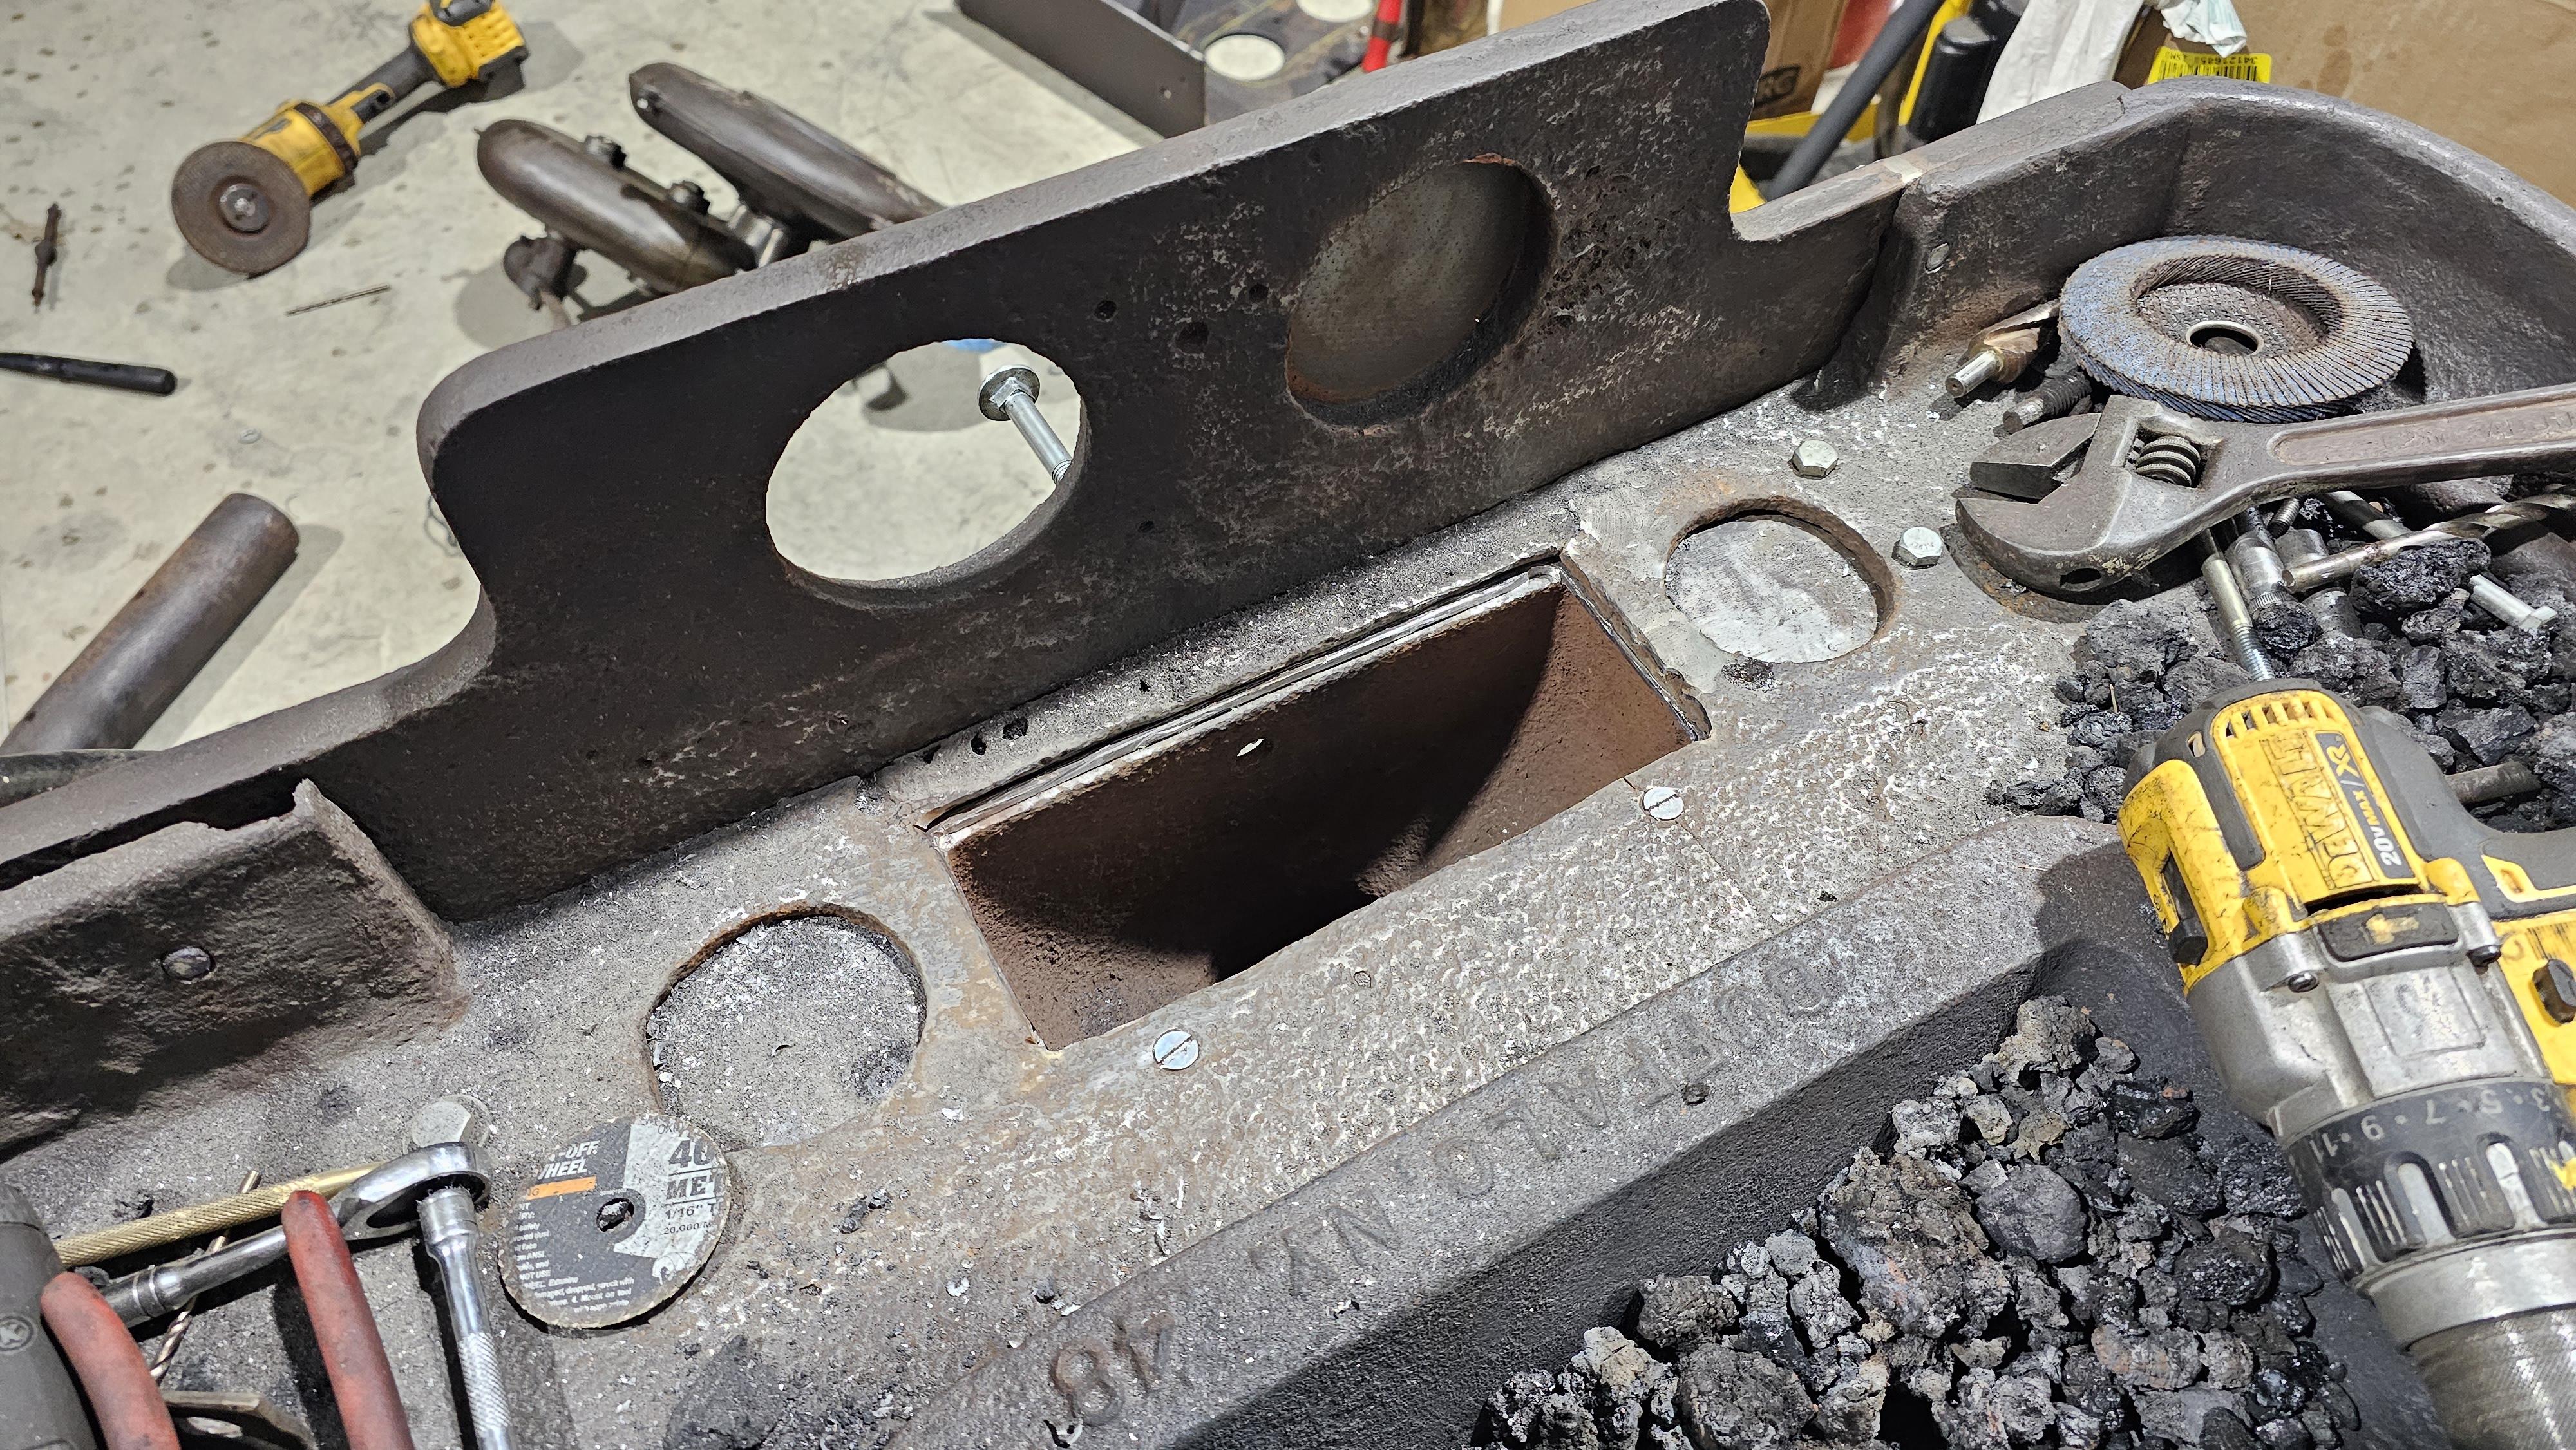
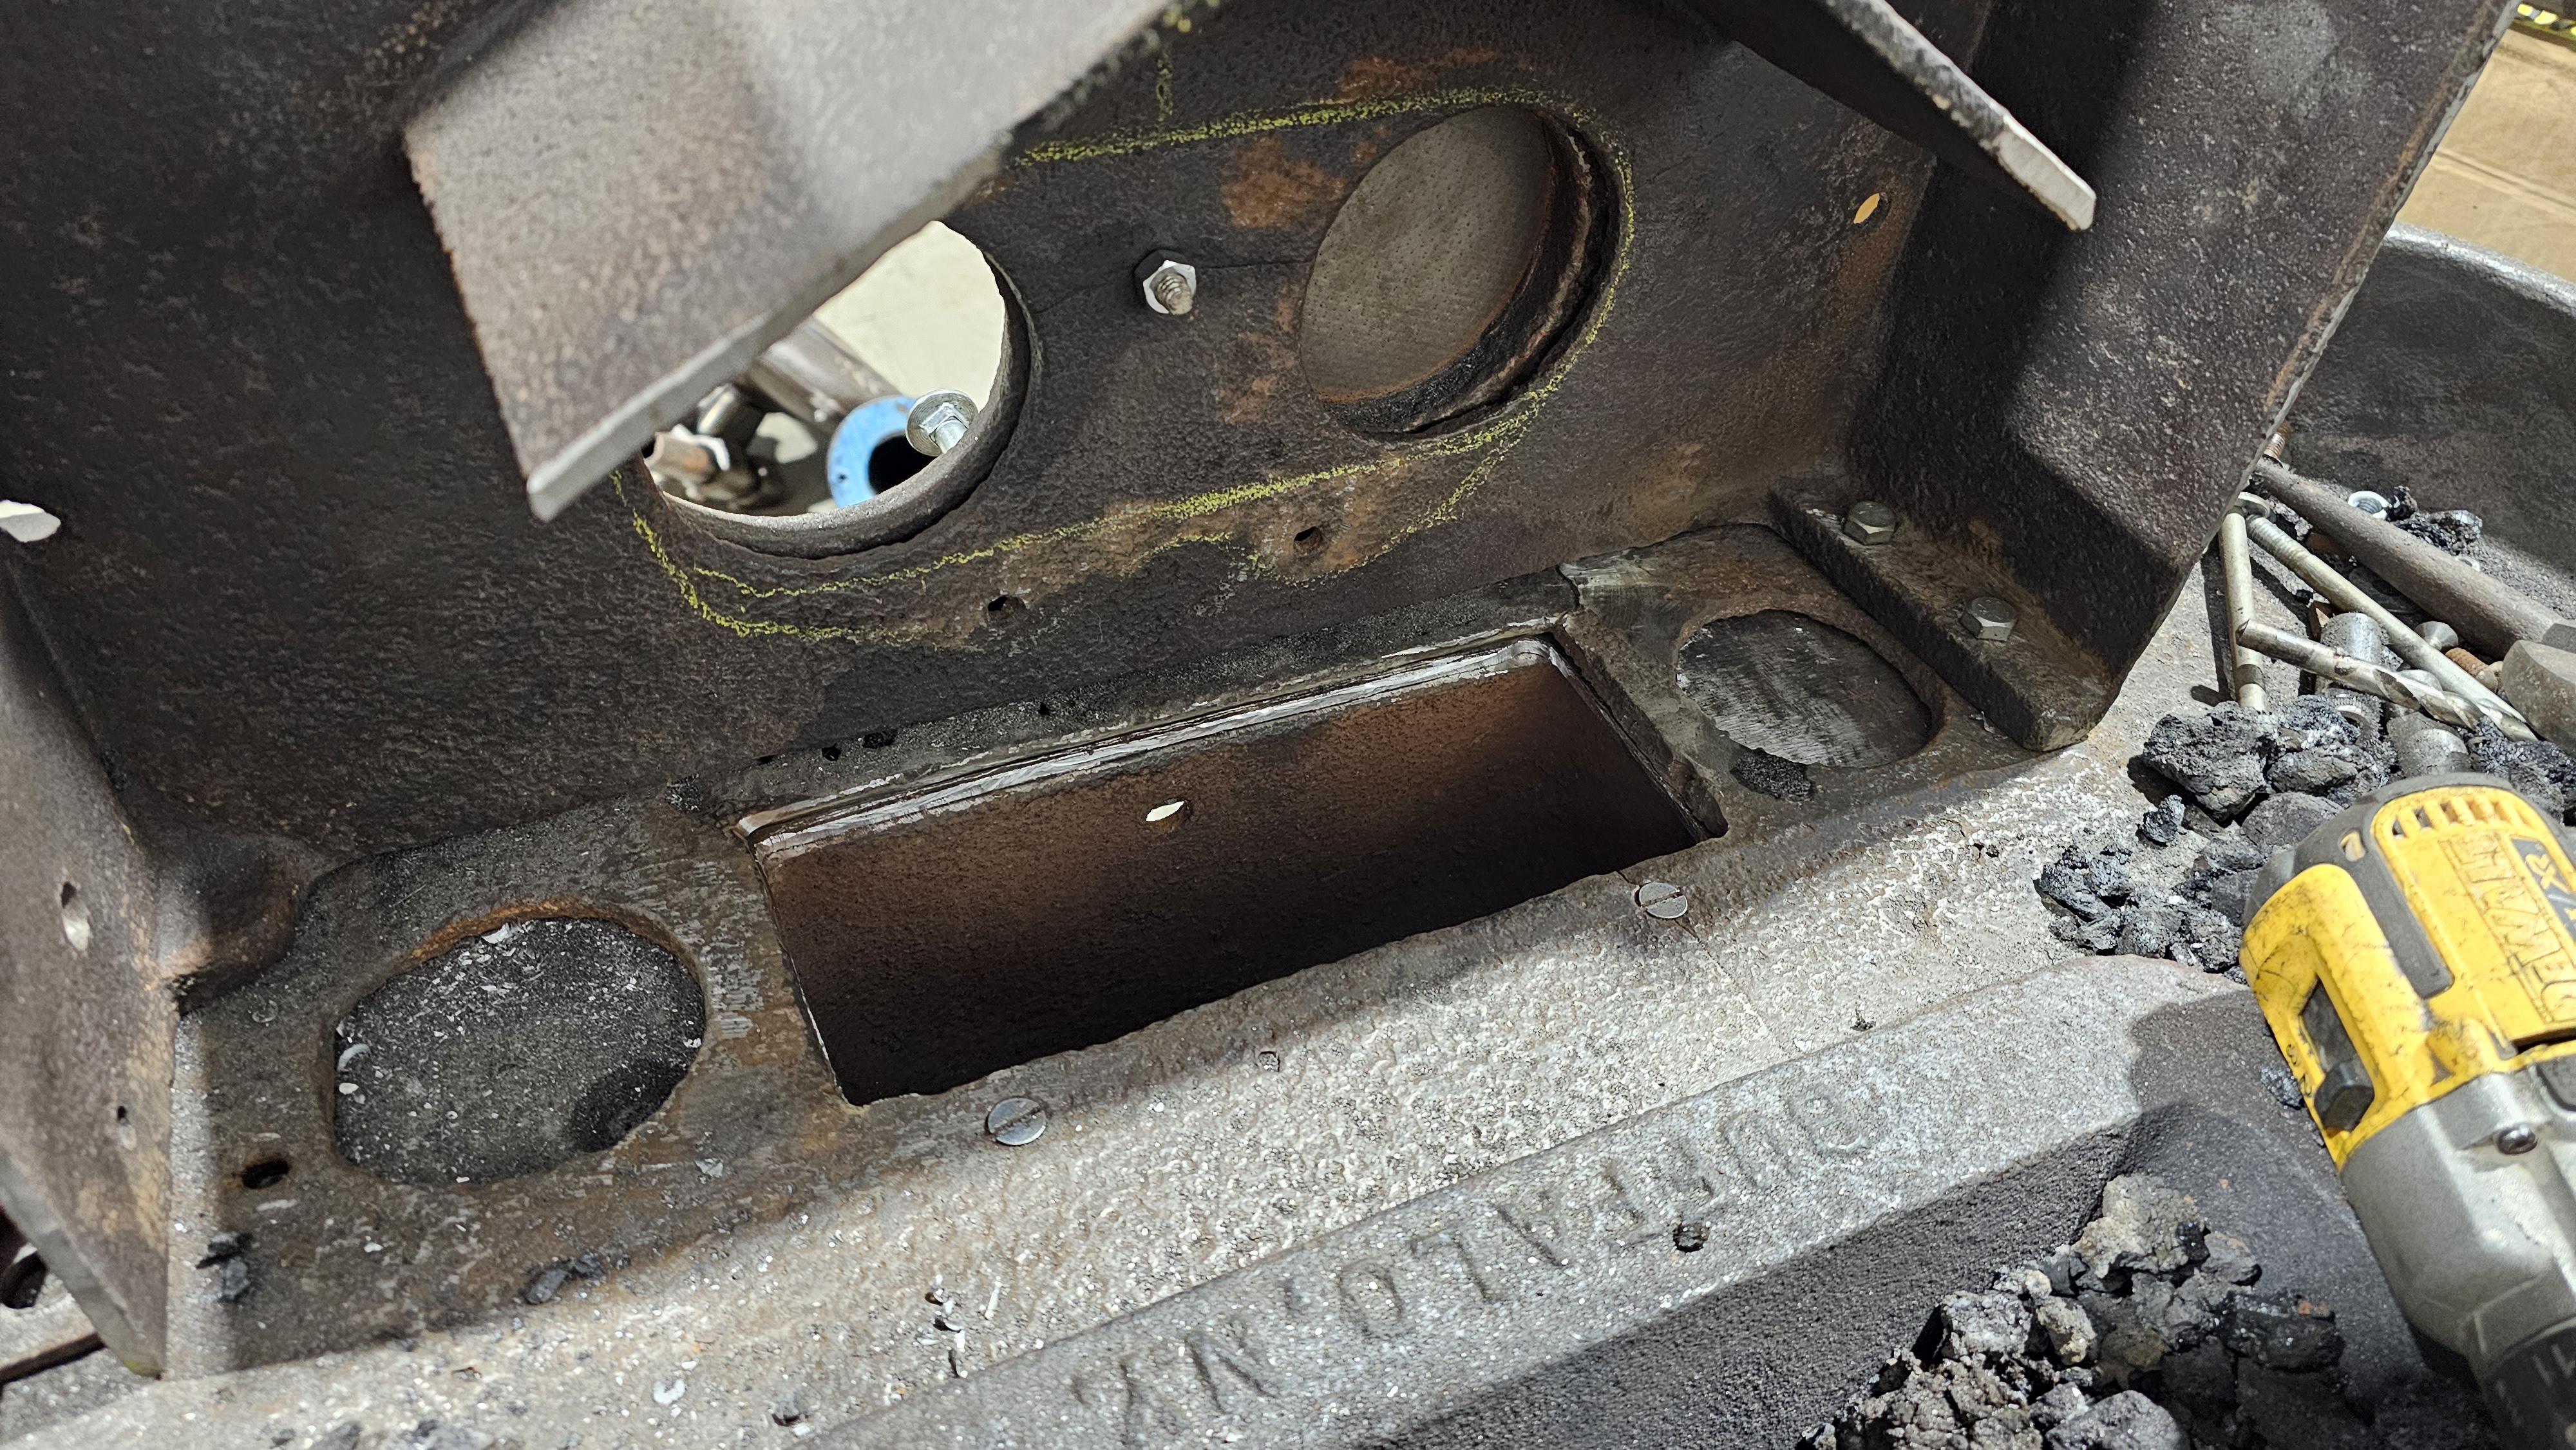
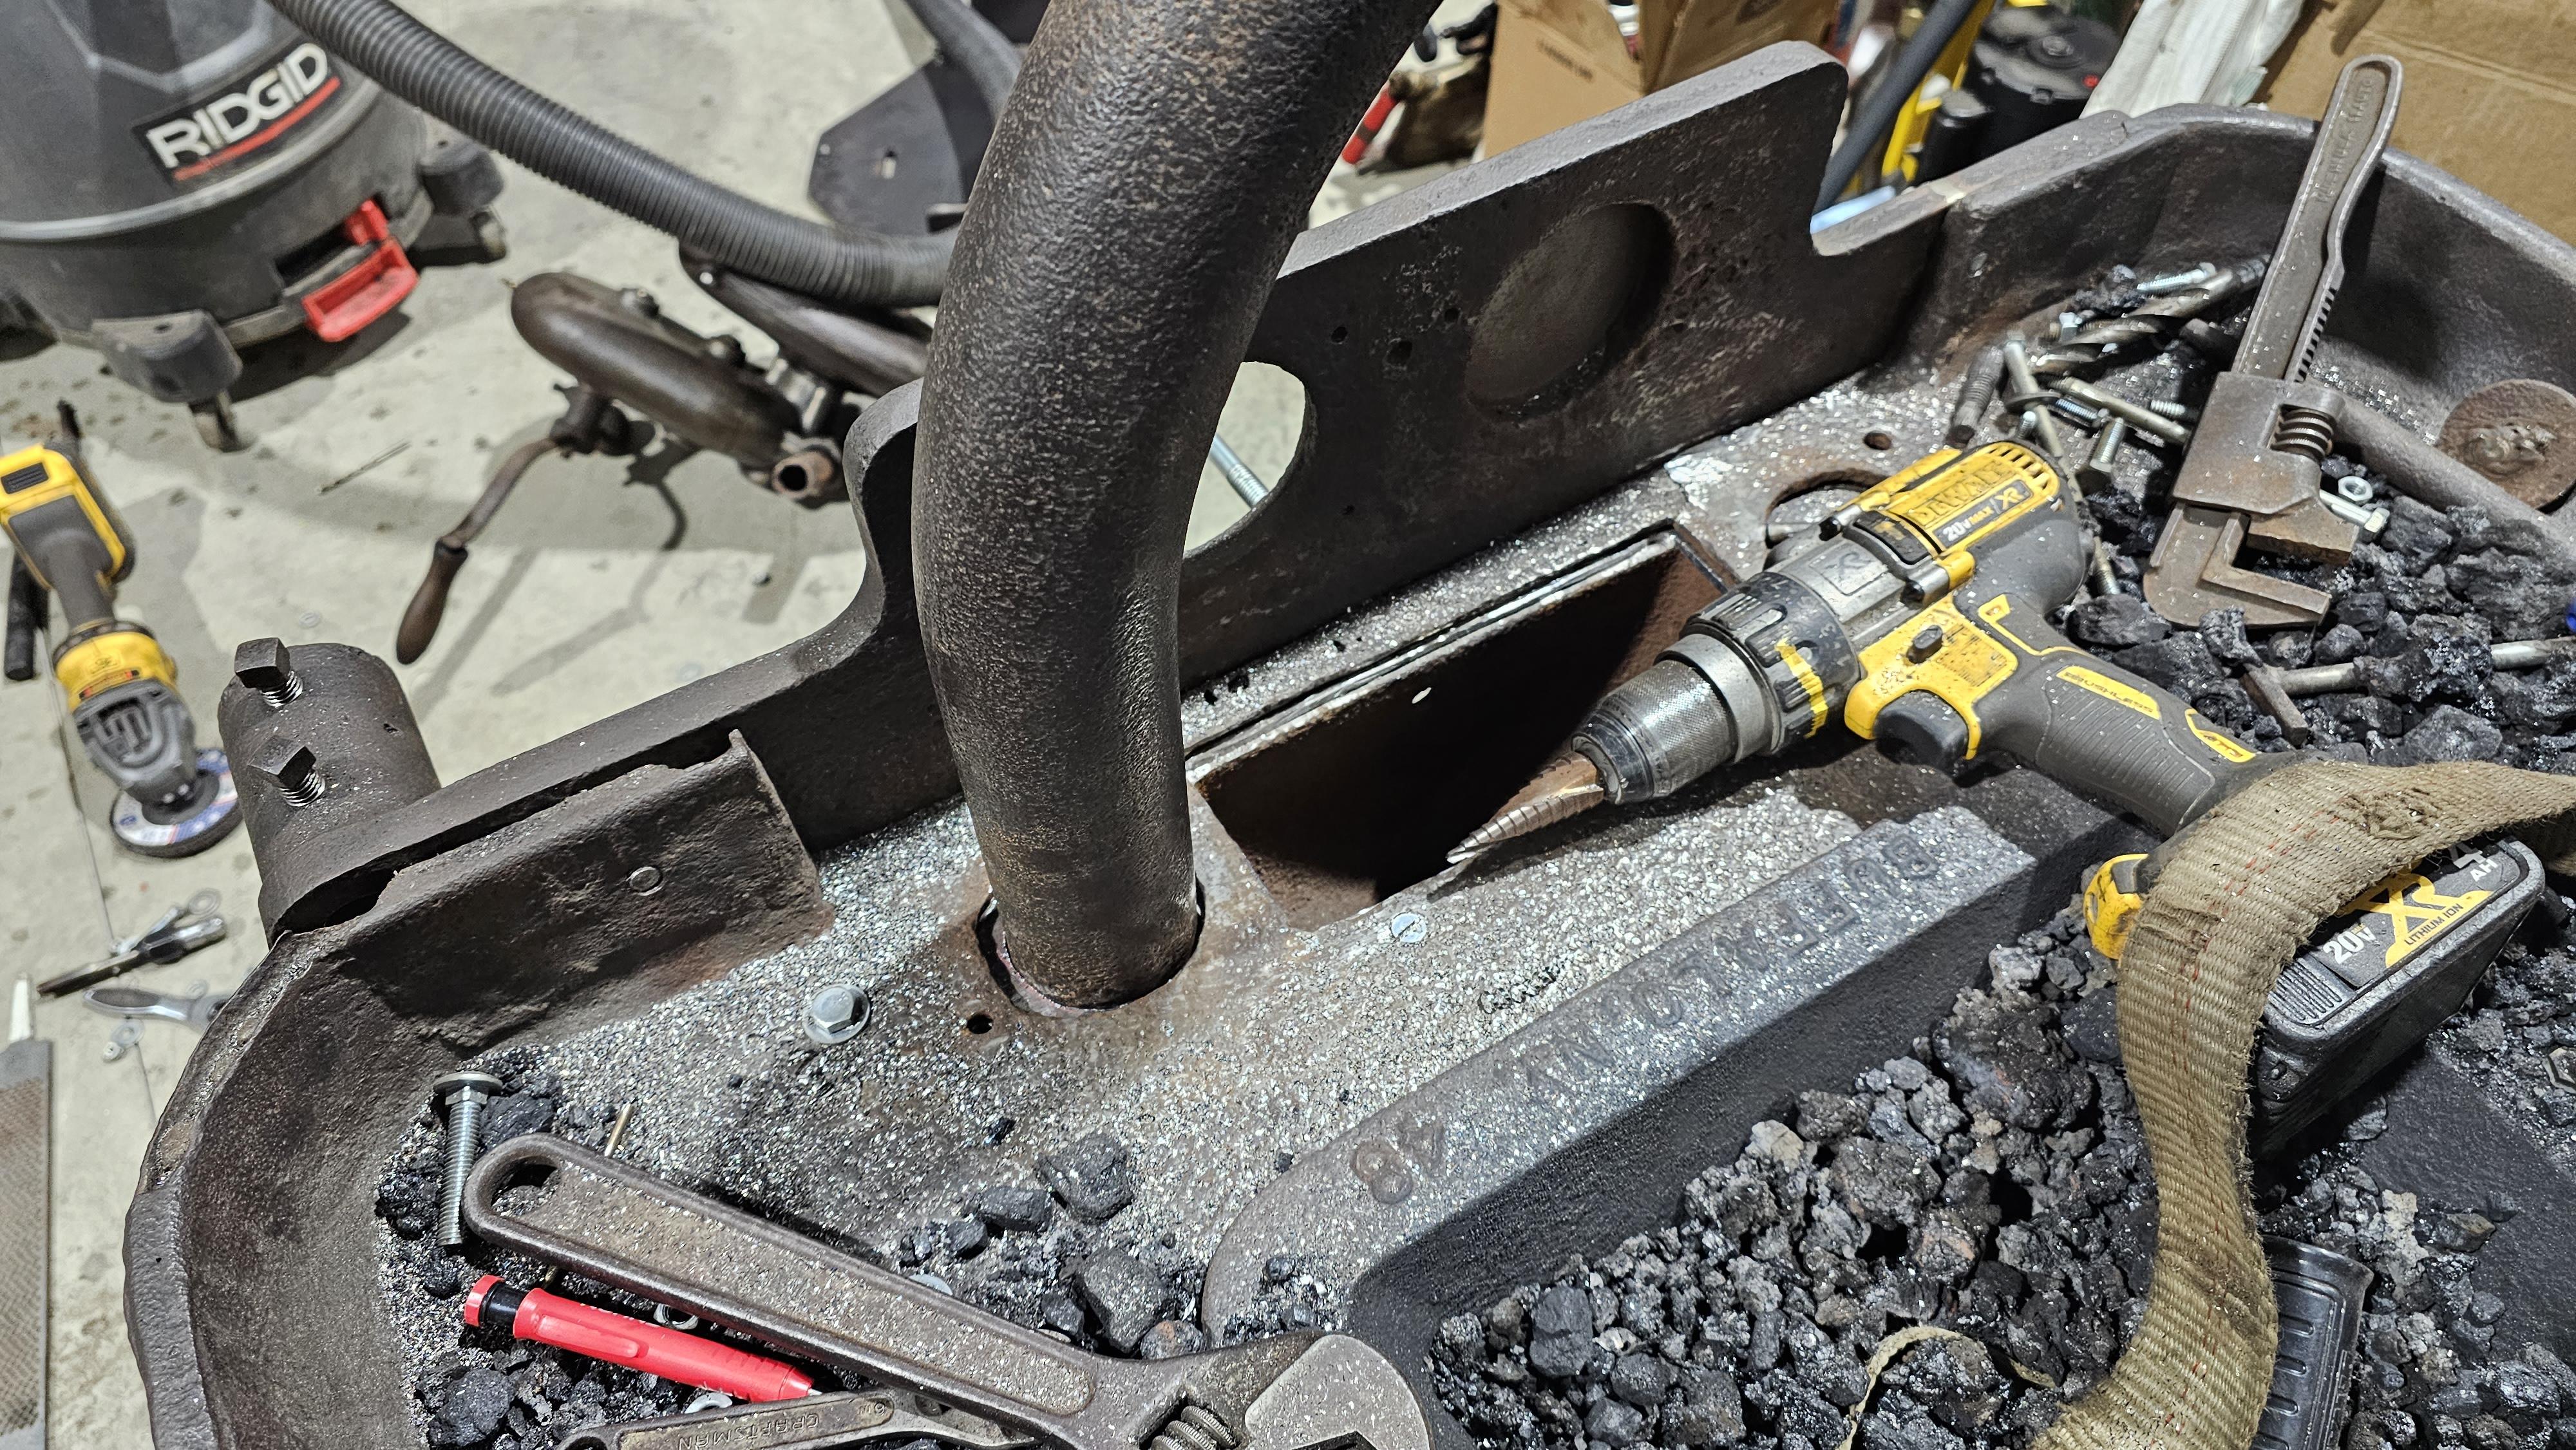
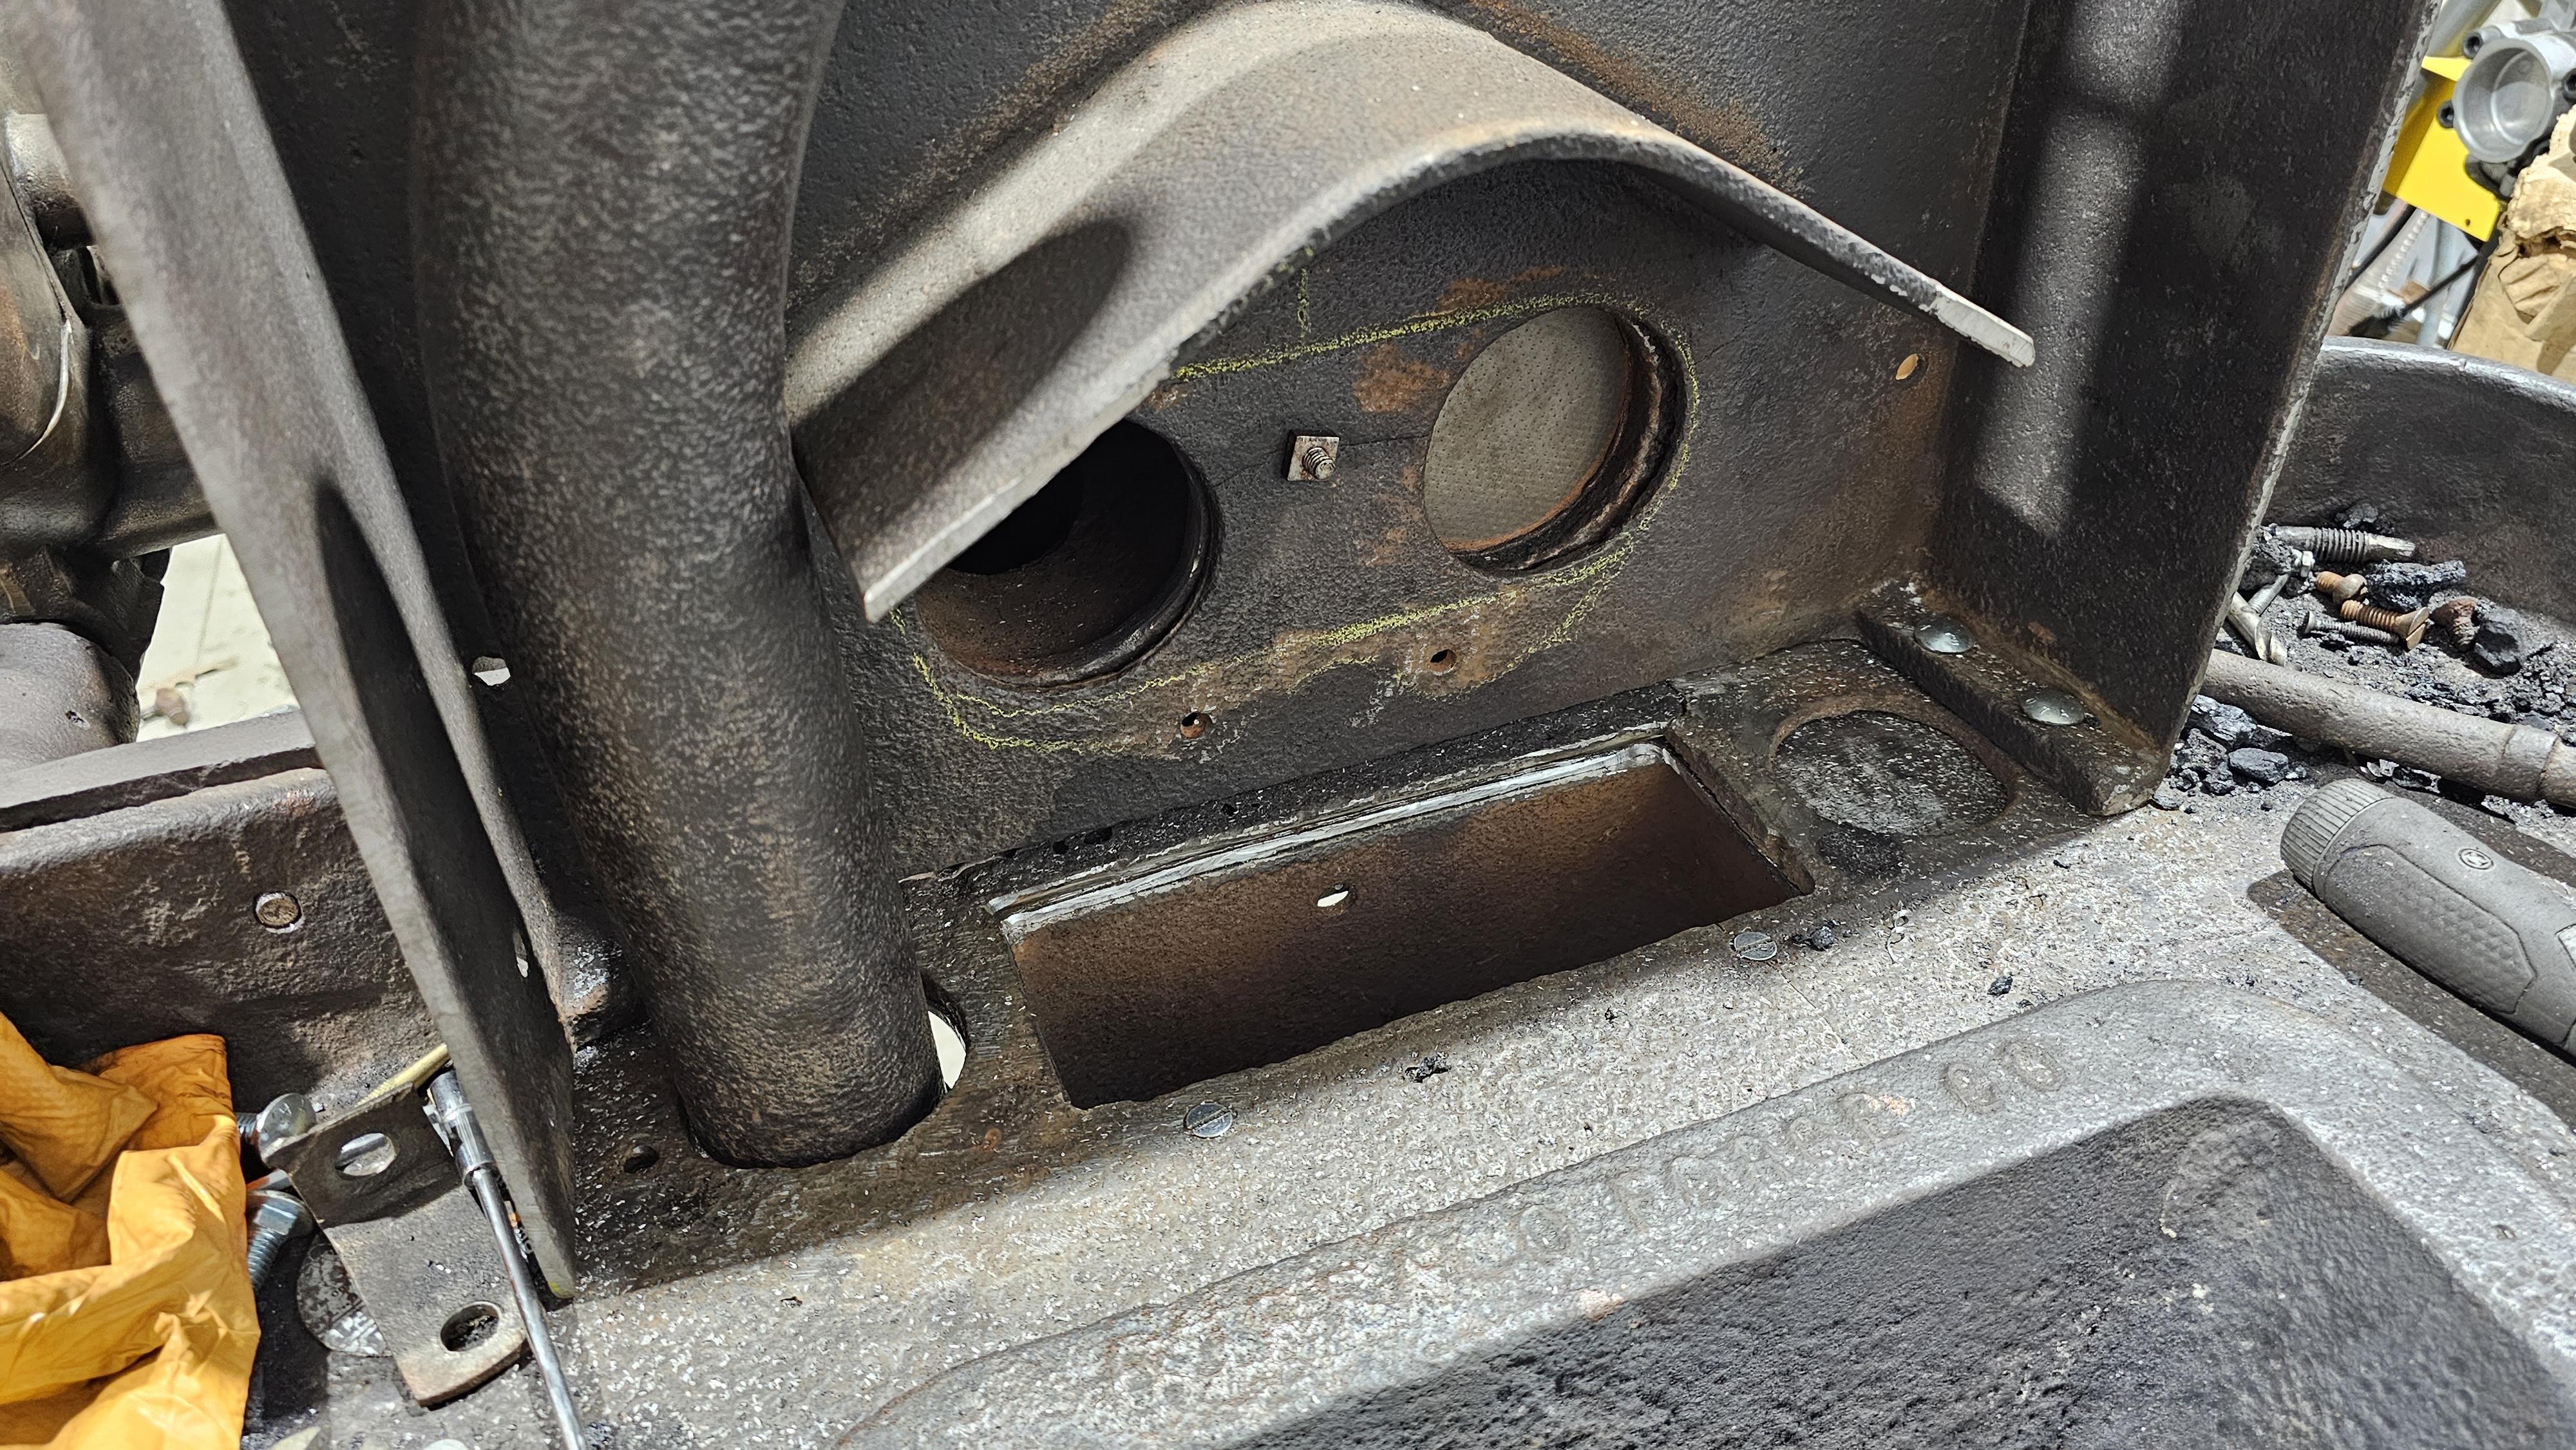
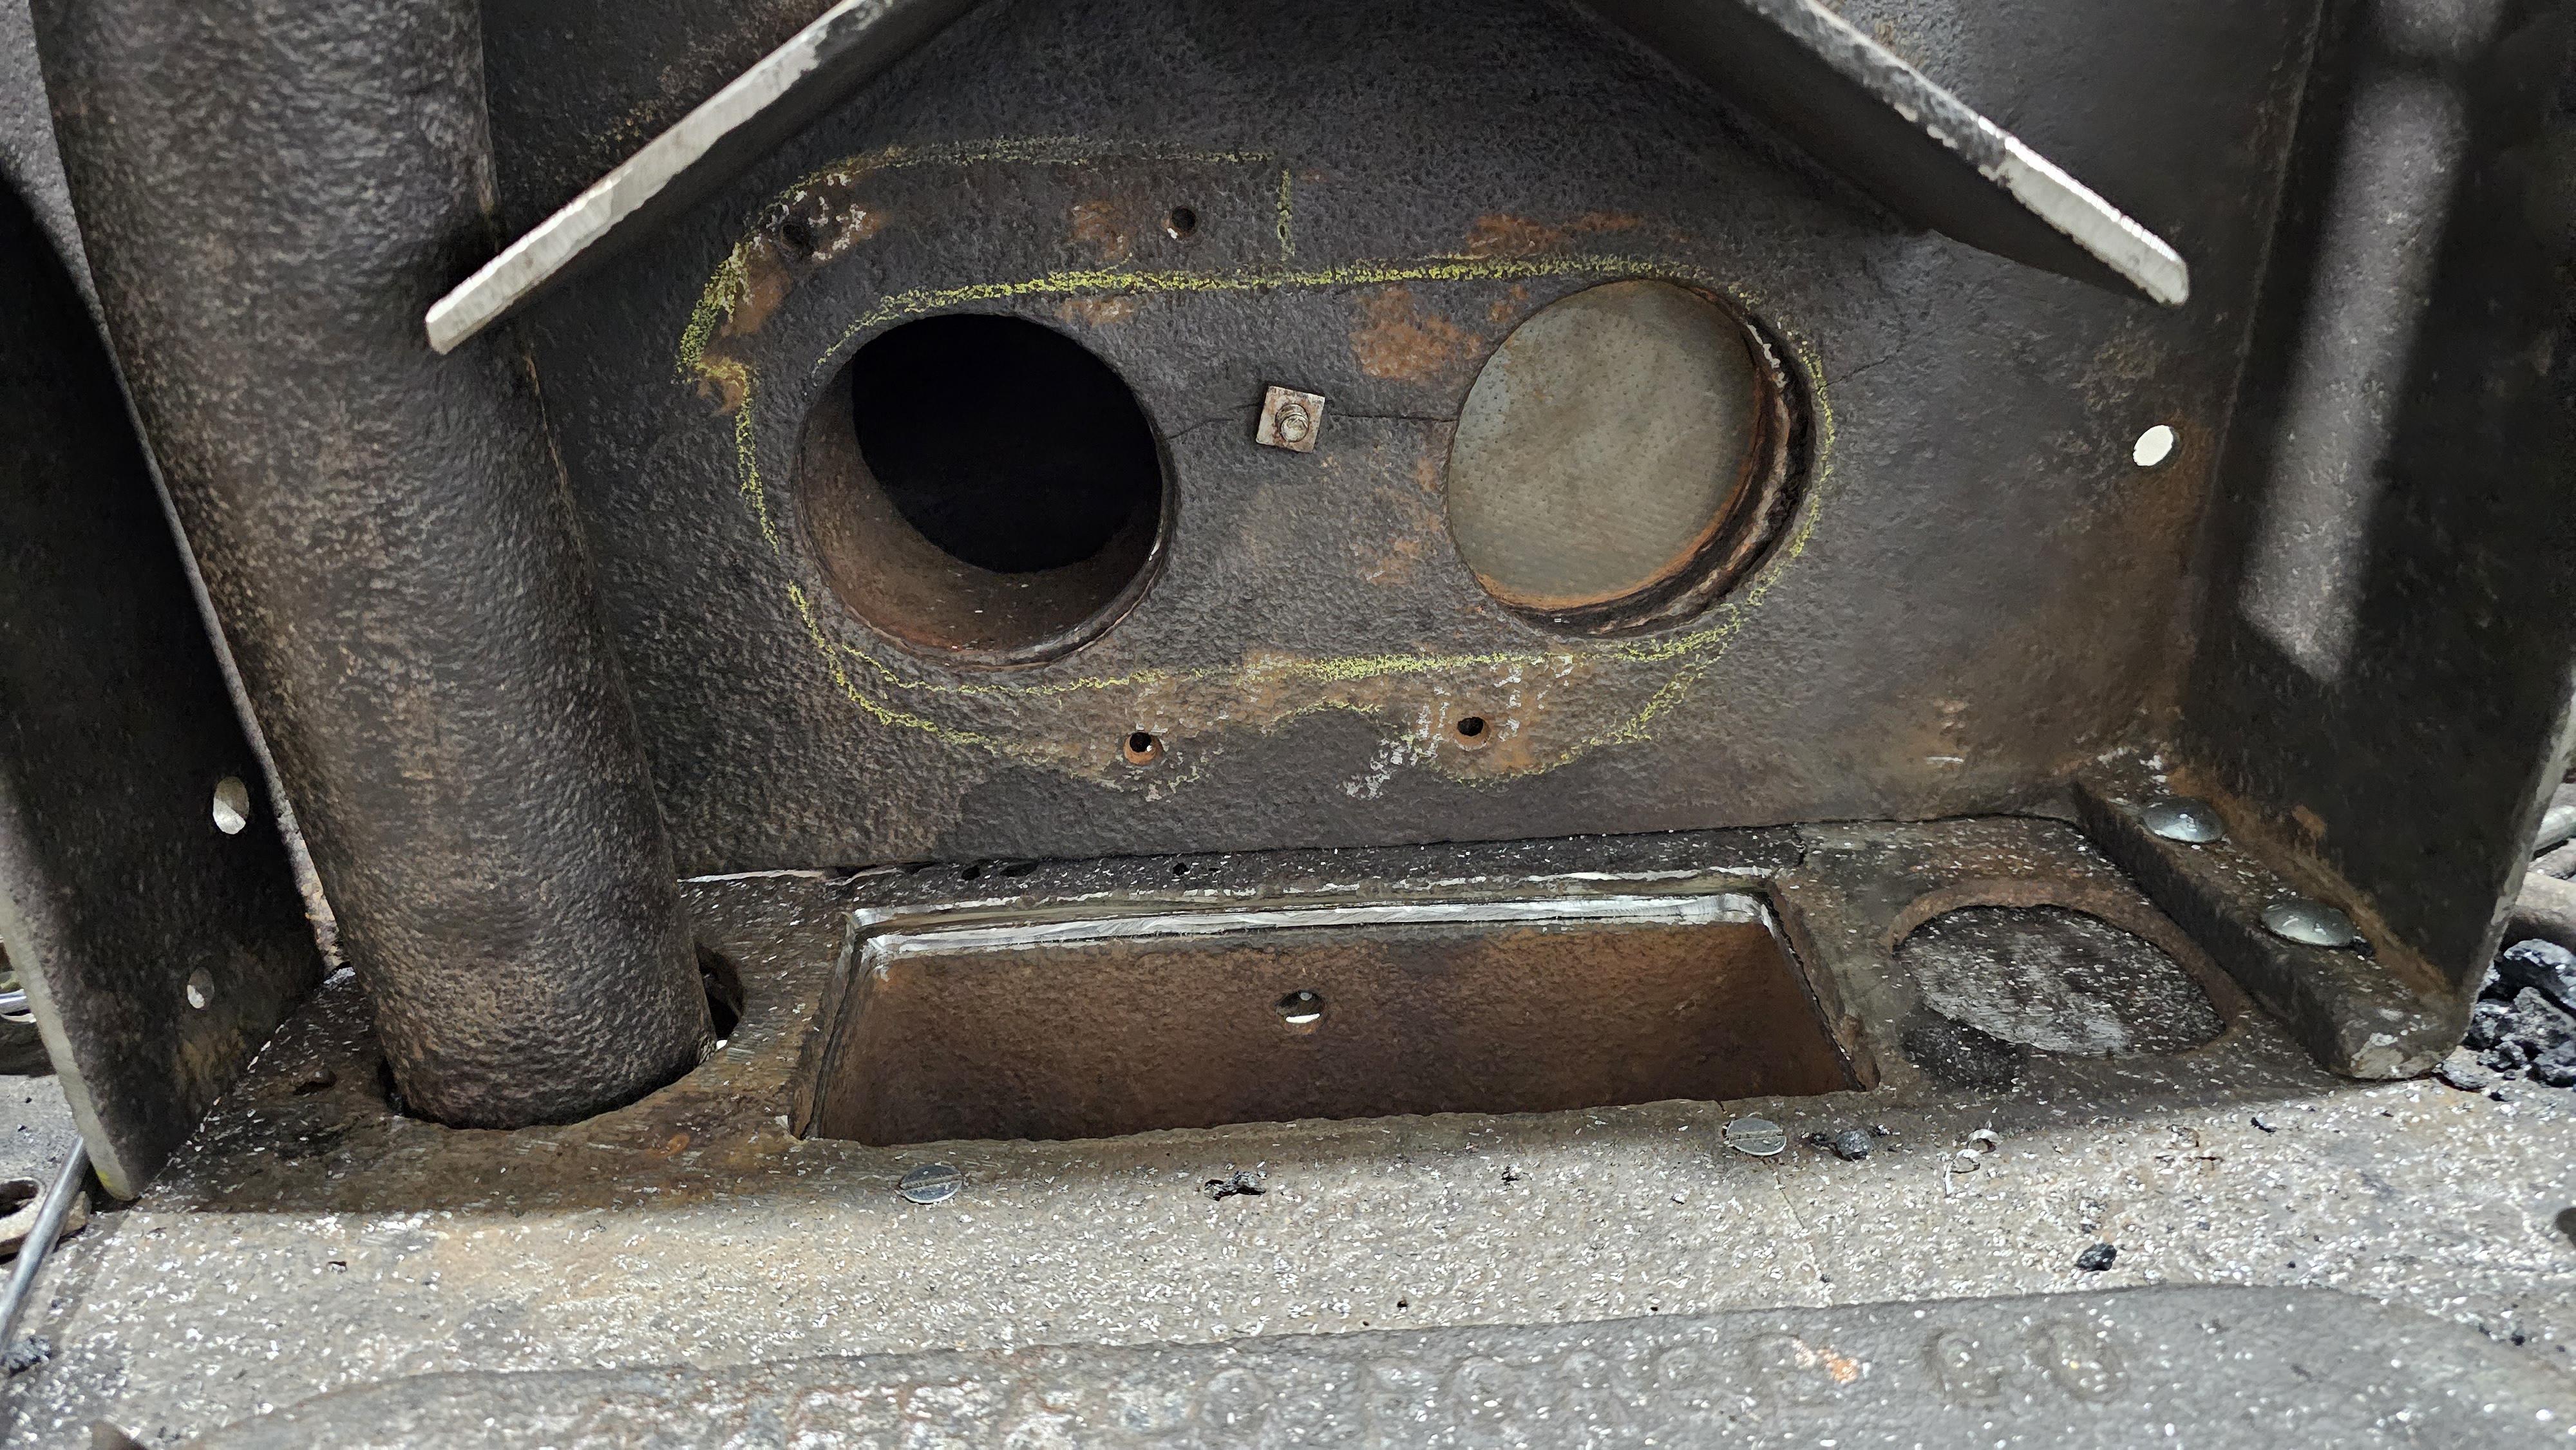
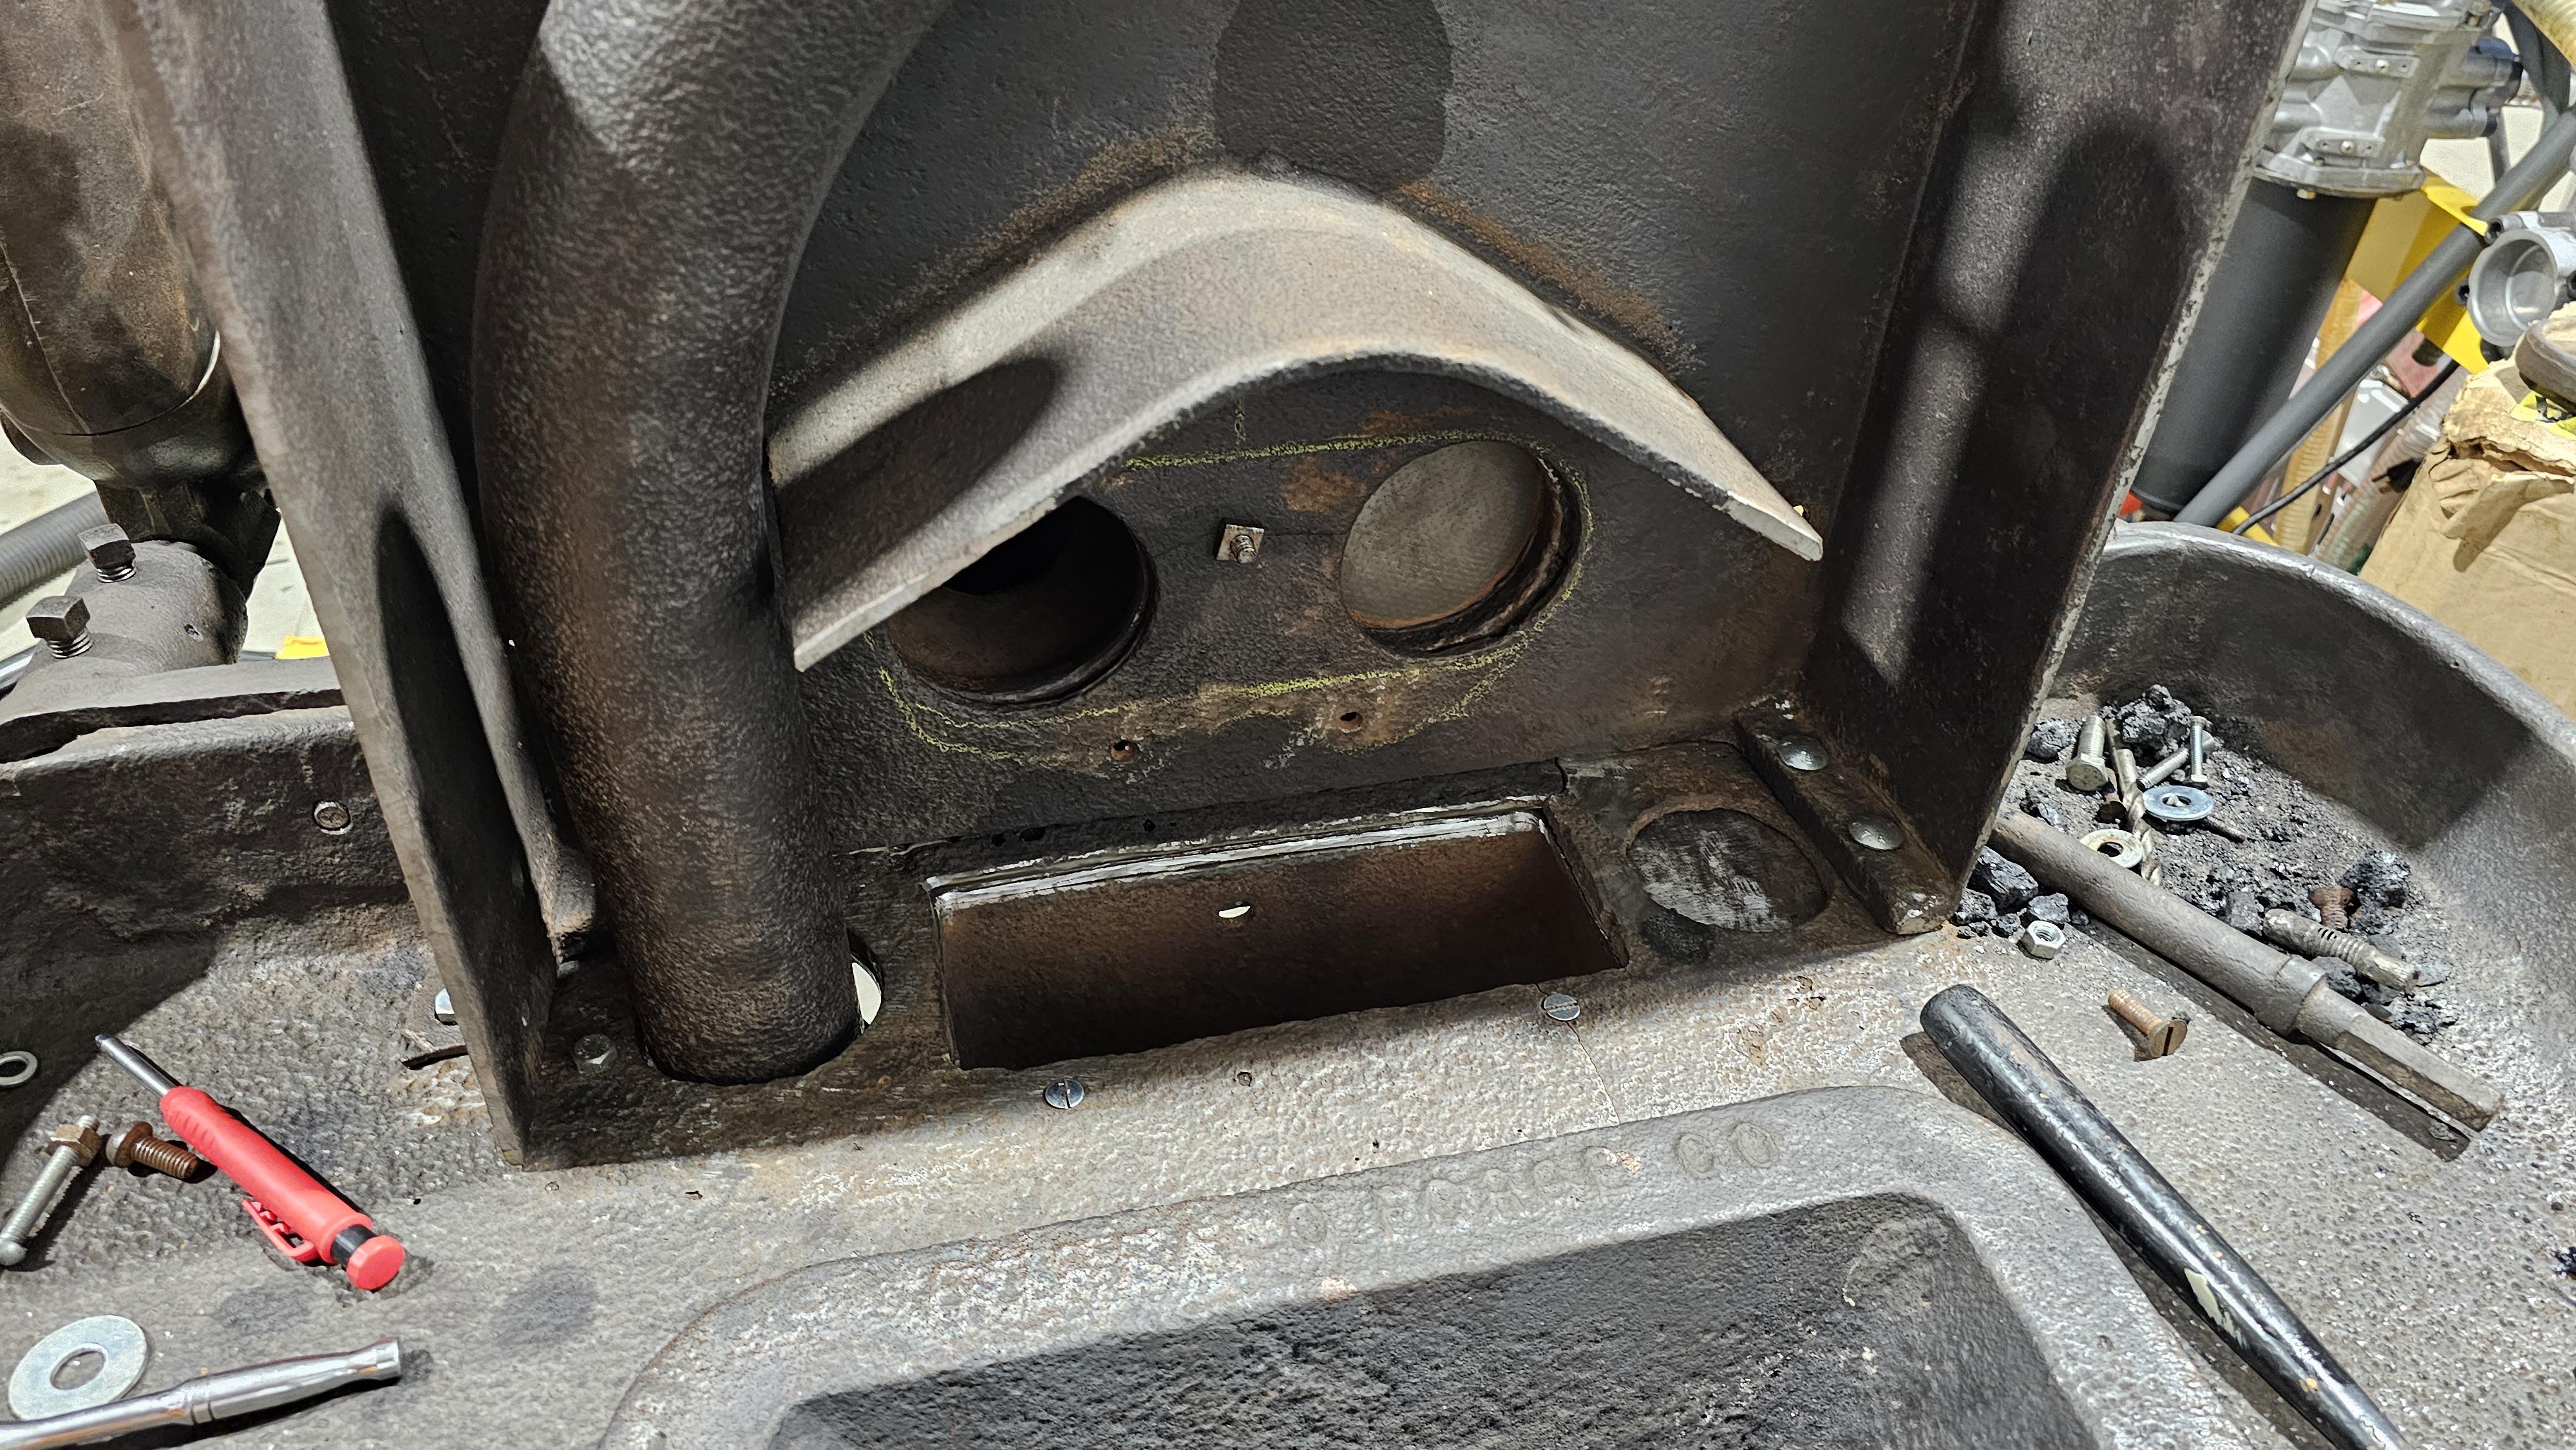
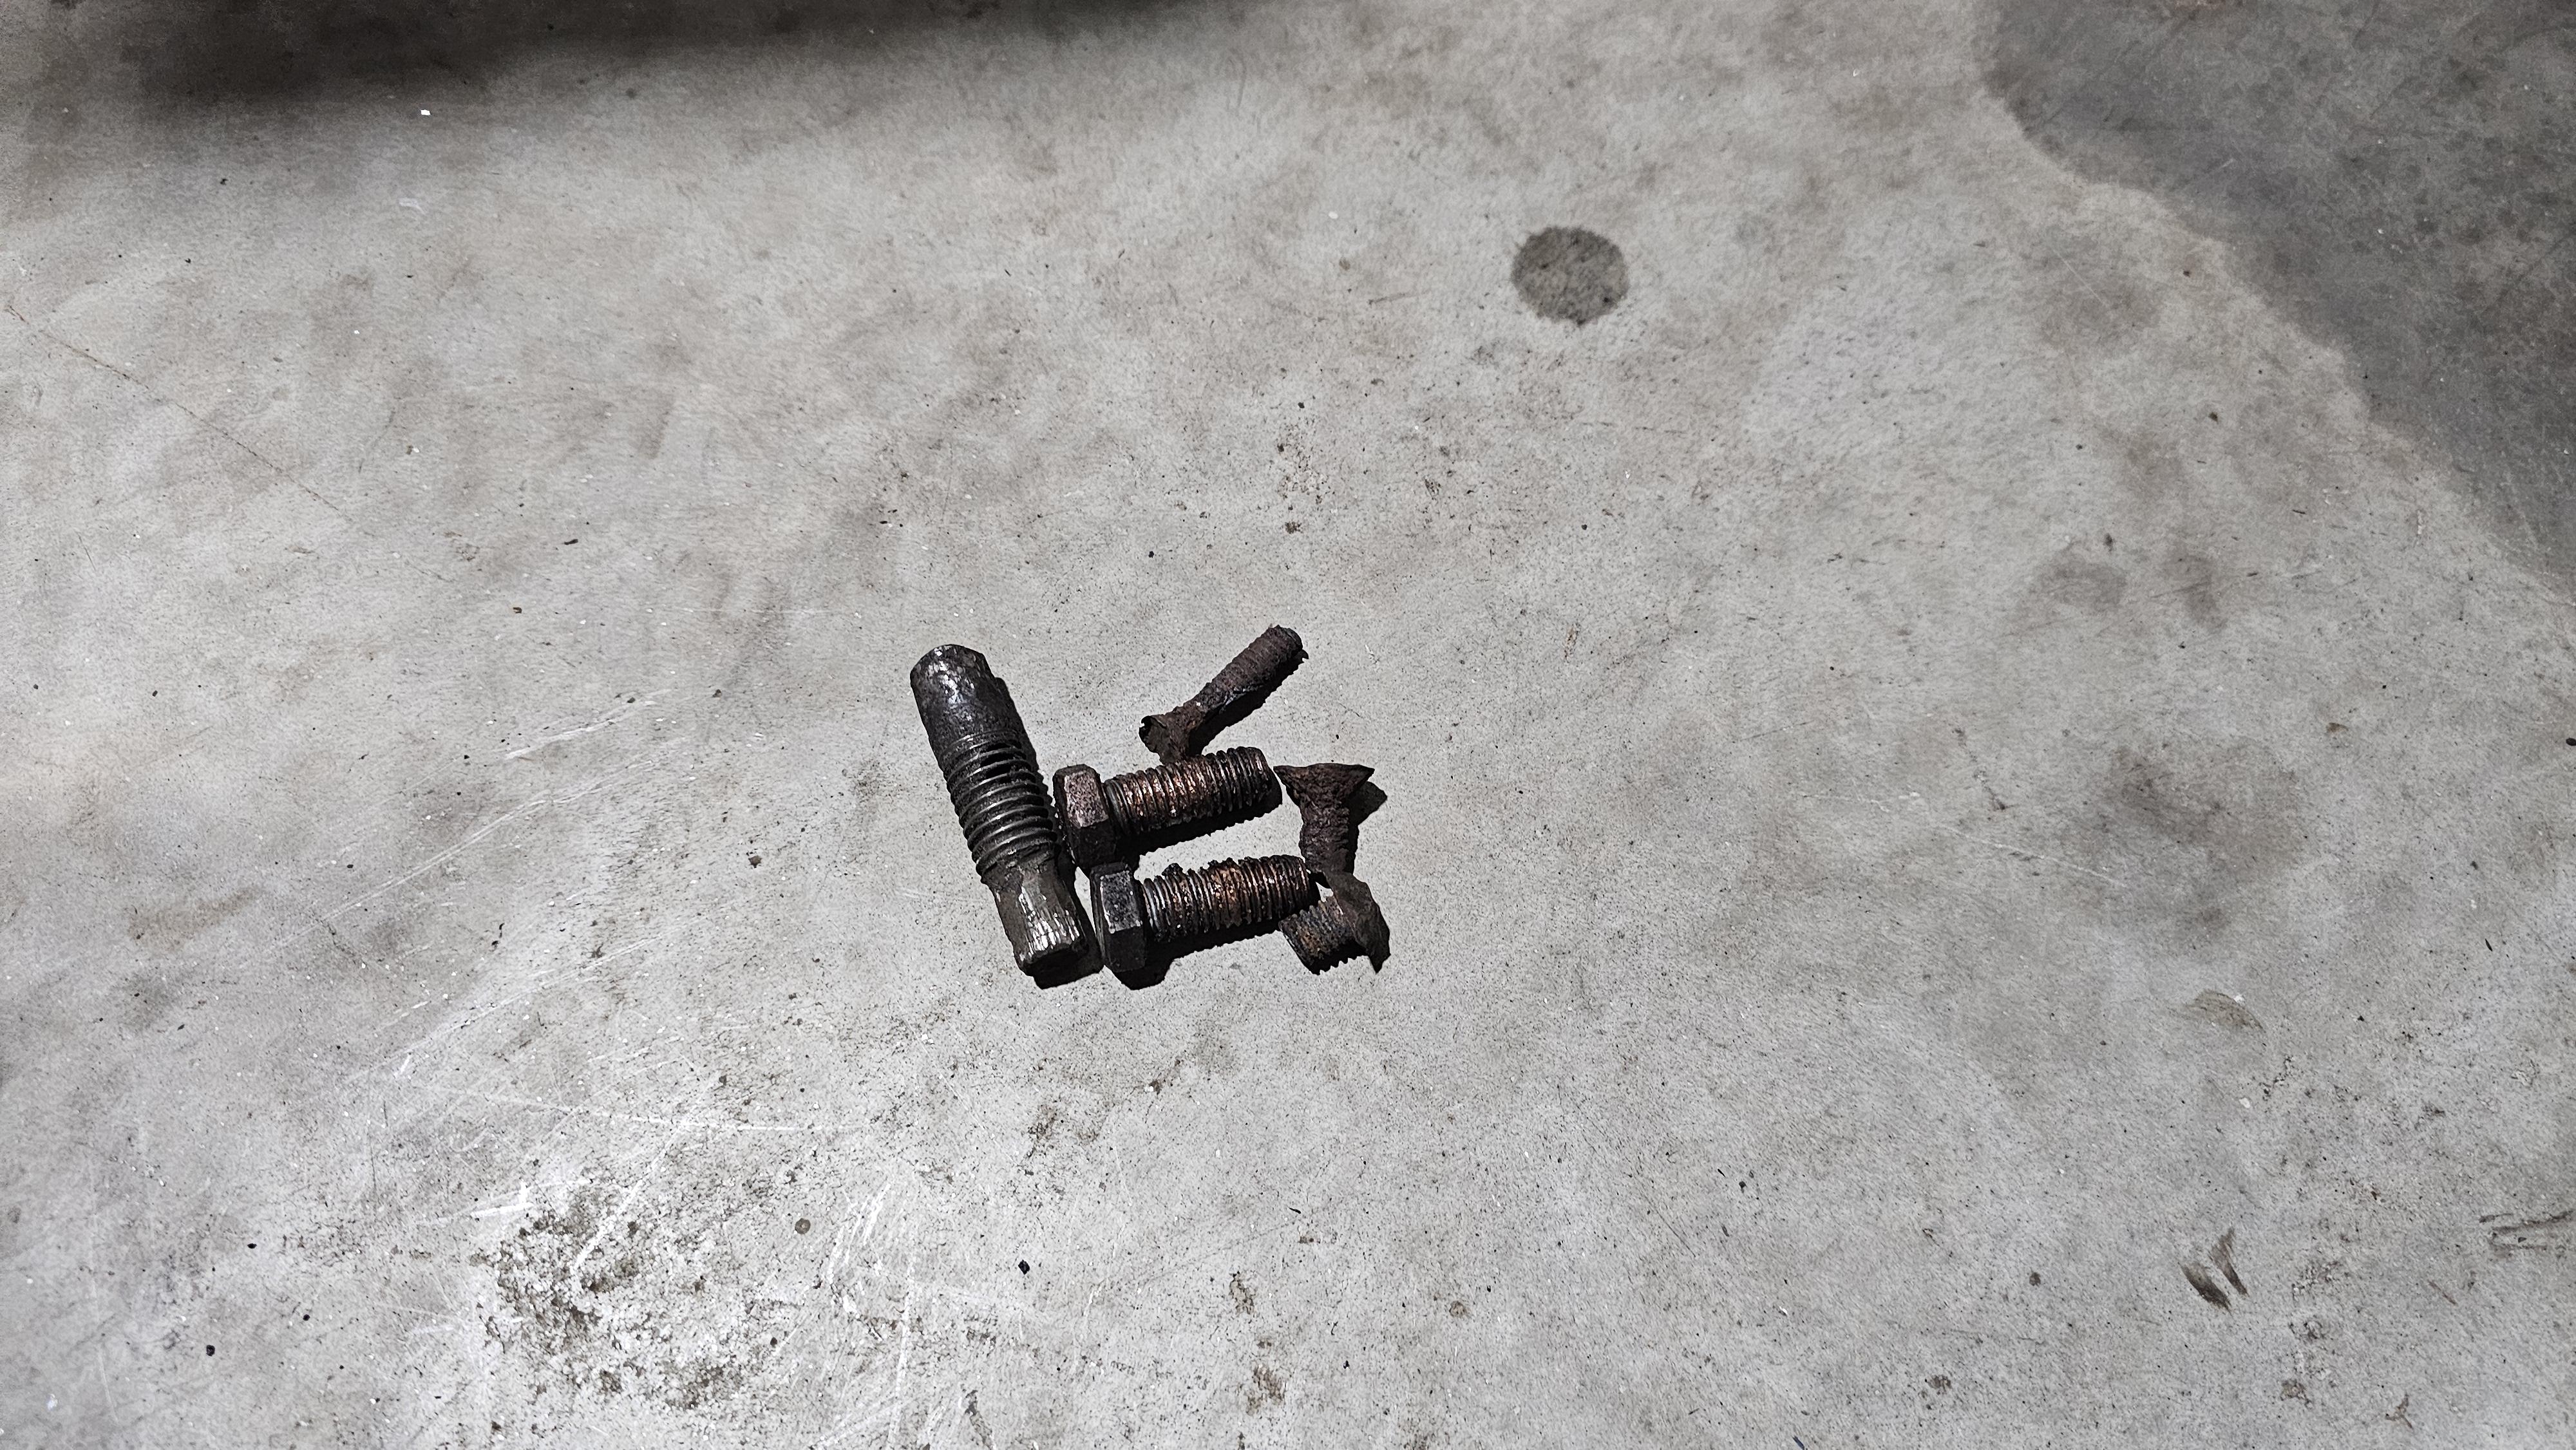
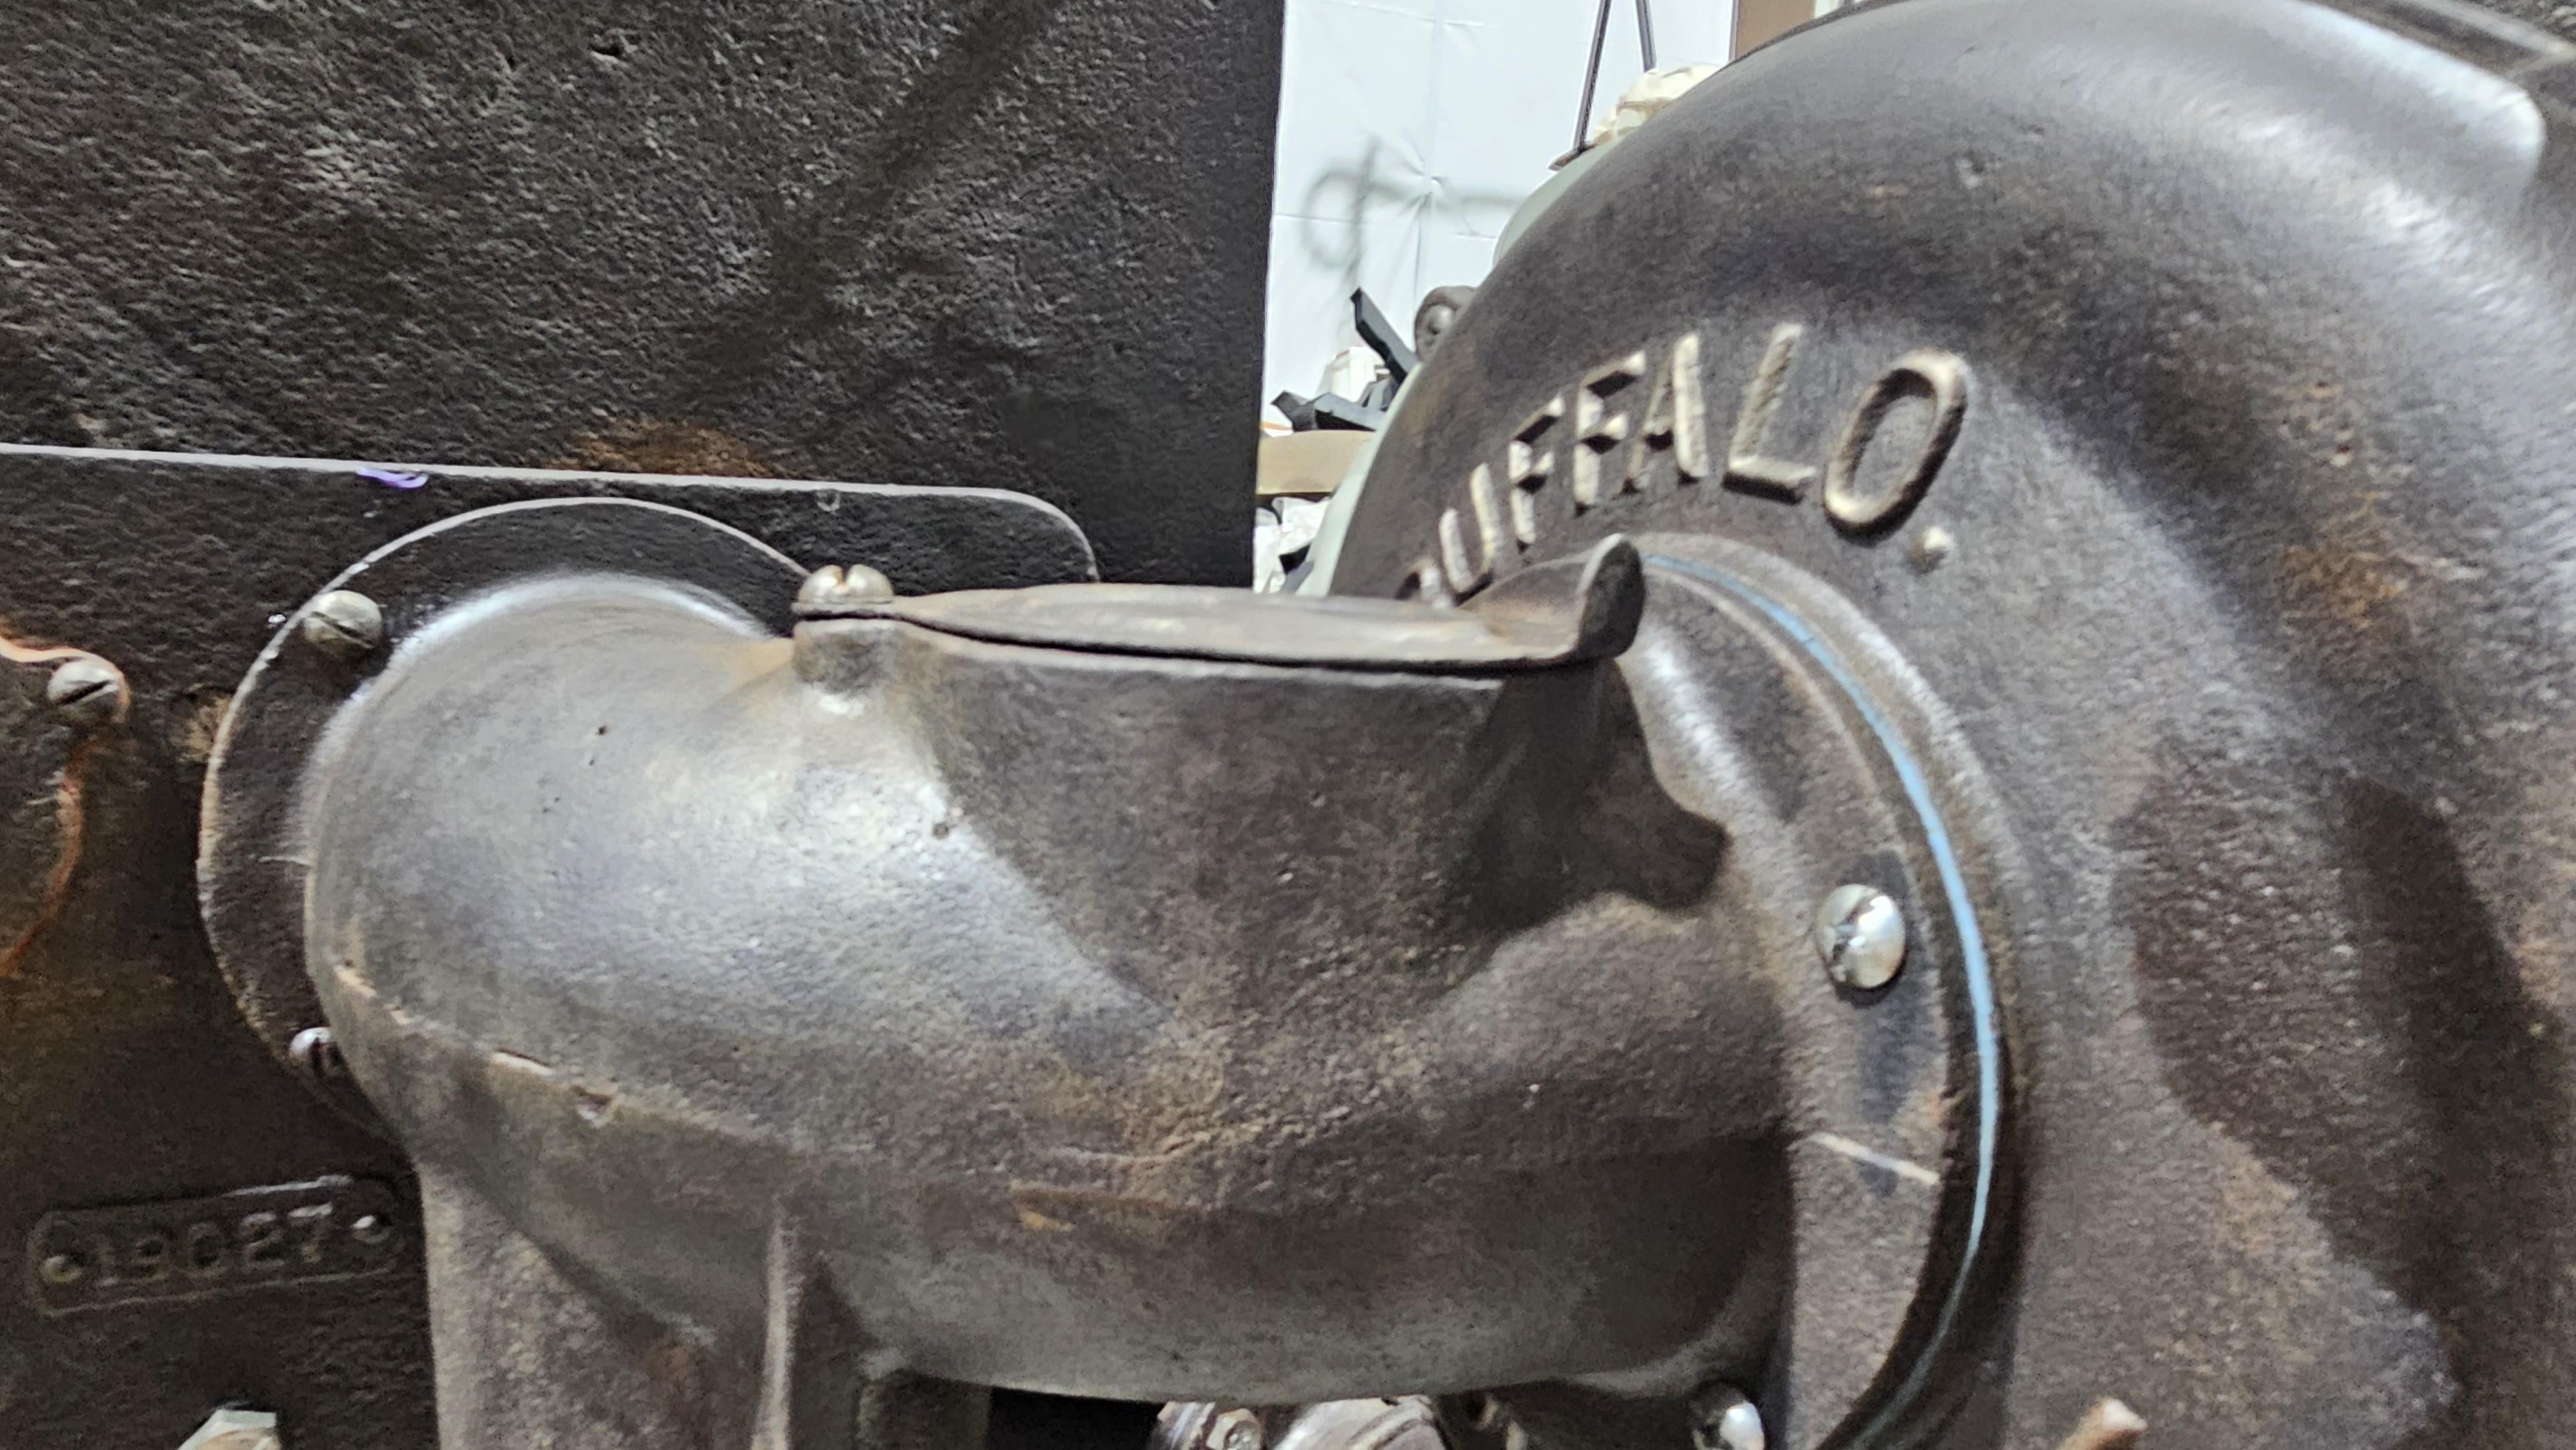
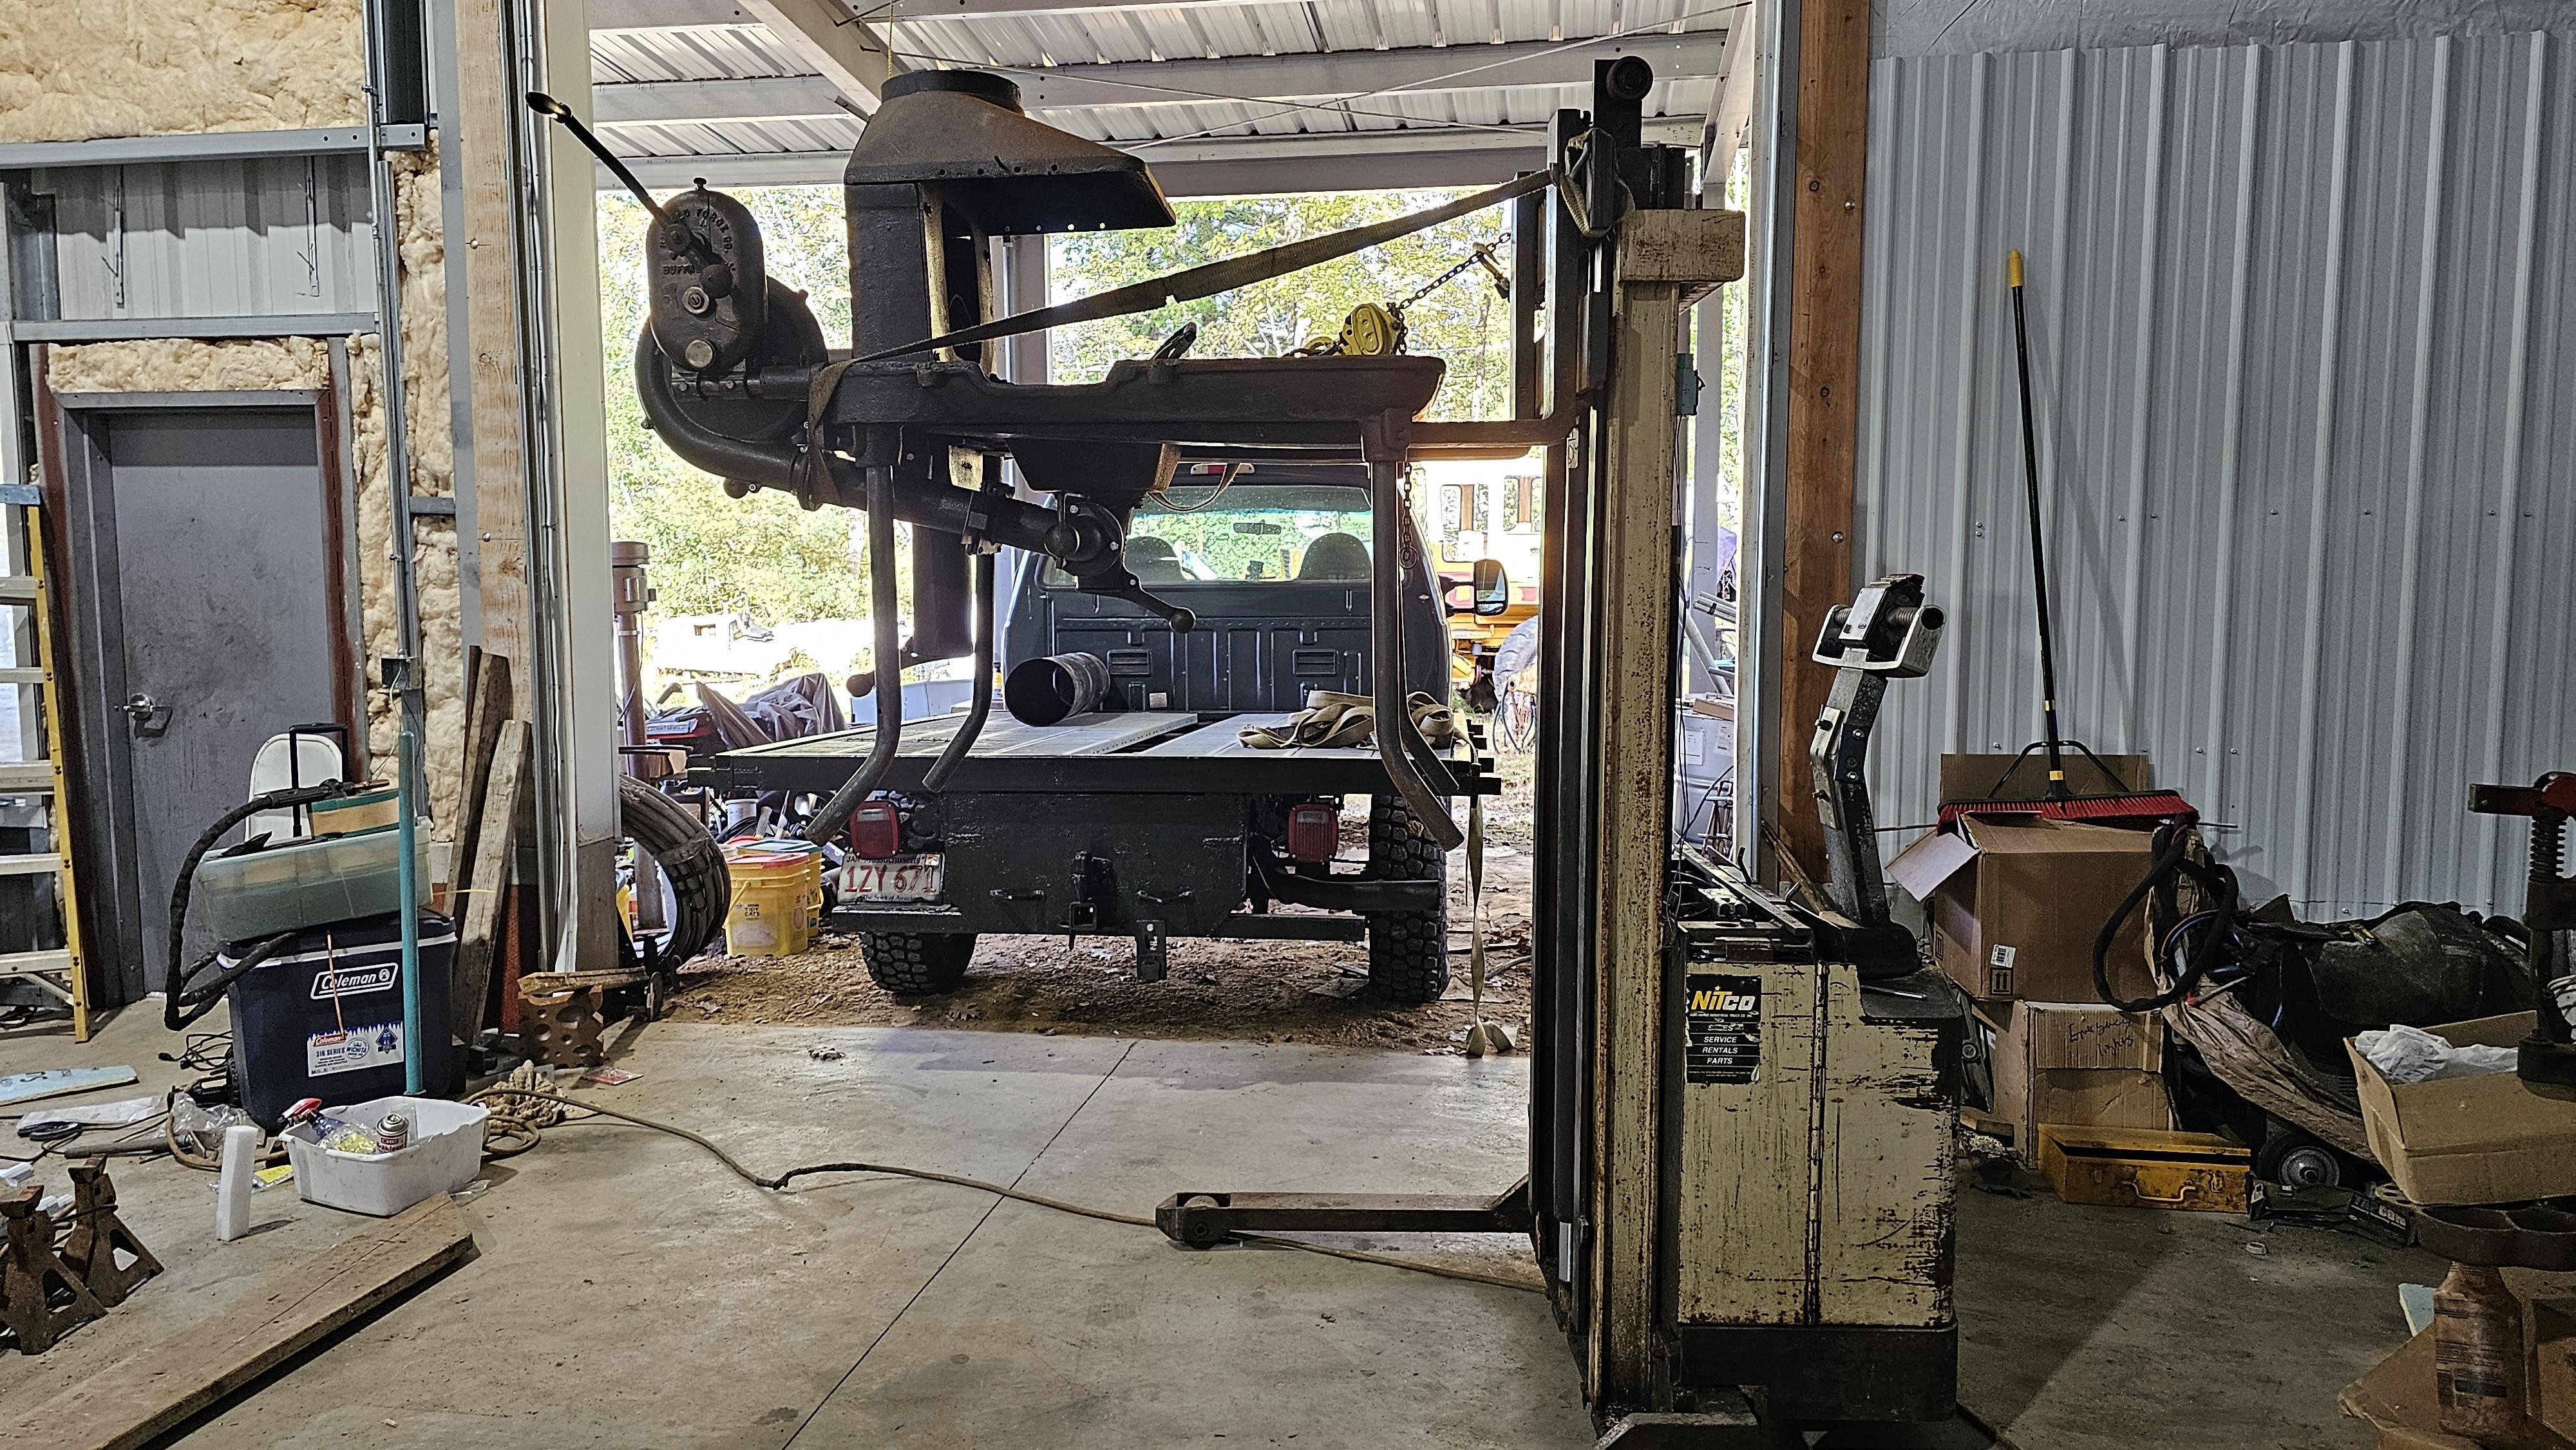
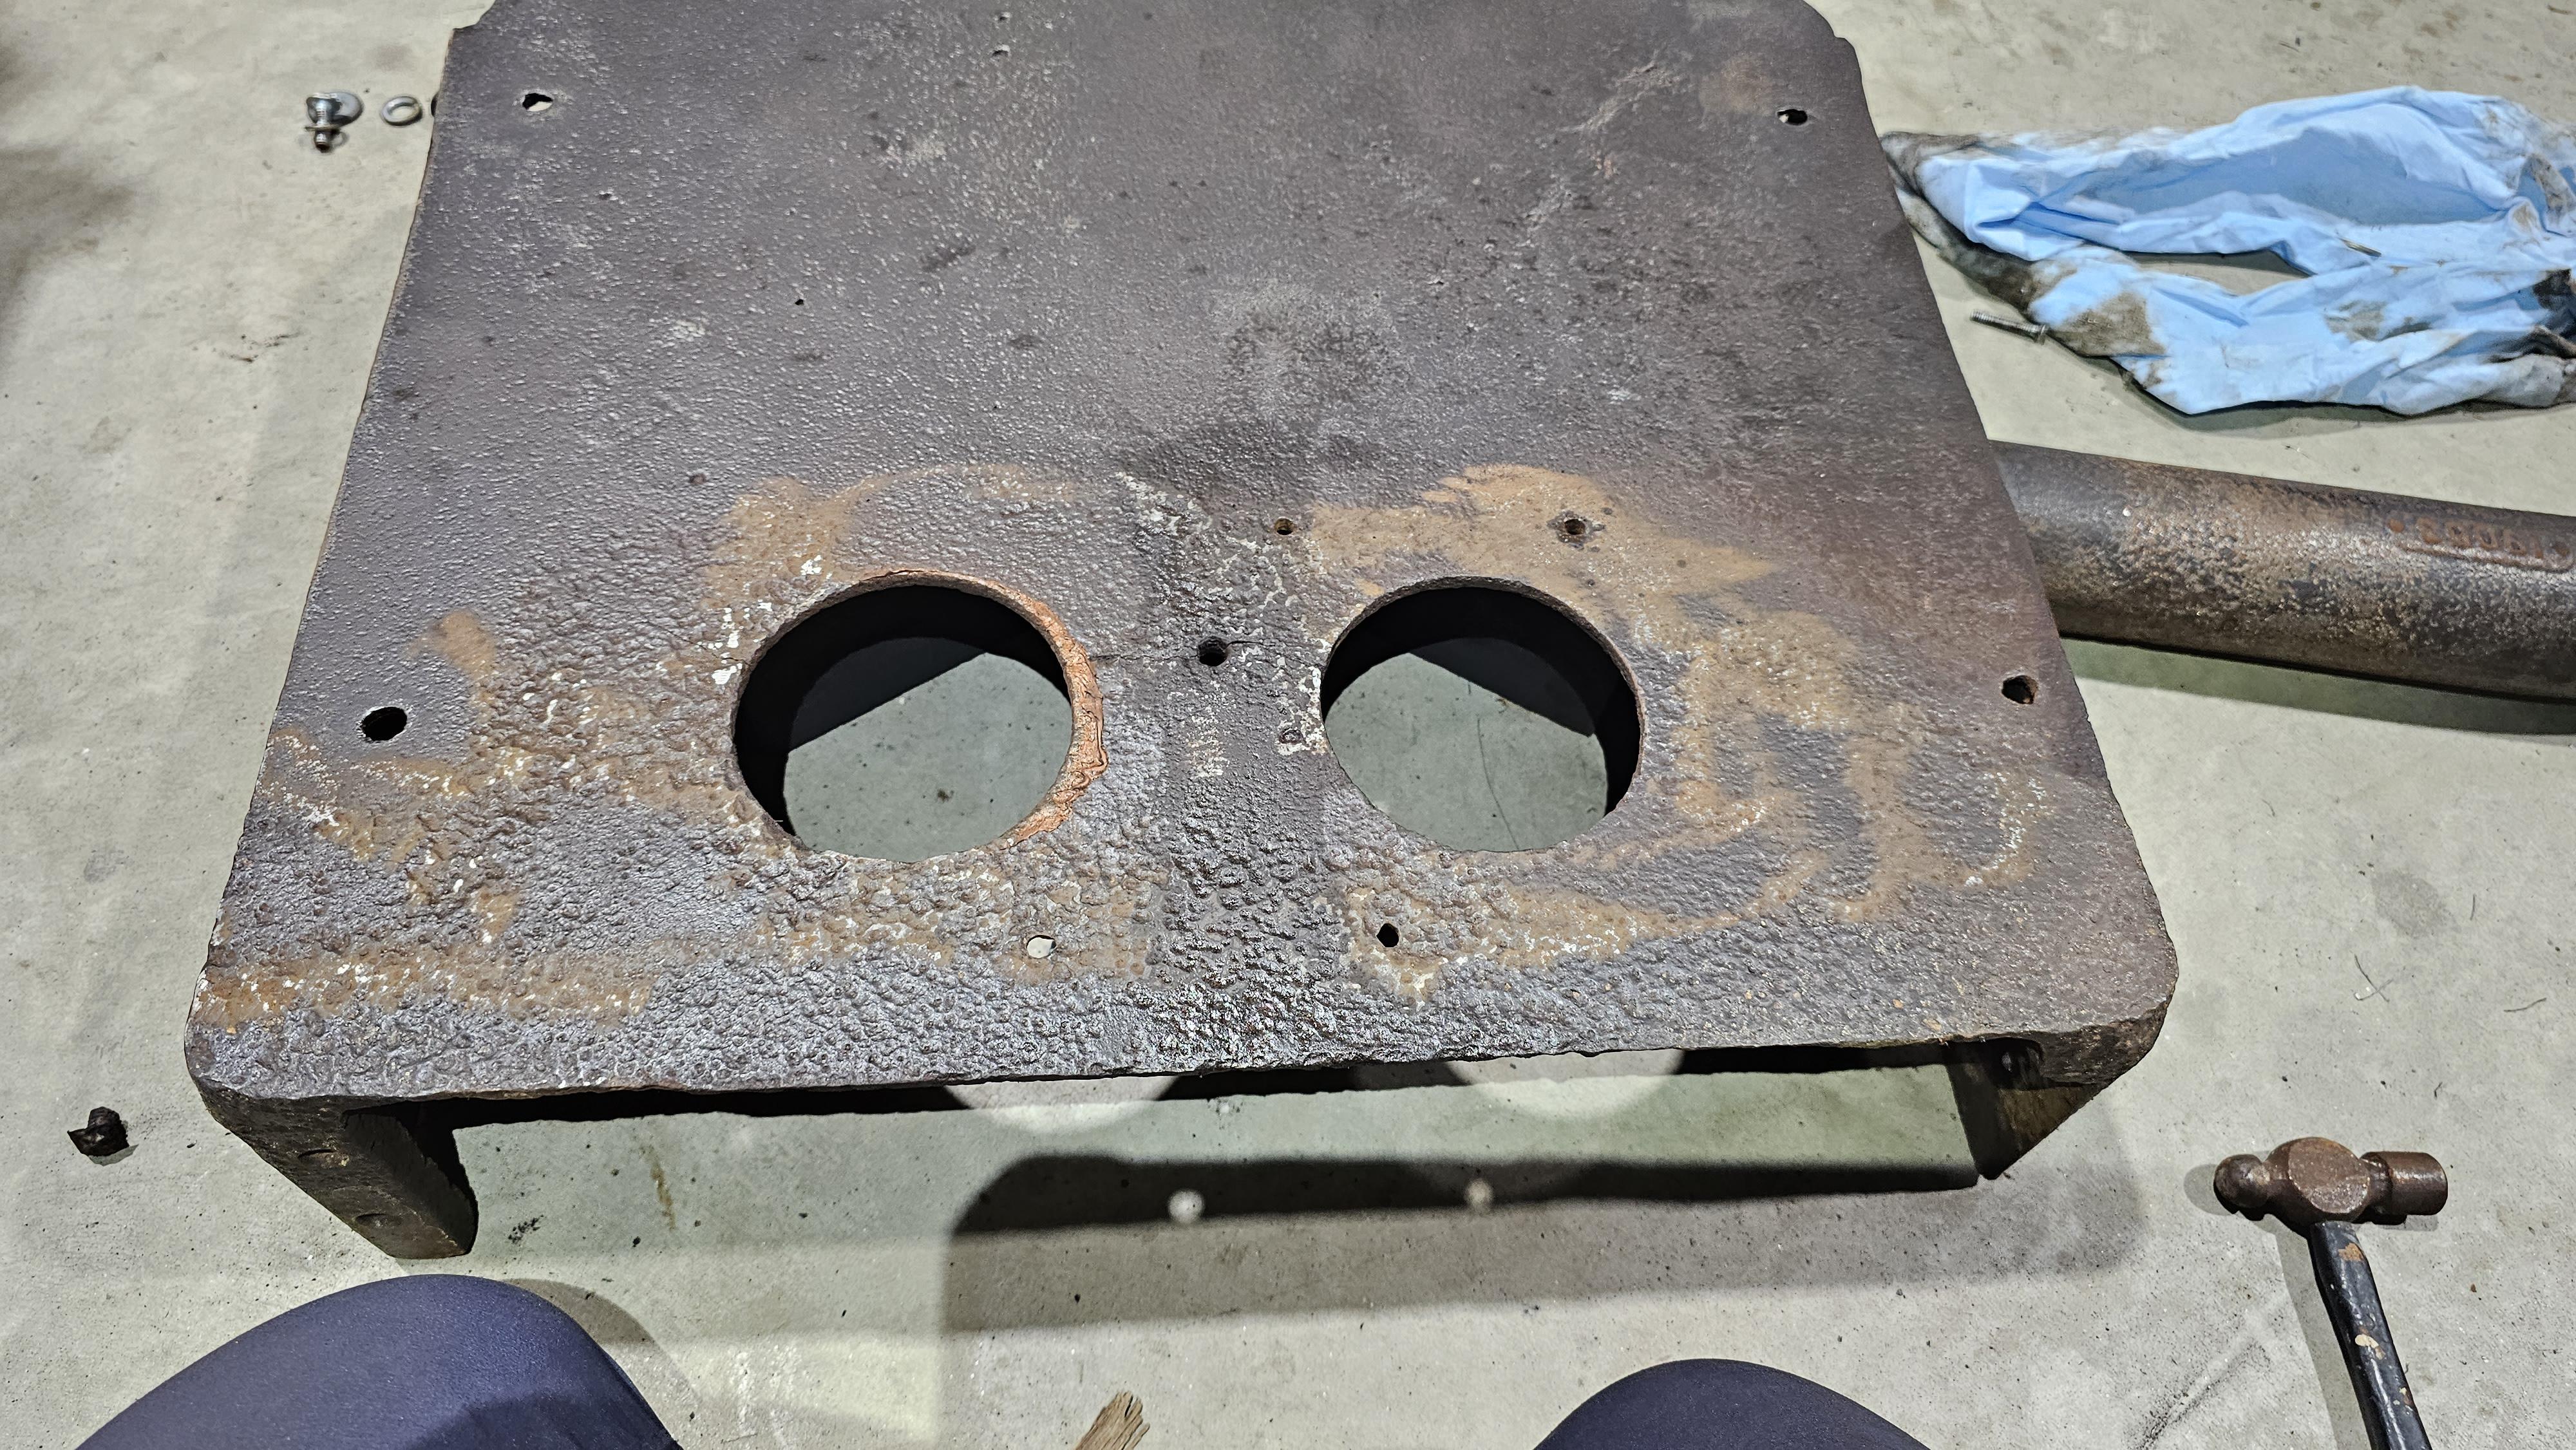
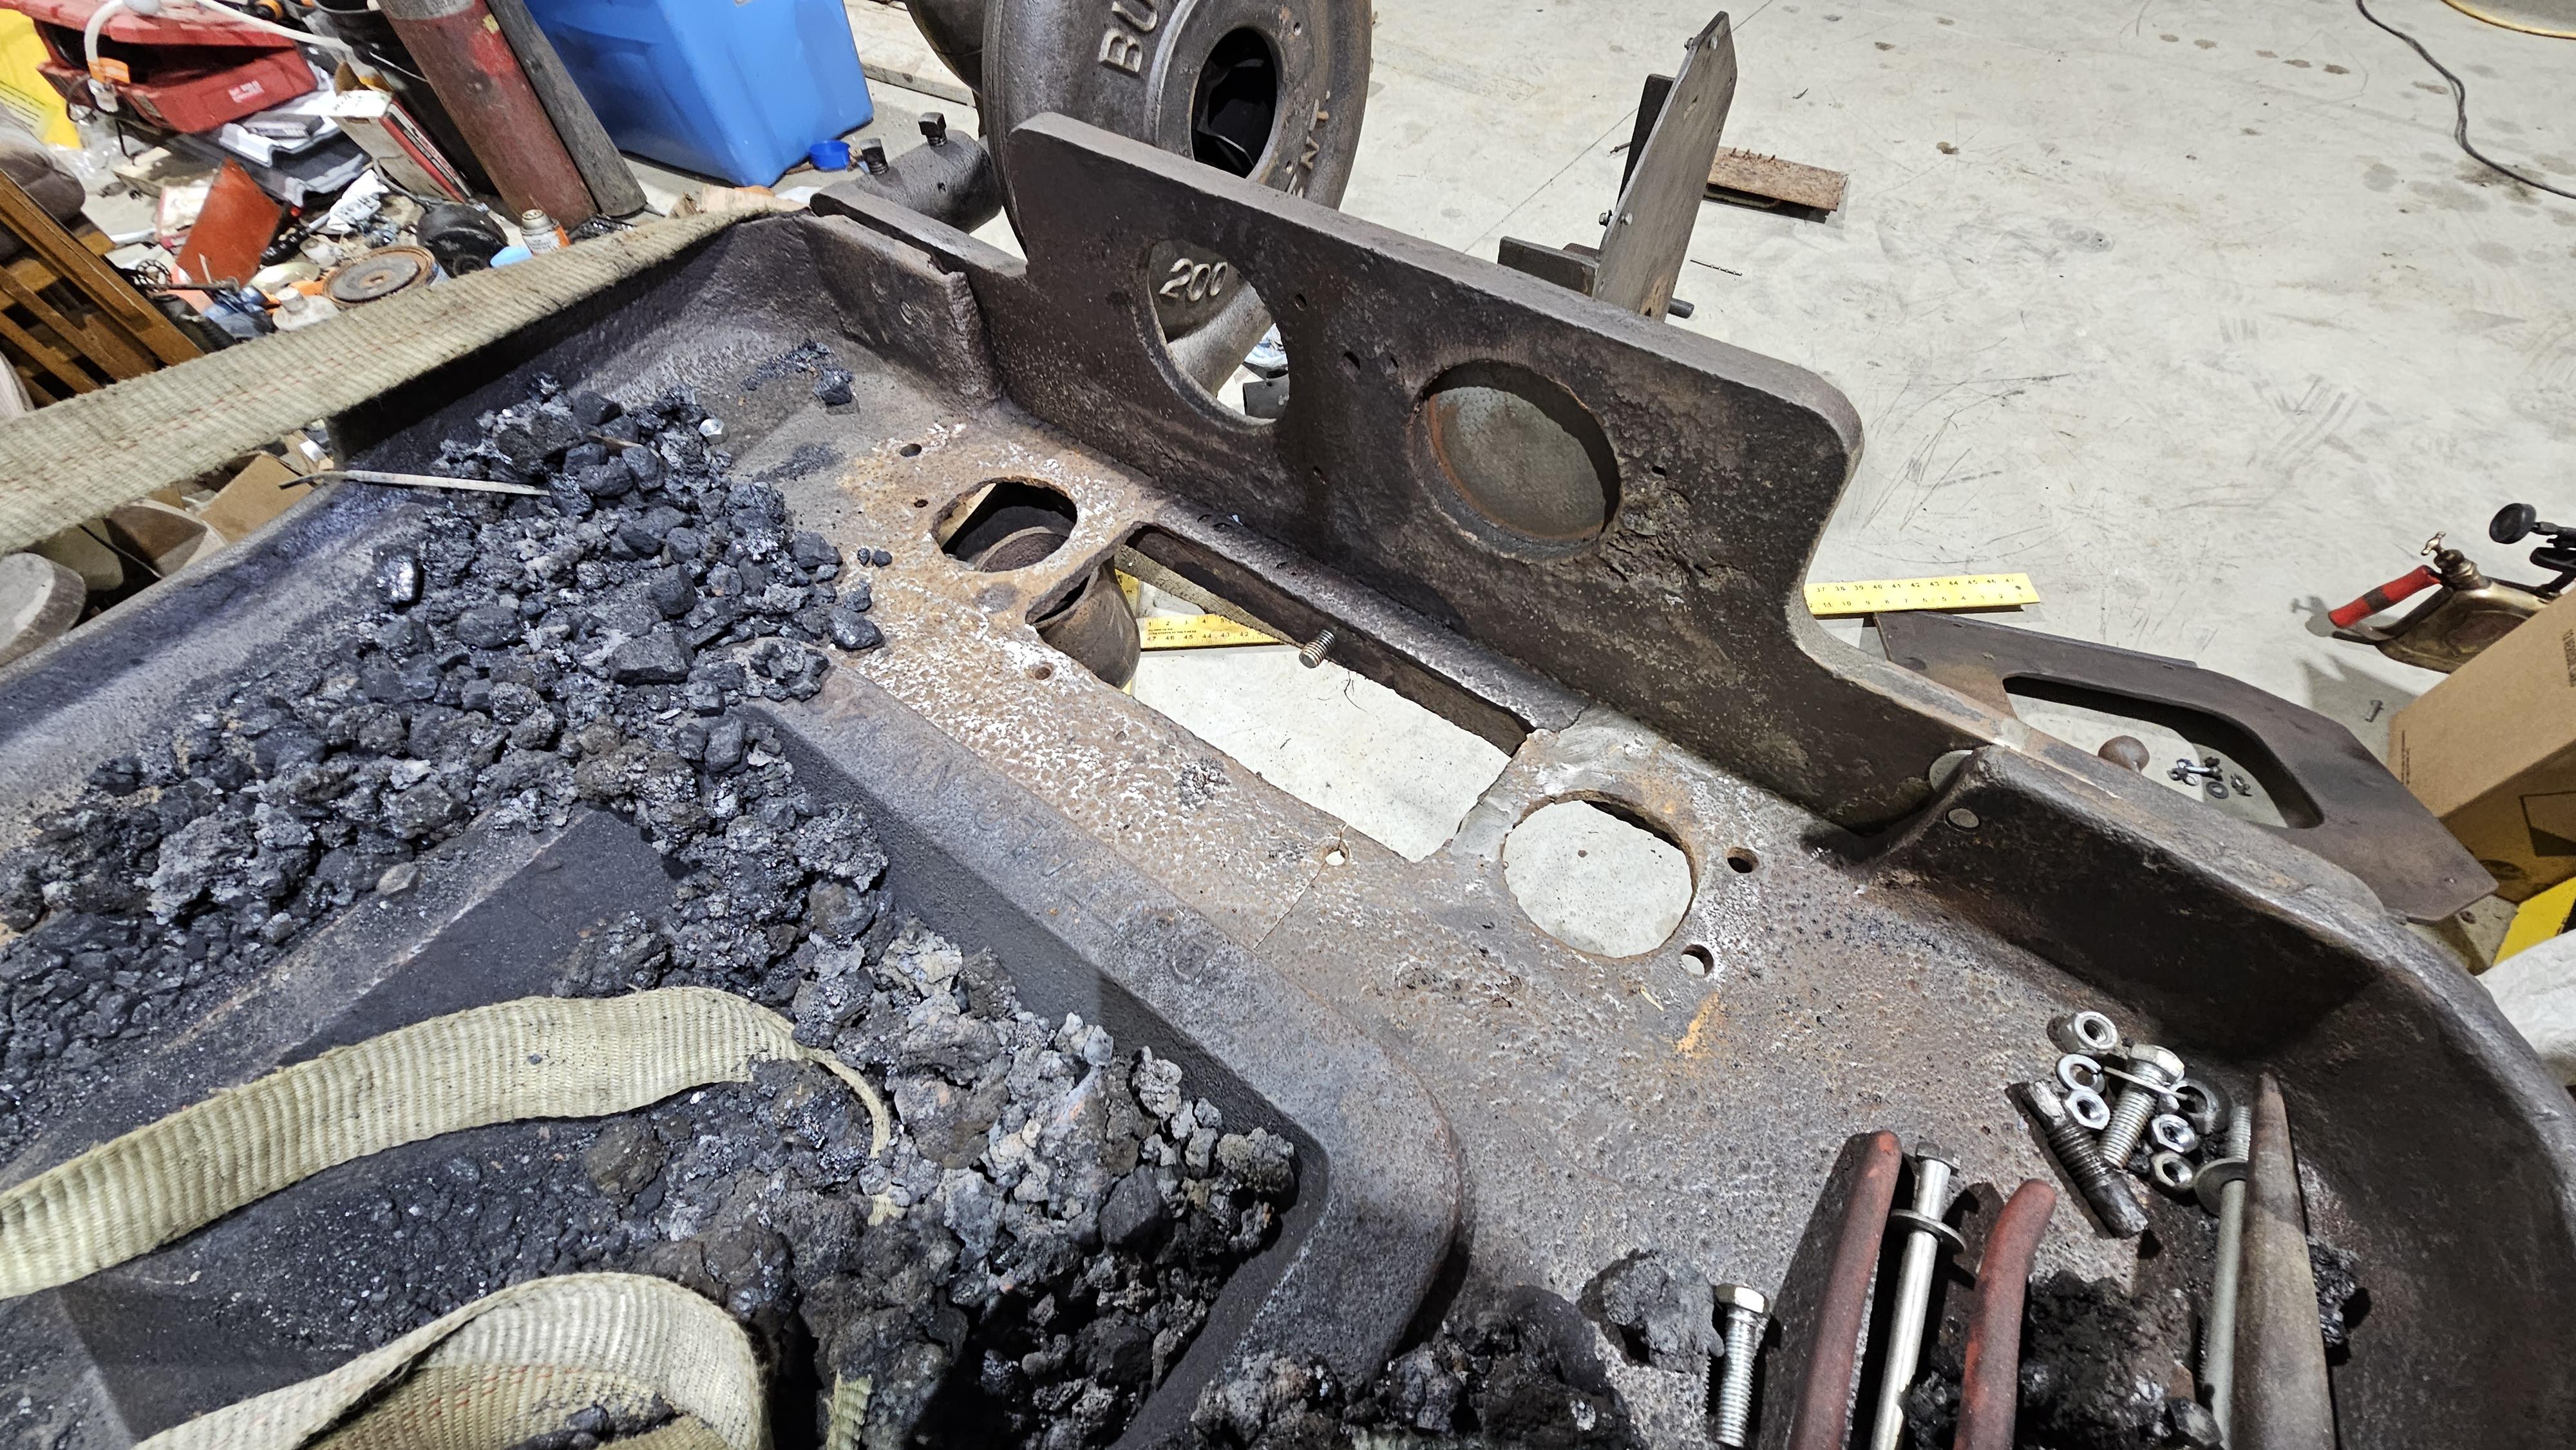
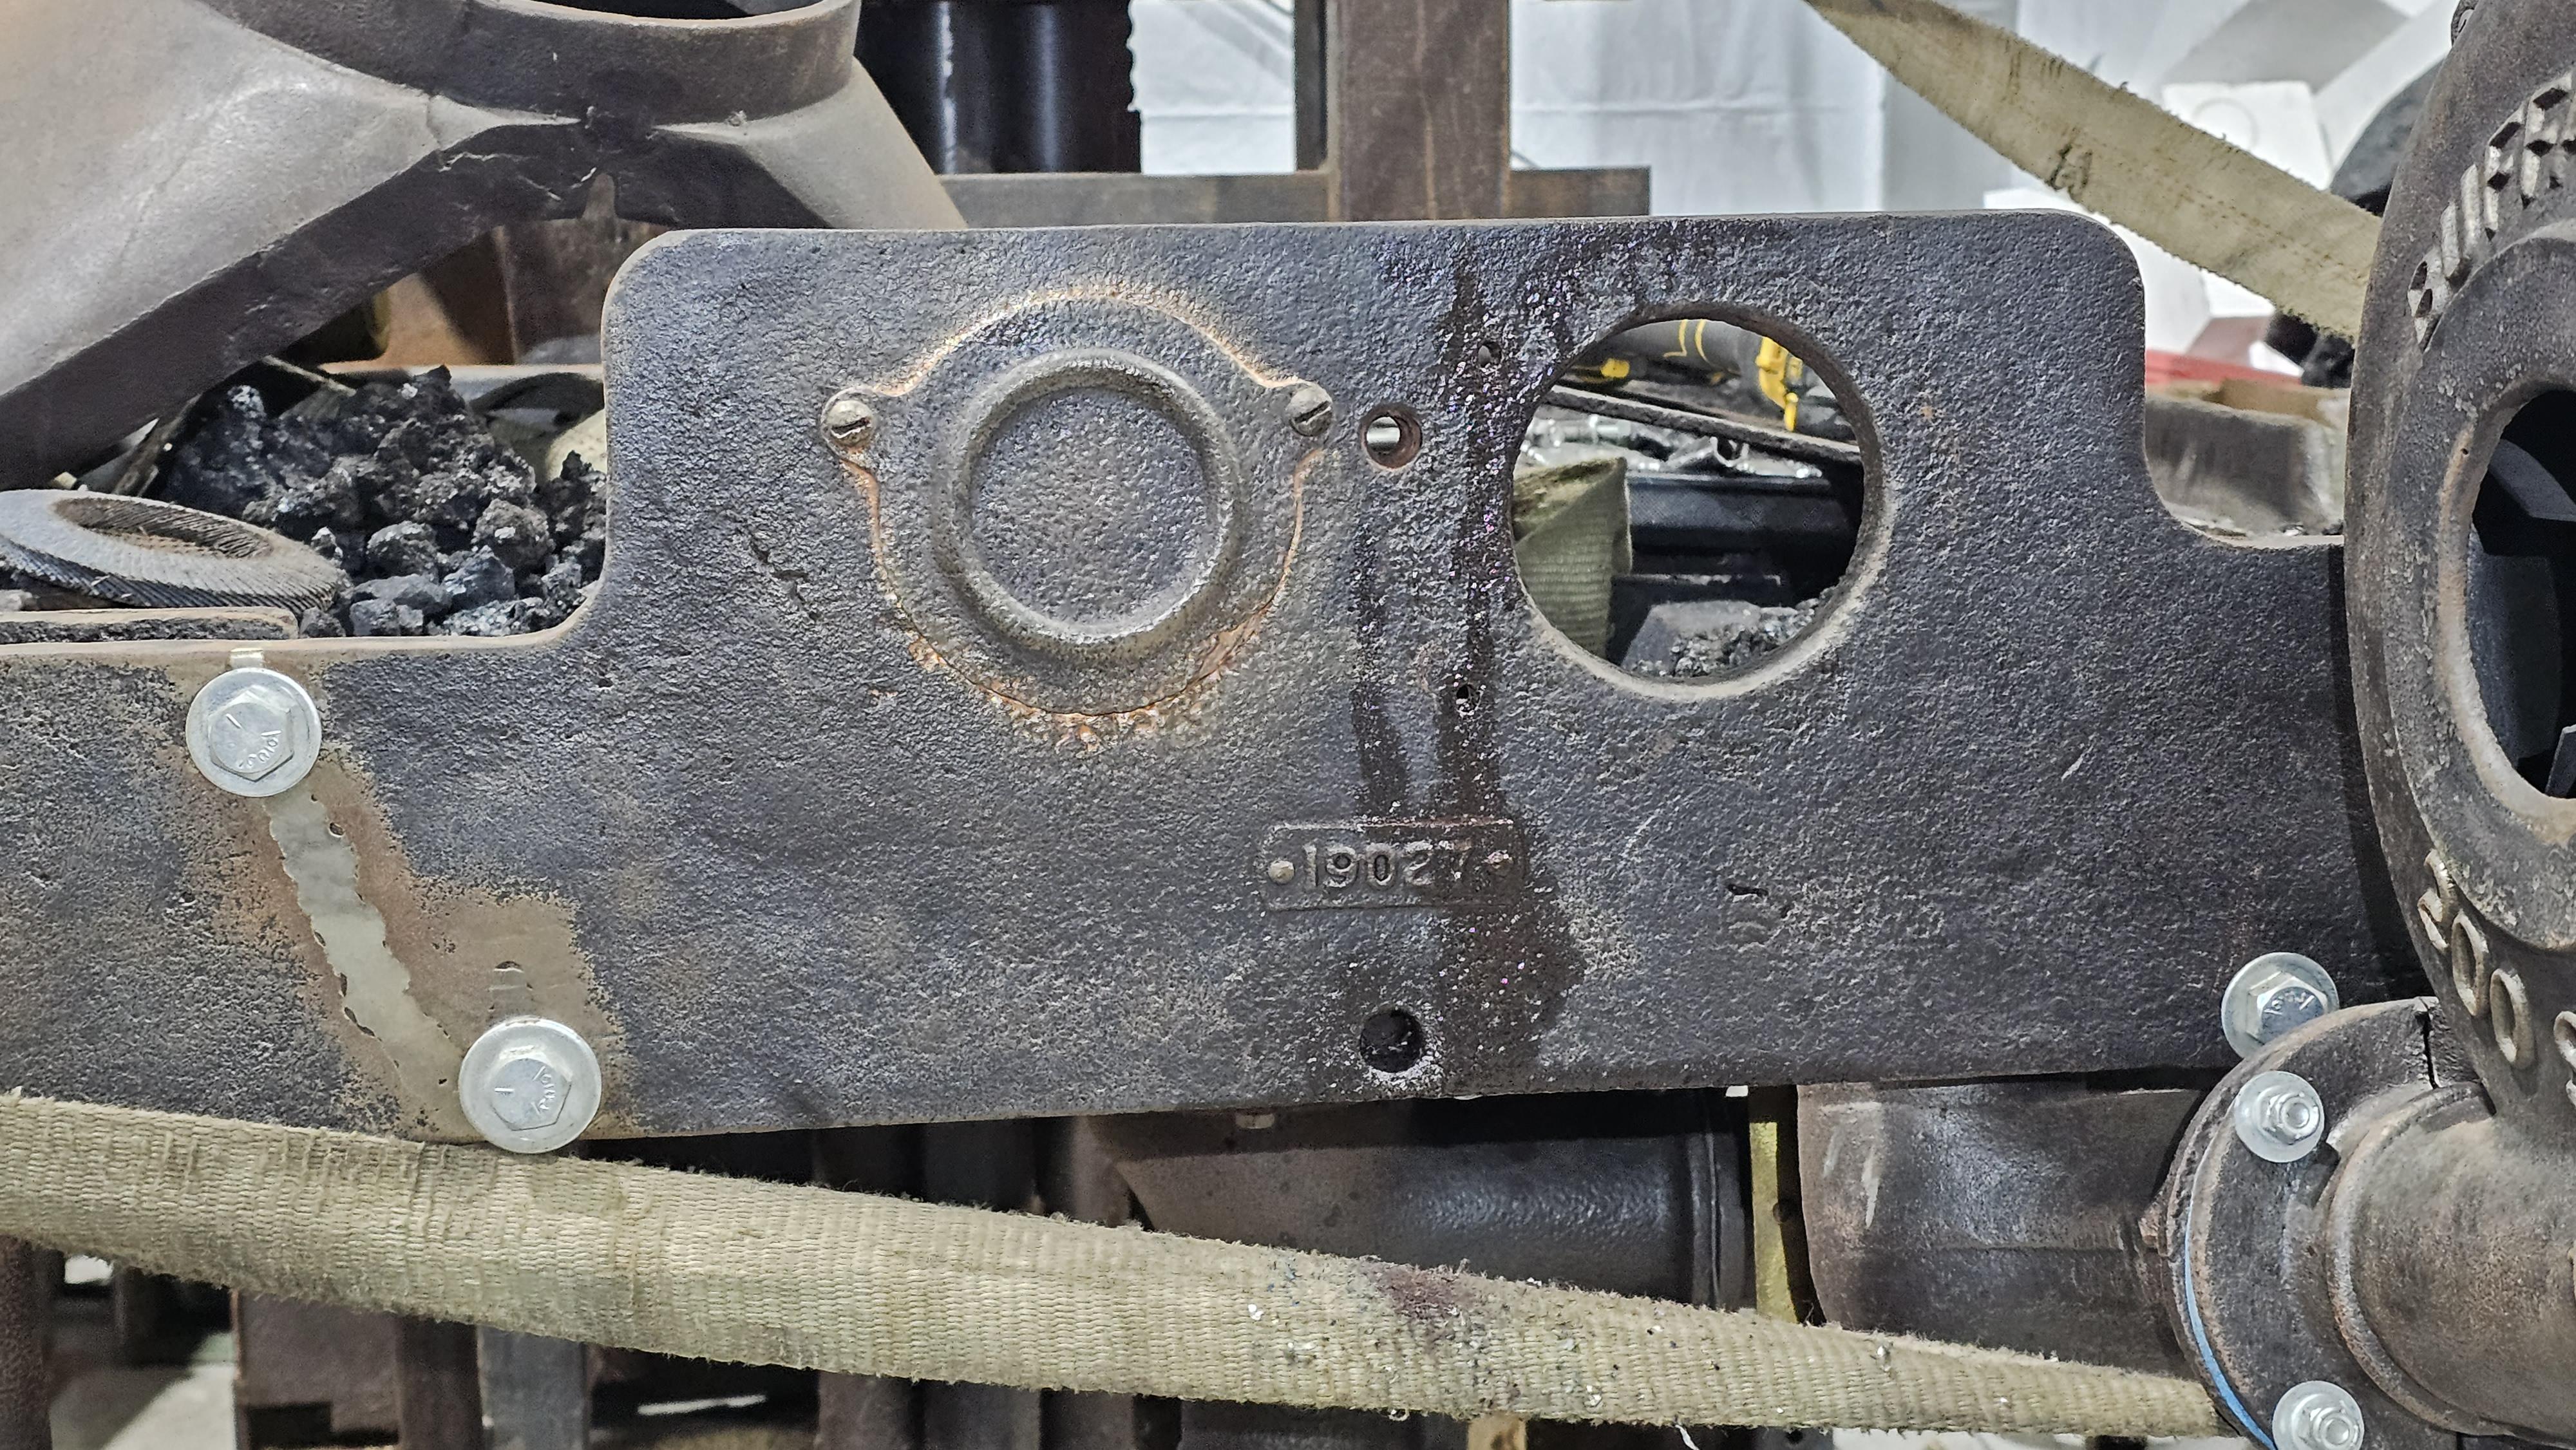
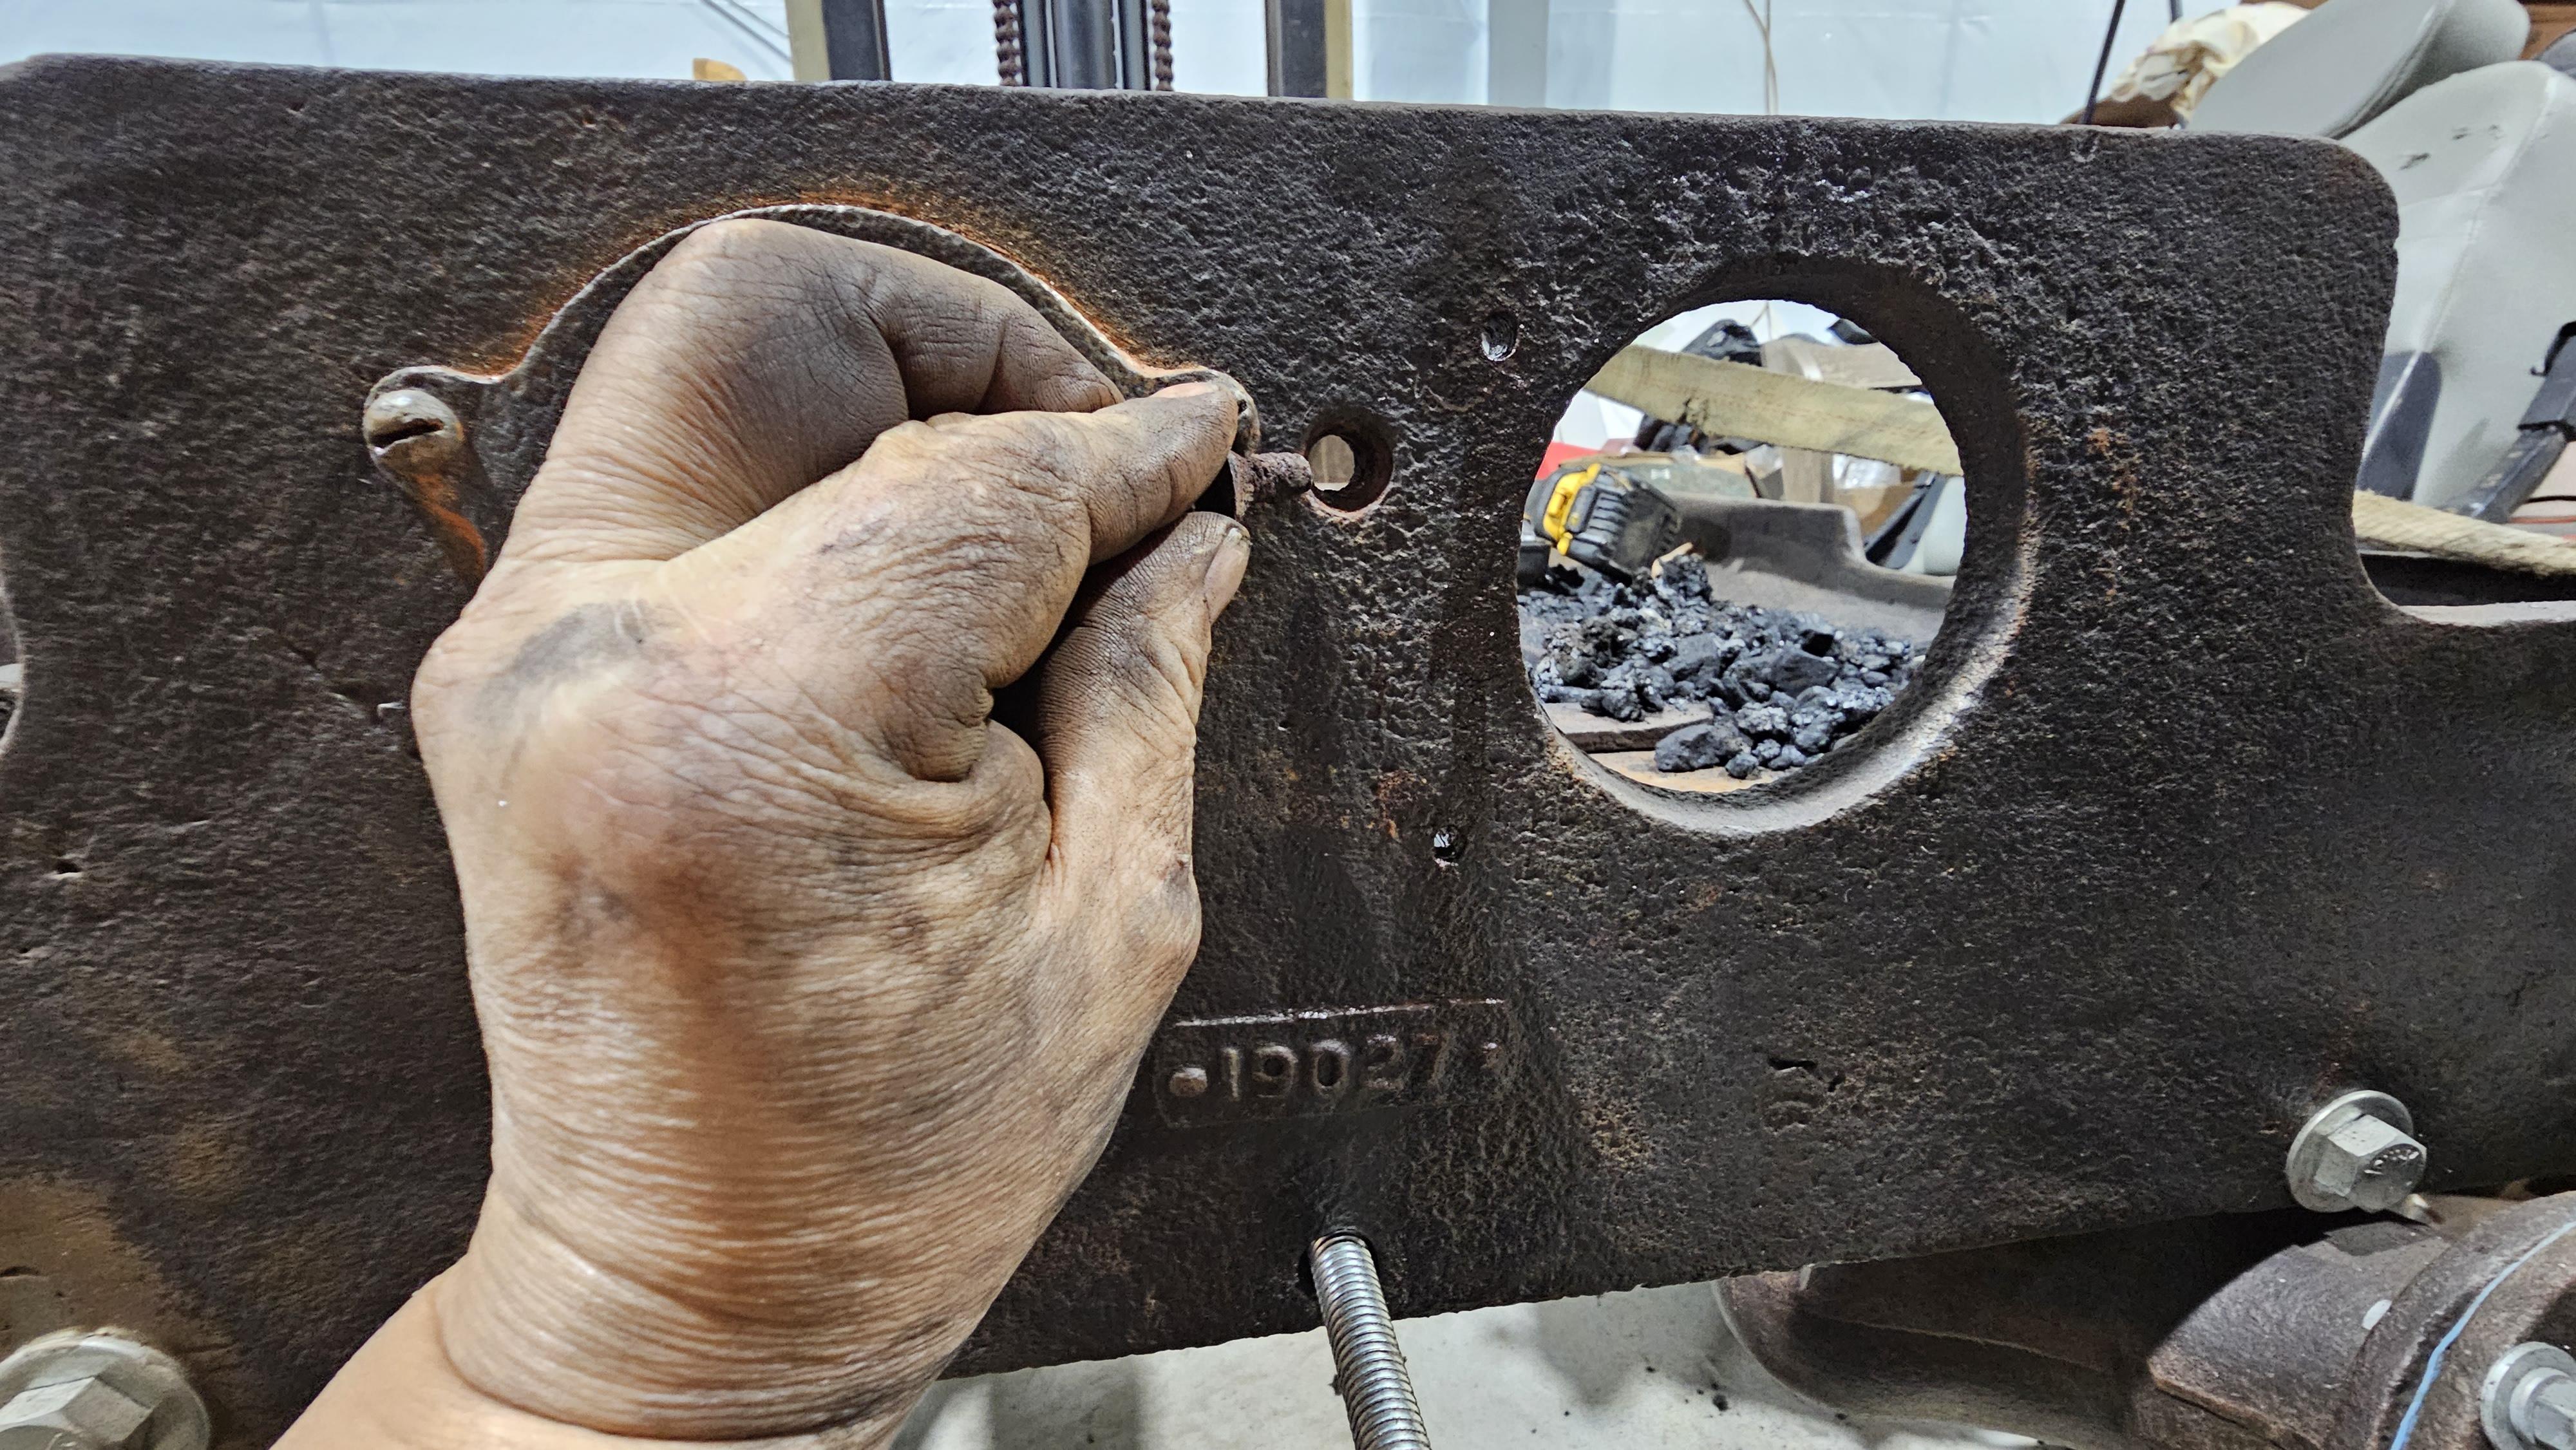
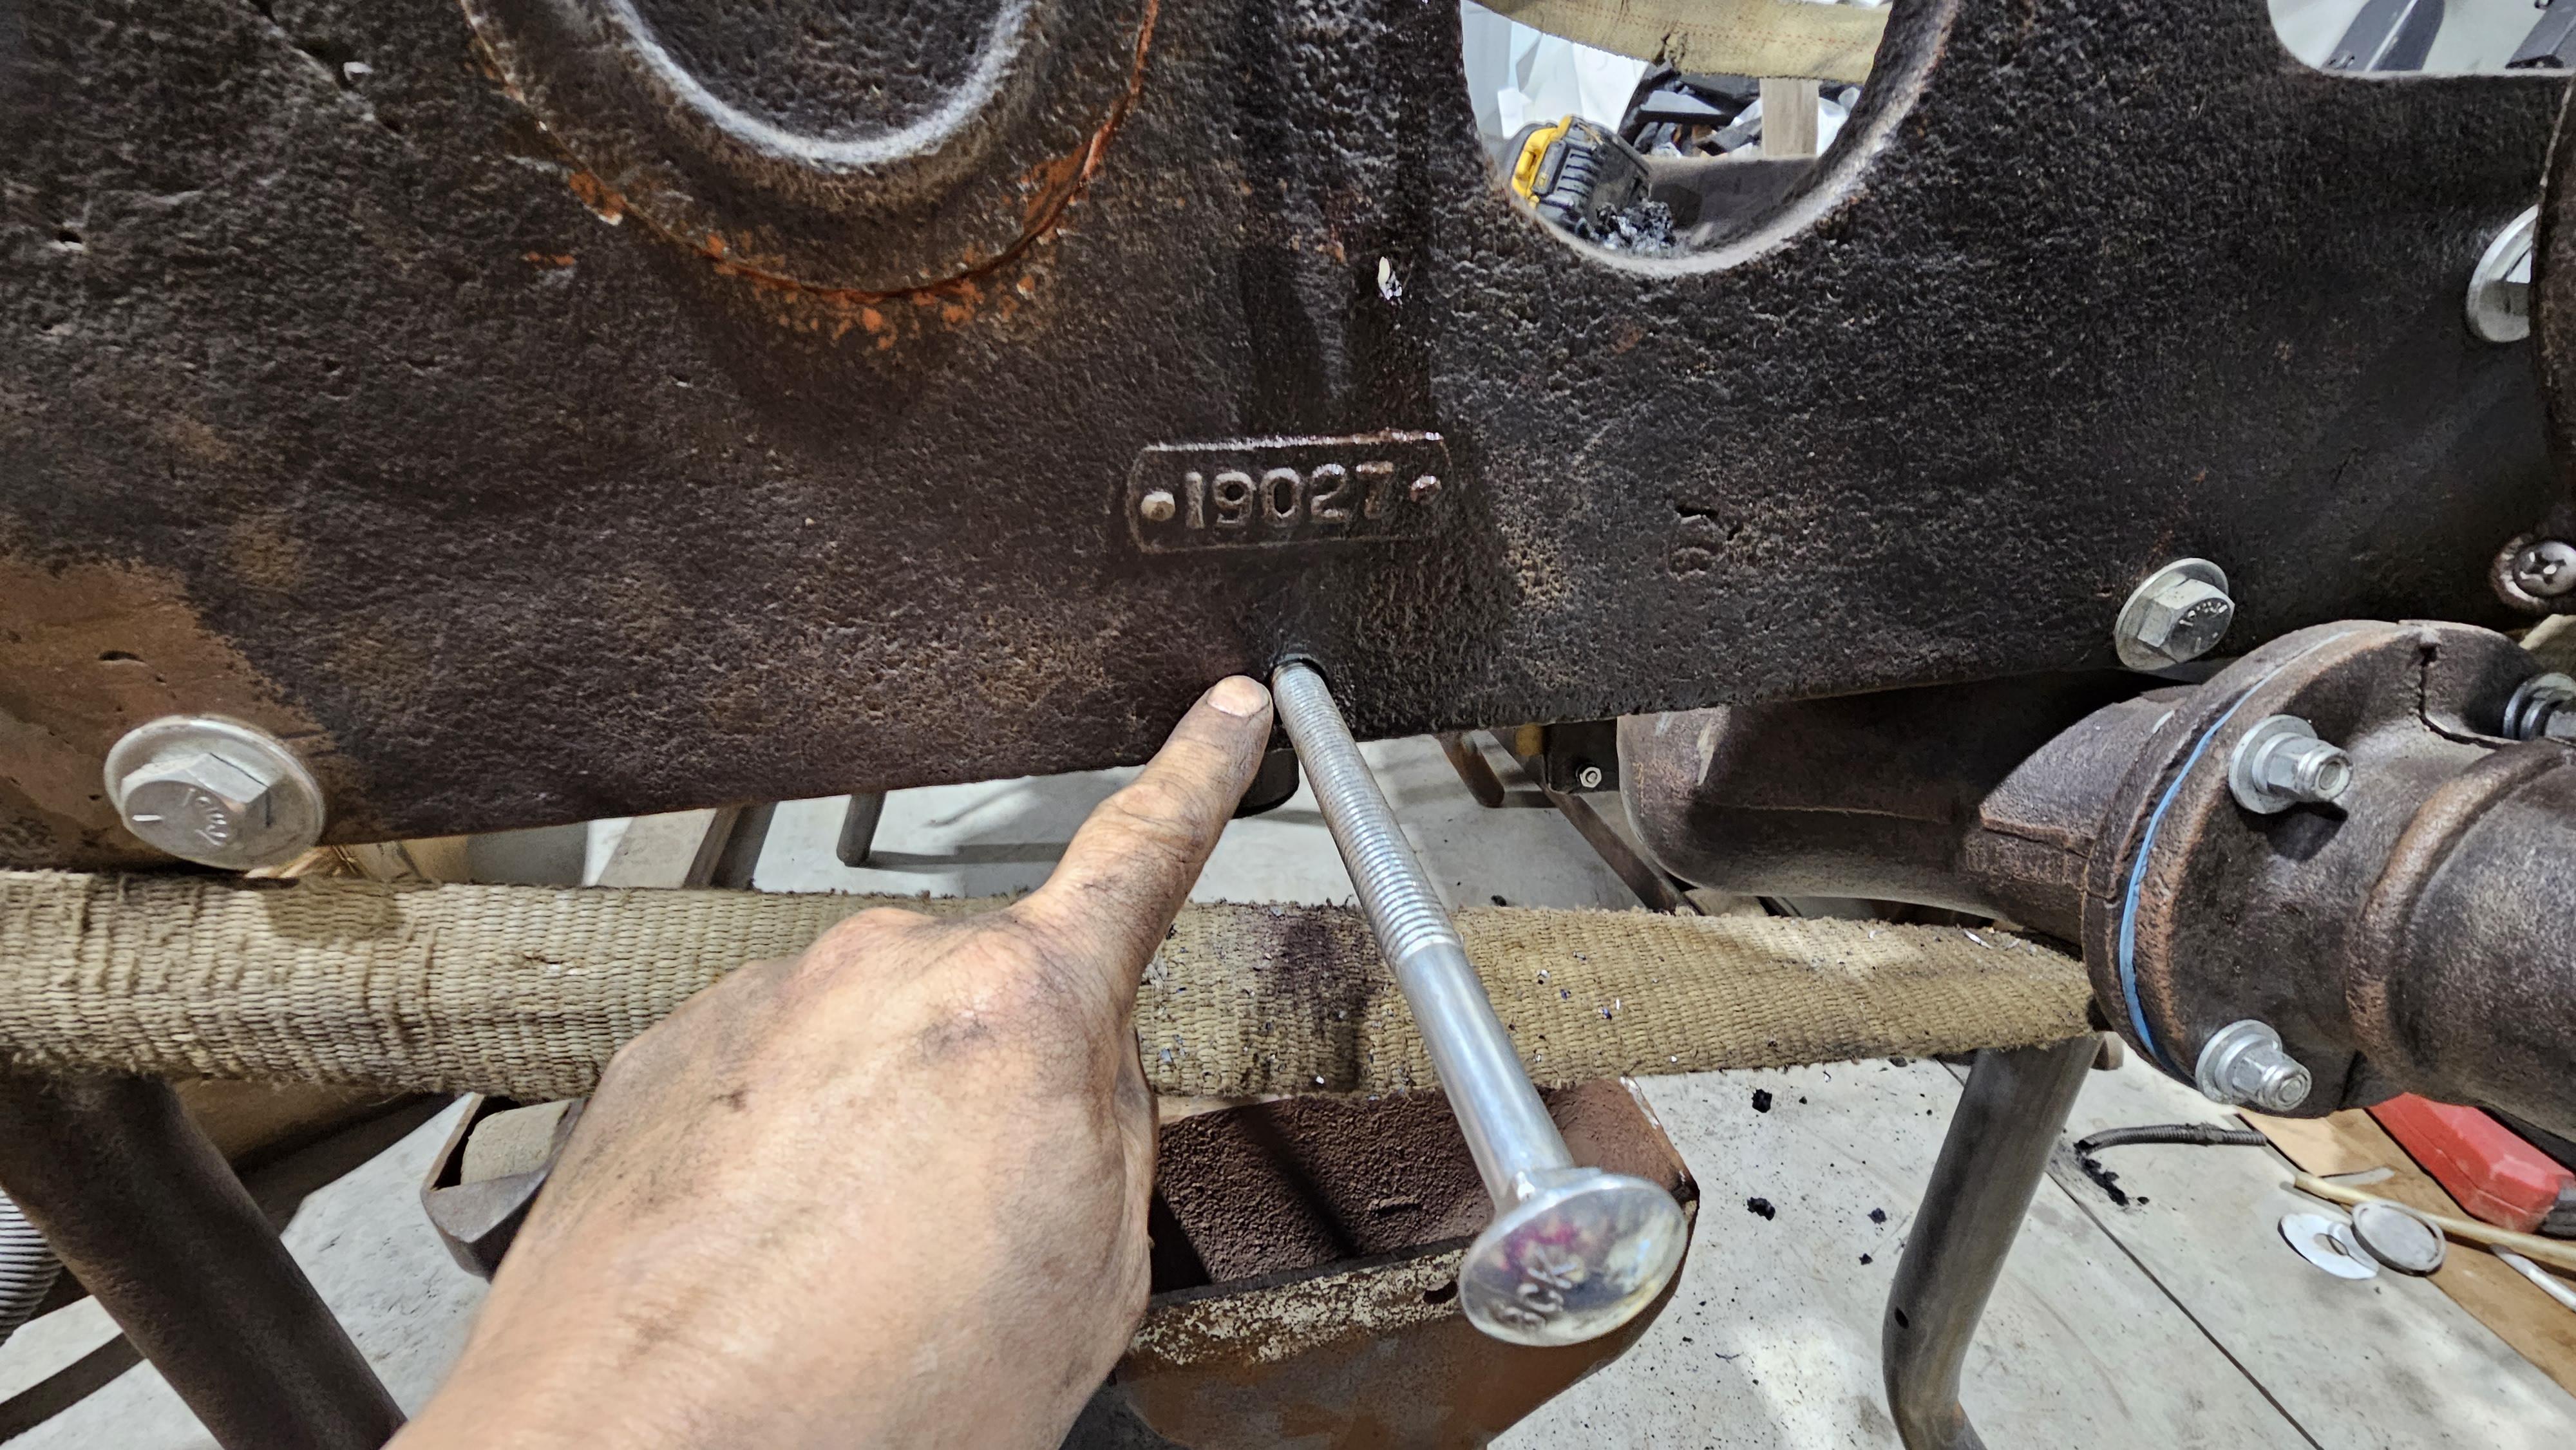
I'm starting a new thread here since it will be easier to find the information. So I have wanted one of the Buffalo Downdraft forges for a very long time. I picked this one up last week. The 45yr quest has been answered. I have a lot of experience with very early 1890-1950's equipment.. This forge was put back together a little off. When items in the old days were assembled they were put together in a very certain way. This forge when it was put back together after cleaning was off. So seeing this I took it completely apart and fixed most of the things that needed it. This forge body is a series 48 with a 200 silent blower with down draft hood (so this is a 248E (The hood itself wears the 6660 number but it is not a 6660 forge that is simply the downdraft number). I had to remove some screws that were drilled in half by the old owner, then chase the threads.. So far they are holding. Also found some screws that were completely rusted in with both head and tail end gone. I removed these as well. the back section has a crack and this has been reinforced with 3/16" plate 24"X7" that is held in via the bolts and screws that mount the hood assembly.. Just used longer bolts for the hood. This unit is still missing the center piece that goes in the hood. It is outlined in yellow in one of the photos.. If someone has a photo of what it looks like please post it. I don't want to reinvent the wheel.. EAsy enough to copy a photo. The middle bolt in the back 1/2" X 13tpi was rusted in place and snapped off. Adding the extra plate moved the ash catch down the 3/16" so I put a very long taper on the bolt for this hole and it mates the hole in the ash catch pulling it upwards. I have other ways of fixing this but wanted to try this first. All the bolt and screw holes for this were plugged with old rusted screws. I knocked them out and clean up the holes.. The firepot was in backwards when I bought it. And had made the mistake of fitting the new plate with it that way.. When I switched the firepot back to the way it's supposed to be the venturi pipe no longer was in the correct location as I put it in the the plate so had to enlarge it and it was moves over towards the side more.. By switching the firepots orientation it put everything back in alignment as it should have been with very little misalignment. If someone in the future gets one of these forges, if you take it apart.. Make sure to put it back together in correct alignment.. The easiest way is to keep all the bolts installed but loose, then start tightening them by working around.. This will be photo heavy.


-
JLP Blacksmith Teaching Center.
jlpservicesinc replied to jlpservicesinc's topic in Building, Designing a Shop
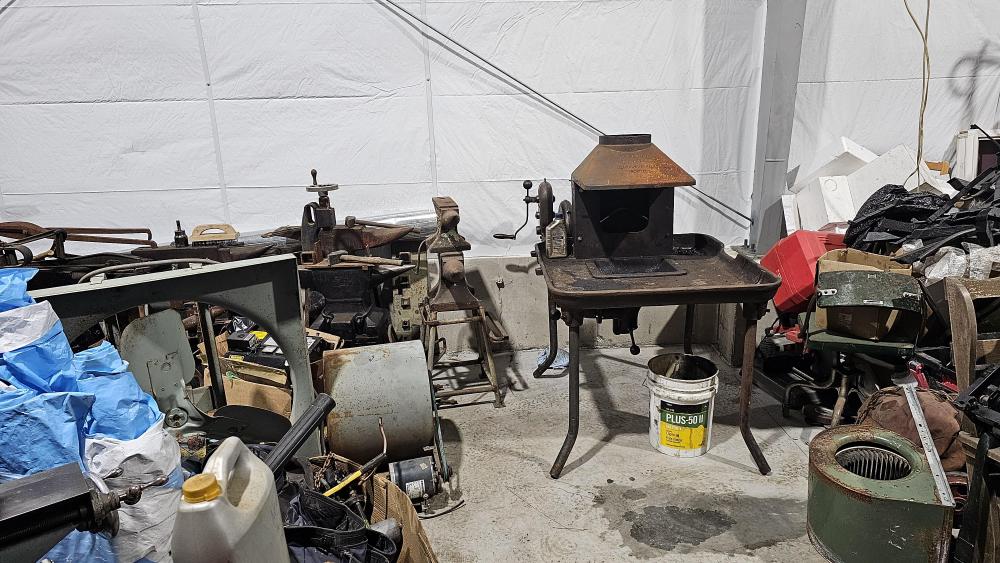
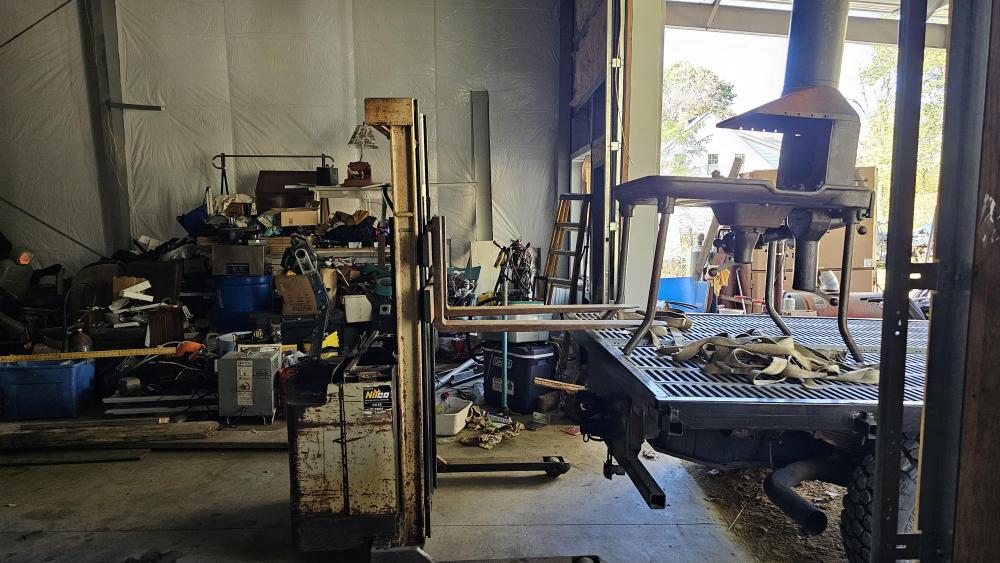
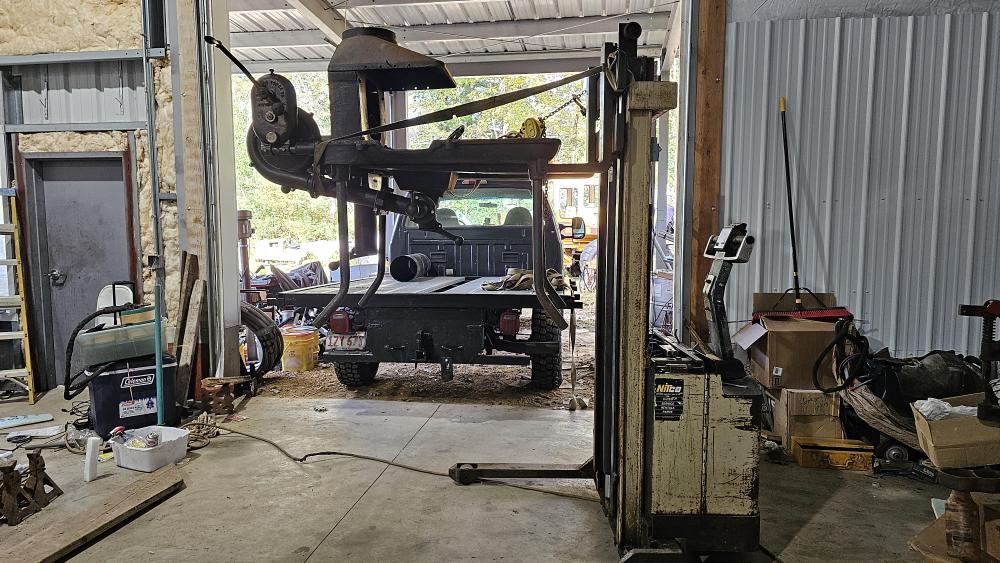
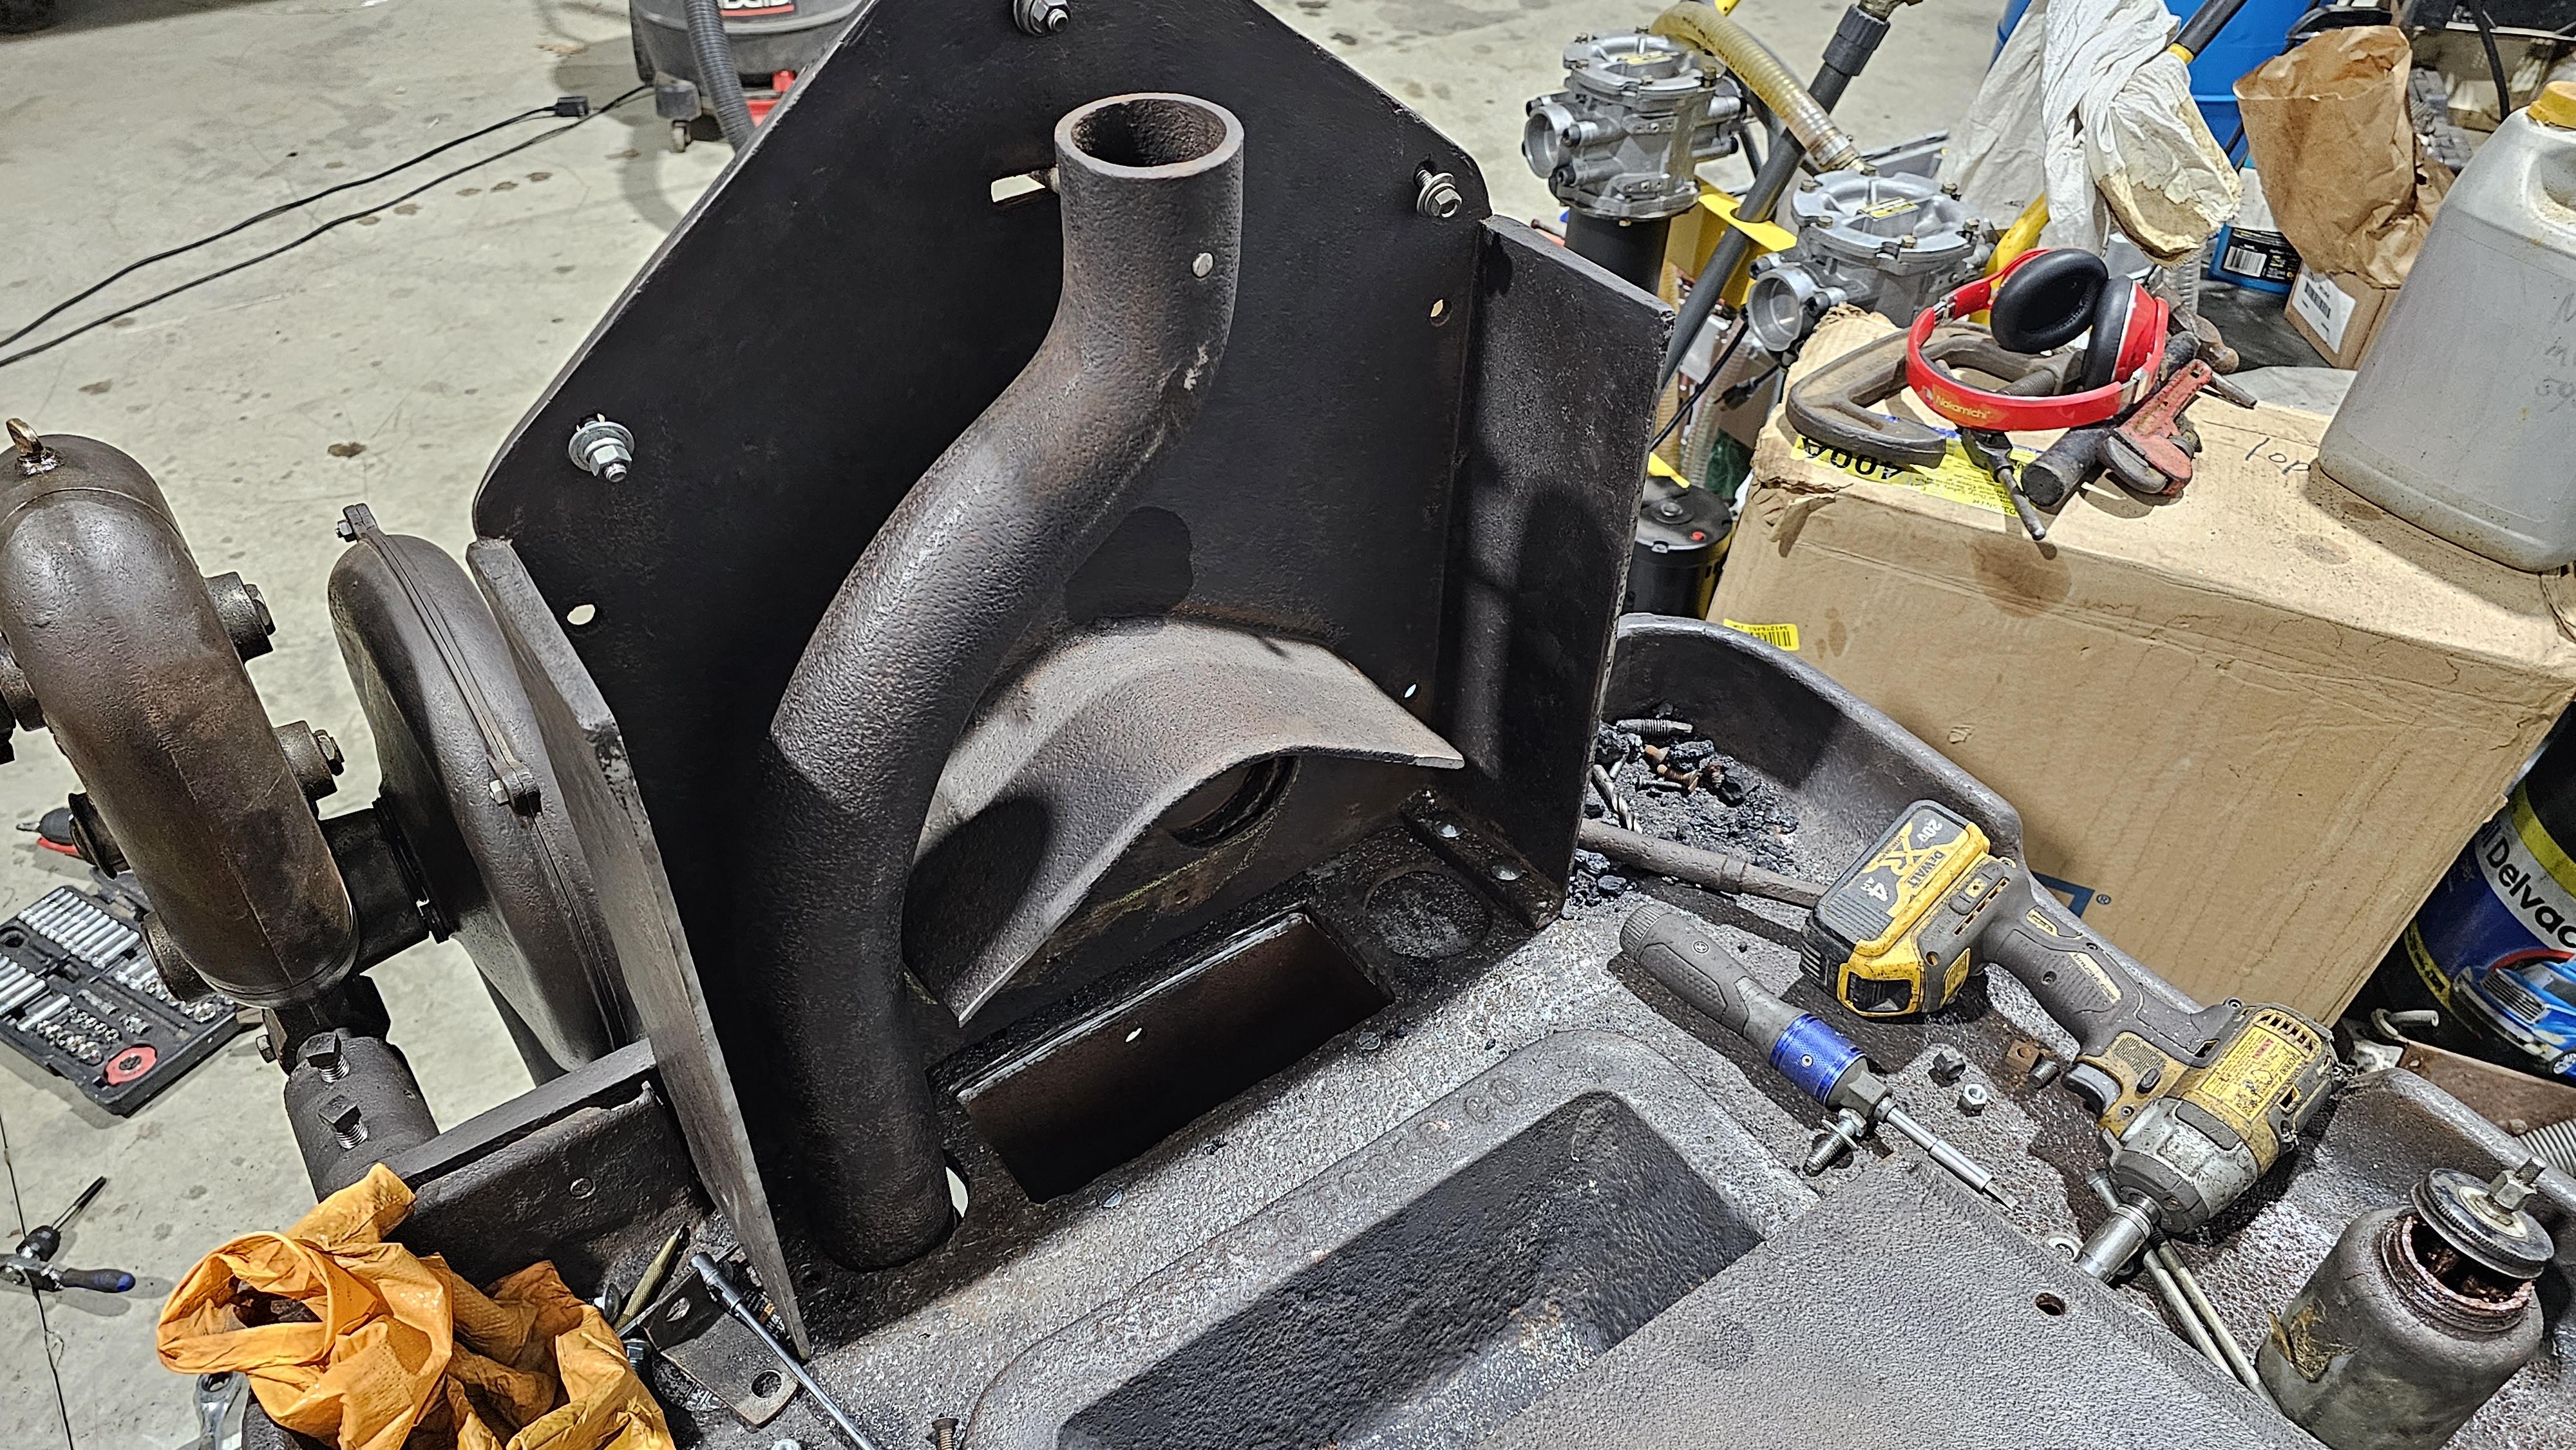
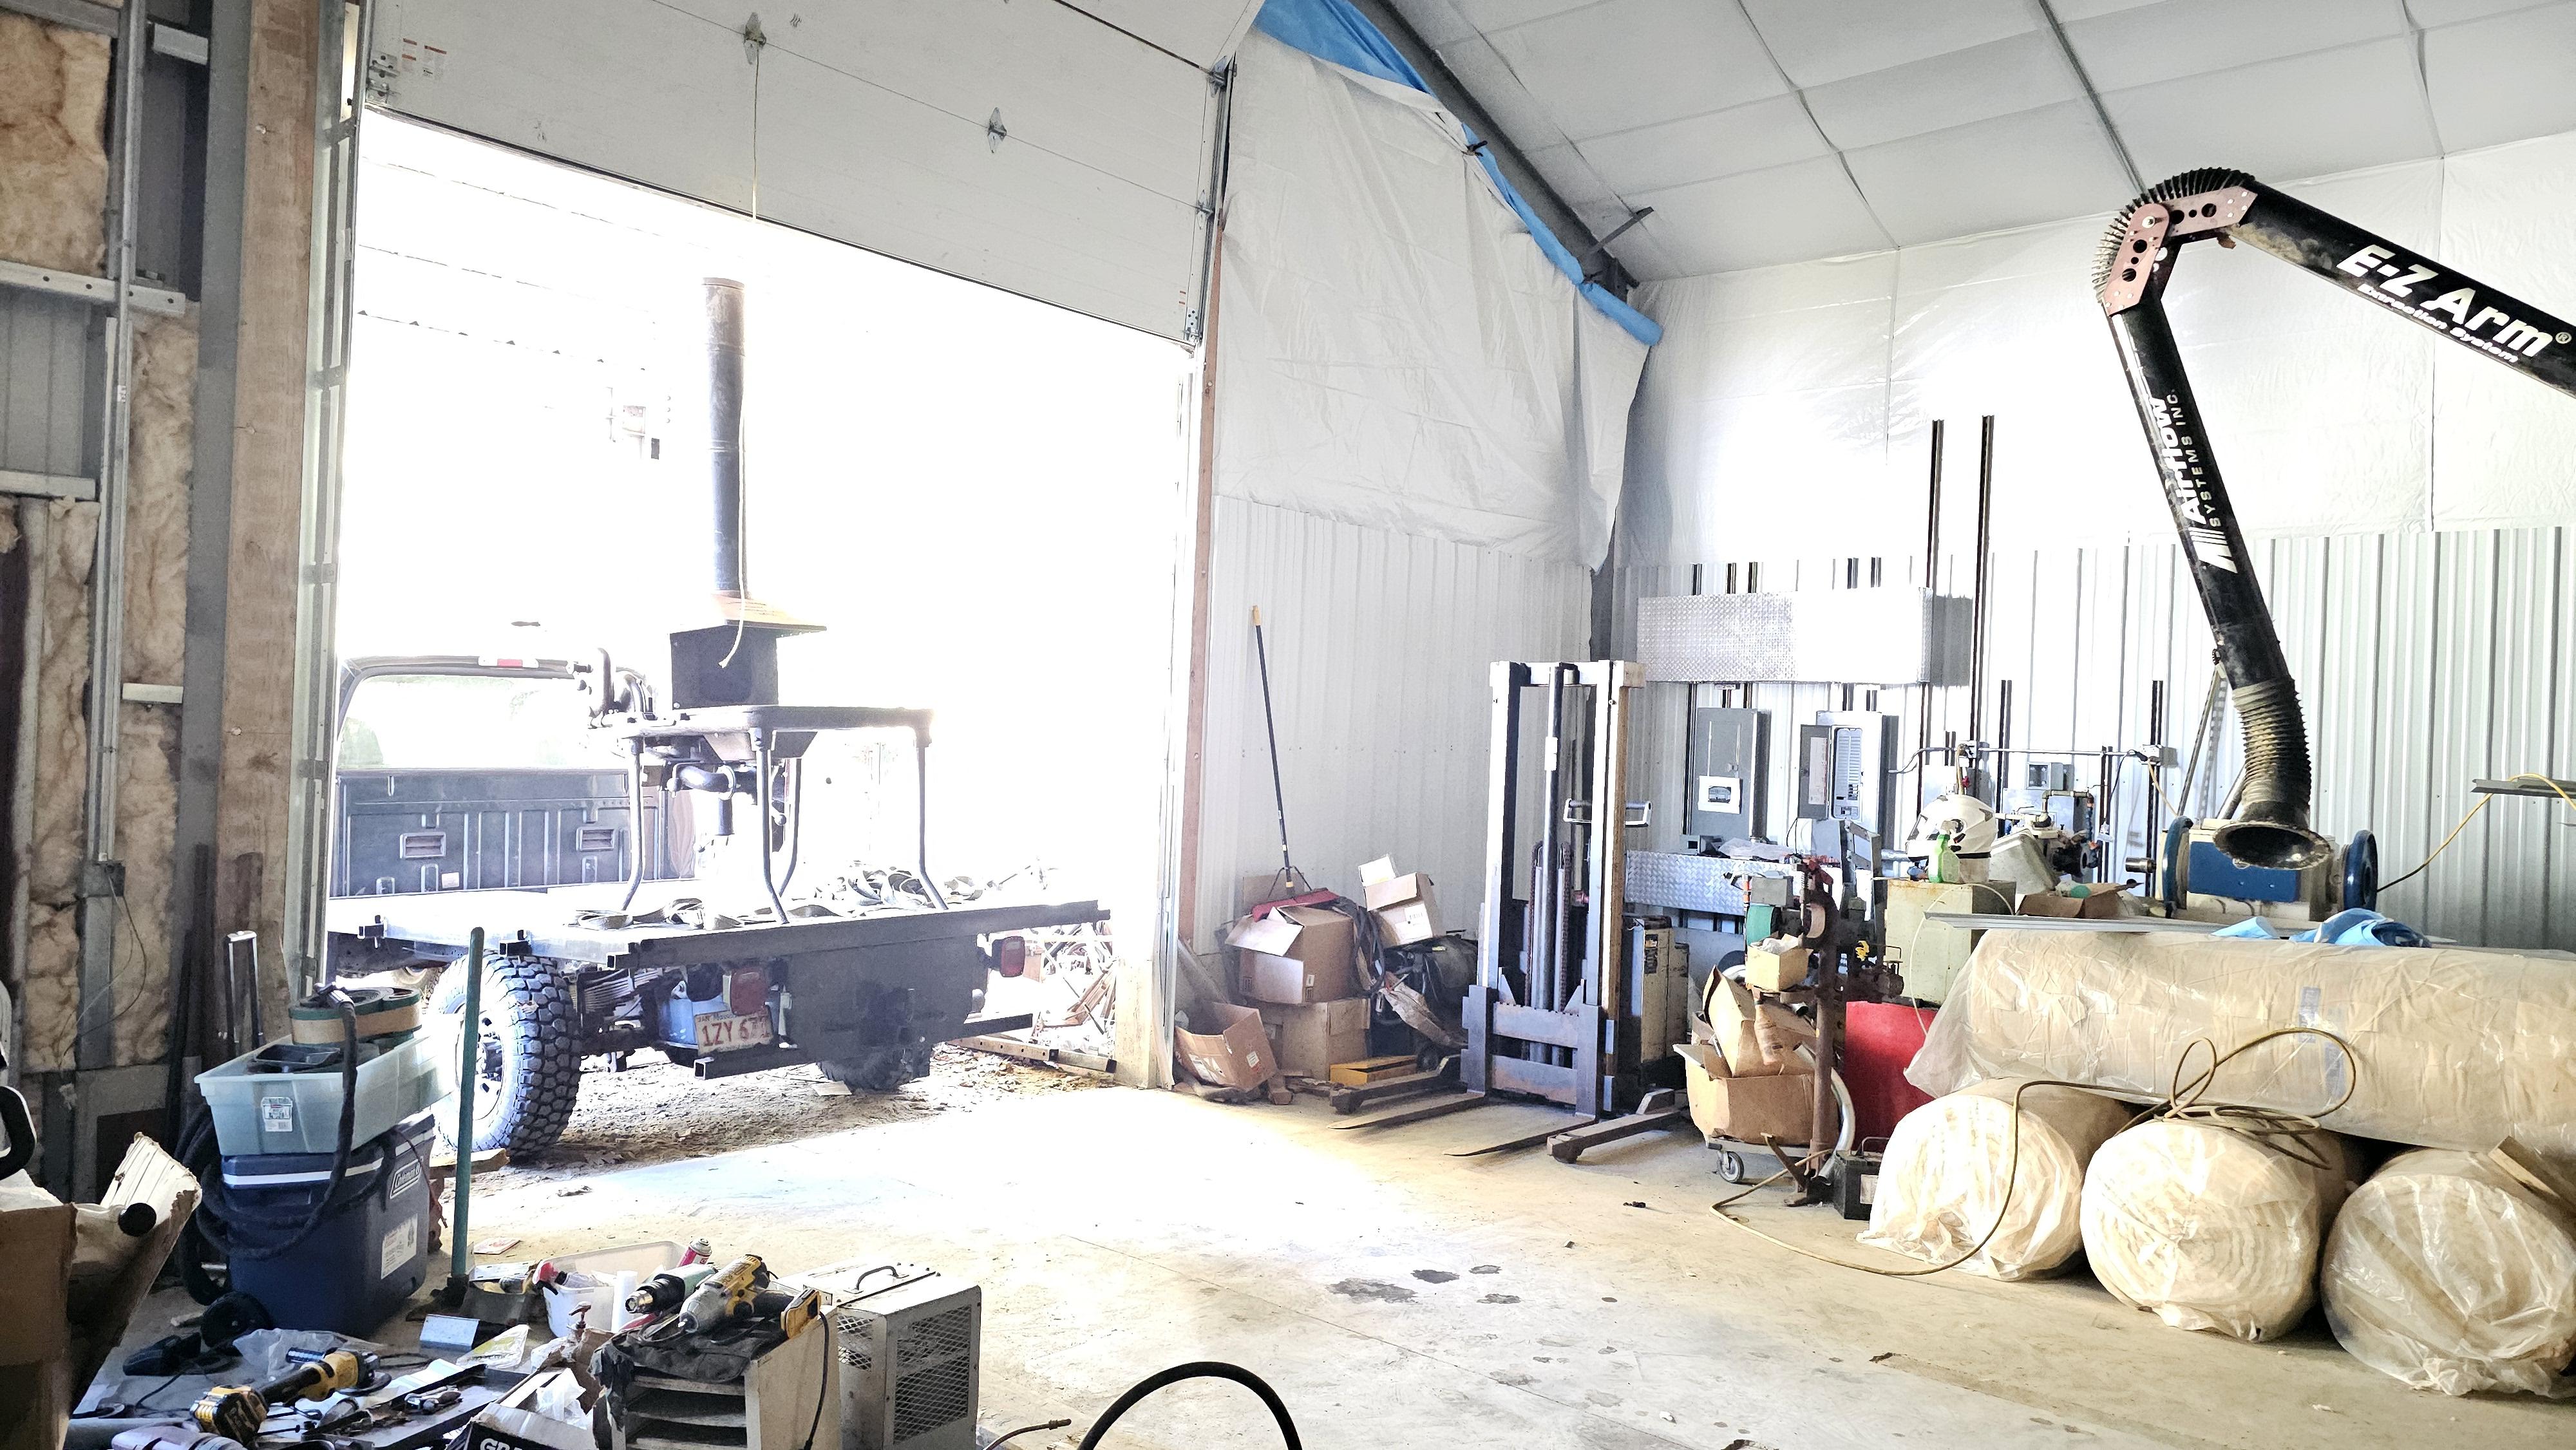
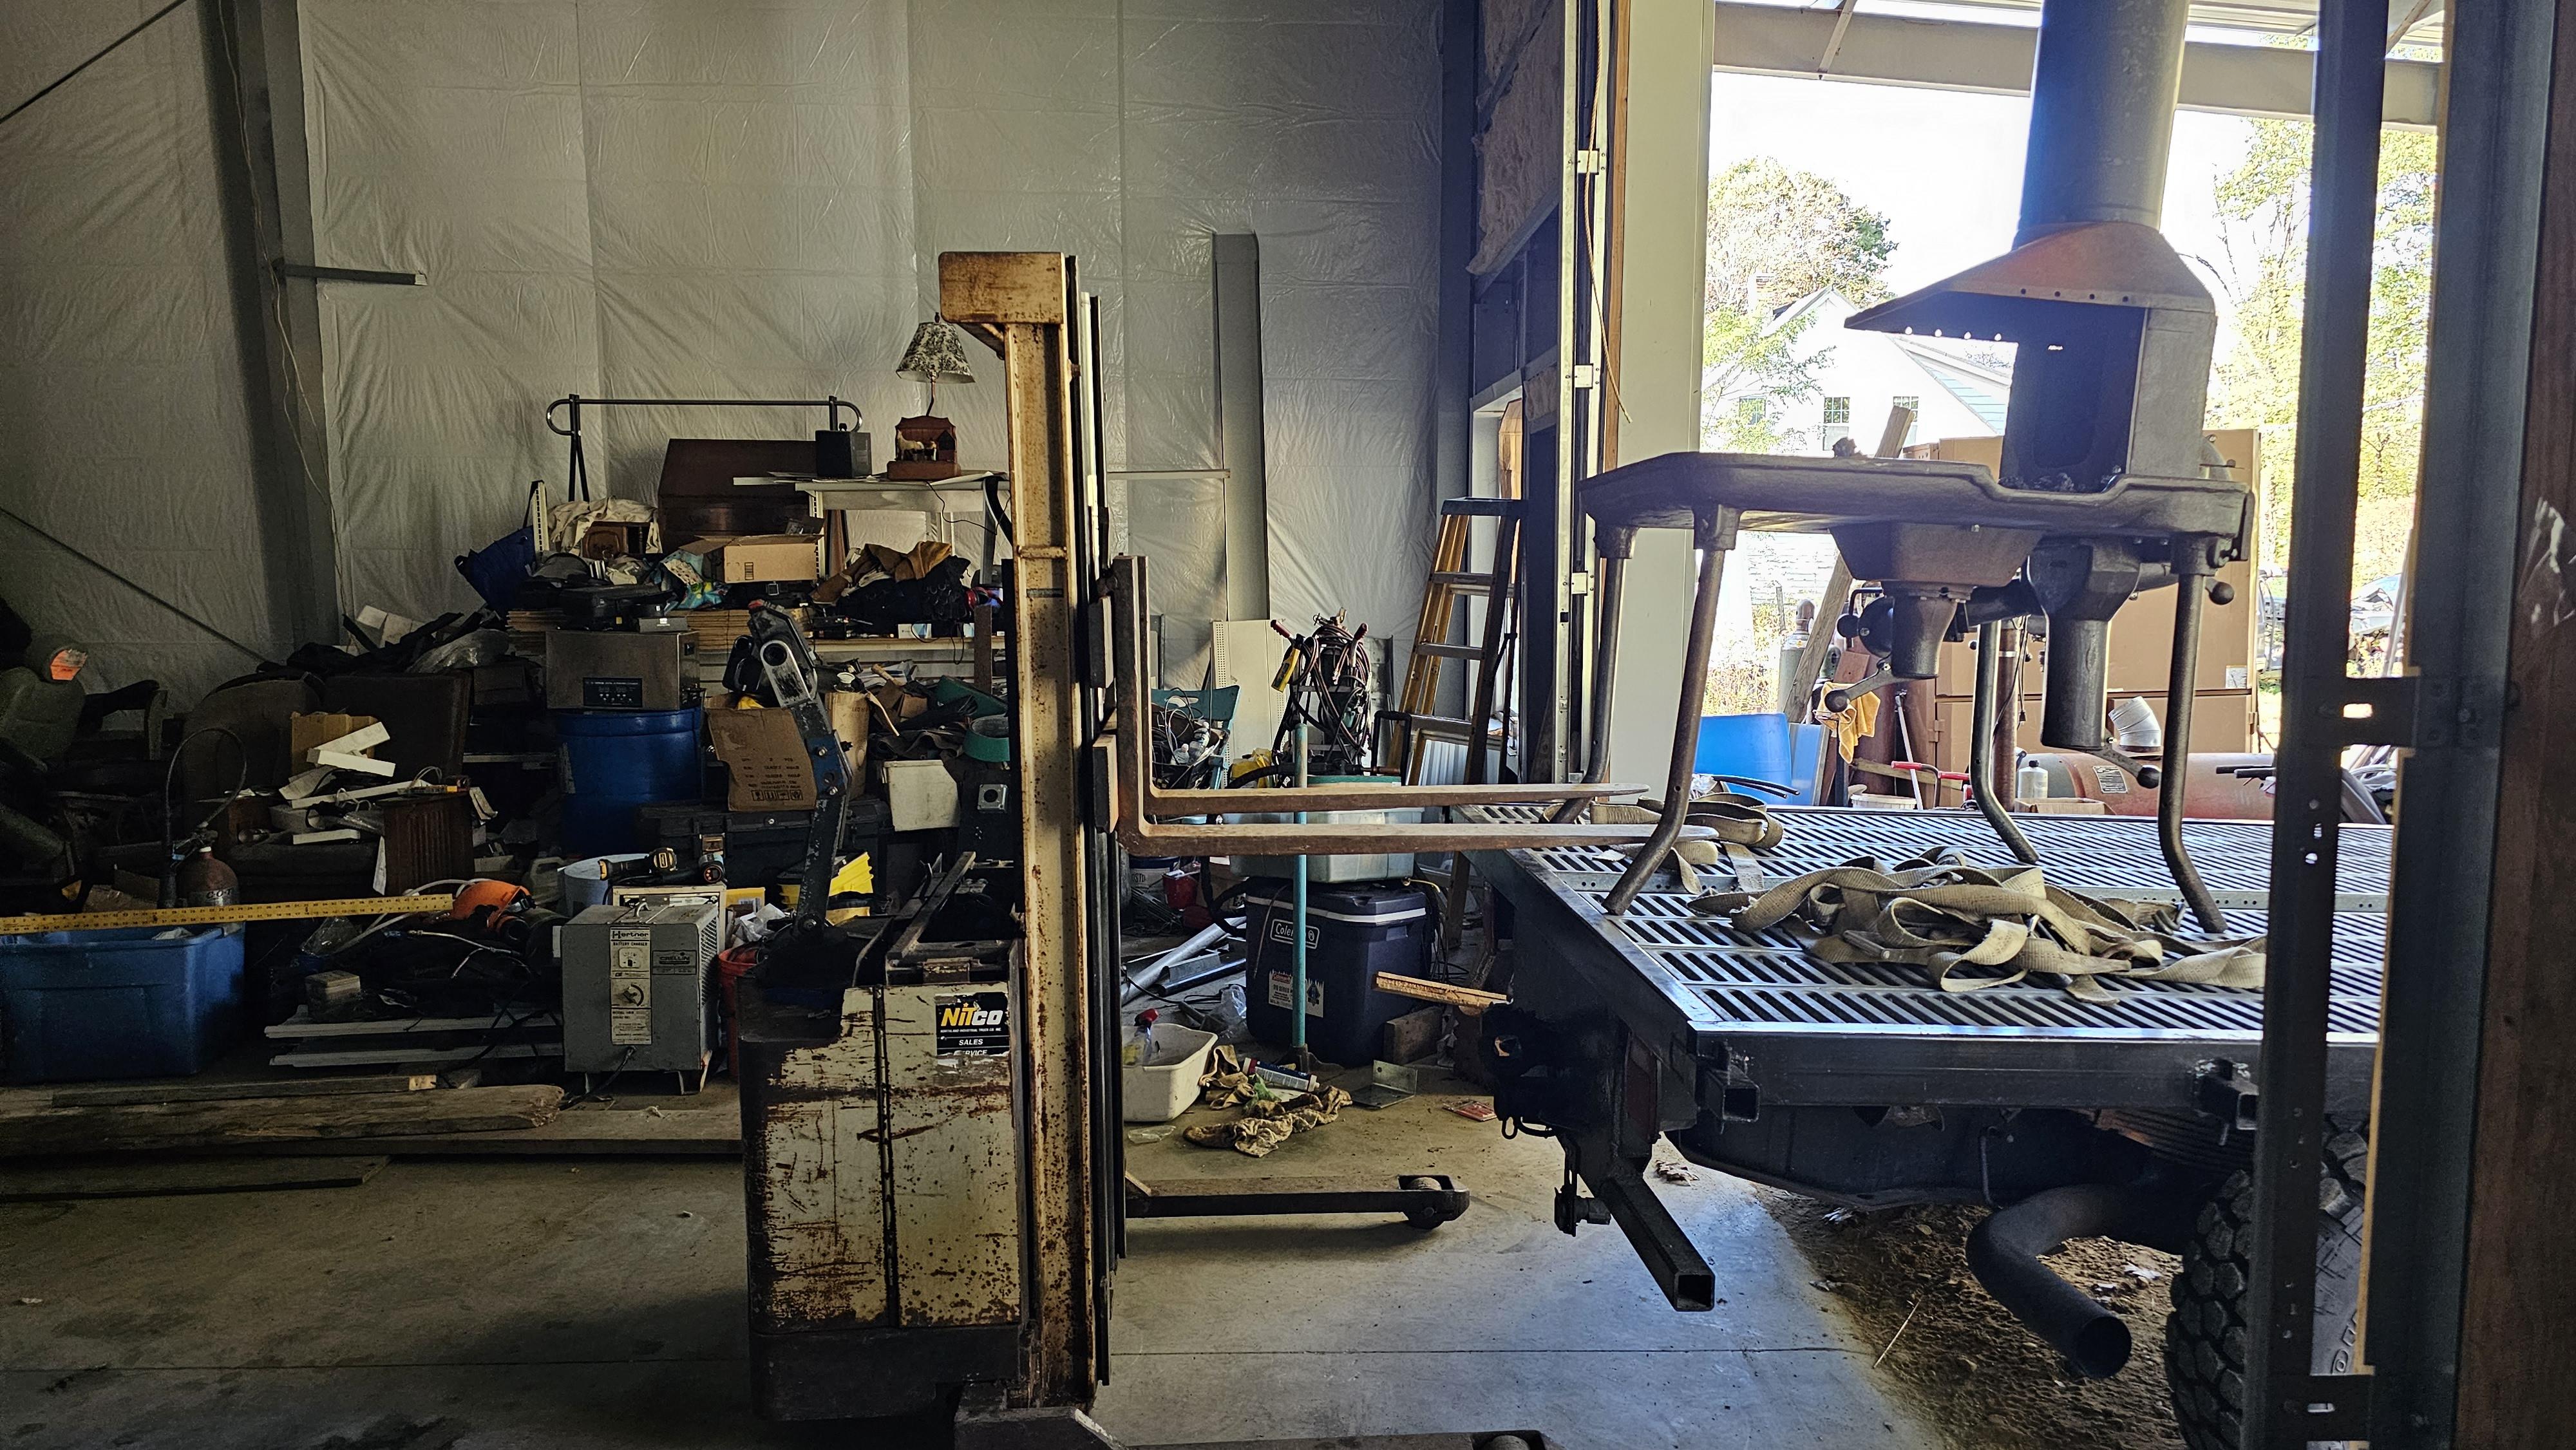
So picked up a Buffalo forge model 248E Downdraft type. Moved it into the shop today and ripped into it to fix some missing bolts, badly replaced fasteners and such.. Also will add a plate to the bottom back to account for age and wear. First time using the electric fork lift. Worked a treat.


-
What did you do in the shop today?
jlpservicesinc replied to Mark Ling's topic in Blacksmithing, General Discussion
John, that looks great.. A much better profile.. Nice -
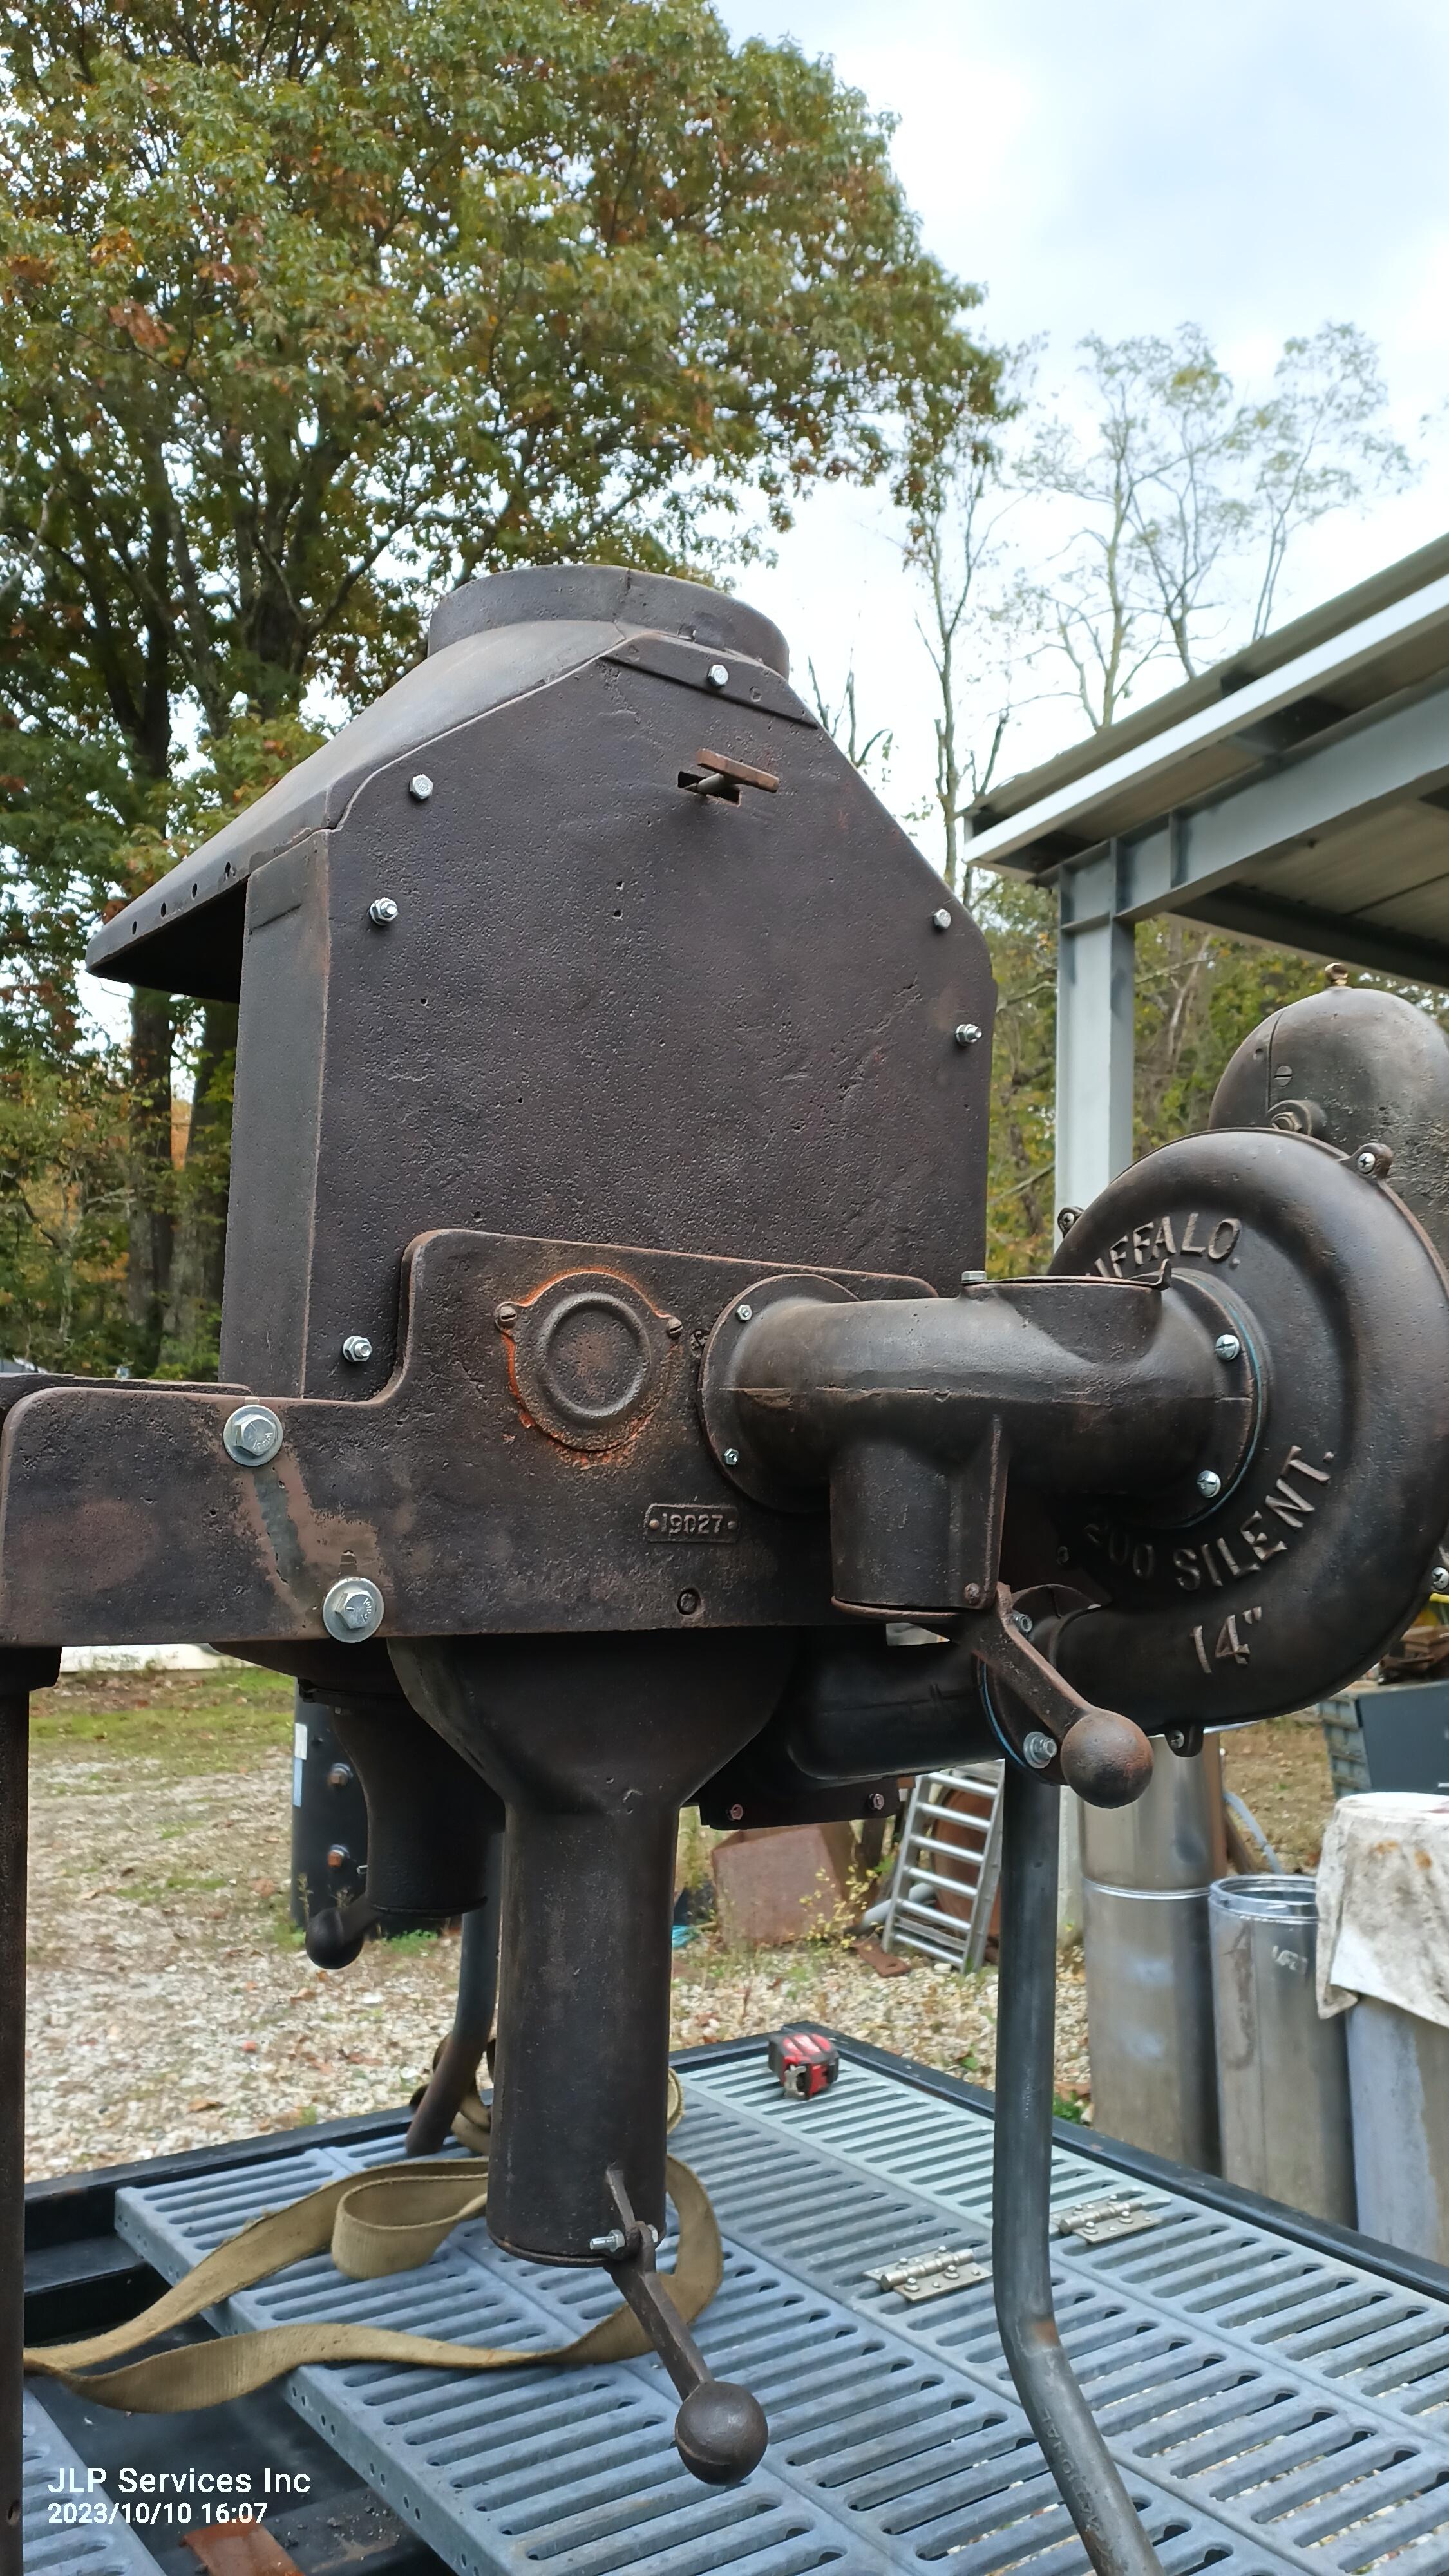
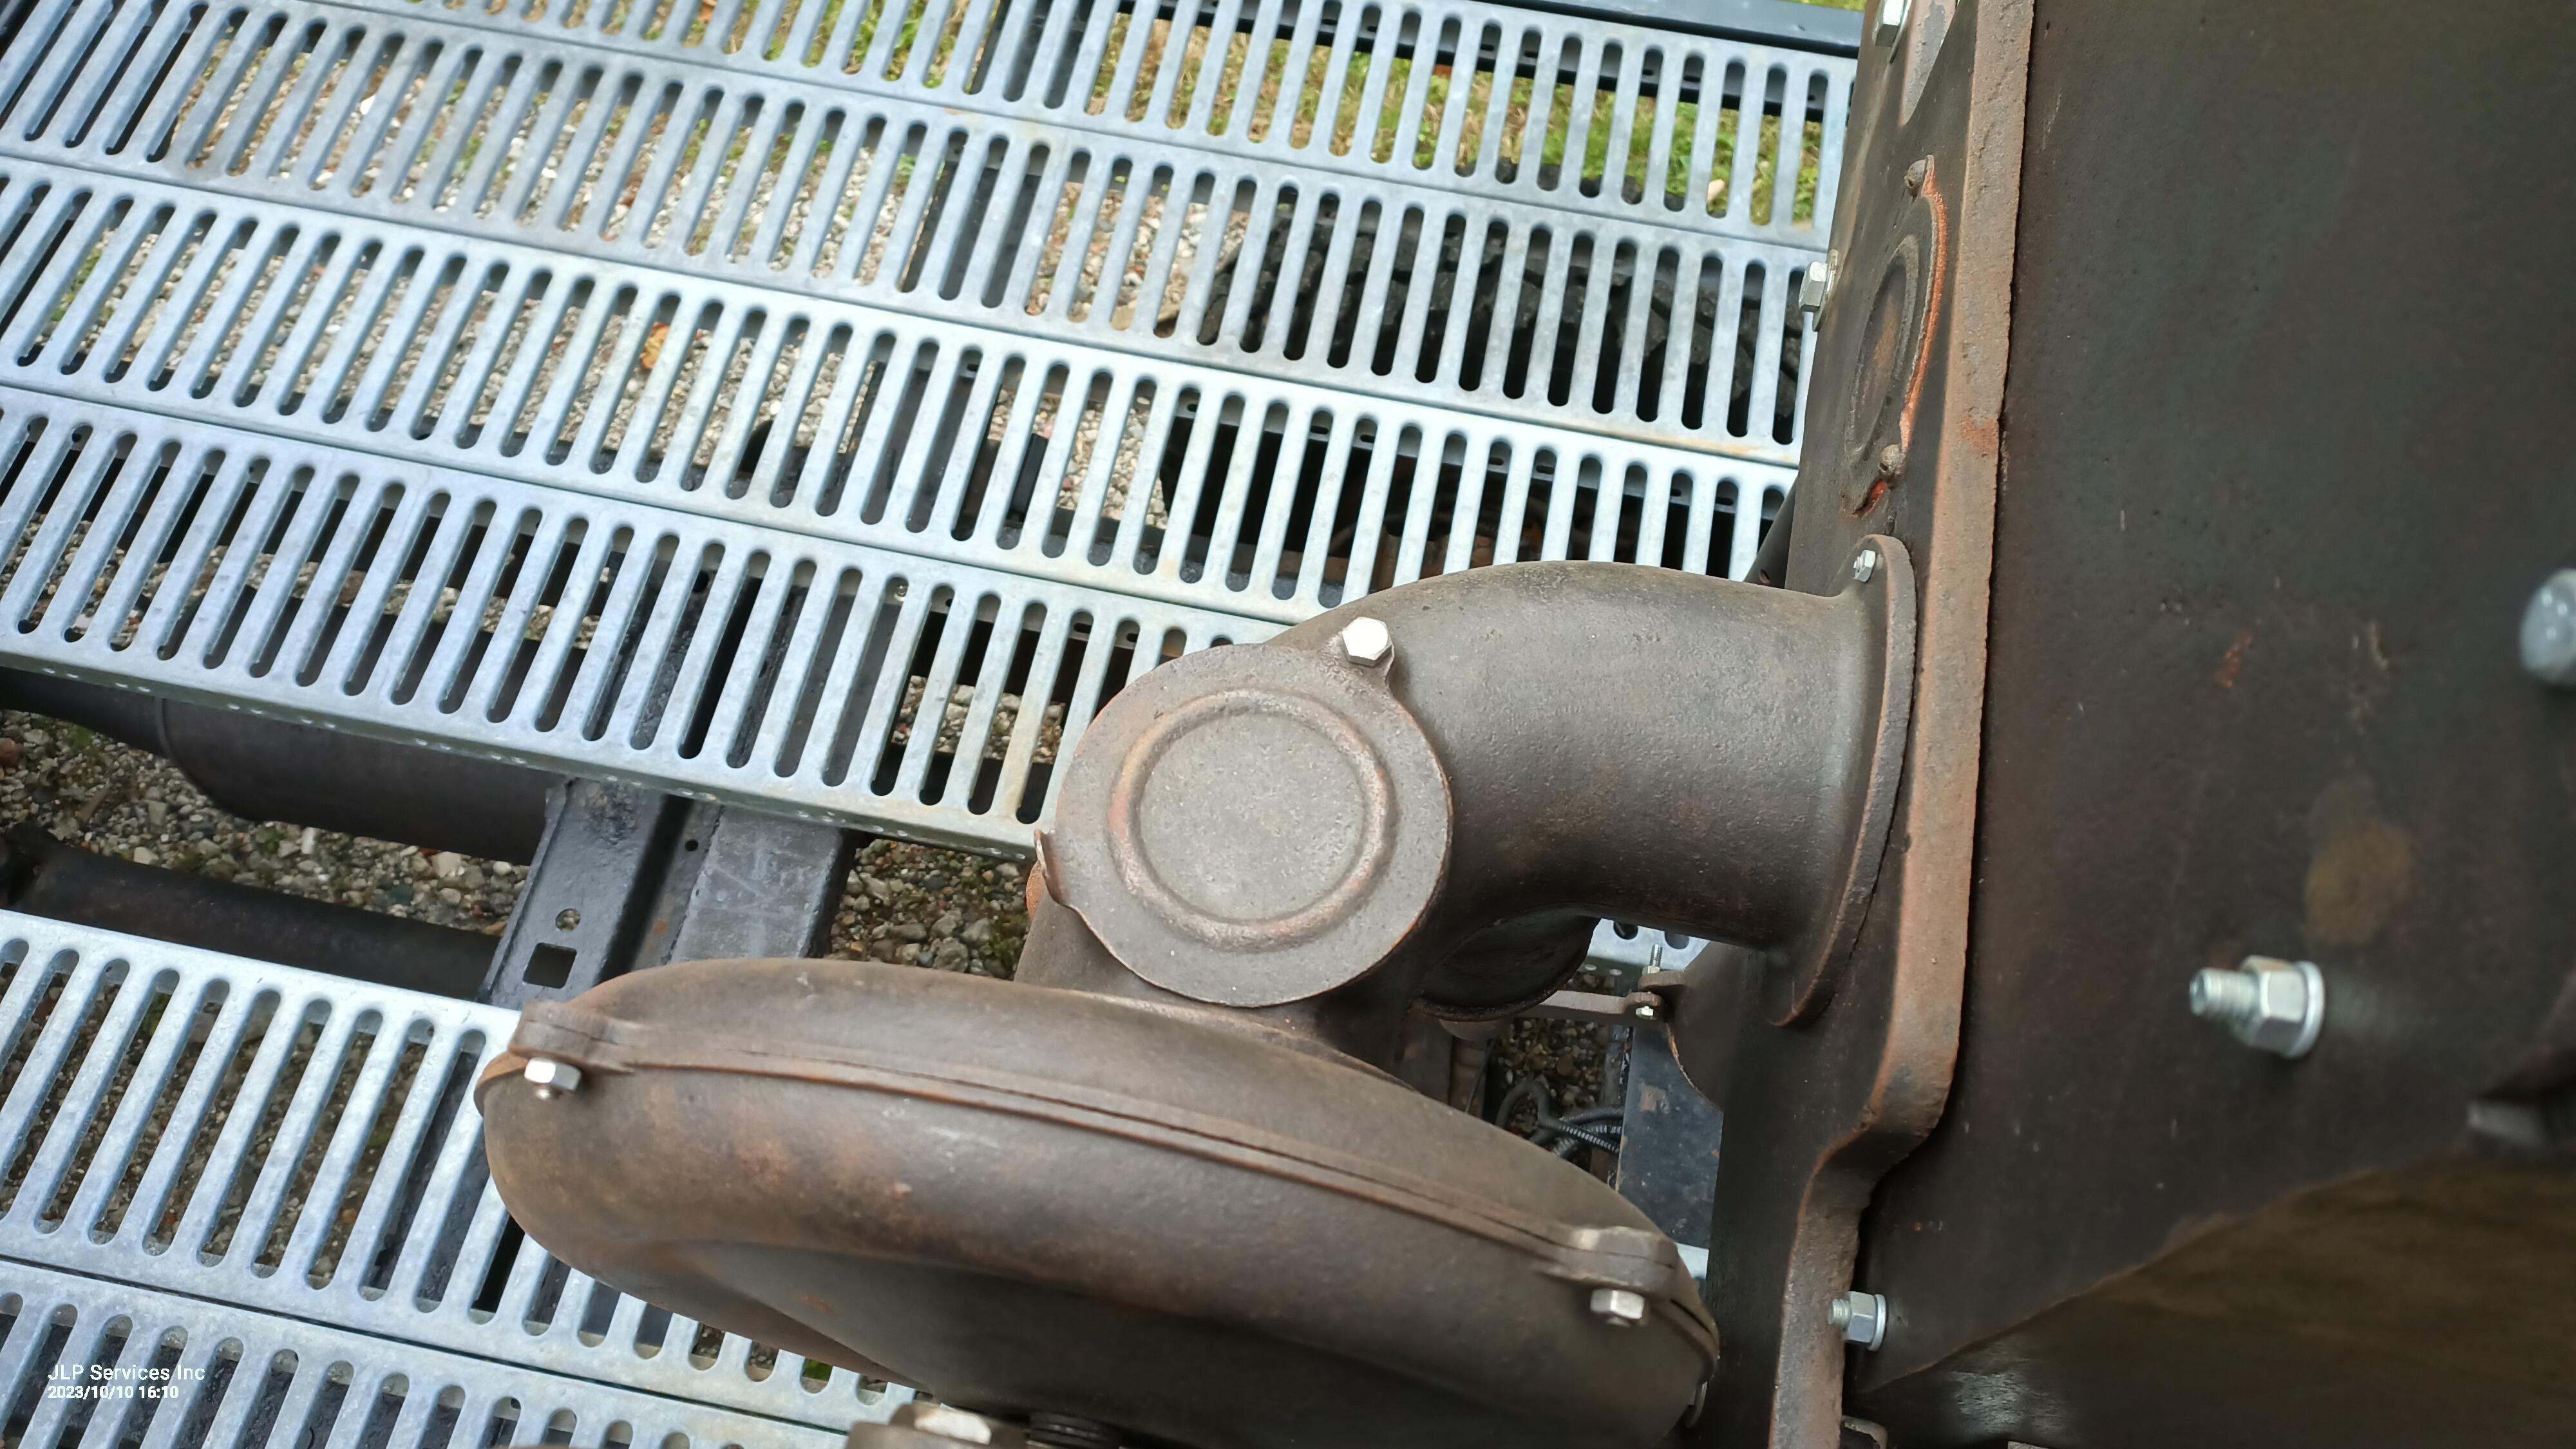
So after my test fire I noticed there was not as much suction as there should be.. When I lifted the forge up to move it I noticed there was a few things going on. Now I am perplexed because there seems to be a part missing on this forge that somehow changes the flow of air. It's a shield that goes in front of the blower intake at the back of the hood at the bottom. I can see where something was mounted but is not missing. Be great to see an original before I just guess at it. I also tore it all apart and found some missing bolts holding up the ash dump for the hood as well.


-
You found it in the 2nd to last photo. That is the model with the 6660 hood..
-
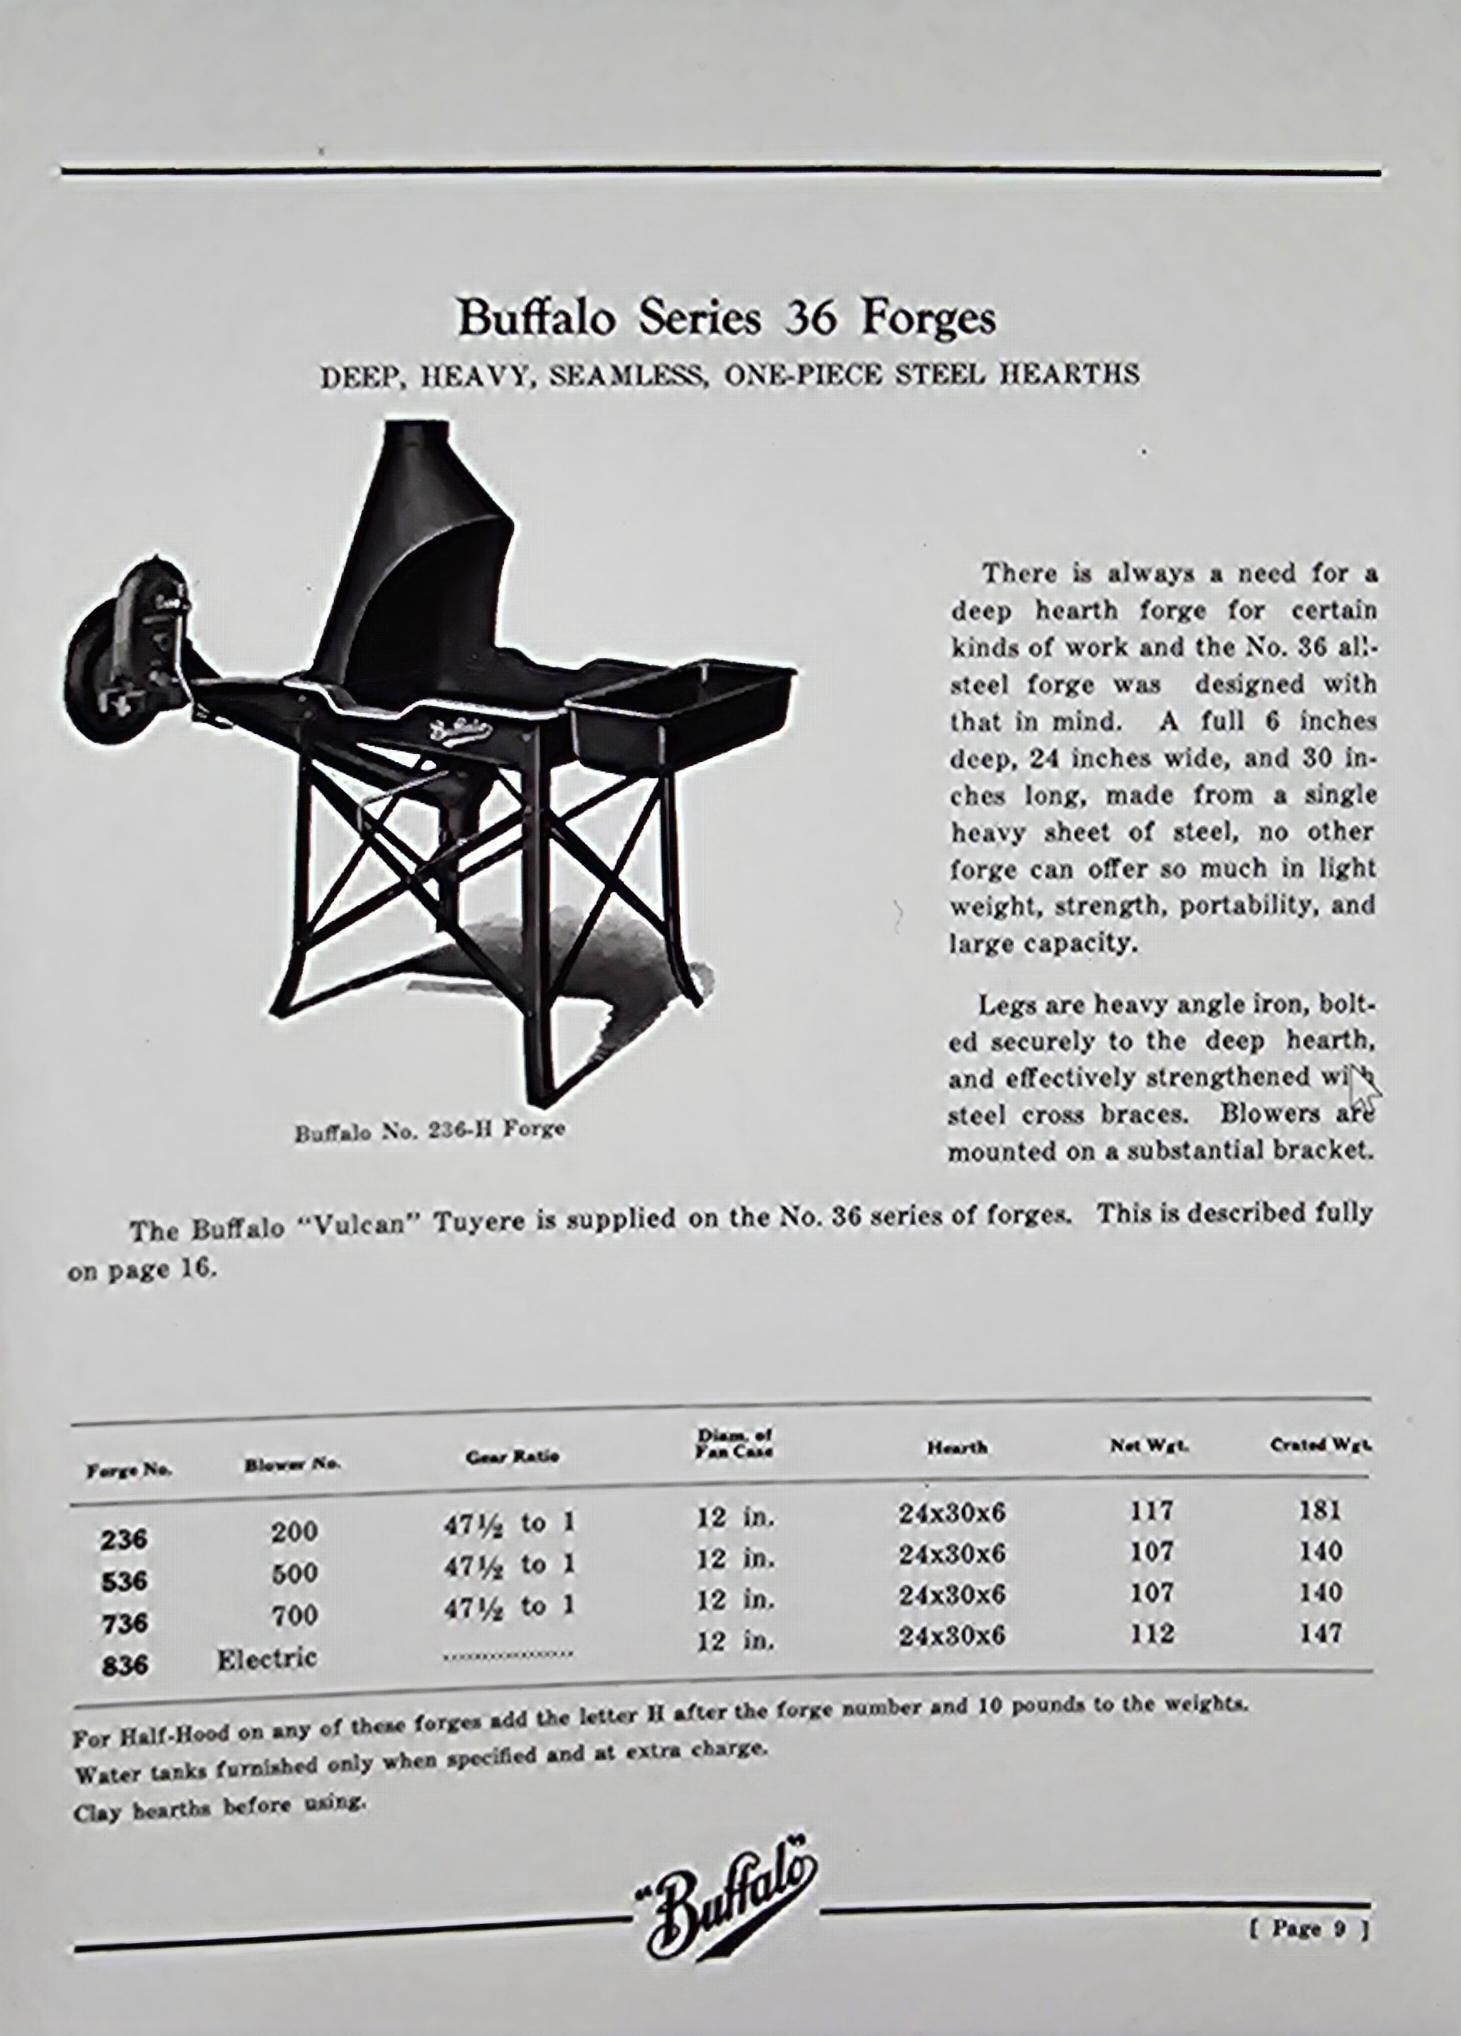
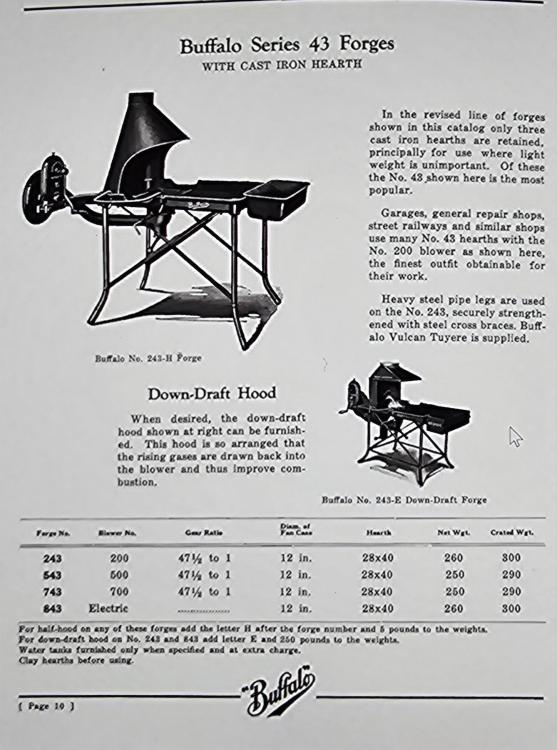
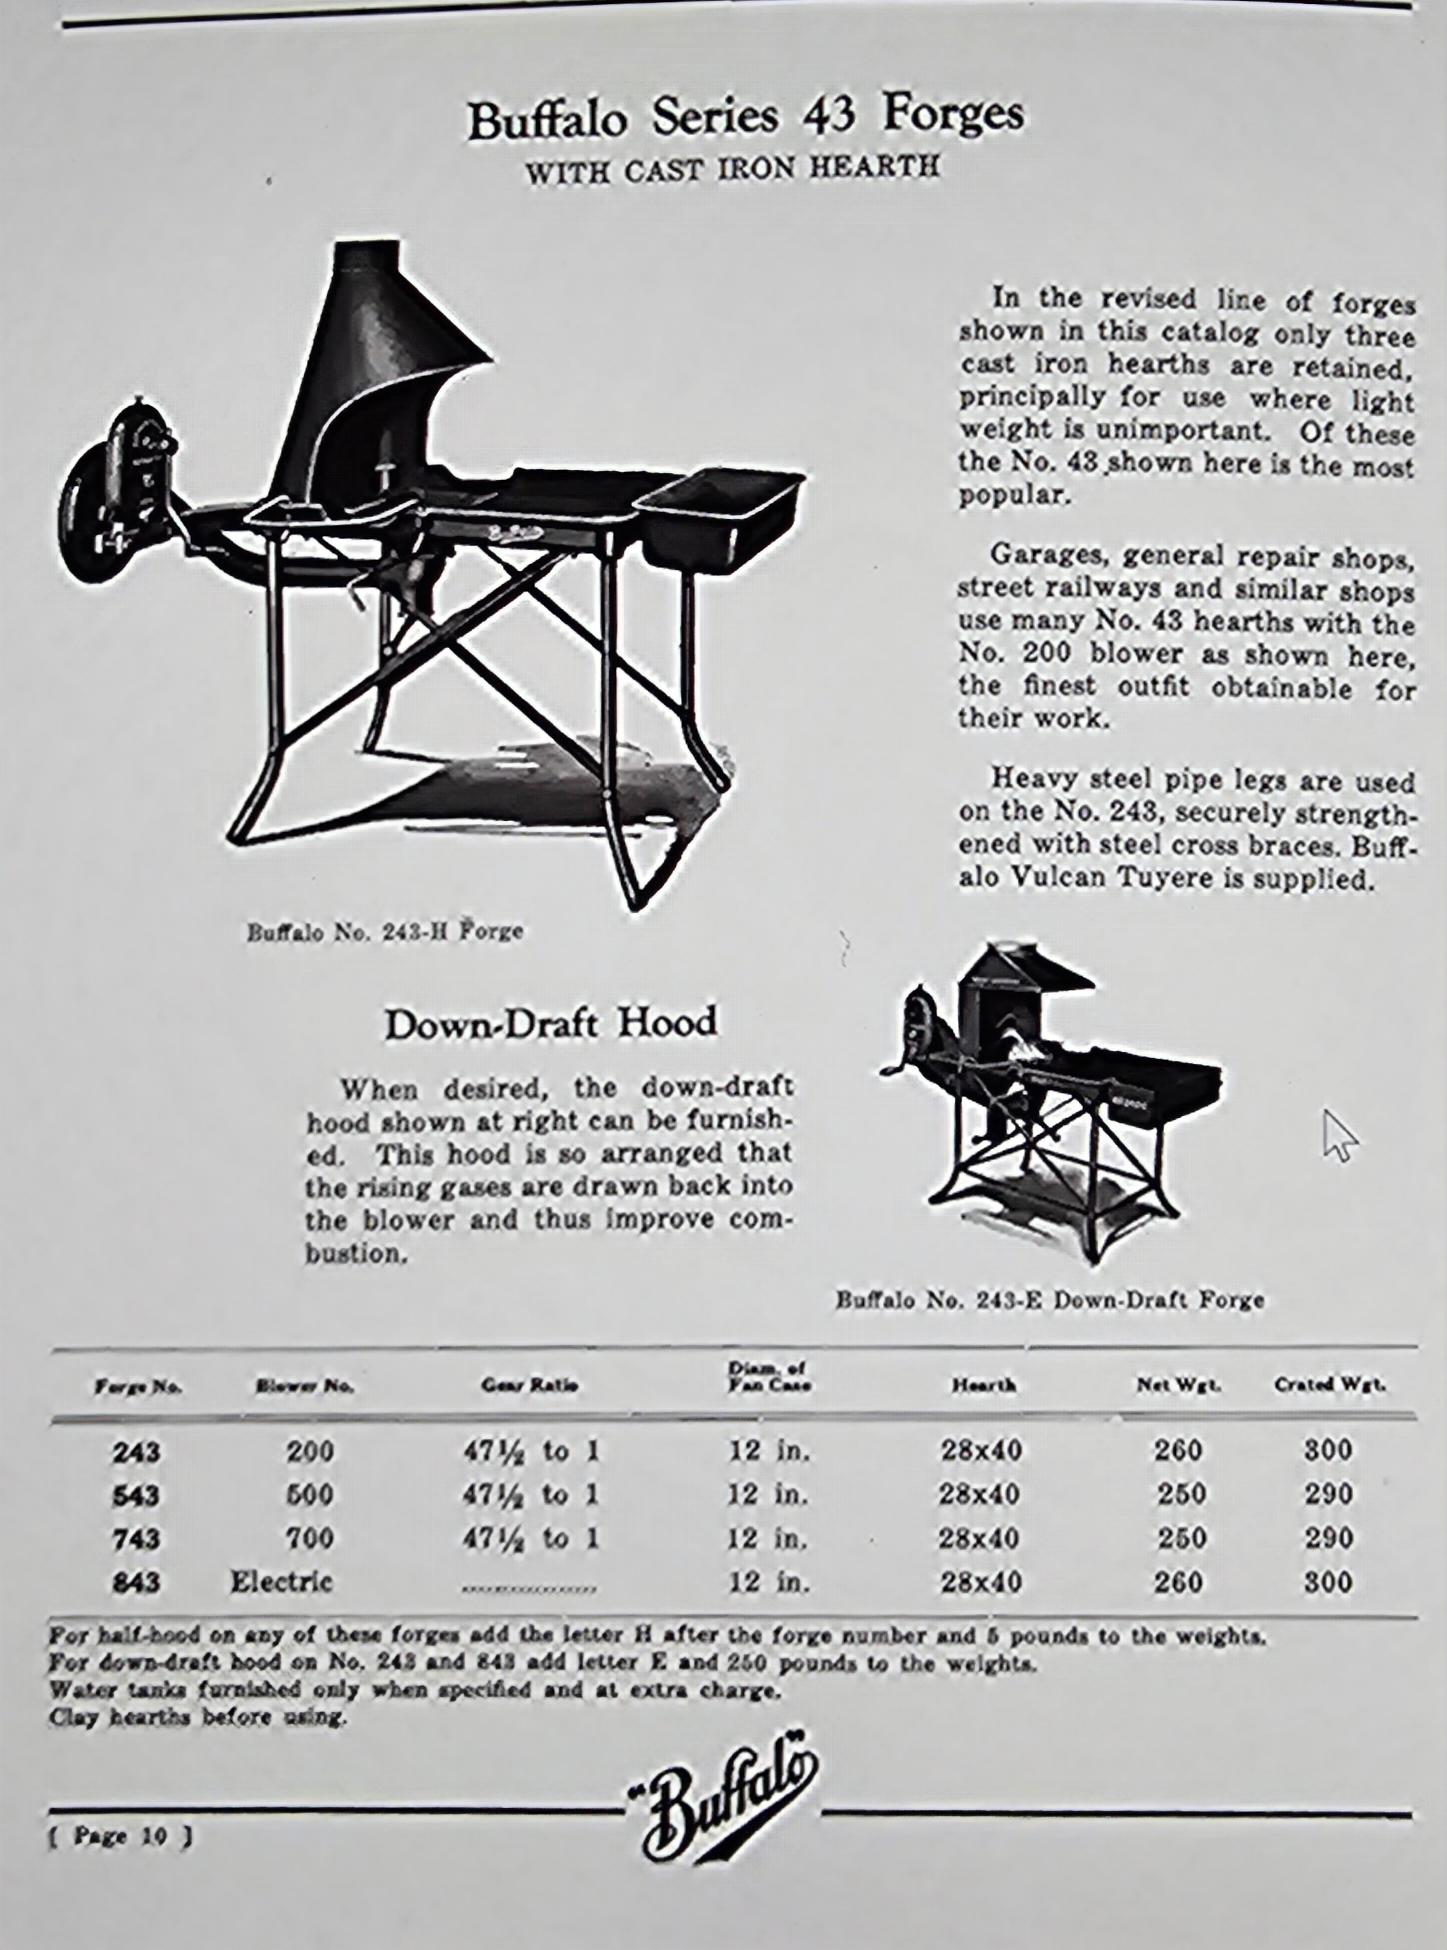
Also from the 660 to the 6660 the swing down divider disappears. Also the shutter grates are slightly different. Thanks.. On that flyer there was a patent date of 1894 for the commercial down draft forge.. This is one of the oldest production forges that maintained the same design.
-
Thanks was hoping to establish a date for the information. From what I can gather.. The 660 hood has the blower connected directly to the larger ash collector. The 6660 connects to the back of the hood. I can't seem to find the date of change from the 660 to the 6660
-
JHCC where did you pull that 660 photo from? Do you remember the date of the catalog? from the beginning of this thread.
.thumb.JPG.cd588d6040a73bf34725c350c043e36b.JPG)
.thumb.jpg.e14eb0ed41bad4443741afc41c949c3a.jpg)
.thumb.JPG.91309b2377853df35faf9045673513c1.JPG)
-
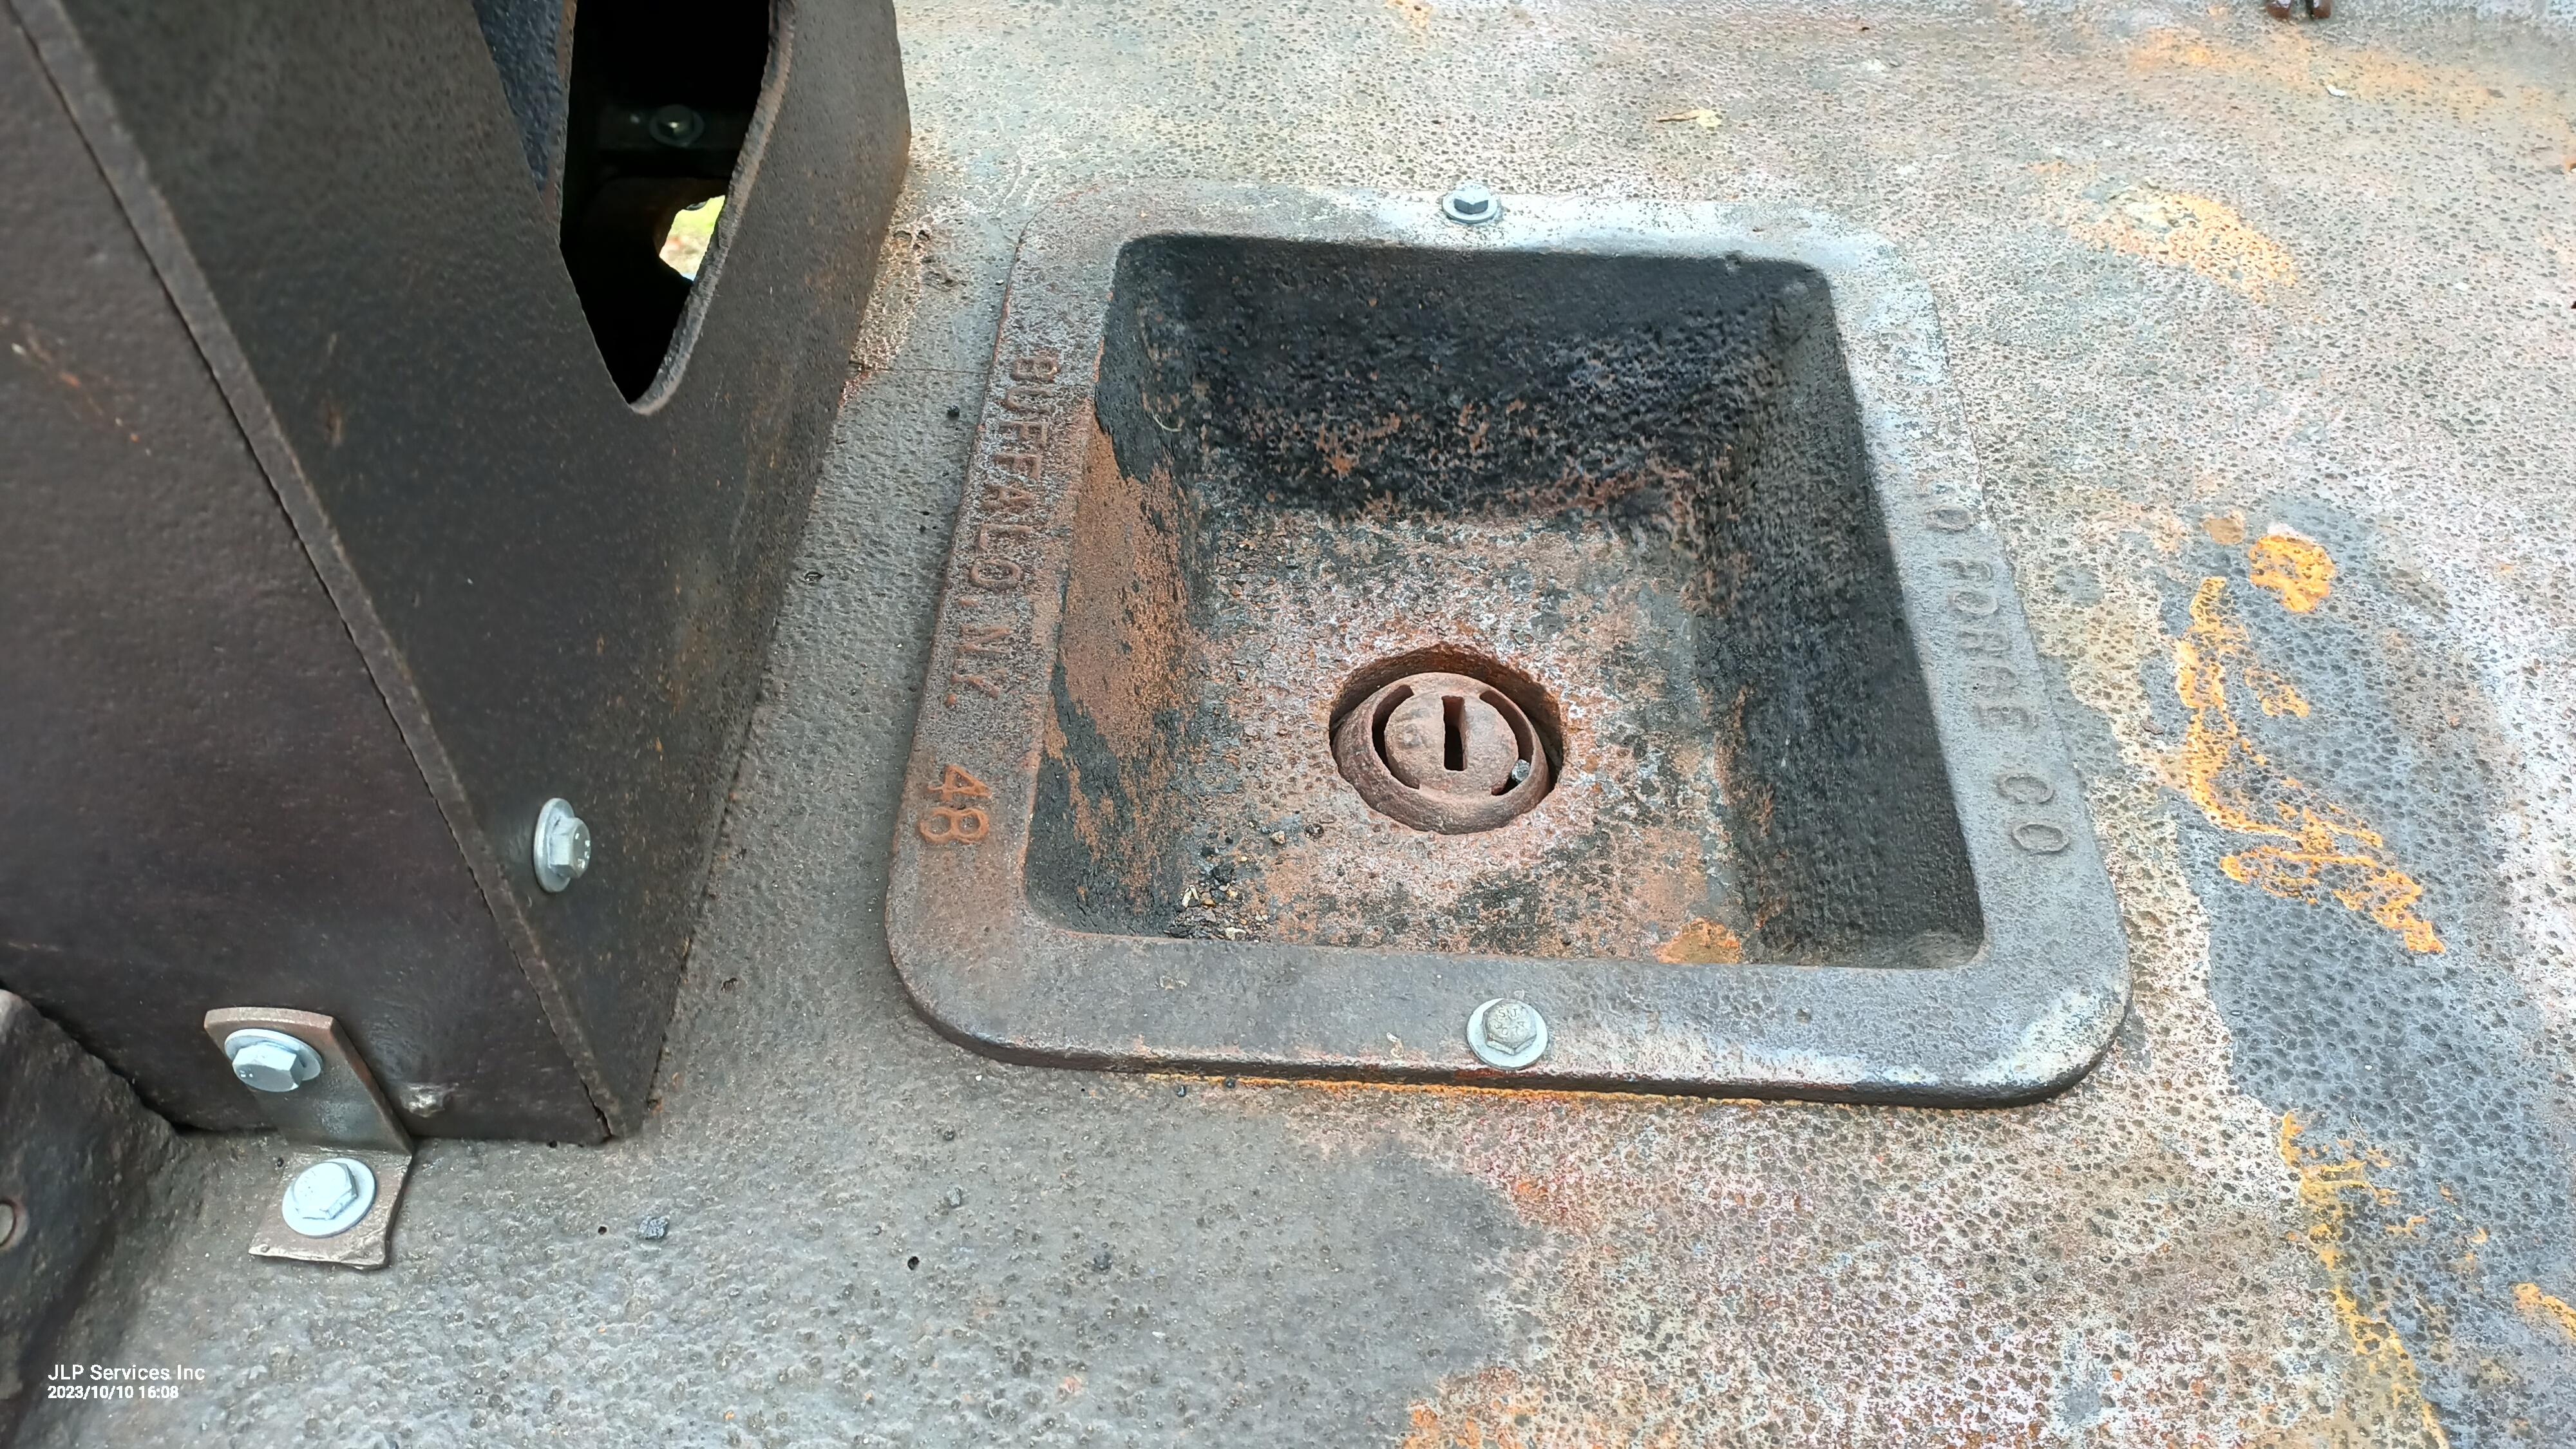
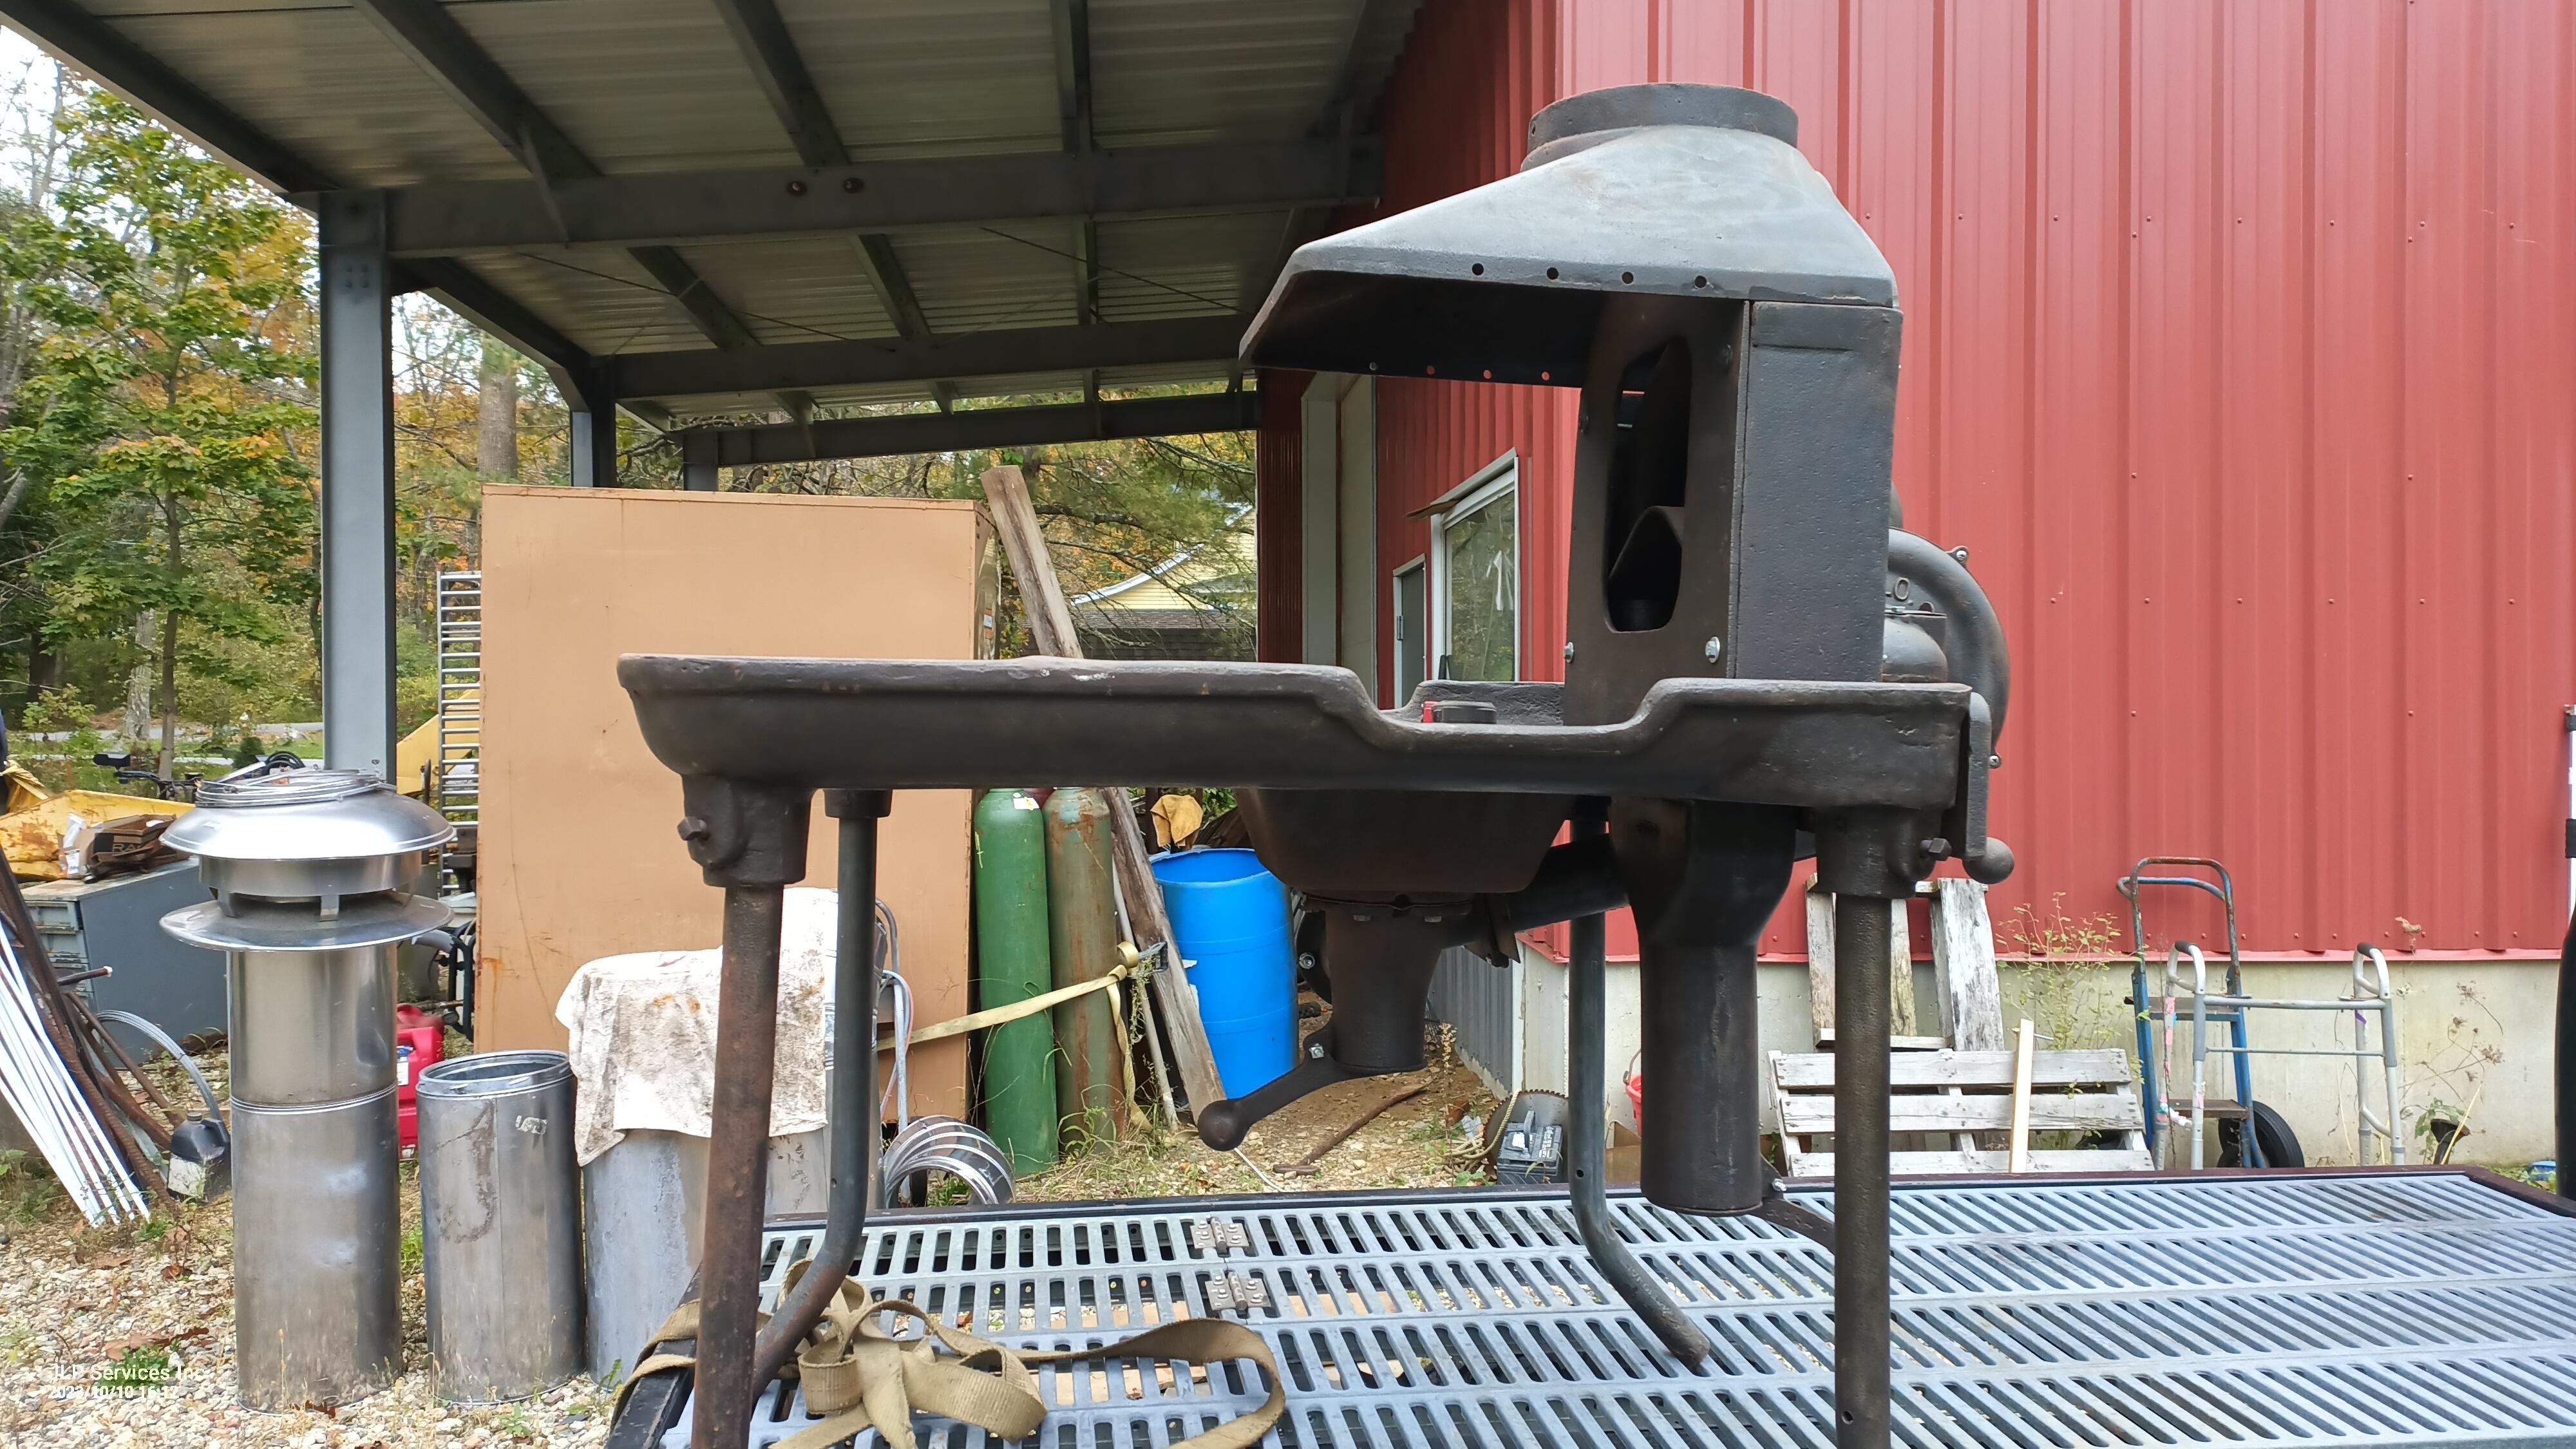
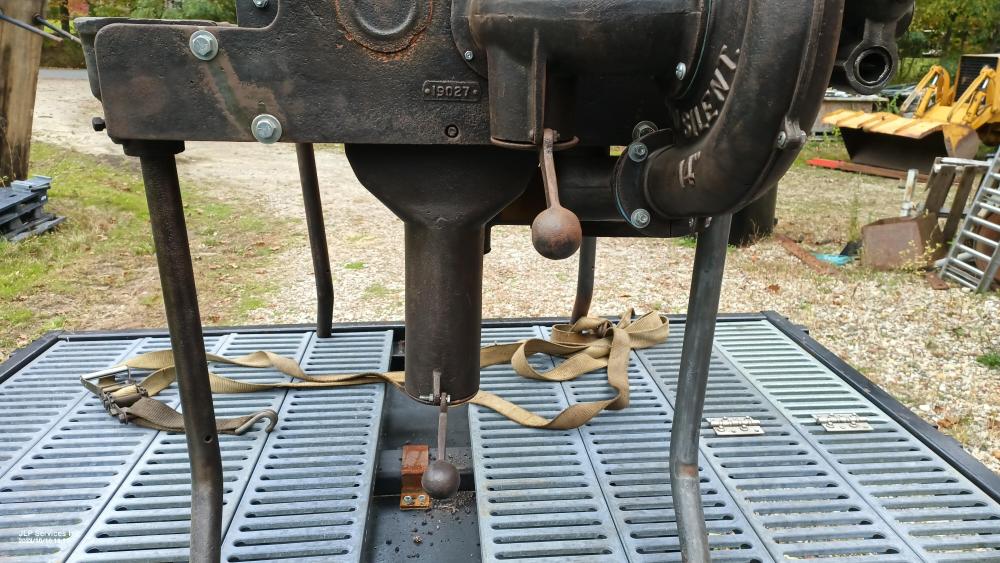
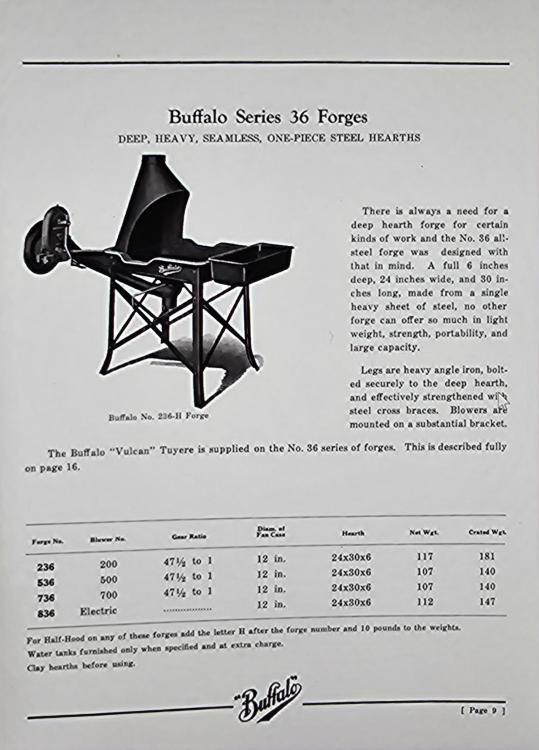
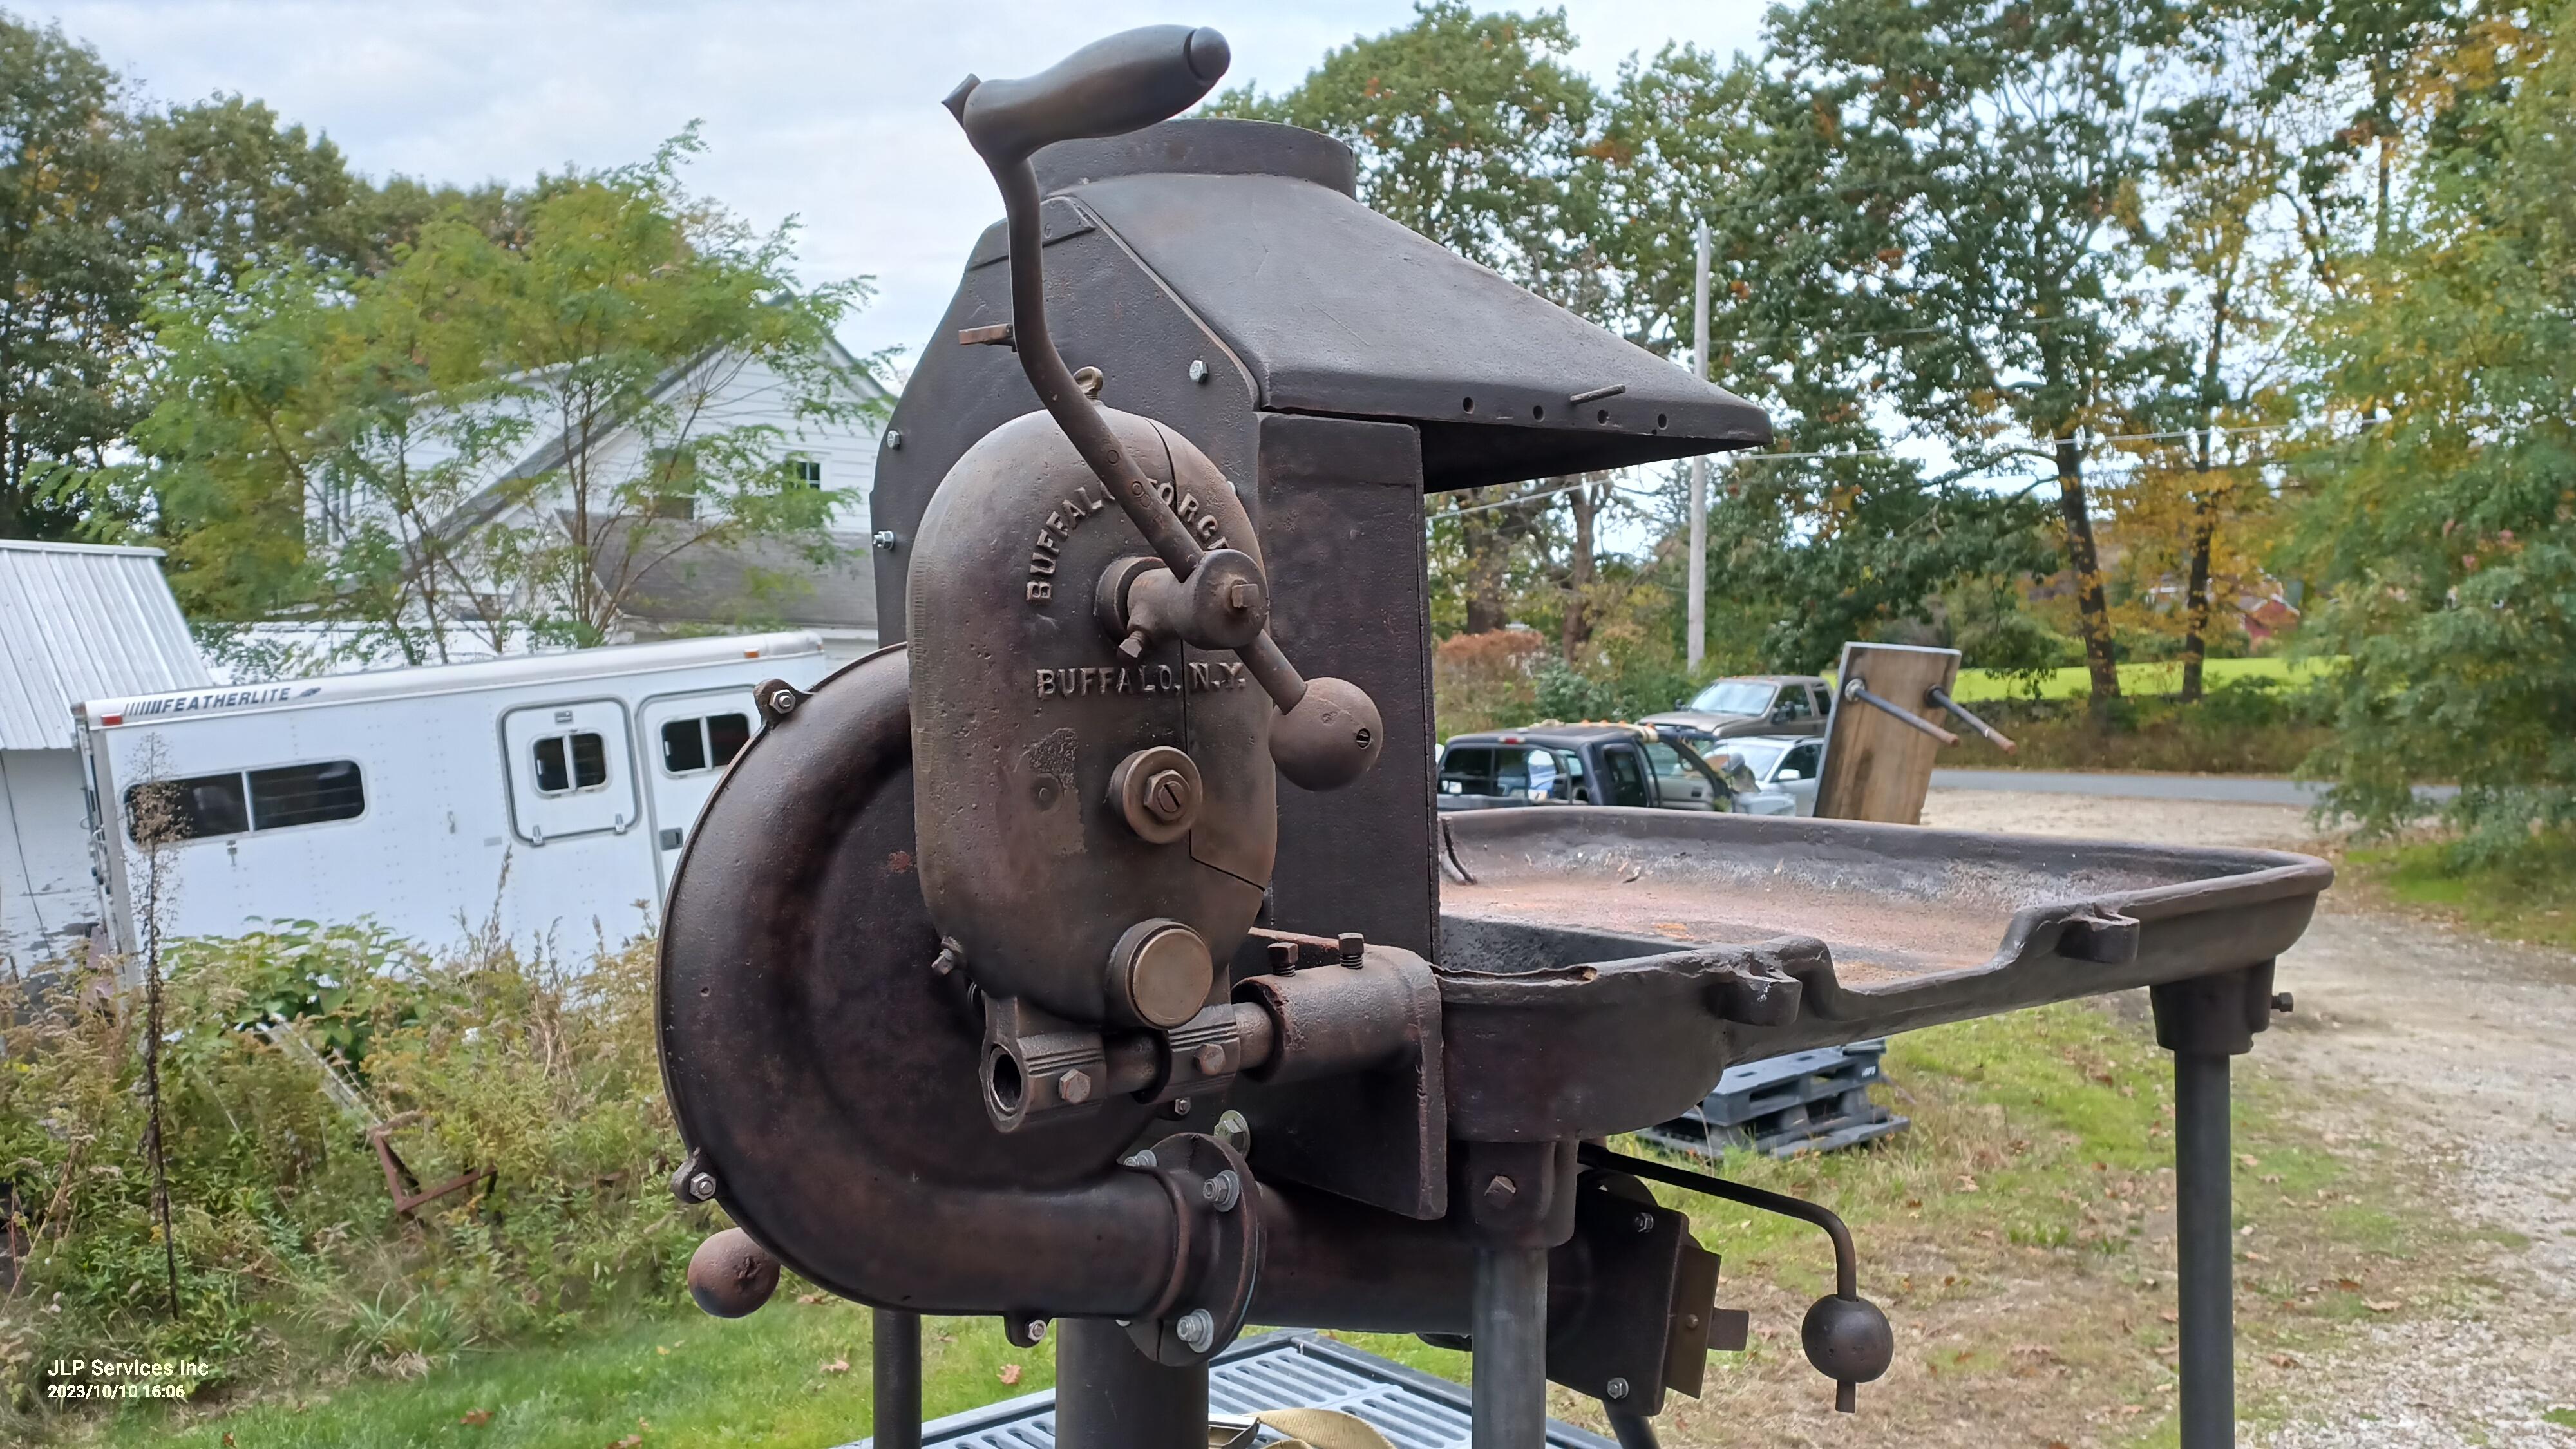
Yes, the down draft hood is for burning the heavy smoke and for assisting with the cold chimney drawing problem. Catalog 801 1903 Buffalo forge and blower. So in my research on the subject, It's been made clearer and clearer that the down draft hood assembly was indeed a separate item and could be added to both the cast iron forge bodies of the 48 series of forges as well as other models of both cast iron and pressed steel. So the forge body is a 48 Series.. This model is a 248 with downdraft hood which is a 6660 model. The 2XX represents the model of blower.. 2XX is the 200 Silent blower, The 5XX is the 500 series blower and the 7XX is the 700 series blower and 8XX is the electric model.. So a 248 is this forge body with a 200 series blower with the 48 firepot and heavy cast body.. H is half hood, E is down draft.. These forges came in a 48 and 49 series Heavy body.. The 48 is only 3" deep and the 49 series is 6" deep. So, this forges is a 248E with 6660 down draft hood. The forges weighs 345lbs and the hood assembly weighs 250lbs. By the way.. At some point.. They made 660 forges that were either/or with sidedraft.. so I own a 660 forge that is not side draft.. 660 was the forge model. I think they fitted the 660 side draft to these 660 forge bodies and just to simplify their internal system.. I can't confirm this as it's very hard to establish lines simply by catalogs. Within a very short time Buffalo forge was moving away from cast iron in their forge products stating that steel was superior in every way.. The Silent 200 blower was their main stay premium blower but even this was moved to pressed steel stampings.
-
By the way.. After seeing one in person.. It would be easy to make..
-
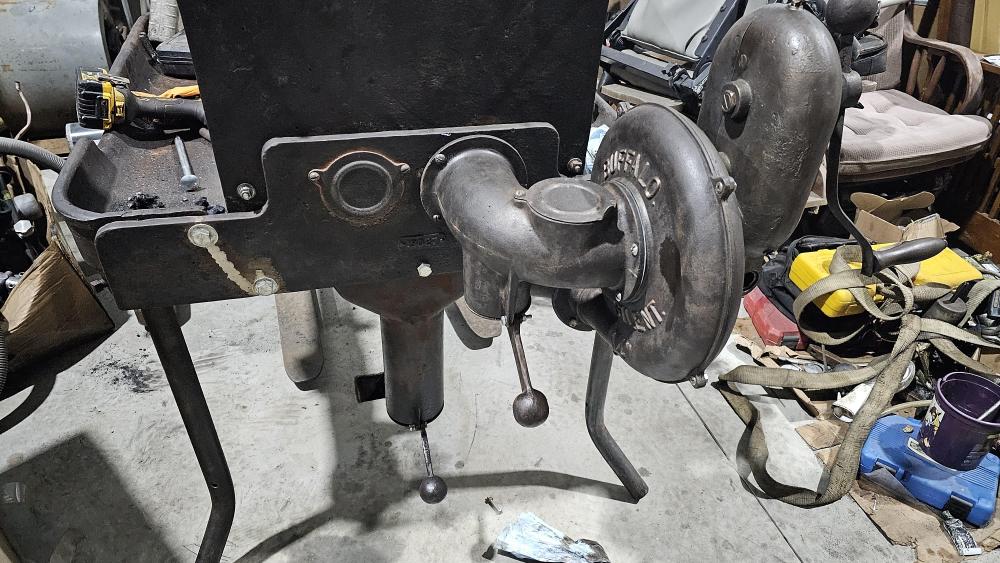
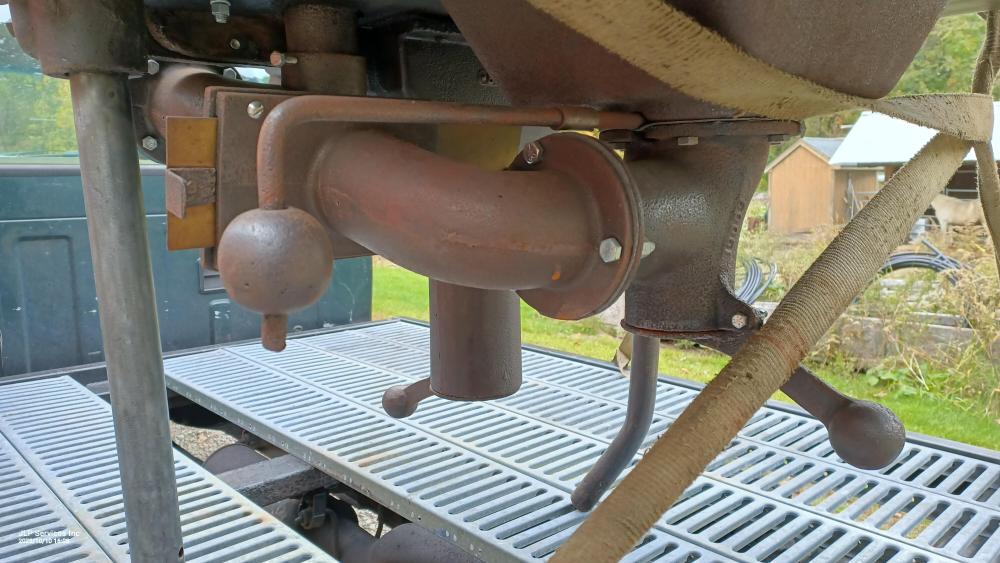
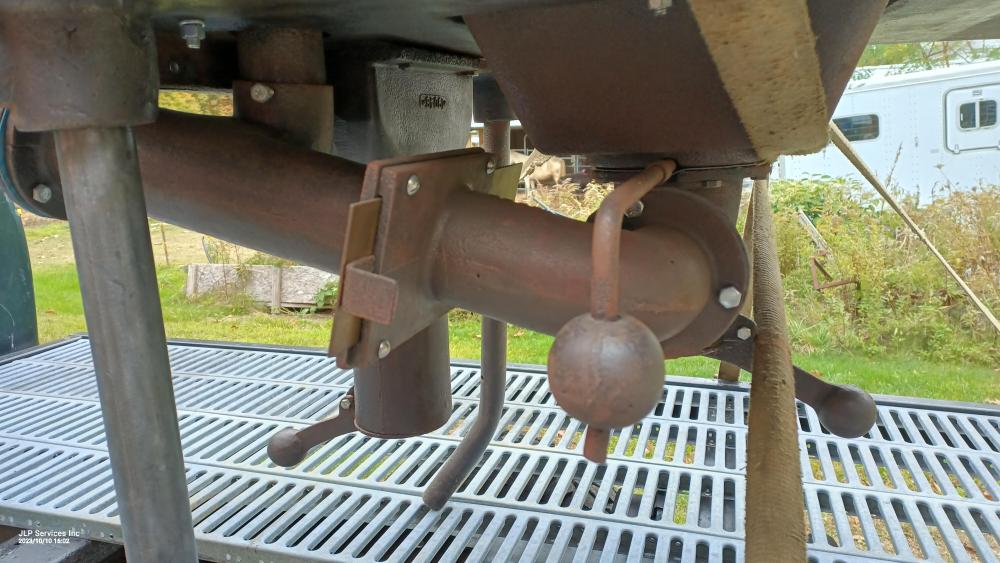
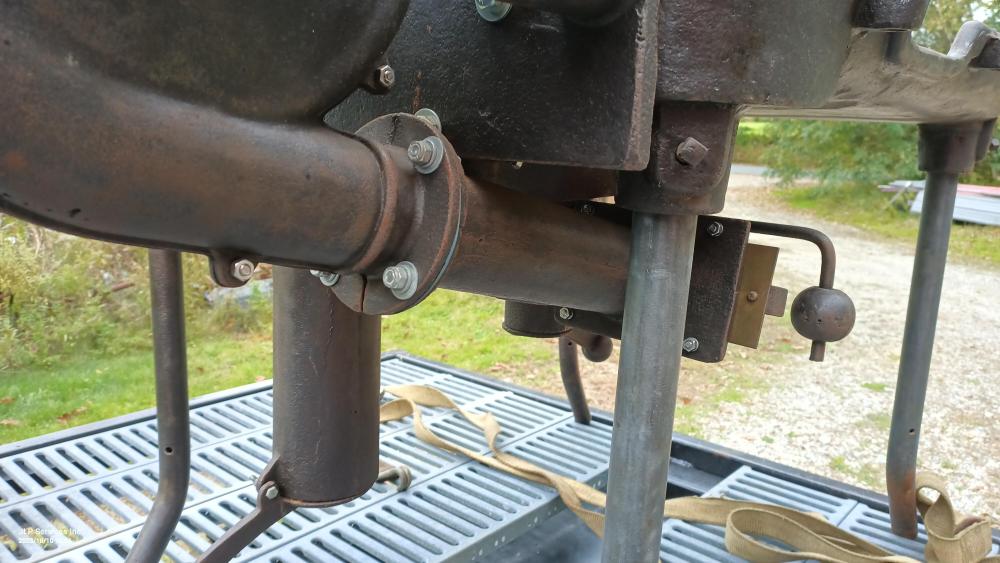
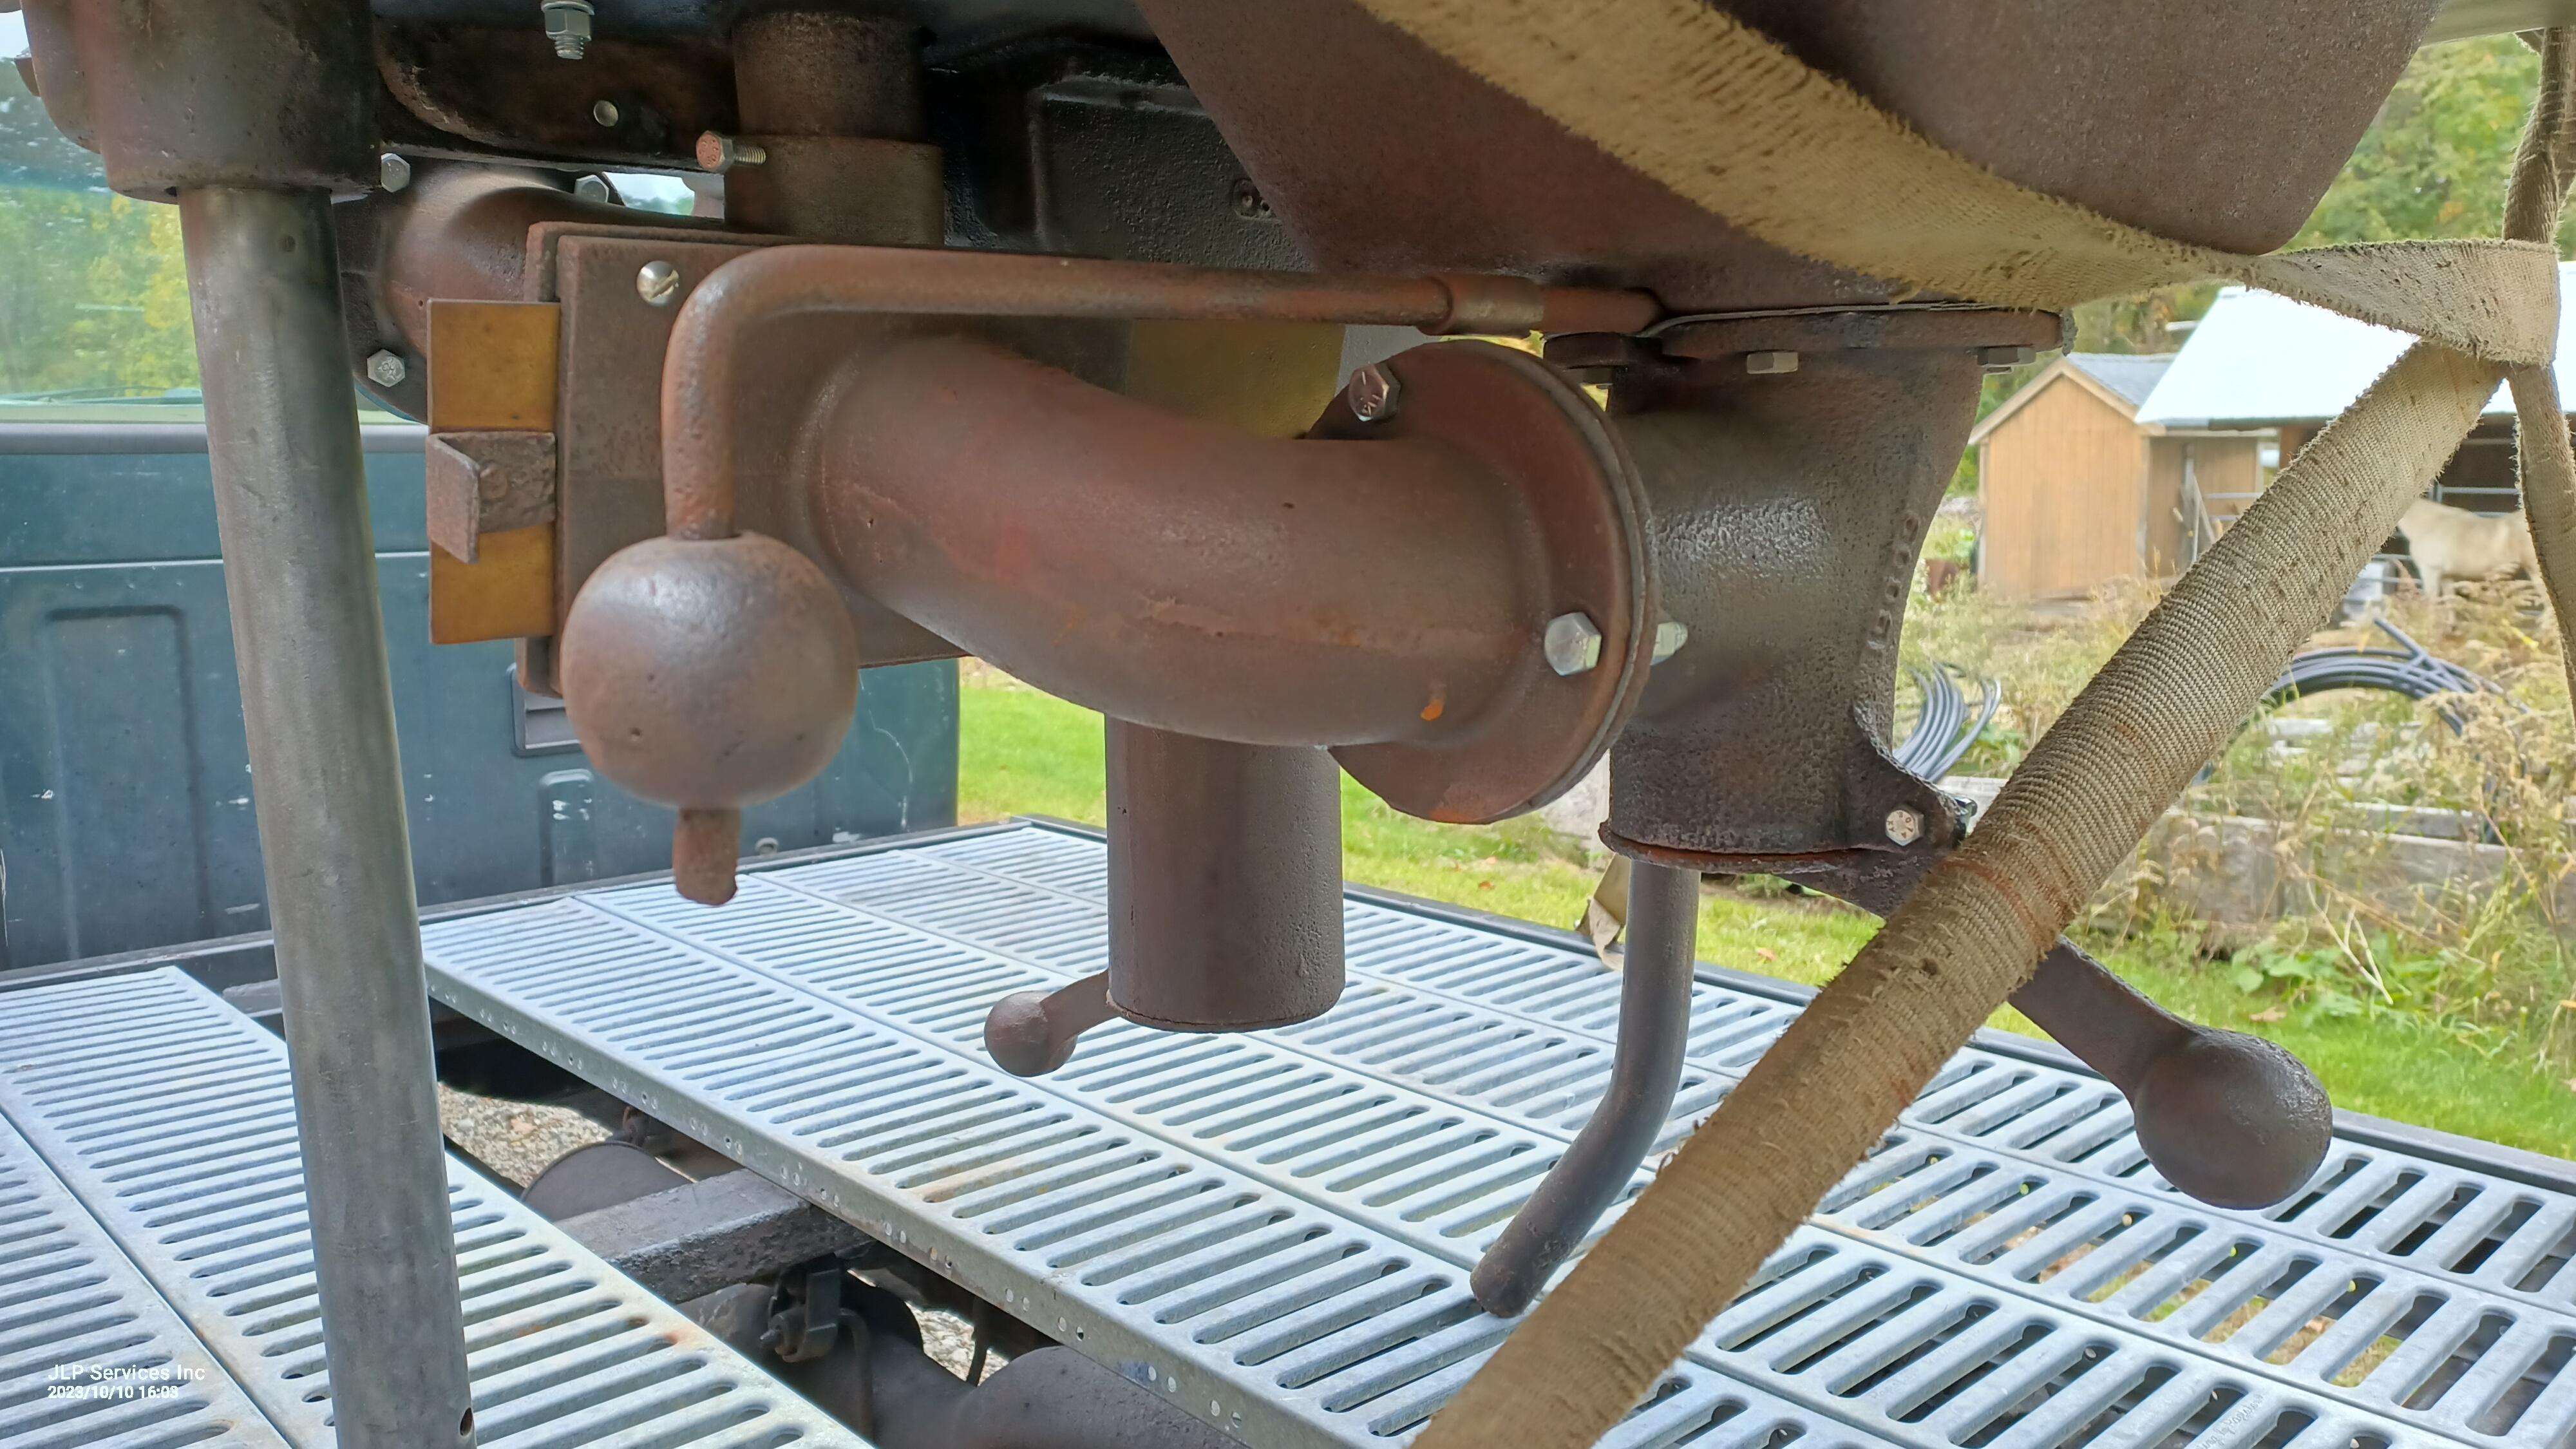
George I'll try to explain but it's rather complicated.. It's all based on where the fire is in its cycle. Starting, green coal smolder/lighting, coked, and ready. The dial on the back of the hood is for the venturi assist.. This is used in conjunction with the slider just after the blower and before the tuyere to increase the venturi effect and also lessen the amount of air going to the fire. Between these 2 you adjust them till you get the smoke going up the hood.. but also recirculated the heavy smoke thru the tuyere again. Starting the forge, you close the shutters, close the vent before the blower, partially open the venturi for the stack (barely a crack).. this pushes any smoke that goes up into the stack but the smoke is still to heavy.. It will help to get it out the stack. When the coke and coal, first starts there is a lot of heavy smoke and this is sucked into the blower thru the bottom upside down V section towards the left of the hood opening, This smoke is then fed back into the tuyere/firepot and up the venturi pipe. As the fire starts and the flames get higher and get hotter and the smoke starts to catch you open the vent just before the blower thus no longer sucking in hot flames and now you can adjust the shutters in the hood, Venturi and the slider valve right before the tuyere for the best burn and smoke removal. The slider valve just before the tuyere controls the venturi volume.. The little valve inside the pipe adjusts the amount of opening. This forge runs hot.. I forgot how much I love the Buffalo 200 blowers.. The firepot in this thing is huge compared to the standard Vulcan Buffalo firepot. This system really needs side shutters when used in less than still air. yes it pulls in the heavy smoke.. Ill have to see how it works over time.. I really bought it more for the potential to learn from it. I paid 975.00 for it and it's whole and has been refitted.. I'll have to ago thru and put new gaskets in because some of the cast pieces have little gaps. If this all makes sense or complete non sense let me know and I can make a video on it. I have included the 3 control points. this is missing the shutters.


-
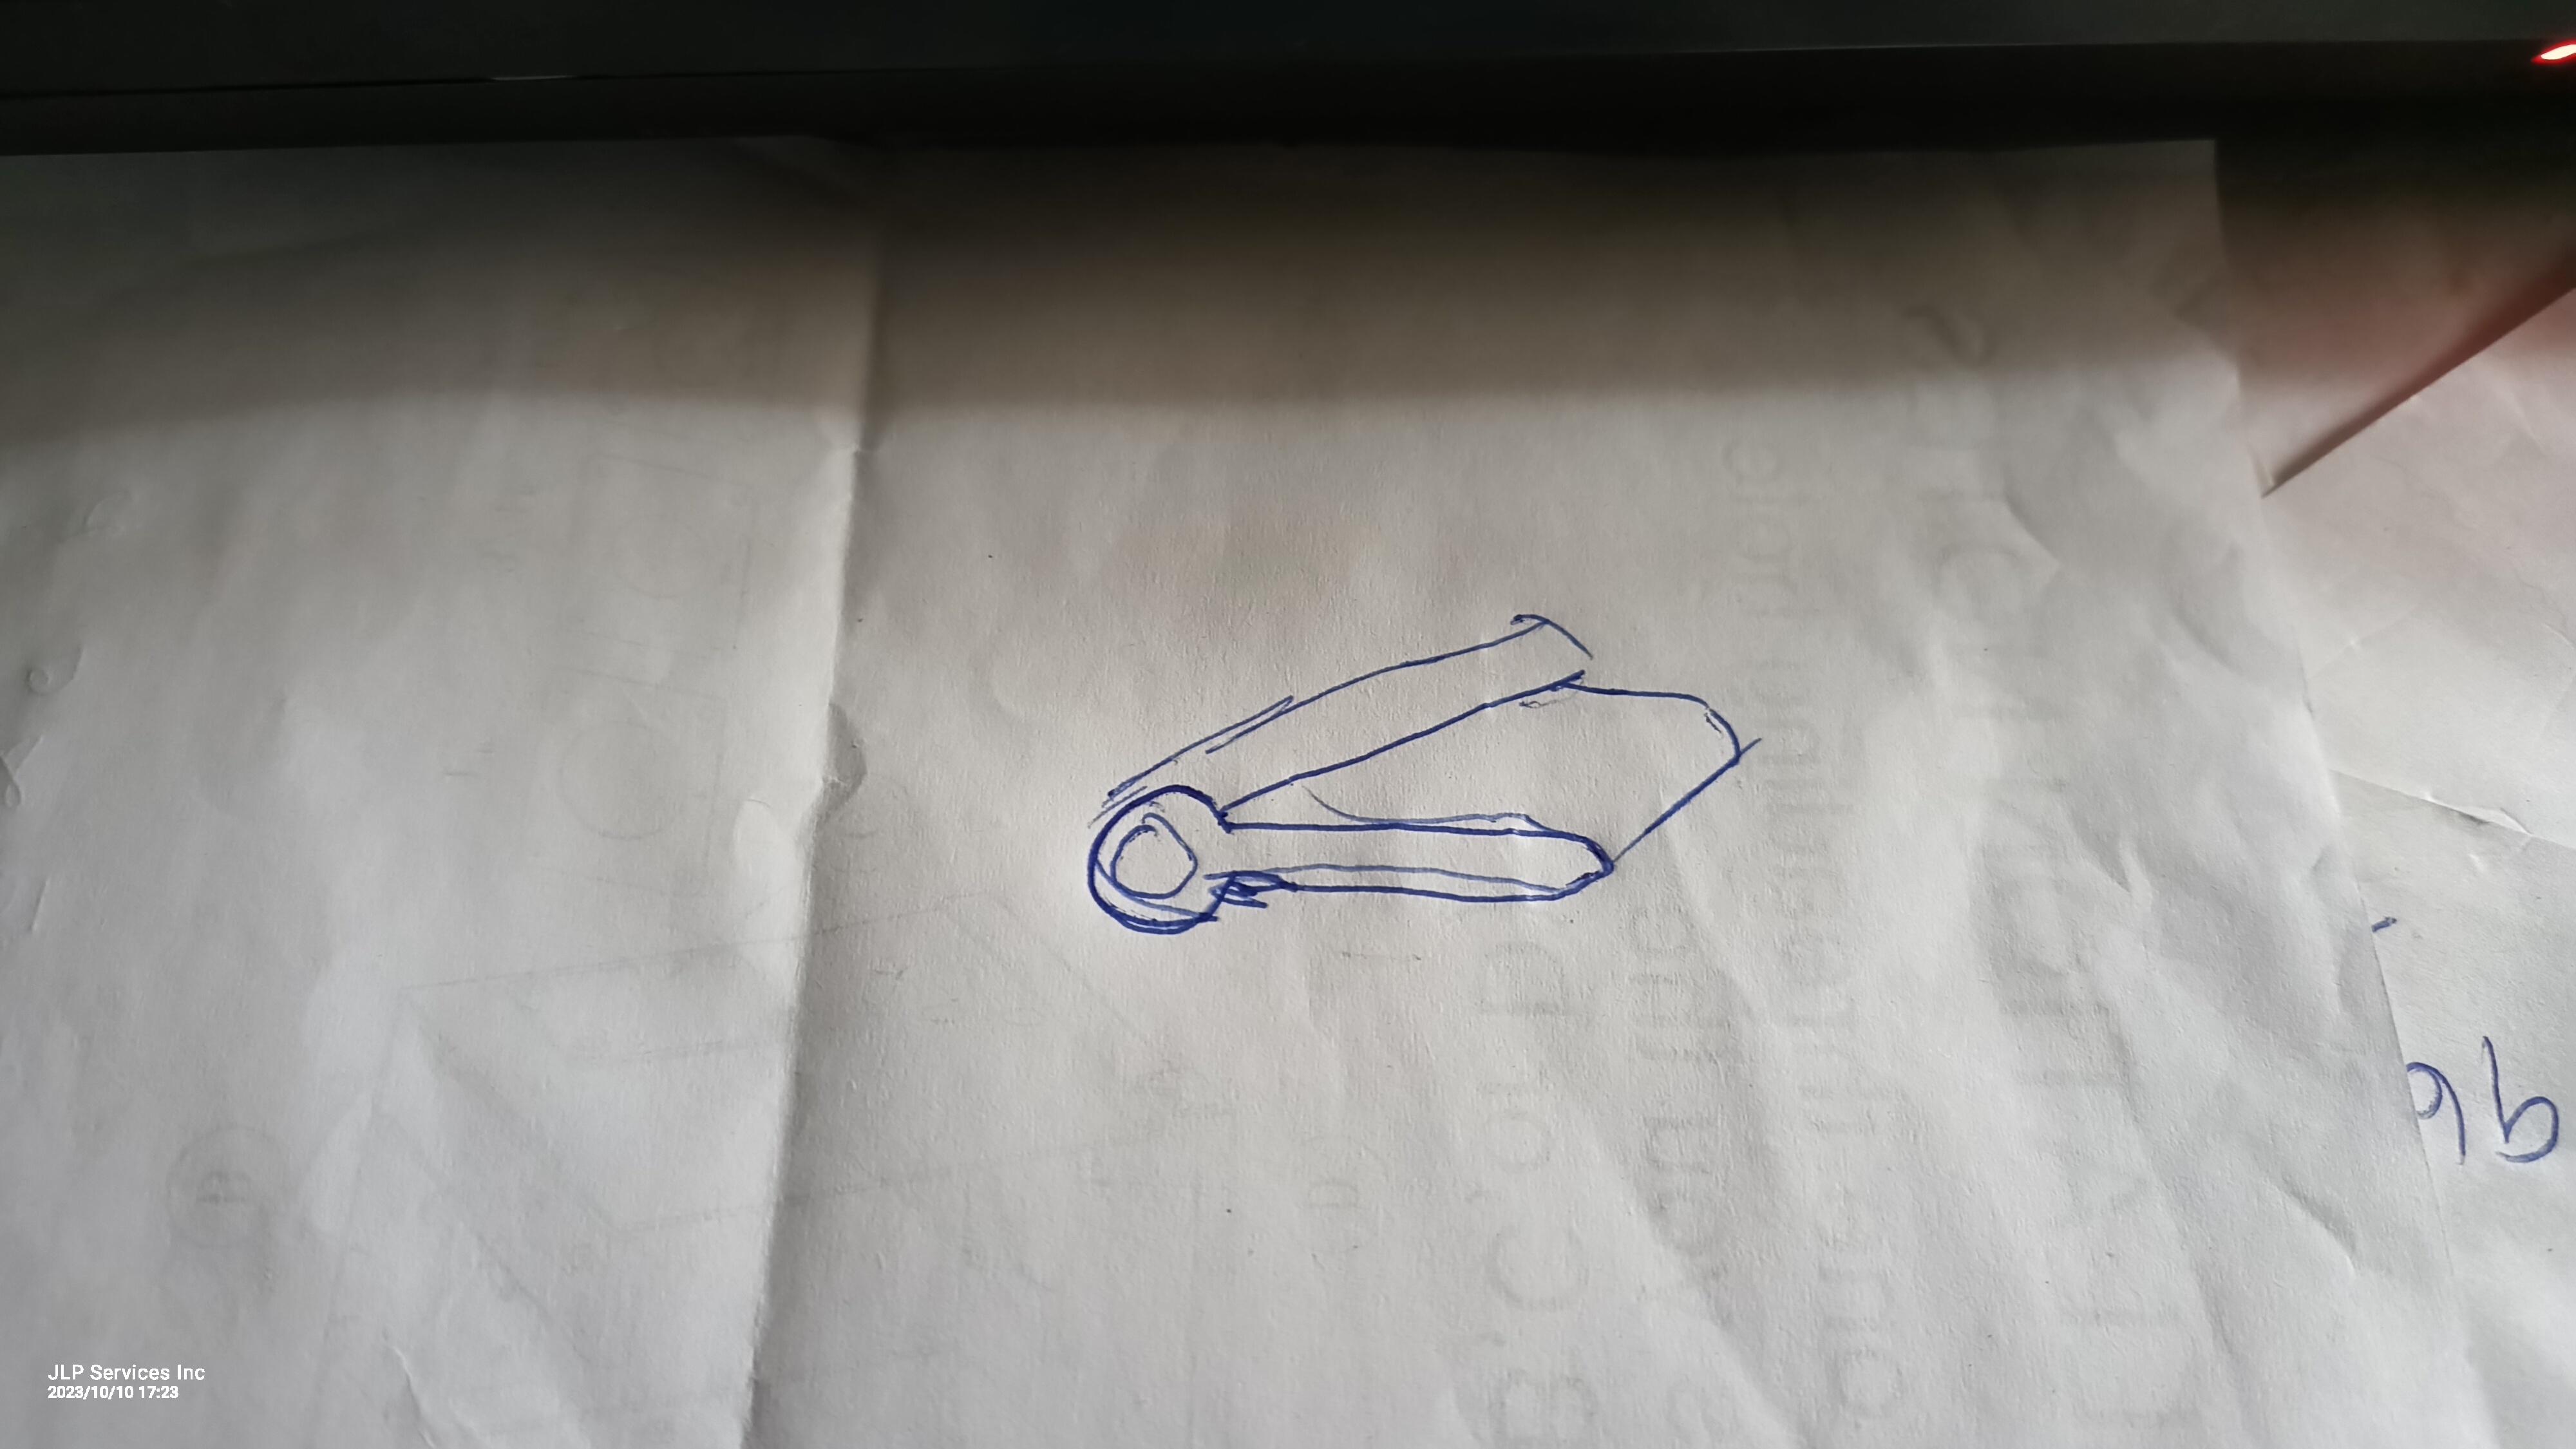
Wow, Thanks.. If the hood is together while I appreciate you taking it apart.. Just a photo will do. I believe the rods are 5/16? They slide inside what looks like cast iron wing shapes. Something like this..

-
Thanks you.. It's hard to tell in the photo.. Are they shaped like a wing with the axle on the backside? Also do they fill the entire inside of the hood? The firepot in this one has no side lips.. The side lips were designed to rest on the bricks or to tuck the clay in.. This firepot is completely flat.
-
Ok. so I went and did it.. I bought a 6660 with down draft hood. My shutters are missing.. Love to see how they are and how they work? shape, thickness and length.. Also curious if your have the divider plate for smoke and fire.. On this unit there are 2 holes in the back. One is covered up with a block off plate. The other looks to be a hole if the unit was to be left handed vs right.. I'm wondering if this hole was plugged at the factory. I have taken a bunch of photos in decent lighting. The top hood is a 12" opening.. The blower is a Silent 200 14". The firepot in this is larger than a typical Vulcan firepot.


-
What did you do in the shop today?
jlpservicesinc replied to Mark Ling's topic in Blacksmithing, General Discussion
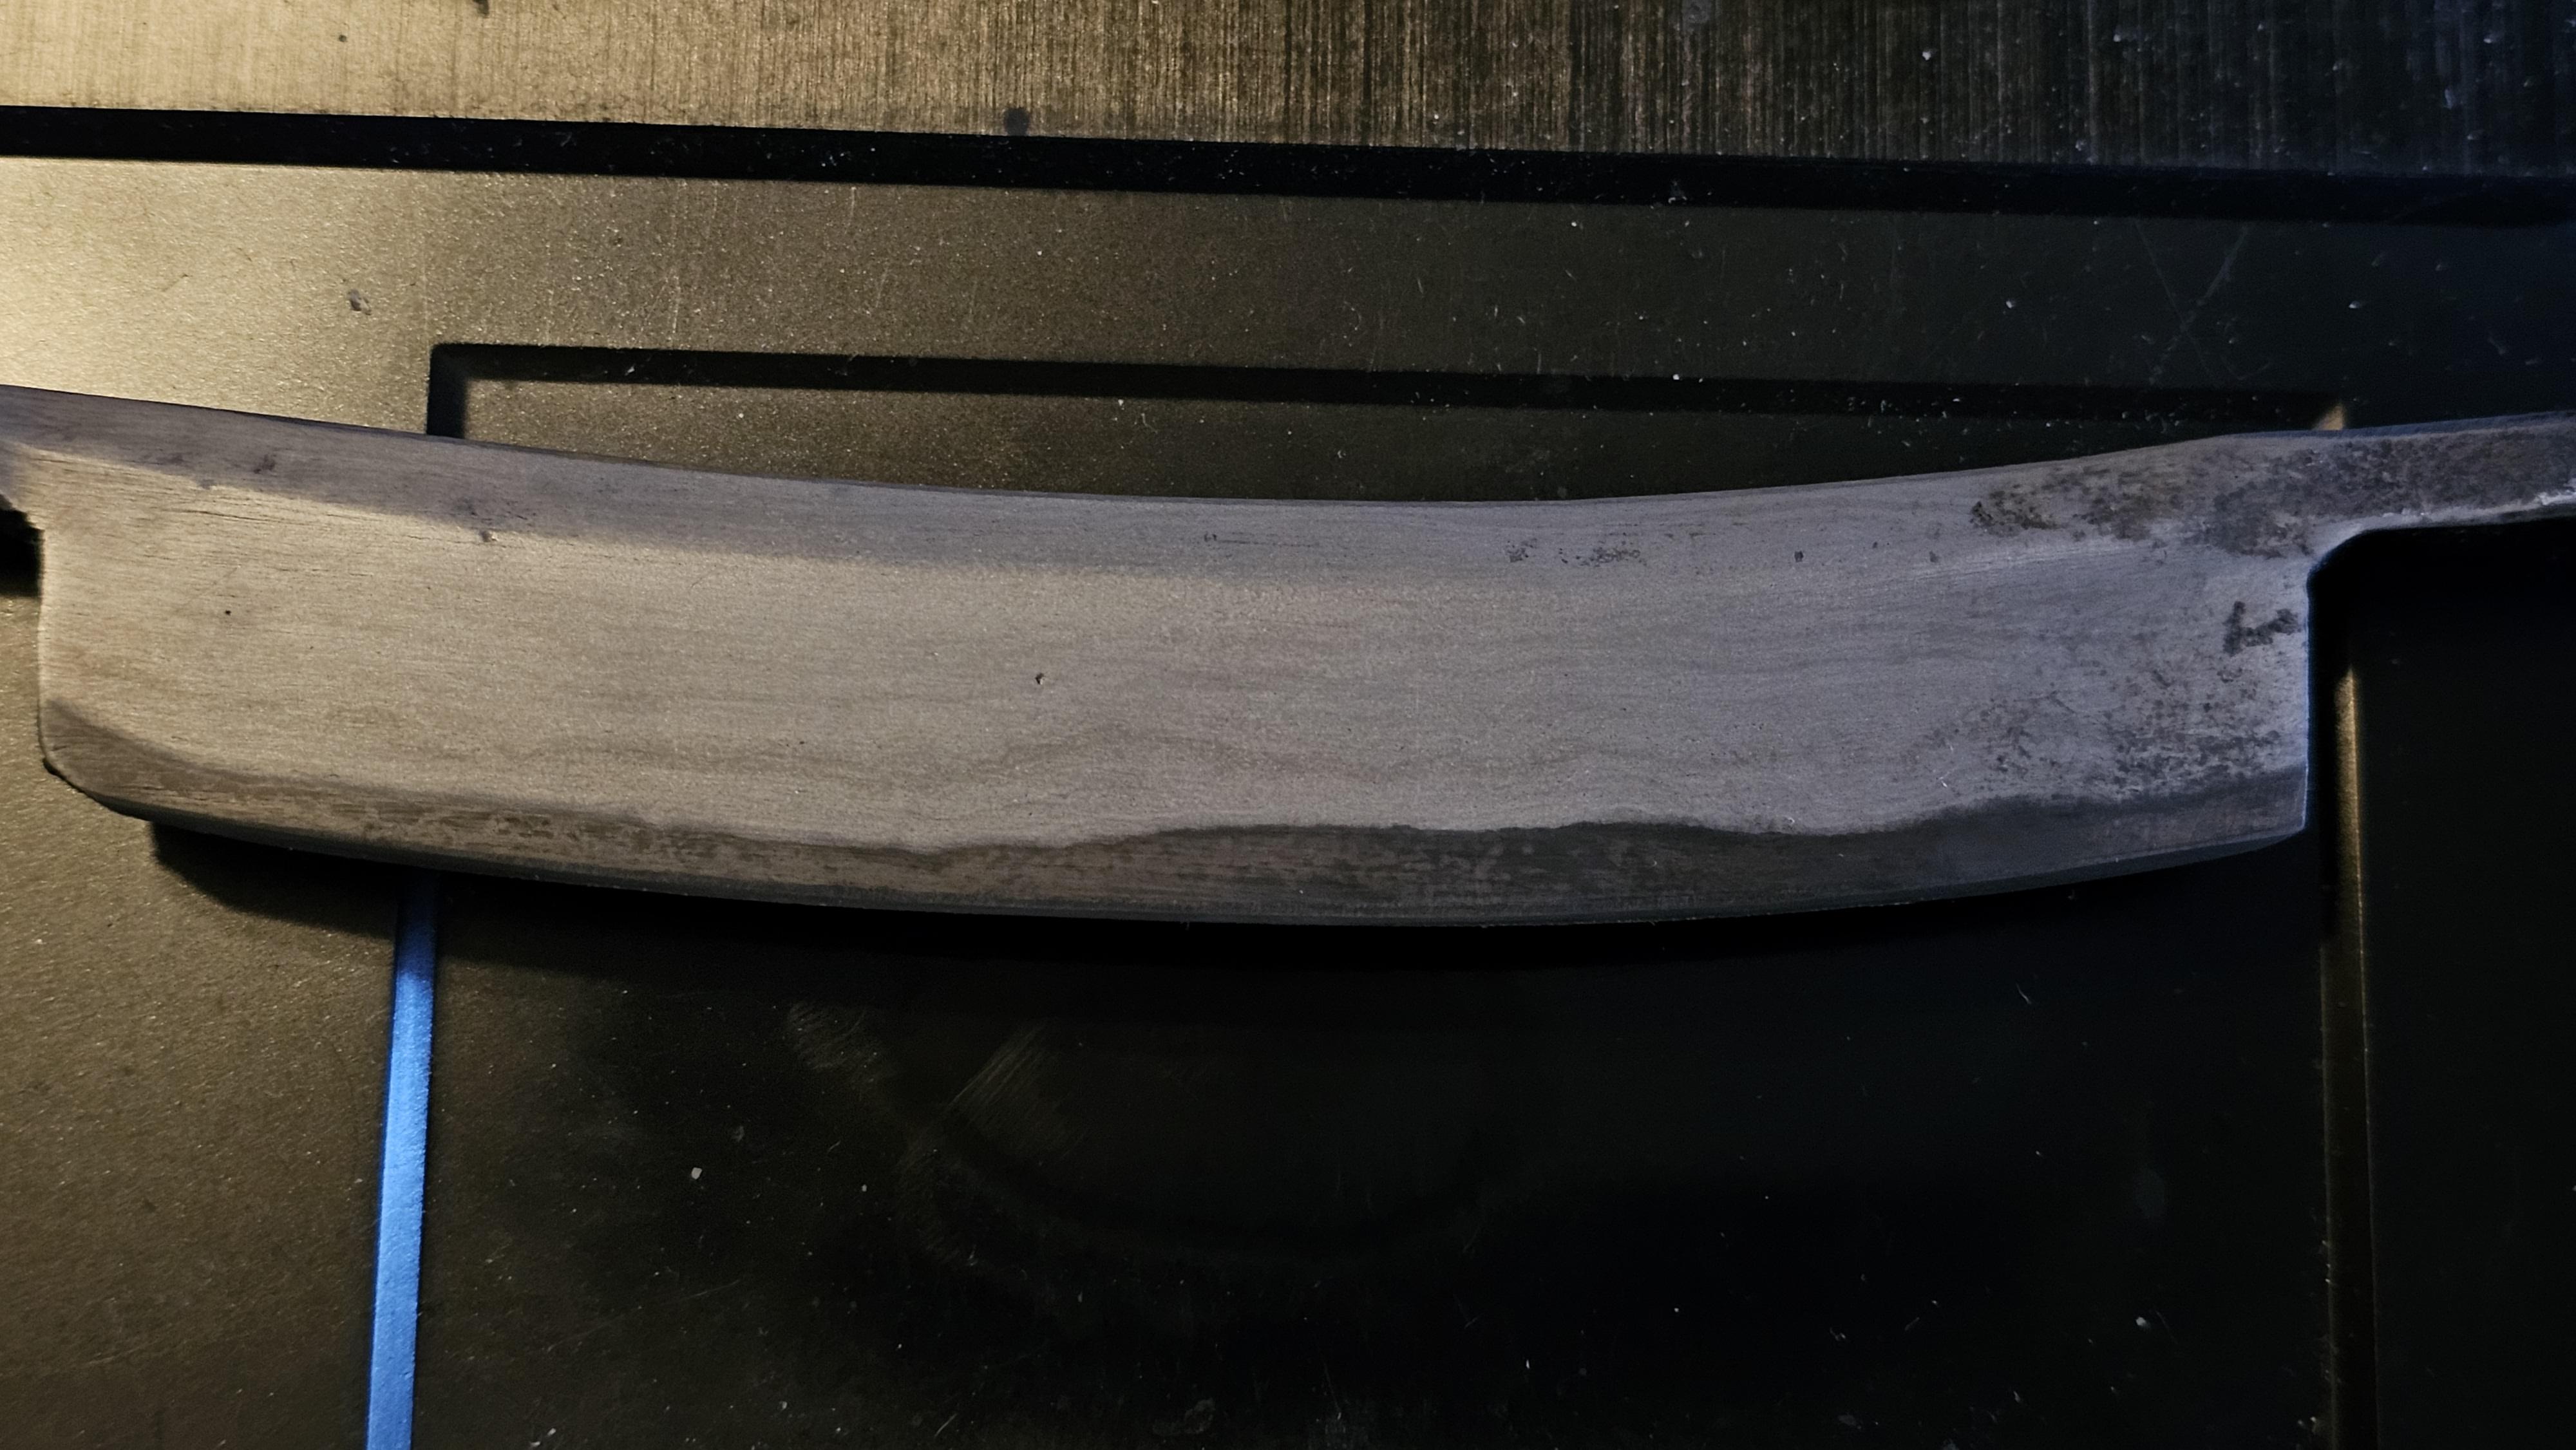
Over the last few years especially working with the steeled wrought iron or mild steel this method is super easy. Once one figures out where to apply the steel for when it's drawn it makes all the sense in the world. I pulled the handles off so I could polish it up more and give it a proper acid soak.

-
What did you do in the shop today?
jlpservicesinc replied to Mark Ling's topic in Blacksmithing, General Discussion
Savlaka, very nice.. You have a big blacksmiths meet coming up down in FL.. Are you going? Nice blade.. Looks nimble.


.JPG.382b459aa5b6d98598bfc8a4aecd3c92.JPG)
.jpg.dfef84e944b7f6942f1c4c4d162b5a23.jpg)
.JPG.f51621ef95a742188a2a8fa6f3ad58ee.JPG)