jlpservicesinc
-
Posts
5,782 -
Joined
-
Last visited
Content Type
Profiles
Forums
Articles
Gallery
Downloads
Events
Everything posted by jlpservicesinc
-
nice work.. Love to see a different take on things.. Love the colors.
-

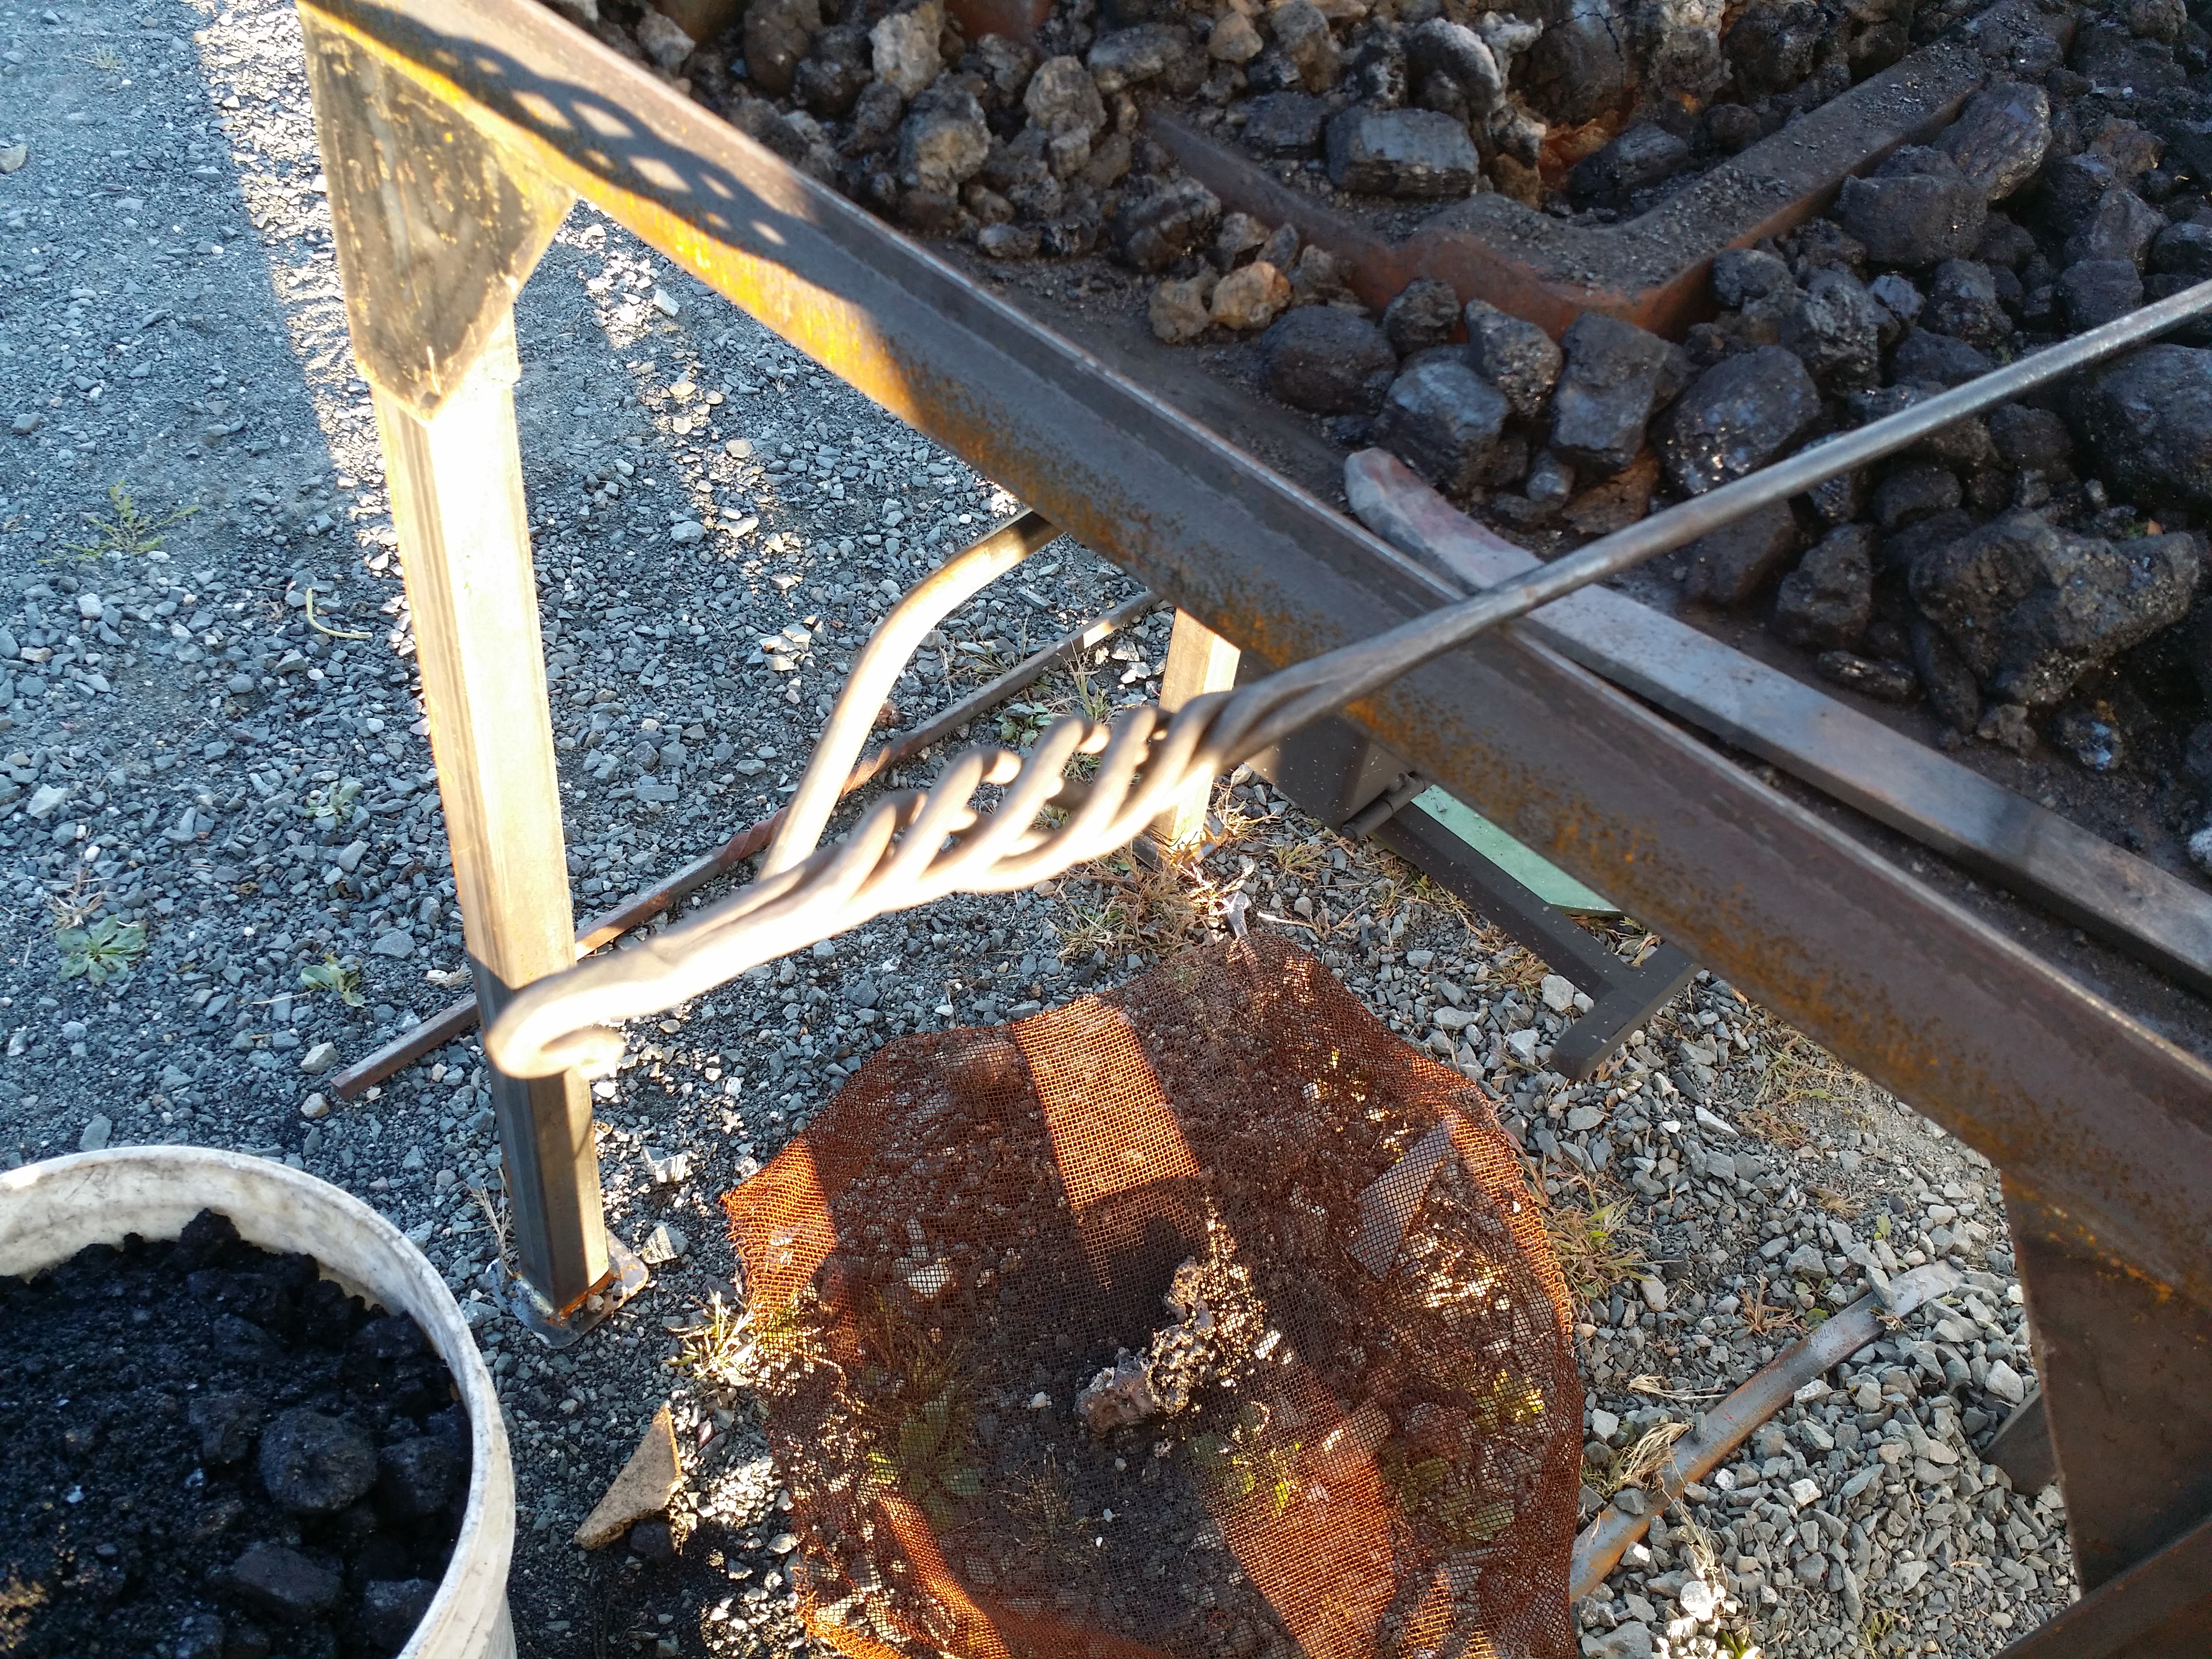
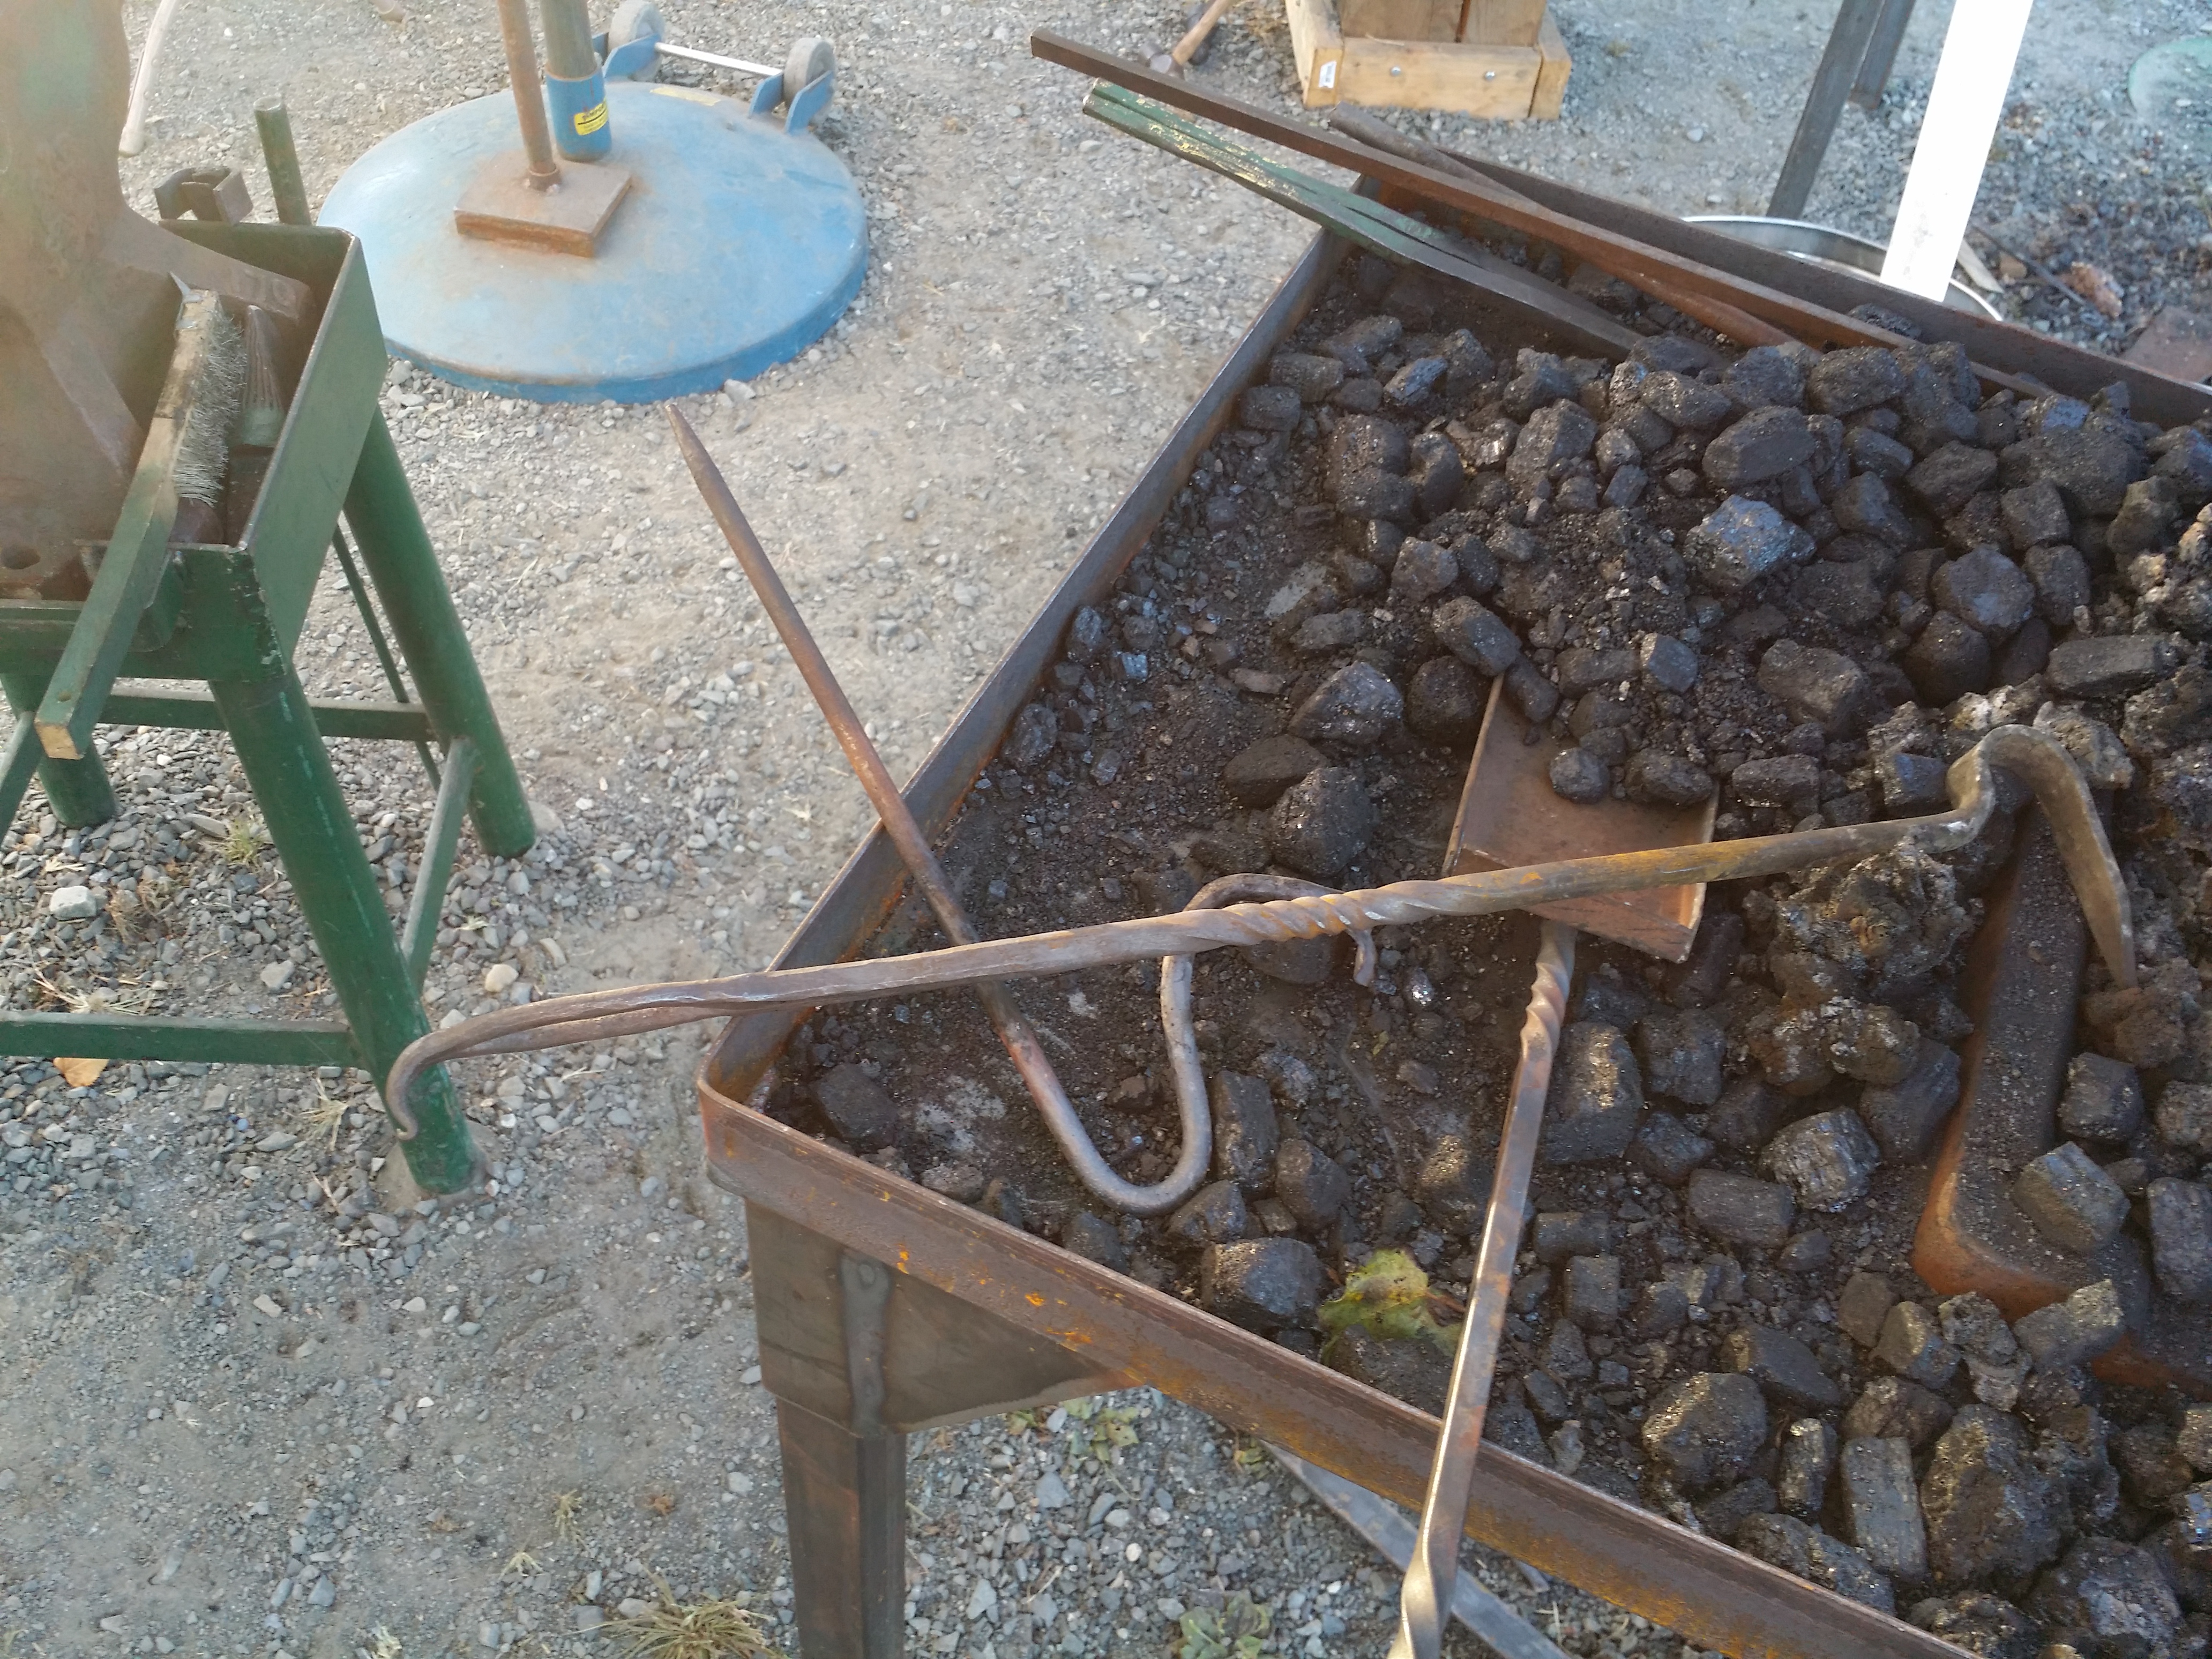
Forge rake (side poker)
jlpservicesinc replied to jlpservicesinc's topic in Tools, general discussion
George, Nice rake.. I find I like my rakes to about long enough to go from the far side of the firepot to the forge on my side.. This seems to be the theme I follow.. average length seems to be about 26".. I have 4 of them and 4 straight pokers on the forge.. I know I have 1 of each from the shop, but don't remember when or why I made the other ones.. You did a great job on twisting it up.. Cold or Hot? The loop handle like that will give pretty good control.. I usually turn the work end 90d to the handle this way the handle lays flat in my hand.. The forge setup looks nice.. Hows about a few of that as well.. -
Forge rake (side poker)
jlpservicesinc replied to jlpservicesinc's topic in Tools, general discussion
From Wikipedia law of the leverEdit The lever is a movable bar that pivots on a fulcrum attached to or positioned on or across a fixed point. The lever operates by applying forces at different distances from the fulcrum, or pivot. As the lever pivots on the fulcrum, points farther from this pivot move faster than points closer to the pivot. The power into and out of the lever must be the same. Power is the product of force and velocity, so forces applied to points farther from the pivot must be less than when applied to points closer in.[1] If a and b are distances from the fulcrum to points A and B and if force FA applied to A is the input force and FB exerted at B is the output, the ratio of the velocities of points Aand B is given by a/b, so the ratio of the output force to the input force, or mechanical advantage, is given by {\displaystyle MA={\frac {F_{B}}{F_{A}}}={\frac {a}{b}}.} This is the law of the lever, which was proven by Archimedes using geometric reasoning.[2]It shows that if the distance a from the fulcrum to where the input force is applied (point A) is greater than the distance b from fulcrum to where the output force is applied (point B), then the lever amplifies the input force. If the distance from the fulcrum to the input force is less than from the fulcrum to the output force, then the lever reduces the input force. Recognizing the profound implications and practicalities of the law of the lever, Archimedes has been famously attributed with the quotation "Give me a place to stand and with a lever I will move the whole world."[3] The use of velocity in the static analysis of a lever is an application of the principle of -
Forge rake (side poker)
jlpservicesinc replied to jlpservicesinc's topic in Tools, general discussion
We digressed.. Please don't make assumptions on ability or knowledge.. The idea wasn't on how to change a tire or the right way to do it nor the way an air impact wrench works.. The lift or hoist as you called it irrelevant to the diagram I posted.. It was a way to suggest how in a simple way to see the advantage of moving the leverage point behind the handle with an offset.. I explained the operation in full detail in the post.. All I suggested is": If you want to try it.,. If you don't see the advantage.. Try it on a tire with the wrench or torque wrench on both sides.. as in the diagram.. I never mentioned on tight lug nuts or lug bolts.. Please forget about loosening them.. In the example the tire is getting put back on or the lugs are all ready loose.. LOL>. or If you can figure out a simpler way to explain it be my guest.. Glad you like it.. Thanks -
Forge rake (side poker)
jlpservicesinc replied to jlpservicesinc's topic in Tools, general discussion
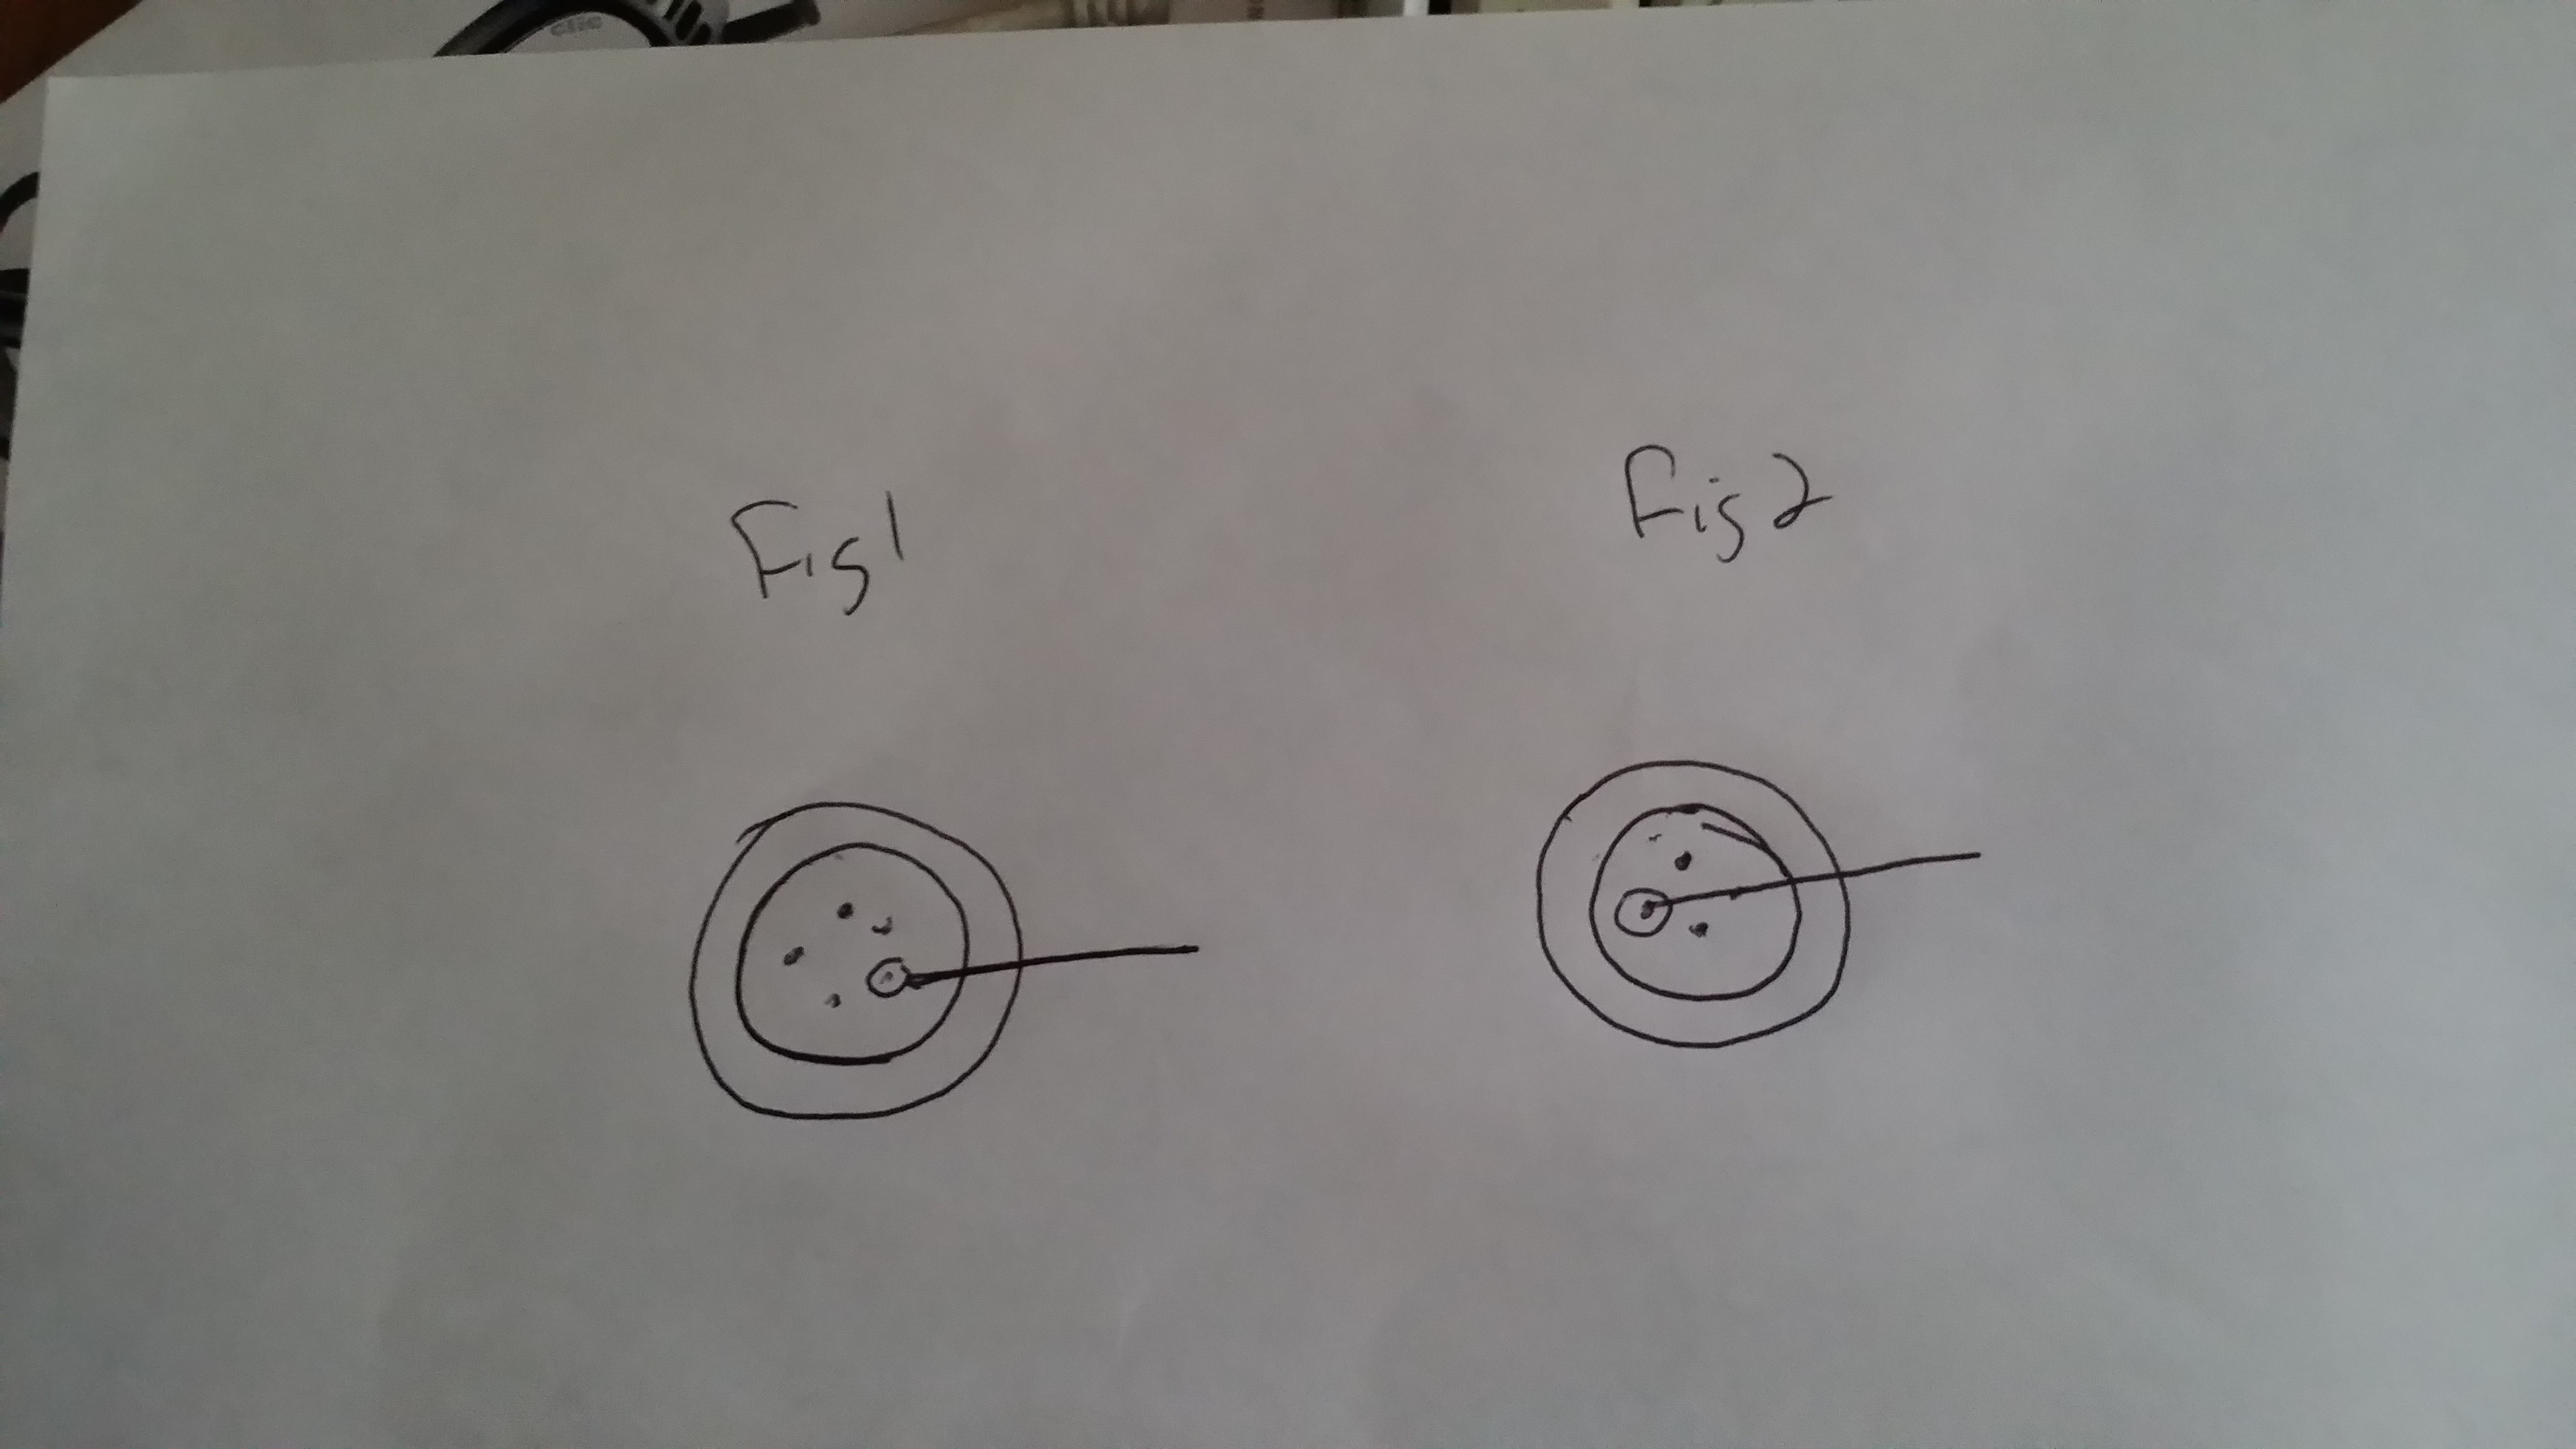
Yes and no since you aren't using mass to move it. if the tire was in motion then what you wrote would apply as you stated inertia.. As then youd being using the mass of the rotating tire to break the lug nut free.. If you substitute torque for inertia then the answer would simply be "Yes".. In my example the tire is stationary and you are holding the tire with one hand while torquing the lug nut after putting the rim back on the car.. Same applies when loosening the lug nut but you would never be able to hold the tire and break the stiction of the nut and rim.. It's why I used the tire all ready off and putting it on and torquing to value.. there is also a leverage ratio which gets applied as the lever moves by the rotational center of the mass since it's actually a dual orbit affair.. (around the center mass, and off center of the rear of the shaft.. This creates a convergence point if both bodies were rotating or there was the ability to clock the pivot points as in the picture.. center orbit of the whole tire turning. (same as twisting the poker at the center shaft) offset center of the back of the shaft (lug nut/bolt location), and then simply rotating the second point (work end of poker long side) . If you were to look at the end of the poker it would align with the figure 2 vs figure 1.. and figure 1 would align with the blade only coming off one side.. Anyhow, I've had enough.. My brain hurts.. It just works.. -
Forge rake (side poker)
jlpservicesinc replied to jlpservicesinc's topic in Tools, general discussion
It does make it easier.. Look back at the drawing and while it looks deceptive it actually does work.. the weight has nothing to add as far as a turning tool.. In smacking coal it does.. If you look at how old hand driven items and how there handles were swept away or towards the direction of travel (away was the preference) vs just a straight handle.. There is actually a science behind it and wasn't done simply as a decoration.. Your going to make me break out the geometric function of levers and pivots aren't you.. ?????????? The easiest way to explain it is: If you have a car tire up in the air with no brakes on and you are tightening the lugs after you have taken the old wheel/rim off.. If you put the lug wrench on the off center side (fig 2) You can hold the tire more easily than if you had it as in figure 1.. The tire example is a great one.. If at some point you still don't believe.. Give it a try see which is easier to hold.. You will find that Fig 2 is the easiest almost exactly at the center line of where the lug nut/lug bolt and the center of the axle are in alignment. about 40 degrees of arc swing through this center will offer the proof.. Near perfectly centered is where you will be able to put maximum torque on the wrench while still holding the tire fairly easily even if torqued to 80-90ftlbs as recommended by most auto MFGs.. Forget about holding tire in figure 1 at those torque values unless you are a hulk..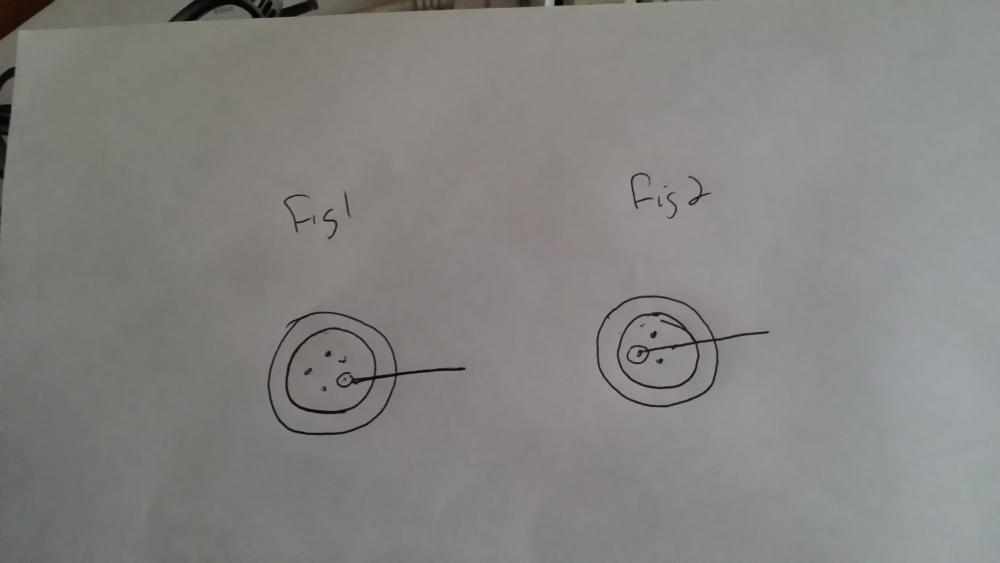
-
Forge rake (side poker)
jlpservicesinc replied to jlpservicesinc's topic in Tools, general discussion
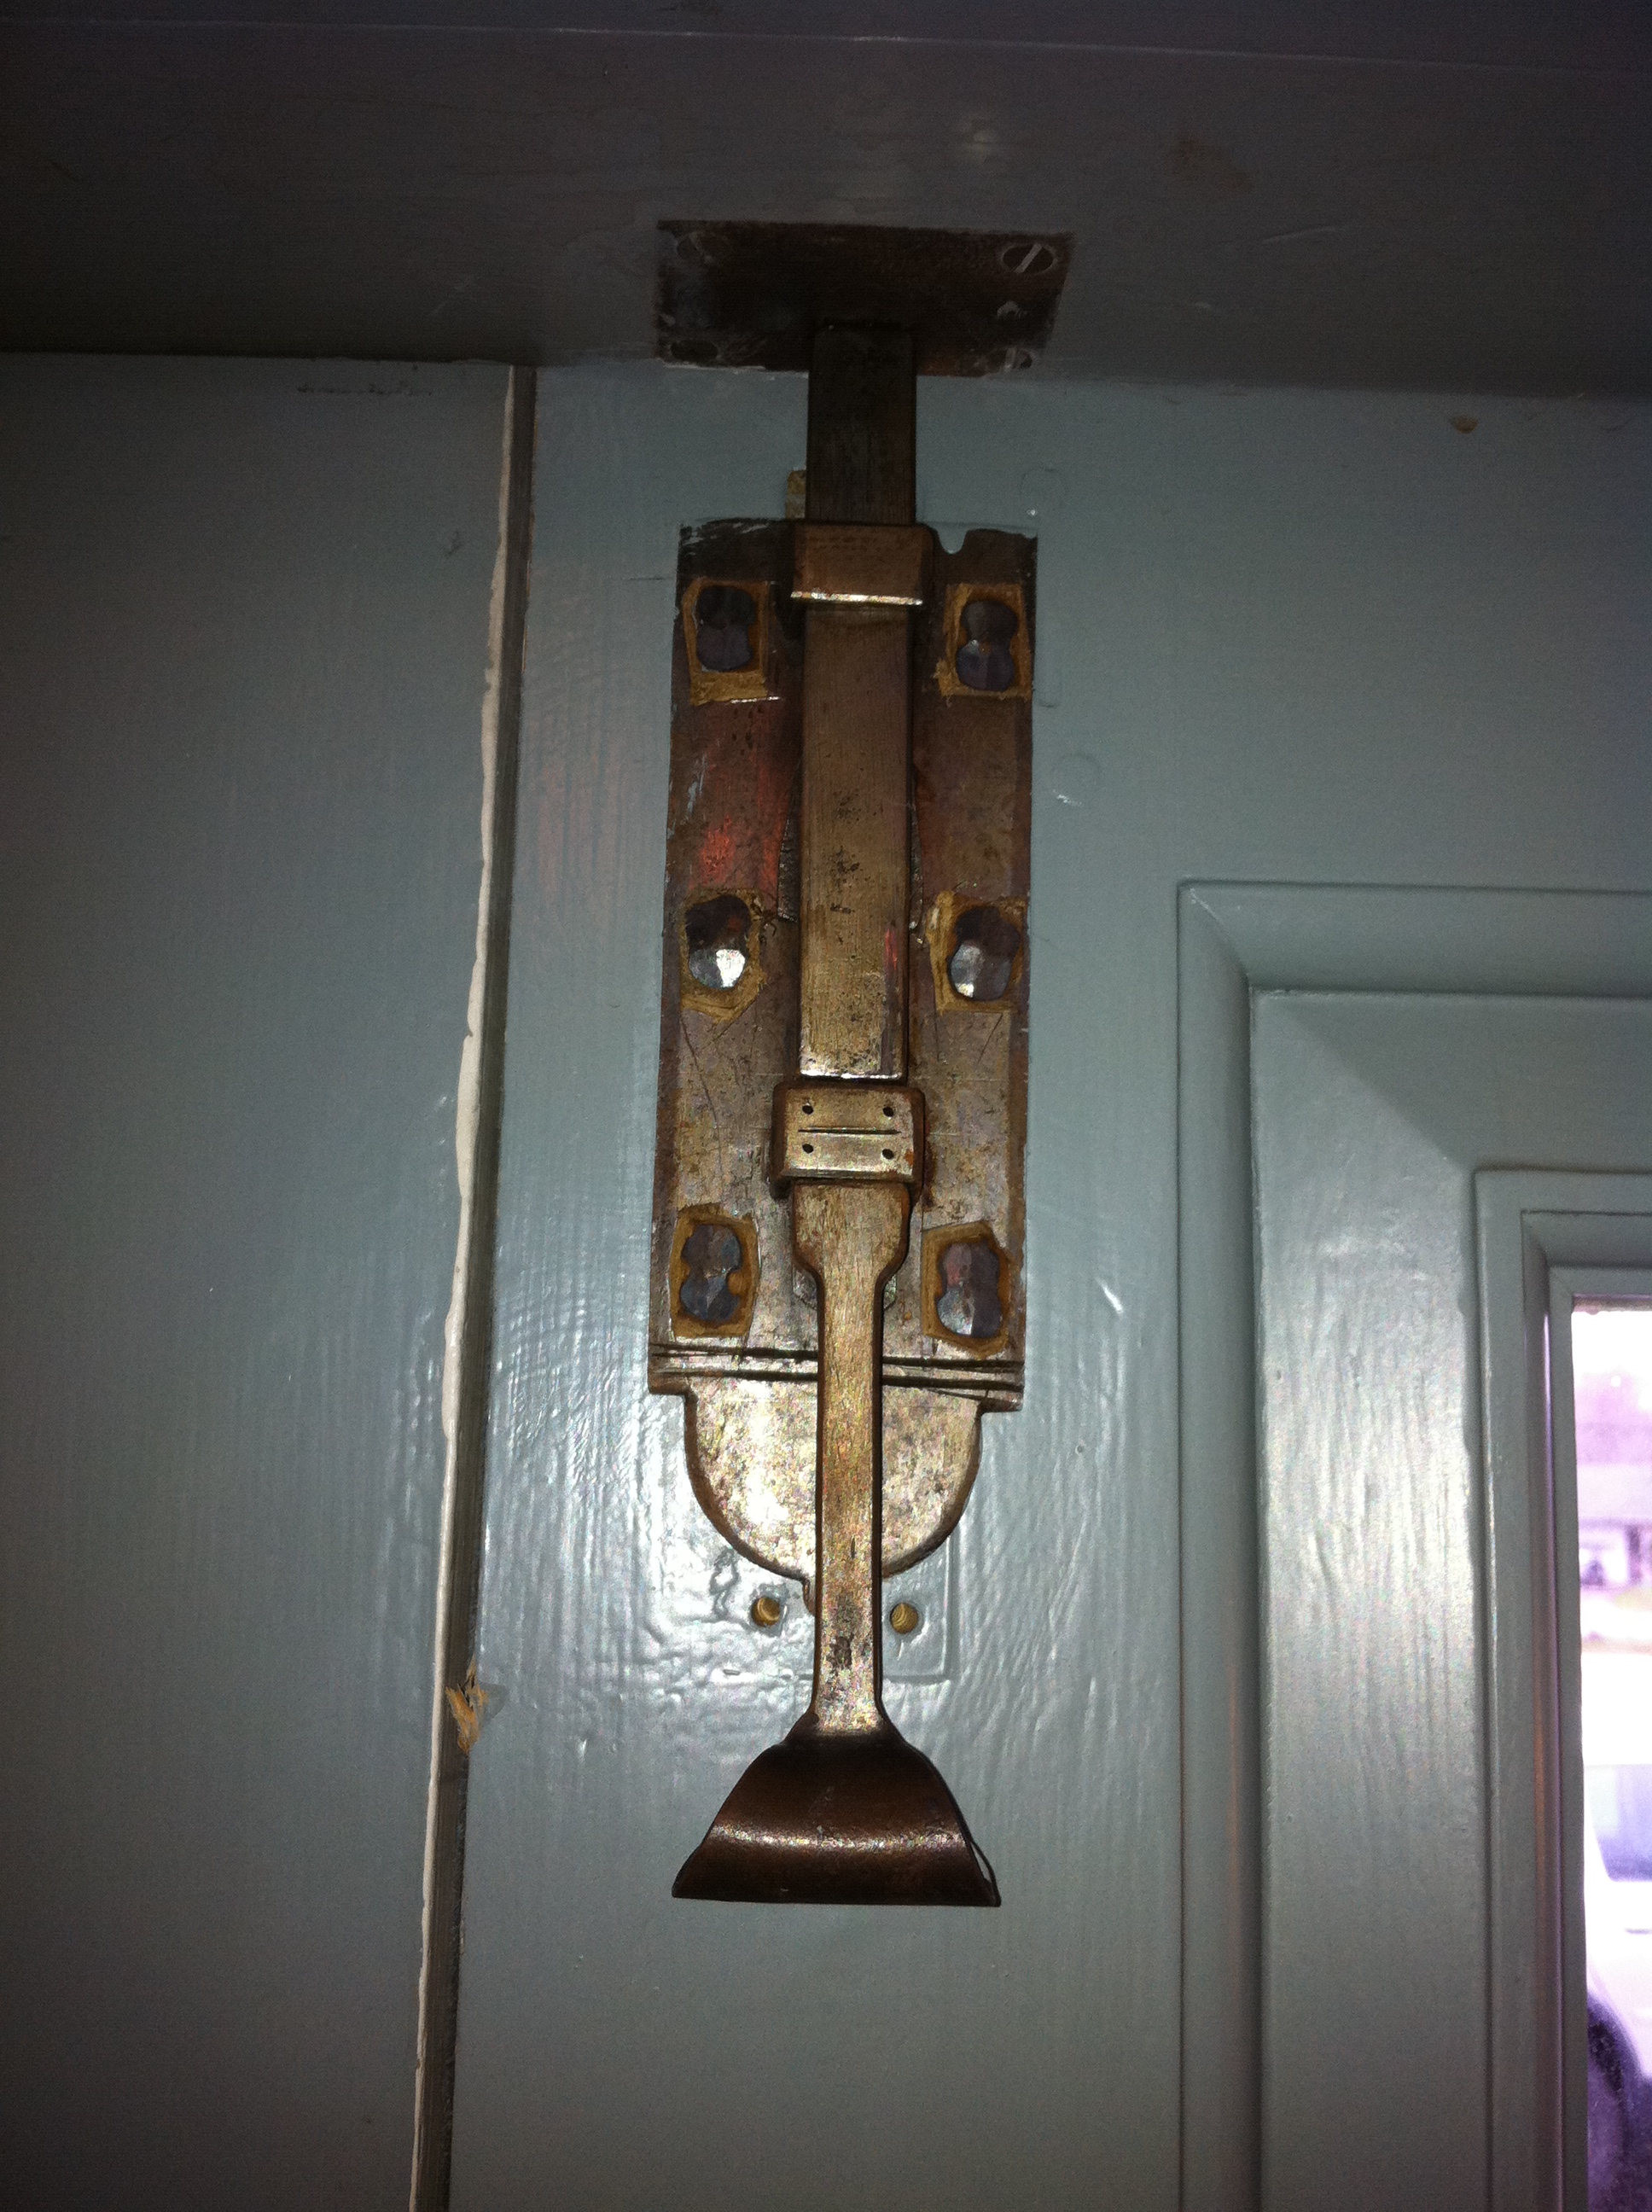
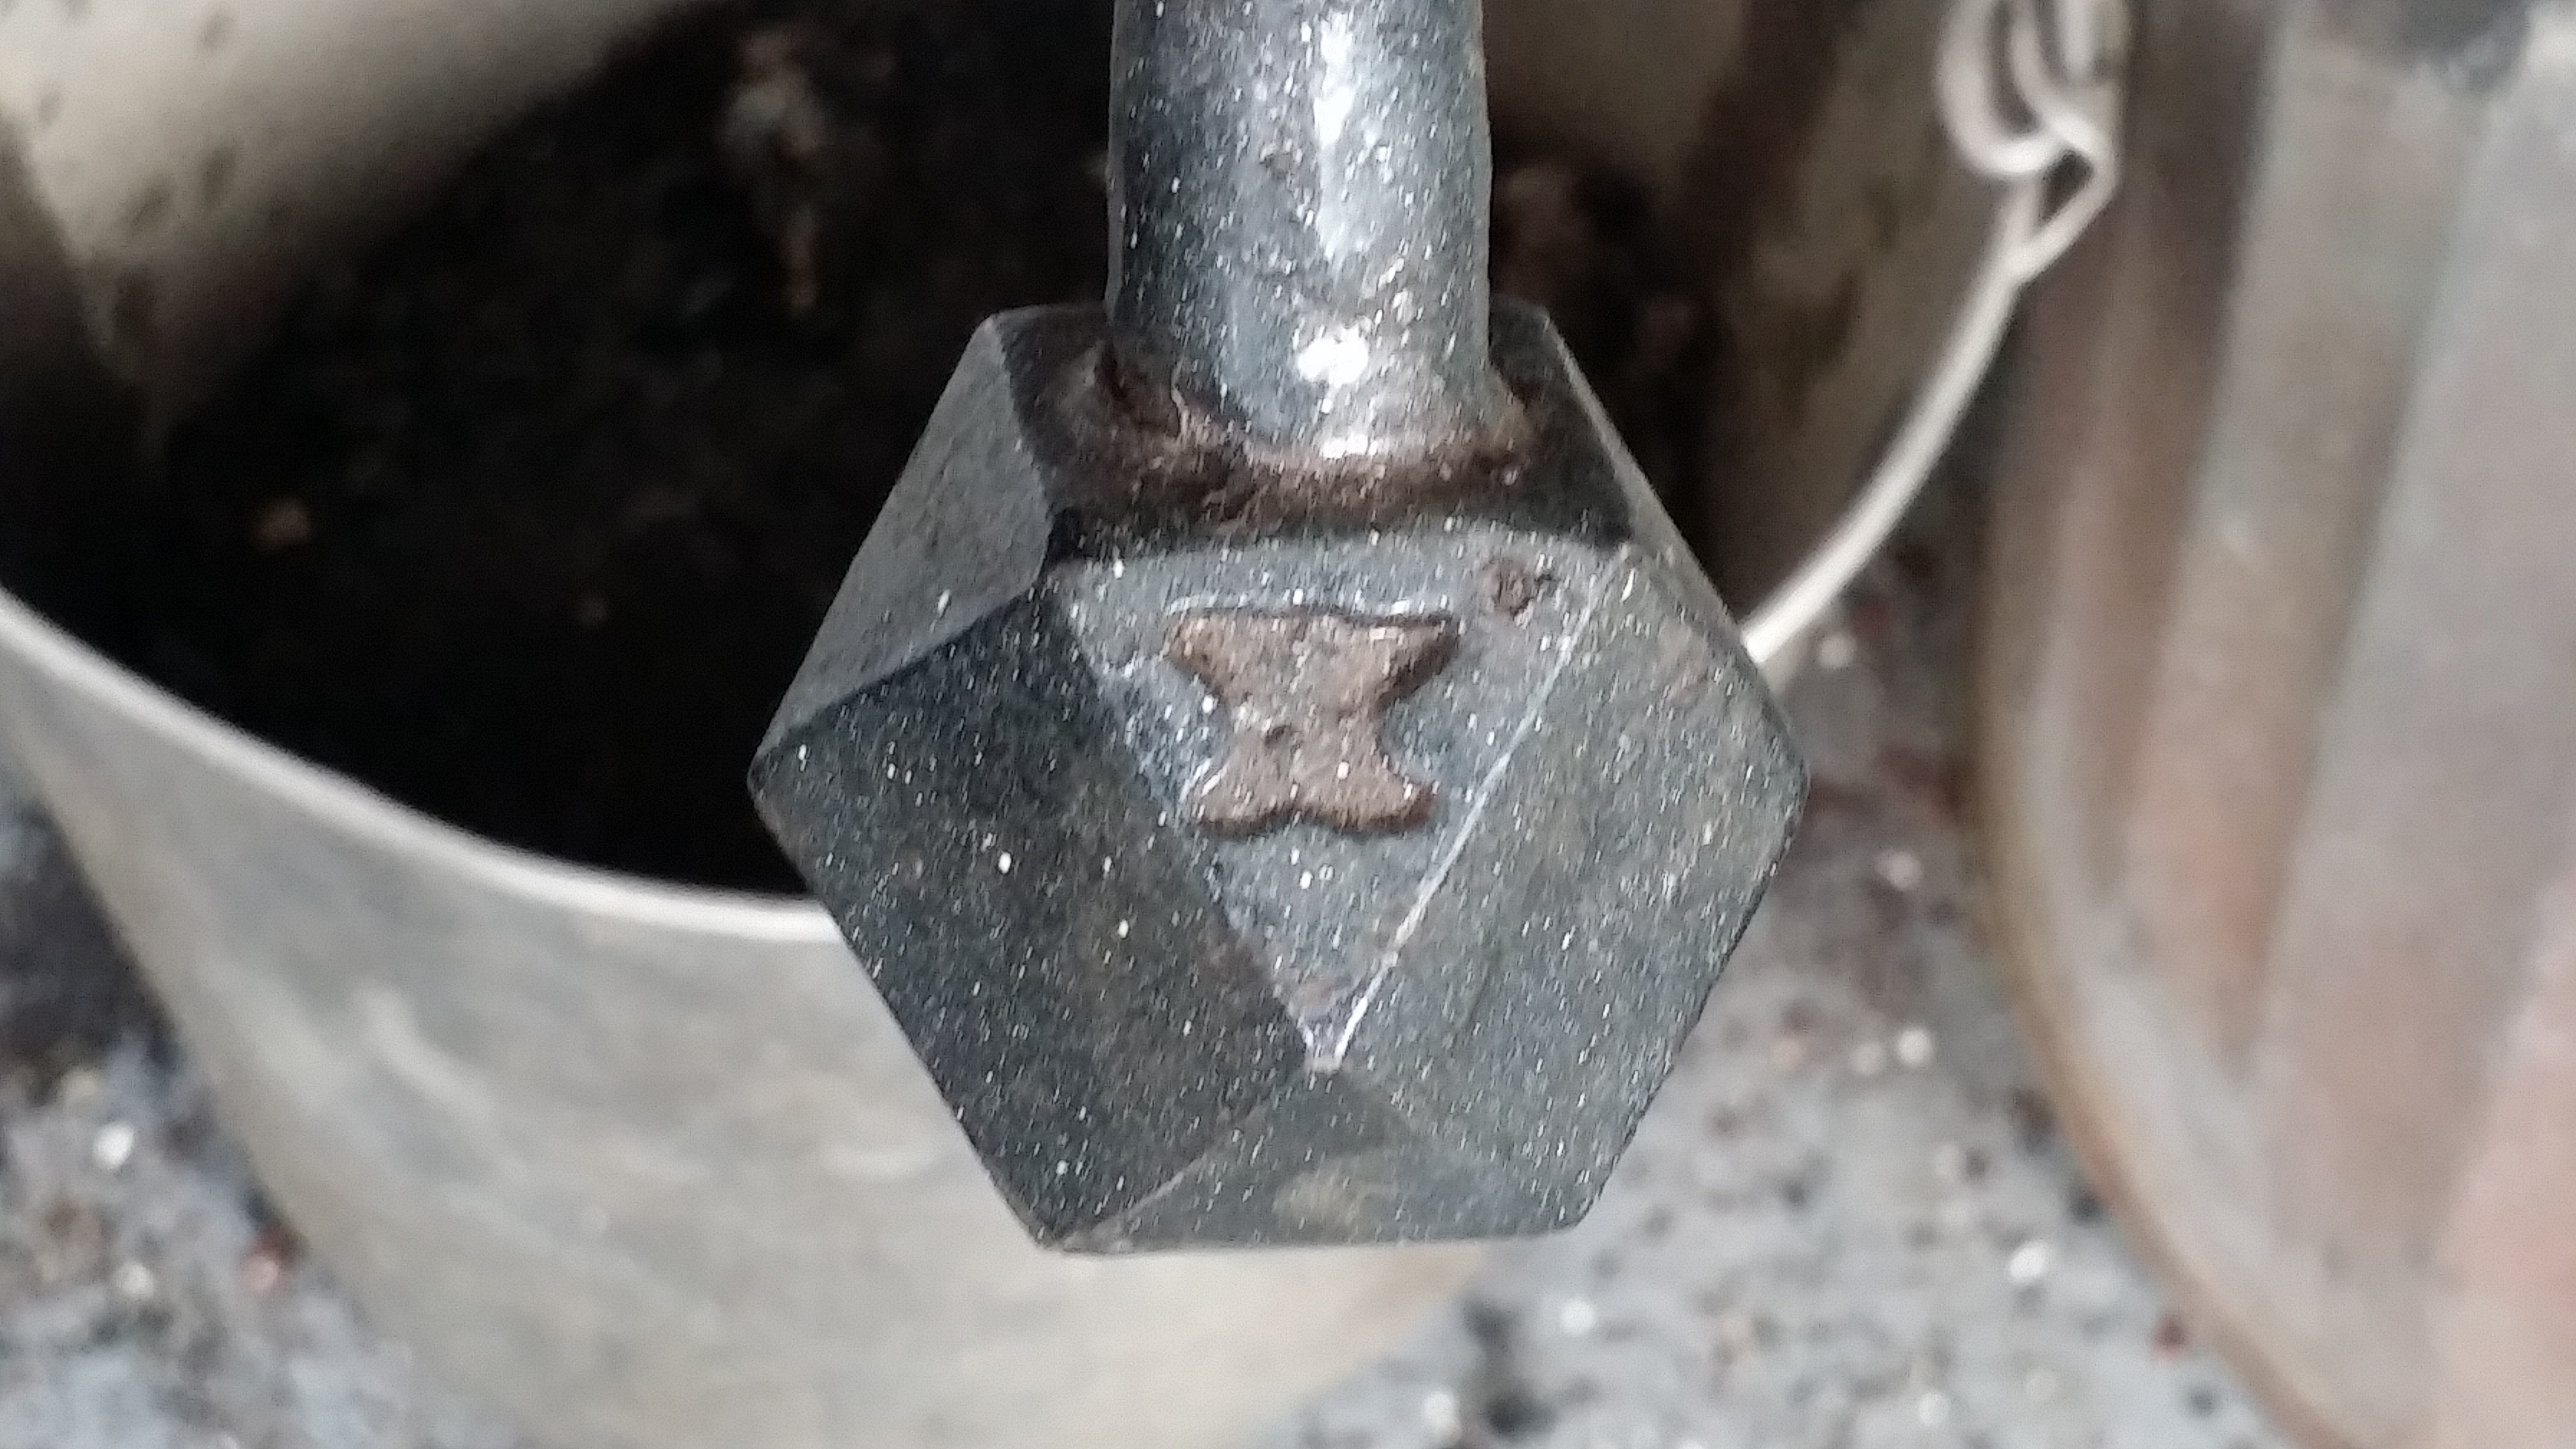
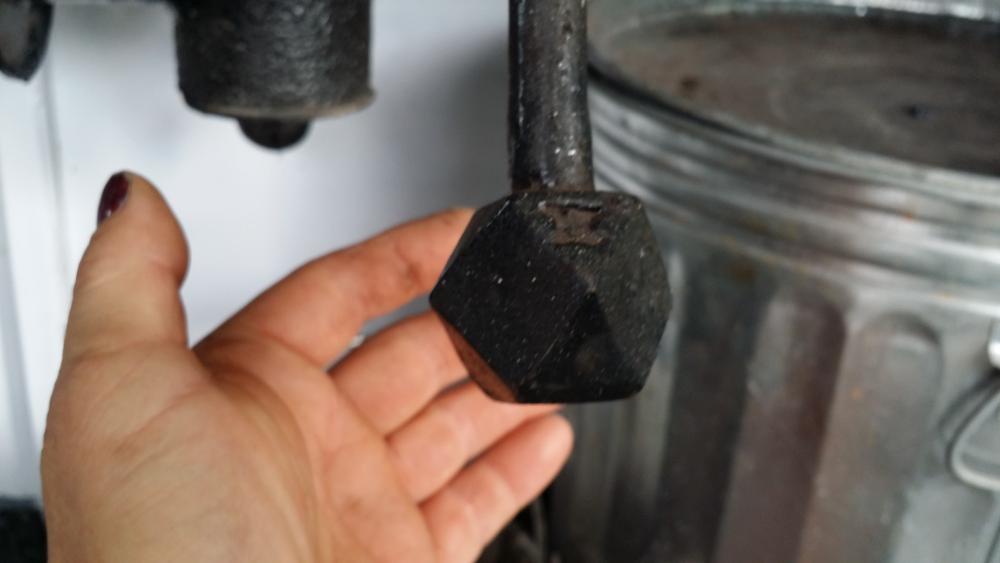
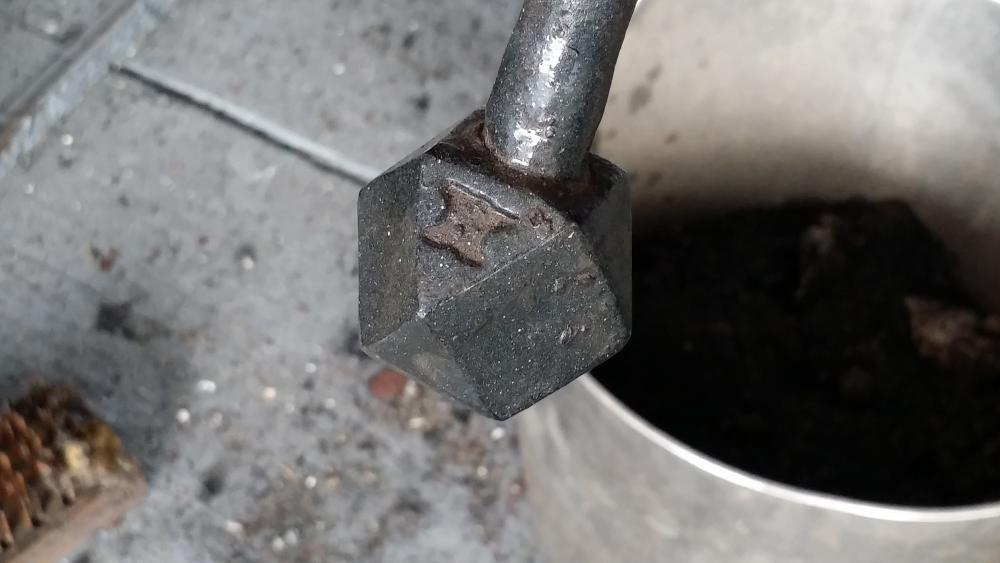
Frosty, I'm just getting ramped up.. I've been sleeping for 10 years so the skill set if rusty.. LOL no pun intended.. Ok.. maybe a little bit.. Thank you.. I actually have 3 touch marks small anvil, large anvil and 2/2 or 2 dots over 2 dots as a representation of zero.. In the olden days it was considered a travesty to make a beautiful peice than deface with a makers mark.. So the 2/2 can be seen as a decoration of sorts, yet is my mark just the same.. You can see it clearly here on the spring lock.. My pleasure.. Love to see your item when/ if you make a new one. I will be making a few more as I believe I will be making some more as well as shovels to donate to the NEB for the new forge setups they have if they approve my offer.
.png.c95654babe8bffd229c4d0c3e739f85a.png)
-
Forge rake (side poker)
jlpservicesinc replied to jlpservicesinc's topic in Tools, general discussion
Post one up when you have a chance.. Love to see it.. I leave a rounded end on the work side.. I used to do an offset bevel, but found I didn't use it enough to have it.. I use a shovel, rake and straight poker/welding feeler as my forge tools.. -
Forge rake (side poker)
jlpservicesinc replied to jlpservicesinc's topic in Tools, general discussion
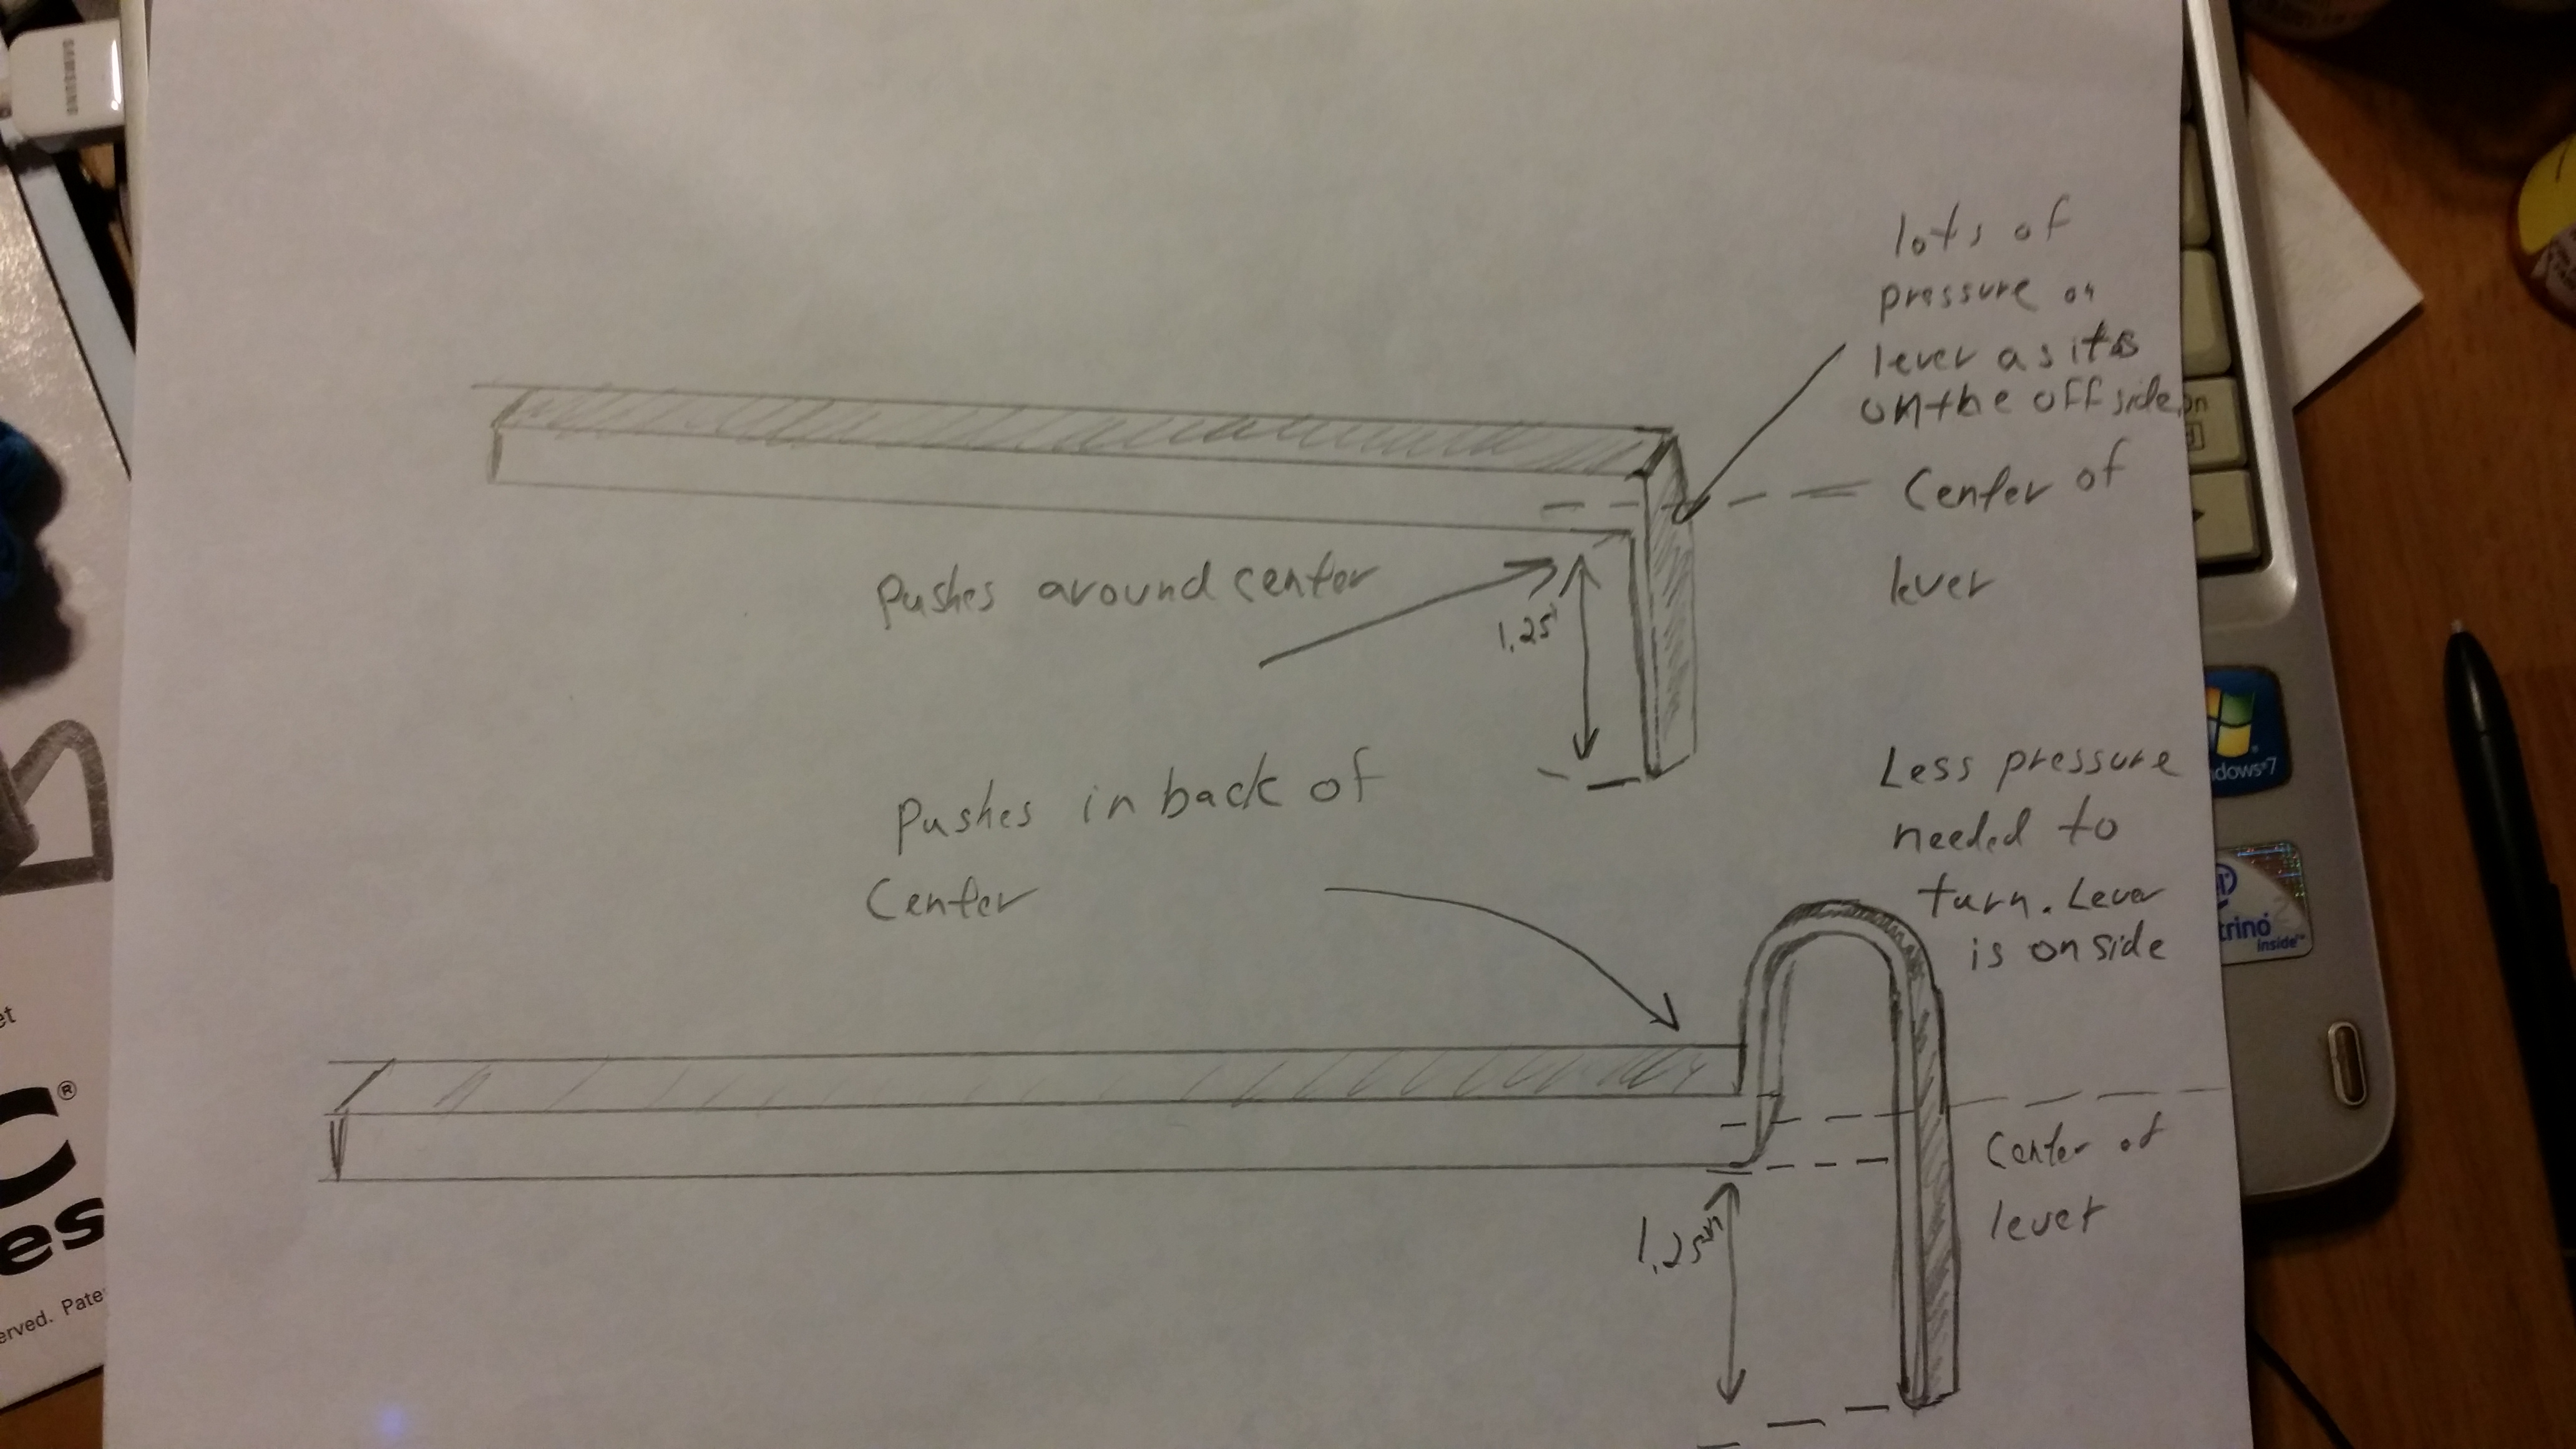
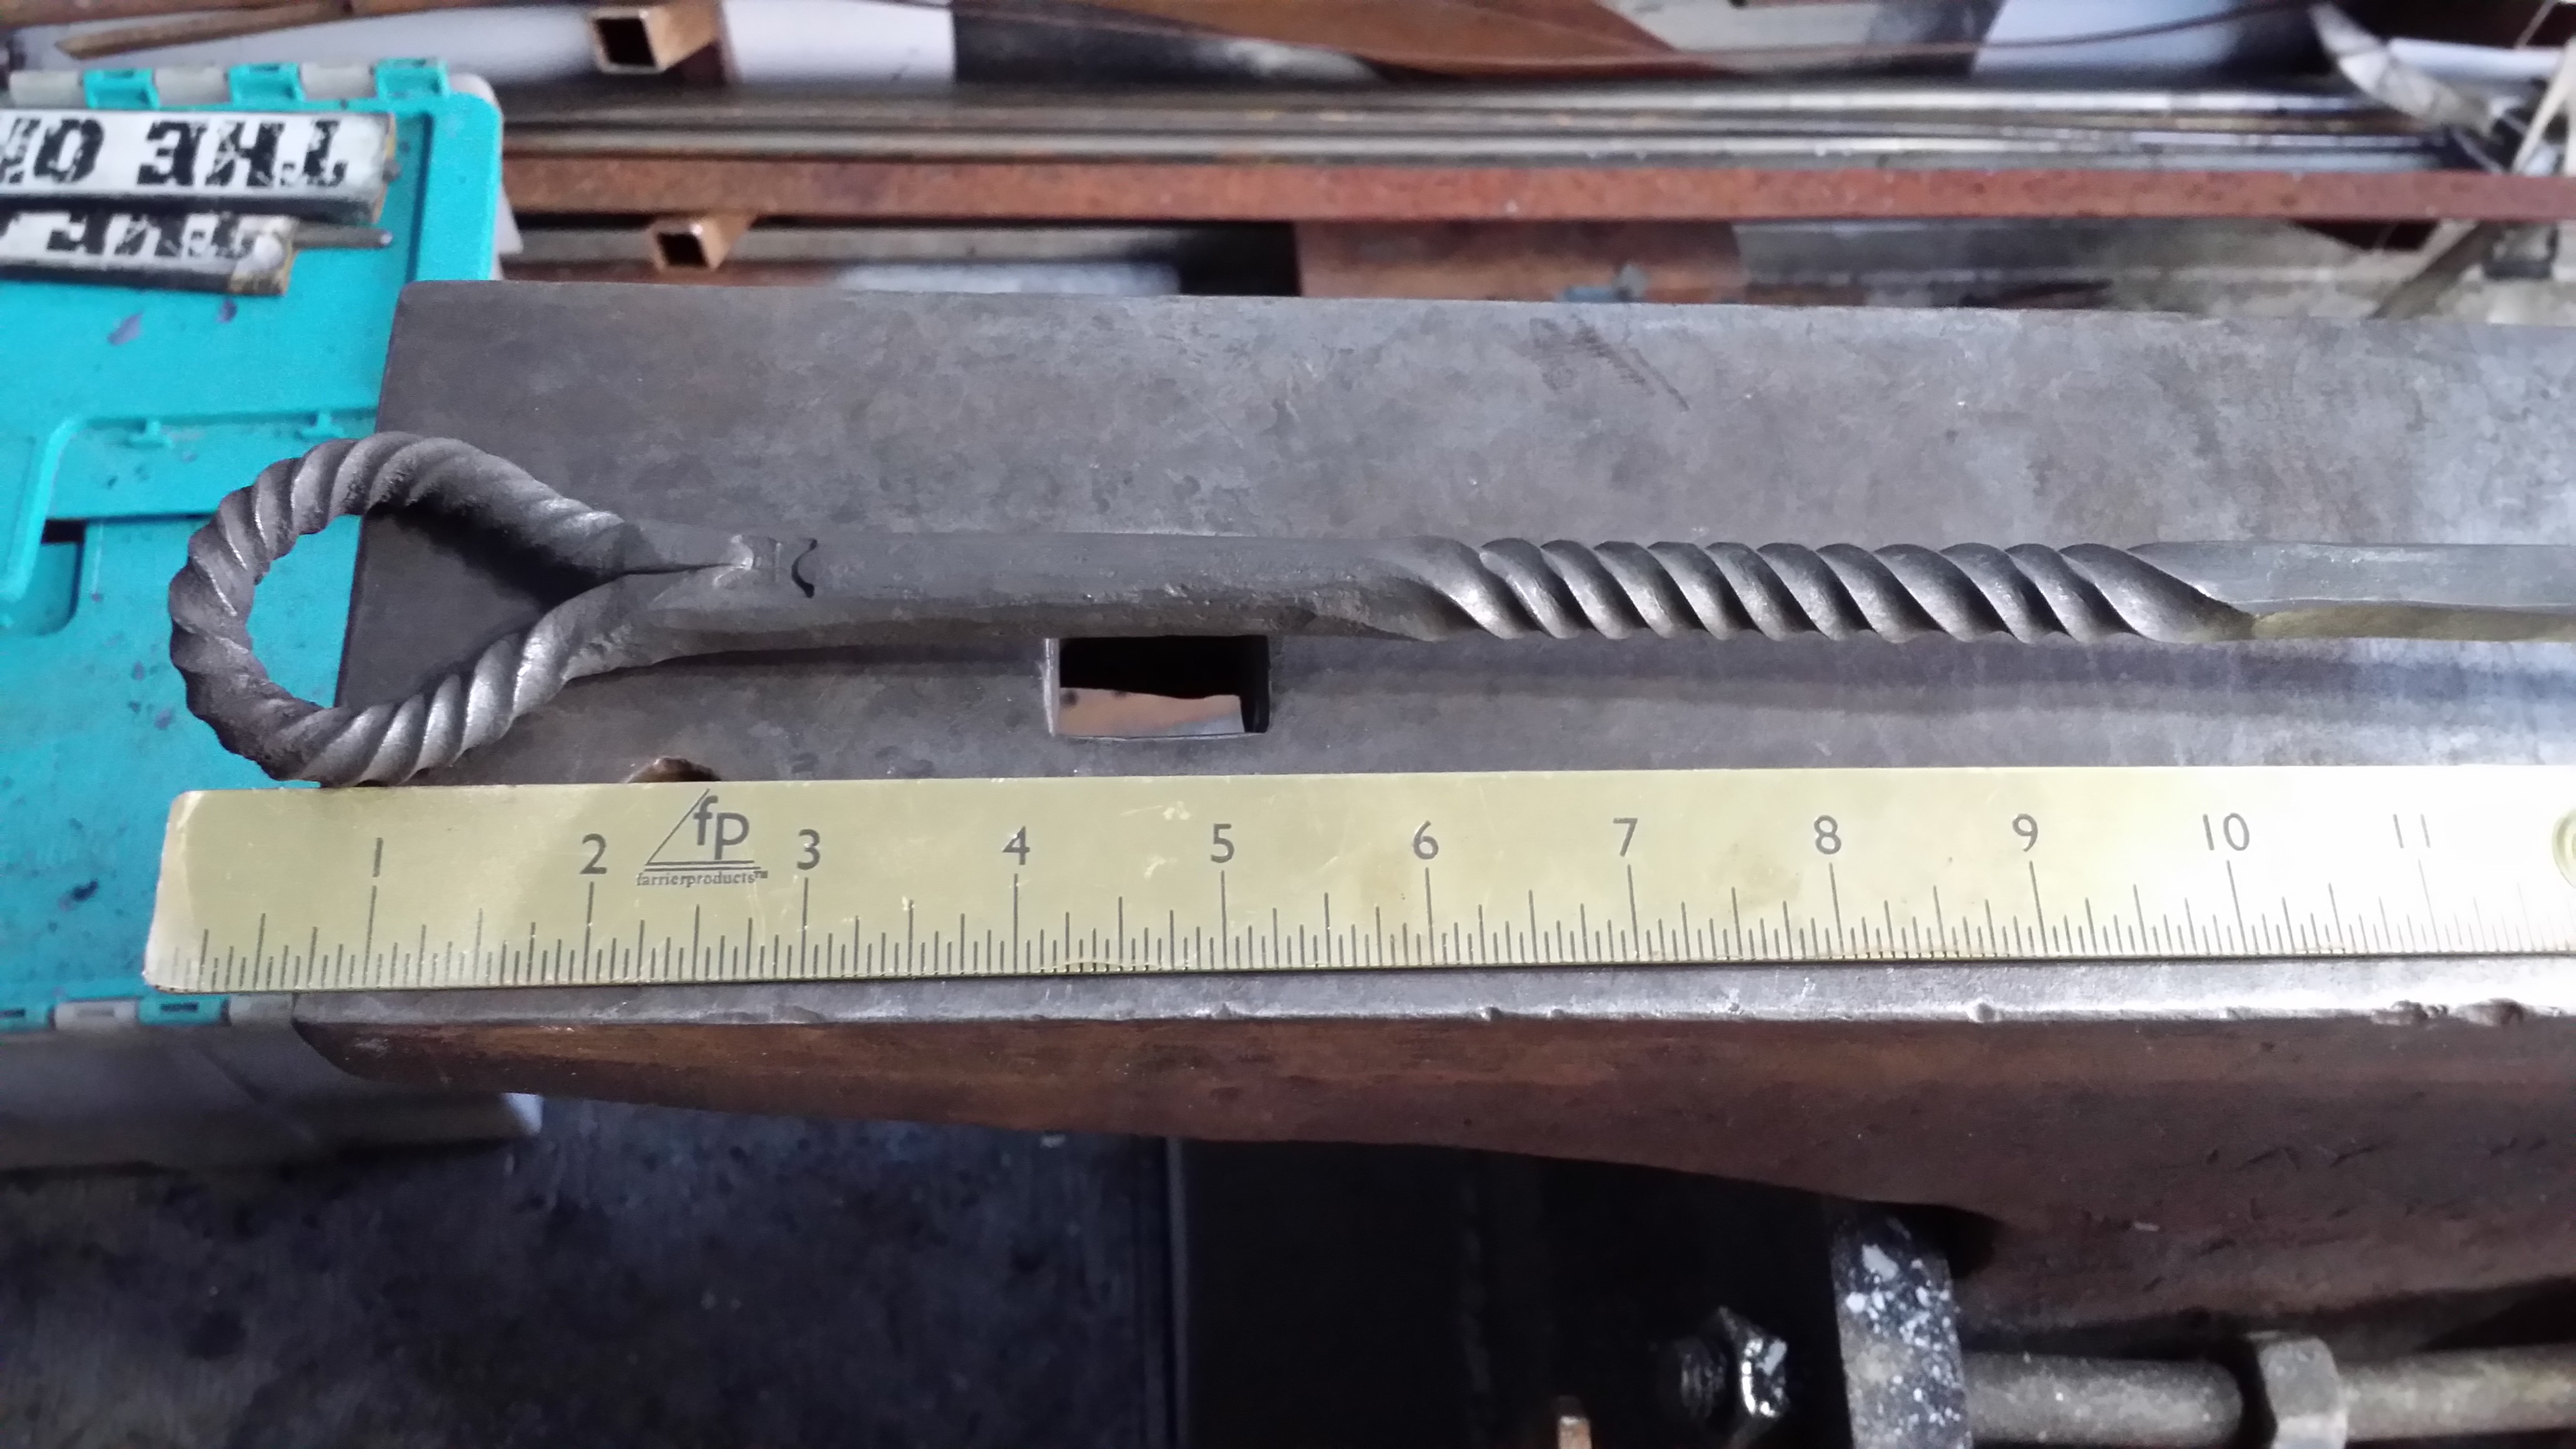
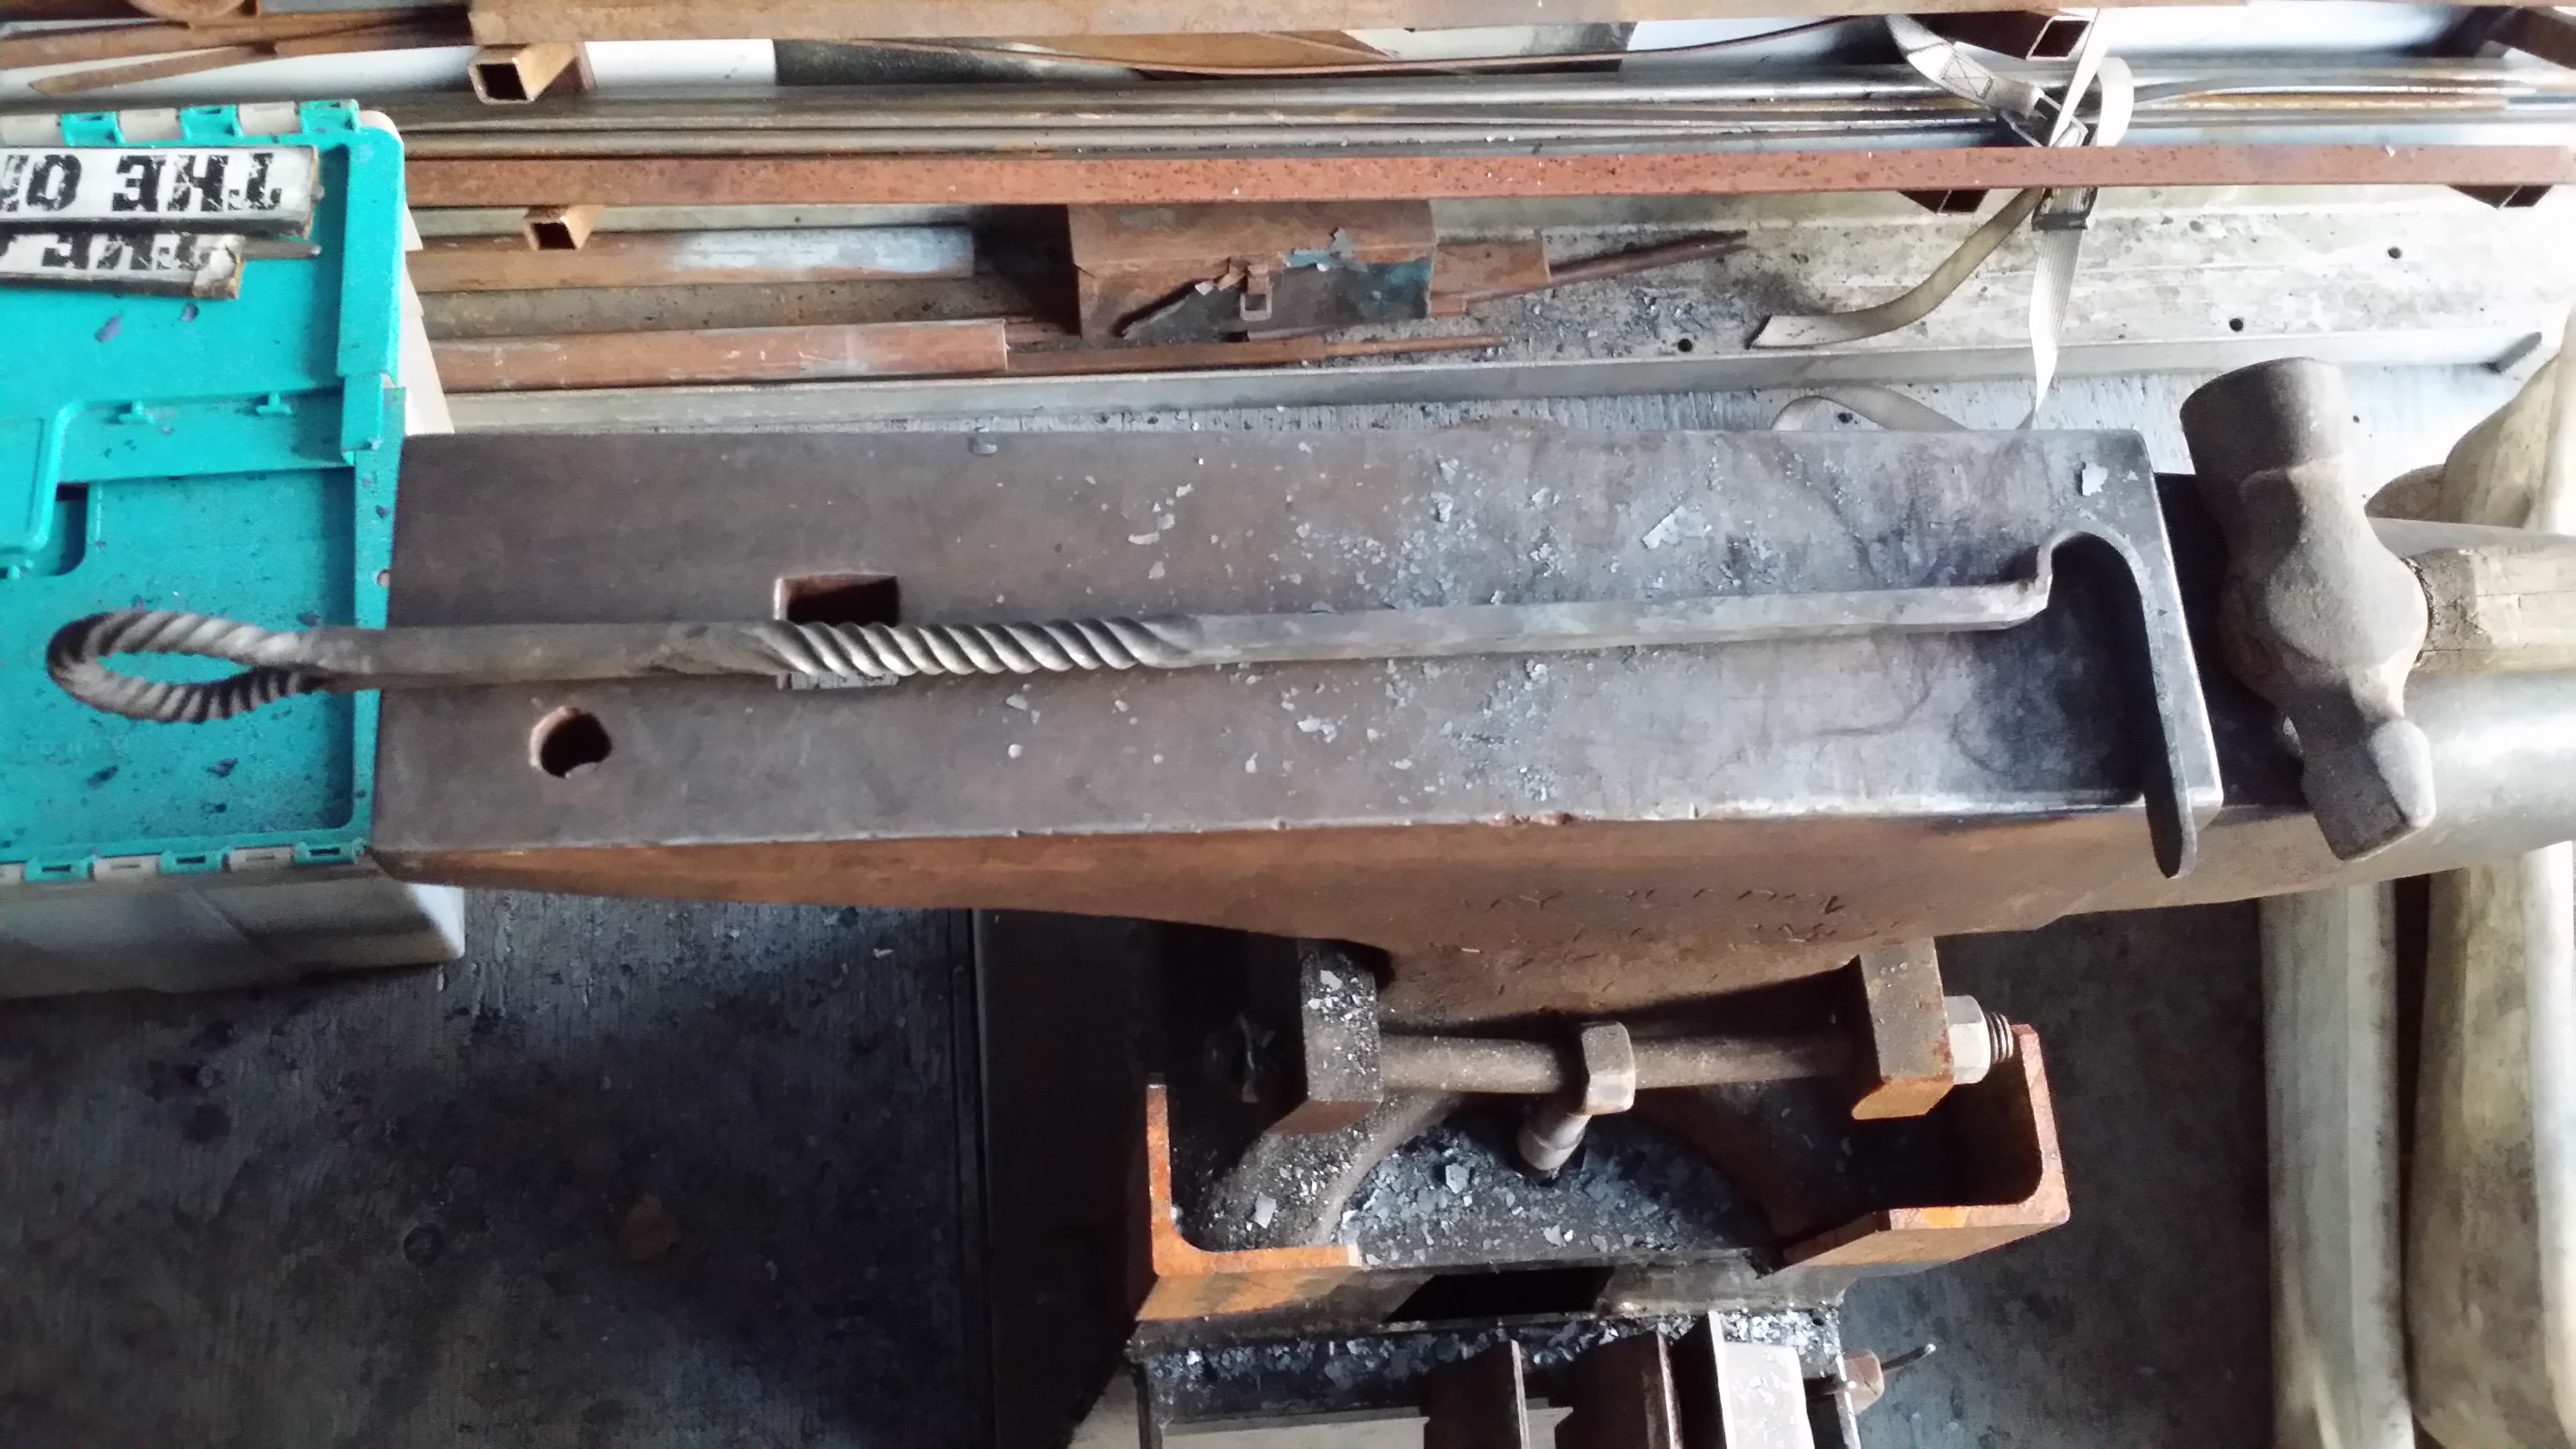
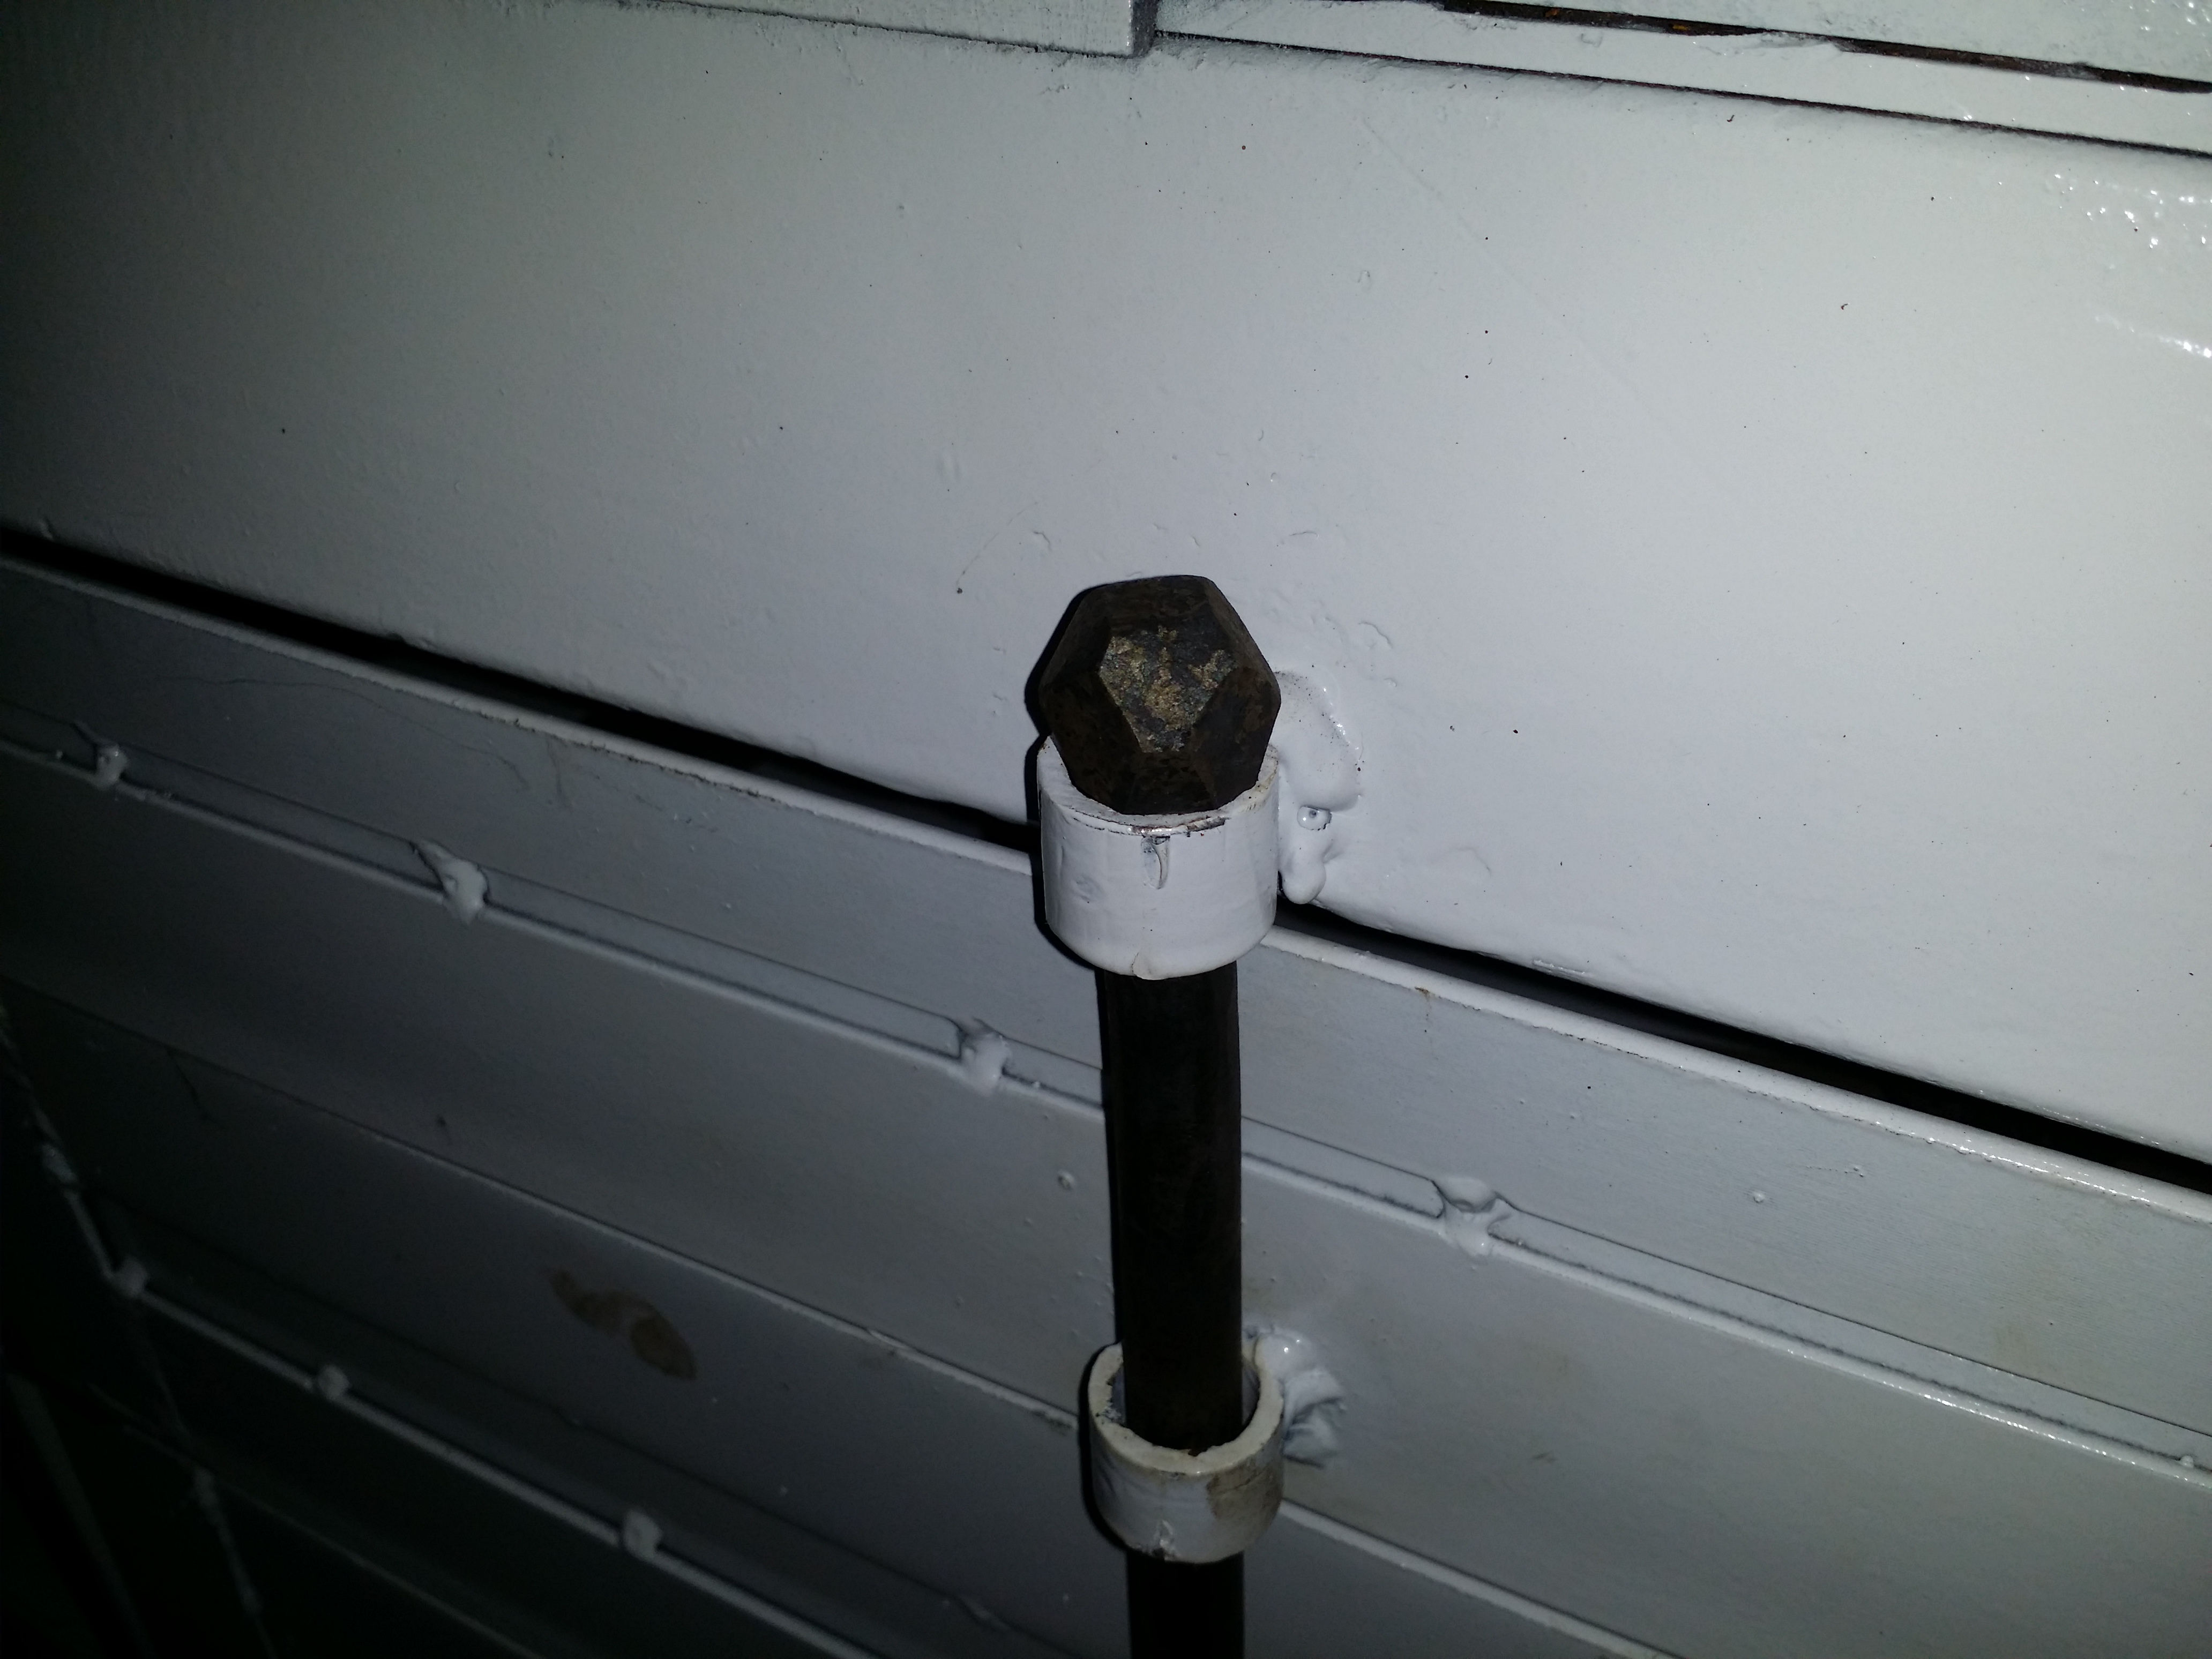
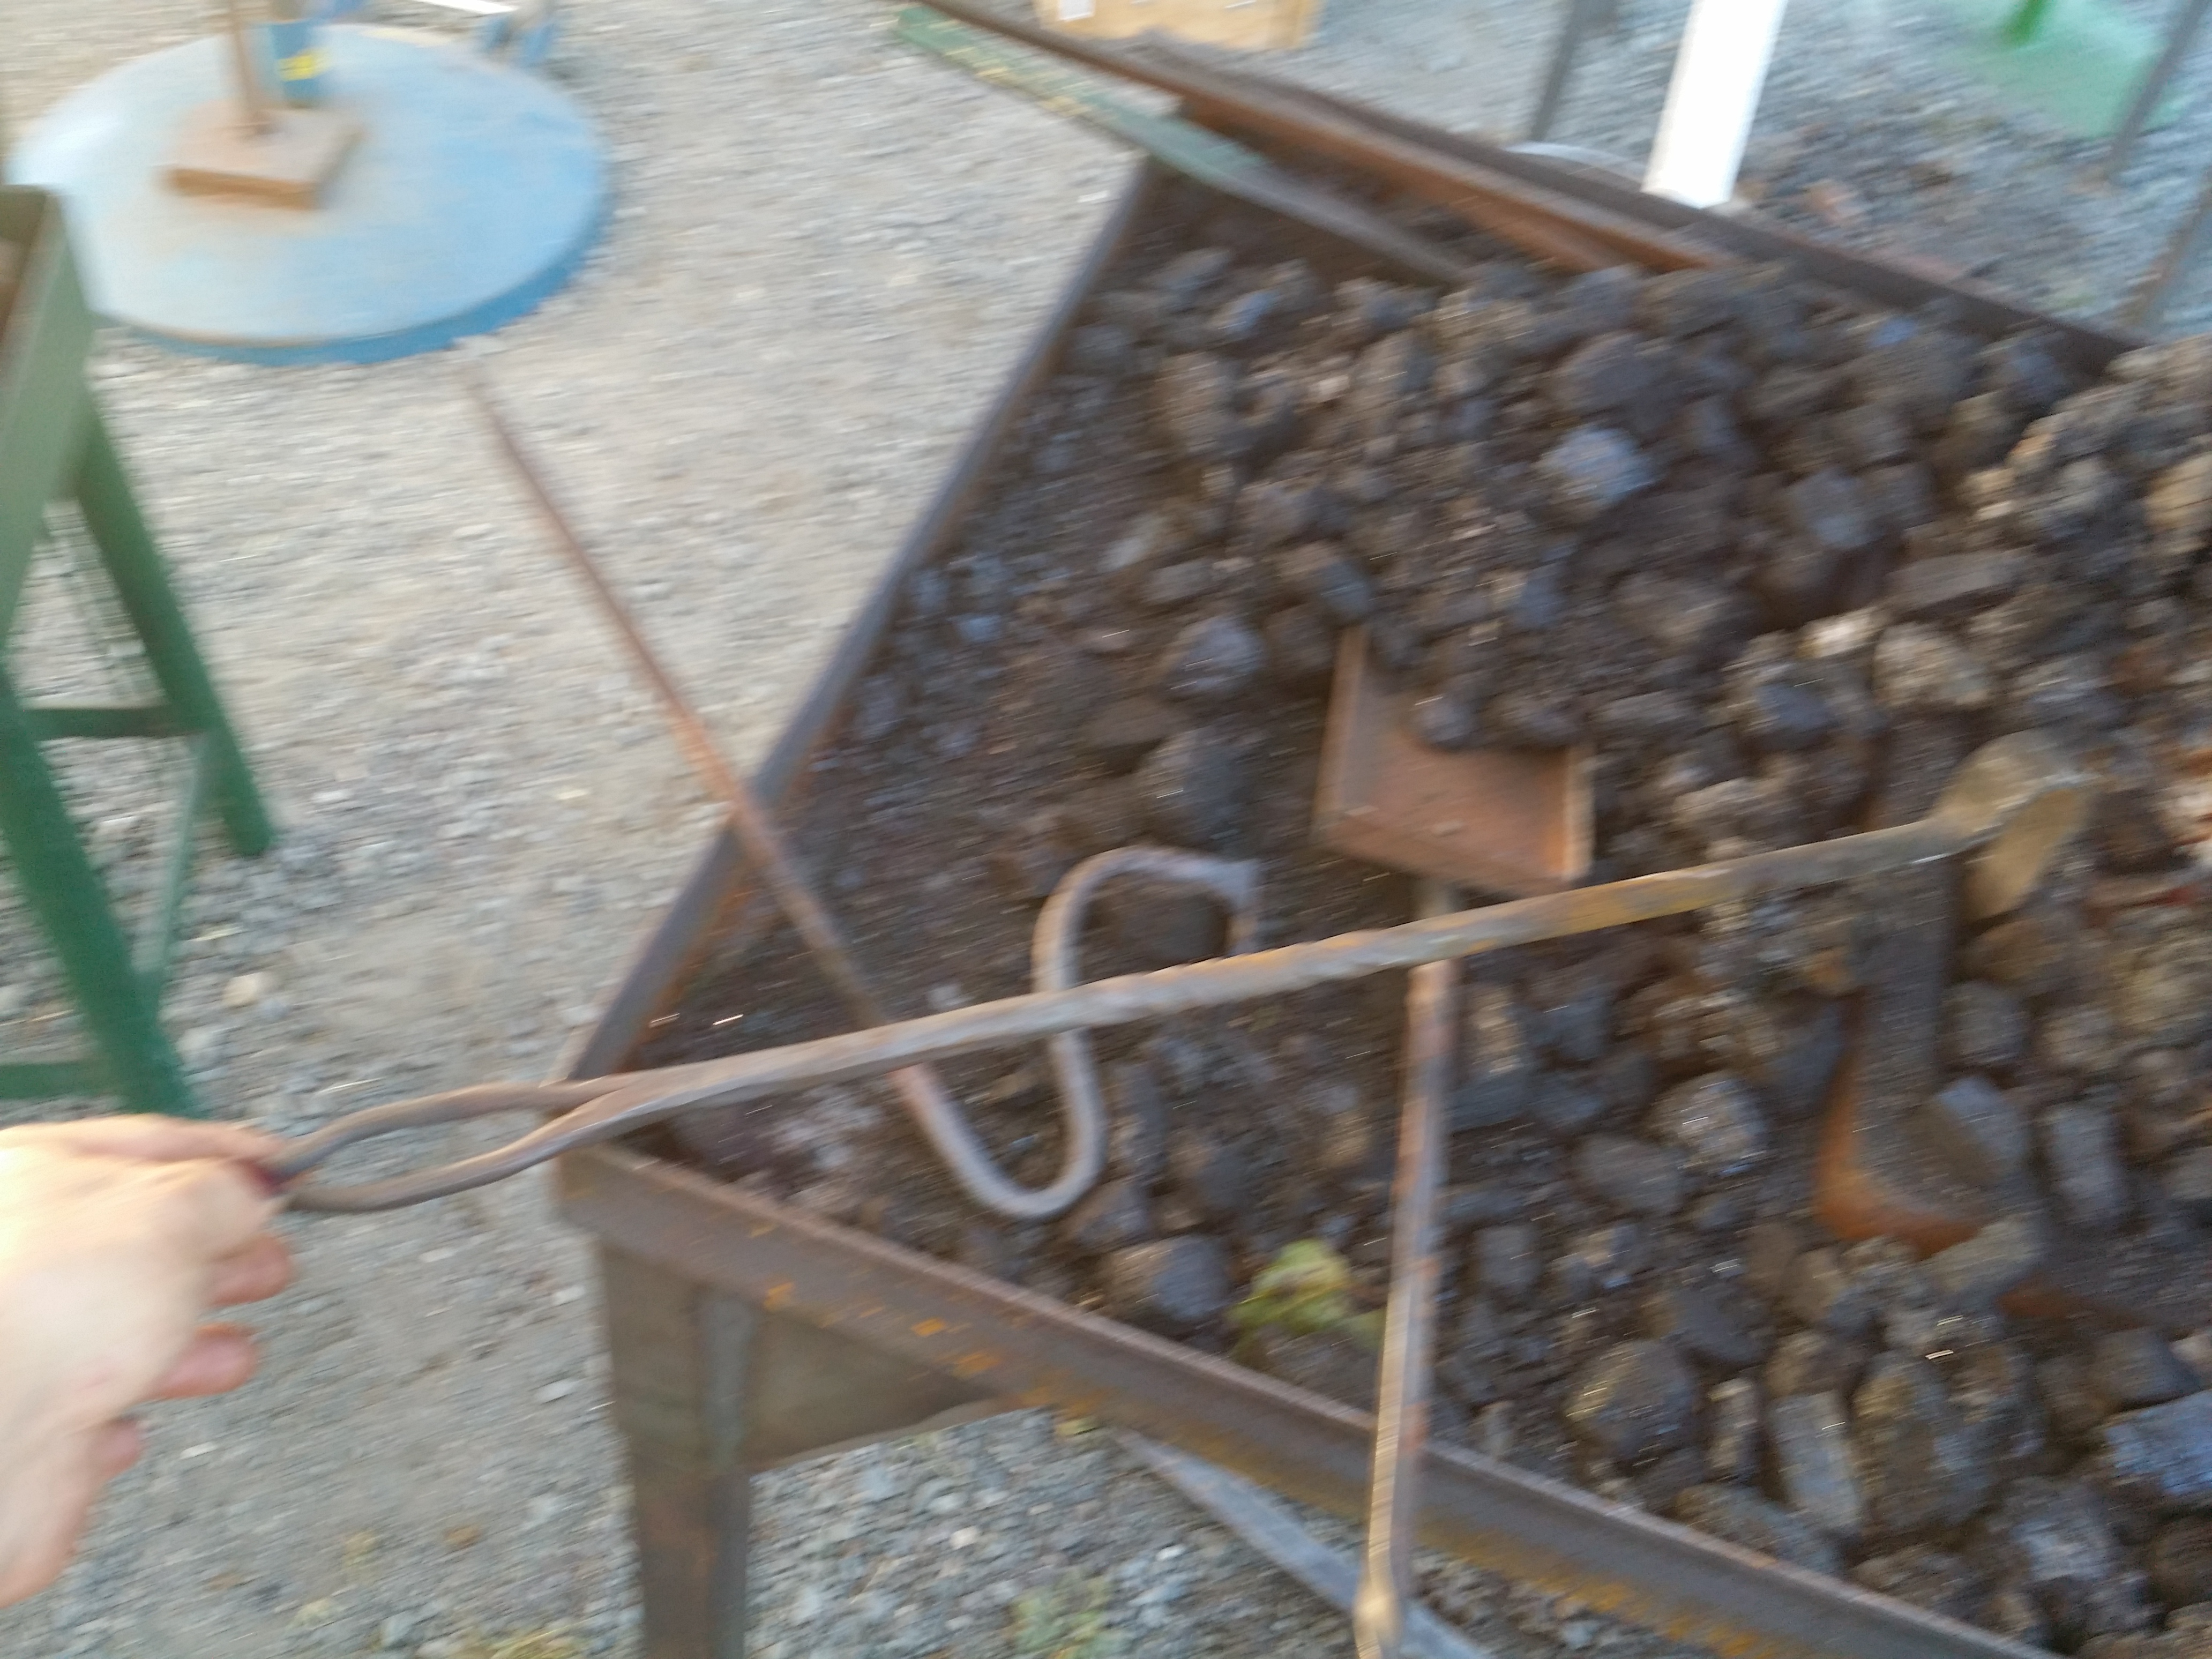
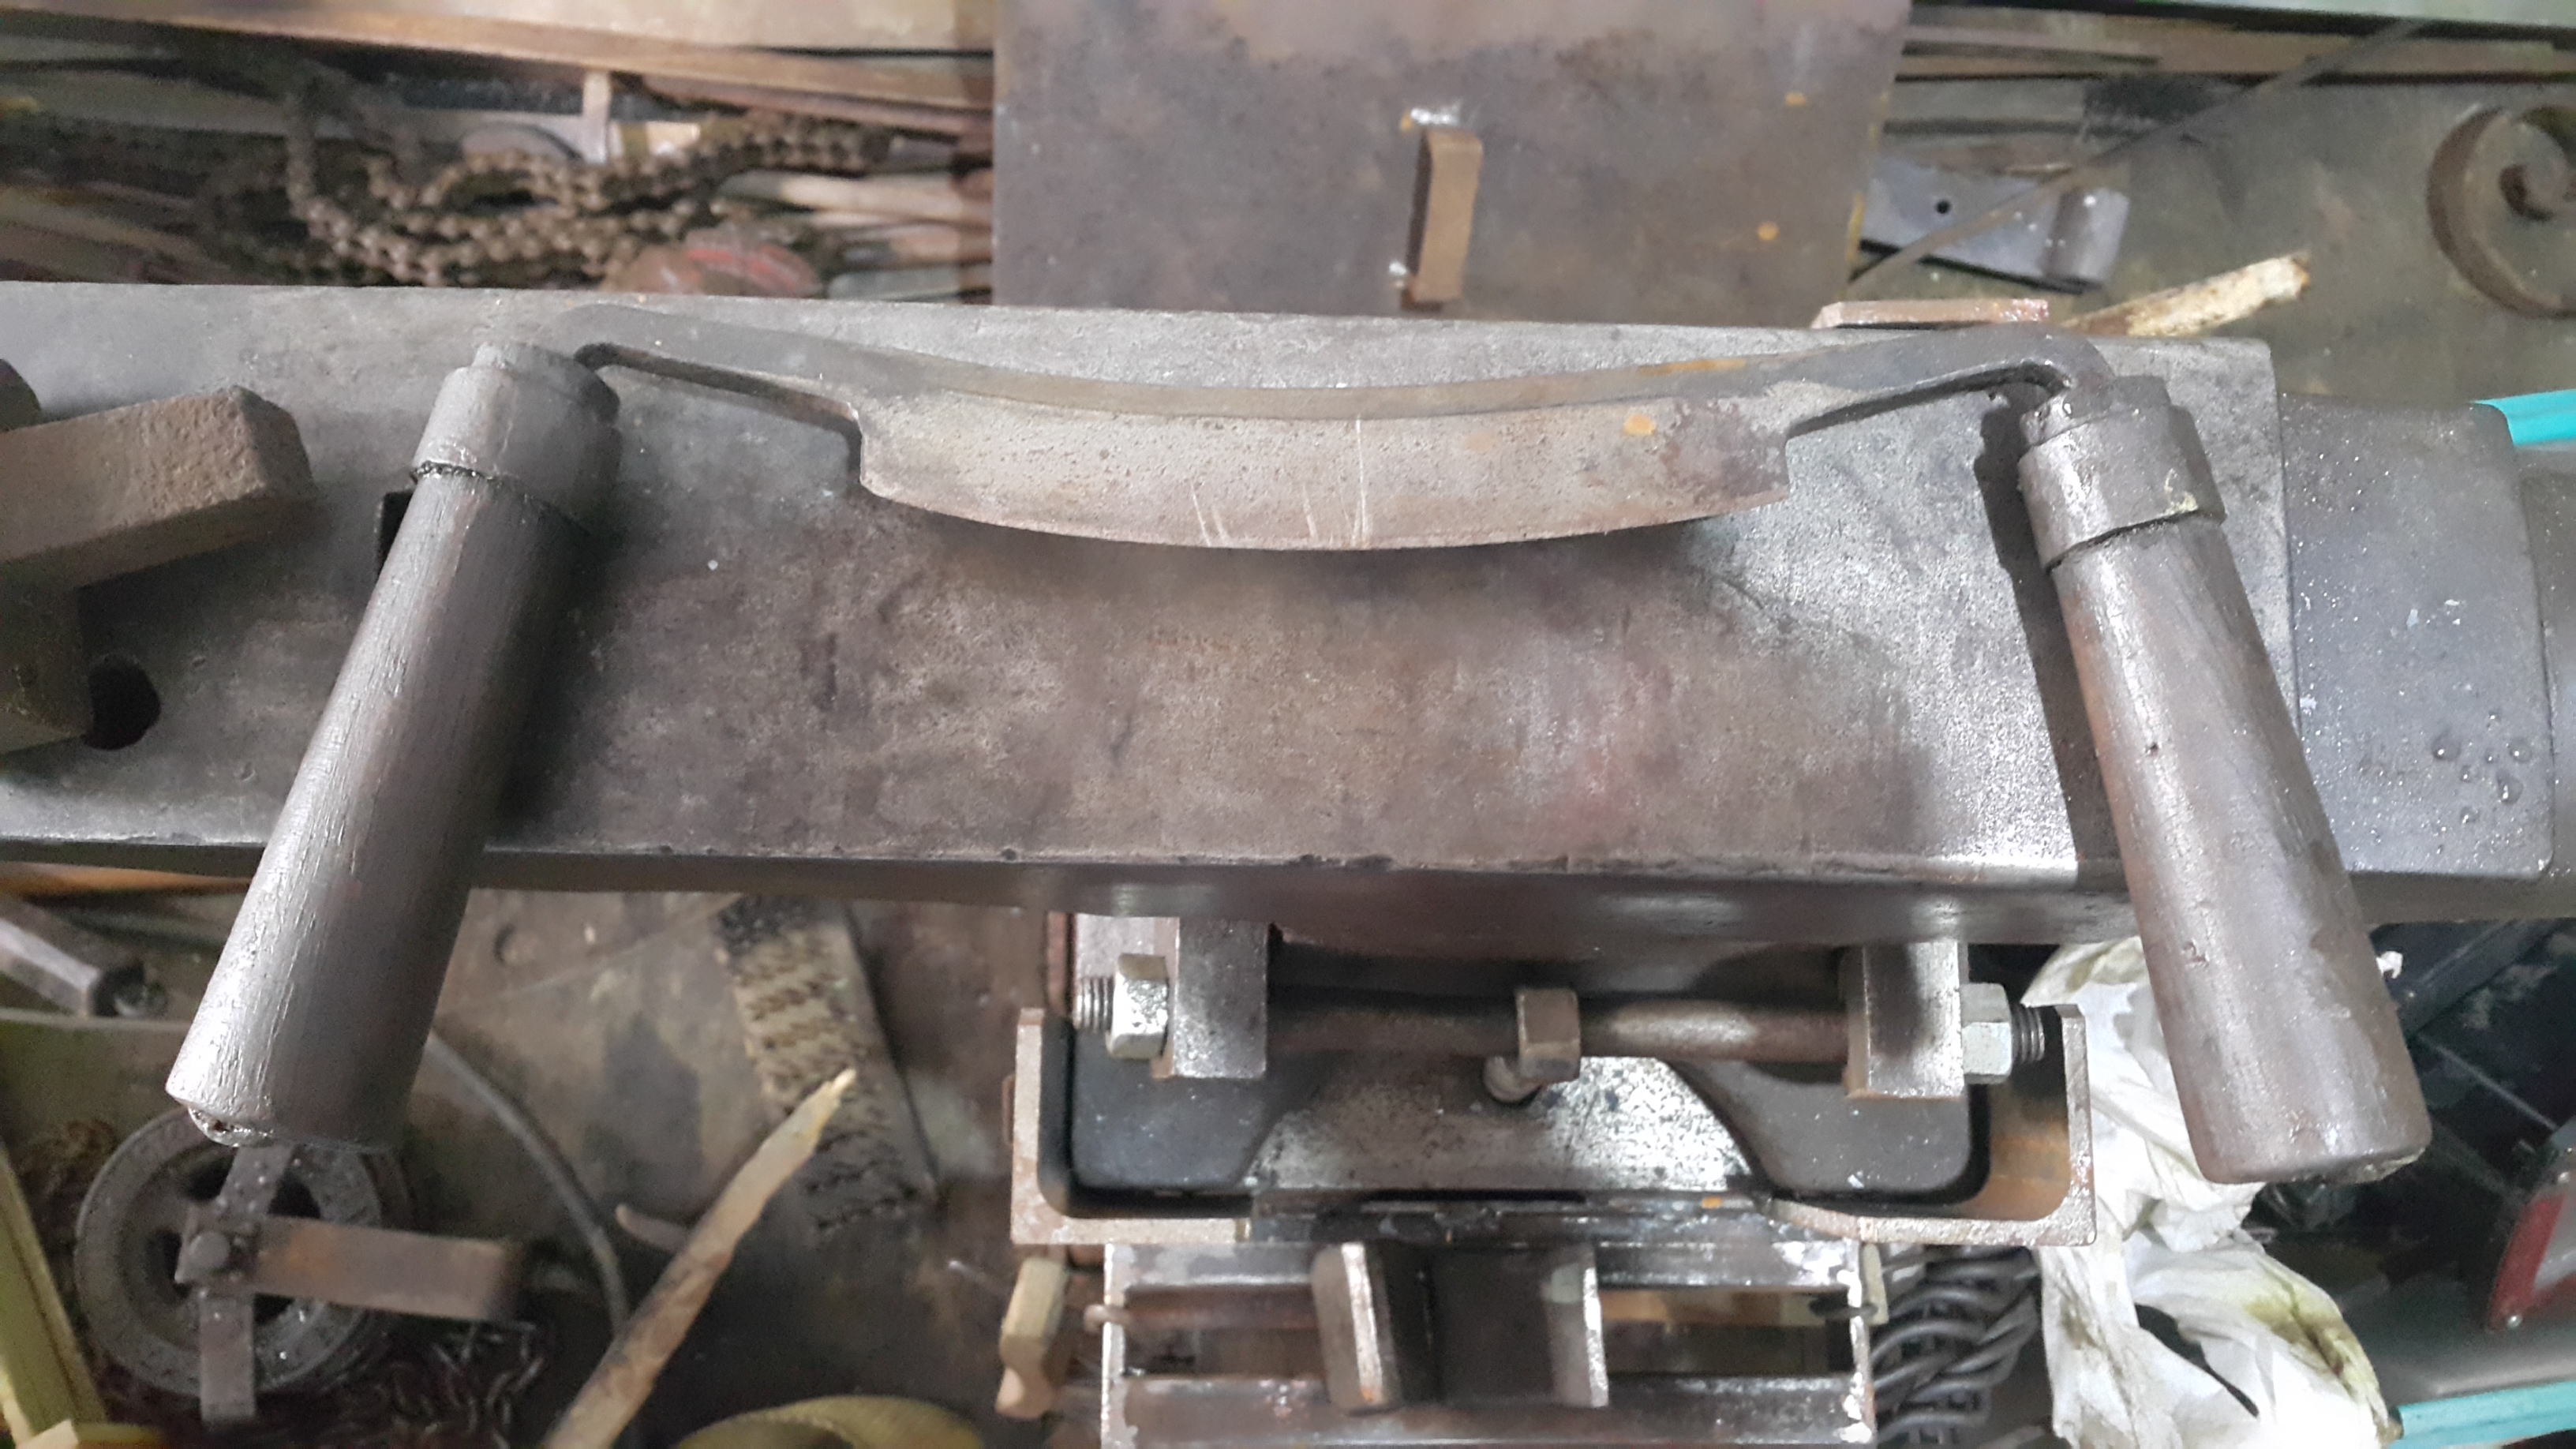
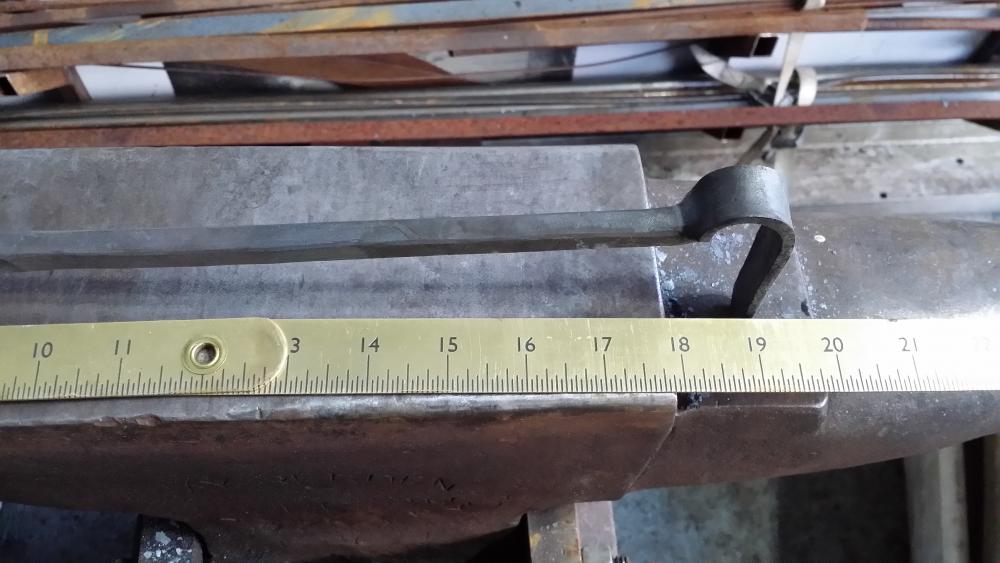
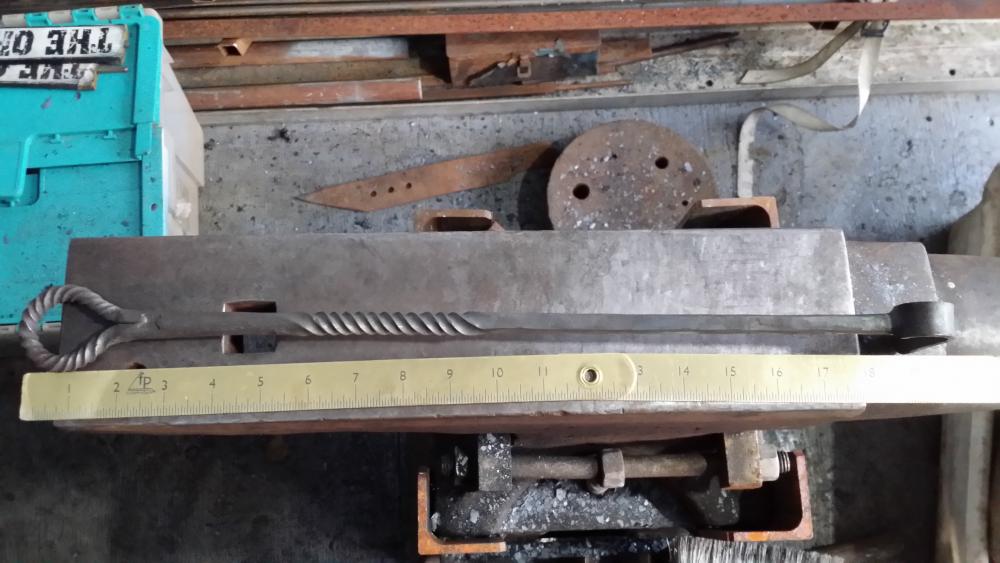
Thanks guys.. Was fun to make and a great way to use up the rod which was discarded.. Smoggy, the reason for the offset hook is so you have better control over the hook end.. with it offset to one side like you mentioned the pressure applied to the tip is pushed either left or right around the center mass and since the hook is on the down side. With the hook mounted to the back of the shaft. (back being the side you are looking at in normal use or tip down) the pressure is moved to the back and it re centers the hook which now moves the pressure more center line to the shaft vs being offset only on one side. This little thing can make the tool more user friendly and take some pressure off the wrist in use from lateral (twisting/torque) forces.. I like all my forge tool handles to feel like I can pry up an anvil with them.. I found in my early days that a handle that doesn't offer positive control are harder to use and I found my forearms and wrists were more tired at the end of the day.. So no round handles unless they have some way to prevent a twisting force. Like the hoop end.. The drawing explains it a little better.. The 1.25" measurement is just to show how the lever applies the forces a little differently. the number is kind of arbitrary since it comes down to what someone likes.. Each leg from the shaft in the drawing is the same length and the reason I measured them and they are as drawn 1.25" long.. Also some would argue it doesn't matter in a forge tool since it sees so little use..Need more pressure for turning just put on a bigger handle.. I just do what I have found works better for me and besides that it looks neat..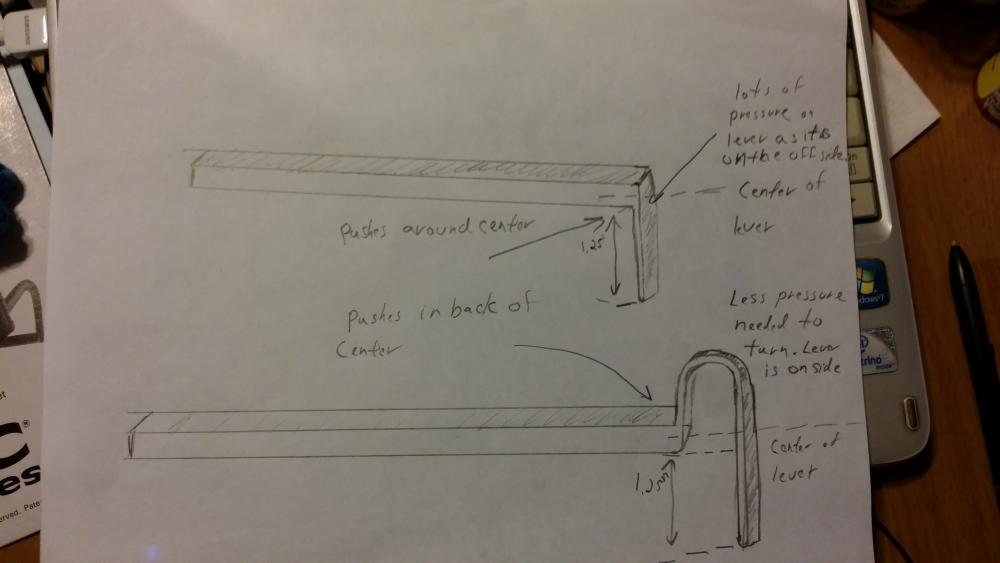
-
Forge rake (side poker)
jlpservicesinc replied to jlpservicesinc's topic in Tools, general discussion
Thanks. . It's very comfortable in the hand.. the ring sits right in the palm and gives good control of the shaft in use.. -
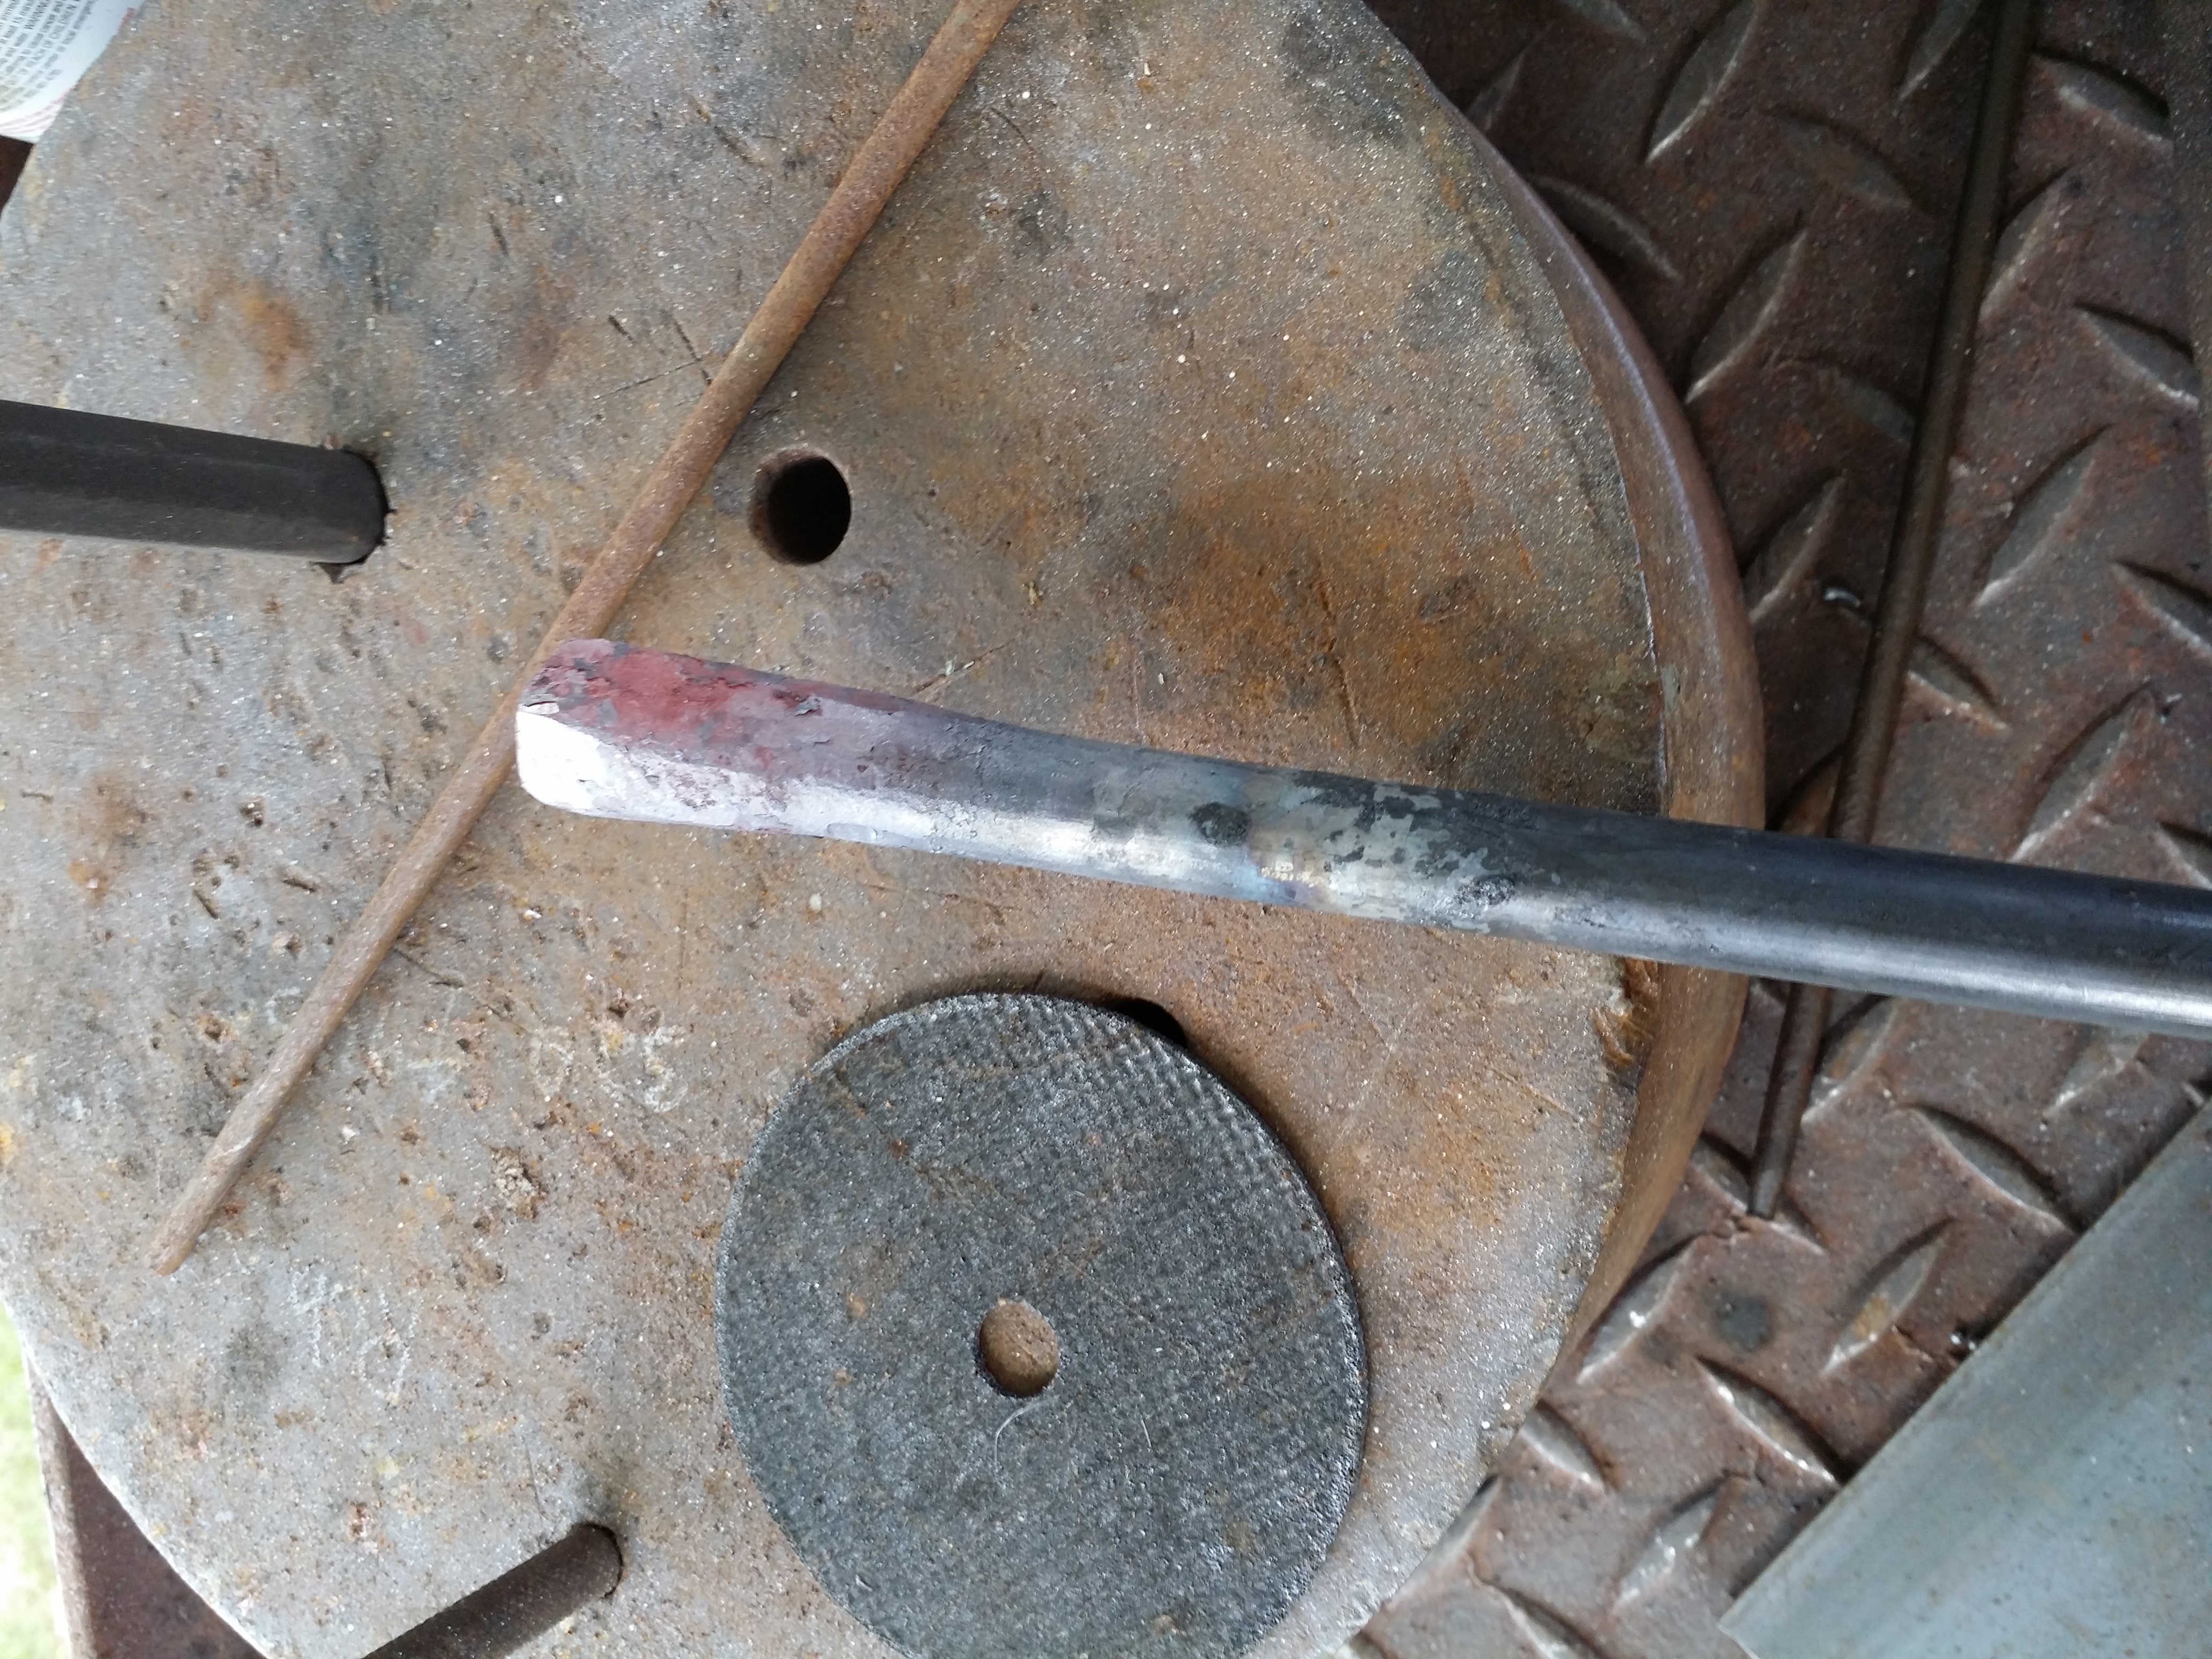
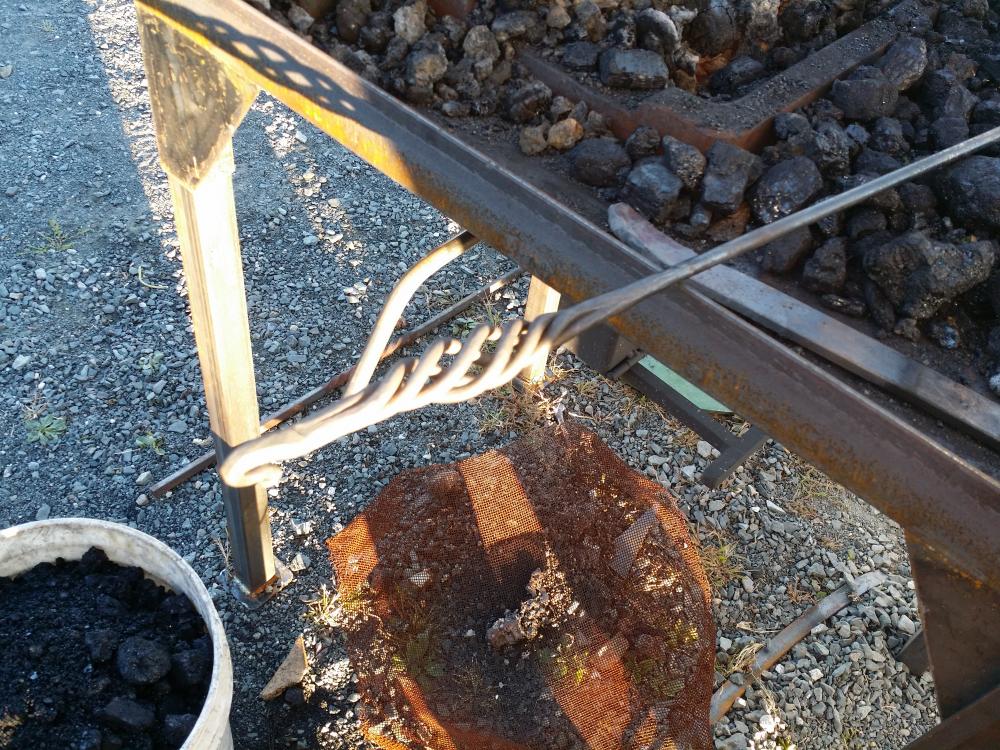
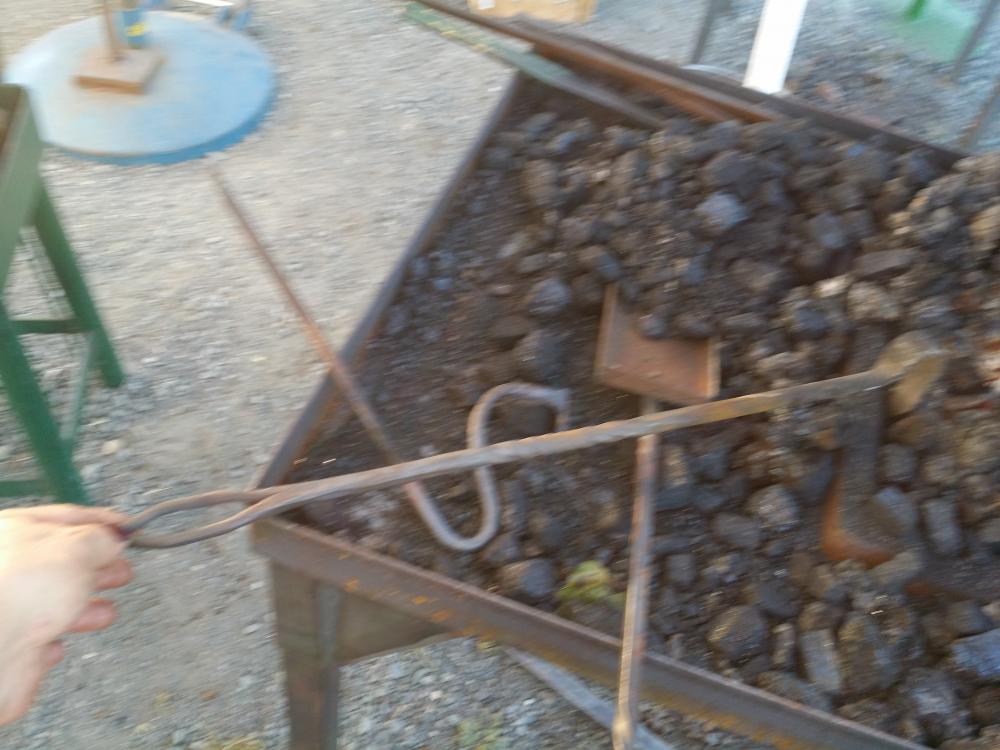
this started life as a 1/2" round.. The finial shaft size is about 3/8".. It is a rake or Side poker for forge coal fire maintenance..


-
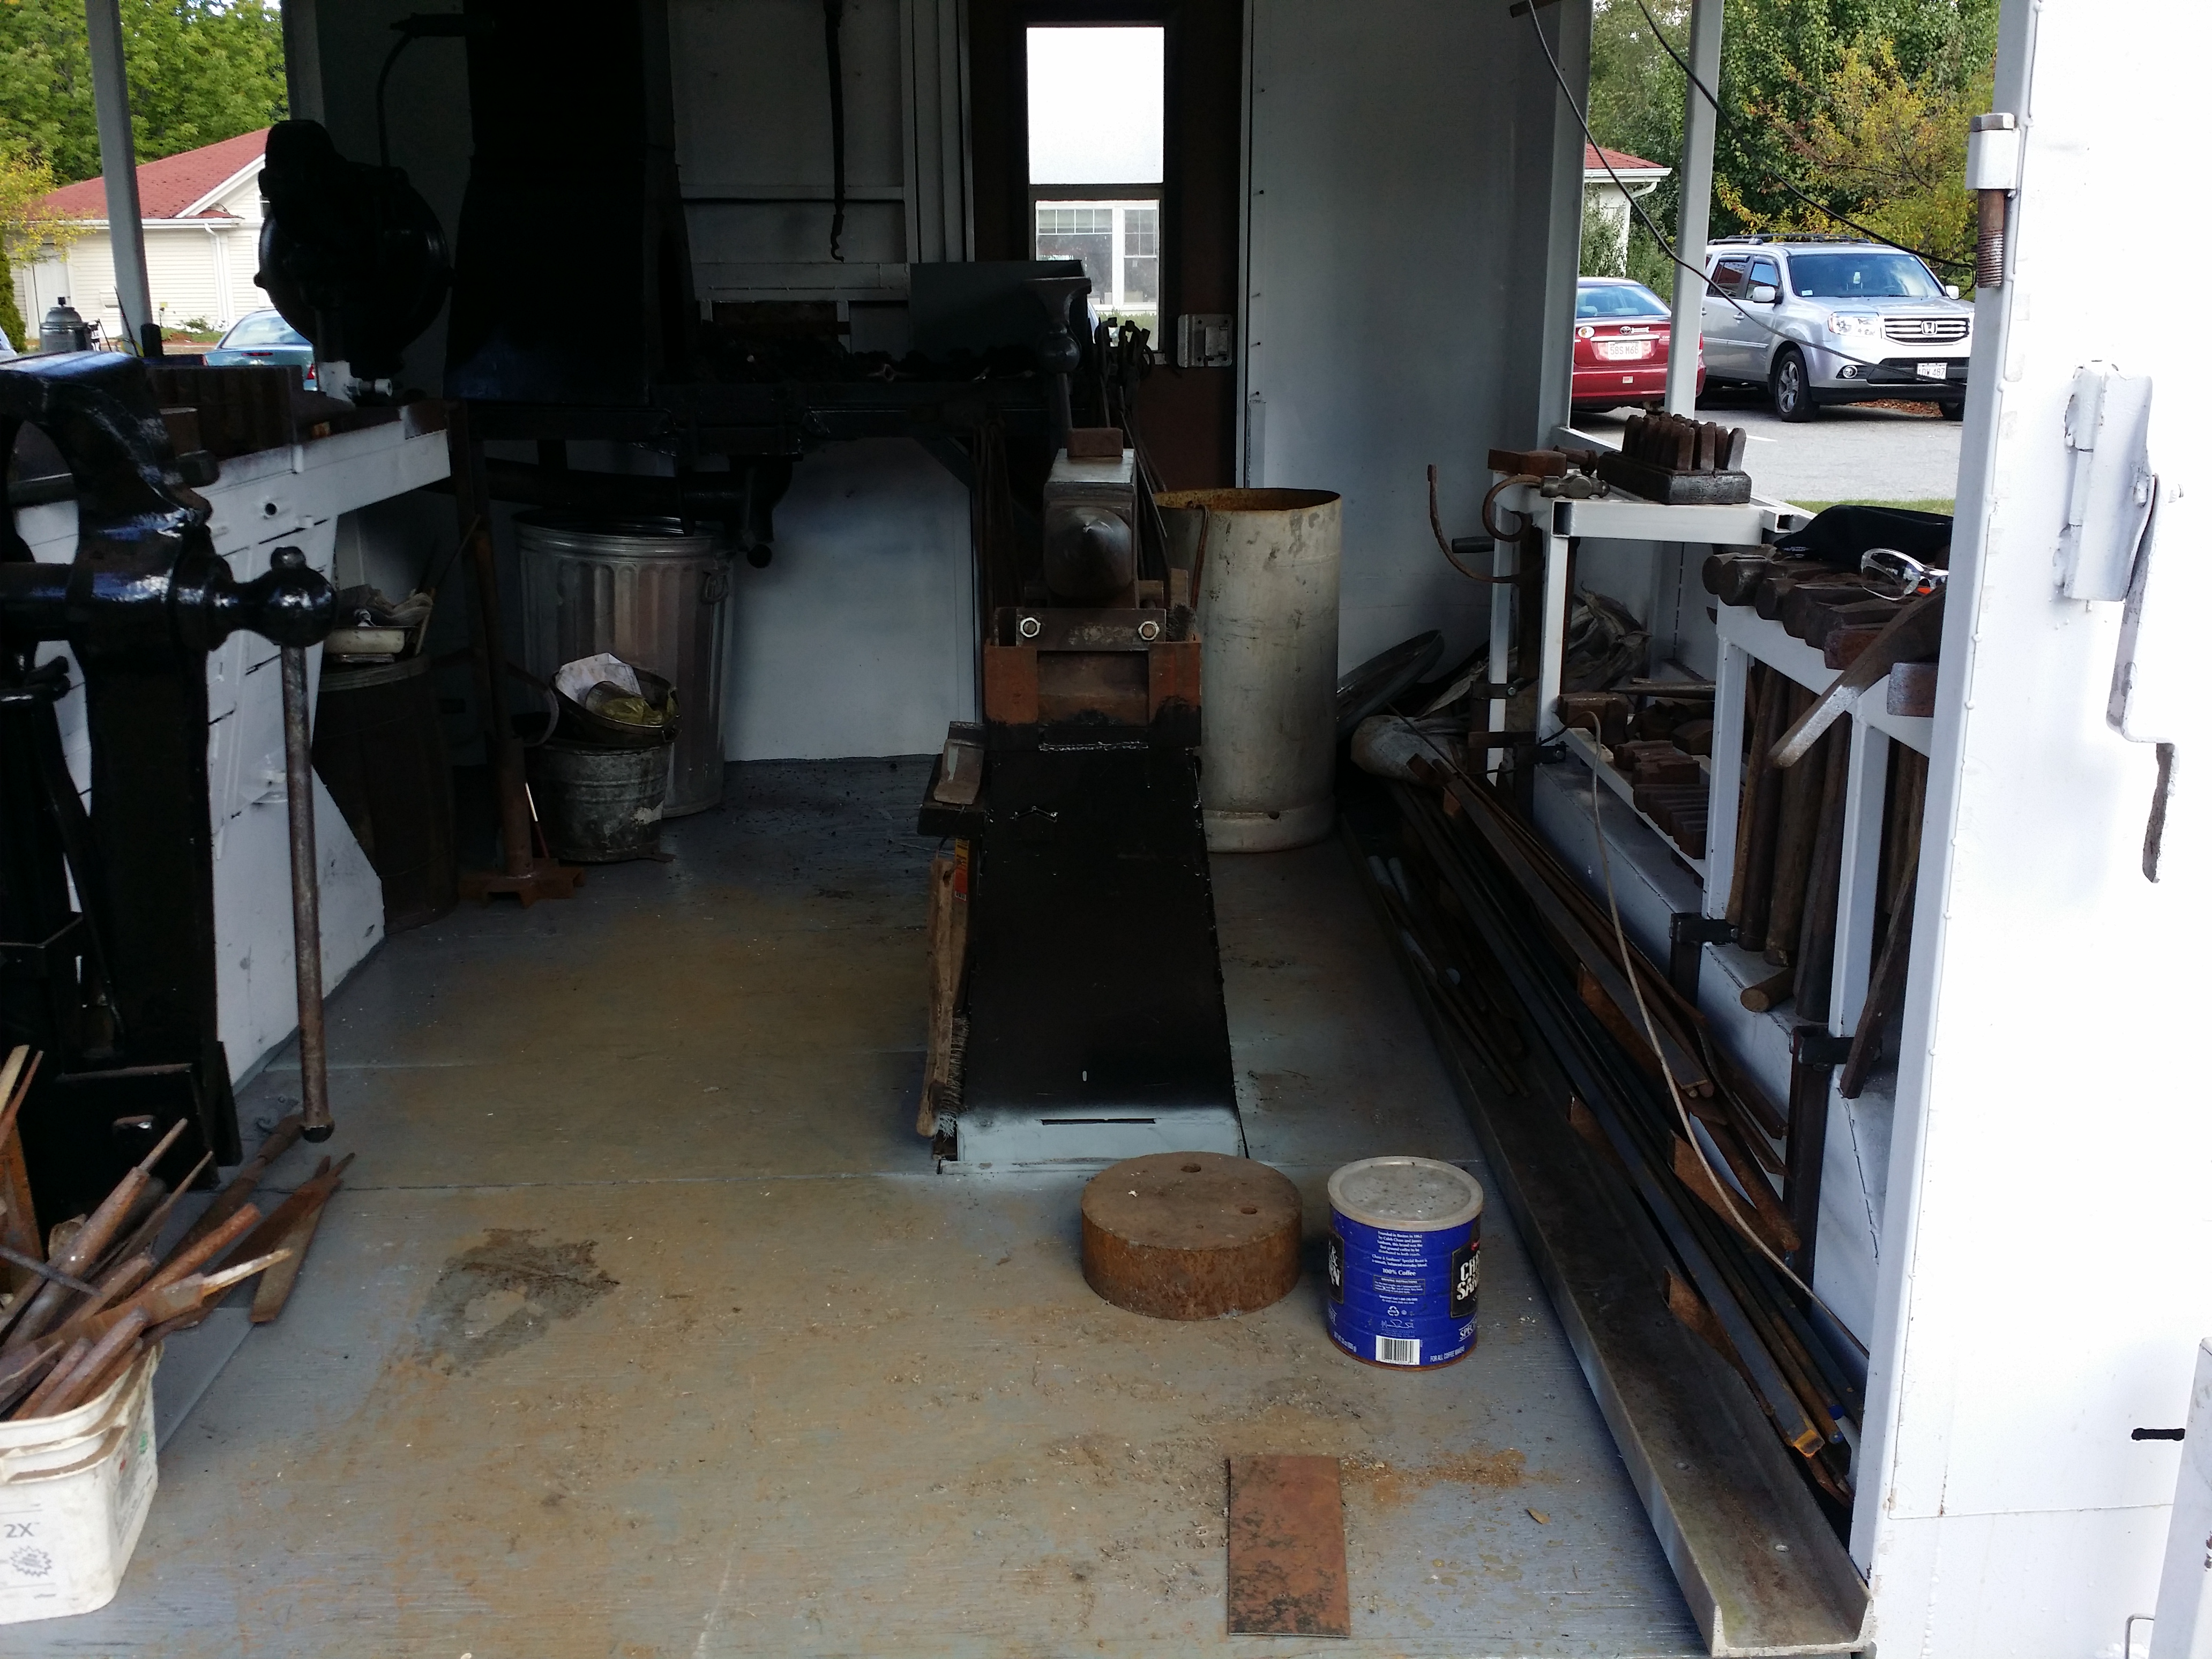
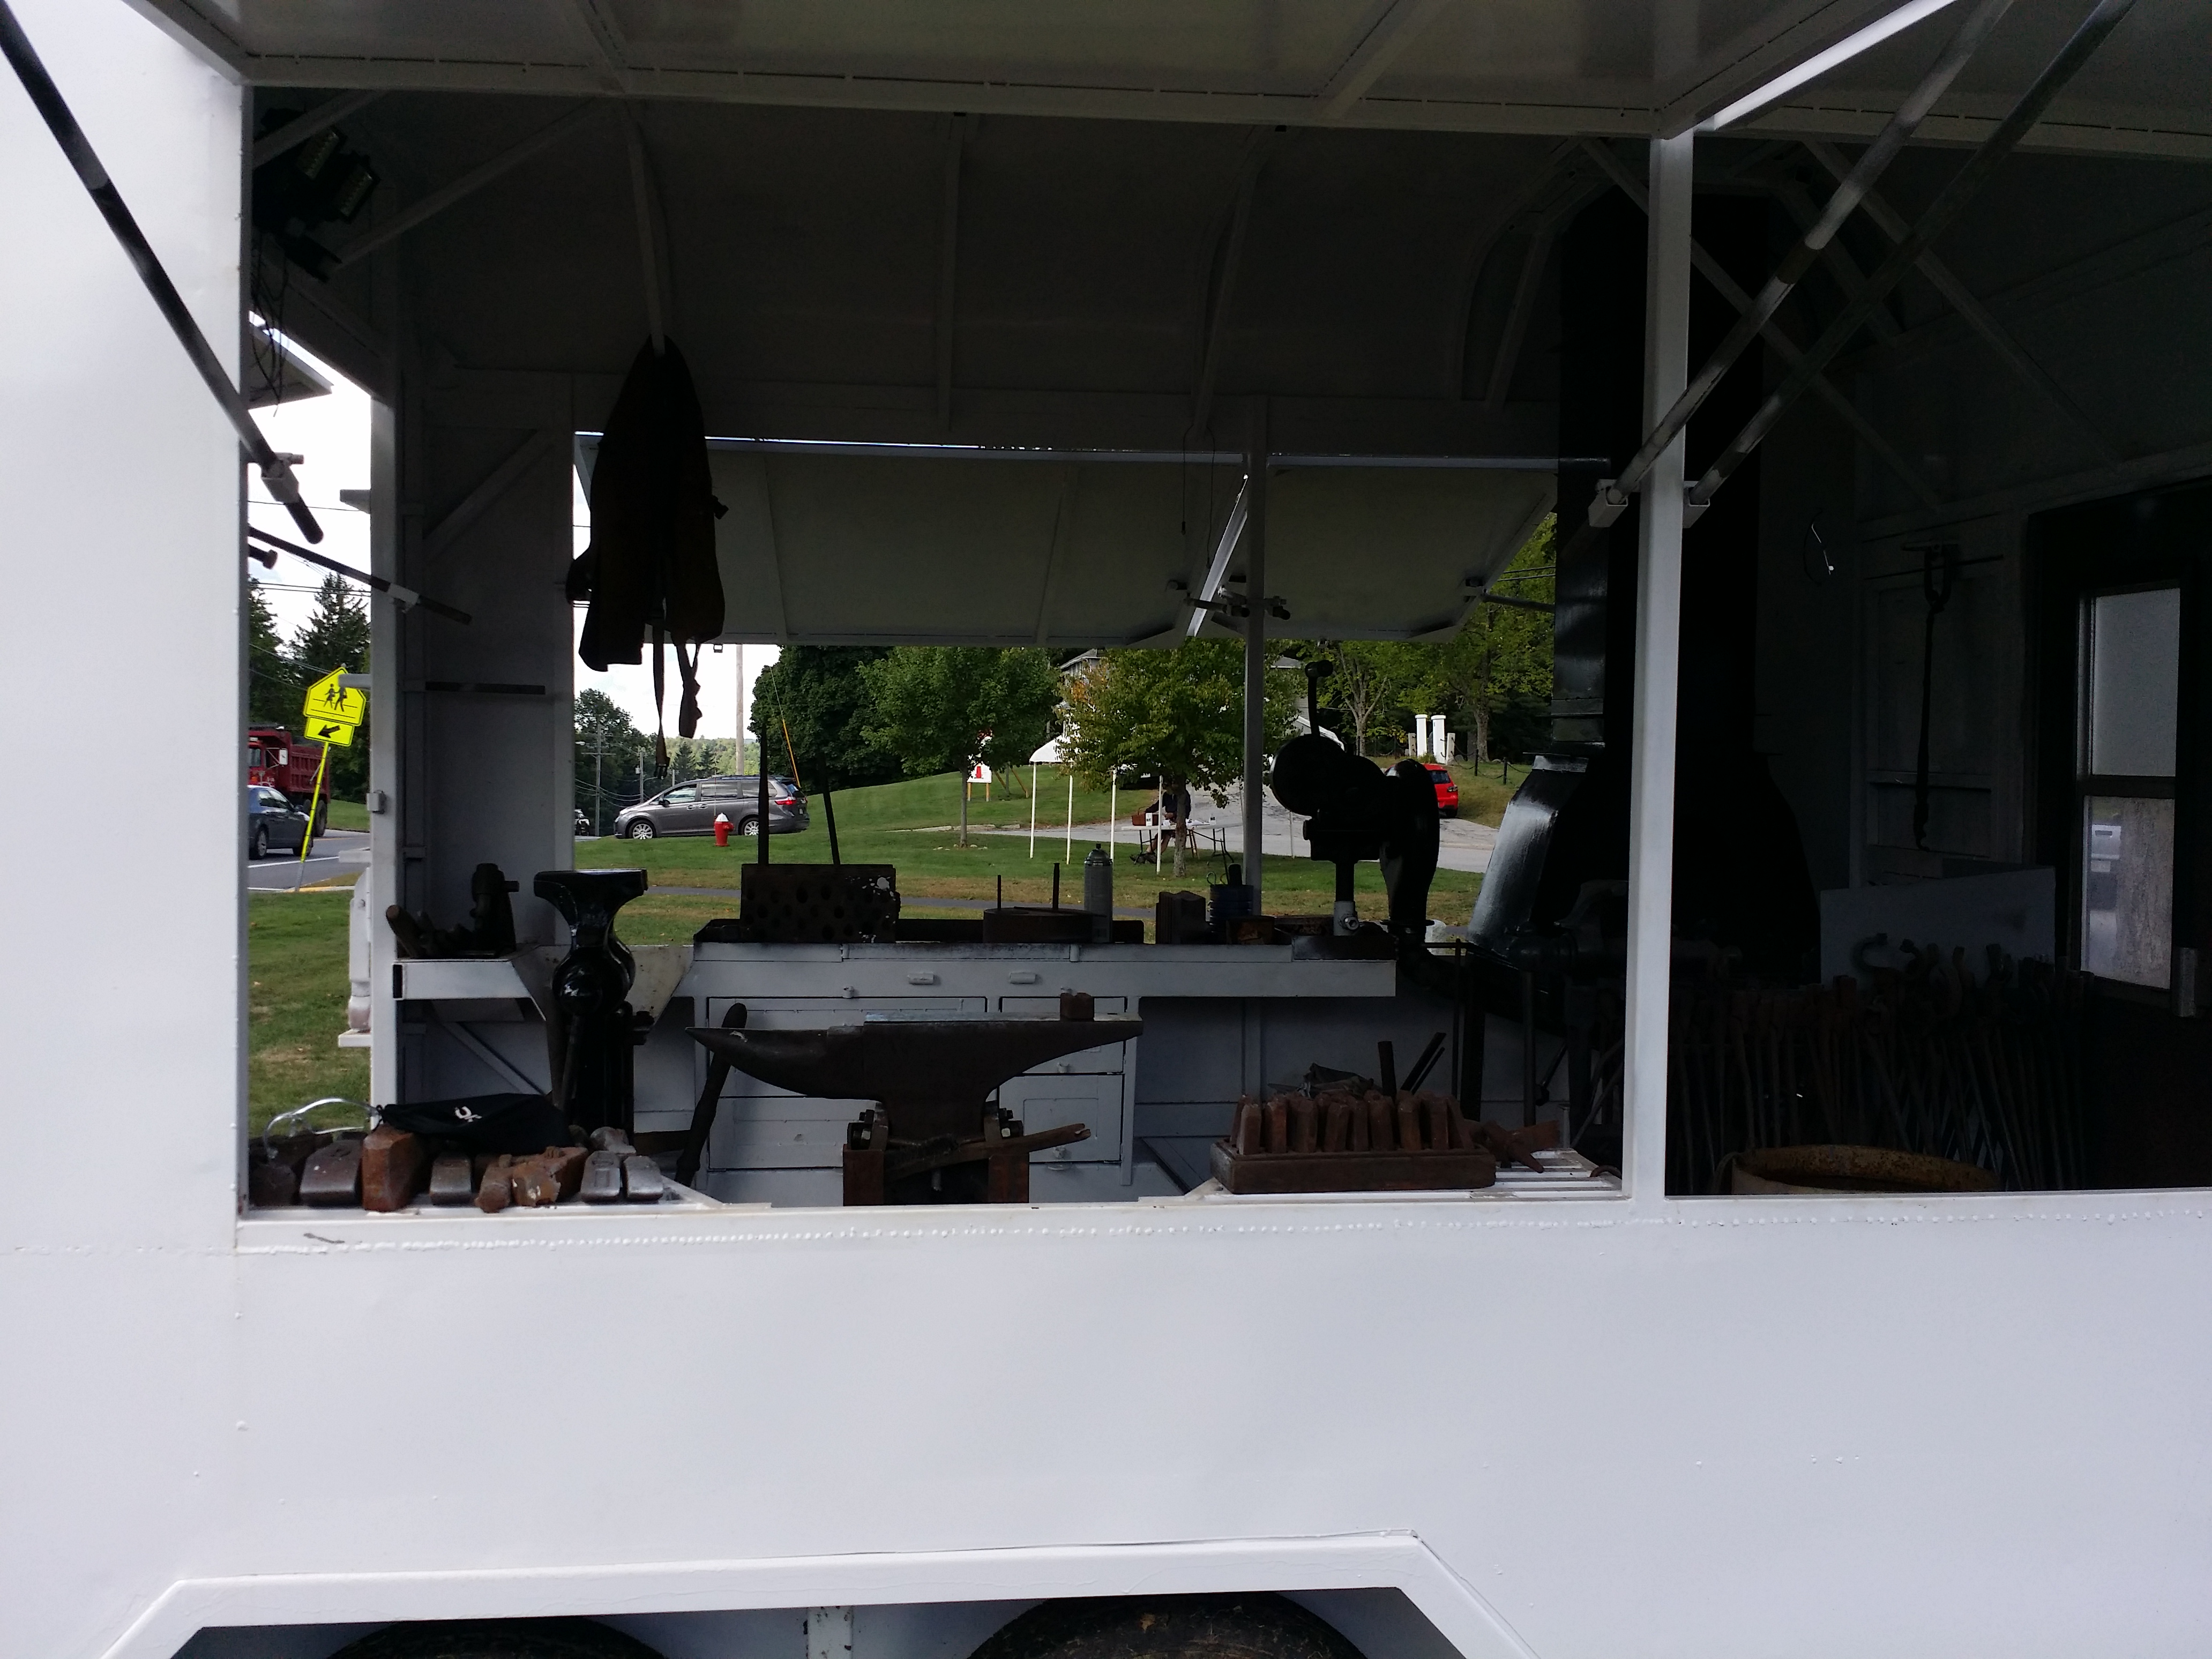
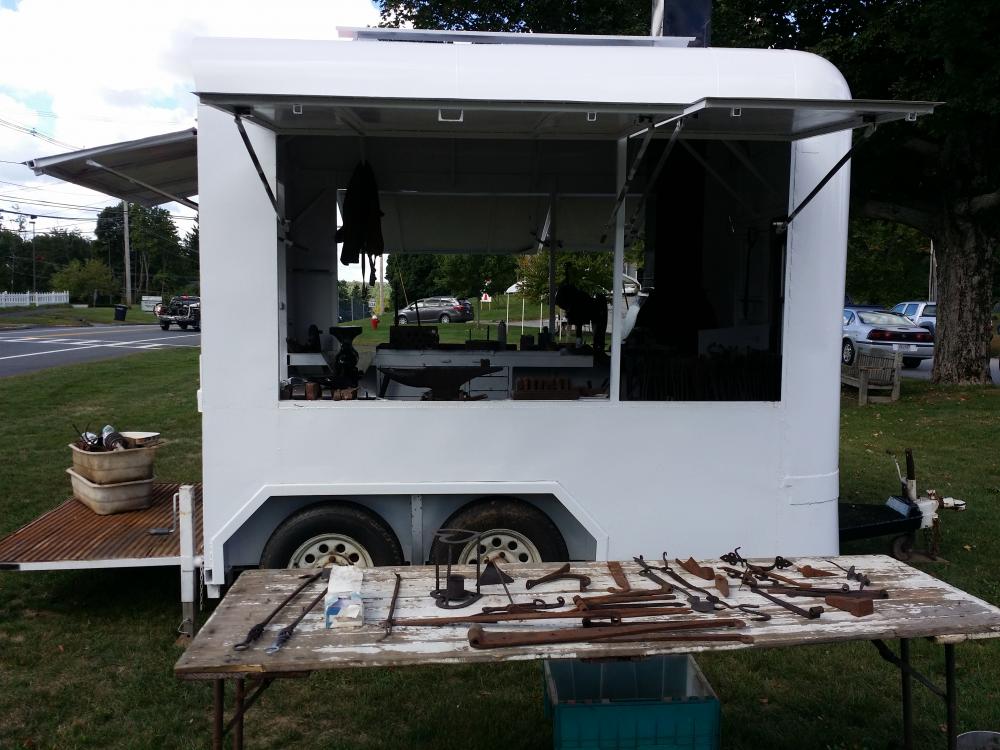
Portable Blacksmith shop
jlpservicesinc replied to jlpservicesinc's topic in Building, Designing a Shop
It's all good.. After what you had said, I gave it a lot of thought.. I also had someone video me this past demo day.. While I do work like a person with their hair on fire I also do chat it up and engage people.. Sometimes it's a matter of not seeing what it is you do so the video was great to watch.. As for a demo training thread I'd be game.. No such thing as bad information and the nice thing about a place like this is the open sharing.. Something in my earlier days I would have foregone.. Also, I don't think you or I have detracted in anyway with our discussion on demoing.. If anything it might help others who are thinking of demoing but don't really know how to get started in how to converse, act or portray.. If the demo gets done and shows what blacksmithing is.. This was my 3rd demo of the year.. And add in the 2 days of demoing (didn't really demo, just had people watching, or did I. Does teaching count as a demo?) at the NEB event well that's 5 days of demo's this year.. I'm still having fun and the last demo in town was excellent. if you do start a thread I would certainly participate but in reality we covered a lot of terrain.. Not sure I'd have much to say.. Just kidding I love to hear myself talk.. -
Portable Blacksmith shop
jlpservicesinc replied to jlpservicesinc's topic in Building, Designing a Shop
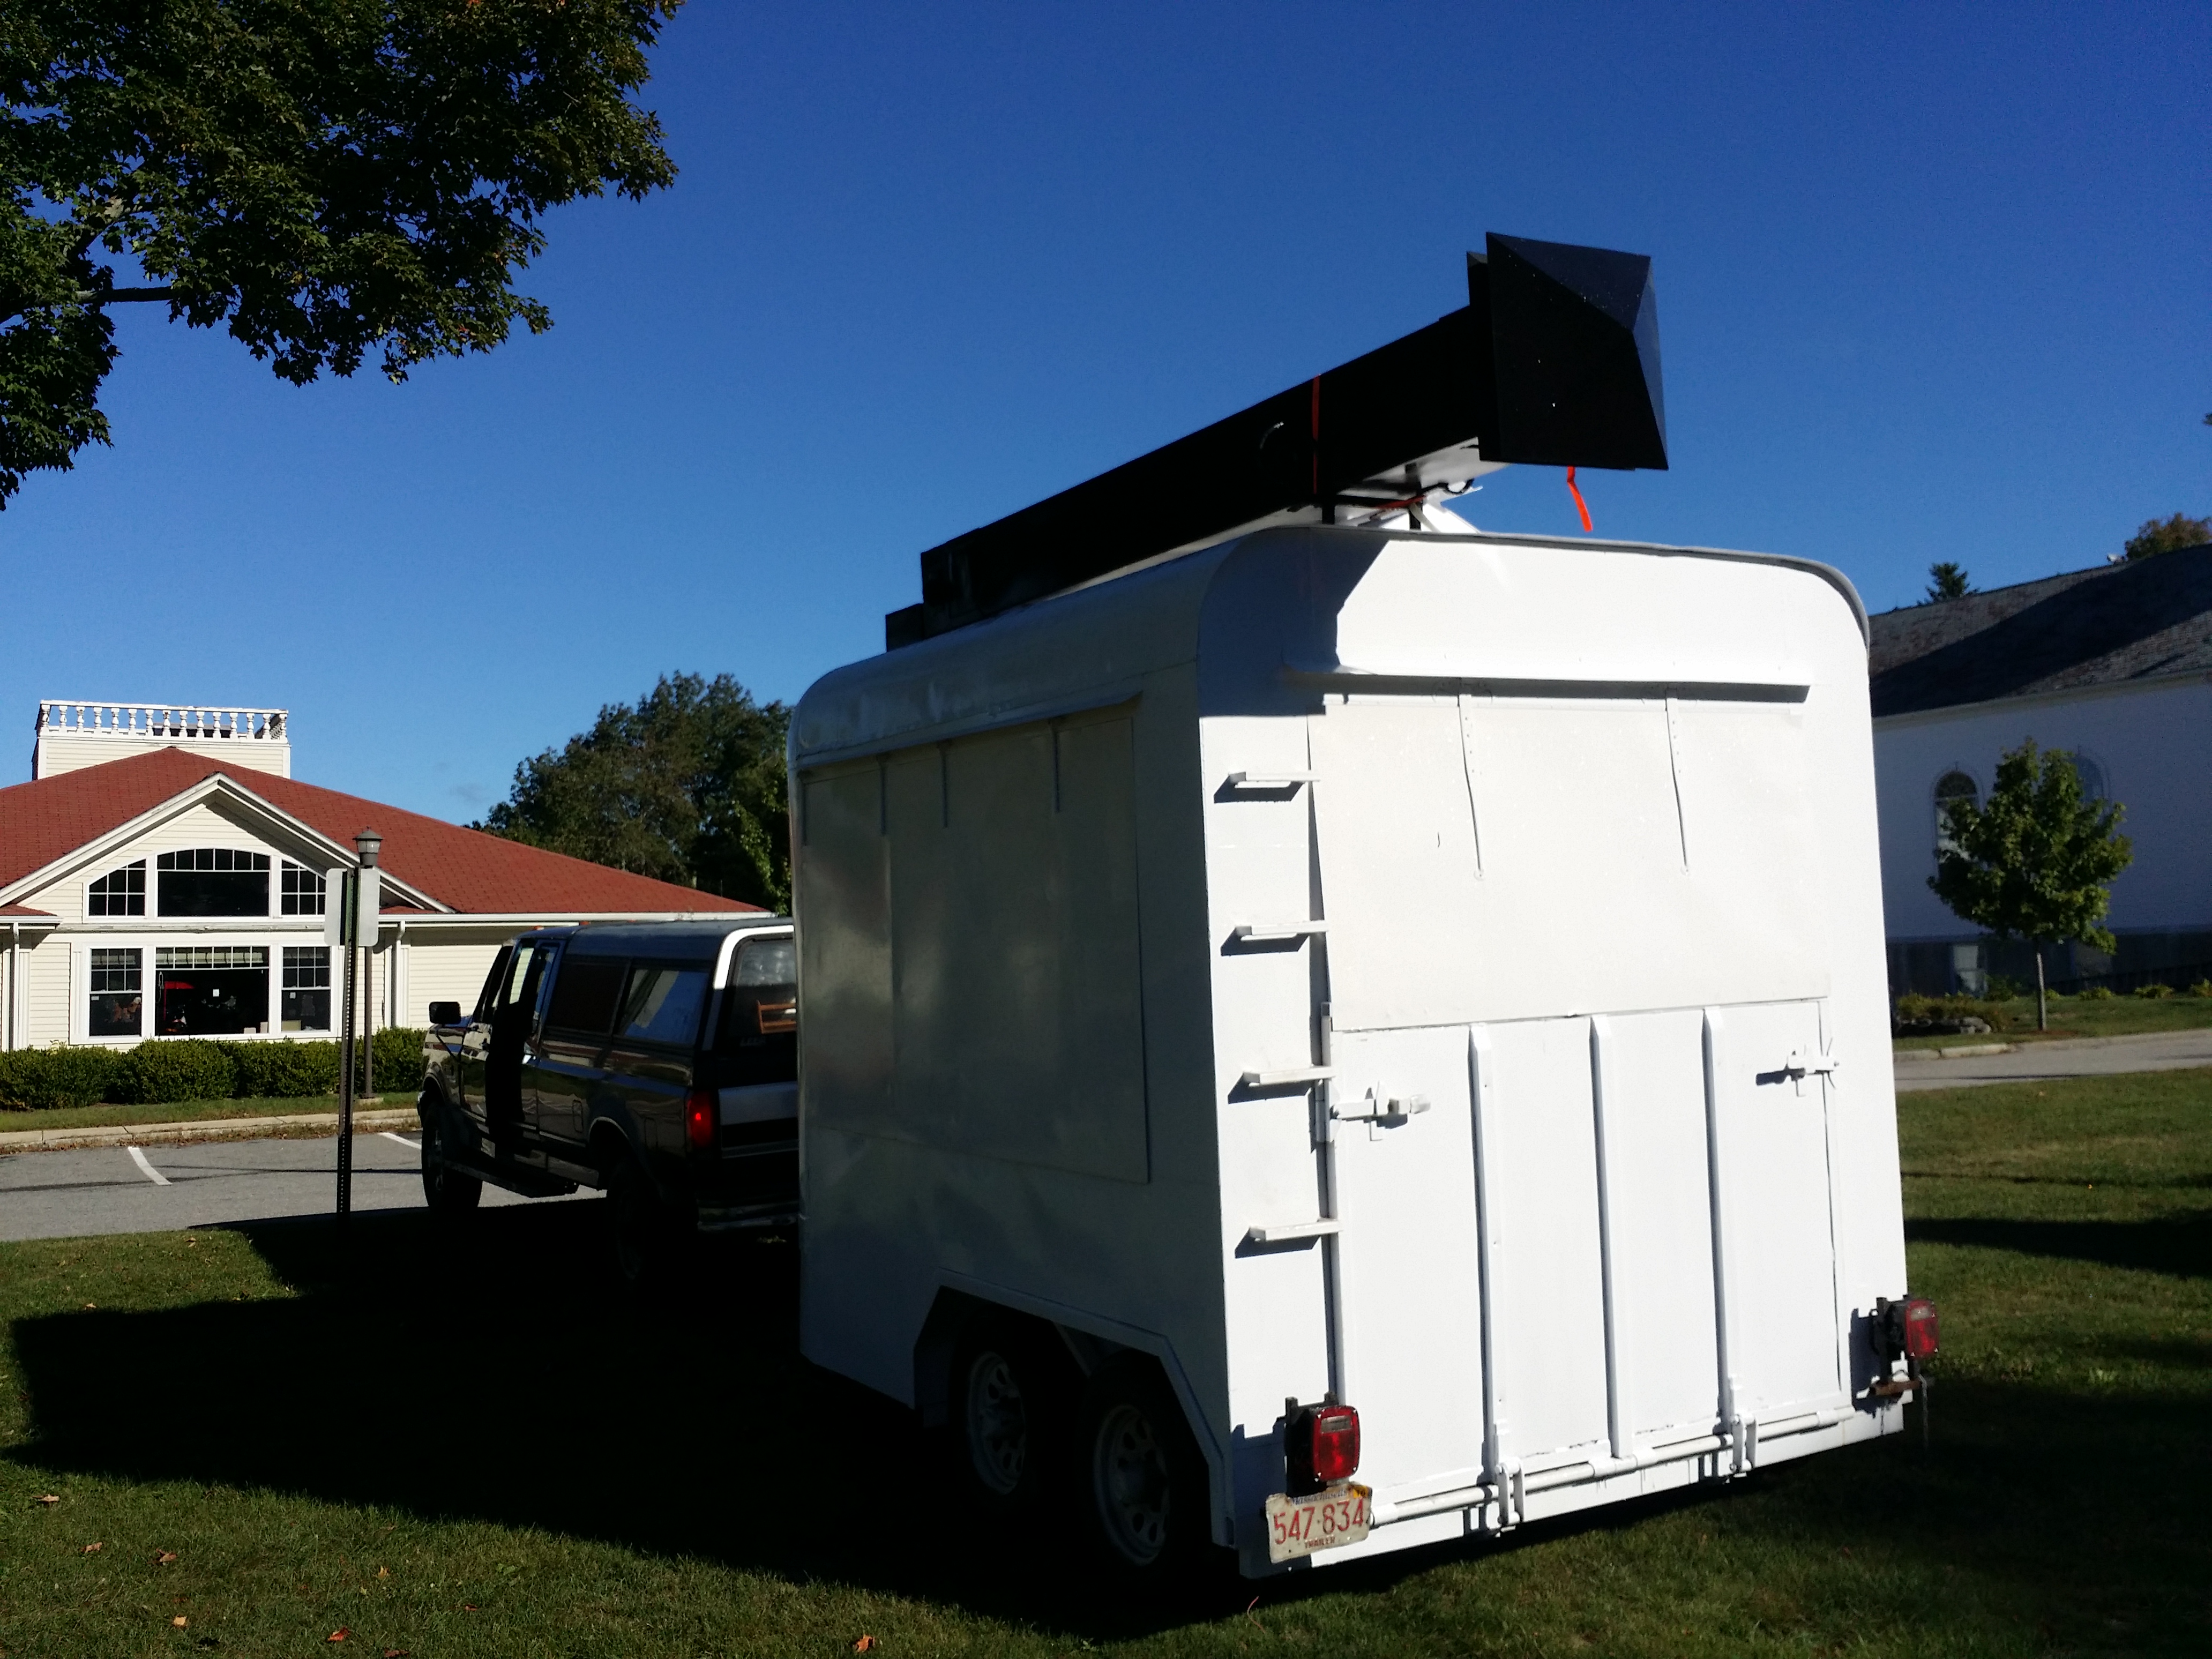
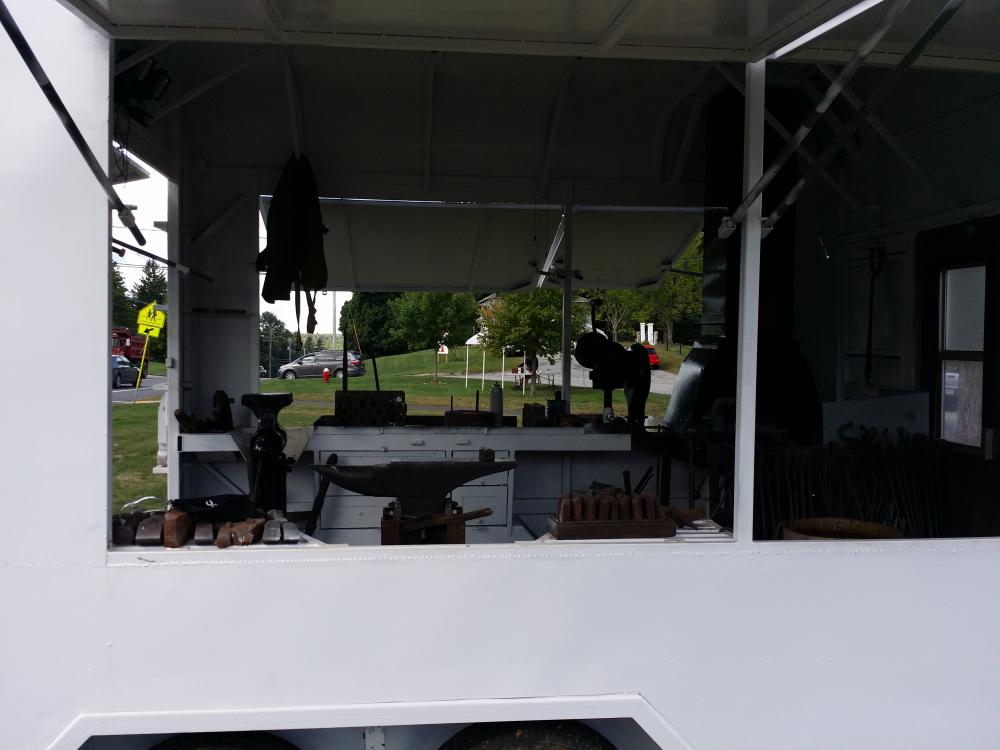
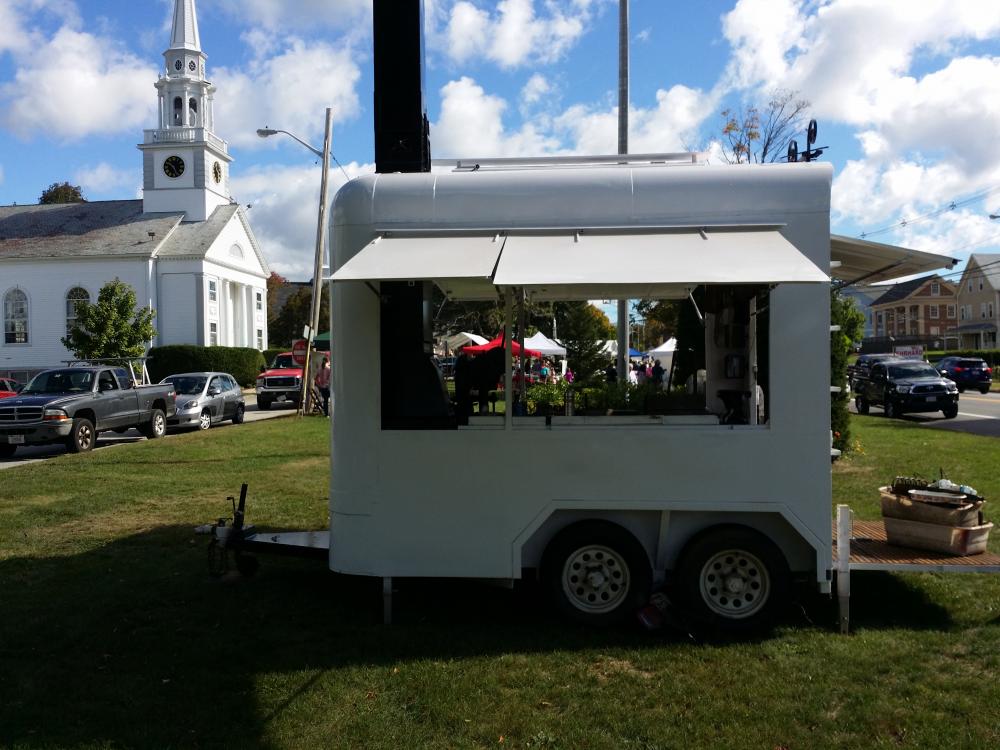
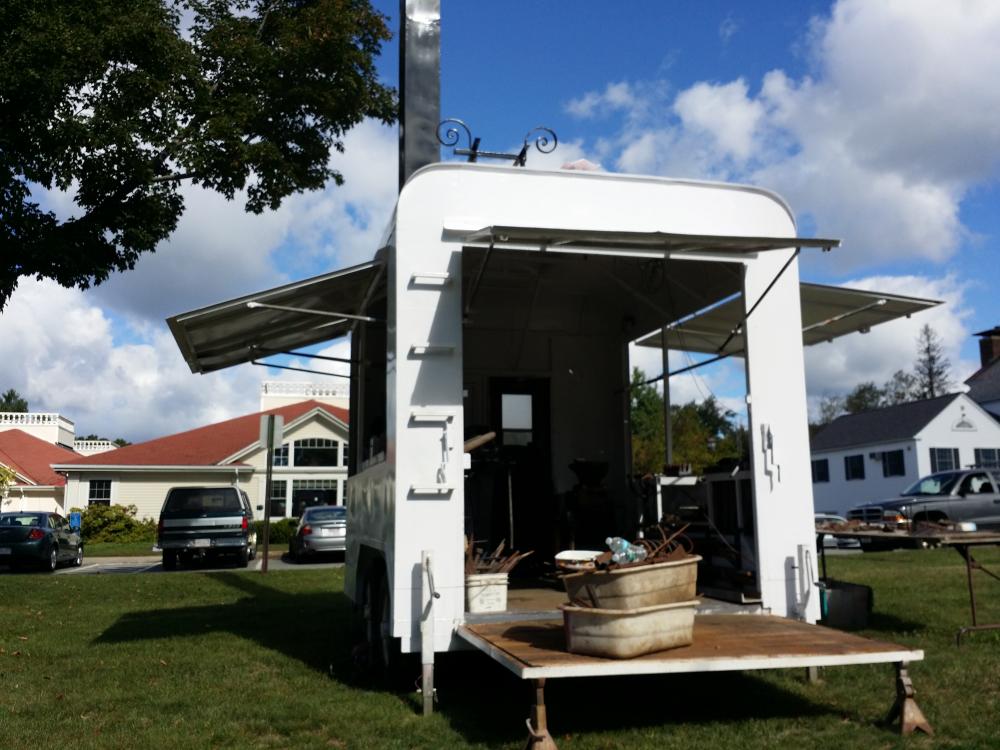
Transport mode.. 11ft from ground to top of stack cap..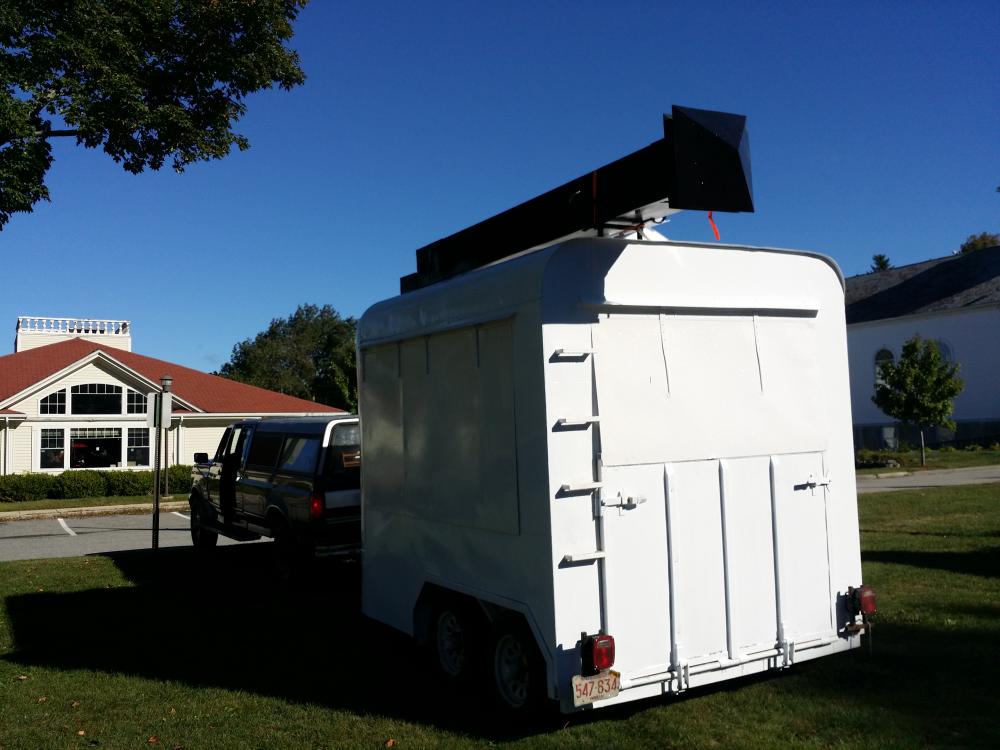
-
I prefer mine to be perfectly flat on the back side.. This allows for me to take off just the right amount at a high spot and by running the knife flat I can burnish the wood at the same time.. If I need to take more just change the angle of the draw knife to what ever depth of cut I want.. In the olden days where everything was done by hand.. They had like 1000's of different kinds of draw knives.. Concave, convex, Round, sweeped. Short, long, wide, narrow.. pivoting handles, blades swept forwards, blades swept backwards.. Each had a particular task which it was designed for or more in mind but could also be used for other things.. Some of the concave bladed ones are also designed to be used upside down..
-
Portable Blacksmith shop
jlpservicesinc replied to jlpservicesinc's topic in Building, Designing a Shop
Thanks.. Coal smoke is pretty heavy so this keeps the smoke moving along over peoples heads vs coming out a short stack and settling back down into the crowd.. Also a longer stack will offer an increase in cyclic negative pressure between full on and off.. I use a hand blower.. -
Portable Blacksmith shop
jlpservicesinc replied to jlpservicesinc's topic in Building, Designing a Shop
There are 3 video segments on my facebook page showing the steps to the diamond in these pictures.. More of a time lapse then a how to but it should give you the full picture of the process.. https://www.facebook.com/jlpsinc/ -
When you say weld a plate on, do you mean with forge and anvil or do you mean with arc welding.. I've reforged or as better known " redressed" several anvils with excellent results but again I was setup for it.. The faces were well attached and stayed that way in the forging process as well as the heat treat which I did in house. I've done them up to 200lbs, which was the largest I was setup for.. Like I posted earlier if you are setup for it, makes all the difference in a good job vs ruined or lack luster job.. If you really do want to fix the face then cleaning up all the cracks and voids in the face, Bevel out the area nest to the existing face, then use a hard facing rod that is a softer Rc for the base layer and then switch to a higher finished Rc layer.. While not perfect from the stand point of an anvil made 100 years ago as it now will ruin it's authentic hand made nature it will make the anvil fully functional offering up good corners, a flat face.. and if you do damage it in the future can just re fill the dents with the hard facing, grind down and it's brand new again. Once i get the full shop up.. I'll be putting in a forge for anvils as I have 2 that need a redress and the forges I have now are undersized for the job.. One is 200+ the other is 330lbs.. It's your anvil and if you feel comfortable with doing the work and then finding a heat treater or finding a group to help you can do it with a lot of water a big wood fire or a stream or pond.. Just understand the face if not thoroughly attached will come off.. If you arc weld the new plate on and it's a good clean welded out portion, it will work fine and the incidents of the face popping off is very small vs forge welded on..
-
Milling off the face completely and putting a new one on, is a very laborious project and unless you have the equipment to put the face back on the old way with a forge weld you would be remiss.. If you really want to have it functional preheat the anvil and then use a hard facing rod.. There are youtube videos as well as other forums with like information. New England Blacksmiths have an anvil rebuild clinic every so often which they have all the equpment.. If you have a large arc welder 225amp -250amps you could take off the plate, bevel out both plate and anvil and then arc weld on a new face being extra careful not to get any voids or inclusions.. Then harden and temper the edges but just the hardening process alone can be costly so unless you have access to all the equipment yourself or are highly skilled it's best to find a different anvil.. There are still deals out there to be had..
-
I might be interested in this as I could actually take care of 2 birds with 1 stone.. Is the 1/4" round all we can use? If that is the case it would limit the items one could make..
-
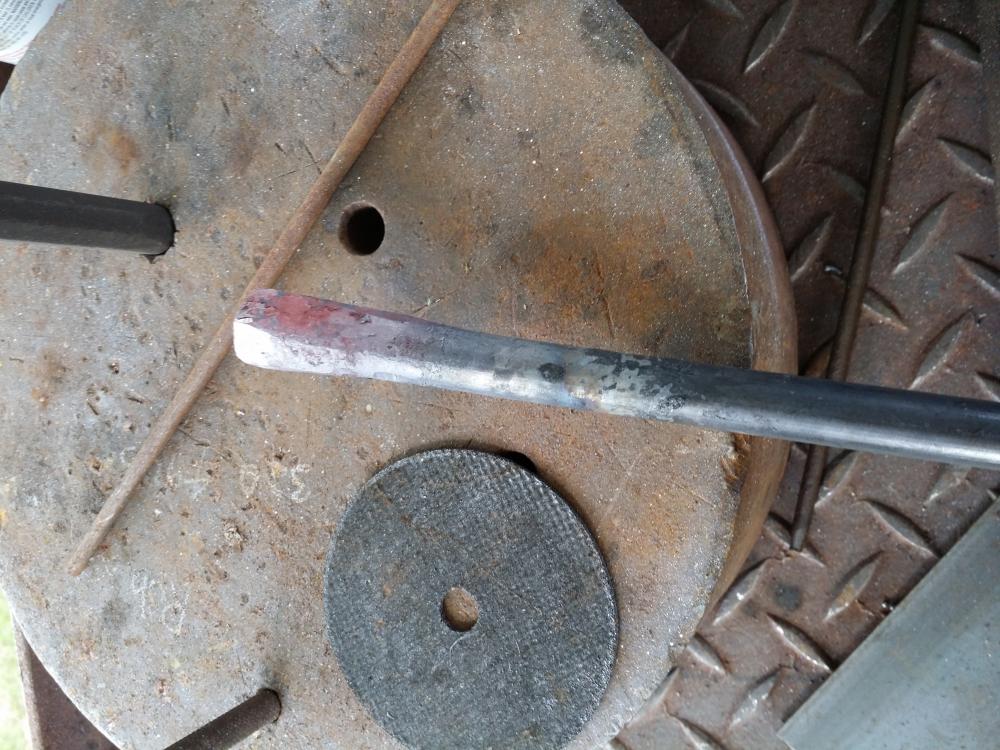
5160 gets plenty hard to act as a Sen.. 58Rc-62Rc in the hardened untempered state.. In today's Metallurgy and alloying fields there are so many different steels that are designed (designer) to work better in some situations than others but for the most part O1, W1 or W2, or A1, 4140, 4150. 5160 can be used to good advantage in many different roles as long as the heat treat is appropriate for the job at hand.. As a simple demonstration.. S7 is said to make great hot chisels, punches etc, etc, So does H13,, But so does 5160, 4140, 4150, O1.. I have hot and cold chisels and punches with many thousands of hits, hole, cuts, slots etc,etc on them and they will have many, many more before their life is consumed.. Anyhow, the argument comes down to semantics and which someone prefers.. If you are an engineer and have to have exactly the right material then 5160 is probably not your choice.. I would have no problem using it.. Traditional Japanese Sens are made with a low high carbon (0.07-0.85) cutting edge laminated to a softer core.. These steels are considered water hardening steels. A draw knife and a Sen are 2 totally different tools and are designed for the materials they are used with.. A draw knife is used on wood and usually drawn to a peacock or purple which lends itself for the ability to hold a good edge but also be sharpened with a stone or a file.. Has a very thin edge profile with very little back up geometry as the edge has plenty A Sen is left fully hardened or a light bronze Temper and is used on Normalized, annealed on surfaces of which the Rc is at it's lowest point.. One could argue the best steel would be a HSS until you look at the forces involved and even with a blue temper on the HSS (depending) it would make a bad Sen. Anyhow the argument as to which steel makes the best what ever will never die since everybody has an opinion and the argument of Engineer vs shop floor person doing the work is always an issue.. I've made draw knives and Sens out of the same materials from 5160 to 50100, W1 etc, etc.. How you heat treat it will have the largest effect on its use.. Anyhow, 5160 would work great as long as you understand the edge geometry and how to create the geometry needed to support the cutting action you want.. this might take some experimenting and the limitations a Sen has in stock removal.. It's great for removing high spots or planing a not to wide blade but once you get to a certain width the amount of strength you would need to make it works becomes astronomical.. I find a sharp file can strip metal pretty fast with less dangers of gouging involved both to the work piece and to myself. Enjoy..
-
Portable Blacksmith shop
jlpservicesinc replied to jlpservicesinc's topic in Building, Designing a Shop
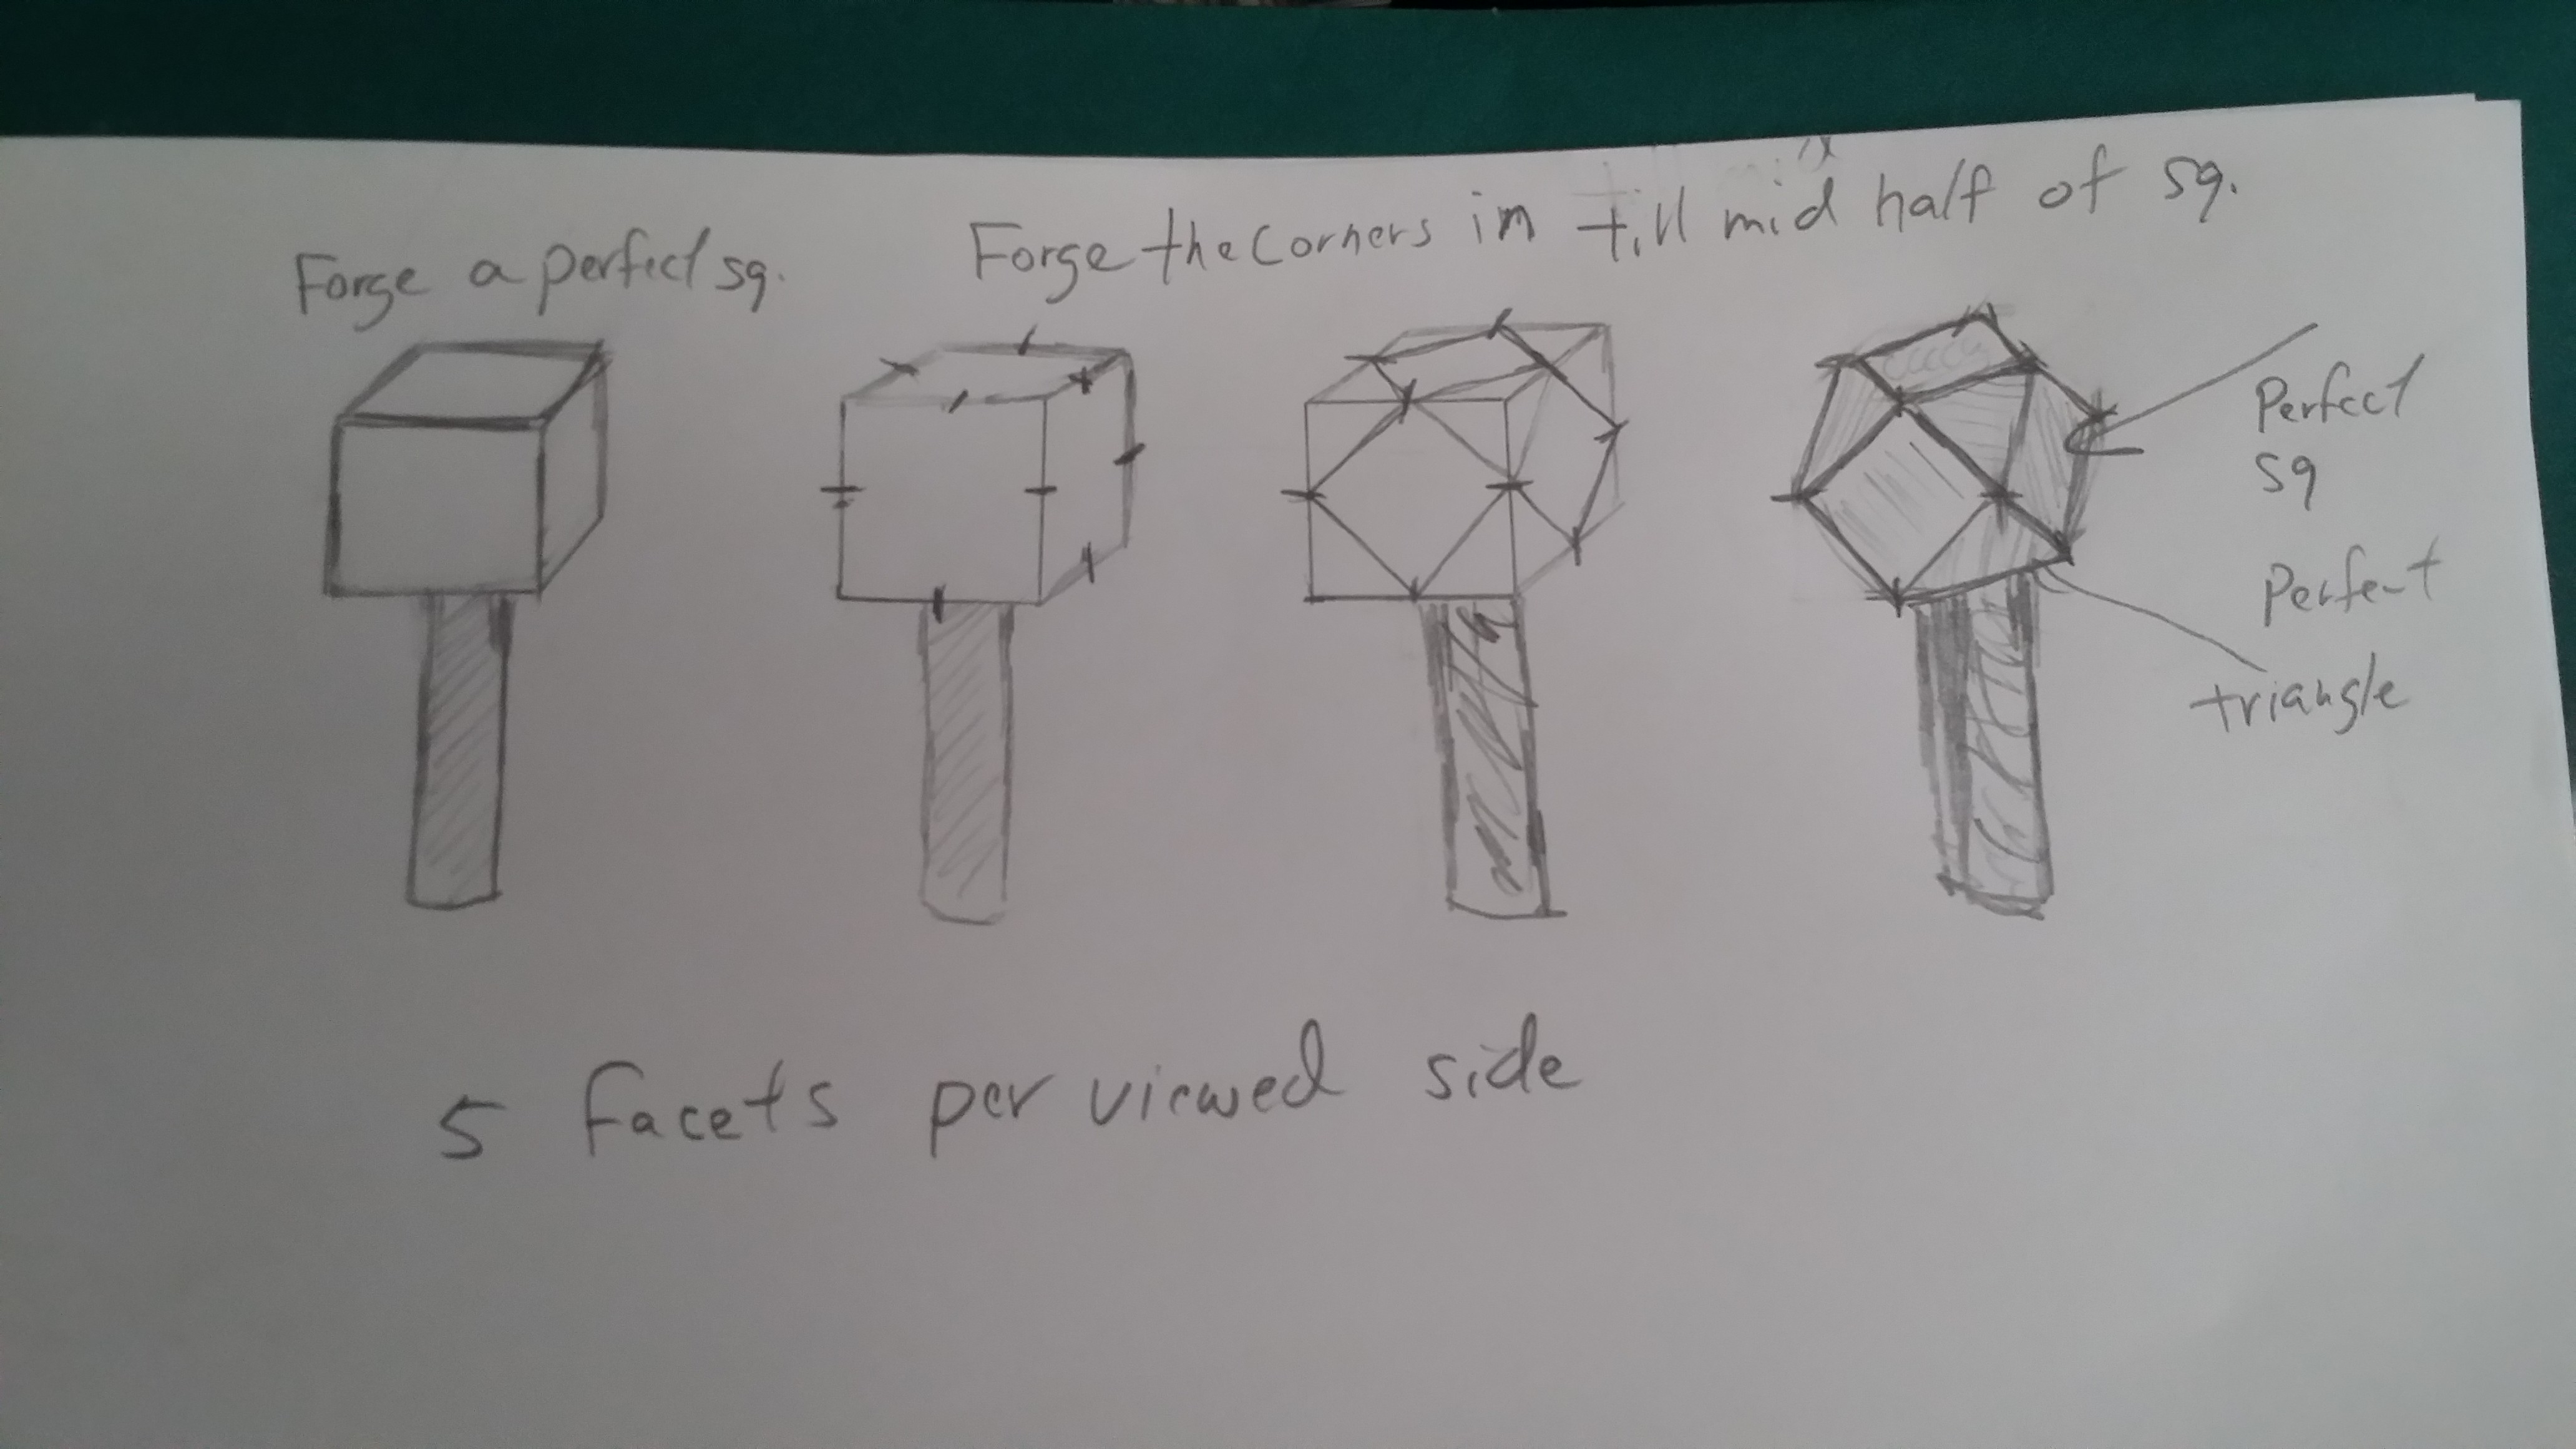
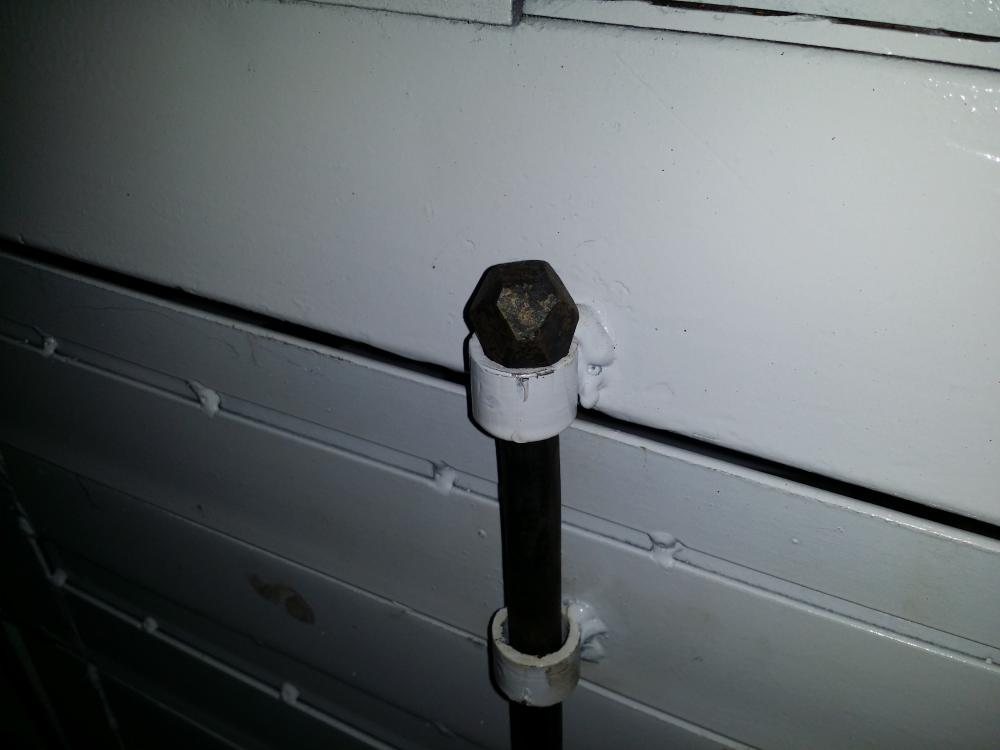
Thanks. It's so nice to work in.. The stack gets lifted up onto a thimble which is mounted to the roof and a support structure under it.. This thimble acts as a water tight pass thru for the stack from the forge.. It has a tapered fit so once the stack is up, you wiggle it just a little bit and it locks onto the thimble. It takes 2 jacks on each side to raise it back up to lay it down for transport.. Here is a visual reference and lesson on the blacksmith diamond.. Ideally when finished all edges should be sharp and the square sections should all be square and the triangle sections should all be sharp triangles.. Certain finials were considered difficult to master and showed the level of mastery by the smith.. The blacksmith diamond is one such item.. While not that hard to make, to make them all perfect without a file is challenging.. Besides that its a fun item to make..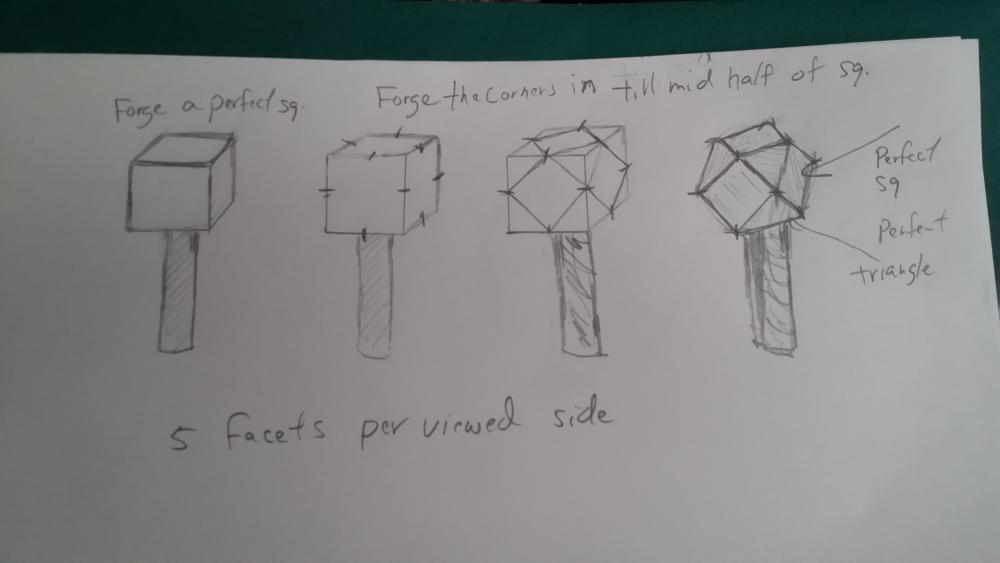

-
Do you know if the material would harden.. I don't recognize the base part as being a high carbon scrap piece.. Nice start.. And even it it's not hardenable it's stil good practice..
-
Portable Blacksmith shop
jlpservicesinc replied to jlpservicesinc's topic in Building, Designing a Shop
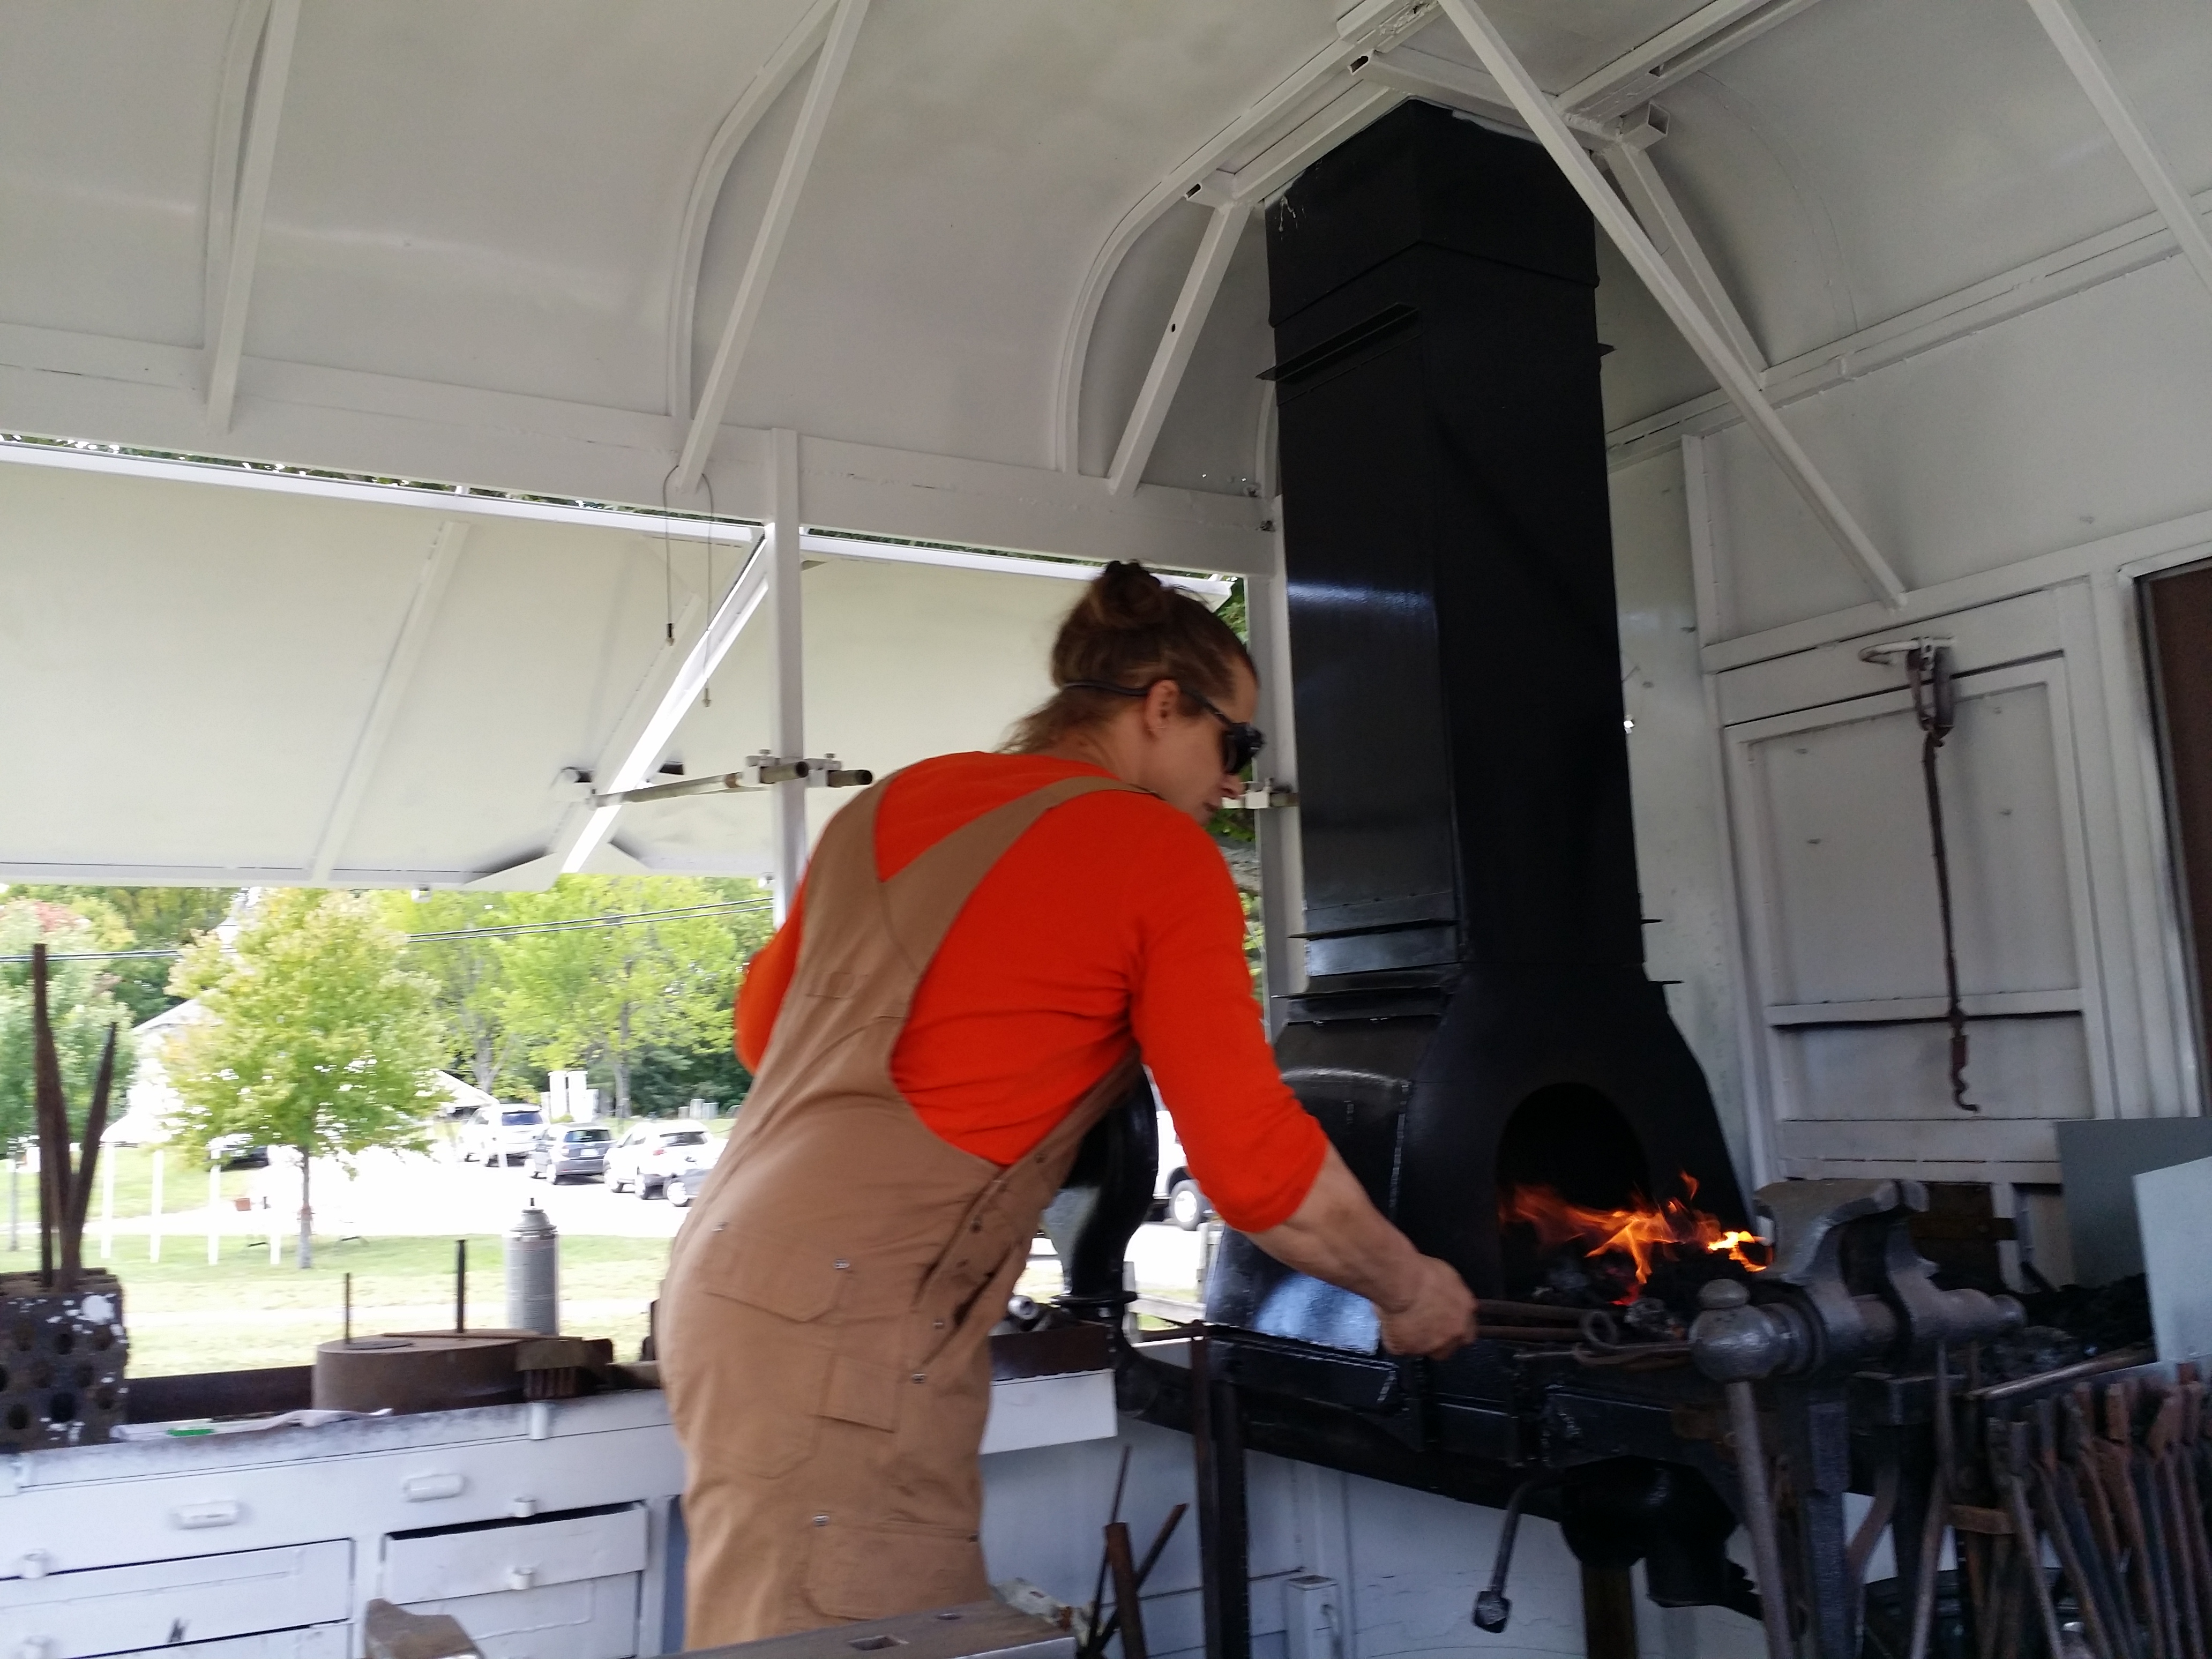
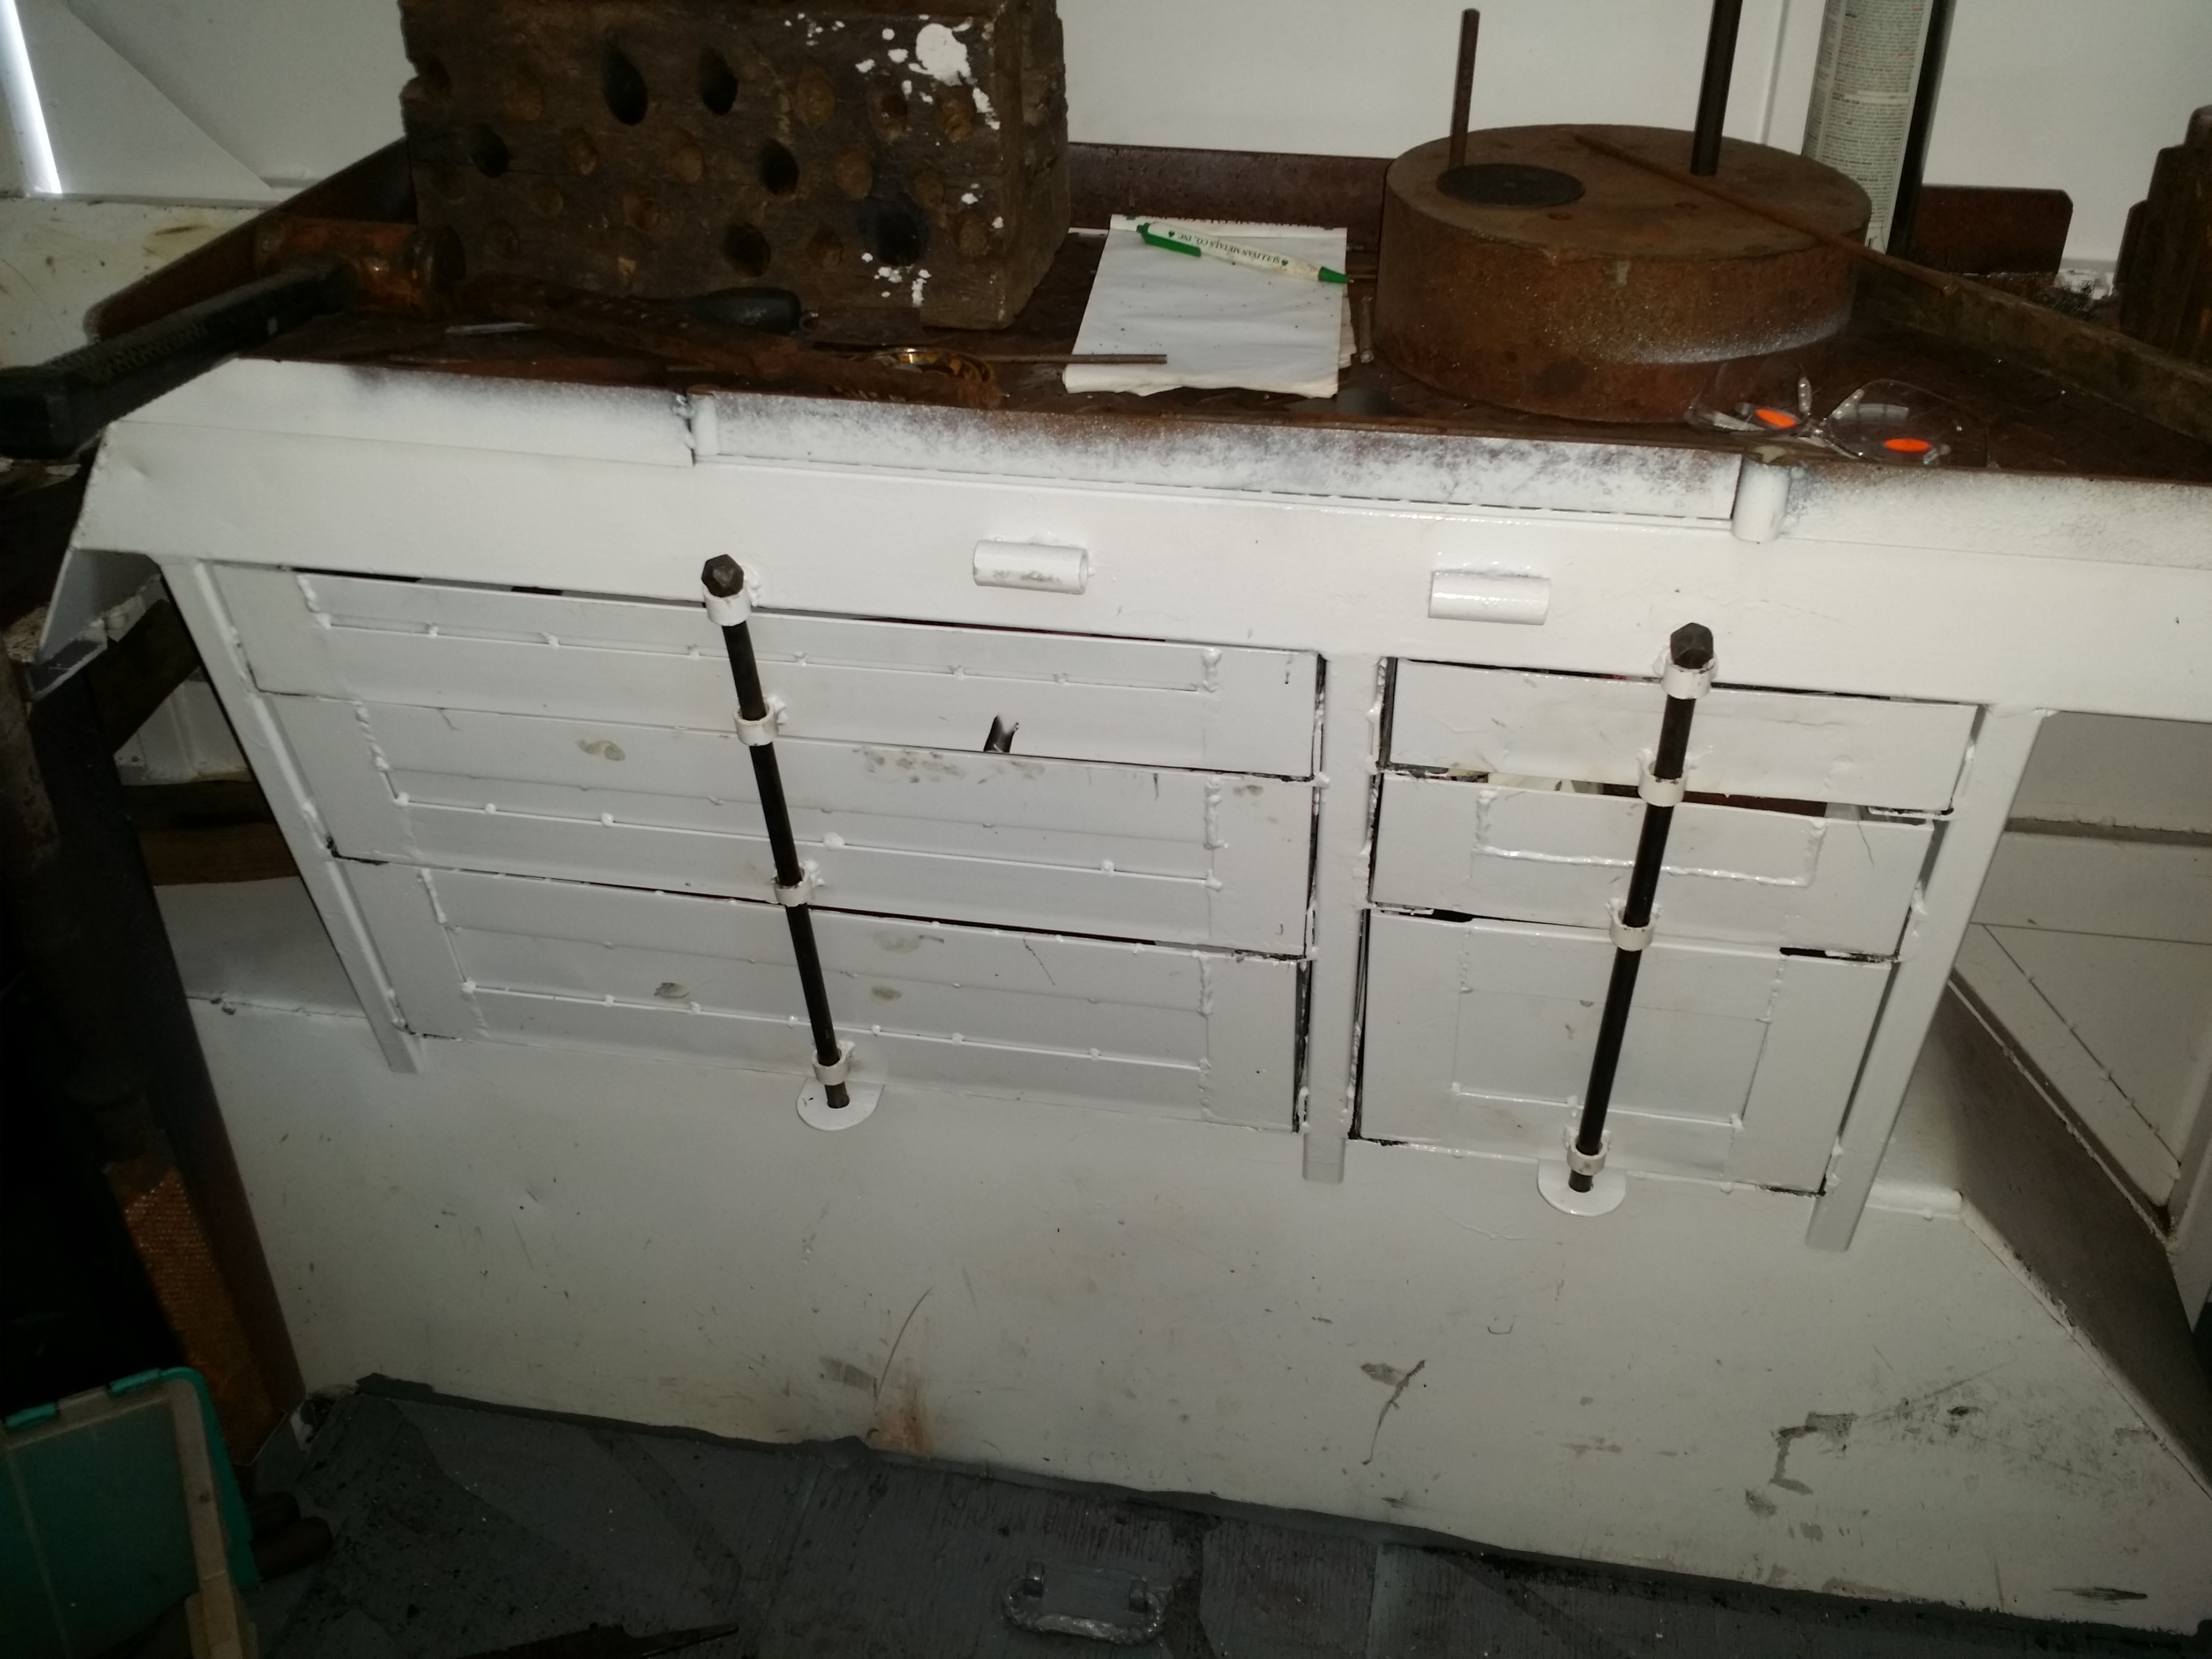
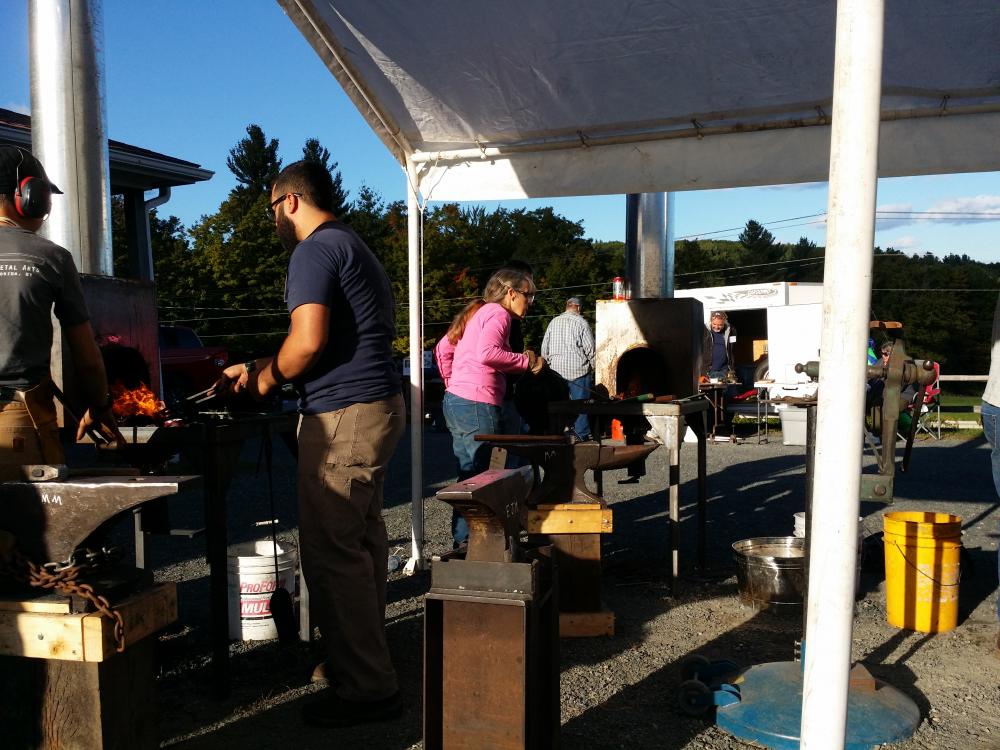
I love to be around happy people. it brightens the day.. Me, I'm a worker ant.. Not one to sit around.. But can be happy also.. I just sound like a downer because of where I came from.. Anyhow, Friday I went to the NEB fall meet (My first meet with the group) and ended up making some stuff at the open forges. Which they had 6 units setup. A forge side rake (side poker) and a blacksmith twist handle on a shovel which had no handle.. I never expected it but since there were no forge tools I took it upon myself to get the move on.. My first time at the forge in weeks.. Took a little while to get warmed up but all in all was good demo's for the guys hanging around and watching.. And since both items involved forge welding one of the guys spoke up and said he never had a successful forge weld.. So gave him a lesson in chain making which is an excellent exercise to develop technique and timing without fiddling with extra hands or tongs.. So we each made a link then I tested mine by smacking the weld back down towards the other side and it just about made it to within 1/2" before the weld failed.. I expected it to fail so wasn't a biggy.. There was a lot of variables going on and I used a lot of green coal to stoke the fire so the next guy would have plenty of coke to work with.. I was so surprised they everybody used a shallow fire and a nearly empty firepot.. I filed that bad boy up.. When I got done I asked the guy if he was going to test his.. He said " H no".. LOL.. Was a great day.. So, back to this tread.. Saturday I went and did the last demo of the year here in town.. Friday was a great warm up at the NEB and it felt so good to be in with my equipment laid out the way I like with a forge built the way I wanted.. Ah, such a relief.. Working at the NEB event reminded me of why I don't like working on the ground.. Moving blowers.. Smoke and soot and cinders all over me.. Ick.. I demo'd from 10-2pm and didn't even get dirty, I had a wonderful group come through and since this was the 4th year of doing it, I had a ton of town folk come by and take pictures of the new trailer and exclaim on what a fine job I did.. One guy came back about 5 times to check out everything each time saying what a fine job.. He is a post and beam builder as well as wonderful carpenter.. I asked if he was going to build one.. He said "NO" it's just a work of art.. This year was especially nice not only with the new trailer but because the level of involvement with kids was amazing.. It used to be the parents that want to stop and watch and the kids would be egging them to go.. This year I had so many kids holding the parent there to watch what I was doing.. And the amount of girls just hanging and watching was the most I have ever seen.. It was so inspirational.. So many good questions and the girls ranged in age from 5-8 to 20-25.. Anyhow was just the best day.. LOve it.. Also got some great 3D footage of me making a large toasting fork.. I did forget to fill the water tank before I left for the show.. So that was a bummer.. it holds about 25 gallons so recruited one of the town guys and we hustled water in jugs and pails from behind the church.. The day finished up at 2 I had made 2 bars with blacksmith diamonds to keep the drawers shut for trailer transport, 1 hook, 2 nails the fork and started to work on a set of butterfly hinges for the front of the trailer again.. Was home by 2:40pm had some lunch and headed back to the NEB meet.. Arrived at the NEB meet to see every forge taken up but kids.. got some nice 3d footage there also.. I noticed one kid was struggling with what looked like a small knife.. It was about 5:30pm and was going to call it quits and head home.. The call went out to the group for supper.. So every body cleared out but the guy making the knife.. He sat down and started to eat at the forge.. Awesome.. As I walked by the Kid making the knife I heard a woman call to me and said. " Oh, you must be the lady all the guys were talking about making a blacksmith twist handle in like 15minutes and a poker".. YUP.. I said.. She introduced me to her son which was making the knife made a little conversation and headed for the car.. I had the car today as I had bought a firepot on friday but had the 77 BMW R100RS and no way to get it home.. So I got about 3 miles down the road and decide the kid might want a lesson on knife tip making.. I went back and pulled up in the car and asked.. Want a lesson on forging knife tips. The kids face lit up like a christmas tree.. I ended up making a full knife.. The lesson was supposed to be about directional forging which is was but in the process I ended up making a drop point camp knife, half hidden tang. I had like 30 guys standing around watching me and had 1 kid swing sledge, one twirling the blower on and off. The demo/lesson was good but since I had only planned on forging the tip of the knife as a lesson the blade came out a little wider than I would have liked.. Anyhow I gave the kid "Jesse" the knife and asked if he got the lesson of forging vs mushing and using the hammer to pull the material where you want it to go.. He smiled said " Yes".. Thanked me many times and the Mom came over with a big thank you.. I almost got a hug I could see it coming but at the last moment she caught herself.. I love hugs.. Was a good day.. I have a huge blister on my thumb as I have no callus on it since I've been working on the trailer and very little smithing.. So there is the update on the trailer, the NEB fall meet http://newenglandblacksmiths.org/ and all the like.. Few of the trailer in it's nearly completed state, as setup.. everybody I asked about the view and if they could see well enough what I was doing was a resounding yes.. I had a group of girls camp out at the back deck on the grass to watch.. There are also a few of the Youngsters at the NEB meet and the parts I made on friday night..


-
Yes. This was made in the blacksmith demo trailer doing demos at a show.. 5160 blade, pear wood handles.. forge welded ferrules.. Water quench. all hand made, no drills, grinders or the like.. Just files, and sand paper..
-
I to the same thing depending on how the handles are finished out.. metal washers on the ends get peened, wood gets clinched..