jlpservicesinc
-
Posts
5,776 -
Joined
-
Last visited
Content Type
Profiles
Forums
Articles
Gallery
Downloads
Events
Everything posted by jlpservicesinc
-

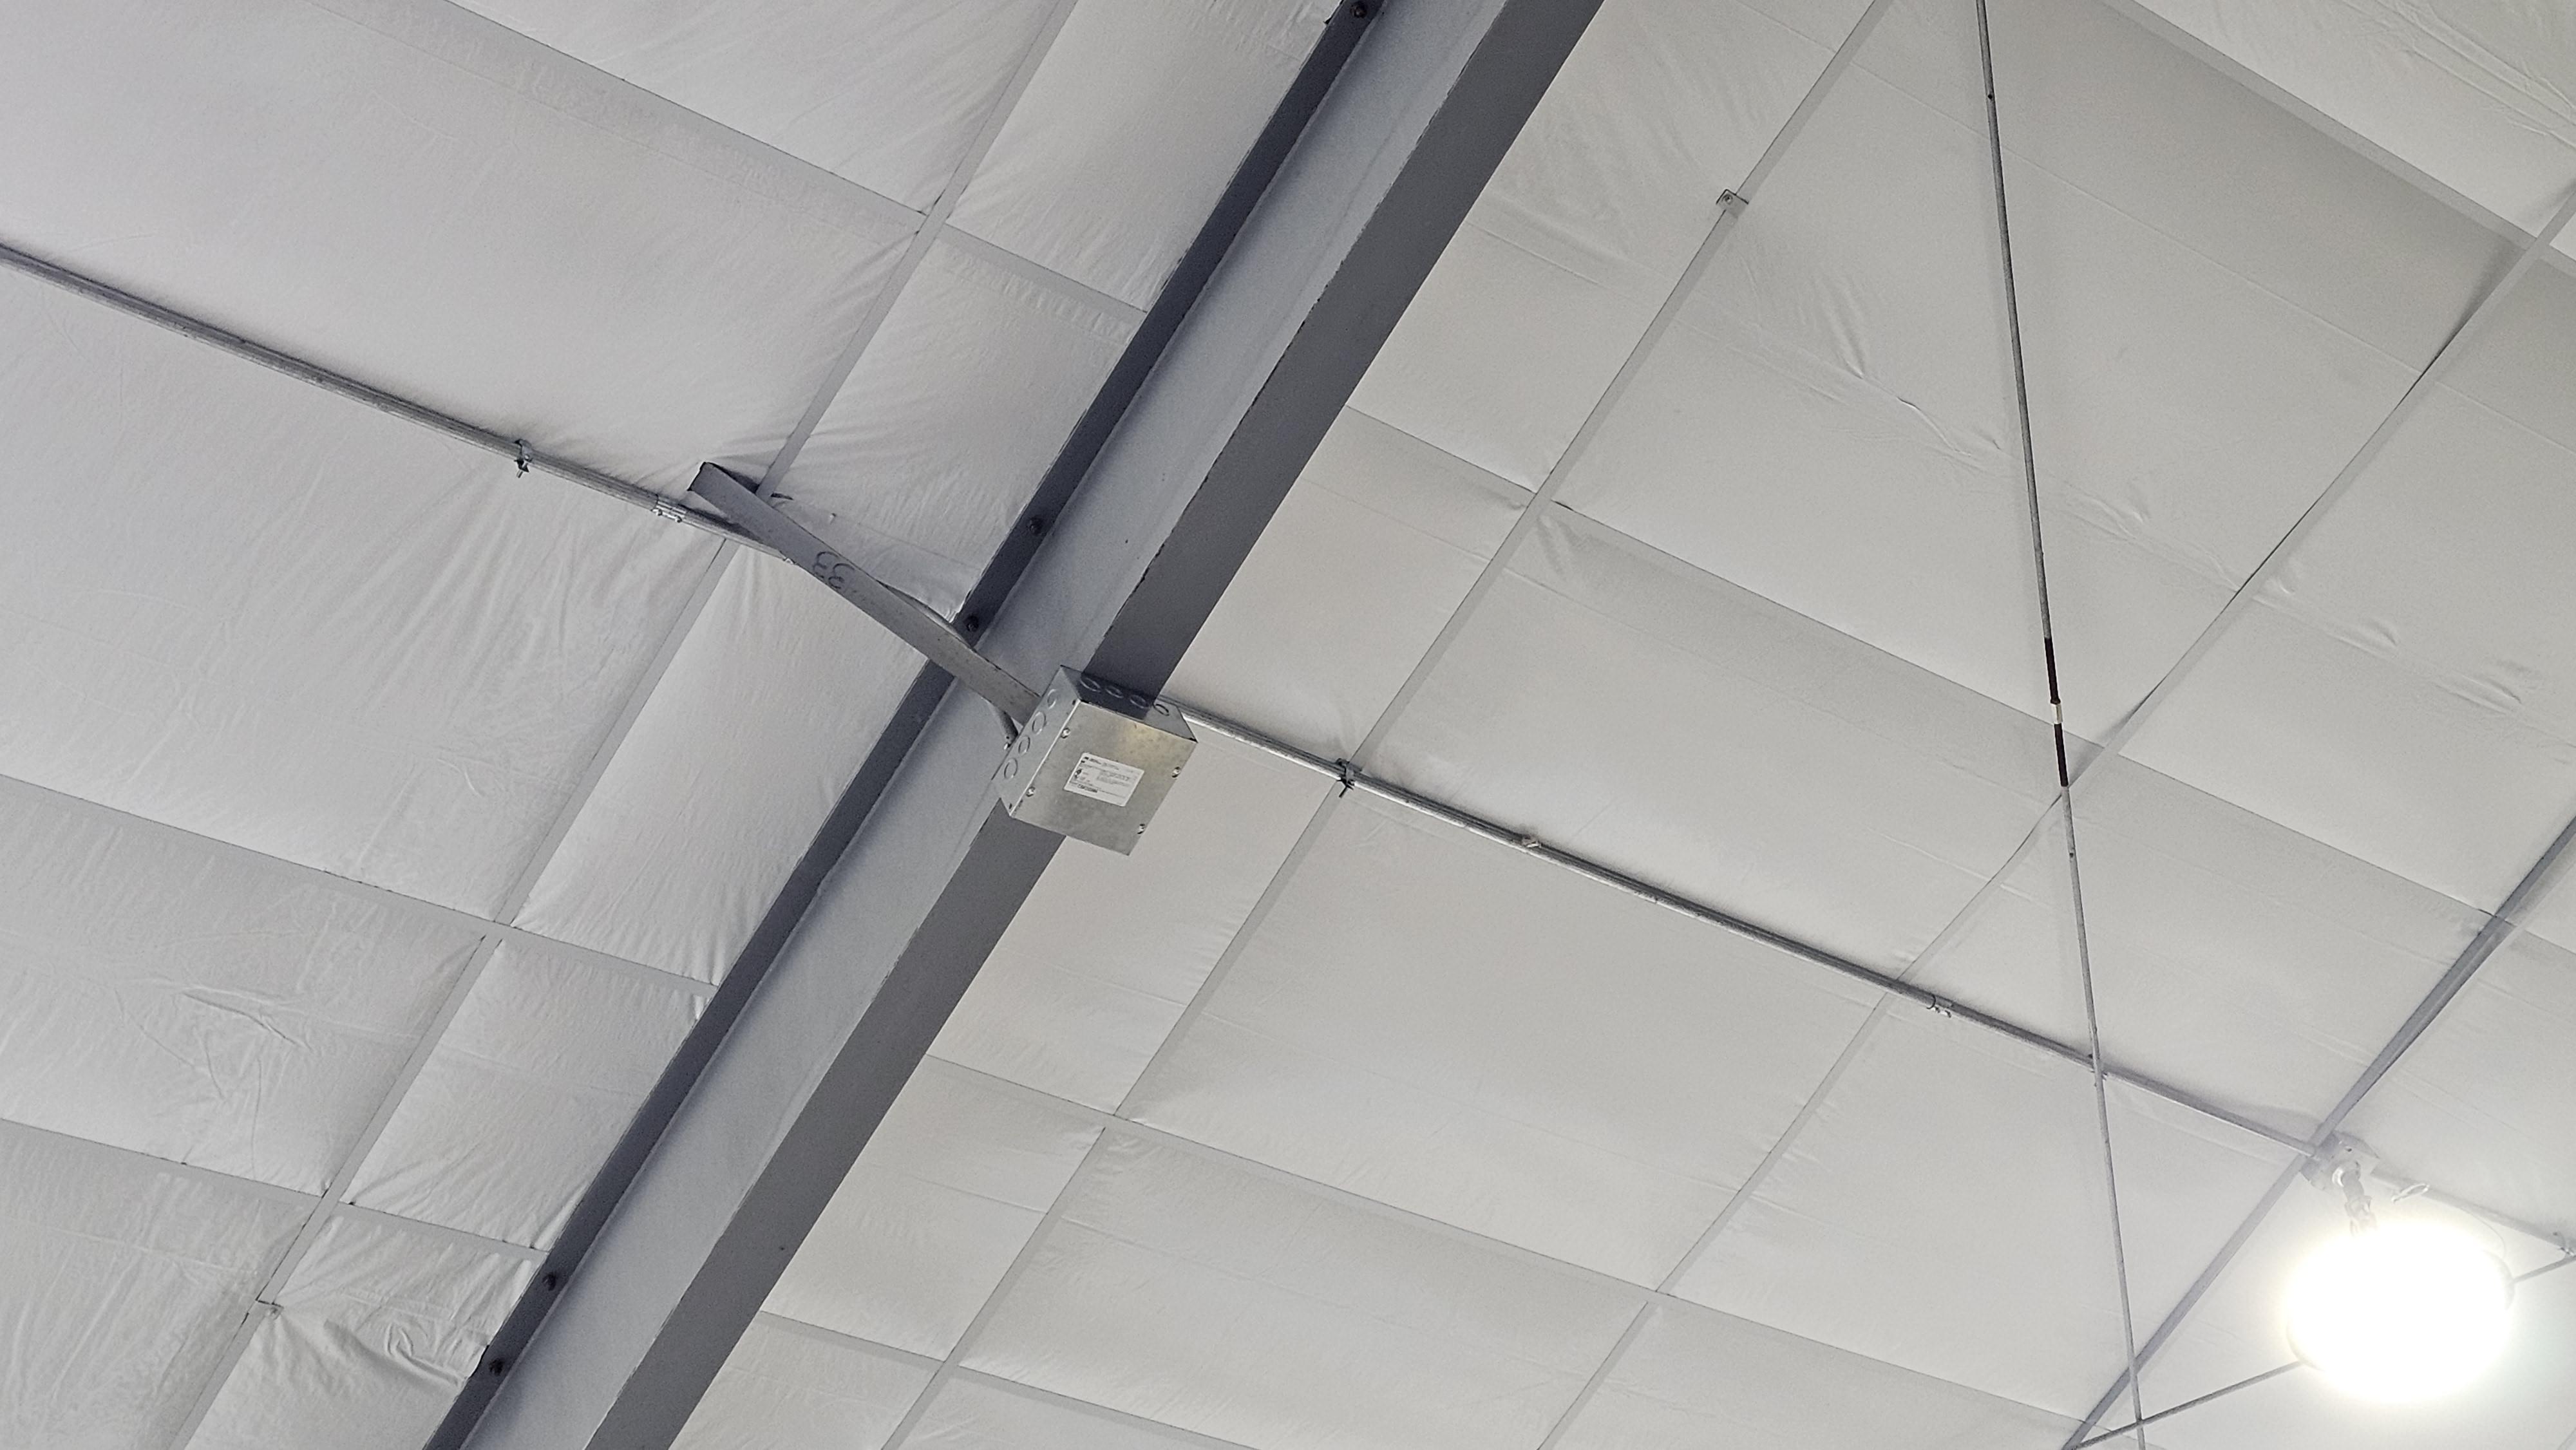
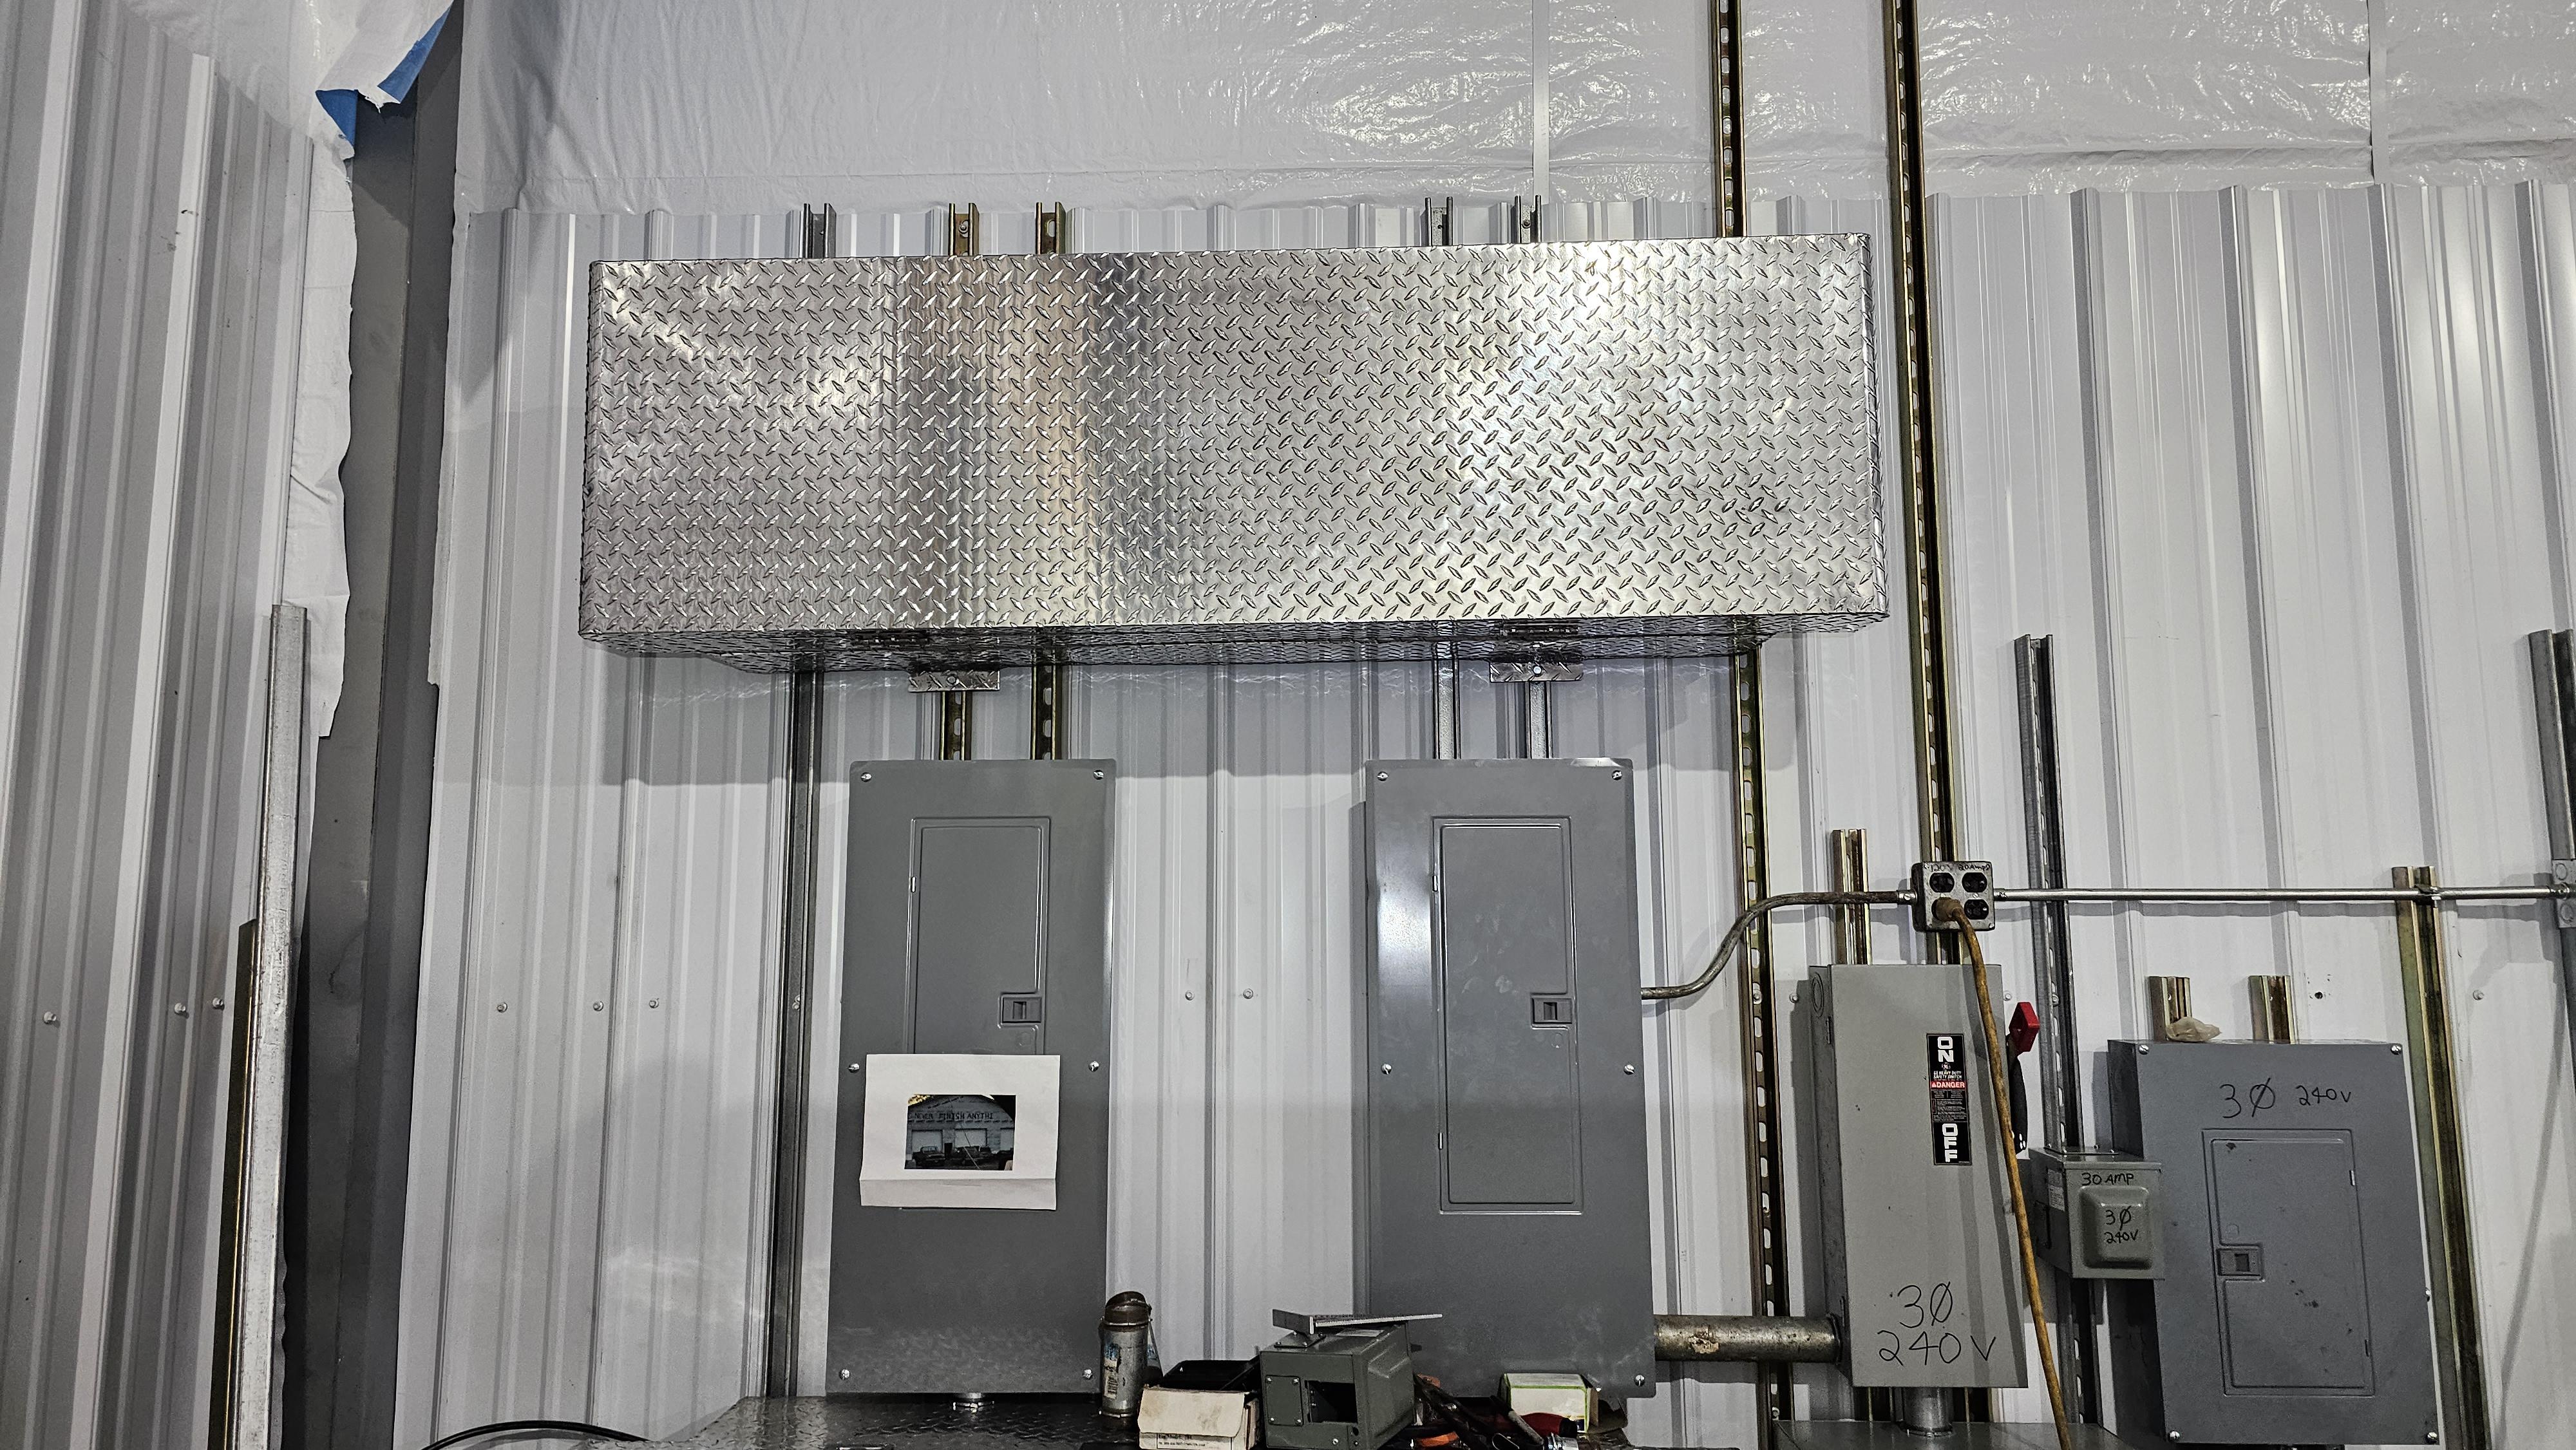
JLP Blacksmith Teaching Center.
jlpservicesinc replied to jlpservicesinc's topic in Building, Designing a Shop
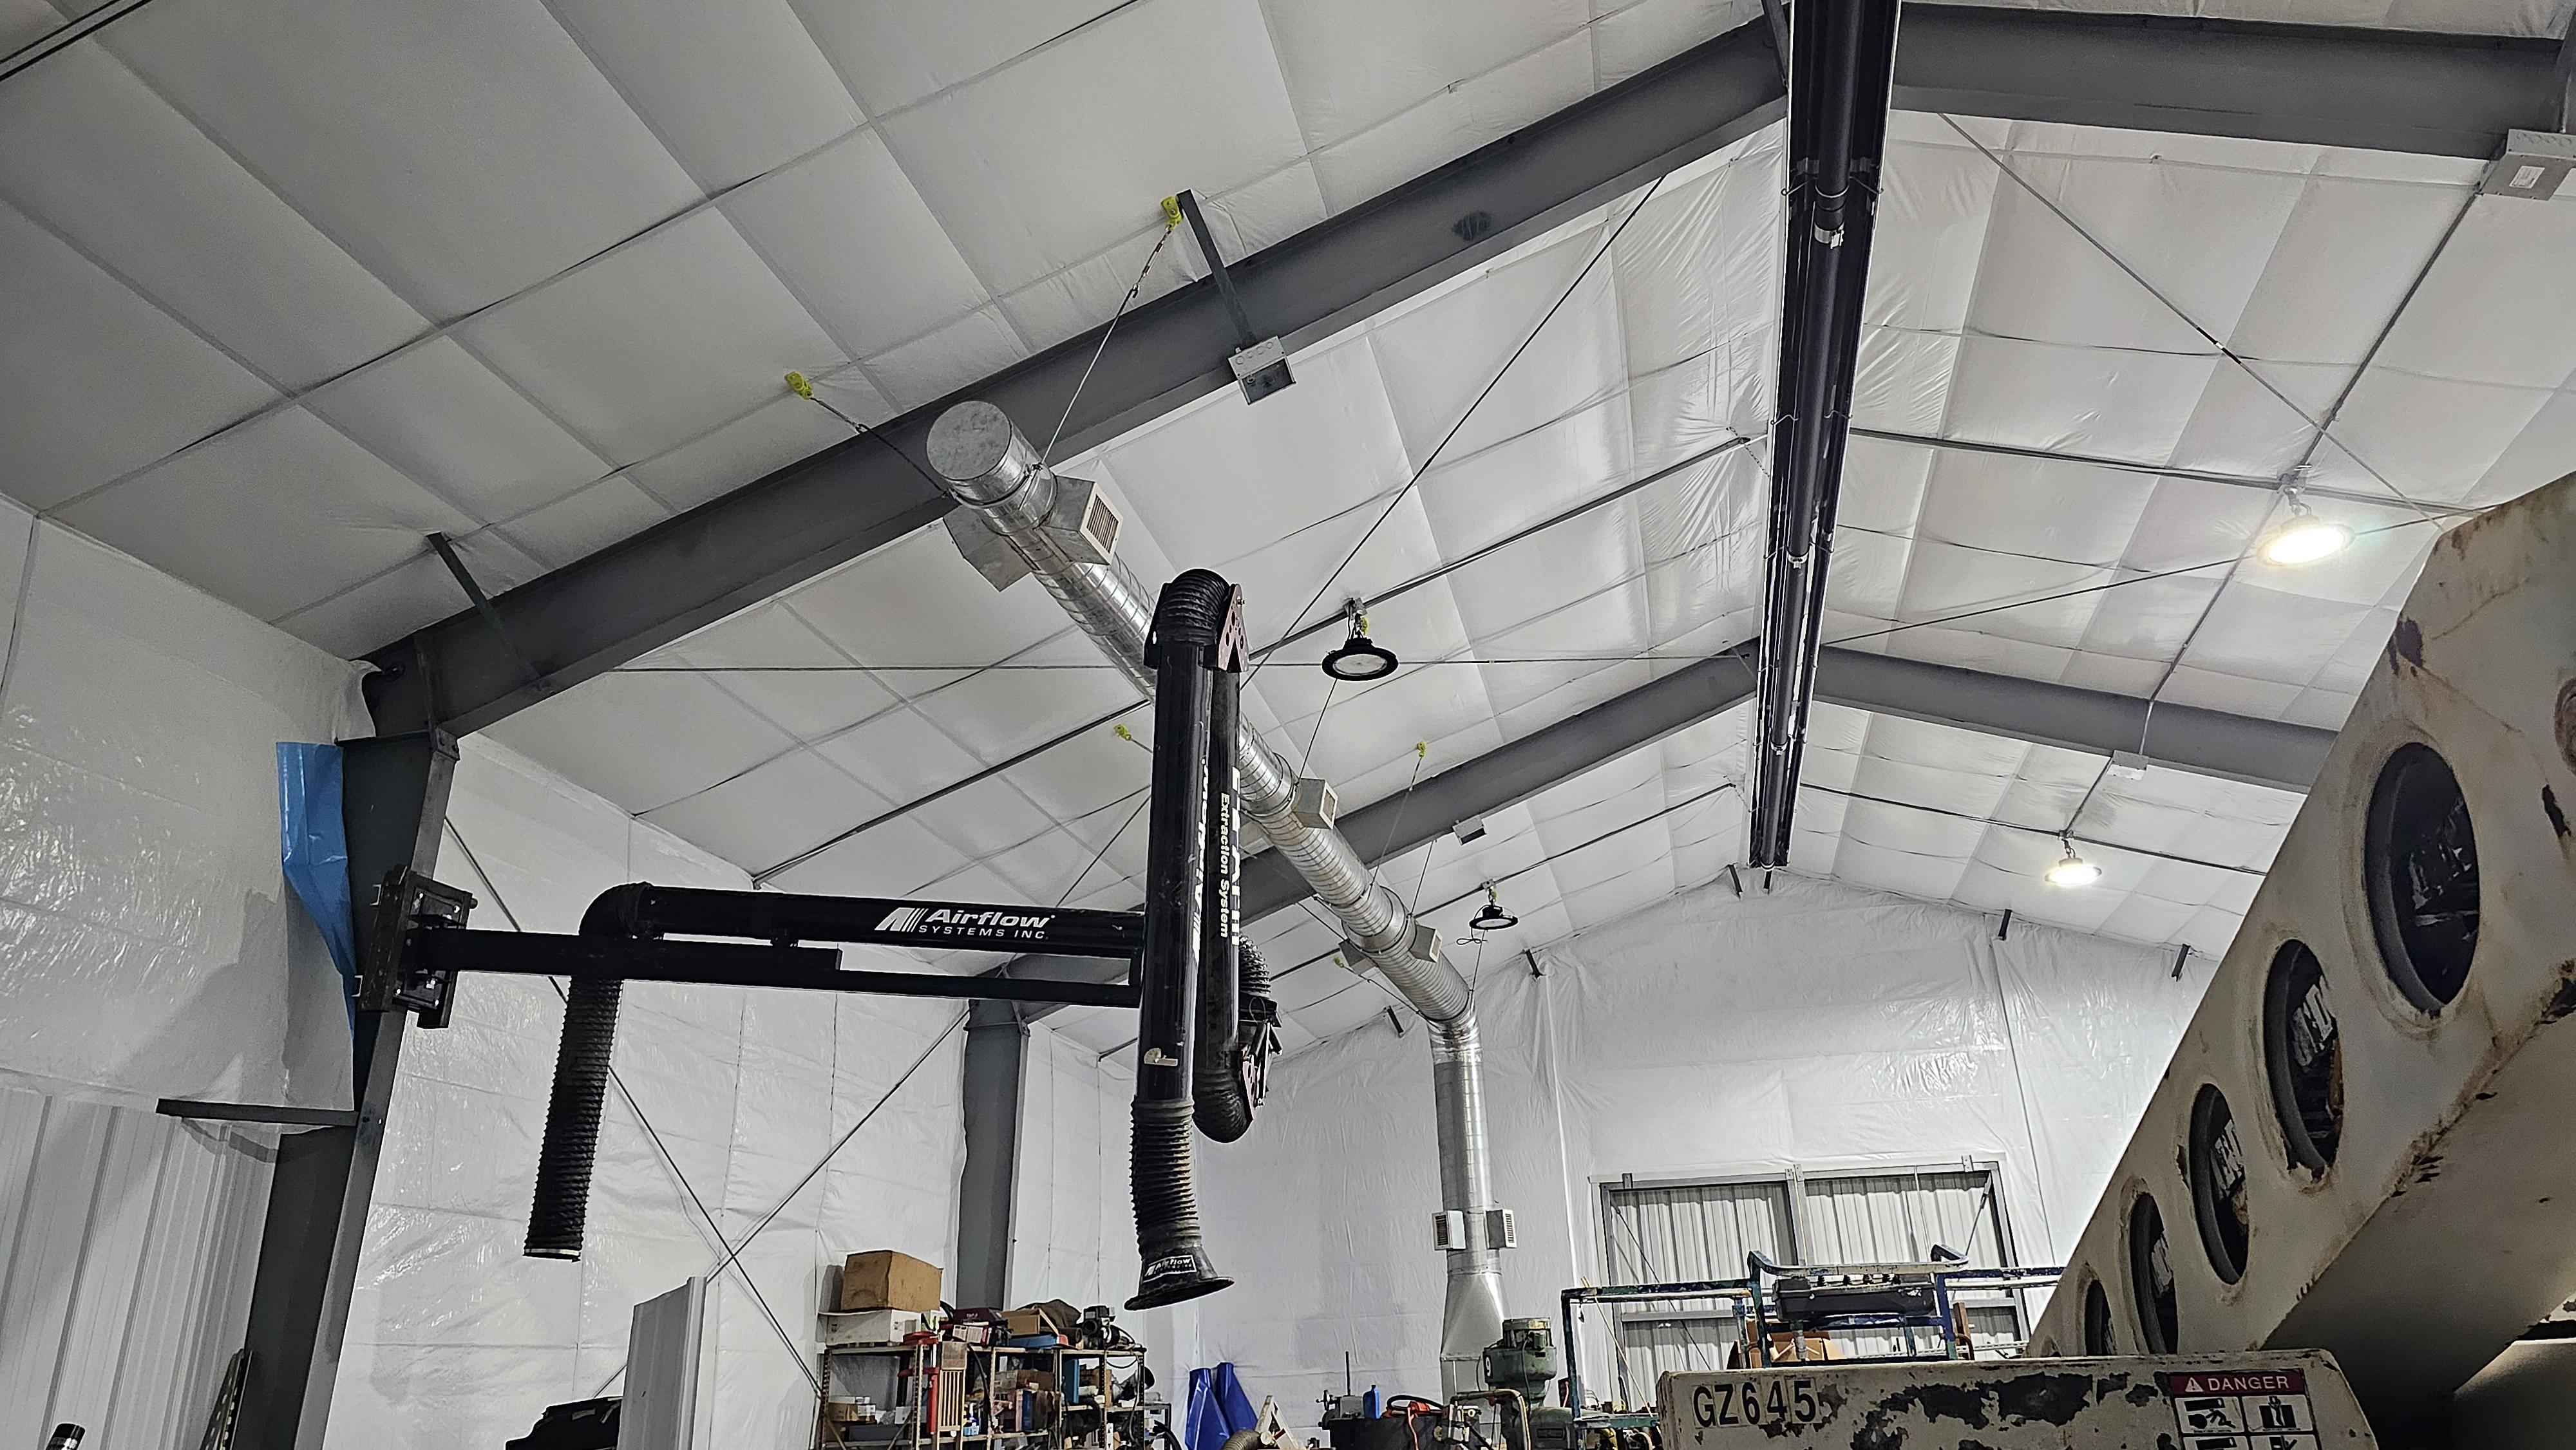
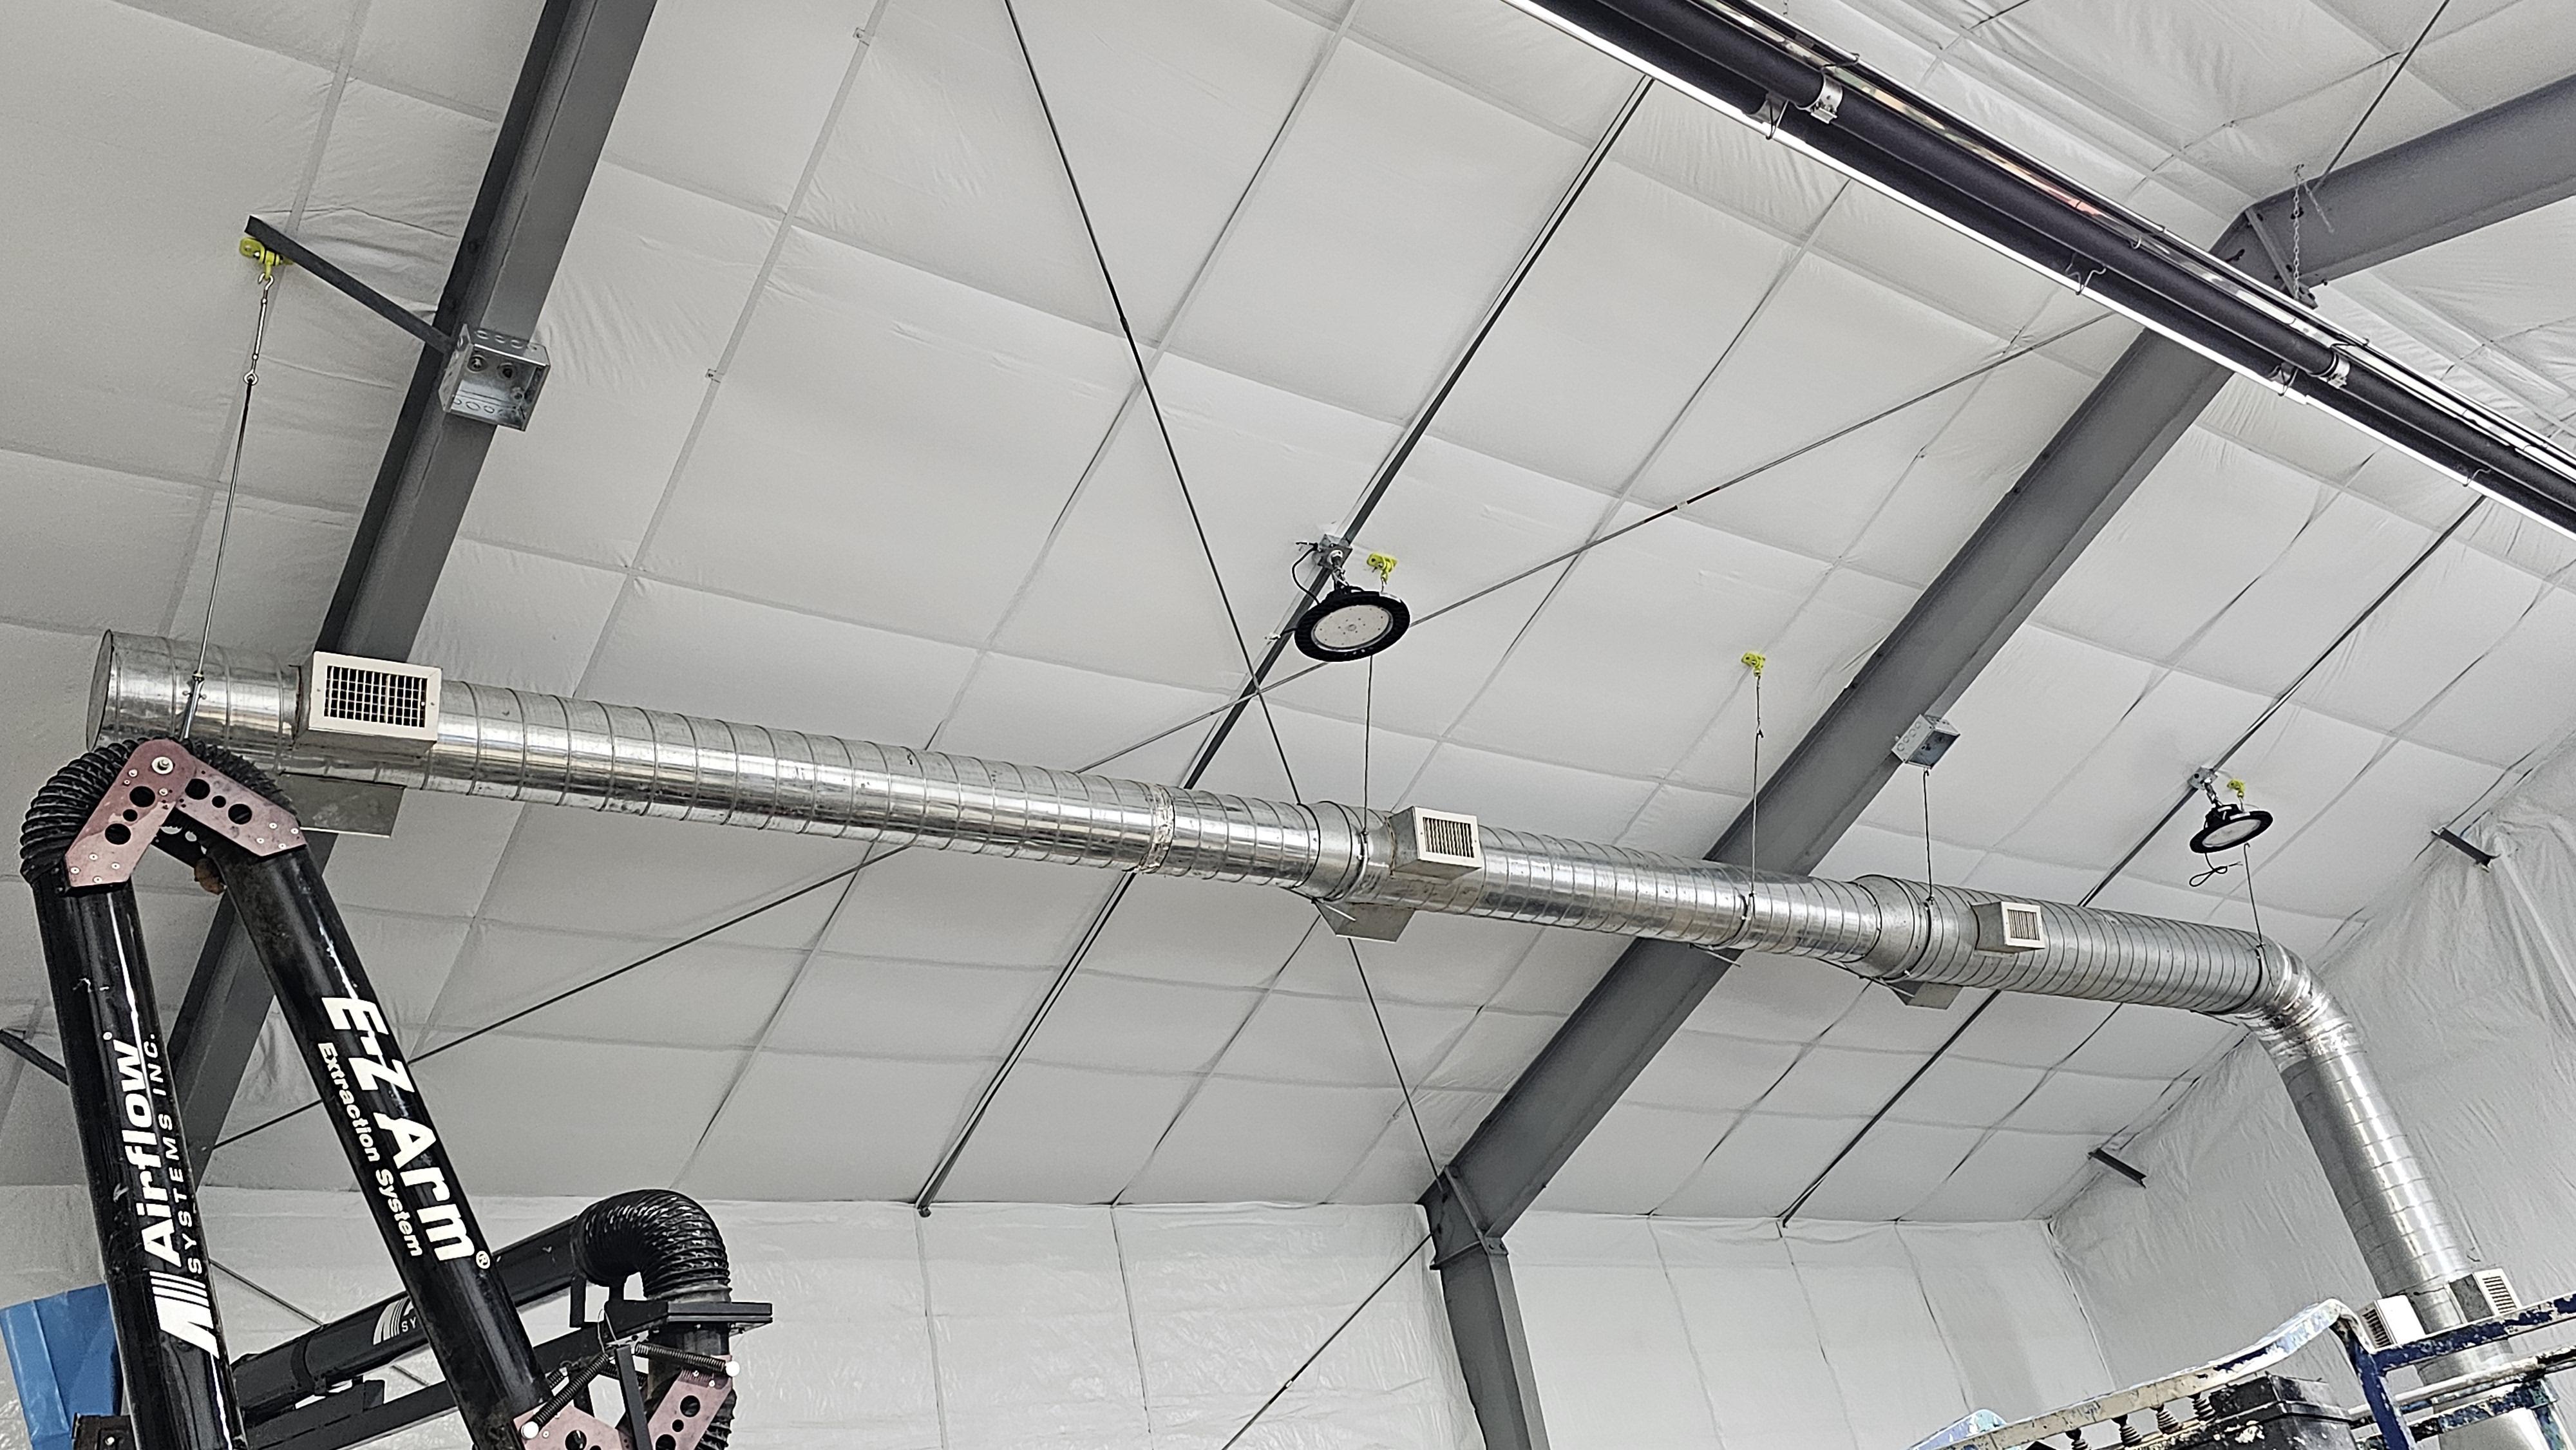
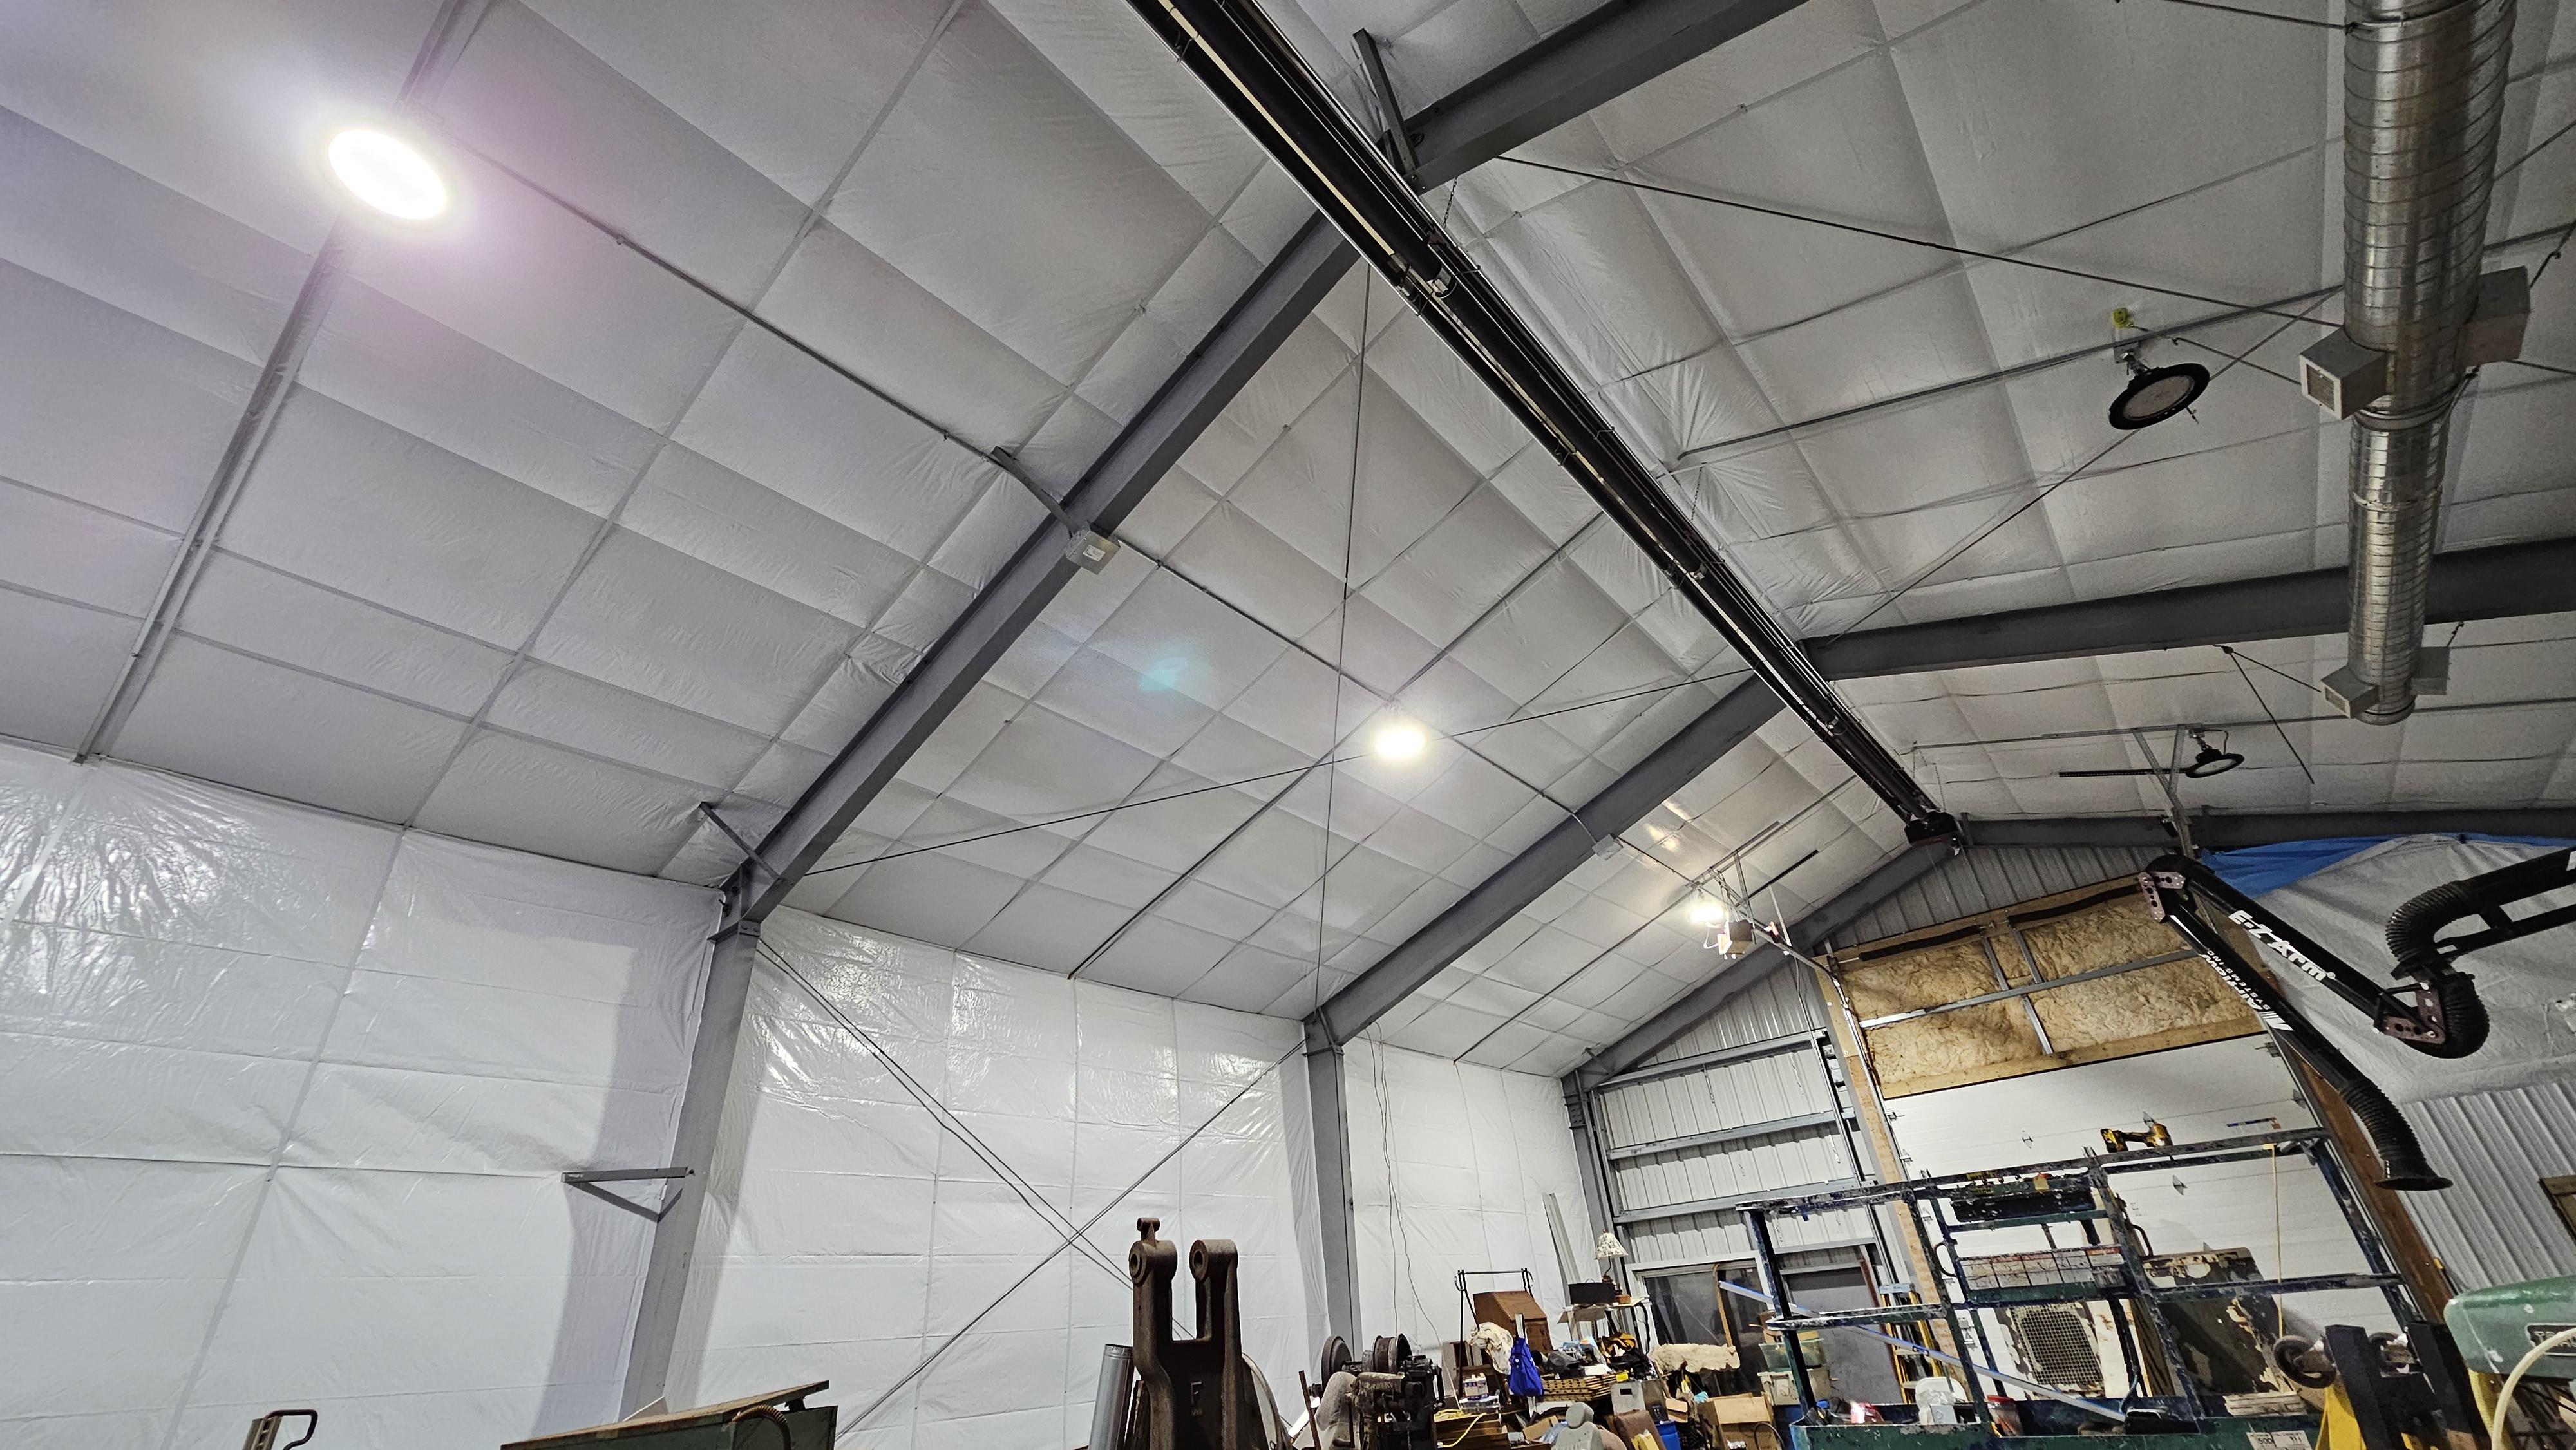
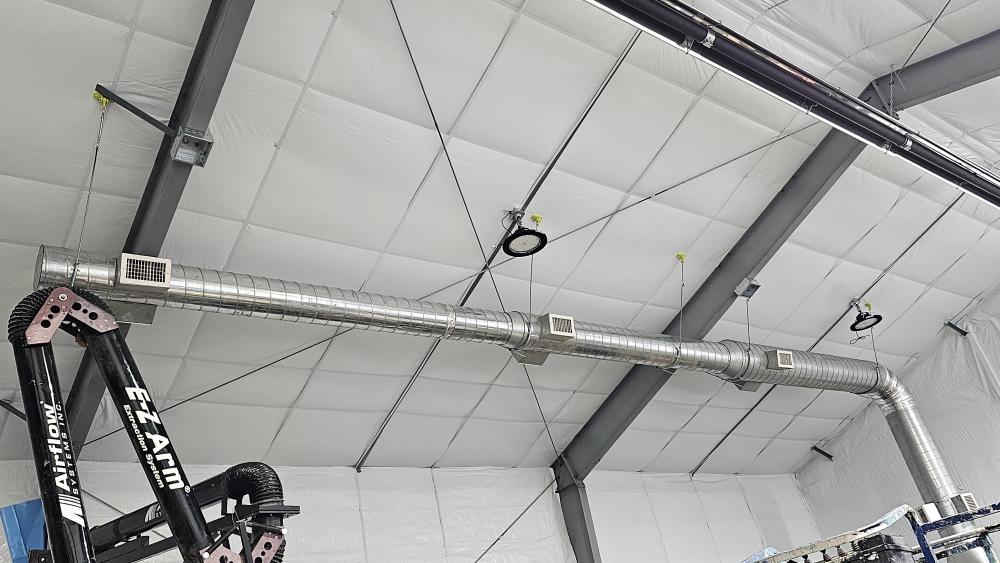
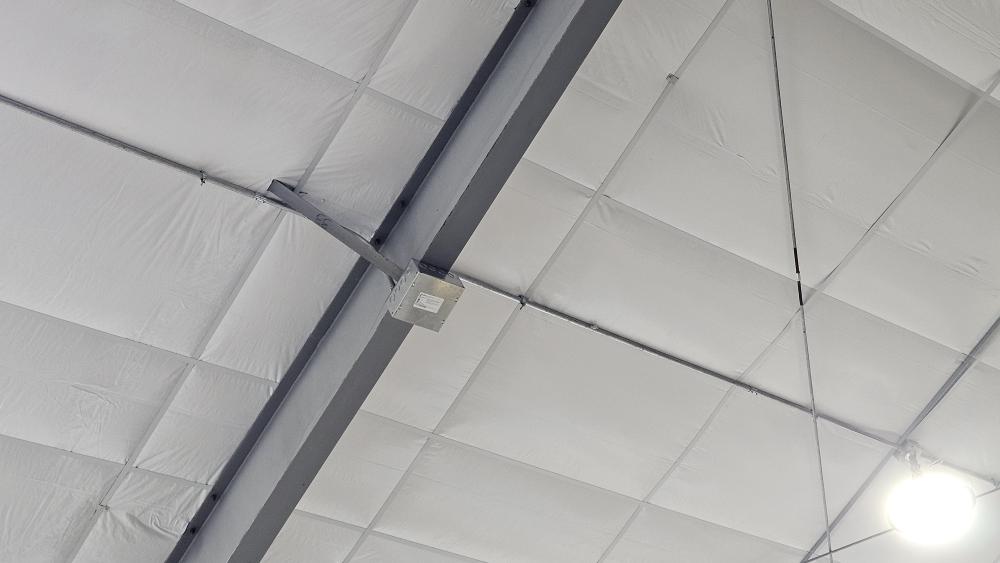
Today I installed the boxes on the left side and finished installing all the hardware to hold the duct work in place. The duct work now is stable enough to walk on.. Also aligned it a little more with the building.. Was aiming towards the left hand side of the building. I have to confess I'm starting to get pretty excited about the school opening. Getting that 3ph power installed charged me up. Ordered the 4 extra lights to day. There will be no dark spots in the school..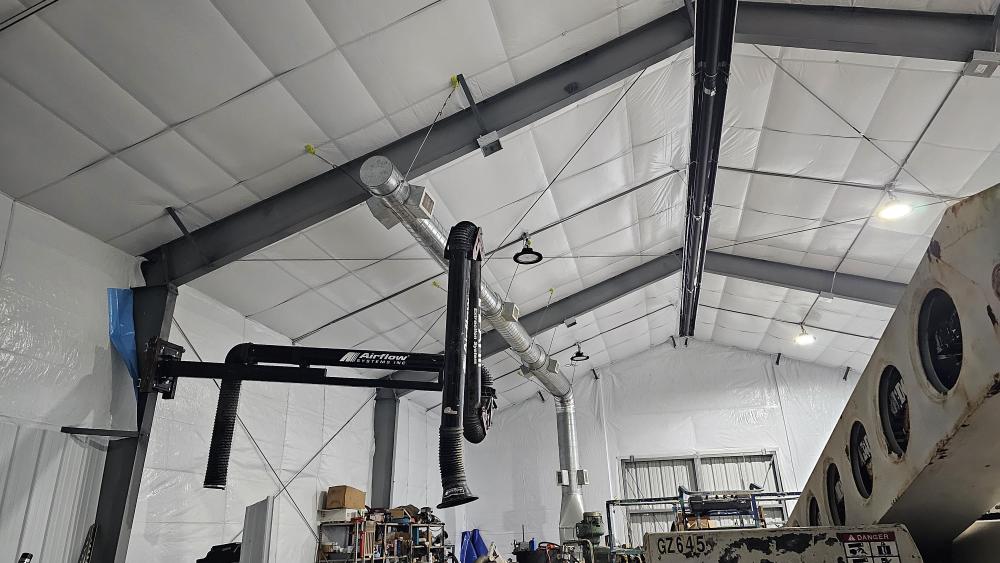
-
What did you do in the shop today?
jlpservicesinc replied to Mark Ling's topic in Blacksmithing, General Discussion
Alexandr that is crazy.. You are a machine.. -
What did you do in the shop today?
jlpservicesinc replied to Mark Ling's topic in Blacksmithing, General Discussion
Goods, the judge has the say.. It's interesting how they determine the positions (1st, 2nd, 3rd).. Really depends on the judge. Beth will eye things, shapes, measure to check for requirements.. Little things.. My bowl was the deepest and my twist was even from top to bottom.. There were only 2 professionals in this last forge in.. I'm lumped into the professional group though I only forge about 10 occasions a year. Once the school opens that will be great.. then I can get back at the forging on a regular basis. The hawks look great.. Is there a reason for such a high finish? Chimaera where will you get stenciles from? -
JLP Blacksmith Teaching Center.
jlpservicesinc replied to jlpservicesinc's topic in Building, Designing a Shop
So, I've been getting some work done now that I'm feeling inspired by getting some 3phase power into the school. Now it's the little things. I had to order some electrical enclosures to finish off the light runs. I have also included extra wires for another 4 LED lights.. All on dimmers.. So I can dim each side (left and right) of lights separately and I can also turn on and off as well as dim the 4 lights that will be ordered and installed at the enclosures.. Ever since getting the 3phase installed I've been inspired to get out there and spend the time.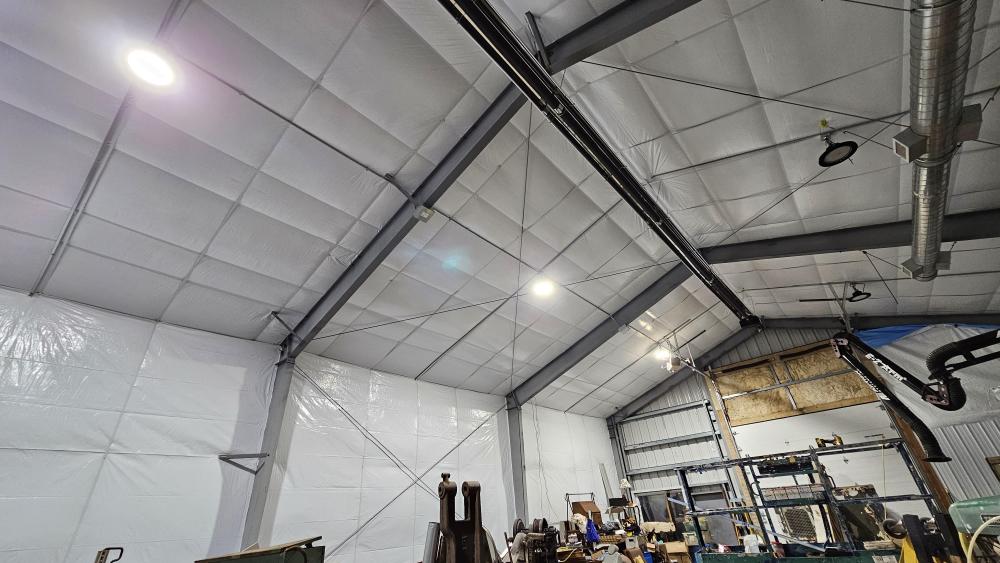
-
What did you do in the shop today?
jlpservicesinc replied to Mark Ling's topic in Blacksmithing, General Discussion
Fired up the fat lamp. 20231001_162754.mp4 -
What did you do in the shop today?
jlpservicesinc replied to Mark Ling's topic in Blacksmithing, General Discussion
George, the judge picks the items to be forged, the time allowed, and the specifics. The Judge was Beth Holmberg.. She is into Vikings and early British, Icelandic, and Scandinavian lore. Fun really because she researches the items and gives history on them with location. Only a few items I've made there since going.. ((This was my 3rd time I think.. (covid time off)) have been useful with potential sales. 2023-division_sessions-3.pdf -
What did you do in the shop today?
jlpservicesinc replied to Mark Ling's topic in Blacksmithing, General Discussion
Fitchburg Forge In competition. Super fun. Something different. I really should practice the items. Last arrow head I made was 30 years ago and never made a meat fork nor this design of fat lamp.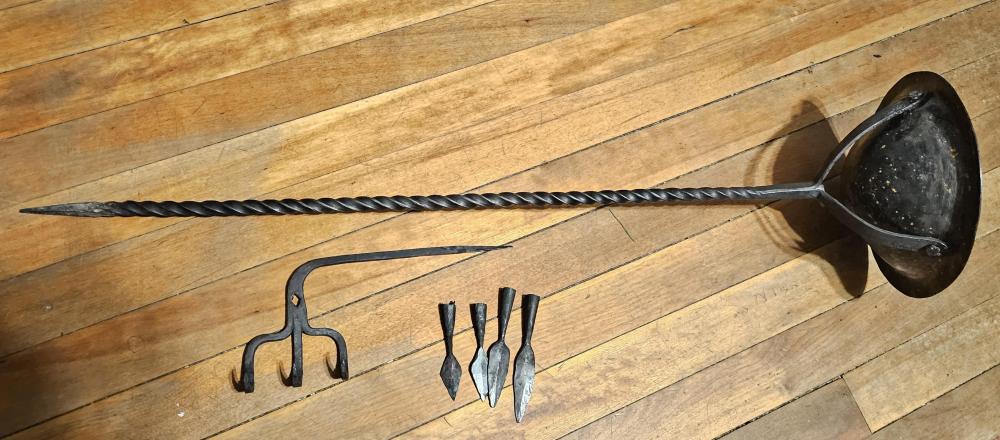
-
What did you do in the shop today?
jlpservicesinc replied to Mark Ling's topic in Blacksmithing, General Discussion
M.J. I never knew that.. Wow.. Thank you. -
JLP Blacksmith Teaching Center.
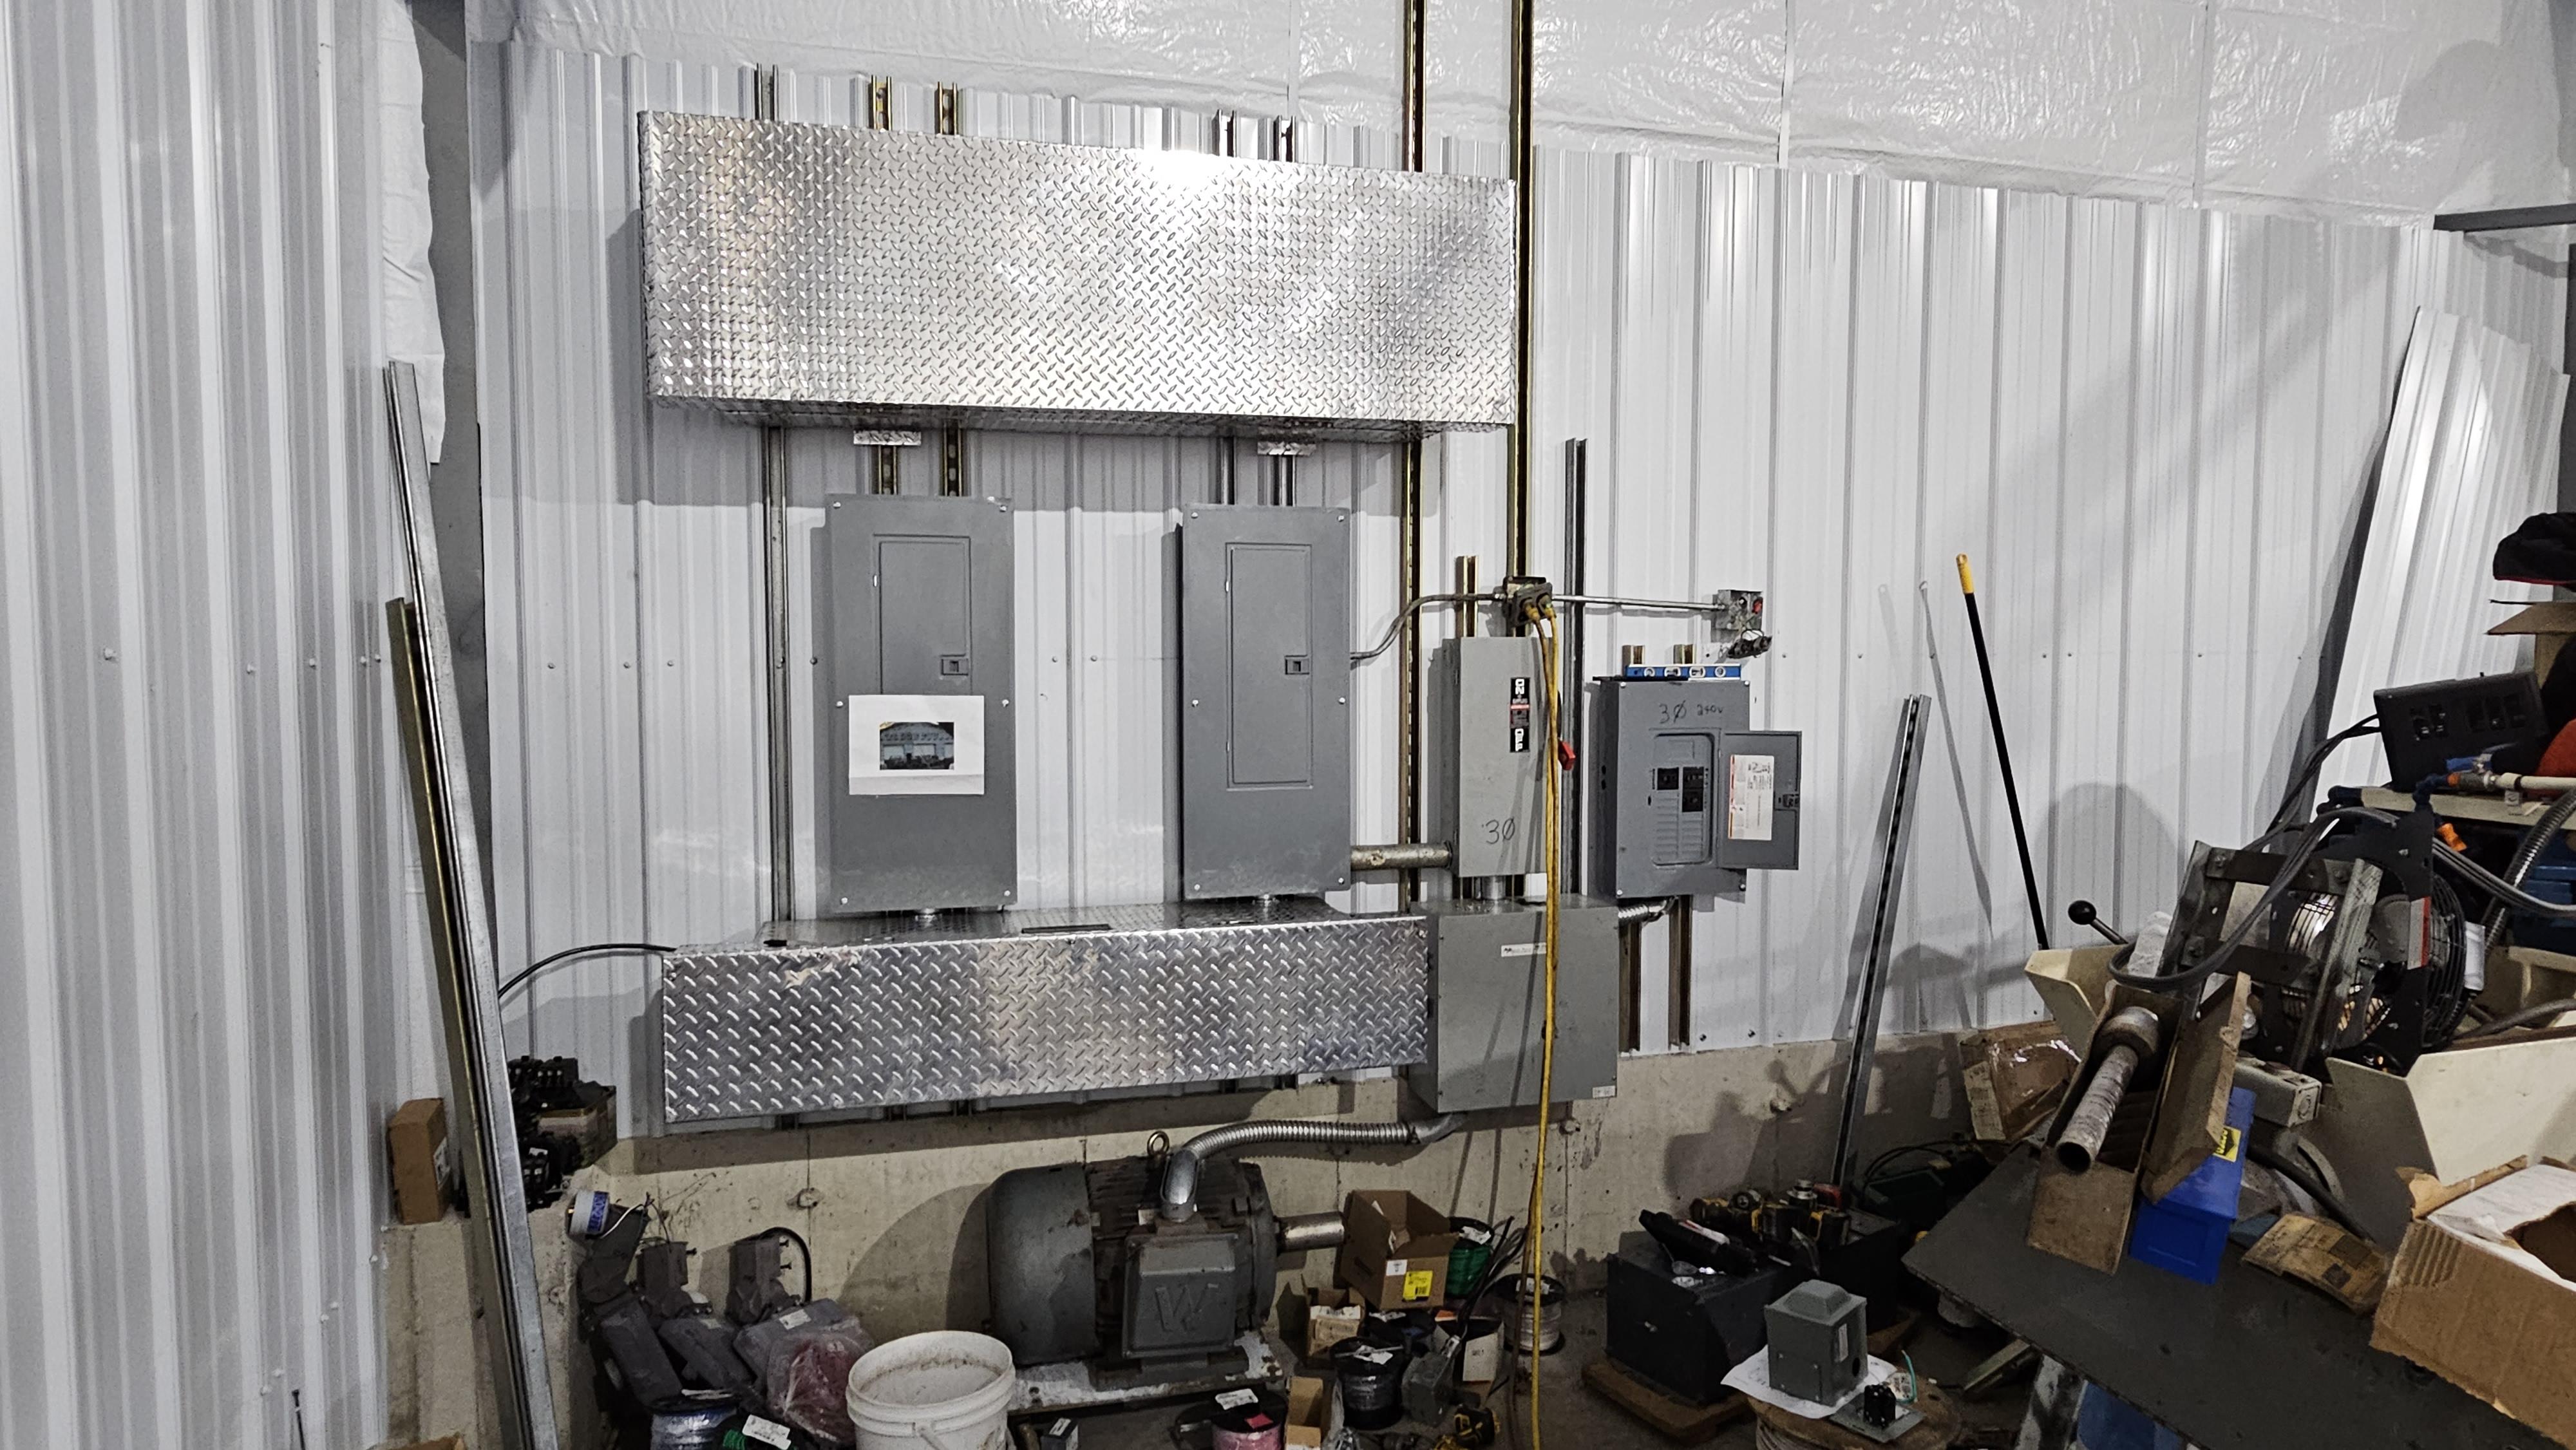
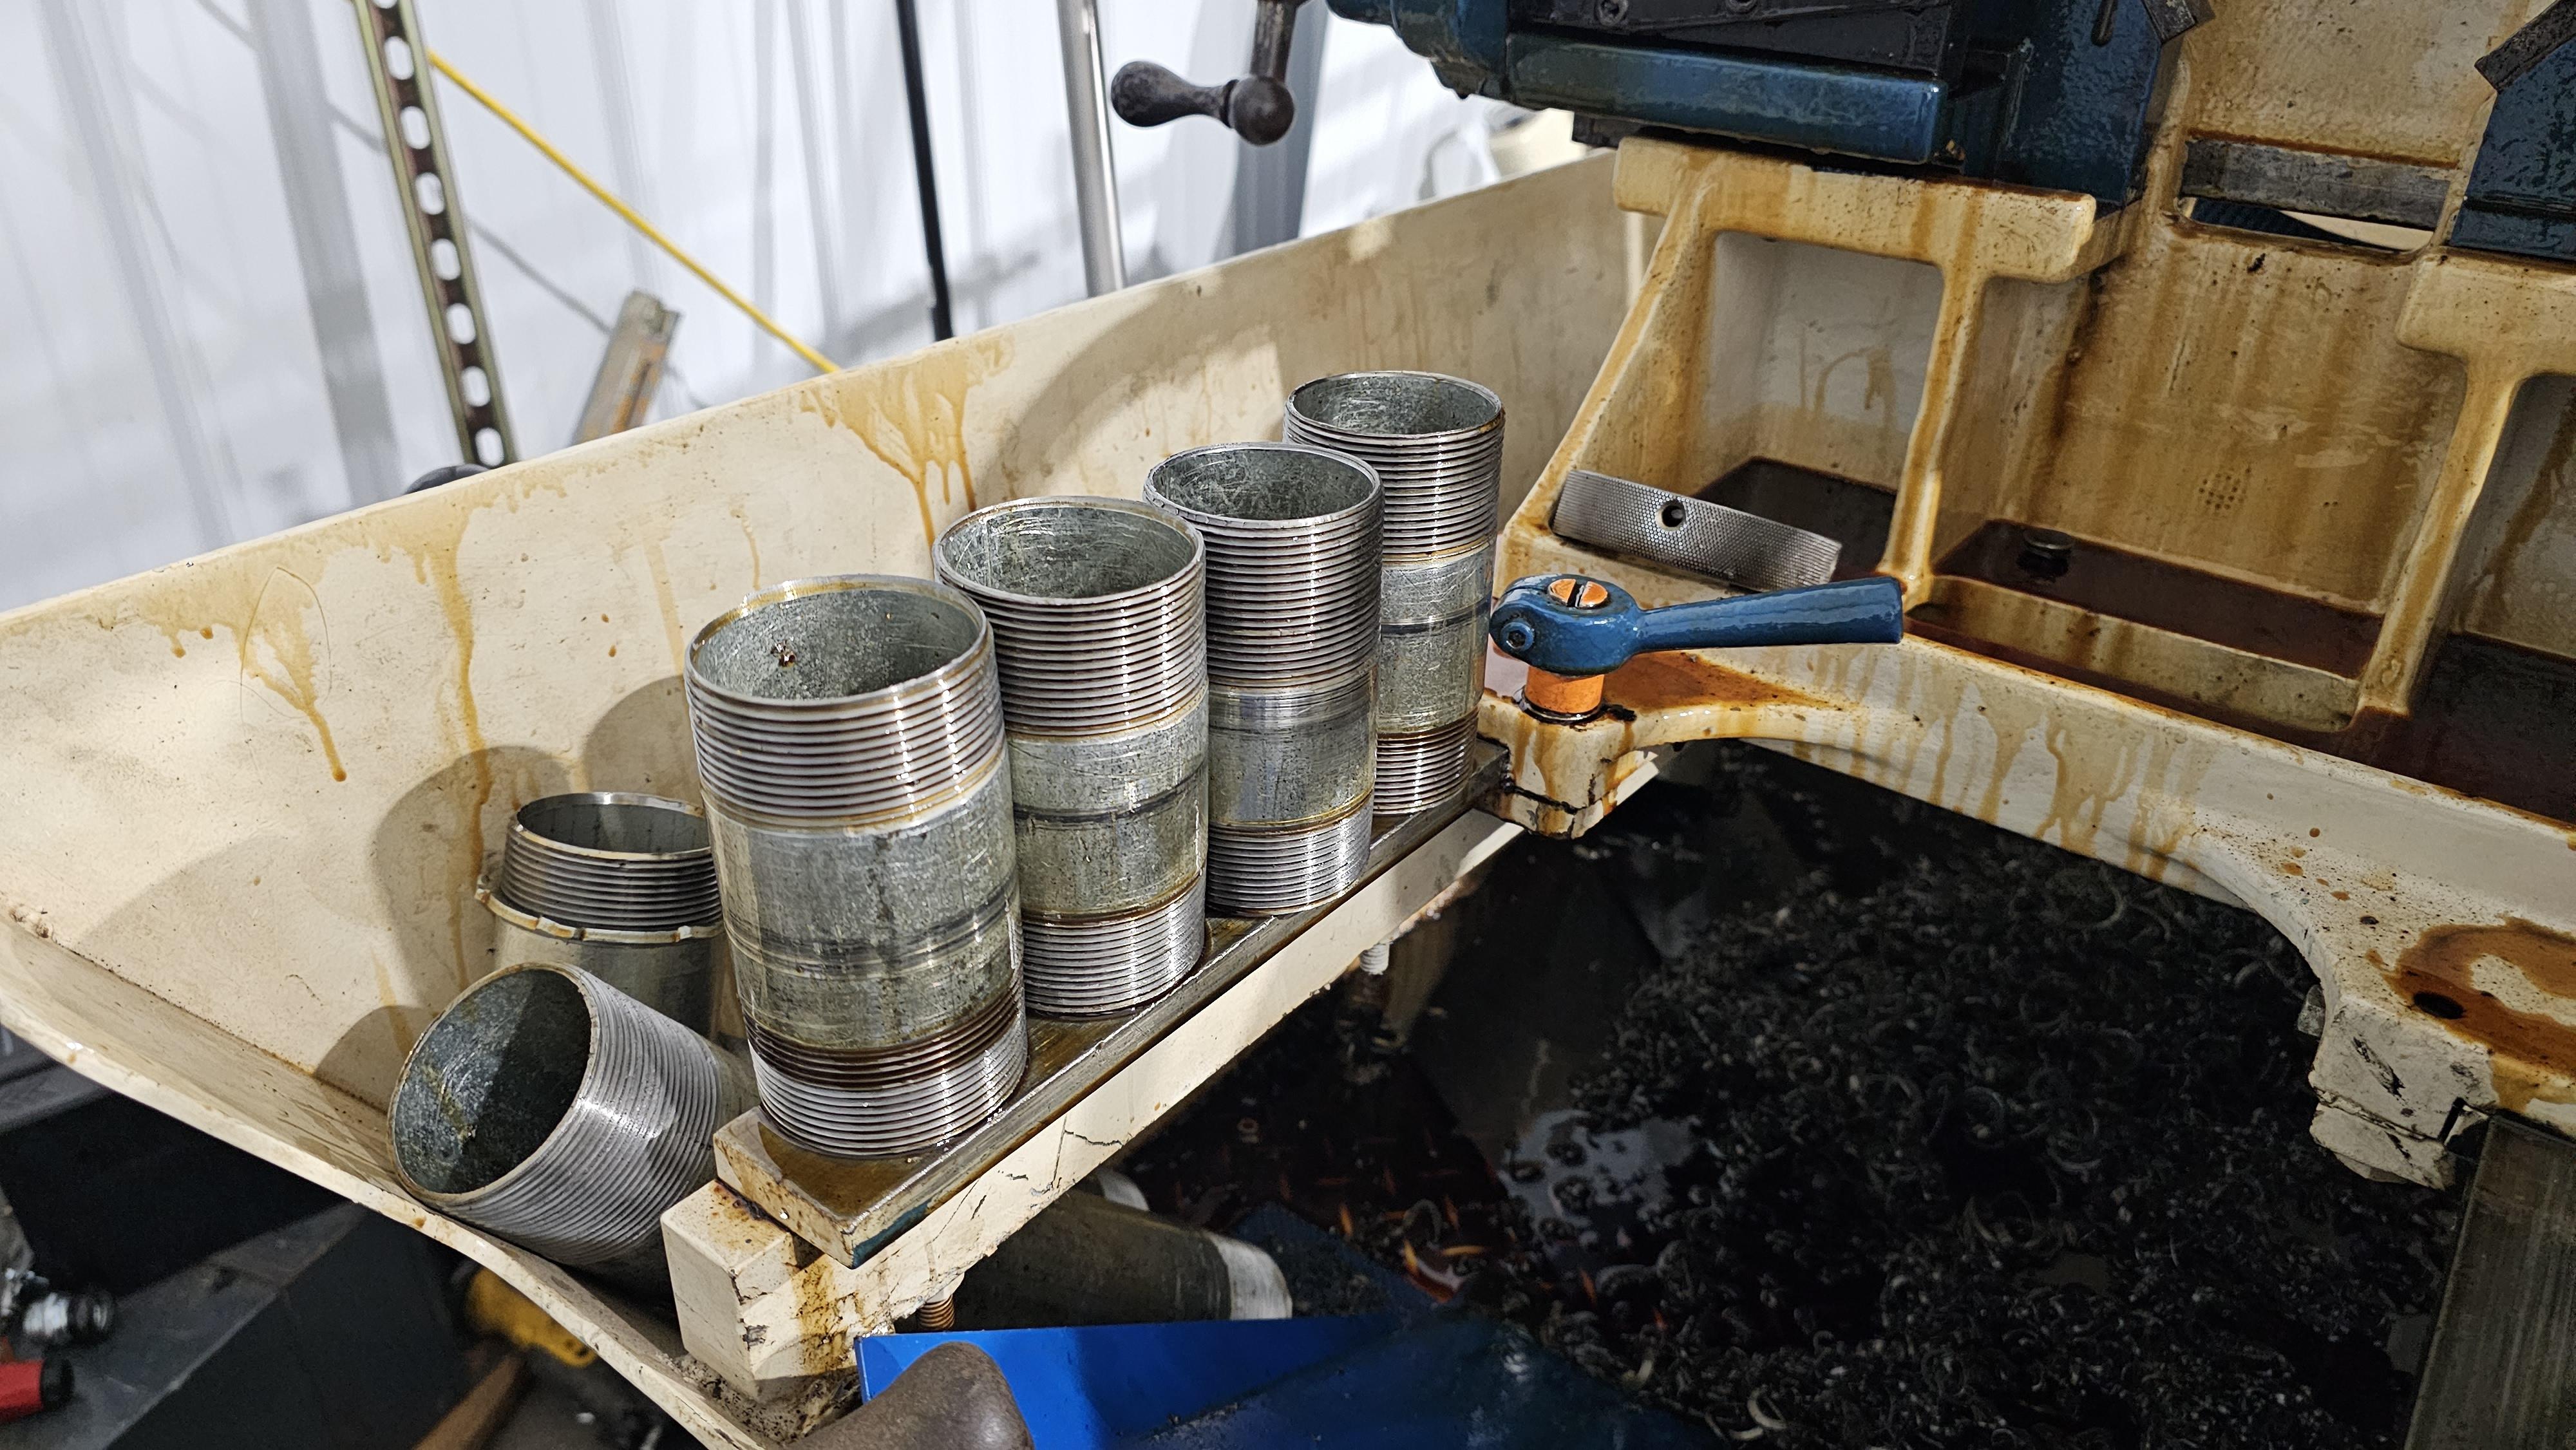
jlpservicesinc replied to jlpservicesinc's topic in Building, Designing a Shop
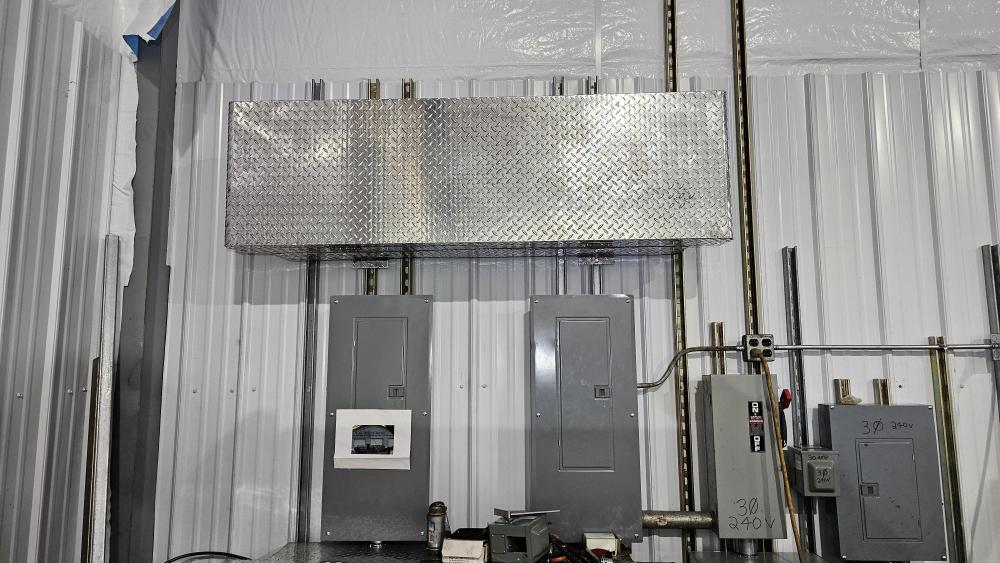
So, the RPC is installed.. Took a little while to figure out location and overall layout. Sadly with never doing this before it's not cut and dry.. You do things all the time and it's second nature.. Layout with what I want to take place in each bay is tough. I was able to fire up the Oster 784 threader and finally make some RMT Nipples to go between the large wireway and the panels. It felt amazing being able to use the equipment finally.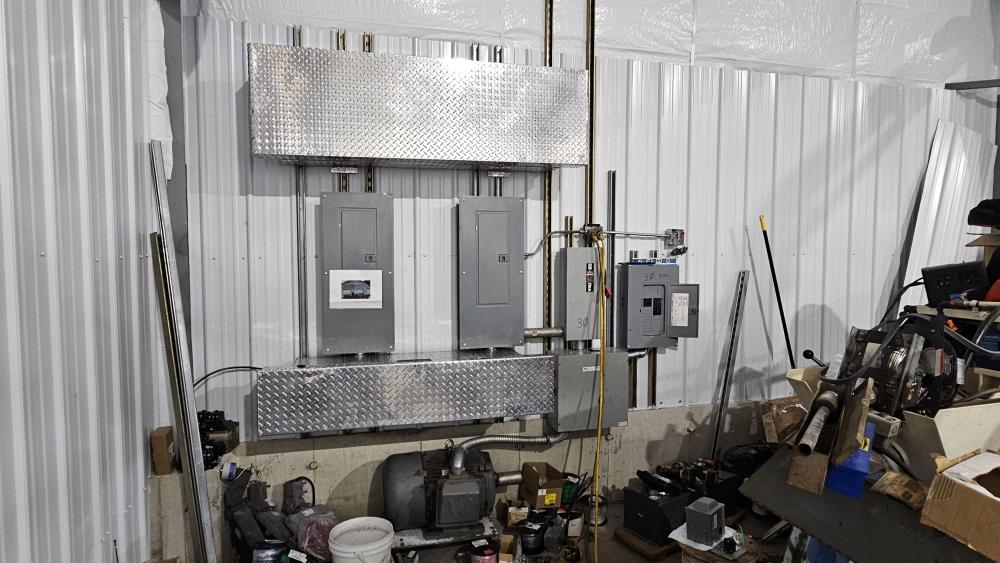

-
old style 250 pound little giant
jlpservicesinc replied to jason0012's topic in Power Hammers, Treadle Hammers, Olivers
Great detective work. -
What did you do in the shop today?
jlpservicesinc replied to Mark Ling's topic in Blacksmithing, General Discussion
Your knife work has come a long ways.. Congrats. -
What did you do in the shop today?
jlpservicesinc replied to Mark Ling's topic in Blacksmithing, General Discussion
Goods.. Don't adjust the mandrel.. What you do is flatten the eye once it's welded.. This will give you the correct geometry for the handle. You are better off with a rounder shape as that is traditionally used for many things.. Froes, hoe's, axes, etc.. I try to show this each hawk I make at demos.. The thick side you need to forge down while it's on the mandrel.. The eyes should always be undersized when forge welded and then drifted up to size.. Keeping in mind that you will need to flatten them some to fit the handle.. The Qualiity of handles is lack luster so even between the same sizes the hammers won't be perfect.. I got a batch that they all needed to be sanded on one side because they were kinda flat where they were supposed to be round. Chad, nice job.. It's great you stuck with it.. practice makes perfect.. -
What did you do in the shop today?
jlpservicesinc replied to Mark Ling's topic in Blacksmithing, General Discussion
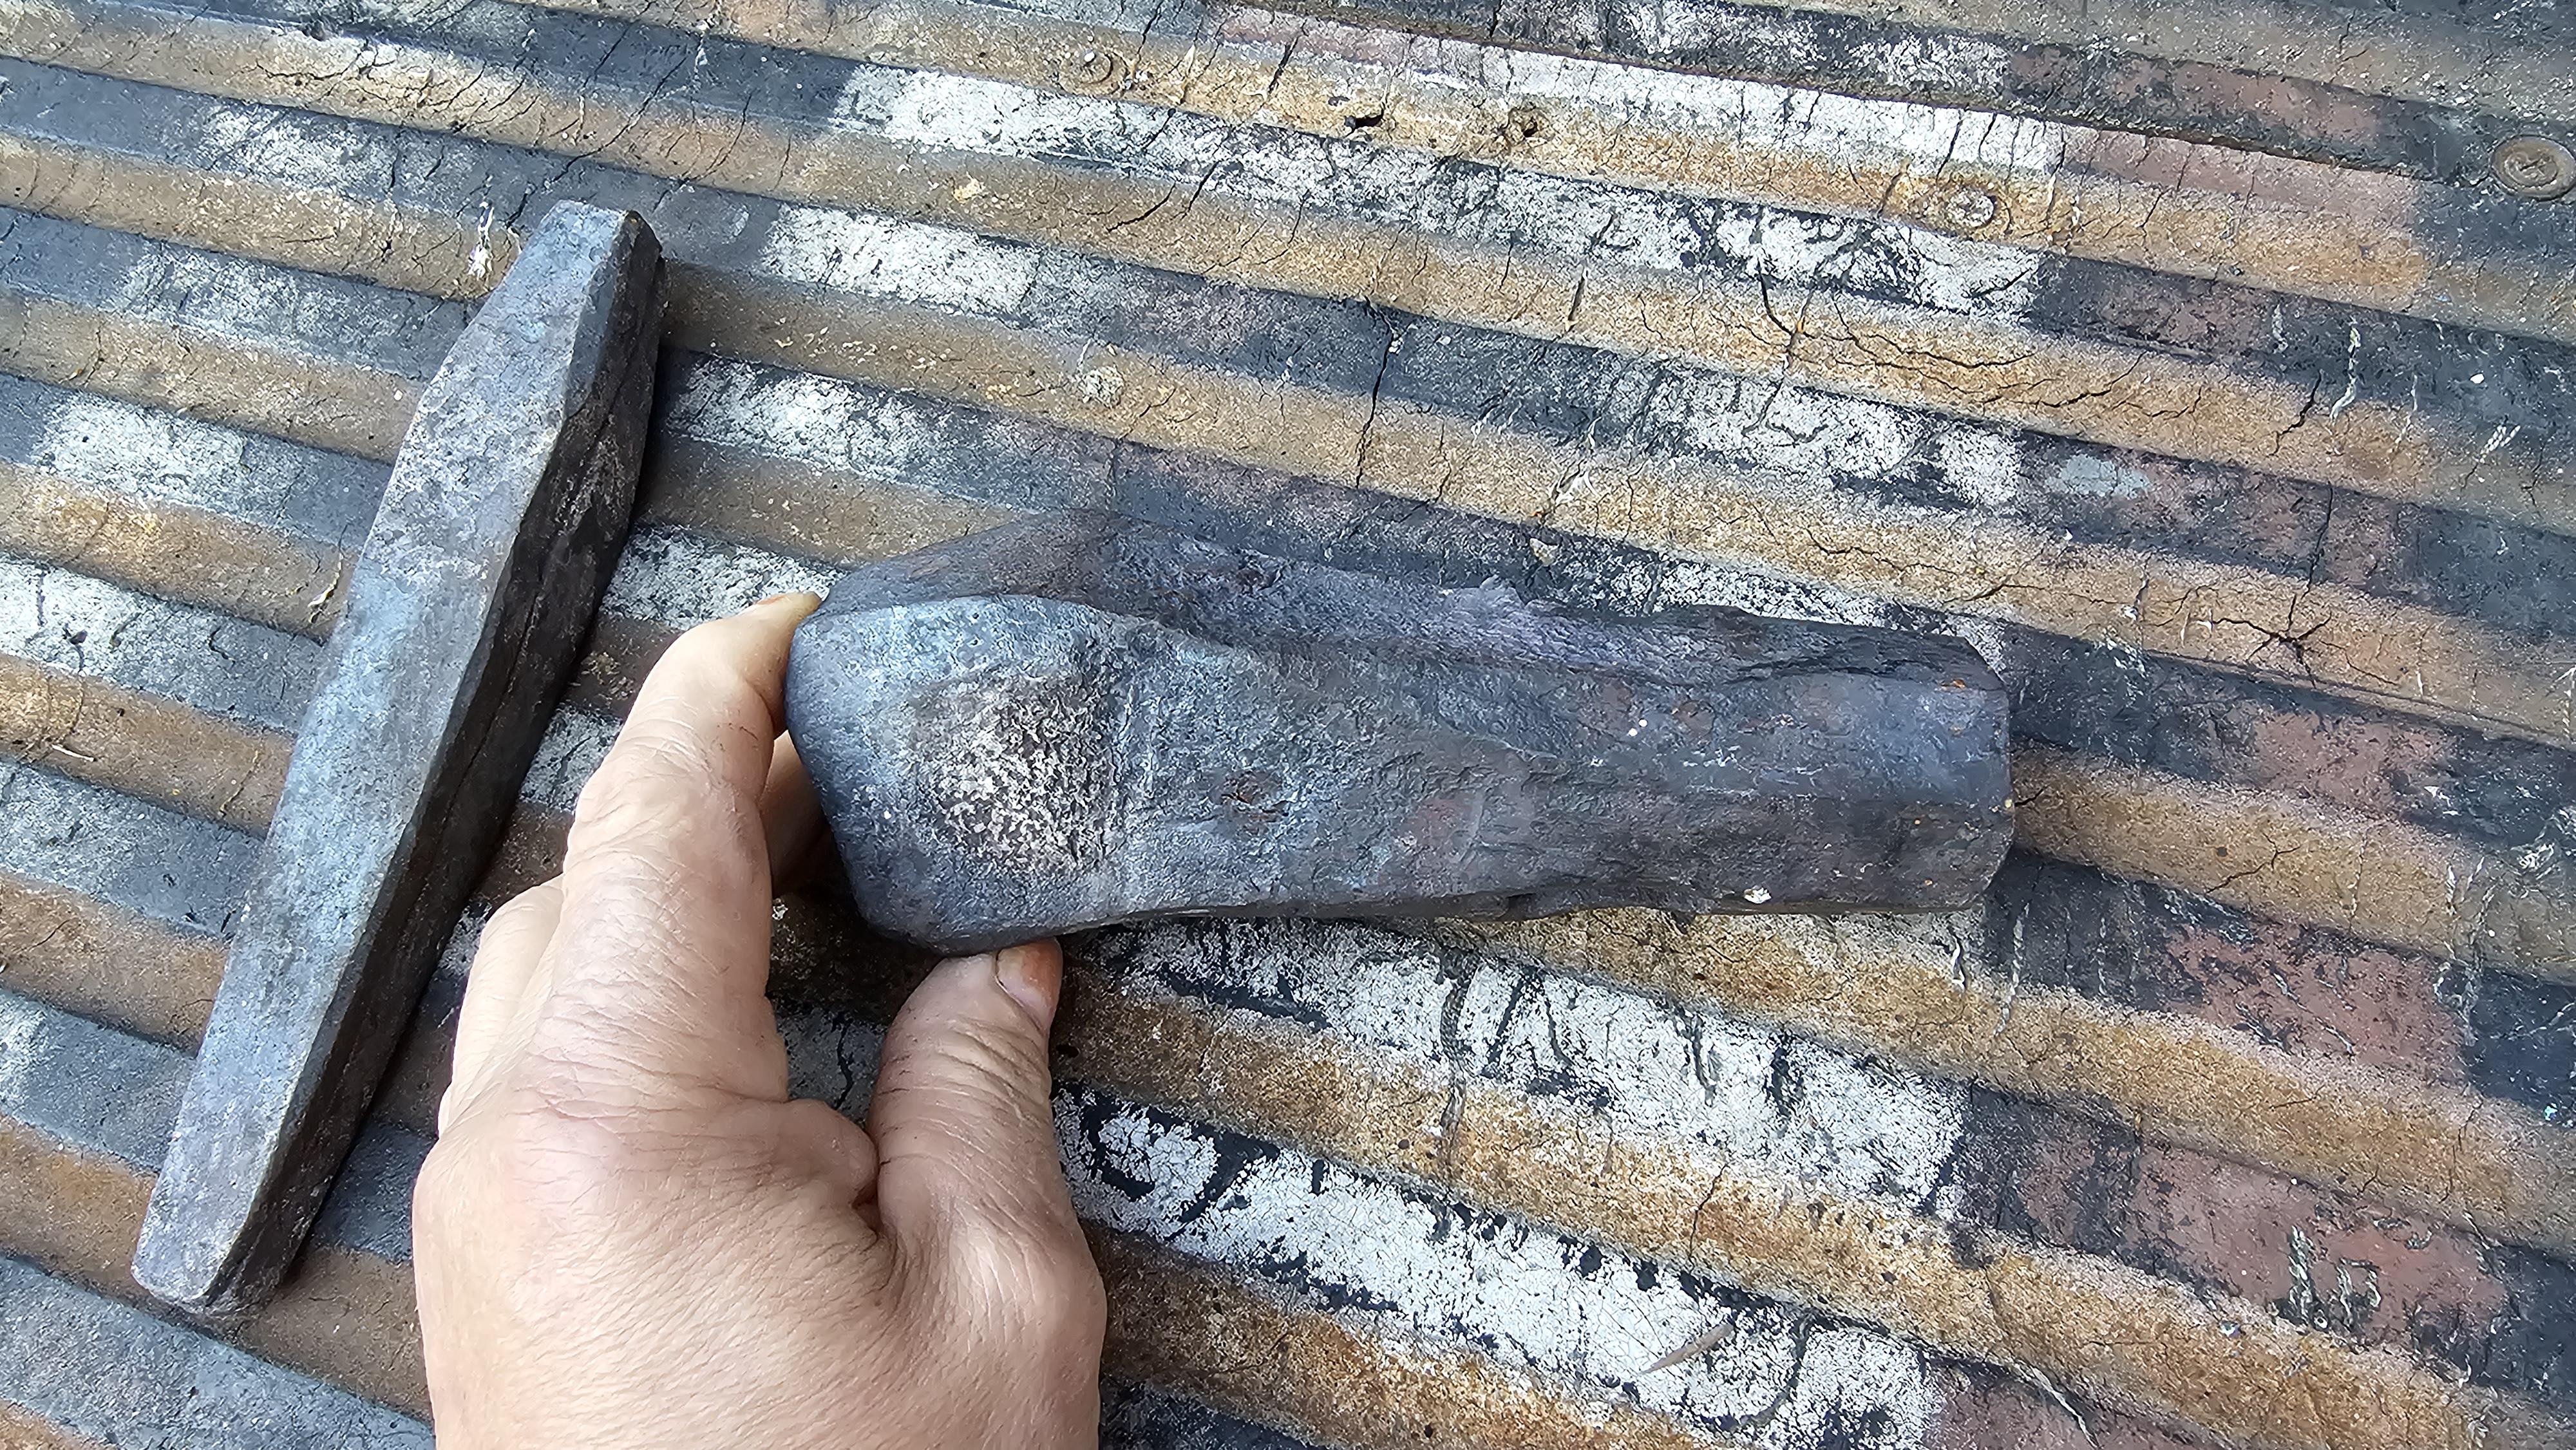
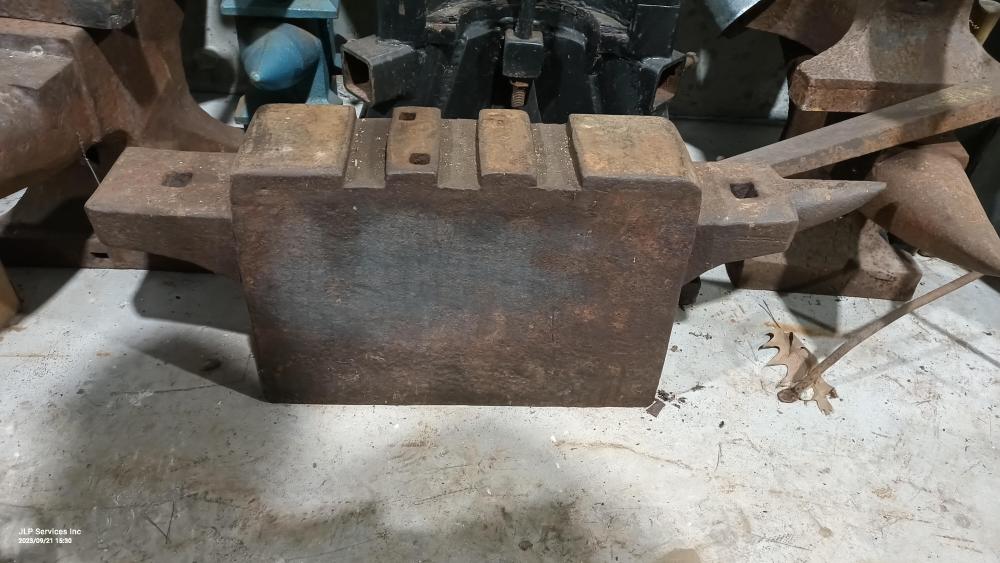
Ghost town forge.. Mr Craven and I have the same anvil.. -
What did you do in the shop today?
jlpservicesinc replied to Mark Ling's topic in Blacksmithing, General Discussion
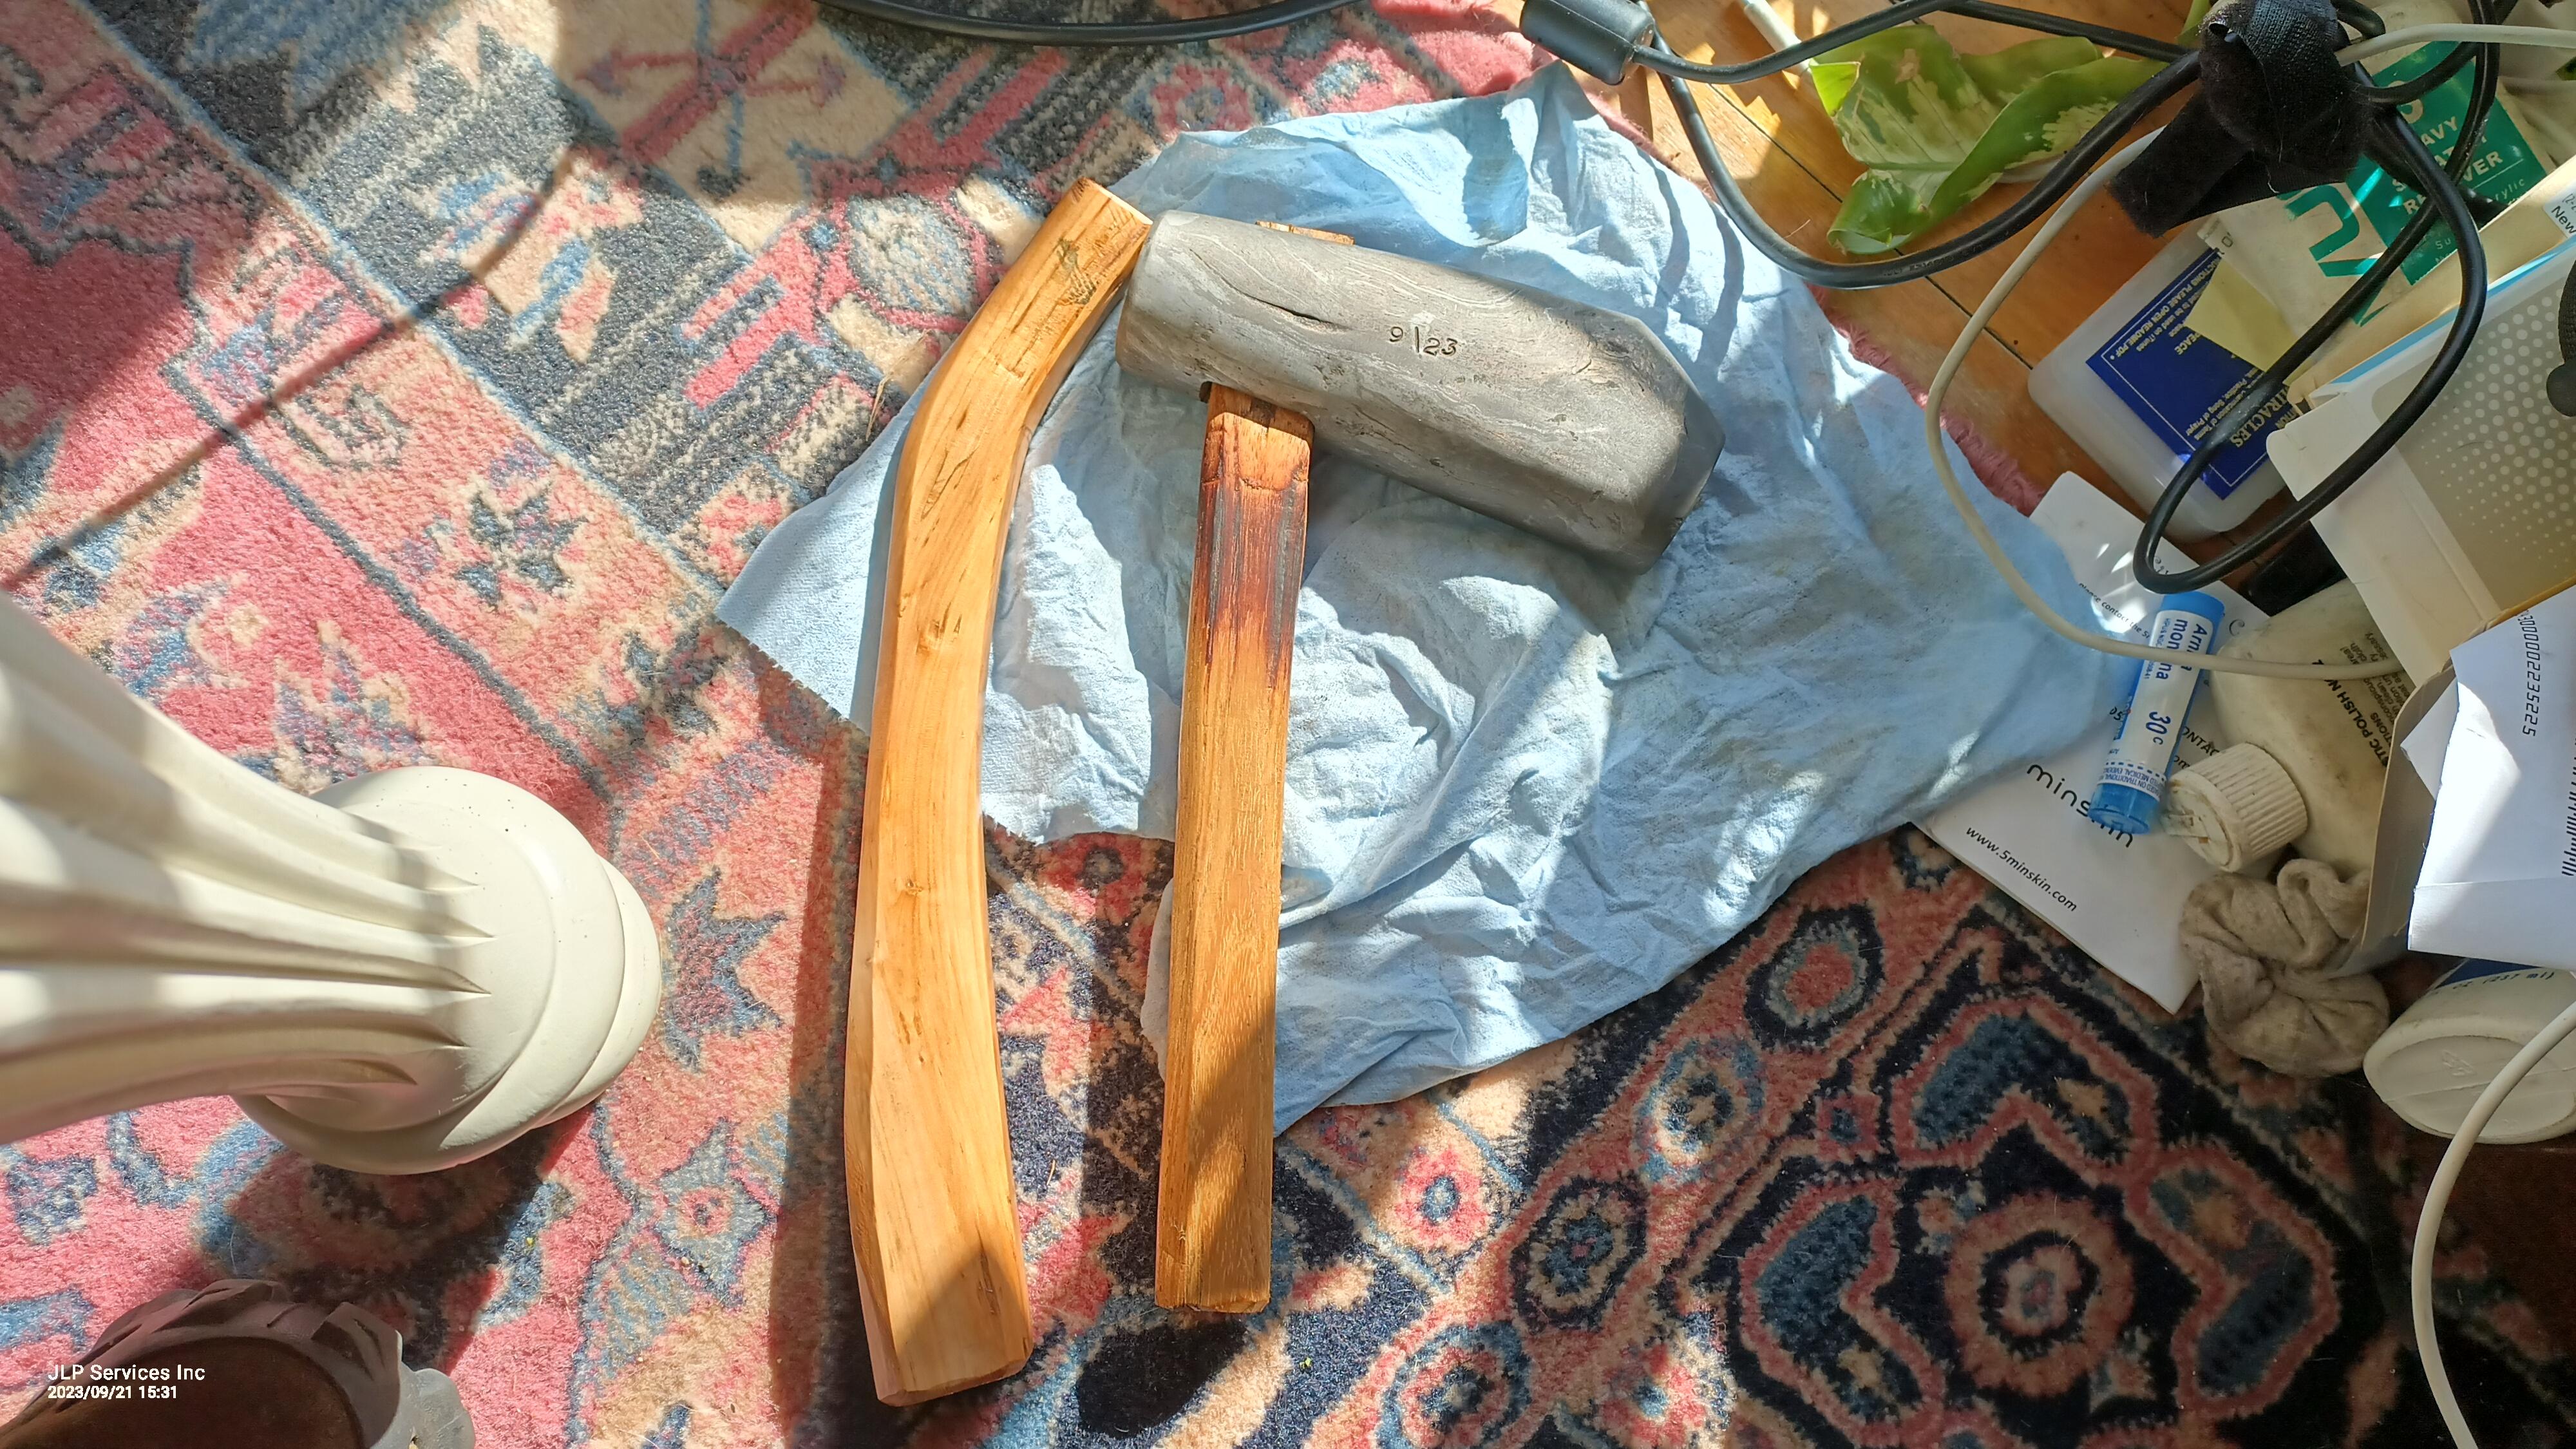
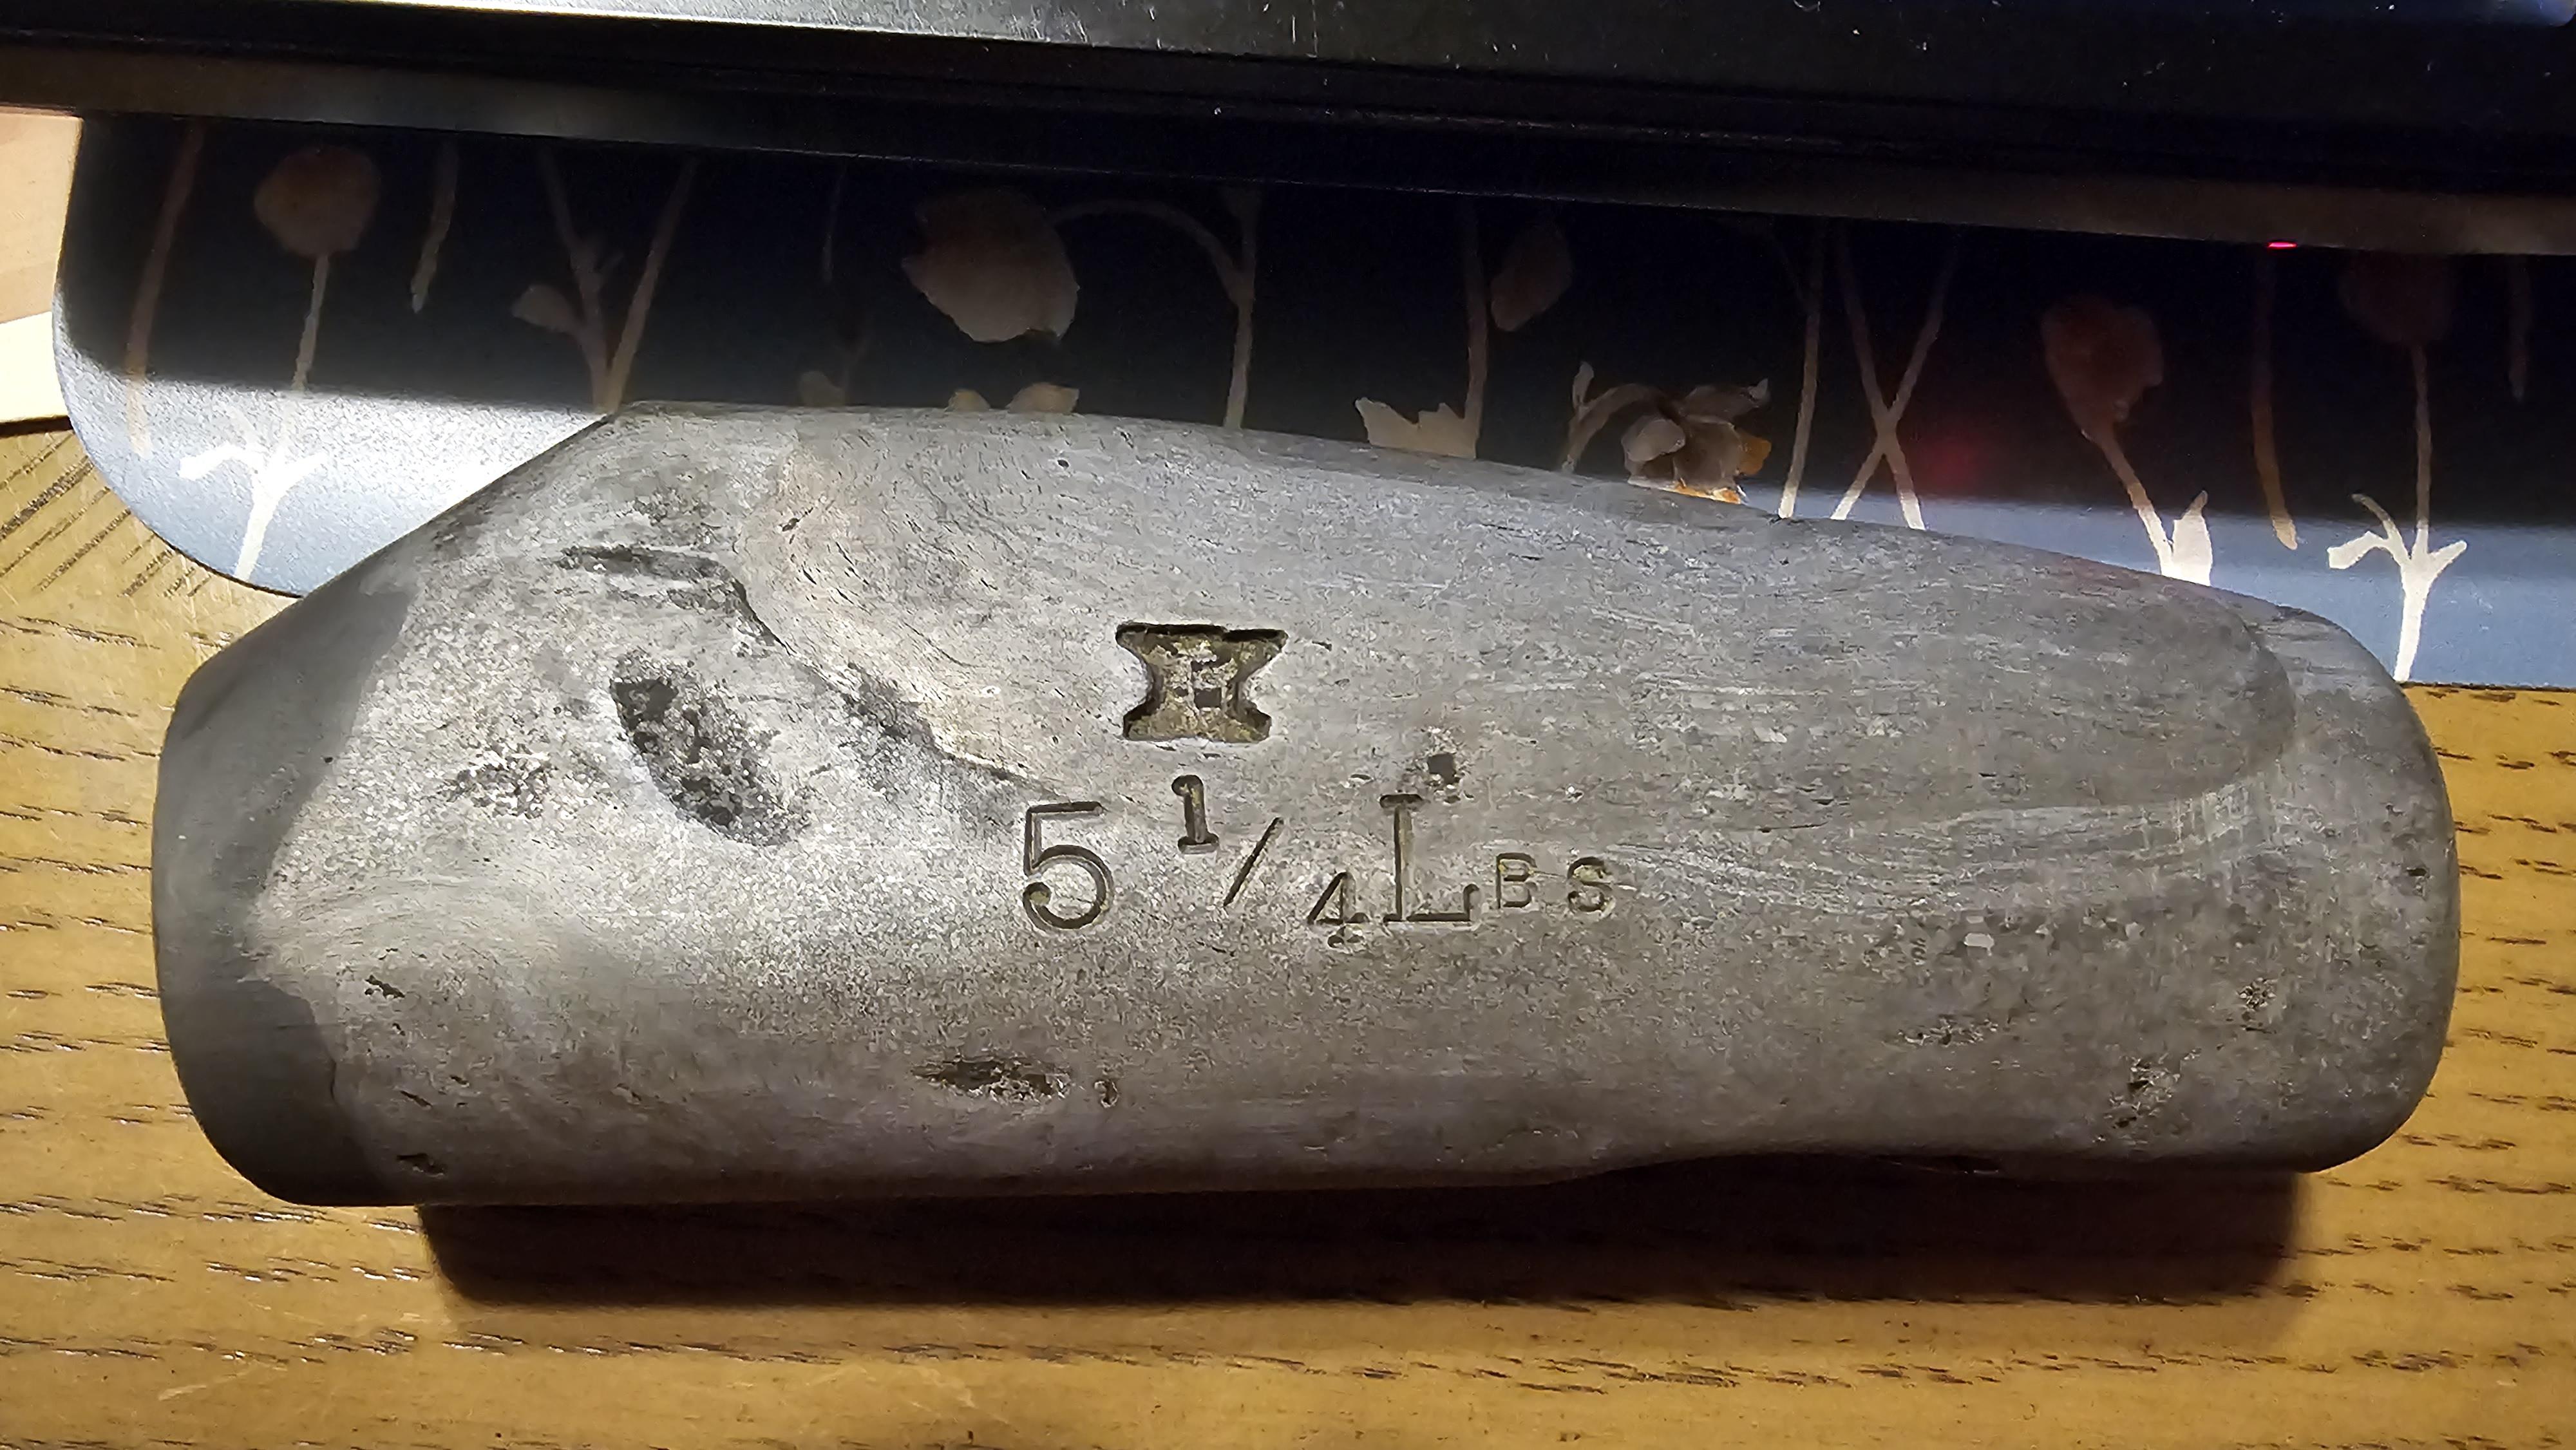
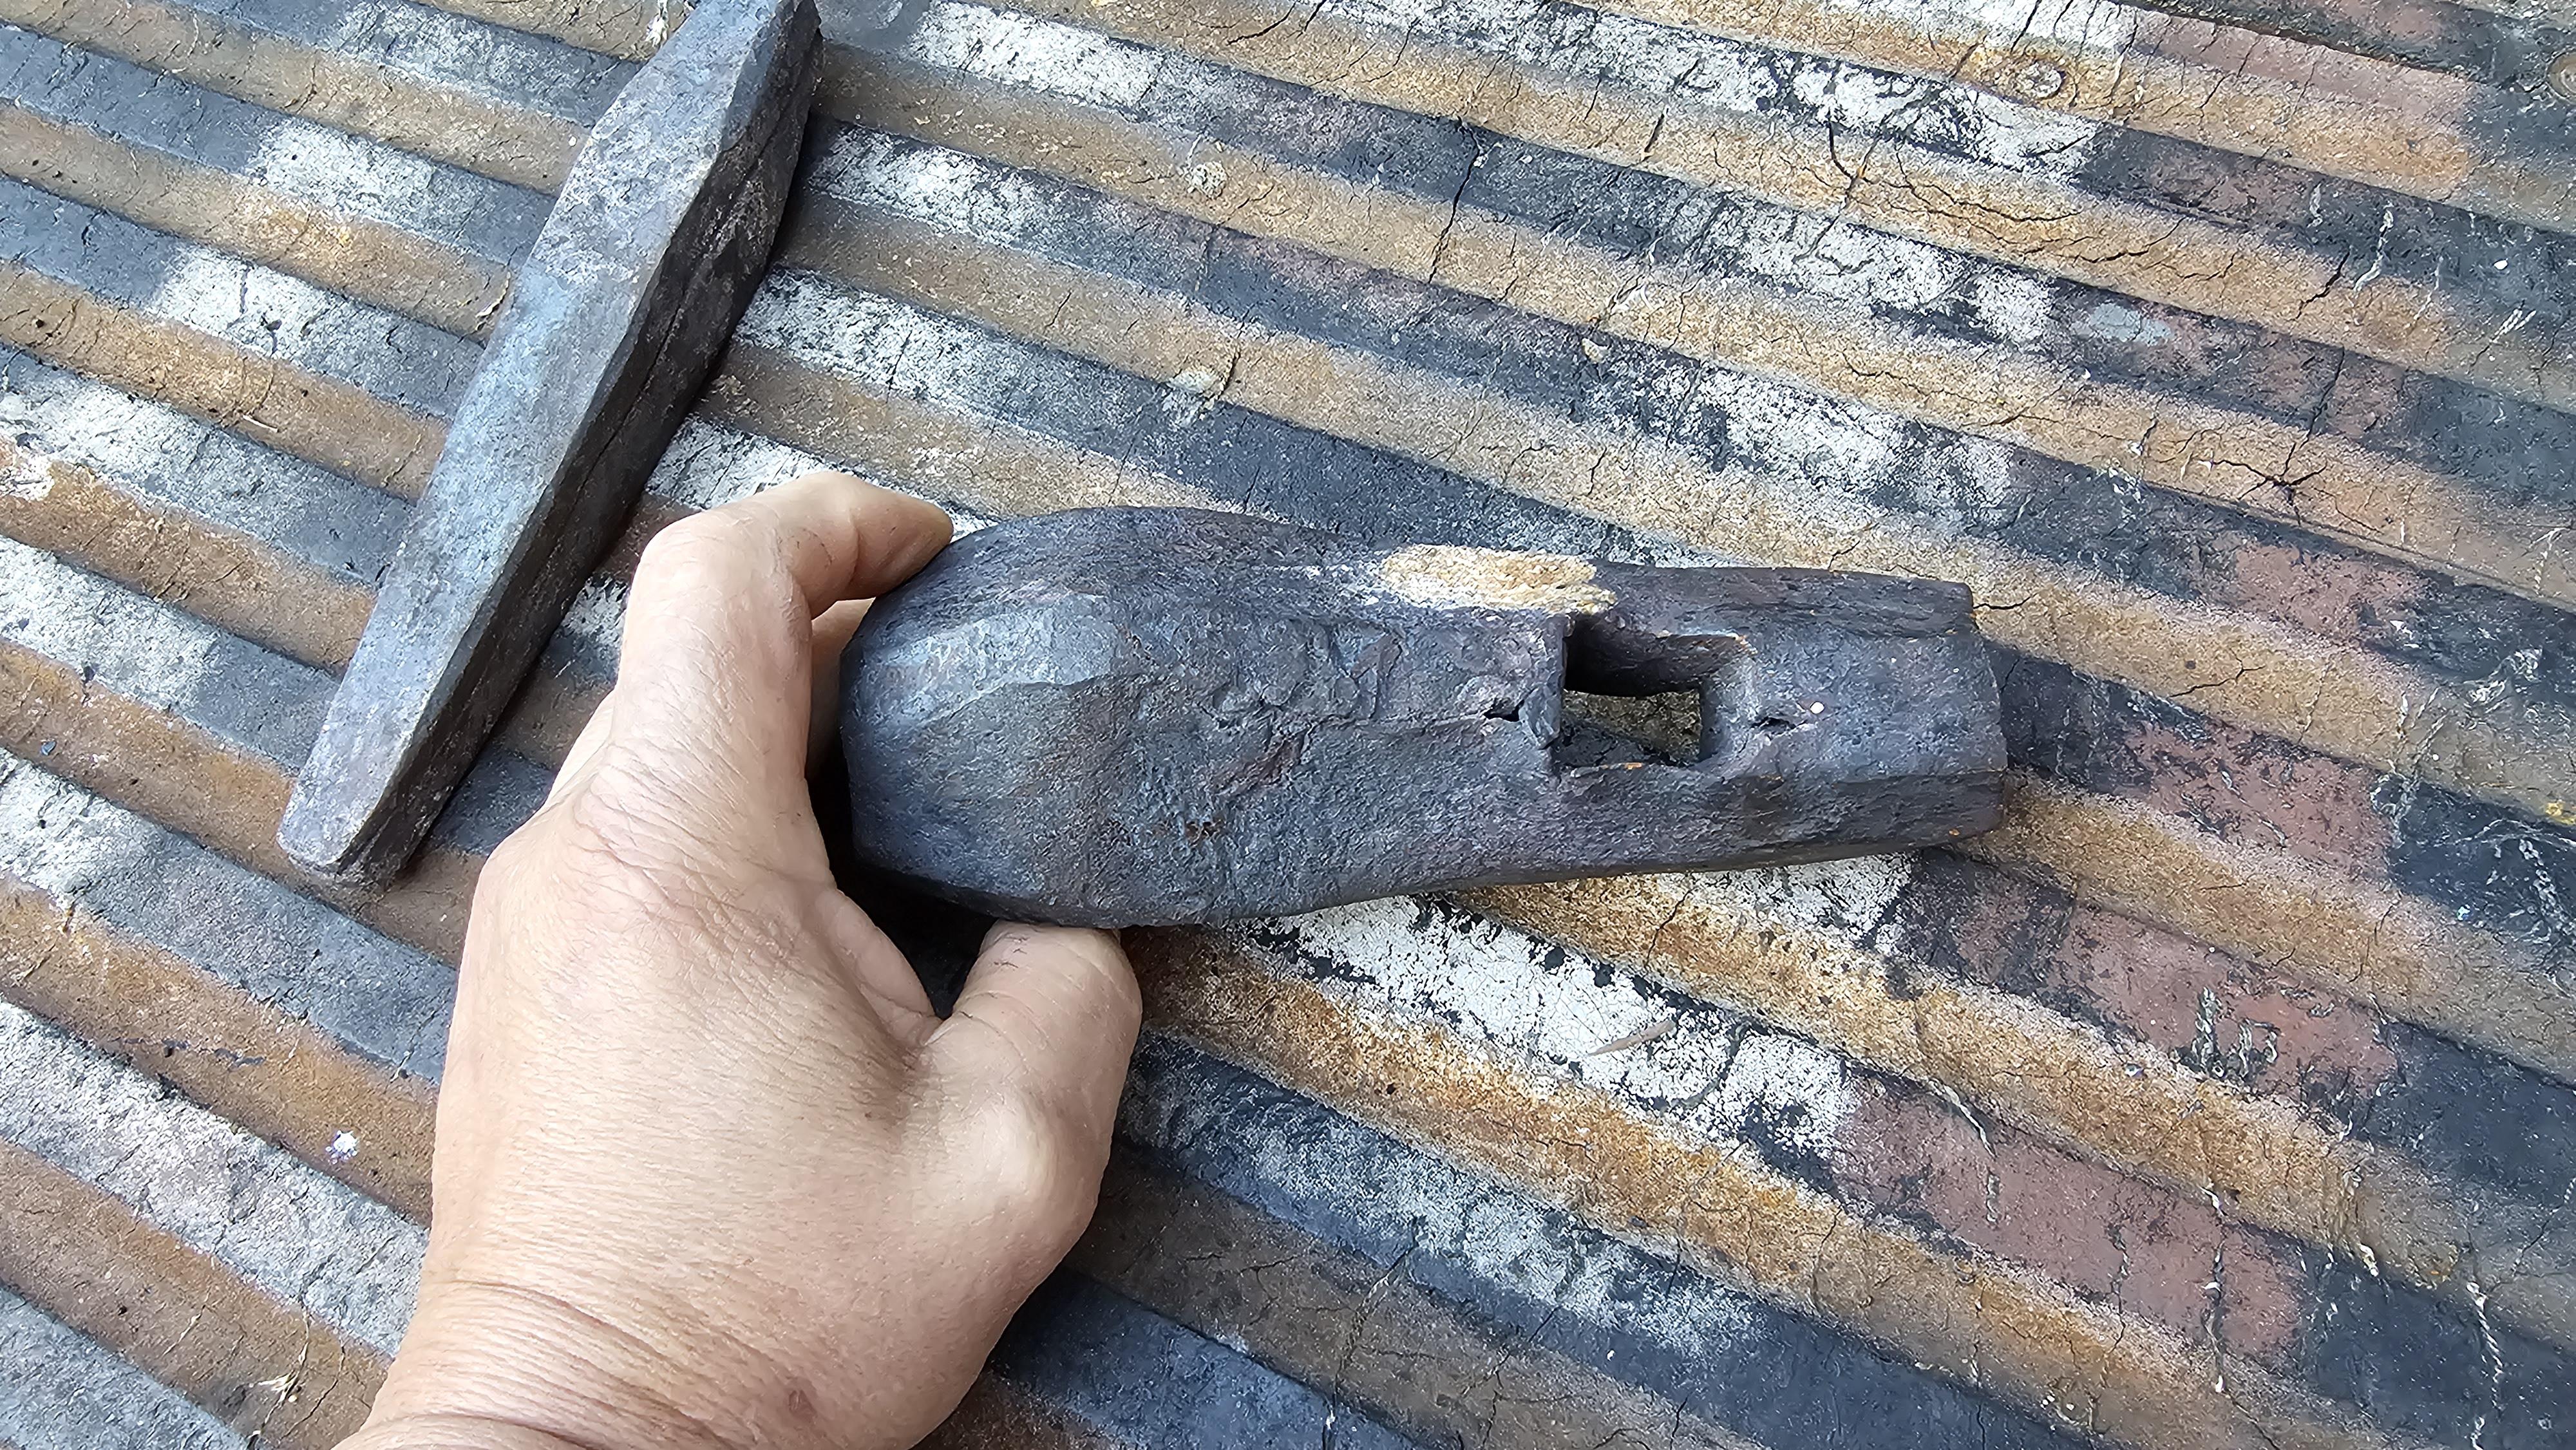
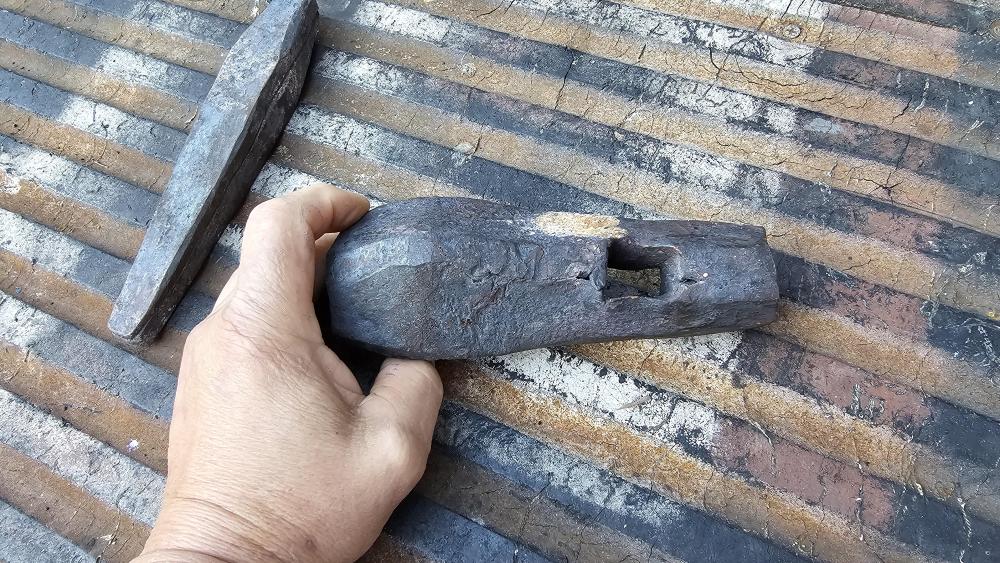
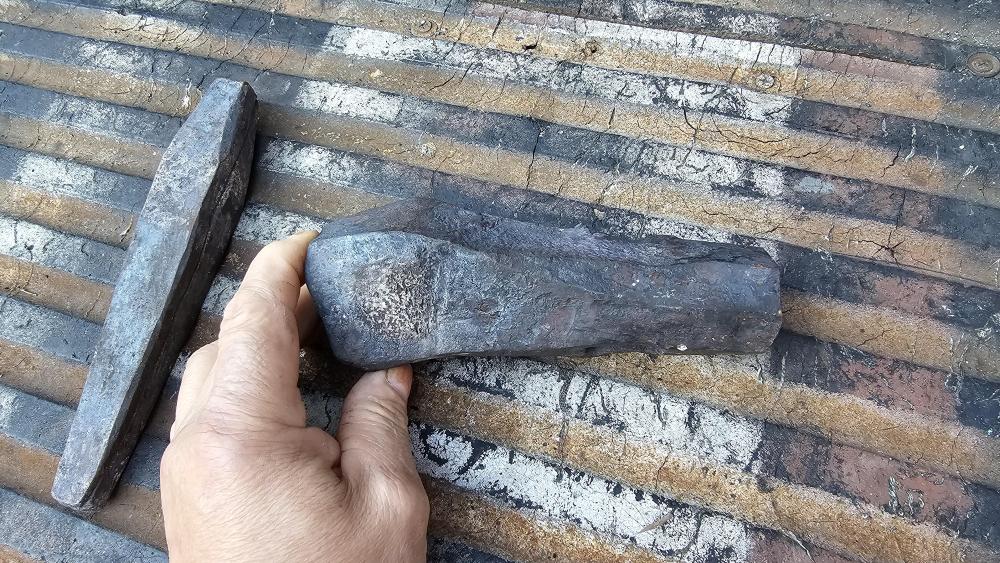
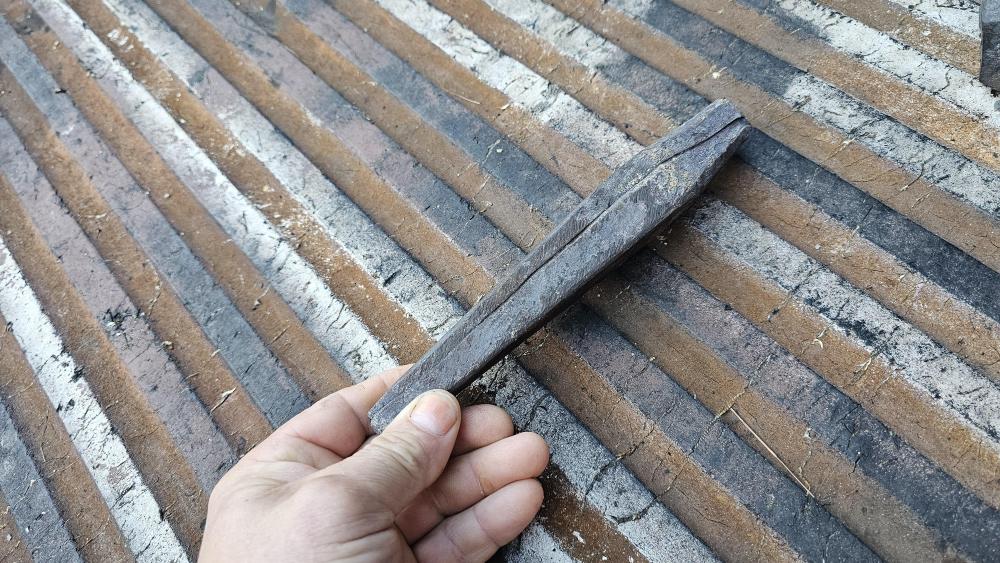
The head shape and weights are slightly different. The main difference is the handle. I've made 2 handles that suit each need. Cutlers is the main use and made the hammer to go along with the anvil. I'll interpret a little about Frostys post about work height. The anvils and the materials dimension wise are closely fixed. Unlike regular blacksmith work that varies in material thickness with large variation. A cutlers or file makers materials don't change as much. In the photos the handles are markedly different based on the difference between swinging the hammer. The file cutters swing is much more confined. Frosty that was some neat information about "Eisenhower" do you remember the book? This hammer and head combination is held in with external wedges. Once I get some use time on it I'll adjust the handle. I'll make a separate file cutters hammer at some point when the file cutting station goes in.

-
What did you do in the shop today?
jlpservicesinc replied to Mark Ling's topic in Blacksmithing, General Discussion
So here is the follow up which might make some more sense to my last post.
-
What did you do in the shop today?
jlpservicesinc replied to Mark Ling's topic in Blacksmithing, General Discussion
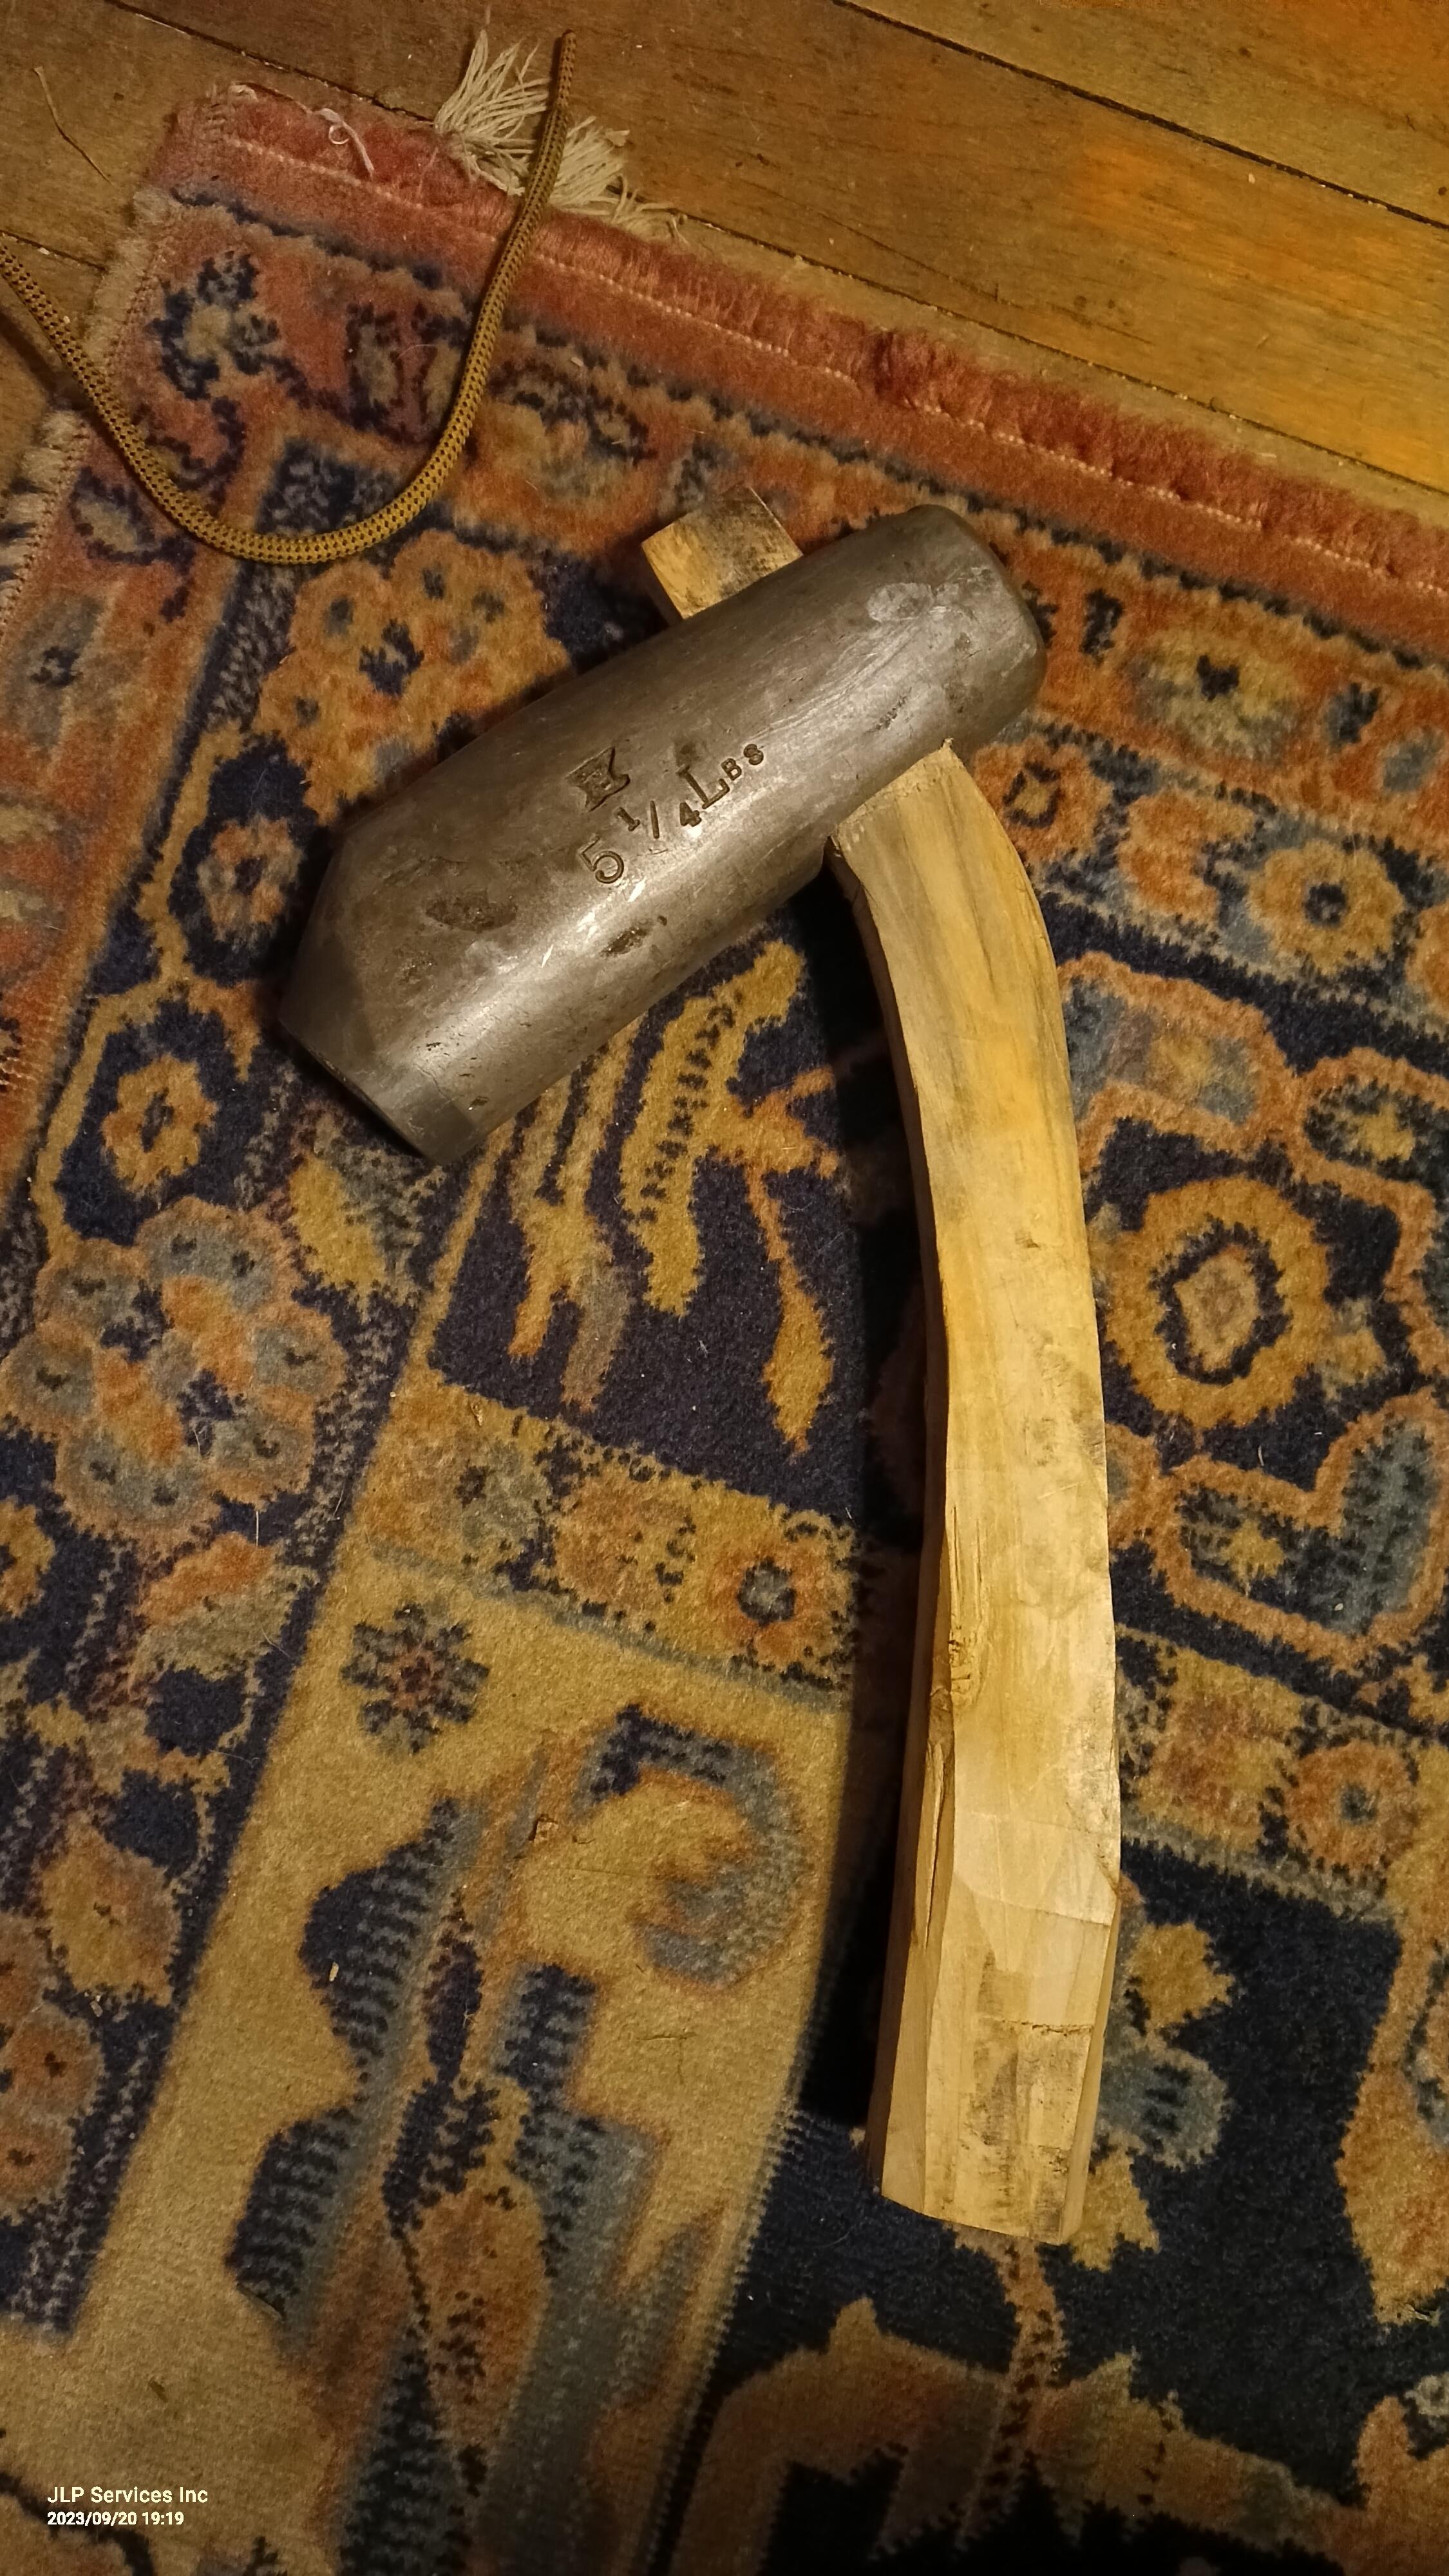
Savlak. Nice looking hammer.. I forged up a steeled wrought iron cutlers hammer.. Cutlers hammers and file makers are very simular.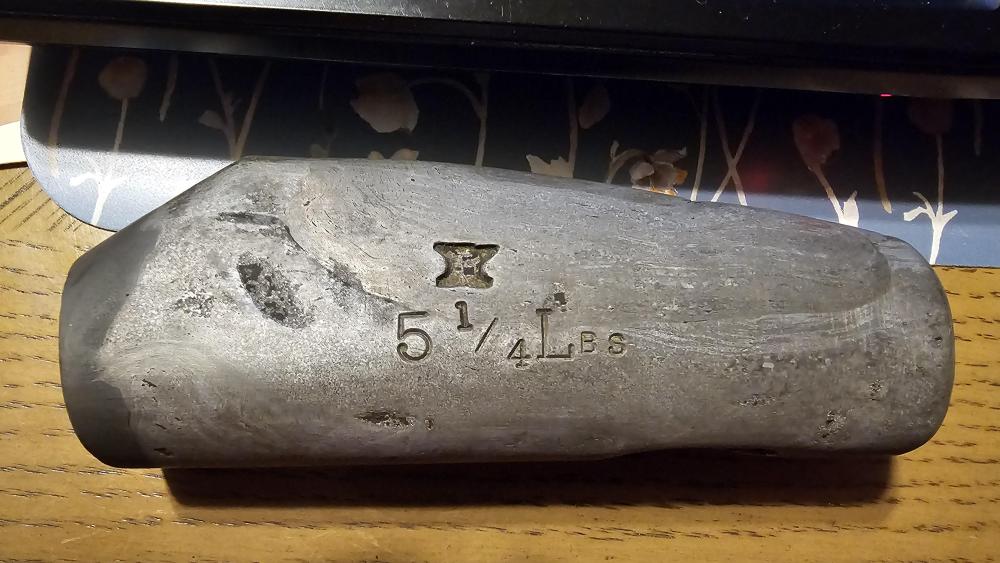
-
What did you do in the shop today?
jlpservicesinc replied to Mark Ling's topic in Blacksmithing, General Discussion
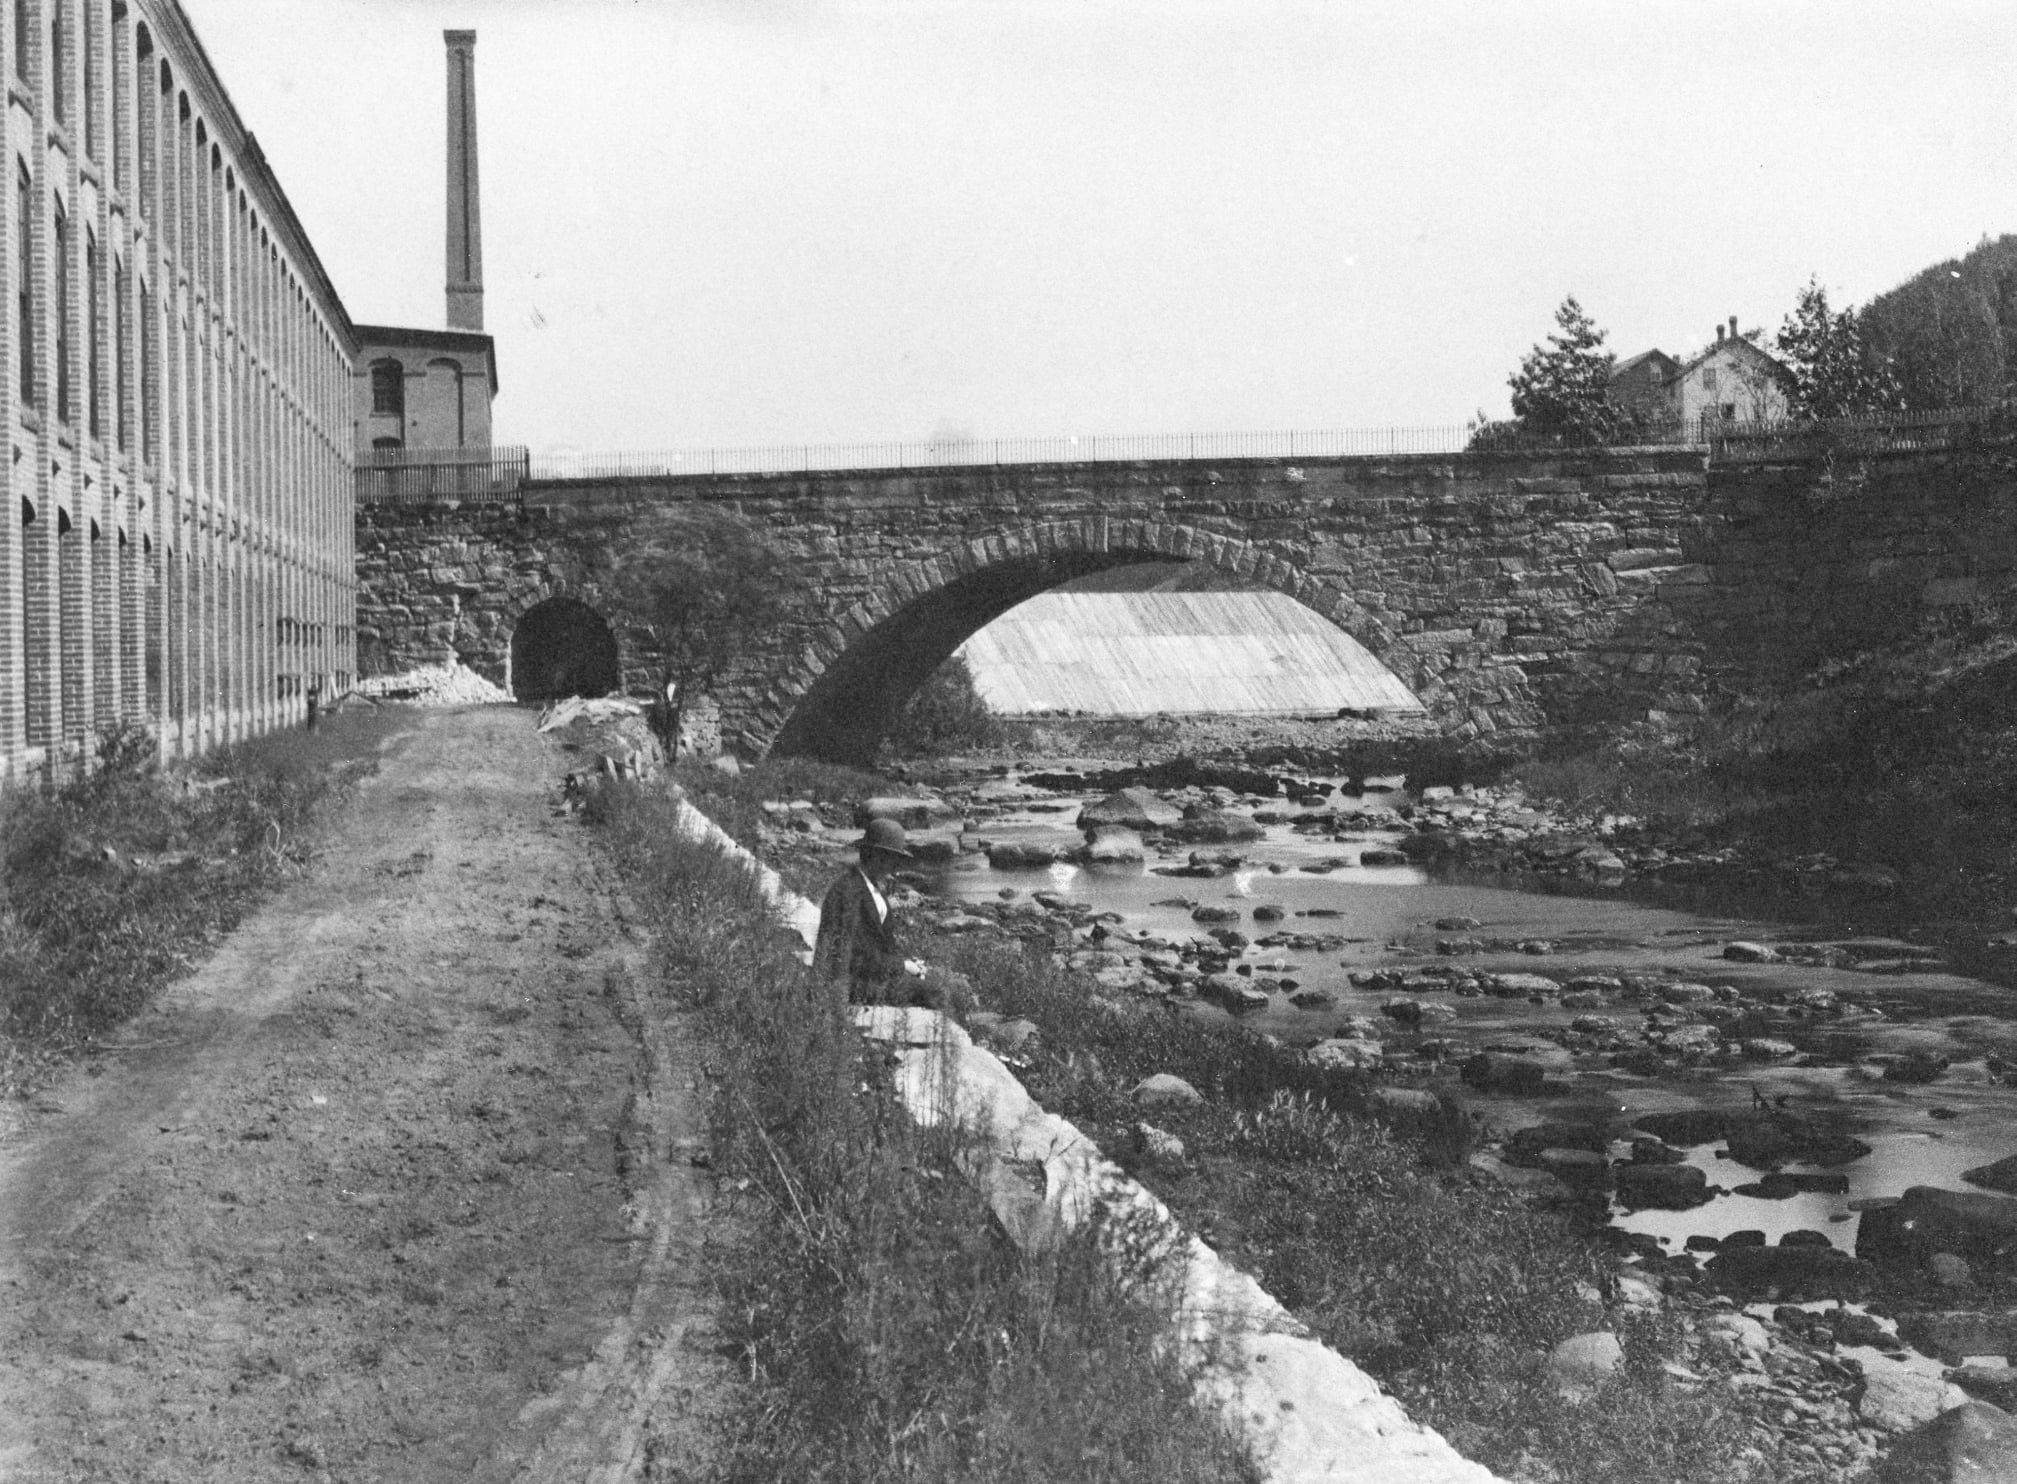
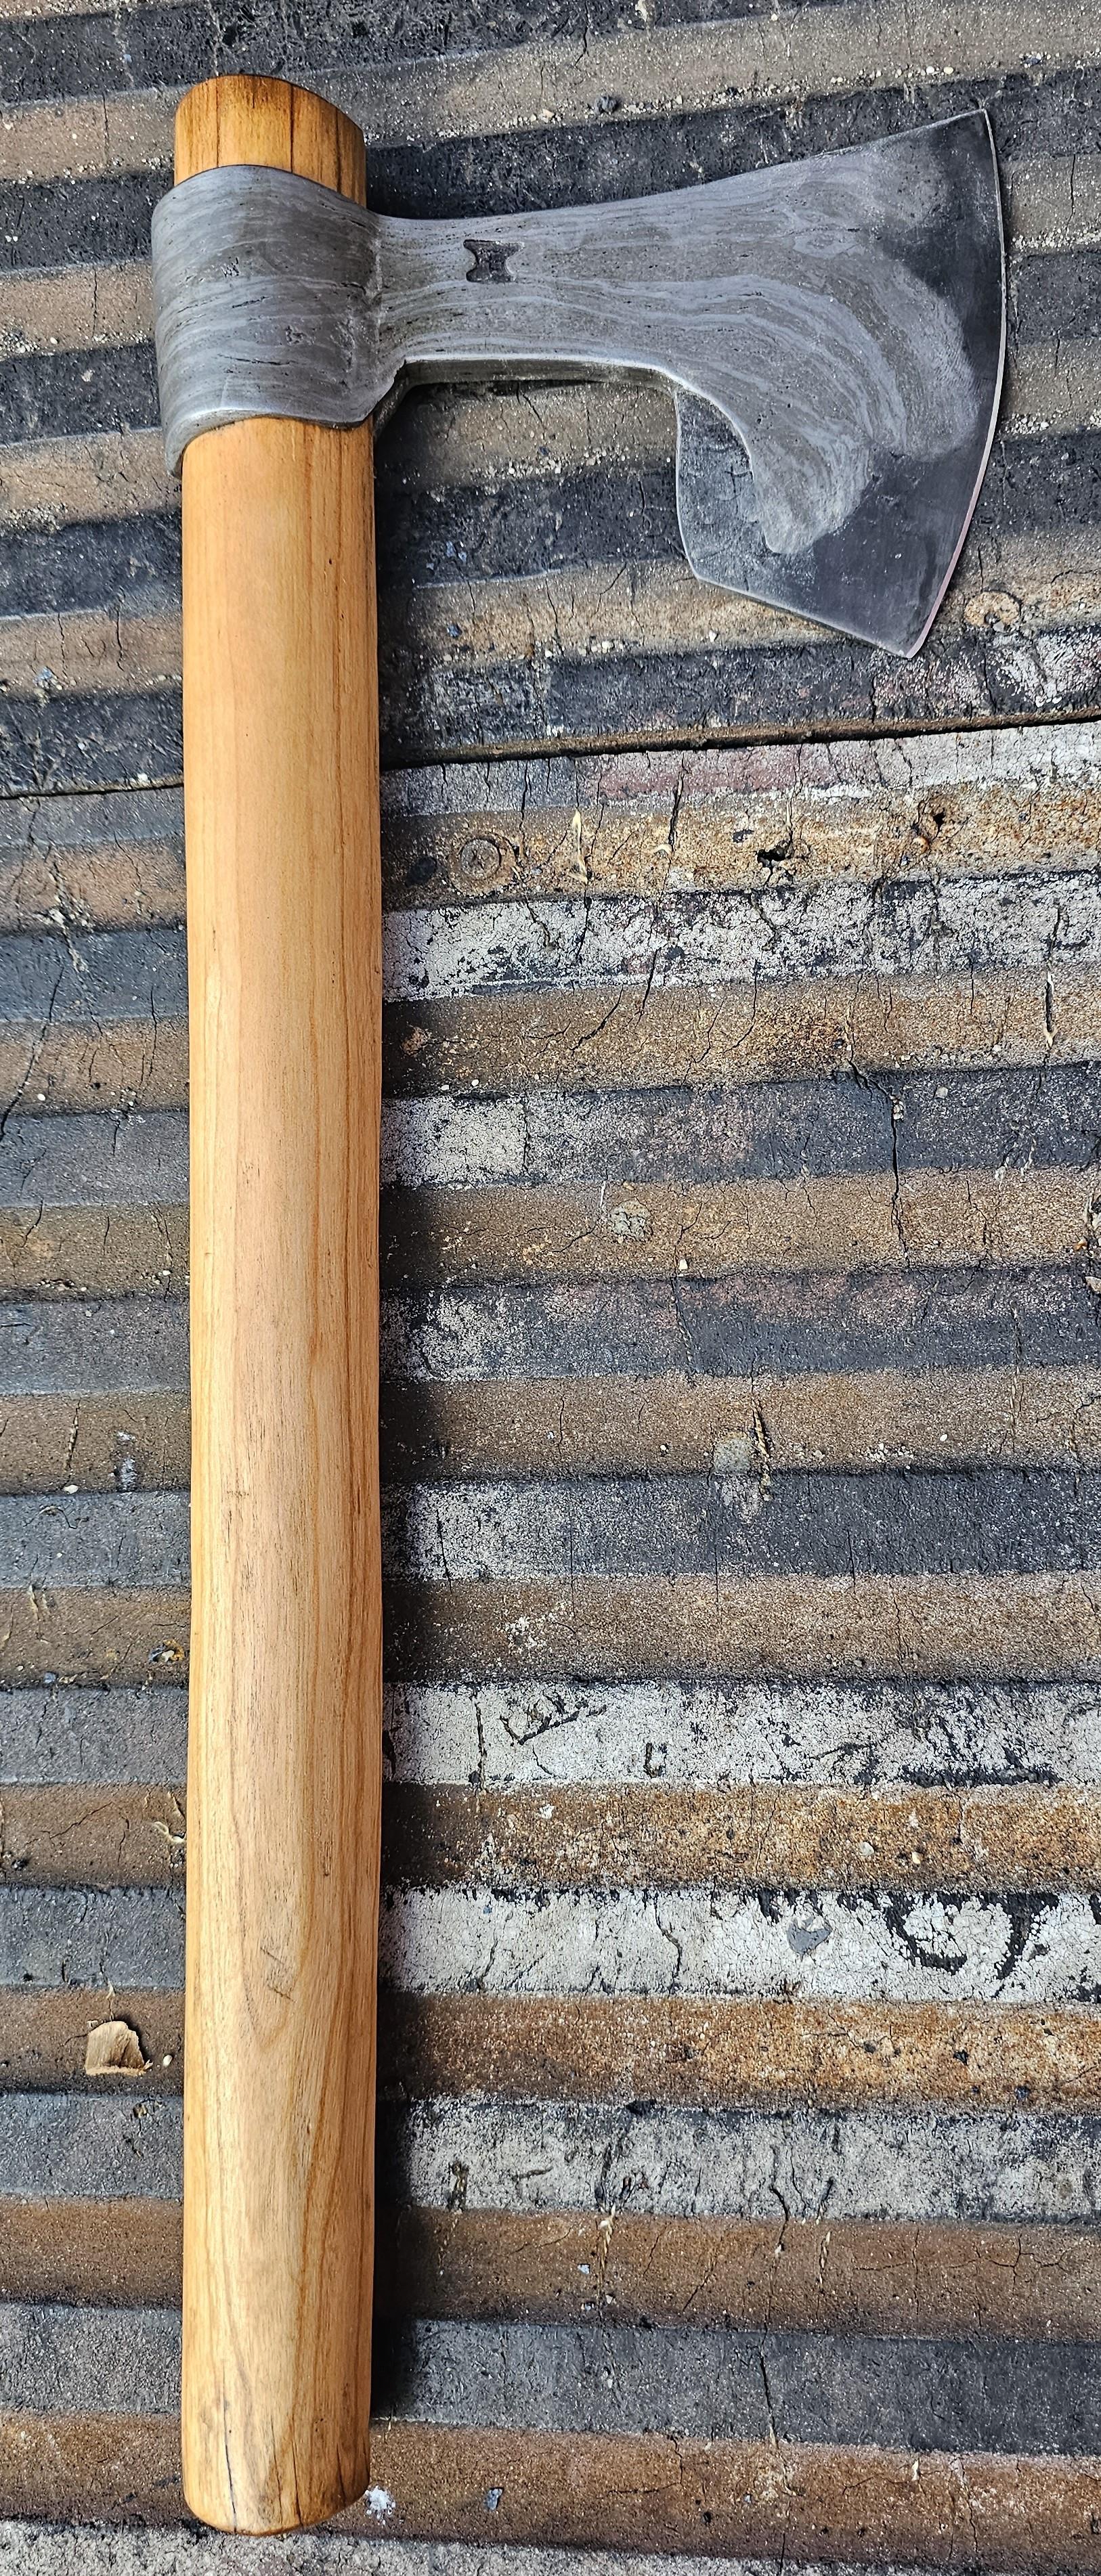
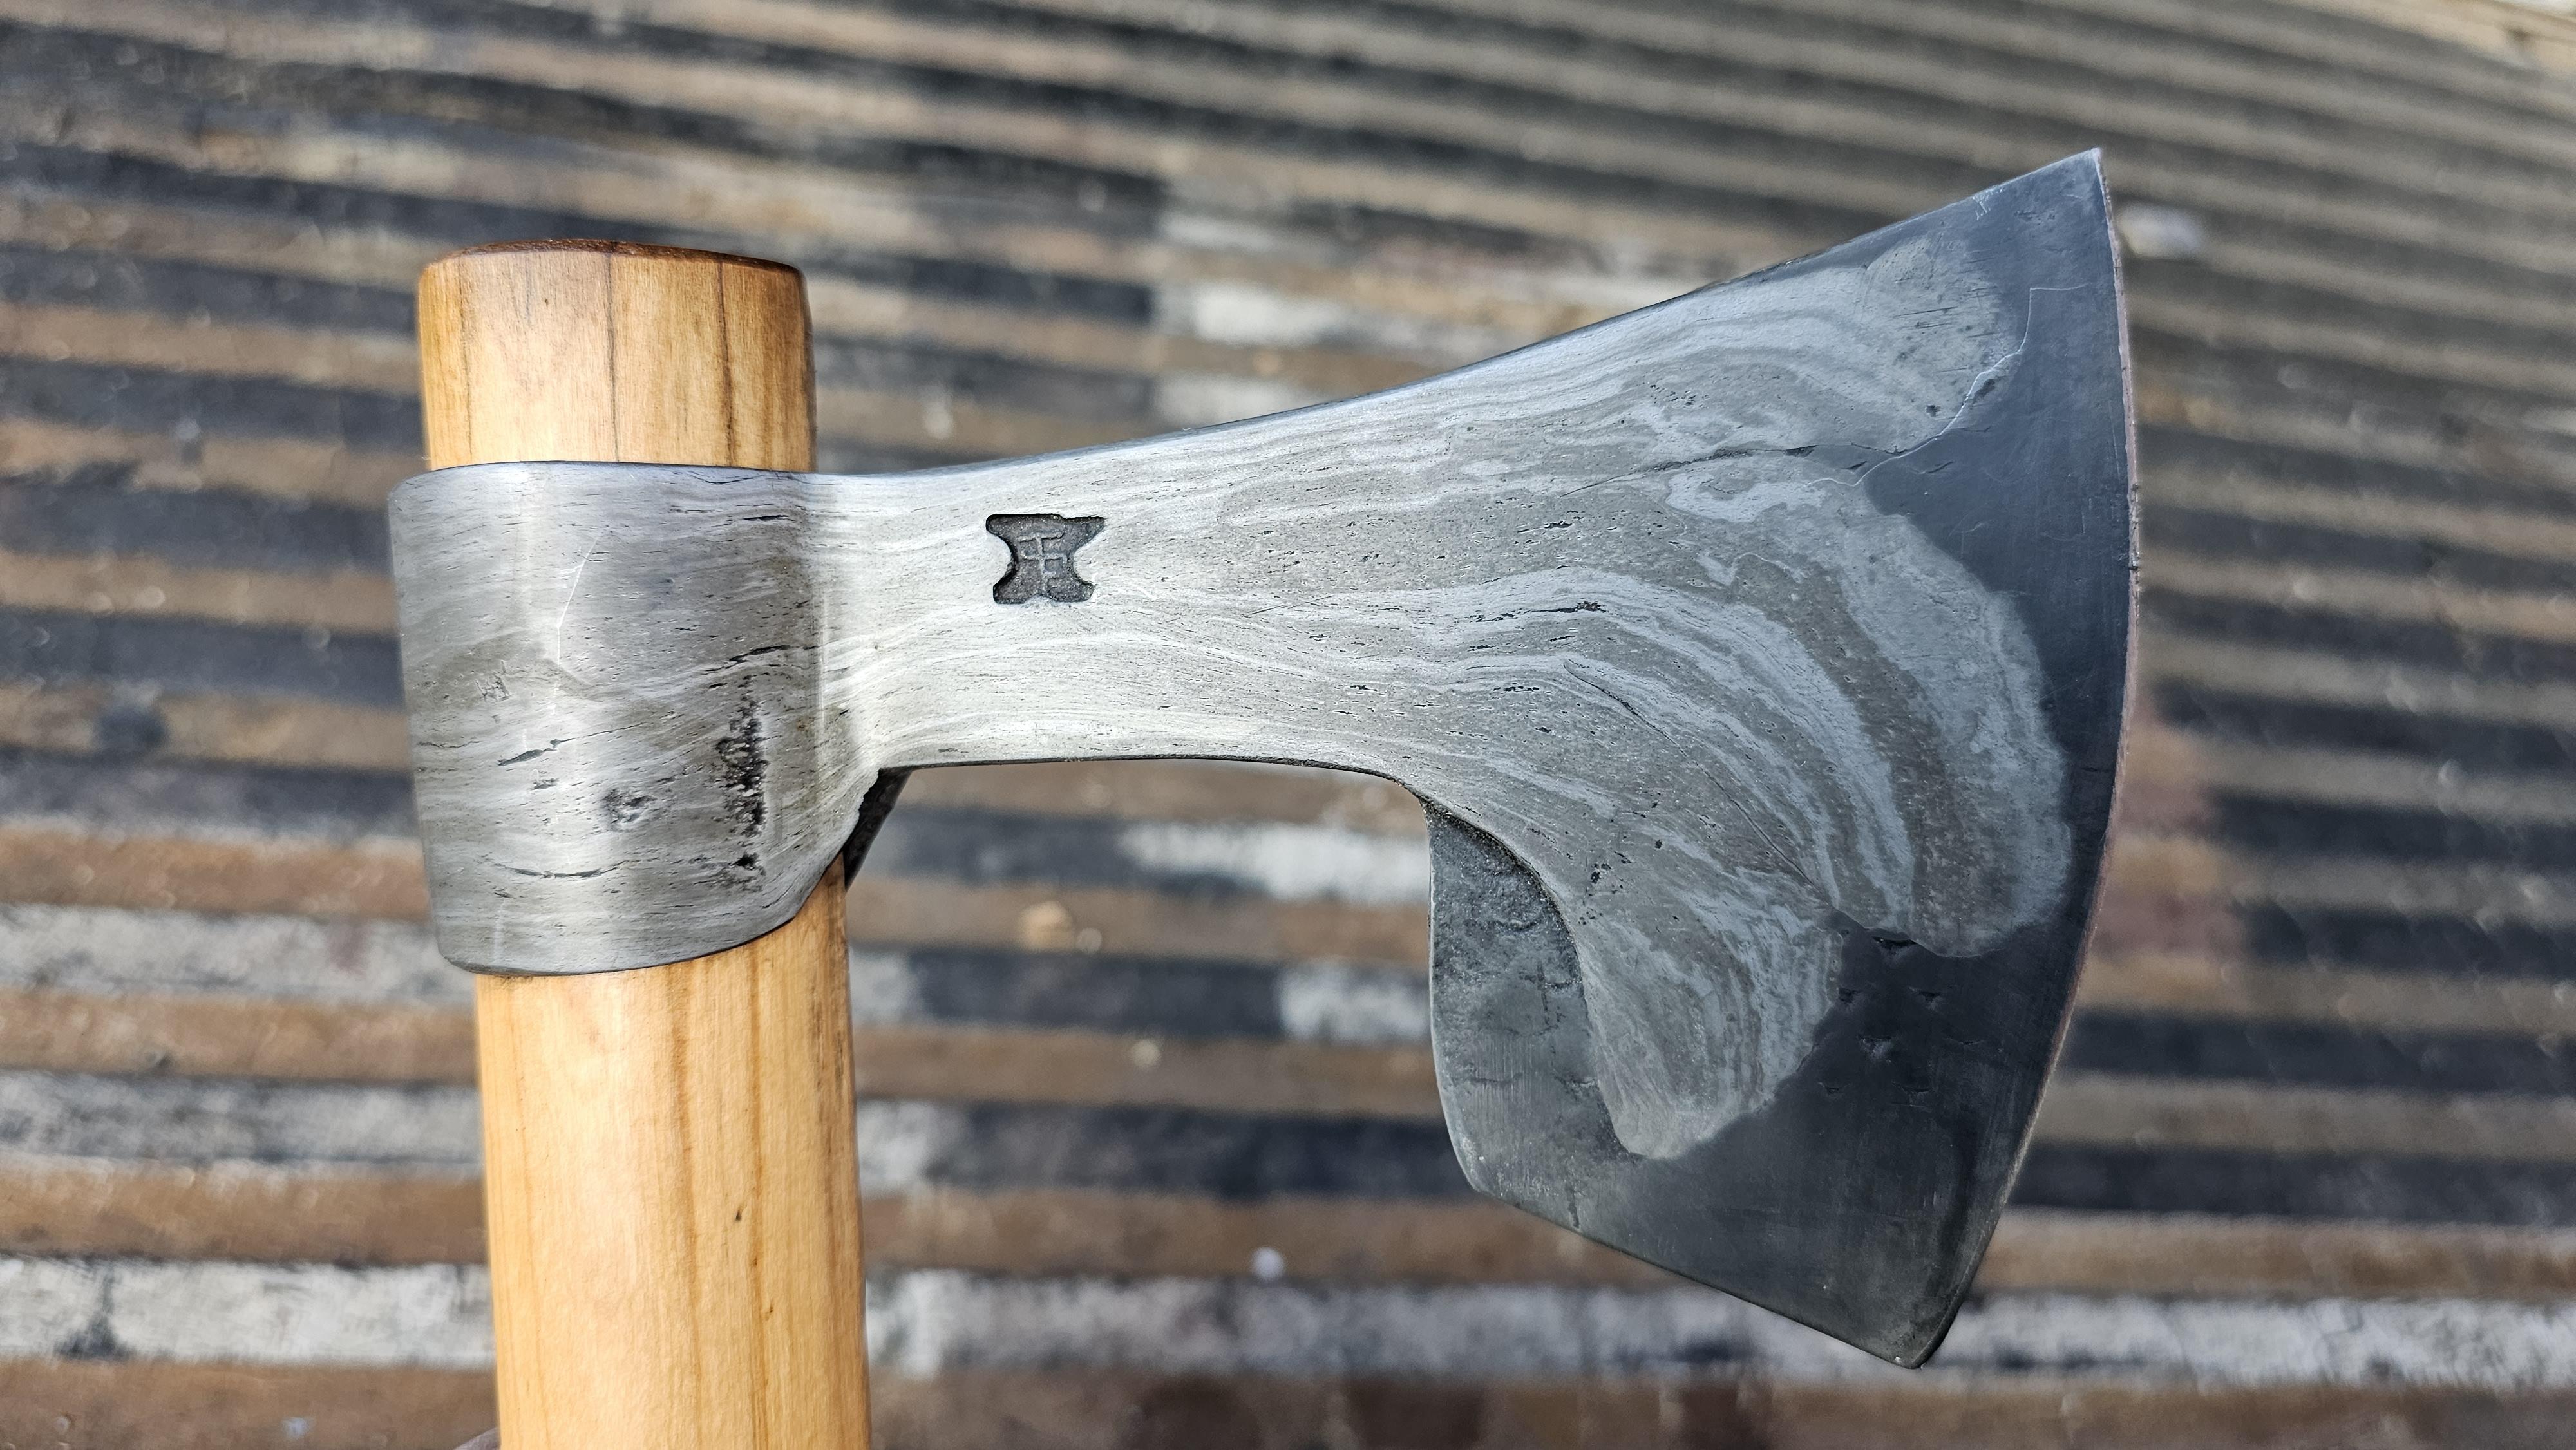
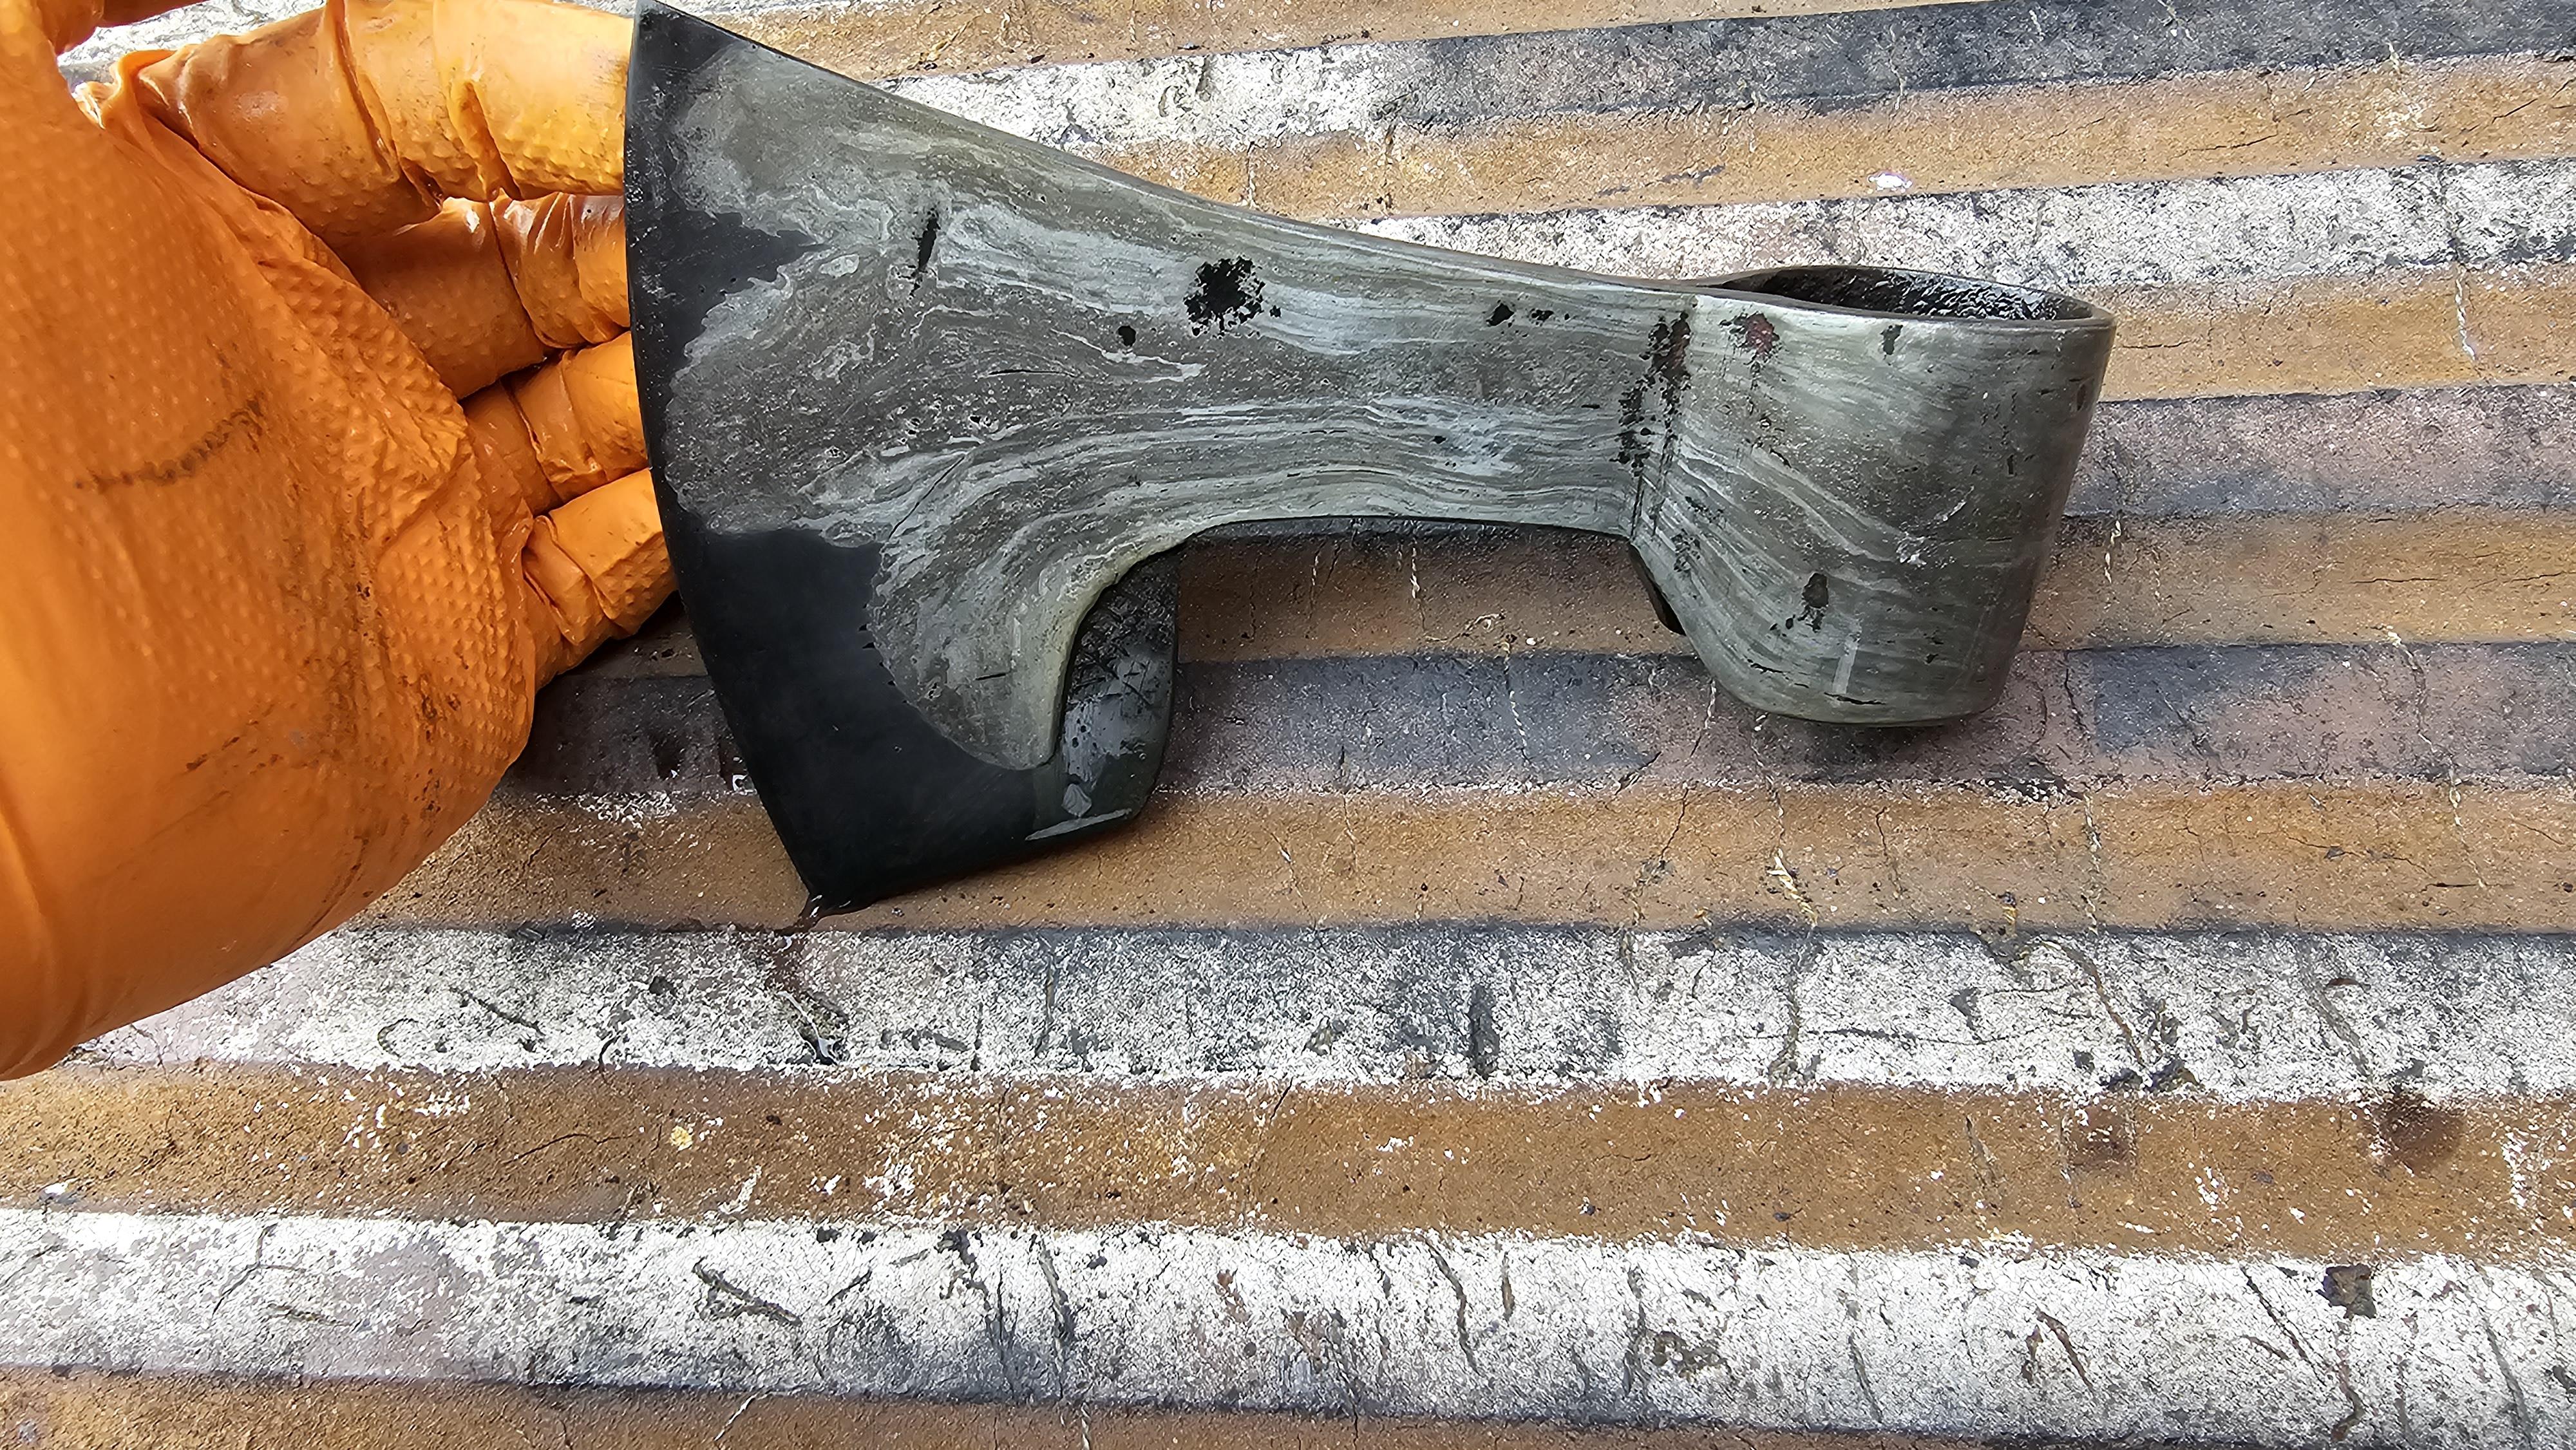
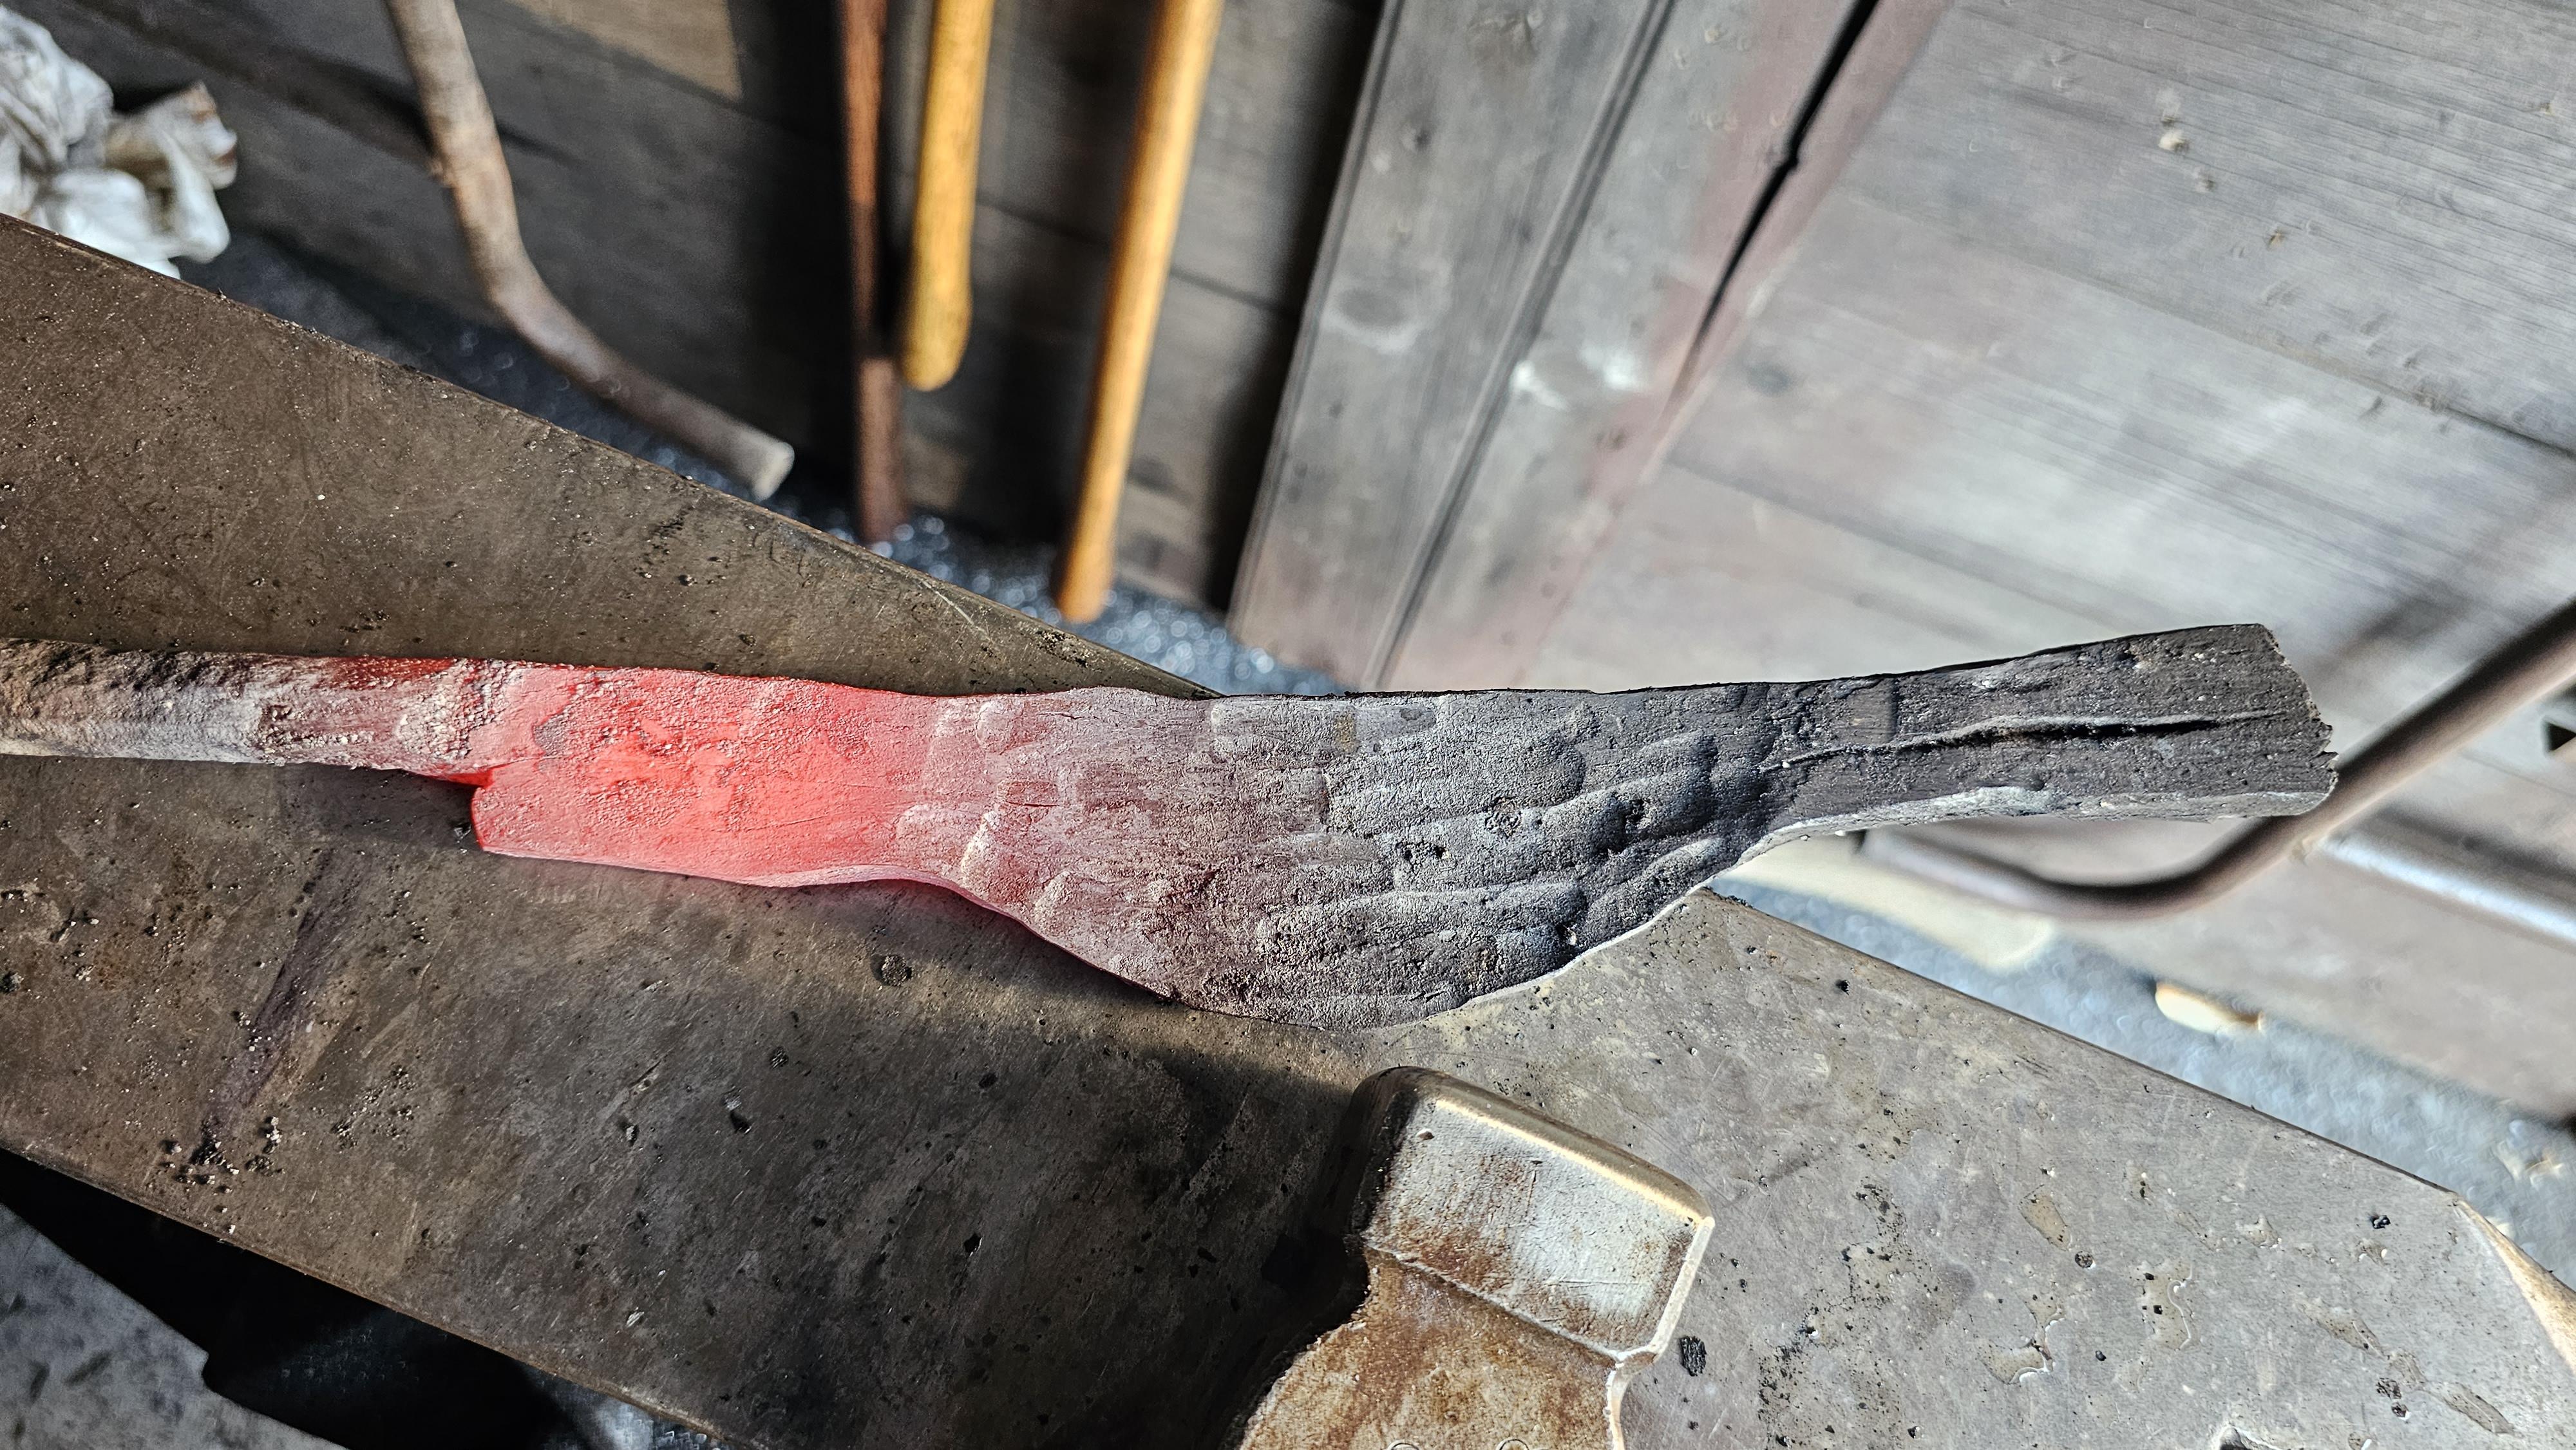
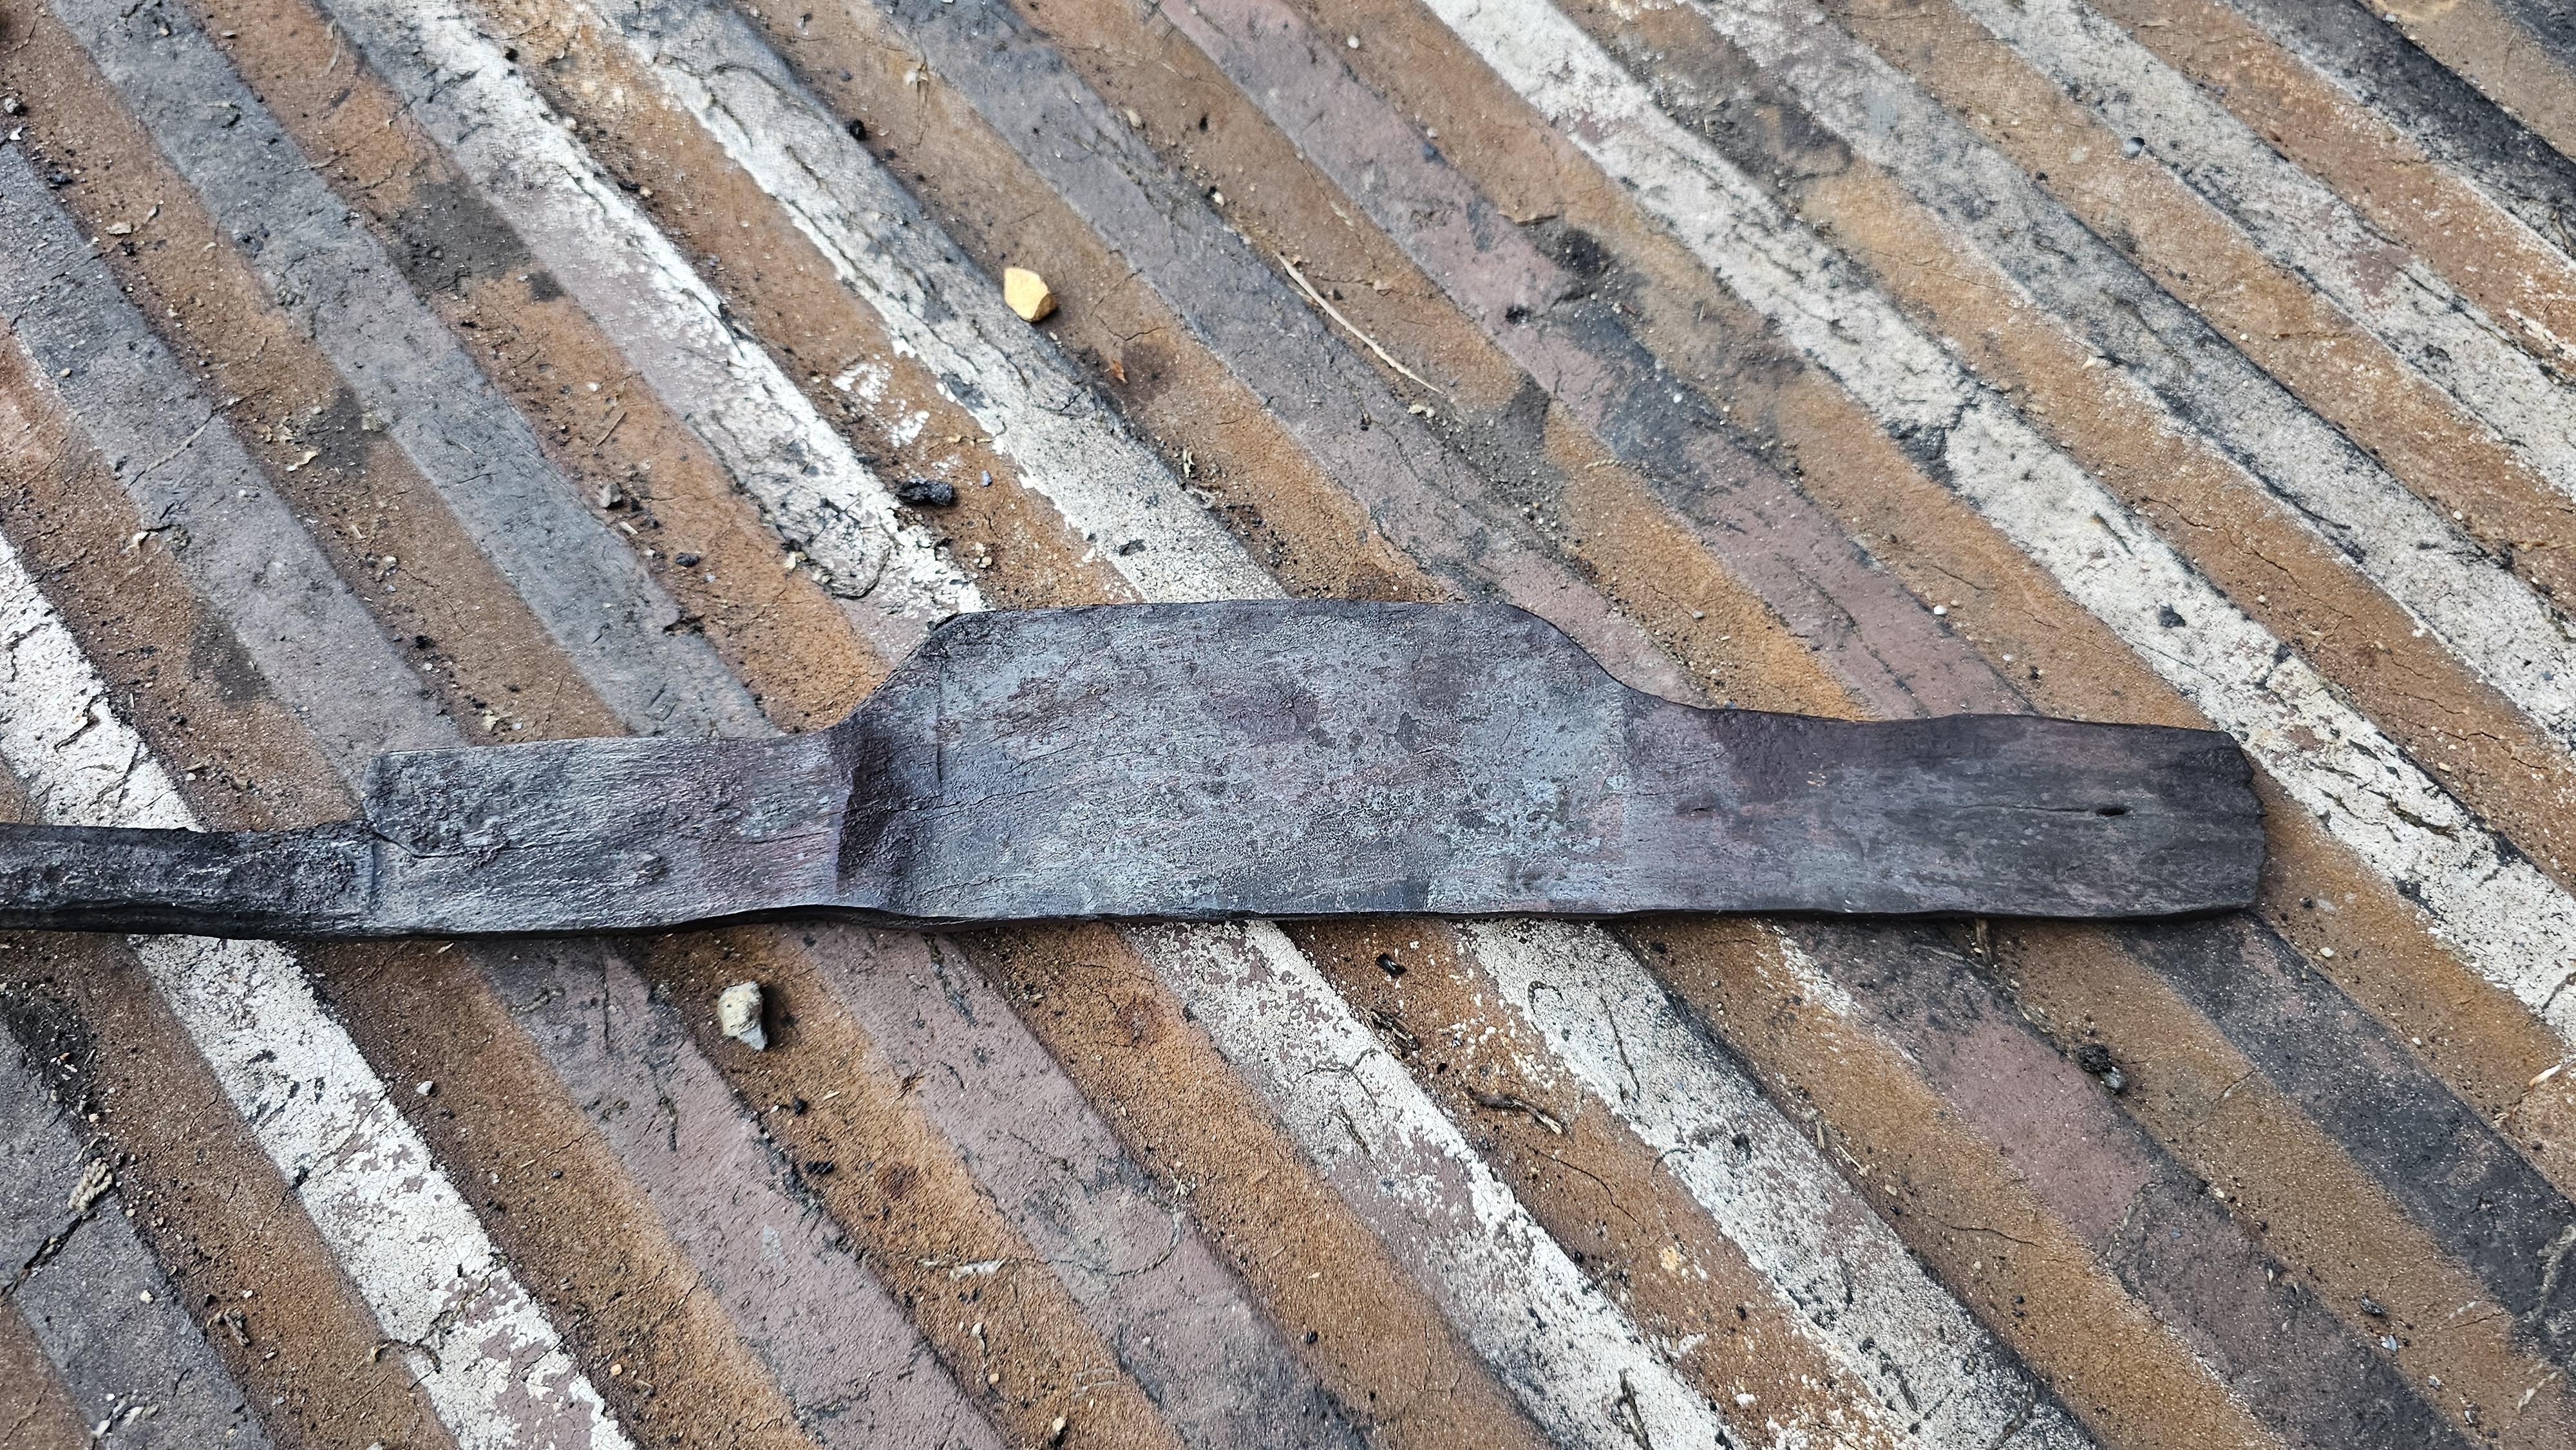
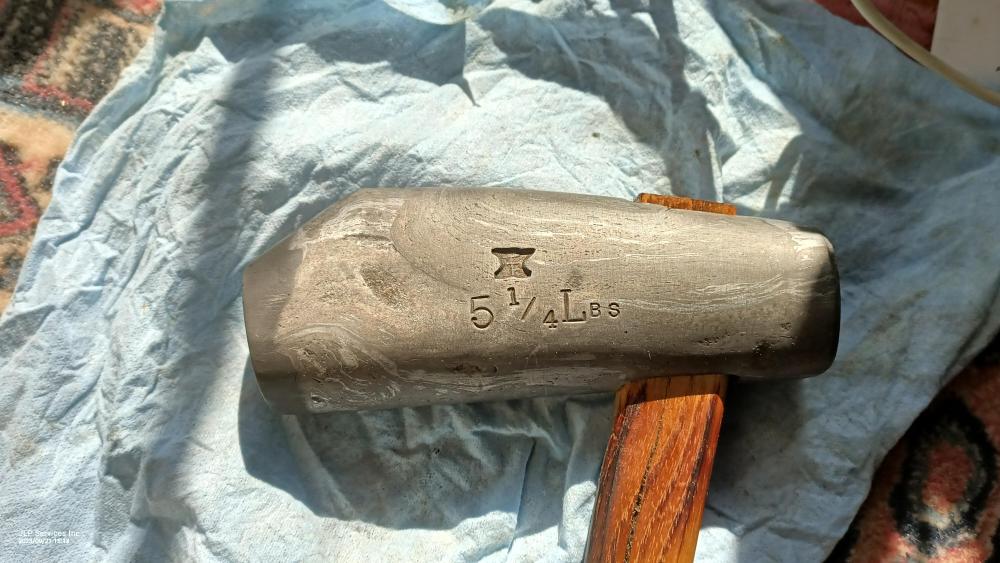
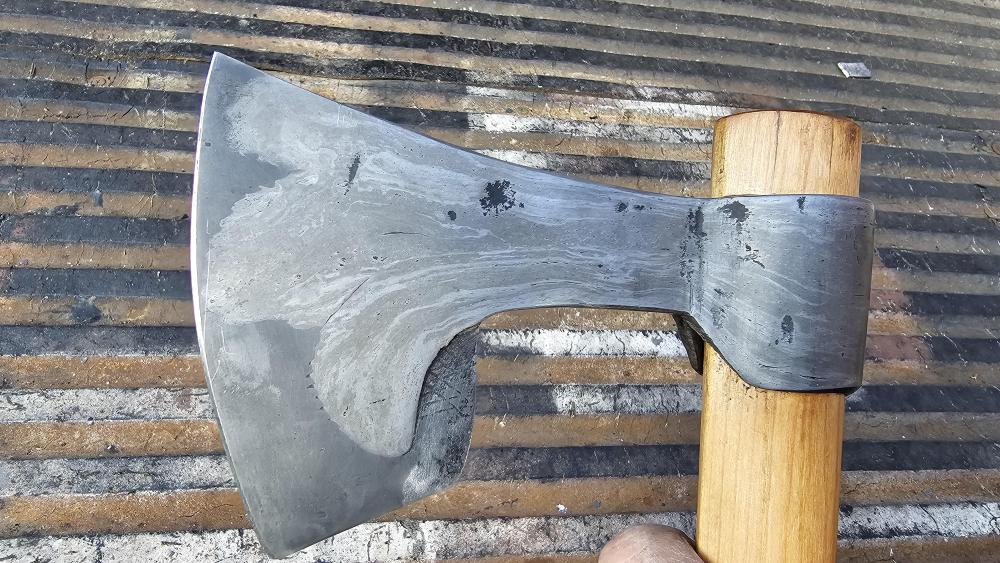
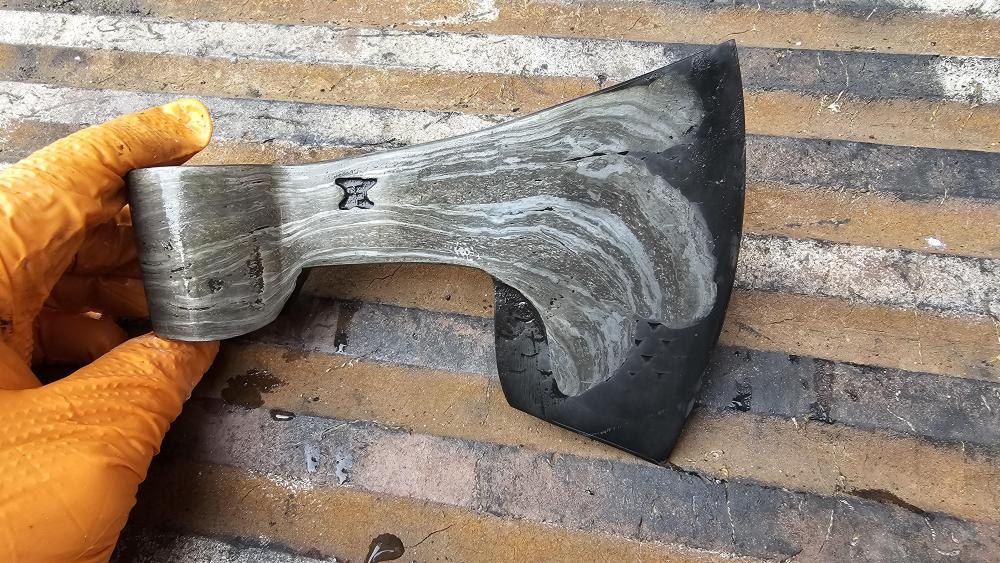
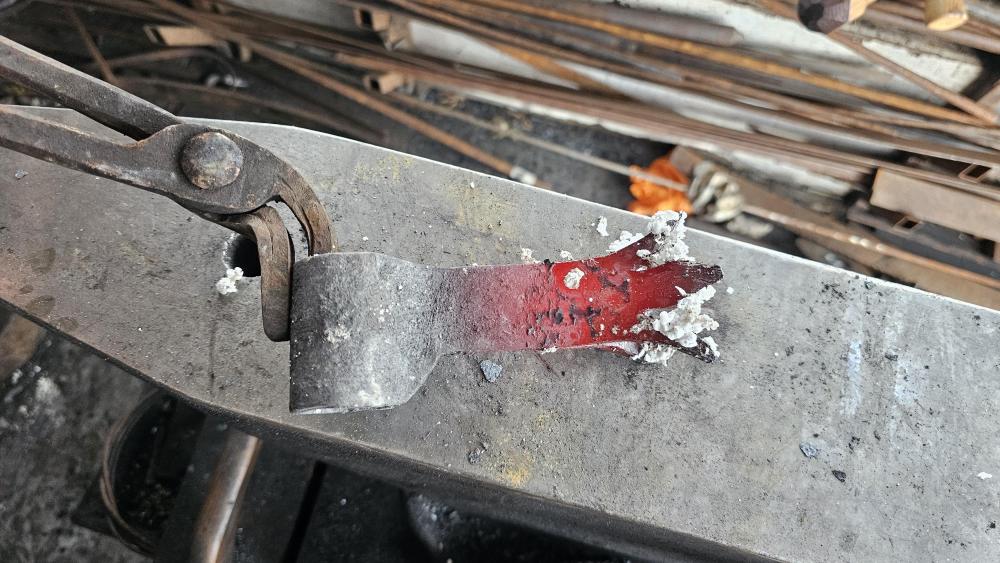
Thanks.. I will consider it.. I was trying to think of an appropriate name.. Anyone else get a sense from the hawk? I've been really enjoying manipulating the wrought iron's grain.. The farriers rasp was part of the patterning.. once side being lines. the other being the gouging.. This wrought iron was from Gilbertville, MA.. River find.. Came from what I would consider the original hand railing that spanned the stone bridge before the bridges collapse in a flood in 1938. One can see the hand railing..
-
What did you do in the shop today?
jlpservicesinc replied to Mark Ling's topic in Blacksmithing, General Discussion
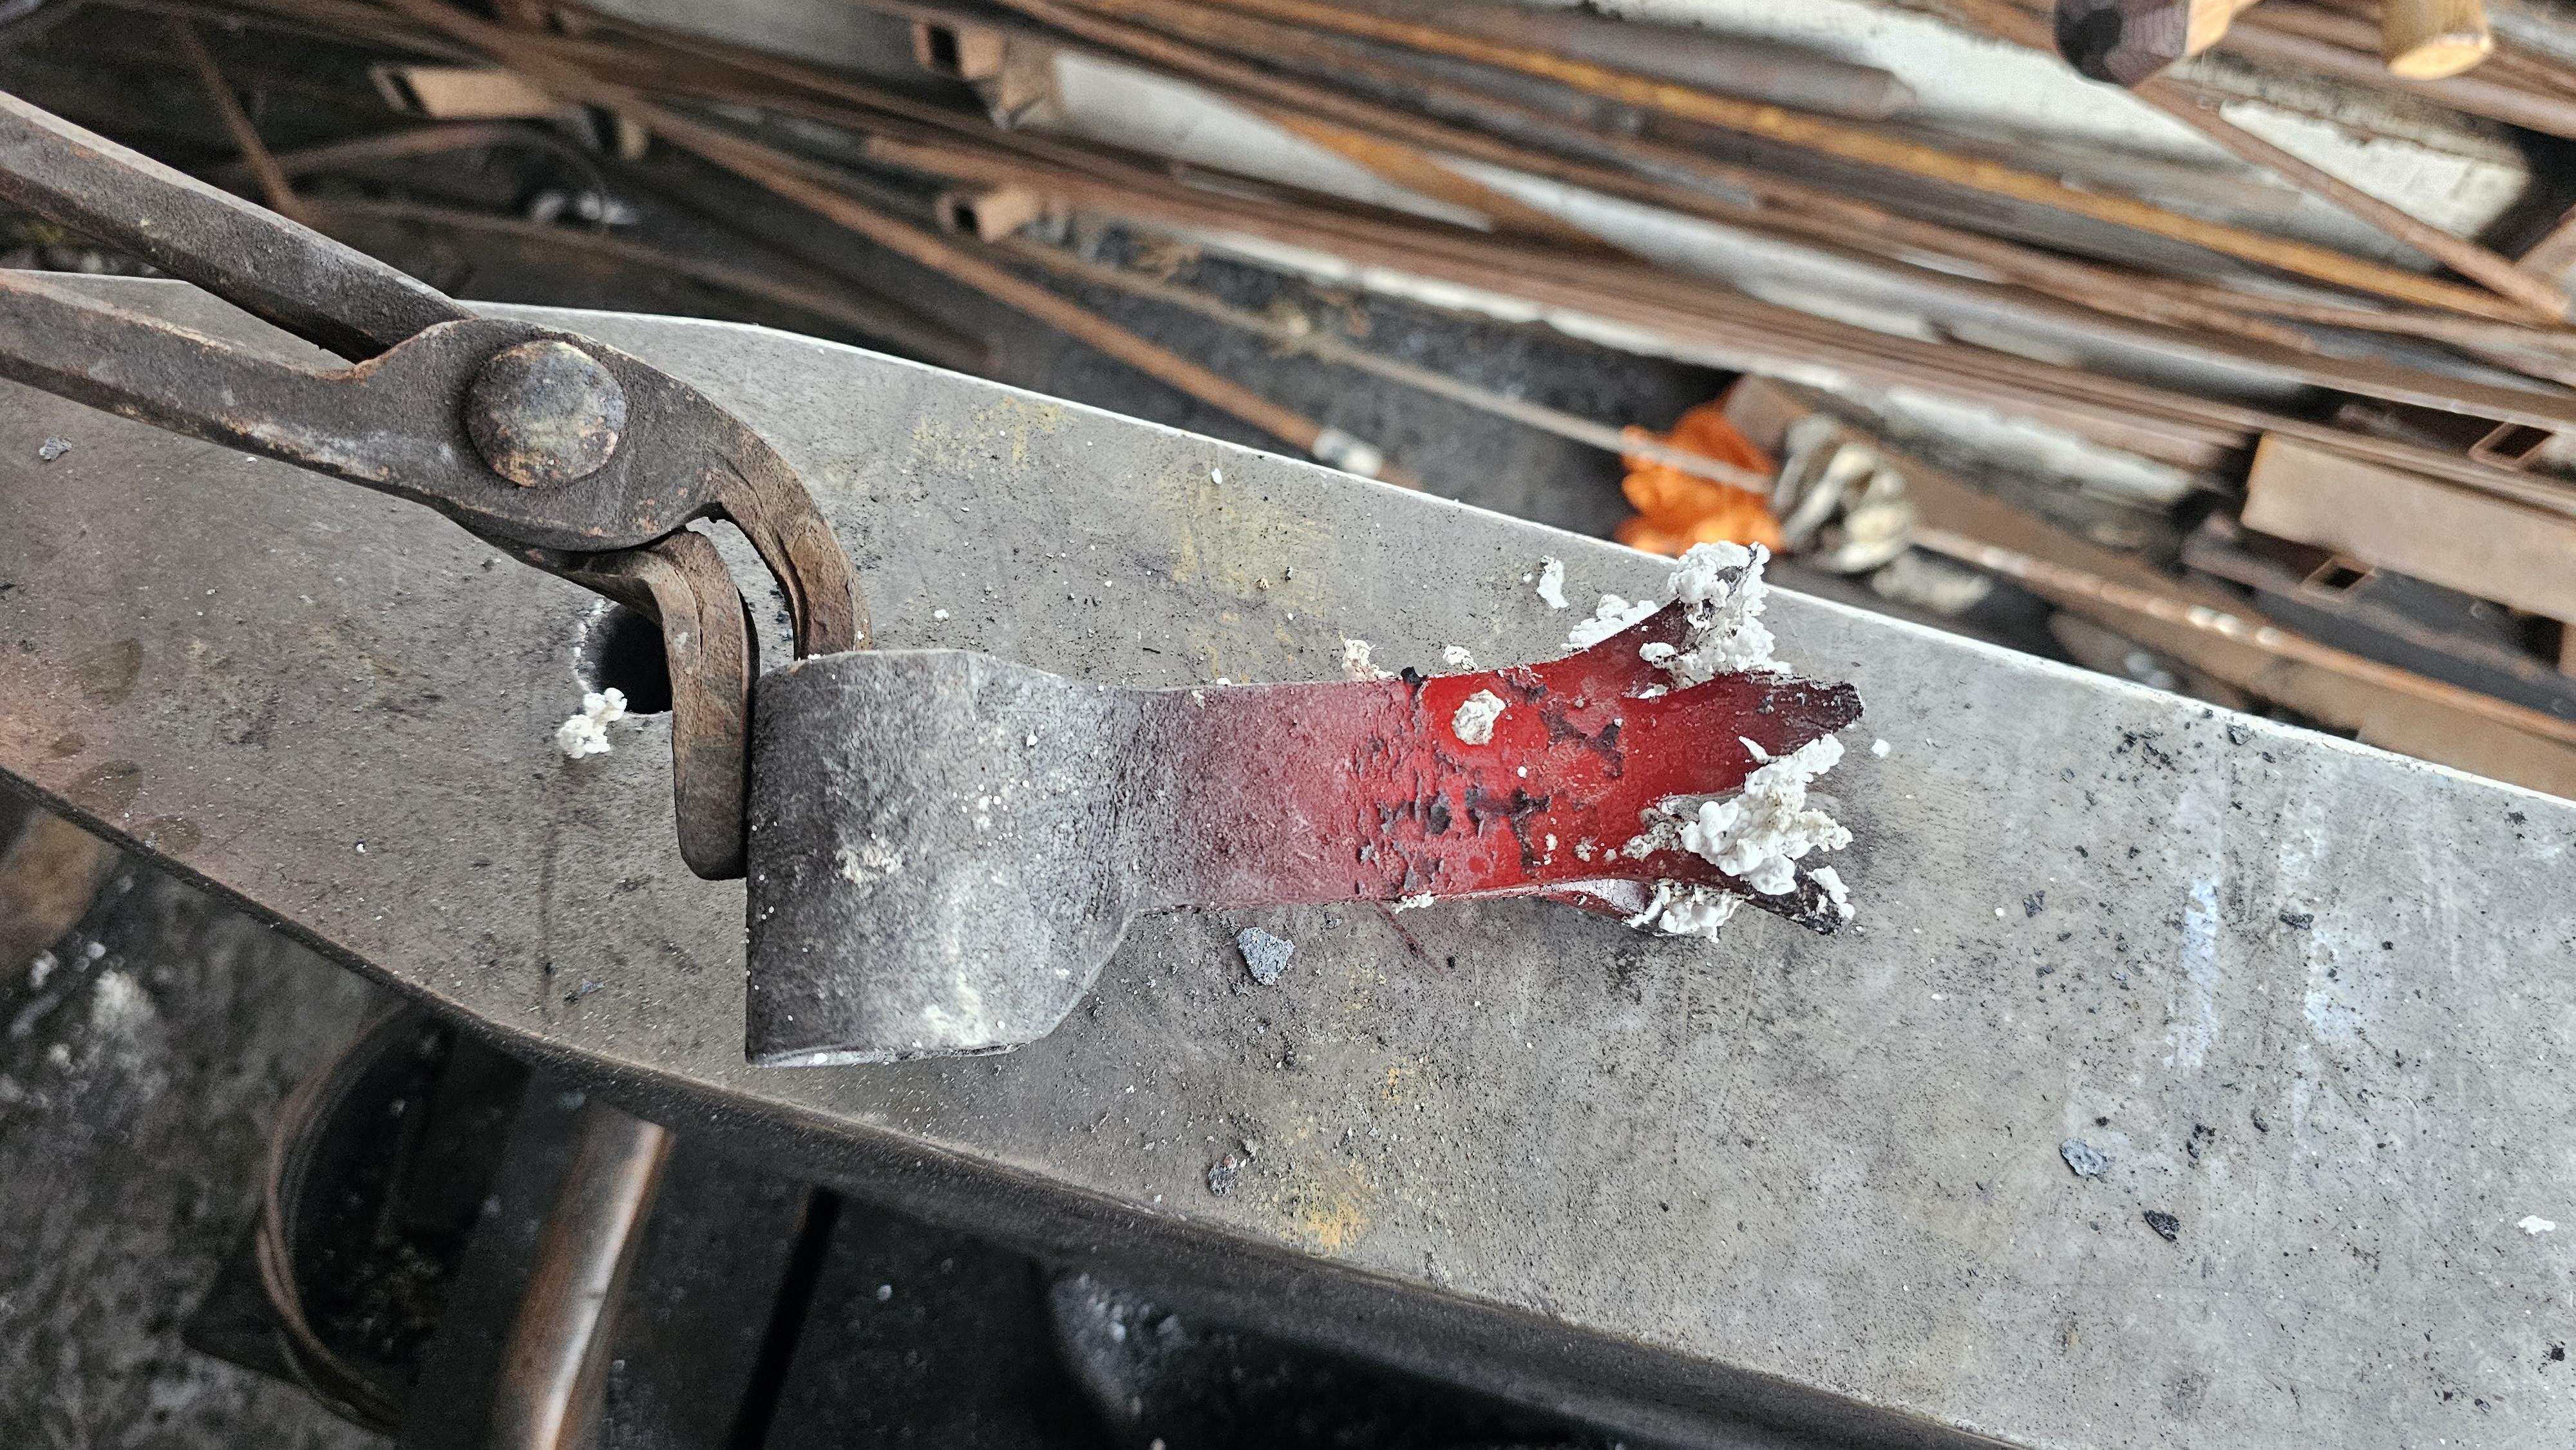
David,, Great advice.. I always use the mandrel to drift the hole to the final size. Most people won't because they are afraid the weld won't hold and don't want a failure because of the work they put in.. If it takes 5 tries to get a good one to me it's worth it. Doing it this way does 2 things.. I can choose the handle size based on how far the mandrel goes in and it tests the forge weld.. When you drift the eye, bring it up to near welding heat and get it in and sized asap.. I will use the vise as my backing for drifting. Every time I drift something that is welded I'm doing it to test the weld. A good weld won't pop.. If it does pop then I need to reweld it.. No better time to know the weld is bad.. Better now vs in the customer's hands.. A lap weld on tomahawks is a tough weld to do well simply because there is not the reduction in cross section. Fast light blows are applied just in front of the eye pinching the eye shut. This is where hoop tongs are well put to work.. The little notch under the blade just in front of the eye is there to help get that much more weld in and it kinda looks good. Great info.. -
What did you do in the shop today?
jlpservicesinc replied to Mark Ling's topic in Blacksmithing, General Discussion
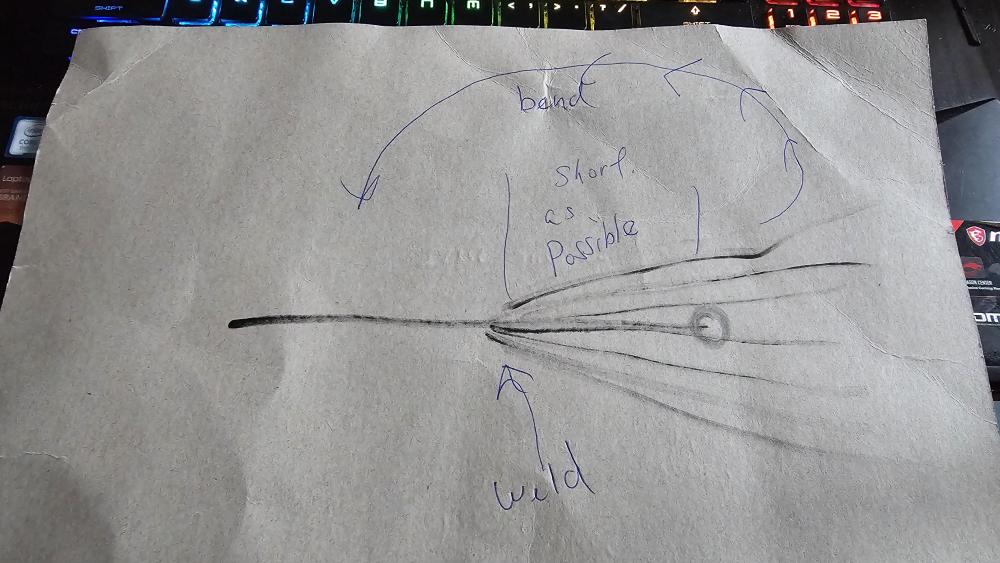
David. I have double pickup tongs.. Was the 2nd set of tongs I made 47 yrs ago.. I used them rarely back then. What I use them for now is upsetting 2" stock and over when under 6" long. The hoop tongs (I believe you are calling lip) will be your best friend if you are doing hawks.. If you wanna get really special make the inside jaw rounded and the outside hollowed some.. You will get a lot of mileage out of the hoop tongs if your doing hawks.. Your skill set though is good enough you should have both. Always set your welds at the eye first. Your best bet is to do an old fashioned hawk.. The modern designs are more based on axes vs tomahawks.. Trade tomahawks were very thin and used the least amount of low quality steel they could.. Forged crudely and designed to only last about 1 yr since the steel was so lacking. Somewhere along the way in the last 8 yrs the designs have morphed between axes, Viking axes and now you see a lot of combination type deals. Start small.. the starting stock can be as small as 1/8"X 3/4".. No need to pull the socket out of the eye.. Bend it over the mandrel and weld it.. Drift back to size. Shaina.. Love, love, love the drawings.. Great seeing your layout and follow thru.. Great skill builder.. Thanks.. Thanks.. Been trying to bring about my artisticness with the wrought and patterns.. Lotta fun. Les, no reason why yours can't even look better than mine. Handle is finished.. split out with froe, aged cherry. Draw to size with draw knife. scrapped then sanded then steel wool.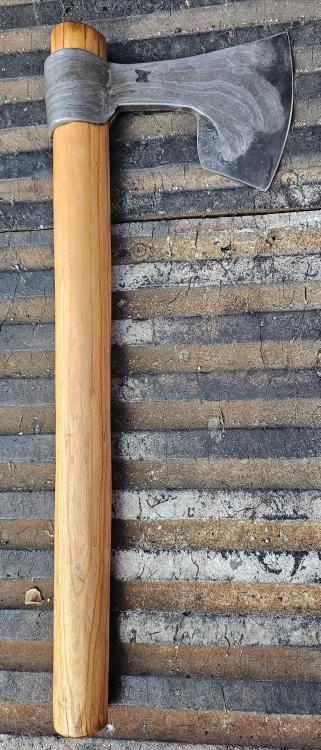

-
What did you do in the shop today?
jlpservicesinc replied to Mark Ling's topic in Blacksmithing, General Discussion
Thanks Larry.. I've been having fun manipulating the wrought iron to create patterns.. -
What did you do in the shop today?
jlpservicesinc replied to Mark Ling's topic in Blacksmithing, General Discussion
Alexandr very nice as always.. Very consistent.. Love it. Tomahawk finished..
-
What did you do in the shop today?
jlpservicesinc replied to Mark Ling's topic in Blacksmithing, General Discussion
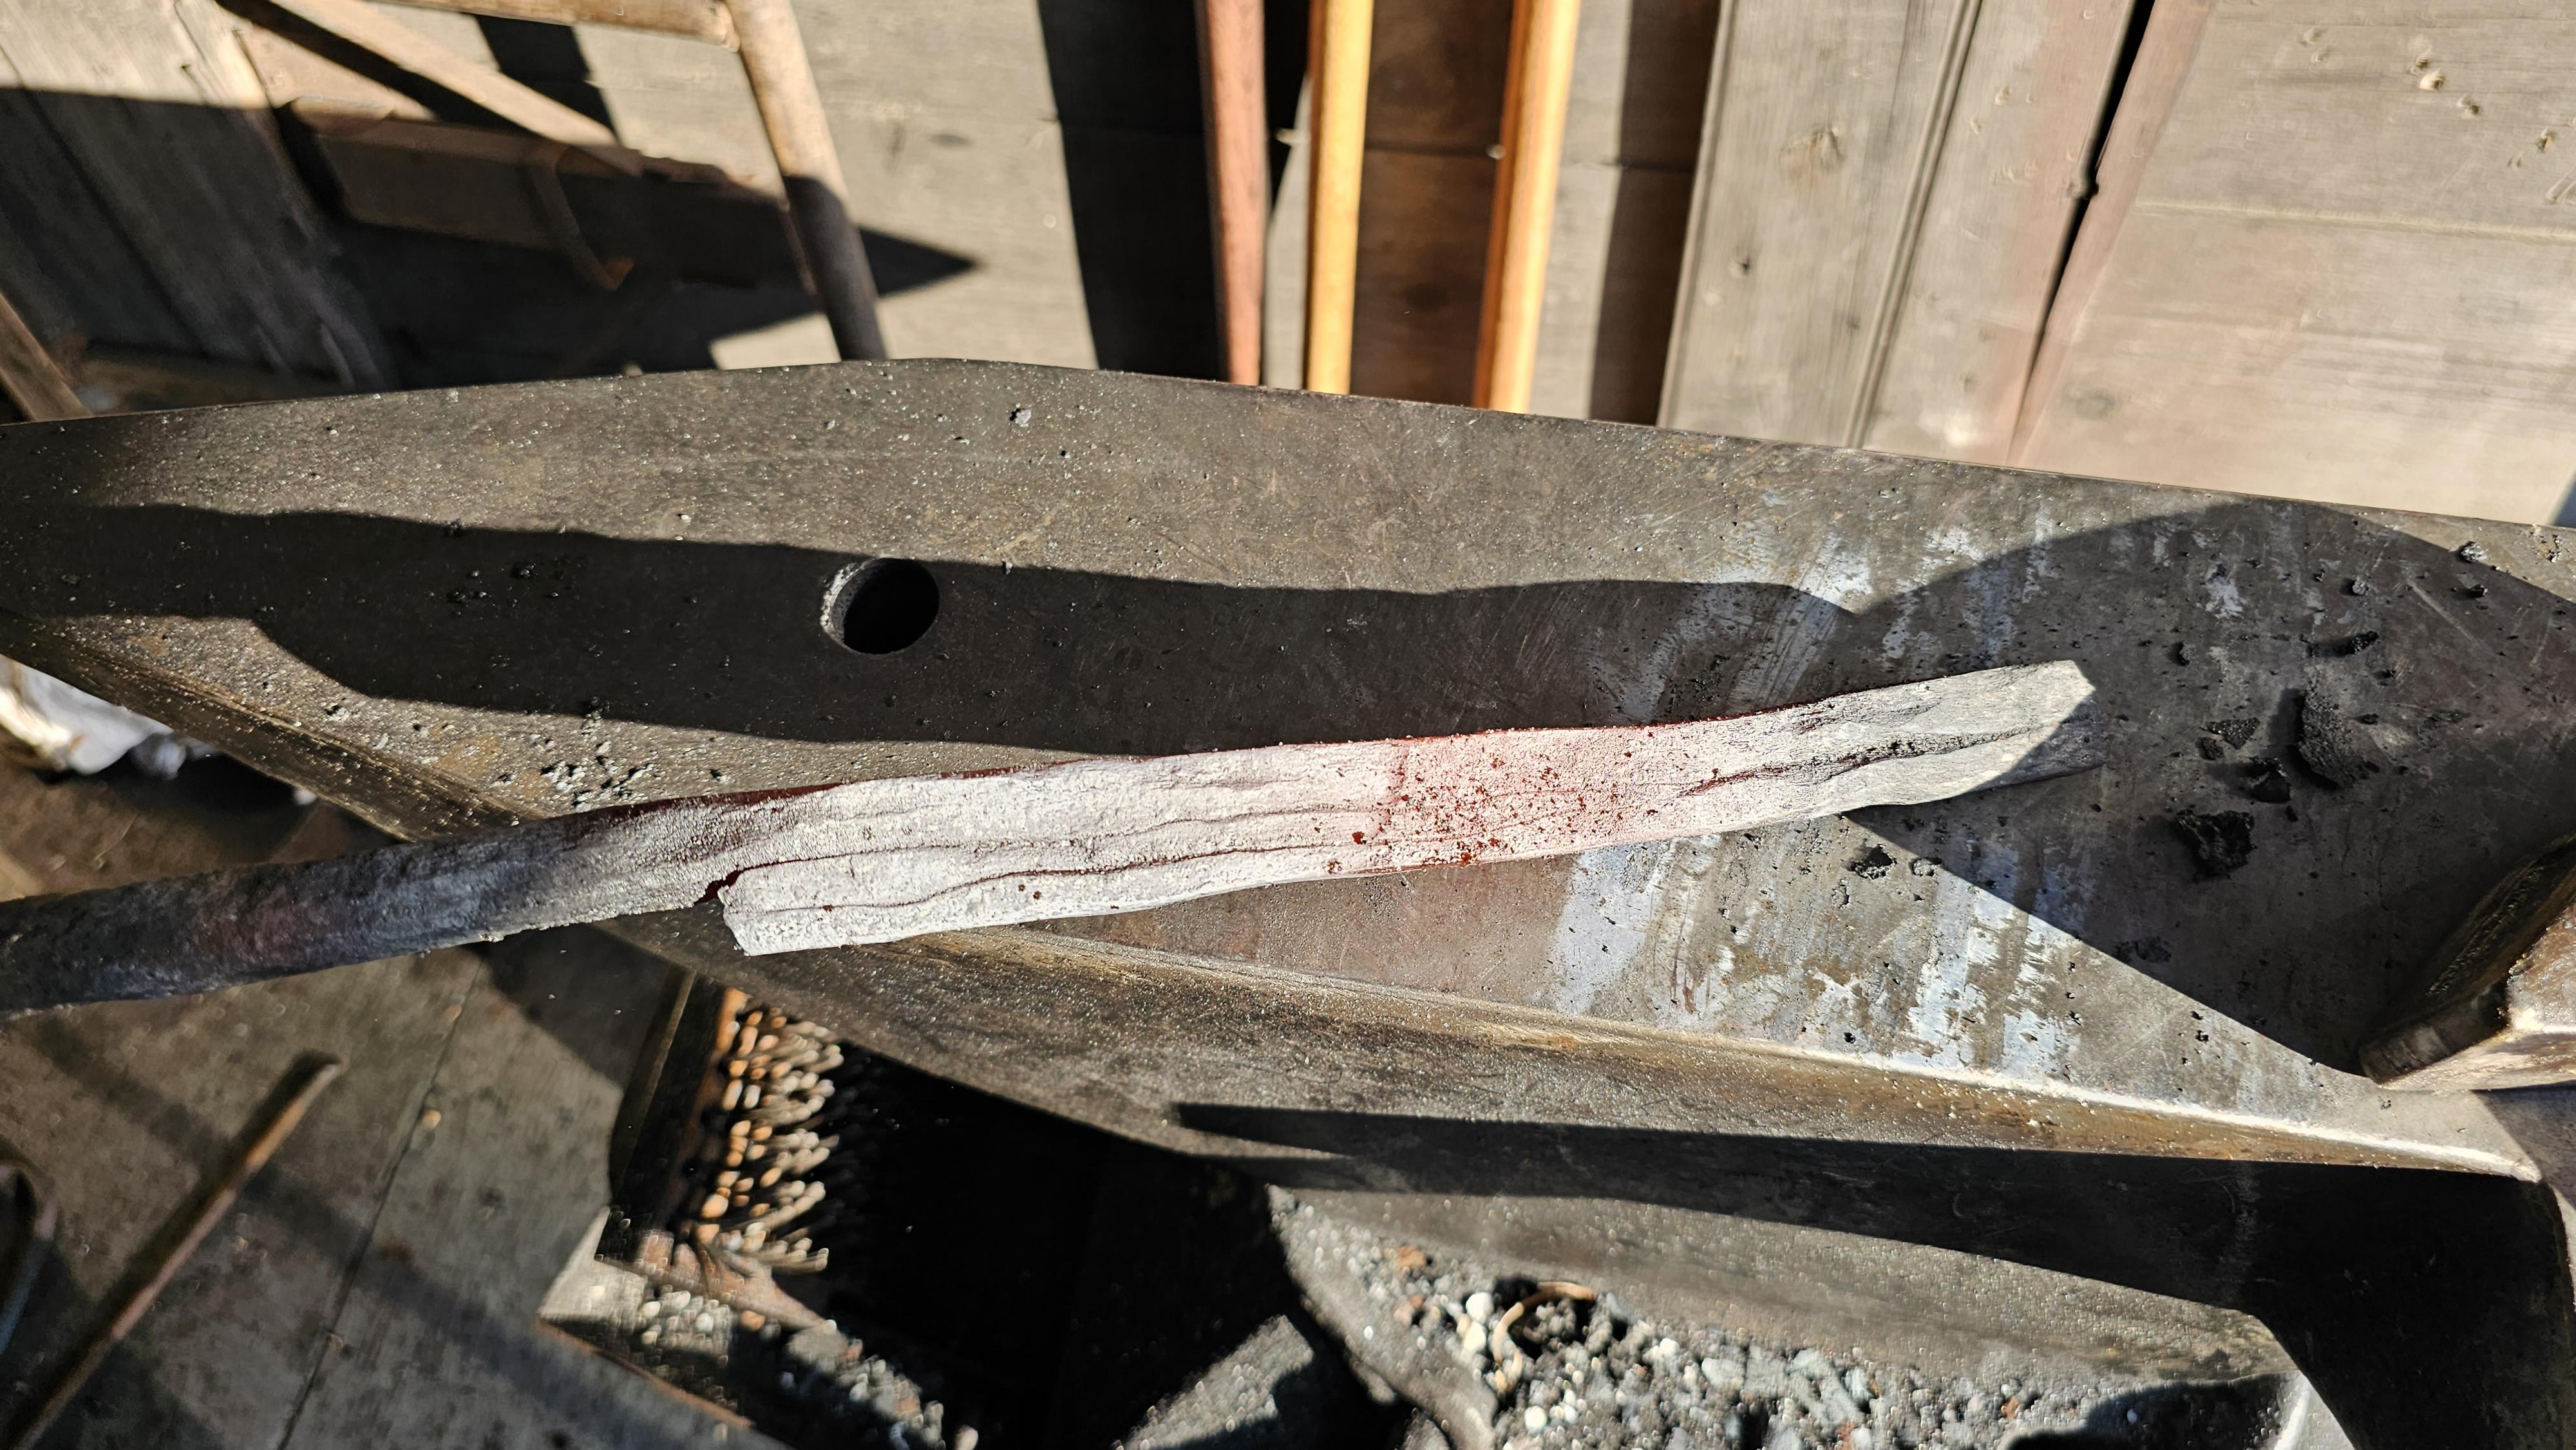
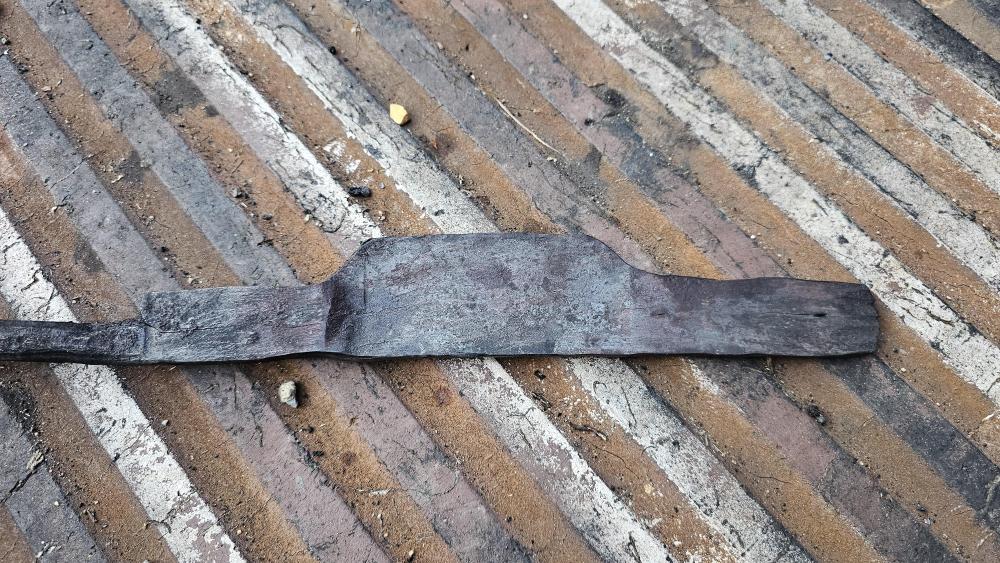
Rojo, that is some amazing work.. Super hard to get the corners to be sharp on the bottom.. How did the inside come out? Any cold shuts or folds? Das, super nice design.. Looks like you flattened the nose and eye sockets back in to gain the shadow and look of depth. past Saturday was NeB fall meet. I was able with assistance from young Mr Yaggy get the eye punched into the steeled wrought iron. No proper sized punch nor drift so made a proper drft on Sunday at the Sterling Fair demo.. I also started work on the fancy Tomahawk I was going to enter into the Northeast Blacksmiths Associations Fall meet at Ashokan NY.. Stacked wrought iron and drawn against the weak side of the welds. Sadly over the past weekend I came down with Covid and have been incapacitated since Monday. I'm feeling about 75% today thursday with only a slight sore throat.. The hammer will need to be drifted and upset more around the eye.. Drift is 3/4" sq back to back and 3/8" X 1" upset, stacked and welded onto the side. by the way.. I do not like doing large forge welding jobs in public like fairs.. At blacksmithing demos or events its a free for all..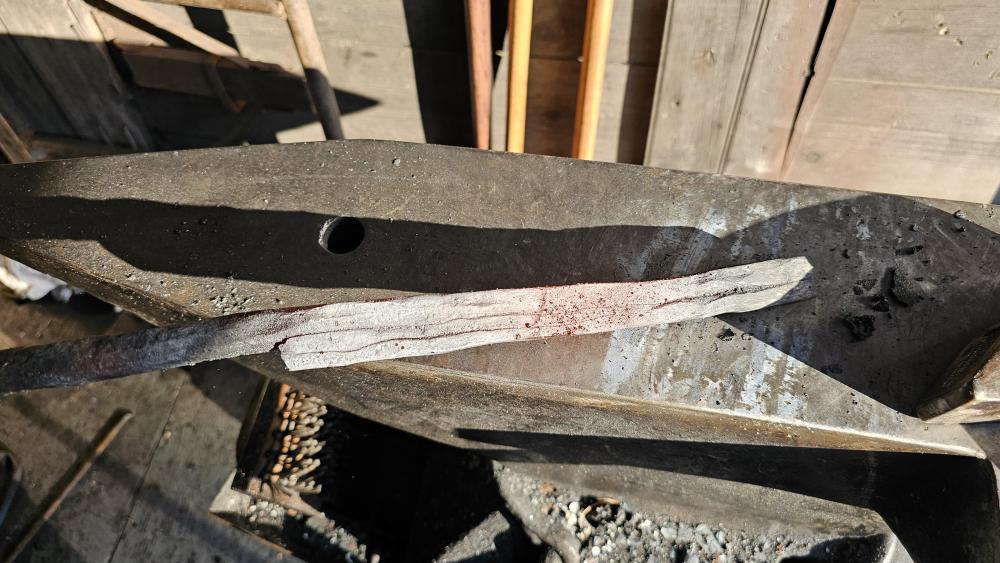

-
If you use 1/4" you will have a terrible time bending them once welded. On projects of this magnitude it's best to follow the recipe as closely as possible.. Once you get comfortable making additions to a recipe changes can add flavor and depth.. If all you have is 1/4" you could forge the bars to size.. You can use square vs round.. The same principles apply for any multi bar twisted handle.. the count is based on shaft material circumference. If you flatten the ends you can change the bar count but will also increase the difficulty in holding them. Since the weld is on the inside you have to scarft the ends of the rods before welding if you want it to be finished nicely.. I left the ends less tapered so people could see what was being done.. Ideally everything should be smoothed and blended well. Scarf both ends to the rods before welding..
-
Give it your best guess.. Love to see some sample pieces.. Figuring out the process while forging would be the best way.. But drawings work too. I won't offer any assistance.. If you get it right I'll let you know via PM..
-
The single inverted twist is easy.. Just run the bars along the finial and weld them.. Then pull them back gracefully back over and reweld. Then twist.. It's good for people to use their forging brain power to help establish complex thought processes.. I highly recommend taking a drawing class or just doodling.. There is a great tablet app called Concepts.. Has lessons and everything. The double inverted twist I did as a joke or complex puzzle for other smiths to oogle over and speculate on how it was done. NO one has figured it out. So, that one will go to my grave unless someone does figure it out.. That and the hard way flat basket twist.. Of course, if the demand is high enough once the school is open I'll show it. But that's a ways off. All the videos I've produced have been designed to be watched 3-5 times.. Watch it Once or twice then go and try it a time or 2 or until one gets stuck.. Then watch it again. By the 3rd watching more or less the skills should be on the way to being understood and the little nuances should be seen. Then the videos will make more sense as does the process. All the footage from those early examples are missing. I believe it was on my NAS that crashed. Put the finial on first.