HEAP of JEEP
-
Posts
203 -
Joined
-
Last visited
Content Type
Profiles
Forums
Articles
Gallery
Downloads
Events
Everything posted by HEAP of JEEP
-

Forged Stainless Steel Base For Picture Frame
HEAP of JEEP replied to 7A749's topic in Member Projects
As always, Steve, your work is amazing. The only problem I see.... with how nice you made that base, the heart frame looks totally out of place... like Mutt and Jeff. lol. Gonna need to make a much classier picture frame for it now. lol. The forging stuff is great, but your finishing work, like on your other pieces, just fascinates me. Great work, my friend. -
I've always just used the forge. When I'm done for the day, I just leave the coal piled up... its anthracite, so I don't have to worry about it going out... and put the blade in the middle of the pile. I think it still cools down to quickly for me to to say I've properly annealed it... usually cooled down in 4 to 5 hours, but I've not had any issues drilling holes in the tang or anything, so it must be softening the steel enough... maybe just a couple of normalizing cycles would do the same.. I don't know... still to new at this myself, but it works for me, so don't know that I will change up the routine any time soon.
-
I have forge welded a lot of junk steel together while trying to learn. Never tried razor/utility knife blades, so can't offer much advice of those, except to say, I have bought stainless blades before. Might want to check that out before starting. Also, if they are from the same maker, hence the same steel, you won't get much pattern to show, so you might want to layer it up with something else to help show some contrast. As with any unknown steel, you run the risk of winding up with something that won't make a very good knife, but what else have you got to lose but time and the cost of a little forge fuel? You could always pick up some powdered steel from Kelly Cupples and try a canister weld, if you can't get them to weld on their own. I'm curious to know how it goes.
-
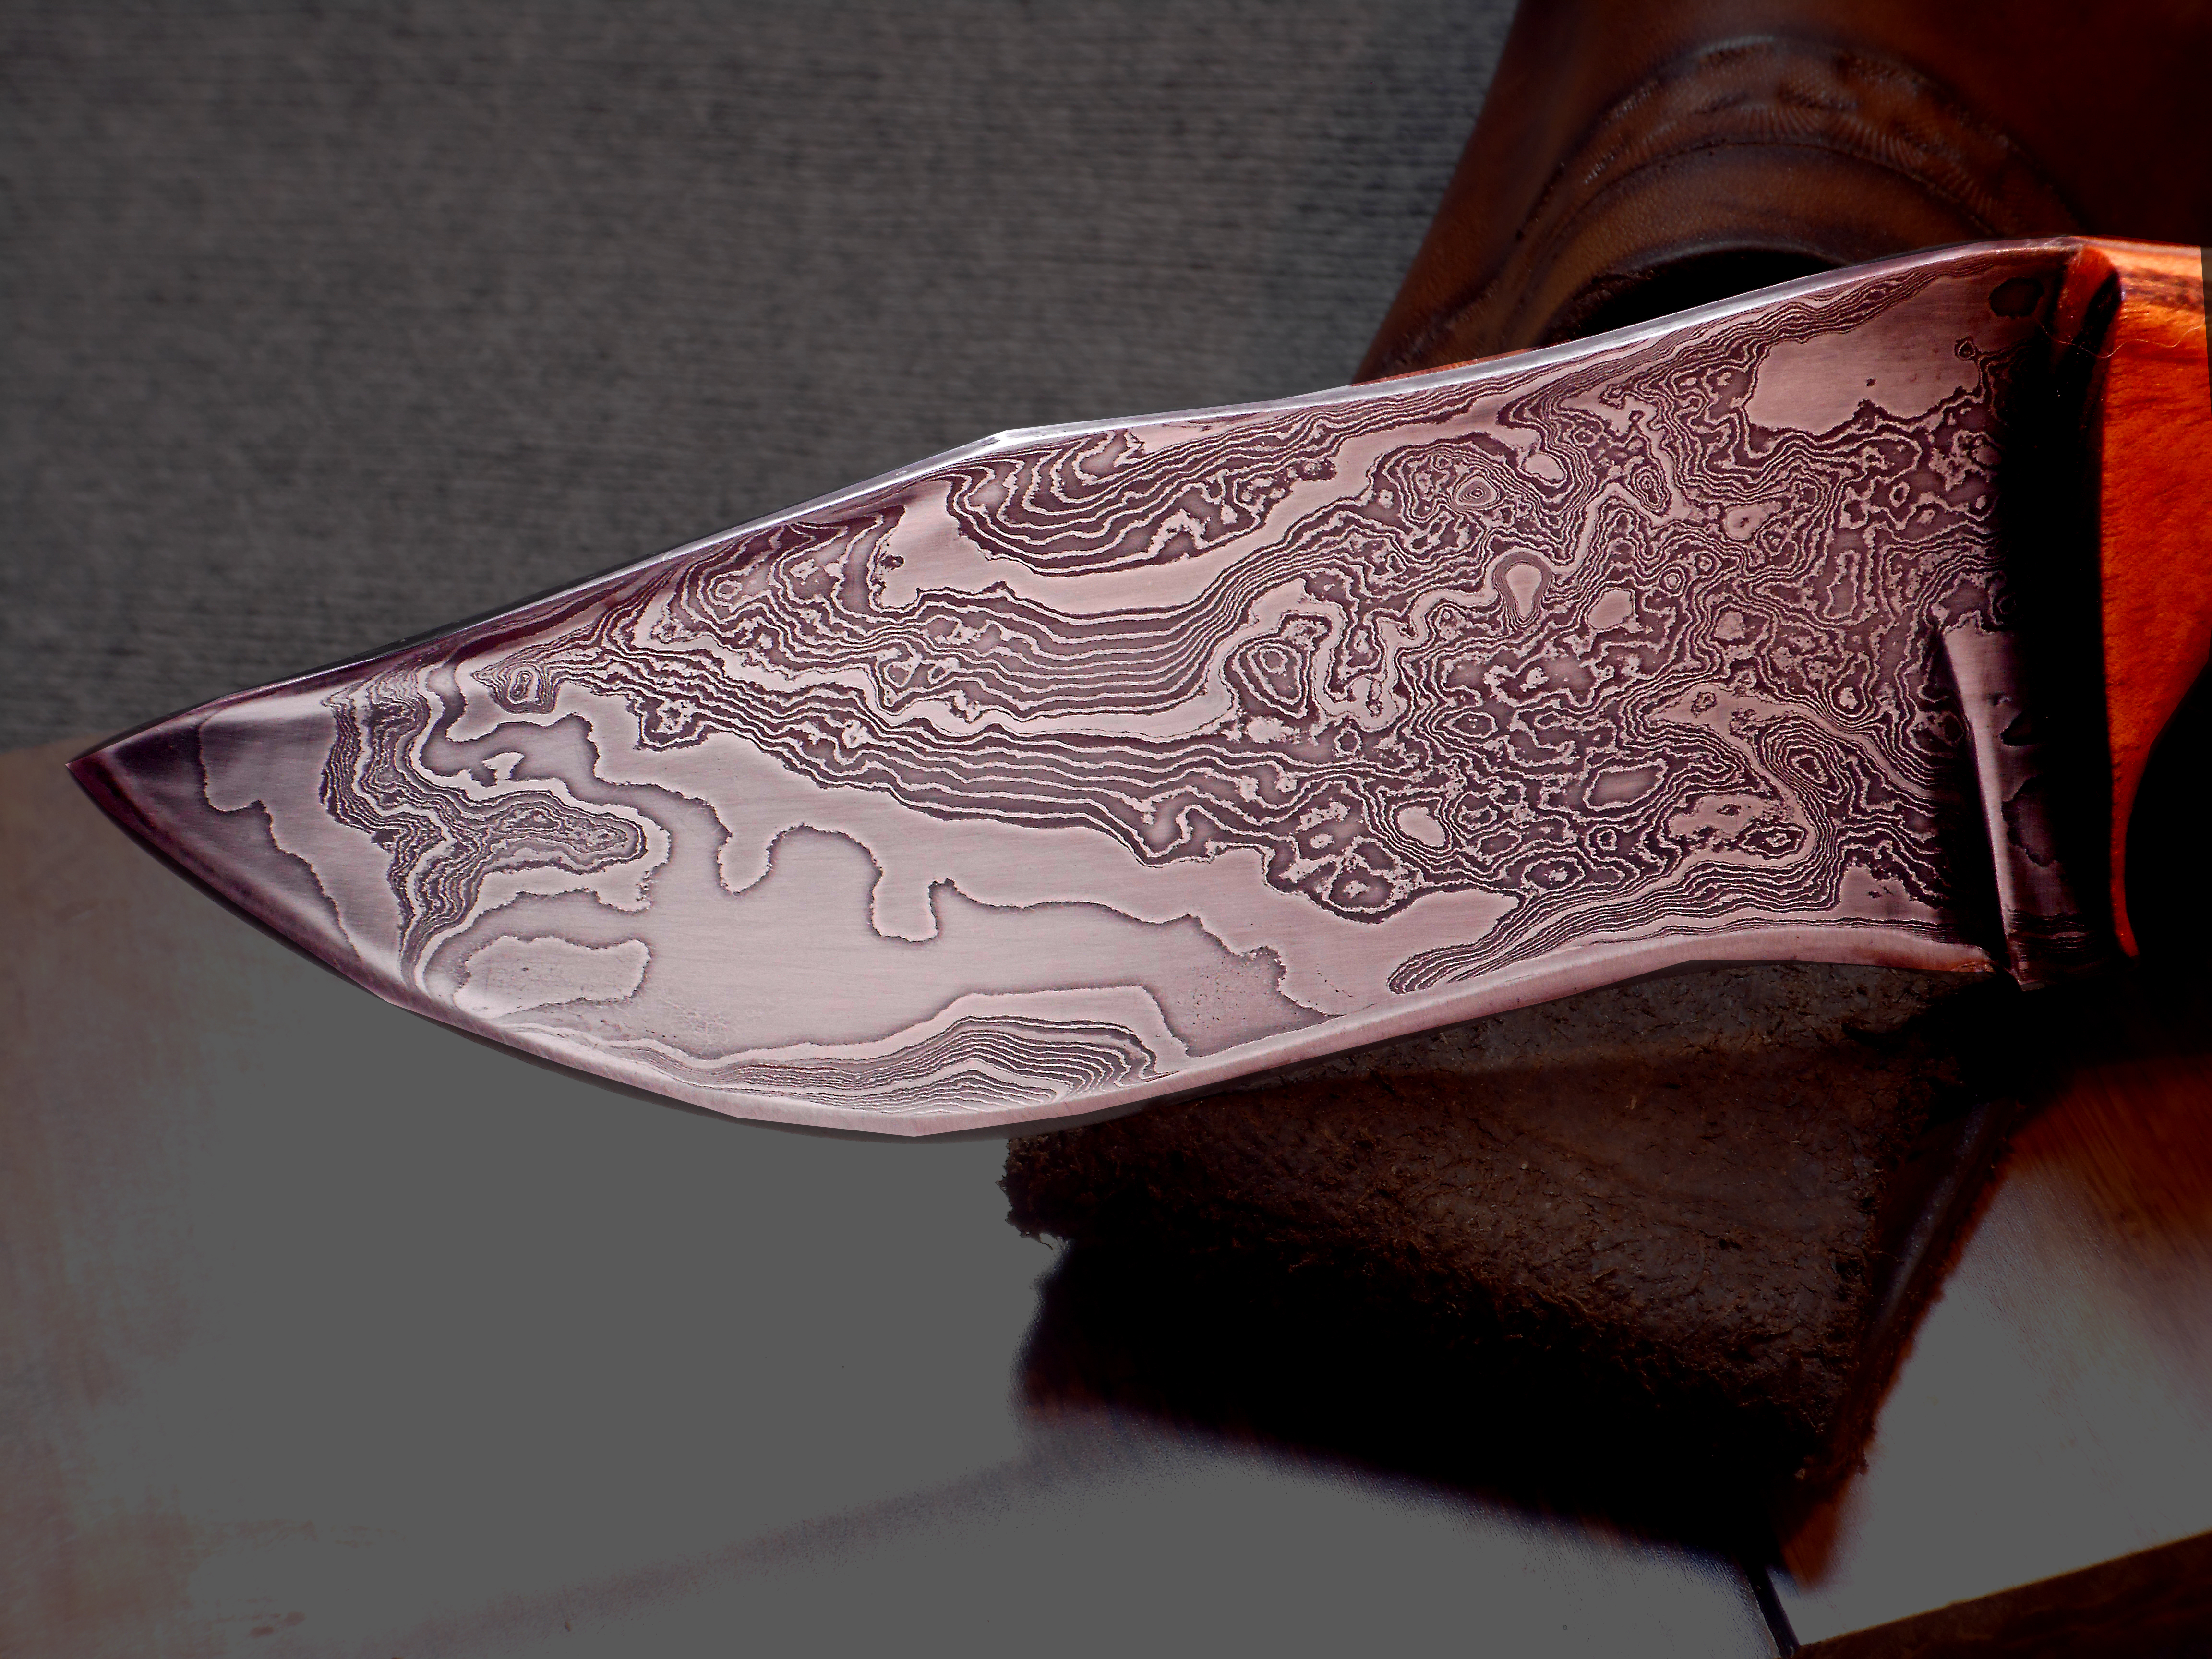
I'm no expert, but can show some pictures of different layer counts I've done that might help you decide how far you want to take it. This was my attempt at a dog star pattern with 178 layers This was 176 layers too, but I forged the final knife on is side to show all the straight layers. This one was 280 layers with two twists after the final two folds. And this one was one of my earliest ones with 72 layers and just a random pattern. All of them were done by hand, no press or power hammer, and they were all done with either 1080 & 15n20 or 5160 &15n20. I'm still trying to figure it all out myself, but maybe these pics will give you some ideas of where you want to go.
-
Forging Stainless For The First Time.
HEAP of JEEP replied to 7A749's topic in Blacksmithing, General Discussion
Steve, still loving the texture you get on your pieces. I've never worked with stainless so can't offer any thoughts or advice on it though, but it sure looks like it has much difference appearance that the things you've shown picture of made from mild. Should make for some really cool contrasting pieces. Looking forward to see what you create. I'll ask around for anyone that does plating up here in Traverse. I don't know of any off the top of my head, but even if there is someone, we're farther away from you than Detroit. -
I've played around with more mower blades than I care to think about. With the stock pile I collected from random blades picked up at the scrap yard, it has been hit or miss on whether they would harden at all. Some worked well, some were ok, and about half of my collection wouldn't harden at all, even in water. If you get a mower blade, its best to nip a small piece off and play around with heat treating it to see if its even worth your time to forge a blade or if it would be better used for a different project. For a first knife, I think you did really well. Better than my early attempts. Love the reclaimed oak.
-
Its not that I'm not pleased... I just know it could be better. I'm just not sure how to get it better without going through the whole hand sanding process that I'm already familiar with. And yes, she does really love it.
-
So after I tried my hand at that last cable knife, a woman at work ordered a his and her set for herself and her husband. For what I am charging, my goal is to get the whole process down to under 4 hours. On this one, I was just over an hour and a half from starting to forge to where I was ready to hit the grinder. Probably not the fastest, but I was pretty pleased with the speed in which I was able to turn it out. I don't do any hand sanding on these. The lightest grit belt I have for my sander is an 800 cork/carbide belt, so after some rough shaping and grinding with a 50 grit, I did a couple of passes with a 120 and then heat treat and temper. That grinding took another hour and a half, so up to just over three hours so far. Then the on the final grind, I cleaned it up form HT on the 120, then went to 400, then to the 800 cork belt with green compound. Total time spent... 4 hours 22 minutes. The last one took just under 5 hours, so shaved some more time off and getting closer to my goal. I'm not totally happy with the finish. I probably should have spent a little more time with the 400 belt, because I can still see to many sanding lines. I did make a video about how I went about the whole process. If you want to see it, just PM me and I'll get you the link, but out of respect for the forum, I don't post links to other sites. And any input on how to get a cleaner finish with just the belt grinder would be much appreciated. I really want to avoid having to put any time in to hand these knives because I do sell them so cheap, and on my other knives I can easily spend many many more hours going through all the grits with hand sanding. I'm not going for perfection with these, but getting a littl ebit cleaner finish would certainly be nice, if it doesn't add a whole lot of time to the overall process.
-
Fix welders eh? Hmmmmm... we might need to talk. I don't have any pictures of my forge, but I will try to remember to take some this weekend when I get out there working... my wife has me building a chicken coop this weekend... it was our anniversary and what does she want? Chickens. I will never understand her. So anyways, I'll be busy with that, but when I do find time to forge, I'll see if my brain will prompt me to remember. I do have a thread about the grinder build. Followed the advice of Jim Coke (forum member and fellow Michigander) in how to set up the pillow blocks and pulleys. Good thing I did too. If I hadn't, I can see where I would have been going through bent axles, like crazy. http://www.iforgeiron.com/topic/45150-heap-of-a-grinder/
-
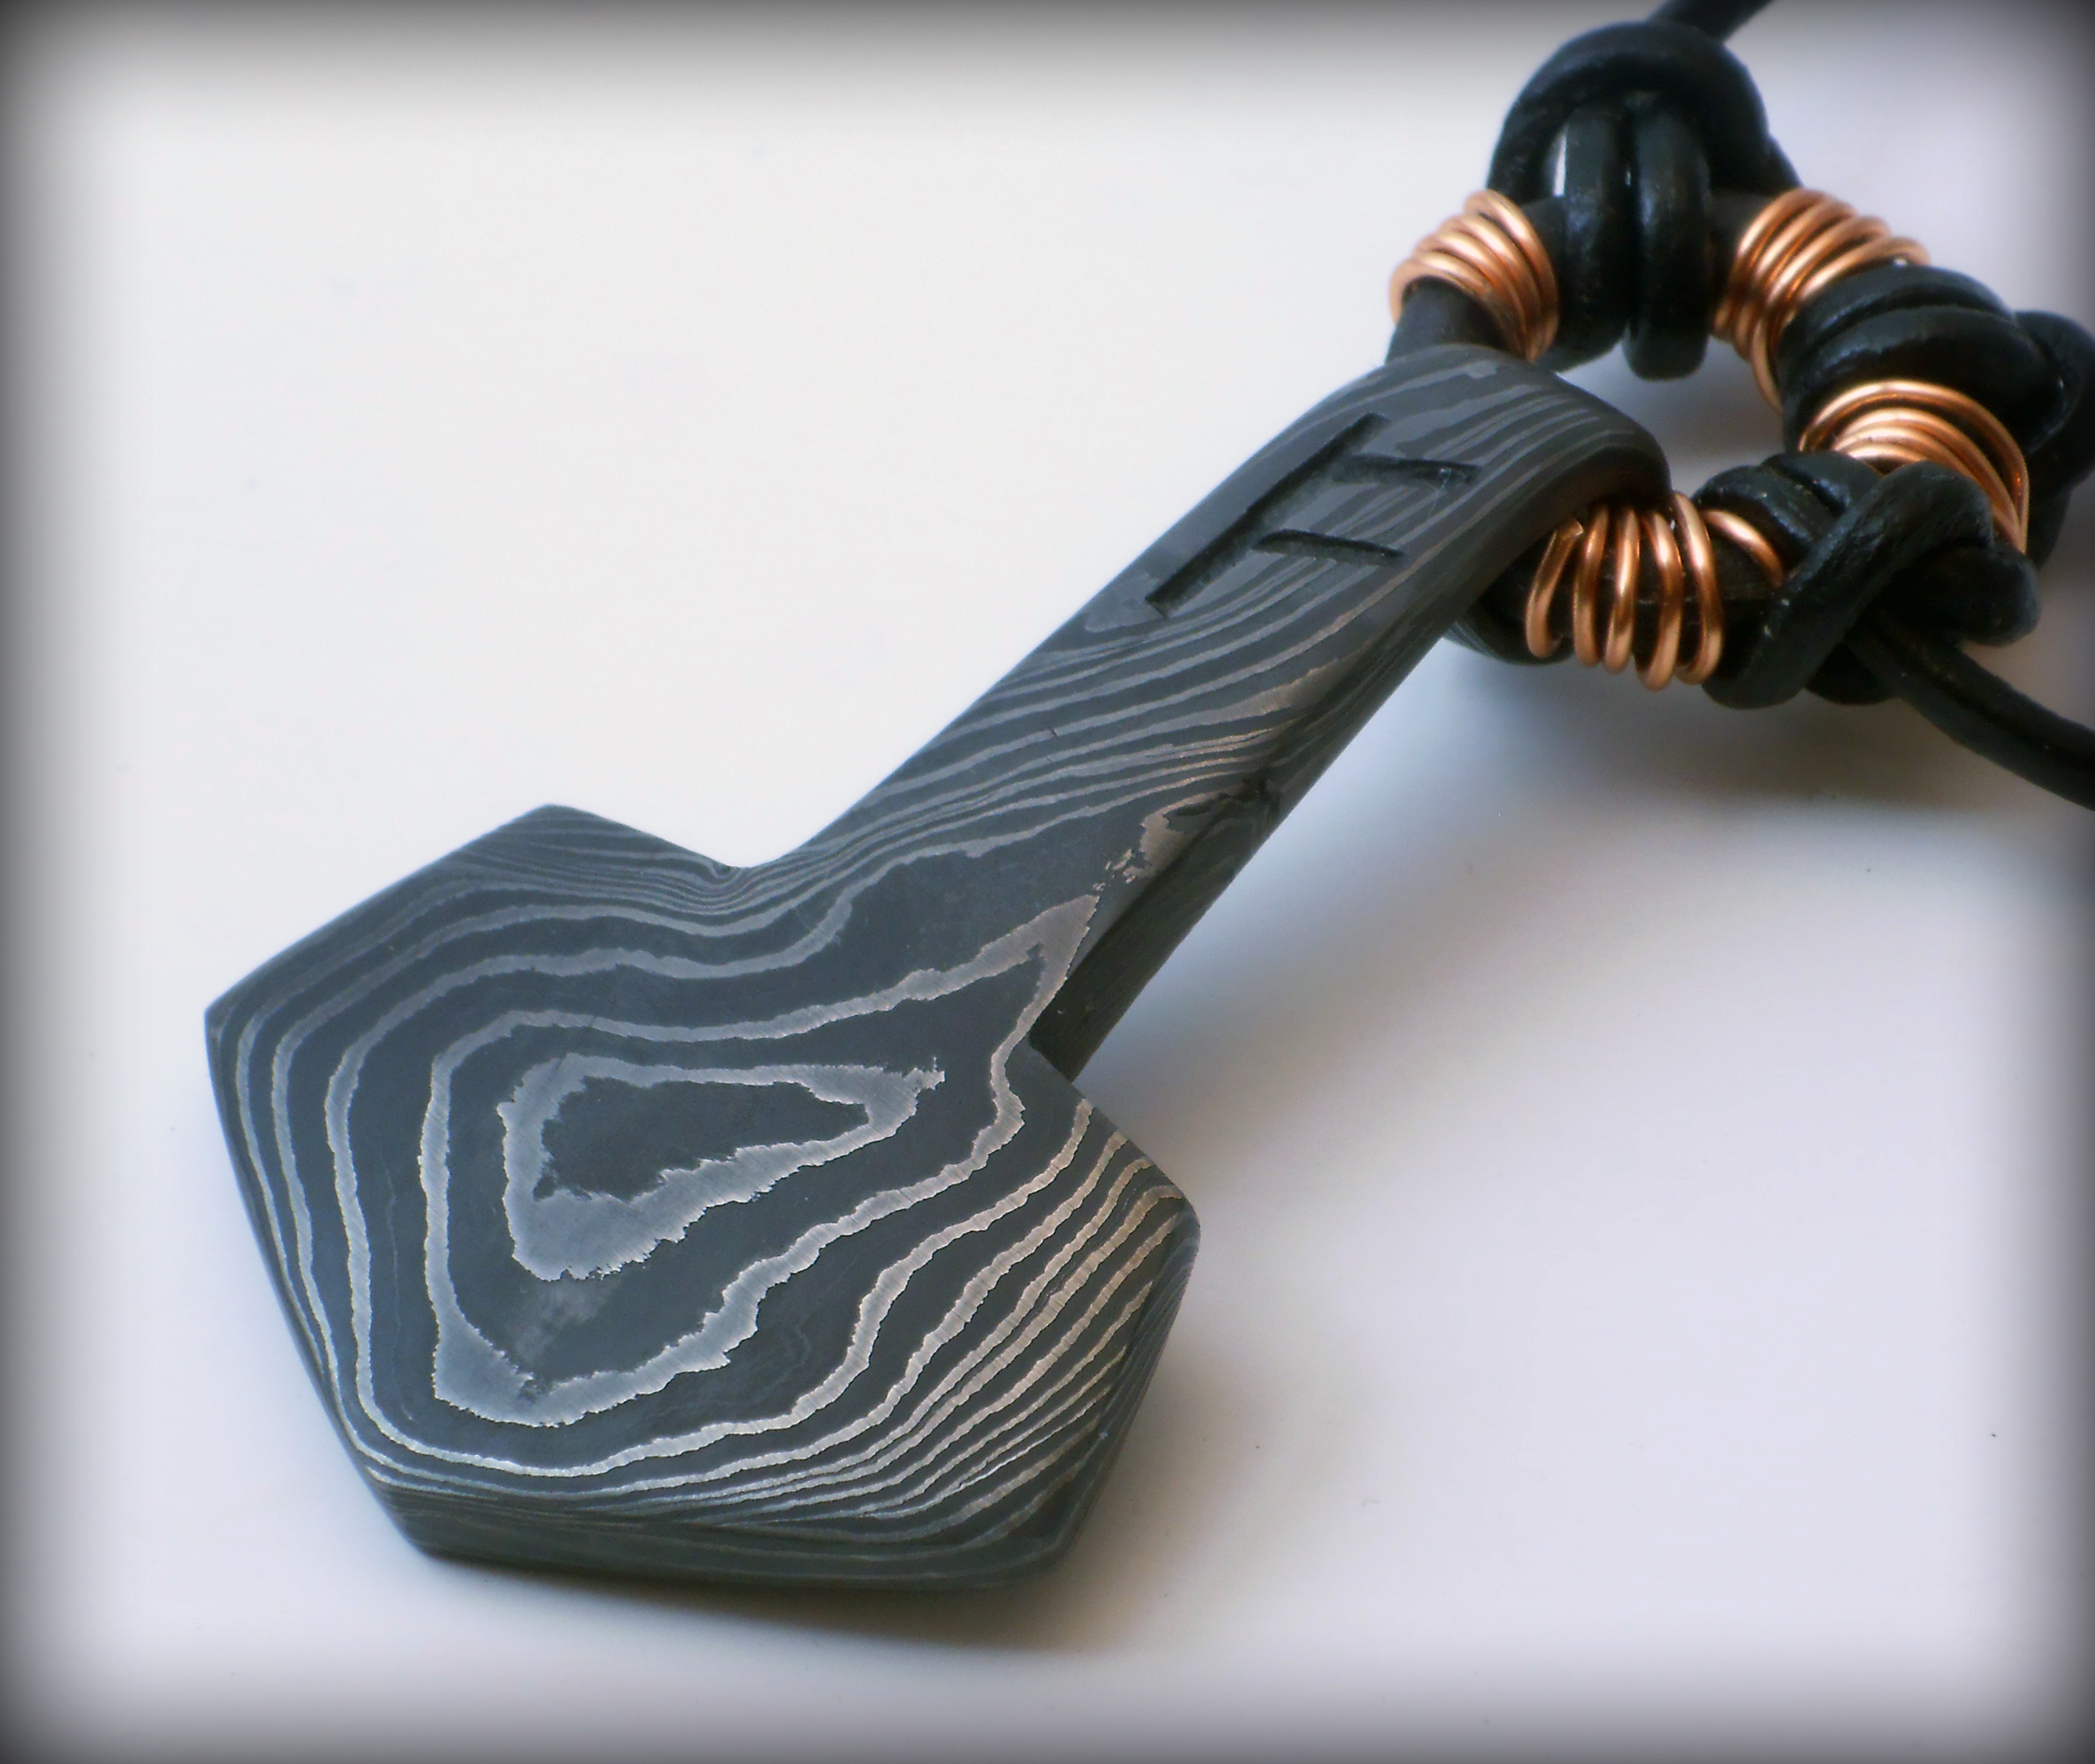
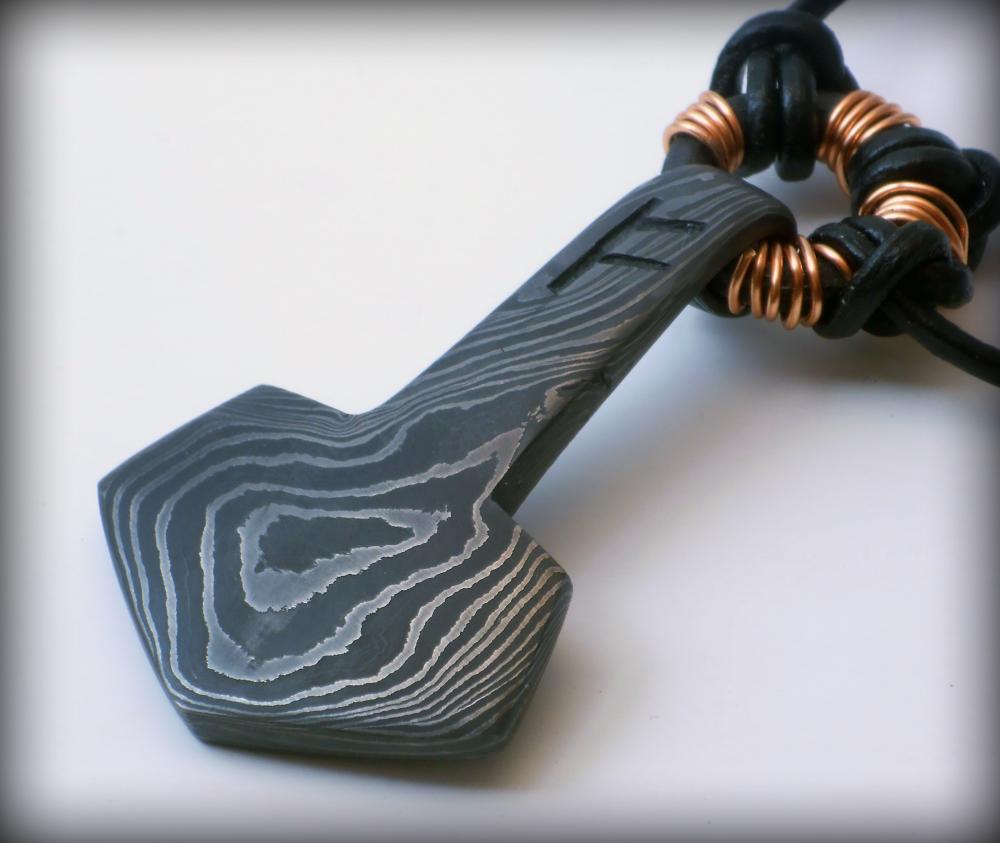
Yeah, don't even get me going about Michigan rust. LOL. There's a reason why my 96 Jeep is a heap. I appreciate the kind words, and it does mean a lot, but I really haven't been doing this long. I built my forge and picked up the hammer for the first time at the end of last summer/beginning of fall. My forge is on a rolling cart so I can wheel it out of the garage when its in use, so with the mild winter, I was able to muddle through some of the learning curve as the snow fell, but its only been in the last couple of months where I felt like I was really beginning to understand a few things. plus, my whole purpose in picking up this hobby was to learn how to make damascus knives. Had a passion for folded steel since I was a kid and saw a Japanese sword smith do a demo. So, my first forging experience was just heating and moving some metal around... my second was forge welding two pieces together. My third was folding a billet two times, then three times, then trying to form a folded billet in to something resembling a blade, and making damascus has been my main focus since then. So, with all that time spent making, discarding, and remaking damascus, I've gotten pretty good at that aspect of it, but the rest of my smithing skills are lack luster, to say the least. My tongs are some of the most hideous things ever to grace a forge. If it wasn't for the belt grinder I built, this pendant would still be a lump of ugly steel. I can forge a blade ok, but I've really been trying to focus on more of the basic techniques that I skipped learning in the beginning. There's two main reasons why I keep doing other things in damascus. One, people seem to really like it. Each billet has its own unique beauty, so no matter what you use it for, a knife to a pendent, it is truly a one of kind piece. Second, to make the pattern really show up, the finishing work had to be good, so if I don't want to waste hours at the grinder and hand sanding, I can force myself to produce pieces that are closer to "forge to finish". It still takes a lot of sanding, but I can knock a lot of time, sometimes hours, off of all the grinding and finishing, just by producing a cleaner piece at the anvil. And, even though I'm focused on that right now, I still have to clean up an awful lot hammer marks. Its getting better, but I still have a lot more practice to do before I would consider myself anything more than a hack. So, with where I am today, I don't see any demos for me this summer. If you're ever up in the Traverse area, (I actually live in Kingsely, about 15 minutes south), you're more than welcome to swing by my house, grab a beer, and we'll talk forging and smack some stuff around on the anvil... but even that is just a 70 pound Vulcan I was able to find on craigslist for a steal. I've got to sell a lot more stuff to pay for the nice big shop anvil I've got sights on. I was thinking of doing a booth at the Cherry Fest in T.C., or maybe one of the smaller festivals, but I don't know if I have enough free time to make enough product to fill a table. Because I've gotten somewhat decent at the knives, I've been kept pretty busy making those. So, who knows. Some day maybe. But for now, its still just a fun hobby that happens to be paying for itself, and might make me enough for some extra beer and pizza occasionally.
-
Keep getting orders for these things. Was able to shave an hour off the time it takes me to forge one, so that's a plus, and thinking ahead, I made the billet large enough to get another one or two out of it for the next orders. Maybe I'm starting to get the hang of this.

-
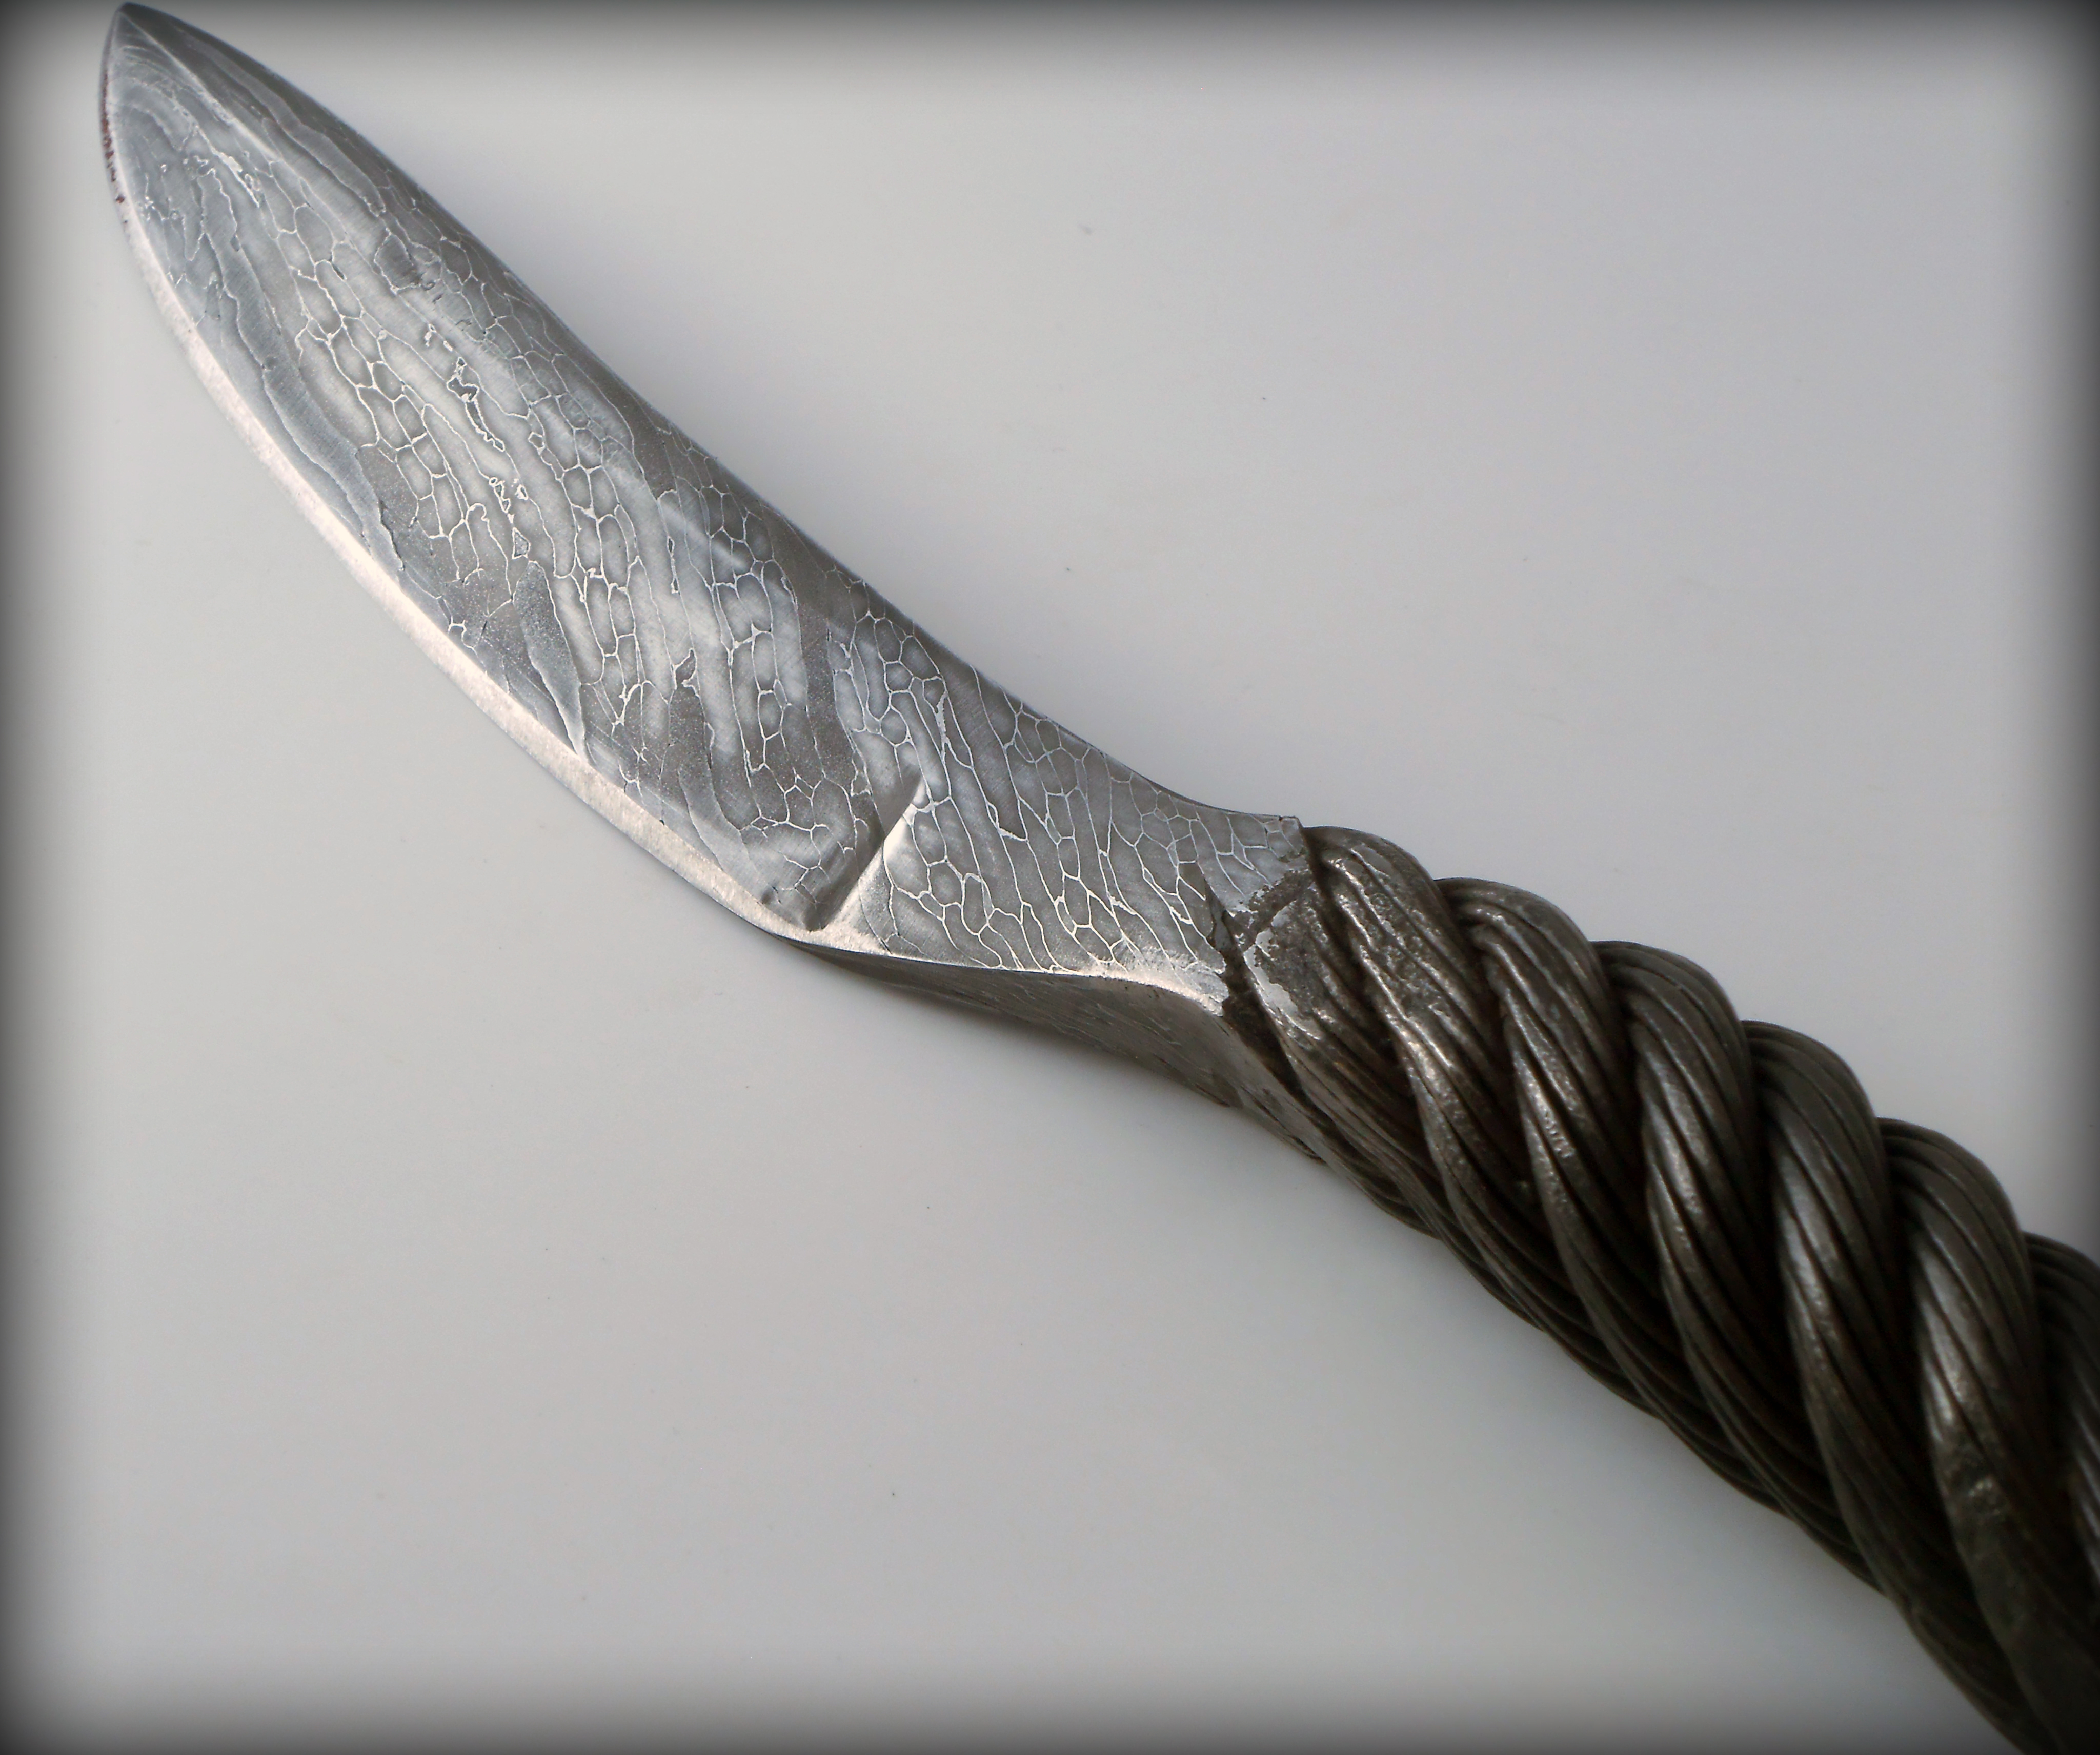
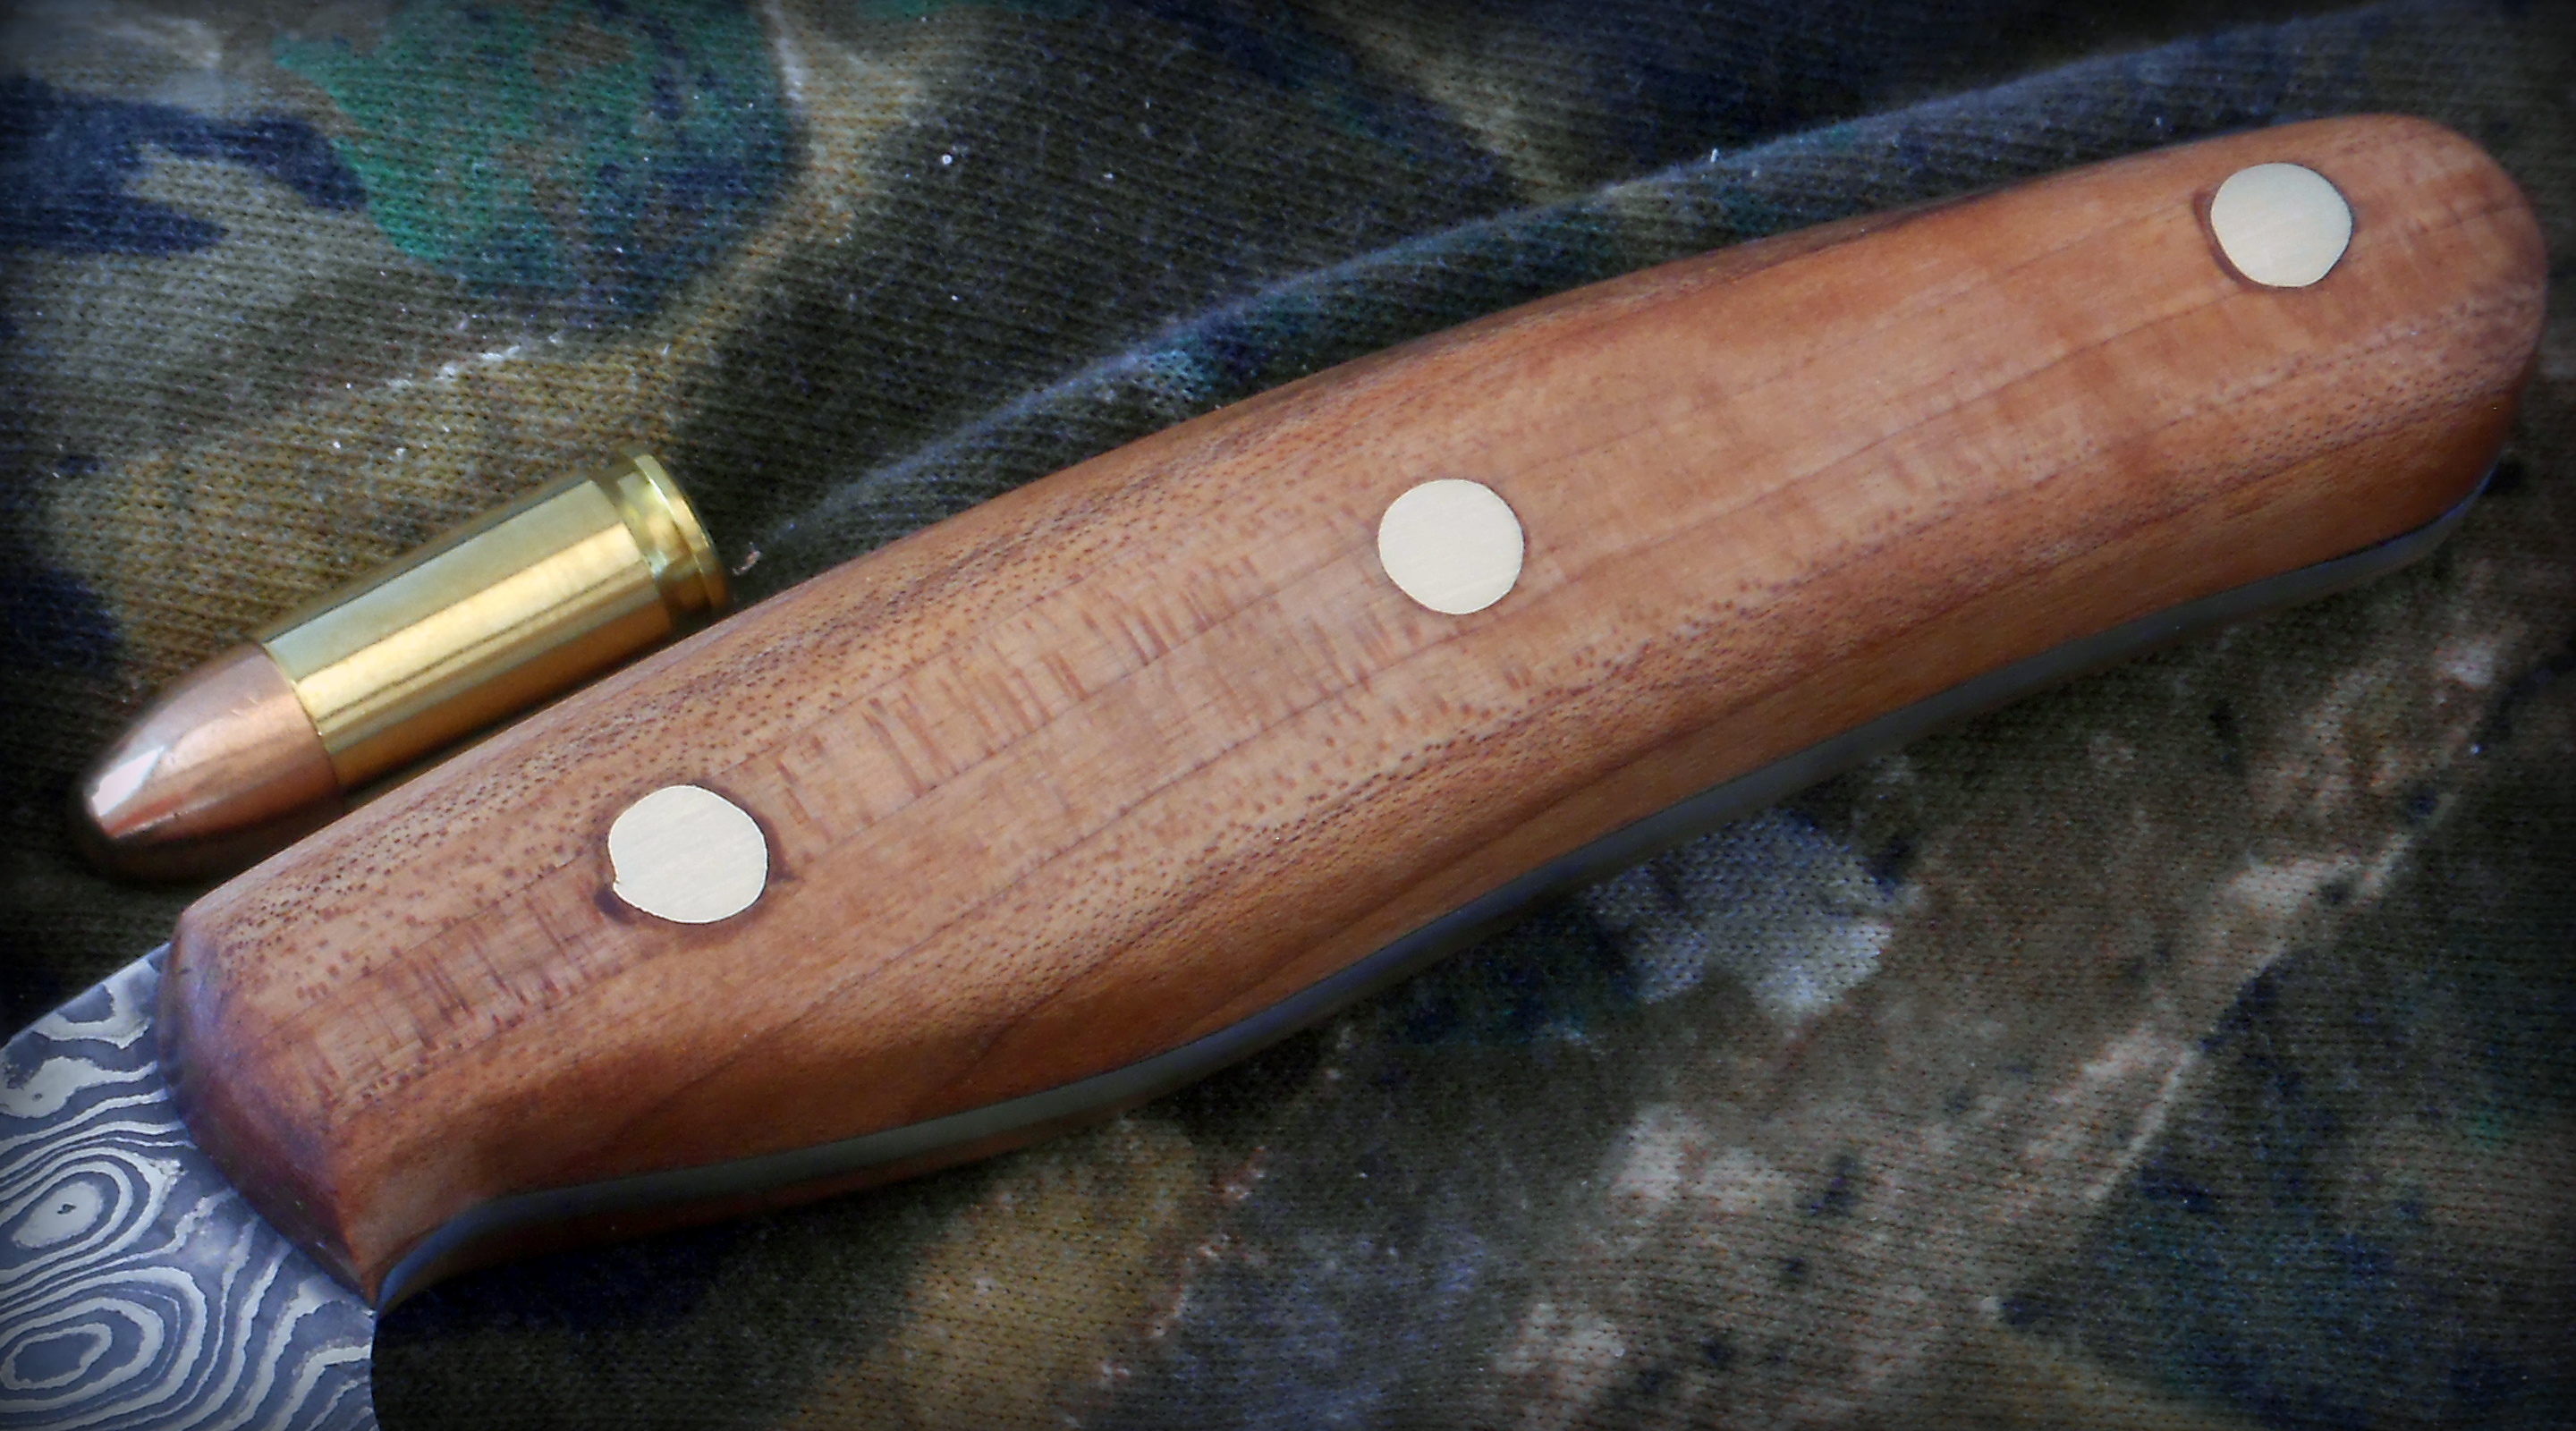
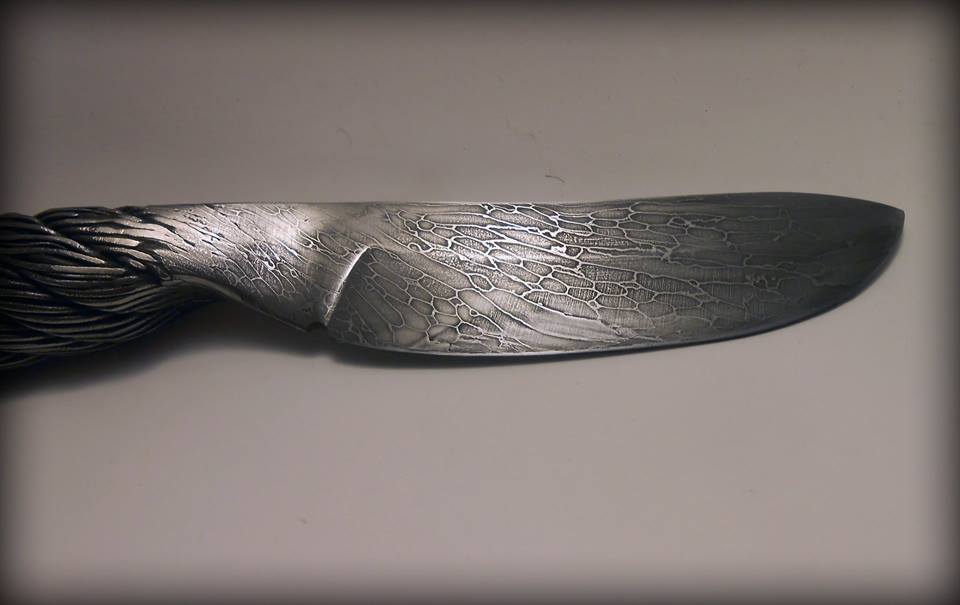
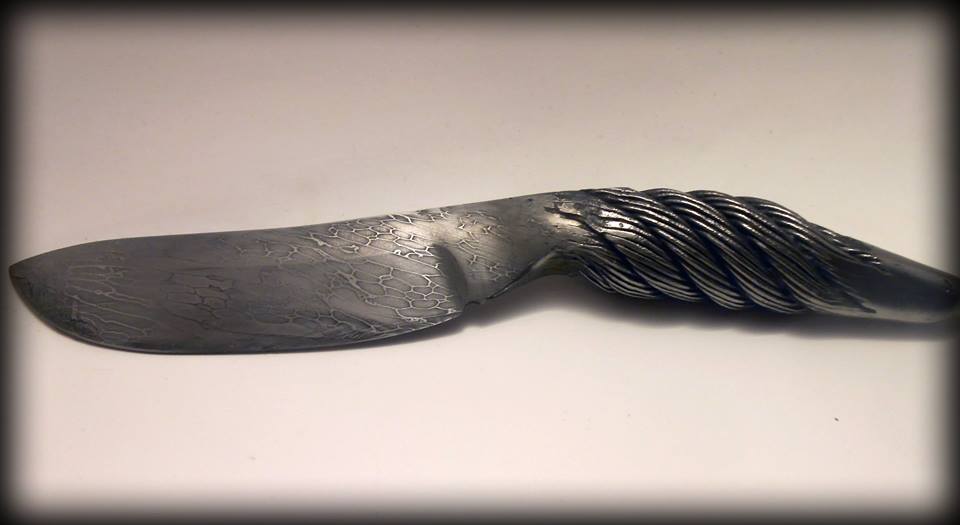
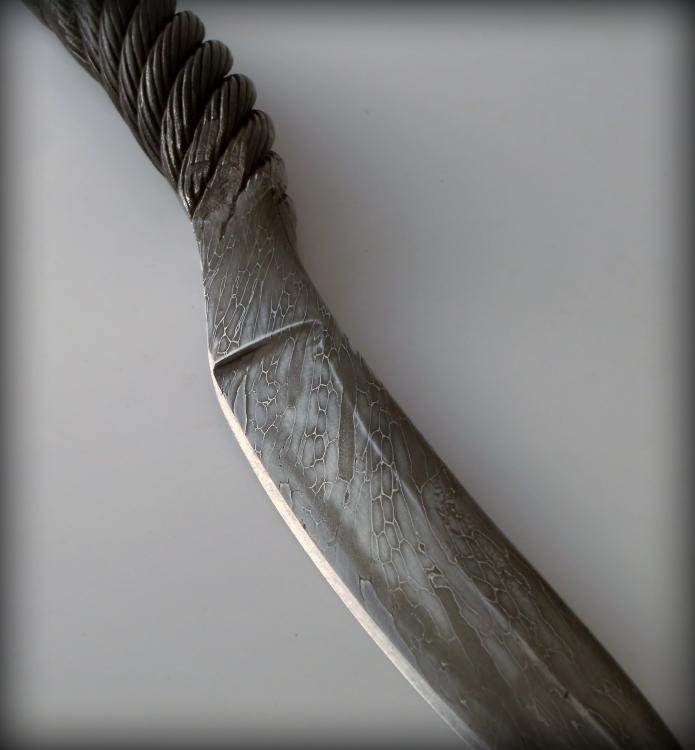
I tested some of the cable before I ever made a knife to see how it would harden and to see how refined I could get the grain pattern, and I was extremely happy with both. I haven't put this one through much use or abuse yet though, but the brass rod test was promising, especially considering I was just guessing at the tempering temp... fwiw, I tempered it for two 1 hour cycles at 400. Its shaving sharp now, and I'm just using it around the shop to cut kindling and what not. Its holding up fine to the limited amount of use its getting now, but I do plan to put it through some real abuse at some point. The problem is, I'm guessing that not all cables are created equal, so even if I nail the perfect HT procedure with this one, once I use up the 8 feet I have left, I'll have to go through the whole process again on the next piece of cable I can get. For that reason, and the fact that I didn't have to put to much time in on it, I'm just selling them cheap, like I would a spike knife... sure its fun, it will cut (for a while, at least), but its more of a novelty than anything. If/when I can get around to actually putting it through a true destructive test, I can report back, but again, I don't think all cable is created equal so your results may vary.
-
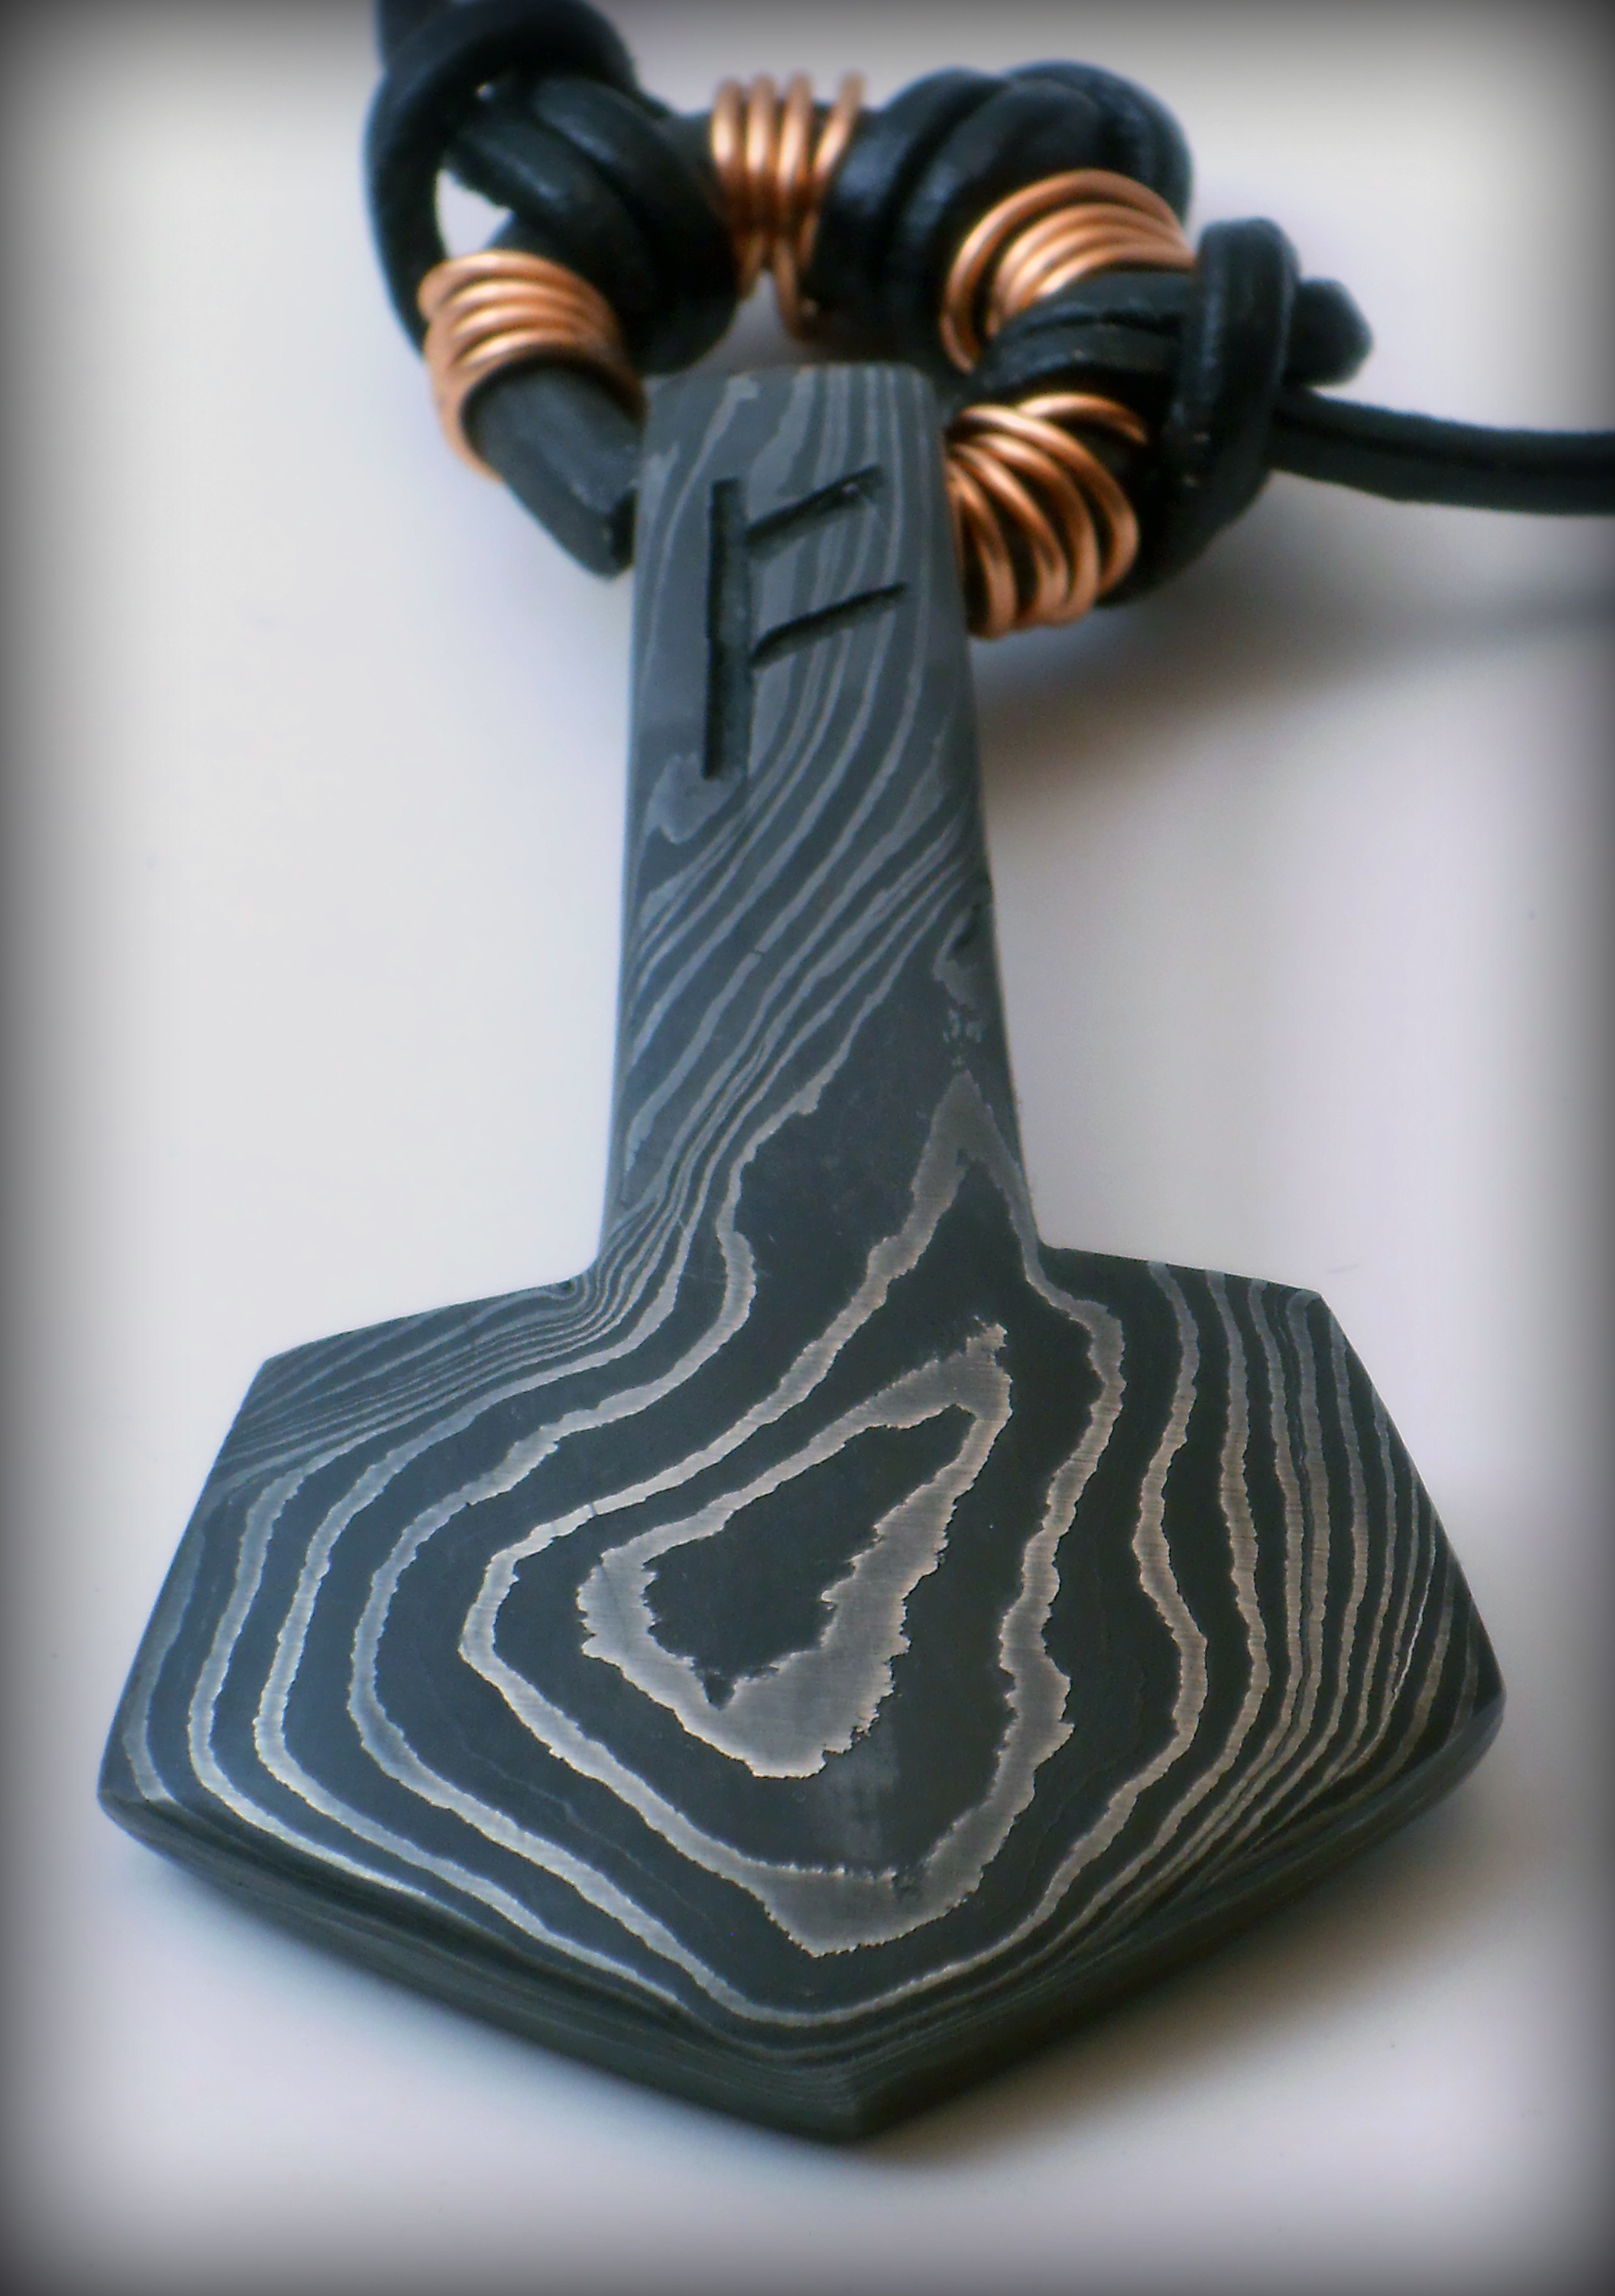
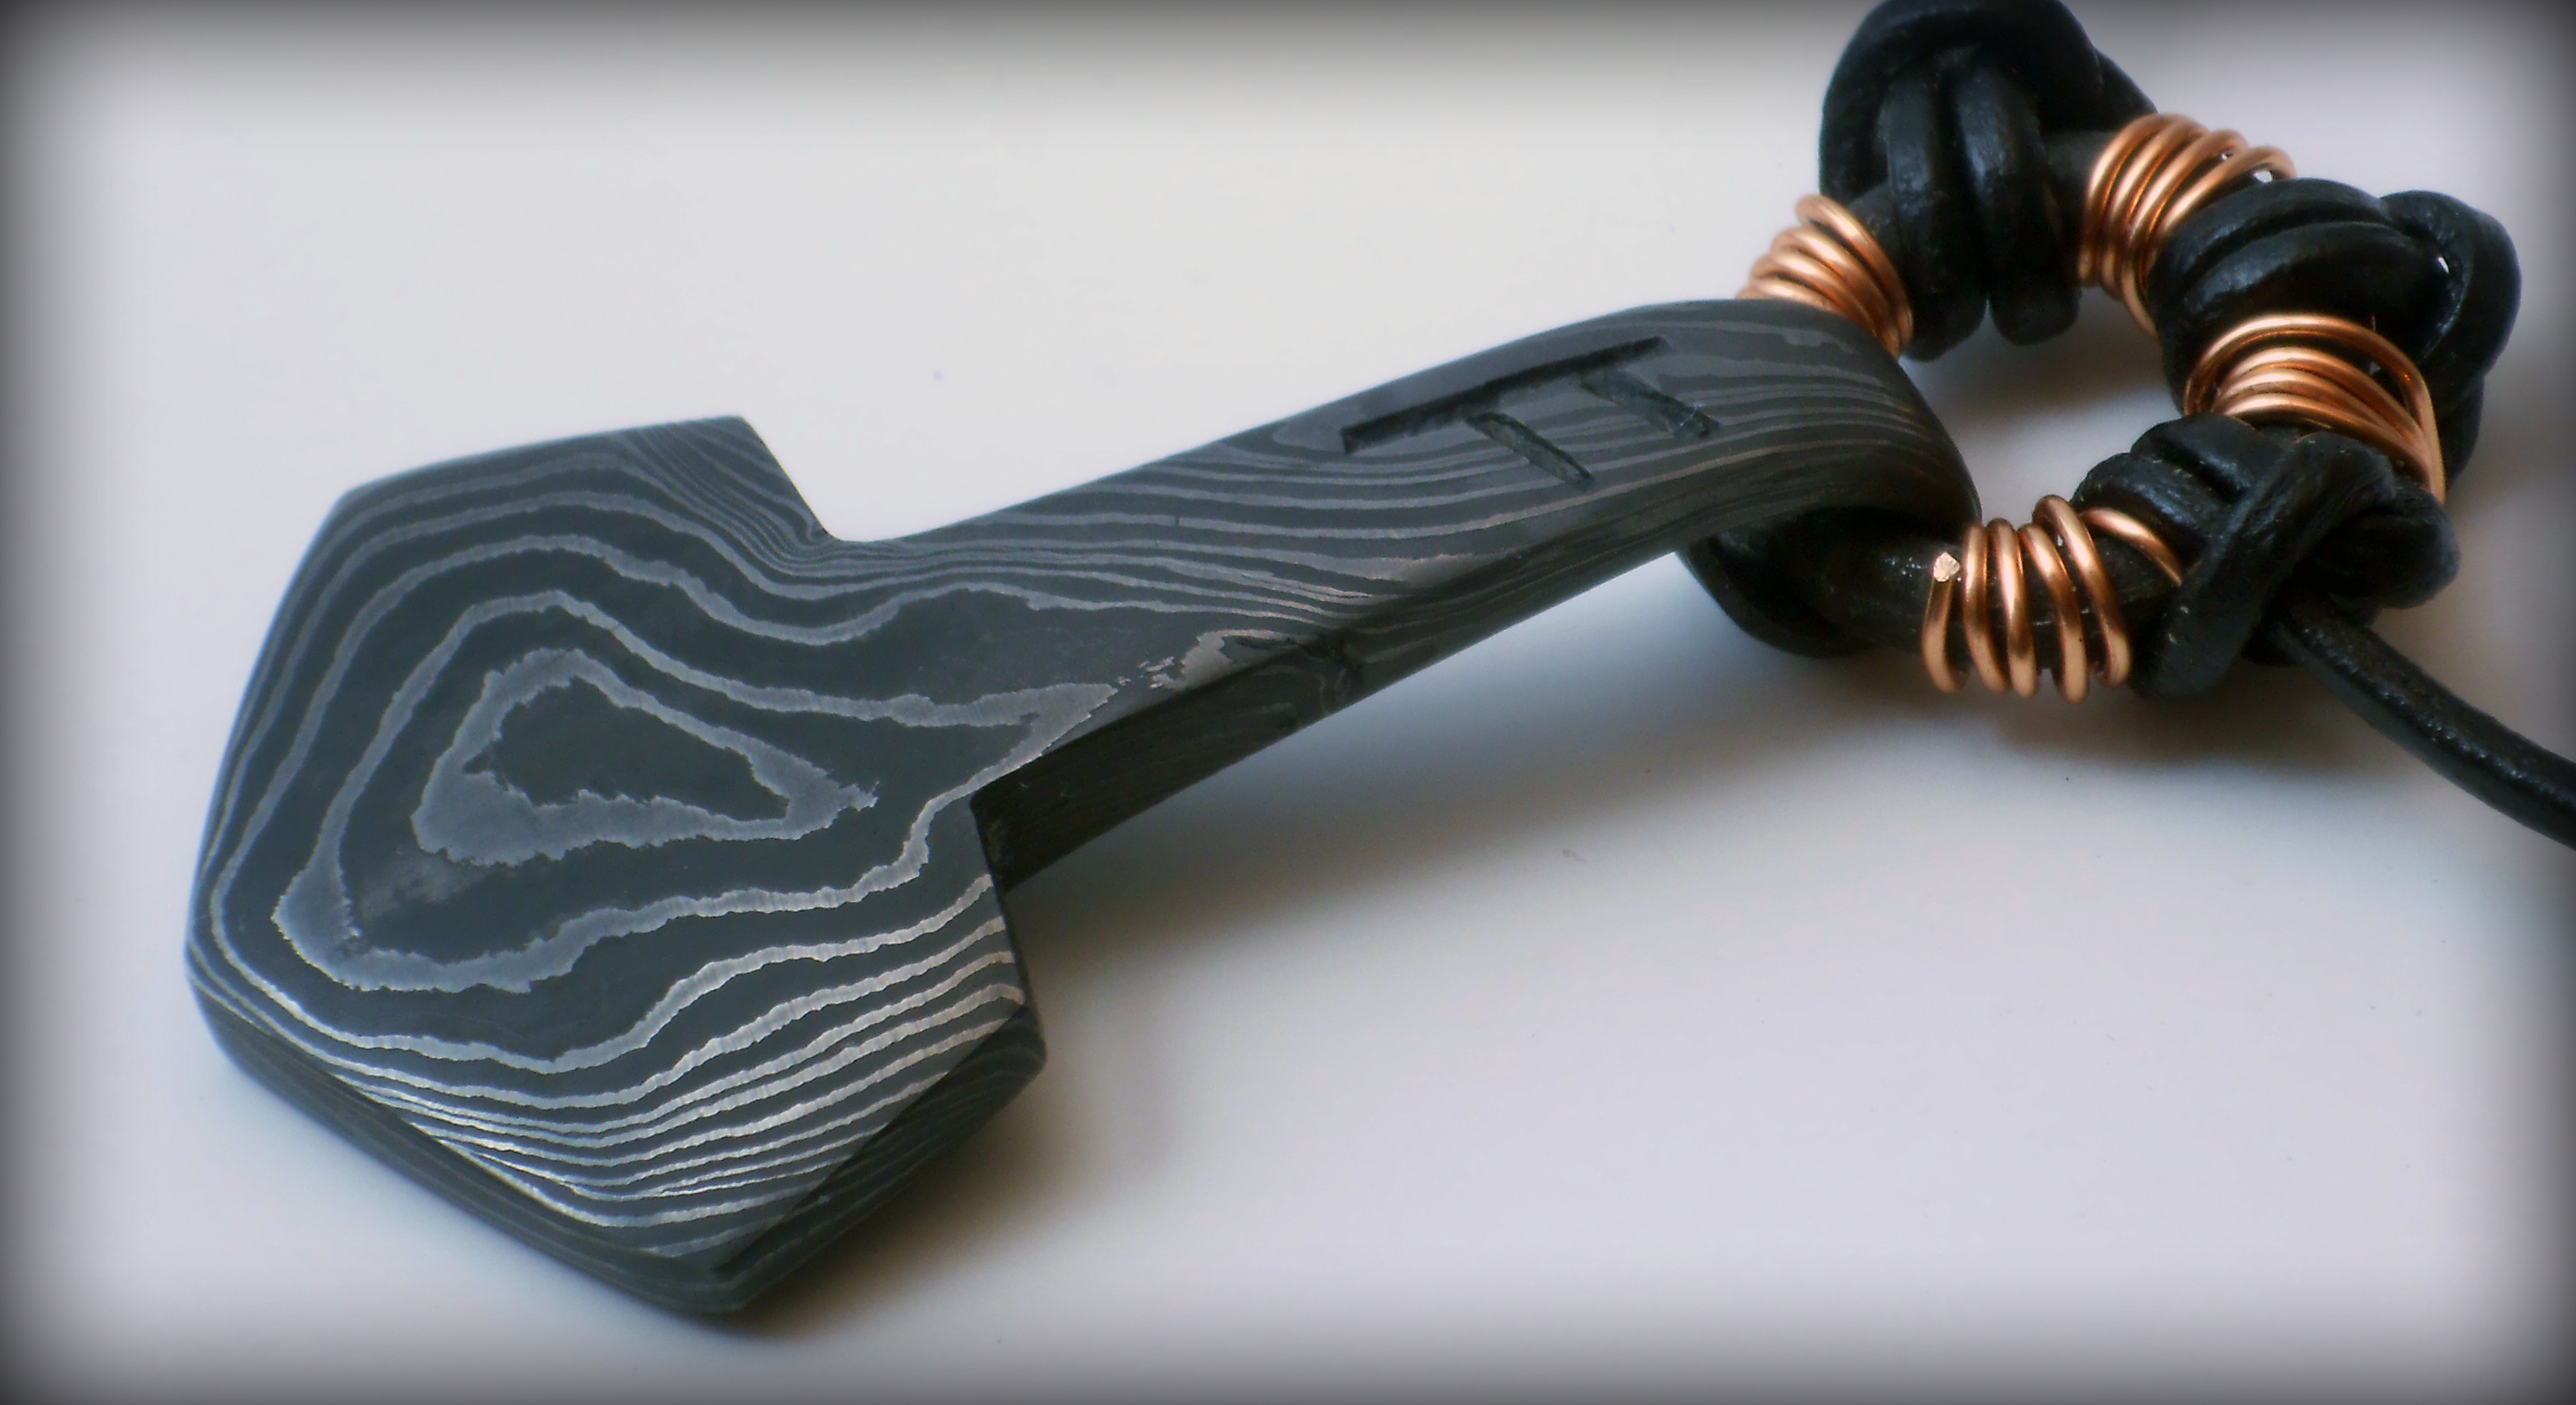
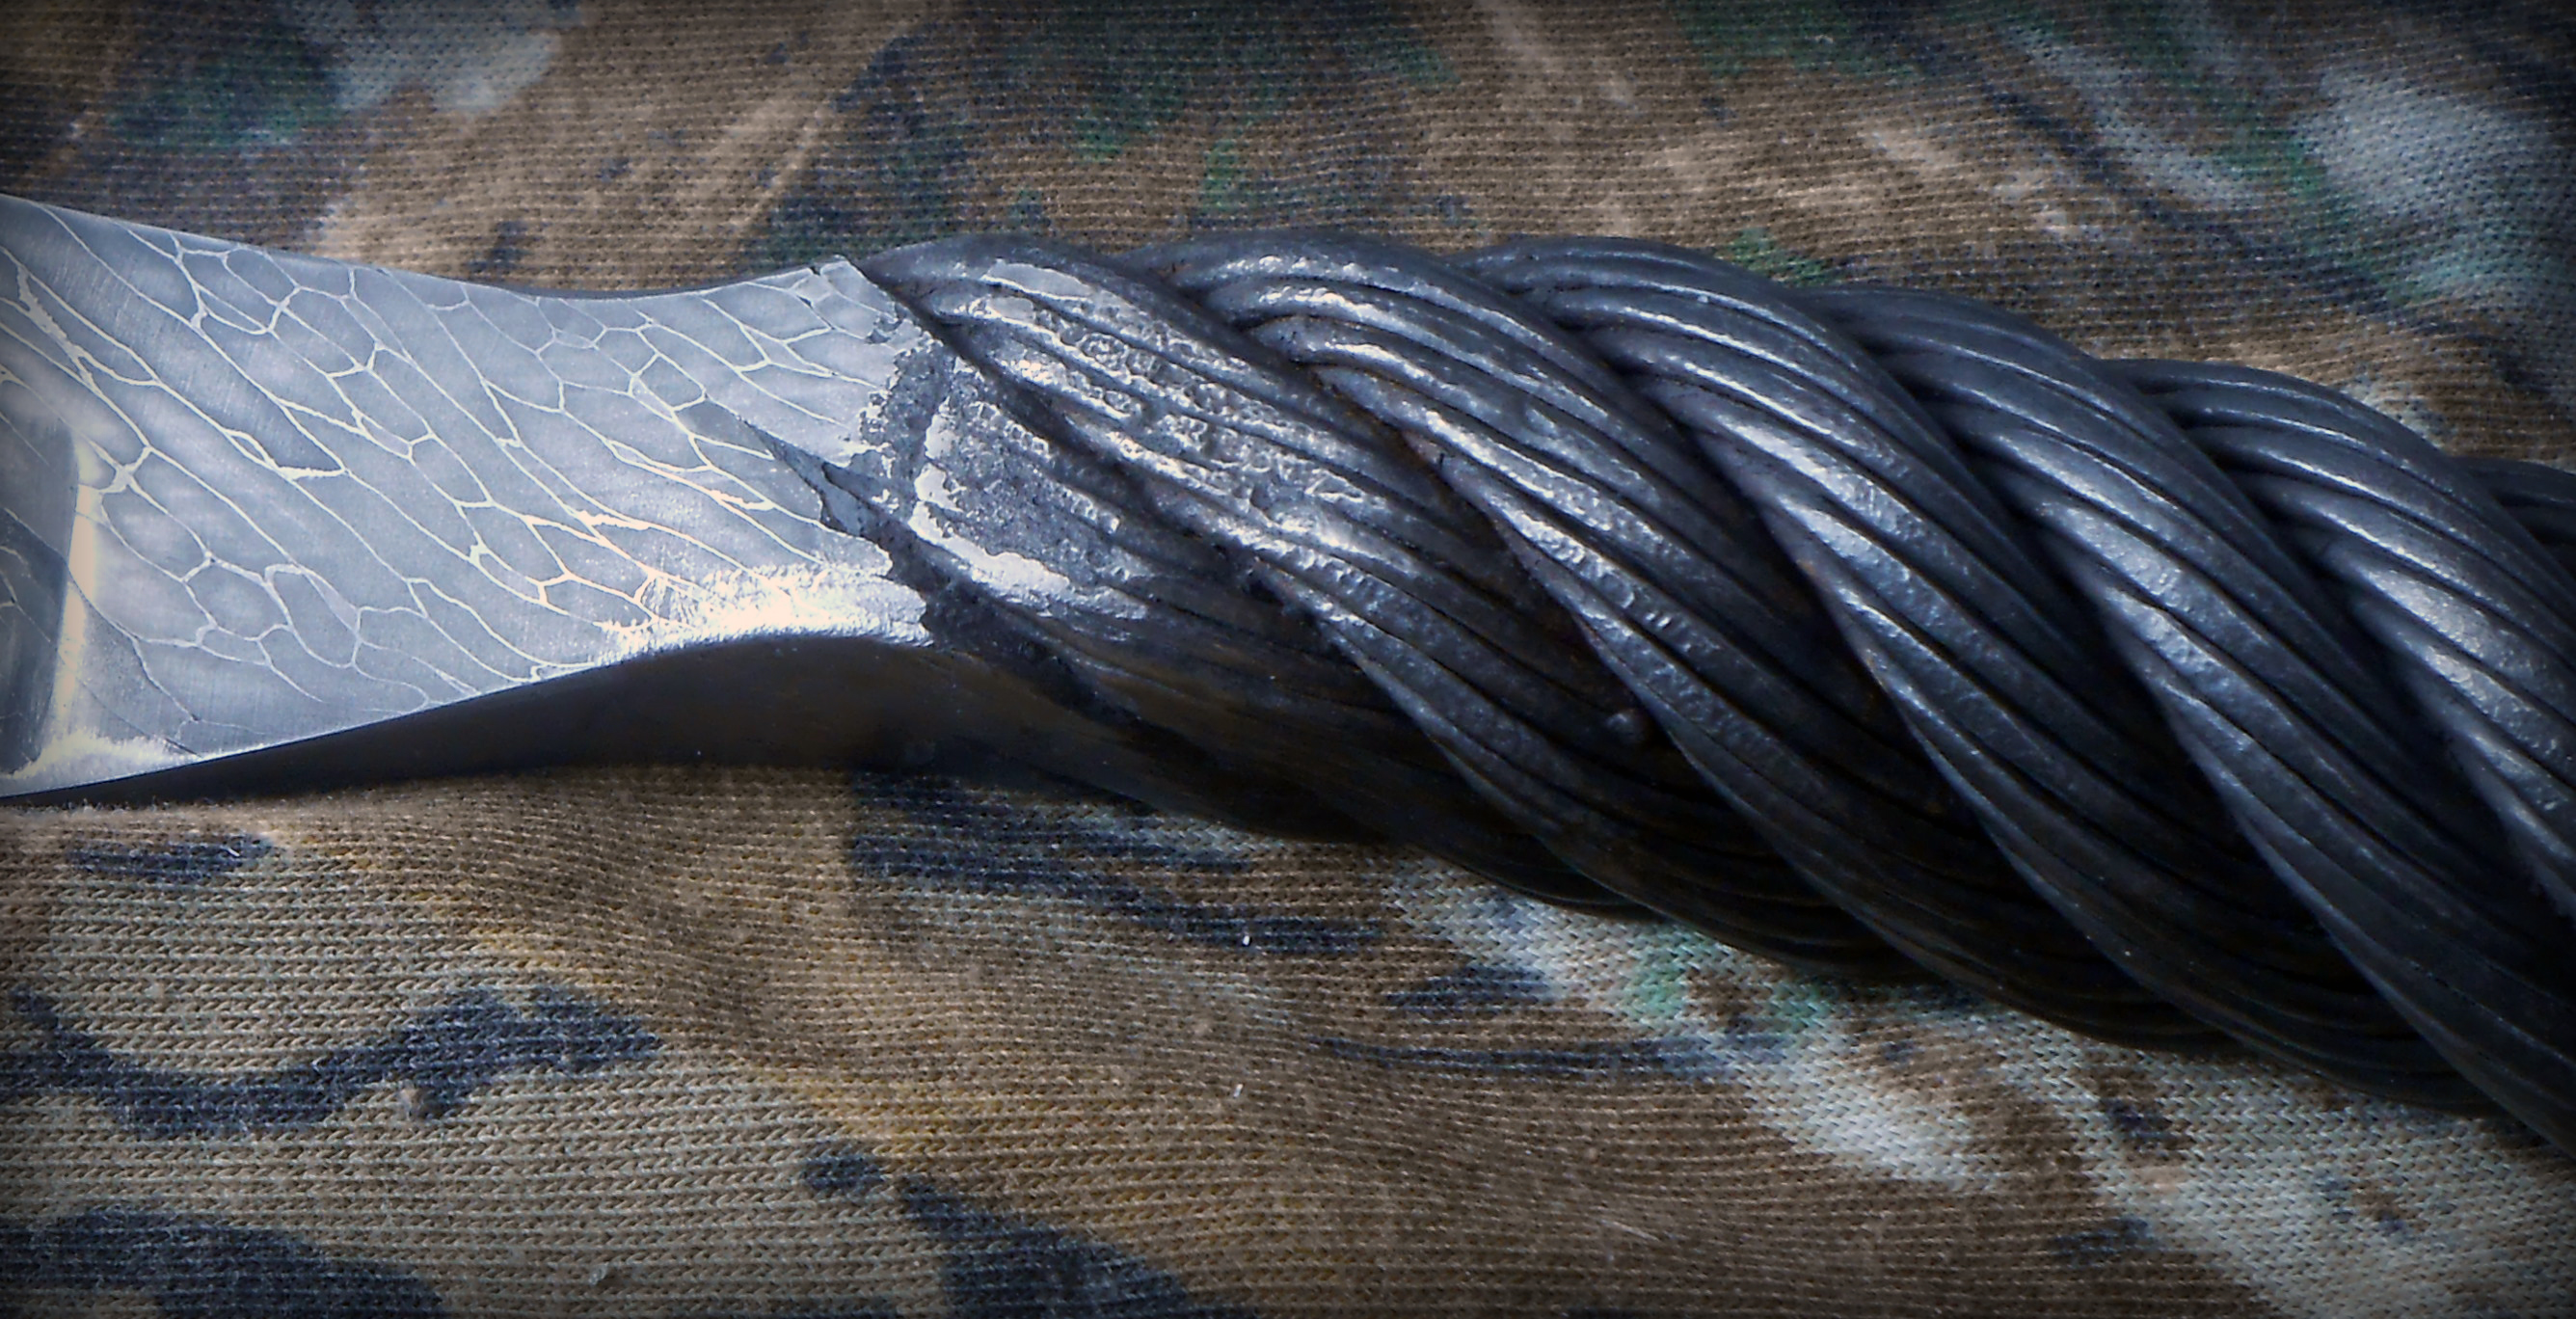
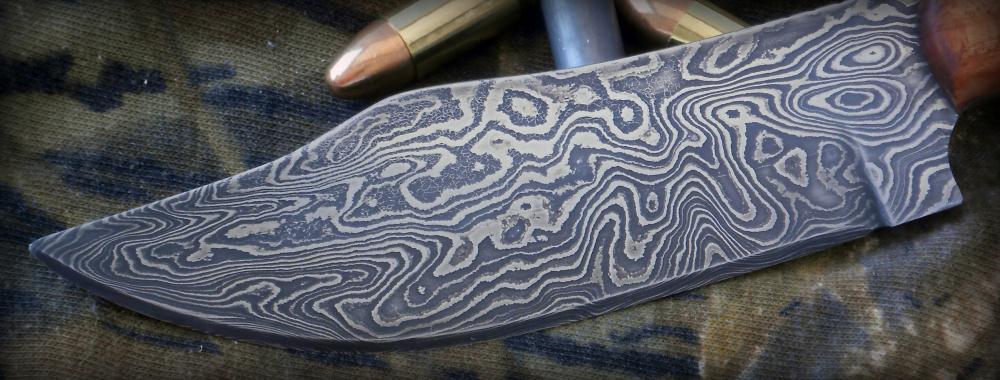
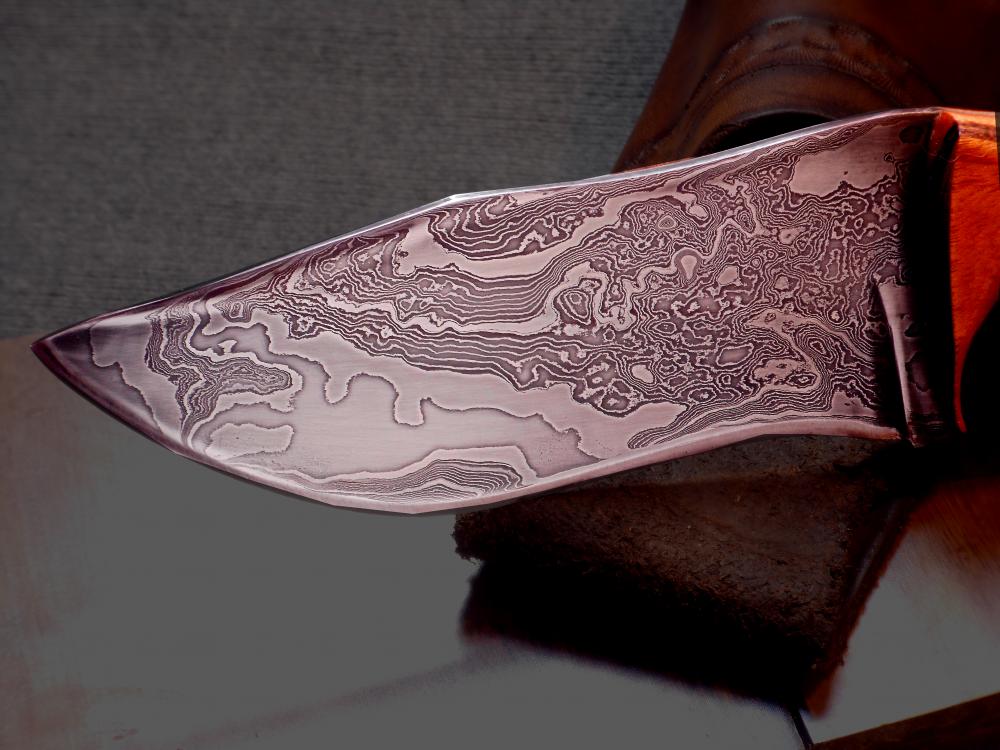
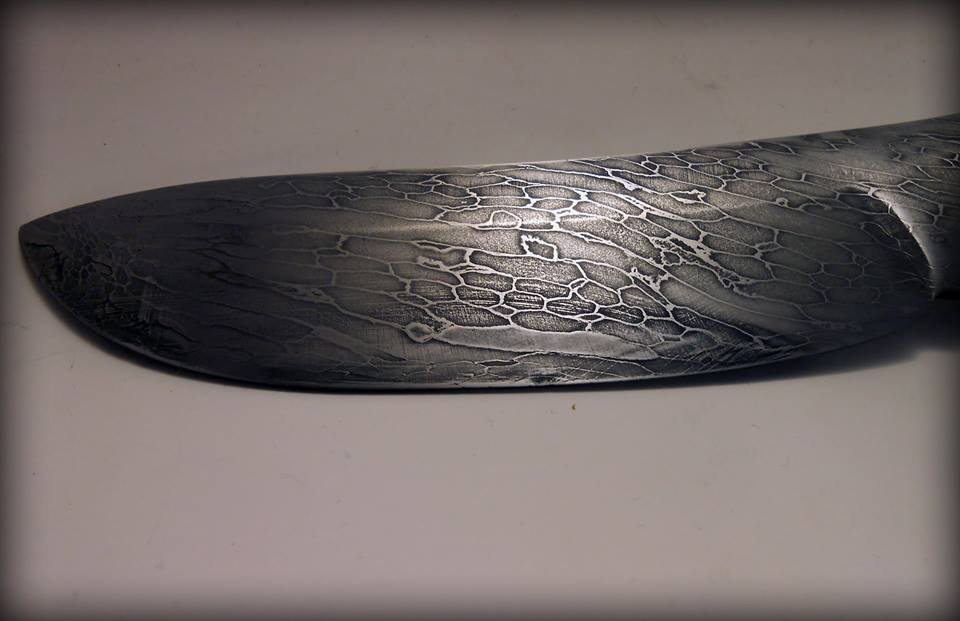
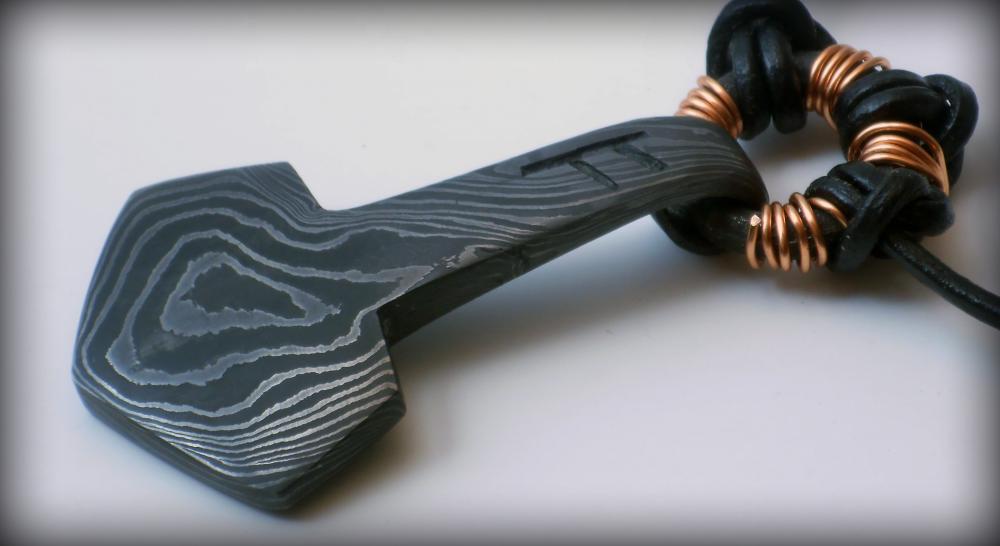
I used ferric chloride. lol. After the first 15 minute etch, there wasn't a whole of contrast, so I just used some thousand grit to sand it down a little, then etched it again. repeated that two more times. Took a total of about 45 minutes in three separate etches, with sanding in between to get what little contrast is there. Its decent for what it is, but I've seen picture where the pattern is really quite bold. Maybe another etching cycle or two would bring it out even more, but I just wanted to call it done and go to bed. lol
-
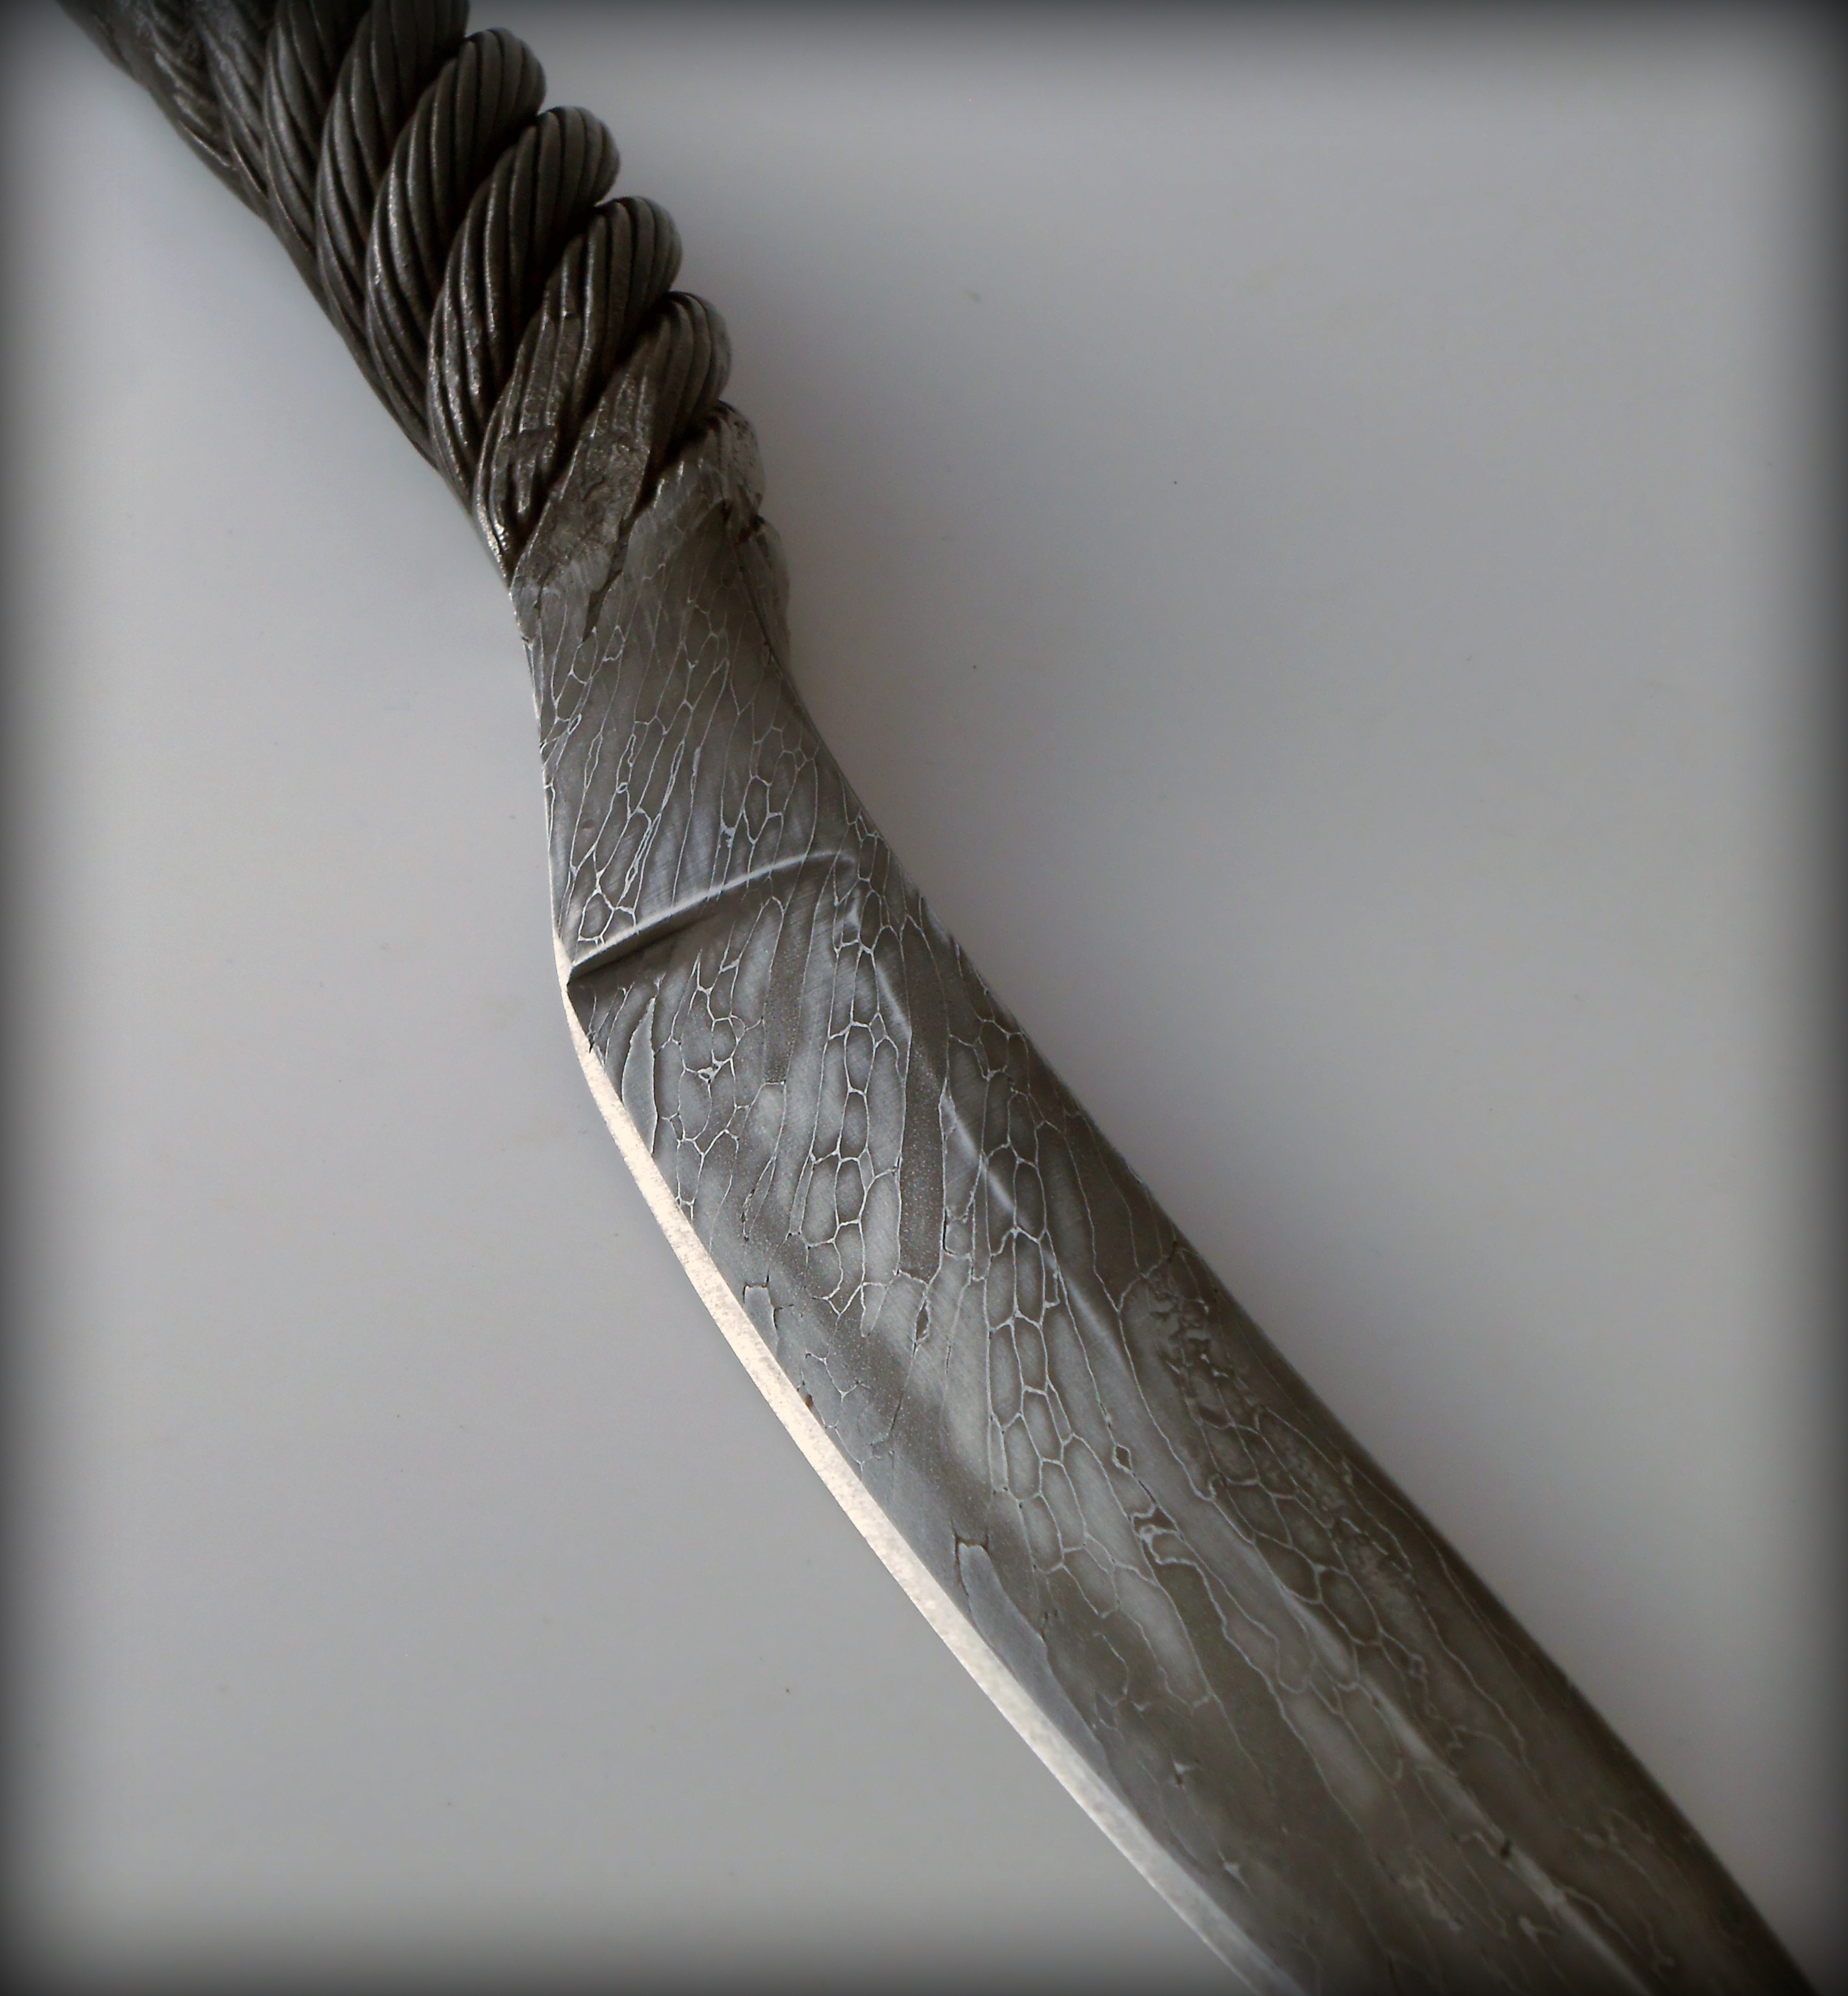
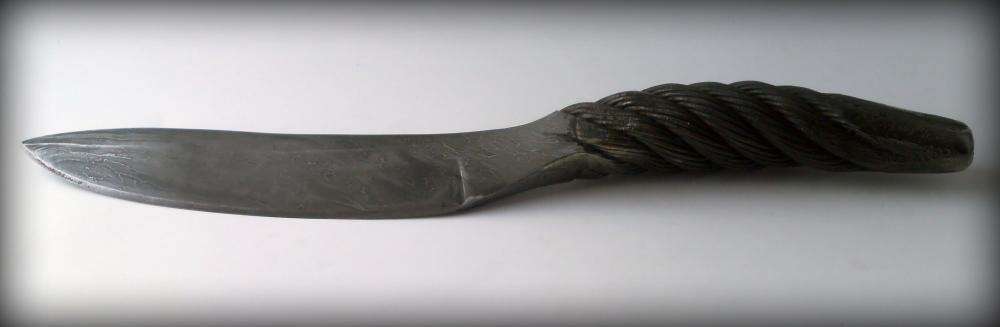
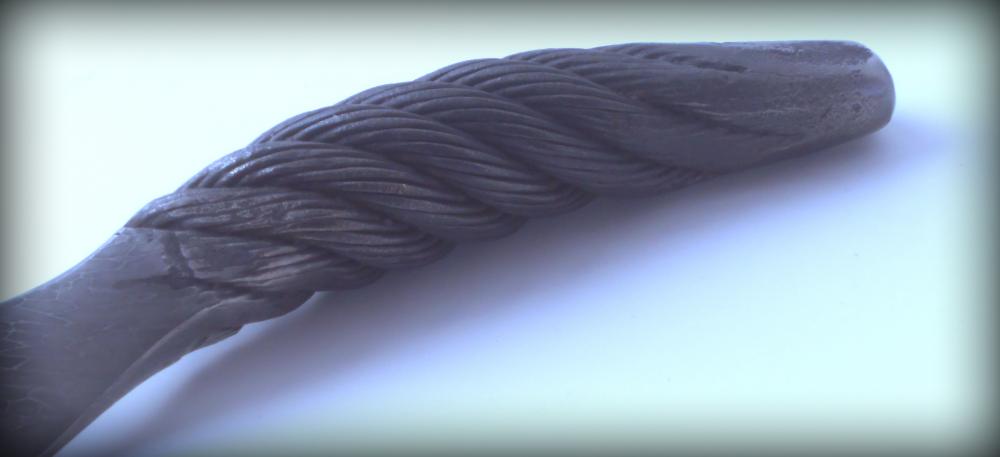
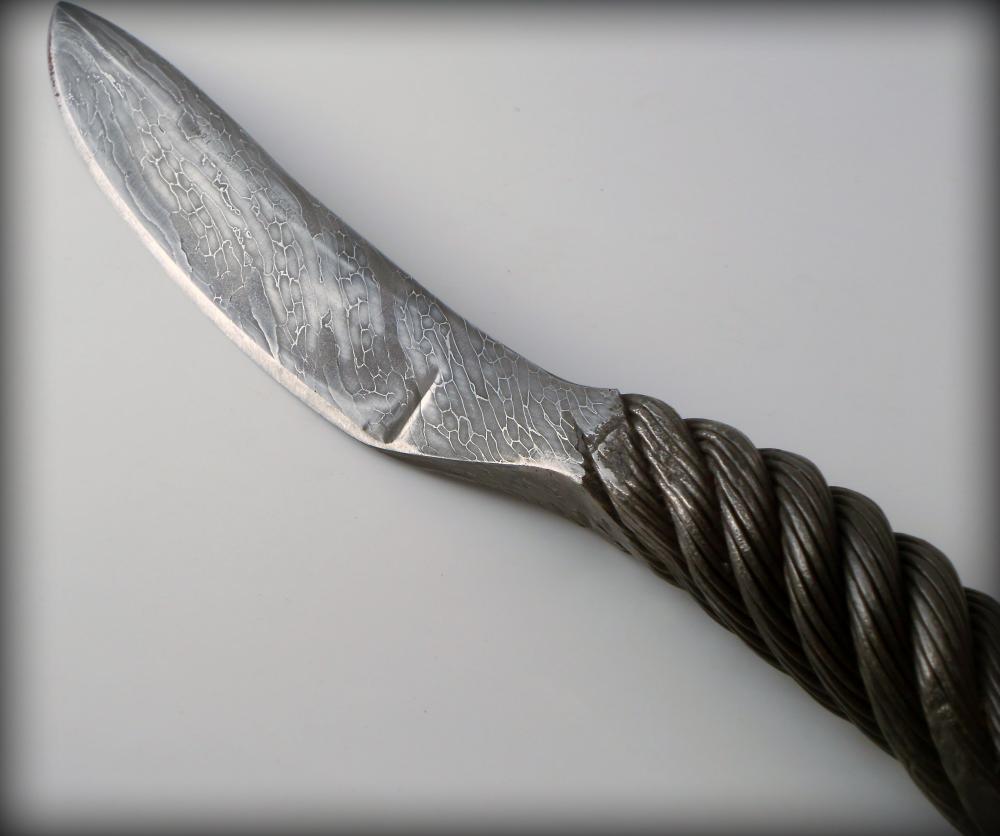
This cable measures up just a hair over an inch, not sure if inch and an eighth, or just one inch but do to normal variances, it measure up slightly over. This was actually my second attempt. On the first one, I just tossed it in the forge to start burning off the oils and everything, and then fluxed and heated to welding temp, but I couldn't get the ends to weld up. I kept going slightly hotter and then before I knew it, half of one side of the cable was gone... melted away. On this one, I mig welded the ends of the cable before I started, and that made all the difference. Once I had each end forged welded and shaped in to a square, I just heated the whole thing, fluxed it, and tightened the twist in the vice. Everything seemed to weld up very nicely after that. I ended up cutting about a half inch off the end, before forming the blade, because there were some burnt ends from a few of the strands.
-
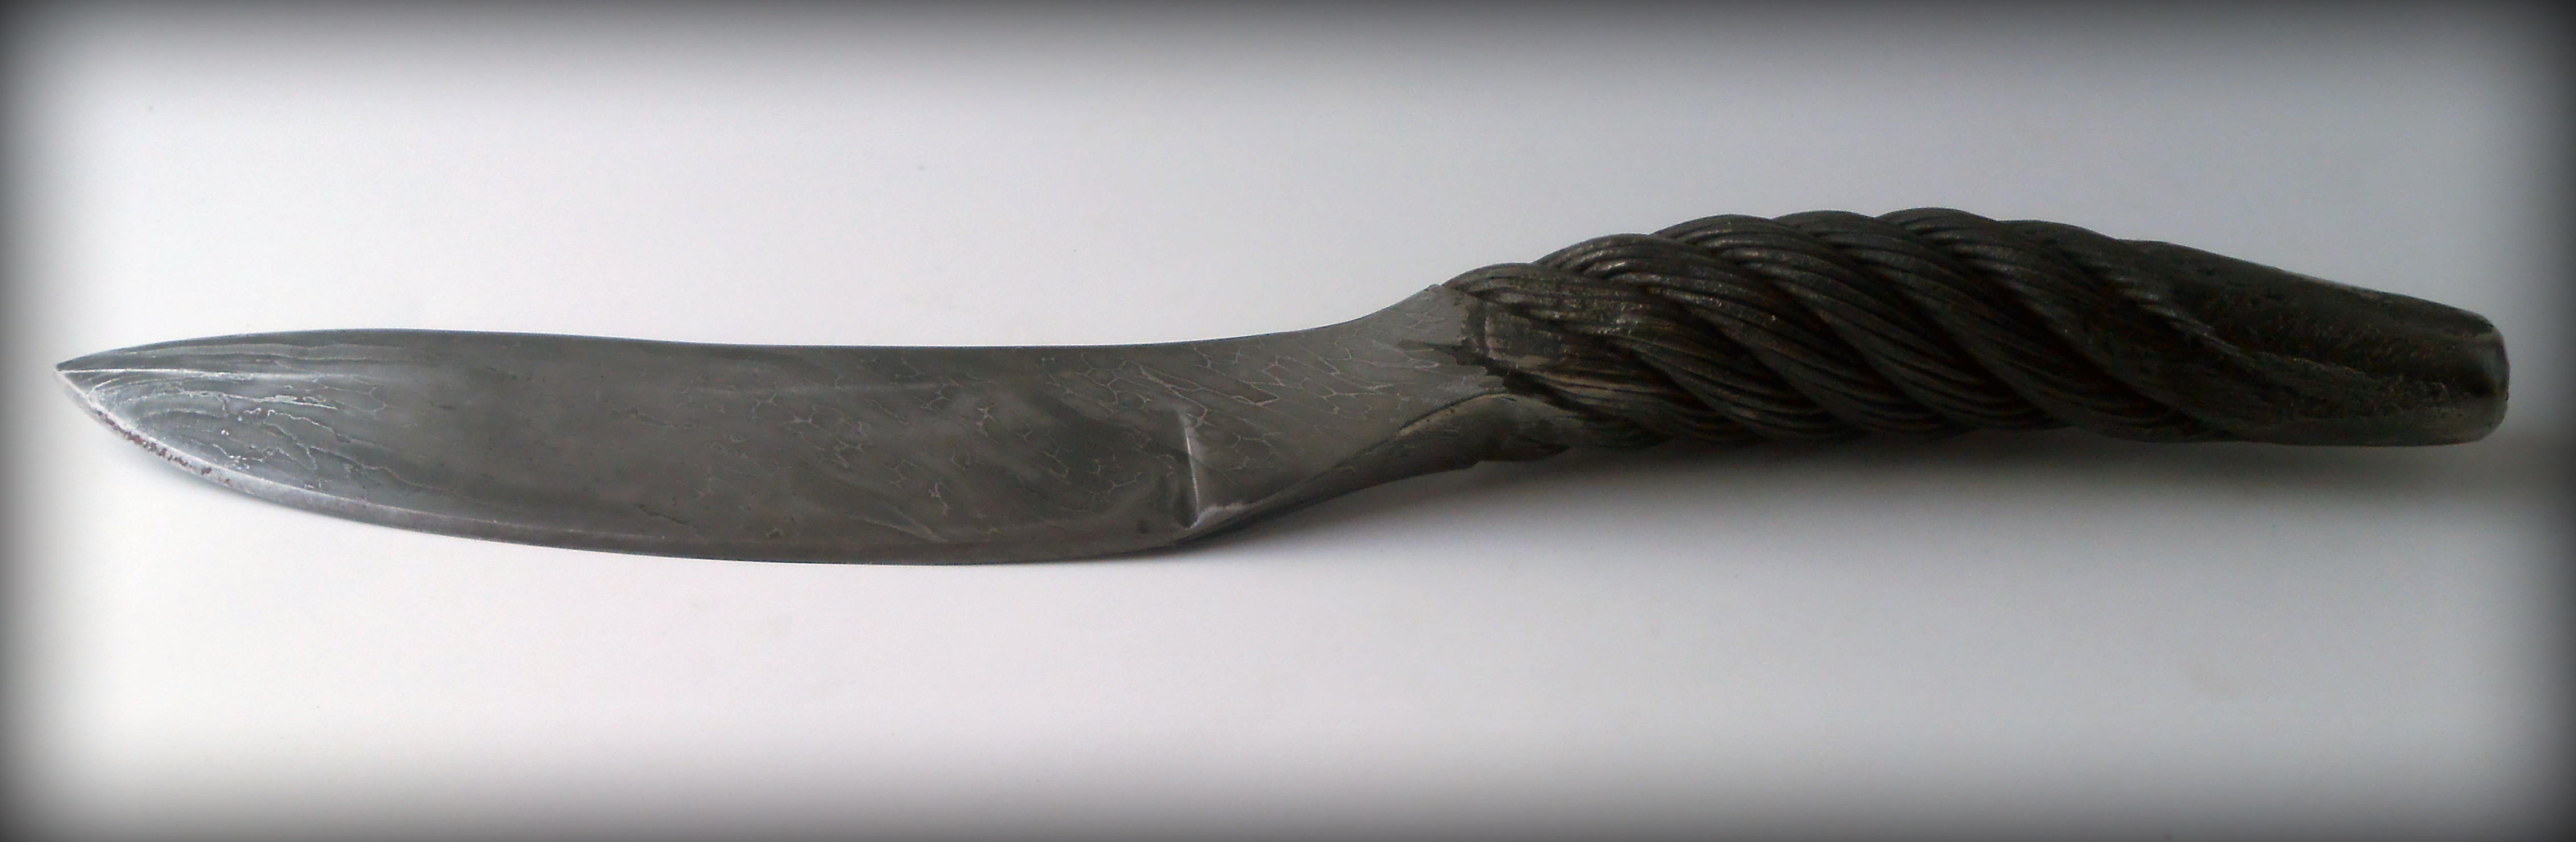
I'm walking through the scrap yard the other day and found a big honking piece of cable. The owner of the scrap yard says, "Take it." so I do. Cut off a hunk, forge weld it, flatten it, heat treat, and low and behold, nice and hard with a beautiful grain pattern. So, had a little free time and thought it would be fun to give a cable knife a quick try. I wasn't sure how much I would need, and probably took a little more than I should have. 12" overall. 7" blade. Its pretty dang heavy. All of the sanding was done on the grinder. Didn't have time to spend hand sanding like I would on any other knife I made, but I think it still came out pretty cool. Might have to pump out a few more of these. Took it to work to show a buddy who is a "knife guy" and while he's looking at it, I get orders for two of them from other people just walking by. I'll never understand people. I spend 30 hours making a knife that I think is fit to hand down to future generations, but then I do something just for the fun of it, knock it out in just a few hours, and its the most popular knife I make. (rolls eyes)... some people's kids.

-
As a someone who is still very new to knife making, but has sold a few, maybe my take is a little different than most. I started blacksmithing so I could learn how to forge weld and make damascus knives. The aesthetic pattern in them is a fascination of mine, even to this day when I've made quite a few of my own. As with any hobby I seem to undertake, it took a little money up front to really get to a point where I felt like I was doing things "right", and like any hobby I undertake, I seem to always look ahead to some sort of angle where I can at least get the hobby to pay for itself. Much like you, I didn't want to sell any of my early knives, as I was still feeling things out, to even know if I could produce a knife that behaved like it was supposed to. Besides a small handful that were given as gifts to family for wall hangers, all of my earliest attempts were destroyed in testing or given to big burly friends who I knew would take me seriously when I said, "Put this blade through its paces." Now that I am producing a quality of knife that I am proud of, I have been willing to sell a few, and with that, all of my free time is now gone, as commissions have started to pour in. My first actual sale was over facebook, and after a lot of haggling, I took a lot less than I had originally wanted. Two things made me do that. One: I really just wanted to be able to say I sold my first knife. Two: I needed supplies... grinder belts and more steel, and I promised my wife I wouldn't spend anymore money out of our usual budget, so I had to get money from a sale to afford to make more knives. I look back on that sale, and I am glad I took the guys final offer. Otherwise, I might still have the knife in my possession and not have the cash. Since then, I've been able to sell a few more, all of them commissioned pieces, but on those, I know going in how much I'm going to make, so I'm able to judge a little bit better, how much time I can spend on each particular task. As an example, the last knife I sold went for $300. My goal, right now as a newer smith, is to aim for about $20 an hour (not including supplies), so that meant I had to get it finished in 15 hours. The forging of the billet went exceptionally smooth, and the initial grind was pretty easy too. As with all my knives I've done so far, though, I get lost (or just plum forget) how much time is involved in the hand sanding to truly finish the blade, and it took several more hours than I had originally thought it would. (Seems the more knives I make, the more hand sanding I want to do on each knife, because that seems to be where the real magic happens for me). In the end, I made closer to $12 or $13 an hour. So that means I either have to improve my speed, which is a given, but also, as the my quality continues to improve, I will also need to charge more. Since I'm not paying my bills with this money, or trying to run a professional or even a semi-professional shop, the money is a lot less important to me than some, but I also don't want to feel like I am giving them away. Its not only a fine line to walk within your own personal finances, but it also might make some people angry if you're priced to low. I've had some nasty correspondence with two people regarding my prices. Both are professionals, one a blakcsmith and one a blade smith. Both of them said my prices were to low and that I was creating an expectation in people's minds about how low smithing work should be priced. I understand their points... they are trying to run a business and feed their families from it, so I get it, but my argument is... I wouldn't expect to pay a backyard mechanic the same shop rate as I would at the dealership to fix my vehicle. I'm the backyard hack smith, and they are the dealership or professional shop. I think there is reason for both to exist. But its something to keep in mind, especially if you have visions of supporting yourself/family from this in the future. As a hobbyist, you can be a little less careful about pricing. As a professional, you need to listen to everyone's advice on here and really start working out a formula to make it profitable enough to survive/thrive.
-
As always, a wise sage. Thanks Steve. First place I'm gonna look.
-
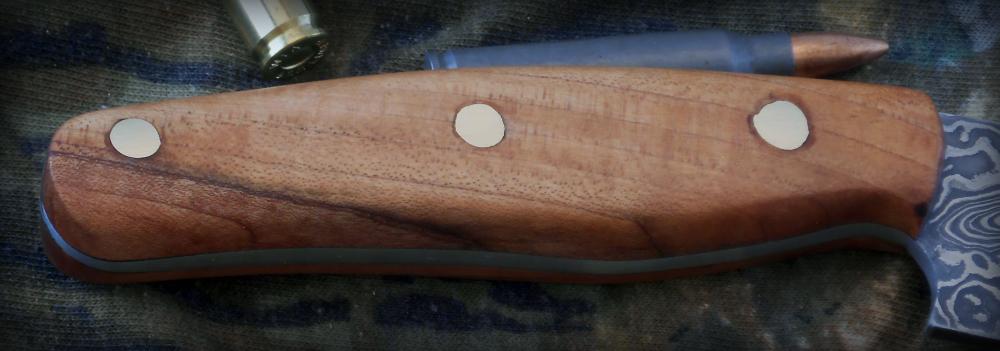
Going back over my steps, and I would bet money that I didn't countersink the holes. That could explain it. I always do, but on this one, I think I blew right past that step. Never tried annealing the brass. Didn't even know it could be done. What temperature does it need to be taken up to? I just use my forge for HT, normalizing, and annealing, and have gotten pretty good with the steels I use, but not sure how I would tell the temp on a piece of brass, being nonmagnetic already. Ill have to look in to it and play around a little bit.
-
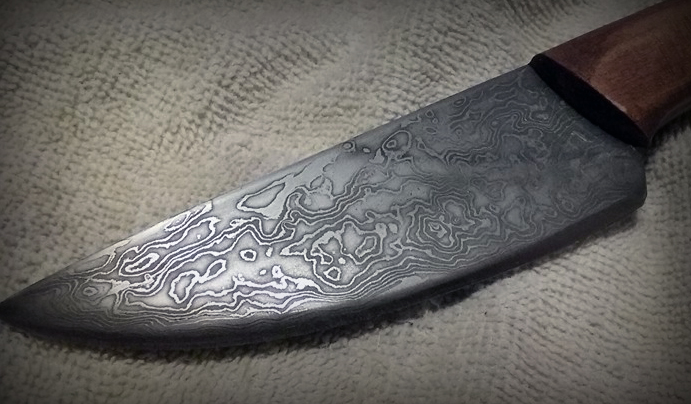
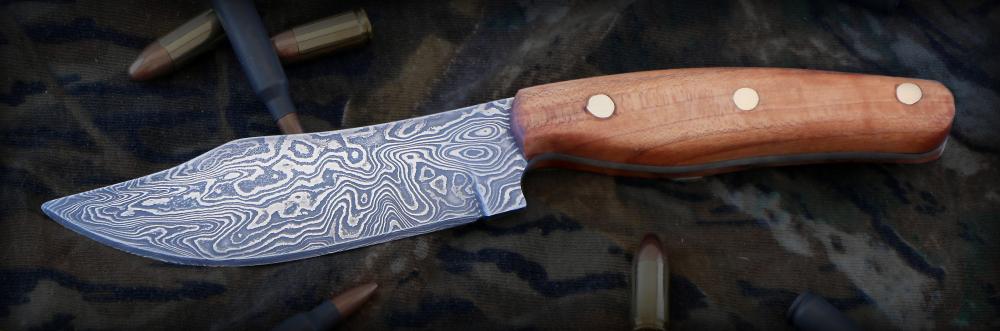
Finished this one up today. First attempt at a dog start pattern. Don't think I quite nailed it, but do love how much movement the pattern has. 1080 & 15n20, maple handles. Screwed up on peening the pins too. Don't know what I did to make a couple of them come out so wonky. Guess it really doesn't matter on this one. It was a commission job and the customer loves it, so no biggie, but wish I knew what I did so I don't repeat it in the future.


-
Mice, men and slack tubs
HEAP of JEEP replied to ytuyuty's topic in Blacksmithing, General Discussion
You could look on this as an omen from the forging gods. I believe I read about this from the ancient Japanese sword smiths. The correct time for quenching a katana is when the moon is the same color as the underside of a hawk's wing. The wind will be blowing in the direction of the spirits. The voices of your ancestors will be seen in the stars... oh, and there should be a dead mouse floating your slack tub. So, by my reckoning, you're a quarter of the way to turning out an amazing forged masterpiece to be rivaled by smiths for centuries to come. -
Agree with everyone else. Stunning work! The texture you get in your finish is mesmerizing to me for some reason. I just caught myself staring at the leaf for 5 minutes. LOL
-
Wish she took an interest in it... let me rephrase... Wish she took an interest in actually making the stuff. She loves wrought iron looking pieces, rustic forged pieces, and she loves the fact that when she tells her awesome husband to do something, he does it without question. She came out to watch/help me forge one time... got a small burn on her hand from some flying scale when I had her helping as a striker, and she hasn't been back since. The copper on Joel's piece is what caught her attention on this one. I've never worked with copper, but I guess I'll be learning. It will be a while though. Other things on the list include more candle holders, an incense holder, gardening tools, door pulls for the sliding barn door in the master bath, and a bunch of other stuff. Actually, with my passion for the knives, my general blacksmithing skills haven't improved nearly as fast as my blade making skills, so I do credit her for forcing me back to basics on a lot of things, and I don't think that is all bad.
-
I love the look of this. Excellent job! On a side note, I wish you people would stop posting so much cool stuff. My wife was just looking over my shoulder, saw the pictures,, and now there is another project added to my honey-do list. Can't tell you how many times this has happened, so that list is huge!!!
-
Ha, to funny Das. As much as my wife laughed at it, I used it on the grill this past weekend, and it was great. I have an order for one for a father's day gift too, but I have to add viking runes to that one. lol
-
I cut the chain in to lengths about 5 inches long, then stacked those up the best I could and tack welded them together, and welded a handle on the end at the same time. Heated them up real slowly, and used a lot of flux (borax). At an orange heat, I taped them together as light as I could so the tack welds wouldn't come apart, but it closed up a lot of the spaces within the billets. Brushed and fluxed again, and then went to welding heat. First heat, I just set the welds on the side, and back in the fire. Second heat, started on the side, then turned the billet and gave it a few light hits on the top, to close up some more voids. Third heat, I started on the top, and treated that as an initial weld, just lightly setting the weld, then back in the fire. After that, I would just rotate the billet with each heat. One working the sides, then one working the top and bottom. For the normal damascus that I do, I like about 4 welding heats, but with the chain, it really didn't feel set 100% after four... I think I wound up with closer to ten. Lots of brushing and lots of flux. There might be an easier way, but it worked pretty well for me. I did do a video about how I did it, but once again, I'm not sure of the rules for posting links because I have it up on my Jeep channel that I do make money on. So, not gonna post the link, but if you want it, you can send me a PM and I'll get it to you.