HEAP of JEEP
-
Posts
203 -
Joined
-
Last visited
Content Type
Profiles
Forums
Articles
Gallery
Downloads
Events
Everything posted by HEAP of JEEP
-
That really means a lot to me. Thank you, very much. I see what you're saying about sanding all the way up. I was also thinking, I may just take a q-tip and run some ferric chloride down around the handle. Is one more preferred than the other? I don't like the direction of the grain either, but the bamboo came from a Lowes flooring sample, and it just wasn't long enough to run the correct direction. I had to do it on the other knife I used bamboo on, and that's what she saw and fell in love with, so no worries on that end, and since, I swear I will NEVER work with bamboo again, and this time I really mean it, I don't think I'll be running in to that problem again. I found a wood shop by my work that let's me go through their cut offs and I've found quite a lot of nice hard wood scraps that I plan on using for future projects.
-
I got a commission job and was asked to do something that I had never tried before. Its going to be a gift from a woman I work with to her husband for their anniversary. I was walking the scrap yard the other day, and two old chainsaw chains followed me home, so since I had never tried any chain damascus, I decided to give that a shot. I also found a few old files, and since I have no idea what the steel is in the chains, I decided to do a san mai style with a file for the cutting edge. I swore I would never work with bamboo again, but when the money was dangled in front of my face she said she really wanted the bamboo handles, my convictions went right out the window.


-
Had a chance to watch the first part of it last night, and can't wait to get home from work and catch the rest of it. Very interesting stuff. Thanks for the link.
-
Interesting stuff there. Guess maybe I should read up on runes if people are going to have putting them on things. I'd hate to have gotten it reversed... they probably wouldn't have been to happy... of course, if it caused them confusion, they may not have known why they weren't happy with me... right? LOL. I threw pictures of this up on my facebook page, and now I've got people calling me things, from heathen to pagen, because of this... I really don't get people. If my customer had wanted a damascus cross, I would have made them one of those... instead, they are Viking lovers, and asked for a Thor's Hammer. For them, there might be a deeper meaning, but for me, it was just a small commission piece that netted me enough money for some pizza and beer. Didn't realize I was condemning my soul to the eternal torment in the underworld by forging something that, to me, resembles a boat anchor more than a hammer. lol.
-
Thanks for the info. I'll be doing another one for a customer to give to her husband for father's day, so I will try that out.
-
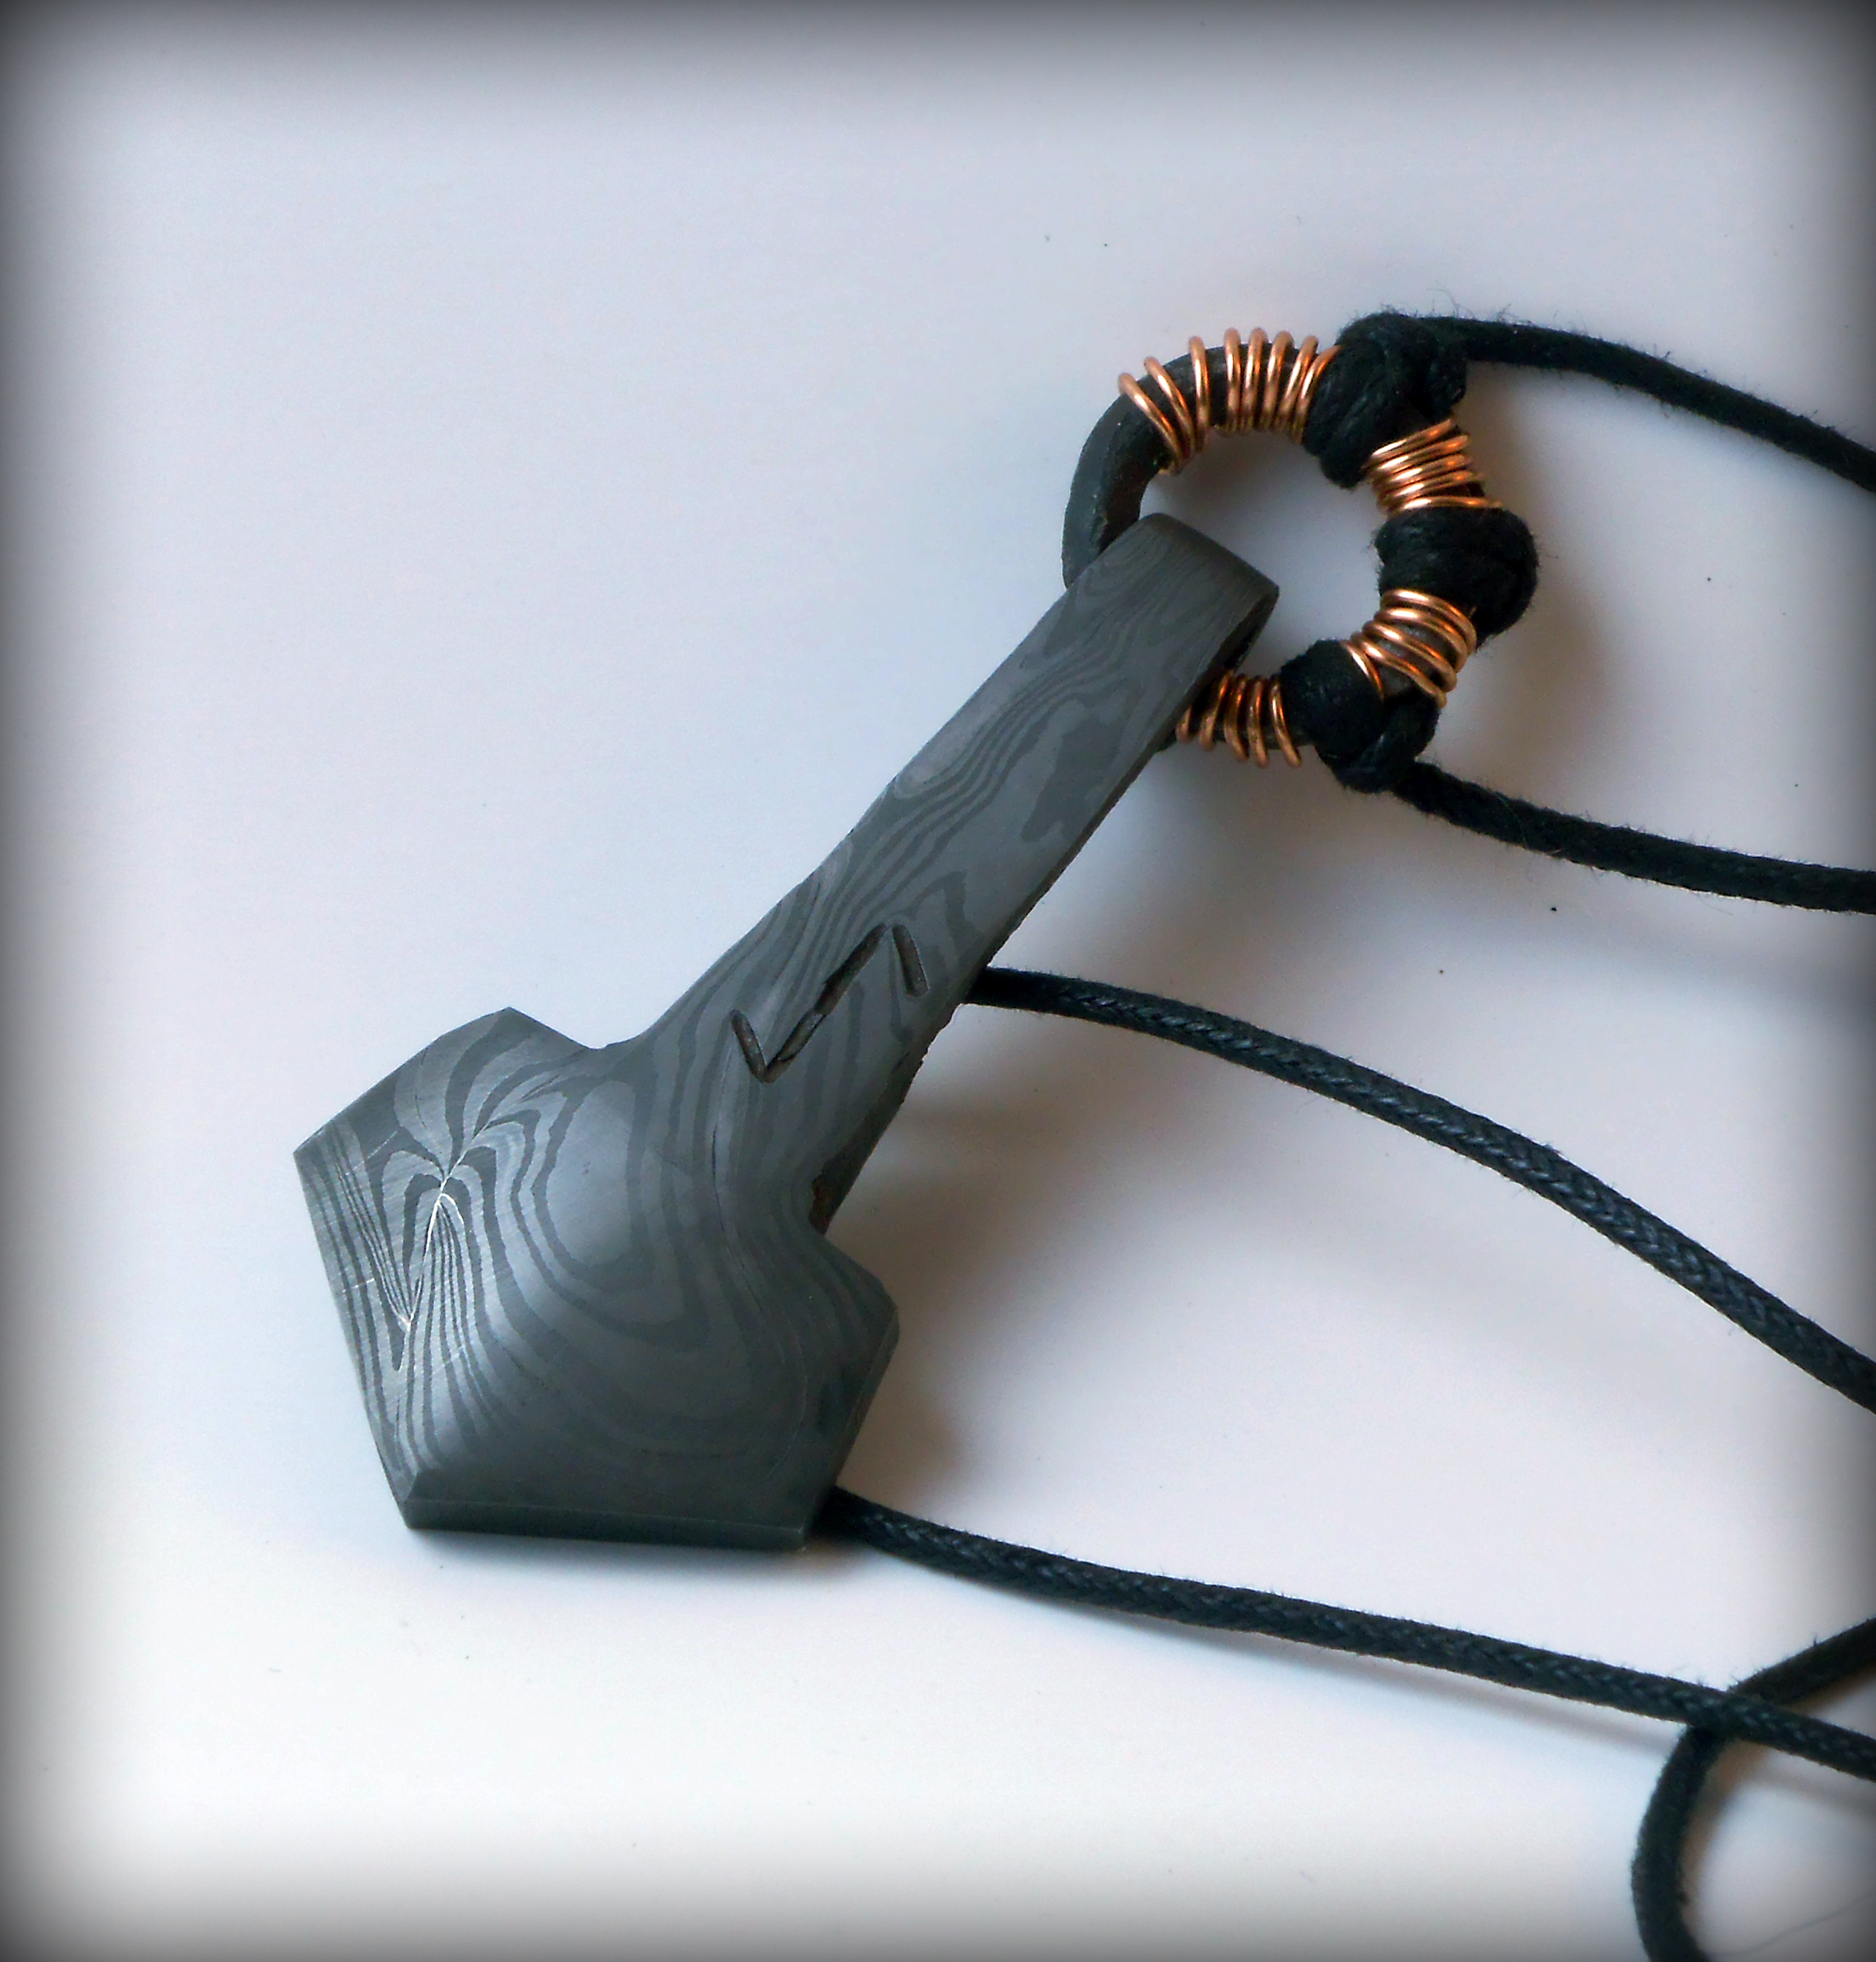
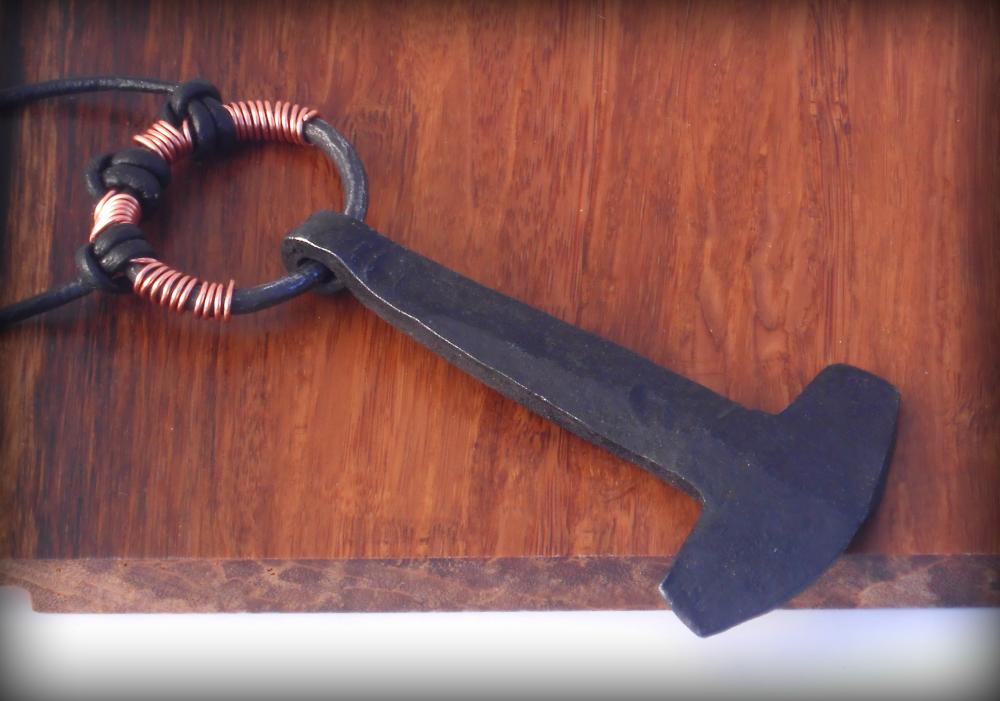
Had a customer order one of these Thor's Hammer pendents, but she wanted it in damascus, and asked me to put a rune on it. Not sure what the rune means, but looks like the picture she drew. Still don't get the popularity of these, but this damascus one came out pretty cool.

-

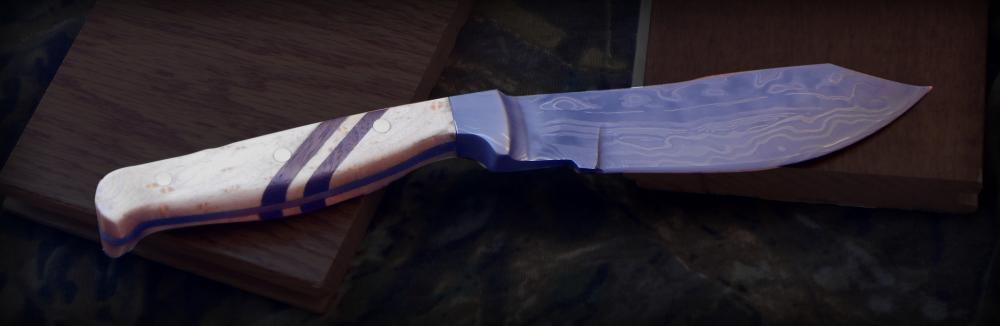
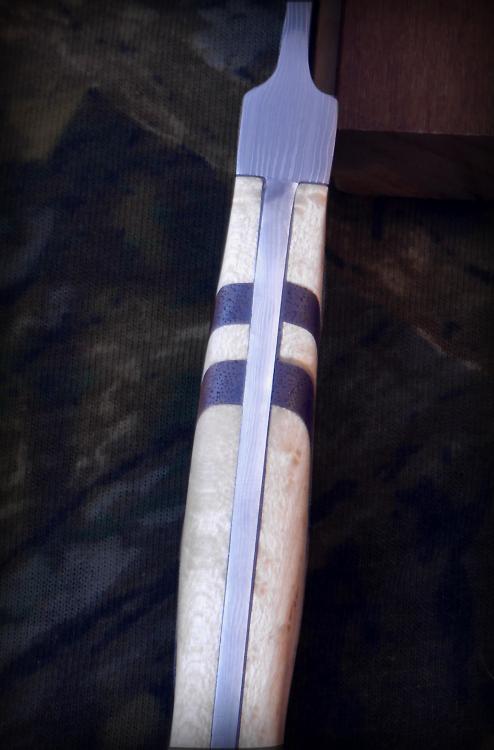
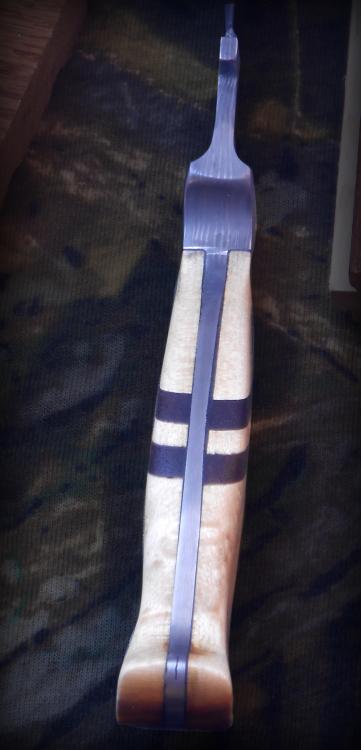
Damascus Hunter with Integrated Bolsters
HEAP of JEEP replied to HEAP of JEEP's topic in Knife Making
Thanks. I looked it up last night, and watched a couple of videos of people doing vine patterns and the like. I've seen it, but never realized it was called jimping. It can be quite artistic. I've got a knife I'll be working on this weekend, and I think, after a little practice on some scrap, I may give it a try on that blade. Its a gift for a coworker's husband, so if I screw it up, I'll probably be the only one complaining. I'll have to do a little more research on it, but one early question I had was how do people clean up inside the file marks? From the little bit I saw, a lot of people are using very tiny files, so how do they get sand paper down in into the design to clean up the file marks, without dulling the crisp edges at the top of the spine? Or do most folks not even worry about it? I'd worry on the damascus, because every little blemish seems to get magnified in the etch. Maybe its not so noticeable if its just small grooves rather than some of the intricate vine patterns I saw. -
Damascus Hunter with Integrated Bolsters
HEAP of JEEP replied to HEAP of JEEP's topic in Knife Making
I appreciate the kind words. One of these days I'll come up with some kind of mark that represents me, but for now, I'm just having fun making them... the few bucks I'm getting from the occasional sale just means my wife doesn't have to complain to much about my hobby. Its pretty much paying for itself at this point... now if I could just get her to stop complaining about how much time I spend in front of an anvil, life will be all smiles. Gotta admit though, I am not familiar with the term "jimping". I'm going to have to look that up. -
Damascus Hunter with Integrated Bolsters
HEAP of JEEP replied to HEAP of JEEP's topic in Knife Making
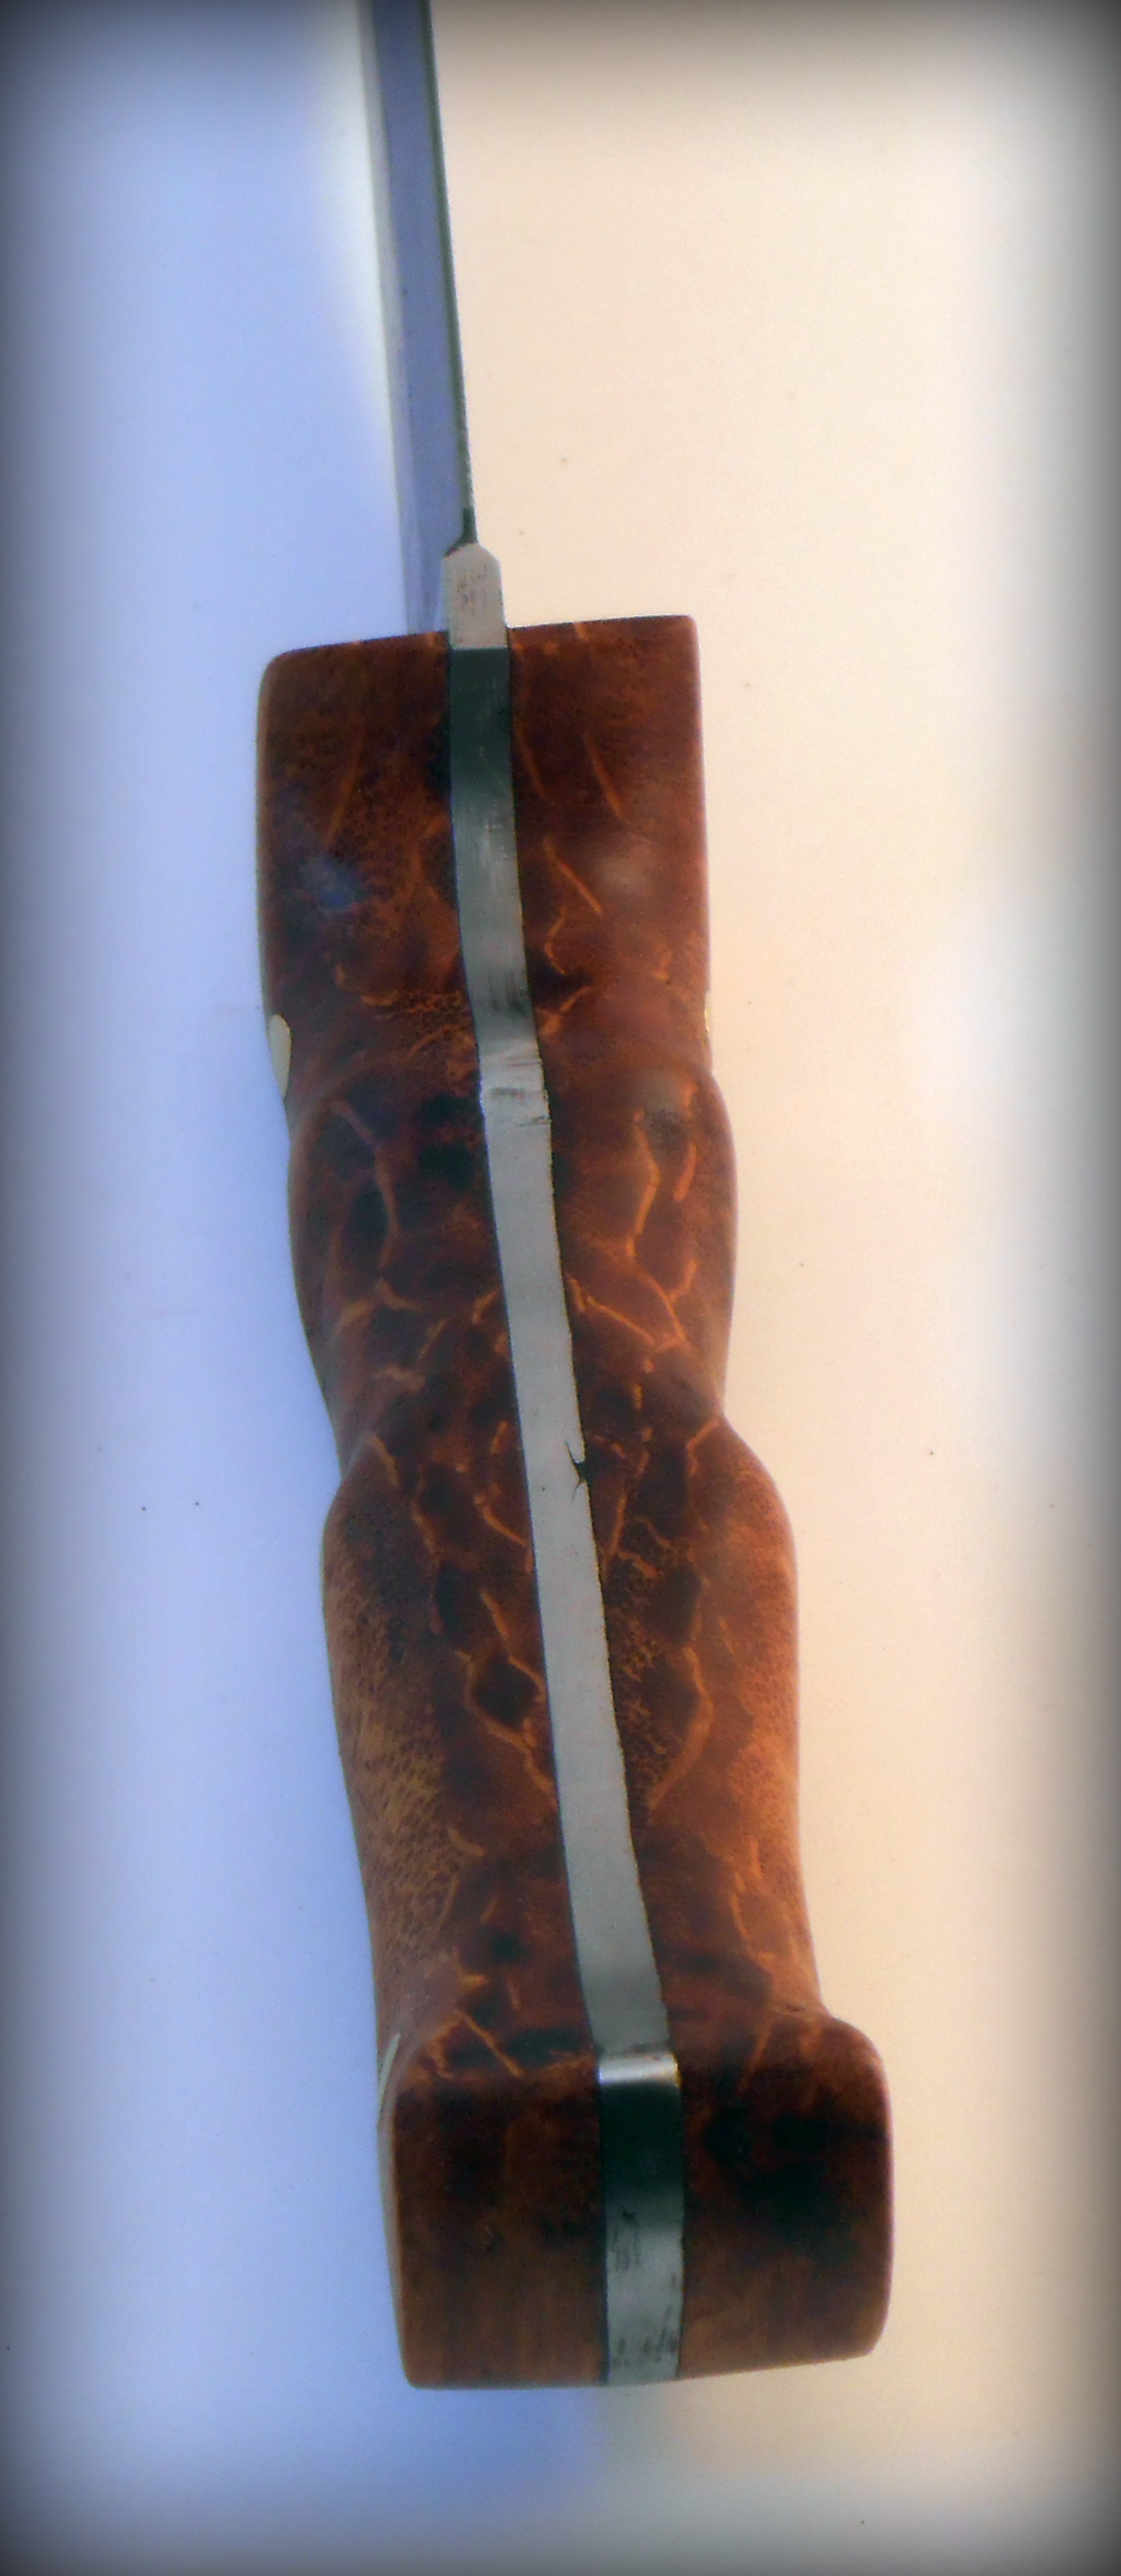
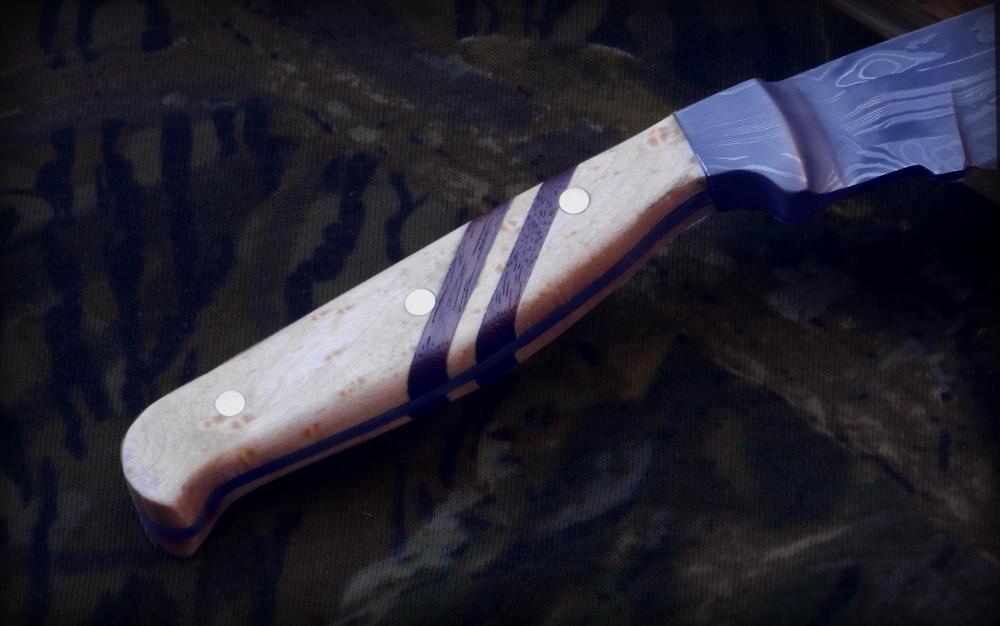
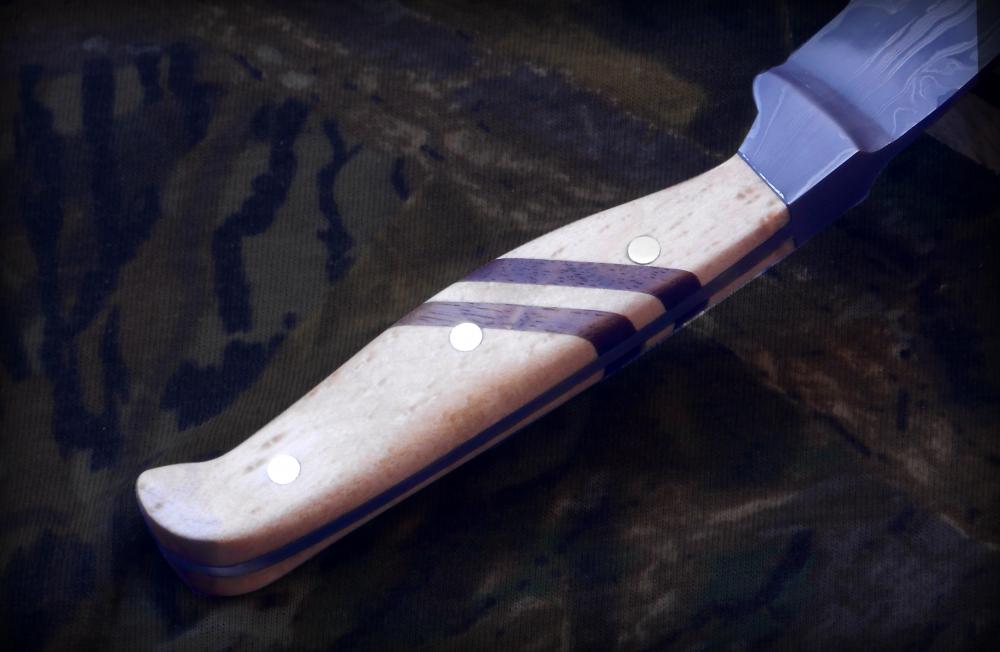
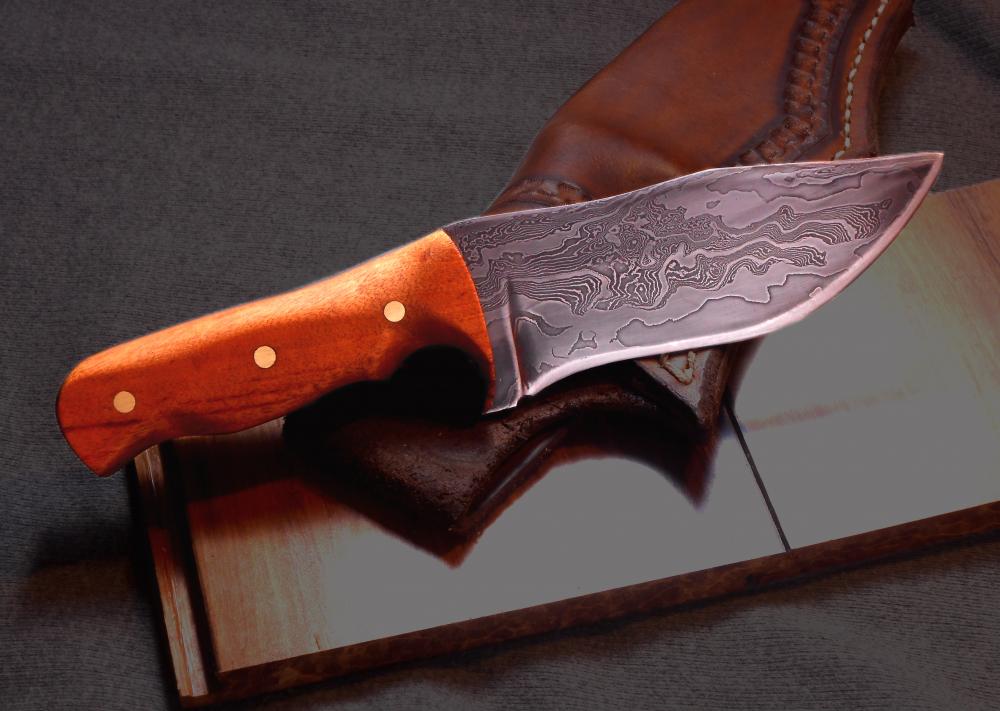
Thanks. For the handle, I took the birds eye maple and cut it at a 45, then cut a small strip from the end of the 45 I just cut. The dark wood is walnut, and I just cut a couple of thin strips on the table saw. Then I put the maple back together so it made a straight board again, but added the walnut in, so it sandwiched the the thin strip of maple. Glued it up, and when it was dry, just ran it through the planer to clean up the sides, and I was left with this. I was still thick enough that I just split it down the middle, which made lining up the stripes a lot easier... I didn't get it perfect, but for my first try with this technique, I think it came out pretty good. I did take video while I was making this. I have one up now that is just highlights of the whole process (just over music), but tonight I should be finished up editing the much longer one where I try to explain everything I was doing and my thought process behind it. I'm not sure what the rules on this forum are for posting video links (I have them on my Jeep channel which I actually make money on), so don't want to chance posting the links, but if you send me a PM I can direct you to them. I'm not sure if I covered a whole lot about making the handle, but I think I got enough video for the longer one, that you'd be able to kind of see how I did it. -
Damascus Hunter with Integrated Bolsters
HEAP of JEEP replied to HEAP of JEEP's topic in Knife Making
Yes, I put a slight bend in it. I forged it straight, but it just didn't feel right, so I played around and giving it more of chopper feel, made it feel good to my test subjects... those consisted of me, my wife, and my teenagers. lol. Don't know if its right or wrong, but its where it felt to good to me, and I like the look, so hopefully it doesn't hamper the function. -
Damascus Hunter with Integrated Bolsters
HEAP of JEEP replied to HEAP of JEEP's topic in Knife Making
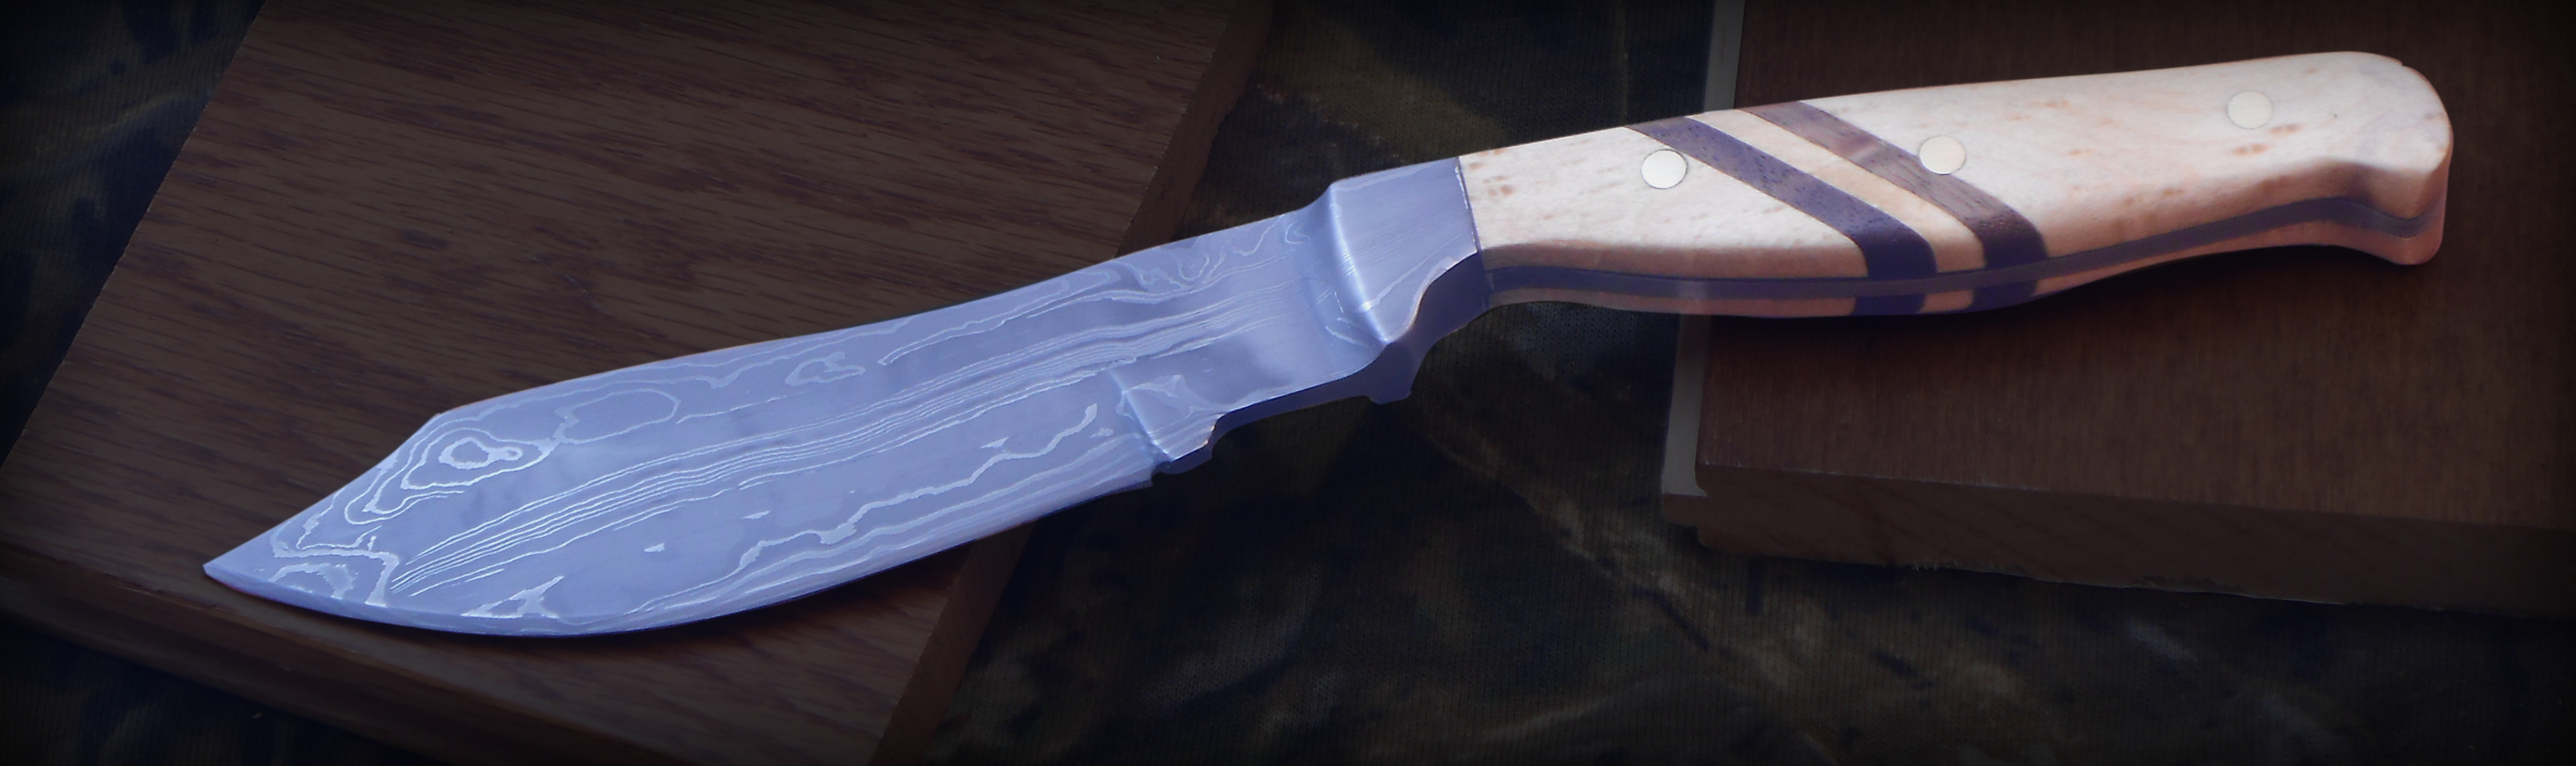
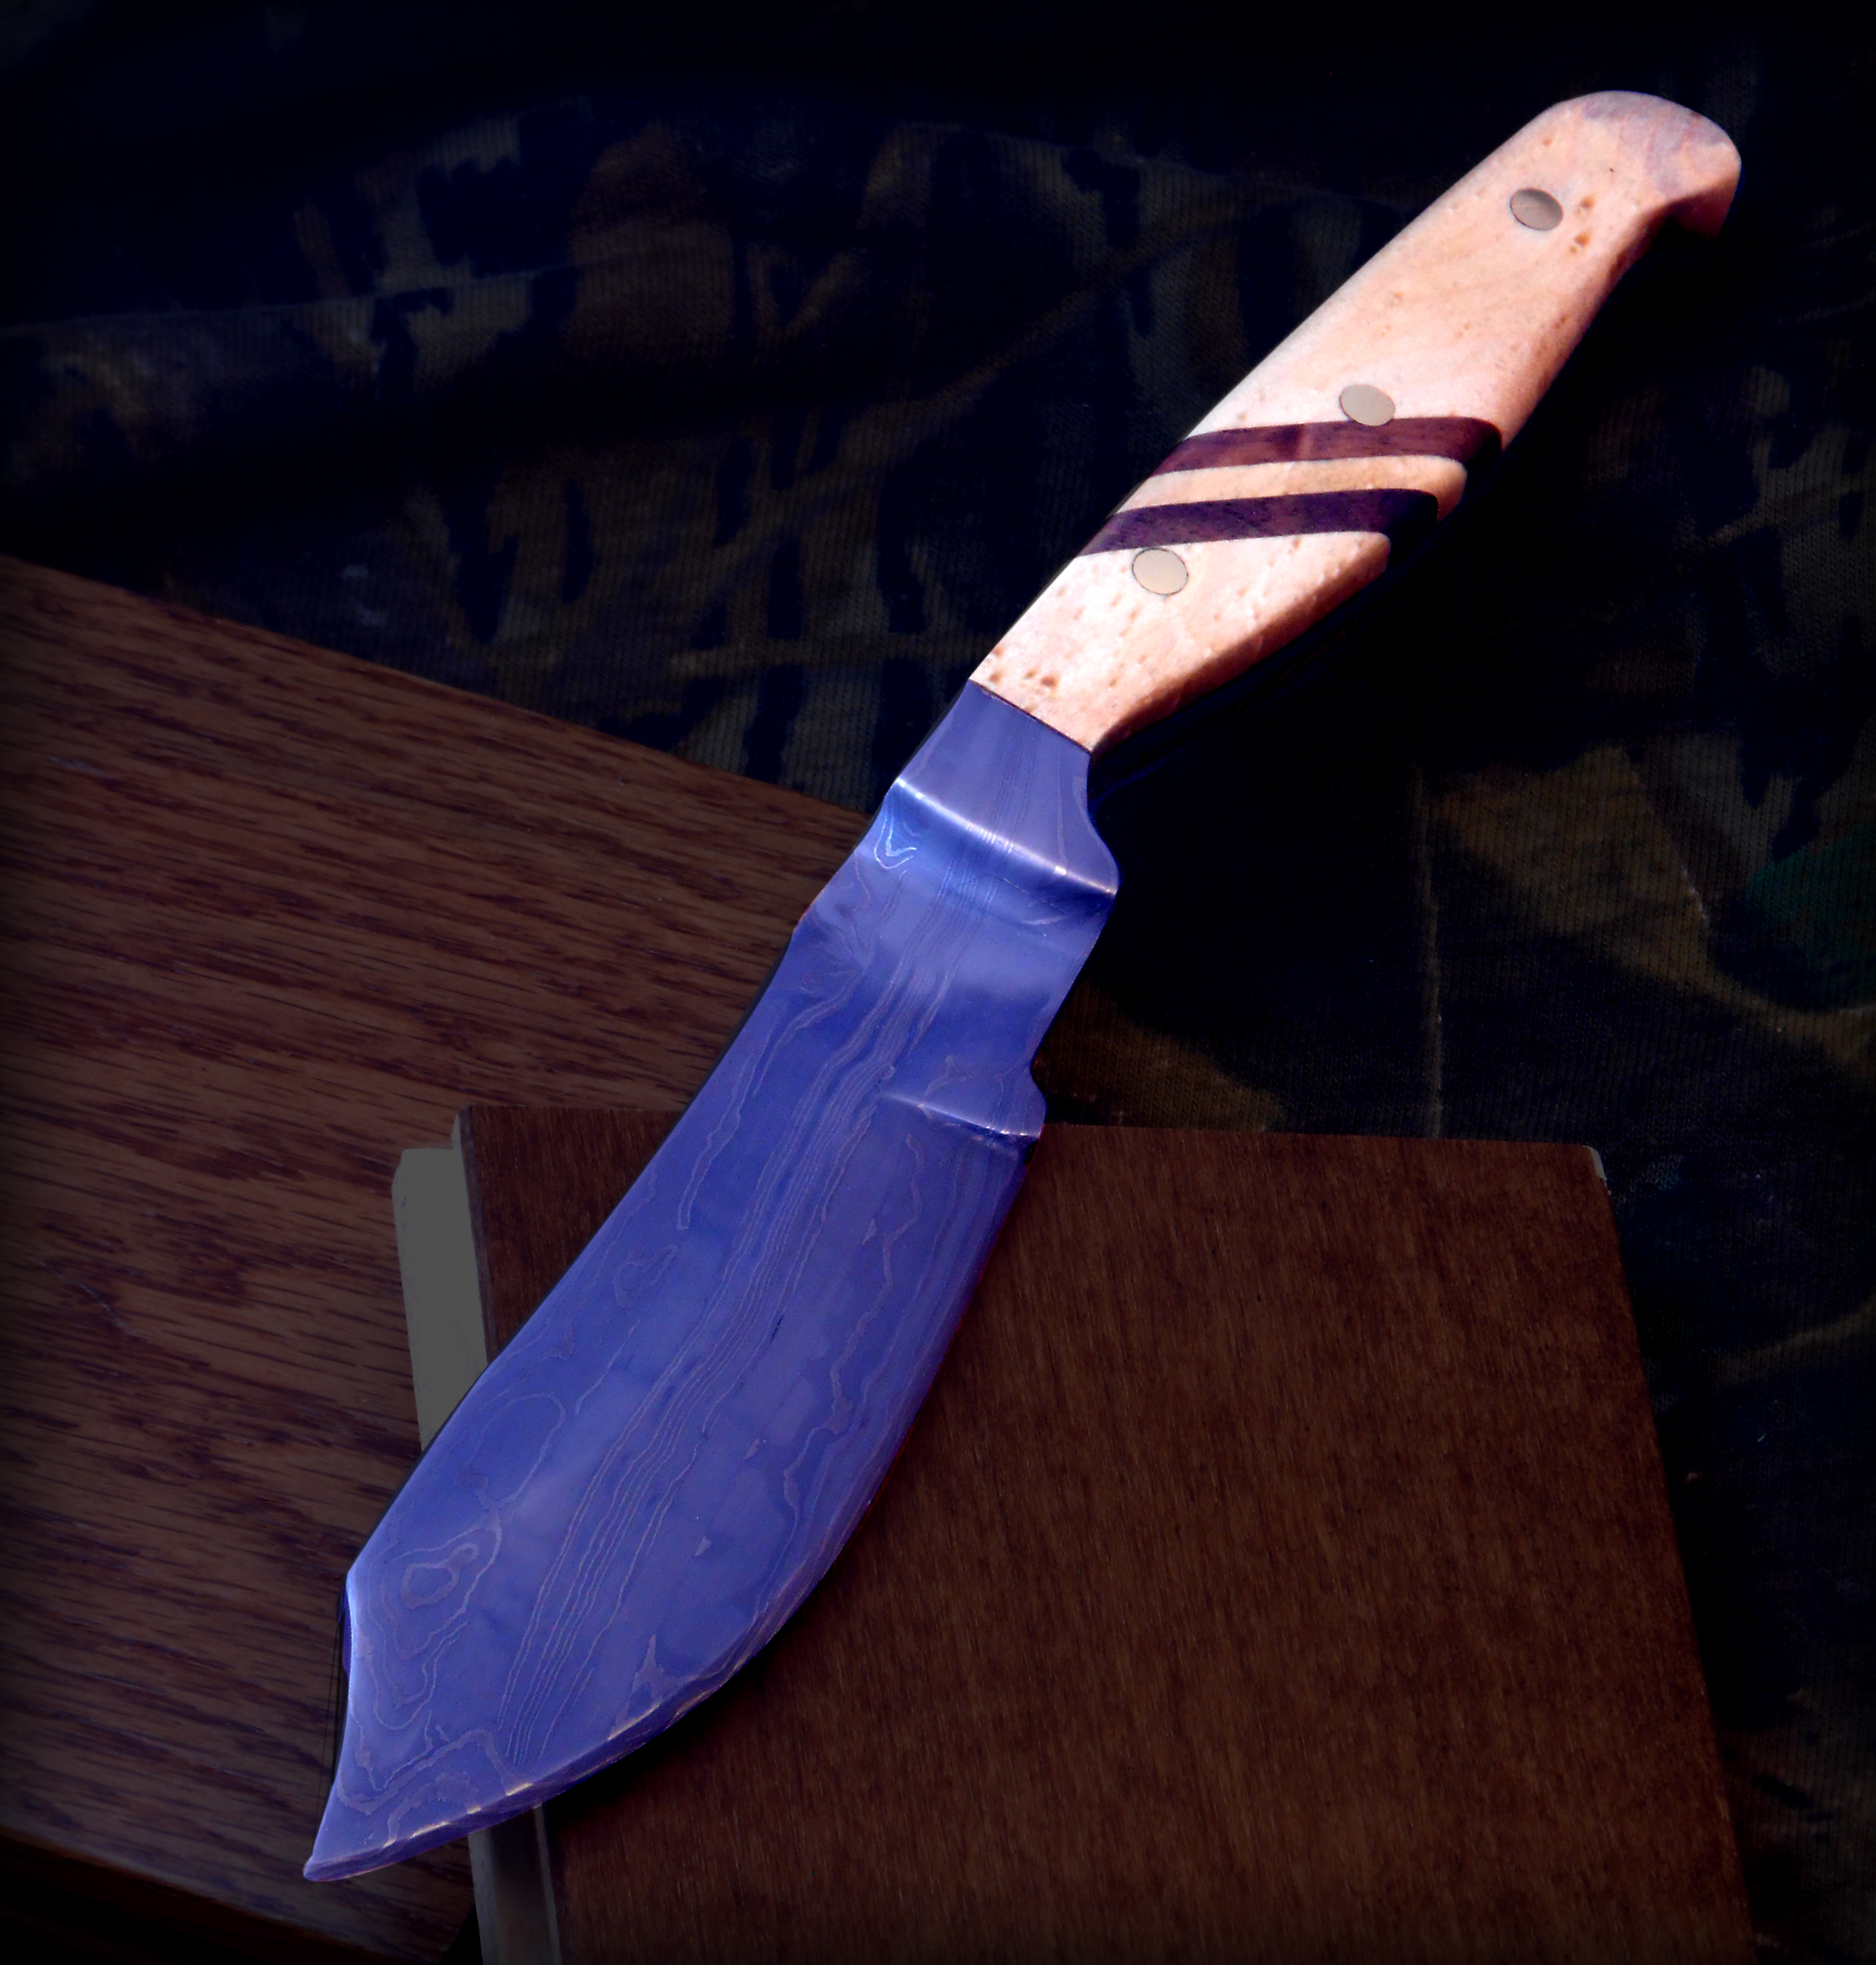
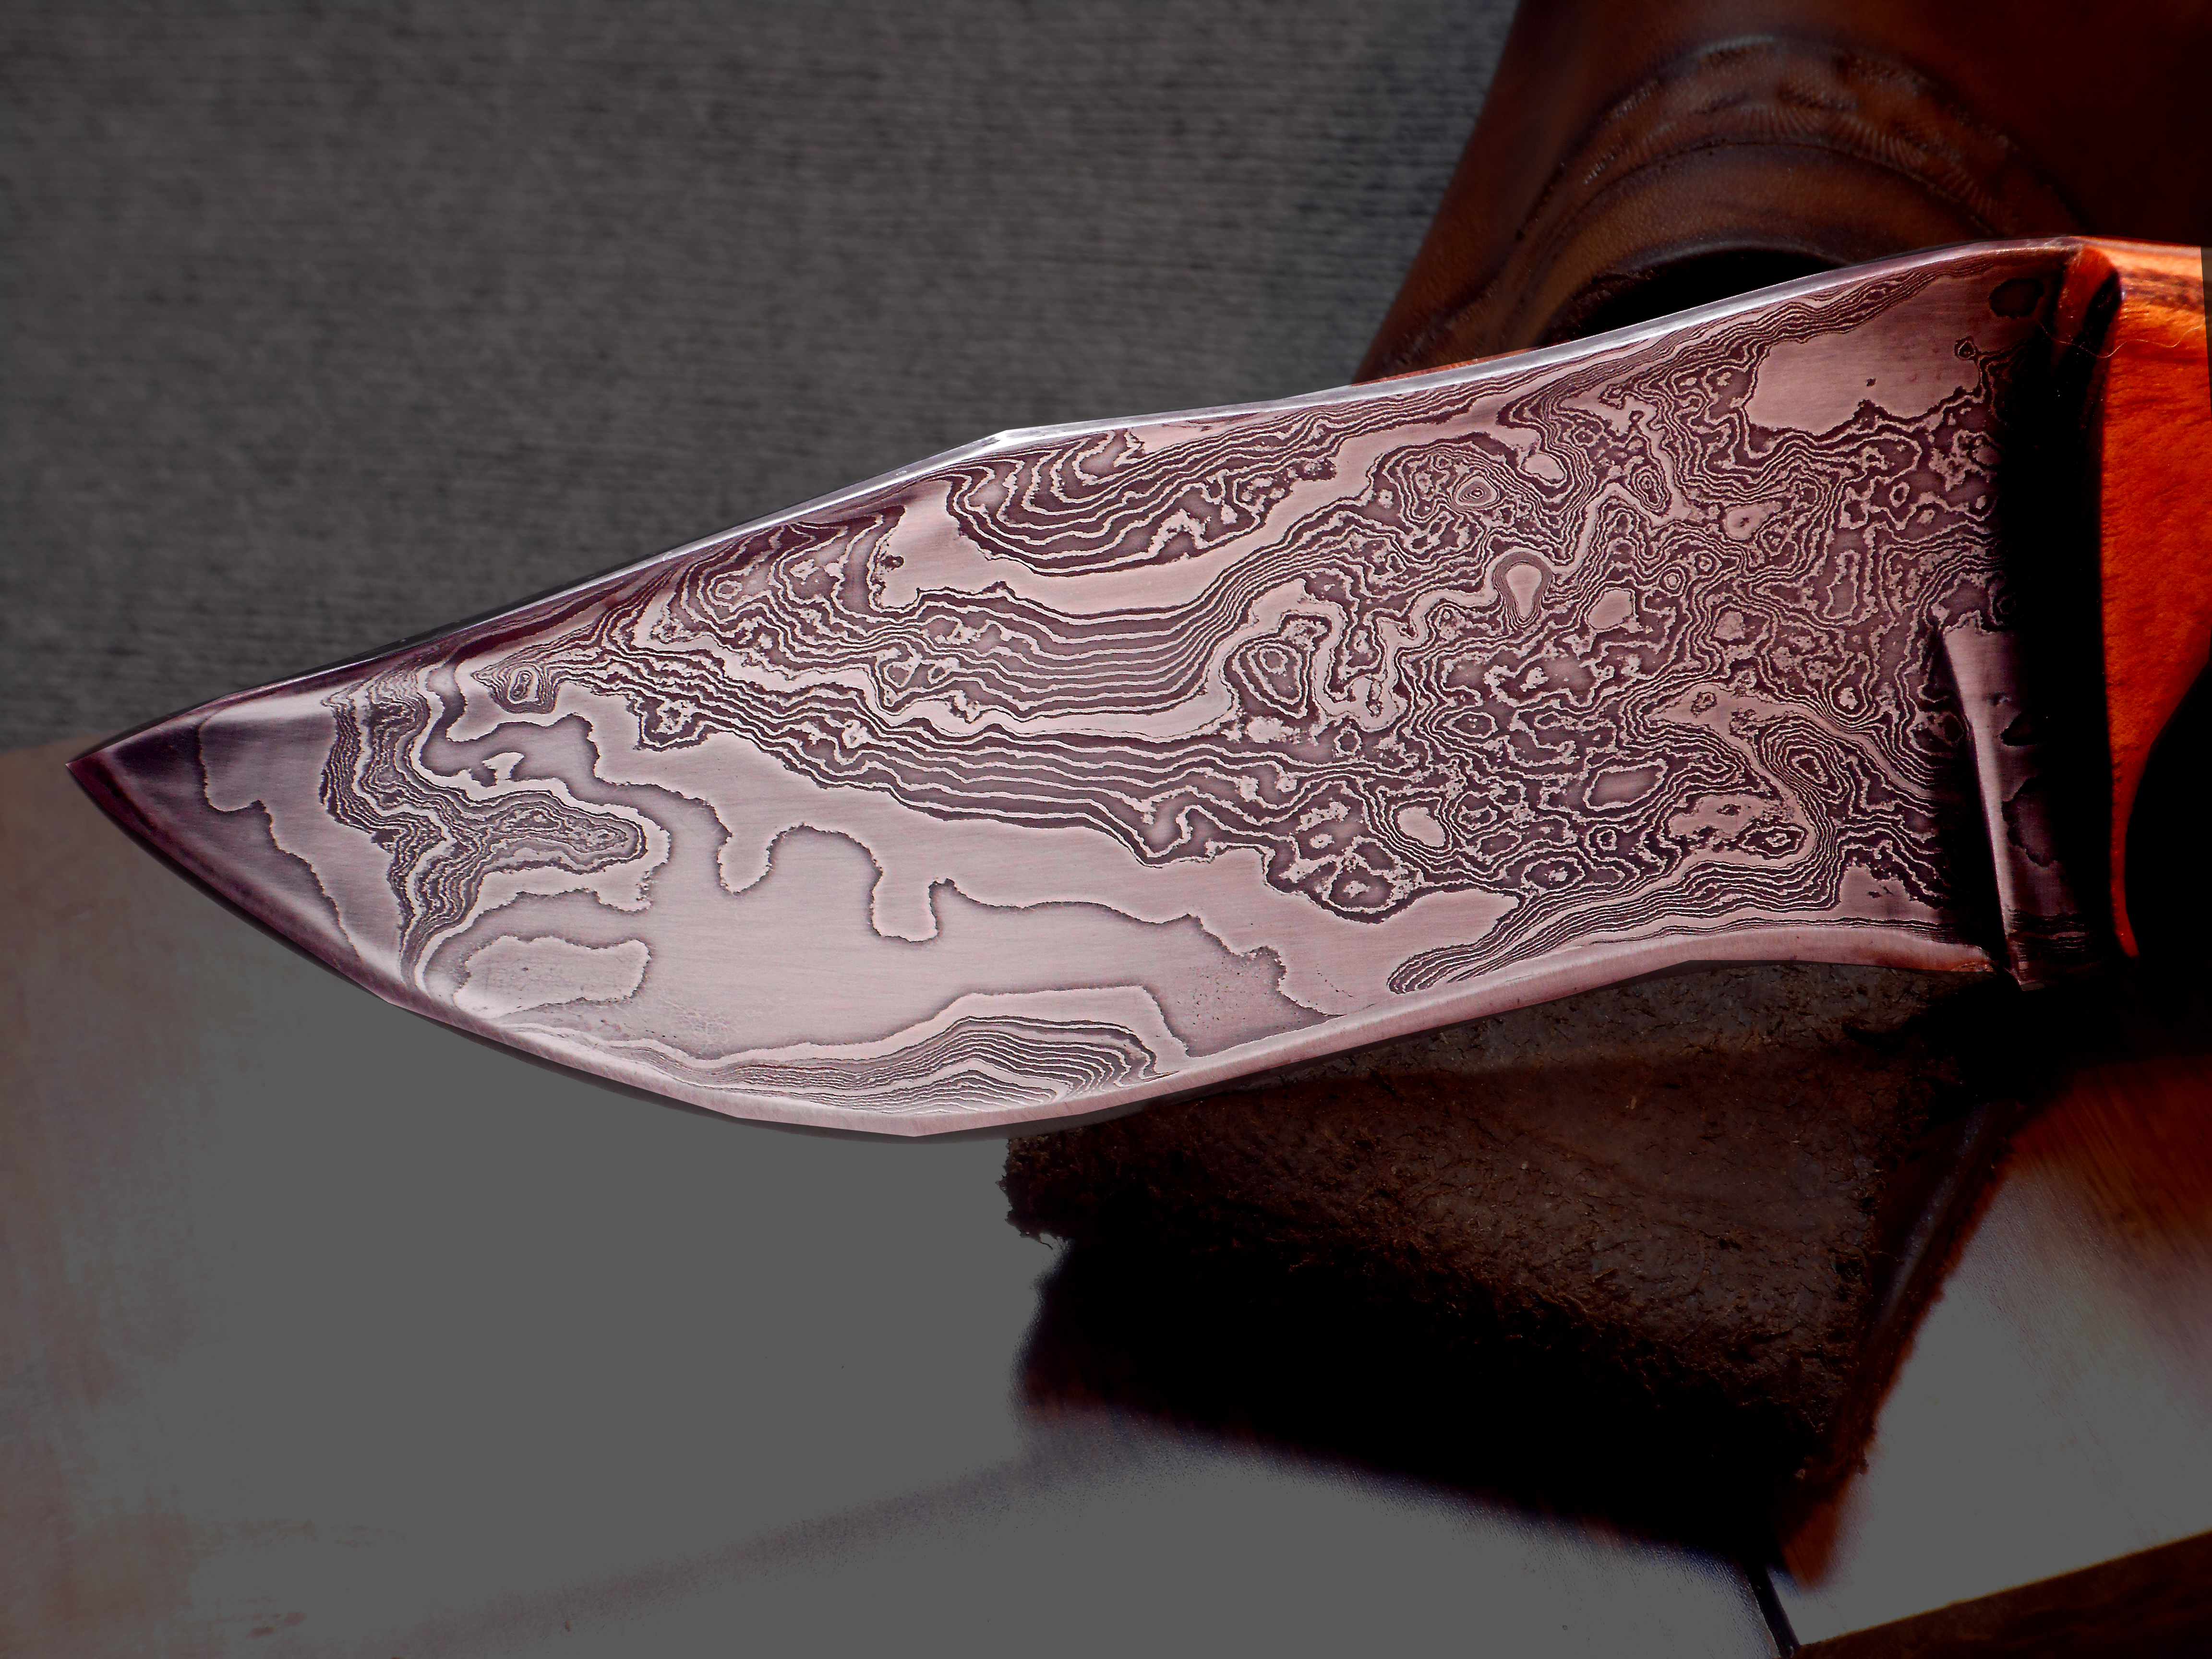
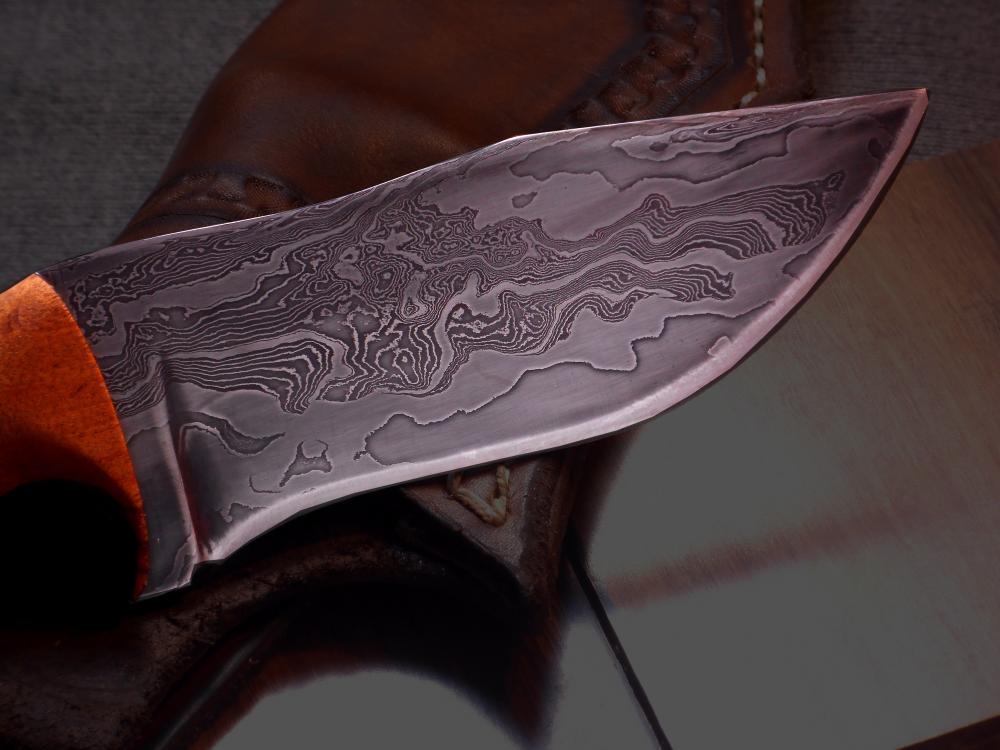
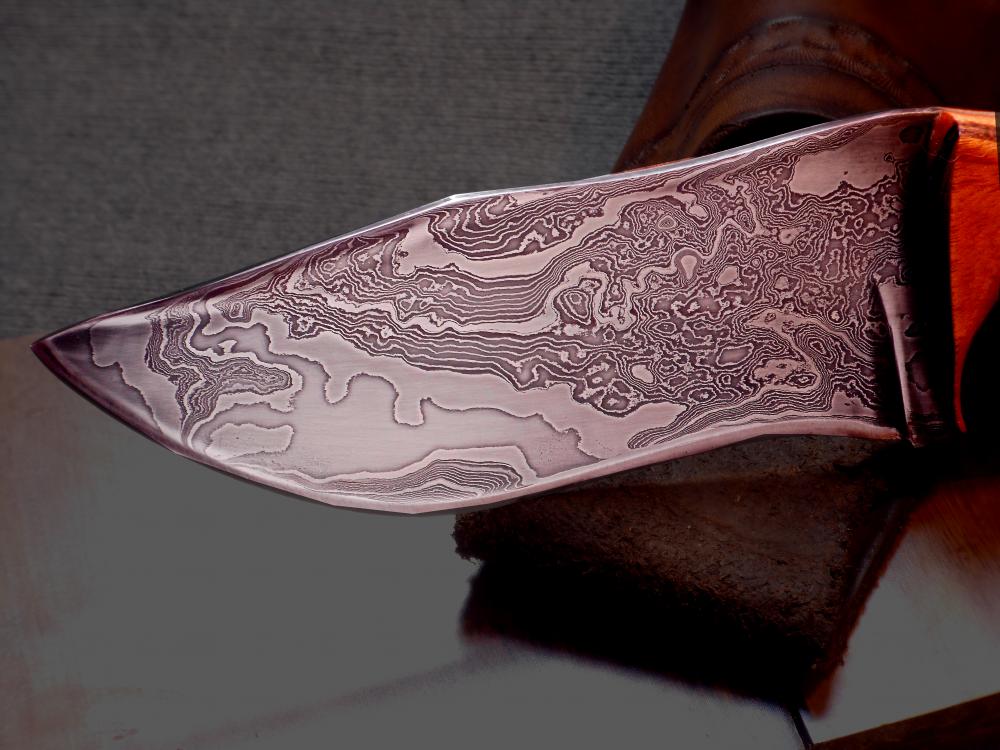
5160, 15n20, and 1080 -
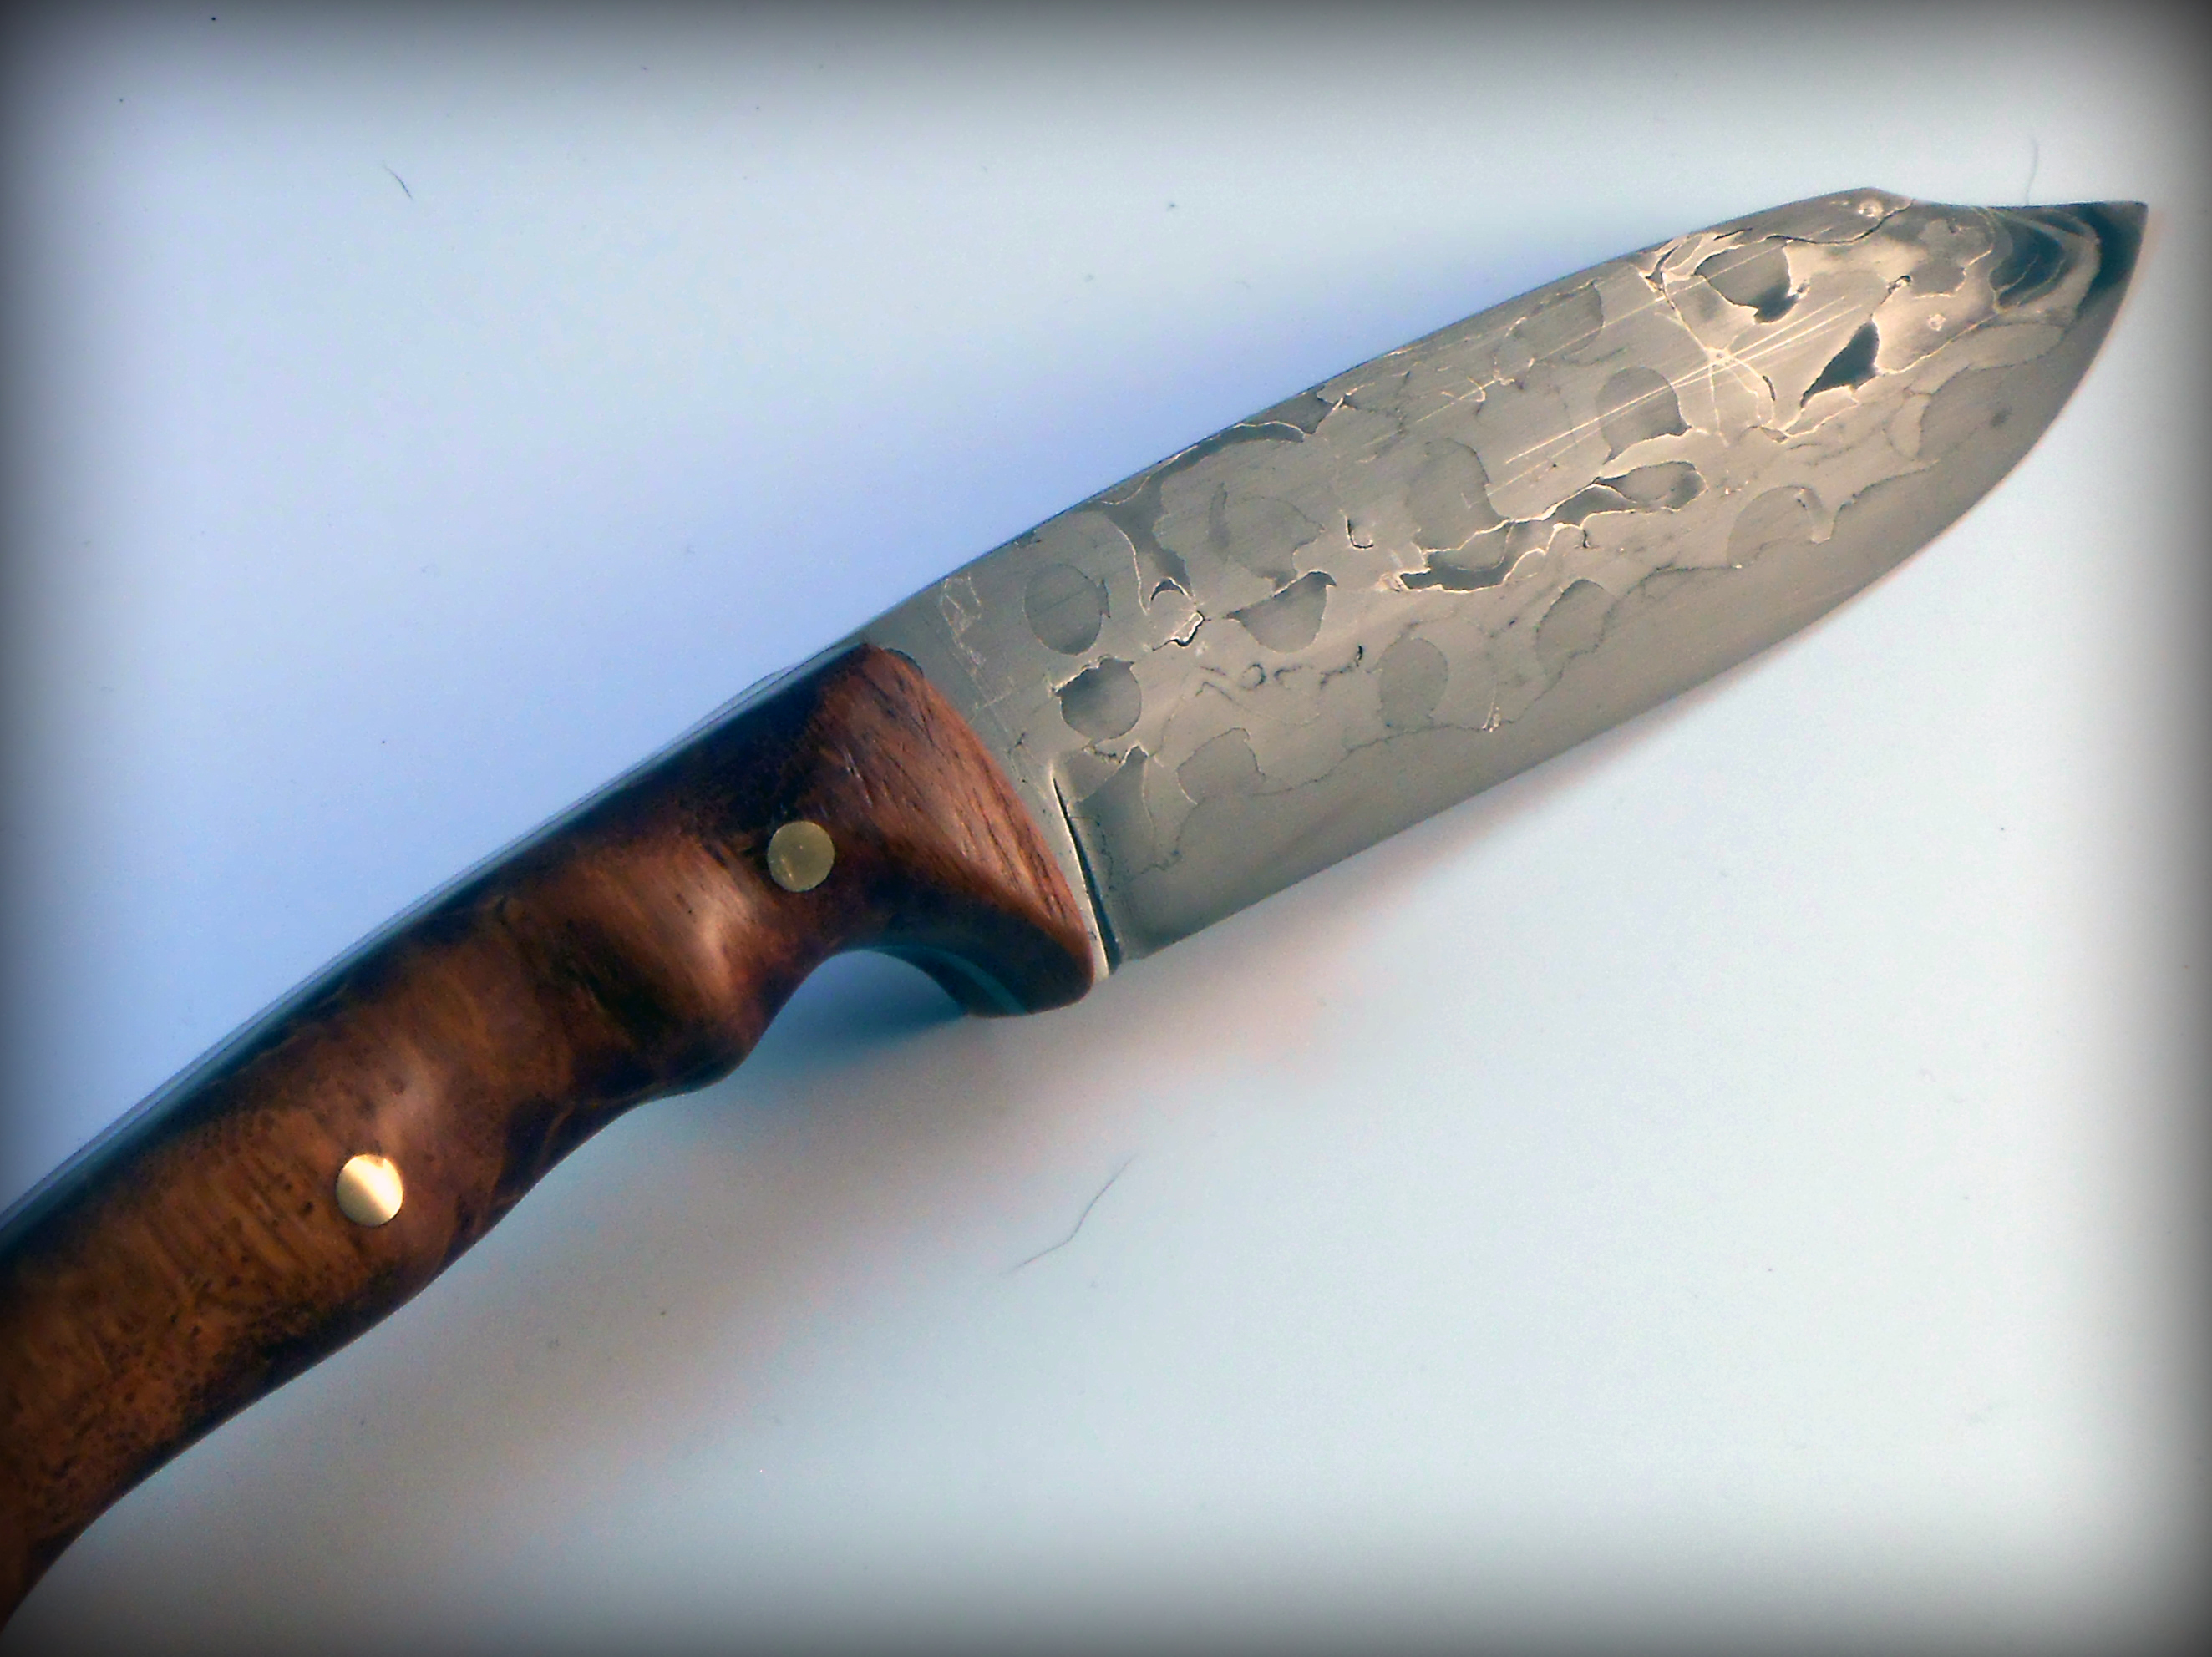
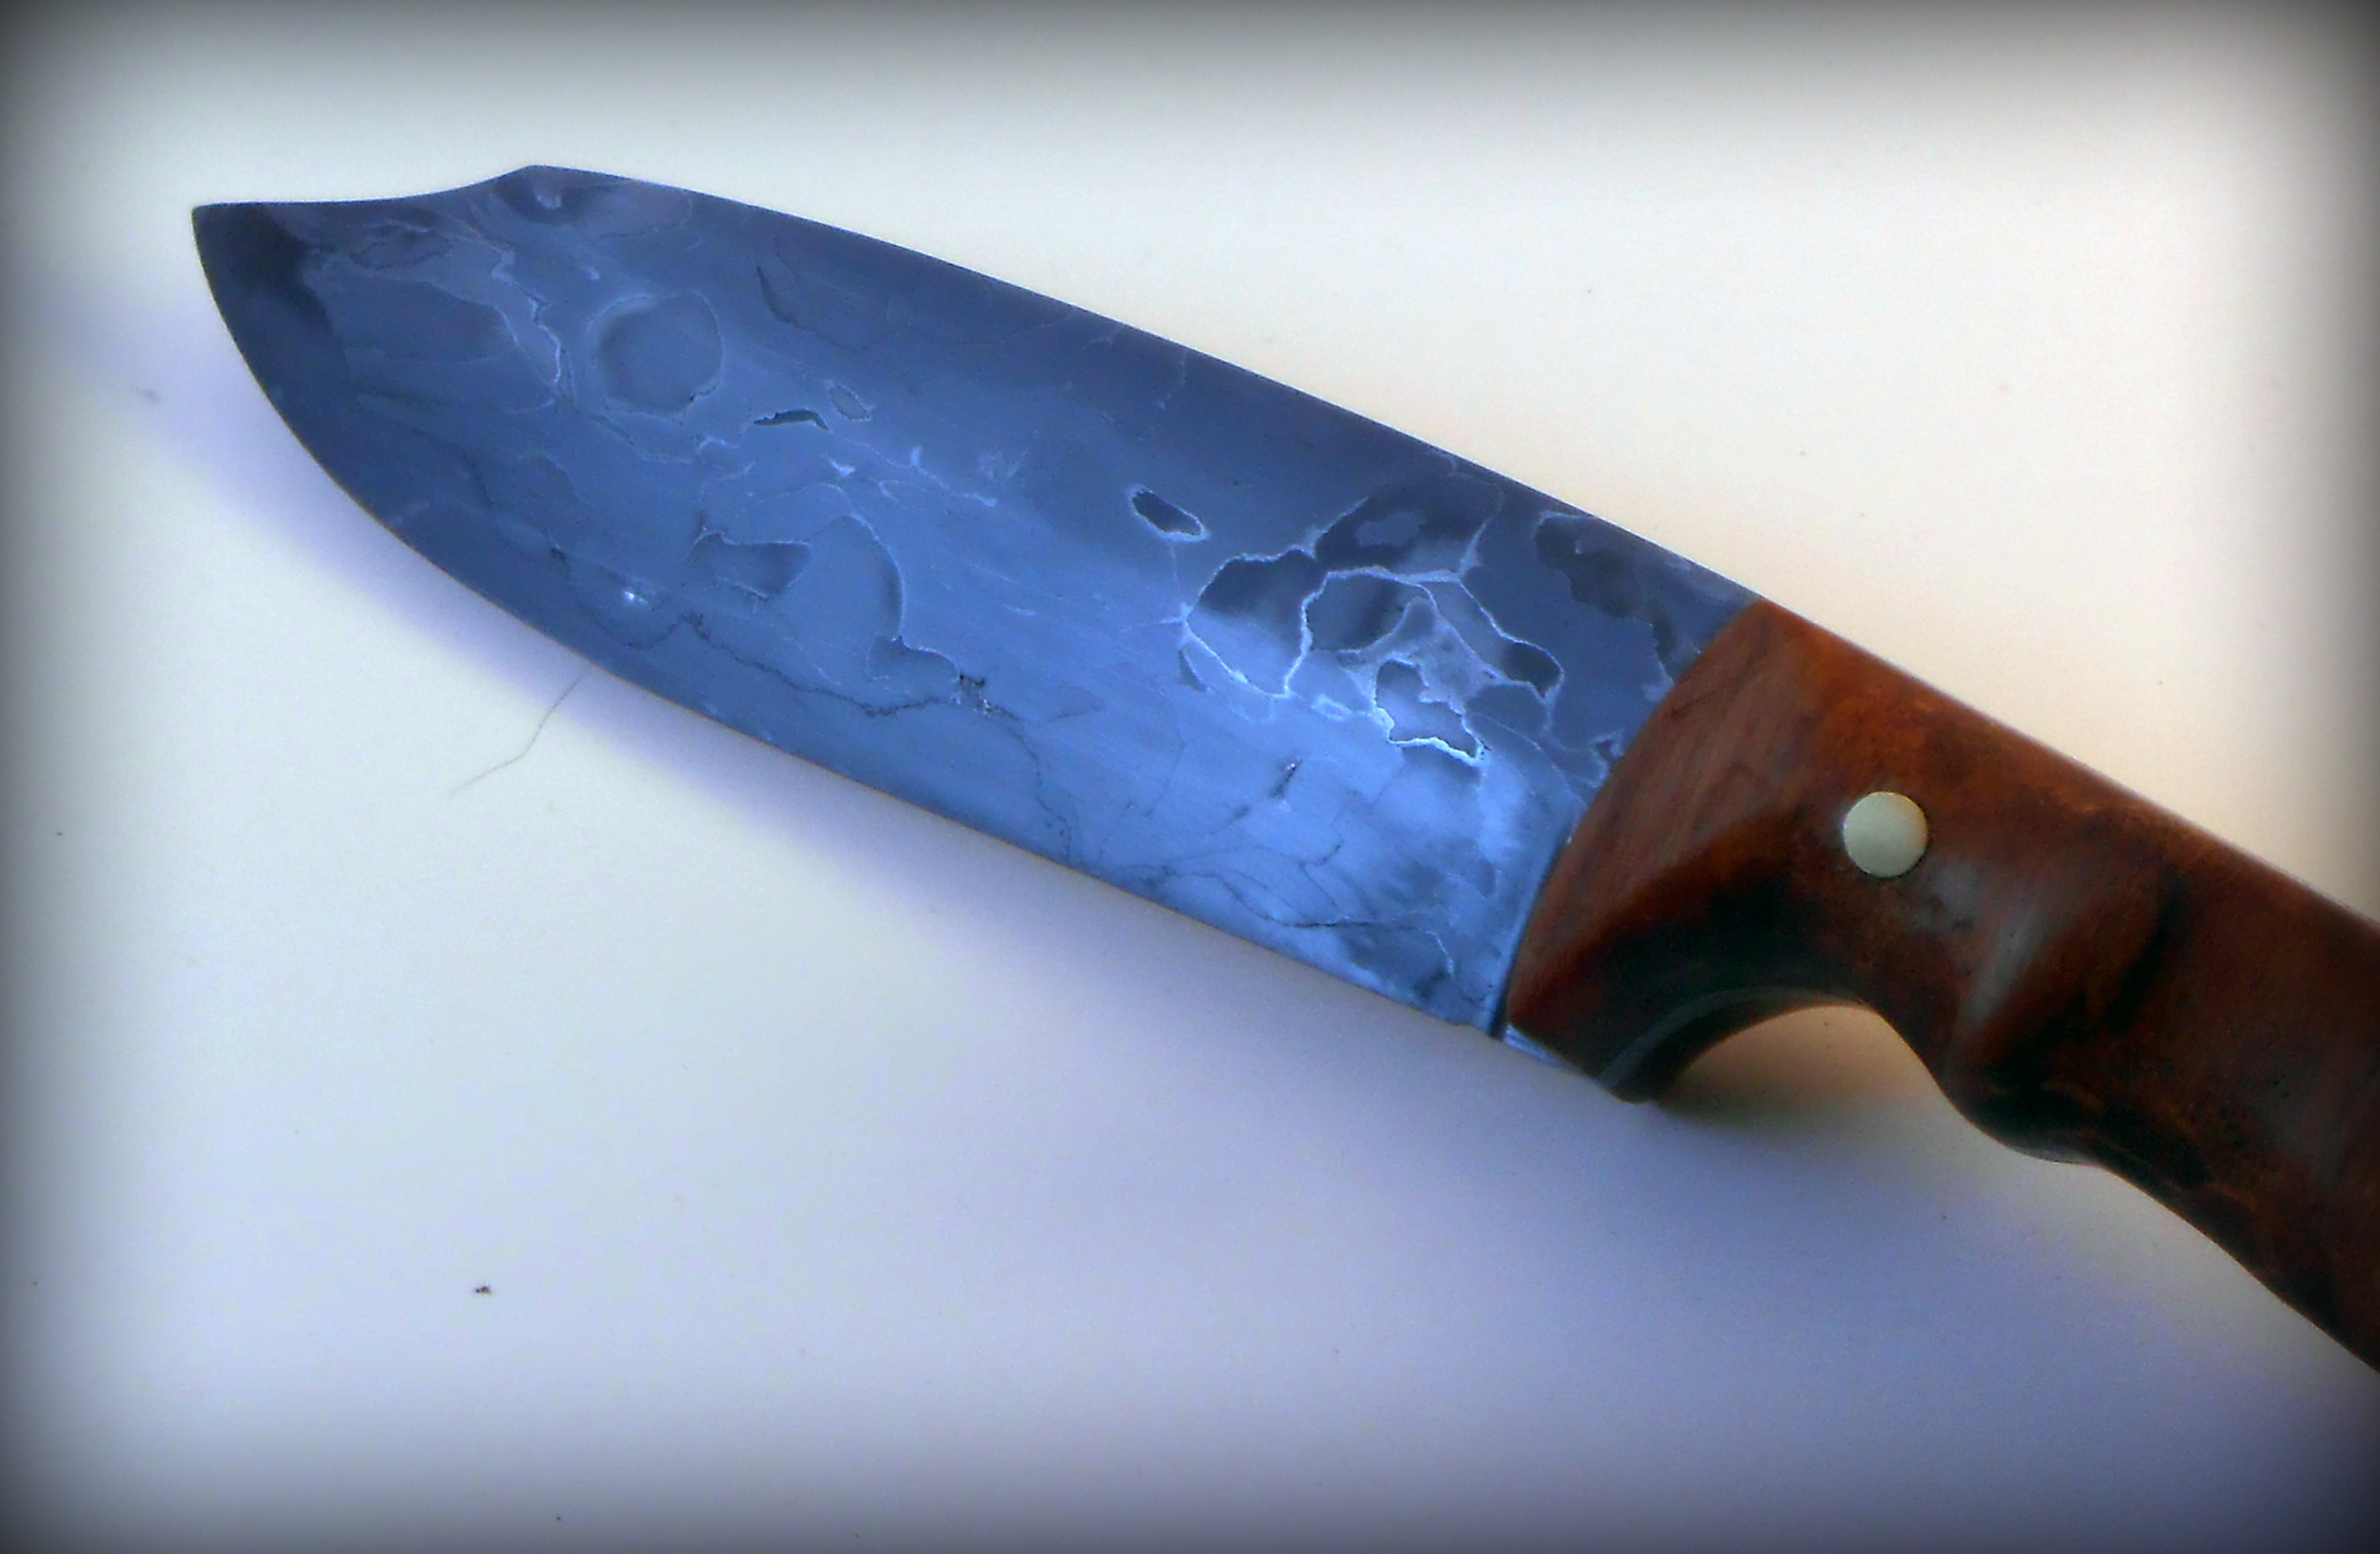
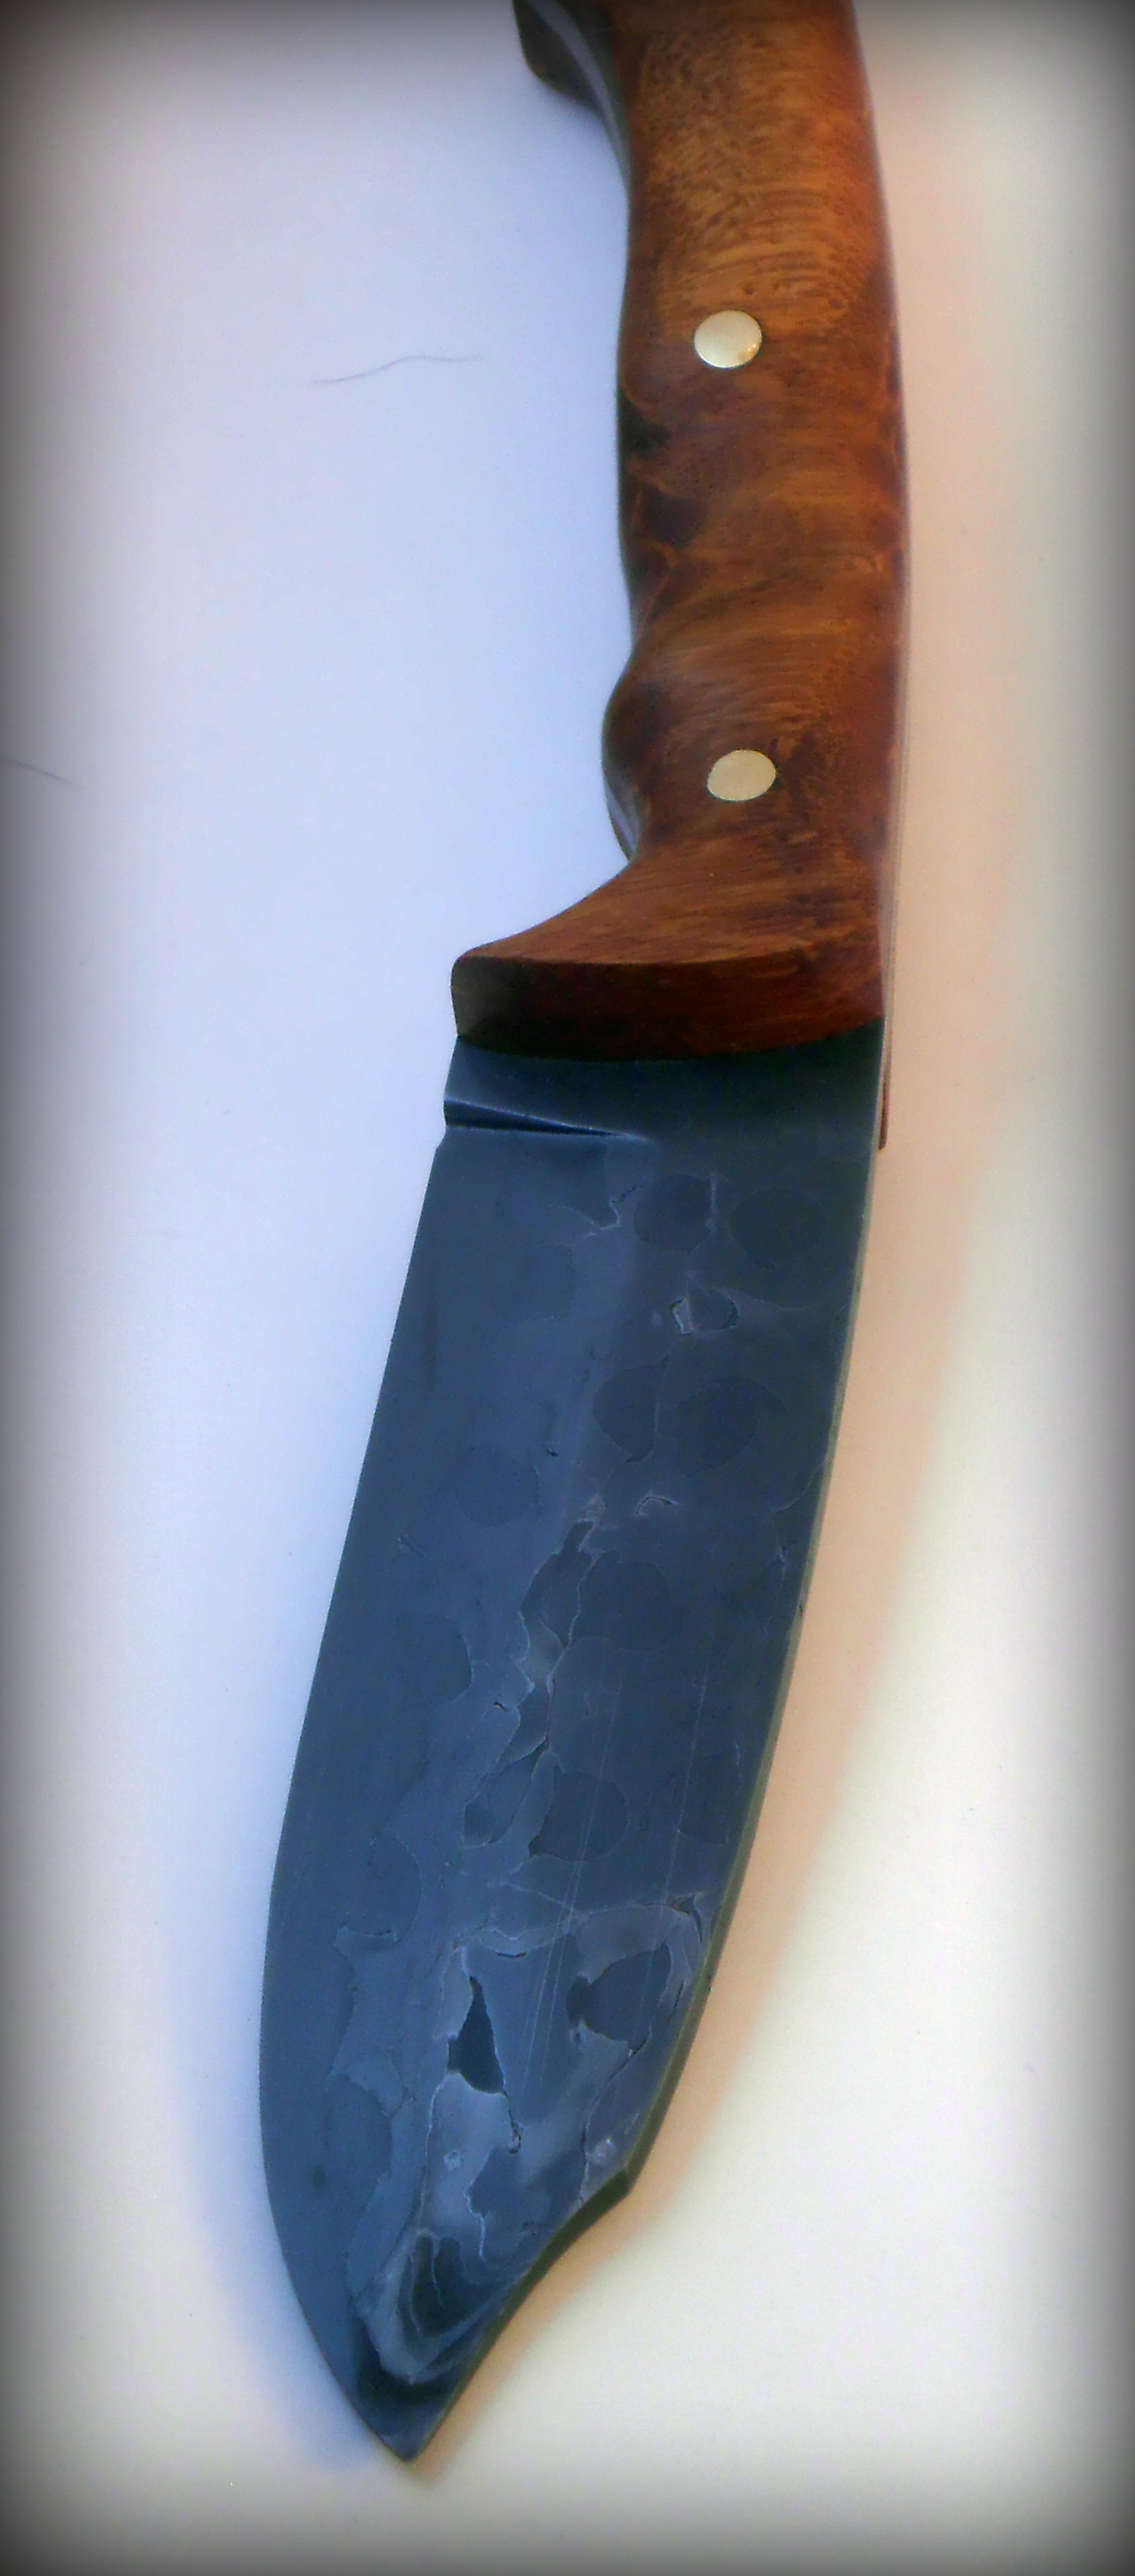
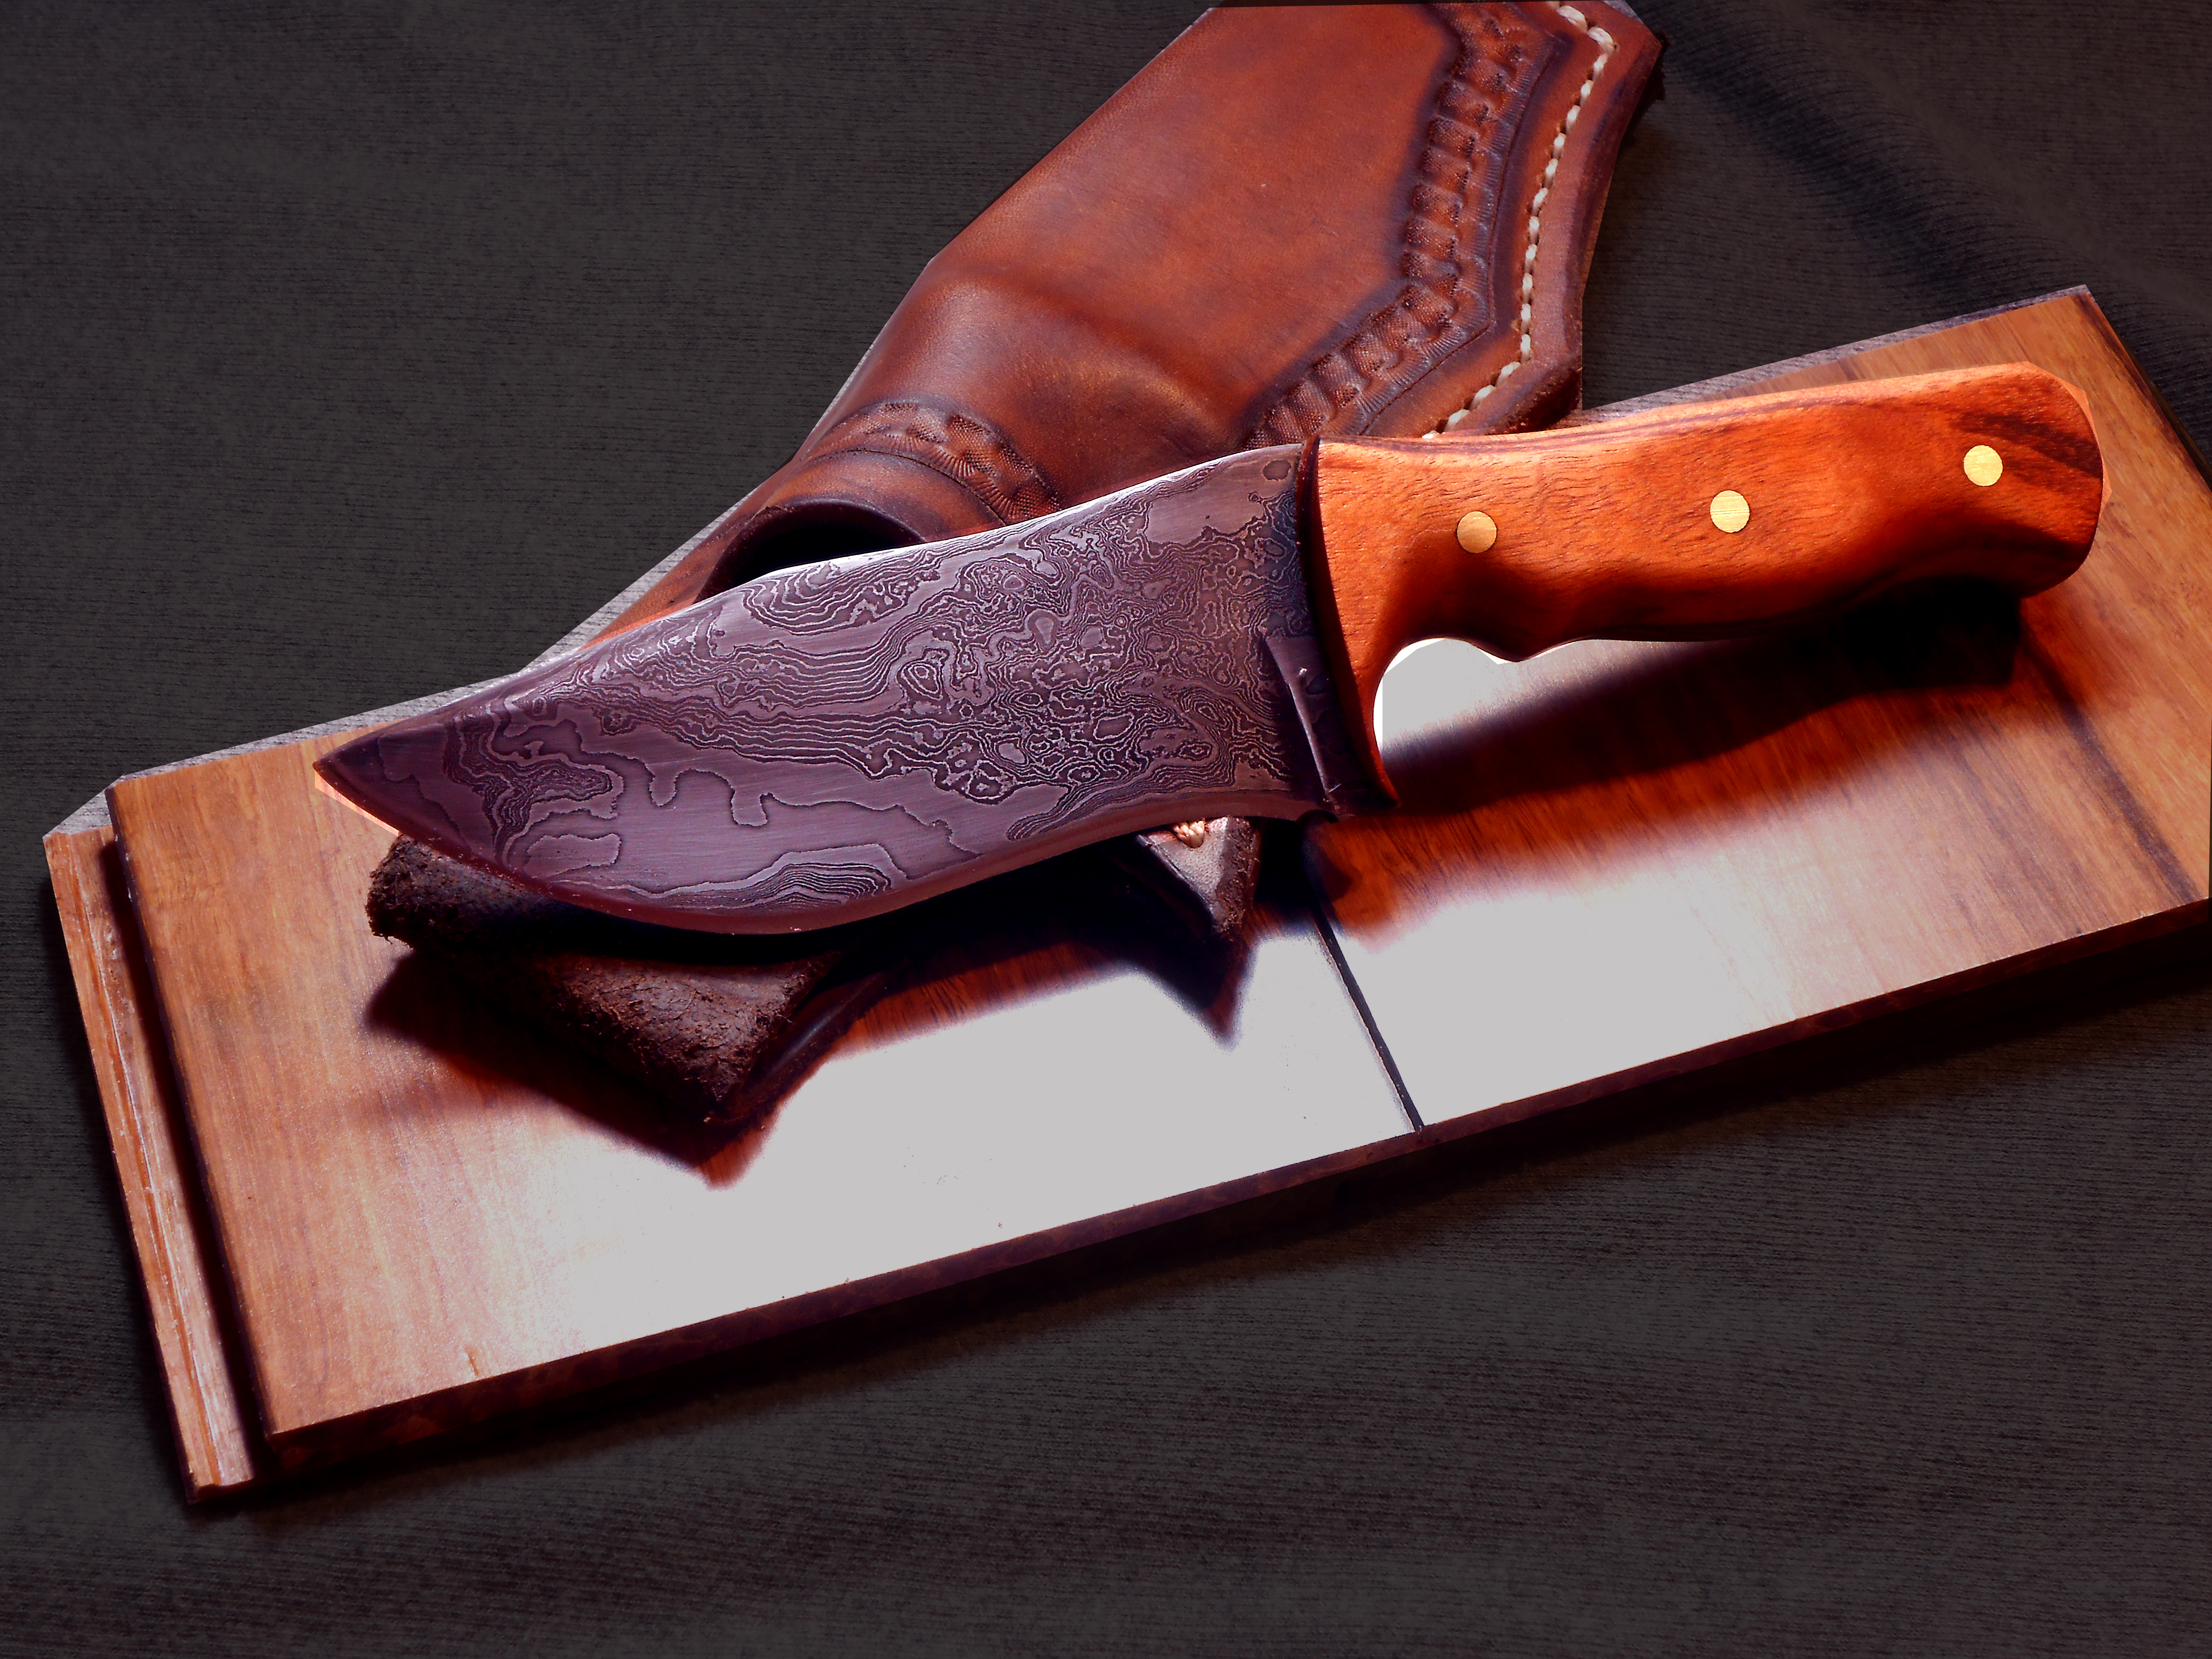
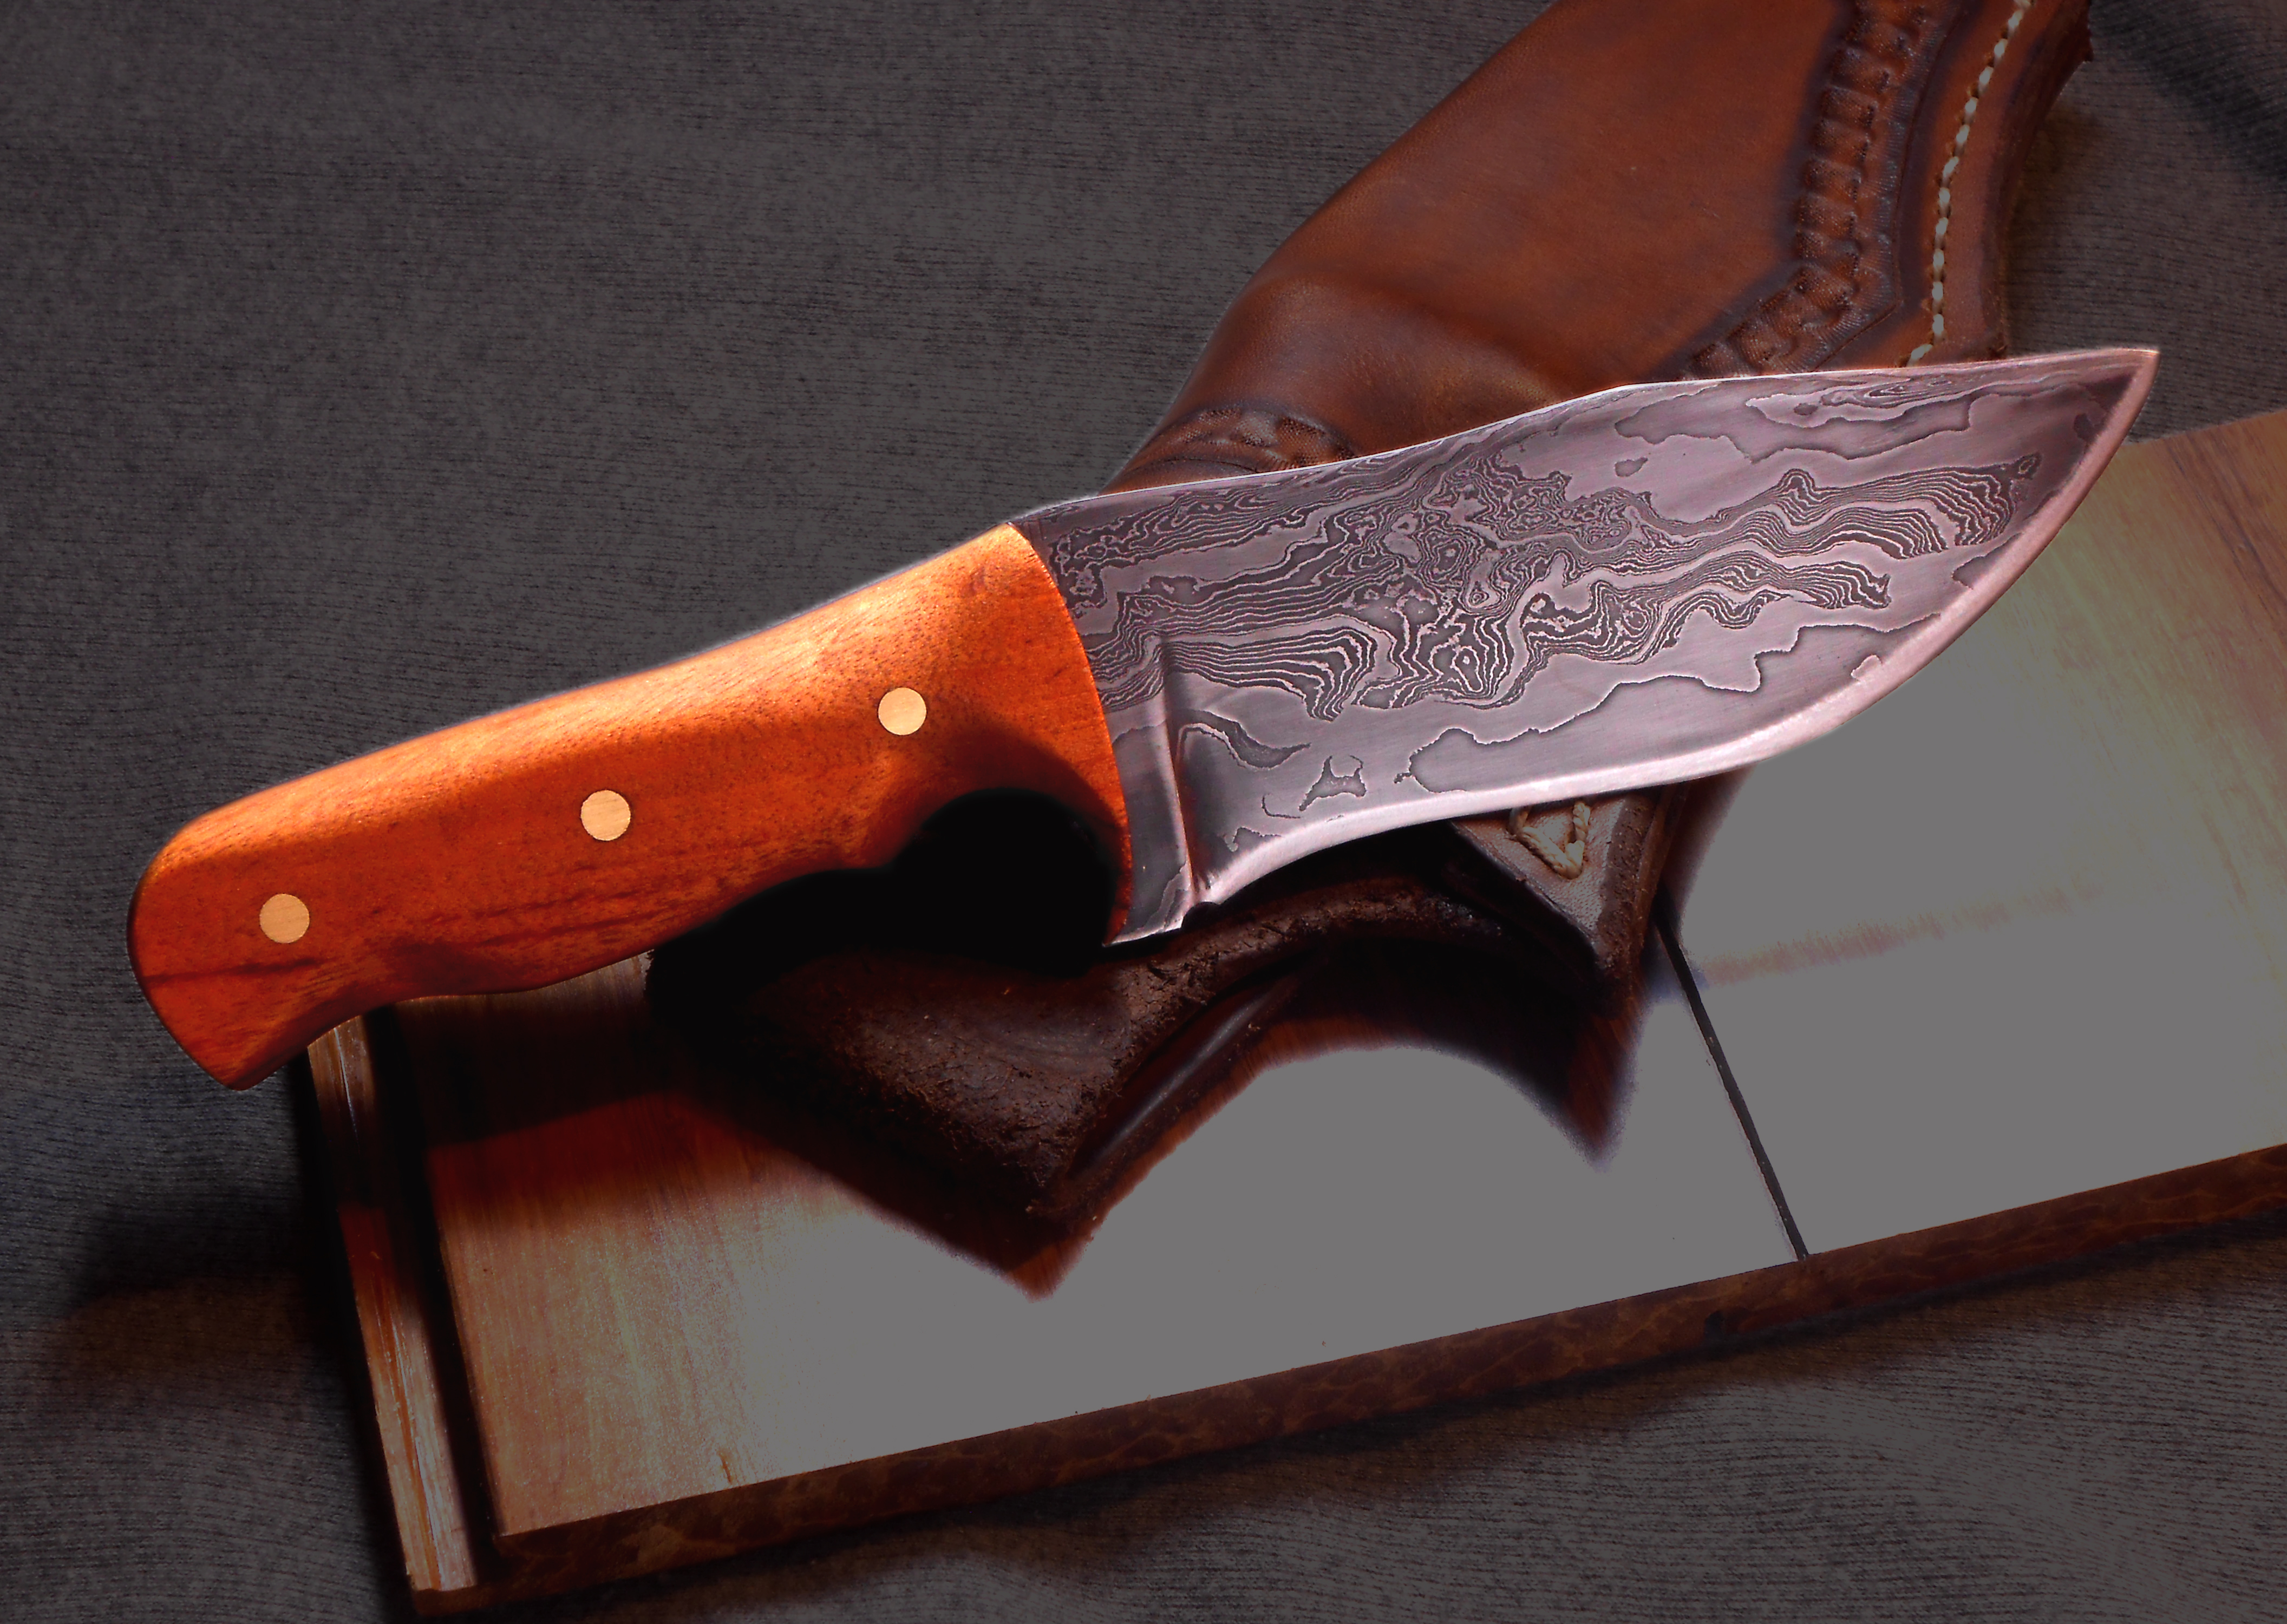
Here is my latest effort. I'm not super happy with the pattern, but its okay. My main goal was to do the integrated bolsters. Doing it all on the anvil turned out to be more of a task than I had imagined, but with a lot of filing, I finally got them to look somewhat decent. Length is 10", Blade is 5.5", Handle is 4.5" Scales are birds eye maple with some walnut inlays. Lots of overall improvements on my fit and finish, so I'm taking it as a positive, but there's 360 layers in this knife, and it doesn't look like it. Oh well, I was trying something new on how I stacked the billets, and I guess it didn't work, so lesson learned on that.


-
Buying coal
HEAP of JEEP replied to Steve Meyer's topic in Solid Fuels: Coal, Coke, Charcoal, Wood, etc
I use anthracite coal from Tractor Supply. Not the same as bituminous but I've found it to be much better than Charcoal. 40# bags are about $6. I haven't really run a clock to determine time vs coal consumption, but I know I get a few hours out of each bag. With the anthracite, you have to keep some air moving or it will go out, but it doesn't have to be much, and then when you crank the air up, it gets the steel up to forging temps very quickly... so quickly, you better not turn your back on it. -
As a newb with only a few months behind me, and besides some decent safety glasses, I found the most important part for me was learning hammer control. Being a bigger guy that has always figured you could muscle your way through anything important in life, I was very disappointed to learn that hitting the metal harder isn't always the best thing. Because I wasn't gripping the hammer right, I wound up with some early stress injuries in my hand. Because I wasn't swinging it in the best way, I couldn't figure out why I couldn't seem to move metal as easily as the youtube guys who were smaller guys, using smaller hammers. And when I simply tried more brute force, I'd tend to walk away in tired frustration. Strength and endurance do come in to play, but with proper technique, they both become a much smaller part of the equation. I've been doing this for about 8 months now, mostly on my own, although I've had a few people from this forum, who are close to me, offer to help, but it all comes down to free time. It took me some time, but learning how to grip the hammer so I wasn't causing injury to myself, and learning how to control the swing so I could move metal in more efficient ways was a biggie. I finally scored a small Vulcan anvil off craigslist for next to nothing, but it was the RR track for me for the longest time. A big set of vice grips served as my tongs... heck, I still use them from time to time, even though I've gotten fairly proficient at making tongs.... not good, mind you, but good enough that they work the way they were intended. No tong beauty contests for me. So get out there and move some metal, and remember to keep it fun.
-
I never knew that about bamboo. Interesting stuff. I wanted to do more with the scales, but I was whipped at the end. After ruining the belts, I went at it by hand, and since it wasn't cooperating, I settled for "Good enough", but I agree that they need a little more love.
-
Thanks, Man. I like making the other ones better too, but I have a few Jeep friends that want to throw money at me... and I like money... so just whipped this out to show them I can make something that they can afford. Working on the next damascus one now. I'm trying something totally new to me, and attempting some integrated bolsters. Fingers crossed that my ideas of how to do it efficiently and effectively will work right. I should probably try it out on a hunk of mild steel, but I'm one of those "jump first" guys. Well of course your Jeep is going to spring another leak, and of course its going to want more of your money. Come on.... its a Jeep. LOL The bamboo is just a flooring sample from Lowes. I don't know how it is milled or prepared. I just grabbed a bunch of different samples (50 cents a piece), and decided I like the looks of the bamboo and wanted to try it. I sanded it down first, just to see what kind of finish I could get, and it looked decent, so went to town on the scales. I worked them like I would a regular hard wood, but it turned out to be one of the most difficult things I've ever worked with. It ruined 2 belts on the grinder, just from gumming them up to the point where they are now useless. The wood rasp did okay, but it is tough stuff. I showed this to an old knife maker, I know, and he said he has used bamboo, and he goes after it with an angle grinder. I love the look of the scales, so I may try that on a future project.
-
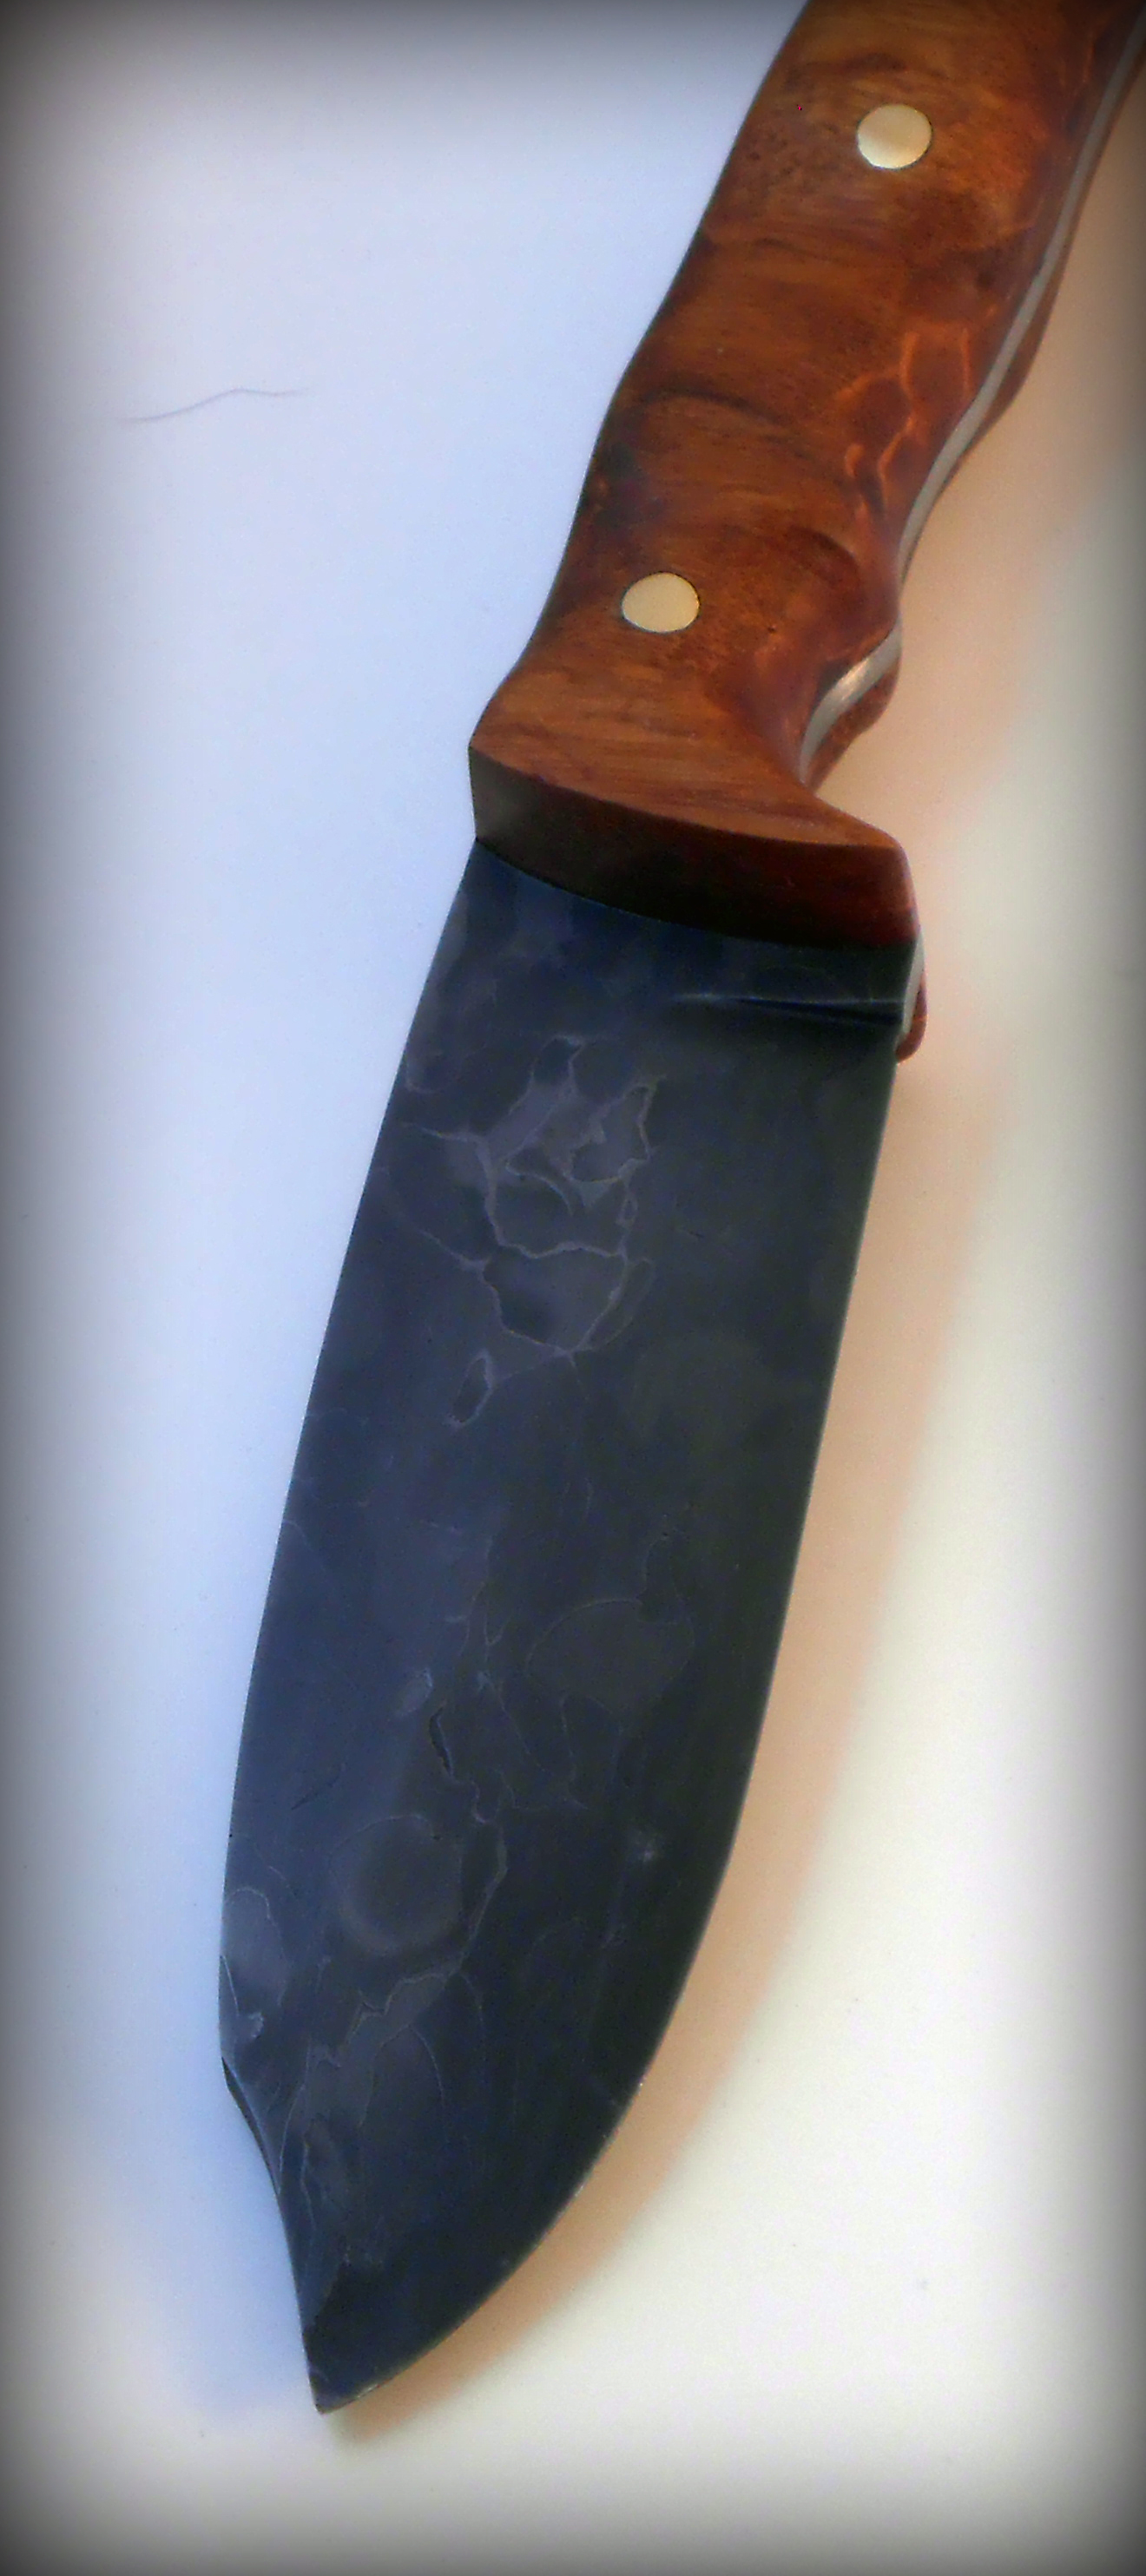
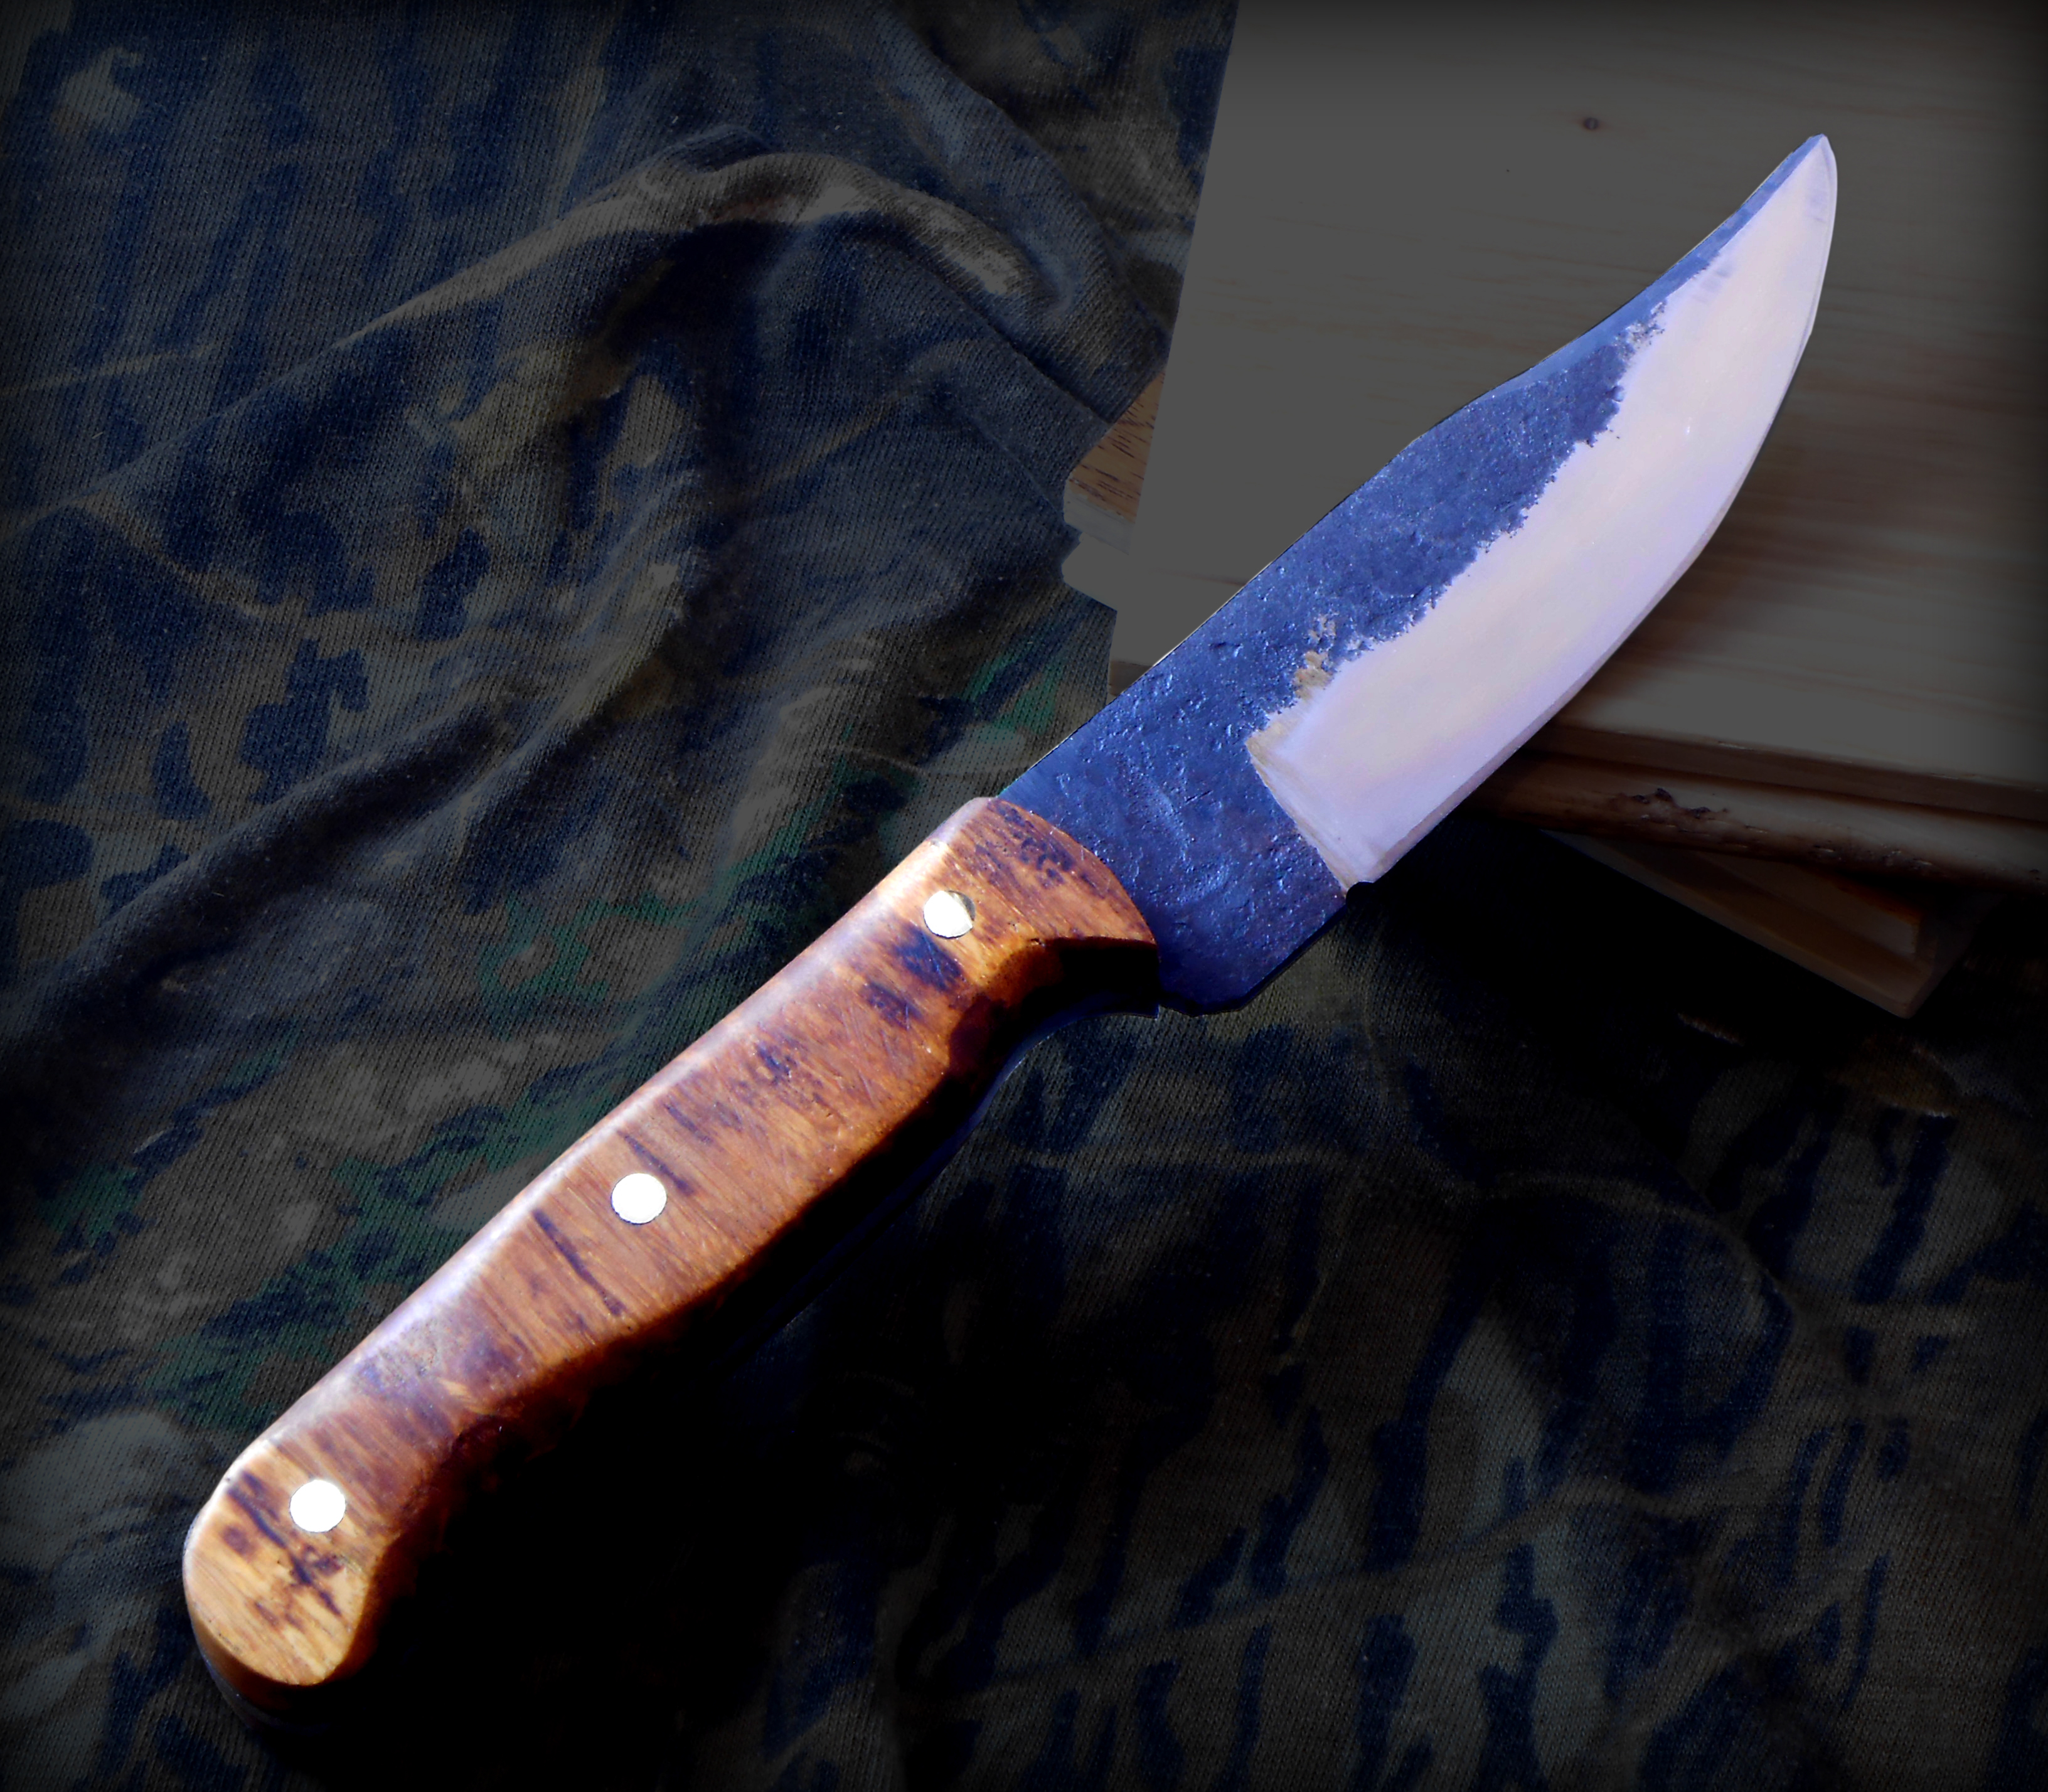
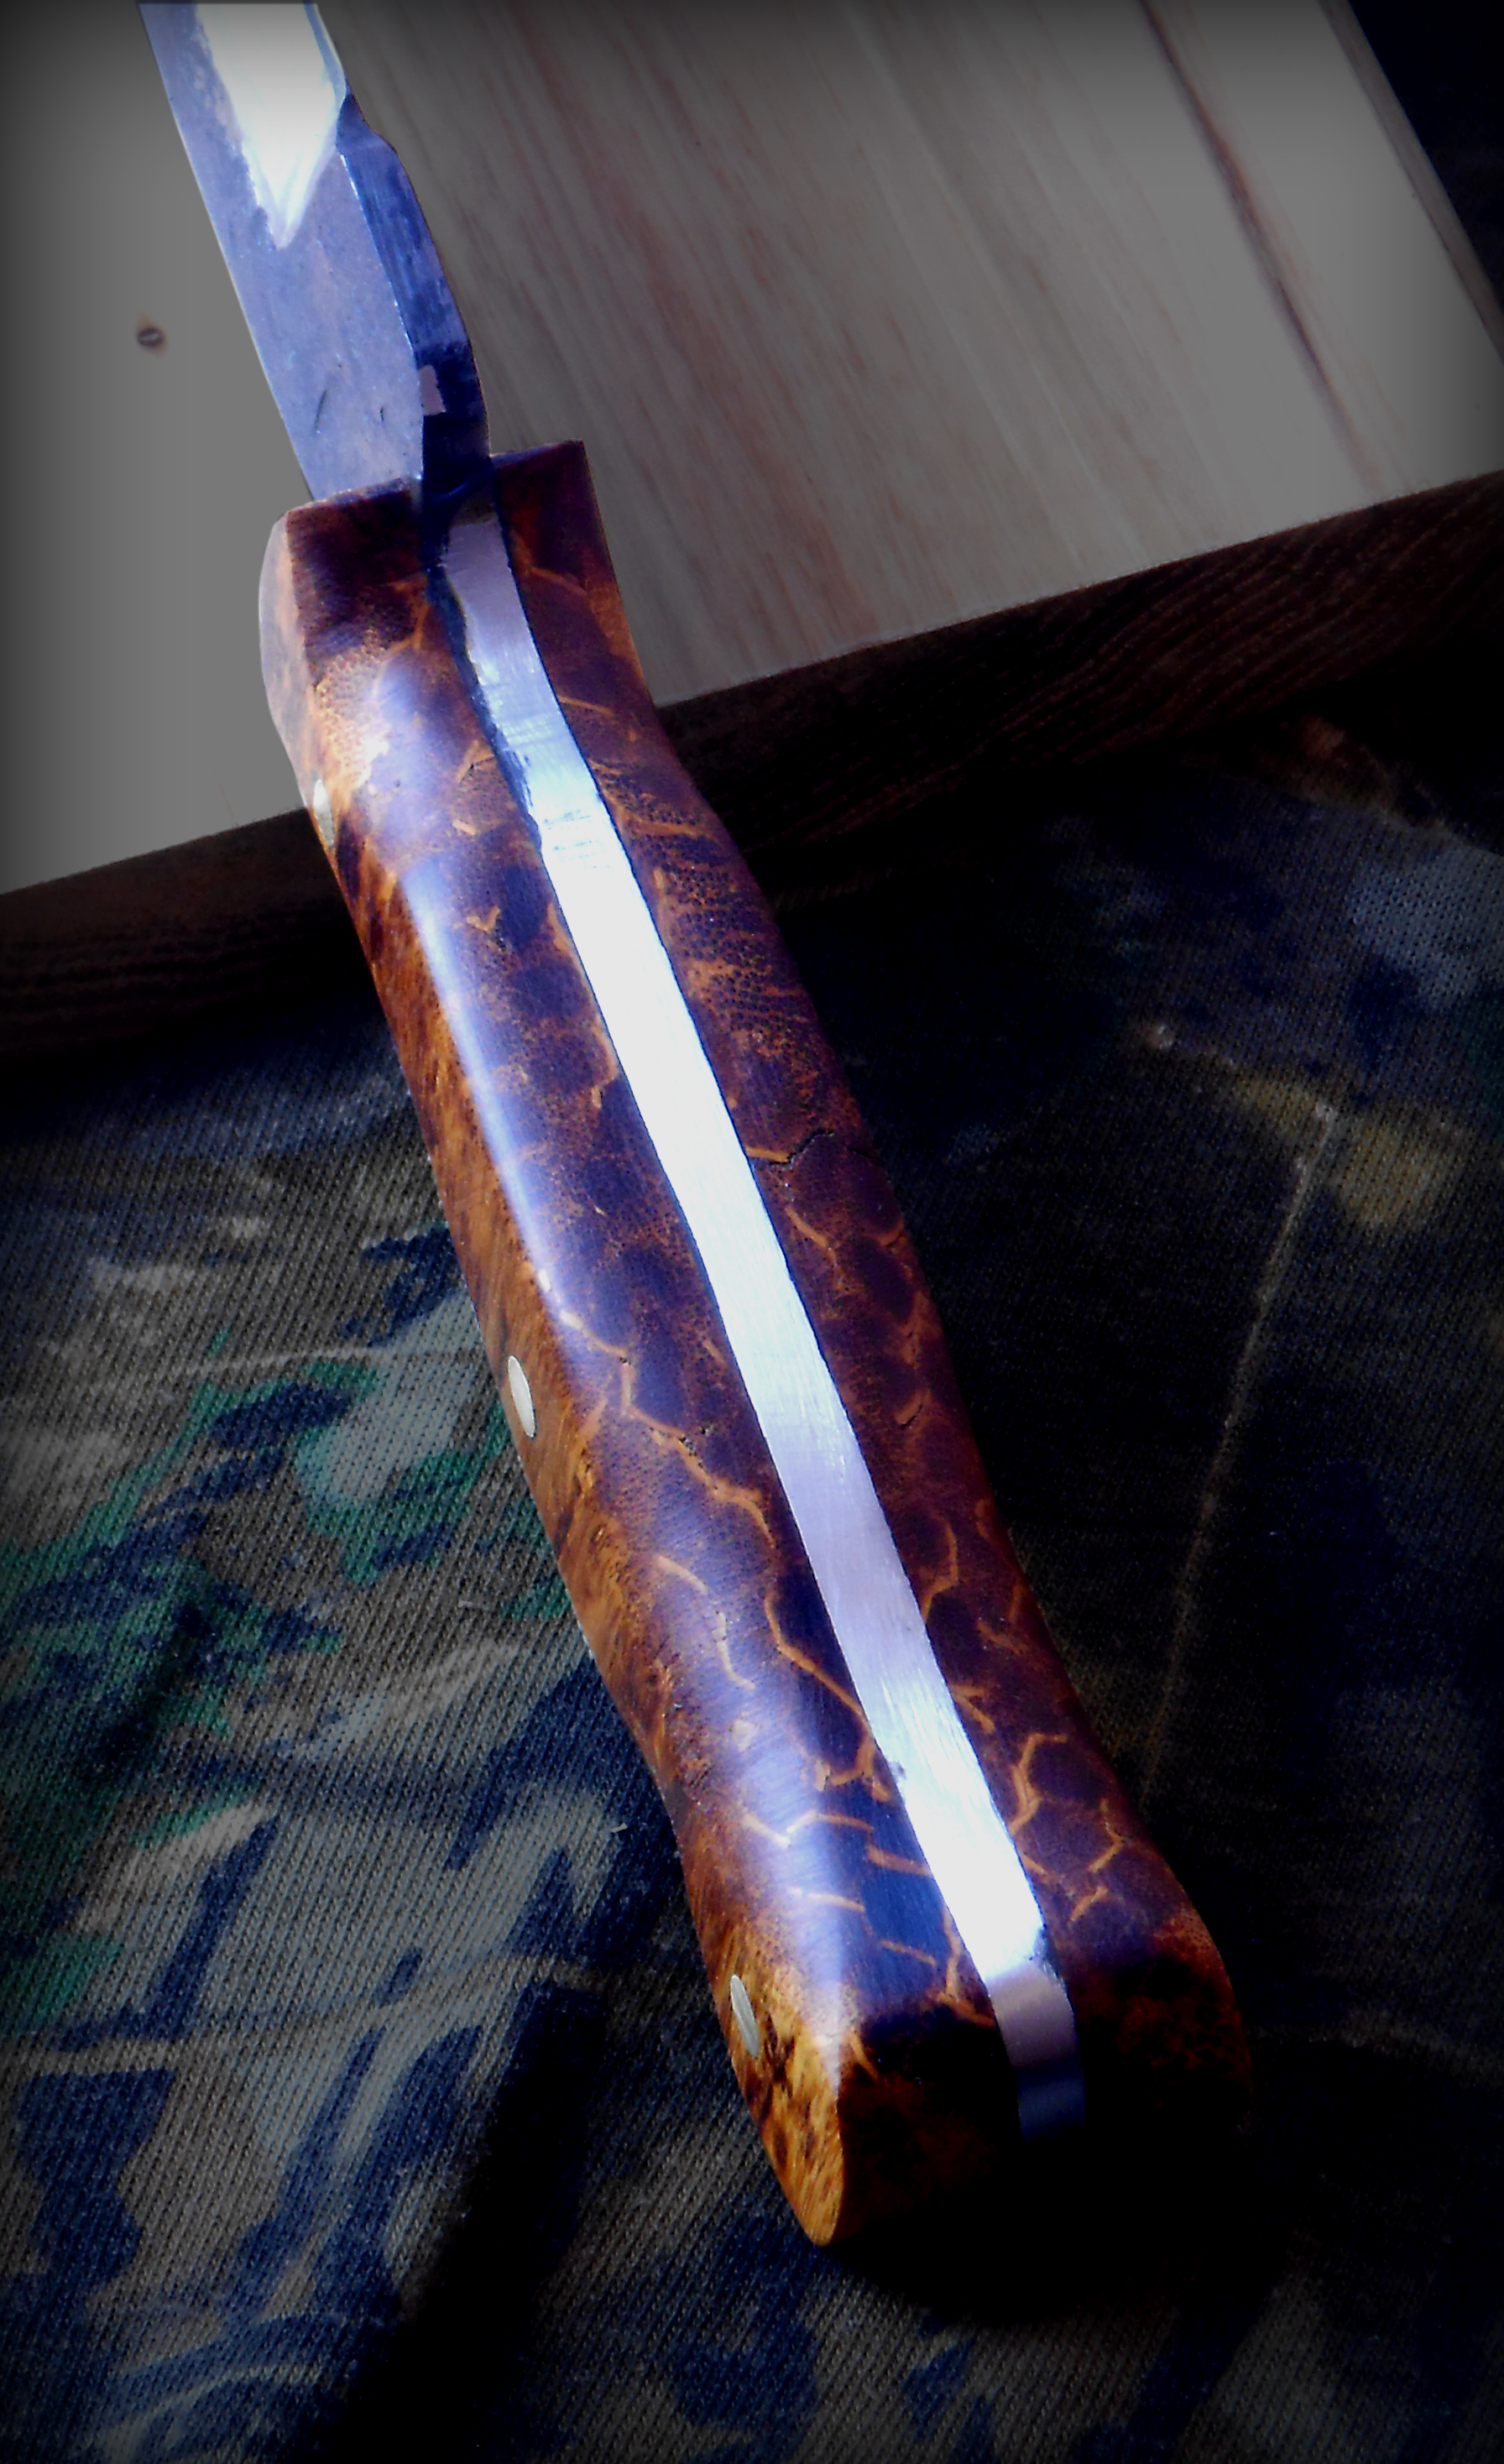
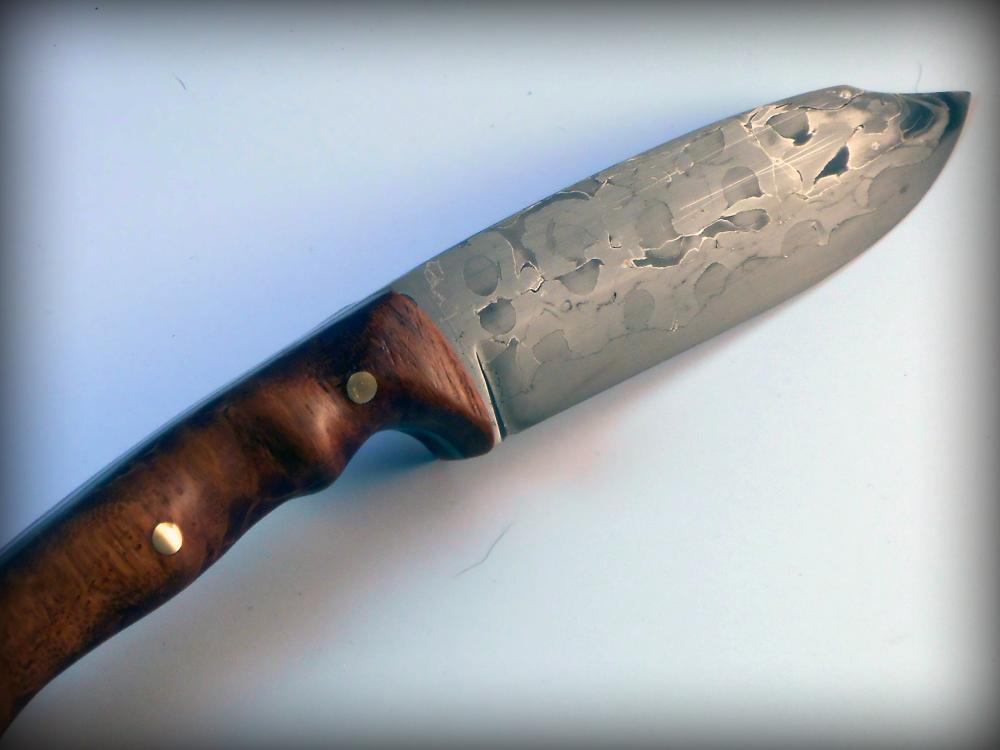
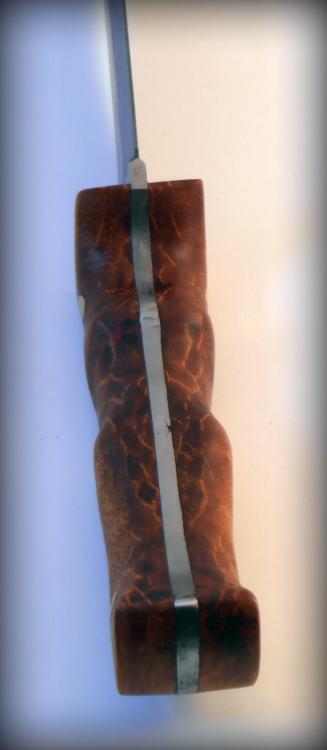
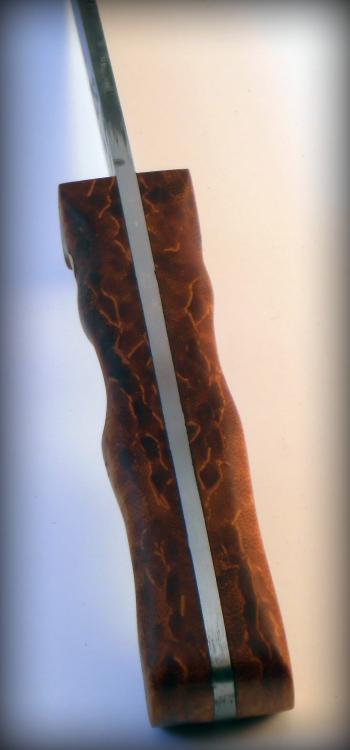
By request, I came up with a less expensive version of a Jeep Knife, than the damascus ones I've been making. This was made from a leaf spring out of a 96 XJ. I left the forge scale and hammer marks on the sides, to give a rustic look with a lot of character. The handles are bamboo, finished with brass pins. total length 9" handle 4.5"


-
Show me your Bottle Openers!
HEAP of JEEP replied to Arbalist's topic in Blacksmithing, General Discussion
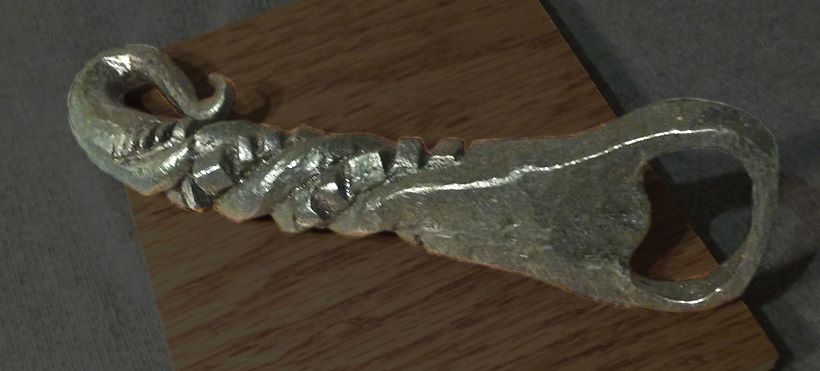
My first bottle opener!!! It may be ugly, but it opens a craft beer just fine. LOL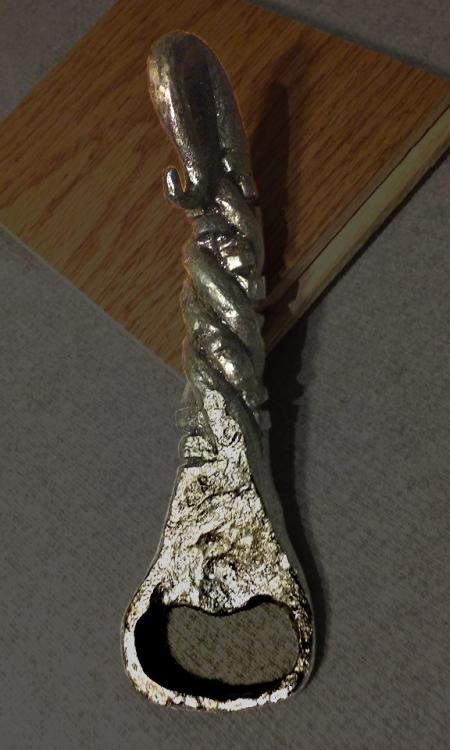
-
I'm still pretty new to knife making, as well, but I agree with Prevenge. Heat it up and straighten it out. I'd also normalize it a couple of times before quenching too. Otherwise, I think you might see that bend become a permanent feature. Nothing wrong with taking it back to the forge to fix any issues. Its all about learning and getting experience so you can minimize problems as you move forward.
-
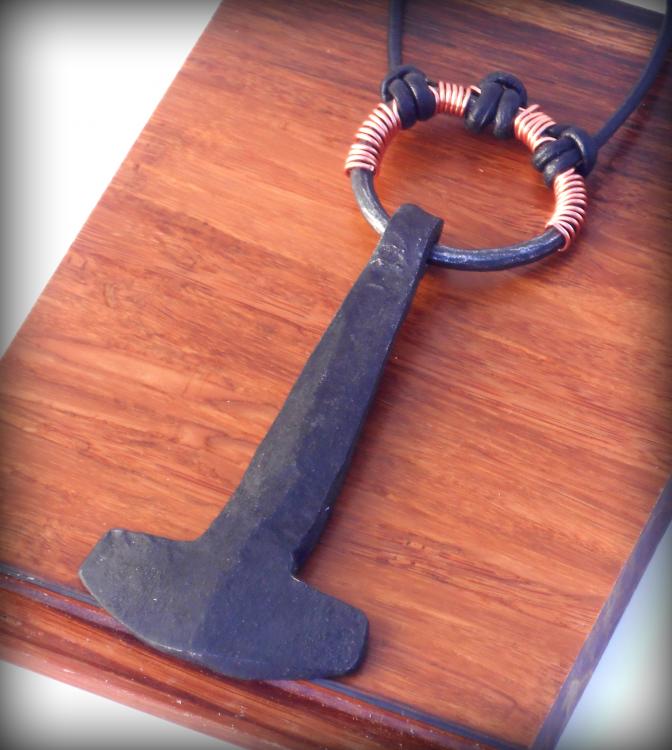
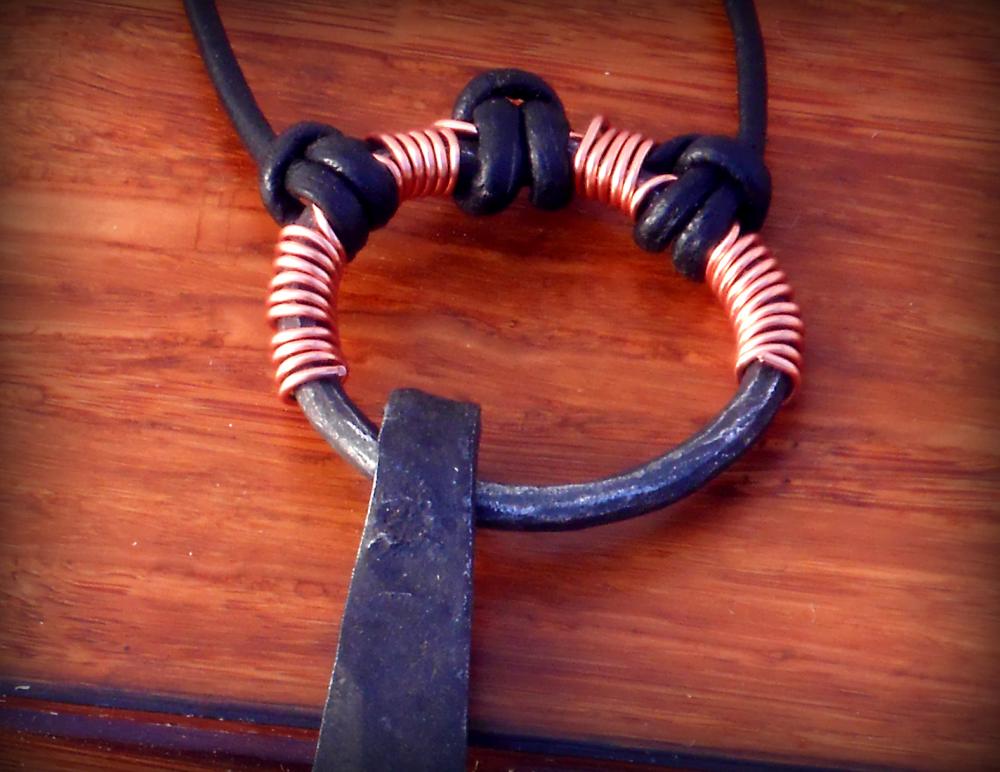
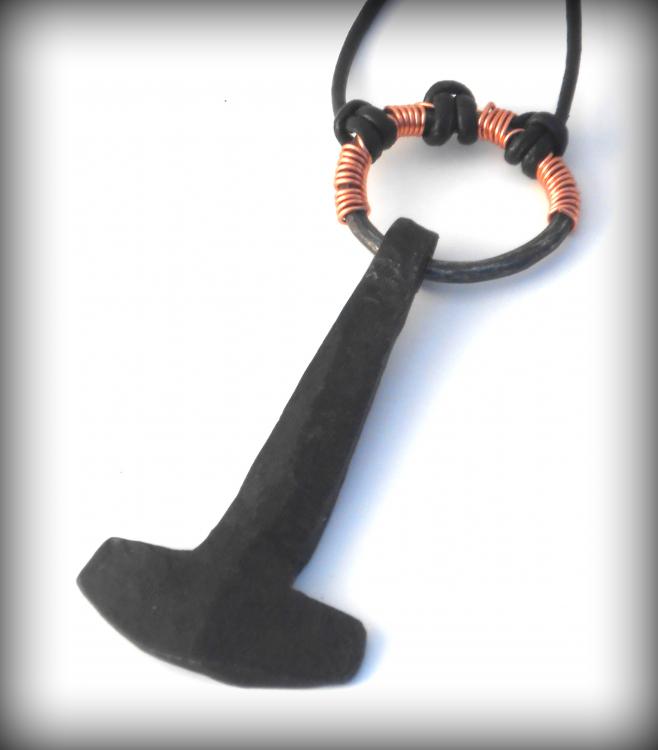
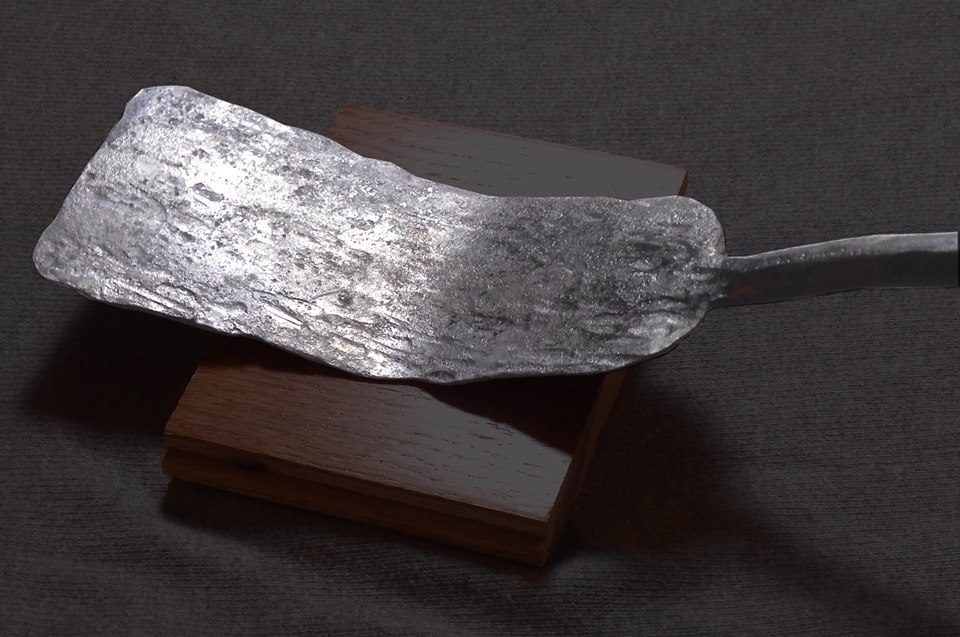
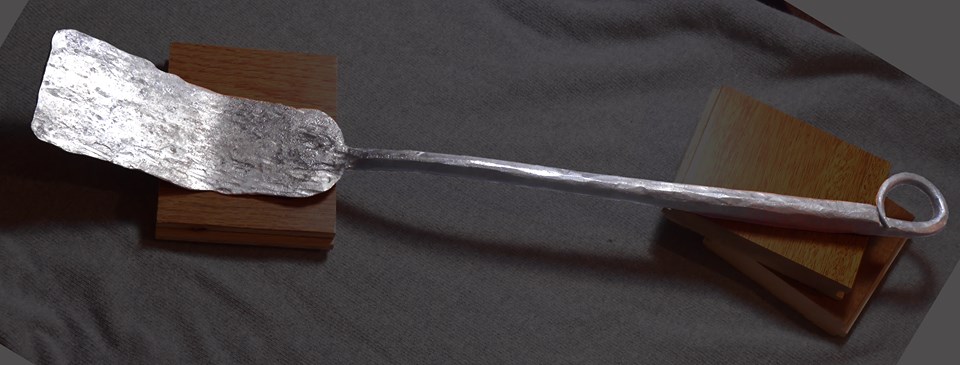
I don't know what all the fuss is abut these things, but I've been asked by several different people if I could make them one of these pendents. I'd rather be making knives, but if people want to give me money for something, I tend to take it. I just used some 3/4 round bar I had a hunk of, finished it with some copper wire and a leather cord.
-
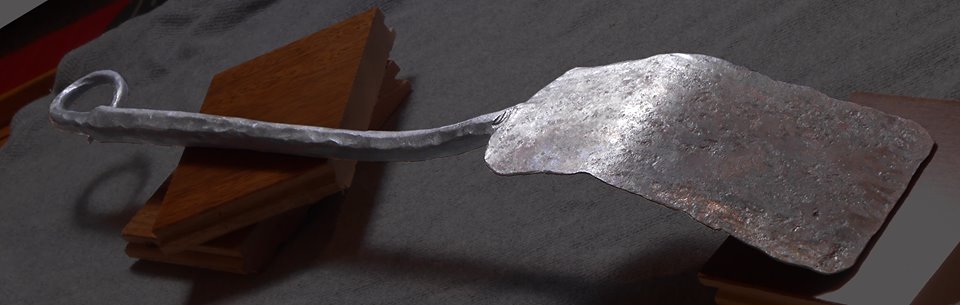
Most of my time at the forge has been for knife making, with an occasional "Honey do" project thrown in. As such, I've noticed, my skills as a knife maker are greatly improving, but my general blacksmithing skills are still sorely lacking. So, I decided to dedicate more time to just moving metal around for some different projects. Made a couple of bottle openers, completed a few tools that I've been meaning to make forever, like my spring fuller, and then last night, I decided to have some fun and try something that I honestly didn't think I would be able to do. Took some 3/4 round stock and managed to smack this out. Flattening the blade part took 4 times as long as I was expecting, and by the time I was ready to start cleaning it up, I decided it was getting to late (I try not to hammer on the anvil after 10 so as not to annoy the neighbors to much), so its got more of a rustic look than I shooting for, but I think it will fit in well with the rest of our camping gear. I honestly don't mind all of the hammer marks, but removing them is another skill that I want/need a lot more practice in.
-
First knife made and now a couple of questions...
HEAP of JEEP replied to burninghXcsoul's topic in Knife Making
For a first one, I like it. Its better than my first effort. I'm only a few months in to my knife making adventure, so can't offer a ton of advice, never having worked with old files, but on the finishing side... I do 95%, or more, of the finishing work of the blade, before I ever epoxy the scales on. About the only thing that isn't done, is the final sharpening. That way, you don't have to worry about messing up your scales, or getting odd sanding lines up close to the wood. As for the epoxy, after you get your scales glued on and clamped, take some Q-tips, dipped in acetone, and clean up the edge of the scales and any epoxy that might have gotten on the blade before it sets. Do it before it sets, and you won't have any issues. There's already a ton of knowledge on this forum about heat treat and tempering. I went through a lot of steel, learning how to HT my blades with my set up. I'm to new, and there are to many variables, especially when using a coal forge, for me to offer good advice on that... suffice it to say, it sounds like you should do a little more reading, and to get it right, be prepared to sacrifice a lot of steel. If you truly want to see how good or bad your particular process is, you'll be breaking coupons to check grain pattern, bending/snapping blades to check tempering, and putting your knives through enough paces that you have sore arms and blister on your hands to make sure it will hold up to some real world use. Its a good start, so keep learning and enjoy the journey. -
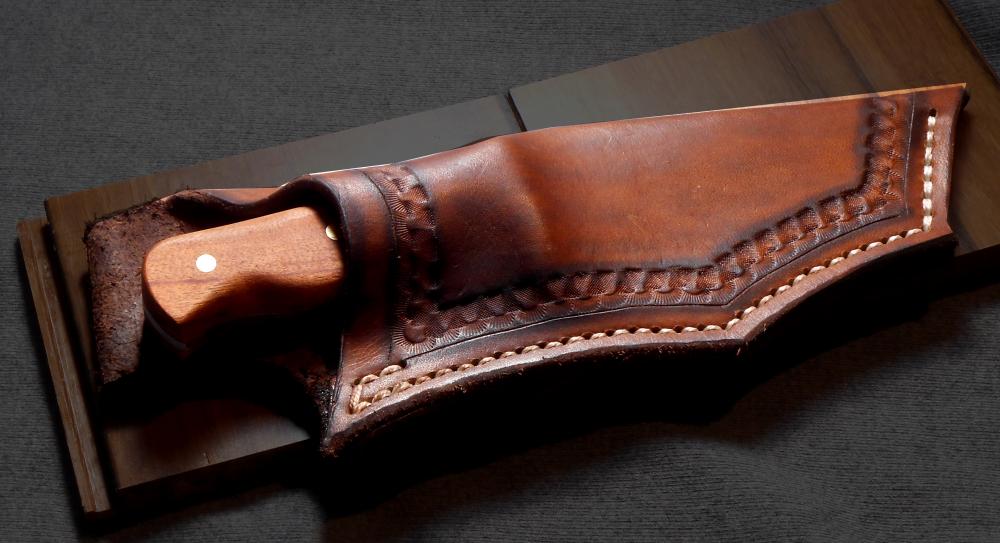
So decided I didn't like any of the pictures I took of this knife, and have been watching a ton of videos on photography. Put a little of that new knowledge in to practice and came up with these. Still not perfect, but much like my forging, certainly headed in the right direction.

-
I've smacked plenty of Home Depot steel around on the anvil, but don't waste your time trying to heat treat it. If its all you have to work with for now, then I'd just practice your skills at forming a blade, whether its forging or stock removal. And maybe try to get a sense of what direction you need to go in on your fit and finishing. Since its mild steel, it will never hold an edge and anything beyond practicing some of the basics will not give you the results that you want. My first knife shaped object was simply that. I still have it... actually gave to my teenage son to keep (He's the sentimental type) but every blade I make will always be compared to that so I can see how far I've come. I'm still in the beginning stages myself... only working on knife #8 right now, but what I learned from all of my early goofing around is all worth it. I ordered some good steel, and actually didn't touch it for another couple of months while I was still teaching myself how to correctly shape a blade with cheap scrap. The only money I spent on those first few objects was a little fuel for the forge. Once I was confident I could turn out something with a decent shape, I broke in to the good steel and experimented with different heat treatment and tempering. You'll go through a little steal that way, but it is imperative if you want to turn out a truly good functioning blade. So now my focus is all on my finish work, getting the perfect grind on the bevels, sanding, sanding, sanding, and of course the wood working for the handles. Don't get discouraged by early attempts. Just figure out the areas you'd like to improve in, and then figure out the plan on how you're going to accomplish it.
-
Right now, its all done on the anvil. If I keep improving to the point where I could reliably sell some knives, I might invest in a press to save my arm, but for now, its all by hand.