

MarkDobson
-
Posts
141 -
Joined
-
Last visited
Content Type
Profiles
Forums
Articles
Gallery
Downloads
Events
Everything posted by MarkDobson
-
just use it as is for a while and develop your skills, if it needs modified you will know after working on it a while.
-
What materials to forge for a beginner?
MarkDobson replied to Forging Carver's topic in Blacksmithing, General Discussion
I call them drops but when they do a project they will cut stock to size and whats left is often to small for them to use and is a drop. it drops to the floor and doesnt get used, another place we call is a fabrication place not to far from the house, pretty sure he makes trailers. not sure how much of what he has would work for forging but he had the steel we needed to take the saw mill from 8ft to 20ft so dad was satisfied. -
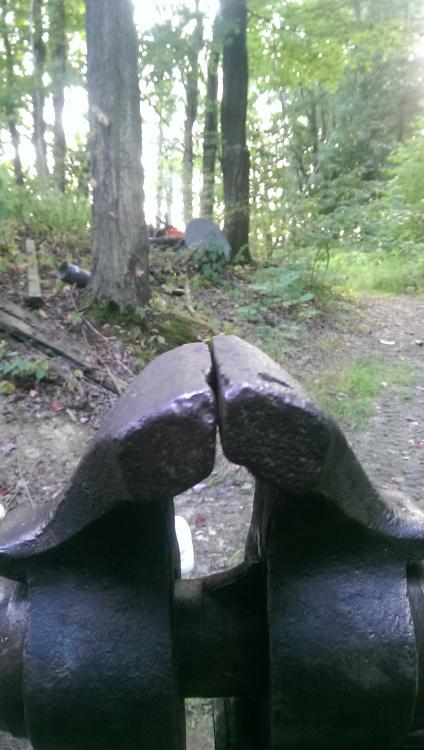
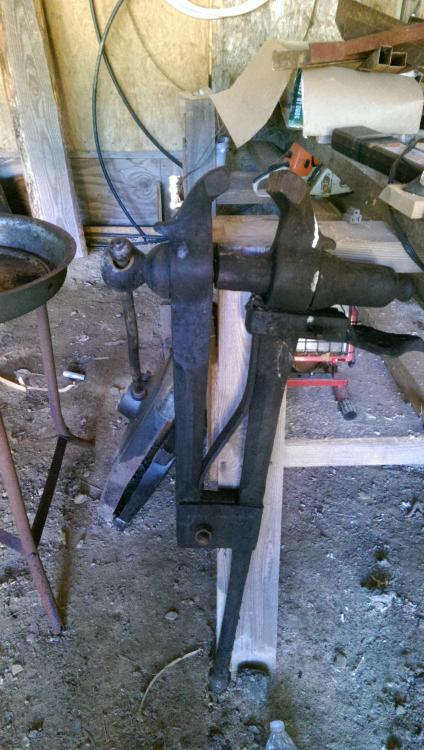
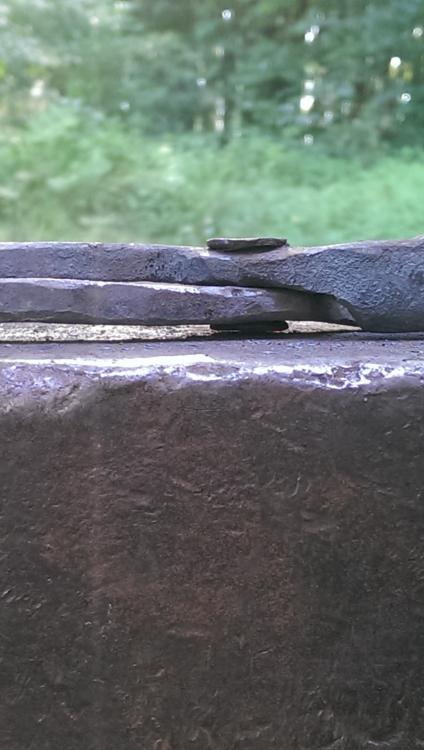
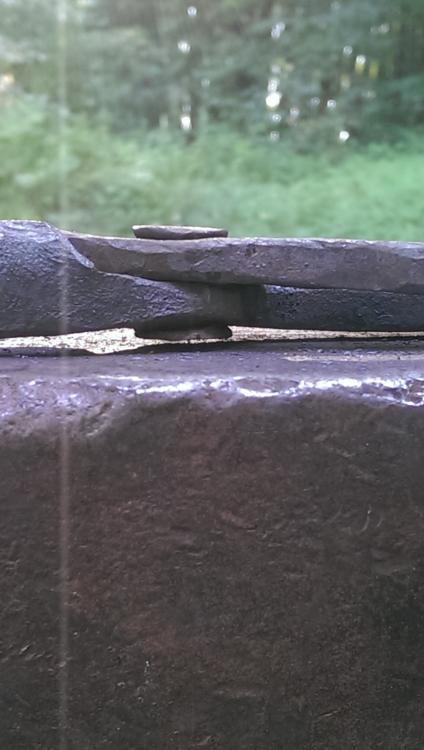
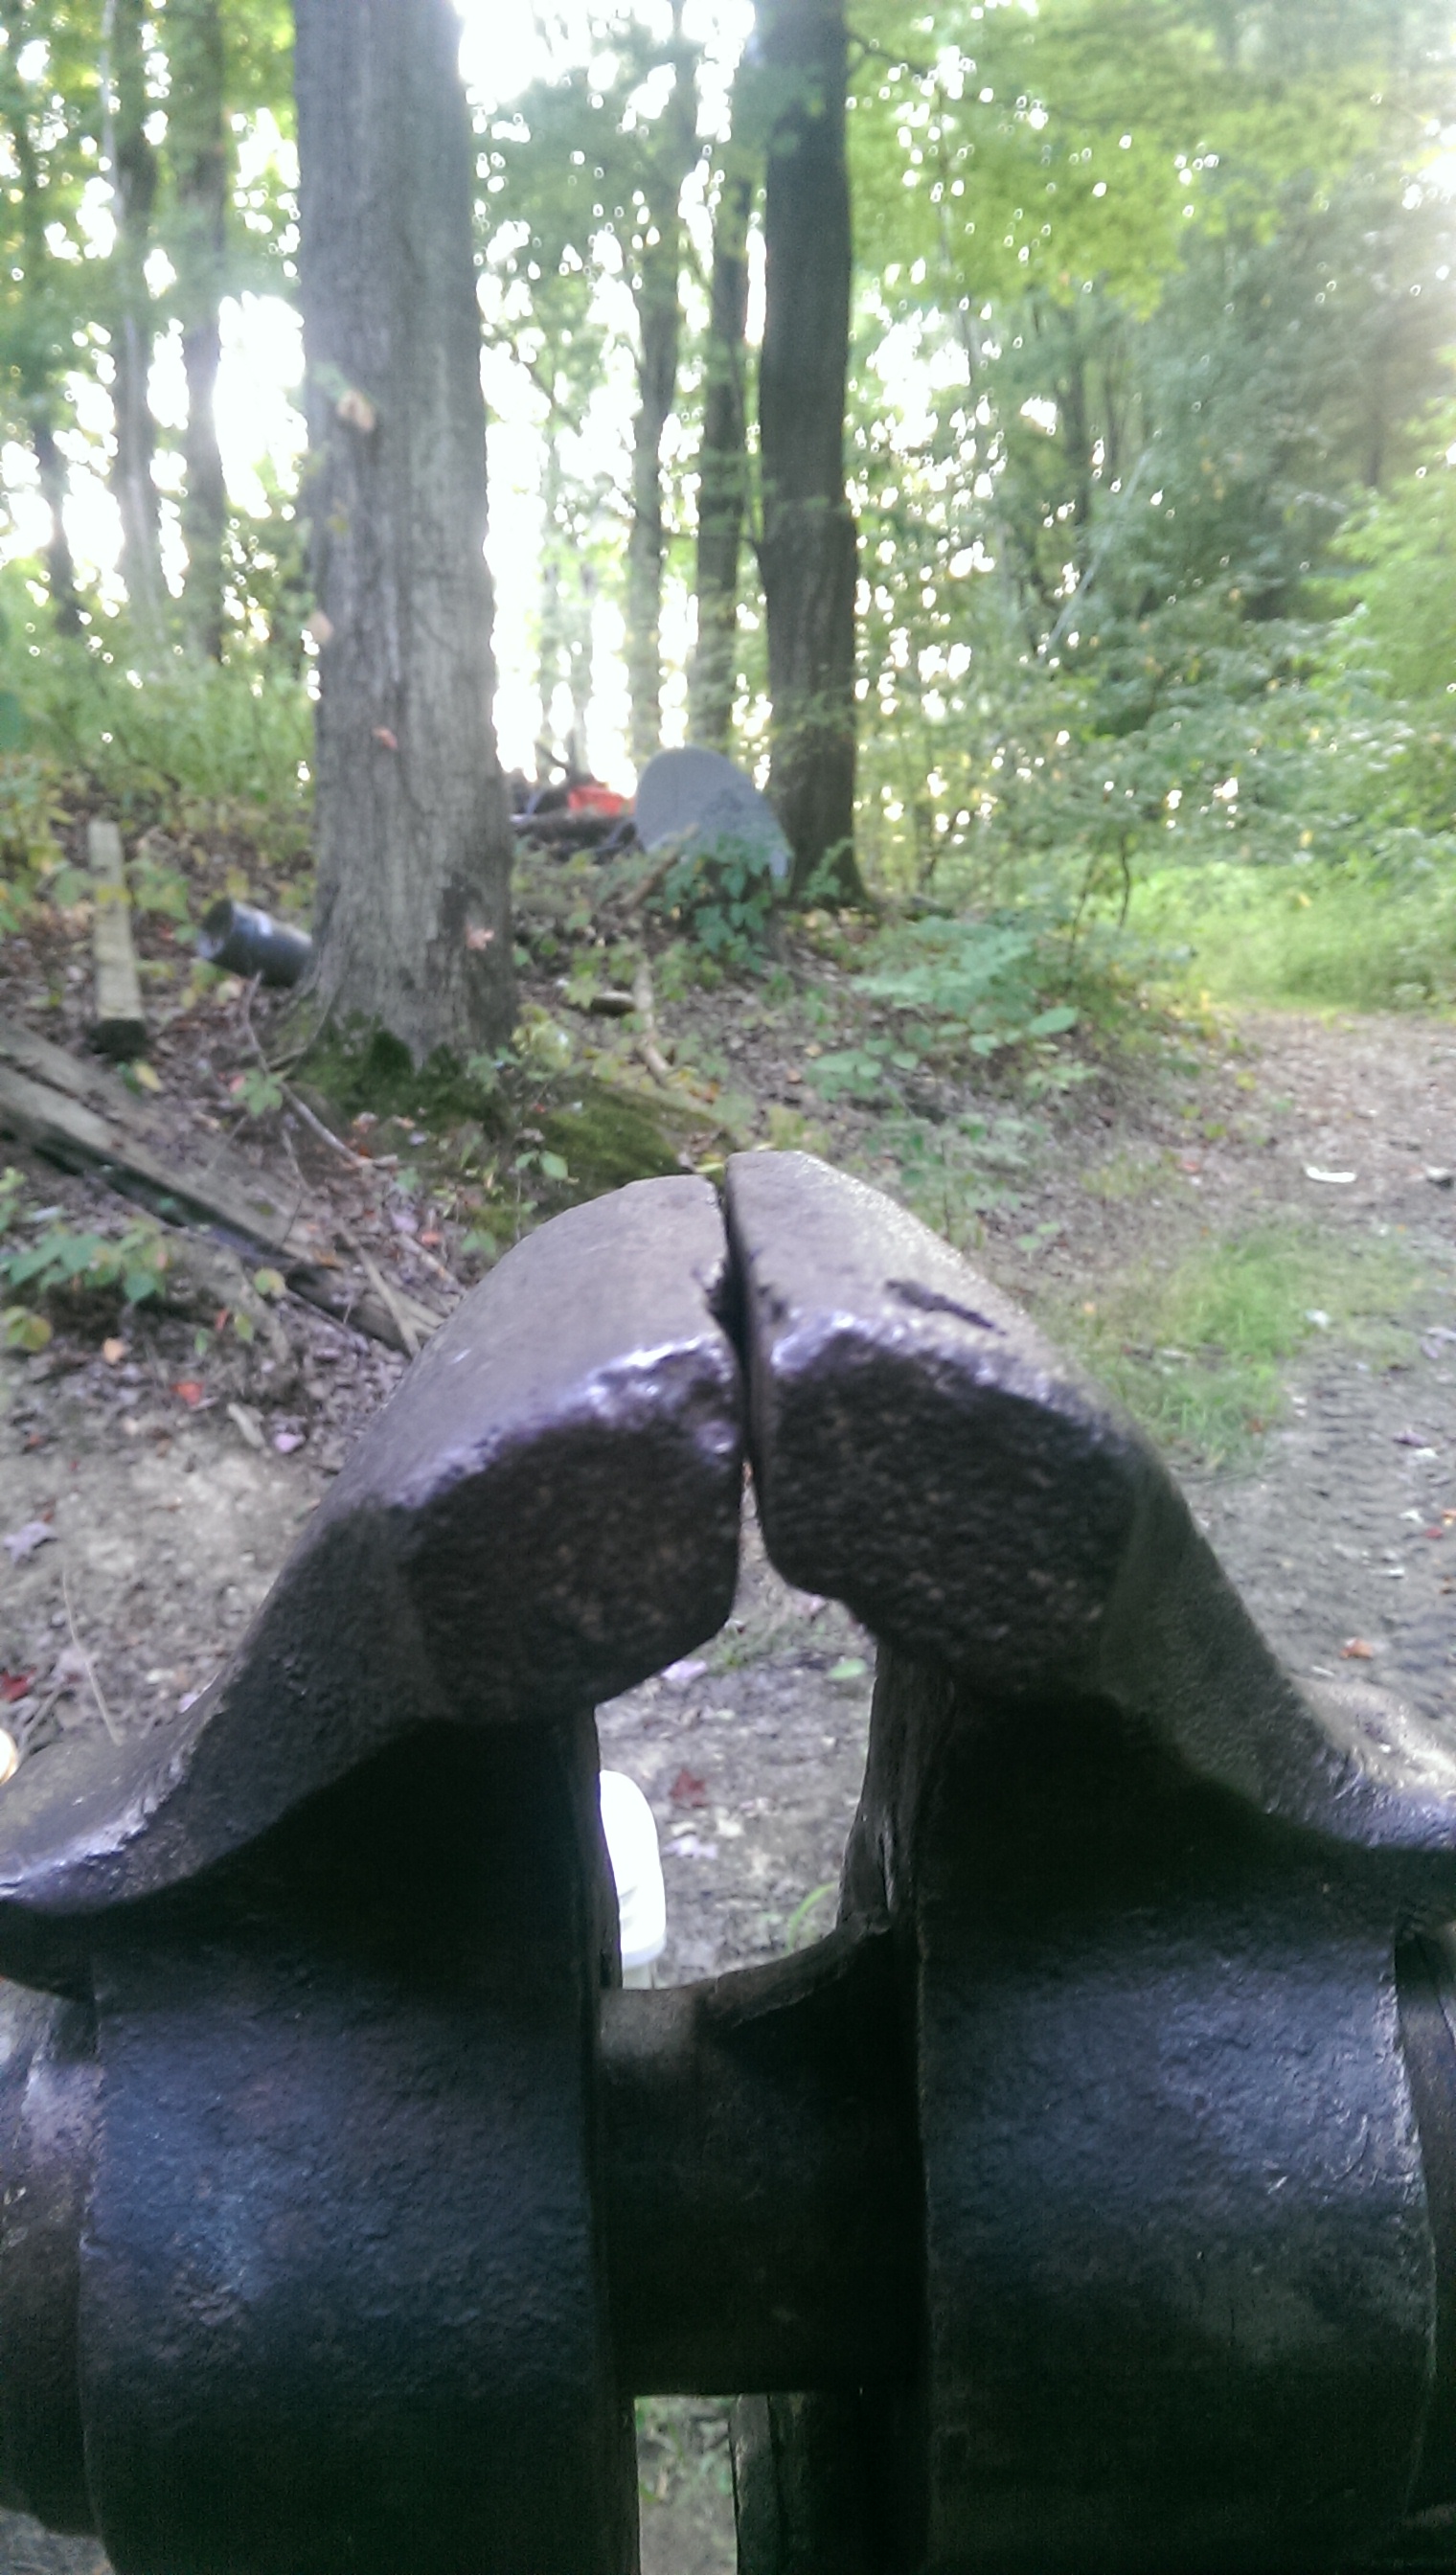
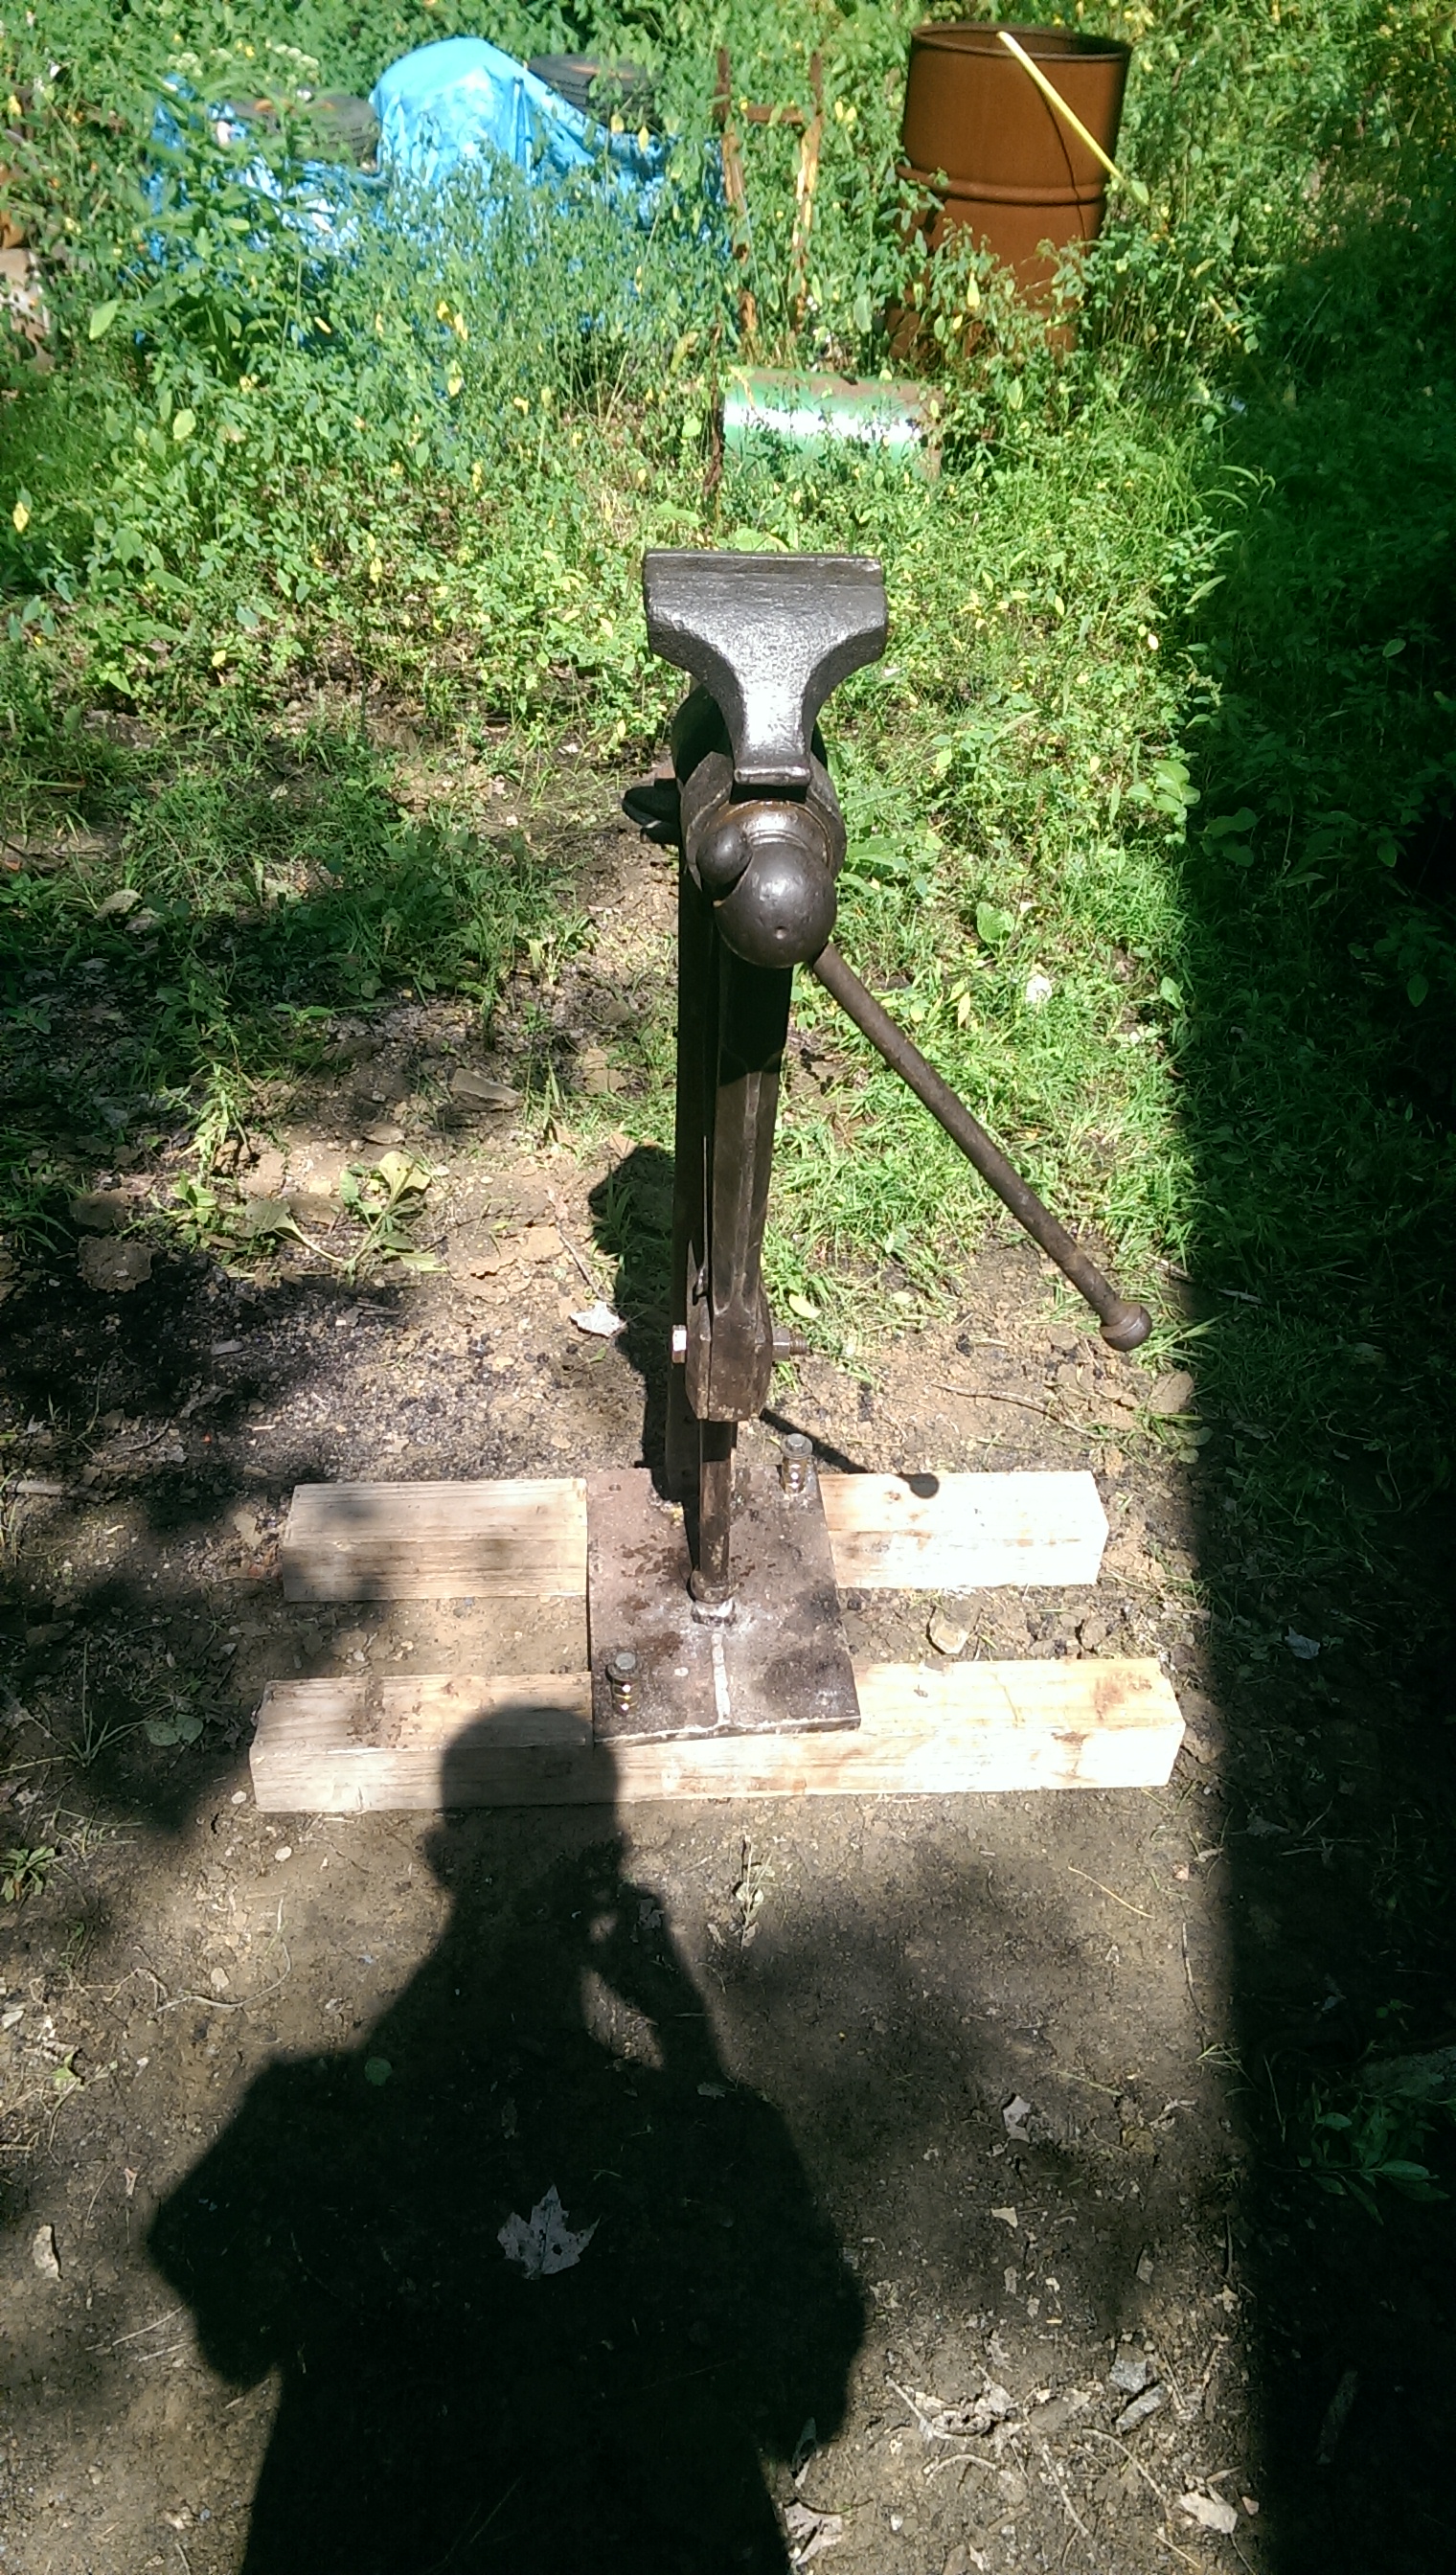
so i did a bit of forging tonight and made a new pin to hold the jaws together. its a tight fit and got the jaws within a 16th of each other so im content. the last 16th is just from wear on the working arm. the pin is tight enough that it doesnt rotate so im hoping that it wont back out, but JIC i punched a hole for a cotter pin. i have a piece of small barstock in the hole ATM. Im hoping that this repair will last a long while, so now all thats left is to get it off those 4x4s since it feels too high, mainly had them their because it was too tippy side to side, i heard bolting to concrete tends to fix that.

-
My forge, it ant pretty but it works.and well
MarkDobson replied to Zaku's topic in Solid Fuel Forges
looks good, a lot better than my first 2 break drum forges. looks nice and portable as well so when you get a bigger shop forge make sure you keep that one. never know when your gunna need a portable forge for demos or something. is that a clinker breaker or just something to regulate the air? -
looks like an early vise, use the missing spring and mount as a bargaining point. check the screw and threads obviously. if all looks good id probably id buy it. remaking a simple bracket and sping isnt that hard and there are plenty of write ups on the topic online. on a side note if it is an early vise it looks like original mount broke off and plugged the mortise. so might be another bargaining point. it shouldnt really affect your mount unless you want your repair to look somewhat original.
-
Hookway charcoal retort?
MarkDobson replied to JHCC's topic in Solid Fuels: Coal, Coke, Charcoal, Wood, etc
so i havnt seen a retort like this before (admittedly i havnt really looked into them) but i dont see why it wouldnt work,just a rocket stove minus the insulation from the looks of it, i find the clay one especially interesting seeing as my "shop" is in an area with TONS of clay. ironically right across the boarder from you in West Springfield. if anyone with more experience making charcoal could chime in on how effective they think it would be, that be awesome. I wouldnt mind trying to make one if the design proves solid. -
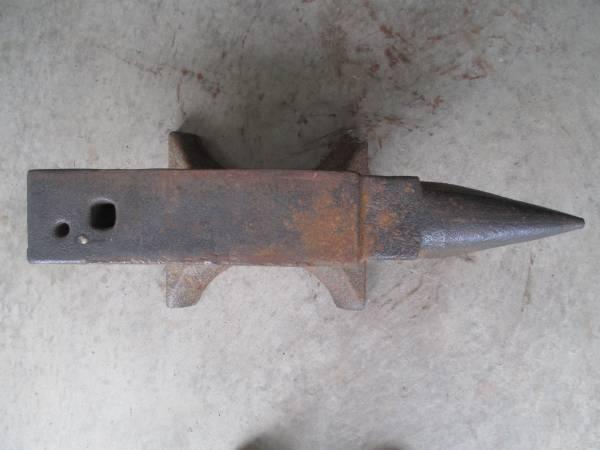
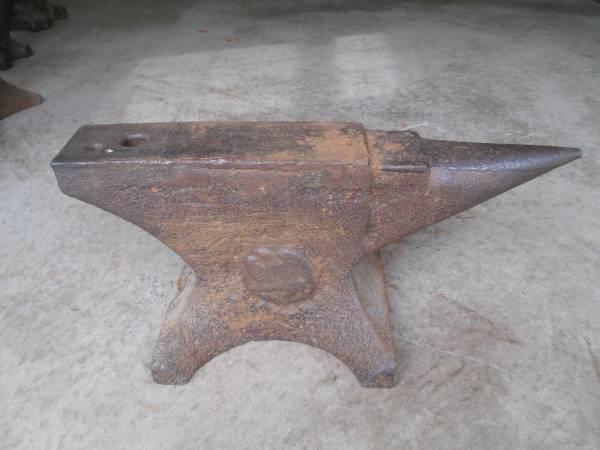
ok so i was searching craigslist (looking at things i cant afford lol) the other day and saw an old fisher. In the description it says "EDGES HAVE BEEN PROFESSIONALLY REPAIRED" Id assume that welding on a hardened steel plate would cause the plate to become tempered well into the face and ruining the hardness of the working surface. so my question is, can you "professionally repair" the edges on an anvil without ruining it? pictures included (because who doesnt like pictures)
-
so seeing as i just turned 20(as in today lol) and have been at this for just long enough to have a firm grasp on the basics, i can tell you that a sword is a very ambitious project even for someone who has been at it for a while, and while you may have bit off more than you could chew, you still learned something from the experience. Take whatever you learned and apply it to your next project. EVERY time you make something, think(or write it down), what could i do better or could do differently to make this look better or function better etc etc. this helped me a ton, instead of getting frustrated (which i tend to do a lot) i just decided that as long as i learn from it i didnt waste my time. Google ABANA controlled hand forging and you should get a link to a page with a bunch of PDF files with the basics.You can go exploring from there. there are also a TON of free books available online (you can download them as a PDF as well) if you can find them also, dont think need all the fancy tools you see people using, a good ball pein from home depot, lowes, princess auto ect in the 2-3lb range will do you just fine. start with a lighter hammer and learn good technique and then move up.
-
looks really good! id be proud to own that, love bowies with those big guards on em haha. idk if this will help you at all but for my pictures i take them with my phone then email them to myself so i can crop/rotate them on the computer
-
already bought some just waiting till i get my technique down a bit better first. started a pair of bolt tongs the other day but ran out of time to finish them before work
-
most post vises are made from wrought iron so im assuming mild would be fine, pictures of what is broken would help. Plus, everyone like pictures
-
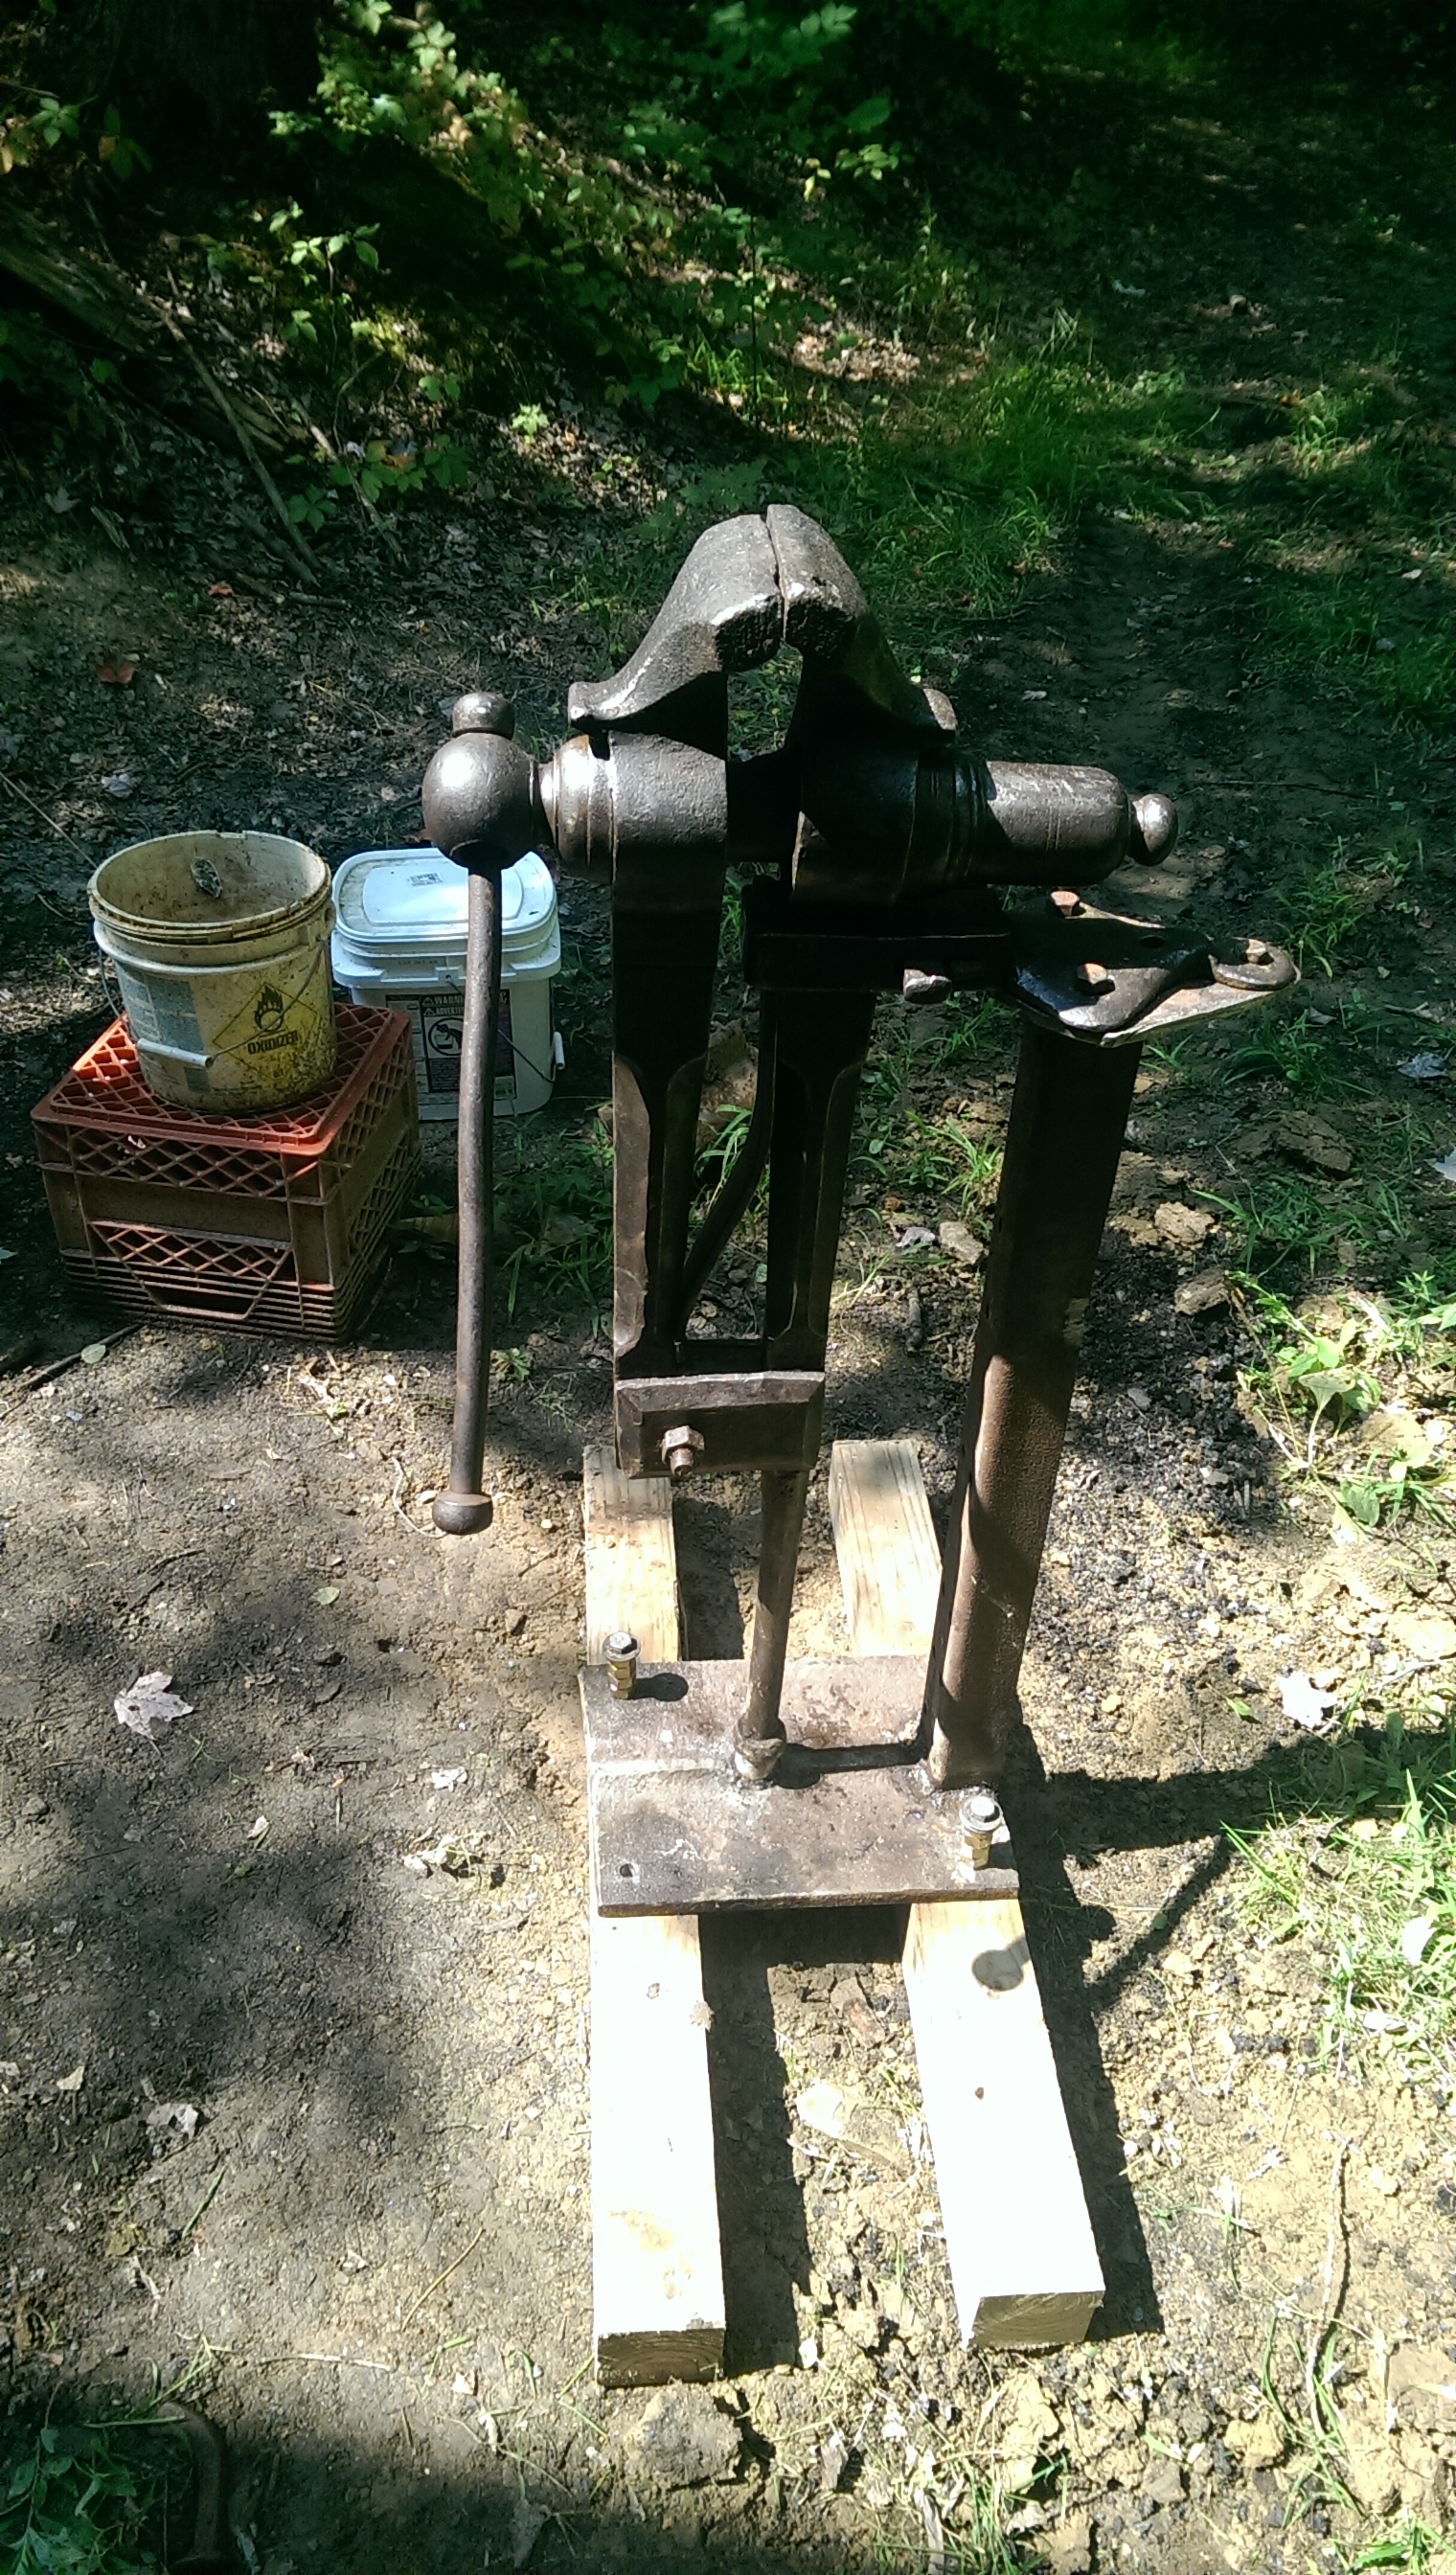
ok so since i was forbidden to responding to my other topic i guess i will make a new one so i got it all cleaned up and mounted and it turns out after using it you guys were correct, the little bit missing form the jaw isnt an issue, the only problem im having ATM is that the jaws arnt lining up, i believe this to be caused by the bolt holding the two halves together being the wrong size. im not quite sure how to fix this beside to forge a pin (or find a bolt) that is the right size. if anyone has a better idea on how to fix the misaligned jaws id love to hear it as for mounting, once i figure out where and how high i want it im going to pour some concrete and make a slab for it. only question regarding the slab is how deep should it be?

-
makes me feel lucky then, the 6in i just bought (only seen 2 on craigslist since i started looking for blacksmith stuff) sat on craigslist till the post expired, i was lucky enough to shoot him an email a couple days before it expired. wonder how the end of the box got broke off?, id assume that the end of the box isnt 100% required as long as the screw and threads in the box are ok
-
forbidden
-
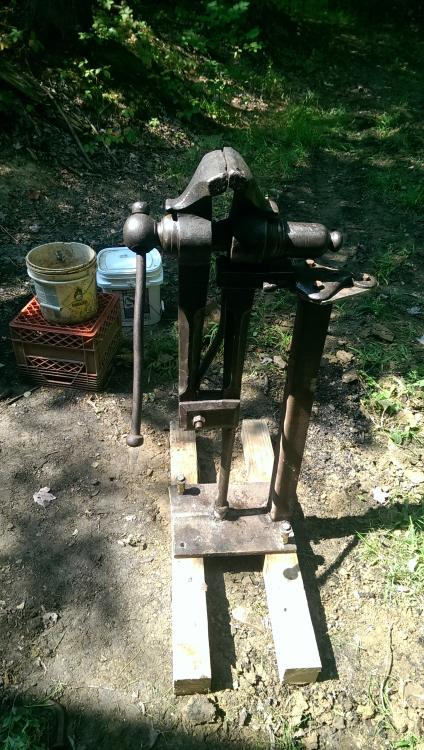
im not 100% sure yet but im thinking im either going to use an extra rr tie we have laying around for the post but since my shop is more temporary im not sure how well it will work. Or another option i have is to make a steel stand, this is entirely dependent on if i have what i need for that. you can also see the base and top from a craftsman table saw (leaning against the saw horse next to the rivet forge) i got for free that was about to visit the scrap yard, i was planing on using those for a grinder stand but i need a longer piece of tube/pipe to make it taller, but now that i think about it, the pipe that came with it might be the perfect height for the vise.
-
Alright, once i find time i will have to see what i have that will work for jaw covers, im sure we have some copper to make soft jaws with. Im glad i finally got a nice vise, now i can give my dad his bench vise back and he will stop teasing me with the idea that im going to come over one day and he is going to have it mounted back up in his shop lol
-
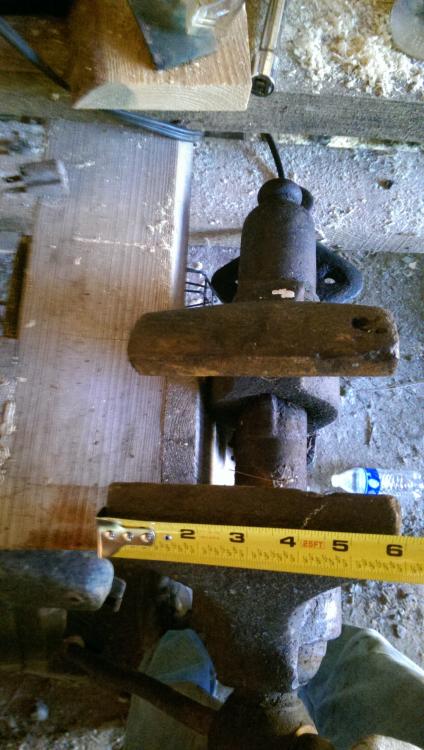
thats the plan for now, its hard to see in these pictures but there is a sizeable piece missing on the flat part of the jaw. i dont plan on doing anything to it unless it is a problem. once i get a post set up for it im going to have to try it out. the guy offered me the post it was on but when i asked how deep it was and he said "oooh its only burried 3ft or so" i decided it would be easier to undo the bolts on the mounting bracket haha.
-
Can I heat treat this? (with video)
MarkDobson replied to SoleSoul's topic in Heat Treating, general discussion
i dont see why you couldnt use either of those as an anvil as is until you find an anvil or other more suitable object. personally id use the rectangular one standing up so as much mass is under the hammer as possible. as for the brake rotor, depending on the size it could be used as a small firepot for a coal forge or maybe the base for some sort of stand. as others have mentioned i also havnt had very good luck welding to them so i would use the existing bolt holes if you were going to use it for something if your main goal is to make blades you probably dont need a "real" anvil, a post anvil made from 4x4 stock would work just fine for blades(at least this is what ive seen a lot of bladesmiths use). -
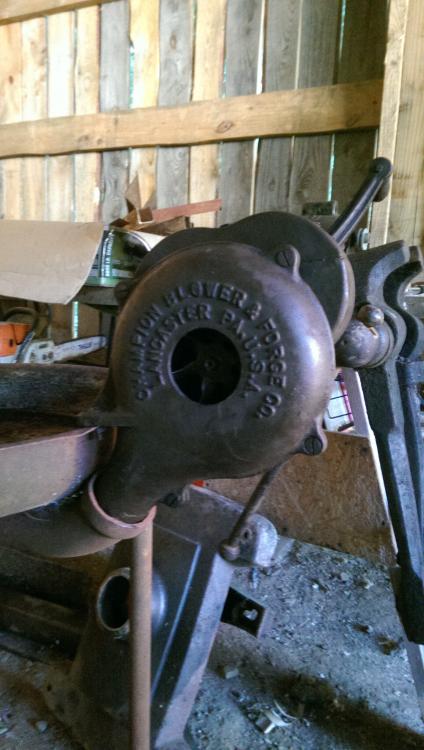
alright so here is the forge i picked up along with the post vise i just posted, came with the hand crank blower which we thought was seized up but it turns out it just had a bunch of gunk in the blower that i didnt see. there is a small rust hole by one of the legs and its going to need a new grate to keep the coal in. Im not really sure if this is cast iron or some sort of thick sheet metal but the fire pot is made of two pieces, there is the outside portion that forms the sides and then an inner portion that the pipes connect to. it also has a thin peice of sheetmetal that looks like it used to be a grate. O and ignore the photobombing cat lol

-
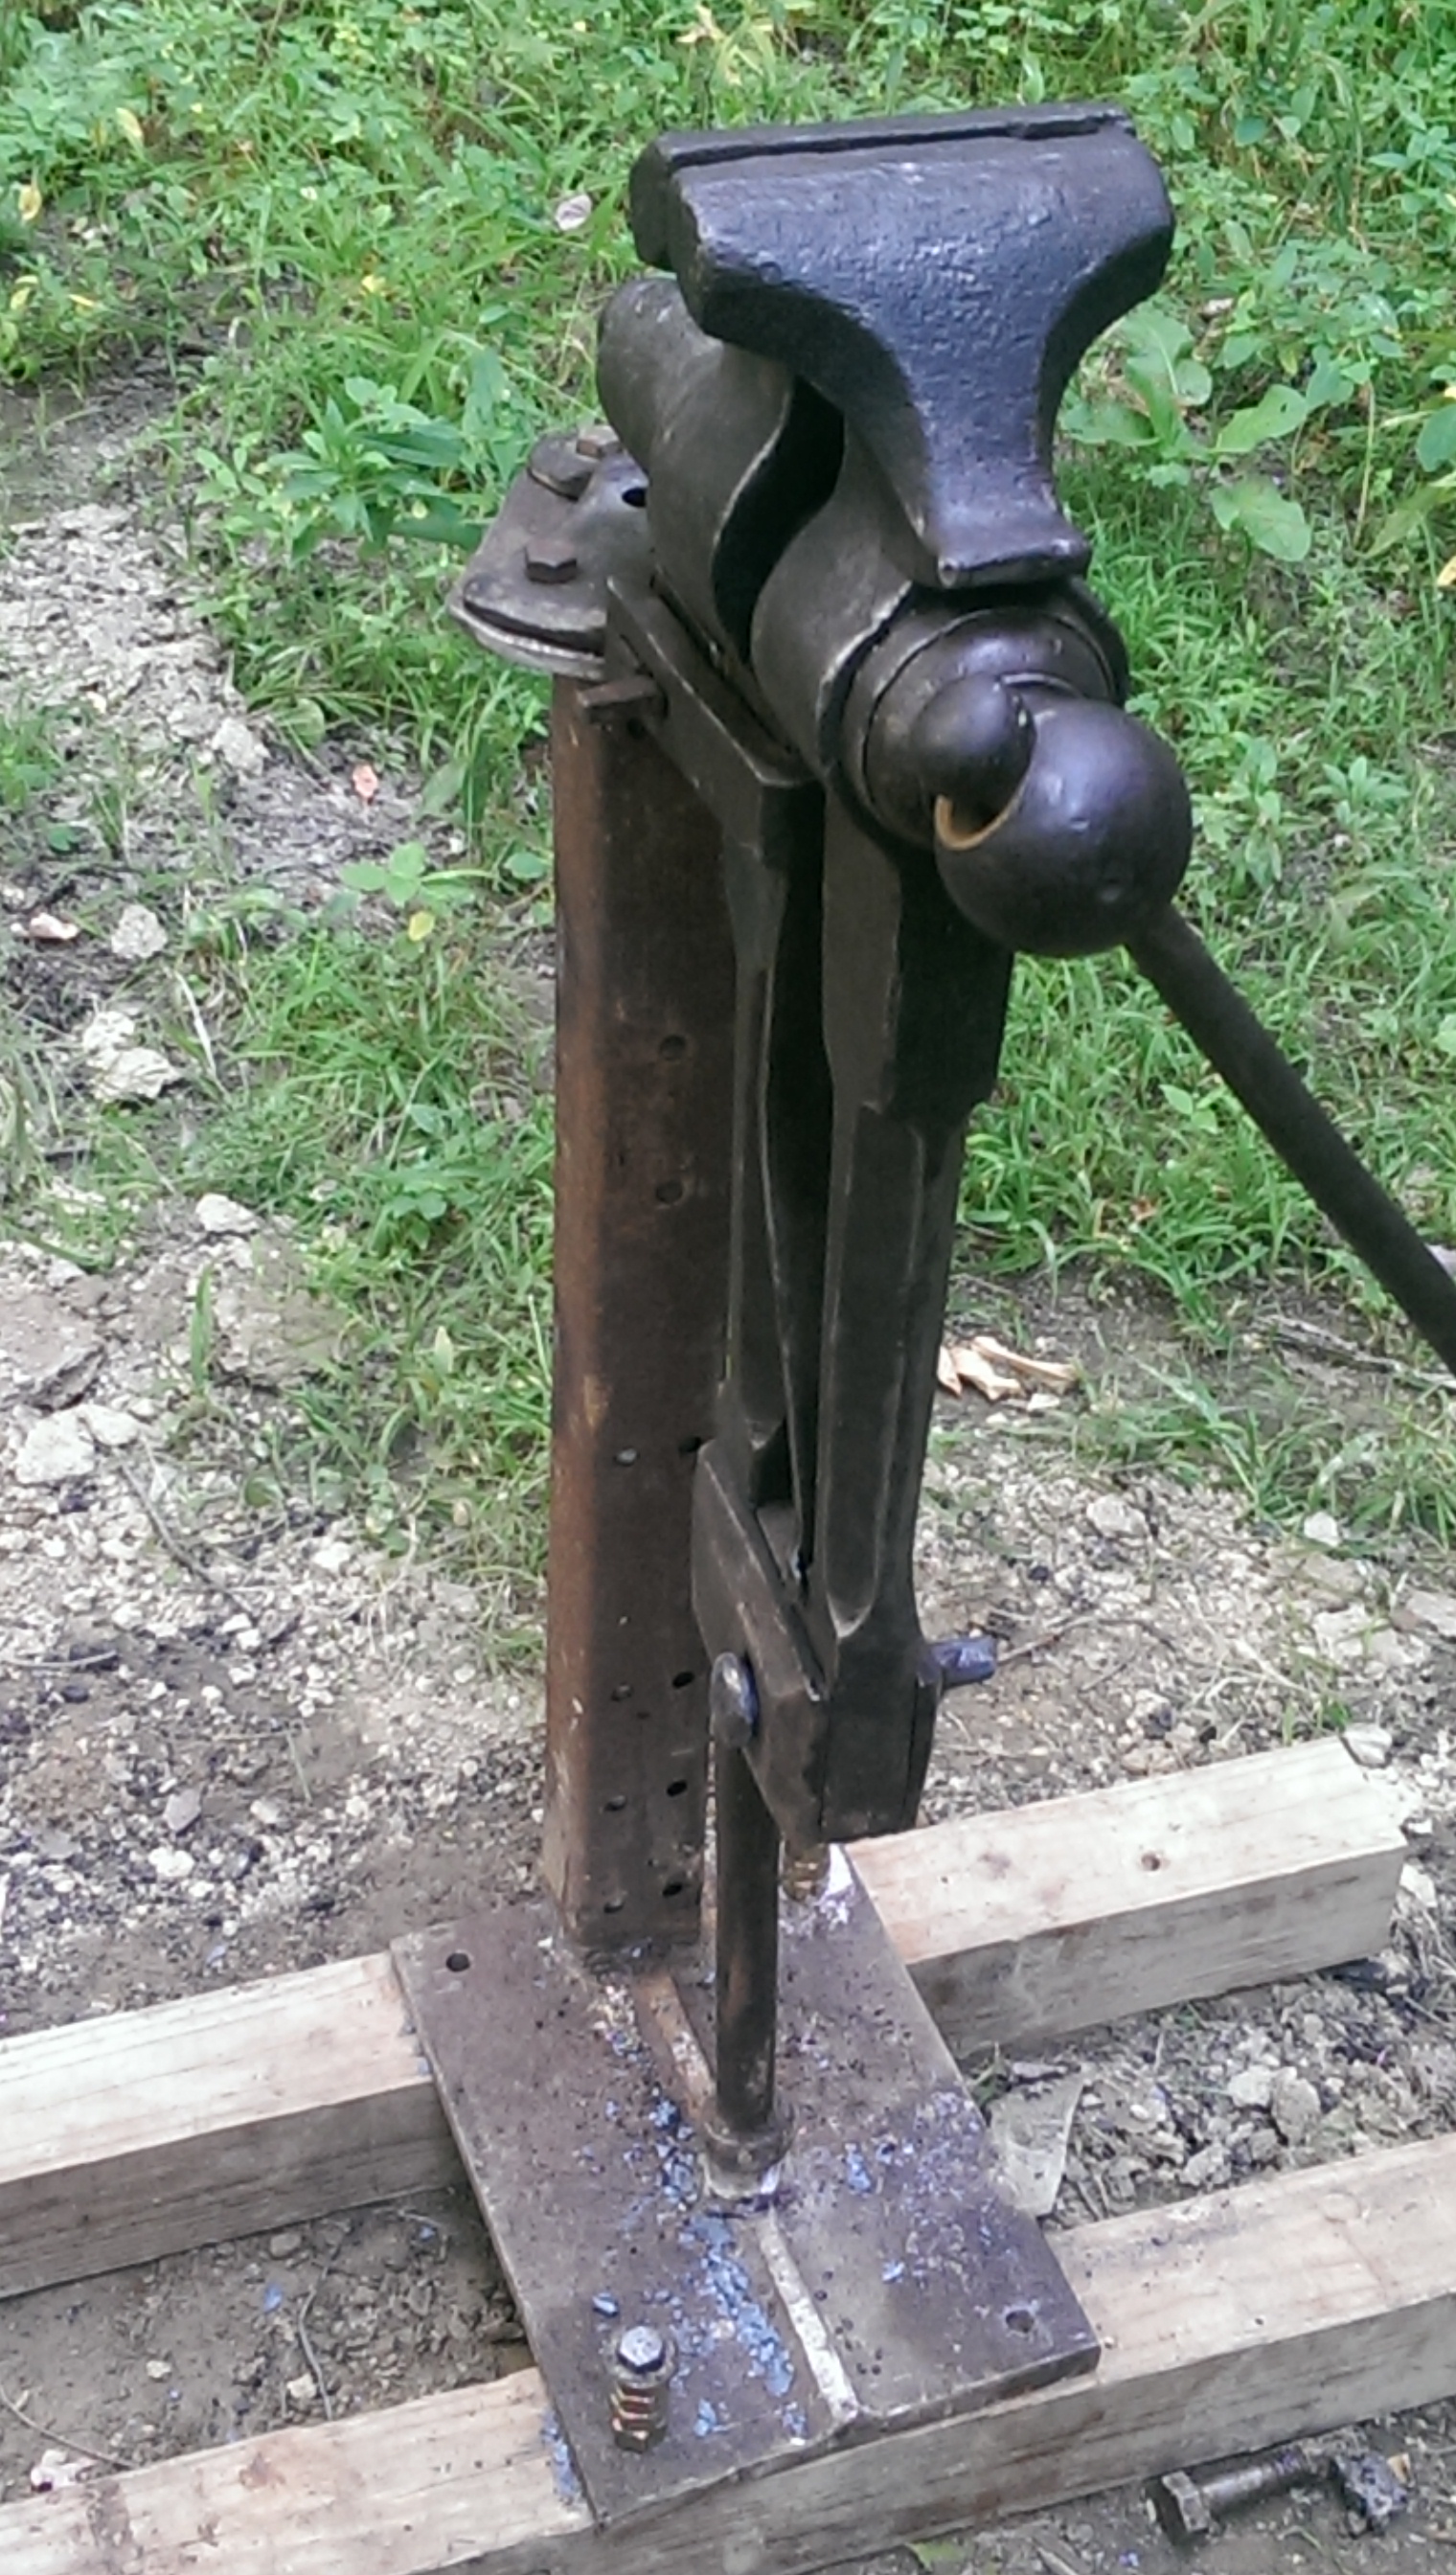
well i managed to pick this vise and a little rivet forge with a hand crank blower up today. the jaws are 6in and the screw looks to be in really good shape. only thing i can see thats wrong with it is that there is a little damage to the jaws,im not sure if i should(or how to) fix them or if it will even be a problem so im going to get it set up and use it a bit first before i decide what to do with them. this thing makes our bench vises look like toys haha i didnt take any really good pictures of the damage on the jaws but you might be able to see some in the two i did take.
-
you could probably split the rebar and forge weld a piece of high carbon in between. would be similar to san mai. not sure how well this would work in your scenario but its an idea.
-
thanks! yes i have both actually, i think i'll have to try that on the next set, might save me a bit of time..and my arm lol
-
thanks guys! yeah the 3/4 rebar was a bit of a bear to draw out but not too bad as long as it was HOT(using technicusjoe's technique for drawing out his rr spike tongs helped a lot also). as for the blisters, i dont have any surprisingly enough, must be from swinging a framing hammer all summer
-
Well, here it is, my first successful attempt at tongs. they arnt pretty but the should work. i forged these out of 3/4in rebar. the next set i make will probably have welded reins, drawing out that rebar took a little to long for my liking haha.
.thumb.jpg.21c879153b5835b5c3d397df9e882ff4.jpg)
.thumb.jpg.8c64adc1fac6dafec202f42c094bc0fe.jpg)
-
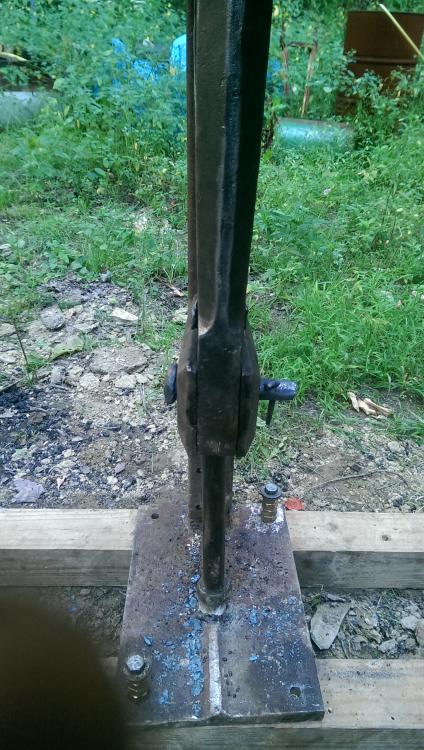
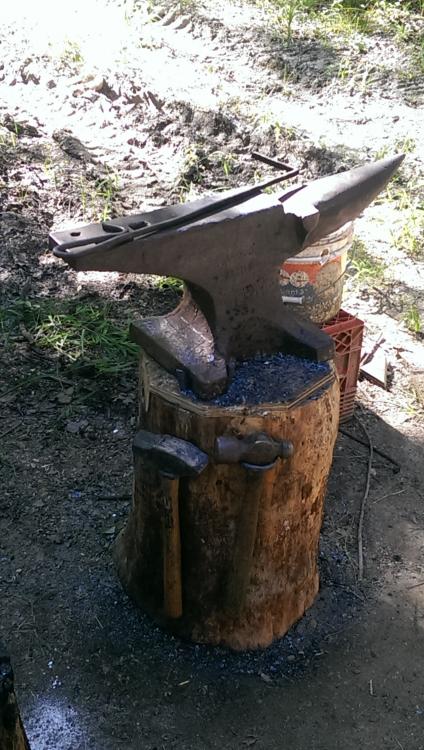
well i got some free time this weekend and made up my stump/stand for my first anvil and a new coal rake for the forge


.jpg.e37c8fbcb2519d15c089604d8740cfe8.jpg)
.jpg.22484ec5f4fb31ba85bb80d13a8eb901.jpg)


