elmoleaf
Members
-
Joined
-
Last visited
Everything posted by elmoleaf
-
-
I somewhat wondered how they managed to produce this chain. A bit of googling came up with this interesting website: The Medieval Roots of Colonial Iron Manufacturing Technology http://www.engr.psu.edu/mtah/articles/roots_colonial_iron_technology.htm It compares Colonial iron production methods to that of medieval Europe. It was interesting to note that the Colonies were expected to send their iron production to England: By 1751, Maryland and Virginia alone furnished England with 2,950 tons of iron, one-sixth of the mother country's own production. [20] [21] Finished goods such as pots, pans, hinges and tools were not to be made in the colonies, however, but bought and shipped from England. Beginning in 1660 and lasting until the Revolutionary War, a list of "enumerated articles" was published by the British government under the heading of the Navigation Acts. These articles, including cast pig iron, wrought bar iron, among others, were to be produced in the colonies, but shipped only to British ports. [22] Later, the Iron Act of 1750 reiterated those sentiments and prohibited all export of iron from the colonies to other countries. It did, however, remit all duties on exports to England, increasing the tonnage of iron exported from 3,000 in 1750 to 8,000 in 1770. [23] Understandably, complying with these laws would have eventually led to the undermining of all colonial iron manufacture efforts, which became a contributing factor to the ensuing revolution. Harold Livesay, summed it up in his statement, "The English passed laws to protect their market; the colonists developed iron works to ensure their iron supply." [24]
-
It's just as well I didn't take photos of the longer "reproduction" they had at the island; it was a dozen or so links of laminated plywood painted black! The caretaker was a very knowledgeable fellow; it would not surprise me to find the inauthenticity bothers him. It would be an amazing project if someone with the means could give the Army a more authentic reproduction. The site itself is not easily accessed by the general public. As an aside, apparently in the early 1900s someone was passing off ship anchor chain as being genuine links from the original.
-
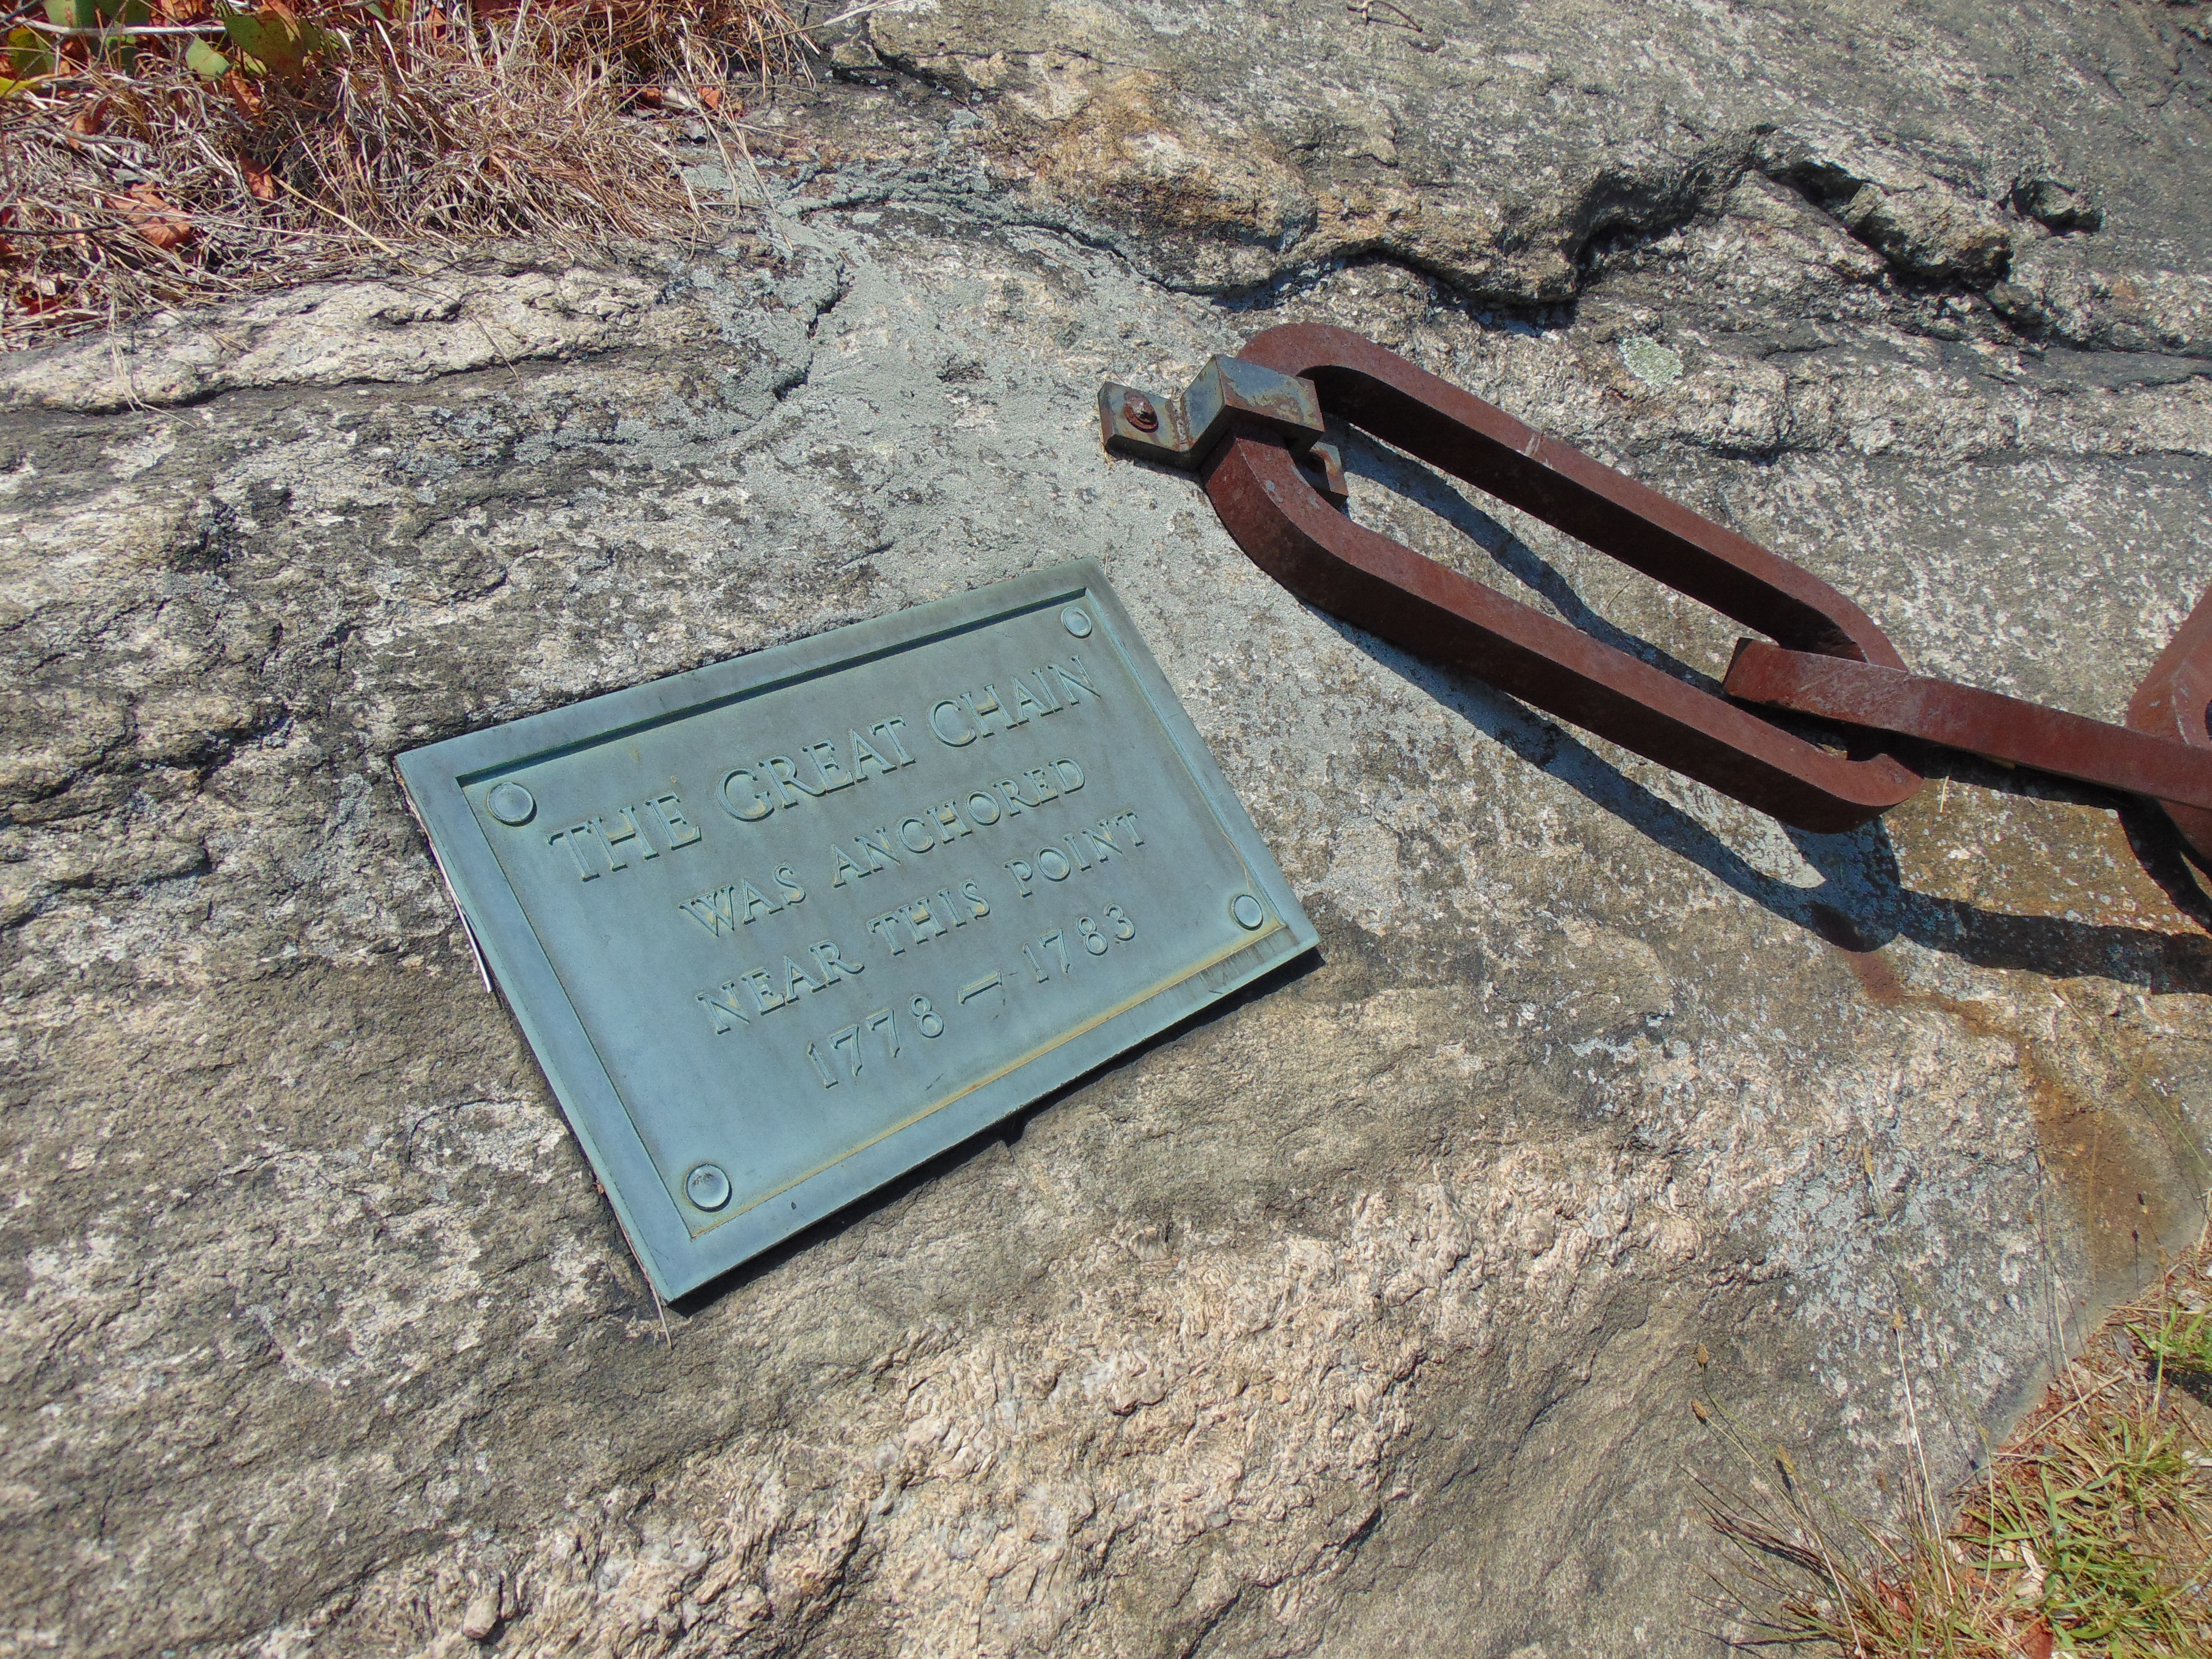
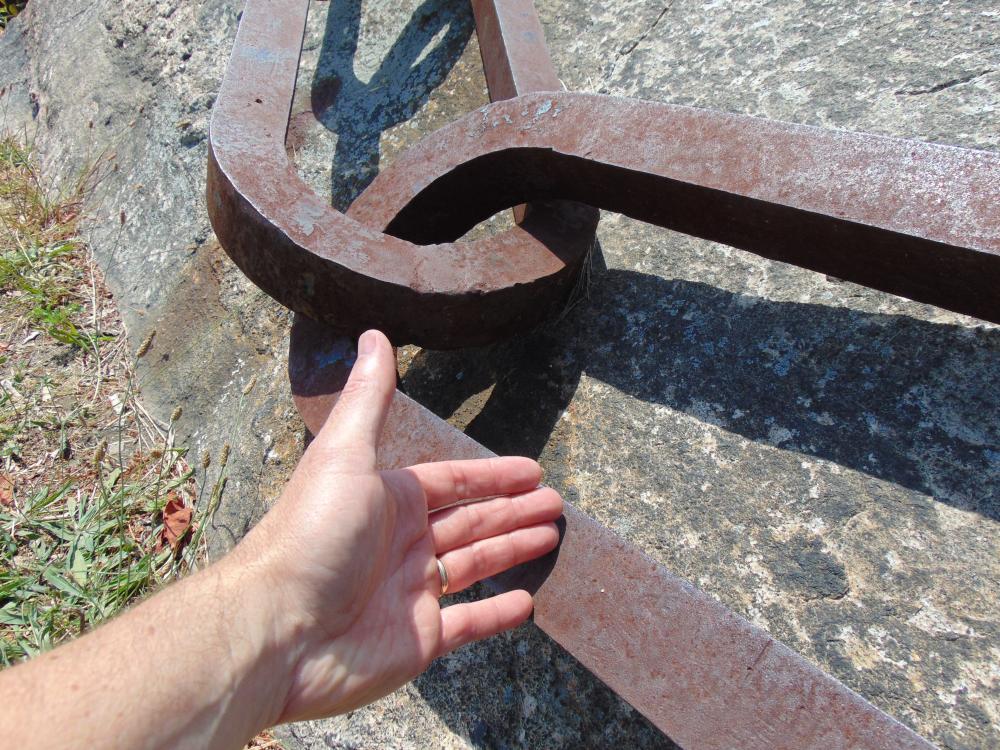
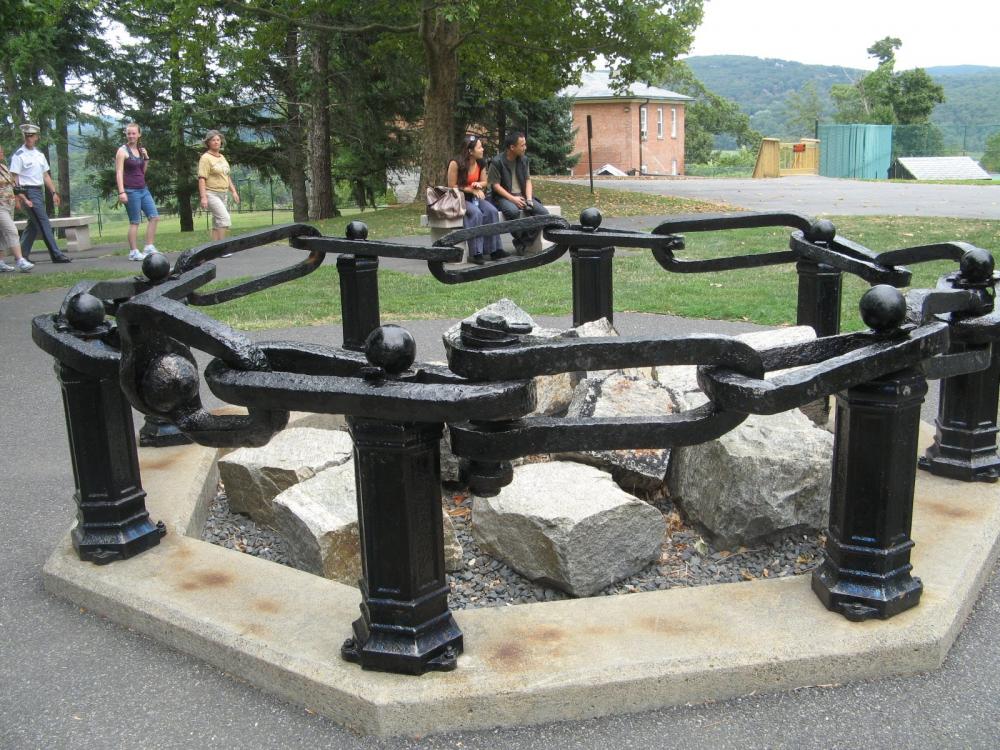
I recently had occasion to visit West Point, including Constitution Island across the Hudson River. There they have some reproduction links of the Great Chain that was stretched across the Hudson River to prevent British ships from passing. It was floated on log rafts across the river. Each link is about 2' long. A short climb through the woods at the island brought us to Redoubt #7, which has a commanding view across the Hudson towards West Point (third picture). Along the way, we passed an old stone wall, on which was resting a rather large abandoned piece of wrought iron. The last pic (not mine) are the only existing links of the original chain. They reside at Trophy Point within the West Point grounds.


-
I'd also suggest that any formal organization--if the parent/guardian will NOT be present at all times--ensure that adults taking responsibility for youth be given appropriate training and have documented CORI (criminal background) checks to protect both the youth and the organization. It is an unfortunate need in this litigious age of seemingly endless predator stories.
-
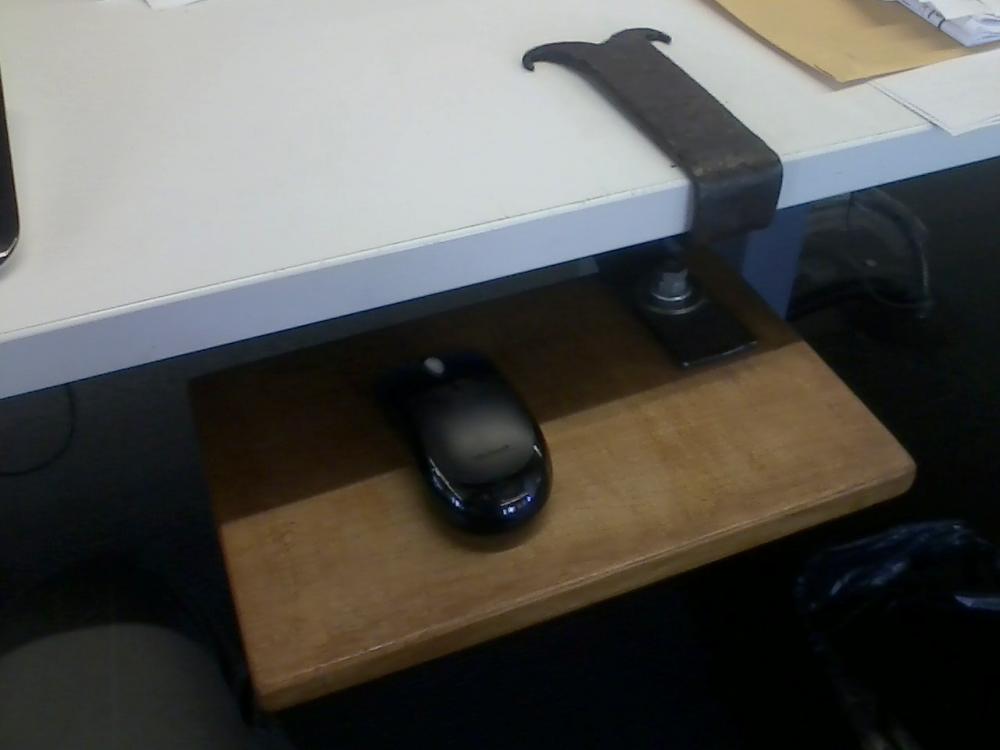
Here's a bad phone pic of the previous version as installed. 1/8" thick x about 2" flat stock (old spring harrow tine). Didn't do so well on the curved ends on that one. Current version is much shorter in how far onto the worksurface it extends, and is only 1/8" x 1" wide stock (piece of scrap steel found in the gutter while walking in Boston). Thanks for all of the tips. I'll keep at it.
-
Ps.. No felt pads. I want it to grip tight....I just make sure it's real clean so it doesn't mar the laminate when slid on.
-
Thanks for the feedback. No pics re: jig. I just grab a couple rr spikes or other 2 pieces of scrap stock and tighten parallel in vice with 3 inches or so protruding vertically. I'm thinking maybe 2 or 3 pieces of identical size stock notched to slide in u -channel or similar would work better in the vice. Then the distances between pieces could easily adjust, stay parallel and clamp at once together in the vice. Ill get a pic at work tomorrow of the previously completed mouse tray so you can see the wood part. Thank you...one thing always leads to parallel projects...improving how to bend...and I realize I need shallower forge pot and better coal...all of these and practice will lead to making items like this a lot quicker 4 odd hours!
-
This is a bracket to hold a computer mouse tray/shelf below a desk surface. It friction fits onto the edge of the desk. The lower arm will have a rotating wood tray held with a bolt, large washers and nut. This is the third one I've made...they get incrementally better each time. Hardest part for me are the right angle bends. I need to get some sort of adjustable bending jig made with square stock. My current method is first bend made in vise (easy). Second bend is uses whatever random assortment of square pieces I can get into the vice to make a homemade bending jig. Does not work well, especially since the dimension of the first bend is critical to having tight friction fit on the counter. Some of the bends end up too rounded or crooked. Scrolls seem simple enough...until I make them. Start with punched hole, then slit down to it and open up two halves. It is very difficult to slit the stock equally, taper equally and bend equally so it all looks symmetrical in the end. Did a little brass brushing to highlight the scrolls.

-
XXXXXX ....I thought he was gonna pull that knife right into his thumb! Still got the willies from watching that!
-
Your steel would probably work as well--likely better--than what I'm using. You have more surface area and mass. Stand it on end on a log or any stand with some mass, and anchor it to keep it from bouncing. The steel in mine is soft enough to file---see the visible dents? But as a no-cost starting point for learning, it can't be beat. I now have a better sense of what I need etc. and am actively looking for a true anvil (or at least a larger chunk of steel!) Good luck.
-
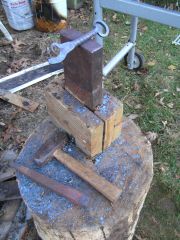 My current anvil. Approx 1-1/8" x 4" x something or other tall piece of steel. Stood on end, caulked on bottom and wedged tight into 2x6 holder that's screwed down to large oak log.
 -
Decided to ignore the football game and instead make another attempt at skeleton key style openers. Steps were: 1. upset end of rebar. 2. flatten out upset area into un-centered rectangular area. 3. taper opposite end for loop and form loop. 4. hot punch hole thru rectangular area and enlarge hole. 5. hot cut two times to remove material at/adjacent to hole. 6. fussing about etc. to clean up opener end and get distance/angle correct. 7. Bit of filing and clean up to remove square edges at loop and opener end. Forming loops and working inside diameters is done with rod clamped in a vice, as I don't have a true anvil with horn. Thanks for all the feedback.
-
First opener attempt...and about my 6th thing made, after some tongs and some assorted hooks. :P Inspiration was to have opener somewhat like a big old skeleton key, and wanted the source material--rebar-- to still be apparent. On the first, one, I formed the loop on the end first...which made it a bit harder working on the tooth part. Second one, I flattened the end area first to do the tooth first. I'm generally ok with the loops, not so much with the teeth. Transition from the flat area to the round handle is messy. Needs some sort of clean line there. Also, the profile of the tooth end isn't very intentional looking. I also didn't clean up the hot cut/inside edge of the tooth enough. The tooth was difficult. Used a hot cut to make diagonal though the flat area, then opened it up by working it around a round rod in the vice. In hindsight, should've hot punched a hole first, then hot cut over to it. I wire-wheeled them to brighten them up....nobody wants to use a dirty-looking opener. Well at least they actually work, and I learned some things for the next attempt. Thanks for looking.
-
It's not much but it has allowed me to get started. 1-1/4" by about 4" wide piece of steel stood on end. It's soft steel that was filed smooth, and it's likely work-hardened a bit now. It's wedged into a box of 2x6's that's been screwed down to a big oak log. Have it off center on the log so I can work without the base getting in the way, and balance of the surface is place to put down tools. Hope is the log will be used for regular anvil some day.
-
This is the overview of the entire setup. Location is surburbia, outdoor setup. Everything sits under piece of 4x8 plywood that's hinged off of the eave of a small pole shed (not really visible). When in use, I drag everything out and prop up the plywood for shade. When the plywood is down, it keeps rain, snow etc. off the equipment. The forge itself was put together with whatever was at hand: Ikea metal bunk bed tube steel frame and ladder forms the table. All bolted, since I don't have a welder. Old dryer sheet metal doors for part of top surface, then oven rack and wire shelving for rest of top and shelf below. Old lawnmower wheels to make it portable. Closeup of underneath. Air pipe is some of the bed tube steel, and tube from old bike pump. Air supply is hair dryer. Ash dump is piece of scrap metal wired to the pipe and held closed with counter-weight. Fire pot was made by forming x-cut in dryer door metal and folding sides down. Then dropped in some really thin sheet metal that had been bent and screwed together in shape of the pot. Insulated it with about 1" thick mix of perlite and mortar. Fuel is anthracite scraped up from an old basement. Pot has been used about 6 times or so and seems to be holding up fine.
-
That is quite beautiful. Are those handle parts/butt end steel?
-
I dug this up about 25 years ago....went back once or twice but never found anything similar. Typically metal detecting is about looking for non-ferrous stuff....coins, jewelry...not the rusty stuff. An identical B Davies latch was recently listed on ebay....but didn't sell. This one was found in Mass, the ebay listing was from Pennsylvania I think. Definitely some sort of production piece, versus a one-off. Thanks for all the info.
-
The rasp door pull thread make me think you might be interested in this old forged pull. I found it with a metal detector years ago, so it's a bit corroded. It's rigged up on an ugly hollow core door. The backplate holes are somewhat irregular, as well as the circular corner cut-outs. The pull seems to be wrought iron, upset at each end near the back plate. How would the round center ball have been made...some sort of swage? It's marked B. DAVIES ALL WROUGHT IRON WARRANTED Here is a picture of the back. It's interesting how the thumb lever is pinned on those two little ears. I'm guessing maybe the smith put a hole through the backplate, then made separate pieces for the ears...each notched top/bottom to the thickness of the backplate? Then they could be wiggled diagonal thru the hole and crimped down onto the backplate? The pointed end (not in photo) of the thumb latch is very sharp!
-
-
Years ago I used to dig for bottles in an old 1920s industrial type dump, full of lots of coal ash, bottles, bricks etc. We used to just toss the metal aside along with the unwanted stuff (wasn't into forging at the time). Went back today to find some of that iron. Top piece is wrought, that looks like some sort of ladder piece. Second down is 4' long x 3/8" thick wrought flat stock, and then below that 1-1/4" round bar, smaller round bar, and some sort of square axle. On left is some short flat stock, triangular thingy, part of car jack, two forged hooks, old file, and rectangular scrap. And...some huge chunks of anthracite. Here is closeup of the hooks. They were attached to corroded thin plate, about 3 feet long. I'd guess they'd been attached to a piece of wood. Here is the triangular thing. Both ends look broken off. It also looks to be covered in carbon? Maybe some sort of boiler part? Close up of the ends of the long stock. Last is closeup of broken end of the wrought ladder-type piece. I've only been at this hobby for a year....it's nice to have something to pound on other than old rebar scrap. No particular plans for any of this stuff the moment.
-
I don't know this will help: If you're in the US, google the PBS show The Woodwright's Shop. There was an episode that air in Sept 2013 with Peter Ross, who showed how to make different types of antique locks. The locks they show are amazing. It can be viewed on PBS website. http://video.pbs.org/video/2365021516/#
-
Knife is beautiful and understated. The clean bright handle dot/pin seems somewhat contrary to rustic appearance of the guard and blade. Did you consider a dark finish on the pin? The sheath, while beautiful and well-made, seems busy and "fancy" in comparison to the simplicity of the knife. Not sure if you make these for sale, and this is what the market likes for this type of piece, or you are replicating historical precedent? Perhaps a simpler monochromatic sheath would better highlight the beautiful burl handle? Nice work all around.
-
Has anyone tried asphaltum (aka gilsonite or japanning--but not the laquer jappaning used on woodwork)? It was recommended in an old blacksmithing book I was reading. It cures to a very hard black coating. It was a typical finish on Stanley planes (woodworking) many years ago. I made a homemade version to restore some old tools some years ago. I dissolved gilsonite (sold by graphic arts businesses--used in printmaking/etching) in turpentine, painted it on the metal, then cured at 200F in oven for an hour.
-
Rusted, stored outside, 3-hour drive, labor to move--aside from restoration costs--these items would factor in for me. Try to make him set a price first and negotiate down based on the points everyone has mentioned. See if you're even in the same ballpark pricewise before wasting too much thought on it. Good luck.