teenylittlemetalguy
-
Posts
1,081 -
Joined
-
Last visited
Content Type
Profiles
Forums
Articles
Gallery
Downloads
Events
Everything posted by teenylittlemetalguy
-
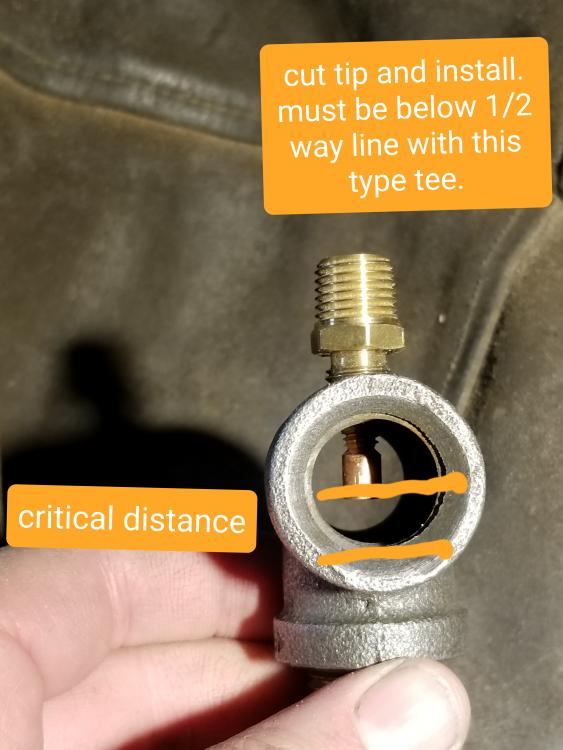
Let's not lose sight of the fact that this whole idea of building a T burner like this was Frosty's idea... I would defer to him... Sorry you had issues getting them straight, it's not an easy thing to do. Even with a lathe it is possible to screw them up though, so don't feel bad. I usually use the 1/2x1/2 as they are easy for me to get and I am used to tuning them. If I was at 5500' I would use a 3/4x 1/2 as well. I have noticed that typically on a 3/4x1/2 the tip of the MIG end is above the 1/2 way mark of the 3/4 opening. Using 1/2x1/2 I need to be below that halfway mark to get them running good. That is just to get you in the ballpark. I am attaching a photo of the area I am talking about. On the plus side you now have experience drilling and tapping T's so a change is going to be easier for you.
-
Let me know if I can be of any help! I would point out that you probably want to get the 0.025 Mig tips for a 1/2" burner. also 6" flame tube is too long. go 4.5" on that. I have a video on burner construction. Not sure if a link is allowed or not, so search Youtube for "Great, easy forge burner". the channel is Tristan Baranov. I would suggest bolting the frame together as bed rail will likely harden and crack, since it is pretty high carbon steel. I use a hole saw to drill out the bricks, then I like to scrape out the middle for a bit of a belly (1/4" total or so) so it is a bigger diameter than the entrance/exits. This makes for a little back pressure and It helps everything to get hotter and reduces the dragons breath a little.
-
Did they give you any grief when you wanted to get it fired? I have been concerned that a studio won't want to fire my experiments. Thanks for the heads up on it being sticky. Nice to be prepared for it. I usually end up making my own exterior shells anyway as nothing seems to fit exactly what I want to make. Frankenburner said he uses a hot foam cutter to make interior molds, I made one and am wanting to try it out. Now to order some Molochite grog...
-
Monkeyforge thank you for the info. the topic is near and dear to my heart as I have wasted a lot of time thinking about similar liners. There are some real advantages to being able to build a forge starting with the interior first as well as the Zircopax content. Your percentages are by weight, right? Have you fired your liner yet? I am very interested to hear the results after some real use in a forge. How was the material to handle when green? Did it stick together well or was it a struggle to get your shapes? Quote below blank intentionally just so you would see the percentage question. 8-)
-
6061 - Casting
teenylittlemetalguy replied to Bob La londe's topic in Smelting, Melting, Foundry, and Casting
It will be cool to see what you come up with. Excellent to have nice castable material for cheap! -
6061 - Casting
teenylittlemetalguy replied to Bob La londe's topic in Smelting, Melting, Foundry, and Casting
I really like the way you are thinking. Making something out of "waste" is how people get rich. I don't know much about casting, but your friend is right about the Silicon just melting. You can see this by looking at a phase diagram for the two metals. If you have about 12 percent Silicon then the melting point is 577C/1071F. But you don't have to be exactly this amount to get them to melt together, you can add in less and still get liquid because it COULD be 12% at some point in your solution. once thoroughly mixed and solidified you would need at least that temp to melt it again. Now this is oversimplifying things though because 6061 has many other metals in the mix and each one has an effect.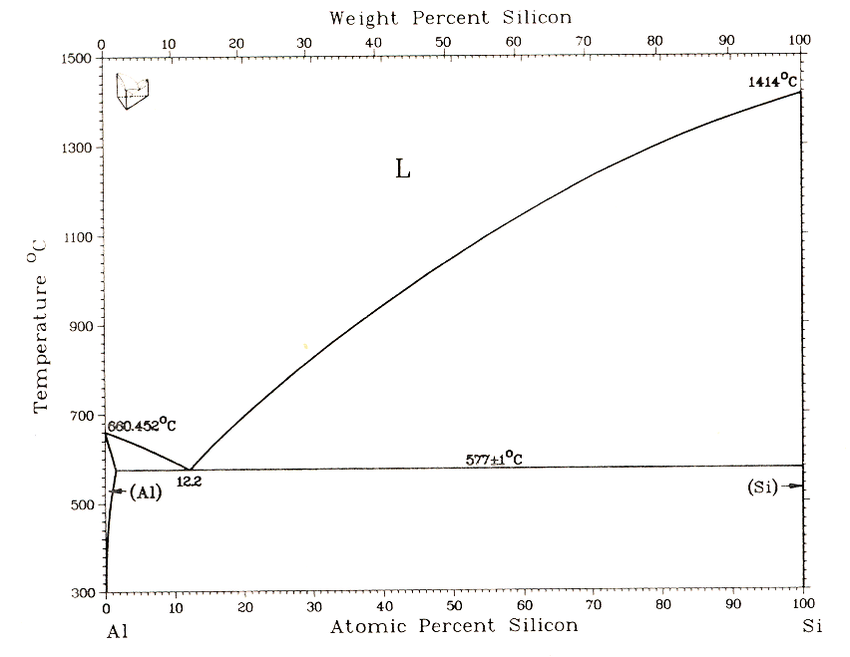
-
It followed me home
teenylittlemetalguy replied to Glenn's topic in Blacksmithing, General Discussion
I like that leather notepad wrap! -
2 stage pumps wear out really easy, it can still turn and sound just fine but leak like a sieve inside robbing you of power. If it was me I would try a new one, they are usually cheap. I would also go back to the smaller cylinder so you can have the speed you need to work hot steel before it cools. a bigger cylinder is more tonnage but way slower.
-
Octopus box
teenylittlemetalguy replied to teenylittlemetalguy's topic in Metal Sculpture & Carvings
LOL, I bet. Have you pressed any coins with it? I have a hydraulic press that I want to make some "rustic" coining dies for. -
Yes, but keep at it. It is not hard once you understand the path through all the hazards and remember to act accordingly.
-
Octopus box
teenylittlemetalguy replied to teenylittlemetalguy's topic in Metal Sculpture & Carvings
Thank you Frosty. You and Thomas are going to keep me busy...Mokume Pieces of Eight is a great idea. Now to make some dies for them... -
Octopus box
teenylittlemetalguy replied to teenylittlemetalguy's topic in Metal Sculpture & Carvings
dang it, you are correct. now I need to make some! -
Octopus box
teenylittlemetalguy replied to teenylittlemetalguy's topic in Metal Sculpture & Carvings
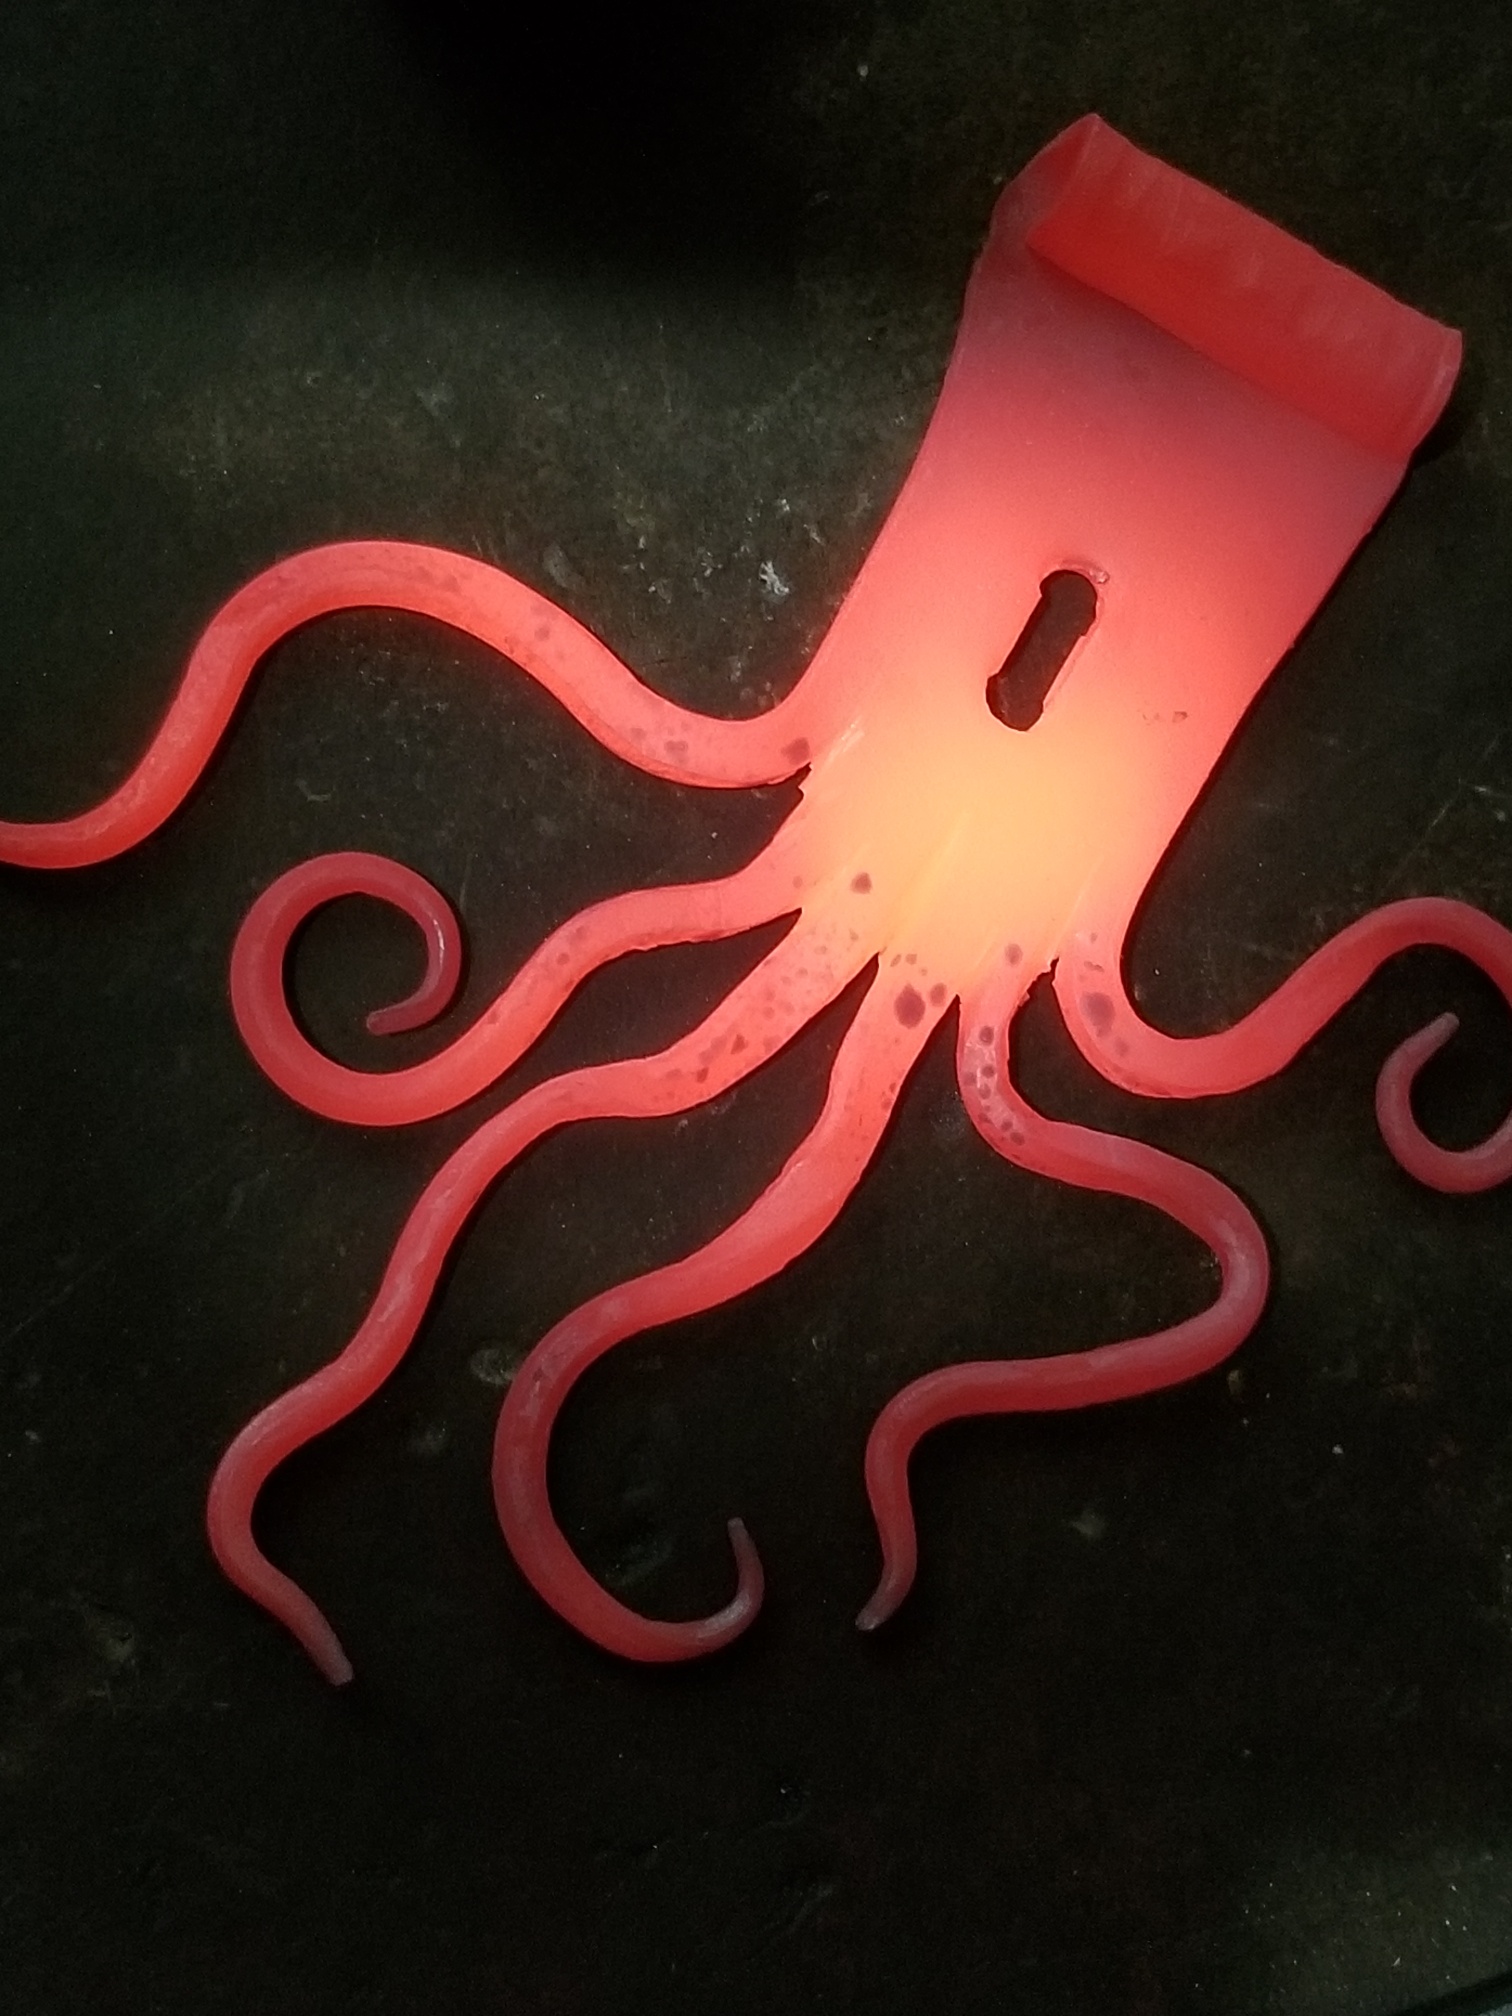
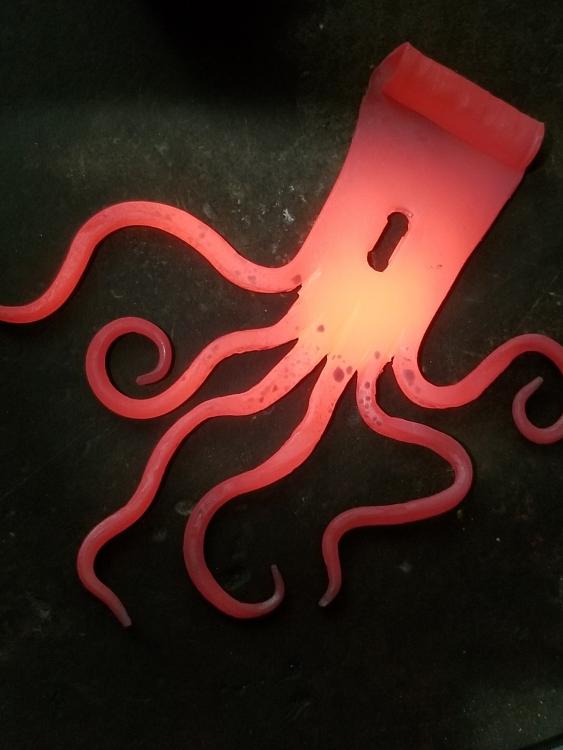
Thank you! Oh, I see now that it didn't show the loop for the lock. adding a couple on that.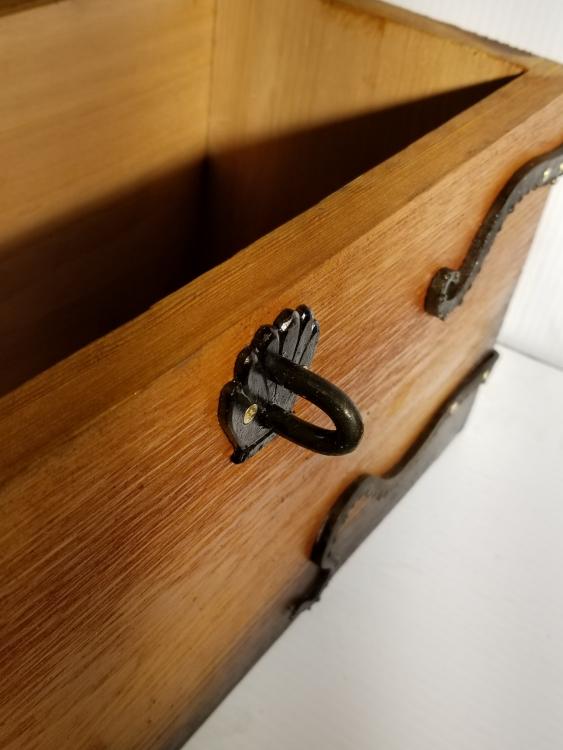

-
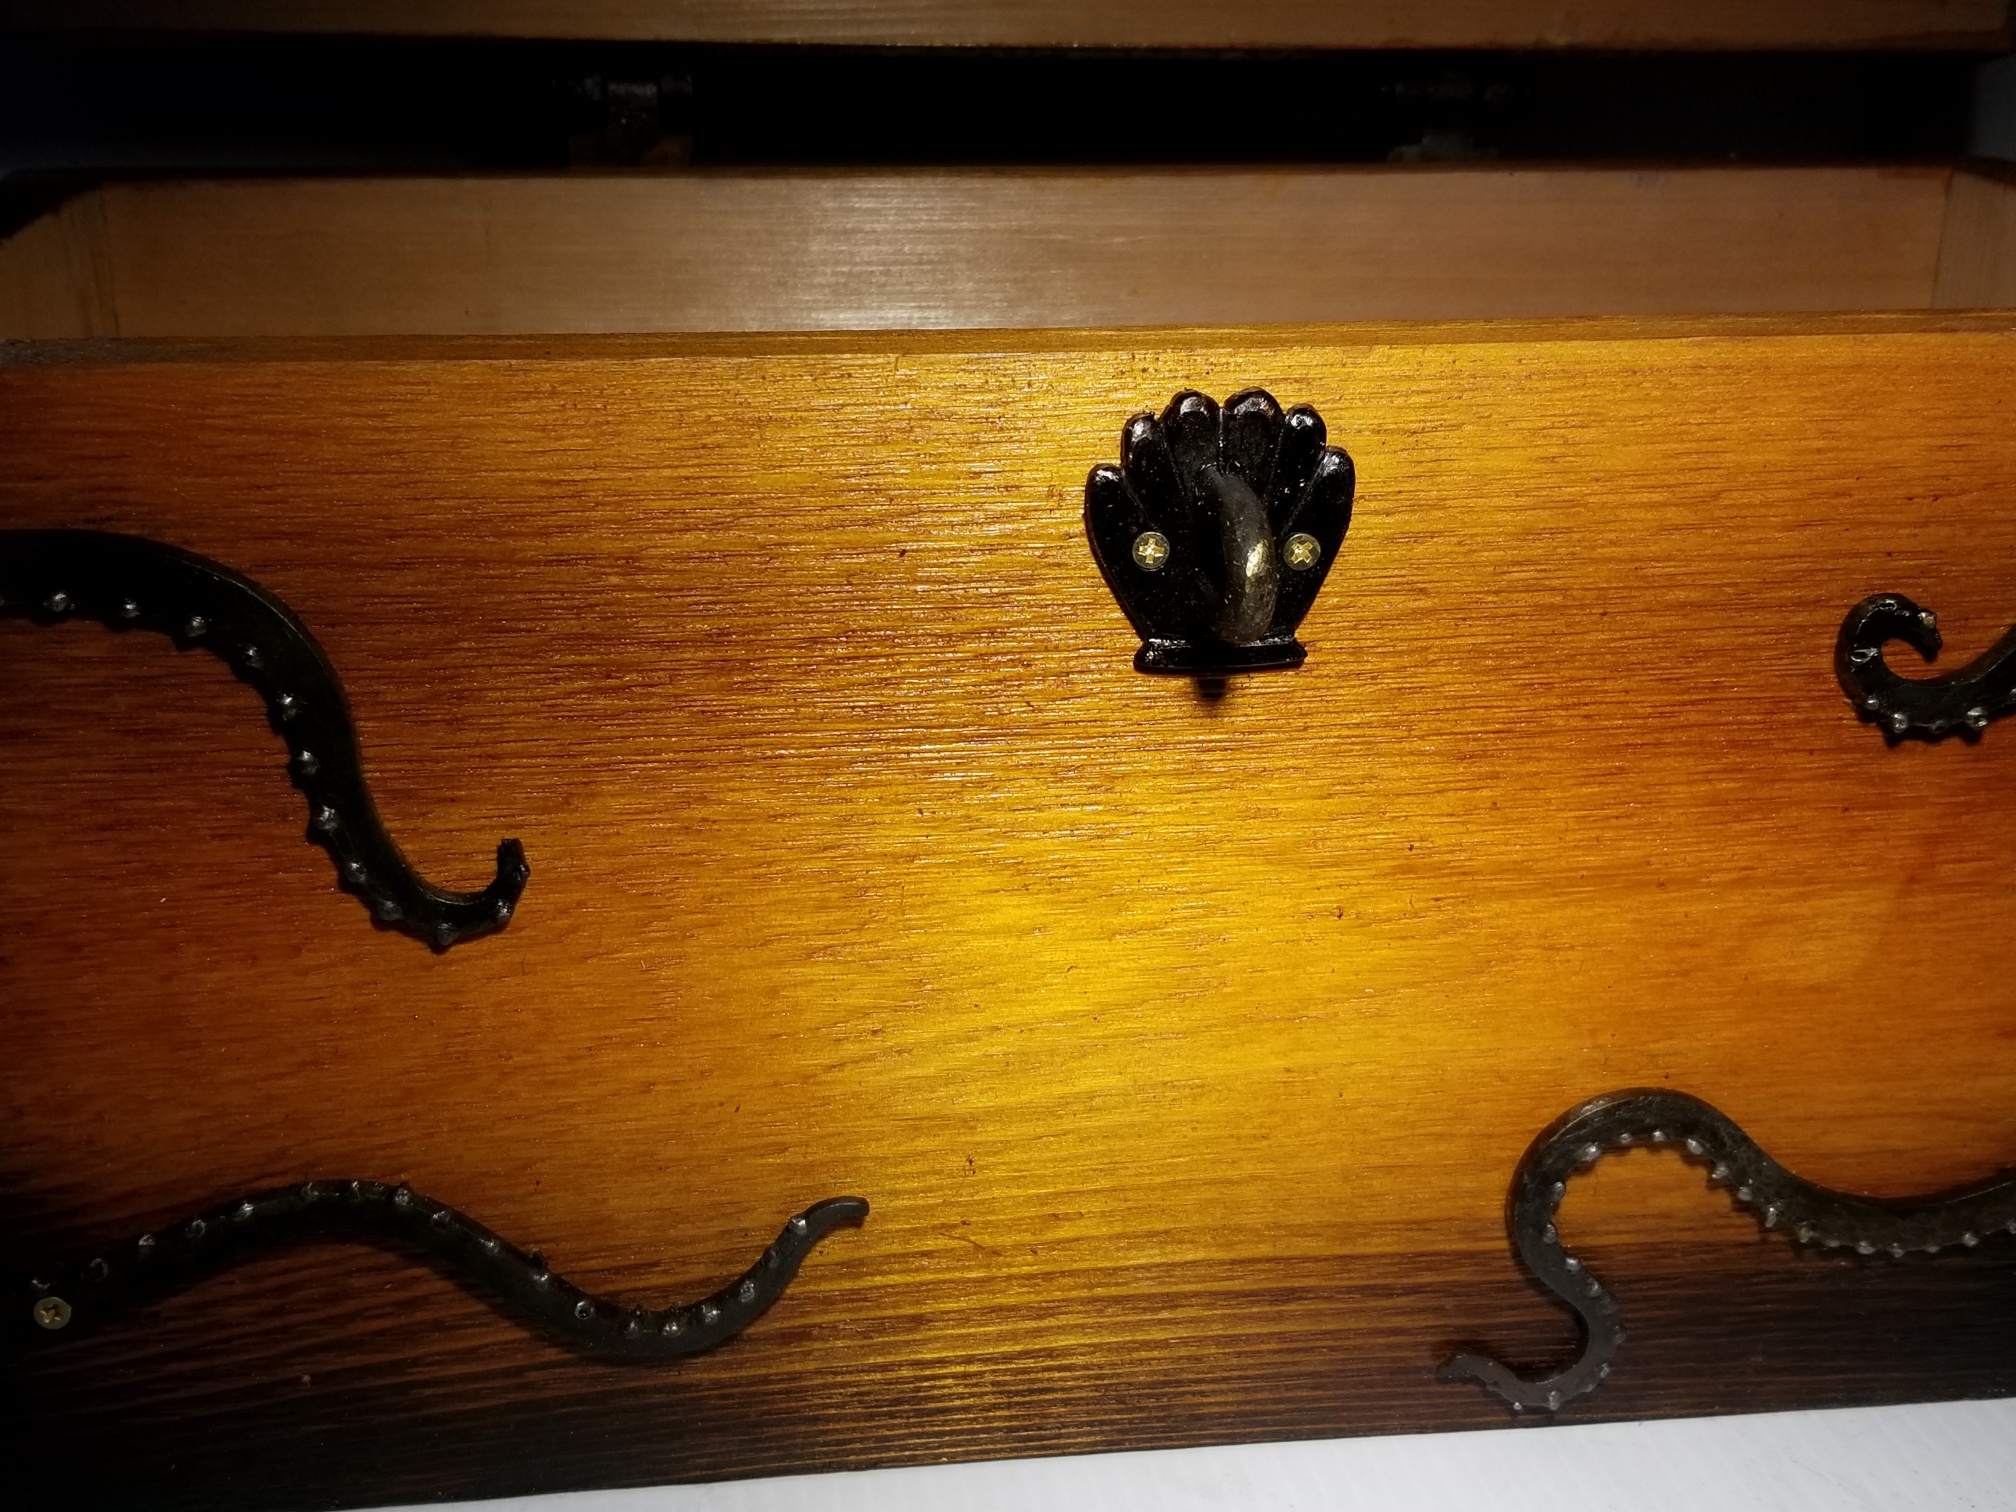
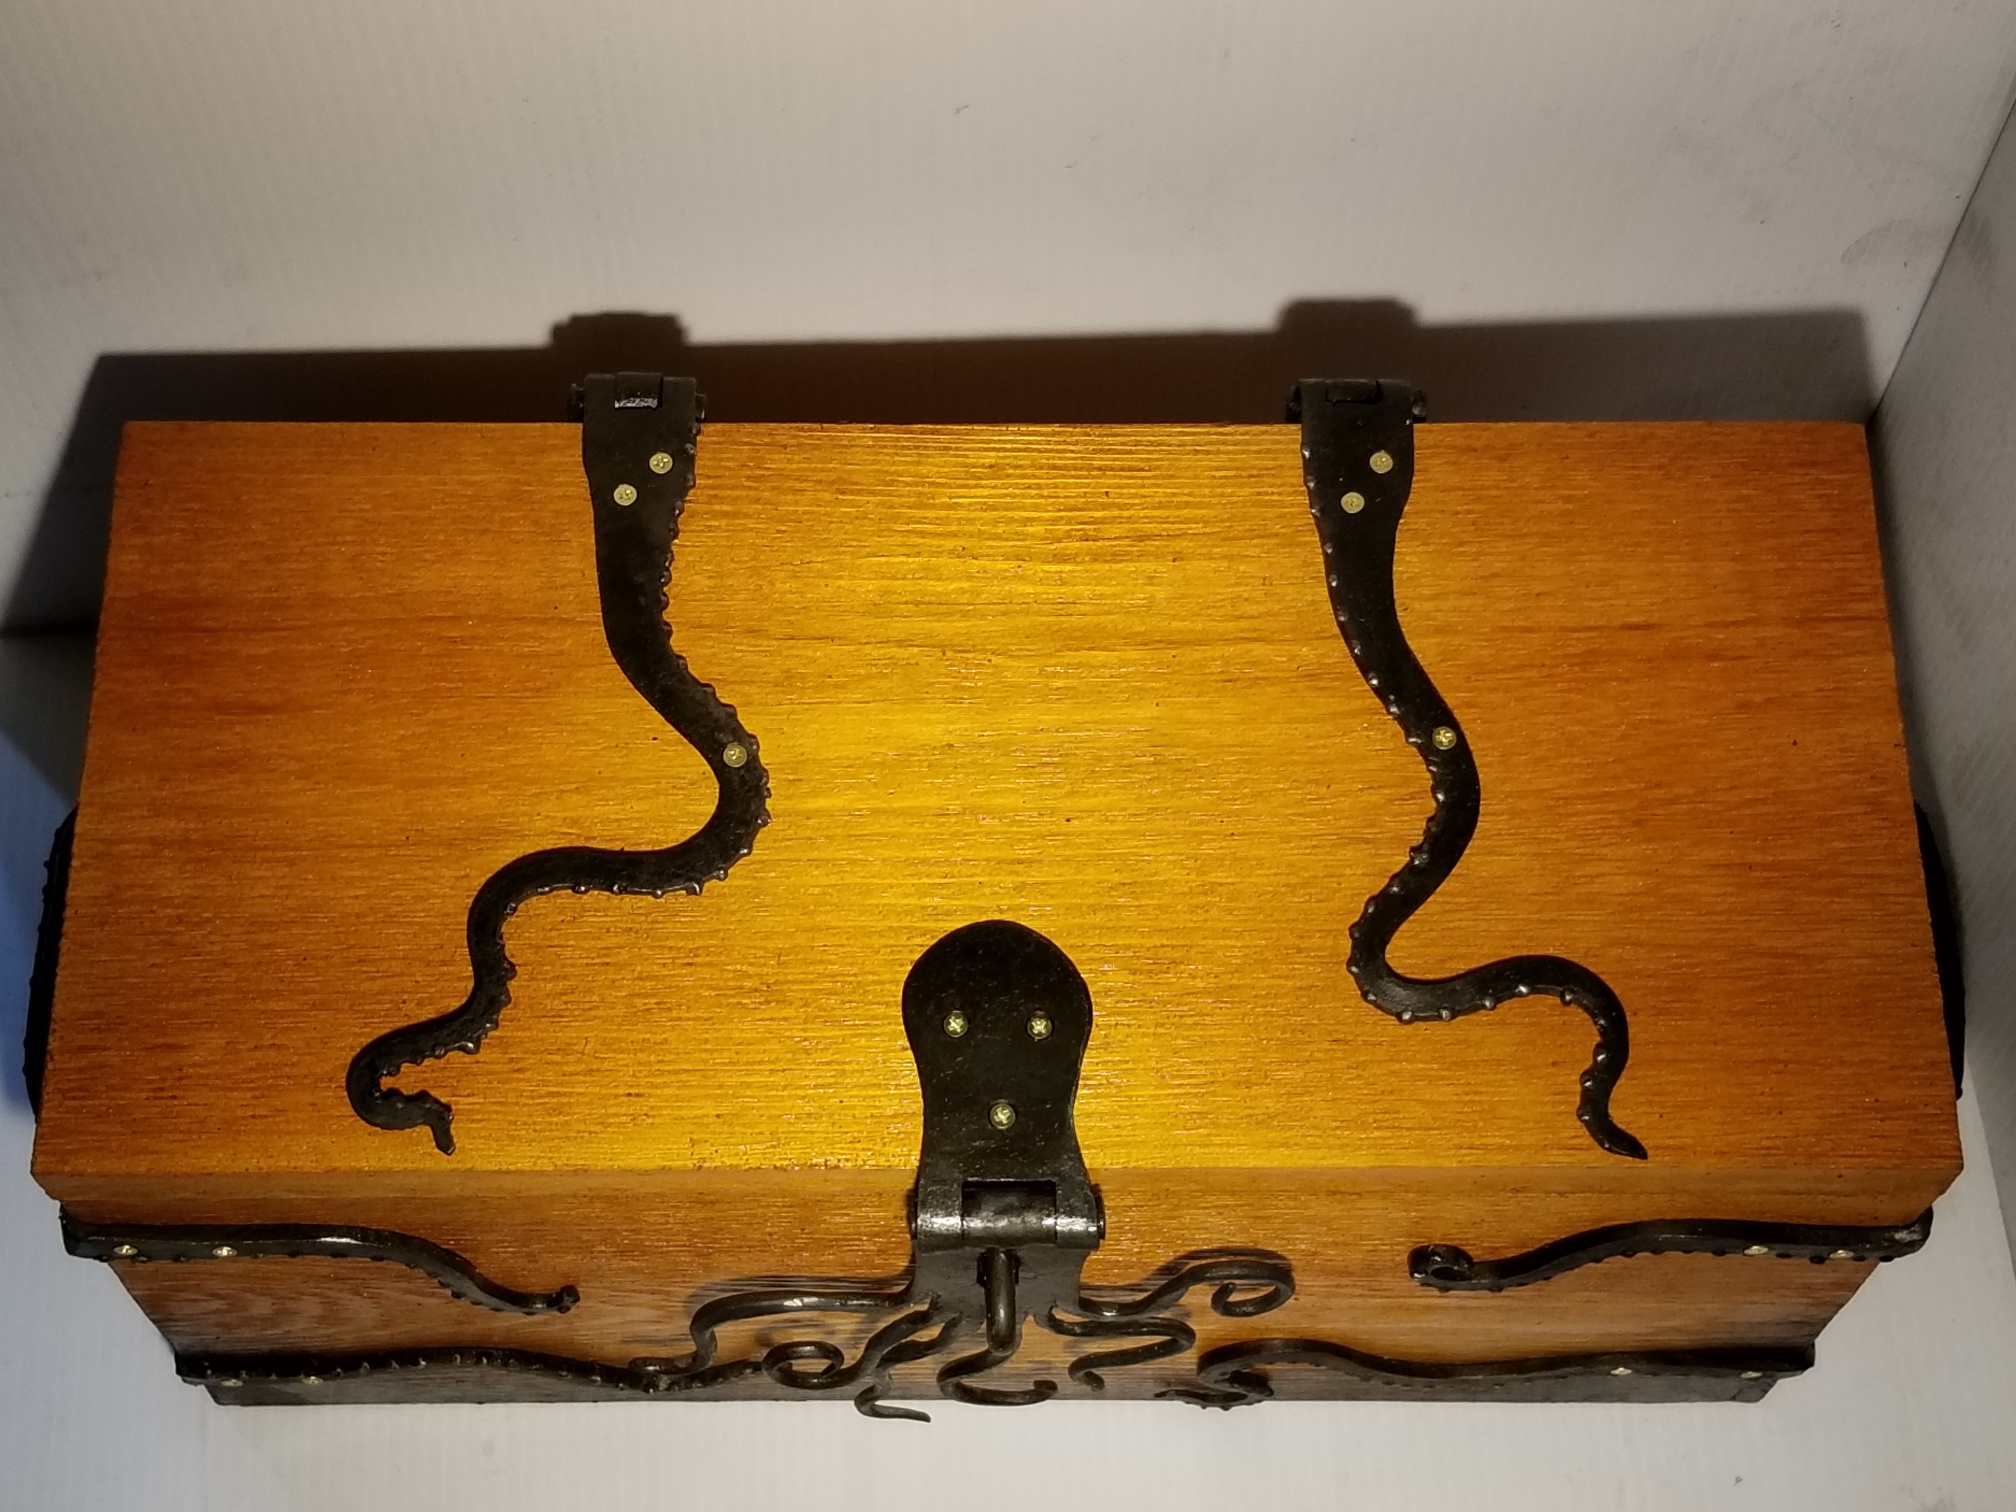
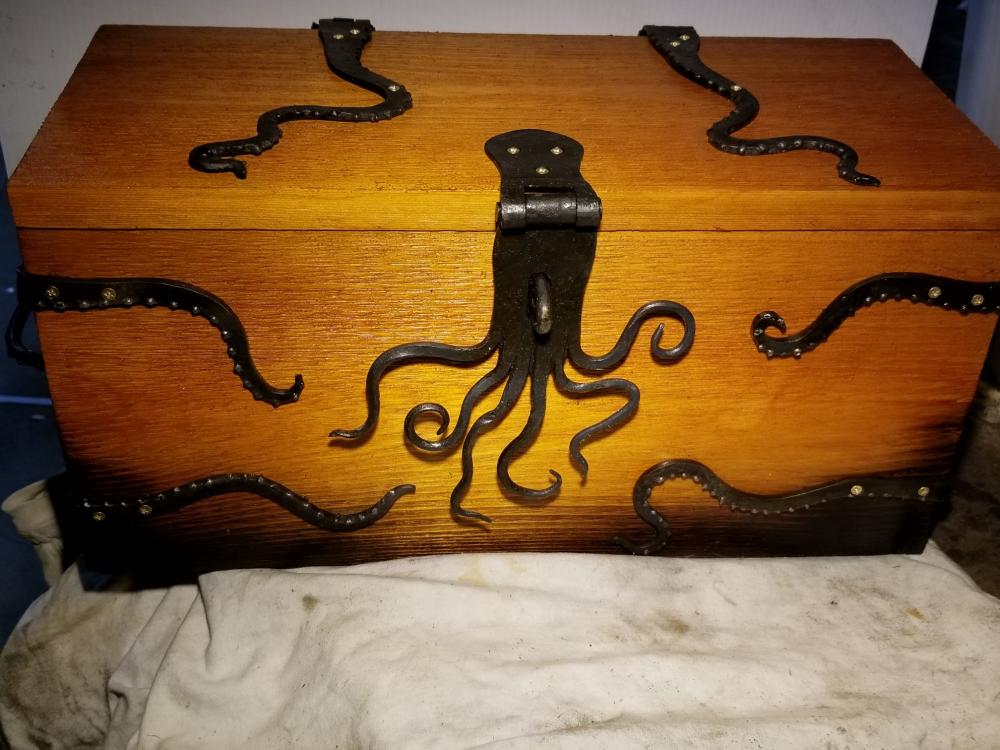
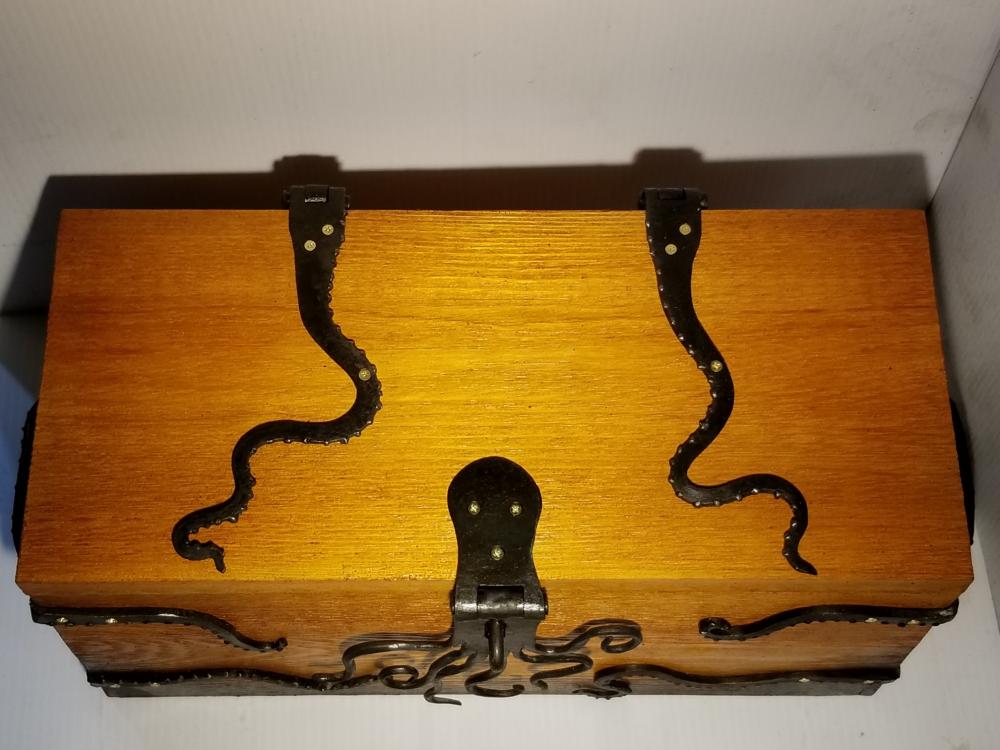
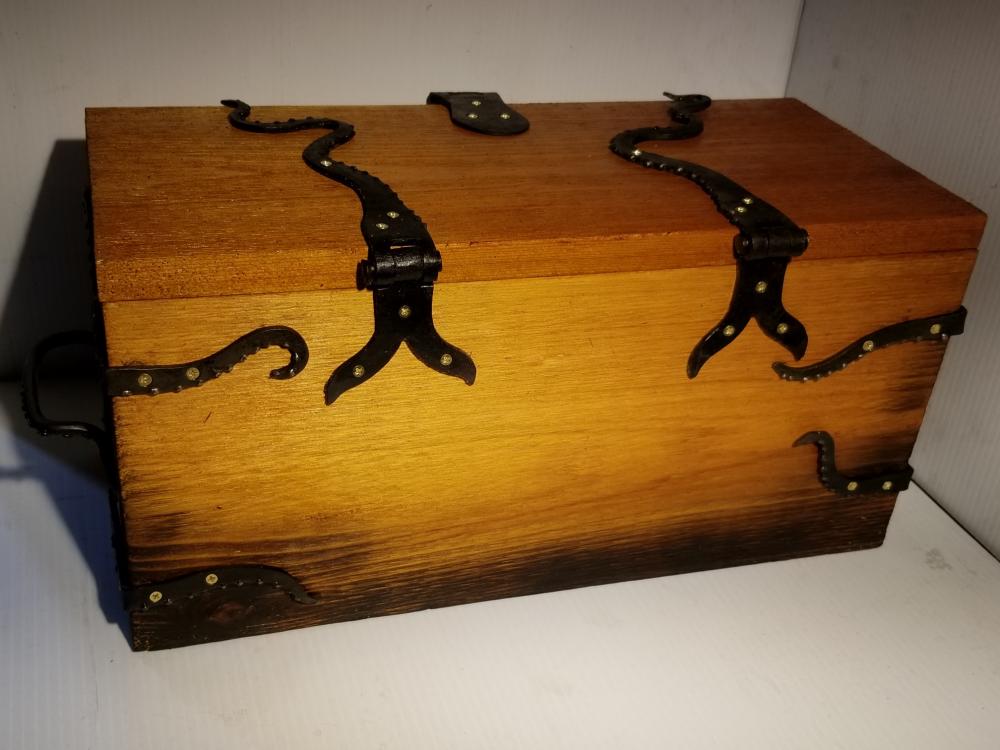
Just finished this Christmas gift for 2020. Cedar box, dowel pins hidden behind the brackets. About 16" wide.
-
Easter island statue for wifes Birthday
teenylittlemetalguy replied to BeaverNZ's topic in Metal Sculpture & Carvings
Nice work! -
Mikey- someone was listening...me! Great pointer, makes cutting off so much more controllable. thank you for the tip!
-
I have done that before, as long as you don't grind against the grain it can work. Just wanted you to know it is a risk, at this game minimizing risks makes for success. Happy to help! looking forward to seeing the post with your billet in it!
-
Project question
teenylittlemetalguy replied to Pat Masterson's topic in Blacksmithing, General Discussion
Rio Grande sells it in single colors as well. Dark Blue is 119470, $10.15 for 2 oz currently. When you search for your color make sure you don't get the liquid, it is more expensive and would be harder to apply to a big hot chunk of steel. -
Chimaera, while a bracket works best when it is big and thick these thinner plates can also work, if just to hold everything in alignment. I used 1/8" thick strap plenty of times to hold coins together. the problem I am seeing here though is all the overhanging material. Ideally you want all your pieces the same size. The welds are all weak points and if you have excess material hanging out there to be bumped it will increase your delamination issues at those points. One good reason to use coins is that they are all uniform size. I would also stress the importance at this point to be as flat as possible and freshly sanded so you don't have any pesky oxide layers on the faces of your material. You won't believe how easy a virtually invisible oxide layer will mess up your hard work.
-
Project question
teenylittlemetalguy replied to Pat Masterson's topic in Blacksmithing, General Discussion
Thompson enamels sells a sample kit with a huge array of colors, both opaque and translucent. I picked mine up from Seattle Pottery Supply, but they are available from any decent Jewelry supply. Rio Grande currently has the kit #119308 for $166.90 A note on the translucent ones on steel- they will all turn black. But they are just as easy to use on copper or silver and nice to have on hand. I made a life size cardinal Christmas ornament with red over copper just recently. The opaque ones are best to use on steel. You don't need a torch for the steel pieces either, you can heat your item to orange in the forge and just sprinkle the powder on. (be careful and wear a mask as the dust can blow around and it is a health hazard to your lungs and eyes.) thank you! -
Project question
teenylittlemetalguy replied to Pat Masterson's topic in Blacksmithing, General Discussion
Ha! My work here is done...8-) -
It definitely makes a difference. Flattening, either by grinding or hammering flat. The more the metal is in contact the better.
-
Project question
teenylittlemetalguy replied to Pat Masterson's topic in Blacksmithing, General Discussion
I will apologize first about potentially making your project more difficult-- Have you thought about doing actual enamel on it like the real badges? The enamels sold for copper and silver will work on mild steel and there is a wide array of colors available... Here are a few pieces I did, if you apply thicker you can get solid colors. It will not be a perfect as a real badge, but I assume you are not going for perfect if you are starting with steel anyway.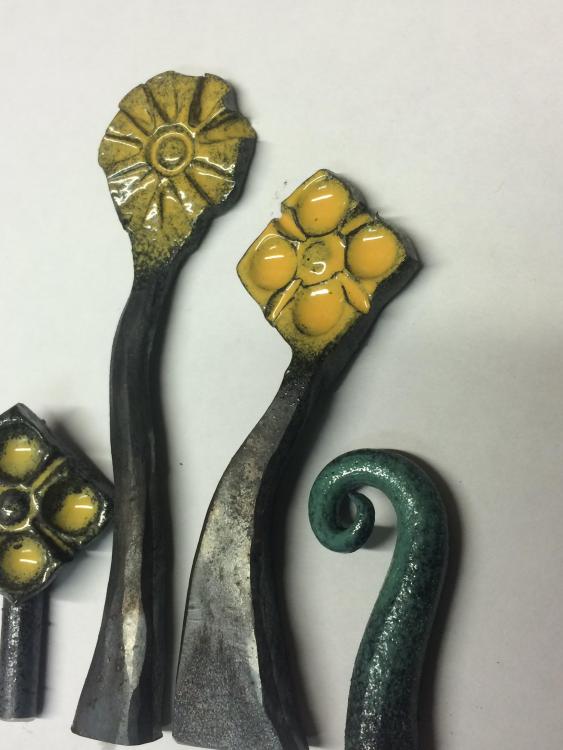
-
Yeah, that was half dollars. The faces on them are not as highly raised as the quarters so they are more apt to weld cleaner without lots of prep work. Every little bump between stacks allows air in, which is very bad. the flatter the better. If you quickly hammer them flat you will have the best luck. If you use nickels I would put copper sheet or other coins between so you get contrasting color. The Nickle content in our coins is notorious for de-laminating. I set a rule for myself with nickle bearing materials to never hit it unless it is glowing, that helped me immensely with solving de-lamination issues. Copper wire is not going to be any help here. Also avoid trying to use brass till you get much better, the zinc in it causes issues. Any kind of rig you can imagine to hold the coins in place will help. Remember that you are going to need to hit it with a hammer so make sure your fasteners are out of the way. Once I tried welding steel cages around the coins, but it was more effort than it is worth and caused other issues. Flat steel bars and a few cheap fasteners are the easiest. My current rig is 3/4" thick plates, but that would be serious overkill for what you are planning. Starting out you will likely be right on that edge of being liquid and squirting metal out the sides is pretty common. Just be prepared for it with proper protection and a fire extinguisher. Once you get the feel for it you can reduce your heat a bit and weld them anyway, that will give you a sharper contrast between the metals and is a sign of experience. Good luck with trying this out. Let me know if I can be any help on it for you. I needed some stock for a project that was just a single color so I welded them up. My project was a success but there was not any contrasting metals. Not really Mokume as they are a single alloy, but it would work with other metal for Mokume. Lol, probably not. I am that guy that picks up every penny I see in a parking lot.
-
I have used nickels before. I can't seem to find a photo, it must have been my last phone. I did a whole roll without any other metals and it was really nice material. I think they work better than quarters, the material seems to weld a little better and they don't delaminate very easily. I did slide a few quarters in another stack and it worked. I am guessing that a little bit of straight copper would work best. If you are looking for layers and better value than quarters you may want to try 50 cent pieces, they are a lot bigger and layered, my user photo was made with them. But in general I am happy to have put coins behind me and using straight sheet metals.