
rustyshackleford
Members
-
Joined
Everything posted by rustyshackleford
-
I'm liking the little twists. When I make lid lifters pokers etc, people initially don't get that they don't put their hand through the "eye" of the handle. I don't quite know why they want a knuckle guard on a lid lifter, because I make them perfectly to fit the hand gripping it all the way around
-
the pieces are well-proportioned to each other and the area around them
-
How to Build a Coal Forge Plans there's a start to save you the trouble of reading it, decrease the depth flush, and to about 4-5" make a bowl or other recessed shape. in the center, install a pipe going down leading to your air source, and install some kind of ash dump and clinker breaker.
-
if you check the 1000 series BPs you will find a reference to it; I'm not going to tell you which one, so you have to absorb them all! :)
-
the lube is used for punches and drfits to prevent their binding to the work piece Paul. The "Moly"bdium(sp?) is mixed in solution with graphite, dishsoap, and water to make an effective mixture for the application. Uri Hofi is a proponent of it, and if I'm right, invented the mix
-
I beleive that the style of hammer used was dependent on the country of origin for the smith, or his master. it's conjecture
-
I've seen all kinds. I made a mild plate for the historical outfit in town. Good luck finding .25 copper nowadays, I'm sure it can be done though. My only adversion to it is that it might produce toxic fumes if the iron is on it for too long while hot enough. I may be paranoid.
-
In a similar tale, I knew a director of a museum that was smithing and hurt himself. he was working on a knife, and was notorious (to me) for using the wrong tool. Had a pair of button tongs squeezing a tang while he was hitting it. *smack smack smack smack* and the blade worked itself out, flew up, and caught him in the face. left a scar across his bridge, burned his cornea. Unfortunately his lack of judgement now means that everyone who works in the shop must wear safety glasses (18-19th century period shop)
-
Thanks Donnie, you'll appreciate my new one coming soon. I'm trying to finish "my" knives for reenacting. There was a minor setback with one, but I'm hopefully finishing it soon.
-
The bolster is a poured lead (will be replaced) band. I used paper and wrapped it, leaving a gap. before that I ground a relief in the blade for the lead to pour around and be a solid ring. I also fluxed the blade, but that probably did little since I only melted the lead and poured it into the paper mould. that clear? let me know I'll show you with pics as best I can
-
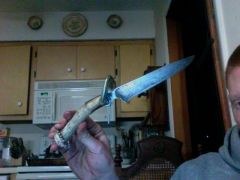 New knife I'm working on for me
 -
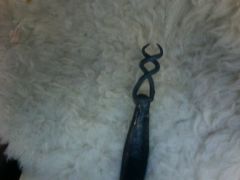 used in a mortar. 1" socket
 -
-
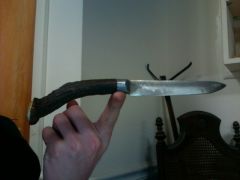 Good W2 steel. The only good lighting position incidentally shows the balance
 -
Post it on here; register it with abana; register it with anvilfire, heck, trademark it
-
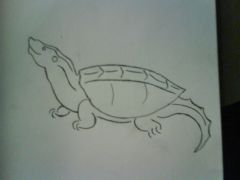 a line drawing of a potential touchmark
 -
I really like the smallest one you did. I've used the crowns from antlers for what few knives I've produced, but like how your handles are proportioned!
-
Sure. publicise them both. Many that have two have an image, and some form of their initials as well. I've also seen positive and negative forms of the same image.
-
Thanks a lot Frosty, I also cut the tube down to 4.5" and used a #77 but for the nipple like you recommended. Your knowledge was invaluable for this, and it would not have come together as it did without you :)
-
http://www.youtube.com/watch?v=dgbKHOUk7dI Well, here's an update. The gasser works now. i'm seeing a little oxidation, and may need to increase my reducing tee's size to accomidate more airflow. I got a flare and welded it onto the burner. If it wears out I'll just replace the whole affair and redo it more precisely, now that I know what needs to be done. Cost: 10" of 6" pipe- $26 8" black iron nipple 1.25" to .5" reducing coupling 4" 1/8" brass nipple 1/8 brass cap 1/8 brass female-female coupling (all above sans pipe- ~$15) insulating wool- $8 misc other expenses for drill bits- $10-15
-
Waynesboro is the wrong side of Raleigh for me I'm up in the mountains. It's closer to Greenville, where I went to school
-
One consideration is to make the tool a little bit soft if you don't know what it is. That way you'll notice it wearing instead of noticing it shatter. A bent bickern or soft hardy is a lot easier to re-treat than re-forge Also, update where you are located by going to the user CP in the upper right hand corner of the page. This way someone might be closer than you think, and can help you!
-
It's also a good excuse to fry a turkey this year! that's where I got my peanut oil a few years ago, still works fine :)
-
Looking good, wish I had the resources right now to start doing the same thing! I bet it will get toasty in there when they're all running
-
to answer your question about the swage, look for the saltfork craftsmen swage block, and if you need one even smaller check blacksmith's depot or centaur etc. for their smallest block. These would provide you with baby half rounds