patrick
Members
-
Joined
-
Last visited
Everything posted by patrick
-
George- You are exactly correct that etching is used to reveal structures before doing that micro hardness test sometimes. A single grain is often too small to measure its hardness and often there are other features located at grain boundaries. For example, in high carbon steels, (those with over about 0.8%) you sometimes find carbide coating the grain. In this case you basically have an M&M structure-Hard on the outside and soft on the inside. Iron carbide is about 70 HRc. Usually carbides are super small, so when we measure hardness with bulk methods like a conventional HRc tester, we are not measuring the hardness of the carbide itself, but the effect that those little carbides have on preventing plastic deformation of the iron next to the carbides. In the case of some very high carbon steels like Wootz (1.5% carbon) or D2 Tool steel (similar or slightly more carbon than wootz) you do see large carbides in addition to the little ones. (I spent several hours today looking at carbides in wootz in preparation for a lecture I am giving next week). If we ignore the high carbon steels and look at the simplest case-pure iron or any other pure metal, we do know that the grain size will affect the strength, completely independent of heat treatment. If I process pure iron such that it ends up with small grains and compare the yield strength to a larger grained specimen, the smaller grain specimen will be stronger. In pure iron, we do not and cannot have martensite, just ferrite or austenite, depending on the temperature. the smaller grained specimen will have a higher strength (not by a whole lot in pure iron, but still a measurable difference) because the grain boundaries act as barriers to plastic deformation in a way that is a little bit similar to the way carbides do in the high carbon example above. The more boundaries there are, the more force is required to make the metal plastically deform. Likewise, in high carbon steels, we can get to fairly high bulk hardness (HRC 40,) without making martensite if we control the size, shape and distribution of the carbides in a softer matrix like pearlite. This technique is used in some things like rail road rails where martensite is too brittle to give a long lasting part.
-
Just to add a little bit to the discussion of the chart and how those values were measured: A common tool in a metallurgical lab is a micro hardness tester. This instrument allows you to test the hardness of all sorts of very small features within the microstructure of materials by first locating the feature using a microscope then, without moving the specimen, an indenter is positioned over the area of interest and a hardness meusurement is made. One of the advantages of this type of instrument is that the platform that holds that specimen can be positioned using a micrometer type adjustment. This lets you precisely move the specimen a desired distance in fractions of an inch or fractions of a millimeter from some reference location and then make another measurement. In the case of 1/4 thick steel bar, the way I would have tested this would have been to conduct the quench, then cut a small bit using a water cooled abrasive saw. This could be mounted in epoxy to create a round disc about 1.25" in diameter with the steel in the center. The steel is position so that the thickness (1/4") dimension is visible when looking at the face of the disc. This is then ground and polished to a very fine finish, usually 1/2 micron grit size. Basically it is a super mirror finish. This is then placed under the microscope and the edge of the steel is located in the view finder. The edge becomes your zero position. The specimen can be moved precisely a few thousandths a time. A hardness measurement can be made at regular intervals. This allows for an assessment of change in hardness through the thickness of the specimen without having to grind a little, check, grind a little check etc. I dont' know if this is the method that Dr. Thomas used but I'm sure he is aware of the technique and if you have access this equipment it is probably the best way to asses change in hardness versus location from the as quenched surface. What Dr. Thomas is showing in his graph is that a 1/4 inch thick piece of 1084 heated to 1475 and quenched in canola oil will not get as hard as when it is quenched in the other fluids shown. If the conditions are changed, such as if the section size is thinner (as in the case of most blades at the time of quench), the choice of austenitizing temperature, which might be differenet depending on your preferred temperature, the grain size and the level of agitation in the bath, the as-quenched hardness of a 1084 blade quenched in canola oil likely will be different, and possible quite a bit harder, than shown in his experiment. In fact, by looking at the graph, we can see that when quenched in water, the hardness is in the upper 60s HRc. Water has a faster cooling rate than the various oils shown. If we increase the cooling rate by reducing thickness, as in the case of a knife forged or ground to shape before quench, rather than by swithing away from canola oil, we will in fact get higher hardnesses than shown on the graph. Will they be as high as those obtained with water? I don't know. Possibly. Once you have cooled the steel fast enough for it to reach its maximum hardness, further increases in the cooling rate will note result in any further increases in hardness. There is no doubt that all sorts of fluids have been used to quench for thousands of years. Keep in mind, though that up until the mid 1850s the only alloys available were iron/carbon combinations. These alloys can only harden to extremely shallow depths, so water quenching was common and necessary. Various oils were used for parts with small thicknesses. After about 1882, alloy development really took off. New alloys would harden to much greater depths and maximum hardness could be achieved with slower cooling rates. At about the same time E. F. Houghton developed the first synthetic oil quench. This had the distinct advantages of giving manufacturers a quench fluid that was consistent from batch to batch and maintained a level of consistency of performance that was unparrelled at the time. Oils like canola and other animal or vegiitable based products degrade over time, especially when regularly heating and cooling large masses of steel. In industrial practice, various synthetic oils are still widely used, but now water soluable polymers have replaced them in many applications becuase of the reduced risk of fire, smoke and in some cases, cracking.
-
Bill-if you pm me or email me I can help get you in touch with folks who can set you up with replacement cushions. I'm in Janesville, WI. I'm pretty sure we met years ago. that shop fire looks horrible. Very sorry to see that. Patrick
-
Blast Furnaces-These are in fact still the predominate way of converting iron ore into pig iron. There are less that 10 still operating in the US but they are widely used outside of the US. The pig iron that is produced by a blast furnace is then further processed in a basic oxygen furnance (BOF). A BOF is NOT used when make steel directly from scrap metal. In that case and electrical arc furnace is used to melt the scrap metal which then has the chemsitry adjusted to make the desired grade. Since both the blast furnace and the electric arc furnace input heat into the process, I'm sure you could get the gold to melt. Dropping cold solid metal into a bath of liquid steel without adding additional heat to the system is not likely going to result in complete melting of the object dropped into the liquid metal. For a steel works in 1944 you most likely would have been dealing with an open heath style system couple with a blast furnace. The blast furnace would have made pig iron that would have then been converted to steel. Open hearth is no longer used anywhere in the world, but was common back then. If you setting is more of a foundry than a steel mill, melding could be done via electric arc furnace or induction melting. The difference between the foundry and the steel being that the foundry just melts steel and pours that into finished shapes while the steel mill is converting iron ore into steel or scrap steel into new steel raw forms like bars and plates. For the scenario originally described, a 90% gold with 10% of iron would like not have much color change from gold. It might have some, but you would not be able to "hide" the gold in the iron.
-
Frosty- It's not the presence of the graphite but its shape that makes the difference with respect to properties. By making the graphite round balls as in Ductile iron, you get a material that has good toughness, in some cases on par with steels, but it still has the casting advantages of a very high carbon material (lower melting temp that steel and good flow characteristics in molds). Ductile iron was developed in the 1950s and is arrived at by adding Magnesium to the liquid metal just before it is poured in the mold. This is what make the graphite take on the ball shape. Prior to this, a similar structure could be achieved by heating grey iron for several days or more to high temperatures. This process also resulted in spherical graphite an iron processed in this way was called Malleable Iron. It is no longer made as far as I know since ductile iron is so much cheaper and faster to make.
-
Cast iron, and specifically grey cast iron which is what Fisher, Star and Vulcan anvils used for the body, has so much carbon in it that much of that carbon exists in the form of graphite. In the case of grey cast iron, this graphite is in the shape of interlocking flakes. It is this shape of graphite that is changing the resonance characteristics of the metal. If you compared this to ductile cast iron in which the graphite is in the shape of little balls, you'd find that the ductile iron rings much like steel. This is also why grey cast iron is so brittle. The graphite flakes act like cracks or even voids. Since there are so many of them, the distance an actual crack has to travel through the metal between the flakes is pretty short. I usually describe grey iron as "pre cracked" metal. It has it's uses, but it is not my favorite material. Frosty's question was about the difference in resonance based on hardness. There is some measurable difference in this quality, but this not usually the dominate factor in anvil ring. That has more to do with the shape of the anvil and how it is mounted. If the mounting method limits the vibration of the entire tool, then you wont get much ring. There is a method of evaluating hardness based on ultrasound. I don't recall the ASTM spec that gives the method for the test because it is not one that we use, but it is used when you need to evaluate hardness without leaving any marks on the part. A simple way to test the resonance question is to take a round bar of hardenable steel. Drill a hole in hole through one end so you can hang it on a string. Anneal the bar, string it up and strike it. then quench the bar and repeat the experiment. If you are really curious, temper the quenched bar at increasing tempering temperatures and repeat the ring test. By using rounds of the same steel grade, diameter and length, you remove the geometry/size variable and can isolate only the microstructure variable. A further test that could be intersting would be to compare the resonance properties of anneal, worked hardened and quenched and tempered specimens since, in some cases, you can achieve the same hardness via cold work that you can via a quench and temper, but the microstructures are different.
-
Heat treating large pieces is a topic on which I am a bit of an expert (professional metallurgist in an open die forge shop for 20 years) so I thought I'd chime in on this discussion. The quench tank shown in that video is pretty standard for any company that is heat treating large steel parts. In the shop where I work we have two-both containing 50,000 gallons and both capable of handling 50,000# of steel at a time. These are not the largest we have in the company, just in the shop where I spend most of my time. In modern industrial practice, full heat treatment, that is fully austenitizing the entire cross section and quenching it, is common even when some later heat treatment will be done to obtain different properties on the surface. Some folks already mentioned gears, and this is a good example. A surface hardened gear, especially one that is used in a large mining vehicle like a dragline, (these gears are roughly 15 feet in diameter or bigger) are often made from grades like 4340. the gear is quenched and tempered in a bulk manner to achieve a hardness/property combination that gives the necessary core toughness. This might be a rockwell hardness of 30-35 HRc. Later, after the teeth have been machined, the surfaces are re-heated using inducting heating or an oxyfuel torch and quenched. Tempering is done at a low temperature to preserve most of the hardness in the surface. The depth of this surface hardening can be adjusted a bit, but is usually well under one inch. This approach results in a good combination of toughness in the core and wear resistance on the surface. An alternative method to this is to use a steel grade with lower alloy content, for example 8620, then instead of performing a bulk heat treatment as described above, the entire part is austentized in a high carbon atmosphere. The carbon will diffuse into the surface of the steel increasing the hardening potential at the surface. The effect is essential the same as if you forge welded a high carbon piece of steel to a low carbon block. When the entire thing is heated and quenched, only the high carbon portion gets hard. This brings me to the properties needed for anvils. As Joe noted in his post, an anvil does not need to be hard all the way through. Historically, they were not hard all the way through because the desired properties could be most cost effectively acheived by forge welding a higher carbon plate to a low carbon body. Prior to about 1860, the cost of steel was so high that it was used extremely sparingly. Since only the high carbon plate has the potential to get hard, there is no benefit to heating the rest of the anvil for heat treatment and if you did, you might struggle to cool the plate fast enough to get the desired hardness. In modern manufacturing, casting is the preferred method (that is most cost effective) of making anvils. Steel is one of the cheapest materials available on the planet, so there is little reason today to make an anvil of composite construction. It would actually be more expensive to do that since labor is so much more costly than material. Today, there are a wide variety of alloys available. Some are through hardening in large sections, others are not. For a period of time, new anvils were being imported from the Czech republic and being sold by Old World Anvils. These were made from grade 1532 which is a medium carbon steel containing only manganese and carbon as alloying elements. This grade is NOT a through hardening grade in anvil sizes so even with a quench as shown in the video, only the surfaces would be hard. A very effective anvil with a hard face could be made from this grade by induction hardening just the face, but hardening all the surfaces would not detract from the anvils performance. The Nimba anvils were made from 8640 and I've head of others being made from 4340 and H13. All three of these have the potential to harden uniformly in typical anvil sized sections. Doing so is not necessarily going to result in an anvil that is more likely to break. Some modern steels can be both hard and tough at the same time, and though toughness does decrease with increasing hardness, as long as the toughness is high enough, there will be no issues with performance. An anvil with only the face hardened is not necessarily going to be a better performer than one that is fully hardened or surface hardened all the way around. Performing surface hardening on an anvil is a fairly unique process and few heat treat shops are equipped for that type of work, so what you see in the video is actually typical, not an indication of ignorance on the part of the heat treat shop. AND.... When it comes to this type of thing, the responsibility for defining the products properties lies with the purchaser, not the foundary/forge shop/heat treater. If the person who had the anvil made didn't want a through hardened part that should have been specified on the purchase order. Most likely doing so would actually raise the cost of the part since unique heat treatment facilities are required for that.
-
I just saw the news. Like Terry, i had a chance to spend some time with Thomas last September. Im very glad i did. It is exceptionally difficult to express just how big an influence Thomas has had on me and the entire blacksmith community. He will be missed, but his influence will last for generations.
-
Thank you both.
-
The original poster raised the question of doing a short quench and letting the residual heat in the piece effectively temper the part. I agree that this would not give quite the expected result, but such processes are actually quite widely used, especially with steels that have higher hardenabilty than 1095. The is a process, known as austempering, in which the steel is rapidly cooled to some temperature below the pearlite formation temperature but above the martensite formation temperature. For example 600 F. If you rapidly cool to 600 F, you will avoid forming pearlite. By holding at 600 F for an extended period and then cooling to room temperature, the structure formed is bainite. When formed at relatively low temperautre, bainite is quite hard, some times in excess of HRc 50, and can be so tough that no further tempering step is needed. A similar effect can be achieve by quenching in water or oil or polymer solutions for a fixed time to remove most of the heat from the part and then let the residual heat "hold" the part at the desired temperature above the martensite temperature until the part has naturally cooled to room temperature. These kinds of practices are use by at least one sword maker I know. Similar approaches used to be common place with commercial knive and sword makers. They would sometimes quench in molten lead. Today, various molten salts are used to achieve similar effects. In the example from the original poster, I think the bar is so small that these practices are not practical, but pulling a part out of a quench bath while it still has residual heat in it is a common practice in industrial heat treatment.
-
Thanks for this info Glenn. Do you have a reference for where this data came from? I know the commercial quenchants typically have that in their tech sheets, but I don't think I've seen it for the cooking oils before.
-
Those are very neat pictures. Cast iron and high carbon steel really are very different materials, Not only do you have different compositions in two sections of the anvils but you also have different structures since the base is cast and the top is made from rolled plate. My first "real" anvil was a 150# vulcan. I sold it to a friend so I could reinvest in a a decent and slightly large Peter Wright. I was not a bad anvil, but I have a preference for steel or wrought iron anvils myself. That is mostly because they are easier to repair if needed.
-
Thank you for the updates Thom. that is slighlty more positive than what I'd heard earlier in the day. I did try to call Joanne, but it went to voice mail and the mail box was full. Please let them know we are thinking of and praying for them both. Patrick
-
Sorry it has taken me a while to get back to this question. Historically sulfur was found in the iron ore and also in coal. The use of coal in the conversion of iron ore to iron has only been going on for a few hundred years or so. Prior to that it was done using charcoal which is free of sulfur, so in those older iron pieces the sulfur was coming along from the ore. This is a big reason why irons made in different areas had different characterisitcs and why iron from some areas, such as Sweden, were highly prized. When dealing with iron and steel made by converting iron ore to pig iron and then converting that to pure iron or steel, the points in the process where the metal is liquid are the times it is most likely and able to absorb sulfur from the fuel. When solid, as in the case of general forging, there will be much less pick up of sulfur by the iron or steel. As Thomas noted, most modern steel contain additions of manganeese to counteract the red shortness caused by sulfur, so it is extremely unlikely that you will find sulfur in the coal to be a problem. I'd be more concerned about just getting the work piece too hot and having it crumble due to overheating rather. I hope that helps.
-
Thomas- You look really good. I'm very glad to see you back in the shop. Keep it up and happy New Year!
-
Steve- I understand. An interesting thing about molybdenum is that because it has such a high melting temperature it can be used as a forging die material for situations in which you want the dies themselves to be heated to the same temperature as the work piece. This method is used for some areospace forgings made by the closed die method. However, molybdenum oxidizes extremely rapidly at these temperatures so these forging setups are done in a vacuum. Pigsticker- You can get steel and nickel hot enough to weld, which can actually be done at a temperature lower than the melting temperature, but that will only happen if the materials being joined are free of any oxide coating. Oxidation of metals happens very rapidly at forging temperatures so you have to find a method to prevent this if you want to have effective forge welding, no matter what metals are being used. Quite often some type of flux, usually borox based is used. In other cases the billet is sealed in a container or by some other method to keep oxygen out of the system. Burning steel is really the carbon in the steel reacting so rapidly with the oxygen in the environment that it combusts. When this happens there is often also melting of the steel. There really is no way to convert burned steel back to good steel but if burned material is just on the surface or on one end it can be cut or ground off and the remainder of the billet can still be used. Ideally you'd start welding just before sparking starts but if you get just a little bit of sparking you likely can steel proceed with good results. As far as identifying burned steel I suggest you get a scrap and burn it on purpose so you have an example to use for comparison. Filling a hole in a billet is not a simple task and I'm not sure how to advise you on that point.
-
Beside the compression needed for working powder metal the other thing that is required is that powdered metal exposed to the atmosphere at high temperatures will oxides rapidly, even nickel, so you won't have benefit of metal powder but rather oxide contamination. This is one reason why powder is used in cans. The atmosphere in the can can be controlled to prevent this oxidation. Steve-Nickel melts at about 2650 F. Also, according to R. F. Tylecote on page 220 of Solid Phase Welding of Metals, pure nickel can be welded at room temperature but a deformation of 89% is required. He cites a paper by A. B. Sowter published in 1948 in Materials and Methods, vol 28 pg 60-63 for this infomation.
-
I'll add a bit more to this topic as it is one that I have personal experience with. Pure iron melts at about 2800 F. Adding carbon to the iron to make steel lowers the melting point in the same way that adding salt to water lowers its melting point. When we make steel by modern methods, the carbon in the liquid steel is uniformly distributed. However, as that liquid steel is allowed to cool, the bits that solidify first reject some carbon into the remaining liquid. This happens over and over again resulting in a sold product which no longer has a uniform carbon content (at the microscope level) but instead has areas of higher and lower carbon. The lower carbon regions can be heated to higher temperatures than the high carbon areas before they start to melt. When the carbon content is about 2%, the melting temperature is reduced to about 2100 F. Now, there are all kinds of steel alloys with widely varying carbon content, so not every alloy will have such a wide range between the start and completion of melting. When we forge, we are always using a temperature which is lower than the lowest melting temperature region of the steel. Usually that limit is set a couple of hundred degrees below this temperature because the metal will get hotter as you forge it. When choosing a forging temperature, you have to build in this safety factor. In general, it is the carbon content that primarily drives the choice of forging temperature. Alloys with 1% of carbon are usually forged at a maximum temperature of 2100 F, while those with less than 0.5% of carbon are forged at about 2300 F. These are rules of thumb and not absolutes because alloying elements other than carbon will affect the melting temperature. It is important to know that some unexpected "alloying" elements will significantly influence and reduce the maximum forging temperature of steels. The first is sulfur. When sulfur is present, even in amount as little as 0.03%, (and probably less, but my personal experience was with a bar that had this sulfur content) the forging temperature is dramatically reduced making the steel (or iron) "hot short". In such cases the forging temperature may have to be limited to less than 2000 F or the bar will crack and break apart. This effect of sulfur occurs because iron and sulfur react to form iron sulfide (FeS) which collects at grain boundaries. FeS has a lower melting temp than iron. If forging is done at a temp where the FeS is liquid, it will melt and the grains of iron will fall apart. If there is iron oxide mixed with the FeS, the melting temperature of that combination of materials is reduced further, to less than 1800 F. Since the middle 1800s the element manganese has been added to steel to react with sulfur. This compound, Mangenese Sulfide (MnS) has a melting temperature higher than that of iron so even if all the sulfur is not removed from the steel, the steel with Mn is not hot short. This is why almost all modern steel contains some Mn. Typically the Mn to sulfur ratio must be at least 8:1 for successful prevention of FeS. Manganese has the benefit of also improving depth of hardening during quenching (hardenability) but is a very low cost alloying addition. So we get a two for one benefit with manganese. For industrial applications this is a great benefit. For some knife applications where you are trying to get a hamon using clay coatings on the blade this manganese can make that difficult because the depth of hardening is actually too much for this process. In more recent years there have been suppliers of steel to the knife making community who have special ordered low Mn content carbon steels for this application. If the steel is contaminated by copper, it too will make the steel hot short. This can happen if you forge copper or bronze, have some of that melt and get on the forge floor and then that copper comes in contact with steel later. There are some steel alloys that do contain copper and in low levels it can be a useful alloying element. Wootz is a quite different material from modern steels. Most of what we think of as wootz today was very high in carbon content. Historical examples show carbon ranging from 1.3-1.8%. Due to the way in which the ingots were allowed to cool and due to the presence of phosphorus and carbide forming elements such as vanadium or manganese, the separation of iron and carbon was exceptionally dramatic in this material. In at least one case that was investigated in 2018, the researcher found that the high carbon regions contained carbon at near 2% as well as phosphorus. This combination of elements resulted in a region with a composition and melting temperature similar to that of cast iron rather than steel. The result of this is that, in at least some cases, wootz ingots have structure that is alternating regions of high carbon steel and cast iron. In addition to this, the high carbon and other trace additions of carbide forming elements resulted in the formation of large carbides or collections of carbides. These also influence the forging characteristics of the wootz, contributing to the difficulty of forging this material in relation lower carbon steels of more homogenous structure.
-
Thomas-So good to see you home and in good spirits. those are the first pics I've seen of your New Mexico shop. Looks like quite a step up from the one in Columbus.
-
The problem you are having requires two things to correct: 1 You need to make sure you are pounding on a minimum of 3/4 inch of length as measure from the end that is being tapered and 2 you must have enough power to get deformation at the center of the cross section. Without both at the same time you will always get that fish mouth/pucker effect no matter if you are forging by hand, with a power hammer or with a press. Another way to say this is that your die bite must be at least 1/2 the cross section of the stock and you must have a pretty deeply penetrating blow ( I typically recommend a blow hard enough to penetrate 20% of the stock cross section. That is tough to do by hand hand with stock this big so an alternate approach is to cut or grind a taper, even a blunt taper, on the end before forging. This will put the center ahead of the surface and prevents the fish mouth effect.
-
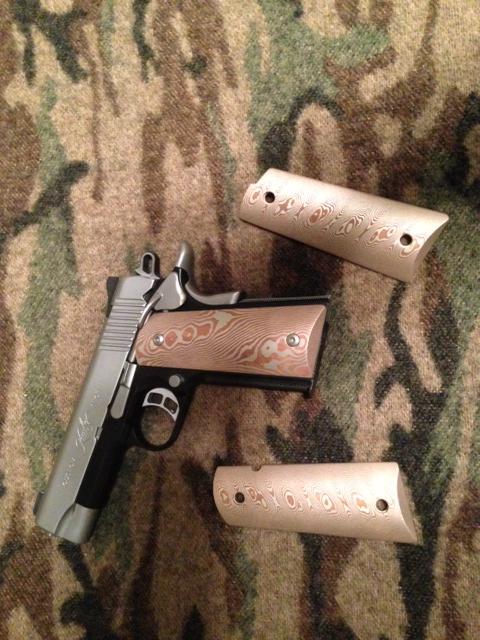
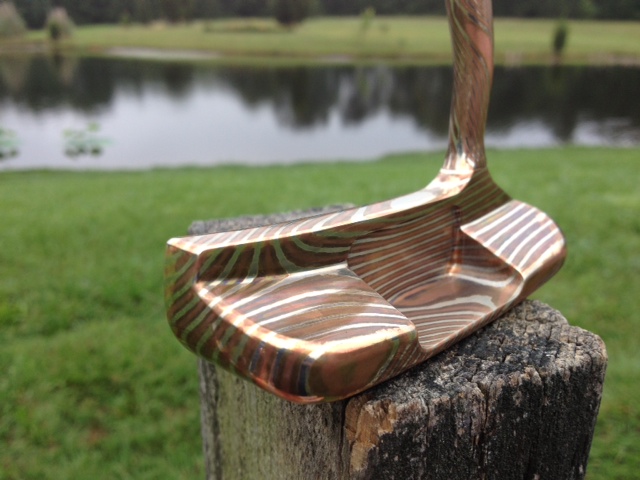
You are exactly right about the putter. I just realized that this set of pictures was supposed to go in the thread on mokume delamination, not this one. I had the wrong thread open when I uploaded the images. My appologies. Patrick Follow up to the question about bonding Ti to other metals: the answer is yes it can be done and is described in the book Mokume Gane by Ian Ferguson. However, Titanium is a very reacitive metal and will form new compounds with most of the metals you might try to bond it to, such as copper. These new compounds can make the interfaces between the layers very brittle and really limit the amount of deformation you can do after bonding. I have seen succussfull billets made of alternating titanium alloys such as CP grade 2 and Ti 6-4. After anodizing, these can really have a striking contrast. The big challenge with any titanium laminates is keep oxygen out of the system because it reacts so easily with titanium. Patrick
-
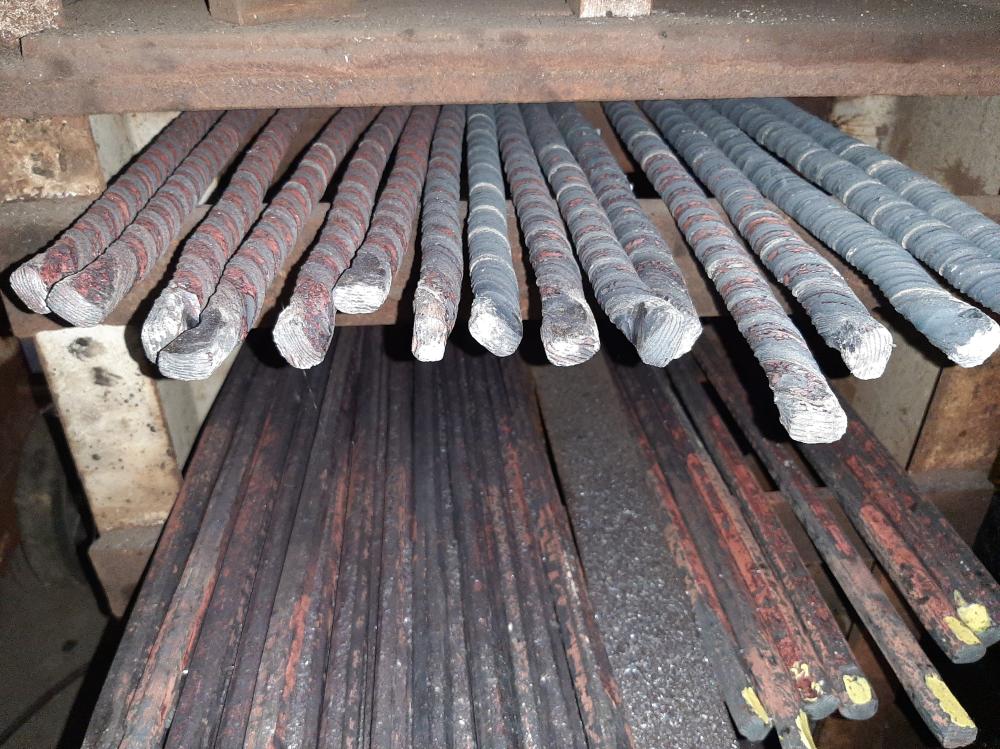
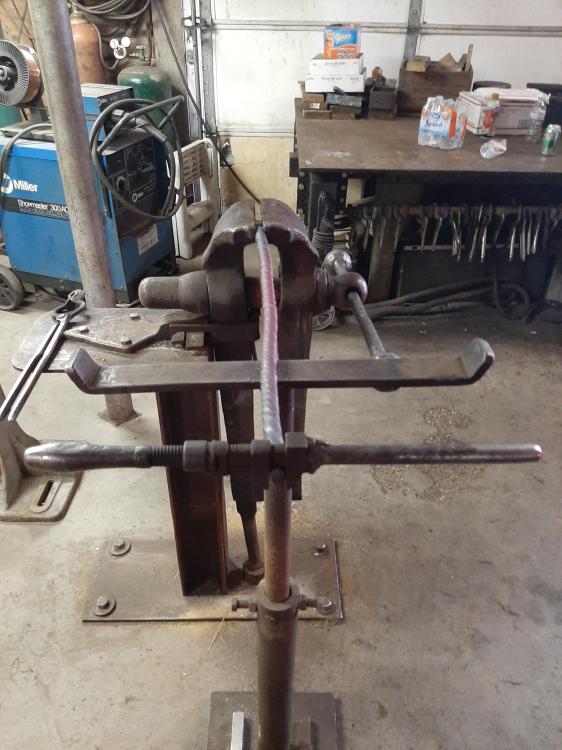
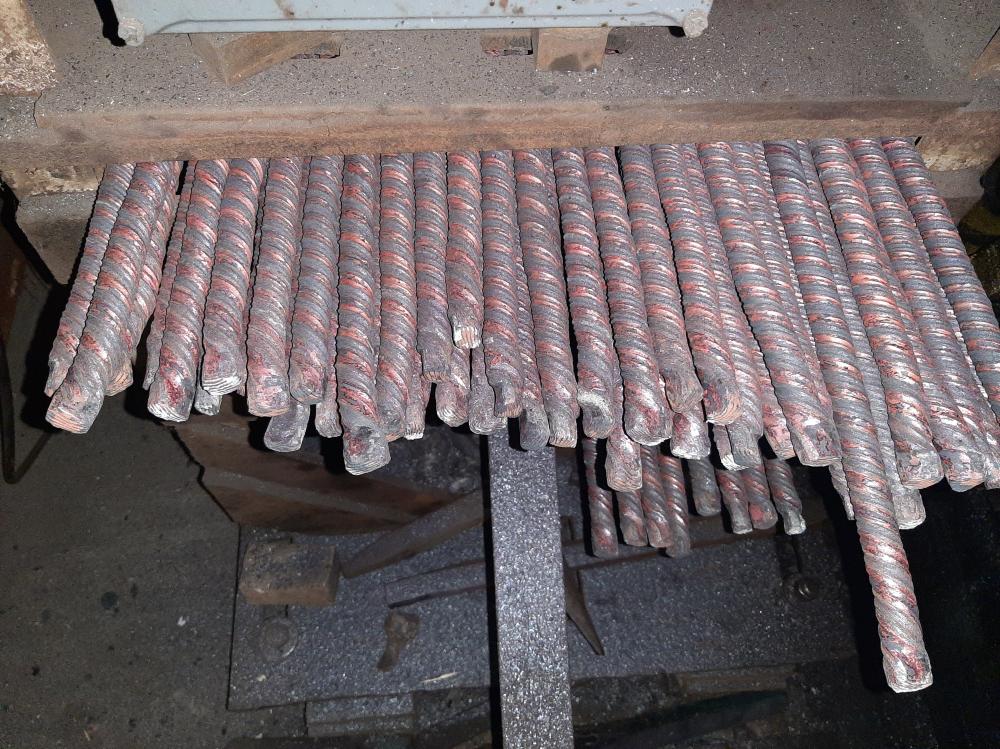
Frosty- Here are some in process pictures of twisting a large batch and then a couple of photos of finished projects that were made from the blocks I forged. Other folks made those finished products.
-
Frosty i provide a forging service for one of the mokume sellers who serves the knife market among other things so all my pics are just stacks of big billets in various stages of processing. The best pics of finished projects will be found on the website of william henry studios. Many of the billets i start with ate 2x2x6 or even bigger and they may weigh 10 to 12 pounds each so forging on the ends is not practical for me but could be helpful in other circumstances. I do all my work on flat dies with stop blocks. Im sure swages could be used. You'd have to work out the exact geometry to prevent forming laps. I wouldn't normally use square stock as input into a swage like that. Round would be better i think.
-
Yes that is true but if you're using a billet of copper based alloys such as brass, copper and nickel silver, those differences are not so big as to be the primary source of the problem. I didn't mention it above but most of the lay separations I deal with are on the very end of the billet where no hammering ever happens. The ends usually bulge out for me and this bulging creates a tensile load on the layers at the end just as it does on the sides. The difference is that since the ends are never struck that tensile load just continues to act on those layers as you draw out the billet. I usually end up trimming a little bit off to clear those splits before i start forging to and octagon, which is my preferred shape for twisting. The biggest risk I see for layer seperation aside from interfaces which are not properly cleaned before bonding is the shearing action that happens when you do go from square to octagon. I minimize that by taking tiny little die bites and very shallow drafts. If I do that right, I usually don't have catastrophic failures. Patrick
-
The reason that mokume splits when forging on edge is because you are creating a tensile load at the layer interface. They want to spread side to side. When striking with the layer horizontal you put that same interface in compression. As was already noted, you really need very clean surfaces before starting the bonding process and then when you do forge with the layers vertical you need to used a technique that minimized the side to side spread. Basically you need to deform only very short lengths at a time. I've been production forging mokume in batches upwards of 100#s at a time for about the last 12 years and I've managed to make it fail in most of the ways that can be done. Patrick