Wroughton
-
Posts
307 -
Joined
-
Last visited
Content Type
Profiles
Forums
Articles
Gallery
Downloads
Events
Everything posted by Wroughton
-
I'm Jelly, when do we go next? I'm Jelly, I have my fare ready.
-
got a little work in tonight
Wroughton replied to brickman's topic in Blacksmithing, General Discussion
Nice forging slippers! I guess if you get a little hot foot they're easy to get out of. -
Light fixtures of the past
Wroughton replied to Michael Cochran's topic in Blacksmithing, General Discussion
Take a little history trip online. Look up Nicolo Grosso (IL Caparra), the Medici and the Strozzi palace lights. Yellin was obviously influenced by these and similar lighting as their "look" is repeated often. 90px-Palazzo_Strozzi,_lucerna_del_Caparra_03.JPG -
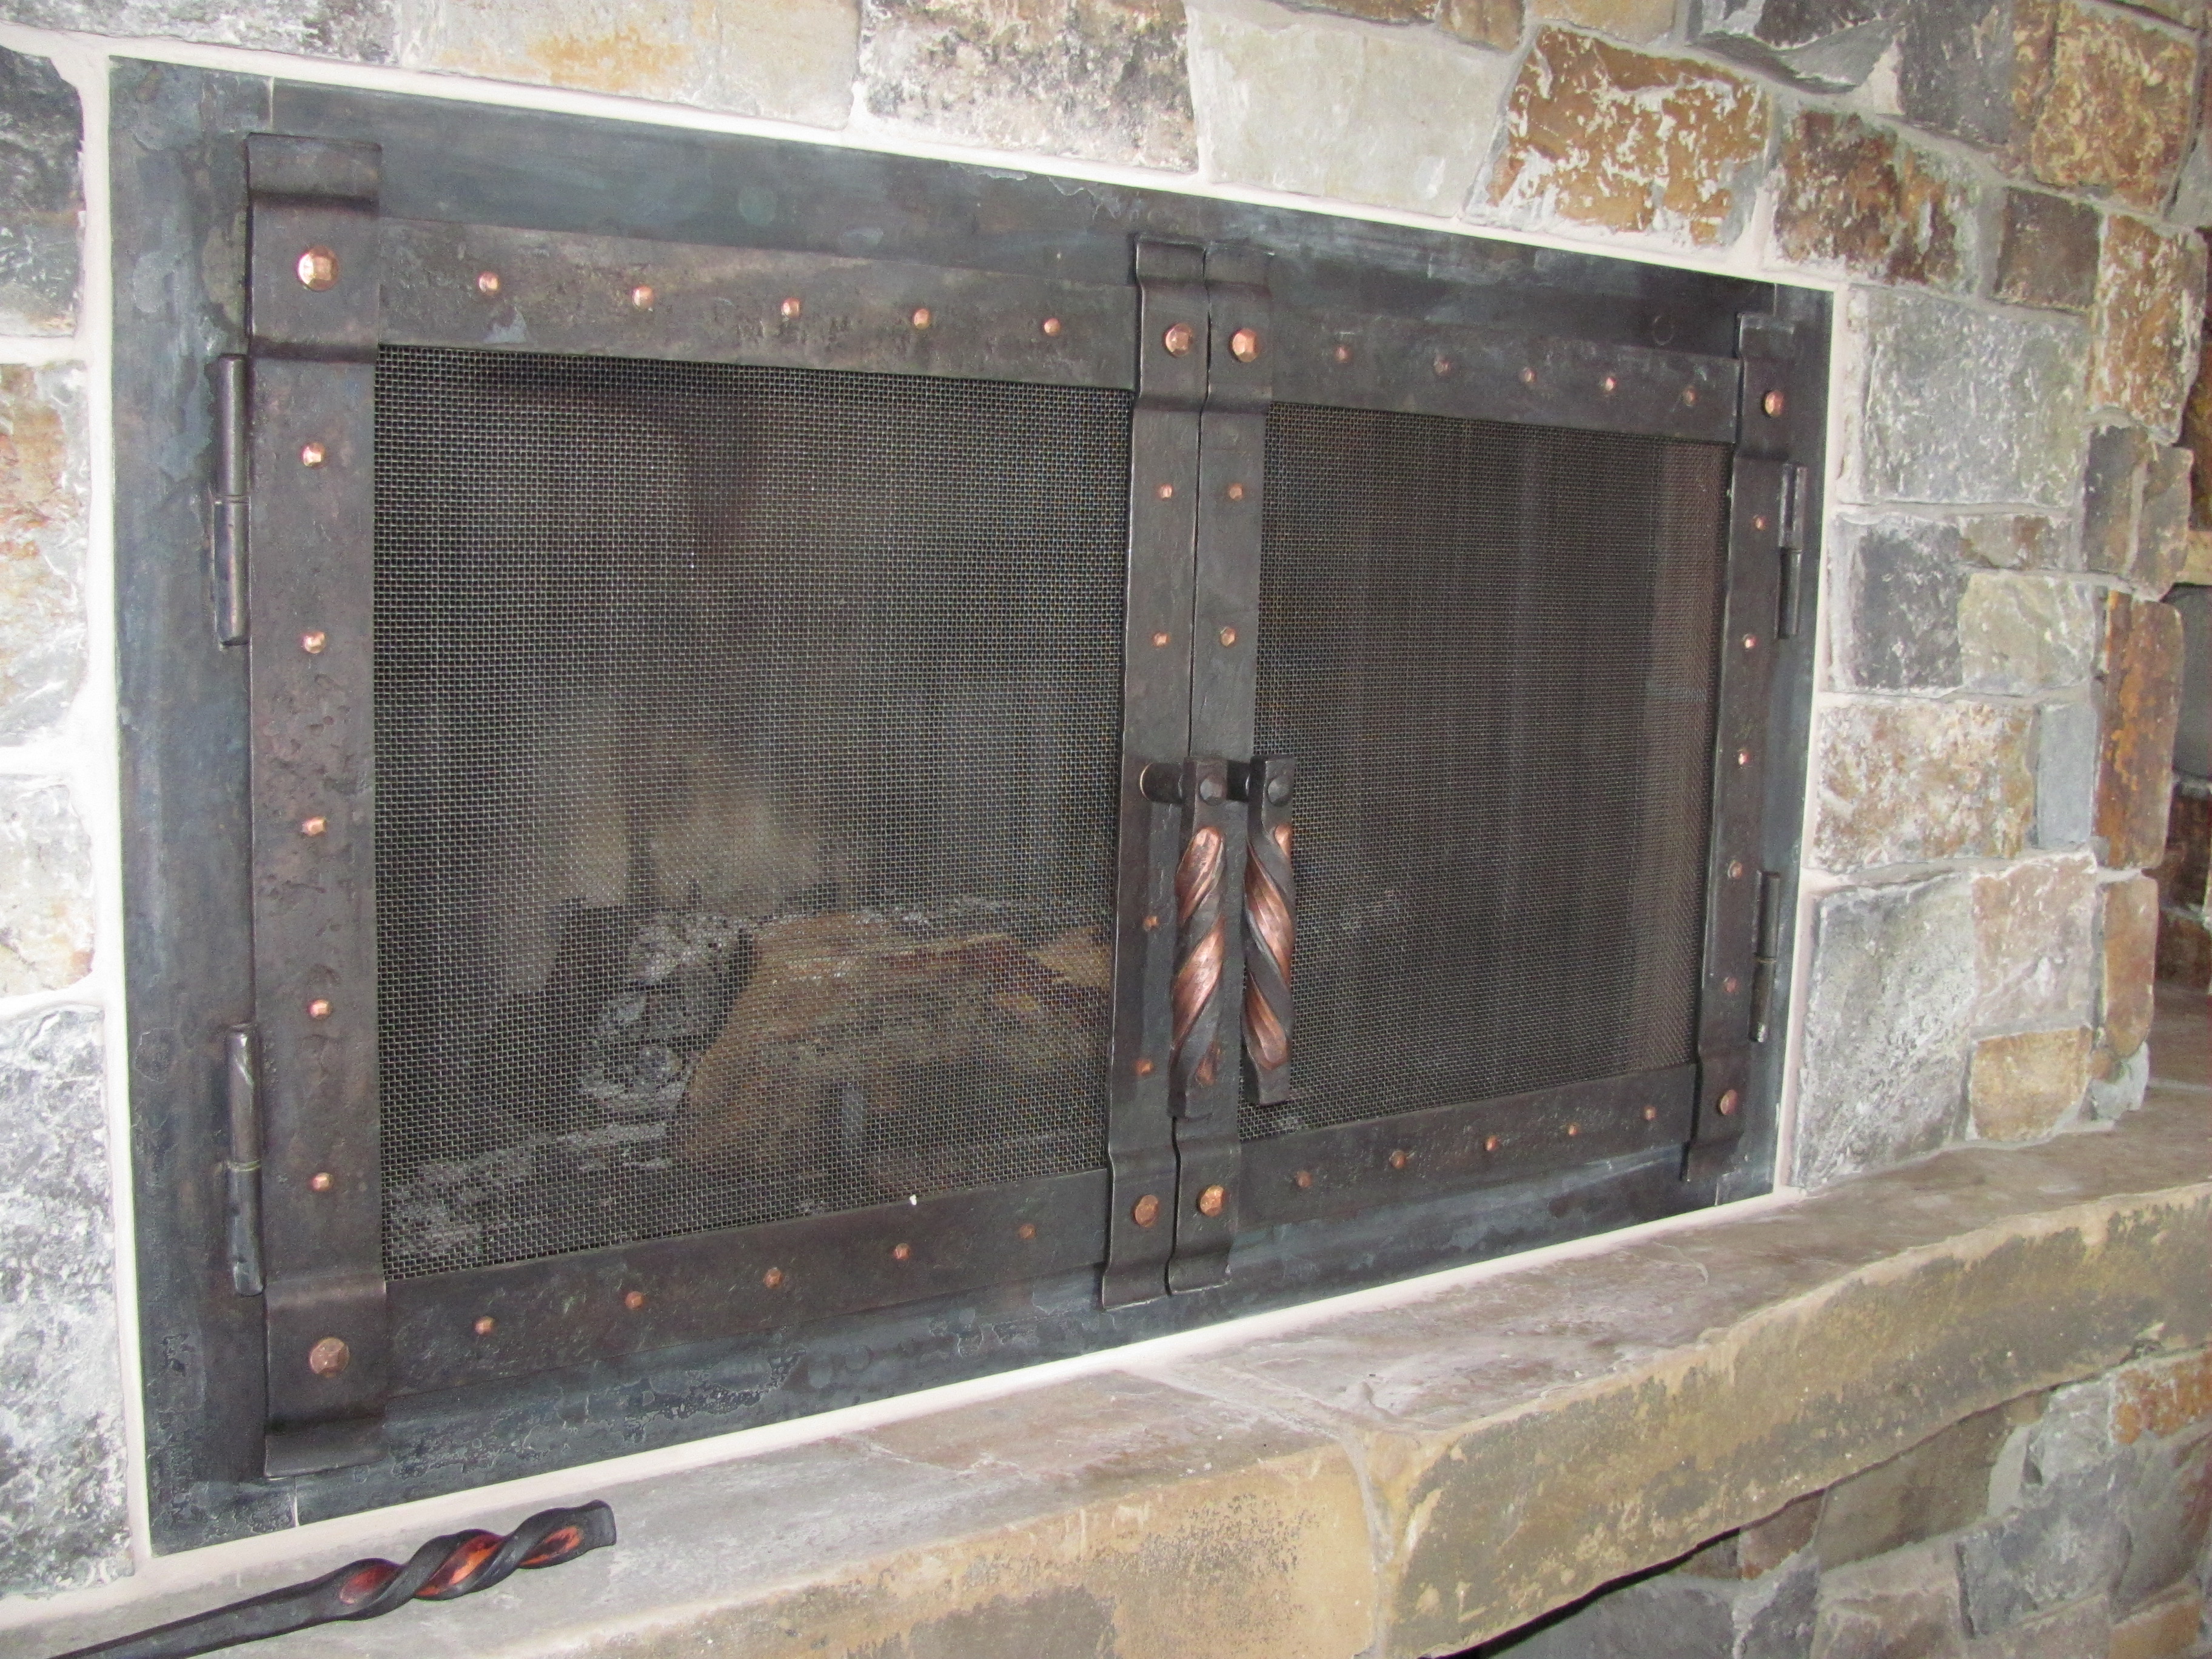
I buy screen (they call it "mesh")from Edward Darby & Son. Order by the wire diameter and then the size of the opening in the mesh. Don't know the wire size but the opening looks to be 1/8". I sometimes go as large as 1/4" opening with larger wire.
-
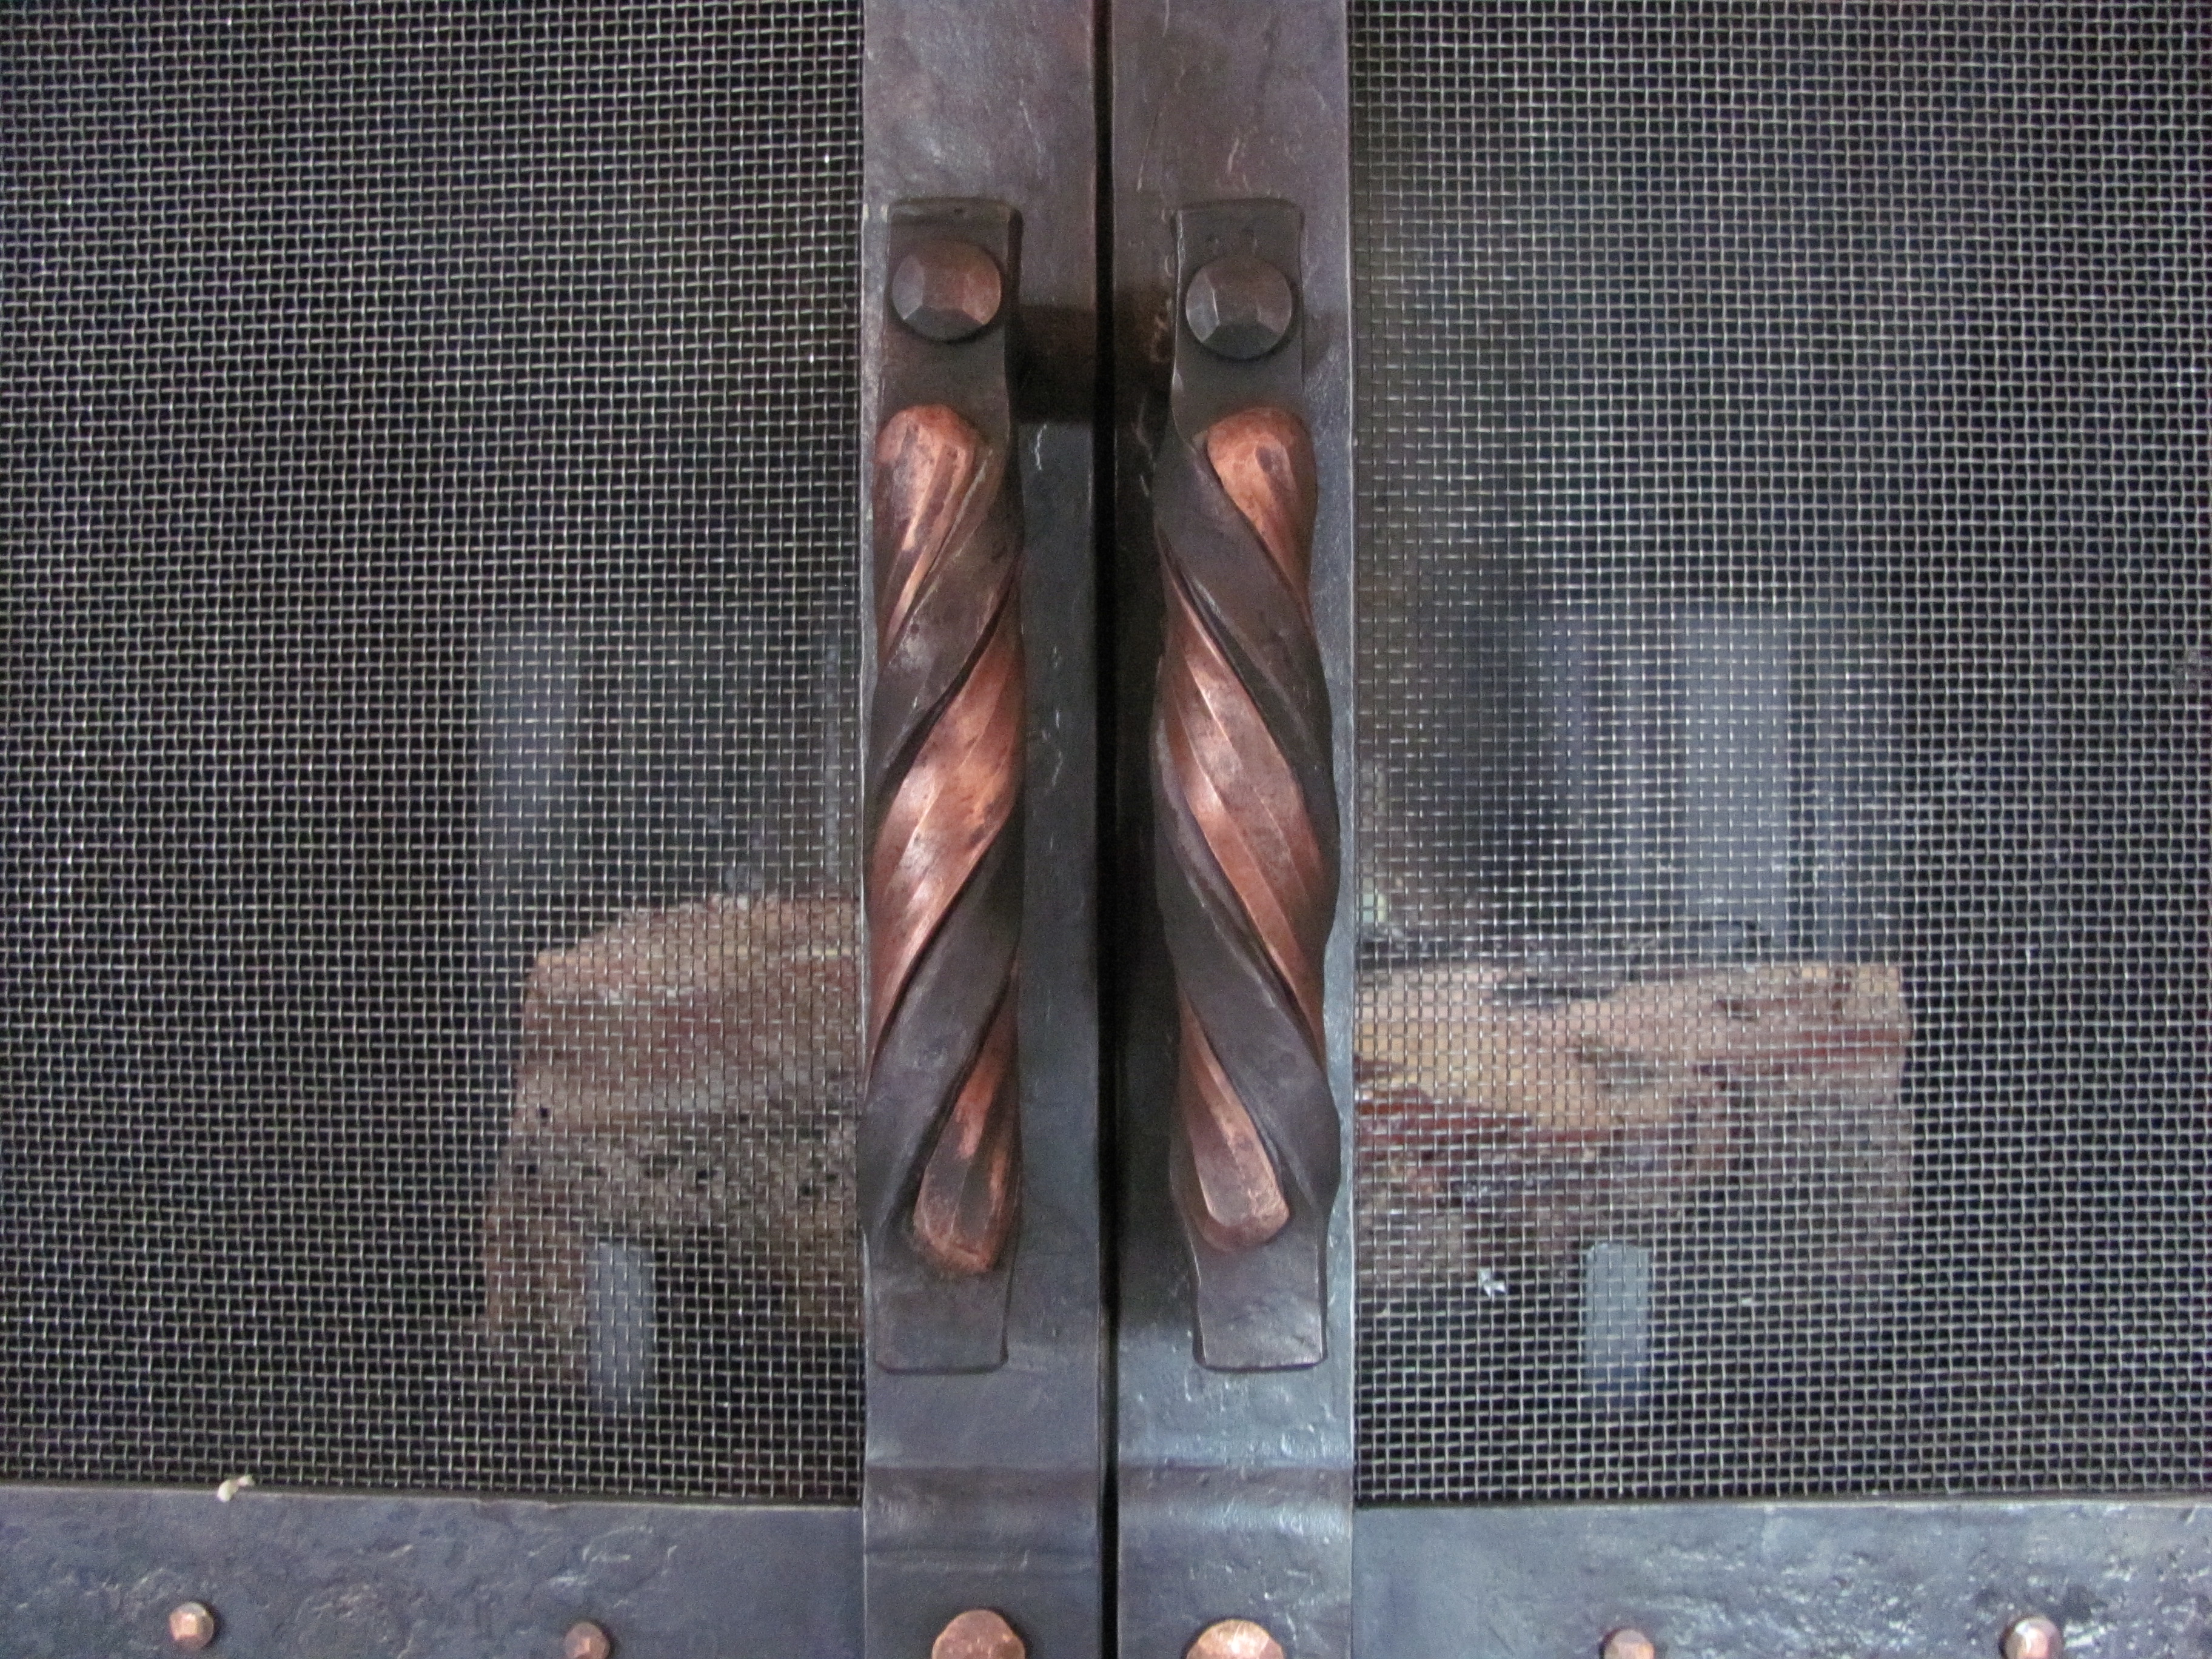
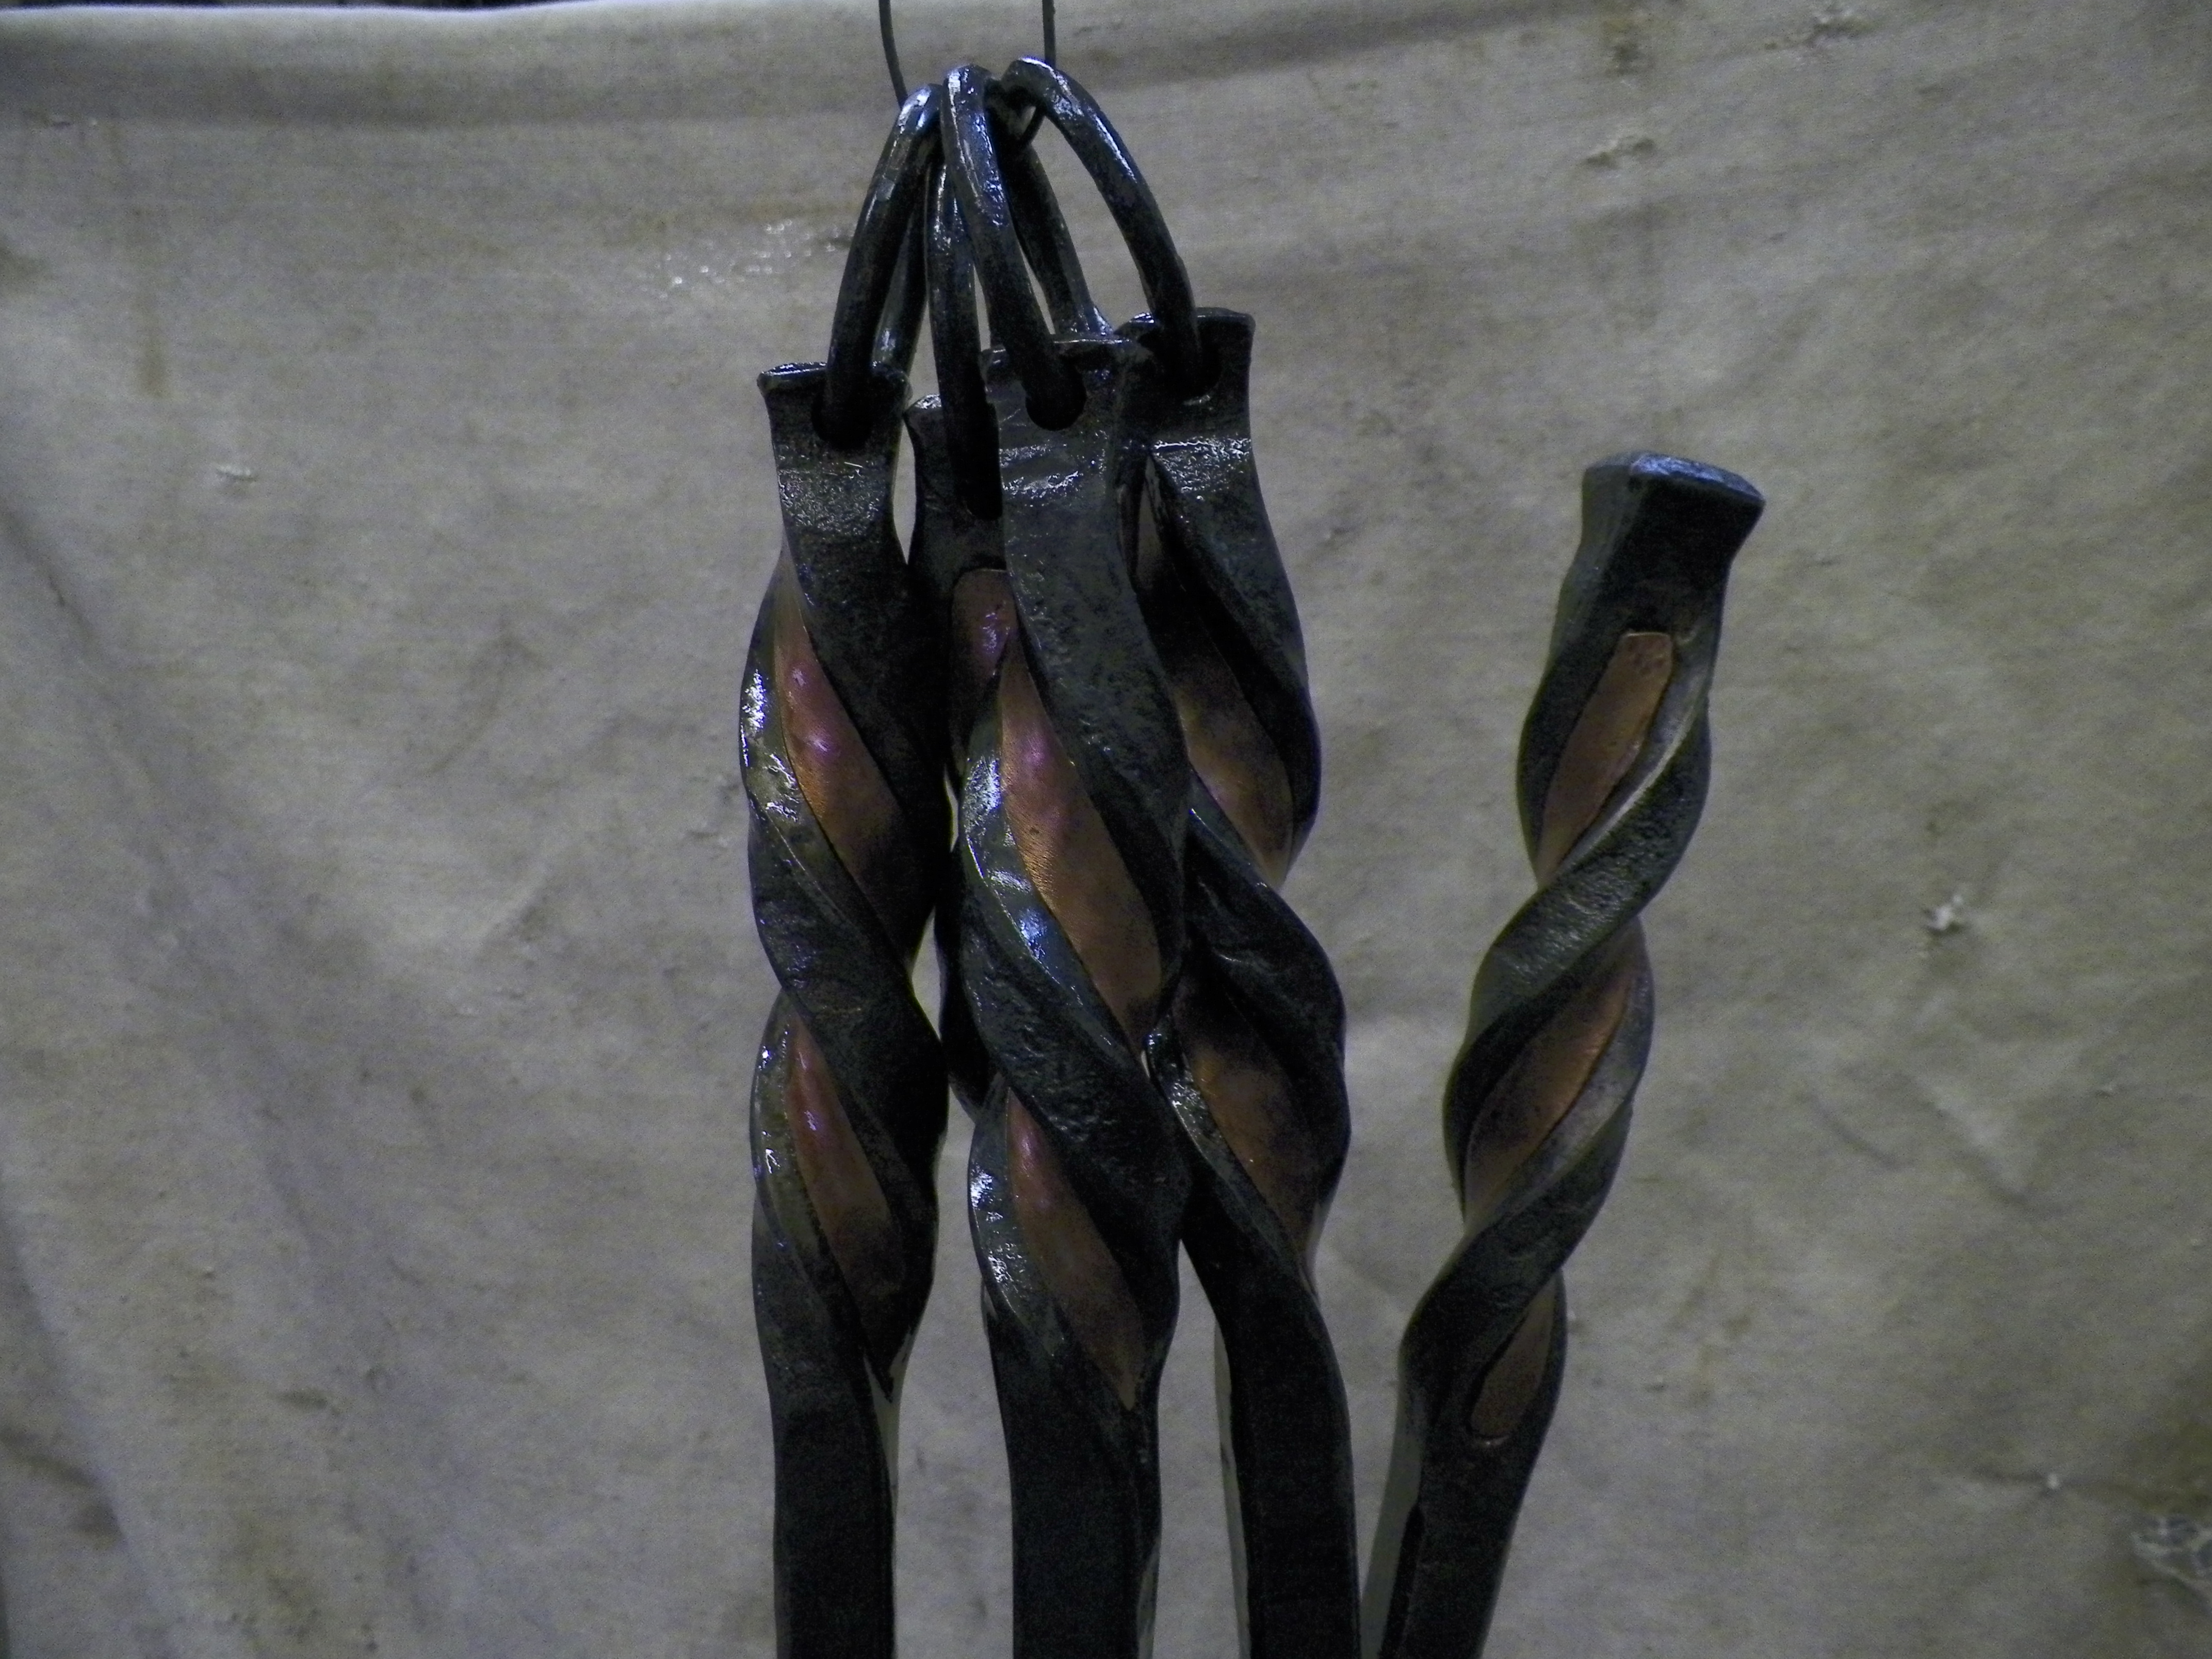
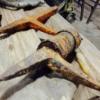
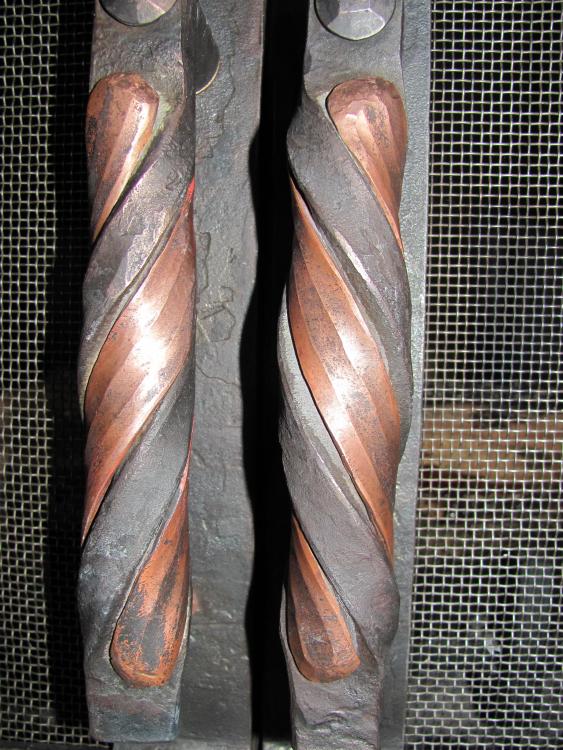
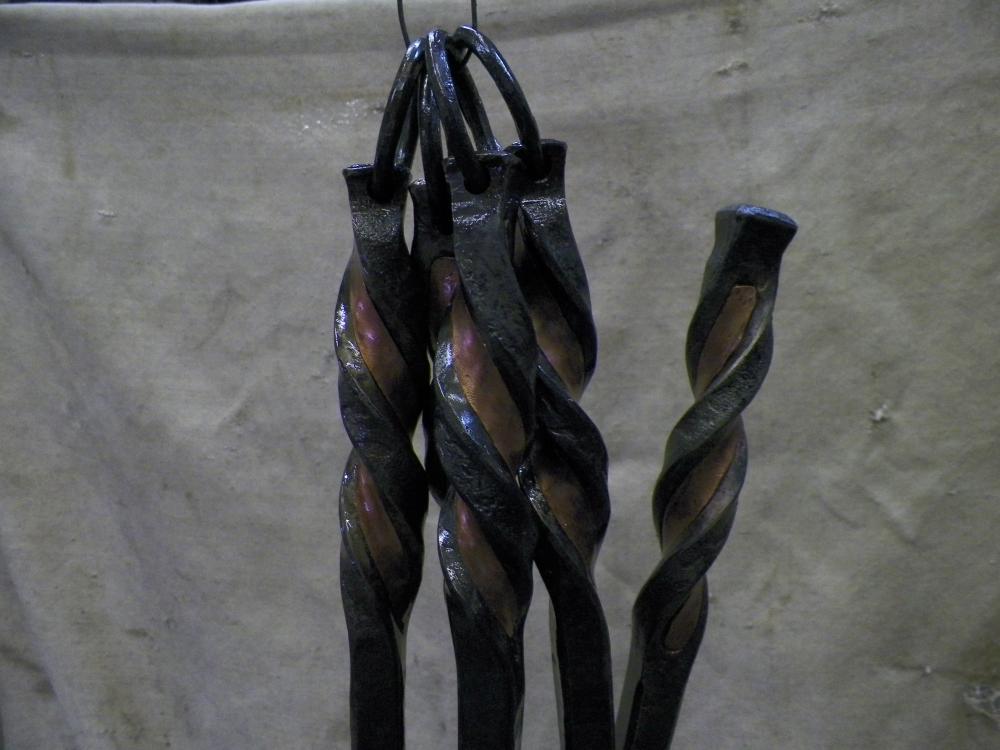
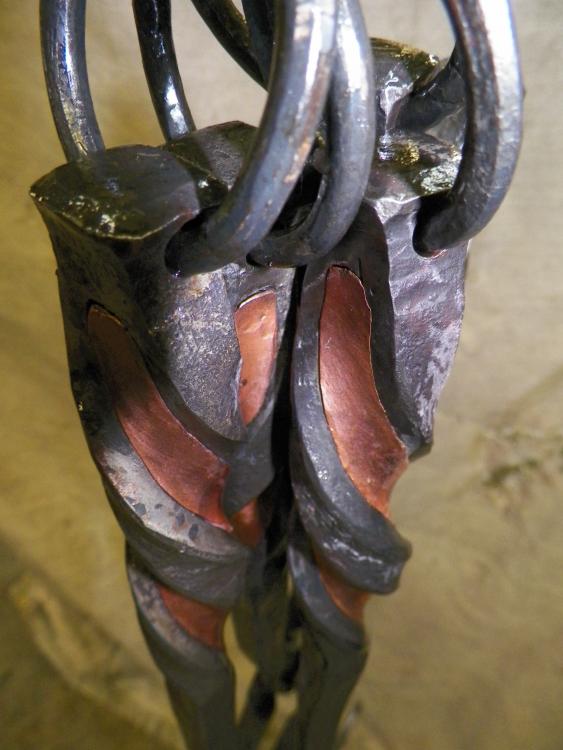
Slit and drifted with copper upset in the opening. I like your bazillion handles also


-
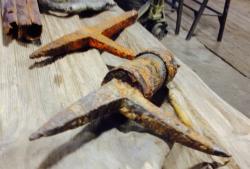
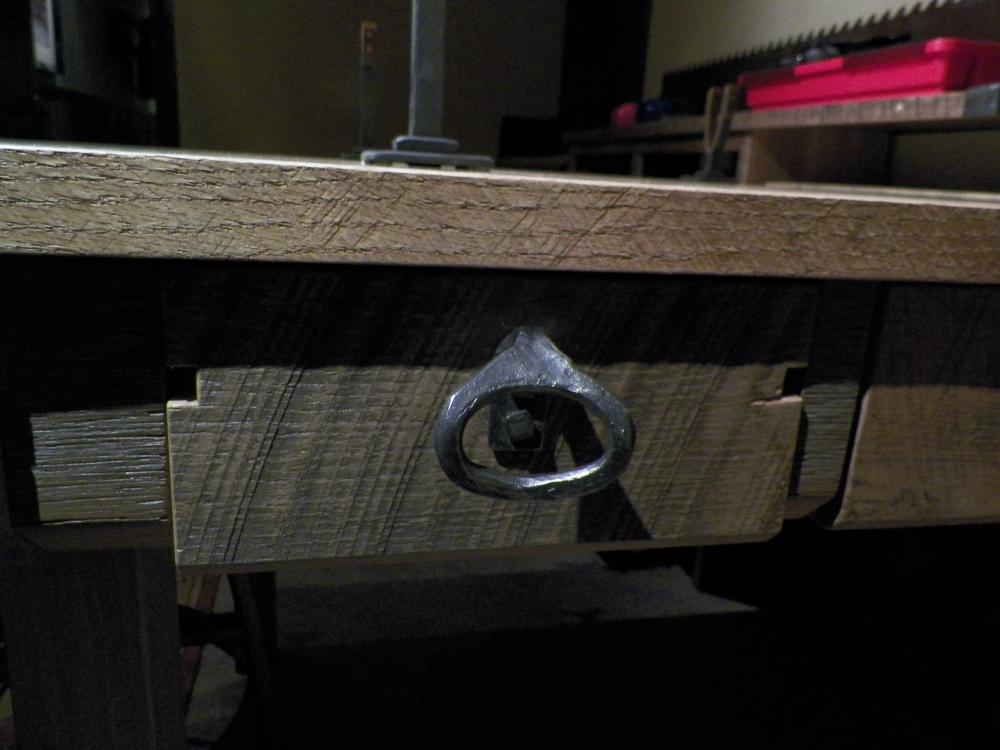
Pulls from left overs. Failed bottle openers that I had way to much fun working over the horn to the point that the opening was too large for a bottle. Copper and Iron fire place tool handles.

-
Man! Did you just pull out Farm Show on me?! The most common reading material found in the shop's commode "library". Thanks Kozzy, the thread kinda went to the "birds" there for a while.
-
Nickel stick welding rod works well for Tig welding cast iron . Just beat off the flux on your anvil and hit the trail. As Frank said, stainless is also a good choice and the approved method for joining different alloys together. Preheating the whole works is advised as well as a slow cool down. Wrapping in fiberglass insulation afterwards works well for me. That being said, I think the conservators touch is required for this item. All the reasons for this are well covered above. The brass backer sounds like a great idea. BBD's solder idea sounds interesting as well but still requires heating.
-
Picked up 2K+ lbs of wrought iron today
Wroughton replied to Eli Taylor's topic in Blacksmithing, General Discussion
Hi, Are the finials forged or cast iron? Looks like very fine grain indeed. Congrats! -
It's not all that old since it's hydraulic. Cute, very cute. Check your local welding supply, they often sell iron worker dies. Pull the punch and bottom die and take them with you. Any labels? Early Uni-Hydro I'm guessing.
-
Raiding a bladesmith shop
Wroughton replied to brickman's topic in Blacksmithing, General Discussion
Coordinates? -
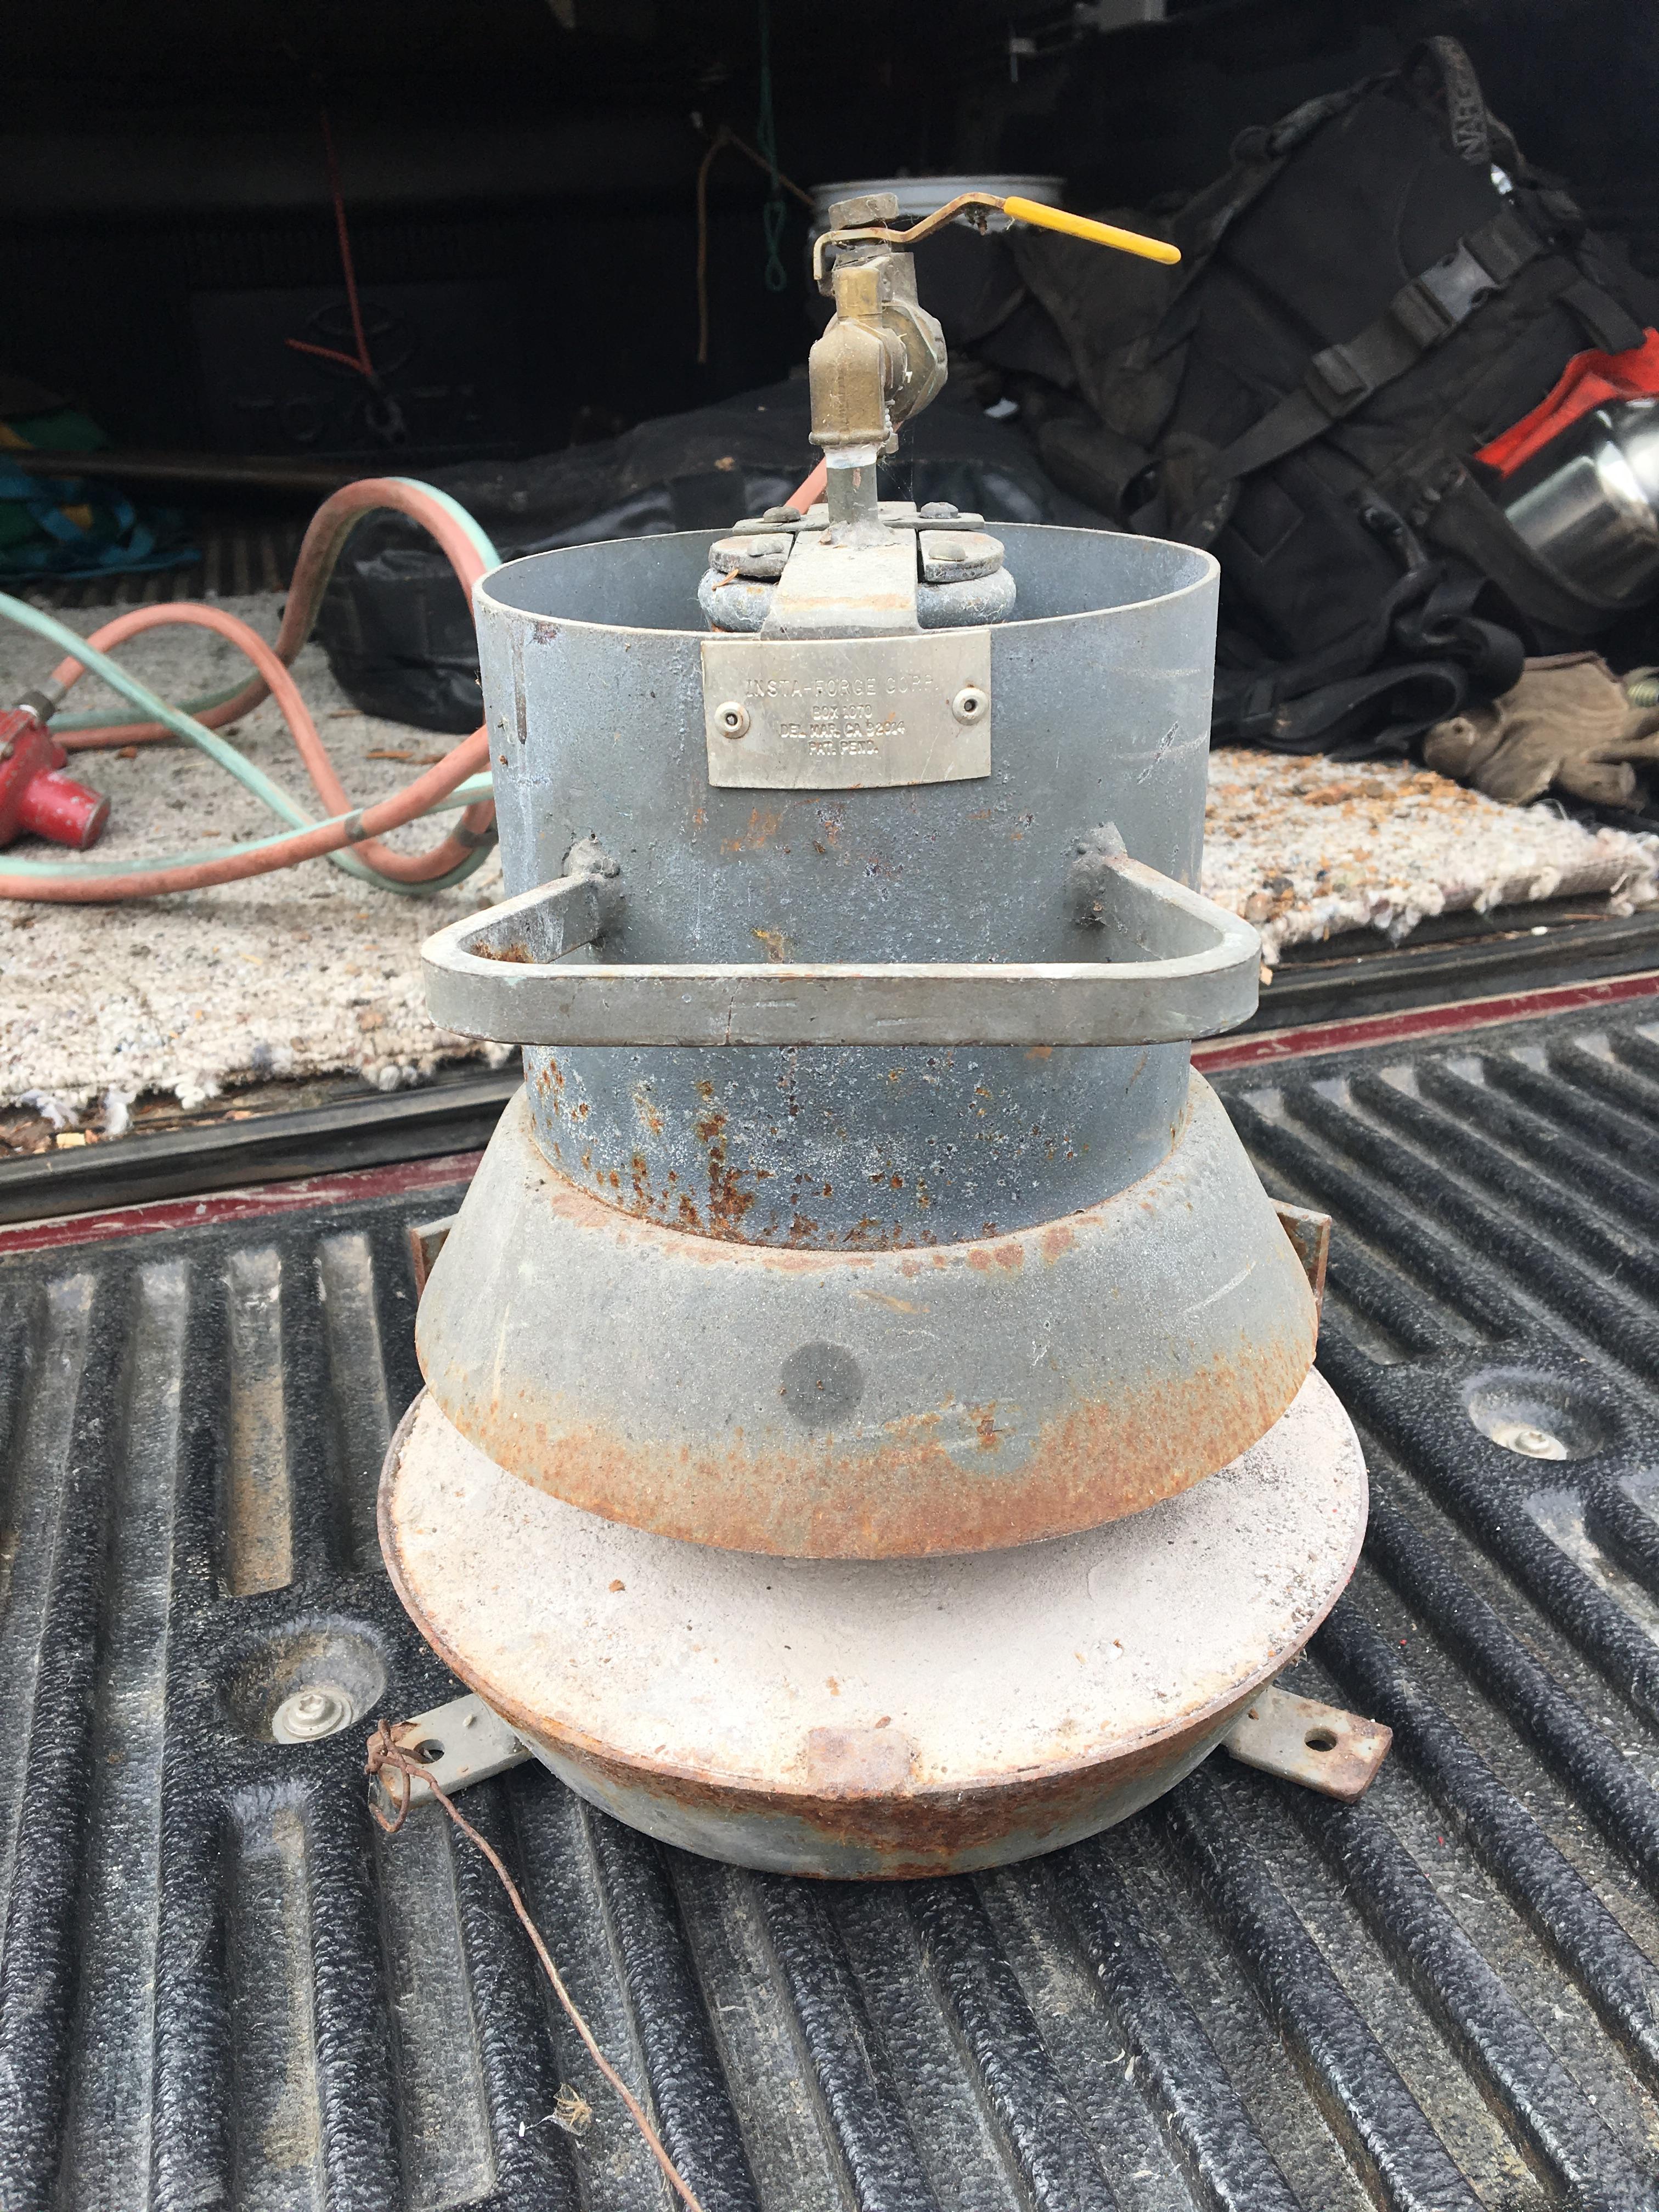
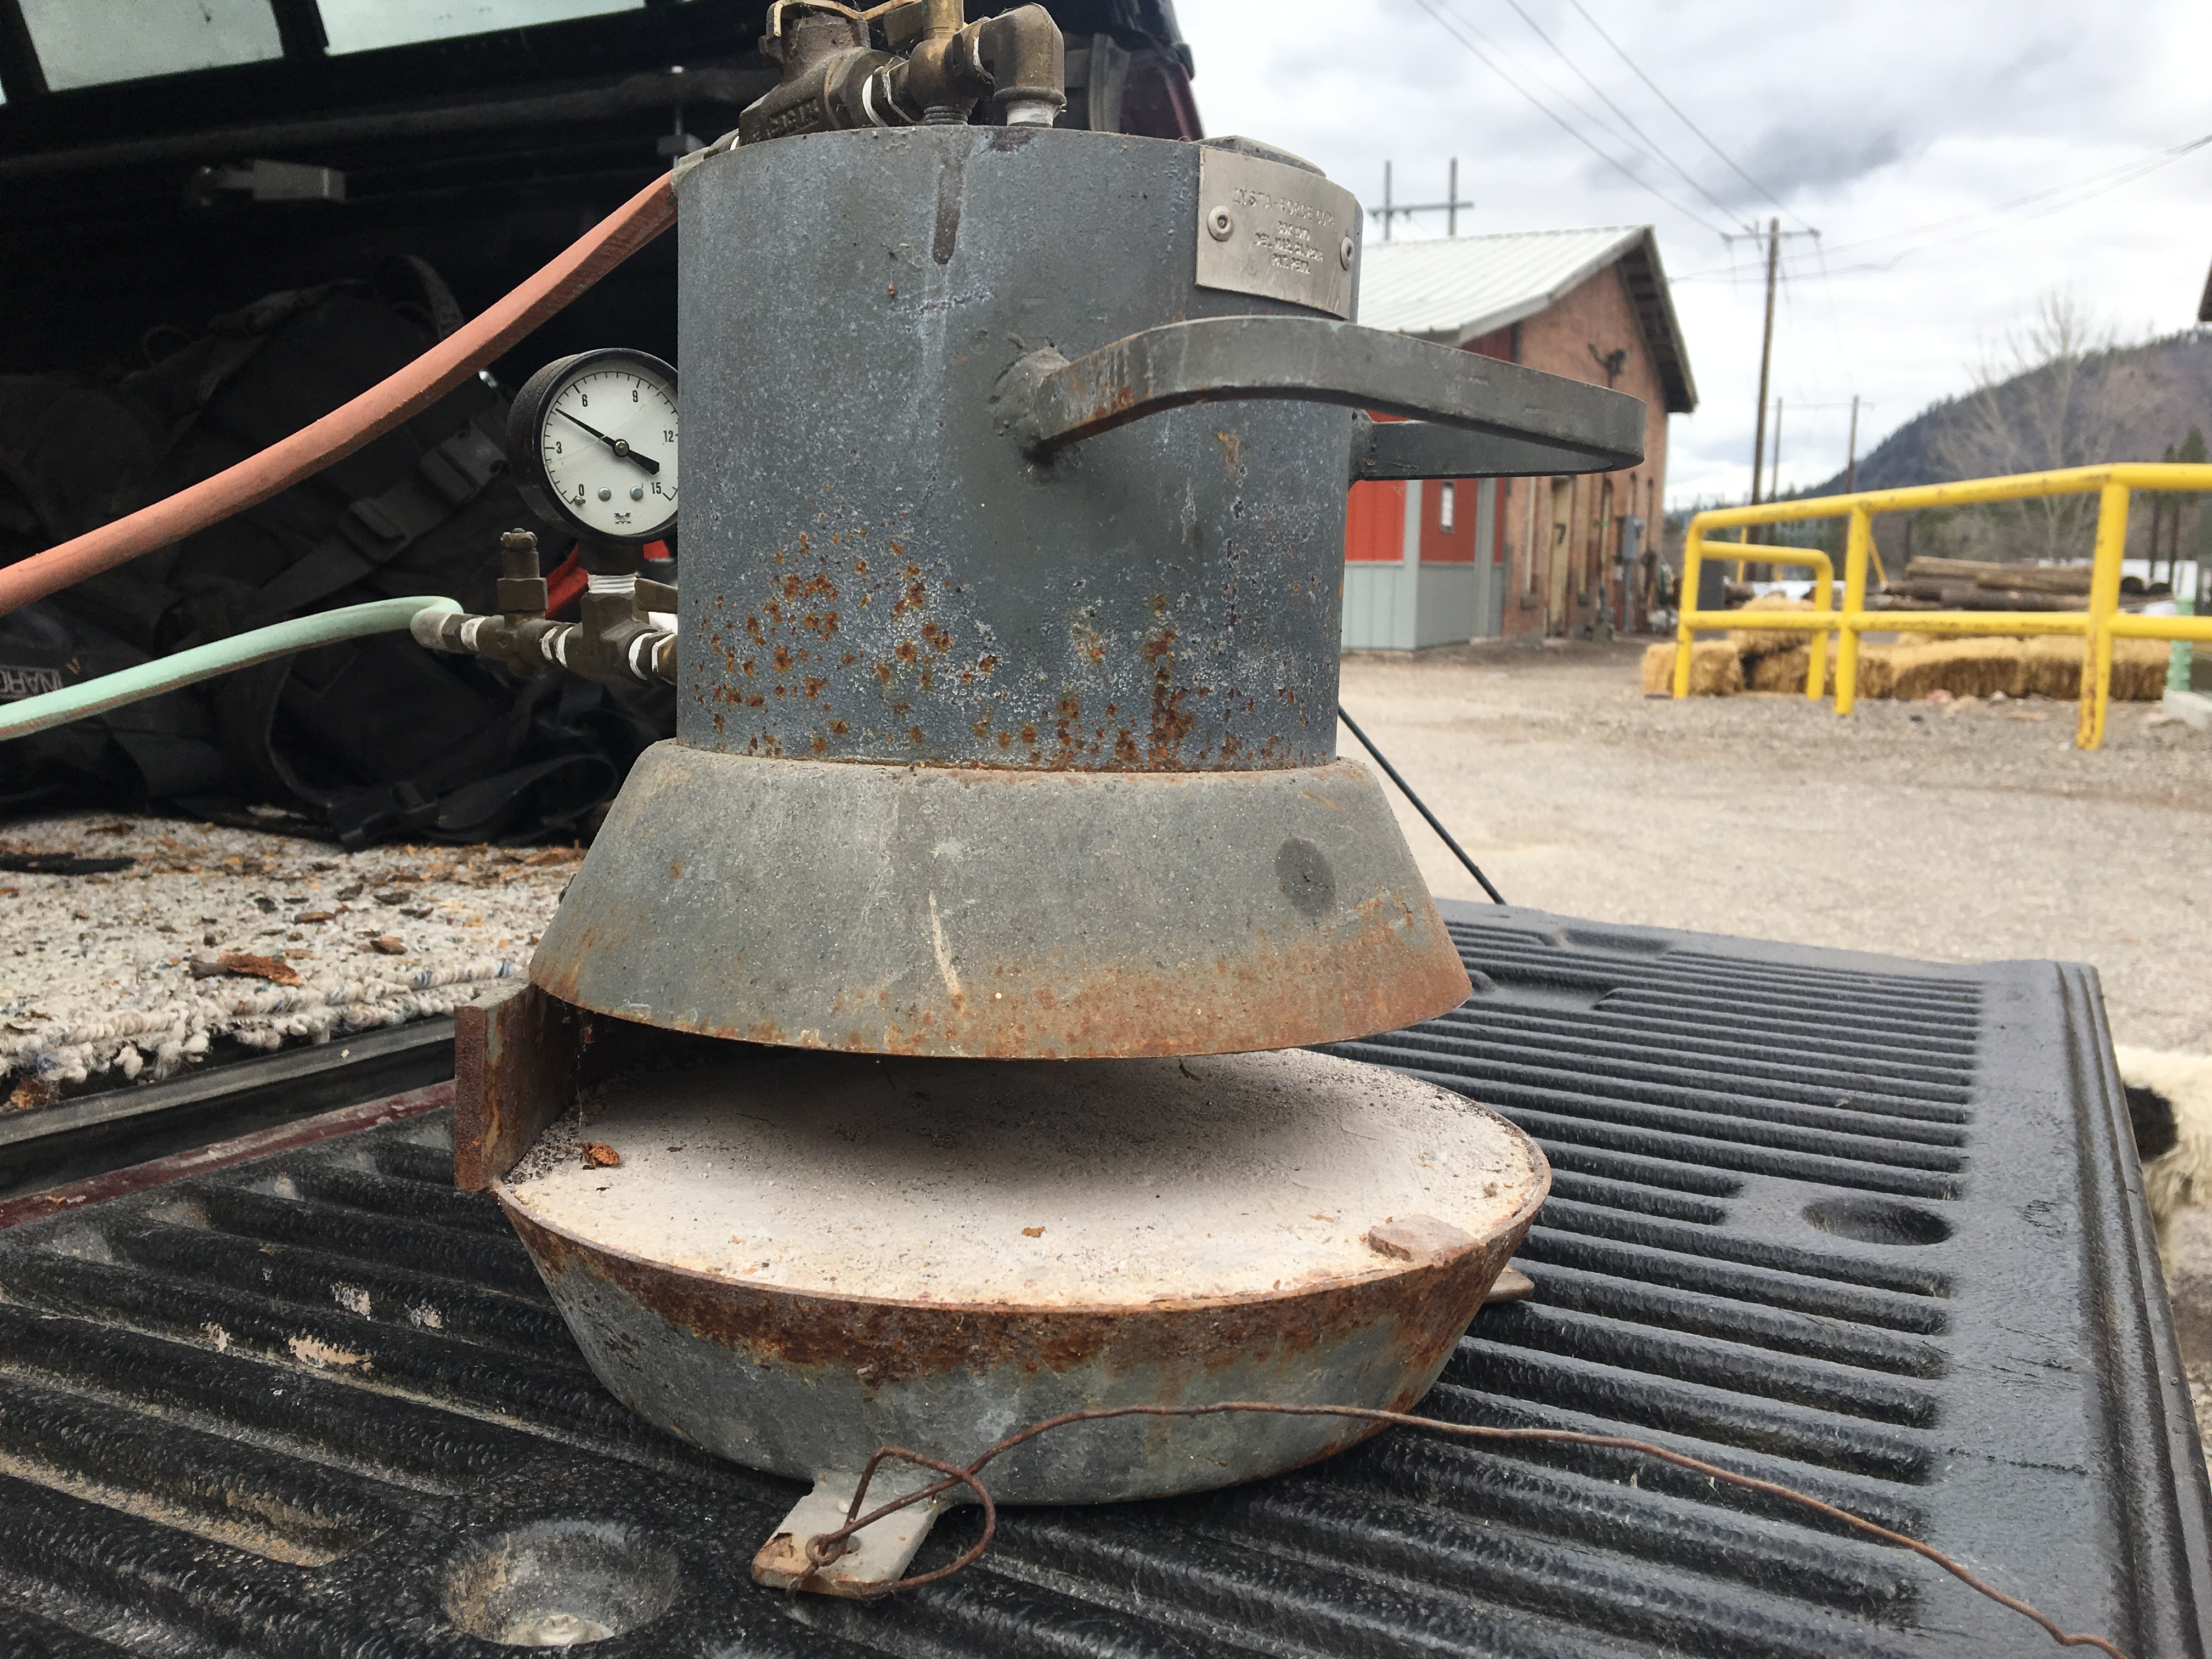
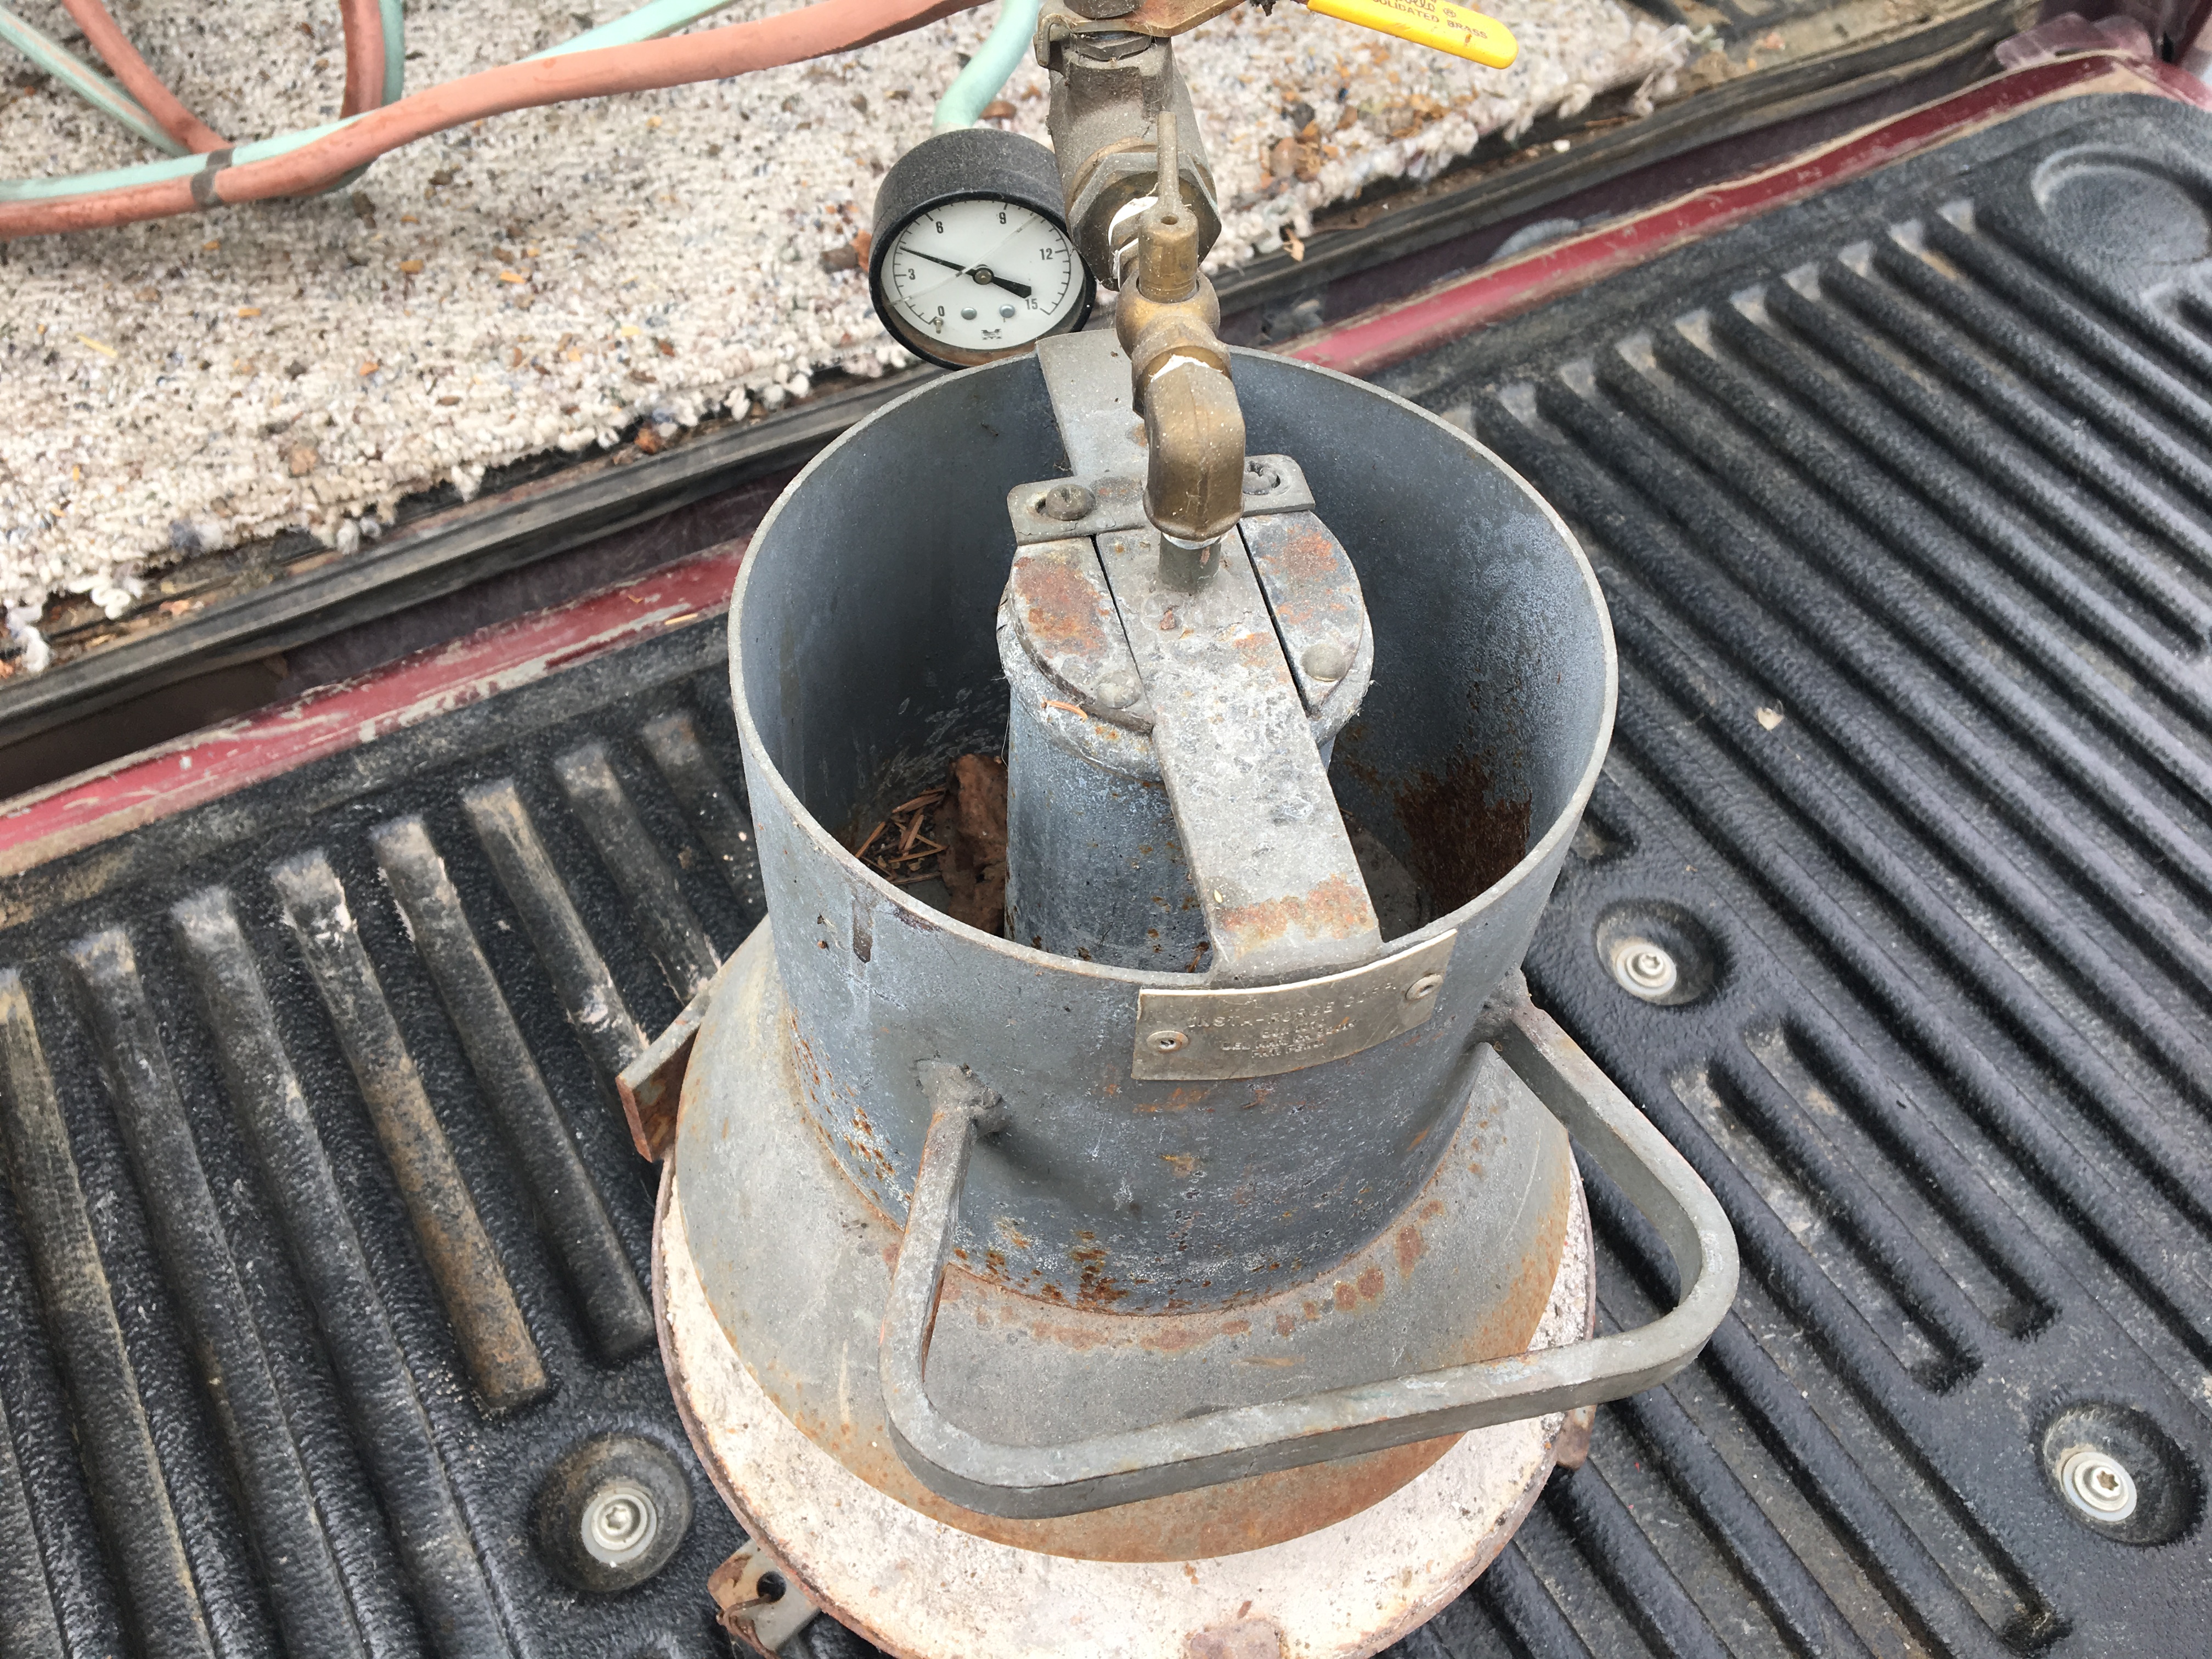
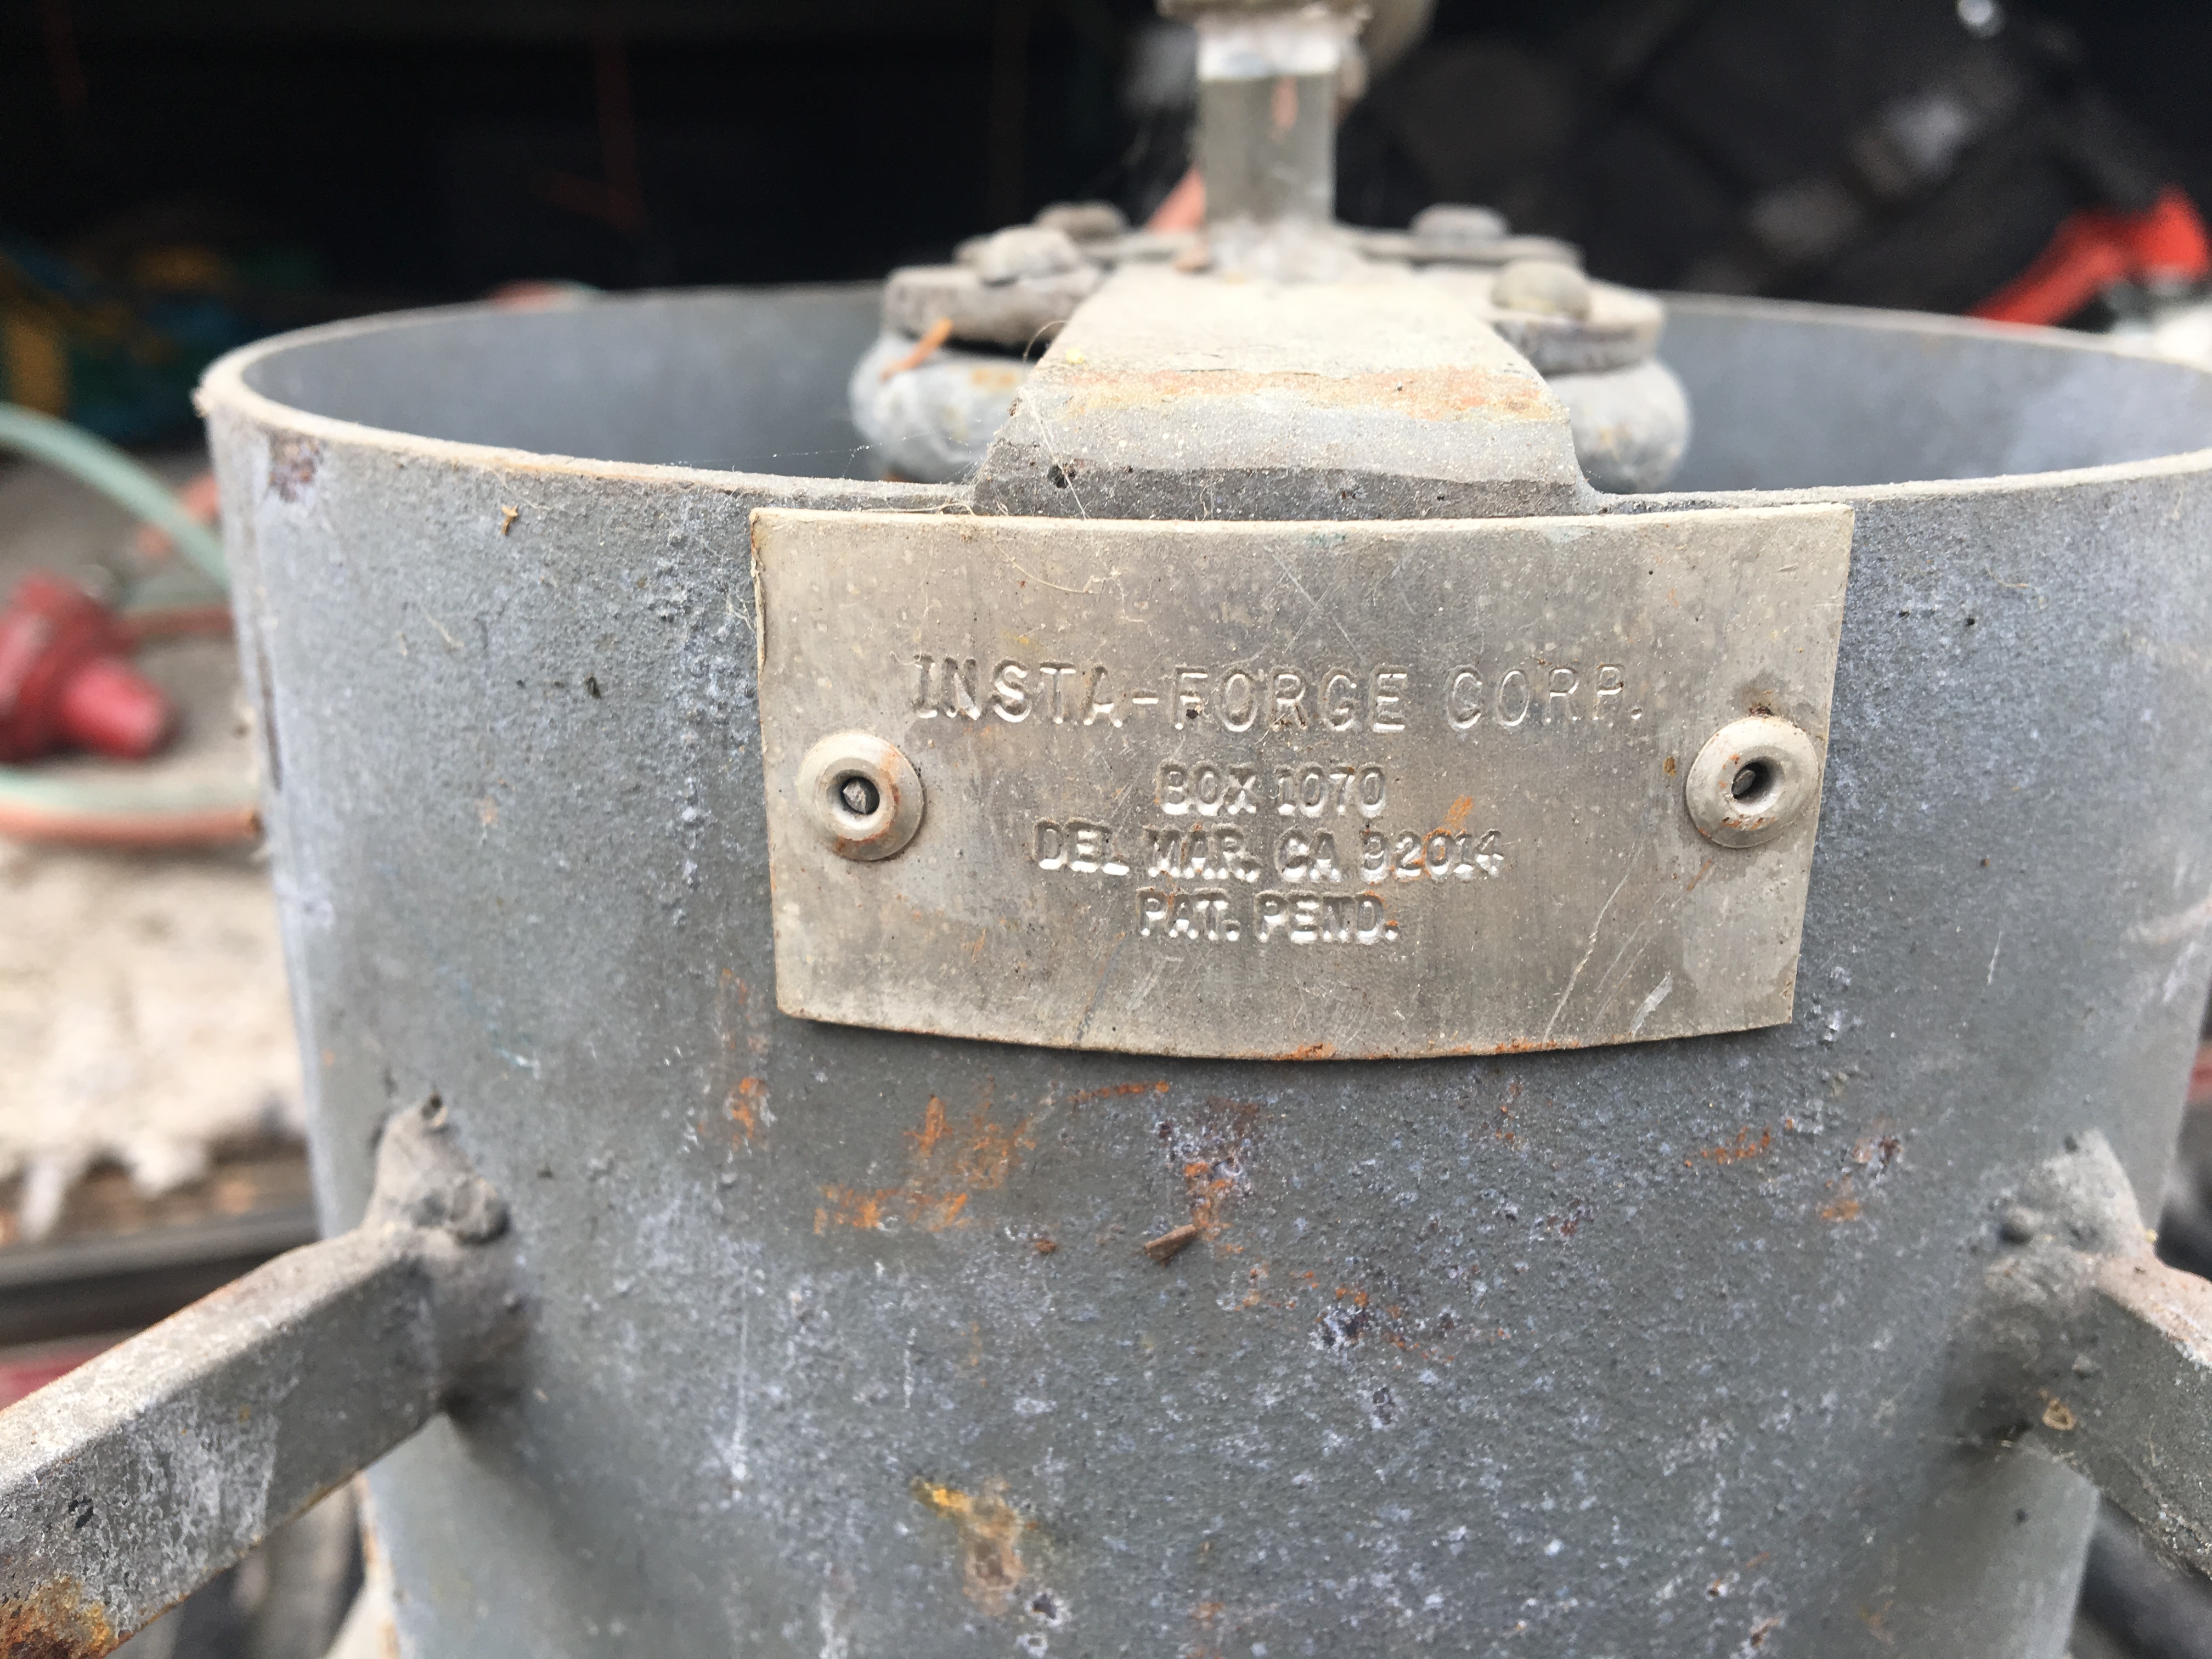
I used the googles for "INSTA FORGE". Nada. I'll look on anvil fire. Well, same principle but that guy came up with his from scratch. My kind of armor is 1/2" plus thick but I think i just found my new bowl forge. I'm guessing now it's a farrier forge for horseshoes after seeing the action shots of the other one operating.
-
That's WI. I'd do some more looking around. I'm not sure what and when they were used but the ones I find are smaller than the sizes used commonly today. Sometimes even the tiny mining rail spikes. In the 1800's train cars and locomotives weren't as big as they are now and there were lots of horse drawn carts on rail spurs for minor to and fro work so they didn't need large gauge rail. Now take some spring and other high carbon steel with the WI and do a spark test to familiarize yourself. There's a dramatic difference in the sparking.
-
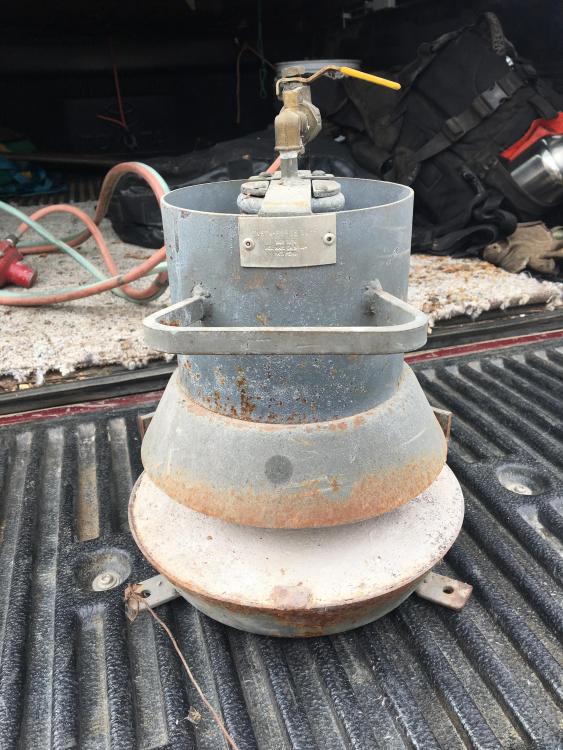
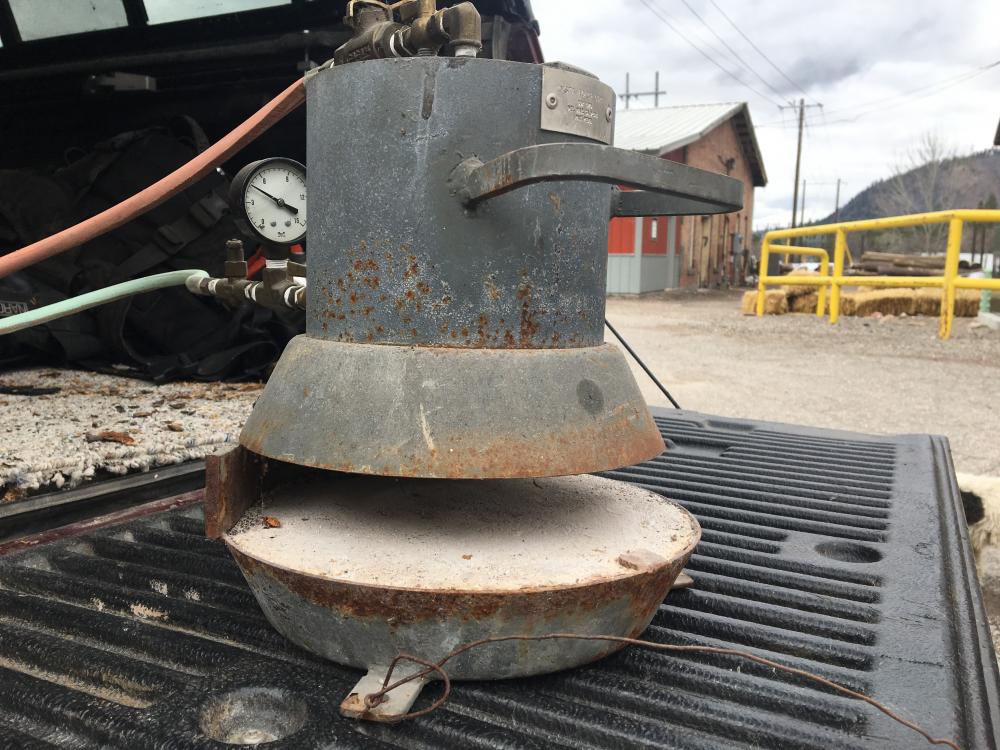
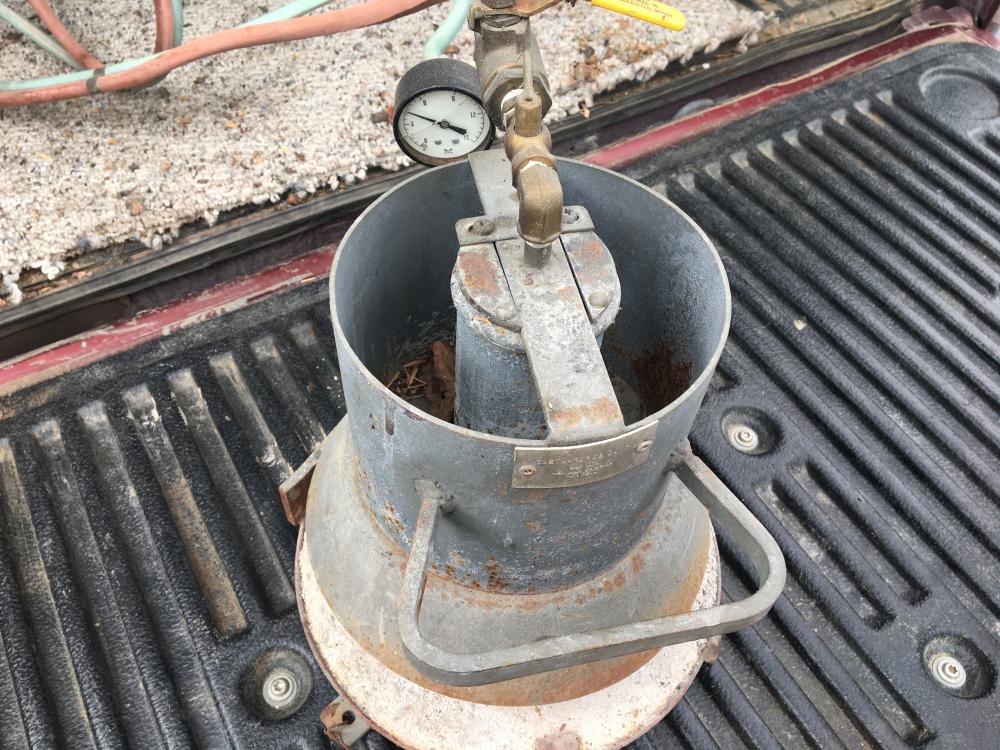
Someone drug this by the shop the other day to ask if they could use it as a forge. I'm guessing some kind of annealing or tempering furnace. Or, is it a farrier forge for horseshoes? Looks like it runs on acetylene and Ox. I did a little searching but couldn't find anything.

-
How to find a good scrap yard
Wroughton replied to derrabe's topic in Blacksmithing, General Discussion
Do not pay more than $.30 a lb unless you're getting an anvil. I would guess you still have a reasonable chance of finding some suitable scrap since you're near Detroit. Heavy is good Find the nearest mom and pop fabrication shop to start your quest. Ask questions, go onto the next one until you find what you need. Also, there are 8 blacksmiths advertising in the YP for the Detroit area and there is a group (MABA) that might be able to help and I STRONGLY suggest you join. A simple search pulled up a truck load more info for your area. Good Luck -
Hi Don, Budget matters, as does your power supply. I'd argue for a Mig or Tig set up but you should also have a torch. OA torches help with localized heats and popping off hard to remove scale. I also use my torch set up when making rivets and squaring off hex bolt heads for hardware. Think of all the small localized heats you've needed to make. Also good for making stubborn coke or coal decide to burn. Torch welding was the first technique I learned in high school shop and its an acceptable process for fusing steel or welding with filler metal. Much like Tig welding as it's slower going but you manipulate the puddle with the pressure from the gas jet. Expansion and contraction can be a problem due to heat control. After I learned gas welding I moved on to stick welding and then to Mig and Tig. I Arc weld when i need portability or just general welding outside. Arc welding rarely cares about wind. I Mig weld when I need to get a lot done. I use the Tig when I want/need the weld to look good or just blend in all together. It saves a huge amount of time on cleanup even if it's a much slower process than Mig welding. Tig is also handy for attaching stems, branches and other small diameter stock together. Each process has it's place. This is my idea of a great welding and auxiliary heat kit - 1- OA journeyman torch set. Most equipment can be rebuilt for about 1/3 the cost of new. Victor, Smith, Harris I highly recommend a gas economizer, which is essentially a pilot light and valve that allow you to quickly use the torch for a localized heat and then set it aside in the off position. When you need the torch again you pull it off of its perch and swing it by the pilot light and boom, you're Vulcan with forge fire coming out of your finger. The analog version of an induction forge. Sorry, no beeping. New prices will make you faint but rebuilt are fairly inexpensive. The same people that rebuild regulators and gas valves are good contacts for sourcing. As mentioned above, flash back arrestors, a tight adjustable wrench and a bottle of slightly soapy water for leak testing. It's a little unnerving when you look at your acetylene bottle and it has a minute pilot light flame coming off the regulator. Always check that your bottle are off before leaving the shop. Well ventilated spaces are preferred for all the obvious reasons. 2- 200 amp, 220v Mig. Many used units around and someone mentioned going to local welding supply stores for used/traded up inventory. $600 to $1000 with argon/CO2 mix bottle. Most Miller and Lincoln wire feed welders from the 90's on are dependable and versatile machines. Welding schools are also good places to find used welding equipment. Smaller welders are great tools for smaller work but entry price for all but harbor freight gear gets you into the $500 range after you gear up. Shop around and get into a slightly bigger welder. If budget is tight Lincoln Arc "tombstones" seem to pop up fairly steady in my area and rarely exceed $400 with leads. Like power hammers, buy the biggest welder (within reason!) you can afford, or more importantly, power. You can turn down a large welder and weld light gauge material but it can be exasperating trying to make a small welder weld heavy gauge. You'll need your OA kit for that but that's way down the line. Training? Practice. Dare I say the Utubes? Actually great material there just look for quality training videos. There are private parties and welding supply companies that have sufficient info and video content to get you started. Nothing replaces watching a master welder in person though. Good Luck!
-
Now you're just showing off. That's the best use of an old BBQ I've ever seen.
-
What is the most dangerous tool in your shop?
Wroughton replied to Glenn's topic in Tools, general discussion
1 - Myself most likely. 2 - The chainsaw is probably second, but it doesn't start itself so back to number 1. 3 - The iron worker is next. Old mechanical can make fingers disappear real quick if the guards aren't on. 4 - Chemicals and paints all piled together in "paint locker". 5 - Guard removed off the pulley on the small ph. More worried about dog ears and tails. Safety meeting is now scheduled for 3/27/17 -
The owner wants to rent a space but he's afraid you're going to burn it down. Make sure you can lock your space. And then maybe lock up your tools that can be moved easily. Affordable rent doesn't matter for squat if all your tools are stolen. Having a show of force for the fire marshal like extinguishers, smoke and gas detectors can't hurt. Though in a place like that it doesn't matter unless you have sprinklers. Good luck, lock your tools up and don't burn the place down.
-
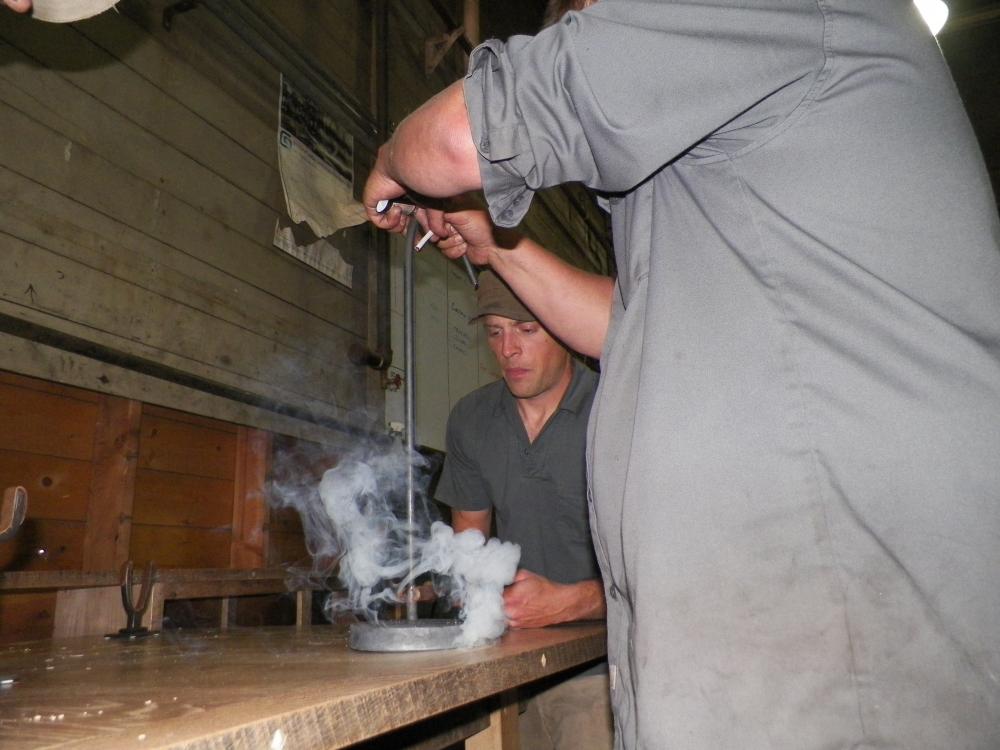
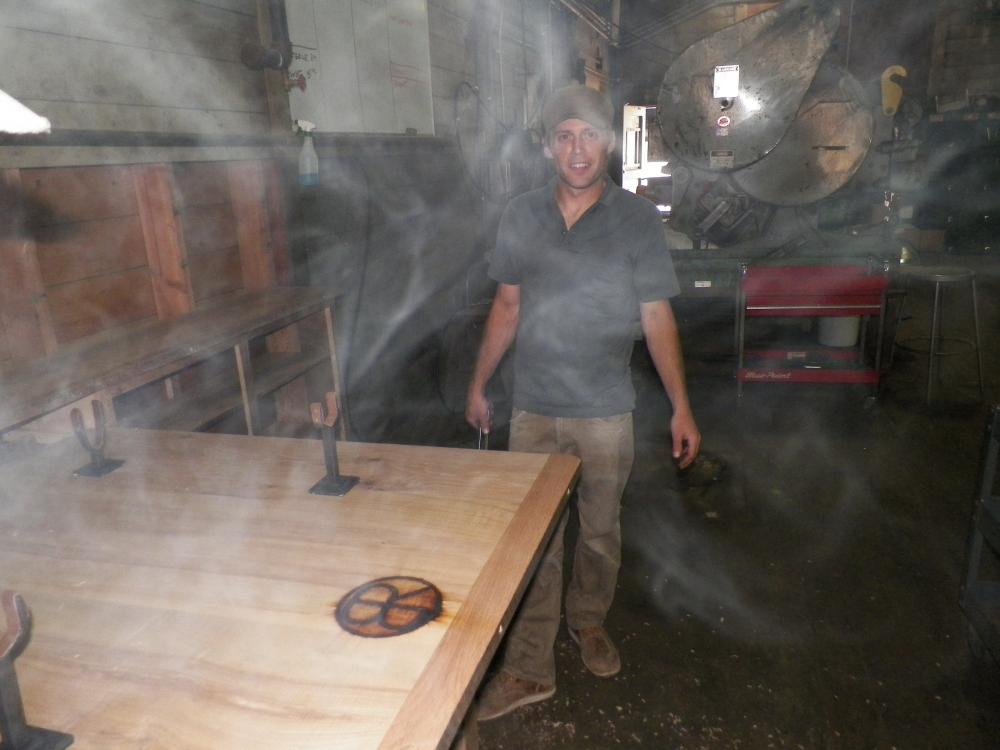
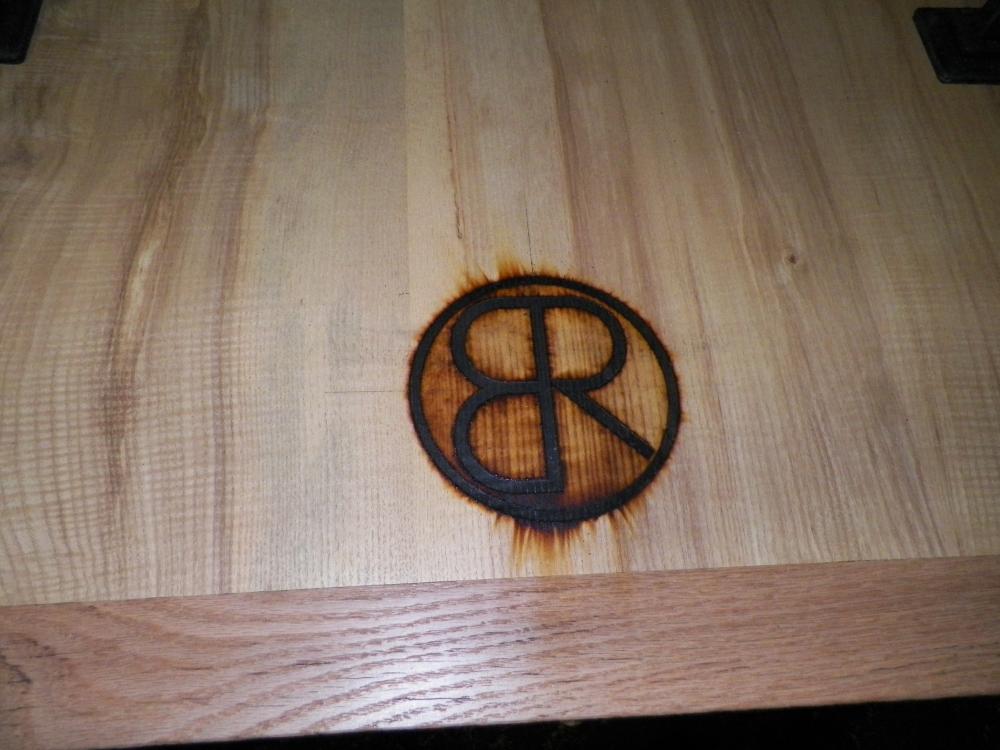
Other than the obvious problem of making sure you're contacting wood with your iron, temperature is the biggest concern. Red hot brands tend to get volatile gasses excited and create quite a show, but not a lot of detail. Black hot brands smoke a little and produce detailed branding. Practice on the same type of wood you want to brand before committing.
-
Starting up a Blacksmithing Business
Wroughton replied to Tristin Haas's topic in The Business Side of Blacksmithing
I'm a Wroughton SOB -
Starting up a Blacksmithing Business
Wroughton replied to Tristin Haas's topic in The Business Side of Blacksmithing
I would say that everything above here is true. However, after reading it, 99% of folks wouldn't want to go into business for themselves. In any fashion. Tristan, I would suggest honing your skills and forging small widgets to sell for your grubstake. 20 meat flippers or 20 letter openers makes a $1000 @$50 each. That's a nice anvil, a good used 200 amp MIG welder or a whole used tool chest full of tools. You're young, stockpile some forgings while your overhead is low and find an avenue for sale. For a financially stable smith I would say the best thing you can do is always make $50 to $100 items to sell and don't search out custom commissions. If you always have a 55 gallon drum of meat flippers full it might as well be filled with $50 bills. Also, if you put an extra twist or detail in one they become $75 meat flippers real quick. Can you show us any of your projects? What's your favorite thing to make at the moment? Start small, no big moves and beware of customers and jobs that are too good to be true. If things sound fishy ask about the "budget" early. When they frown and blush you'll know it's a good time to concentrate on the jobs you do have. Good luck and keep asking questions. -
I've been Frosted! You make it sound like I chucked a grenade. For someone that likes the "particulars" you sure broad stroked my two cents. I haven't ruined an anvil yet, but I am still practicing. One more time. Clean the gouges to remove cutting slag. Heat the anvil to about 120 degrees by putting a weed burner on the body of the anvil. There are temp pencils for this or use an app on your phone. All you're doing is removing ambient moisture and that will help make sure you get a good weld. You don't want to anneal the face. Weld with 7018 stick rod or 70s MIG with a 200 amp or bigger machine. Since it's cold out maybe wrap the anvil in a bat of fiberglass insulation after your done to stay away from any thermal shock (overkill IMHO) but this is also why you bring the whole anvil to the 120 temp. It will cool slowly and everything should be happy, not Frosty. Sure, there will be a small amount of annealing around the weld but the face will hold. AGAIN, these small cosmetic fills are protected and contained by the original anvil face material. After a lot of hammering (years) you might notice a slight dipping from scale abrasion in the filled spots but it will be marginal. The nature of the marks are the only reason I'm advocating for this particular method. If half the face was gone I would be singing a different tune altogether and we'd be getting into a proper Soderfors metallurgy class and heat treat discussion/speculation. To the comments about leaving the scars.....UGH! I can't visualize working around those. If I was that much of a masochist I'd just pound on my thumb a while . I polish out nicks and scratches on my anvils. The first time you have to dance around those marks you'll see the reasoning behind that. The time you forge your piece into one of those gouges and you'll be getting out your welder. As with any welding, or any shop work for that matter, good ventilation is a must. And, one more thing. I forge and weld vanadium wrenches and other tools all the time. They readily weld with 7018 and 70s wire and are used as handles on camp stoves and augmented tooling without failure. Live and learn but don't let the fear of the boogeyman keep you from repairing your tools.
-
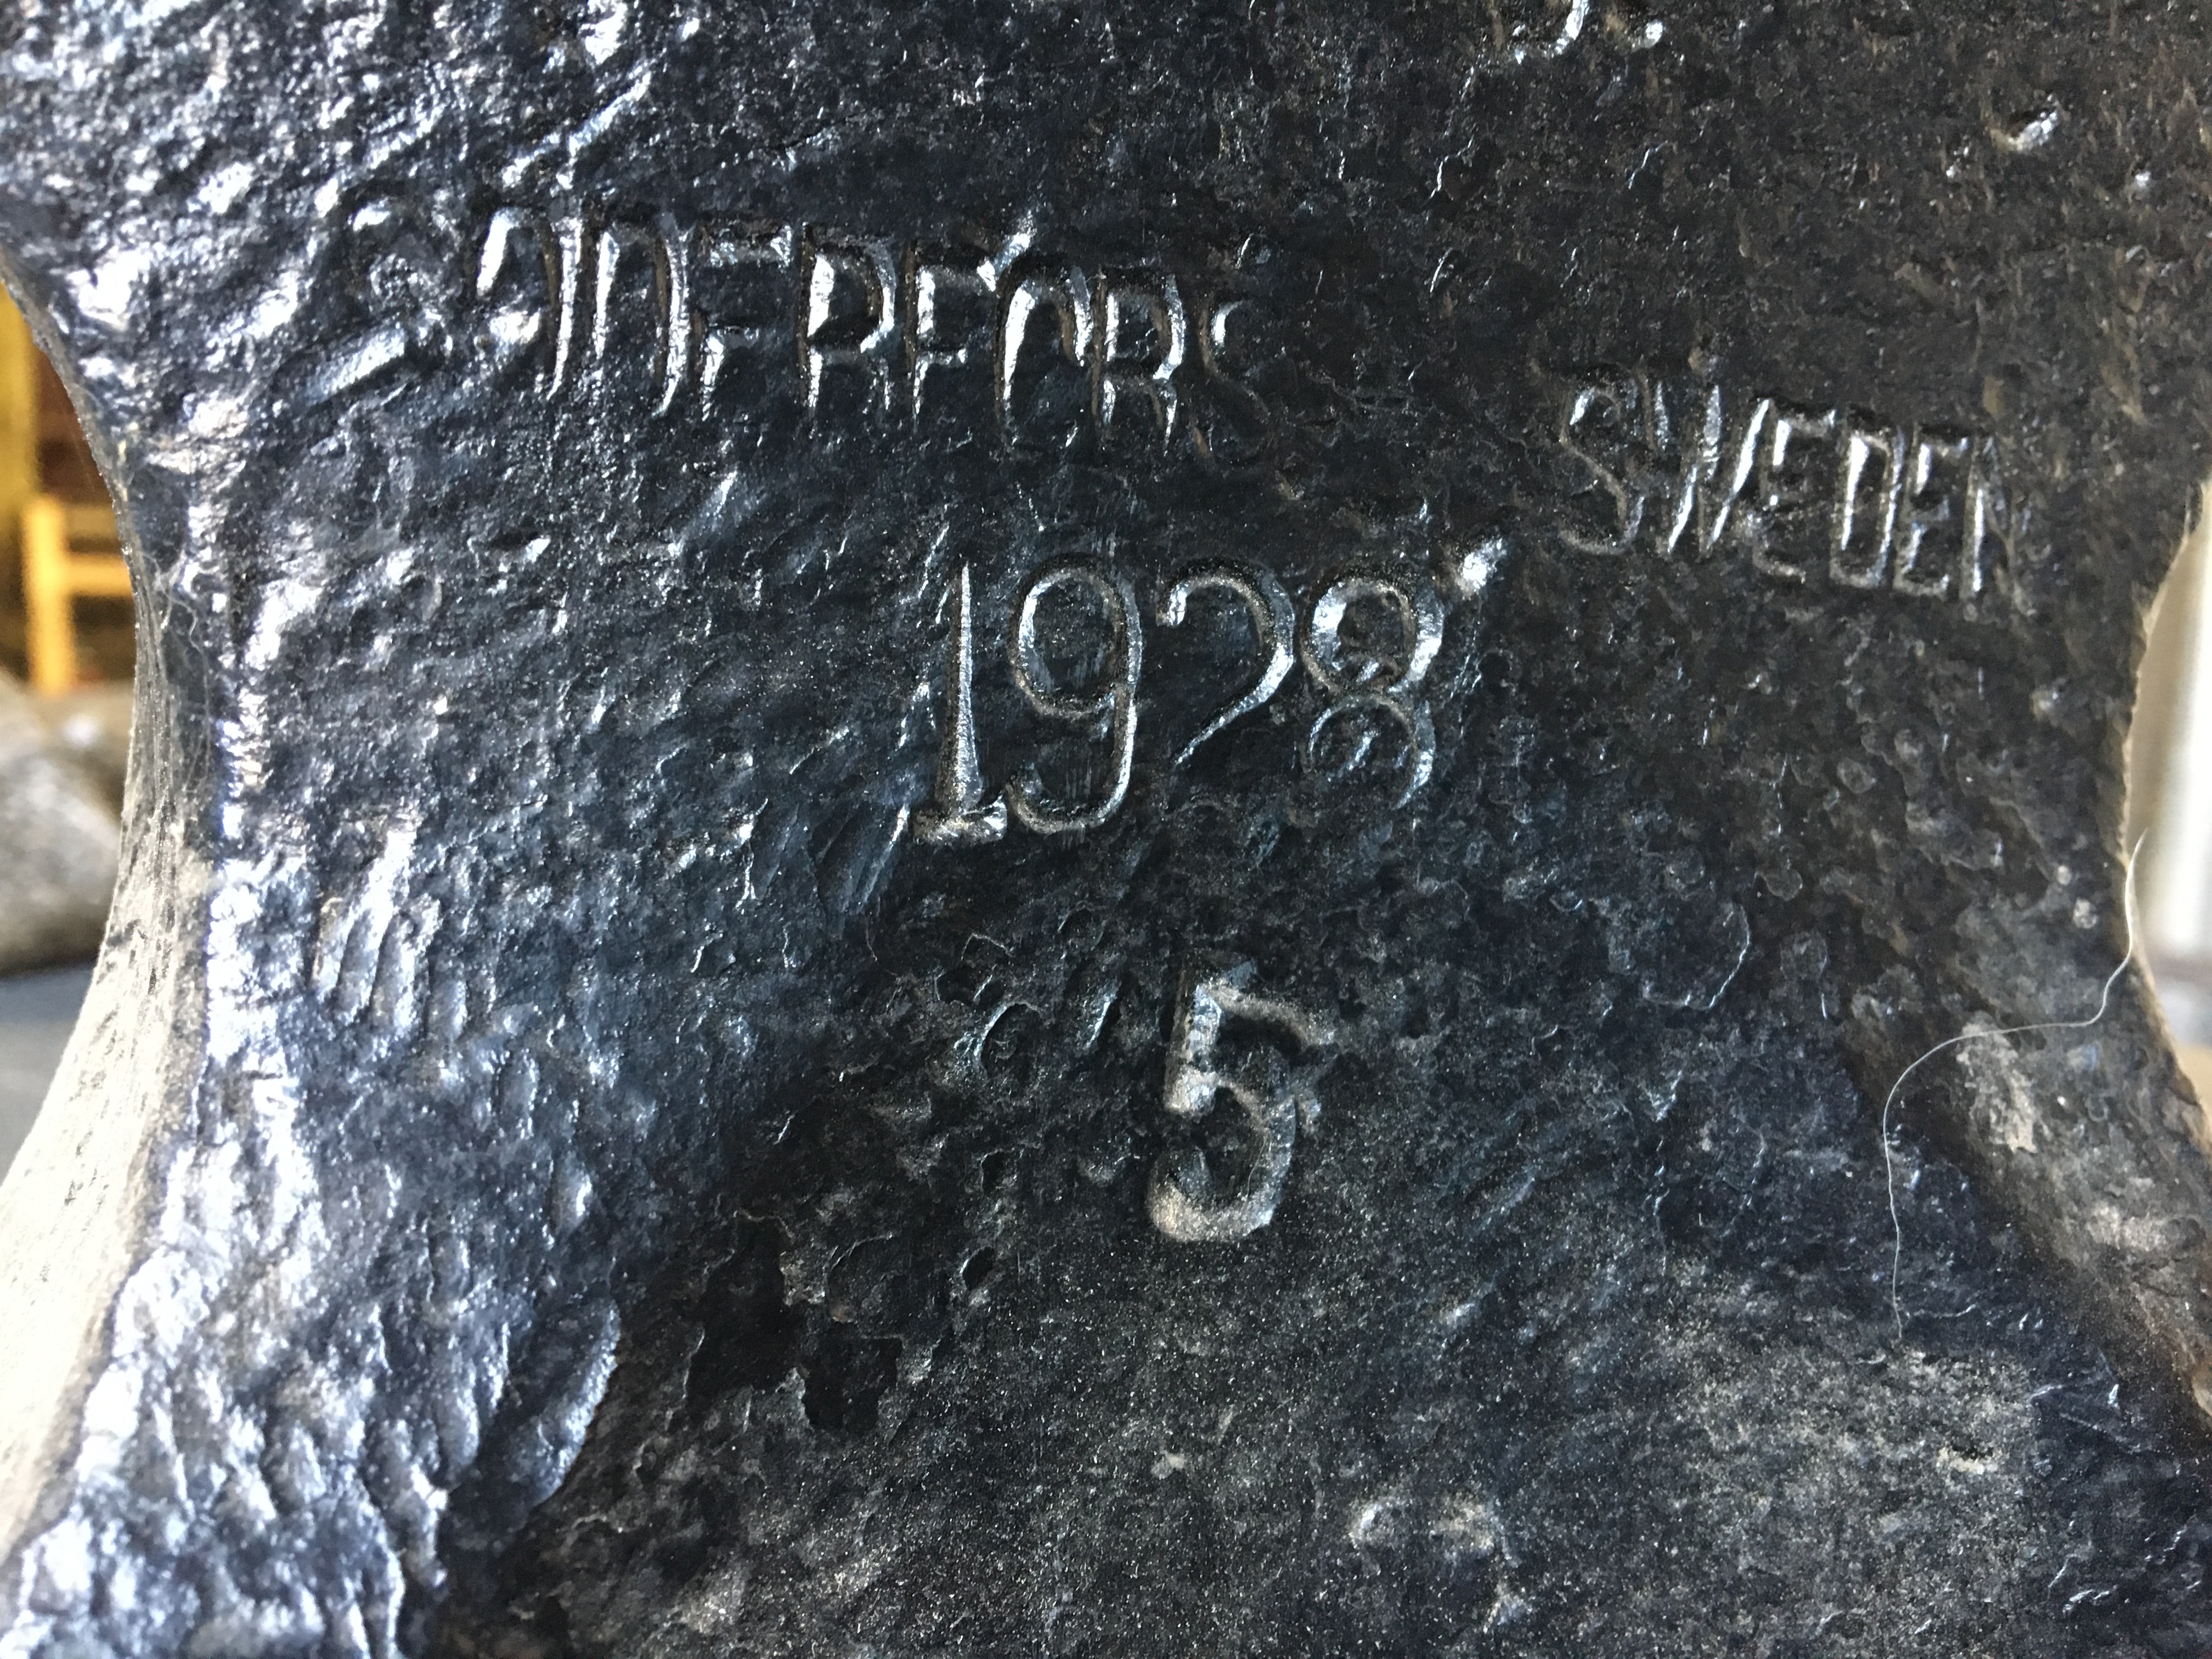
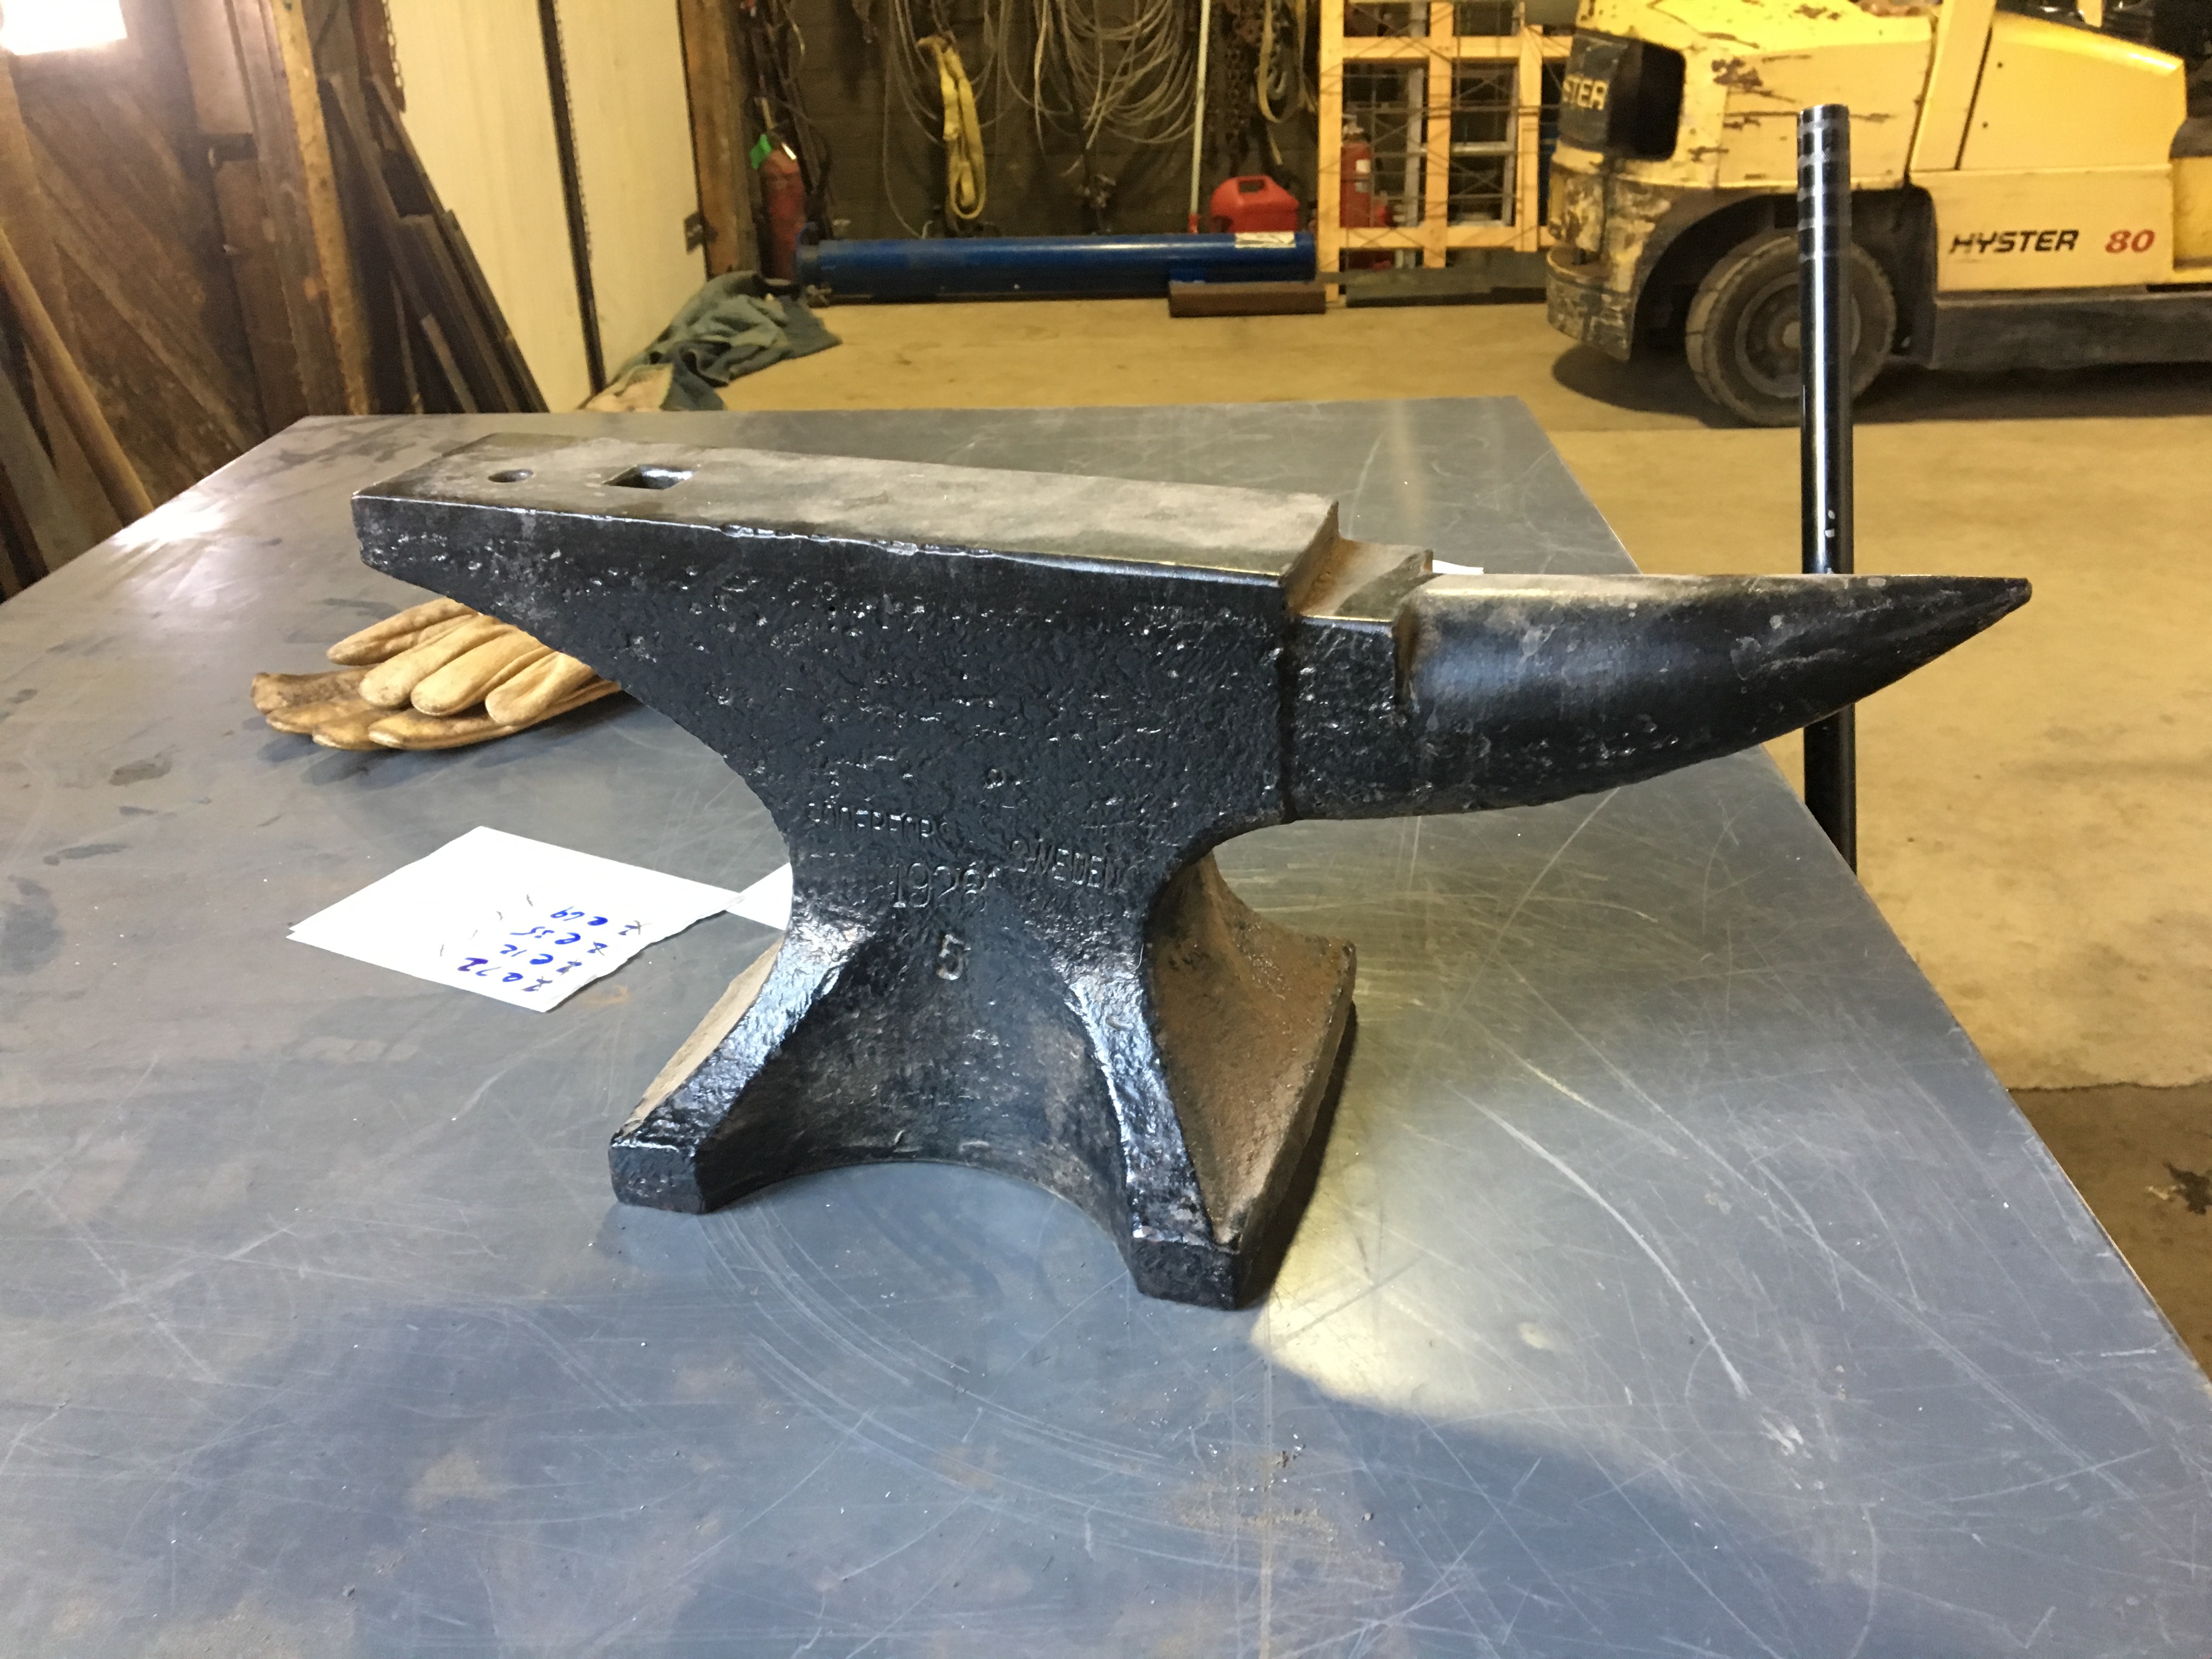
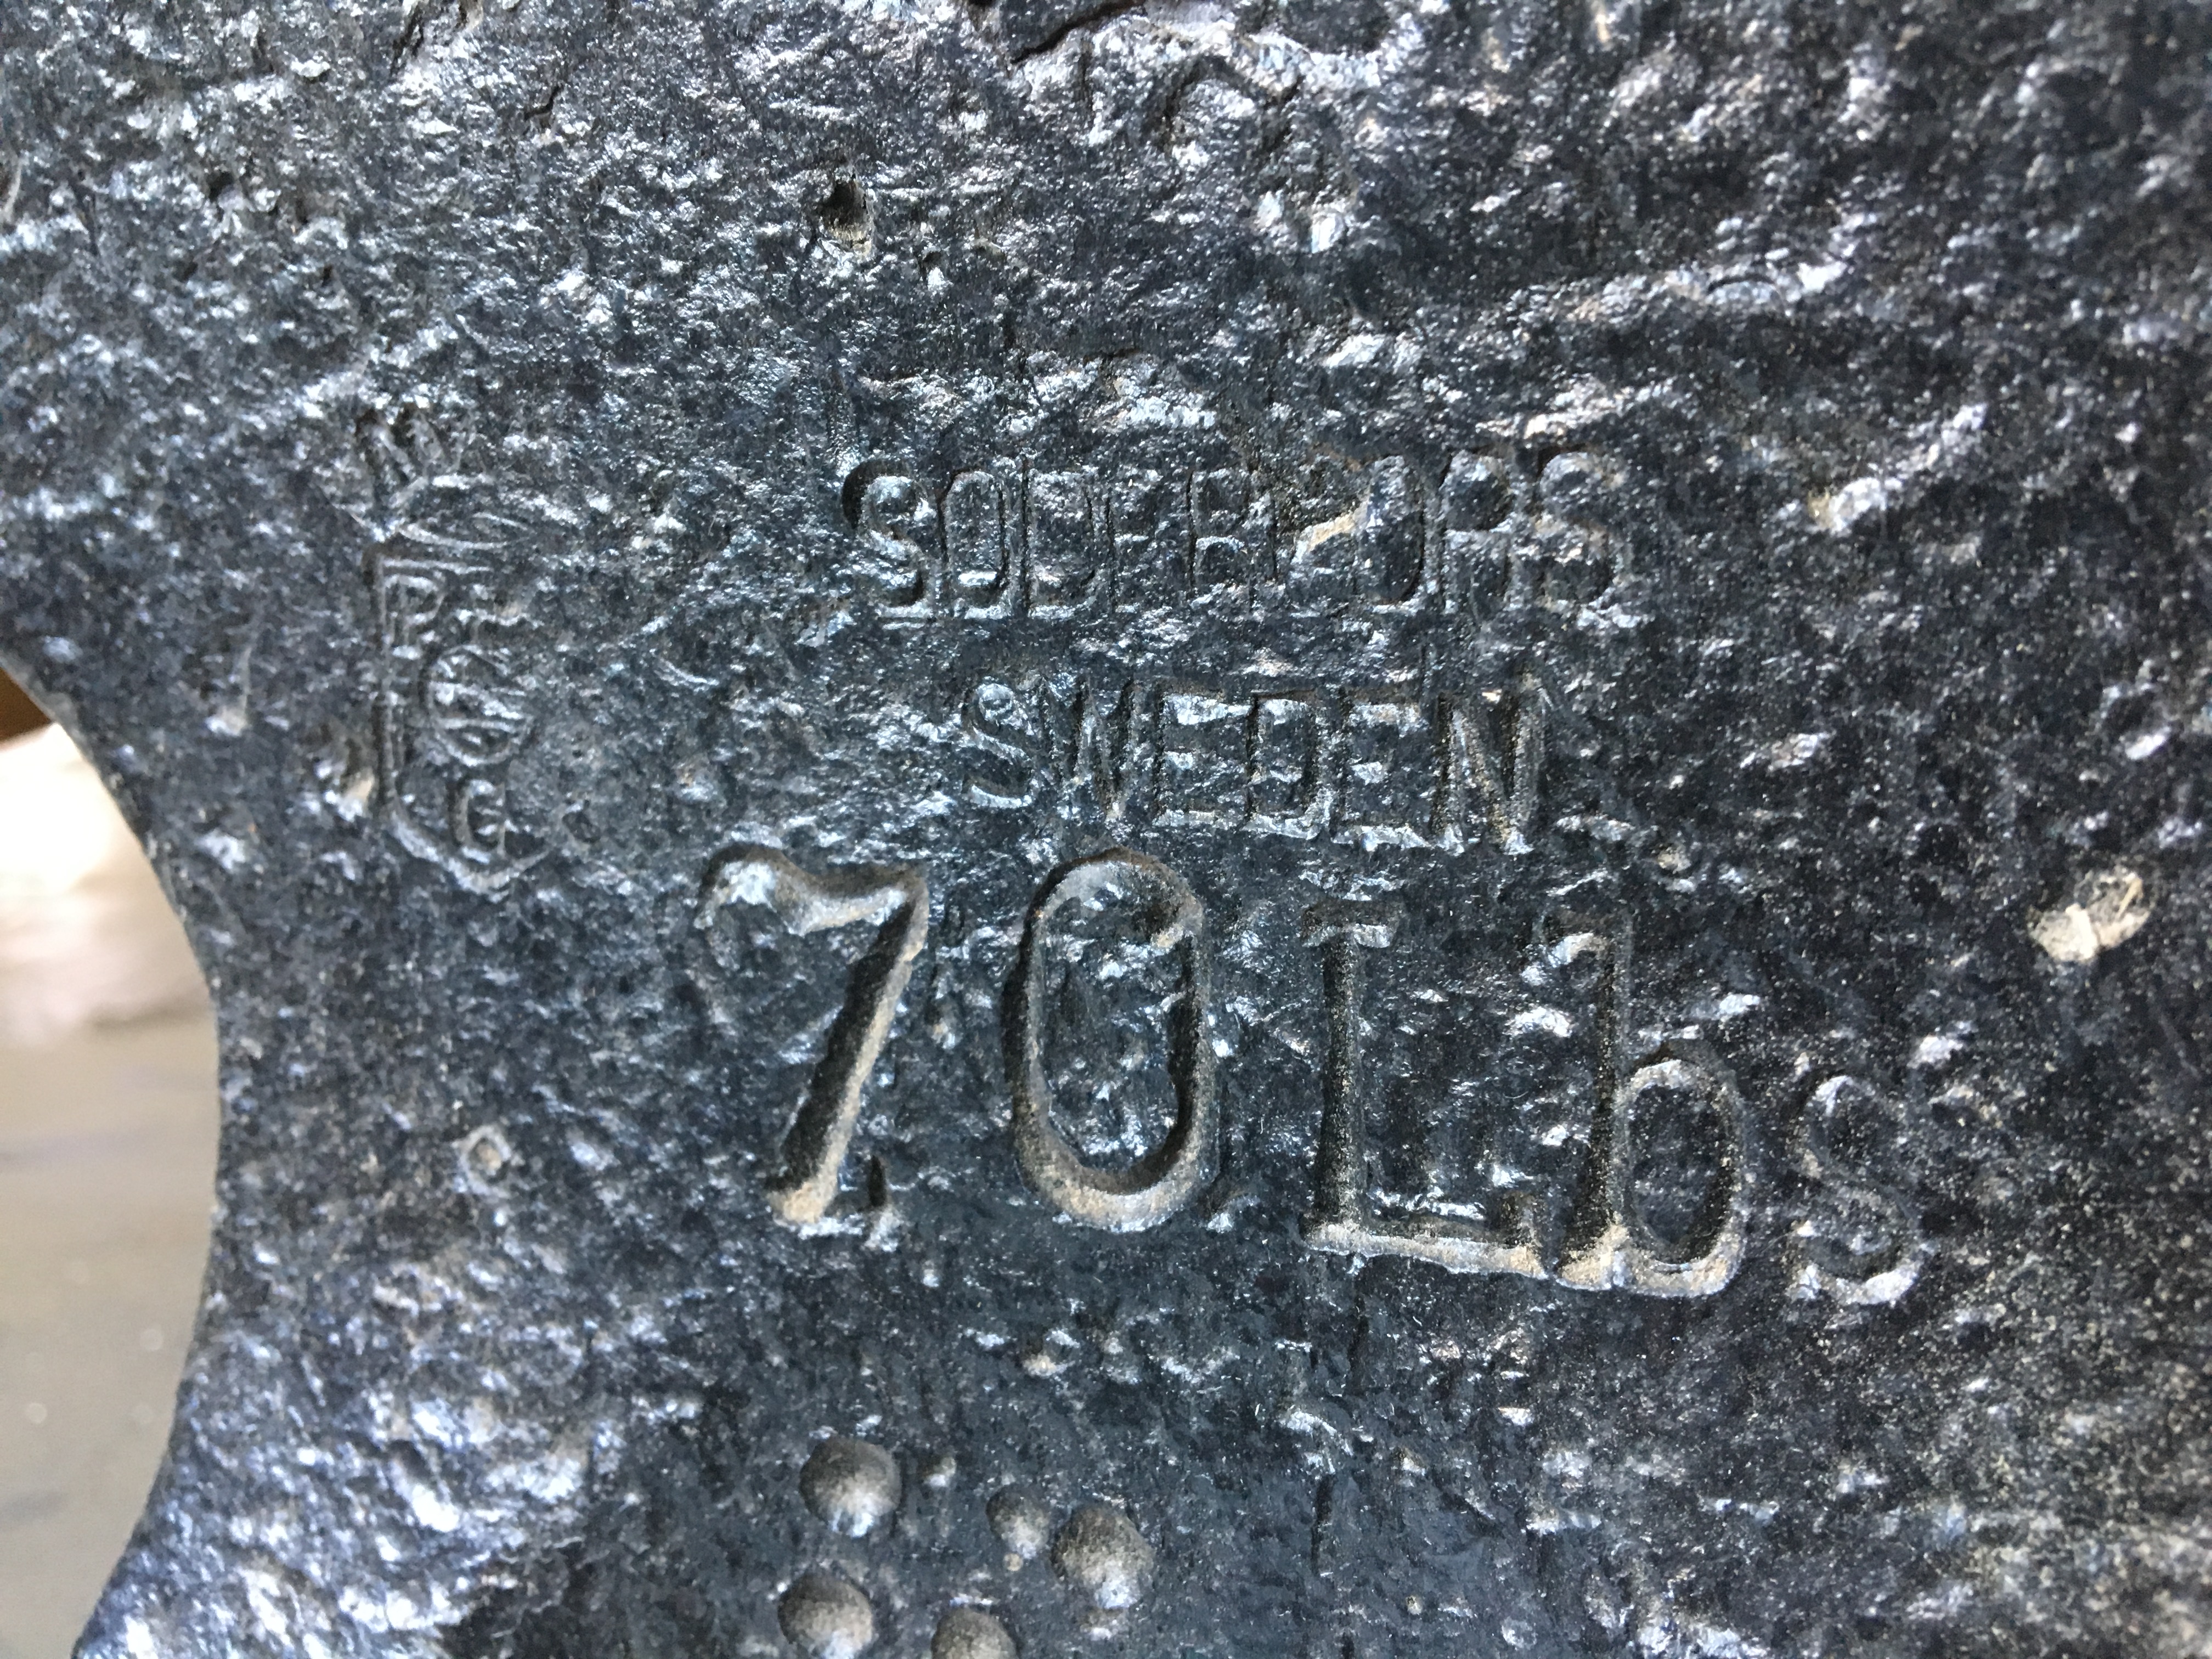
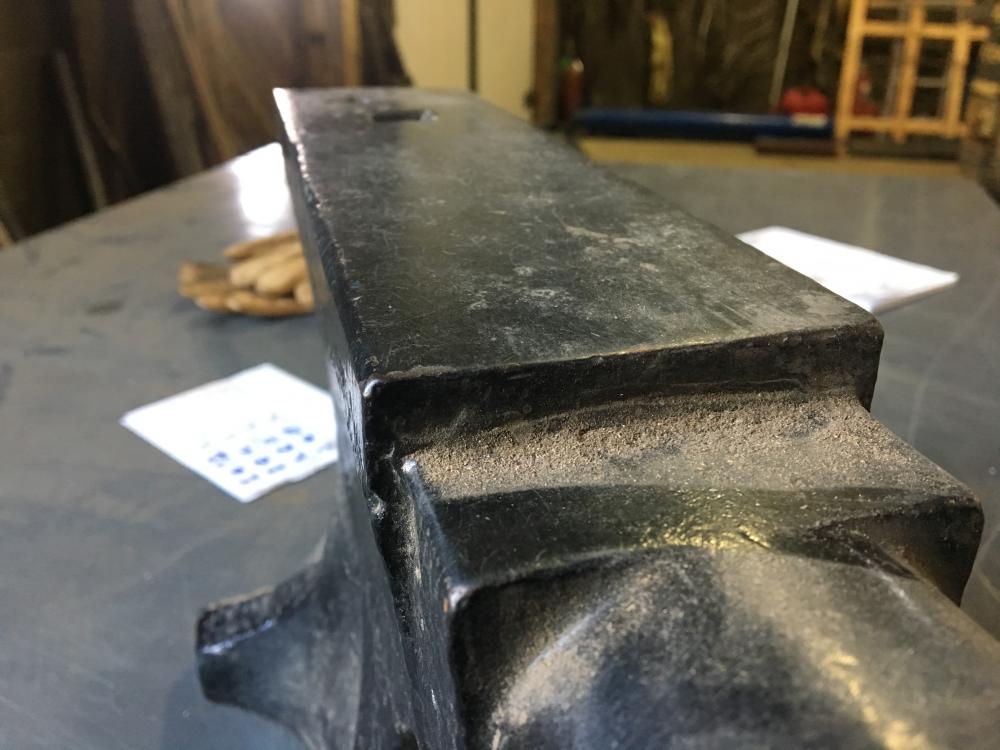
Here's my Soderfors. The face of the anvil to be repaired doesn't look that ground in comparison and the table is flush with the horn as is mine. I'd clean those cuts up, weld them full and start pounding. Mine is new old stock. A professional door stop.


-
Negative Bogiron. Simply pointing out that filler metal is filler metal and it usually doesn't care what process you deliver the goods with.