zadvorney
-
Posts
71 -
Joined
-
Last visited
Content Type
Profiles
Forums
Articles
Gallery
Downloads
Events
Everything posted by zadvorney
-
First sculpture with the new anvil
zadvorney replied to bebeaux's topic in Metal Sculpture & Carvings
Super nice. I like the way it will "spill" out or off of something. I'd set it in a basin of blue glass beads for a water effect. -
My Clontz/Spencer tire hammer build
zadvorney replied to Stitch's topic in Power Hammers, Treadle Hammers, Olivers
Nice job on the build. They give off one heck of a wallop when you're working. Ear protection is a must. Decided on a color yet? I never painted mine and I kind of like it that way. LOL -
That is Really nice 58. Wonderful.
-
Ray Clontz build - Lead weight needed
zadvorney replied to Stitch's topic in Power Hammers, Treadle Hammers, Olivers
If you are building direct from the plans then don't worry about the added angle on the sides. Get some Durabond 45 for doing drywall. Mix some up thick and make a blob of it on the yard. As the stuff starts to set, carve out the correct size hole. Let it dry for a day. Melt lead and pour into mold. Use a hammer to remove the Durabond. Drill and mount the thing. The lead isn't going to jump up and bite you. A filter can be purchased at a welding supply store to filter the air if you are concerned about that. Wear disposable gloves. If you watch the video on how I did it then you now know how NOT to do it. LOL. The Durabond is how I make decoy weights. Good luck with the build. -
I like it.
-
Finished new tire hammer
zadvorney replied to canada goose's topic in Power Hammers, Treadle Hammers, Olivers
Yea Man! Fire up the Forge! -
Videos of general theory + techniques
zadvorney replied to Joel OF's topic in Blacksmithing, General Discussion
I watched the videos. Thank you for the tips. The tooling was helpful to look at. -
wonderful
-
https://www.amazon.com/gp/product/B00EP1R65M/ref=s9_dcacsd_dcoop_bw_c_x_7_w Regulator 0-30 psi I read the shipping verbiage and RV PARTS Online might have a supplier in Canada so no crazy shipping. The number is in the screen to call for asst. Good luck.
-
Ben, you are more than welcome to order it and send it to my house. Come pick it up or I can meet you in Buffalo. PM me if you want. Heck, just drive over and have a nice dinner with the Mrs. and pick it up. I live just south of the City
-
Finished new tire hammer
zadvorney replied to canada goose's topic in Power Hammers, Treadle Hammers, Olivers
Upload to youtube and get the link from there. I'm real happy for your completion! It's a good feeling isn't it. Best of luck.... and get those pics up. -
Machinery's Handbook, 1924 edition
zadvorney replied to VainEnd84's topic in Heat Treating, general discussion
THAT is a lot of information! -
Chambersburg utility hammer
zadvorney replied to upsetter's topic in Power Hammers, Treadle Hammers, Olivers
Very pretty. Not for long I'm sure but... -
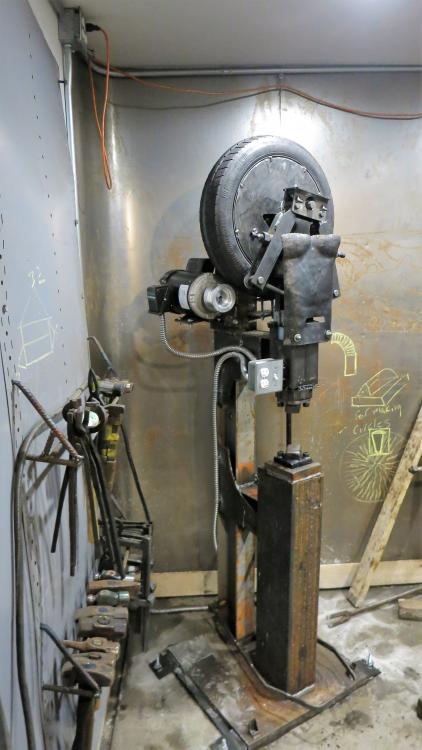
Started Building a Ray Clontz Tire Hammer
zadvorney replied to zadvorney's topic in Power Hammers, Treadle Hammers, Olivers
Thanks Blou. I use the PowerMig 210 and didn't have an issue. I had to cut a few things off and remake parts. Because of my mistakes I could see that I got good penetration with the mig when I looked at the cross section of the offending part. The wire size I used was .035 and C-25 as a shielding gas. If you use a larger wire size or cored wire you can do heavier pieces but I did't see the need. The main advantage with stick would be that your parts don't have to be as scale free as with mig. It took 20#s of .035 to complete the job and I went through 300 cubic feet of gas or two bottles. For cleaning the metal before welding my friend gave me three Norton grinder disks. The ones that are made on a sheet of heavy fiberglass backer. They were great for creating a bevel on the parts for the weld fillet. Use a ribbed backer disk and you might only use one the whole job! WOW do they remove scale and welds and skin fast. https://www.mscdirect.com/product/details/05720362. -
Started Building a Ray Clontz Tire Hammer
zadvorney replied to zadvorney's topic in Power Hammers, Treadle Hammers, Olivers
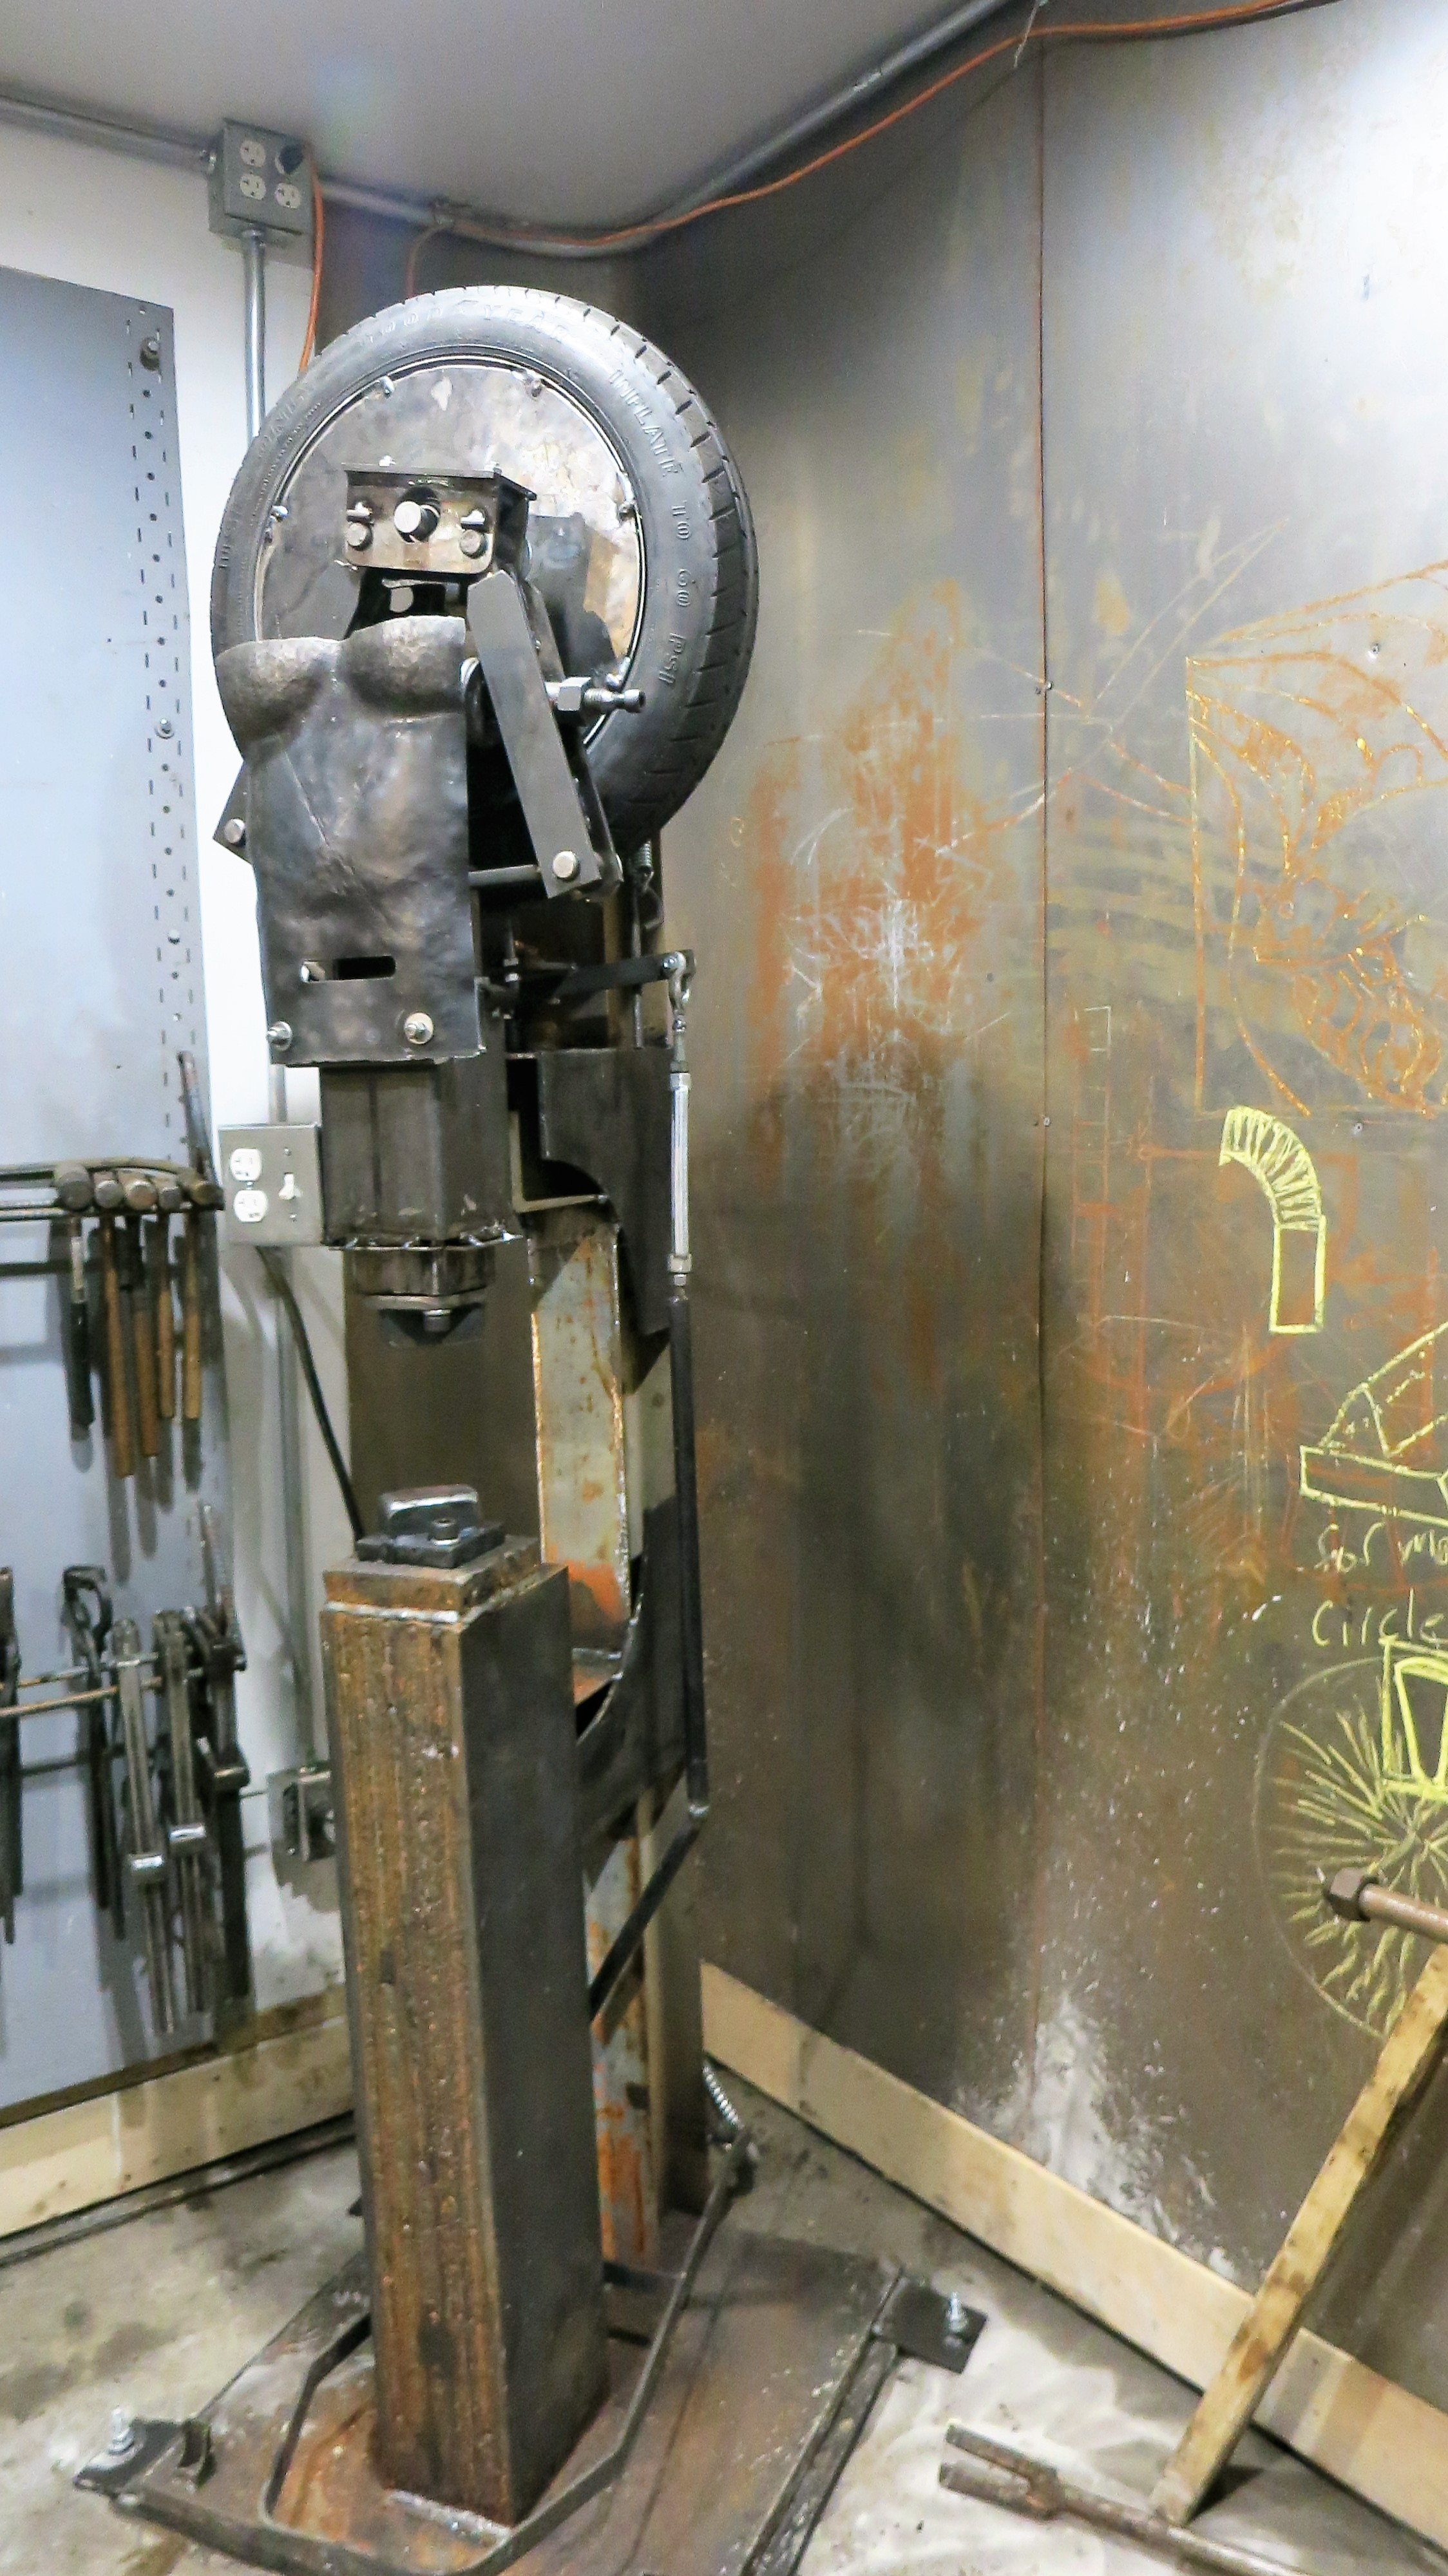
Bush, stick with it. It's well worth the effort you are putting into the build. As far as I can tell, the ratio between the tire diameter and the drive pulley wheel is what is important. Too big or small and the hammer won't have the correct travel. Too big or too small and the motor will not drive the wheel that drives the hammer at the correct speed. If it were me, I'd just make sure the rim size is close. The 4 bolt vs 5 bolt pattern is most likely for strength. If you look in the plans it calls for a square shaft axle to mount the hub bearing on. The thing that the tire spins on. If you can get one for a 4 bolt setup then all things being equal, go for it. I wasn't the brainiac who drew up the plans though so be smart about it. It's a home built hammer that has a lot of latitude with its actual components. The physics we can't mess with. Best of luck. I hope this helped. Ask any time. -
UHMW. It is what the plans specified. I'm looking at it like it is something I must have done. I highly doubt that they would have specked it if the UHDM would not work.
-
Agreed. I used it today for a while. Not much. It didn't heat up but I'm still watching it closely. Next week I'll price some brass sheet. I like the hammer just the same. I did a project that would take me 20 hours of work and got it down to 6. That is a ton of time and fuel savings. Also easier on the arms.
-
I'm concerned for the last part of your comment. What does "for now" forebode.
-
Funny, I just got back from the river trying to catch one of those and HERE they are all along! Good stuff.
-
Great....did not know that. I see brass sheet in my future.
-
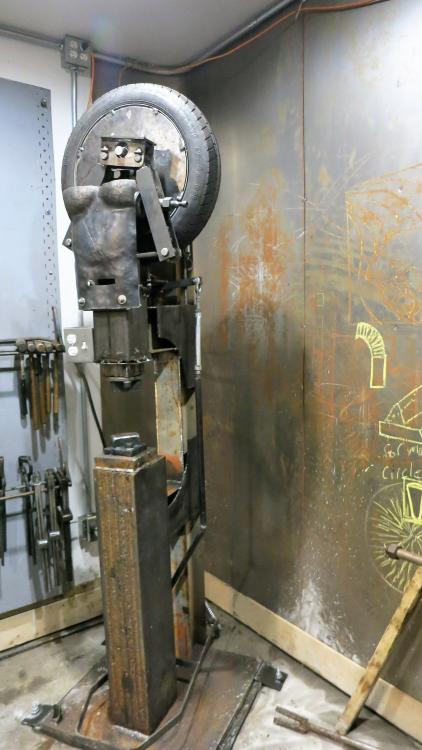
The amount of oil I need to keep the hammer lubed is incredible. The hammer seized up yesterday. That was fun taking apart. Five hours later and a few mods later I'm back in business. Today I lubed the heck out of it and the hammer is hot as a pistol. Does the high density plastic swell? Would brass bearing surfaces be any better? At least I know what to do with my used oil....and before you jump on that one, lol, I've been using new 5-30w. Marine grade axle grease wasn't the cure either. Help
-
Started Building a Ray Clontz Tire Hammer
zadvorney replied to zadvorney's topic in Power Hammers, Treadle Hammers, Olivers
Thanks Crappie. It's was a fun build. Blou, get started on yours soon. The weather is going to change and you won't want to be in a barn welding and grinding. -
Bolting down tire hammer?
zadvorney replied to setlab's topic in Power Hammers, Treadle Hammers, Olivers
I did use this anchor type 1/2"x 8" I cut 1/4" plate 3"x3" and made wings off the 1" base of the hammer. I beefed up the hole I drilled in the plate by welding a thick washer I made from scrap around the hole. Drilled the holes in the concrete where the holes in the plates lined up. Put the anchor in the hole. Put the plates on and welded it in place to the hammer base. Let cool and tightened the nut on the bolt. Like frosty said. The stall mat under the hammer helped with the vibration. I'm using another chunk of the leftover mat to have a standing pad in front of the hammer. -
Started Building a Ray Clontz Tire Hammer
zadvorney replied to zadvorney's topic in Power Hammers, Treadle Hammers, Olivers
Thanks John. One can never have enough tools. -
Started Building a Ray Clontz Tire Hammer
zadvorney replied to zadvorney's topic in Power Hammers, Treadle Hammers, Olivers
So far I figure 55 hours and am close to the $1700 mark. I have some stock left over as I bought more on purpose but not much. I used everything on the list with the exception of a few nuts and washers. I can't say enough of how I enjoyed doing this build. An absolute blast. A great project to do with a kid or a friend. Spending some time in the shop playing with drills and fire and grinders is good for the mind and body. I used a Lincoln Electric Power Mig 210 for the welding. It performed flawlessly. I could have done the project with the old Tombstone AC stick welder from the 50's that I learned on, but the power from the mig and it's precision made it easier. I purchased a used Victor 42 plasma cutter for the project. I didn't use it as much as I figured. I used it when speed was priority over precision. An expensive piece of gear for sure. As I got used to using it, it got easier. I made a stand off jig so the tip couldn't touch the work. It also helped when I used a guide to rip along. The first time I used it was with damp and dirty air. I went through three tips and electrodes before I figured that out. $$$$$$$$$ So I installed a home built air cooler and water/oil separator. Better but it needs a micron particulate filter just before the machine to be perfect. A portable band saw was the BOMB for this job. My harbor Freight cheapo model had it's work cut out for it. A heavier duty one would have made my life loads better. Better still, a stand up band saw. Or a metal chop saw. Some high end bits and a metal hole saw set could be helpful. I got away with a low end set of bits and lubed the crap out of them as I cut. Never dulled a one. Broke a few when the work slipped off the drill table but that was my fault. A good drill table clamping system is on my list of things to get. The drill press I used is a 50's vintage as well. I rebuilt that a few years ago. So worth it on the build. You can't drill through thick metal with a hand drill. The more precise the holes, the easier the pieces go together. Definitely cut things as close to perfect the first time. Square things up. Be patient. Enjoy the ride. A very big thank you to Ray Clontz for the design and Clay Spencer for the excellent plans. My hats off to both of you. Spend the $30 on the plans if you are serious. Well worth it.