

Sanderson Iron
-
Posts
158 -
Joined
-
Last visited
Content Type
Profiles
Forums
Articles
Gallery
Downloads
Events
Everything posted by Sanderson Iron
-

How big of a hammer
Sanderson Iron replied to Millennial Blacksmith's topic in Power Hammers, Treadle Hammers, Olivers
This might interest the fellow who started this thread, if he's still in business. Yesterday my assistant and I were each forging 3/8" round tapered to 1/8" round about 6" long, then bending them. He was using the 25 pound Little Giant, and I was using the 100 pound Hackney. We start with a length of 3/8, draw the taper and then bend them under the hammer using a swage and a hand held tool; then we go to the press, sheer them to length, and start over. He and I were making parts at the same rate--each getting to the sheer at the same time. The 25 pounder was just as fast as the 100 pounder. There are many times when a smaller hammer is as fast or faster than a larger hammer. As long as you are working within the capacity of the hammer, the faster blows of the smaller machine can be more effective than the heavier, slower blows of a bigger hammer. I really doubt that the 250 pounder could have kept up with the 25 for this job, and I didn't even try. Bigger is not necessarily better. -
How big of a hammer
Sanderson Iron replied to Millennial Blacksmith's topic in Power Hammers, Treadle Hammers, Olivers
He got to where he was going (assuming it's free of center splits, etc.) with what he had available. But from a technical review, why would this fine blacksmith want to swage at the same speed at which he draws? Swaging is most efficiently done with fast, light blows. But a self contained hammer can't hit at different speeds. Any decent mechanical hammer can hit hard and fast or hard and slow, as well as fast and light for swaging. (We've been over and over this.) And the "single blow" he made was really one of many blows of which one struck the work. (That's very different from the one-cycle, one-hit with a mechanical.) He did it well, I'll say, but that is a bit of a trick with an air hammer, and it's a stunt with the smaller hammers that most shops have, which cycle much faster and have little control. Yet even the 25 pound Little Giant can pick up its ram and set it down in one cycle. Obviously his operation is set up with tooling and so on to do this particular job a lot. The same can be done with a mechanical hammer so that there would be no need for any setting changes on the hammer for the different speeds that would work best. But as for the original question (how big of a hammer?) well, for that job, about that big. Thank you for the link, Daniel. It was fun to watch. -
H13 steel for blacksmithing tools
Sanderson Iron replied to lyuv's topic in Tools, general discussion
I suggest sending H13 to a heat treating place. I know there's the do-it-yourself part missing in that, and everyone has to set their own parameters where that line is, but after spending hours or days making a decent die, why wreck it in ten minutes? There are other alloys that are easier to deal with if you want to go the in-shop route. For drifts and smaller punches that are going to get a lot of heat transfer, I like the M series--M1 or M2. Old high speed drills with morse shanks are good for that (though you'd have to spark them to be sure) and you can buy HSS stock for lathes and such in rounds, flats and so on. These are great for hot drifts because of their high melibdenum content. Almost everything else can be made of good old spring steel. I even have sheering dies made from spring, for hot sheering, and that you can heat treat yourself quite easily. I have a spring hot cut that I made from 5160 (spring) in 1999; I use it regularly, and it's still doing fine. But that's another story not about your question. Metallurgists made those confounded high alloys like H13; let them deal with them. We're blacksmiths. Joel -
Guys guys guys! You all gave good reasons for why my original thread was removed, and I have absolutely no problem with that. I don't think anybody should be bickering here (well, unless it's with Thomas ). Certainly not on my account. If Glenn wants to do things his way, let him. Everyone has to set parameters or he's nothing. I would like to add, though, about this "newbie" talk: that is a silly term, because someone with ten posts online might be a person with forty years' forging behind them; and someone with 20,000 posts might never have forged so much as a ladle for his soup cup. So be careful who you call newbie, and respect everyone. I don't live in a world where a blacksmith's respect is derived from how many posts he's made with his computer, and I don't think you do either. I think I'll do that in another thread if I do at all, Glenn. (Are you THE Glenn?? Wow.) This has turned into a rule lesson, which has its own value. Besides, I'll need to take pictures and put things together rather than just spout words without support. Sounds like an article though. Well, we'll see. Oh and, thanks for paying the bills.
-
Geeeeez, Thomas. Be gentle, man. We get it. Not everyone spends enough time on this site to rack up thirty-thousand posts and know all the intricate bi-laws. It does make sense though. Thanks fellas. (Including Thomas) I apologize to whoever it is I need to for that mistake. Sorry, dude-in-charge. So... There is an OBI press for sale on Fleabay for $200 in Connecticut. (Sound better?? ) I guess I'll leave you to search for yourselves. Look up "Vintage Press" and you should find it. I have nothing to do with the sale or know who's selling it. I'm just trying to help out a blacksmith in that neighborhood. I've been tempted to start a thread about these machines, but there seems to be quite a prejudice against them; and I'm not sure it's worth the energy. But I will say here, a toggle press ("punch" press, "OBI" etc) is every bit as useful to a blacksmith as a power hammer. In fact, it can do things with ease that a hammer struggles with. (And visa versa, of course.) I can't think of anything a hammer can do that a press cannot. There is a reason why presses replaced hammers in industry, and we shouldn't ignore that and let them be thrown to scrap and miss their contribution to our craft.
-
I don't know if this is where to ask this, but this morning I started a thread in the Press area showing an OBI for sale on Ebay, and now it seems to be either moved or removed. Is there a rule I don't know about that we're not supposed to give links to for-sale ads? I hope I didn't do something bad. Or is there somewhere on this site for that purpose that I haven't found? Just curious. I hope it isn't an OBI bias. That would make people here pressist. Ha ha! Joel
-
25 Little Giant Tension Spider
Sanderson Iron replied to LuckyKnives's topic in Power Hammers, Treadle Hammers, Olivers
Pictures 'd help. -
Downside to Offset V-bit Tongs?
Sanderson Iron replied to carlson's topic in Tools, general discussion
Oh, I disagree, I do I do. It's a beginner's project just fine. You've got: drawing a taper, offsetting, leaving a boss and shaping the fit--done in matched pairs, all of which is excellent practice for any beginner with a wink of potential. (I wouldn't expect my sister to be able to do it.) You can add slot drifting the holes by and by--or forge welding the reins on. See, there's a pile of learning and practice for a beginner. The harm in buying is that Mr. Beginner won't get the practice from making them or the know-how to make a good pair when he needs to hold something odd for which there isn't a pair to buy. If a fella can't make his own tongs, he might want to consider another line of work. Give it a whirl, Mr. Carlson, and you'll have some tools you made yourself, and you'll be on the road to being a blacksmith when you're done. -
Downside to Offset V-bit Tongs?
Sanderson Iron replied to carlson's topic in Tools, general discussion
Limited budget? Beginner? Make your tongs. You'll save money and learn a lot in the process. (It's kinda like casting bullets.) Healthy budget? Been forging for 30 years? Make your tongs. They'll be what you need and will work right since you've been making them for 30 years. (It's kinda like reloading shells.) If you want to be a blacksmith, be a blacksmith. (It's kinda like hitting where you're aiming.) -
I'm so inept with these computers things. I just discovered that I can click on the picture and make it bigger. Oh BOY! Now I can see that die. Of course, your second picture, Jeremy, is bigger already--probably put there special for goofs like me. It doesn't look as flat to me now that I can see it. (!) The opening still could be more rounded though (think fuller) and that will help a lot. Just ignore me if you want to, rattling away up here. Ah, well.
-
It will need to be shaped right first; otherwise, there is no reason for the metal to move where you want it to go.
-
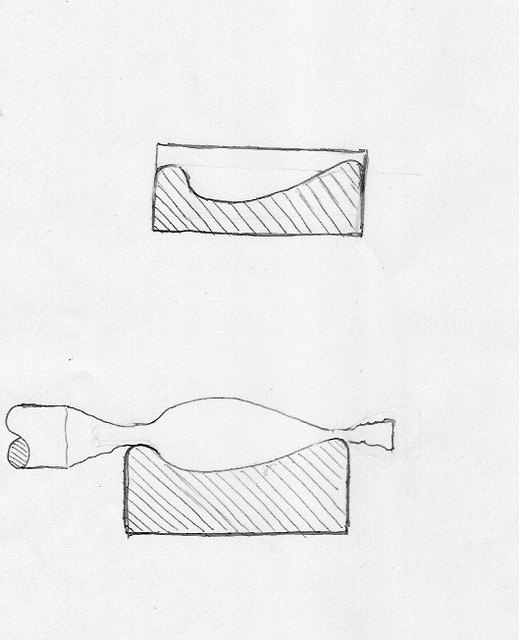
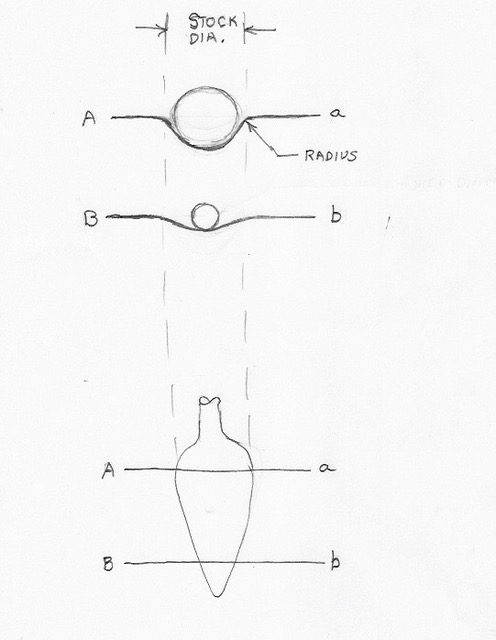
At risk of offending whoever made your die, I will say that it is made more like a closed die and not like an open die, which is what a swage is supposed to be. With a closed die, the image is made, the excess material spews out the sides as flashing, and then the flashing is knocked off in a second set of knock out dies. A swage, of course, is supposed to work that flashing back into the part. It needs to move the metal, causing it to flow--not contain it and trap it. All open die swages come down to the basic principles of the fuller: radii which push and pull the metal into and out of the die. If it does not do that, the metal will be trapped, the flashing will not be reworked into the shape you're making and everything will stick and jamb. If it works at all, it will take a lot more power than necessary. I have drawn some cross sections for you. The first is a side view. Here you can see how the openings of the die are round, like a fuller, to push and pull the metal out of and into the die. (Your die has a flat opening.) The larger opening is where most of the work will be done. That radius will push the metal into the die as well as away from the die. When this movement meets the movement from the far radius, the material between will upset to form the body of your part. In the lower image I drew the finished part as well as the metal as it appears where it leaves the die. You can see how the swage does not need to contact very much, and the less it does, the more efficiently it will work. (There is no reason to shape the metal leaving the die.) A 25 pound hammer should be perfectly capable of swaging a 1" round ball (or bigger) if the die is made right. In the next image I have drawn the cross section of the die from the other side--looking at it from the end--with two cuts through the part, at A-a and B-b. It is important to notice that the opening of each cross section is the same, which is the width of your stock's diameter. Only the depth is different. This allows the flashing to remain fairly thick and oval so it can be worked back into the part as the bar is rotated 90º. If you try this with a die like yours, you'll get an awful lot of notching and even cold shuts where the flashing folds, because the die is not encouraging the metal to flow. You can open up your die and make it into a swage. You're half way there; it just wasn't finished. Go in with a die grinder and broaden the opening to receive the stock, and give the ends a nice round radius, and it'll work. With that said, the design of your die is quite long, so it will not flow easily. That is because the fullers at the end are so far apart and the taper is so long. I've made a die very much like yours with good success, but it does take more force than the same diameter ball swage. Let me know if you have any questions. Dies are fun, but they need to be made right, or their fun quickly turns to frustration. Joel
-
Can't help without at least one picture, and many would be better: inside, outside, spring, results you are getting.
-
They're limited by the stroke. I think the Garvin die slotter has a 2 1/2" fixed stroke, but don't remember for sure. The die filer's even less, though it's adjustable. They're both for 1" and less, I supposed, and even that'd be pretty thick--up to 5/8" is more like it. For cutting deeper unround holes, a shaper's what I'd suggest. That's one of the most all-around versatile machines for blacksmiths. I don't think a blacksmith should be without one--right up there on the list with a drill press. A shaper will do everything a mill will do except bore round holes (which can be done on a drill press with a boring head) and it'll do a lot more that a mill cannot.

-
Thank you, Donniev and K A Willey. I finished the smaller punch and its mating die yesterday. I redeemed myself! It fits in any rotation! Nothing quite like a little concentration. I have one other set of dies to finish today so I can send them all to the heat treat tomorrow. Finally! I've been making dies and shoes for weeks. I have several more to make, but I just might take a break for awhile and move some hot metal around just to ease the blacksmithy side of my brain.
-
Ha ha! We are blacksmiths, after all (at least that's my goal). It just needs to look square, and being .005" off on the square (which I was) won't be remotely noticeable, but that's enough to make it want to go in one way. Still, you'd think I could make a square square, wouldn't you? Sheesh. It's a happy square though.
-
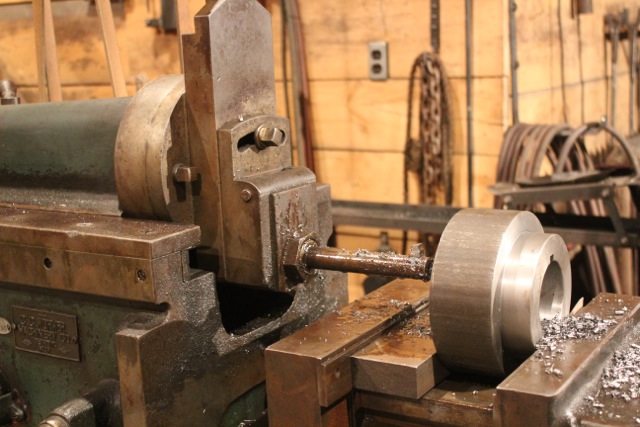
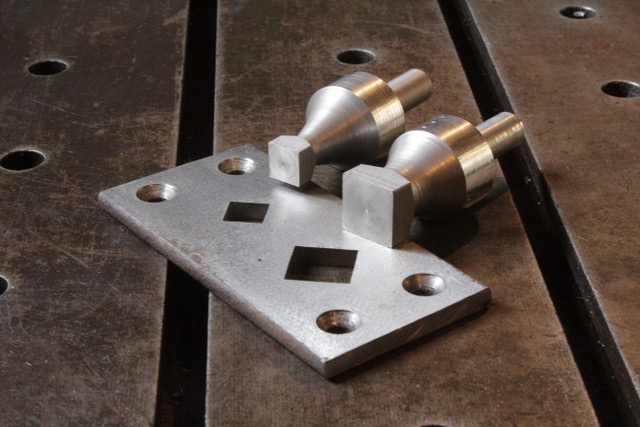
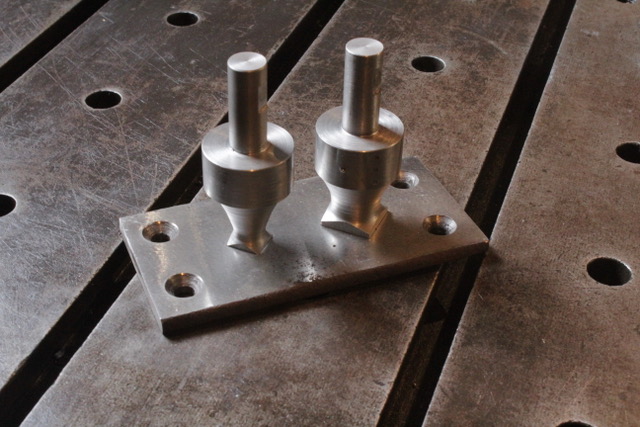
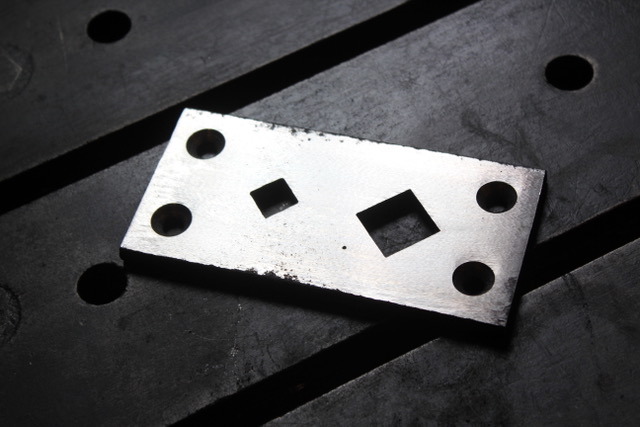
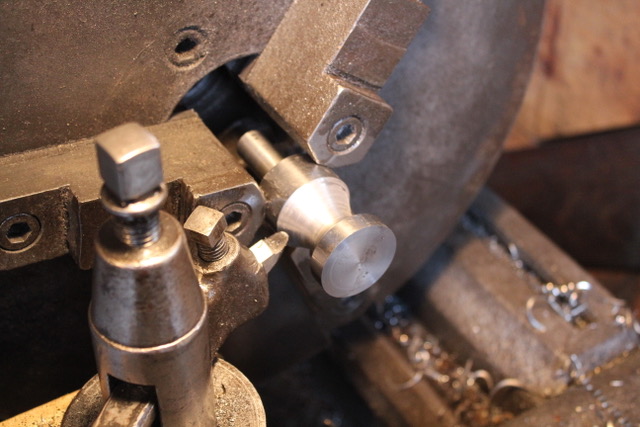
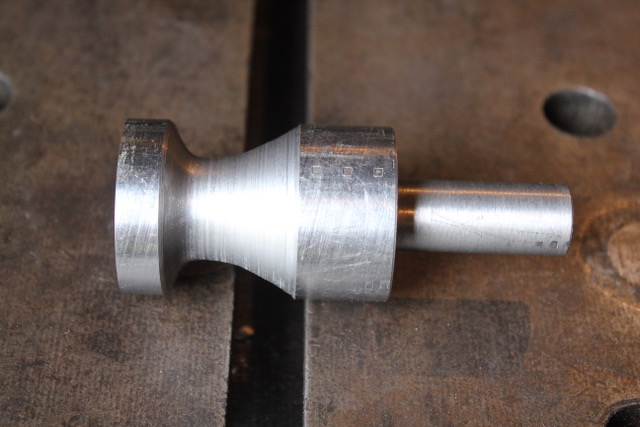
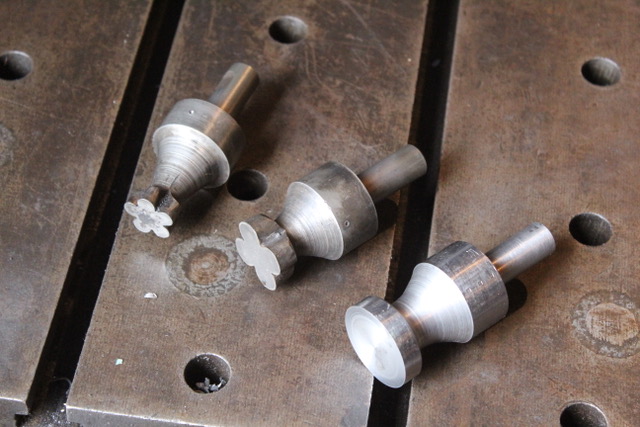
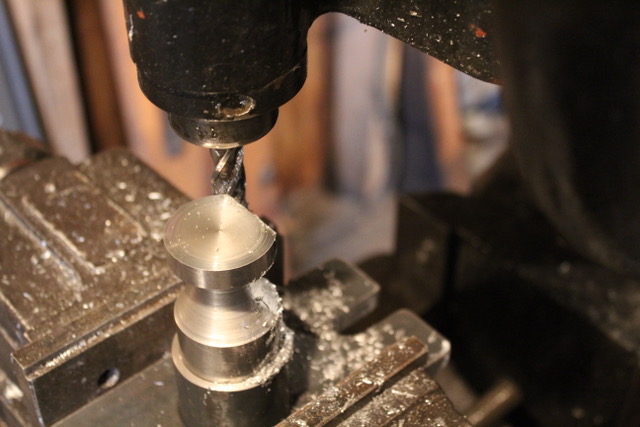
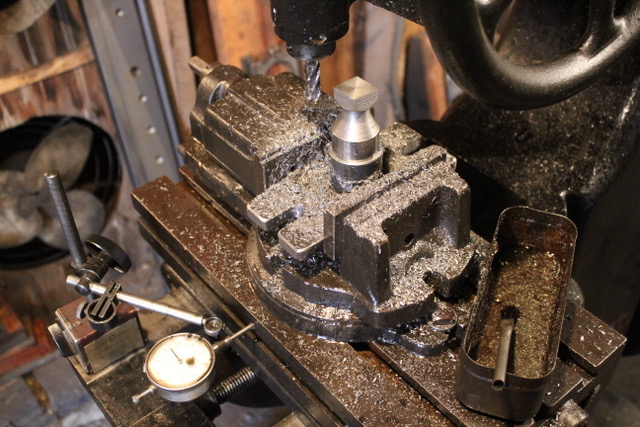
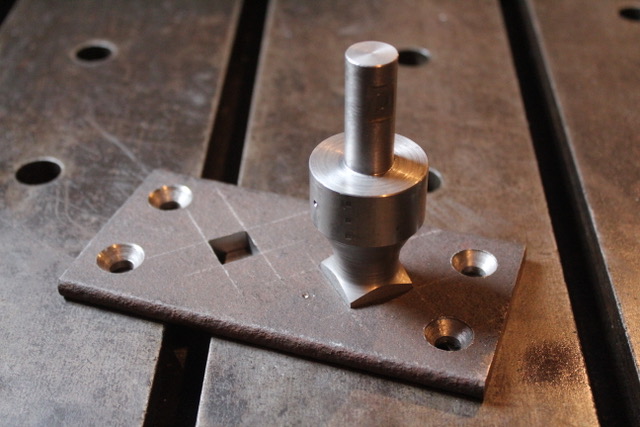
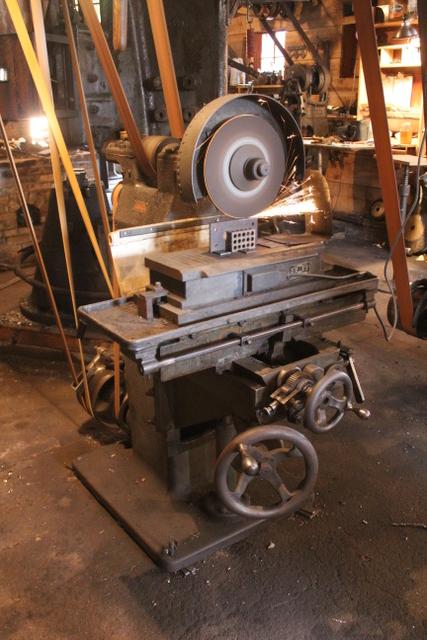
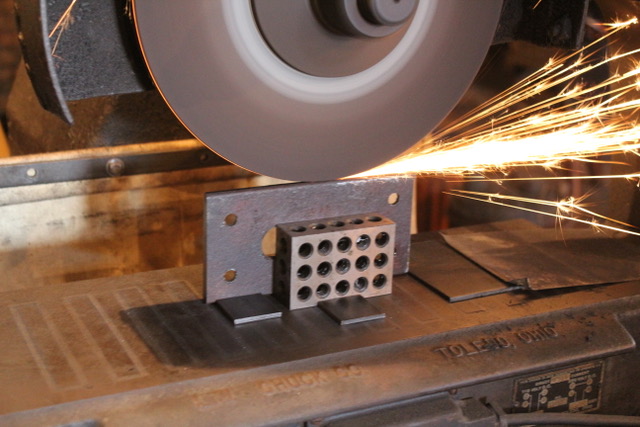
Wow. I can't believe I started this thread back in February and still haven't finished. Dies do take awhile, but this is ridiculous. Hopefully nobody here thinks I've been working just on this. Ha ha! Anyway, the next step was to cut the small, 5/8" round hole to 5/8" square. It was slotted and die filed just like the larger hole. I rough finished both holes knowing that they'd be final fitted to the punches later. The cutters for the slotter are really easy to grind--even easier than a lathe's, since its action is all on the end. It doesn't even need any back relief. I made this one out of a 3/8" HSS lathe bit. No picture of that. (Sorry.) Next is to make the punch. I turned a blank on the lathe. This is D2 for those who care. A friend brought me a piece a week ago. The body's 1 1/2" round. There needs to be nice clearance at the base of the face when you're cutting the sides by hand--otherwise you can't push a file past the image. Blind hole filing isn't very successful. So that's why it's undercut behind the face. Make sense? Below you can see it next to two other punches I cut a few years ago. I hope you can see what I mean about the need for space behind the image. You can see on the smaller die where I could have gone a little smaller, since there's a file or graver mark where I hit the neck. So then I popped it up in the vertical mill and cut the face square. There's no relief on the punch; it's all in the die. This is an easy punch to cut--no hand cutting and no need for a dividing head. Just happy square. Then I cut the other flats. This old mill (1920's?) has no calibrations, so I use a test indicator. Works better actually, because you're not trying to compensate for backlash or lead wear. It measures what the table actually travels rather than what the table is told to travel. And whoopee! It looks right. Must be I did my math right. (Ugh--math and art!) I cut it to the same dimensions as the die's hole, so it took very little hand filing of the die to get it to fit. However, because it's hand fitted, and because I'm me, making art, and don't care about precise size, it fits only one way, so there are indexing marks so I know how to position it. Then I surface ground the die. I sure like that surface grinder. I like any machine I can go away and let do its thing while I do my thing. (Need to figure that out for a power hammer. Ooo, scary! ) I once had a surface grinder without any power feed, and I tell you, that was one boring thing to stand and make happen. This brute takes power, but it's worth the extra fuel. Of course, part of it's the 110 v DC chuck and the dynamo. And she's shiny now. How perty. I'll be making the small punch later this week, and after it's fitted, they're all off to the heat treating place where they know about that kind of thing. Hope you're enjoying the picture show. Joel

-
When my tenth birthday came along, people asked me what I liked--what I was interested in--like grown ups do to kids, hoping for the best. I told them, "Ropes and pulleys." Nobody understood. That was just weird. You guys would have gotten it.
-
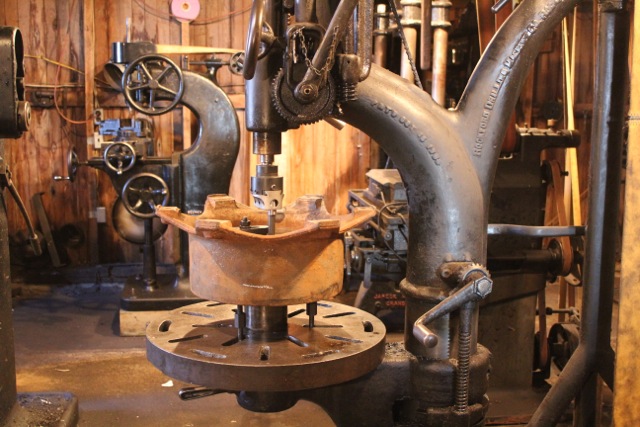
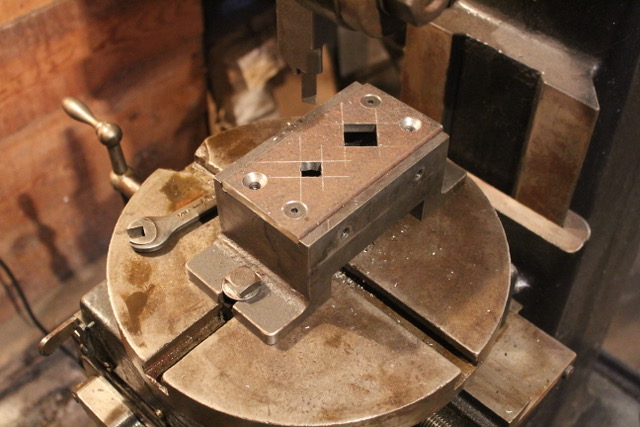
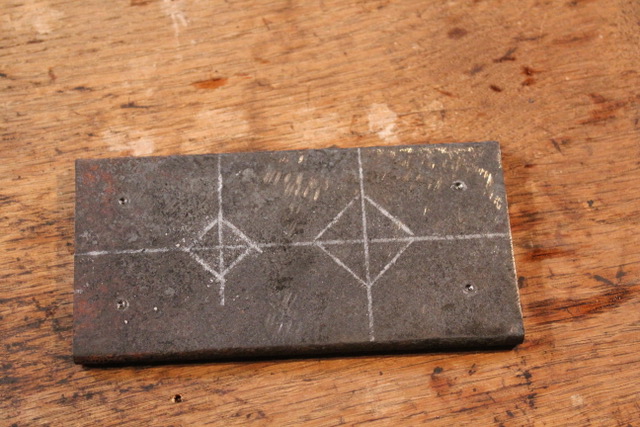
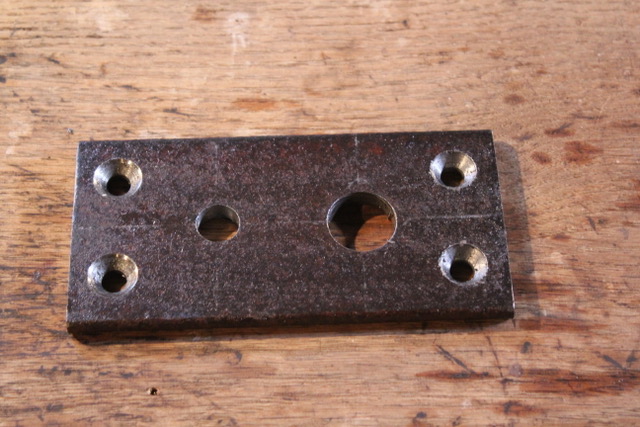
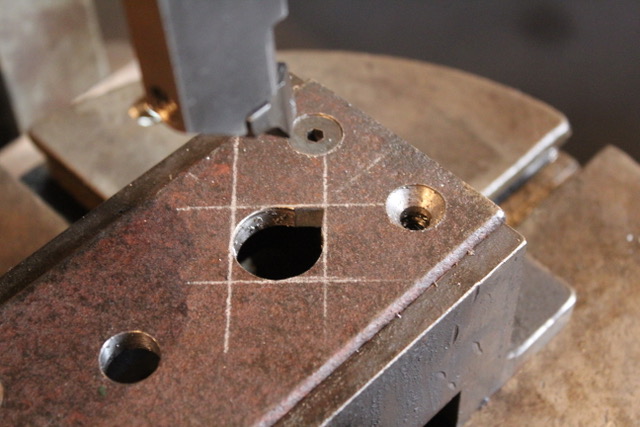
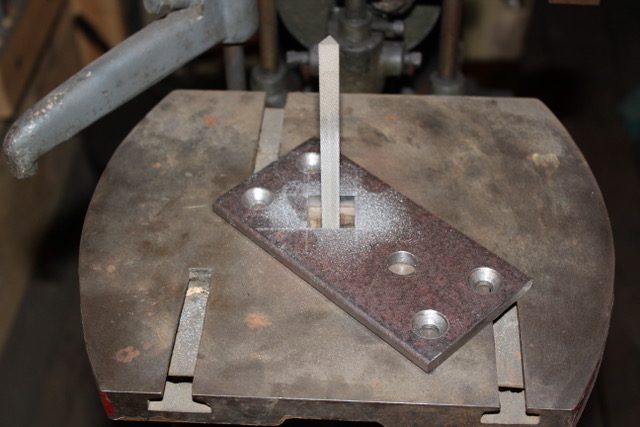
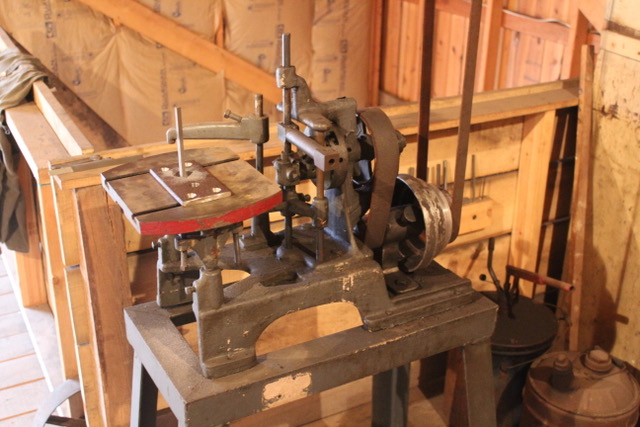
I am making a sheering die for my toggle press to knock out simple squares. This particular die will cut 1" and 5/8" squares. I'm using a piece of leaf spring 3" wide and 3/8" thick. I've not had it tested yet, but my guess is that it's plain carbon between 80 and 90 points. I've used springs before for sheering dies similar to this, but I have to say I prefer 5160, which is typically used in the thicker springs--1" and up. Since this is going to be a hot operation, the alloy is not as critical as it would be for cold. As we all know, the difference in hardness is more from heat than anything else; and in my experience, the biggest enemy is abrasion from the scale, not distortion from power. Spring works for that. It's easy to machine and it's free, both of which let me feel more willing to experiment than with a 50 dollar slab of D2 that's a tool chewer. The first thing is to lay out the holes in their approximate location. Nothing really precise about this other than the corner marks to hold it to the bridge. Then it's drilled. The spring was a tad wide to fit into the die holder, so I ground the edge. Then I put it in its die holder and mounted that in the Garvin die slotter to rough cut the hole square. For anyone who doesn't know what a die slotter is, it's like a shaper, only vertical. The Garvin's ram can be tilted too, to get the relief for the die. It uses a single point tool like a lathe's. It has a rotary table and X Y Z. One corner's cut at a time; it's rotated 90º and then the next is cut, until they're all done. It's pretty rough inside yet, so I take it to the die filer. This also has a table which tilts for relief. It took about twenty minutes to smooth it. Next is to make the punch, but that will be another day. That's when it'll get its final sizing and fit. For now, it's only approximate. Finally, it will be heat treated and surface ground, top and bottom. I hope you enjoyed this. Comments and questions are welcome. Joel


-
Little Giant 25lb hammer
Sanderson Iron replied to Hammerfall's topic in Power Hammers, Treadle Hammers, Olivers
I don't think I've ever seen one for $5,000. rthibeau's right--half that's more like it. Air hammers and mechanical hammers don't behave the same, so if you're considering an air instead, don't expect it to do the same kind of work if you've run a mechanical. I don't want to start any arguments here, but I personally have never run an air that has even close to the bottom end control that a Little Giant has. The mechanical can slow way down and just tap. Self contained hammers don't slow down for anything. -
How big of a hammer
Sanderson Iron replied to Millennial Blacksmith's topic in Power Hammers, Treadle Hammers, Olivers
Wow. What kind of hammers do you have? You can't raise the ram, put a block under it, then lower the ram to raise the ram assembly? Why wouldn't the spring go with it? I'm curious now. Do you have pictures? -
How big of a hammer
Sanderson Iron replied to Millennial Blacksmith's topic in Power Hammers, Treadle Hammers, Olivers
Got it. -
How big of a hammer
Sanderson Iron replied to Millennial Blacksmith's topic in Power Hammers, Treadle Hammers, Olivers
You might try blocking the ram up and down instead of lifting it from above, Basher. I have a set of blocks for my 250, each one an inch different in height, from the lowest setting to the highest. Lift ram, insert block, lower ram, loosen slide (which then pops up or down to the new height) tighten, and you're on your way in half a minute--fast and easy. It works best if you have a brake on your hammer, tho I don't on my little one. That really is where mechanicals shine, and Bradleys are king of the road. Ooooo, the smooth control they have! Their forging range within a given setting is not as great as the verticals though. My wife and I work a lot like you describe; or I work alone that way. I make posey-headed rivets in two heats, using three machines in one heat and reheating for heading. We make a lot of parts that way. My point was to set up for an operation in advance and let it flow--unlike Nonjic's claim that you have to make changes to your hammer while the iron's getting cold. (In the mean time, he's over there fumbling around with his Massey trying to reset it to make single strokes. ) And Allan, I wasn't trying to insult anyone by saying I should get an air brain. I was making a joke about how I need to adjust my brain. (Joel) -
How big of a hammer
Sanderson Iron replied to Millennial Blacksmith's topic in Power Hammers, Treadle Hammers, Olivers
Nonjic, I have to say that the way your hammer runs off the lever is enviable. I will presume to say that I doubt you can hit one blow without the single blow mode. What you get with an air hammer is a series of blows, of which you can usually have one hit. That's very different from a true single blow--one cycle--with a mechanical. How is it that changing your Massey in and out of "single blow mode" (as you call it) is okay, but making changes to a mechanical is not? A mechanical can go in and out of single blow mode without any change whatsoever. Depends on the job. I think we're leaning a bit hypothetical here. But in general, my brain works best if it does all like operations at once and then shifts gears before doing the next operation. I have to stop and adjust my brain. Maybe I should have an air brain. -
How big of a hammer
Sanderson Iron replied to Millennial Blacksmith's topic in Power Hammers, Treadle Hammers, Olivers
You'll notice that once you switched back to the foot control, the thing snuffs up and down, cycling at one speed. That's what I'm talking about. Sure, it can be operated with a lever and a second person--so can a Chambersburg--but for forging in most shops, and most of the time, the foot is the way the smaller hammers are controlled. With foot control, that hammer cannot do what a mechanical can do, because in that mode, it can only hit fast. Maybe I'm wrong that it hits one speed--I have not run a Massey--but that's what I see in the videos you showed us. Anybody here in the habit of forging on an anvil with only one speed? No pushing to bend, no slow blows, no fast, light blows? Try forging on an anvil with only one speed some time and see how it turns out. It makes about as much sense as forging with a power hammer that only hits one speed. That's my complaint about them, and you helped to demonstrate it, Nonjic. Thank you. You're making adjustments while the metal's out of the fire, cooling? Well there's your problem, man. You need to think ahead a bit more. Set your hammer to do the first operation, run the lot; change the setting if necessary for the next operation, and run the lot. It's the Henry Ford approach. That makes it a lot more efficient, you see. Planning. Tuning. Optimum blow type for the operation you're doing. That's what we mechanical guys are good at. It's okay with me if you want to stick with your simple one blow hammer. Really it is. Don't take this so personally, dude. We're talking about machines here, not religion.