DanielC
-
Posts
664 -
Joined
-
Last visited
Content Type
Profiles
Forums
Articles
Gallery
Downloads
Events
Everything posted by DanielC
-
 Thanks Ric. I am milling the die like the one previously used, like you suggest. I have a source to some H13 this size I can use from a friend, but will give fx2 some thought. It may be a thought for the 4b I am in the middle of purchasing though, as the H13 will not be big enough.
 -
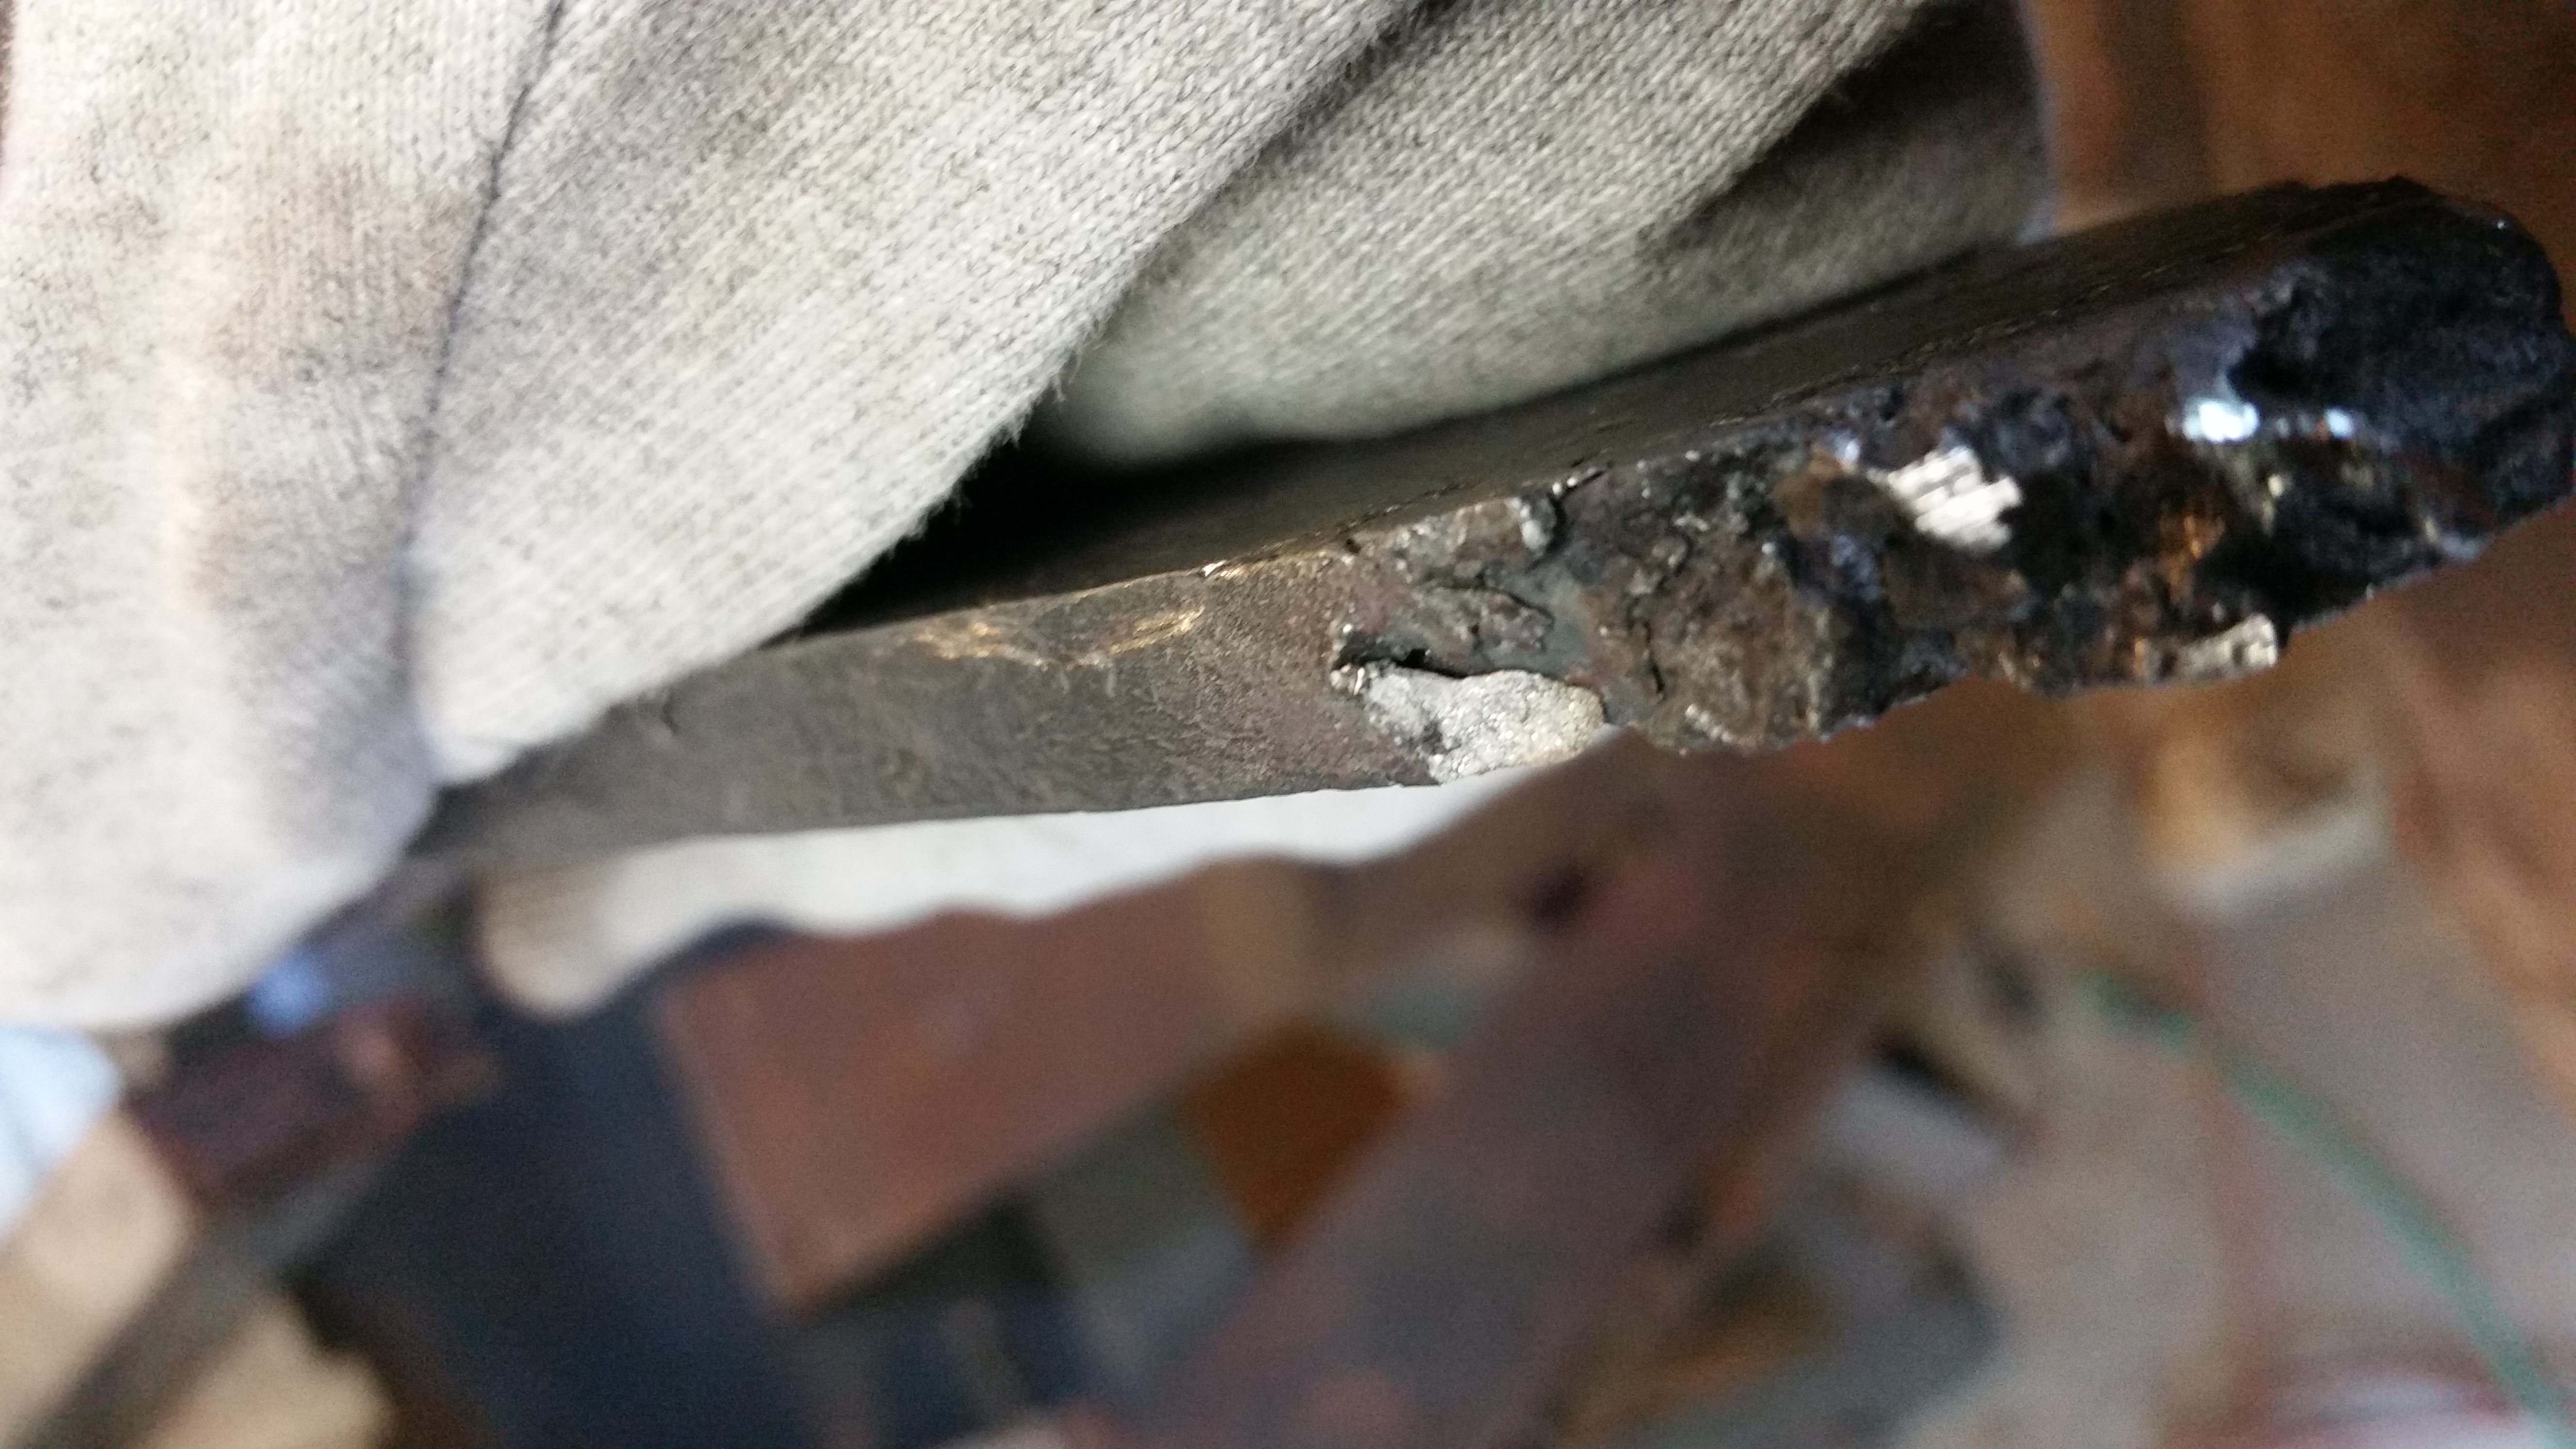
Though looking back, I did measure the female dovetails, and there is a taper there. Just not on this seemingly factory dovetail.
-
Using an indicator on the bottom die, it is showing basically zero taper on either side. Instead of the 1/8th inch per foot. Why is this? My dies look like factory made California drawing dies. I read on little giants site that the older models had straight dovetails and the newer ones with removable sow blocks had the 1/8th inch per foot. My Murray doesn't have a removable sow block. I guess right now I am going to give it a straight dovetail.
-
5-I Nazel hammer rebuild advice needed
DanielC replied to DevinT's topic in Power Hammers, Treadle Hammers, Olivers
I am Necroing this thread at due to my displeasure that I cannot see any pictures. -
Ok. I havent had the need to study the ins and outs of phase converters and read that in passing, and can see now why I confused the two. Good to know. It makes the cost a little different. Wish I could find where I read about the Beche hammer however. May have been an owner of one selling on facebook. Thanks.
-
I may need to call American Rotery. I am in the process of purchasing a 4B, and had plans to throw it in my family shop that has 480v 3ph power. However, considering the foundation, I may wait and place it at our new home. I really want to set it, and move it only after I die. So with that said.... The Nazel 4B has a 15hp motor. I have always heard that phase converters give you only a fraction of power, and to get around this (And I have read about a guy having to do this for his Beche that ran a 15hp motor) you need to double the rotary motor. So a 15hp motor needs a 30hp converter to get full power?
-
Came back to this project. Cut the second angle in. Next while the bottom die dovetails are being cut, I will cut out two chinks out of the face of the die, and use a rotary table to mill it into a cylinder.

-
Recipe for making crucible steel?
DanielC replied to Bo T's topic in Smelting, Melting, Foundry, and Casting
If you come to Fire and Brimstone, there is always a smelt, and a lot of crucible steel made and forged with all kinds of fun machinery. My recommendation is to talk to Jeff Pringle. He is really good with crucible steel. There are a lot of people out there to talk to, though some expect payment in return for some of the more subtle information. Jeff isn't that type. Edit: Ric is also a fountain of knowledge. -
Recipe for making crucible steel?
DanielC replied to Bo T's topic in Smelting, Melting, Foundry, and Casting
Many friends in my circles make crucible steel using various starting materials, including ore. I could connect you to them. -
Smelting of wrought iron nails
DanielC replied to Mountainhouseforge's topic in Smelting, Melting, Foundry, and Casting
Remelt, or forge weld back together. My orishigane is another name for Remelt in a controlled environment to either add or remove carbon, whIle also separating slags from the material. -
Its not easy to do, but I do a lot of it.


-
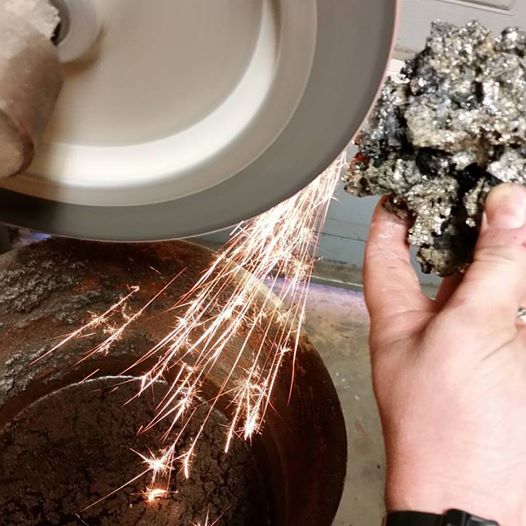
It cleans up very well after 13 folds. These were made for a comission to a really good bladesmith for the steel itself. I have worked it in the past and it works and cleans beautifully with proper heat control, adherence to strict fluxing and protection of the carbon and the power hammer. Basically it is broken and sorted like the Japanese do, and weld into a single billet.
-
I can go on, this stuff is pretty remarkable.


-
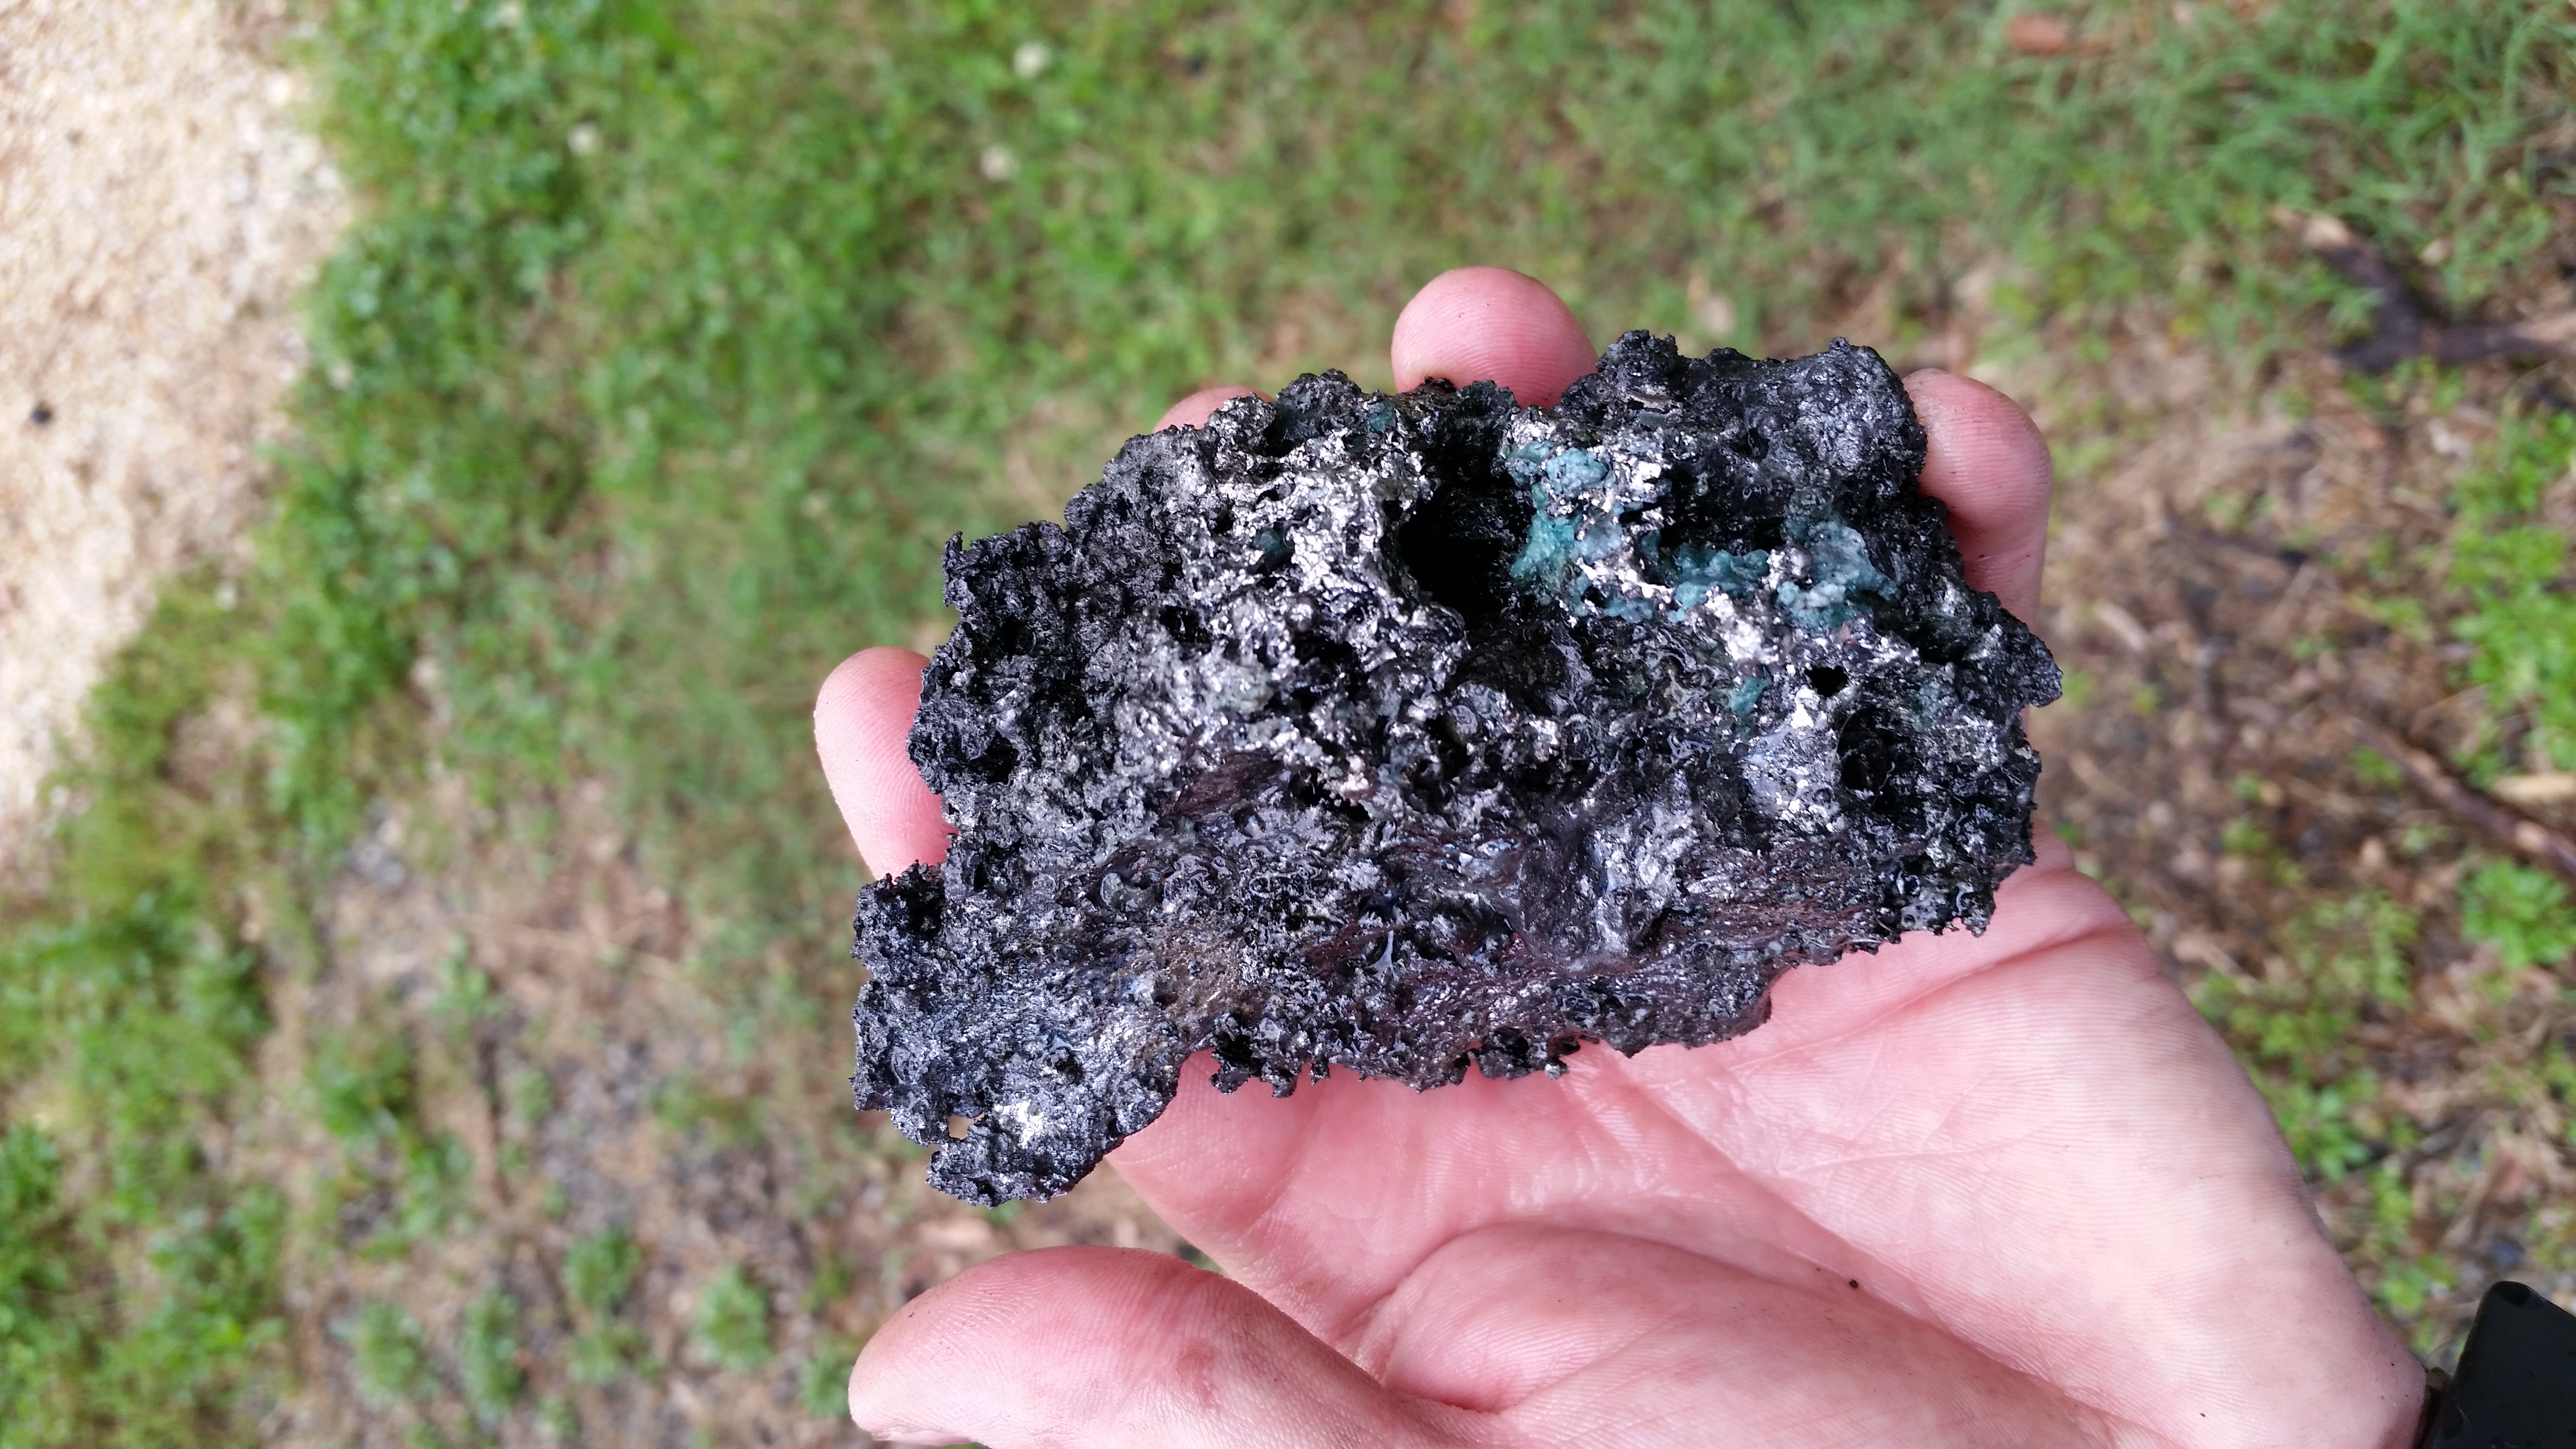
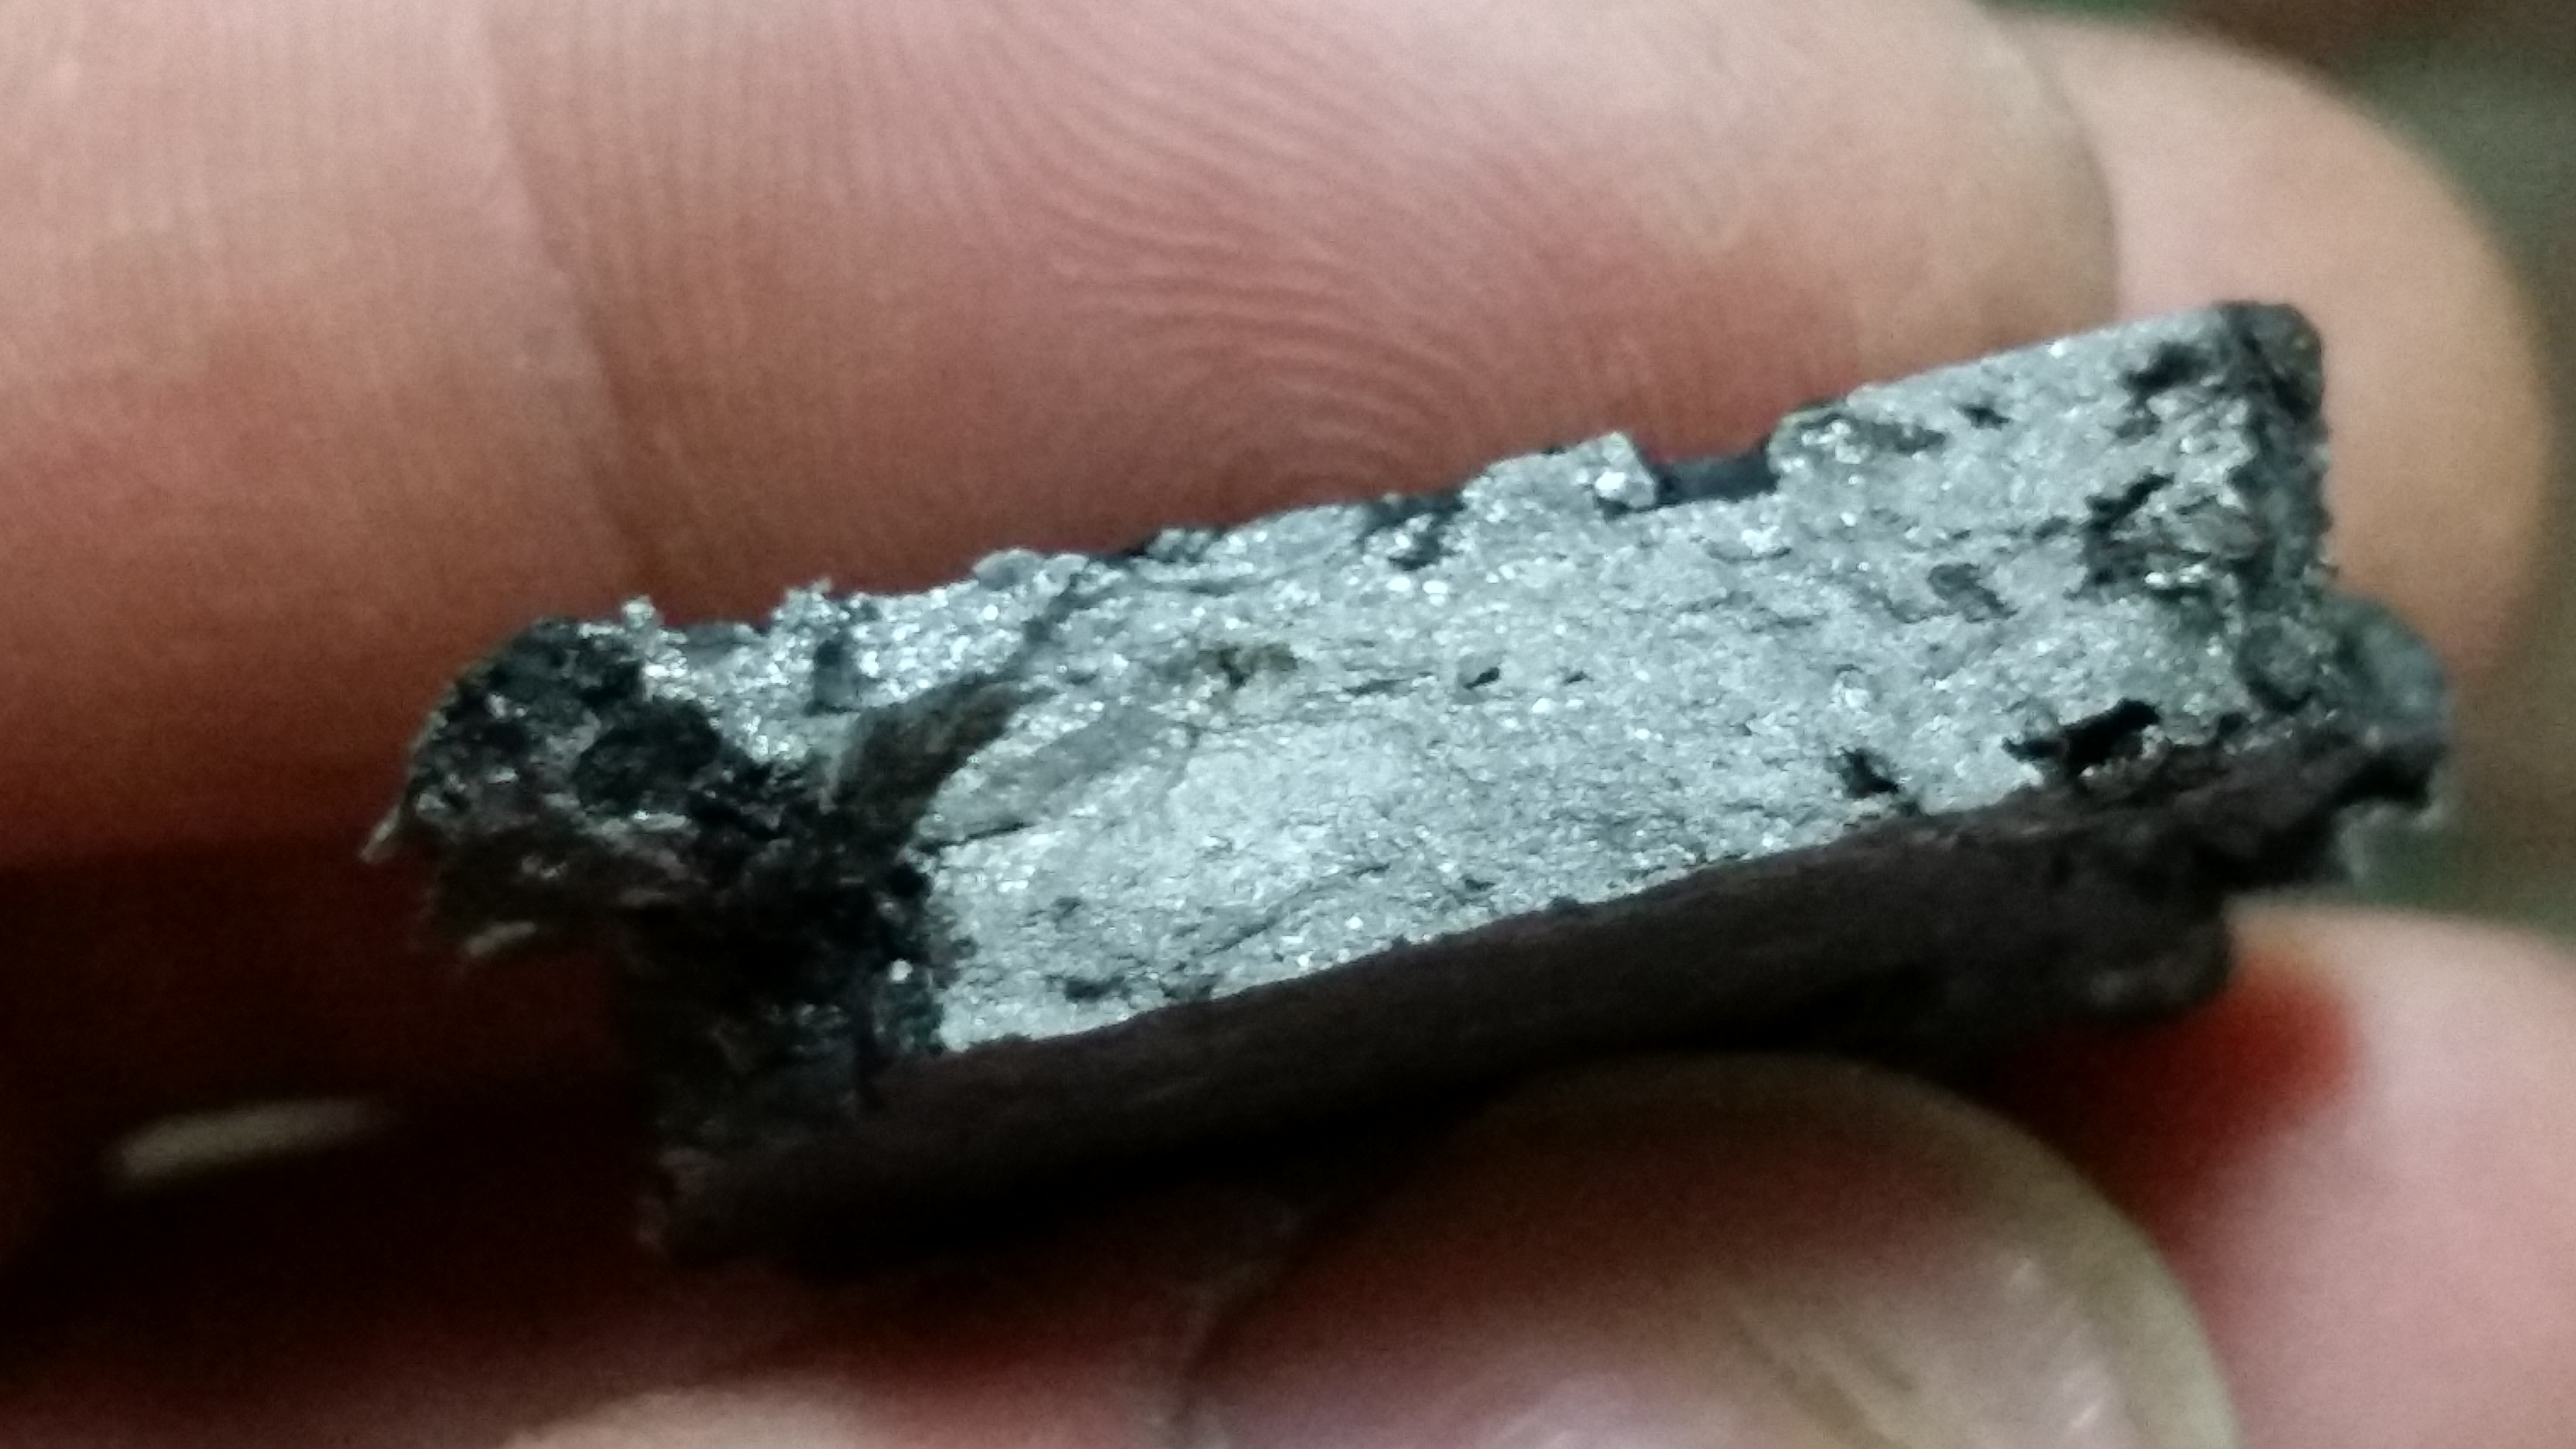
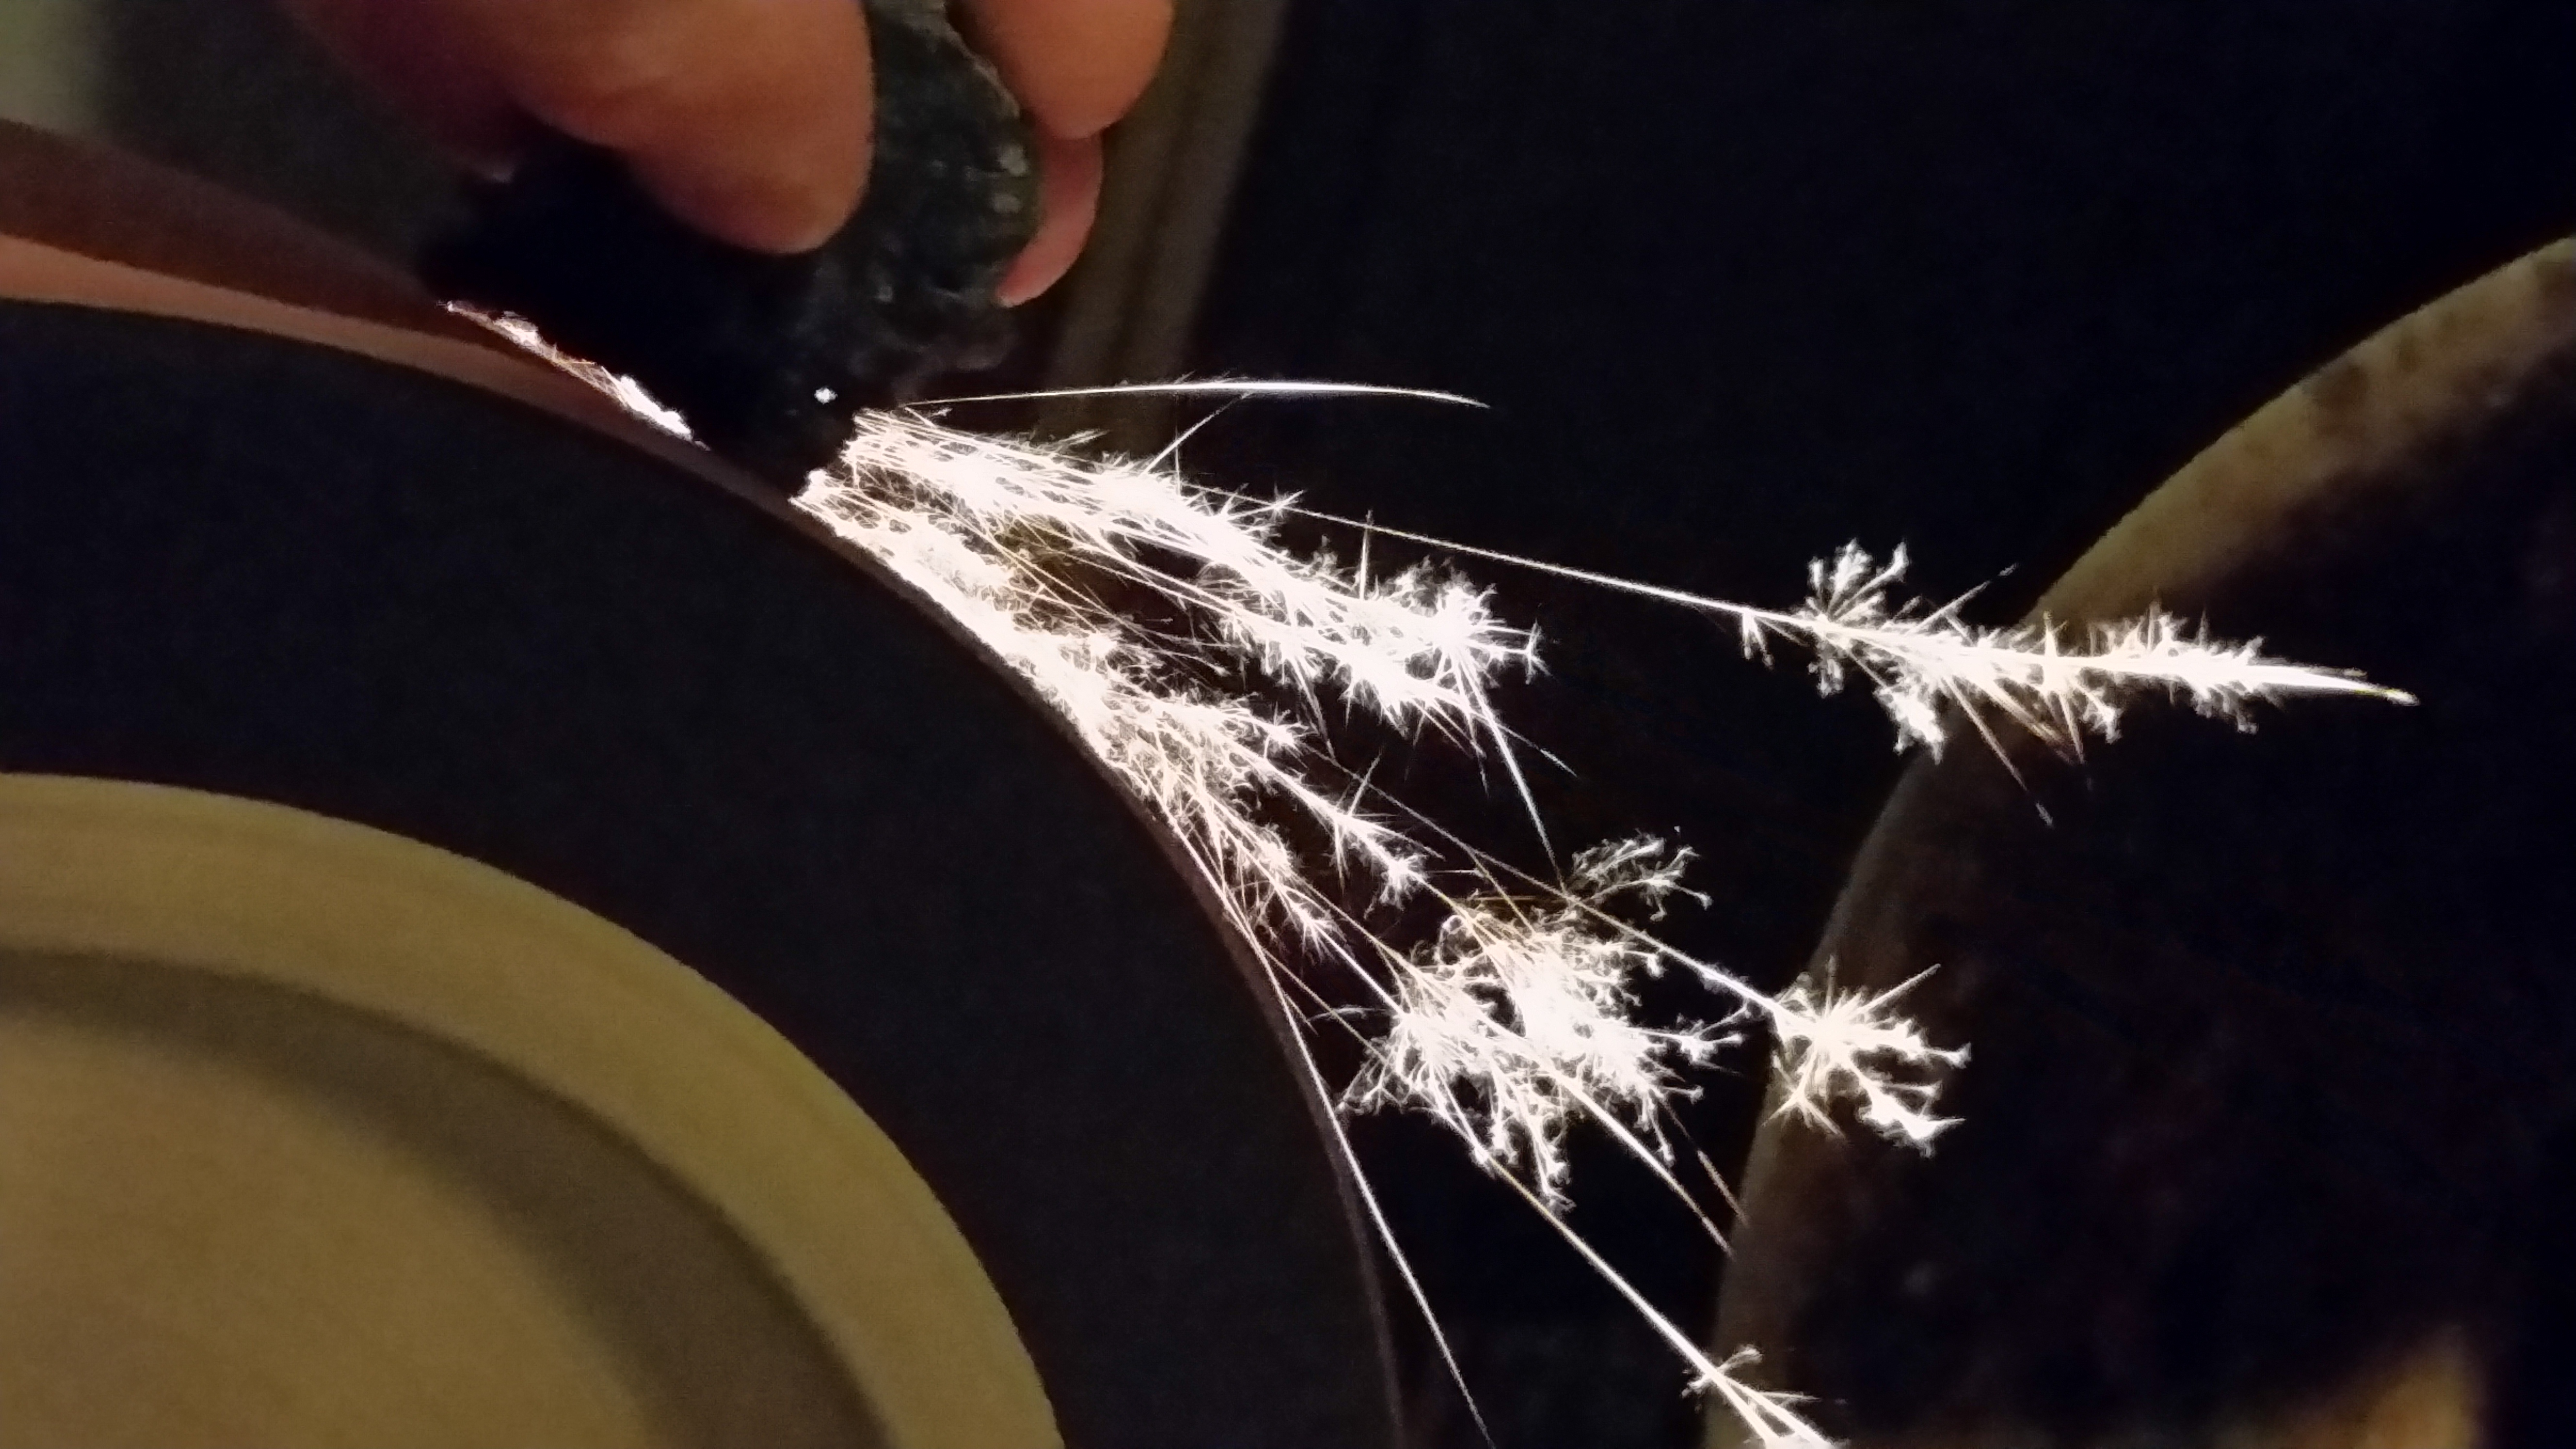
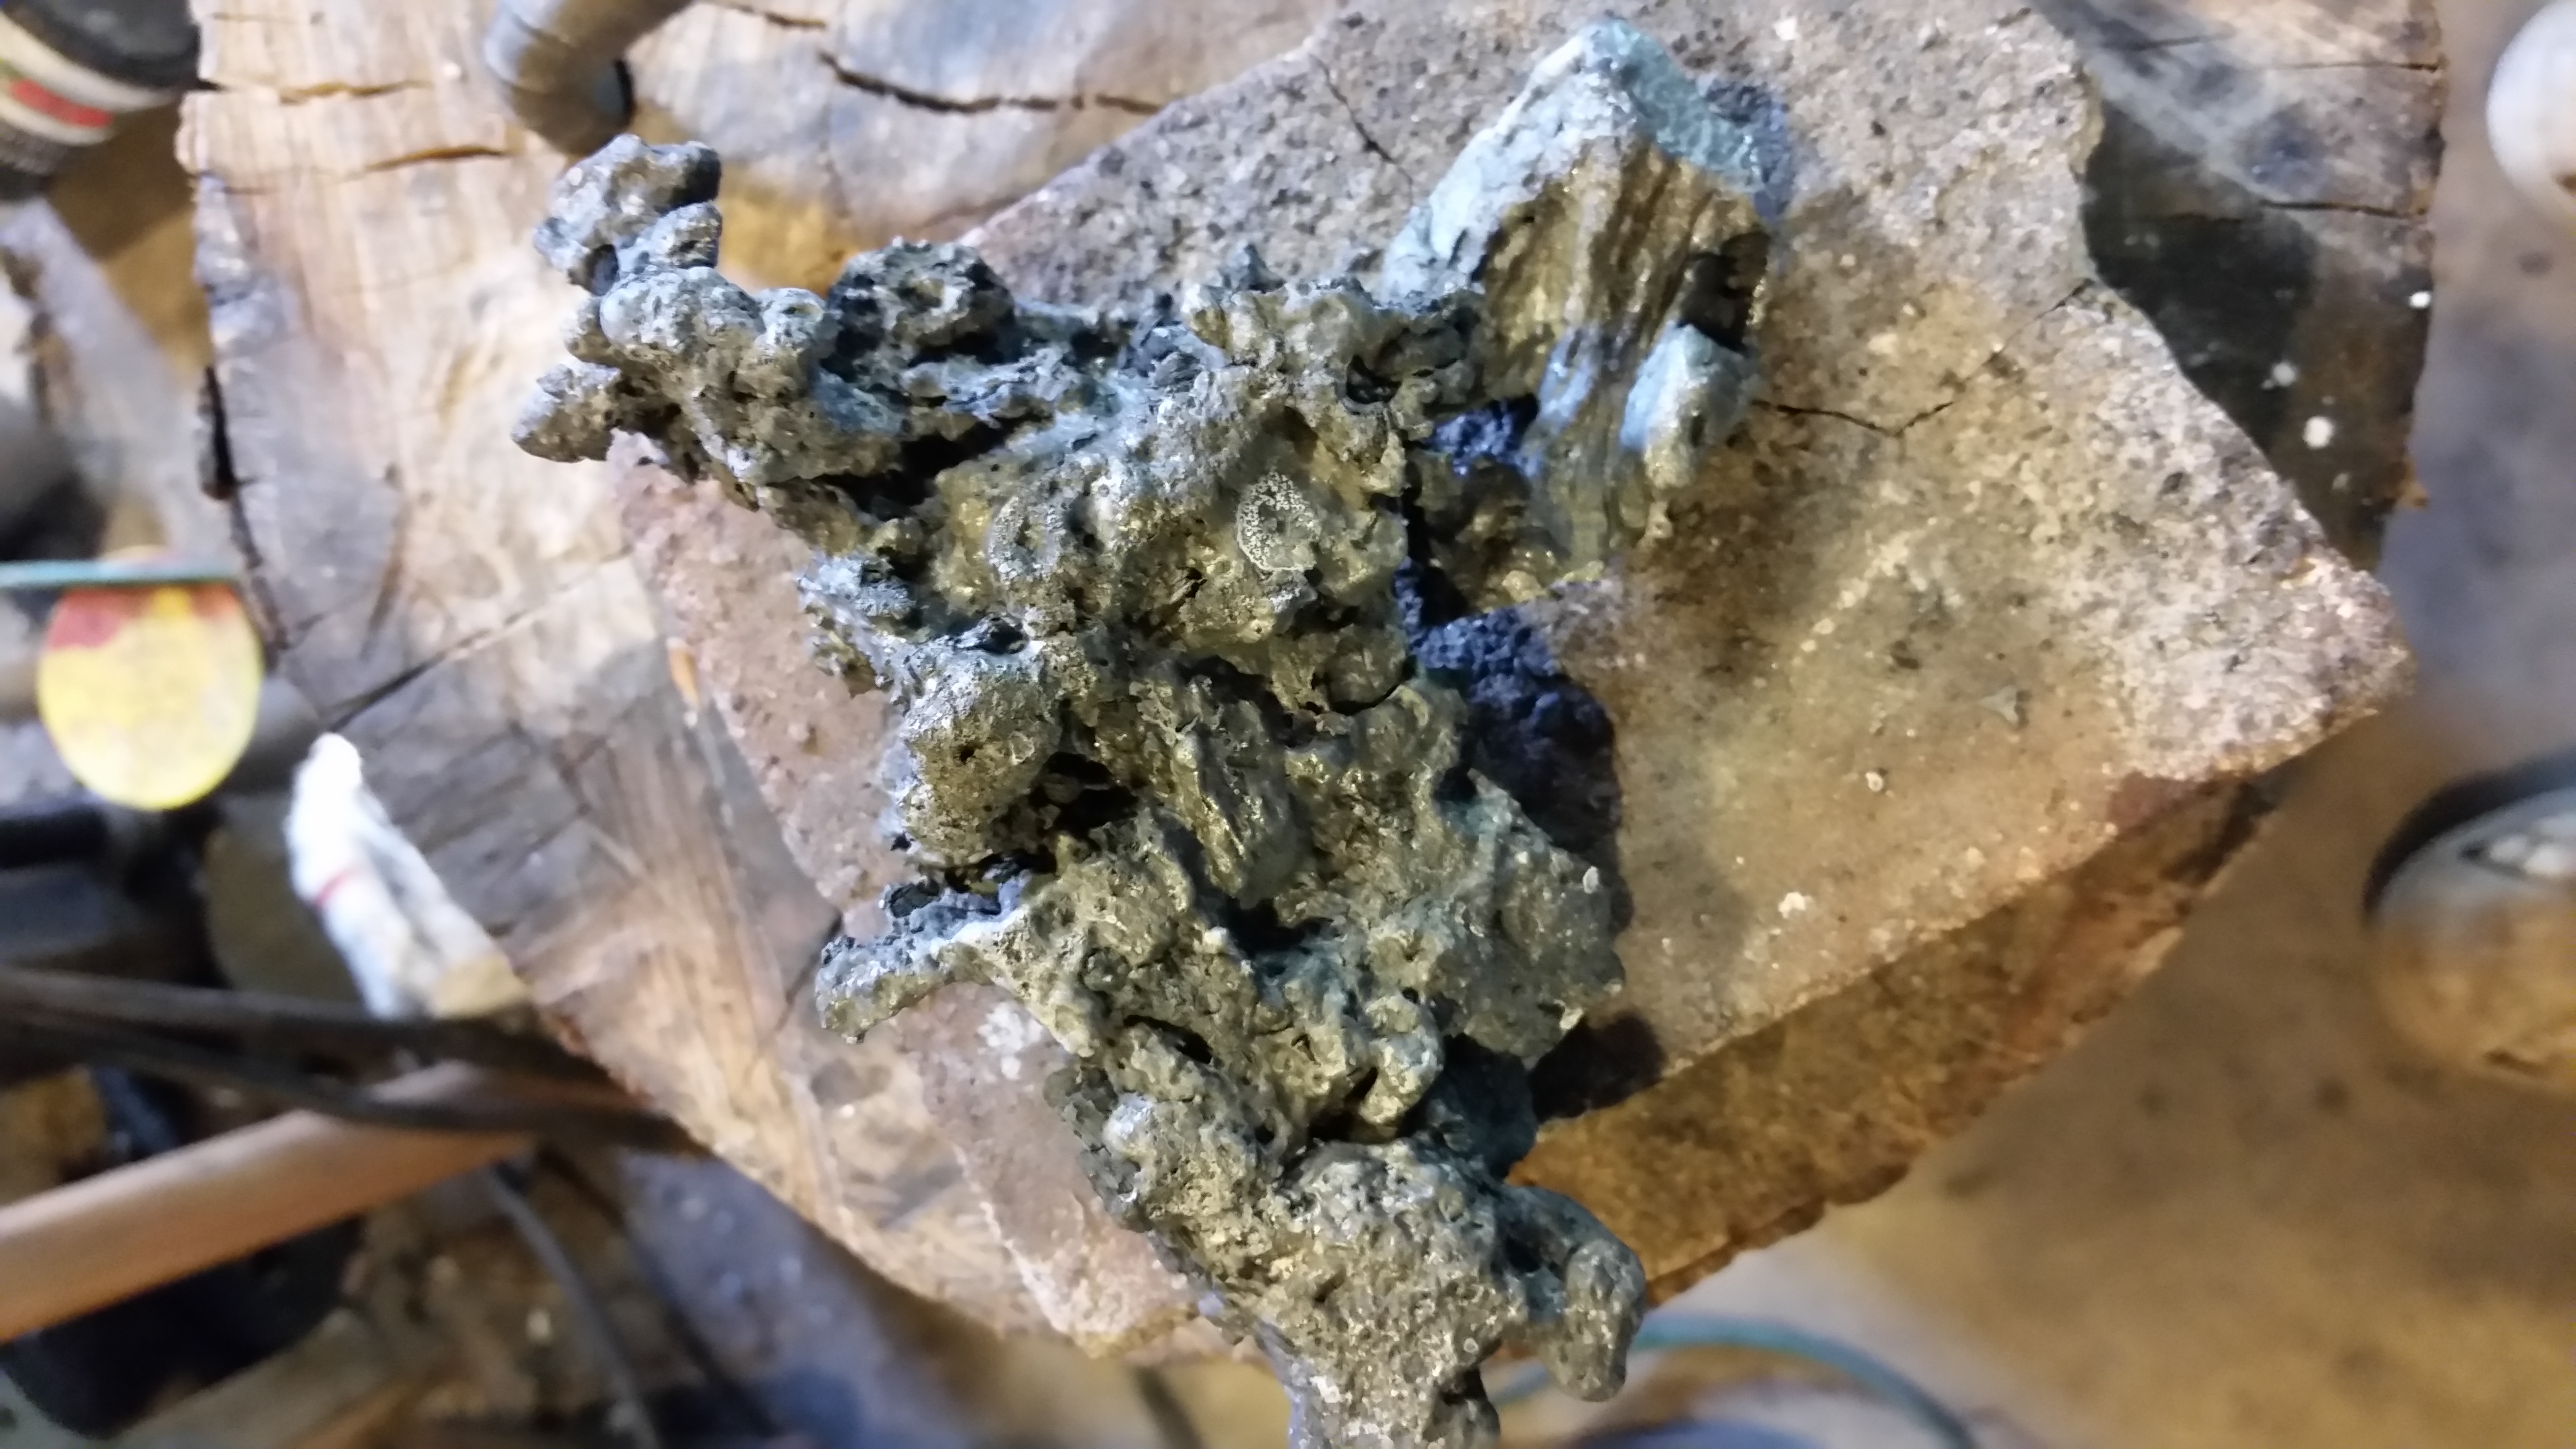
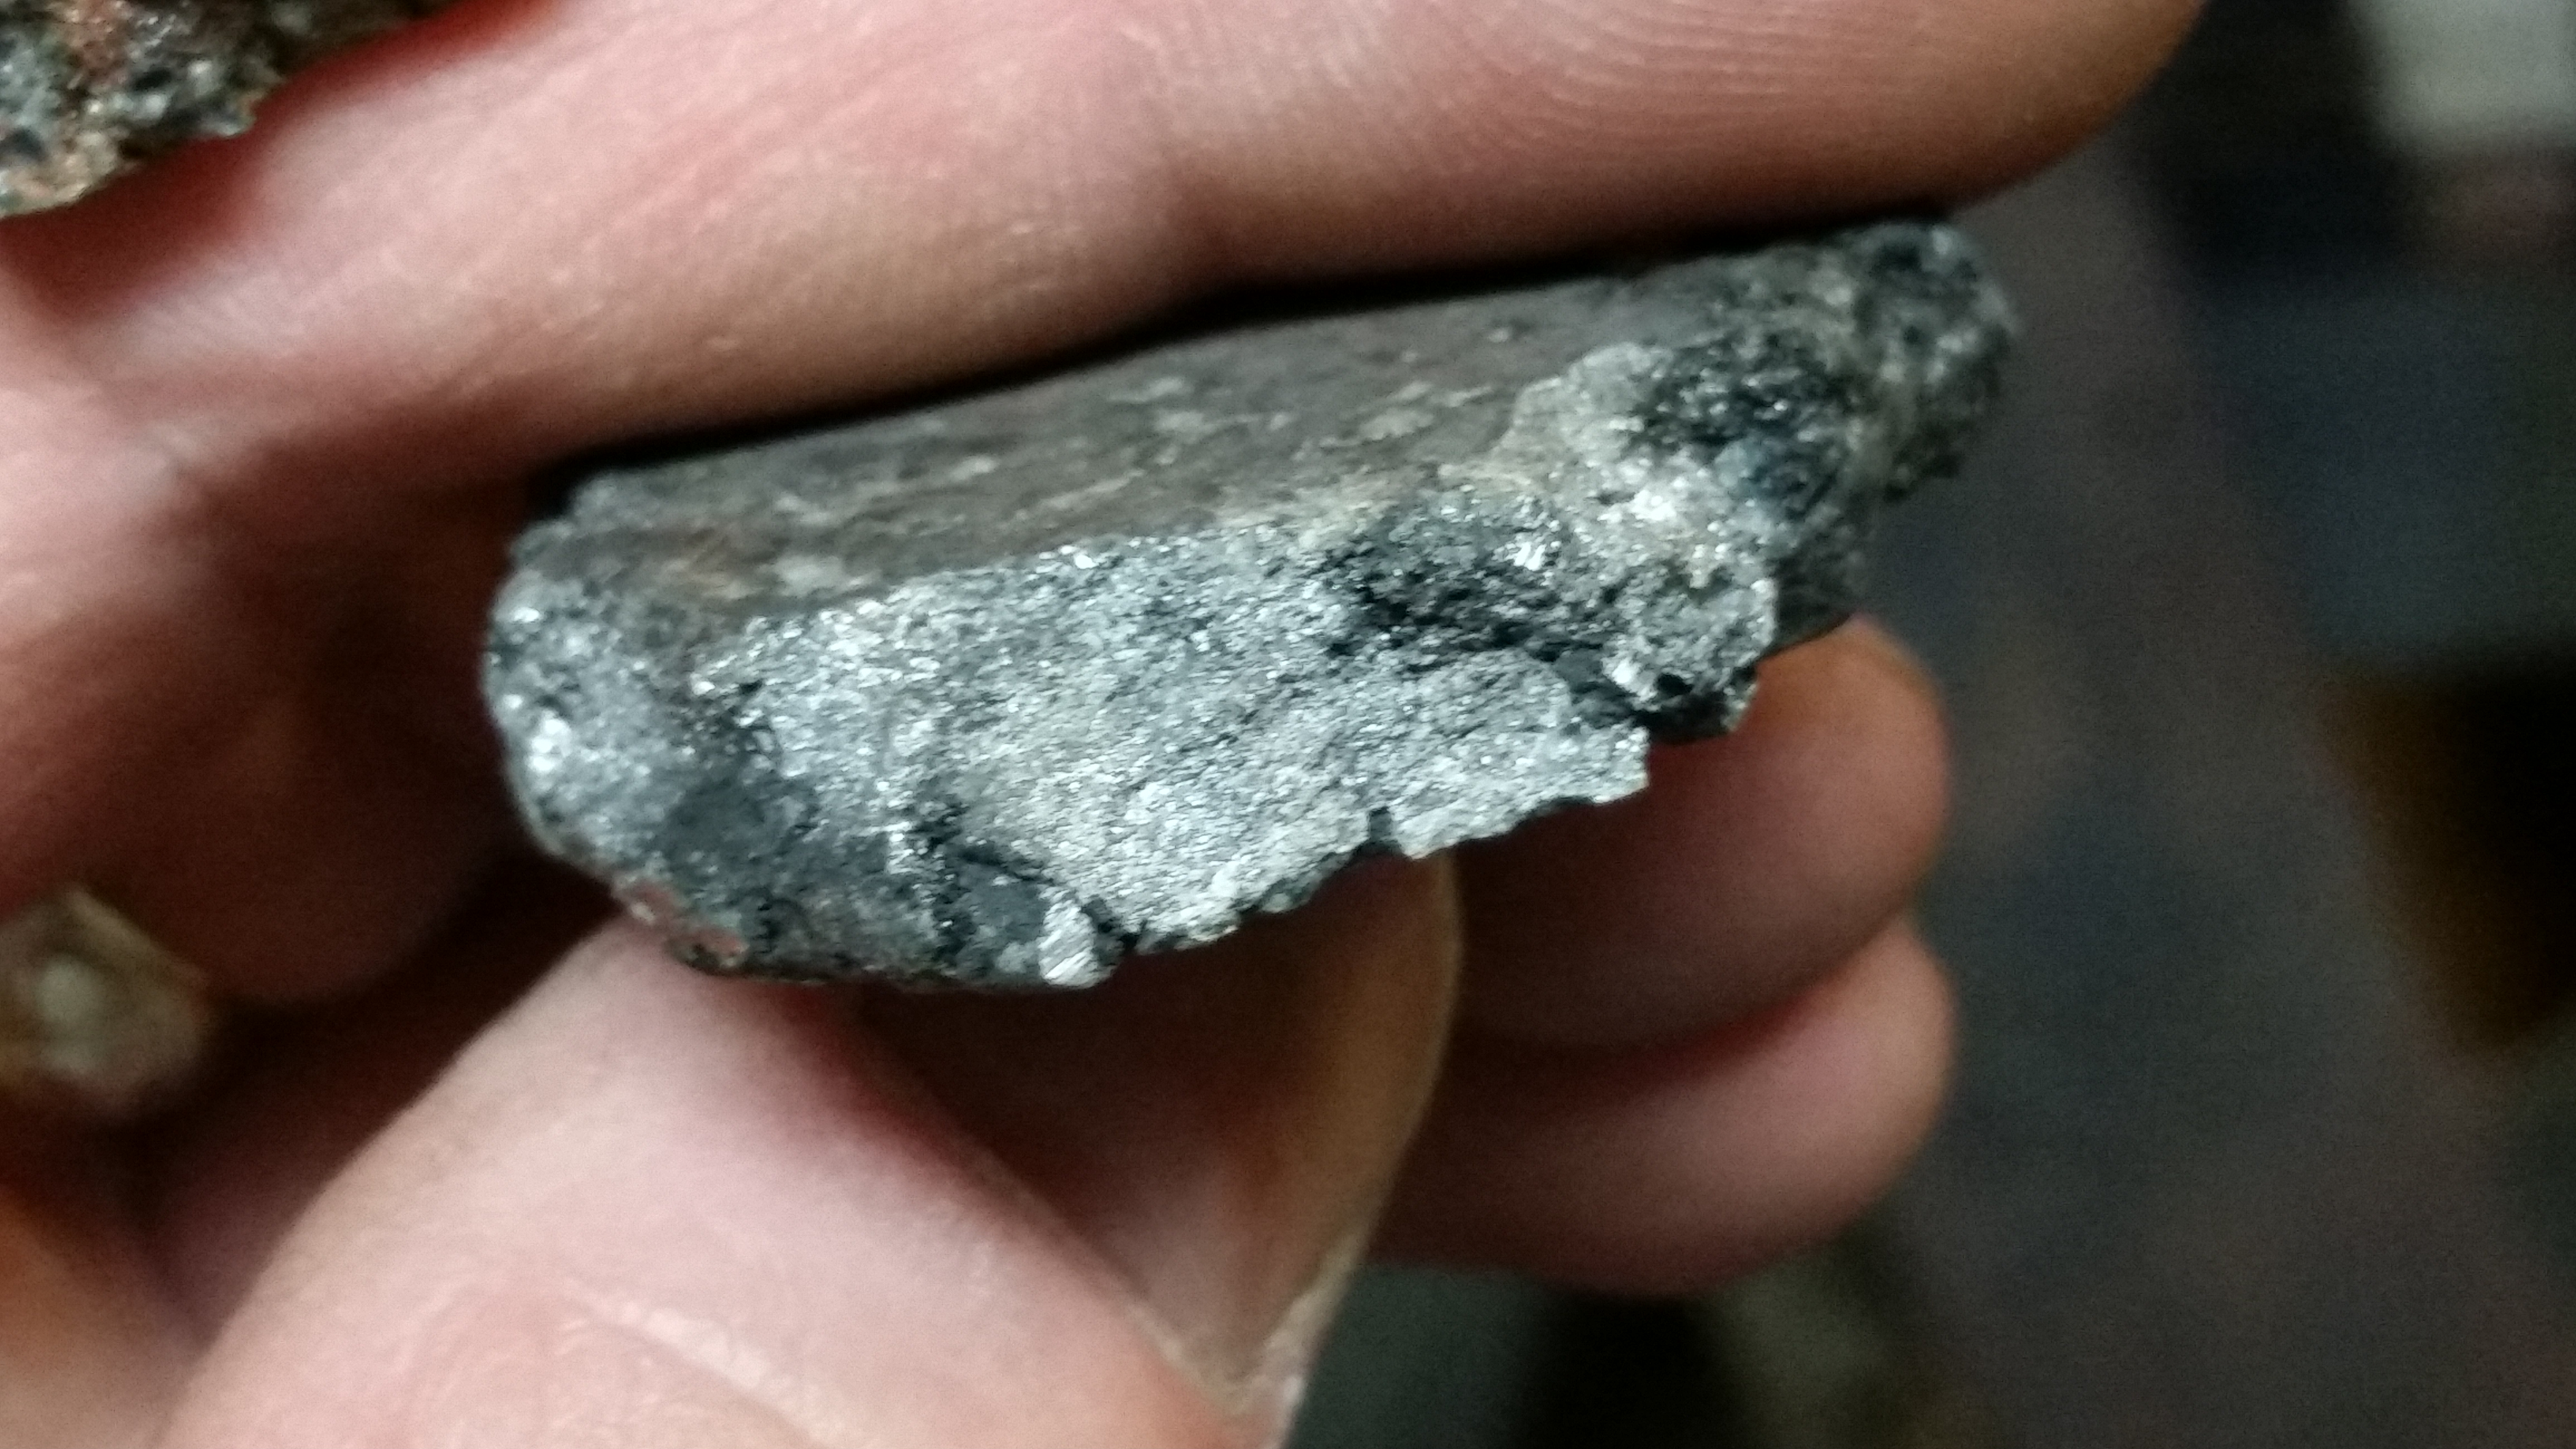
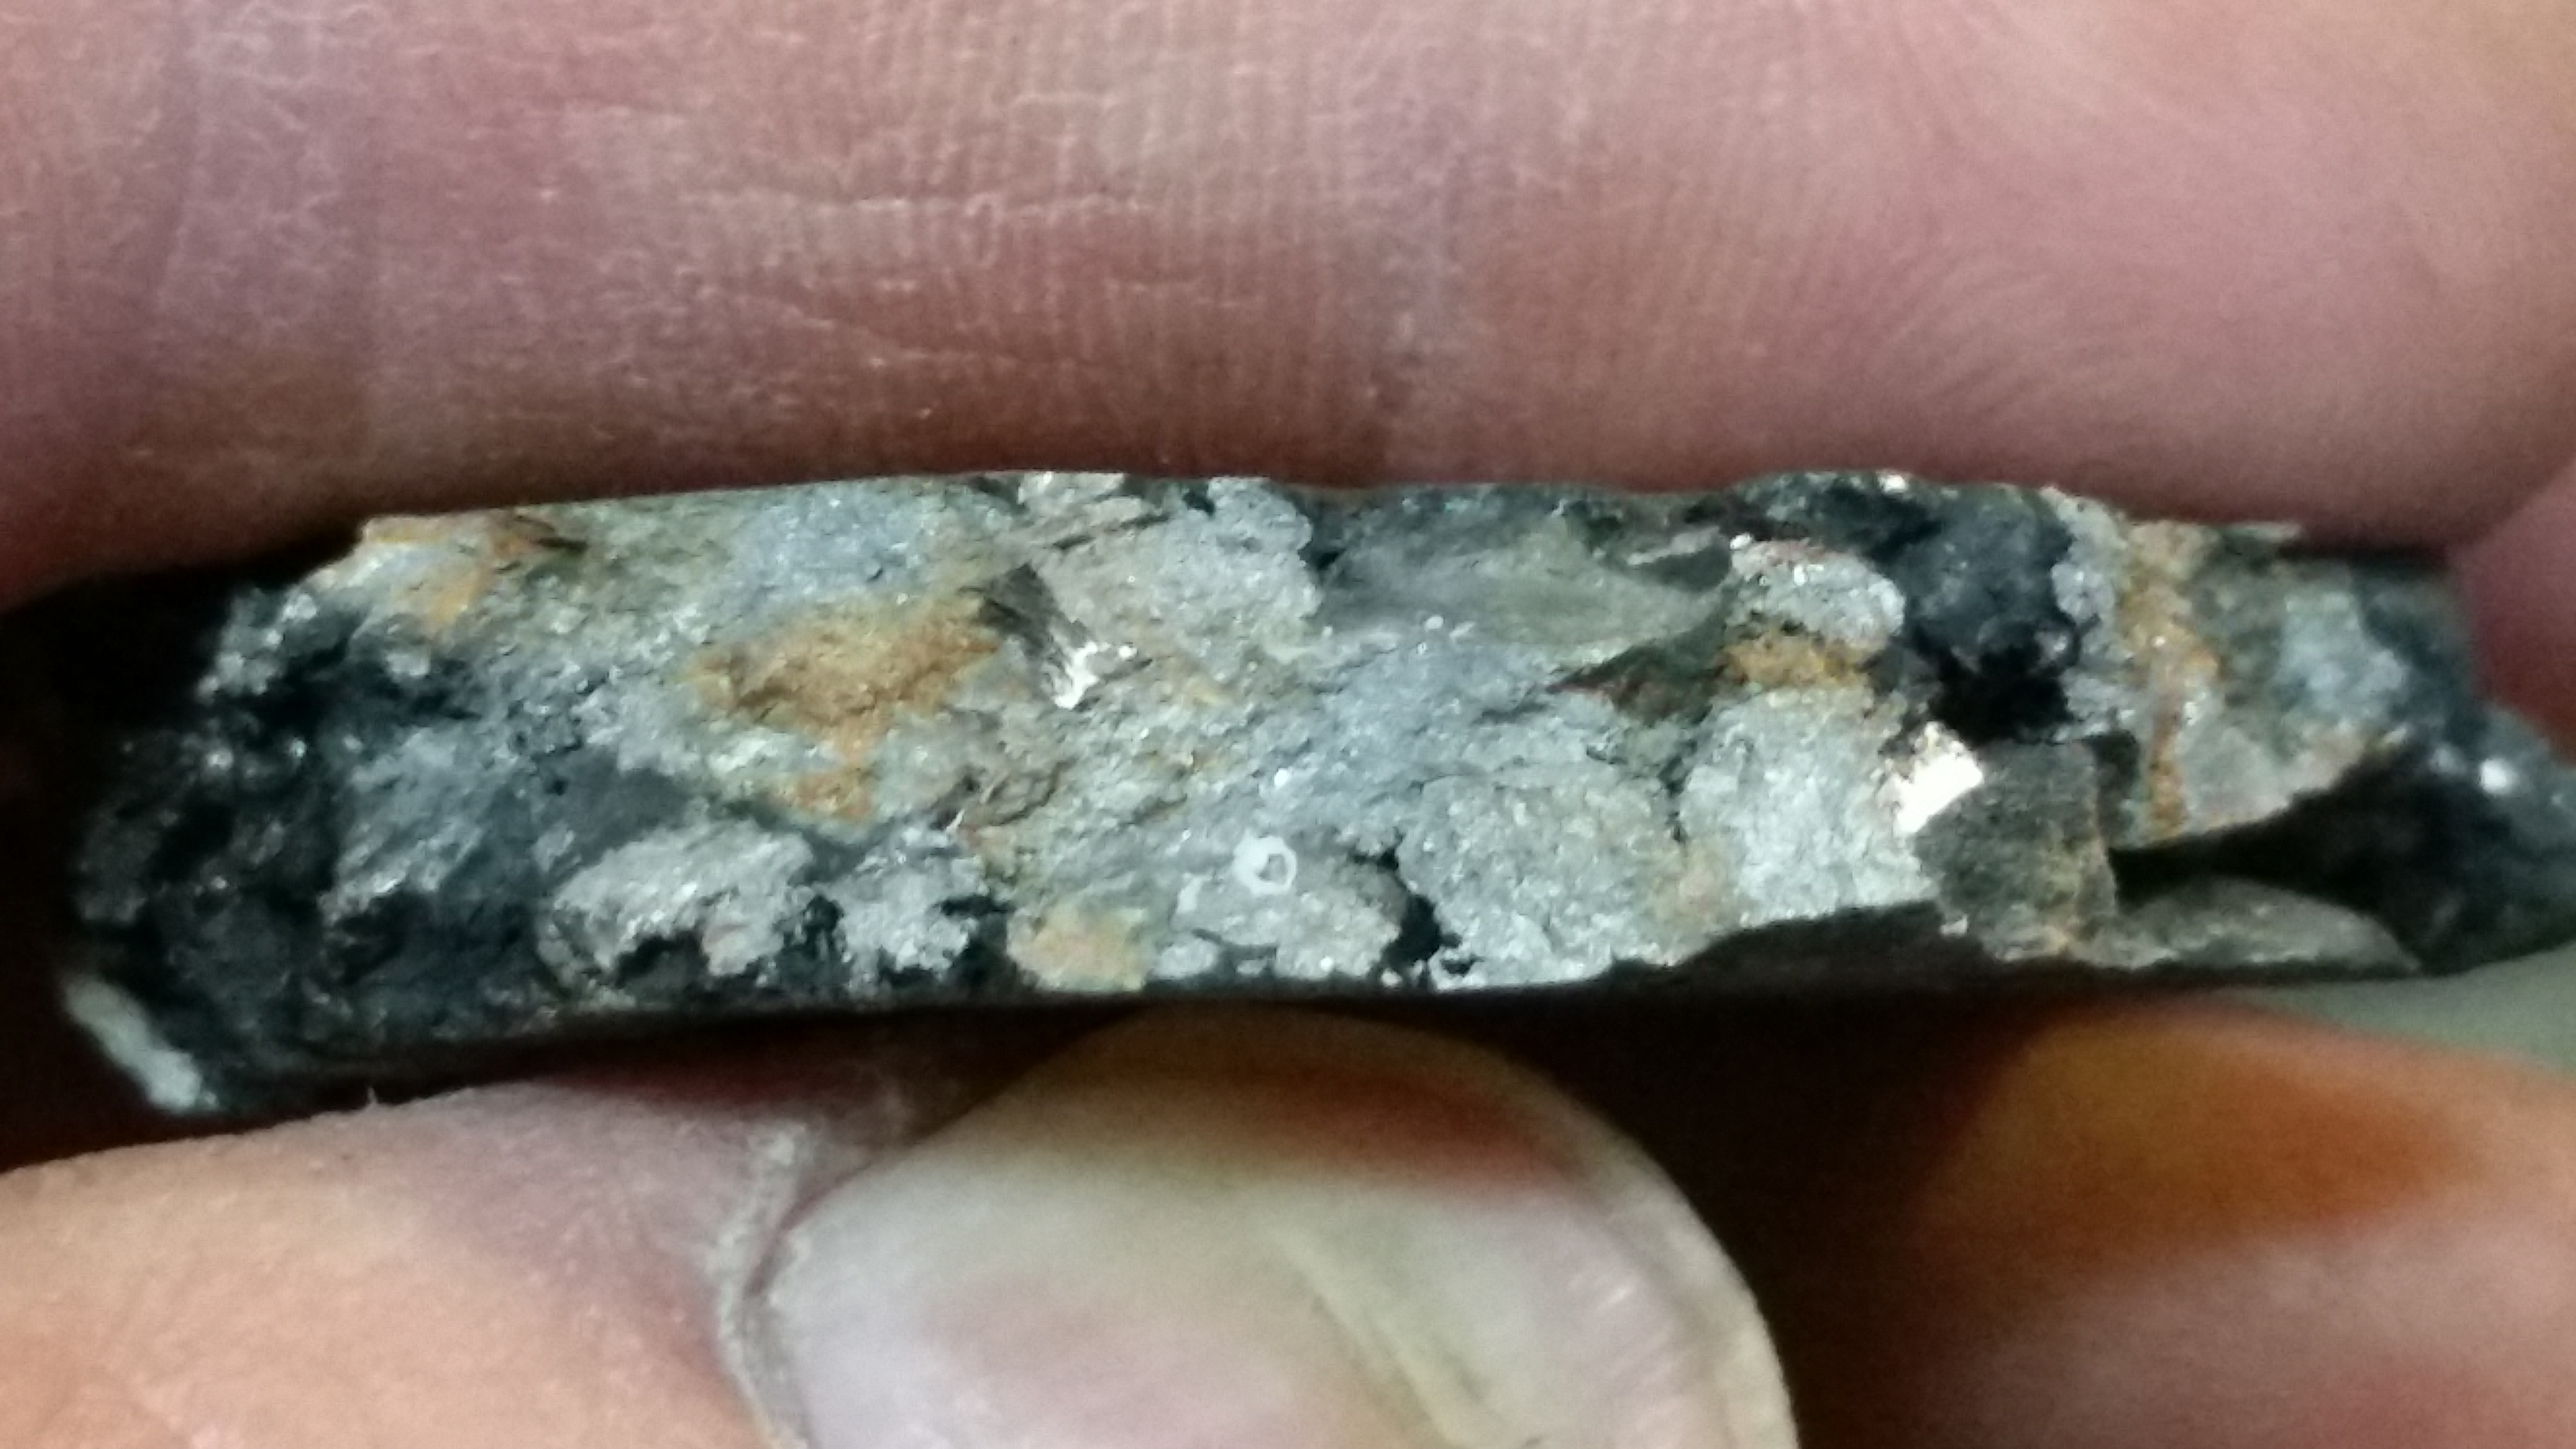
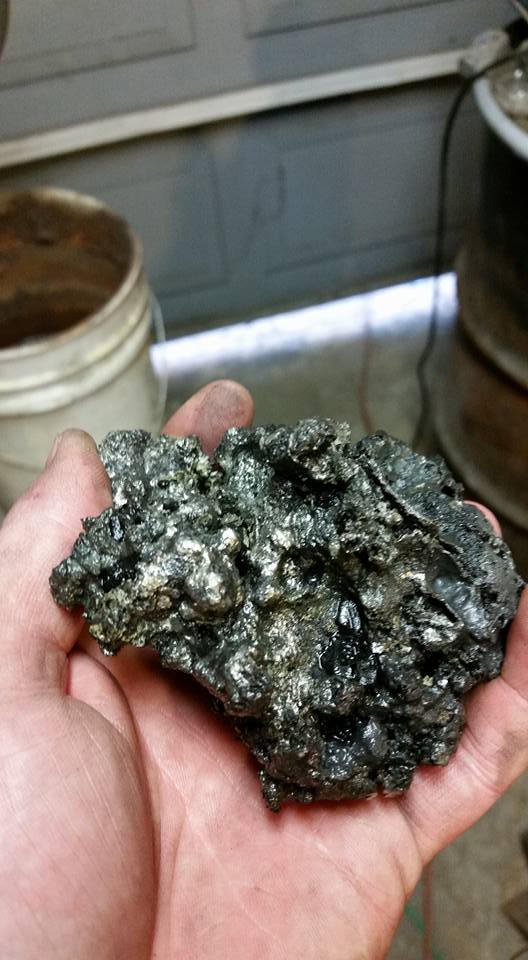
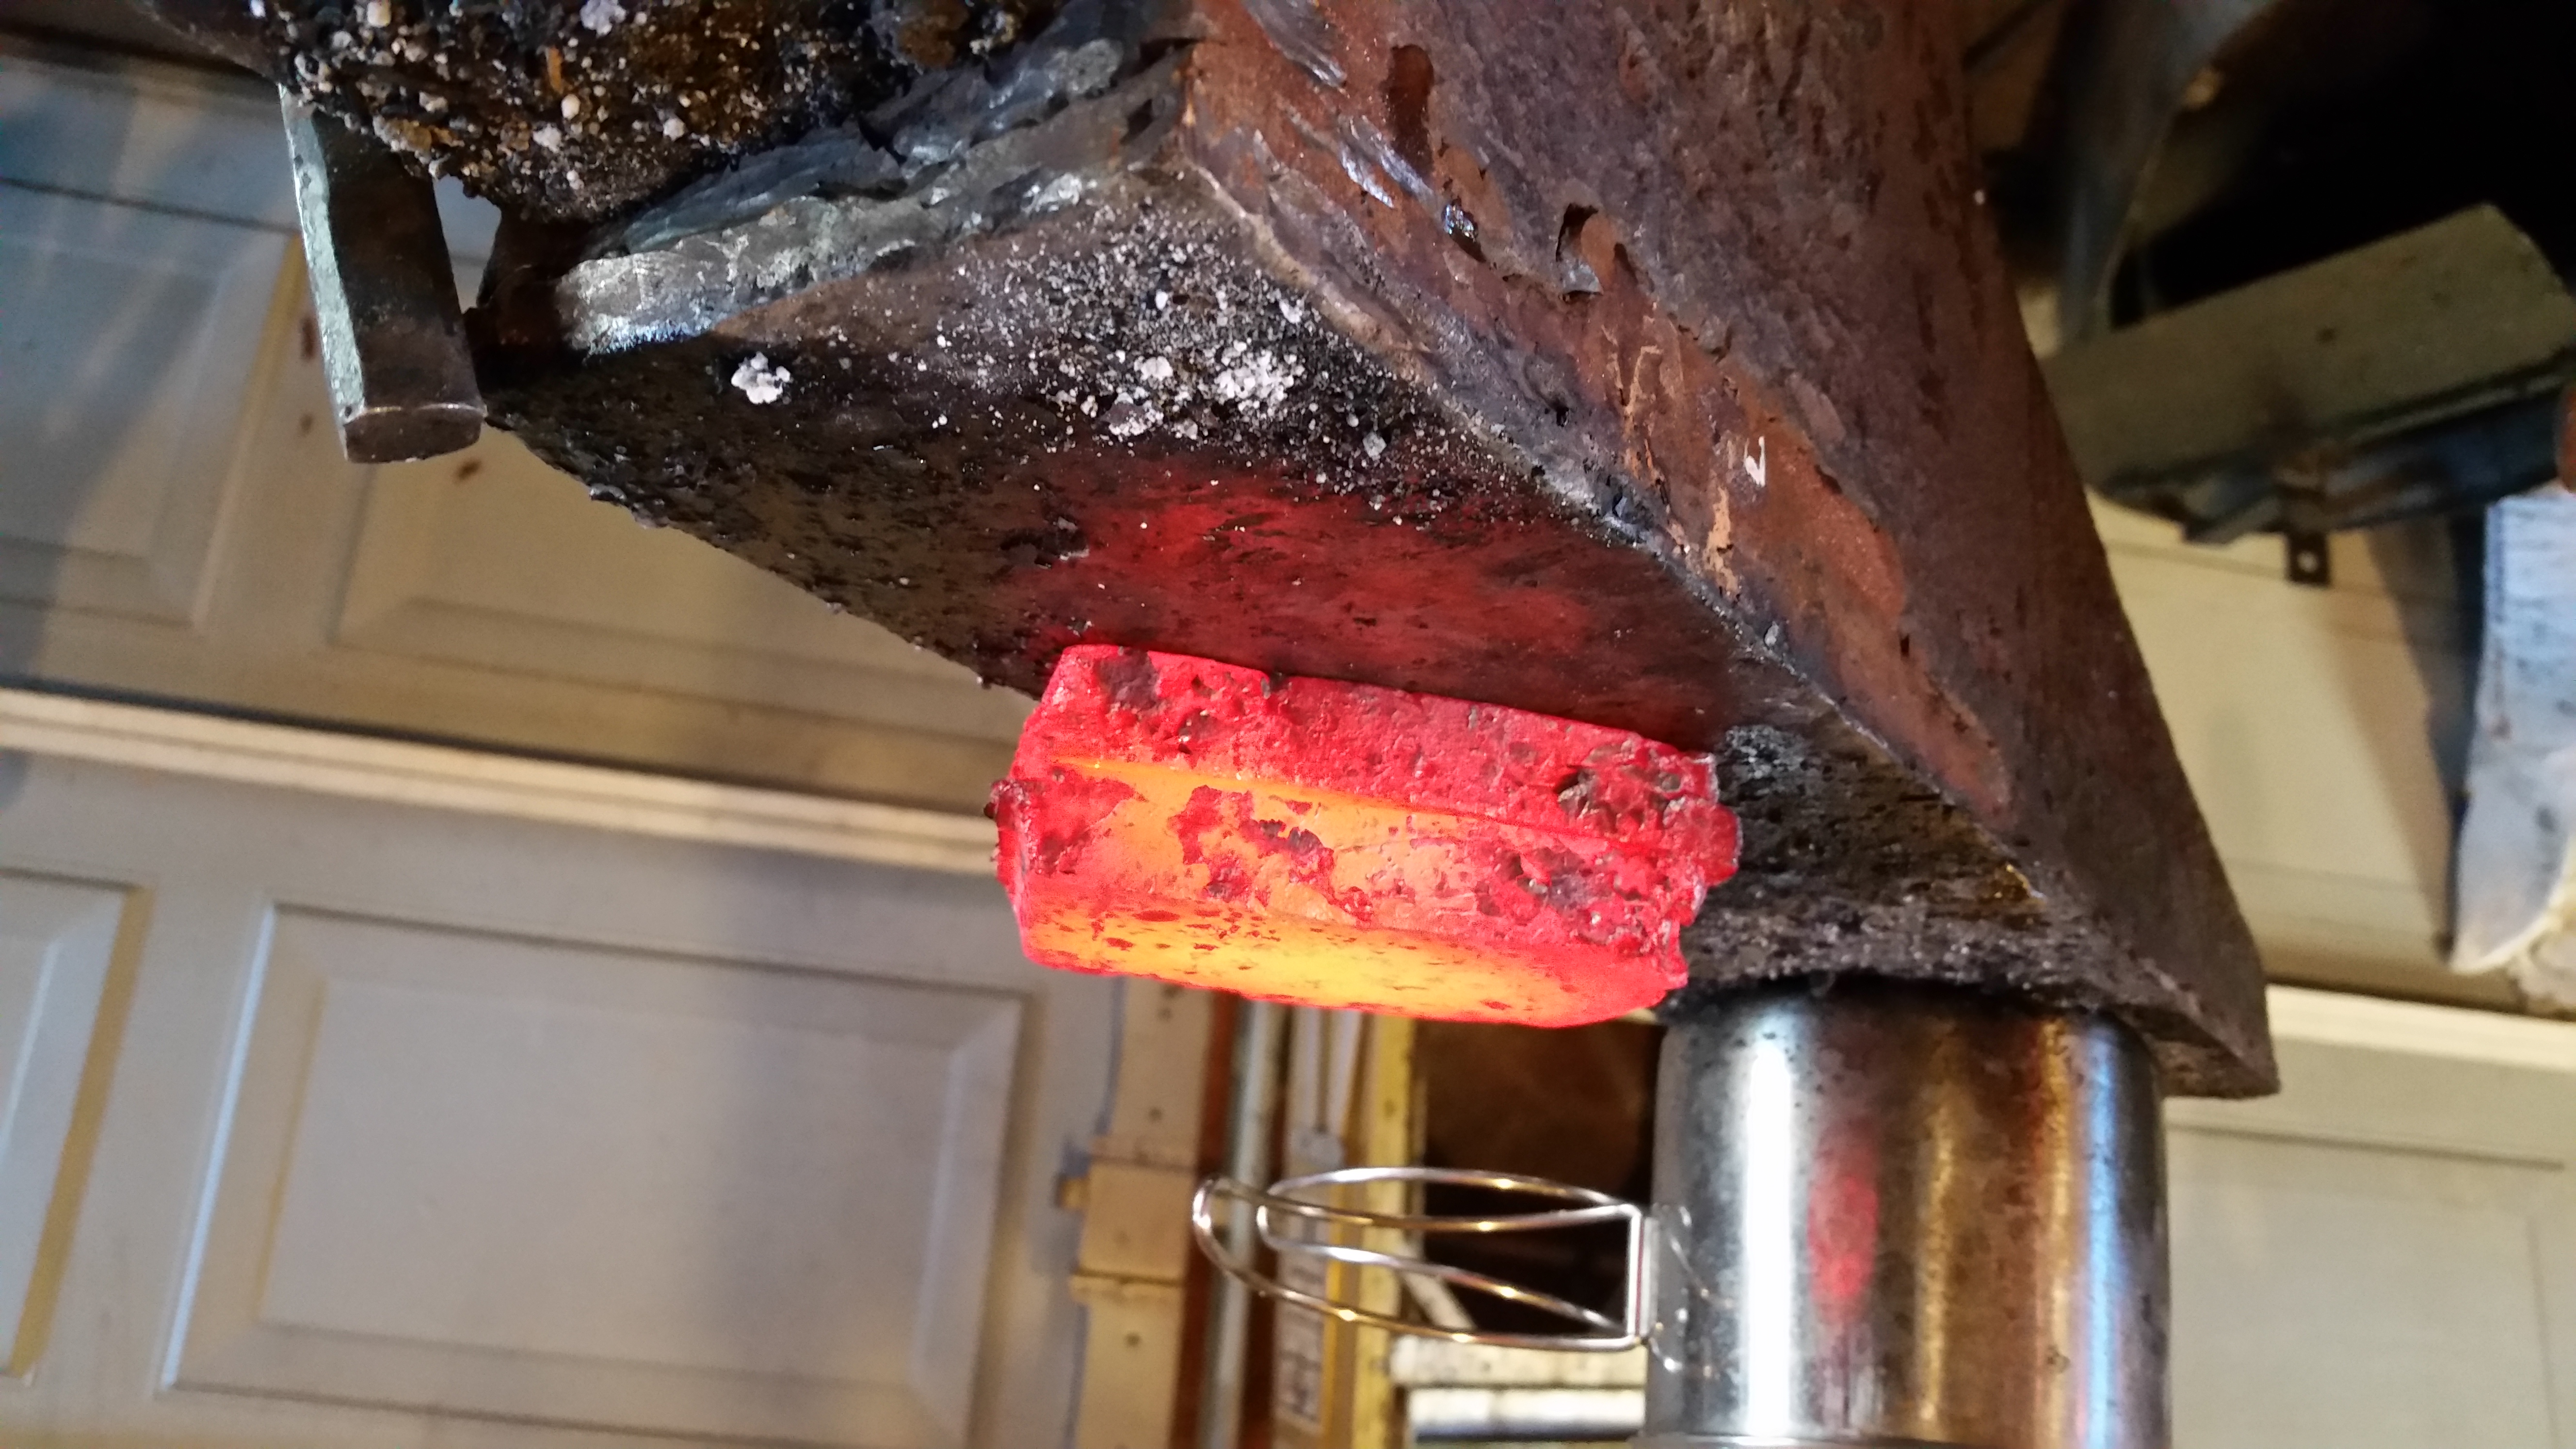
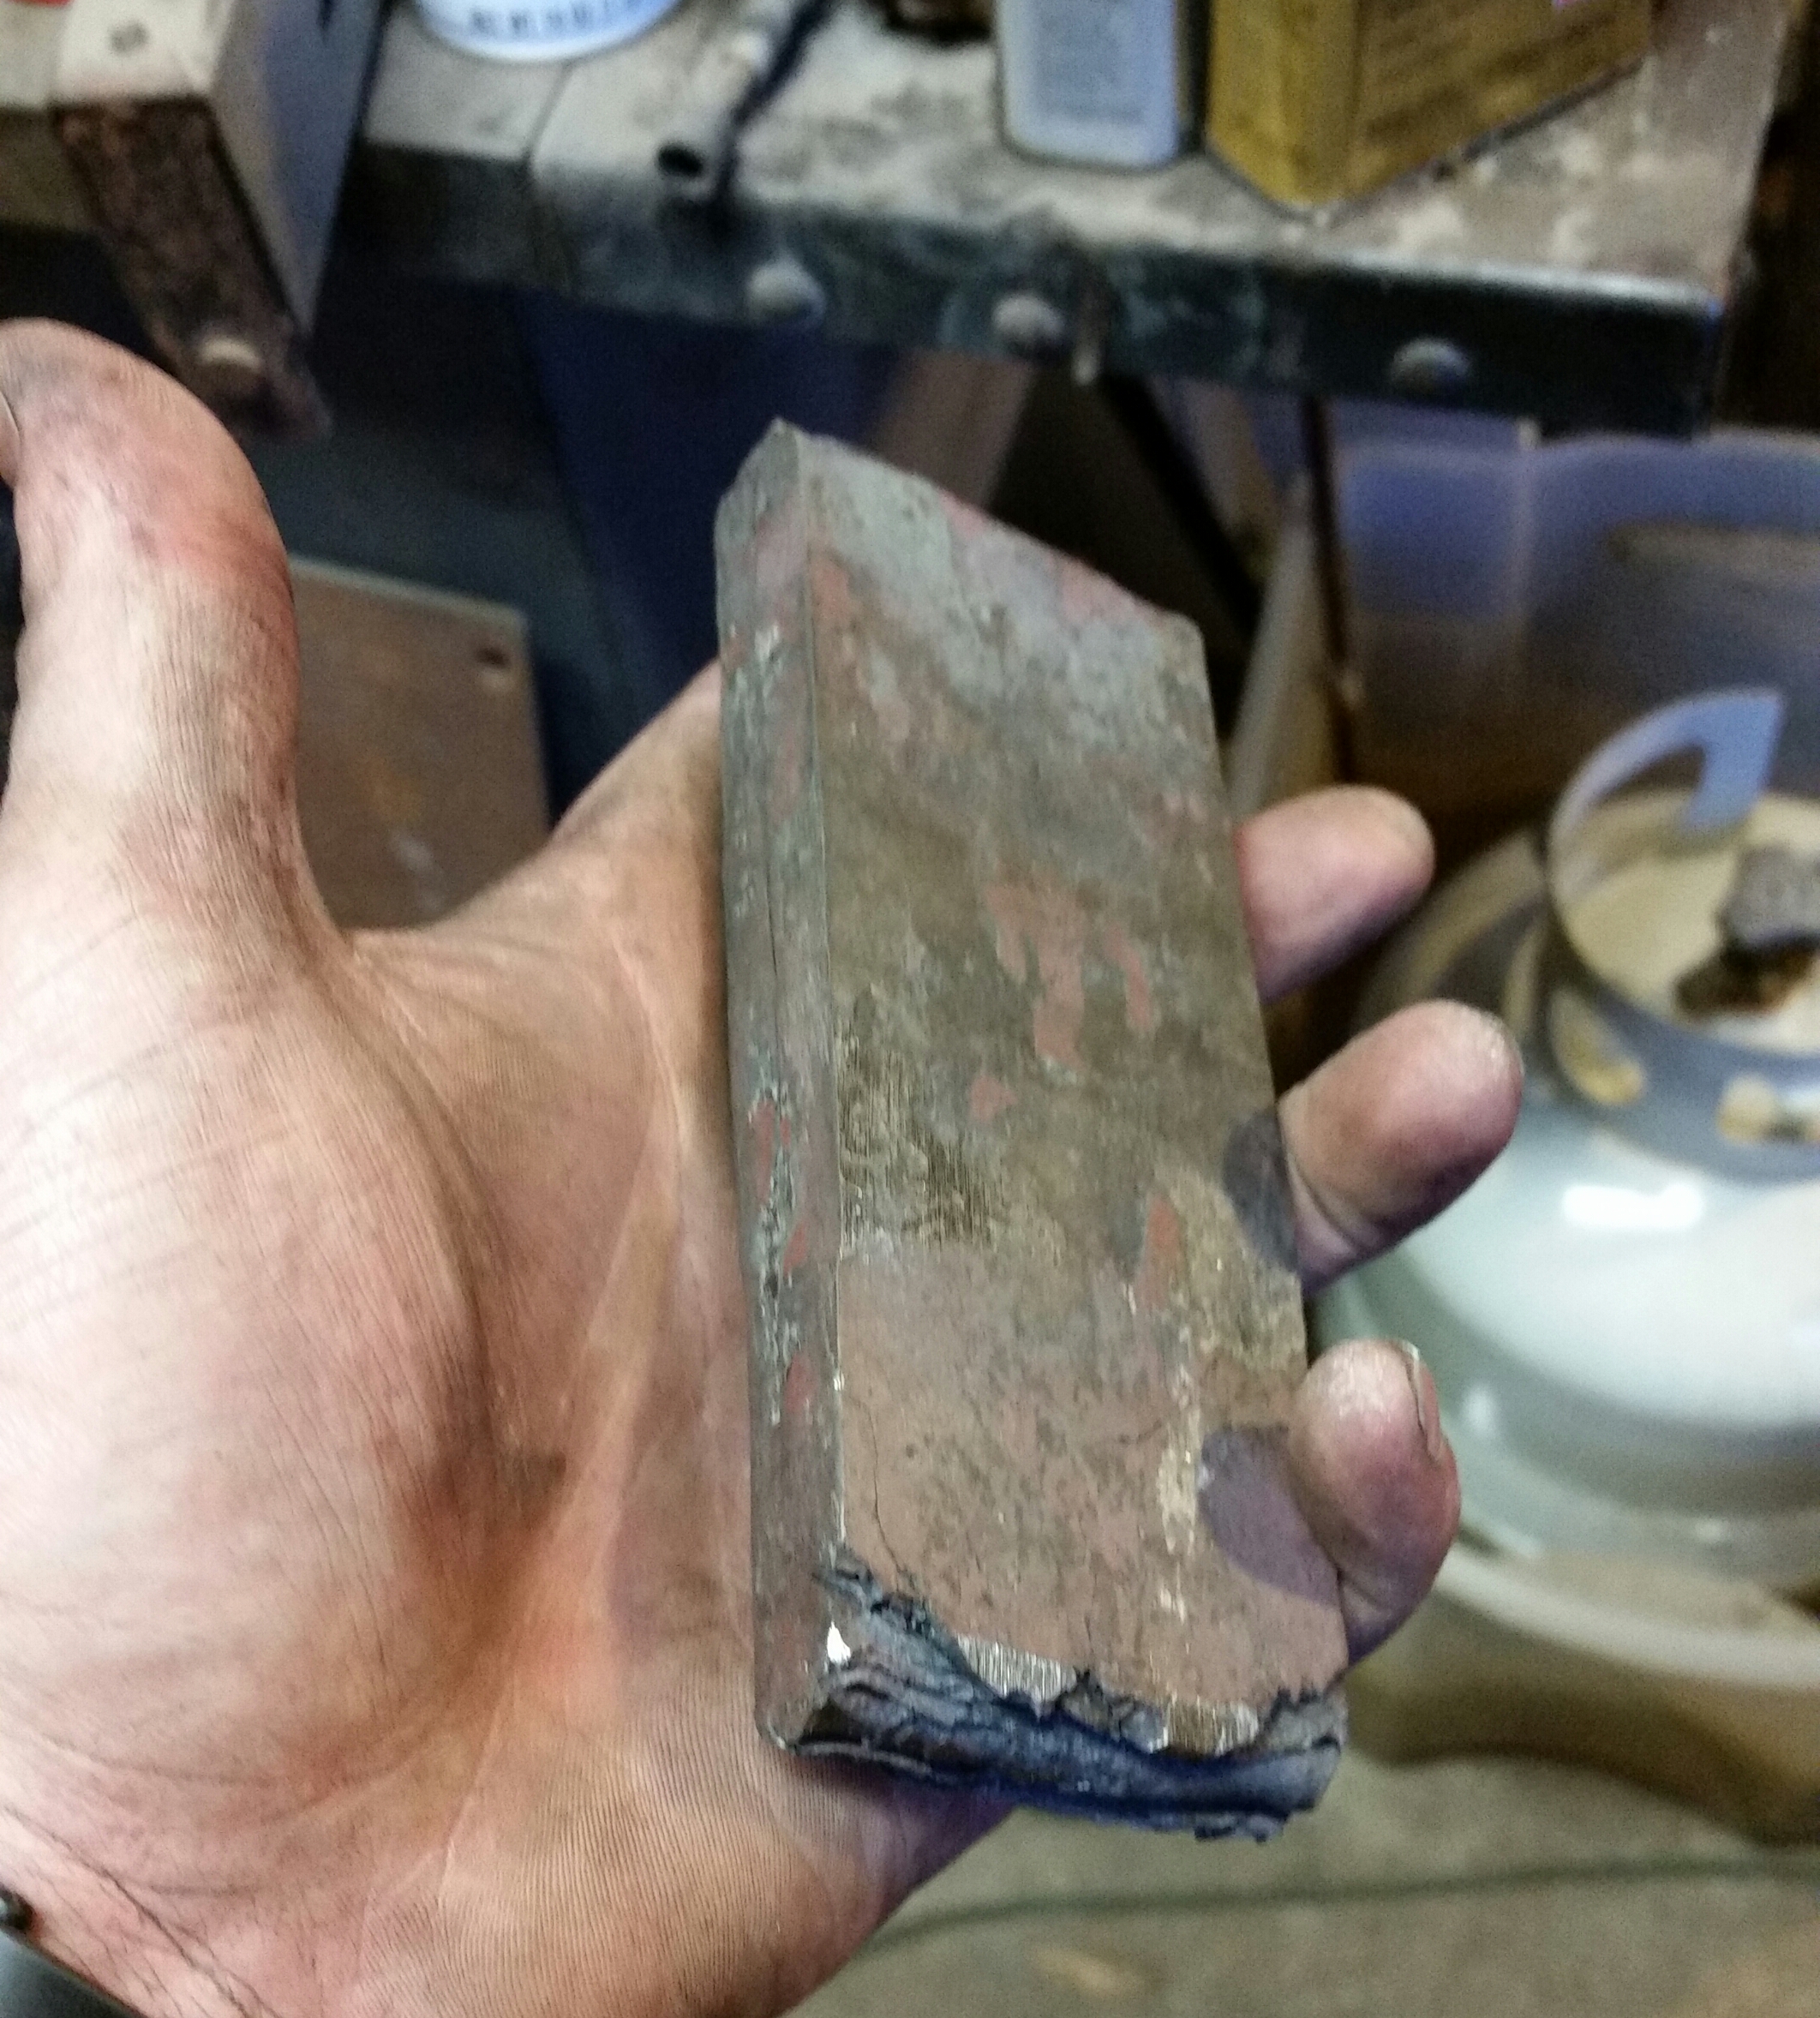
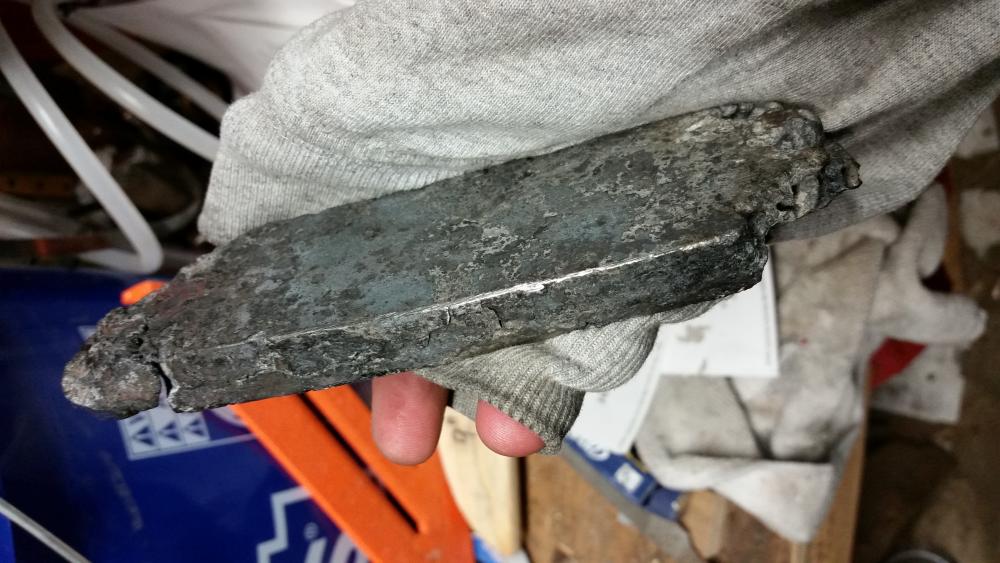
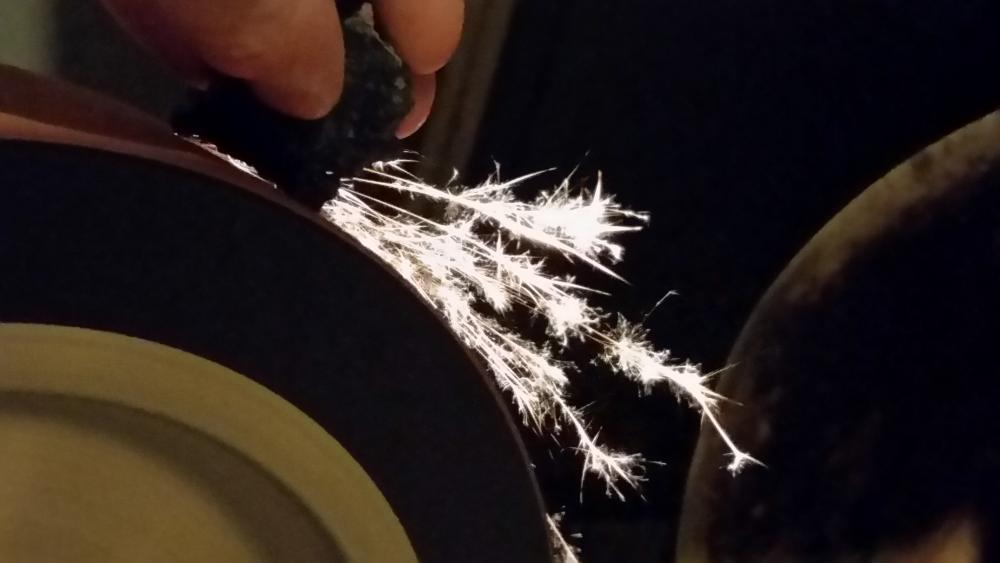
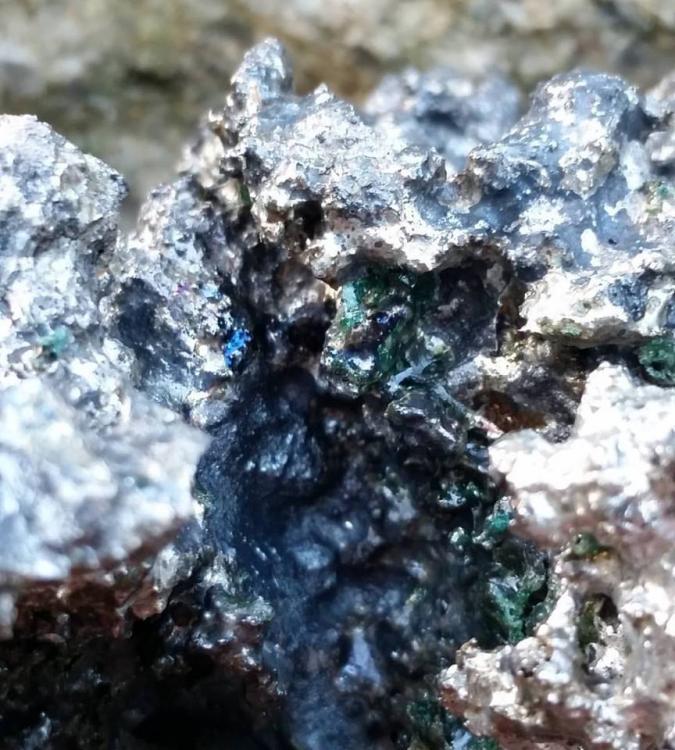
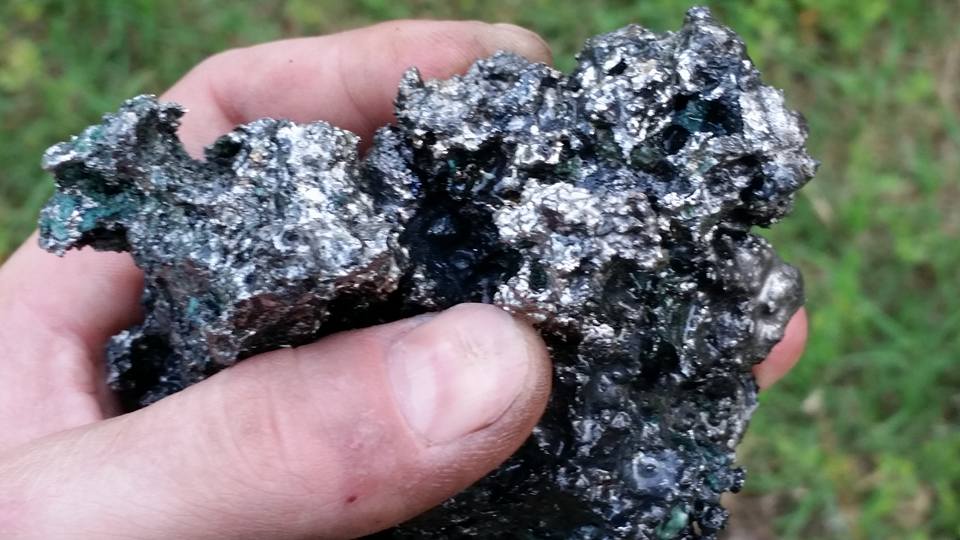
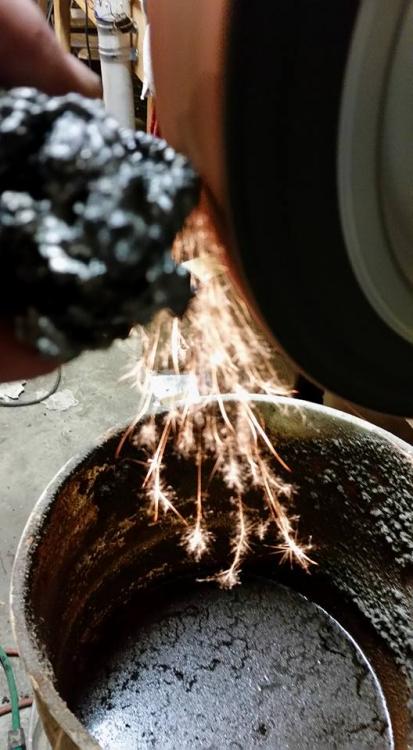
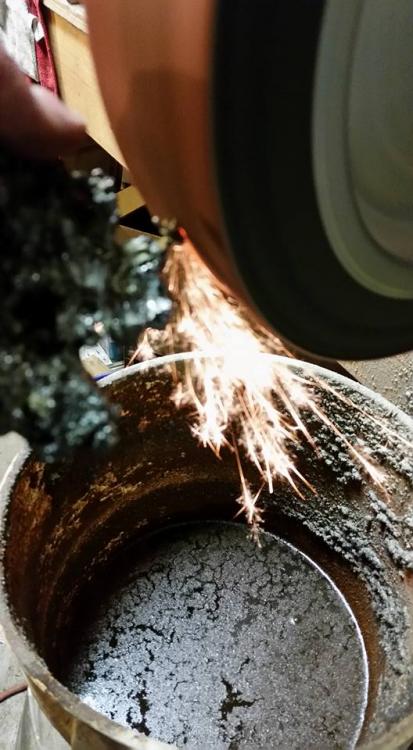
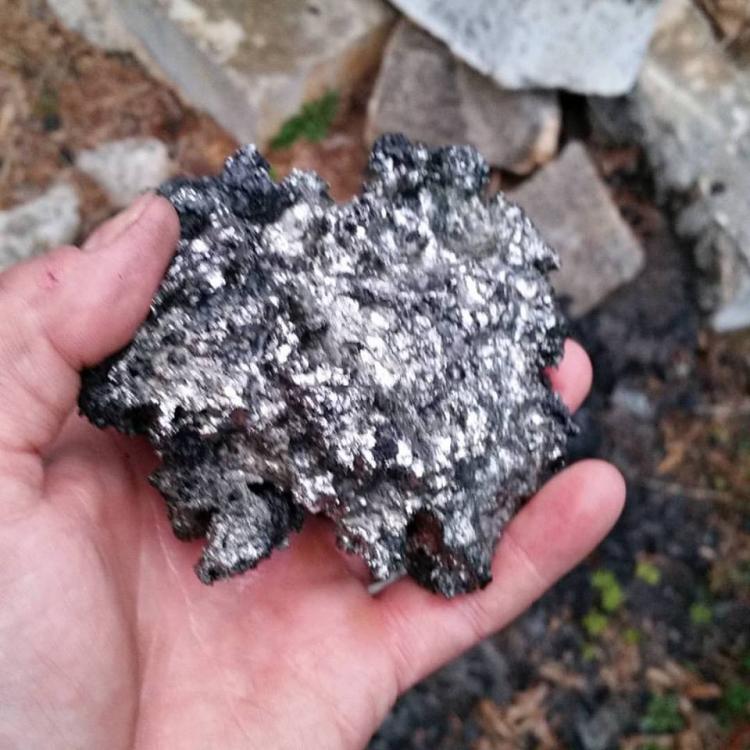
That top pretty puck with the colors wash turned into a bar for a friend. Wasn't cracky at all, just needs some of the charcoal bits to diffuse into the steel. A little piece broke off in the second pic revealing the steel grain. Then changed a few parameters of my furnace to push it further to cast, but not quite. Made these closest possible carbon content before it is so high that it is cast and cannot be worked. I would say this next bit is easily 1.5 C. Squished it down (good sign), and then quenched it. It shattered like glass when struck. The grain is so-so and deserves some folding to be truly beautiful. Spark is dense and intense, but also long. Unlike cast which is dense and short.


-
Been making a lot of it lately. 1.2-1.5% C range in all of my pucks, in their entirety. Been figuring things out, or rather finding through trial and error how the japanese make such beautiful looking steel, with clean surfaces and tempering colors, rendering the steel to take on its name by appearance as jewel steel. I have the composition spot on with what they are using. Almost have the visual down pat.

-
Splendid idea! When I get the atmosphere reducing, I can manage 2 feet of dragons breath. Tongs and handles are HOOOT. You are welcome. Make sure it is clean inside, and no filters.
-
For my ribbon burner I use the smallest Shop-Vac Lowes sells ($35) and pipe the exhaust to my plumbing. Its ~110 CFM and perfect for my ribbon. Can run it on rheostat, but I prefer to run it full blast, with a Tee and ball valve between it and the gas dump, to blow off the excess, as the Shopvac puts out more than enough. Plus if it burns out within a year, I can take it back and exchange it for a new one.
-
We bake lots of cakes around my parts....
-
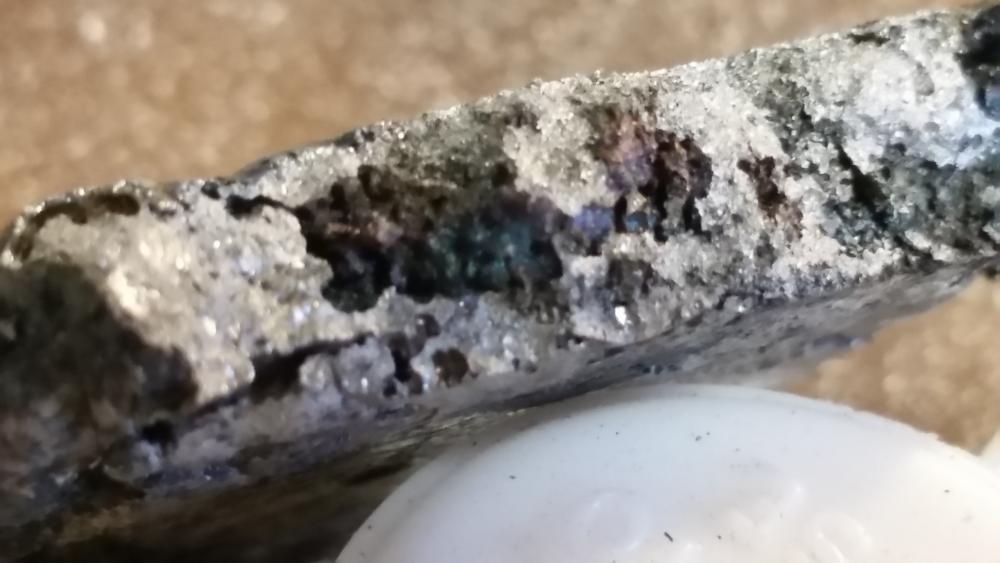
Well honestly I know it lowers phosphorous, and I only suspect it lowers sulfur. Good chance that it does as well. It comes out in the slag during the melt. I can consistently make and have been making fairly clean steel in the 1.2-1.5% C range, and fairly identical to the same orishigane made in Japan, which is widely used as a tamahagane substitute, which in itself is indistinguishable from tamahagane.
-
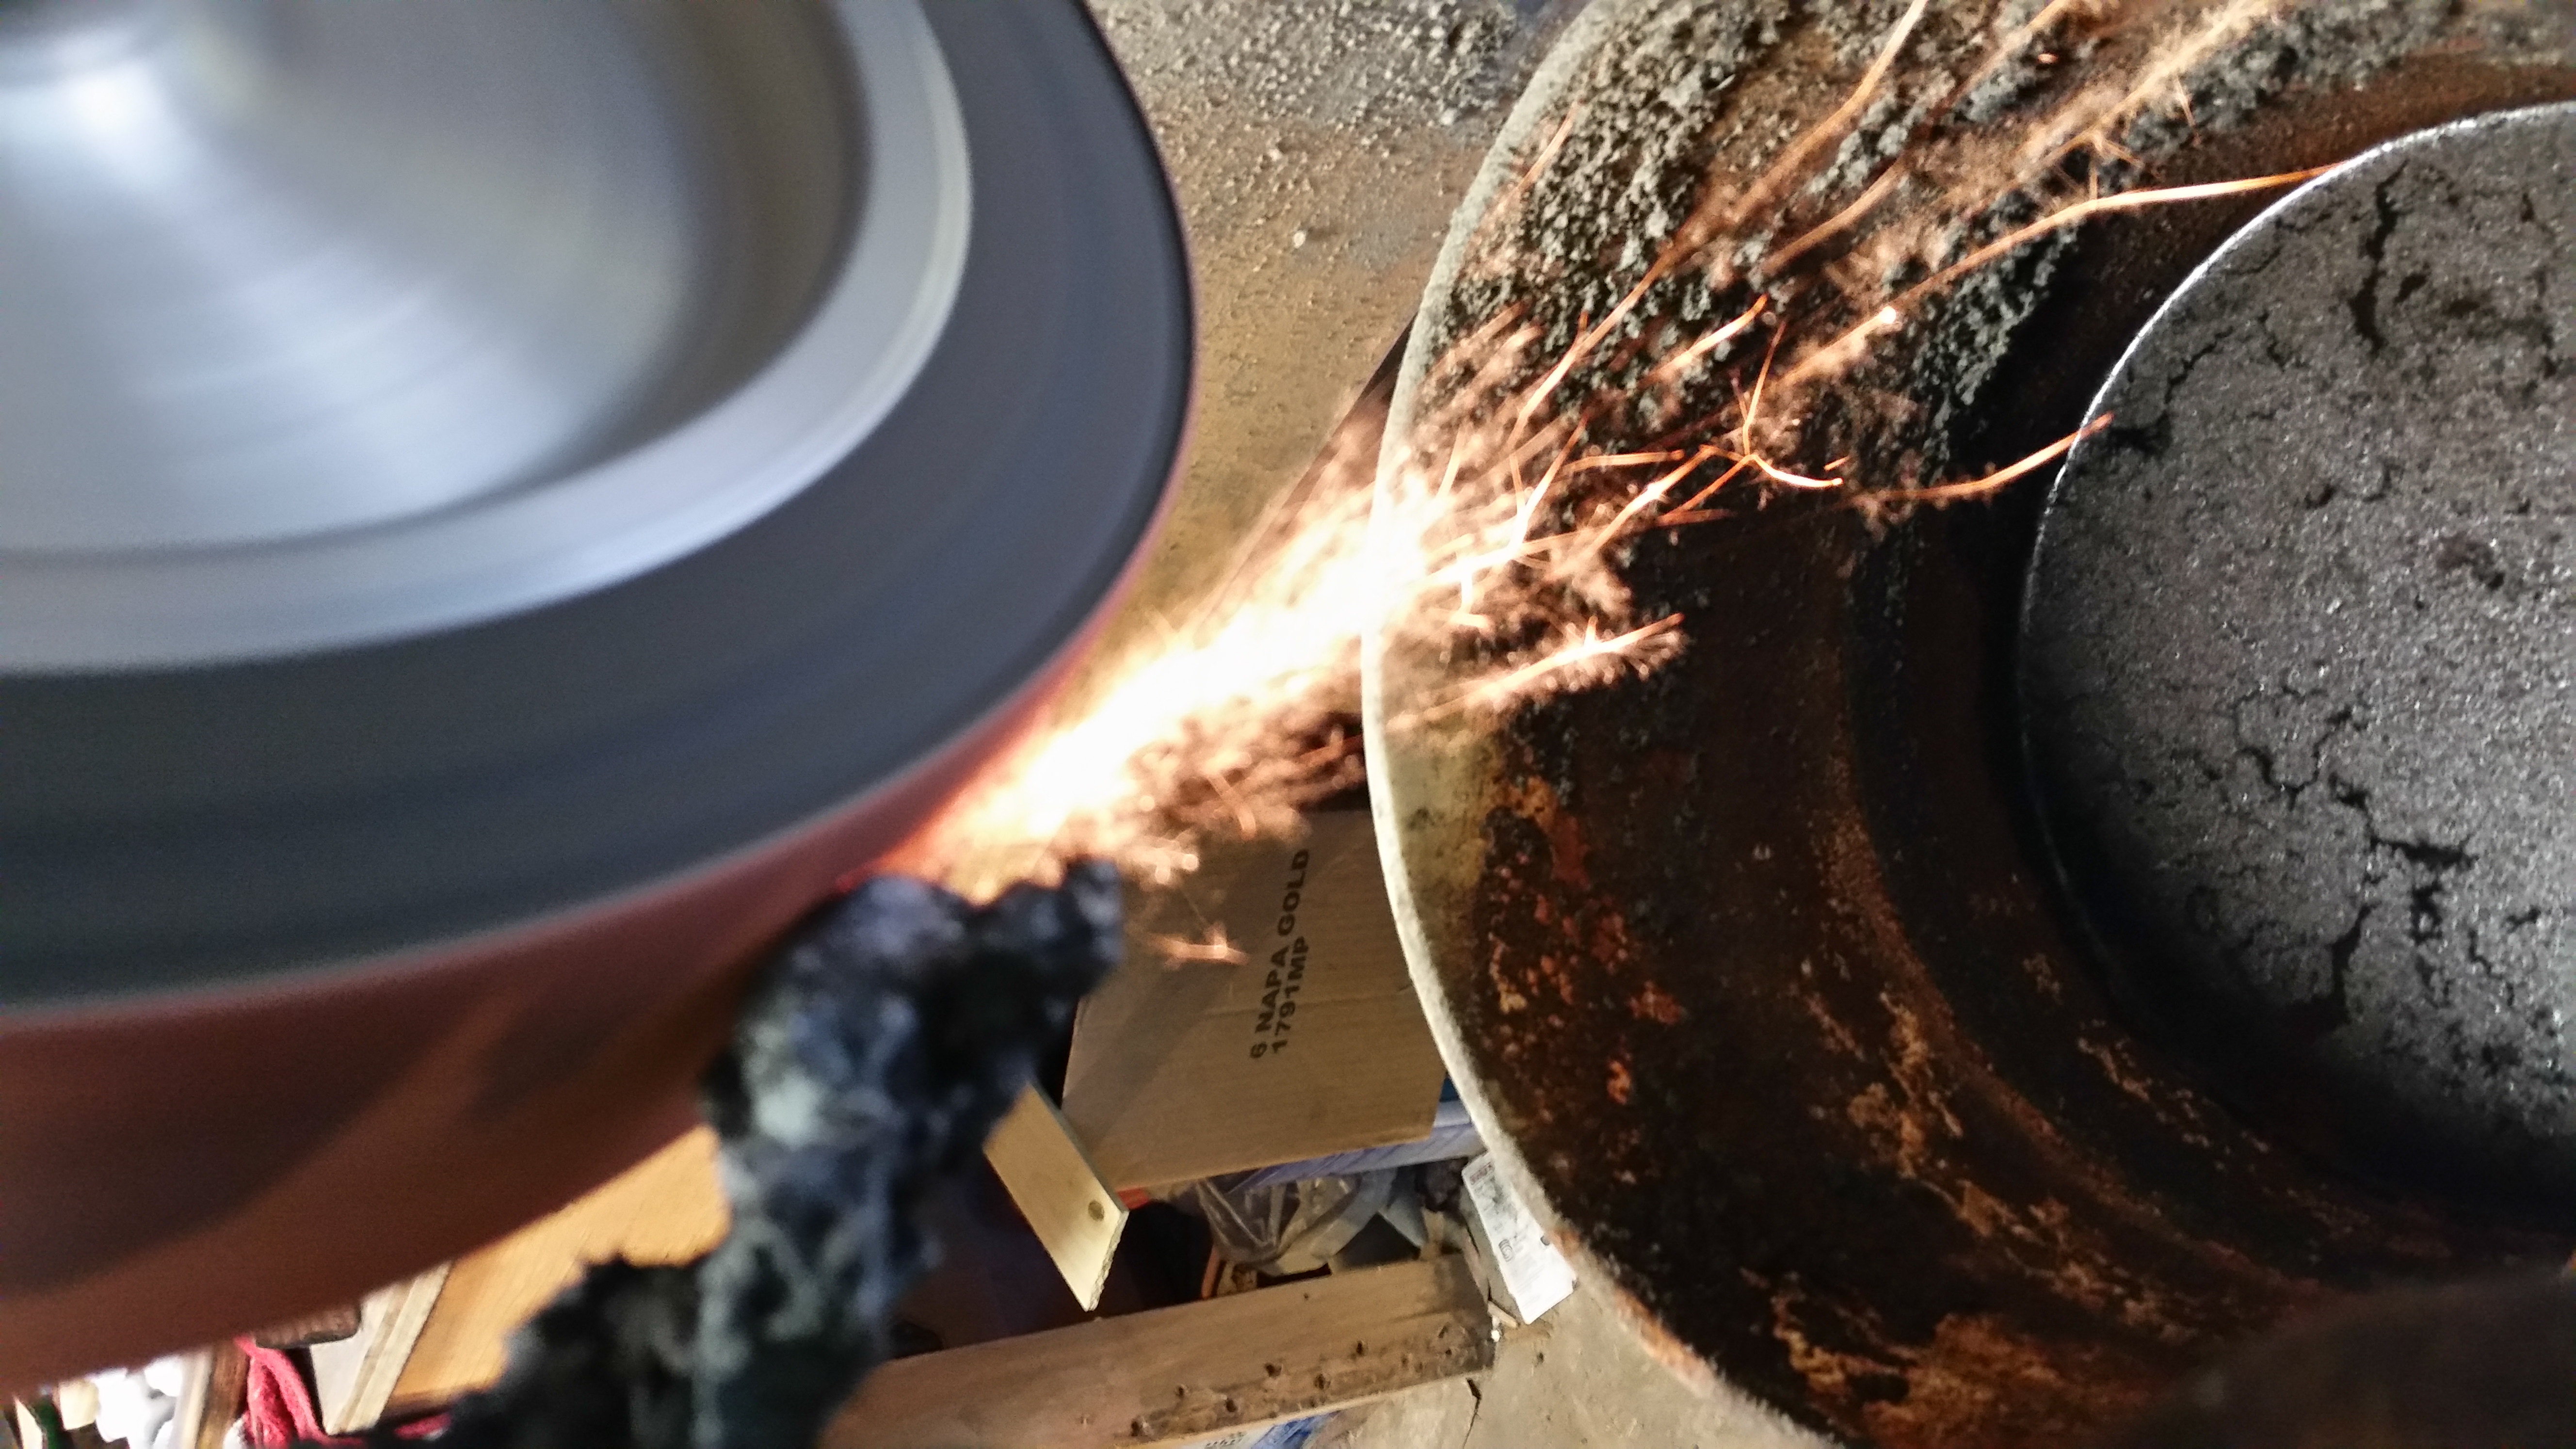
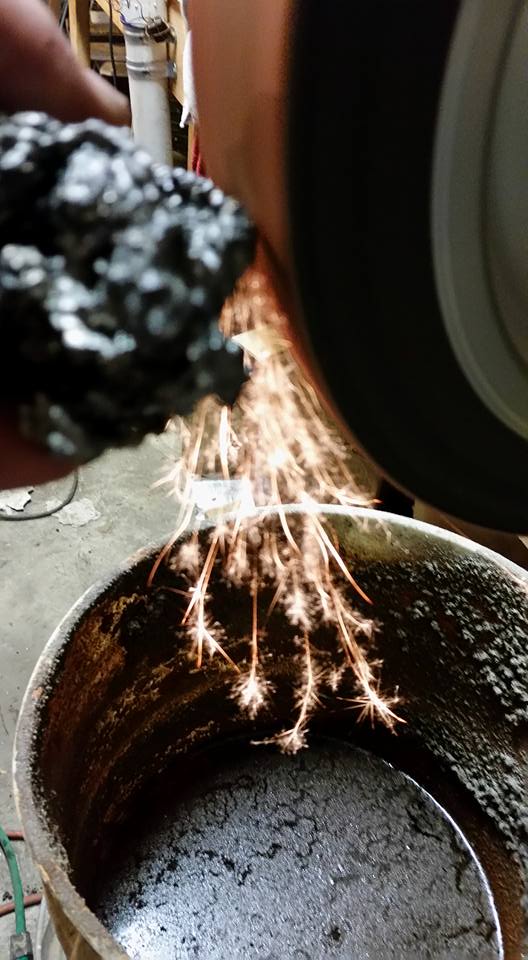
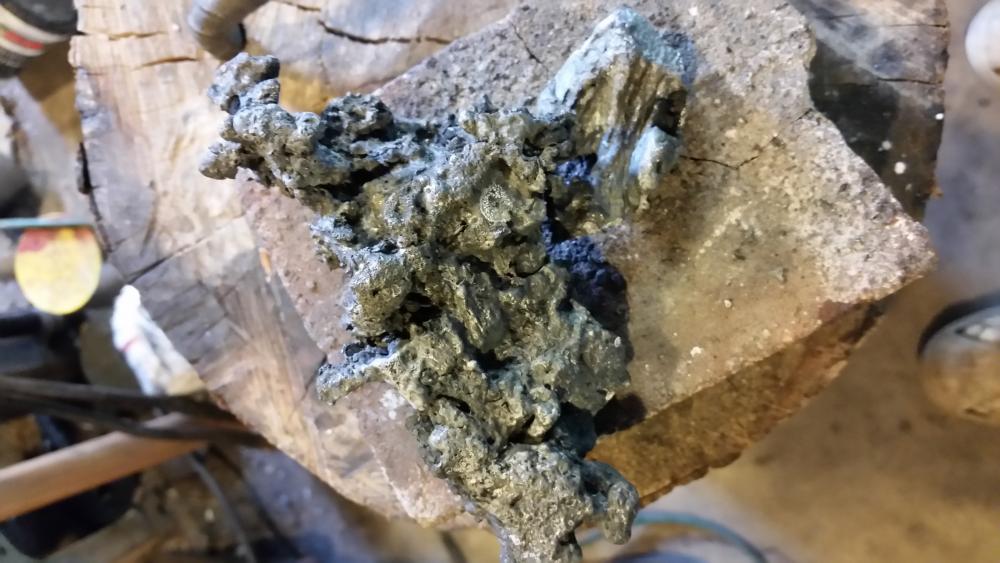
This iron is literally melting. Depending on the height of the floor to the tuyure, I can control the carbon content and separate a majority of the slag from the metal, along with lowering phosphorous and Sulfur to a high degree. I can either make really clean iron with no carbon at all, or introduce enough carbon to make it cast.
-
You can use it to make interesting patterns for us sanmai guys to use as jacket material. Using SS jackets in sanmai is on the rise.
-
Yea, it's really turned into a passion. Bloomery, and the Japanese process has really taken a foothold in my shop time. This project will be a drawn out one. I have way too much going on to fully concentrate on solely this. I have many sanmai blades to make and a ridiculous amount of hammers to make as well. Though it will get finished, especially now that I have orishigane down to a science.
-
No problem. My desire to know in theory and in practice how the japanese create their works of art is strong. Most of my technique can be seen and read in various sources, but its the little details that have taken a tremendous amount of research, discussion with various Japanese smiths, and my own practice to get right. So you guys know, as of right now I am at a point where I can decide to up the carbon content by added fresh orishigane. I feel like by the 13th fold the carbon content will possibly be below where I want it to be. I have decided to make a purer chunk of orishigane to add to the bar, not only upping my carbon content, but my material as well. Probably in the neighborhood of around another pound. This could leave me with around 2-2.5# of kawagane in the very end, while I have a bar of 13 fold shingane already made up and ready to insert as the core bar. The grain of that in particular running perpendicular to the kawagane. This should give me enough to make a sunobe for a katana length blade. If not, a very nice wakizashi. We shall see. Today I am going to be firing up the charcoal retort and making more charcoal while I make repairs to my forge and add ITC-100.
-
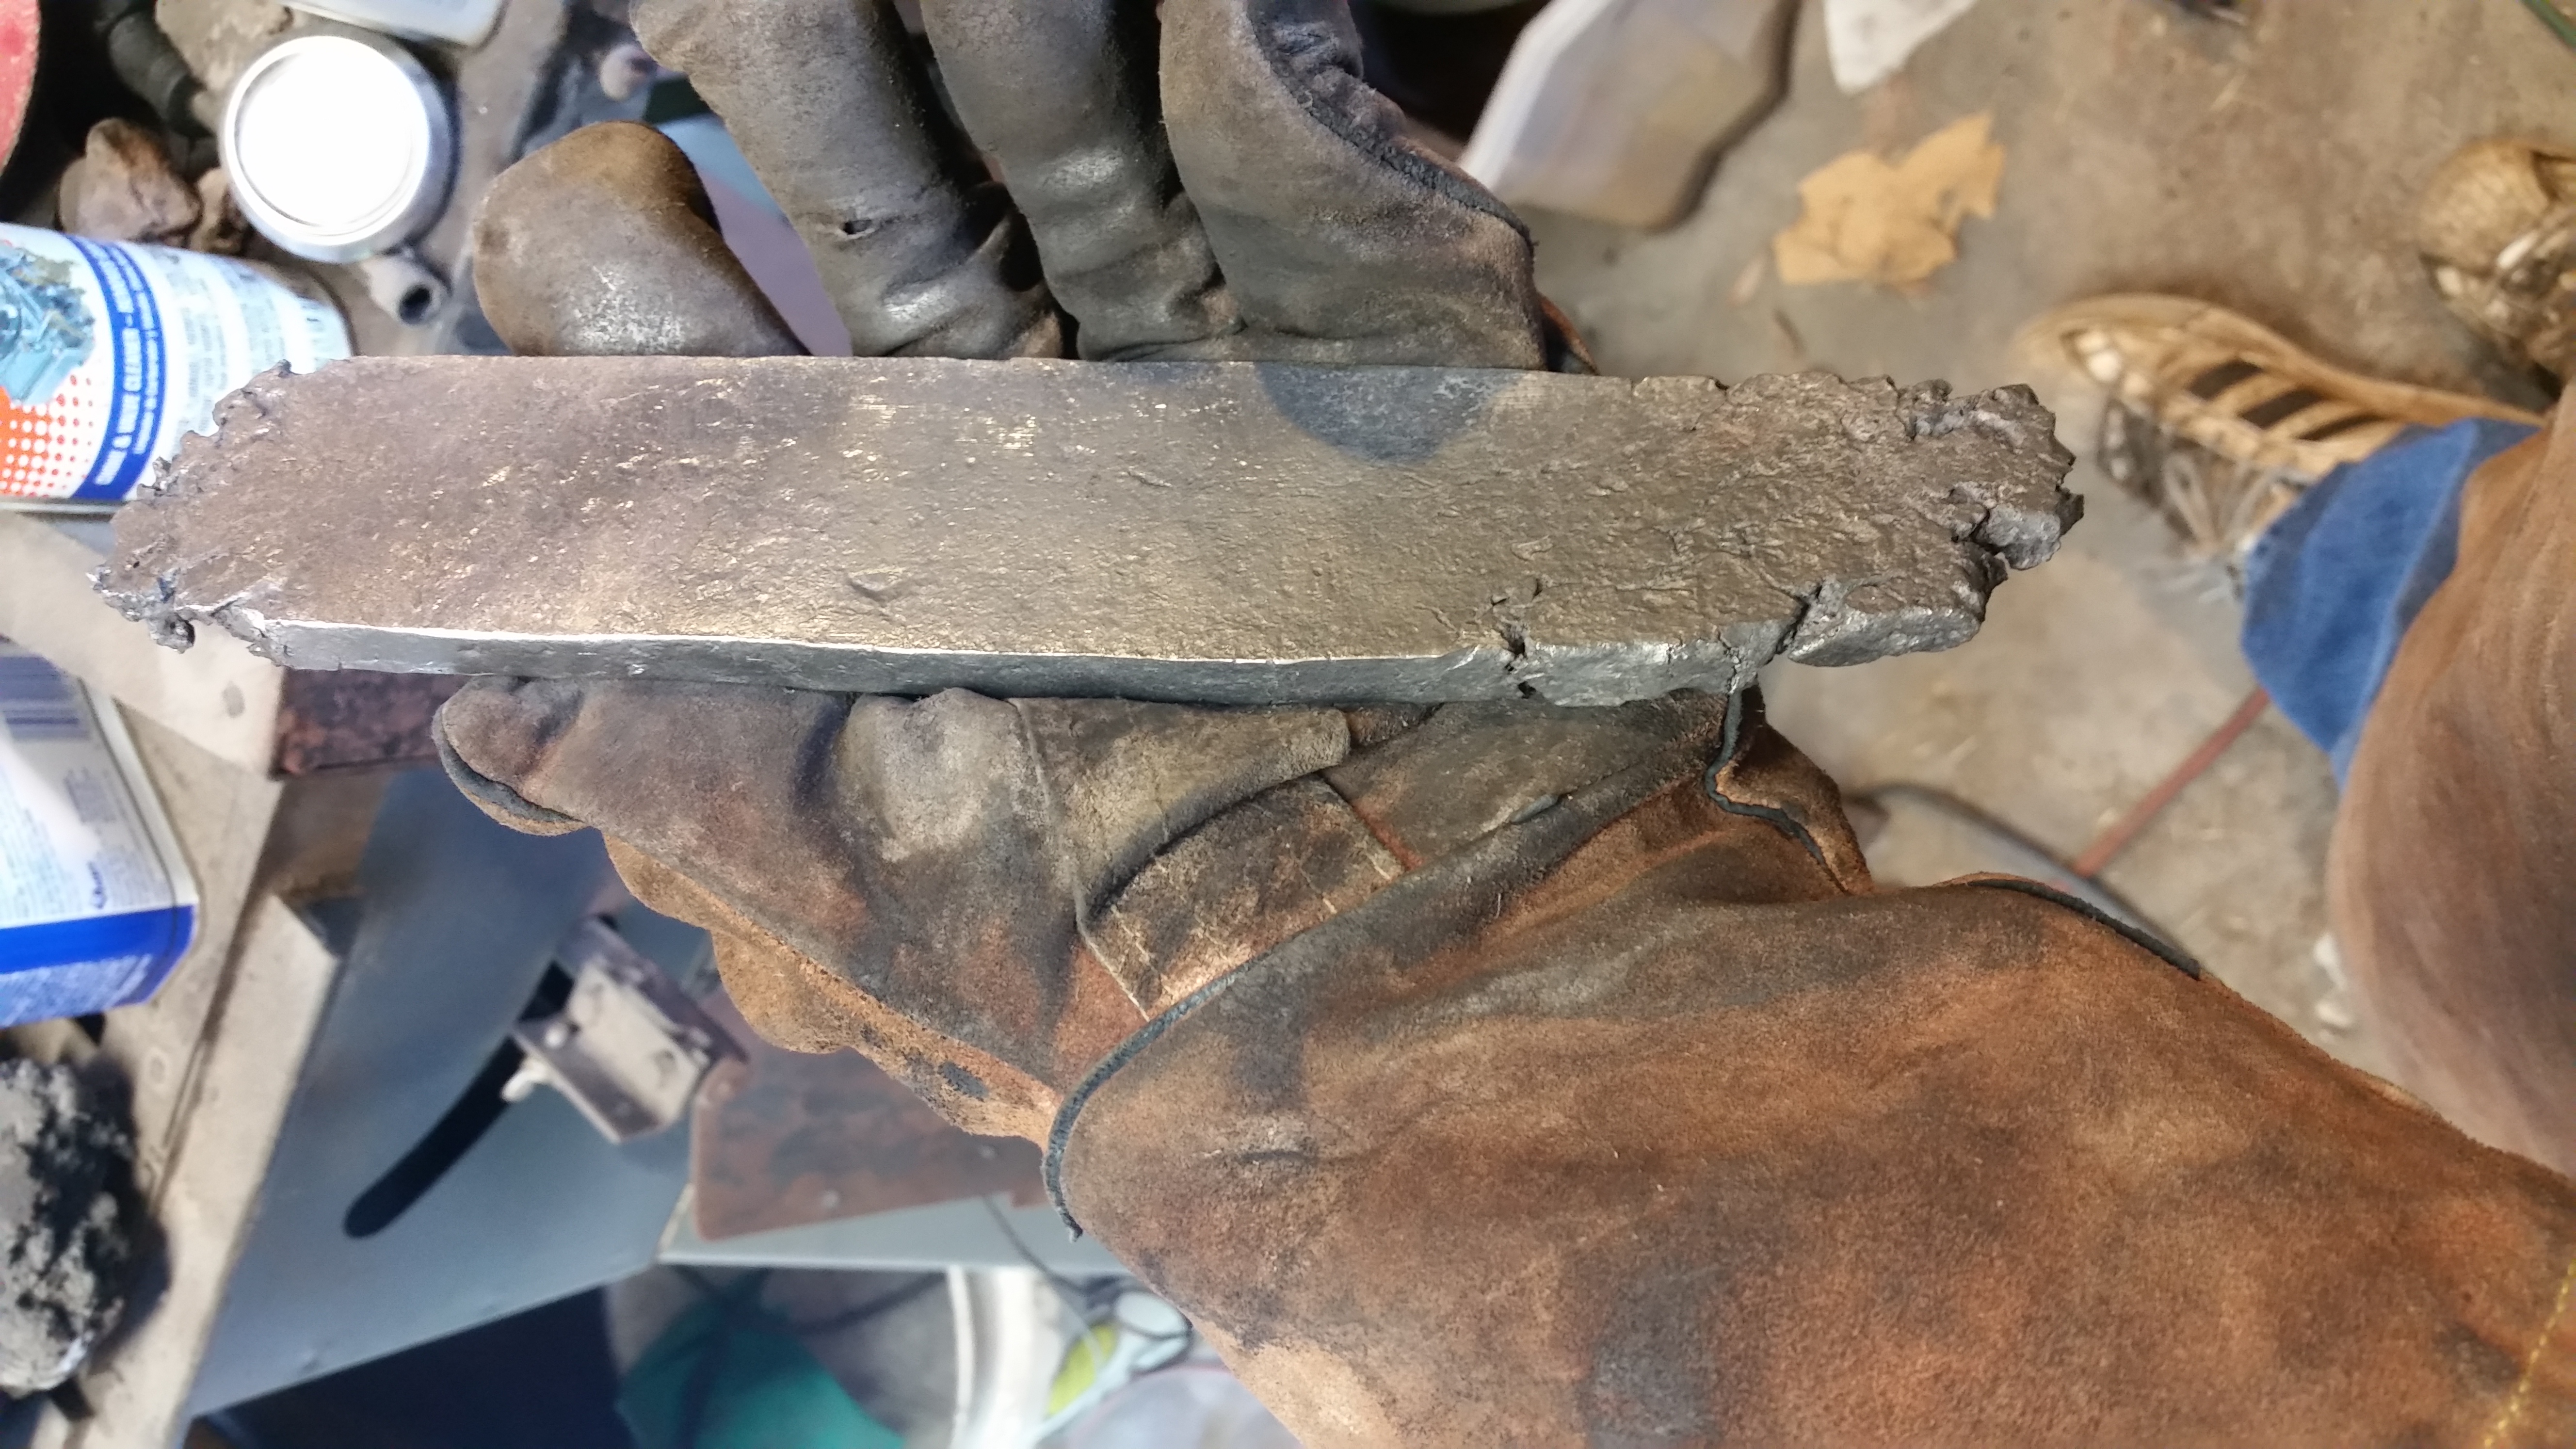
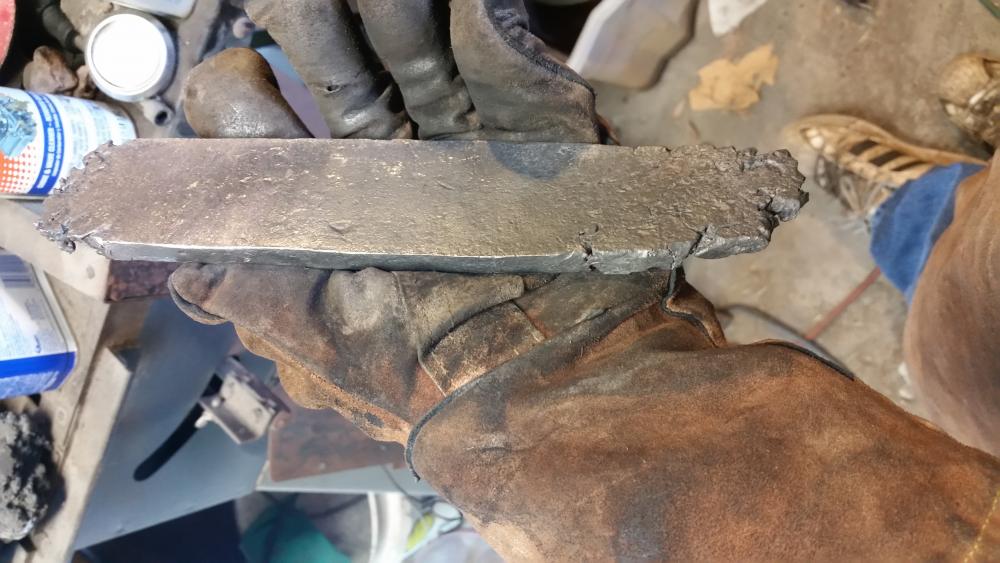
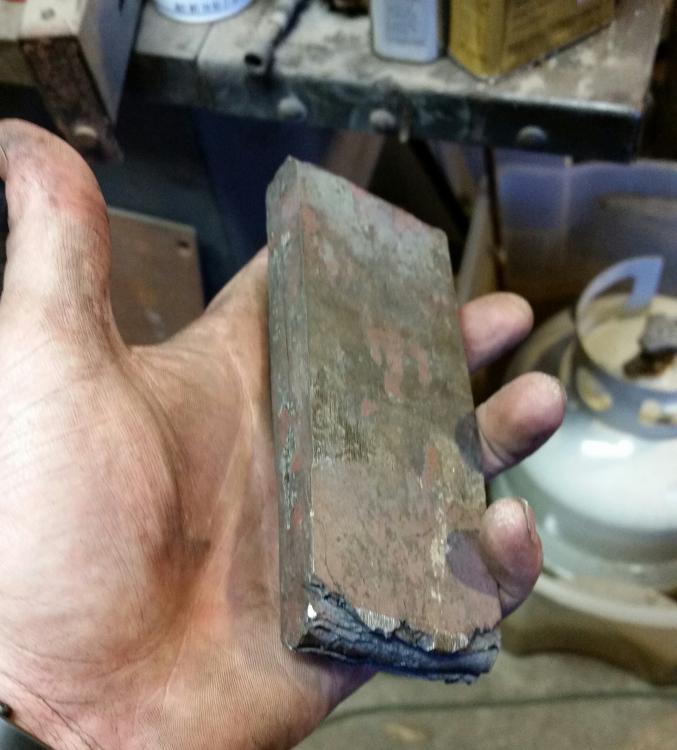
I literally wrapped it in brown paper bag. I followed what I have seen several japanese smiths do. Lay out dry paper, cover the stack in rice straw ash, wrap it carefully so as not to disturb the stack, and wet another sheet of paper, and wrap it again, only tighter. Then I coated in mud, and tossed more rice straw ash on top of that. The paper/mud acts as an insulator allowing the bar to heat as even as possible, and the rice straw ash being ~90% silica melts and creates a flux. Some people start off the very first heat with a light hand hammer. I have basically mastered the control of my mechanical power hammer, that I was able to set the welds with the power hammer alone. Also not shone was the actual fold. It's just me out there working, so sometimes, especially when adrenaline is pumping as weeks of preperation - creating the steel, chopping 100-150 pounds of charcoal to make the steel, squishing, hardening, breaking, inspecting, more orishigane creation, etc etc etc....then creating the mud and all the other little bits to come together. Eventually it boiled down to, I was forming together several hundred dollars worth of special steel....stressful initially. Though once I was there with it at welding heat, I simply knew it would work. Basically the fold acted different than any other type of iron or steel I have created using bloomery material. Instead of breaking due to slags and impurities as it does with bloom, initially, but rather it actuslly bent and folded over on itself and didn't break apart. That was a massively good sign. (First pic is of the bar at that first fold - can someone please flip it?) As of right now I am 6 folds in (second pic). I stopped there to assess carbon content. It is a constant struggle to ease the carbon levels as slowly as possible, or rather get then to where you want. Sometimes the smith's add more chunks of orishigane at this point. I am deciding that now.

-
I made my own mix, but the base was simple red clay found here in the Southeast US. Yes it was a gas forge. A blown ribbon burner. This lump was about 3 pounds to start. I have welded 7-8 pound billets of modern steel pattern weld in it. All without using itc-100 (which I finally nabbed some and need to apply it!).