DanielC
-
Posts
664 -
Joined
-
Last visited
Content Type
Profiles
Forums
Articles
Gallery
Downloads
Events
Everything posted by DanielC
-
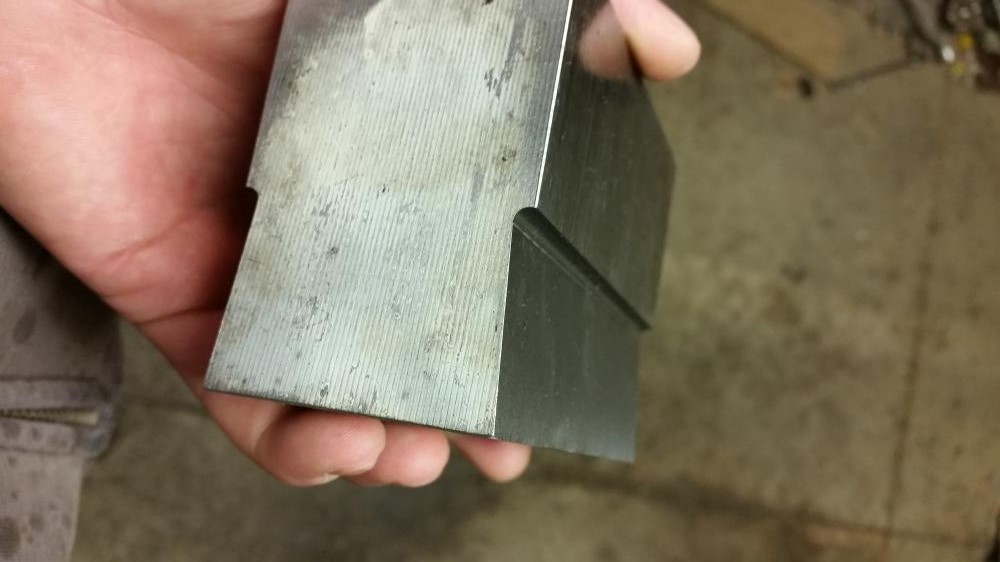
 Unfortunately I jumped into it too quickly. We have feeler gauges I can use as shim stock, and have it fixed. I just misunderstood the full function of the single key dovetail. My mind has been on the Bradley so much. So I just measured my lower and upper dovetail and it seems to follow the 100# LG of 1/8" per 12" as well. And now that I look at the original die more, the more I understand where I totally screwed up. Sigh. So I guess the plan of action is to support it up and mill it out, while making a slightly thicker key. I mean we're only talking a .02 or. .03" diff. right?
 -
I was under the impression that I didn't need to cut a taper on the dies, since the taper is on the female end in the hammer (could be totally wrong here. Wish there were literature)? My current dies, which were originals seems to be measuring somewhat the same width from both end, with maybe 1/32"-1/64" difference. Currently they are milled with no taper. Is it absolutely necessary for this slight taper? And if it is, are both sides being tapered or just the one? Thanks.
-
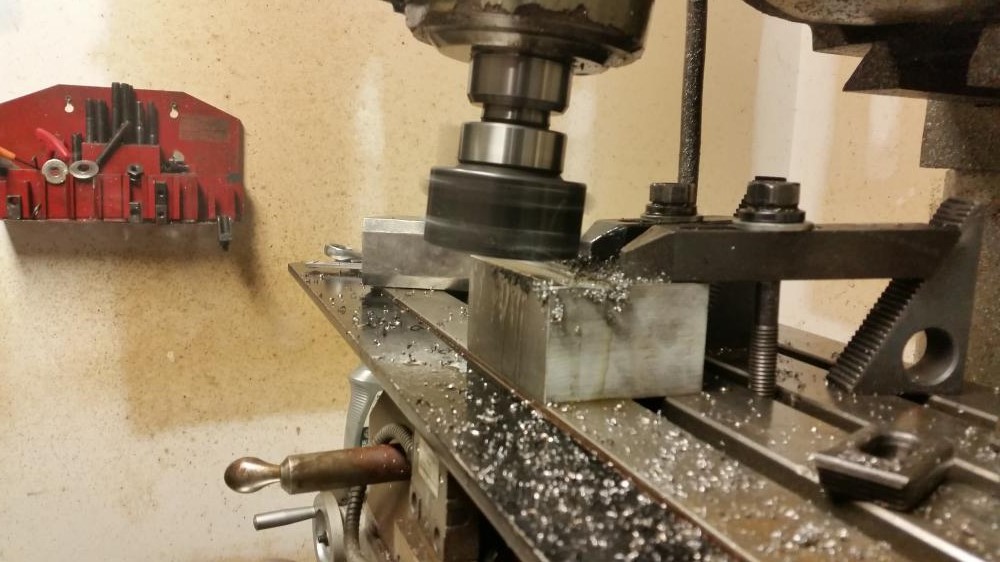
So I am lucky to have a machinist brother, and this weekend he had time to help me with this project. I am making japanese style bladesmithing dies for my appropriately sized hammer. Going with a 2" round face. Started off with a block of 4140 I bought from a reputable steel supplier in my area. From this we took measurements from my original die, found the angle of the dovetail with a very expensive Intercomp angle finder, and began the dovetails. So far so good. Will be working on the face today, and then sometime this week, mill out the dovetail for the much larger bottom die. Also tried fitting the die in the hammer using the same keys, and it worked. Though I want to make new keys. Does anyone know the taper of the keys for these? I plan on HT'ing each die seperated by a day, since I am working with 5gal of Parks 50, and if need be another 5gal of pre-heated canola beside it. I planned of using just parks for the smaller upper die, and maybe a very fast interrupt with the parks 50 and canola with the much heavier bottom die. I am trying to both avoid overheating my parks 50, and get past the cooling rate curve, and I am not sure that just 5gal of parks by itself will get the job done. I have read about several people using water for larger cross sections of 4140, but I am a chicken and will try this oil method first. Any objections to this? Have also been told to use a 450F temper. Anyone else pull back the hardness that much? For the upper die I was thinking closer to 350F.
-
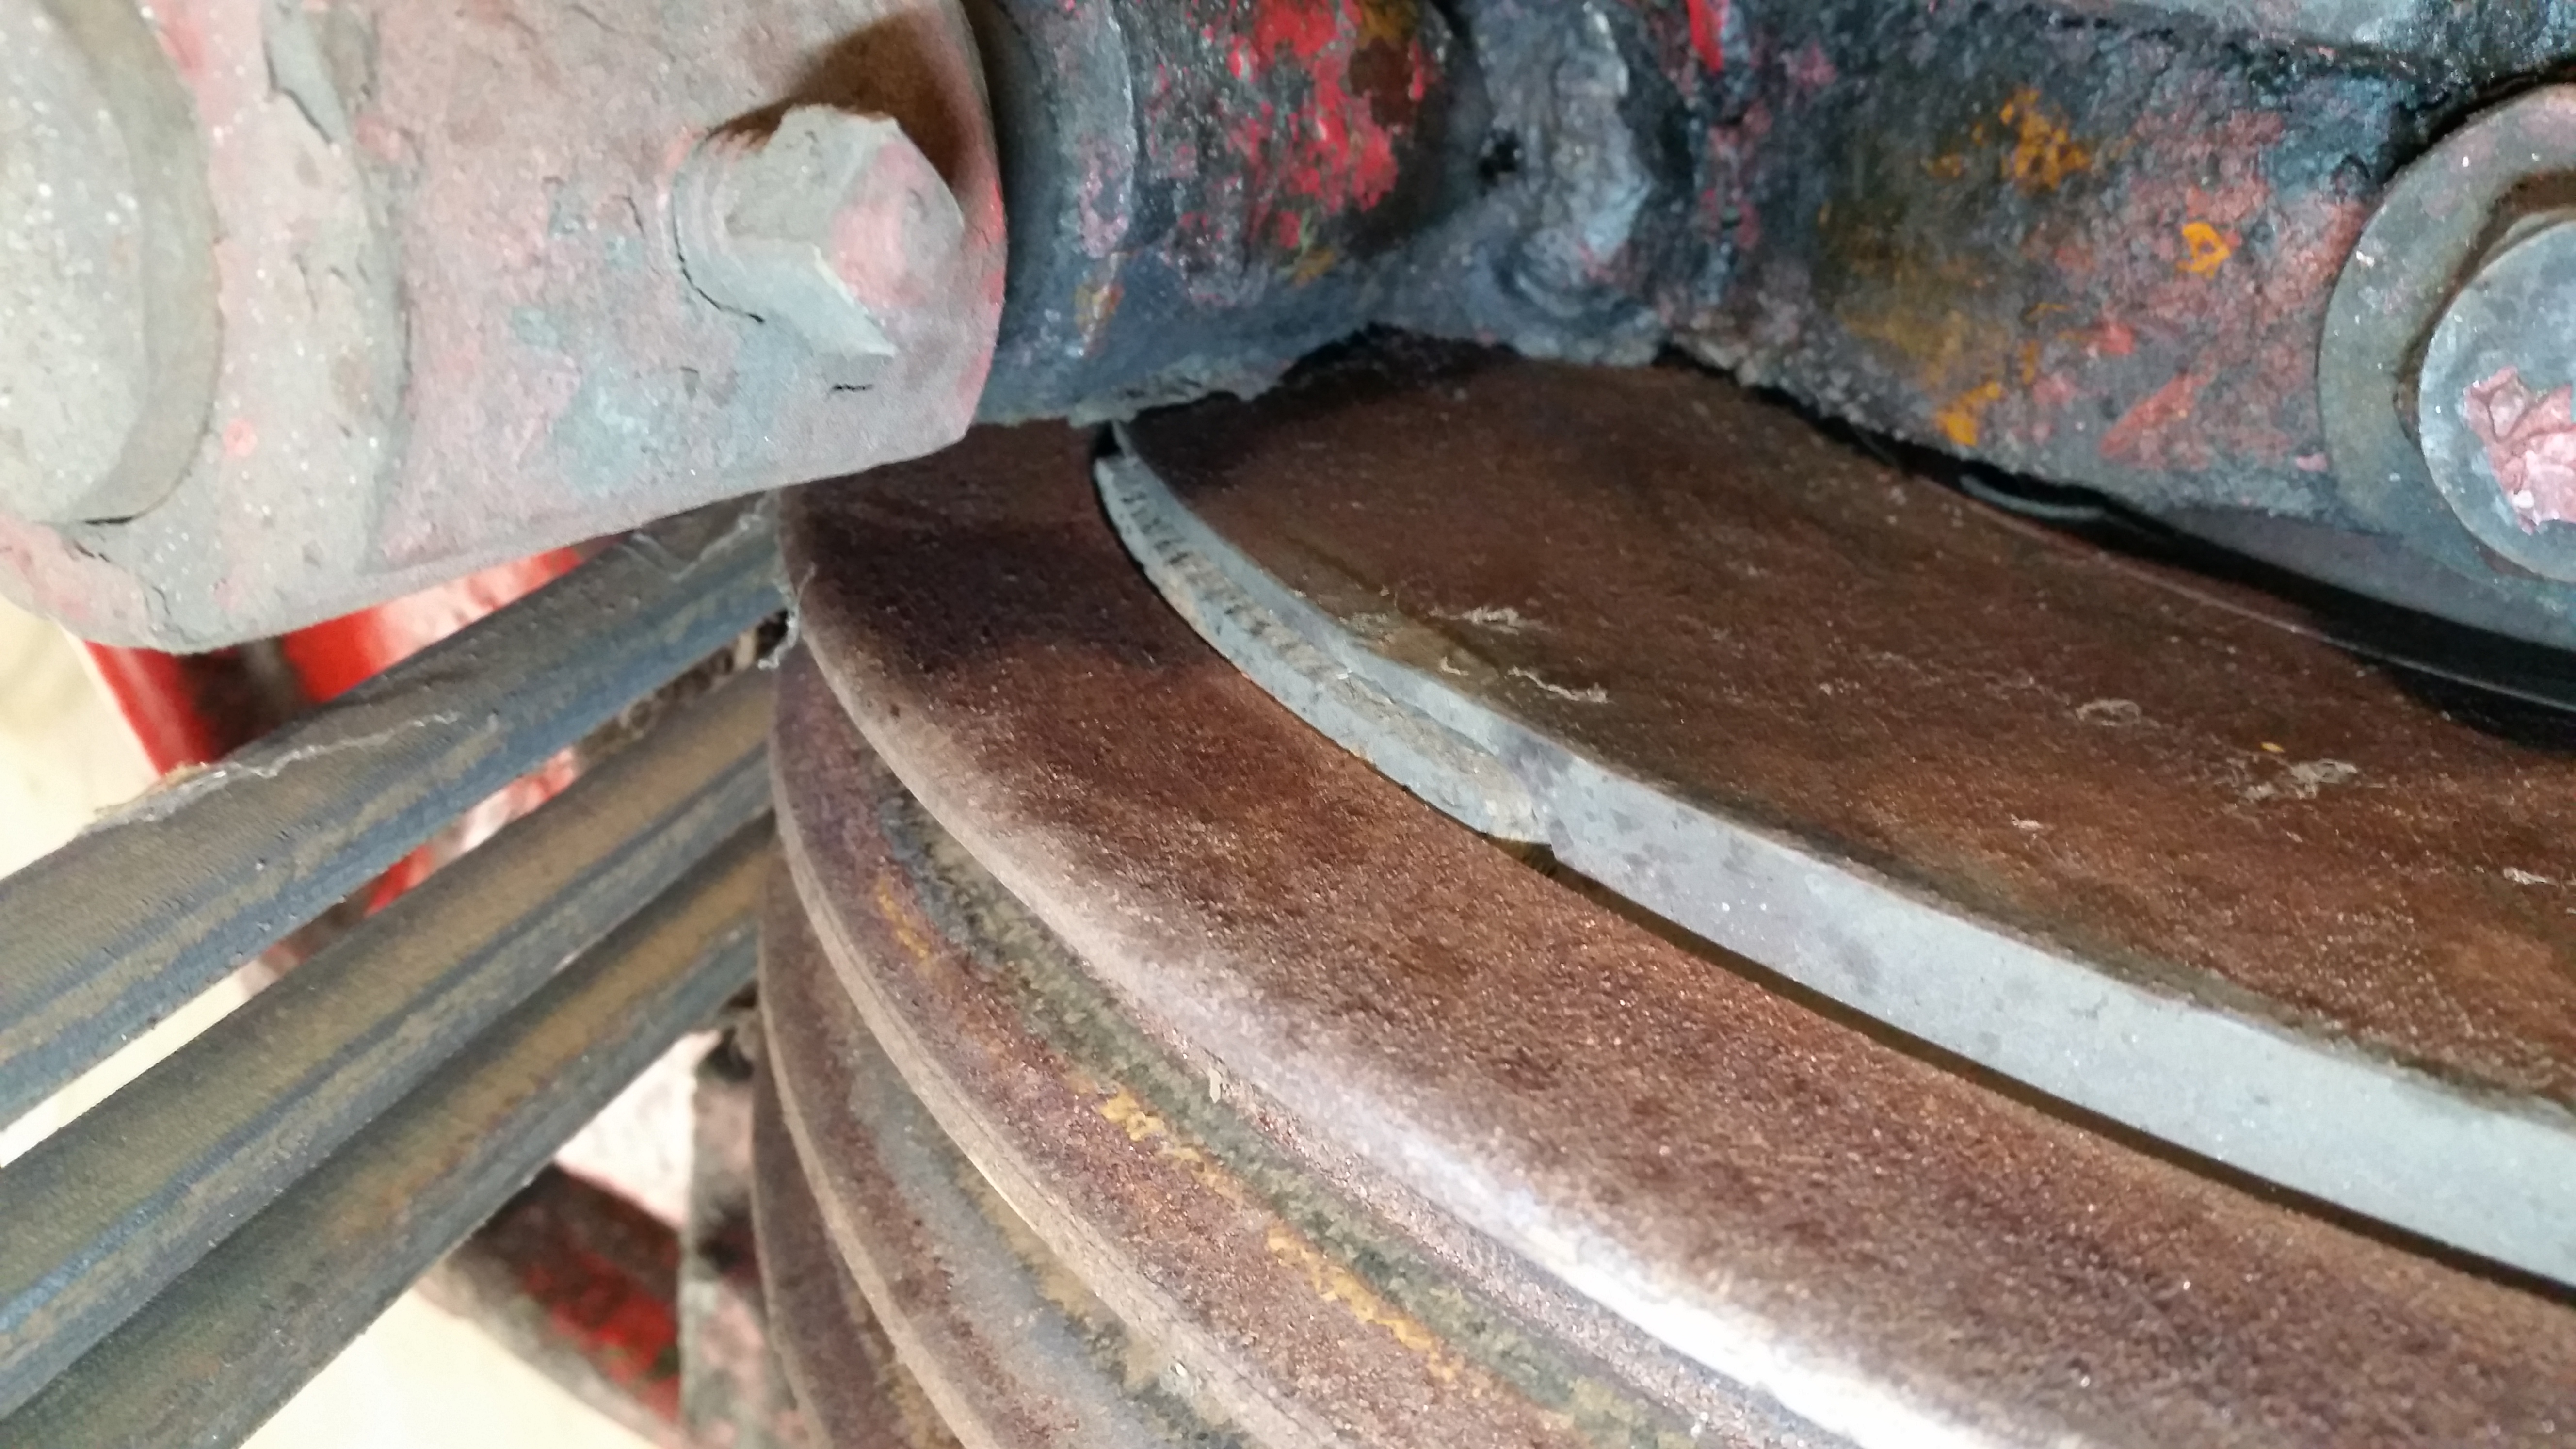
Found a 200# Bradley Compact
DanielC replied to DanielC's topic in Power Hammers, Treadle Hammers, Olivers
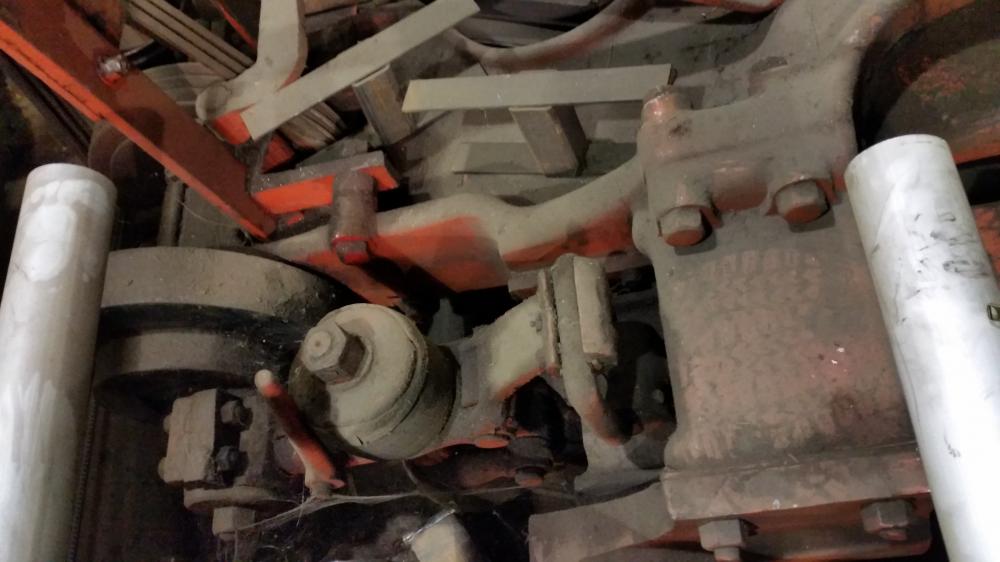
Yea it was a modification. I posted a pic of the pads. Curious if this would be a wet clutch like my smaller murray mechanical runs? Or dry? -
Found a 200# Bradley Compact
DanielC replied to DanielC's topic in Power Hammers, Treadle Hammers, Olivers
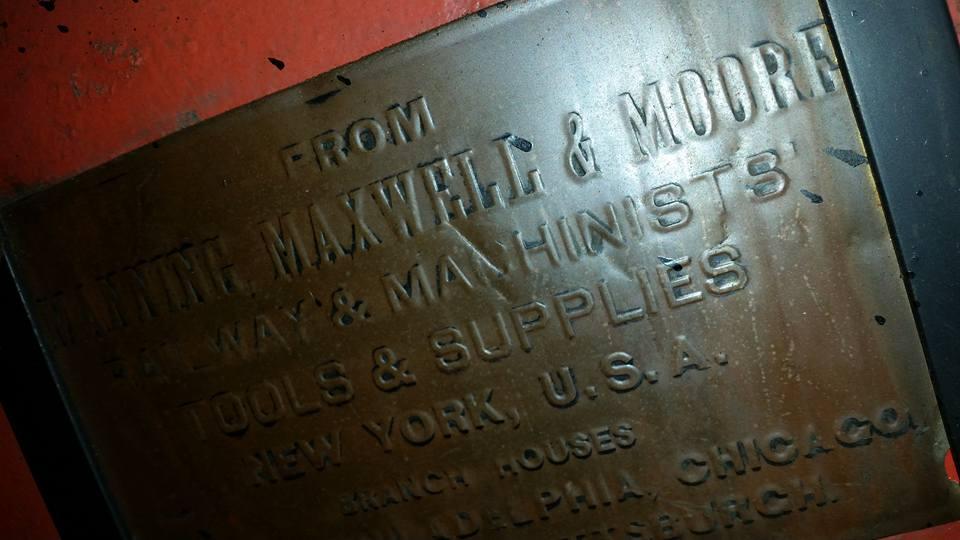
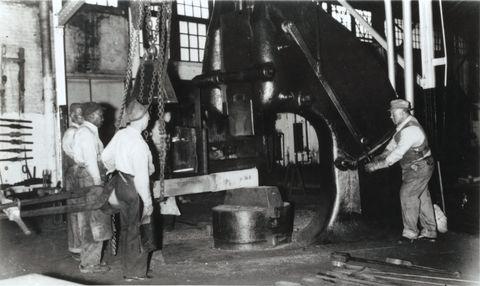
This plate puts my hammer in the early 1900's, as that particular company went by that name from 1901 to like 1932. I also found out it is from the Southern Railroad in Spencer, NC (my area) - which was one of the biggest train repair shops for the Southern Railway of the time. Historic Pics from the shop I had also found. Havent found a pic of this running, though probably because it was just a toy compared to the larger hammer? Not many pics to be had, surprised I found these.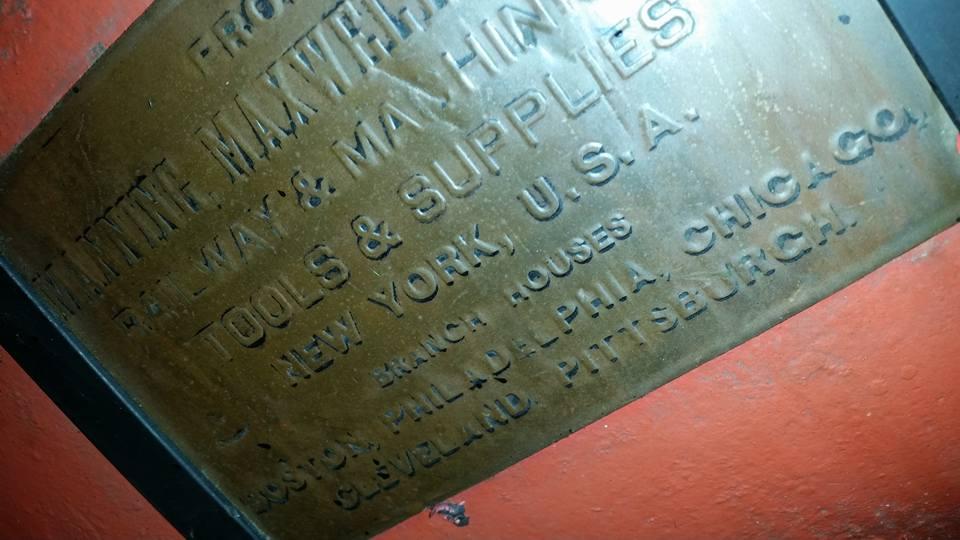

-
Found a 200# Bradley Compact
DanielC replied to DanielC's topic in Power Hammers, Treadle Hammers, Olivers
The story goes by the man I bought it from....he owned it in the 70's and sold it for a 5 year period or so. The man he sold it to passed away and he bought it back. He used wedges before he sold it, and this mod was done by the other person. He also said they weren't the same dies he had on it before either. I haven't got a good look at it yet, but perhaps these new dies aren't quite dovetails, and he had trouble getting then to stay. We shall see. -
Found a 200# Bradley Compact
DanielC replied to DanielC's topic in Power Hammers, Treadle Hammers, Olivers
I don't know 100% yet since I haven't used it yet, about adjustment, but from what I was told, it has a lot of adjustment for different thicknesses of work. I was also told that it is very suitable for multi-station. Infact a previous owner used it for just that. I posted a video of the hammer going over a few things but this forum's bugginess has yet again kept me from posting content. It just reset after I hit reply with no post. Edit: nm, that will work Video of hammer -
Cutler style. One of my hammers.
-
Found a 200# Bradley Compact
DanielC replied to DanielC's topic in Power Hammers, Treadle Hammers, Olivers
Me too. And surprisingly....this thing is set to run at 300bpm.....my Murray 50# runs at that speed! It isn't by mistake either, the factory specs call for this to run that fast. Holy cow! I am anticipating moving a LOT of metal with this! -
Found a 200# Bradley Compact
DanielC replied to DanielC's topic in Power Hammers, Treadle Hammers, Olivers
Clutch shoes look interesting. Lol.
-
I have been working sanmai a LOT lately. Your choice in steels seems to be the hardest combination, or rather the highest fail rate I have encountered for san-mai. Sometimes, not all the time I run into this. I even caught the phenomena in the act on camera, literally listening to the crack slowly tink open. As Ric suggested, I had also switched from A36 to 1018 from my local big steel supplier. I had less problems then. Not gone, but less. To date, the only blades I have had crack at the core were this combination. 100% success rate so far using wrought as the jacket.

-
Found a 200# Bradley Compact
DanielC replied to DanielC's topic in Power Hammers, Treadle Hammers, Olivers
I was literally told just that! What a deal! -
Found a 200# Bradley Compact
DanielC replied to DanielC's topic in Power Hammers, Treadle Hammers, Olivers
Getting ready to load on the trailer!!

-
Found a 200# Bradley Compact
DanielC replied to DanielC's topic in Power Hammers, Treadle Hammers, Olivers
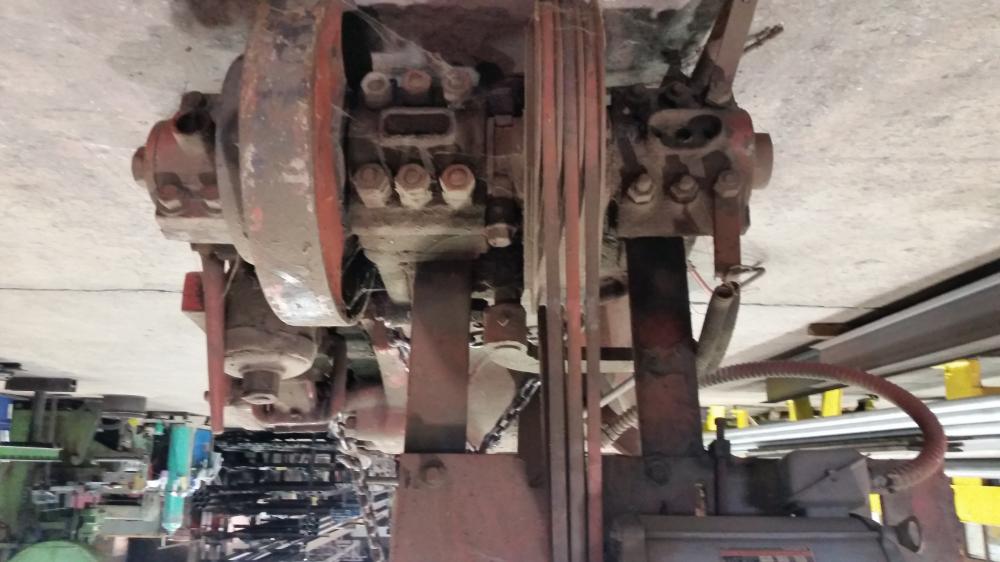
I swear this thing looks like a 300 pounder with a 200 pounder tag. I am aware of other bradley owners saying the actual ram weight being about 30% heavier than advertised.... -
Found a 200# Bradley Compact
DanielC replied to DanielC's topic in Power Hammers, Treadle Hammers, Olivers
For sure. Still can't believe it was a 5 minute drive from my shop!! -
Found a 200# Bradley Compact
DanielC replied to DanielC's topic in Power Hammers, Treadle Hammers, Olivers
Just closed the deal on the machine -
Found a 200# Bradley Compact
DanielC replied to DanielC's topic in Power Hammers, Treadle Hammers, Olivers
Yea, nearly 6000# of machine! Everything is huge on this machine. -
Found a 200# Bradley Compact
DanielC replied to DanielC's topic in Power Hammers, Treadle Hammers, Olivers
Wife gave me the go. So we will see. -
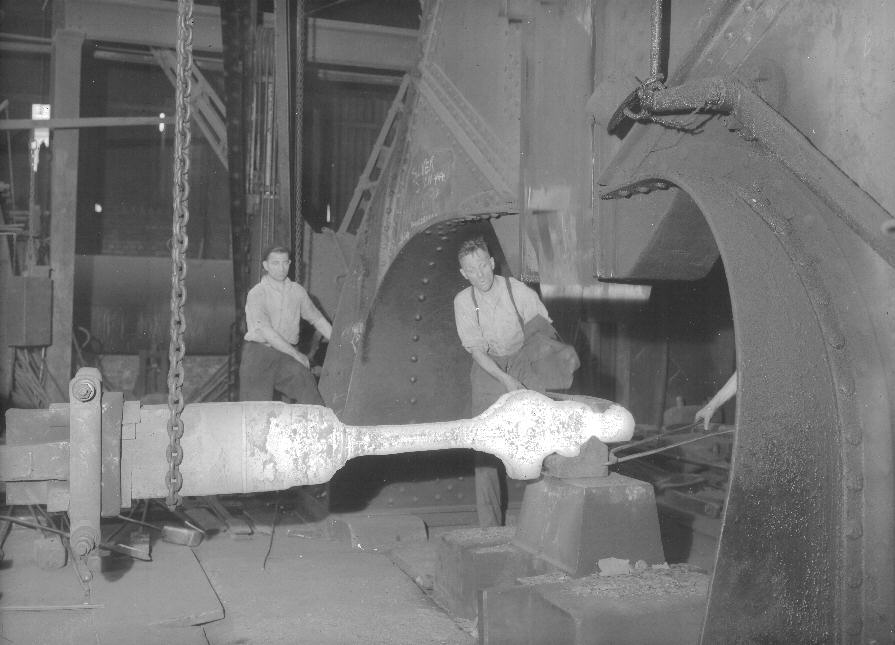
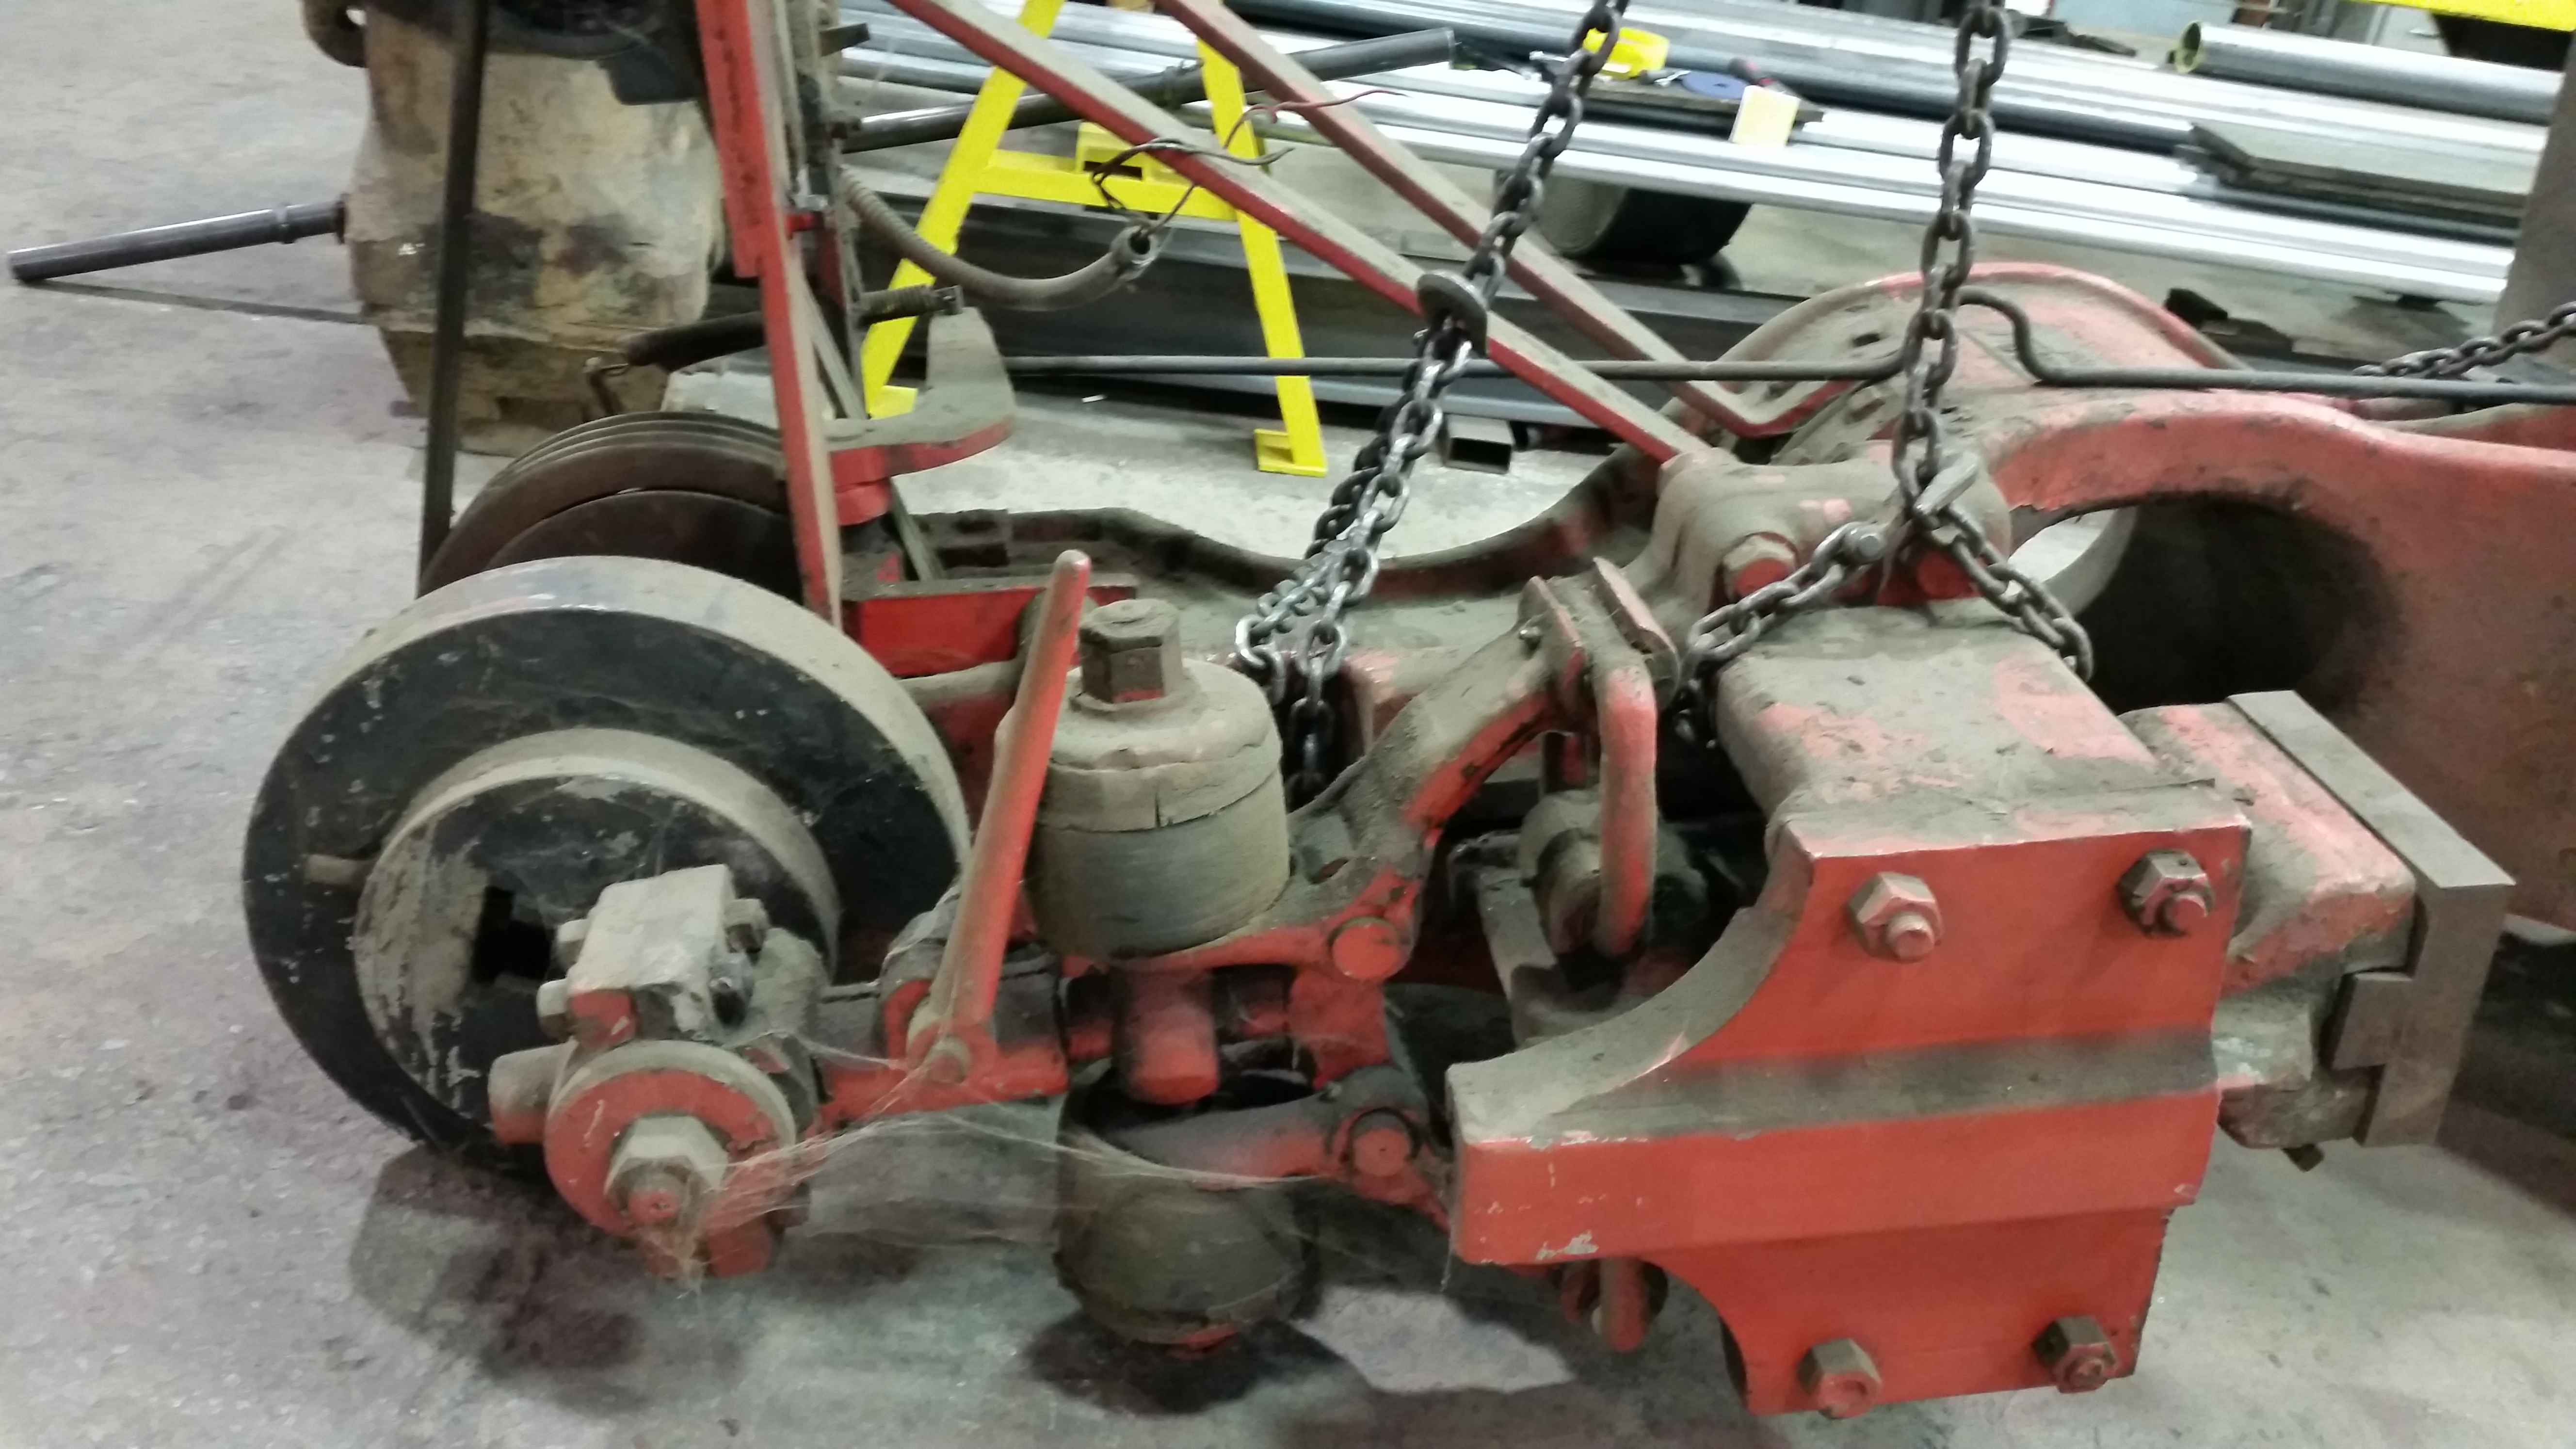
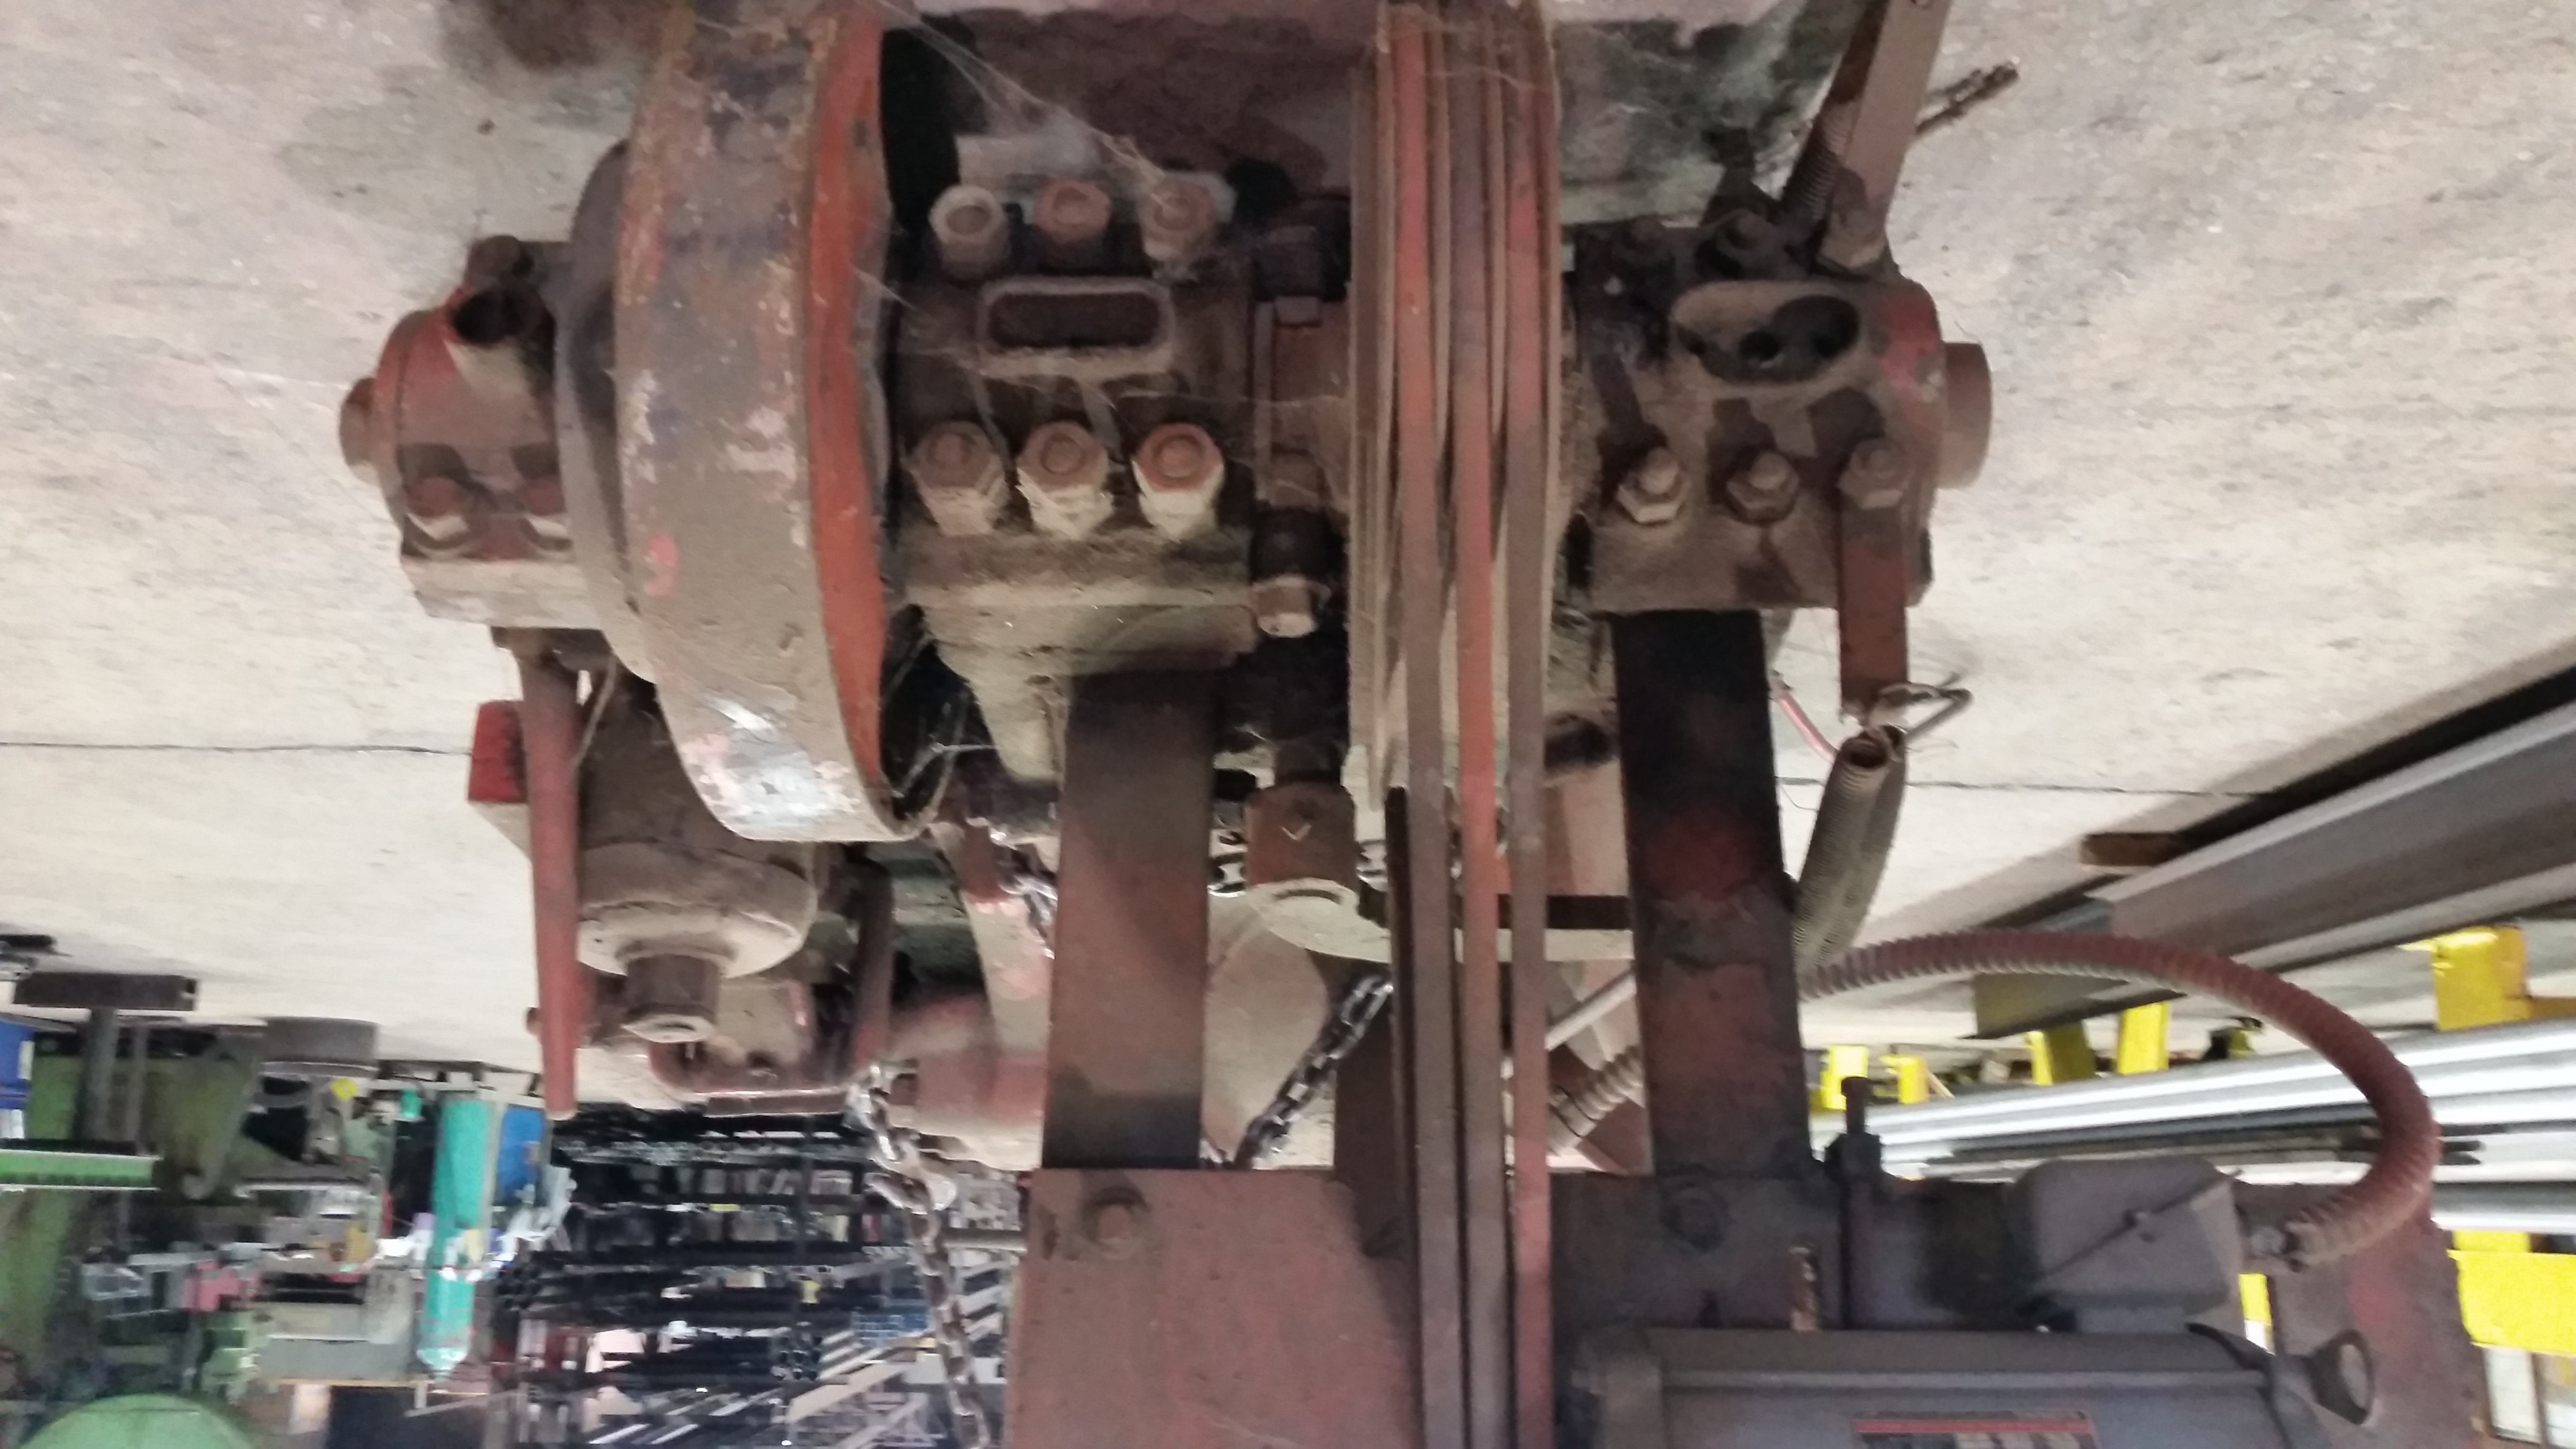
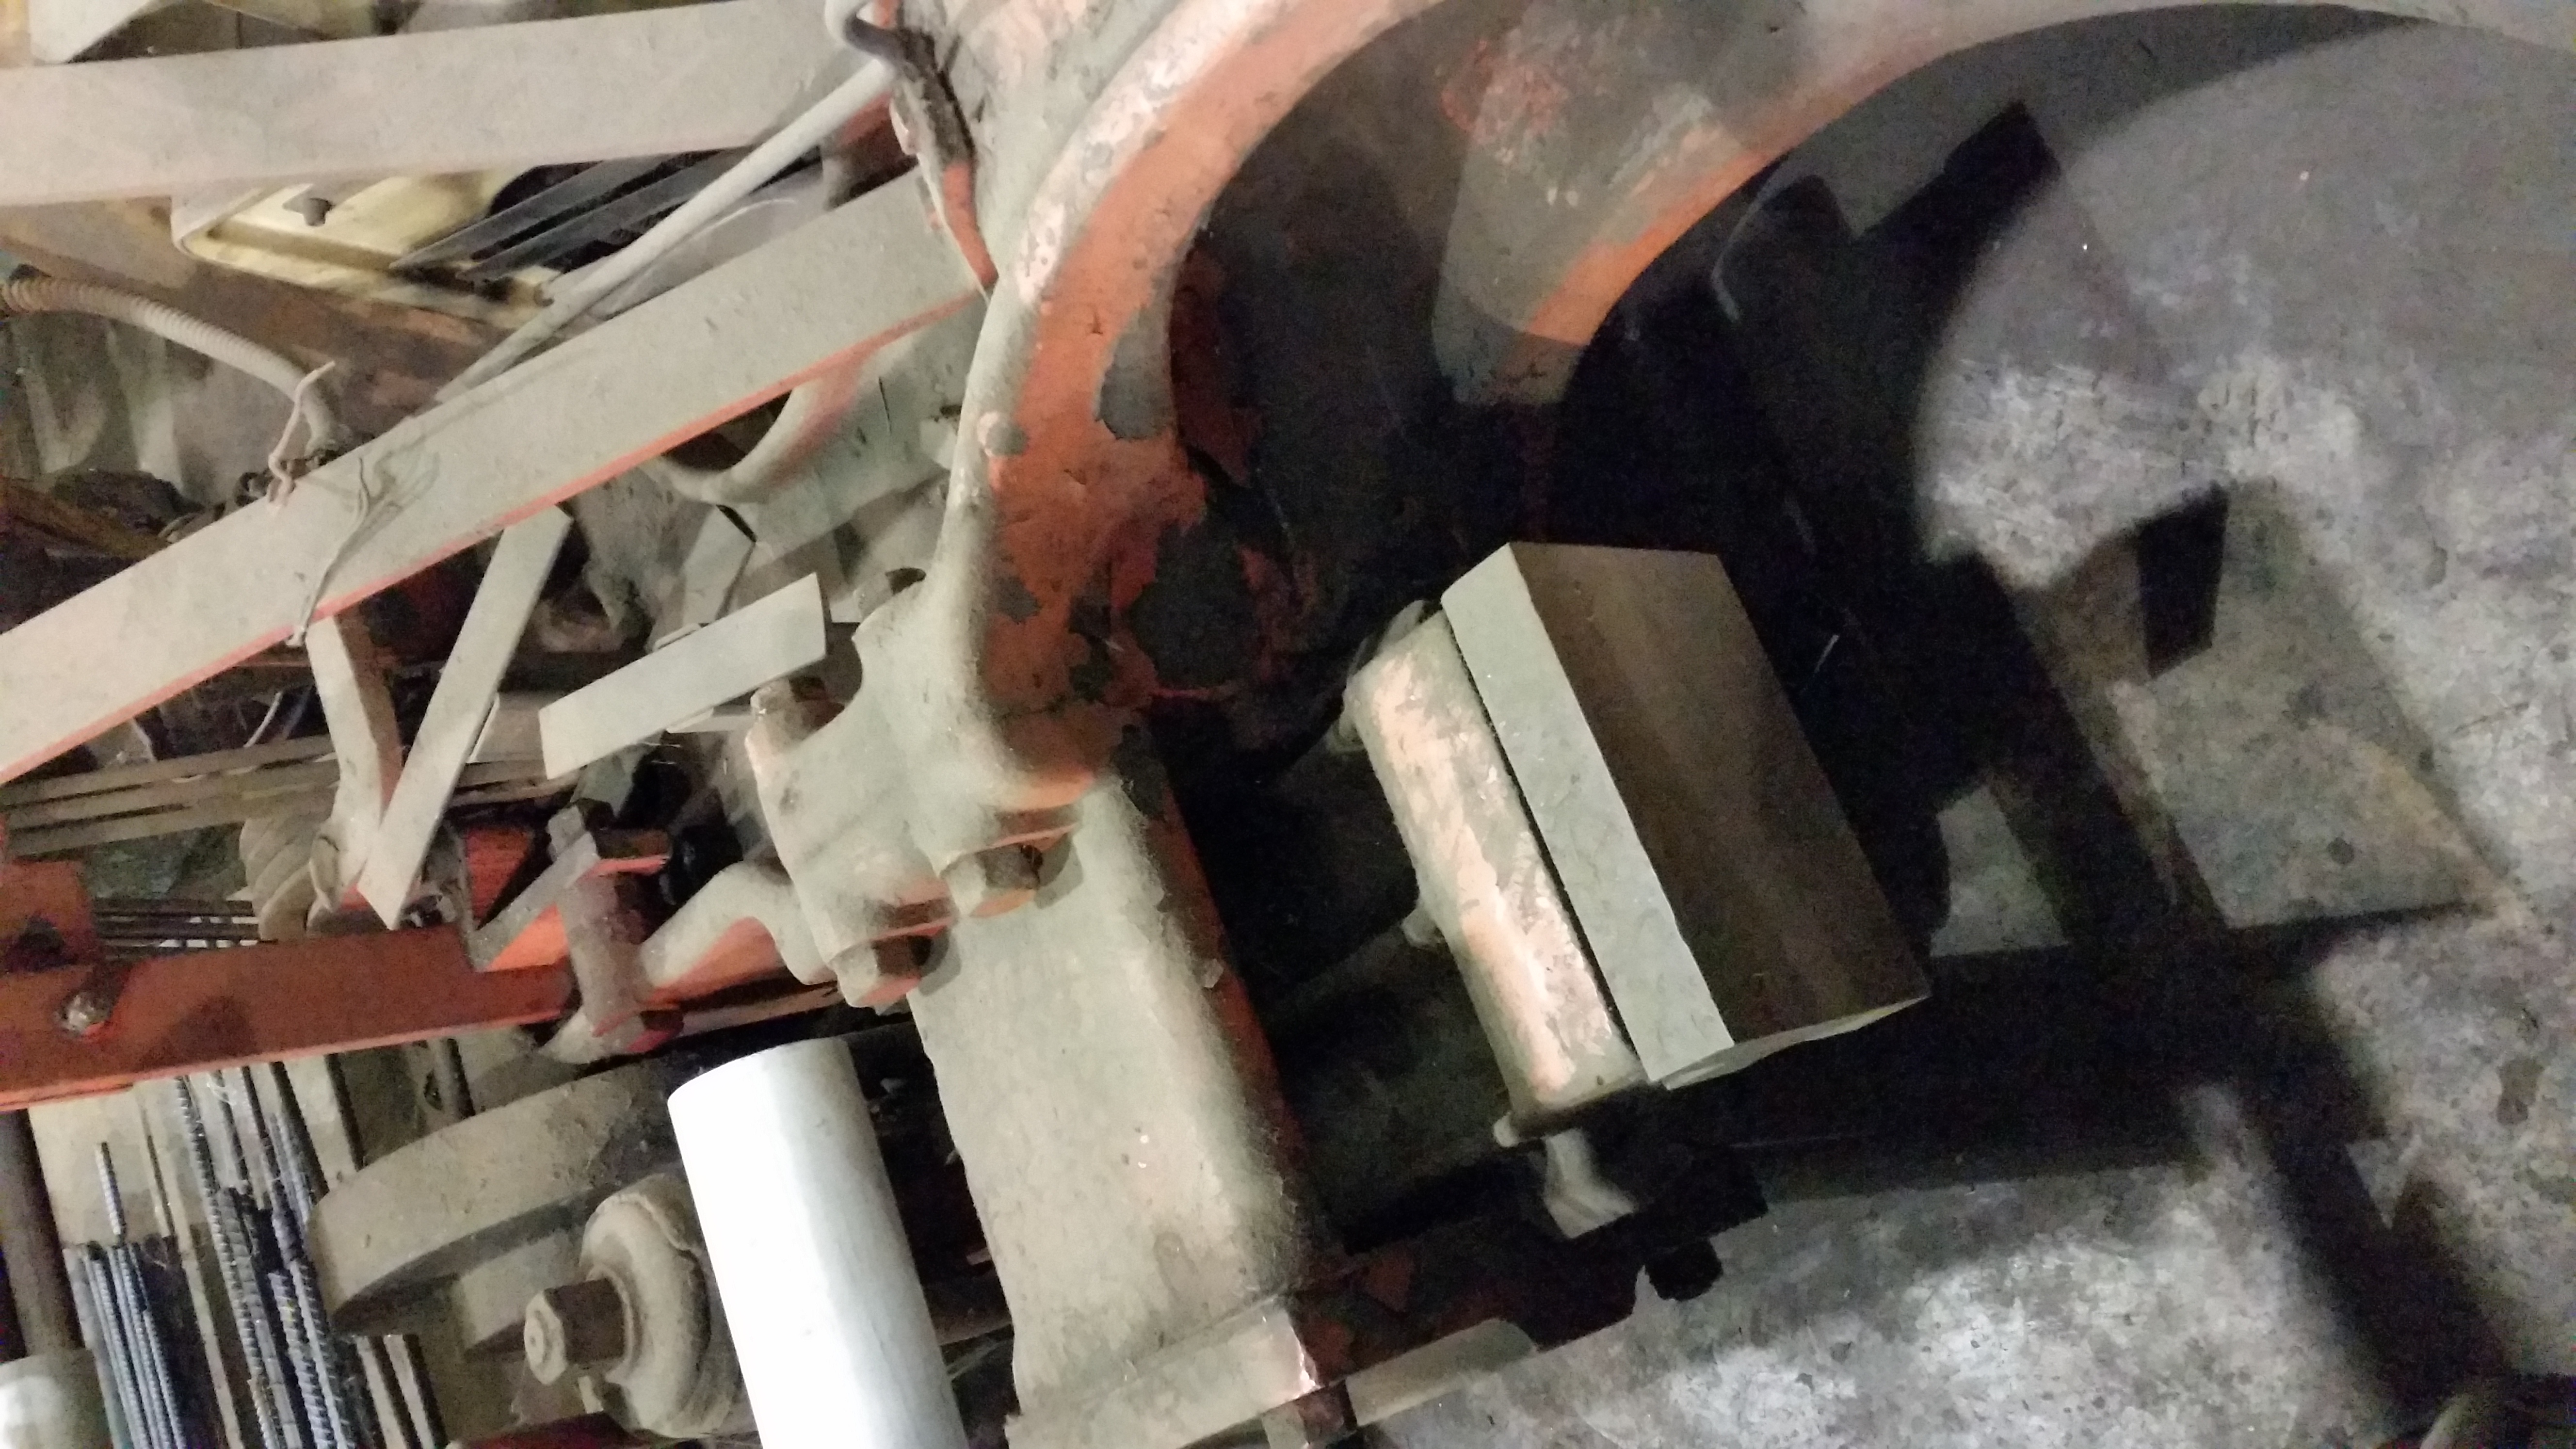
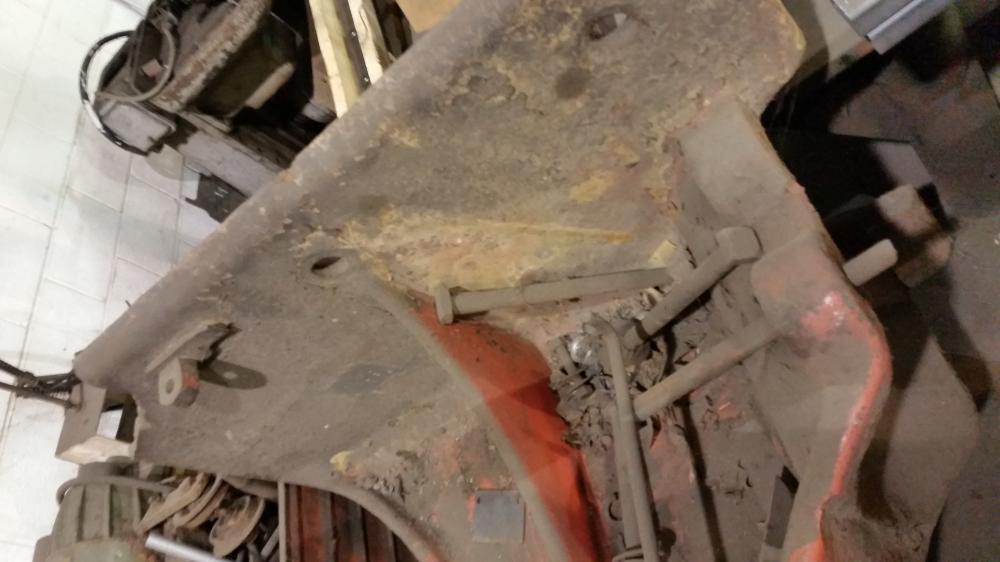
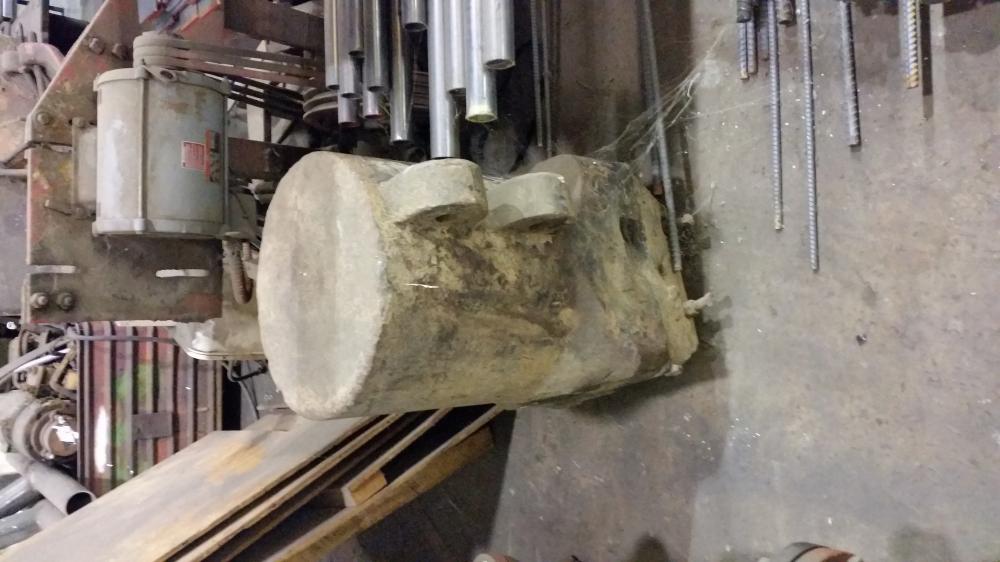
Found this guy about 5min. From my shop. It was used 15 years ago and has been owned by the same owner for decades. Belonged to the RR to ReSharpen chisels, until the late 50's. The owner is offering my some extra things, including a tire shrinker for wagon tires! It is on its side right now, but the machine shop it is in has a 10 ton gantry crane to pick it up and load it on a trailer with. Not sure what to do. Can't really afford it outright atm, but I do have credit! For the price it just seems too good to pass up. I have a seperate shop from my main shop I can run it in. Little iffy over motor size but he says he used to use it. Corner was broken off long ago, and they fabbed a bracket to hold it down there. Also it's hard to see, but the sow block is upside down. The rubber cushions were also replaced around the time it was last used 15 years ago.


-
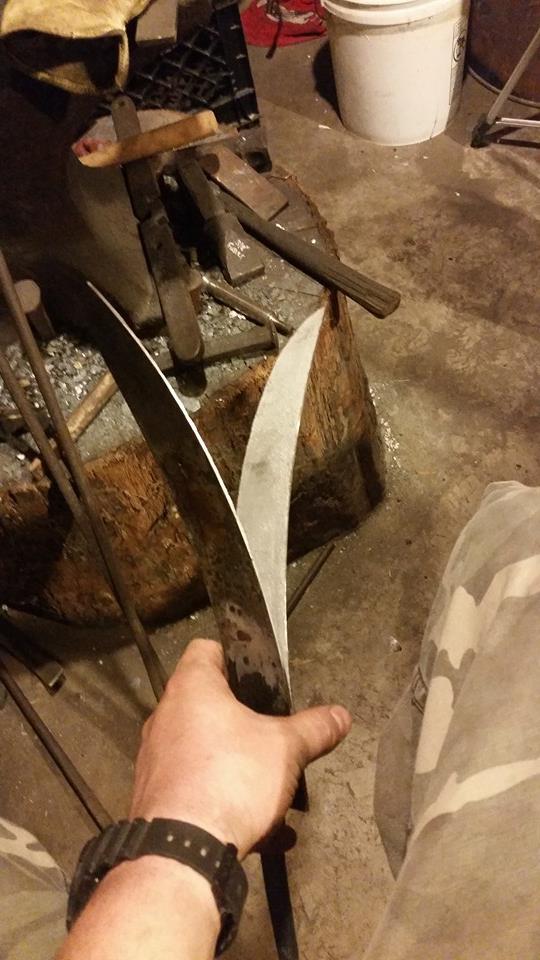
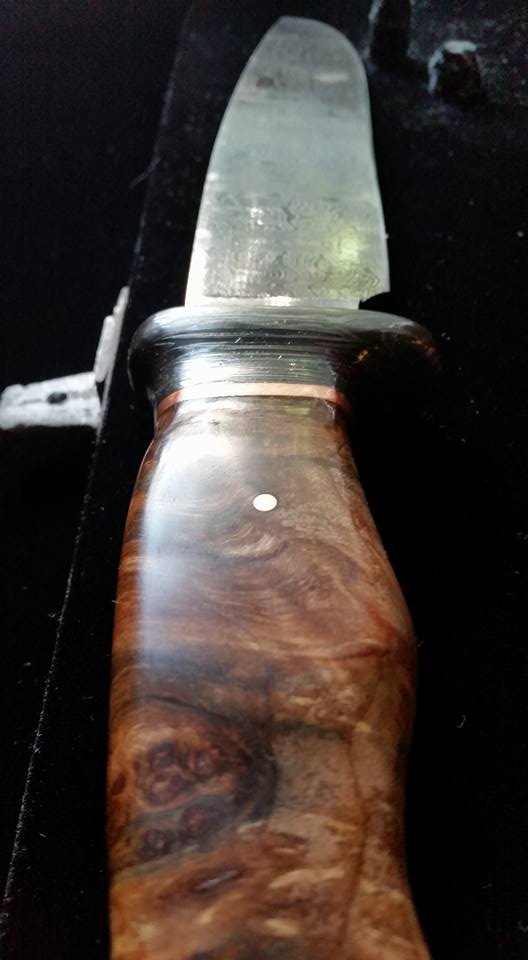
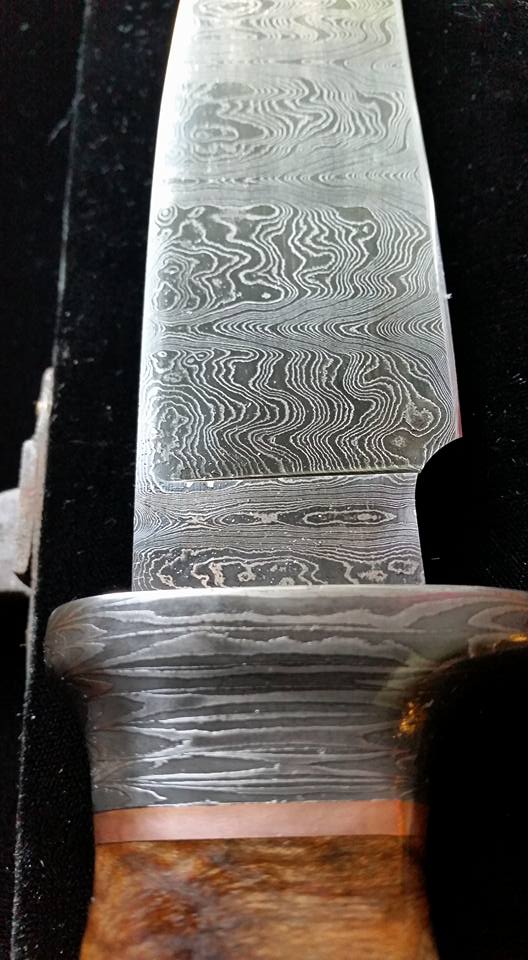
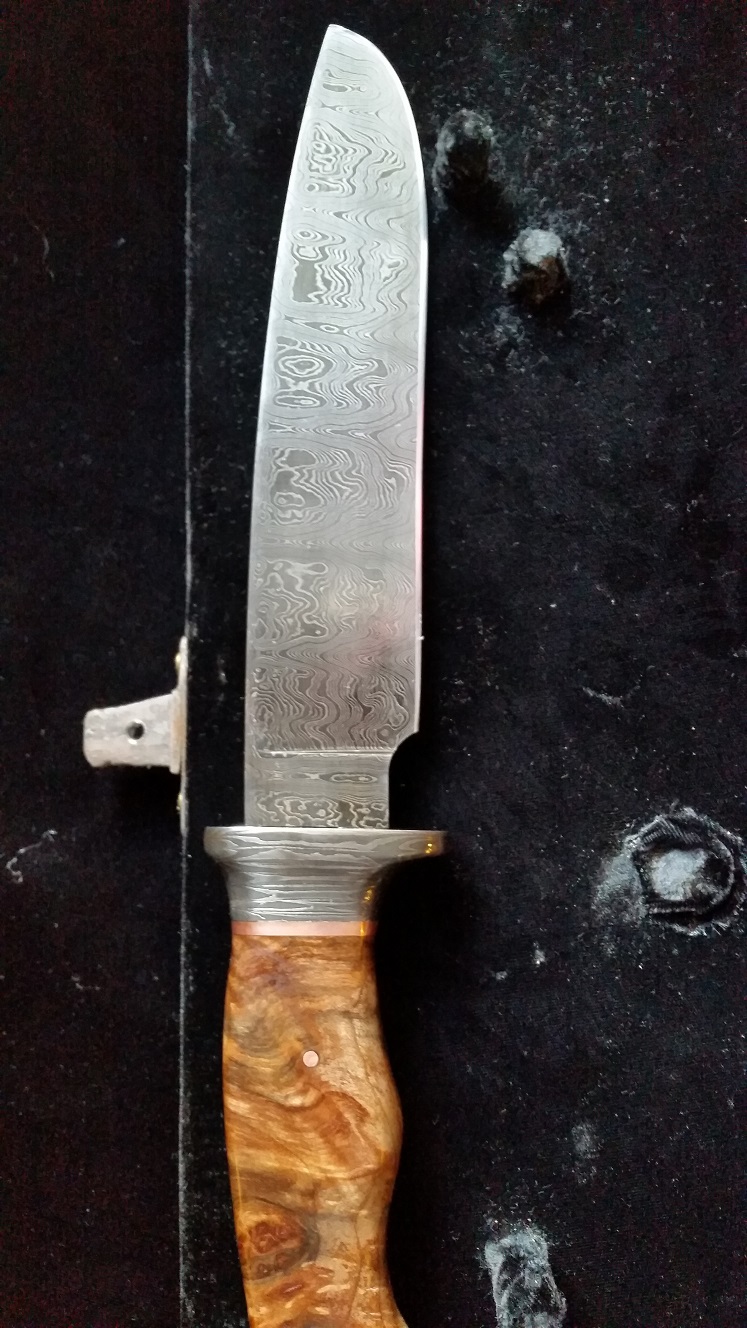
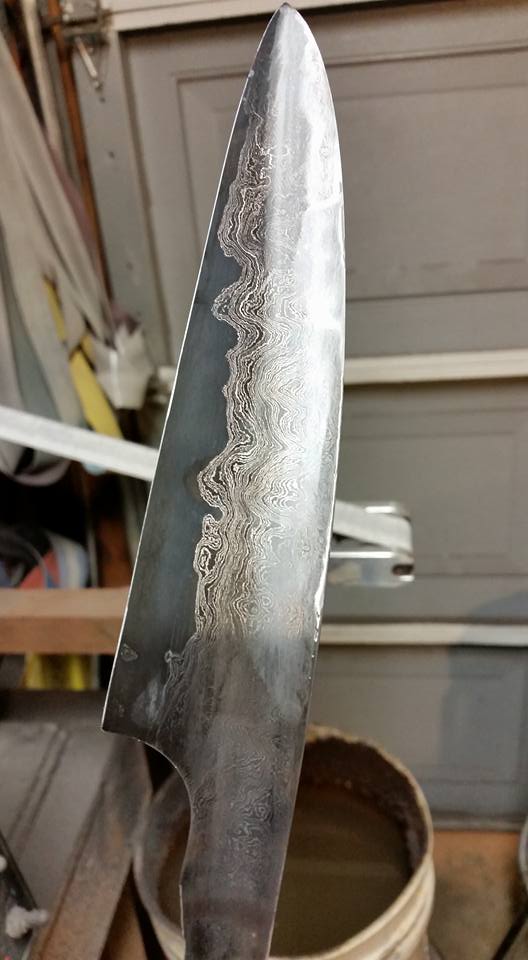
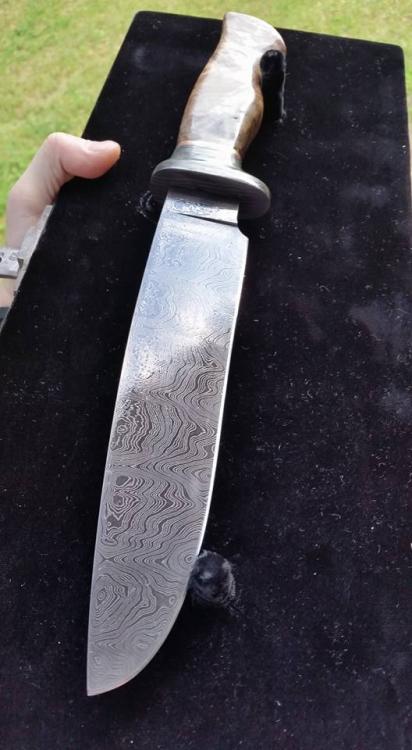
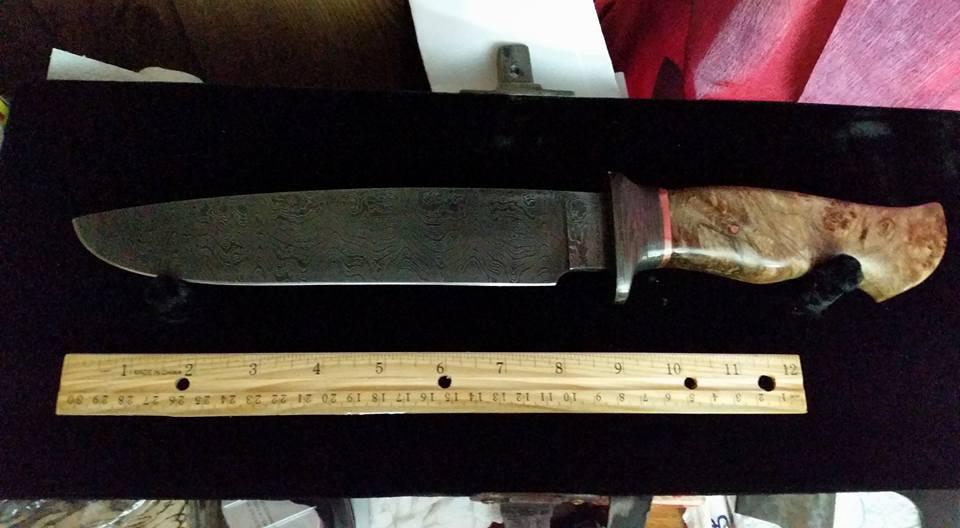
Thank you both. I feel the most challenging part of this was getting the guard down without screwing it up. I milled out inside of it to lighten it up and make the fit at the top easier to file. Still about 3/16" thickness to file that slot after it was said and done. The blade being the first high layer pattern weld I have ever done along with being green on the power hammer, resulted in what I consider a success. It's just been sitting around being scrutinized by me for months, and in that time I've completed 6 chef knives and semi completed 15 more, along with other little projects and around a weekend per month smelting. Busy busy busy.
-
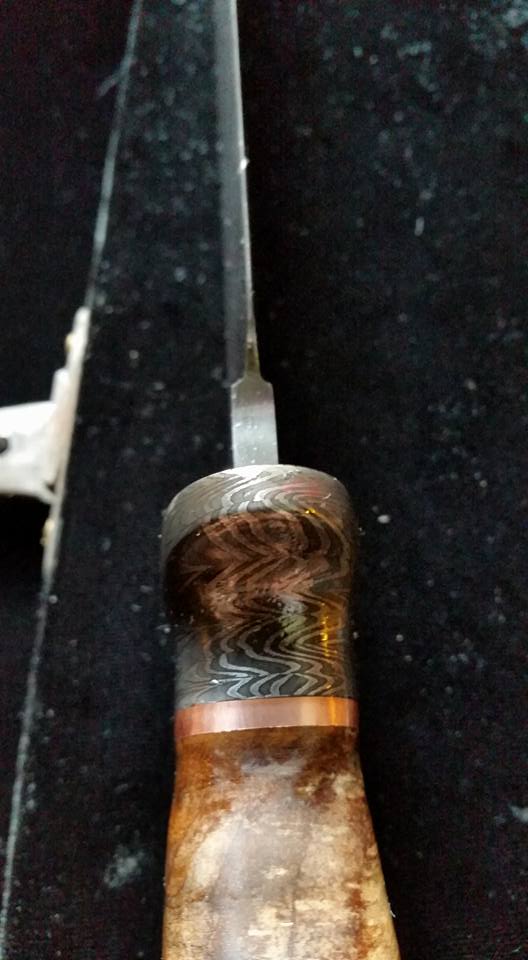
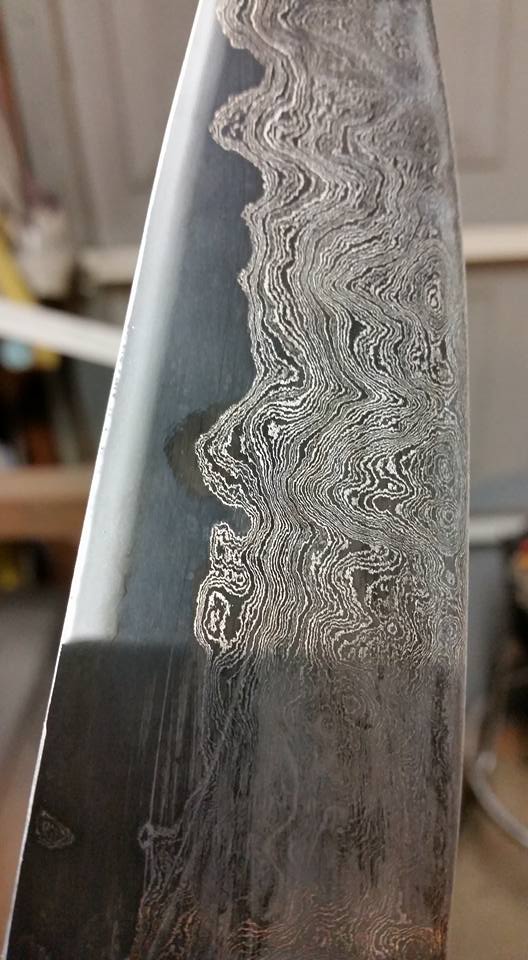
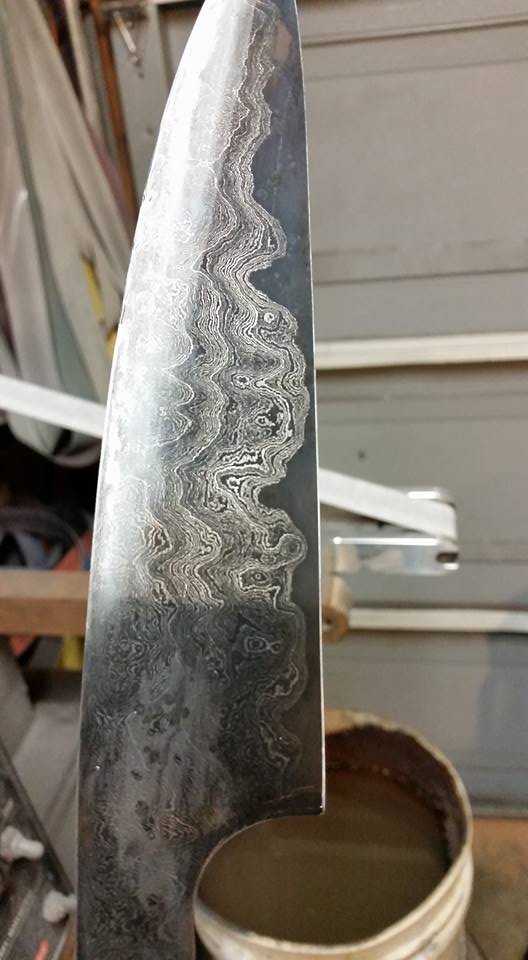
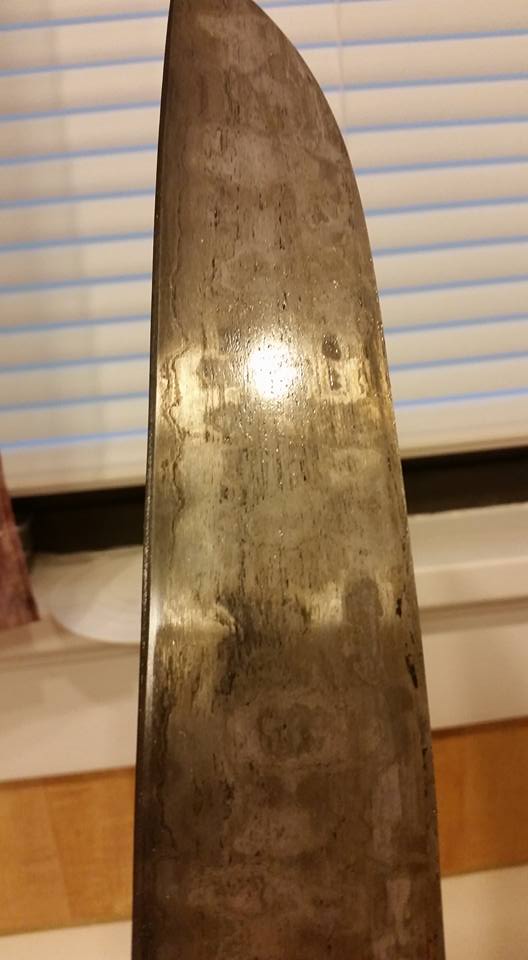
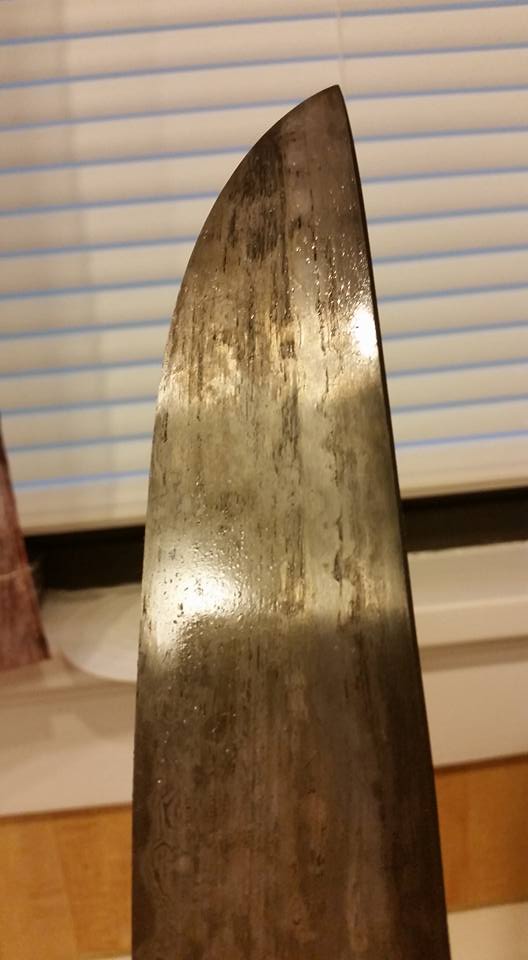
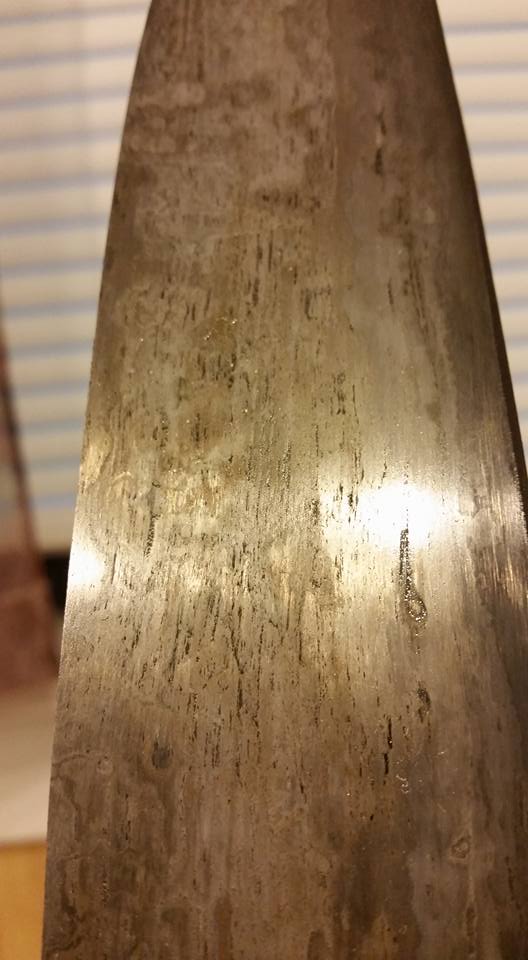
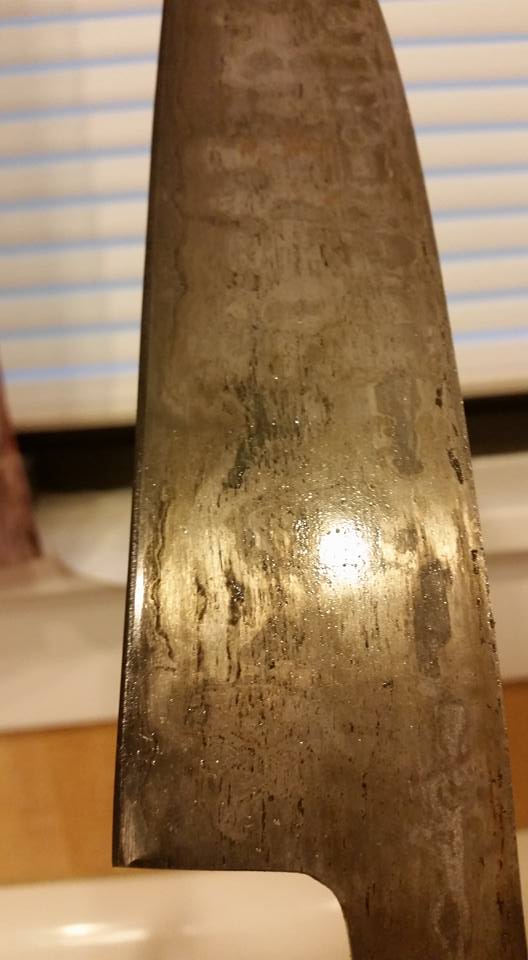
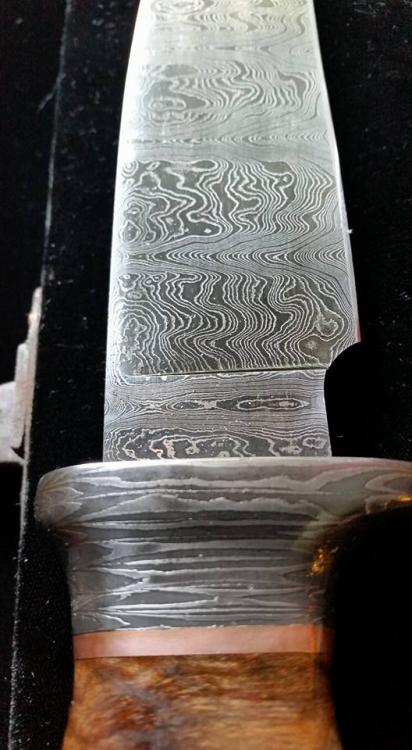
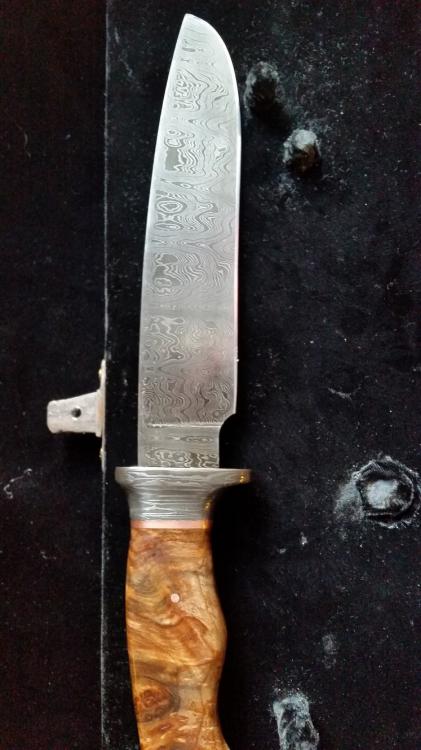
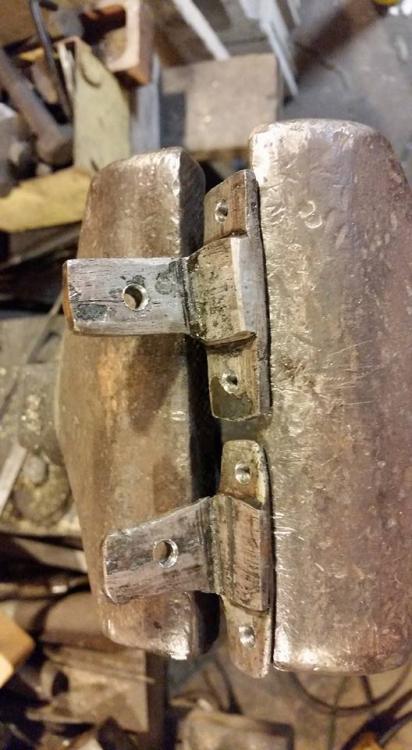
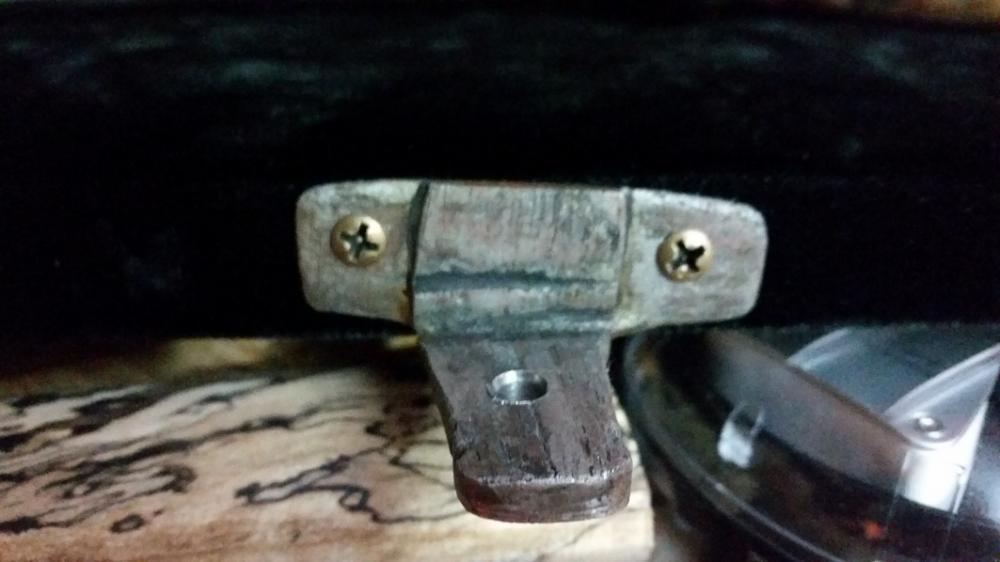
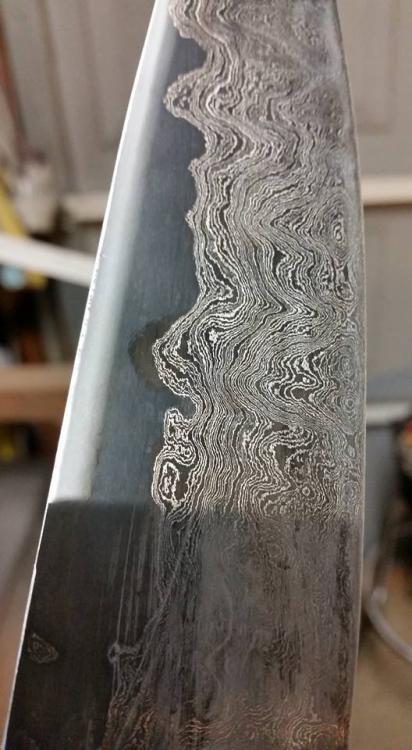
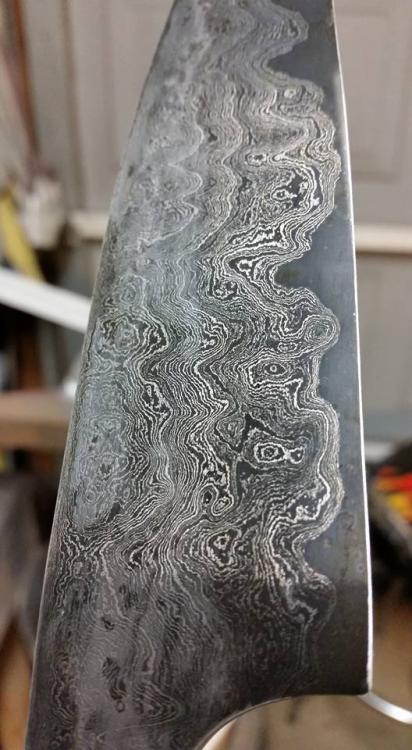
Started this project earlier this year as my first pattern weld on my power hammer. It turned into an on again/off again project. 326 layer, ladder pattern of 1084/15n20. The guard is 64 layer crushed W 1084/15n20 - also hardened. Copper spacer and copper pin, and maple burl handle. Made a display for it as well. Forged the brackets from old wrought iron, and forge welded the pieces together to function as a bracket. Hope you like it. I am not accustomed to making this style of knife, mostly just kitchen knives. Apologies for quality of pics, my camera died.


-
Thank you so much. I will be making many, many more of this style and construction, so stay tuned!
-
I will take it!!!
-
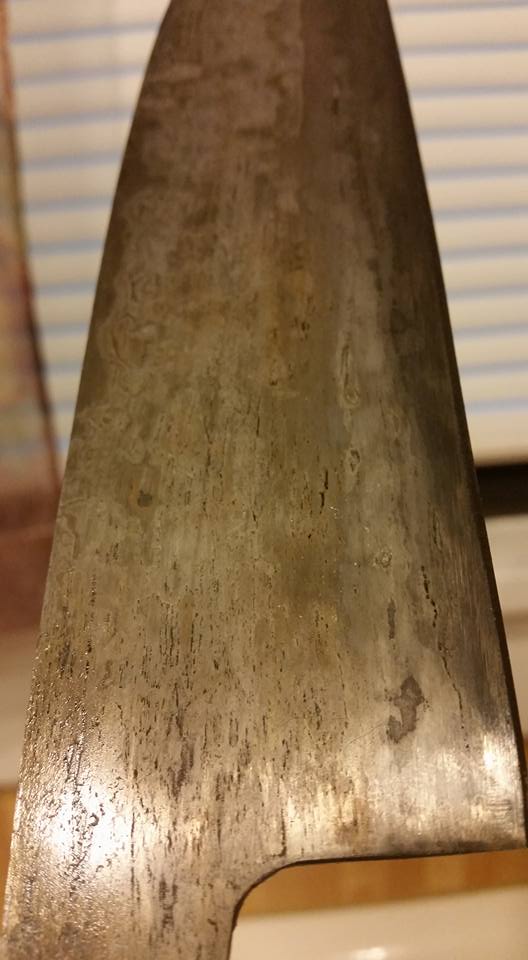
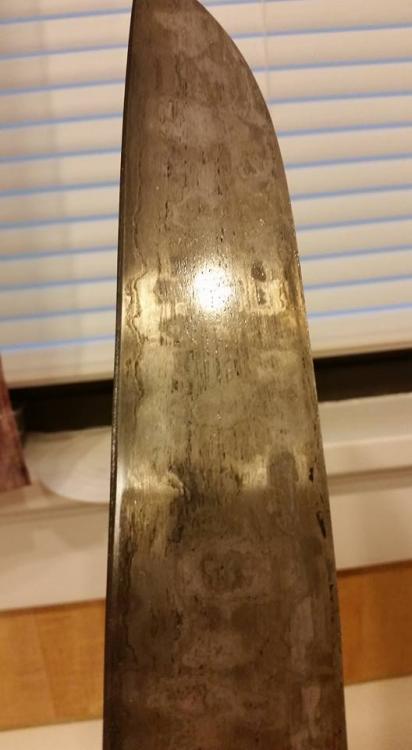
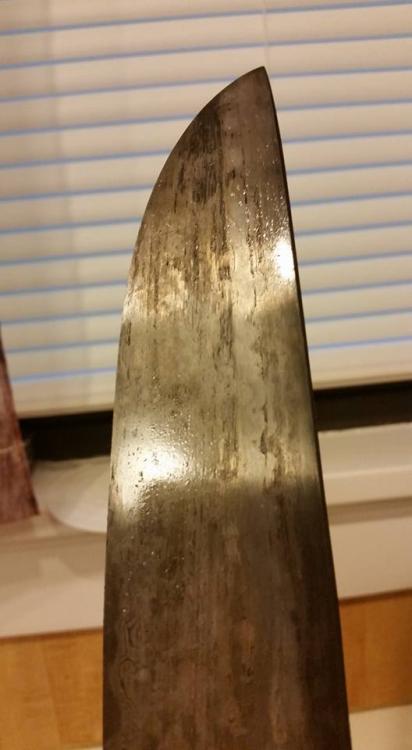
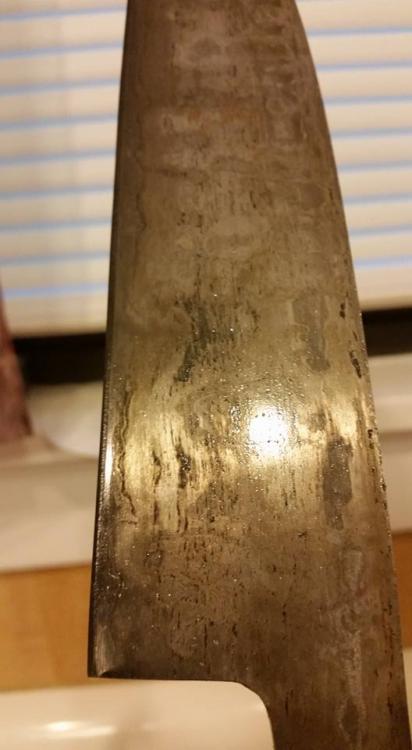
Same pattern weld as before off of same bar of 216 random I made. Also the wrought jacket (Not finished grinding, just wanted to etch to see what was going on with the wrought) on the other is from the huge wagon tire wrought that was recently sold by Craig Hashimoto. In which has good characteristics such as not cracking or splitting at the sharp corners when I turns it from a huge chunk of wagon tire to appropriate bar stock. Its either that, or I am pretty awesome at forging? .... For future jackets with the gnarly wrought, I am going to refine it much further to drive out all of the slags.


-
If you want to turn the scraps into something usable, you can still get something in return without doing a pour. This can be achieved in an aristotle furnace (poor control of carbon content), a shallow hearth (great control of carbon content), or even a full size smelting stack (semi-great control over csrbon content). It will skip reduction and basically melt within the presence of carbon. For any of these methods I would stick with the known 1010 wire, and practice with 40-50# of it with any of the above methods. As far as crucible steel goes (because it is unlikely a beginner or even most crucible steel enthusiasts except for a few are making wootz quality crucible steel), it is a tough animal, and will require a decent setup to get it right, and of course tons of trial and error. There is material out their on crucible steel, and even re-melting in the above methods, but it will really come down to practice. Good luck.