Joel OF
Members
-
Joined
-
Last visited
Everything posted by Joel OF
-
Understood, Dognose. I've agreed with everything you've said, typed words don't have the warmth of face to face conversation and can be misleading. 100% agree about seeing things in a new light and getting new ideas. There's a smith not too far from me whos work I love, mainly because it's so understated, efficient and...well...just really cool. The handles on some of his fire poker sets are fantastic! His design style is quite an inspiration actually. I don't think I'm allowed to post the link so Google "James Price blacksmith wedge table". I love the fullered bends and generally everything about it.
-
-
Cheers Dognose. I don't see making fire pokers etc as a bad thing, I just find them a bit samey. That probably sounds really pretentious, but I don't mean it that way, I just don't get much of a kick out of making ye olde worlde stuff like that. I am still VERY MUCH learning, (doubt you ever stop learning), but I know that it's my ability to think up the more abstract designs that will make me stand out and hopefully earn me some money, so I just think I should refine my skills in to that end rather than pursueing every traditional element of blacksmithing just so I can say I know how to do X, Y and Z. I've struggled with all that in my head a fair bit, I even tought myself fire welding because I know a lot of people say "you're not a blacksmith unless you can fireweld". I felt like a god for a day or two, then it kinda wore off. I know there's not a lot of smithing in these bowls but I do a lot of traditional smithing in my other work, particularly traditional joinery. Blending traditional joinery with modern design is my big buzz. Case in point - I made a garden bench designed to resemble a spine and rib cage - it was very modern looking but fixed together with keyed mortise and tenons and a double collar. I guess at the end of the day I just think life's too short to get too worried about what other do and the processes they think you should be going through. I'm paying for the coal, I'm paying for the steel... That turned into a bit of an arrogant sounding rant somehow, sorry!
-
Cheers. I have to admit that I had to Google steel spinning as I didn't know what it was. I'm slowly gathering knowledge of various metal forming tools/processes, but as someone with no engineering or agricultural background I am starting from a stand-still.
-
Cheers. Both were experiments really, had the drilling/cutting ideas and just wanted to see if they'd work out as expected, I made up a few elements as I went along. The the top one was just heated up a little and sunk into a pre-formed dish shape (some kinda cut up gas bottle I found in a rubbish skip). I did purposefully bend one side of the cut out before I started sinking so that one side would go within the other, but it did a fair bit of the shaping on its own, I just tweaked it.
-
LOL! Unfortunately it's not a metal roof + it has to be something that he can open in an instant as he has a powerful saw down my end which he sometimes uses and in his words "I don't want to lose any bits dear to me in the gloom". Fair enough! I'm sure I'll get it sorted, just a pain in the proverbial that I can really do without! As you were Jones :-)
-
Before I started smithing (about 2 years ago) I had loads of abstract ideas for sculptural items but I quickly got sucked into forging the generic items with the generic decorative details. I'm now trying to make a name for myself doing the more artistic stuff so I get commissions for the artistic items rather than the same old fire poker sets etc, which up till now is what's been happening. Bowls are a particular interest of mine and these are my latest two which I take to markets to feed people's imaginations. Both made from 3mm steel. The big slatted one is approx 24" wide and 6" deep. The smaller one is about 11" wide, 4" deep and countersunk riveted to a 16" chunk of solid steel. Both bowls are made by drilling and cutting, the big one was done cold but the small one I heated up. Bowls are darn hard to photograph as they always look really shallow in pics! Anyhow, there they are.
-
I want to keep floor space free, plus he has an exciteable dog that charges around the workshop and would no doubt bash into it all the time. I know, I know. Not my workshop, not my rules. Just a bit frustrating as it's bad timing and I can't really afford the time or money, though as we get nearer summer I can't afford not to do something about it. Lesson learned.
-
Ho humm, the perils of choosing a great spot in a workshop during the winter, then seeing the light completely change within a few months and the place become almost unusable. Got a cool white 20W LED on wednesday, thought that was the problem solved for the detail issues I encounter in the mid afternoon light, then friday we had probably the sunniest day of the year so far and I couldn't see any colour whatsoever all day. So now I'm in the process of fabricating a sliding shutter to block out the light as the workshop owner doesn't want anything permenant up blocking out light. Very much looking forward to the day when I have my own workshop!
-
Yeah seeing colour is going to get harder with more light, but a lesser evil than not being able to see any detail.
-
My workspace is the corner of a huge corrigated steel barn a fabrictor owns. The roof in my corner is sloping and somewhere around 12 feet high. There's clear corrigated roof windows about 3x5 feet big interspersed across the width of the building, and also tungsten strip lights. The nearest window and light are about 6 feet distance from my anvil. The lighting is a nightmare as it's so changeable, all it takes is a cloud and the light completely changes, and of course the ambient light changes throughout the day. The real problem is with fine work where I need to see every detail e.g tapering small stock, it ends up being the case that I can only see every detail once the metal's down to cherry red. As it's not my barn it's not really my place to go covering up windows or removing lights - especially as we have a very relaxed arrangement that is a dream come true for me at this early stage of my career and I don't want to rock the boat. I'm thinking that the best solution is probably to fight fire with fire and get an LED spotlight I can switch on when the ambient light is bad and I'm struggling to see fine details. They're pretty cheap and inexpensive to run, but I thought I might aswell as the gods of IFI for their 2 cents/pennies worth before I go throwing money at something that might have a simpler solution? Any ideas spring to mind? Cheers in advance
-
I'd never get rid of a vise. Having multiple vises is a real time saver - if a project requires a couple different jigs you can lock both jigs up & jump between them rather than putting down your hot steel, taking out the jig, putting the new jig in... I have 3 vises as they're essential to the way I work/think. I use 1 leg vise right by the fire for jigs & twisting, 1 leg vise left empty for straightening & cutting, then a lower down engineer's vise for holding jigs that require bigger steels that are awkward to handle at leg vise height.
-
Appy's being short for apprentices? Don't know t.b.h, I'll ask around. I'm not normally keen on fine decorations like leaves but I loved the ones on that gate!
-
I found this video on YouTube of the old smith & forge down the road from me in Appledore, Kent - just off Romney Marsh. The clip is from an old episode of a countryside program. After the smith died the building became an antiques shop (forge and anvil still in place) but the building's being sold. Can't be turned back into a working forge unfortunately. I was too young to ever know the smith though I know my parents met him. Just a nice little snippet & nice to remember the guy.
-
Cheers Candid. Keeping everying lightweight was my main aim as I'm only going to use the vise for twisting, though the folding bracket lays flat down onto the ground and the bottom of the leg sits firmly into it, so I'm confident that if I did need to do a bit of hammering the leg is taking the main force, not the mounting bracket. Seems a bit trivial but I think the setup looks quite cool - and seeing as this is a setup to use for demos - anything that helps people remember you is a good thing.
-
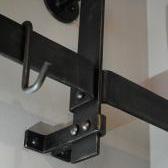
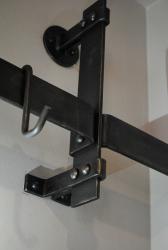
I made this vise setup after, though I did it with a spare 4" leg vise I have. Thought I'd share some pics. It's a bank holiday tomorrow so the govenor shuts the workshop to give the neighbours some peace, so I've setup shop in my parents' garden! The thing that holds the bottom of the leg vise in place folds up out of the way when the vise isn't in use so I don't trip over it. I had intended on making catch for it so it wouldn't fall back down easily but it doesn't need it afterall as I used nylok nuts so the hinge is kinda stiff and it stays up on it's own. Ignore that random hole in the bit of angle iron, I drilled it in the wrong place first time, doh!
-
How long do you do your fire tongs, pokers, toasting forks etc? Especially curious about the tongs as I've had all 3 responses at markets: they're perfect, they're too short, they're too long.
-
Not sure why the pics are rotated through 90 degrees...
-
A few weeks back I made this little forge & legs for my old hand cranked blower as I had a demo coming up, thought I'd share the pics. If I had more time I'd have made the blower legs folding but it was all done pretty quick & made with scrap that was at hand. The fire box is made from a chunk of RSJ, the legs were 20mm bar off a gate, (I forged and twisted them), the pipe was just stuff knocking about. There's some scrap angle iron in there too and some other bits of random junk, the only thing I bought was the flexi air pipe. Works really well, I've forge welded with it & looks kinda pretty for something made from stuff that was otherwise a trip hazard! I'm a very lucky boy that I work alongside a fabricator who has free scrap galore!
-
Mobile phone charger.
-
I know of two types - seamed like in my picture, and seamless which have tapered ends. There's also wraps, but they're slightly different. I can think of a few methods according to stock size, shape, how many collars you want etc but for the minute I want to master them "by hammer and hand" before moving onto doing them in a more mechanized way so I do them the way you do them John, as per this old thread: '?do=embed' frameborder='0' data-embedContent>> Filling in a few stages you didn't mention/adding some things I do on top of what you do: If the mandrel has an odd number of bars and doesn't have a seam line so you know where the middle is, gently centre punch on both sides of the mandrel where the middle is. Gently centre punch half way along the length of the collar material so you know where middle of the collar is. Open the vice a suitable amount and sink a U shape into the collar material, hammering on the centre punch mark. Lock the mandrel stood up the vice, line up what remains of your centre punch mark with the centre punch mark on the back of the mandrel, flatten the back of the U shape against the back of the mandrel being careful not to draw out the length. (Depending on the collar width the U sinking stage might not be needed). In another old thread about collars, Frank Turley highlighted how easy it is to lose where the middle of your collar is when you're sinking the U, the centre punching I do helps you know where you are.
-
Thanks folks, great ideas. Putting the fire dogs to the side for a minute, what are people's general opinions about collars and their gripping abilities? Any situations where you would or wouldn't use them?
-
I mean the collars loosing grip and slipping, not the bars underneath slipping past each - which is what I think you're getting at, Glenn?
-
I've designed some fire dogs for a customer that have 3 x 20mm straight bars collared together to make a 60mm wide front. In imperial that's 3 x 25/32 inch bars collared together to make a 2" 23/64 front. My concern is that the collars might loosen up from the heat of the fire and slide down the bars. That's an easy fix, I can just do away with the collars and rivet the bars together, but it's highlighted a more general concern about collaring straight bars together where there's no vertical resistance. To help explain what I mean about vertical resistance I've attached a picture of a candleabra I made a while ago, it has four straight bars held together by 3 collars. I've always been slightly concerned that a heavy blow could cause one or all of the collars to slip out of position. Collars are typically used to hold scrolls to something else, in such situations there is vertical resistance, like the pic below I've pulled off a Google search. The collar is unlikely to slide down the bar on the right, because the scroll is resisting on the left. (Chances are the scroll's also collared at the top out of shot, so then it's definitely not going anywhere). So I guess I have 2 questions: would you be worried about the heat of the fire loosening the collars on the dogs? And, should collars only be used when there's resistance?
-
These are more like principals than mantras but they often go through my head... It might be good enough for the customer but it isn't good enough for me, so I'll do it again, better. If you don't learn something from a bad experience then all you've done is wasted your time. I'm trying to get into the habit of quenching my tongs before I put them back on the rack. For some reason I often bounce my hammer gently on my anvil to tap out the old test match cricket theme song. I don't even like cricket that much!