ede
-
Posts
254 -
Joined
-
Last visited
Content Type
Profiles
Forums
Articles
Gallery
Downloads
Events
Everything posted by ede
-
I would say that mastery is not a state like nirvana or enlightenment, not even necessarily a certain attainment of skill. Masters can keep on learning in a craft forever and it may still take great pains to learn new techniques and refine them. One can have a title, sure but what is that but an arbitrary list of skills or a piece of paper? Once you say you've mastered something you preclude yourself from evolving and learning. That may be why the true masters have a humility about them. As Lao Tzu said: “Those who know do not speak. Those who speak do not know.” A famous German idiom says it another way: "Es ist noch kein Meister vom Himmel gefallen" which translates to: No master has fallen from heaven yet. And while being called an amateur often has negative connotations, the root of the word is French and means for the love of doing without pay. Not a bad title after all, but I bet you won't find many professionals calling themselves amateurs.
-
Hi Santis, Check out the book "The Jewelers Workshop Safety Report" by Charles Lewton Brain. Much of the material in there is transferable to welding and blacksmithing disciplines. Also, I noticed on your site that you mentioned a 1" hybrid burner, is that the one you had difficulty calibrating?
-
Ernest Rellfinghaus anvil purchase
ede replied to Beatsy' s Forge's topic in Anvils, Swage Blocks, and Mandrels
Sure, walking a shop anvil around is no biggie. To me, the max size for comfortably moving an anvil by myself outside my shop--read: portable anvil-- is around 220. YMMV -
Do you do any brazing? Cadmium is commonly found in silver solders. Also, cadmium platings are commonly found on hardware such as nuts and bolts. To those that weld or forge them, here's a good reference for it: http://429mustangcougarinfo.50megs.com/new_page_26.htm Be fastidious about washing your hands well before eating. Another option would be to get a wet belt grinder to help keep the dust suspended. This is a much more expensive option then a respirator. Consider that there are specialized respirator filters for fumes as well as for particulates. I generally see 4 temperaments when it comes to ignoring workshop safety. 1: I'm untouchable and it won't phase me. 2: I'm too cheap to take the necessary precautions or it will slow me down. 3. I"m gonna die of something someday anyway, (usually goes along with number 1). 4. Ignorance Or any combination thereof.
-
Ernest Rellfinghaus anvil purchase
ede replied to Beatsy' s Forge's topic in Anvils, Swage Blocks, and Mandrels
Not to dissuade you, just remember that unless you are a herculean human, moving a 330lb anvil will be difficult to do, whereas I can lift and move my 220 as needed. It has also been said that sometime size is just ego. -
Rookieironman, I did the calculation here: http://www.online-calculators.co.uk/volumetric/cylindervolume.php for burner volume and think Frosty is correct at around 3,700 cu/in. 24" long at 20" diameter, subtract 6" to arrive at 14" diameter.
-
No worries at all! I'm just tickled and appreciative your helping me through with this. Regarding the pipe size, I see how this can get confusing, just like nominal lumber sizes. I can see how the early days of pipe burner builds would be all so easy to call out the pipe as 3/8", even when using tubing. 3/8 nominal pipe vs 5/8 tubing, this hurts my brain. Instead of protesting anymore, I'm just gonna go with it. For anyone else that is following this, here's part of a pipe size chart for reference:
-
Last time I procured forklift tine, there was an identifying tag which allowed me to do the research to find out the manufacturer and alloy. It turns out that it was about .3% carbon, right on the very low end for medium carbon steel.
-
Another thing I noticed, going back to the 3/8" burner notes previously posted, is that the mixing tube length is 8", whereas the micro burner dimensions above is 1/2 ID and 6" length.
-
Slag, thanks for the chemistry lesson. What limited experience I have with a solid fuel forge has led me to preferring coke. It sounds like one would really get a workout if trying to maintain a coke forge with a bellows so I can see the benefit of coal here. Frank, thanks for the photo of your old bellows, that reference will help for sure.
-
HI Mikey, I have a few questions regarding the build of this burner. I did a test burn yesterday with the torch not press fit into the doubler, but with the luer lock needle just laying inside the mixing tube with the setback at about 1/4 from the leading edge of the air slots. I installed a cork through the luer lock needle to simulate a seal for the doubler. The fist thing I noticed is, unless I'm misunderstanding the directions, if installed with the doubler connecting the mixing tube and the torch, the luer lock would be way forward of the air slots of the mixing tube. In fact, measuring 1/4" back from the leading edge would entirely cut off the needle and part of the taper before the needle. The only way I could get it to run was having the needle down into the mixing tube forward of the slots. When I did the layout, I made the first line at 9/16 and the second one at 1 9/16. What am I missing here? I noticed yesterday that you specified 5/8 OD and .495" ID for the mixing tube. Above that you wrote "builiding the 3/8" mixing tube and it's flame nozzle". Upon doing further research, I noticed that you had written in a different post that the best orifice size for a 1/2 burner is .028" while for these micro burner plans you suggest using .019-.022. I think you might of crossed plans with the 3/8 and 1/2 burner?? This may be confirmed by the fact that the 3/8" bolt was a typo?? At this point, I am thinking I need to buy different needles but am unsure how to proceed. Please advise! Thanks!!


-
If you do a 3 inch lining, that would leave you with a 14 inch diameter. I've heard of ribbon burners backfiring from the forge being too small for the burner, but haven't heard much about forges being too large for ribbon burners. Do you have a ribbon burner size picked out? I would call Pine Ridge to find out what size burner they recommend, or maybe Wayne will chime in. This guy part one used a 10" quick tube for his ribbon burner forge and went with a pine ridge burner part two . Regarding the blanket staying in place, when I built my forge I took inside diameter x pi to calculate how much blanket to cut, then added an inch or so for a tension fit and it stays just fine in place. If the first layer you cut is too small and falls out, cut one longer and use the first one on the next inner round.
-
That's interesting, Charles and good to hear that they can be soothing to use. Out of curiosity, why do Coke and Andercite not like bellows?
-
that was EXCELLENT!
-
Okay distance helps avoid backfires, good point. Thanks for the resources, Thomas. I will check into "Cathedral Forge and Waterwheel" which looks interesting. I looked in the Practical Blacksmithing and I tell you, M.T. Richardson was not a fan of the bellows!
-
Some time ago, I acquired a mostly reconditioned bellows that didn't include a nozzle. I would like to build a tapered nozzle with a sip roll out of 16 gauge and am looking for ideas on dimensions since I don't currently own a coke forge. I say tapered because that is what I generally seen in pictures, but am not opposed to using straight pipe as well. The ID of the bellows hole is 2 1/2 inches so I have that part figured out, but generally how long are the nozzles before they go in the tuyere? Thanks in advance!
-
My ass-umption was that you want insulating properties or air pockets if it's used as a forge liner/hard face, but in this case since it's a manifold to send the gas through multi orficies, that less air pockets would be better for structural integrity. I"ve used a vacuum table extensively for vacuuming investment as a step in the lost wax casting process. Maslow's law of the hammer strikes again! I had read the following on Wayne's site: special castables (the Kast-0-Lite does not work well for this) needed for casting the Ribbon Burners. While on Emmerlings directions on step 6 says other refractories can be used. Wayne, can you tell us what make Kast-O-Lite not work well for this?
-
What is far superior to you, Wayne, may not be superior to everyone else's needs. Form follows function. Not everyone may want to use electricity to power a forge, or they may want to use their burner as a torch. While I have no doubt of the merits of the Ribbon Burners you speak so highly of, I think it's a disservice to proclaim one tool technology the victor over another as this is how tool wars start.
-
" the vibrator I made to settle the refractory into the mold and the expanded sheet thoroughly. It's just a piece of 5/16" rd. with about 4" bent 90* at the end. With the drill turning at a moderate speed it vibrated every bubble out quickly and also quickly produced free moisture at the top of the mix and through a joint under one end of the mold" Hey Frosty, What are your thoughts on putting the plenum with wet castable under a vacuum bell jar and run a vacuum to pull all of the bubbles out? People who do lost wax casting generally take the bubbles out of investment (like a plaster of paris) before doing burnout of the flask/mold. My thinking is that it might create a stronger bond with no air pockets between the castable refractory. Of course one would need a very large bell jar but one could always fab a smaller plenum for a smaller forge. A rod knocker seemed to admirably fit the bill for you though. It's good to see your approach to a ribbon burner. Nice work.
-
Interesting. How thin of a cut are you doing to allow the sleeve to clamp this way, about the thickness of a hacksaw blade or cut off wheel?
-
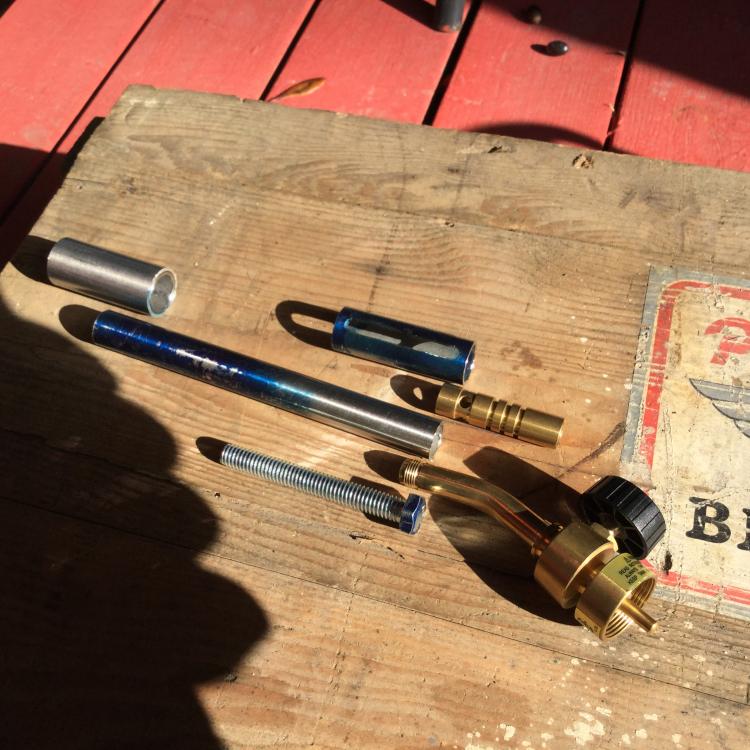
Next step, reduce size of mixing tube to fit flare spacer and choke sleeve. Follow that by drill and tap for the thumbscrew, then layout the air slots and cut. More to come as I progress.
-
Much obliged, Mikey. I will follow up here when I make some more progress or have questions.
-
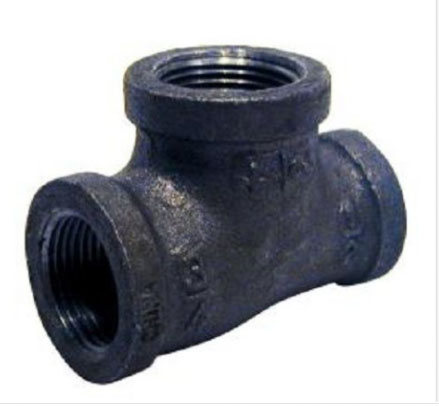
Thanks for the info, jcornell and Frosty. I will have to say after making them both ways, finding center with a lathe, vs by hand, it's definitely easier to get it spot on with the lathe. My first one I tried to find TDC based upon the seam at the top of the T. The mig tip is a little off center, but hopefully it will still work! I went ahead and bored out the burr, but spared the threads per your mention that it really doesn't make that much of a difference to smooth them out. By the way, I was wondering if you've ever played around using asymmetrical sized openings for the air ports. I saw a T at the hardware store that was 3/4, 1/2, 1/2 that looked like this. Just curious... .
-
-
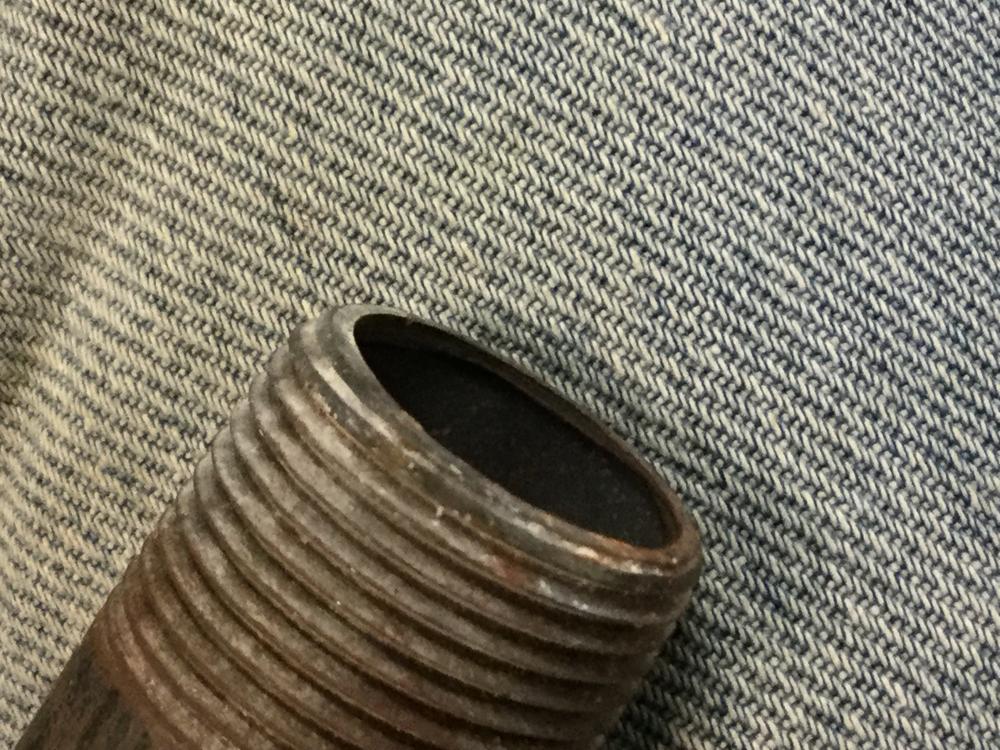
Hi Frosty, I noticed on my 3/4" T burner that the end of the mixing tube has a large ridge on the inside and was wondering if this is normal or something that should be removed? Thanks!