jason0012
Members
-
Joined
-
Last visited
Everything posted by jason0012
-
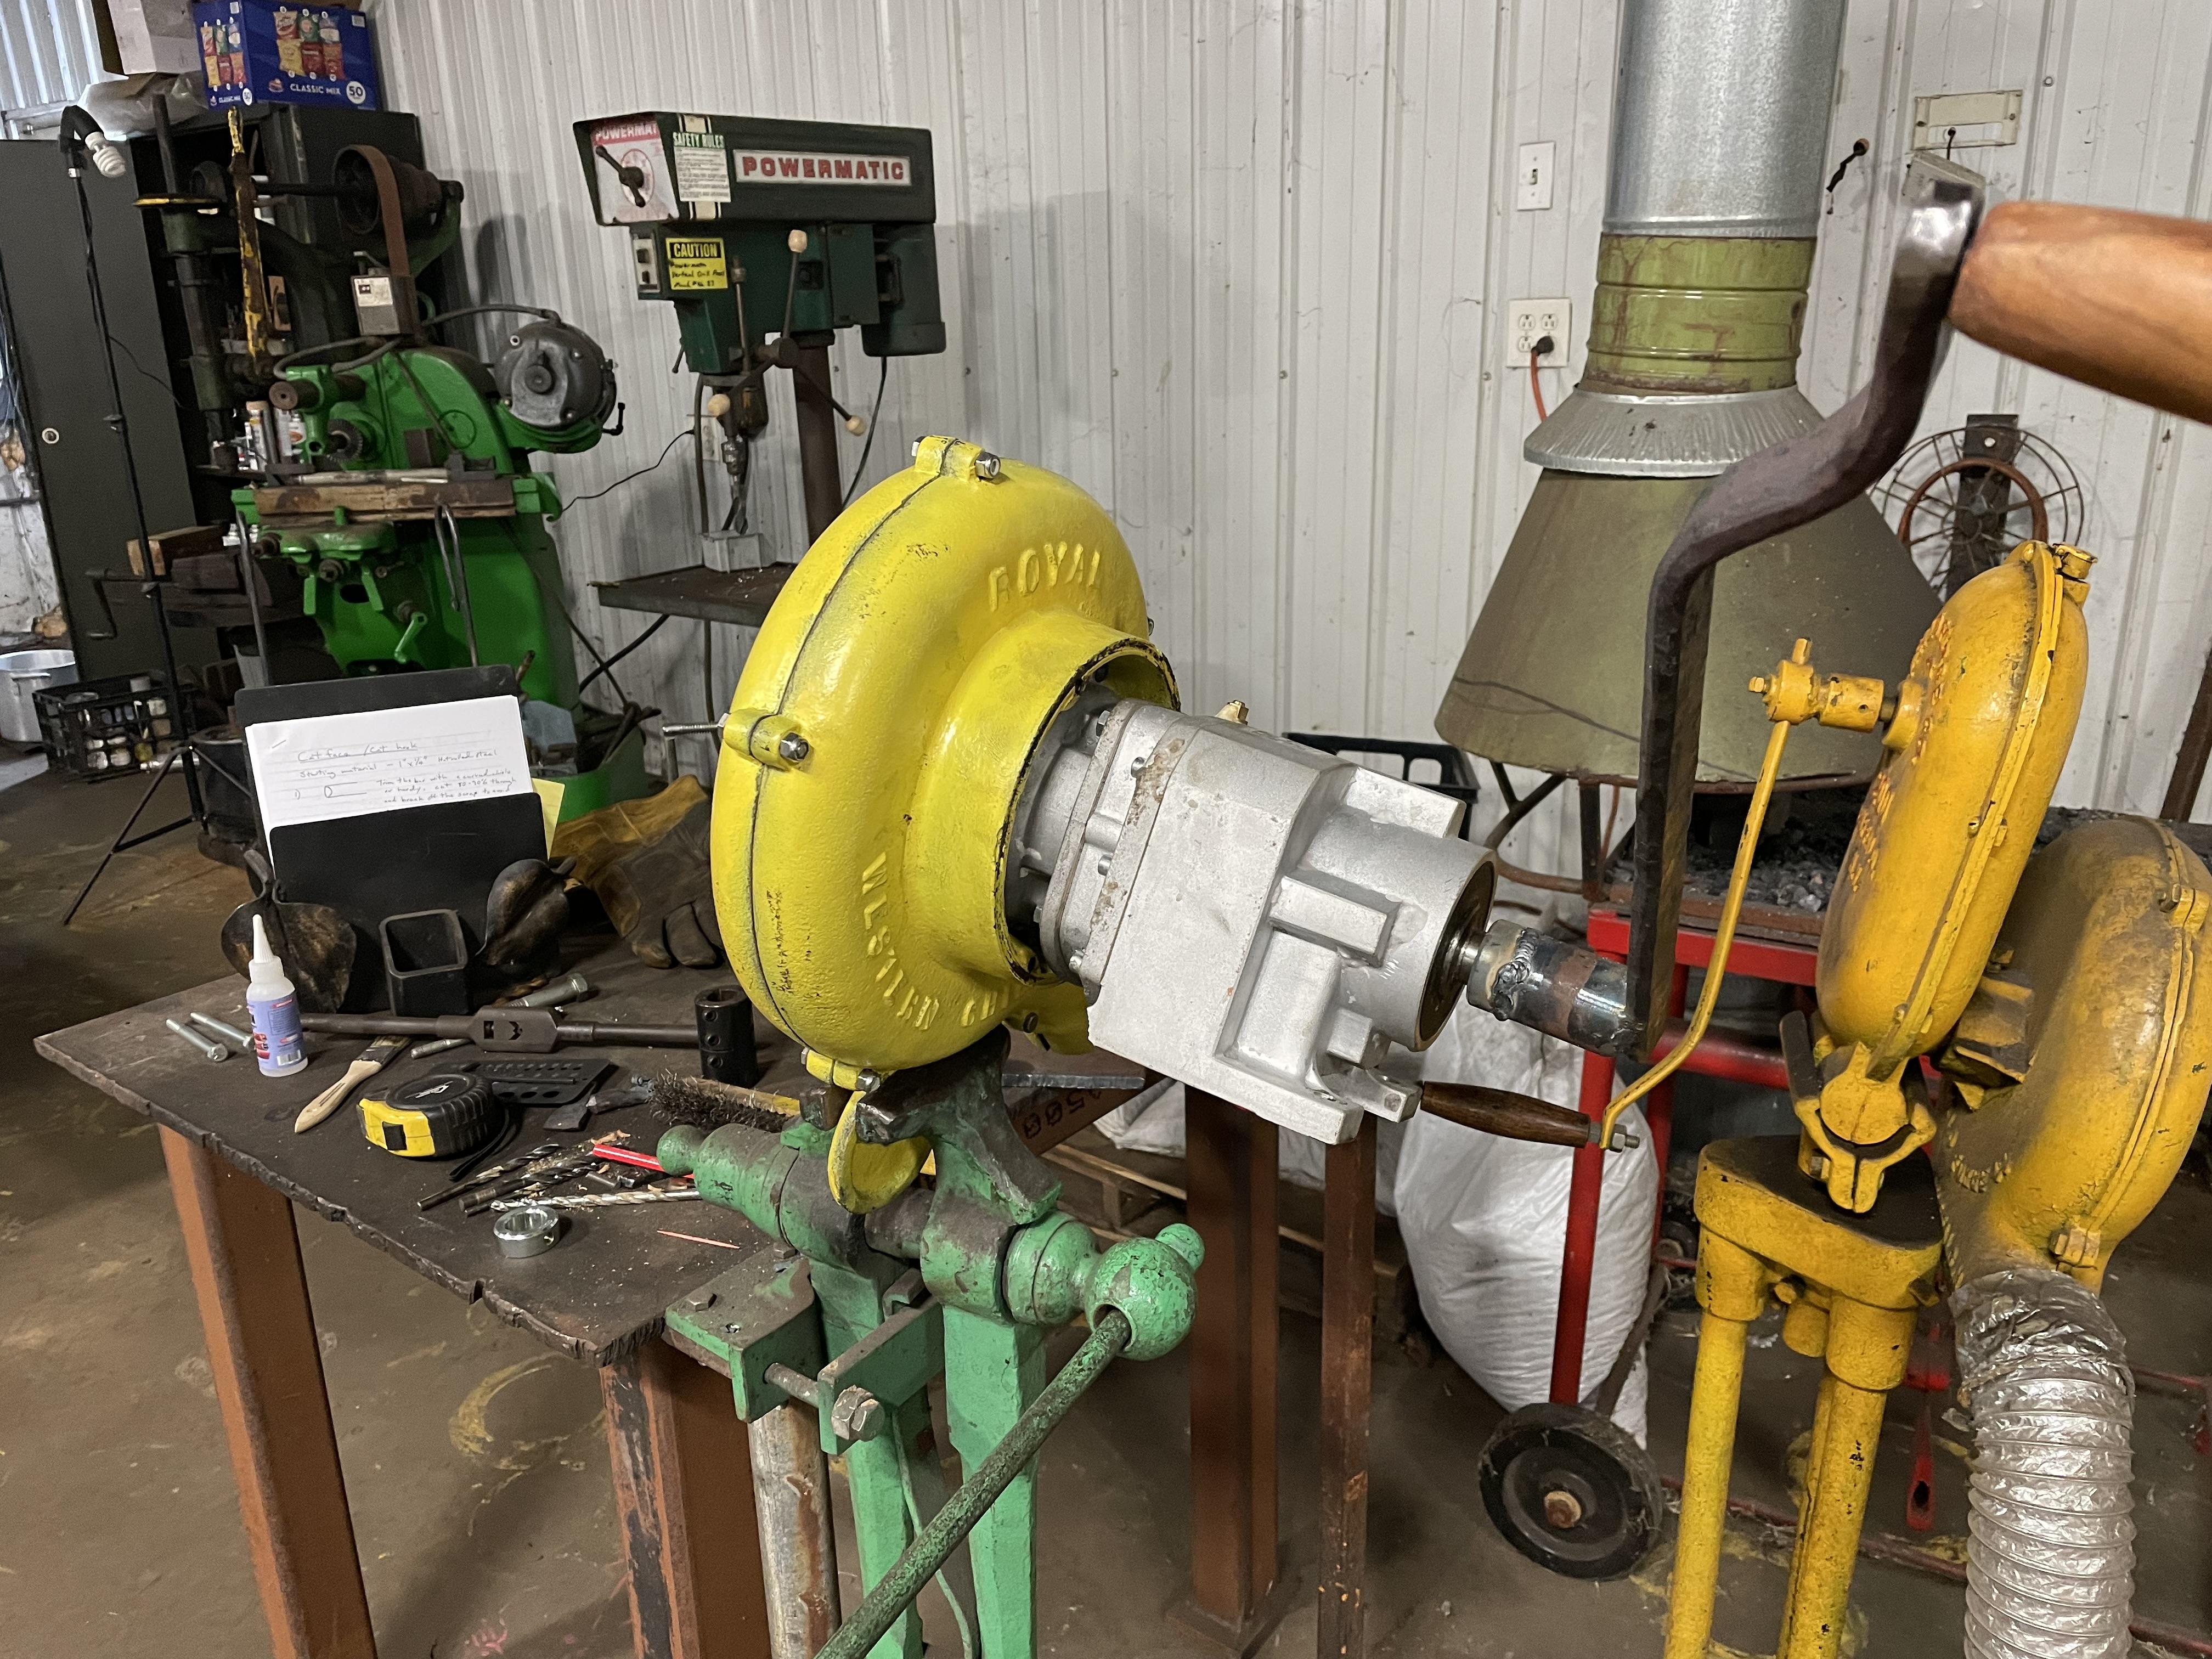
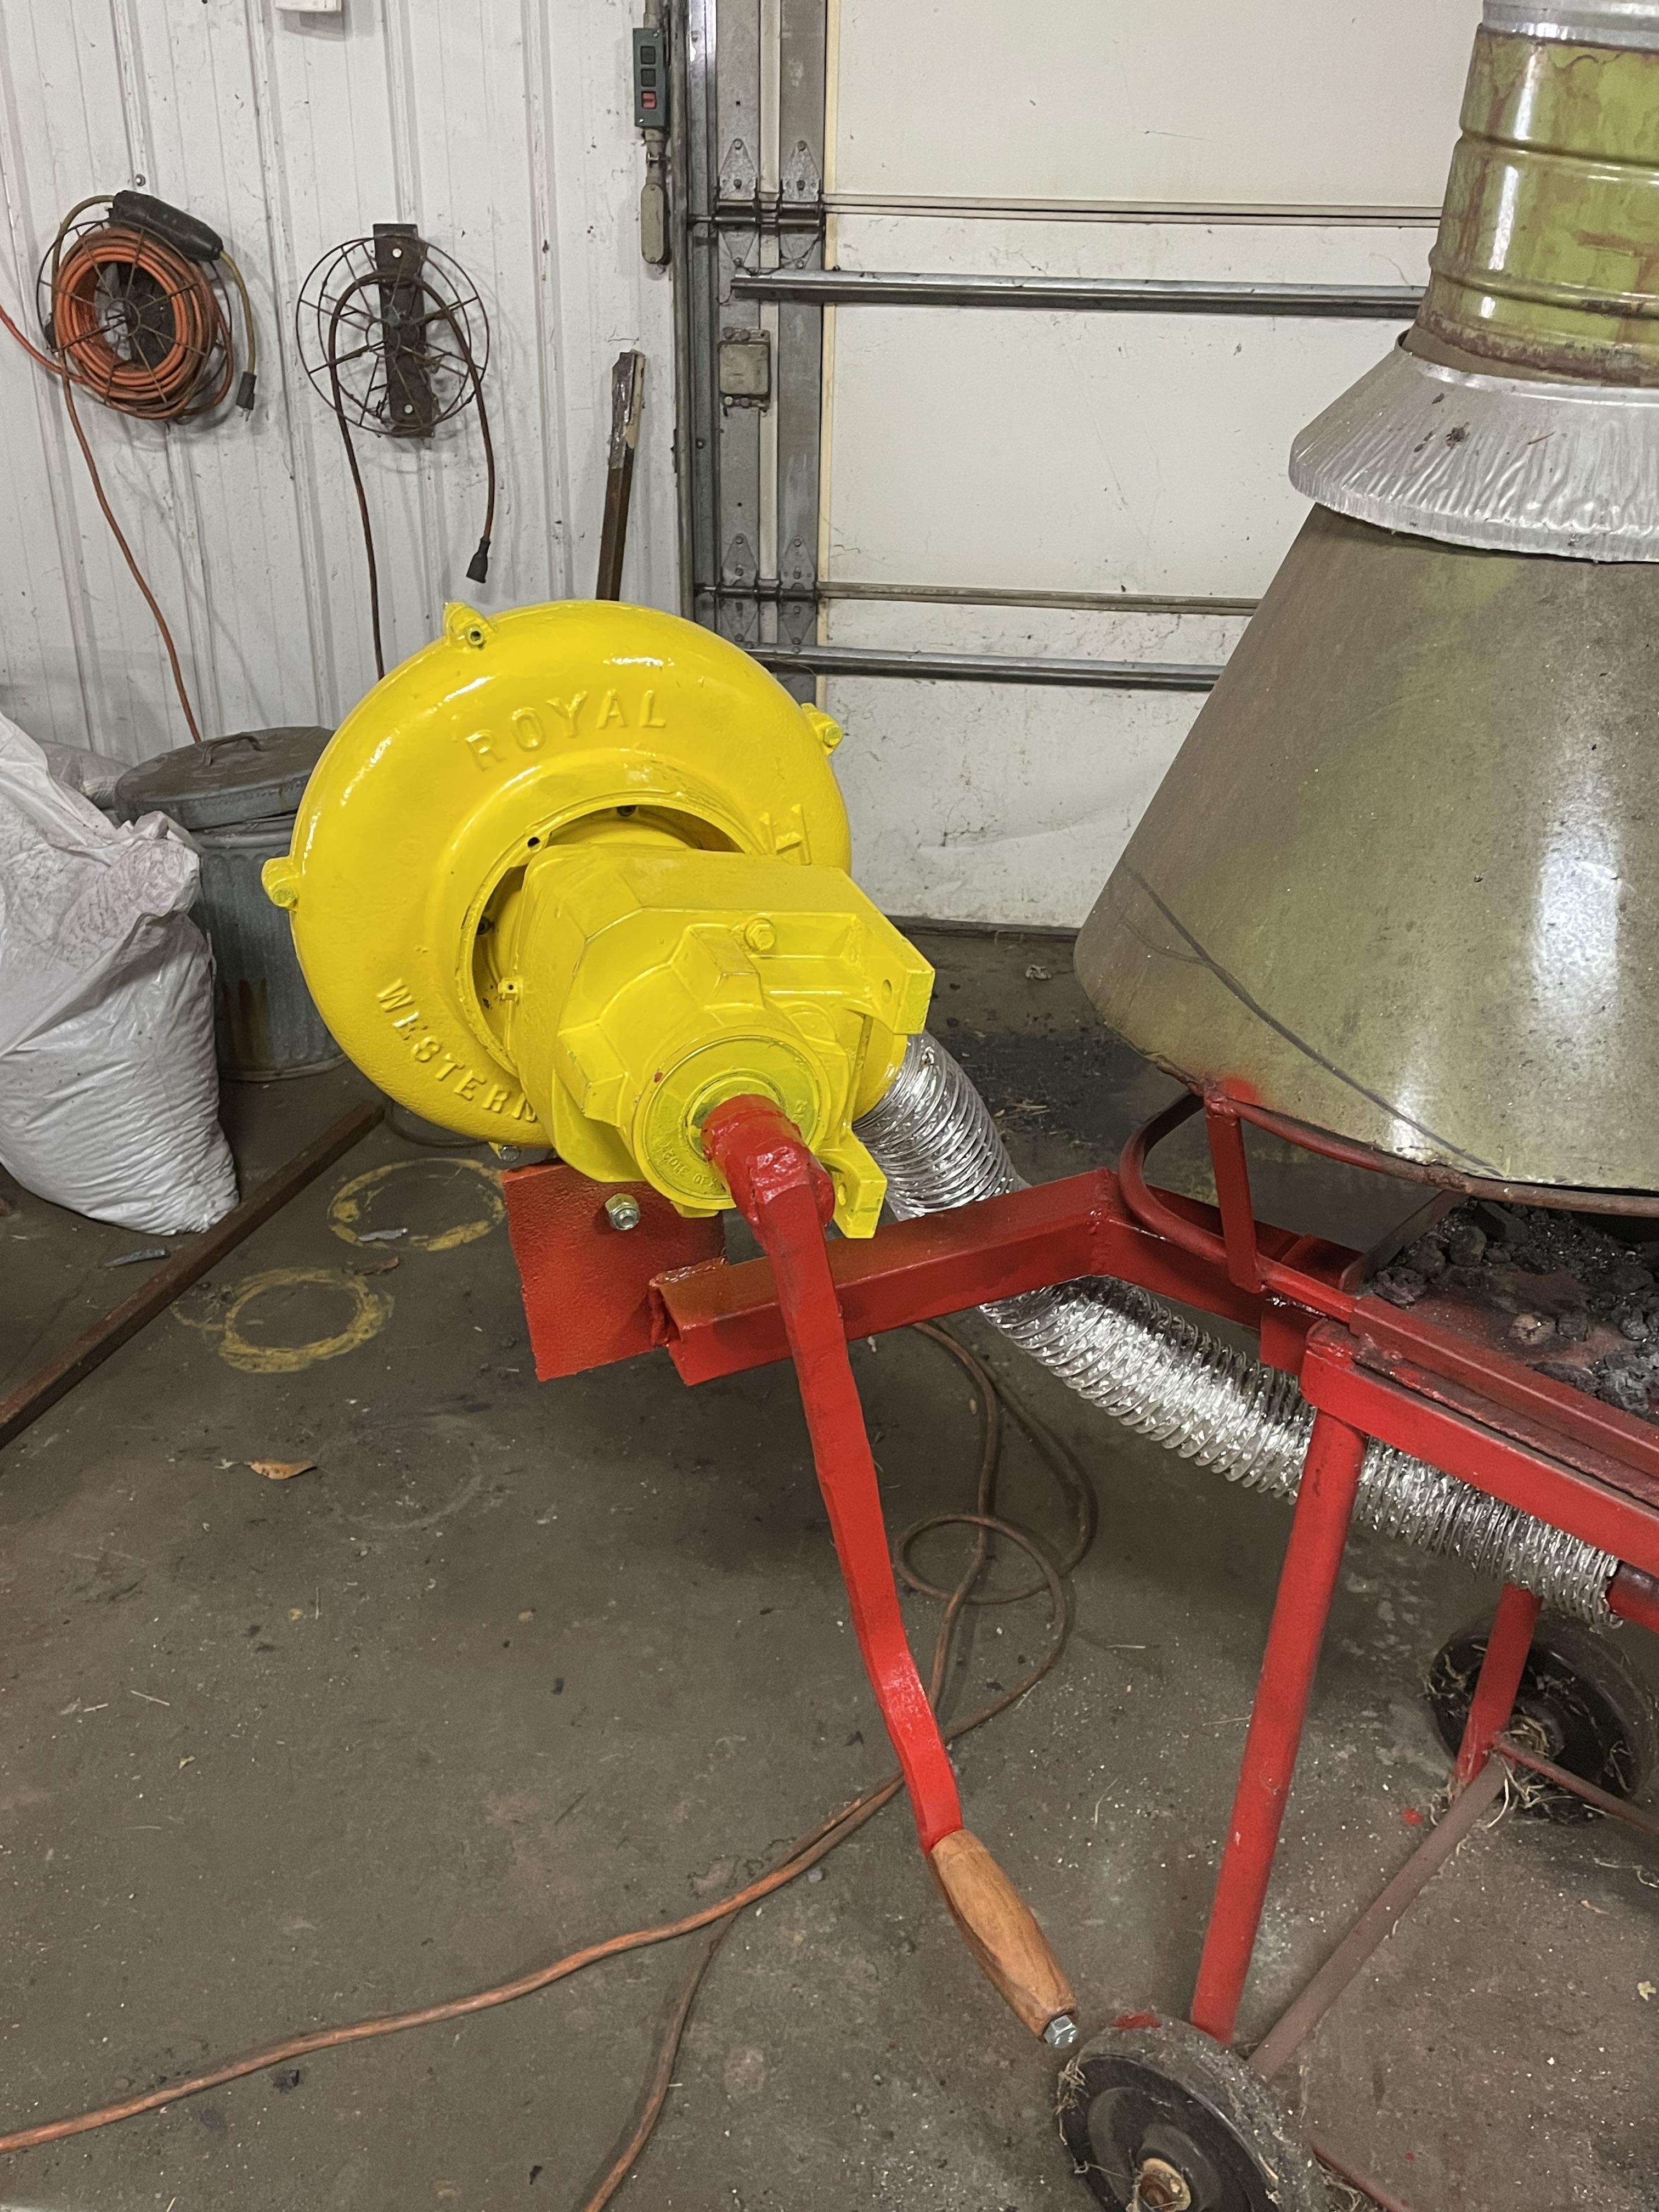
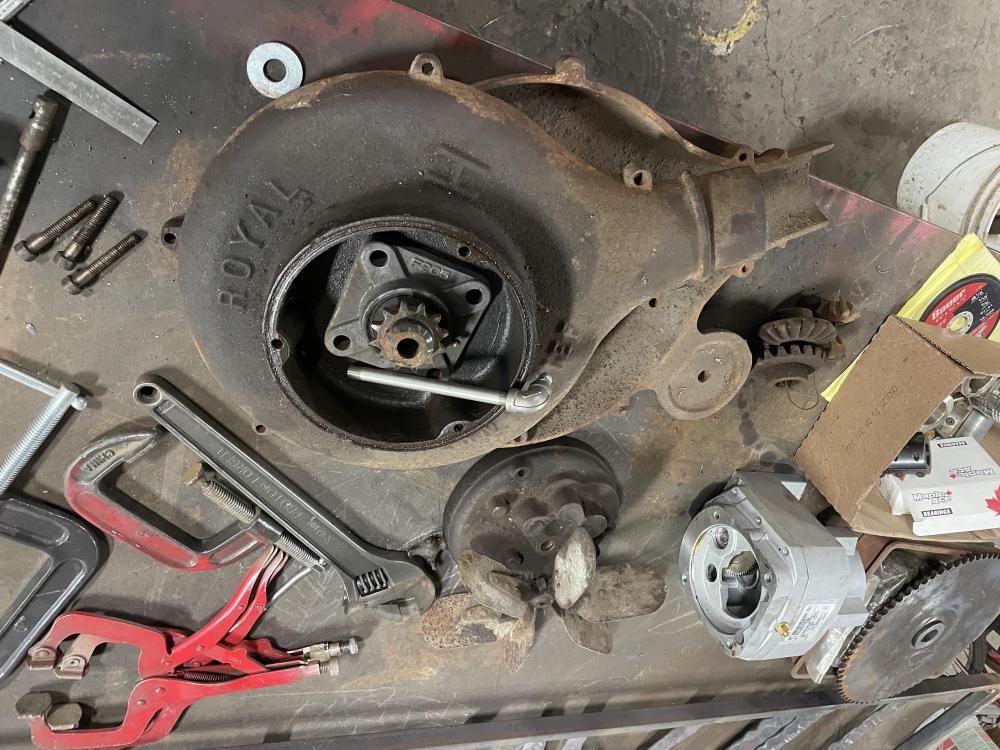
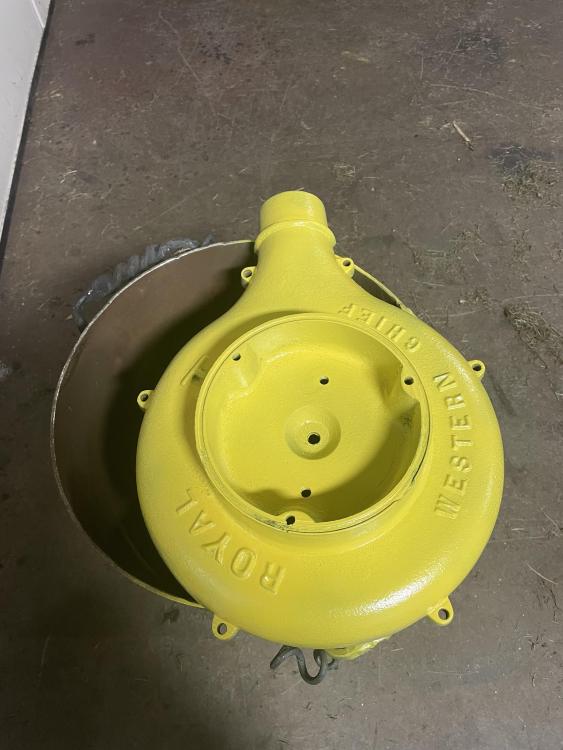
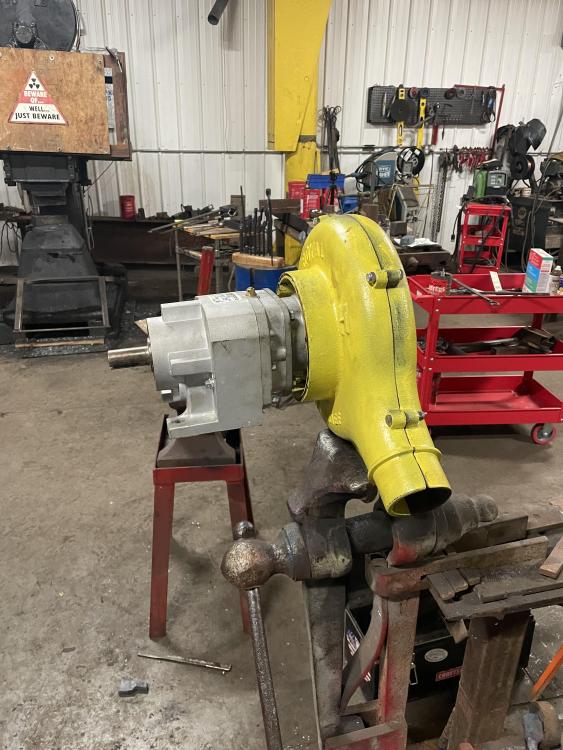
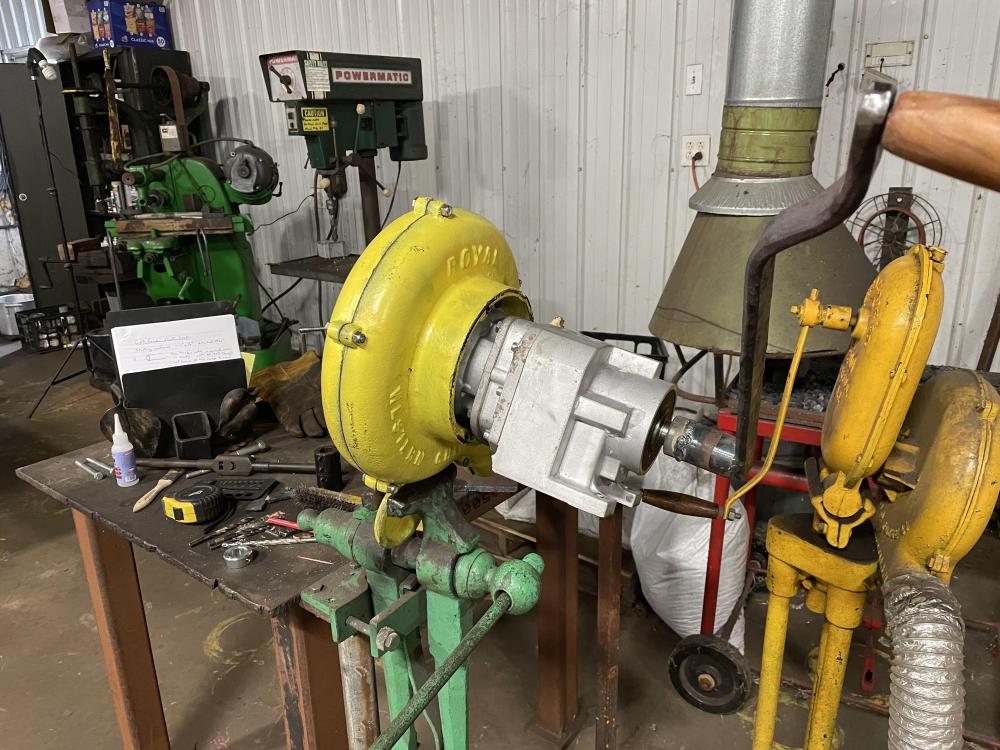
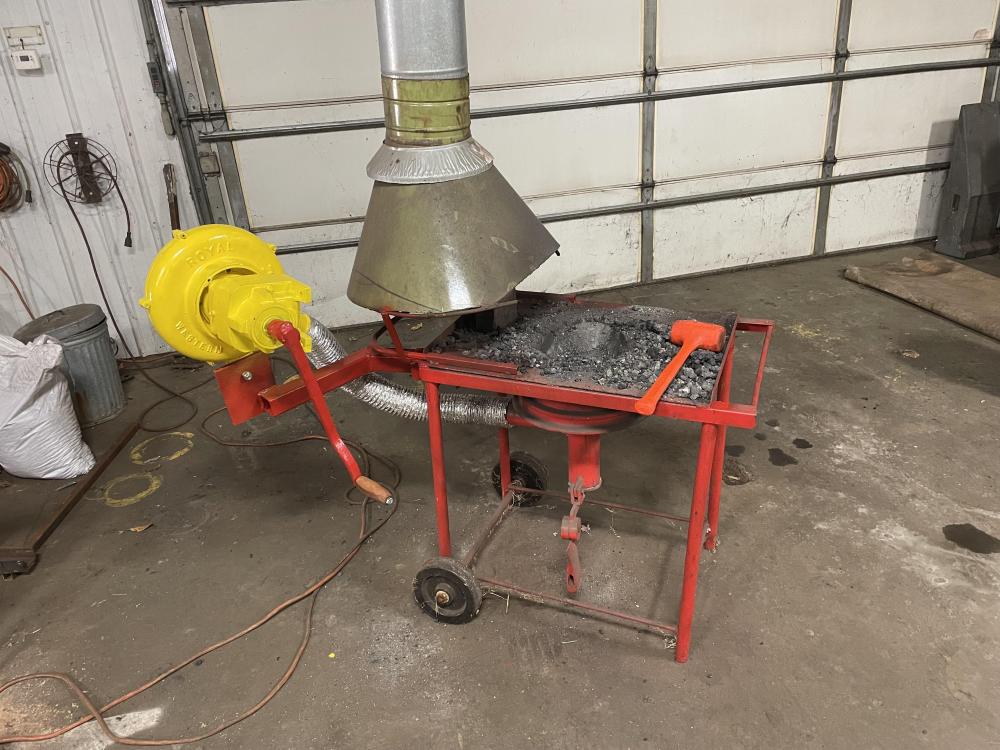
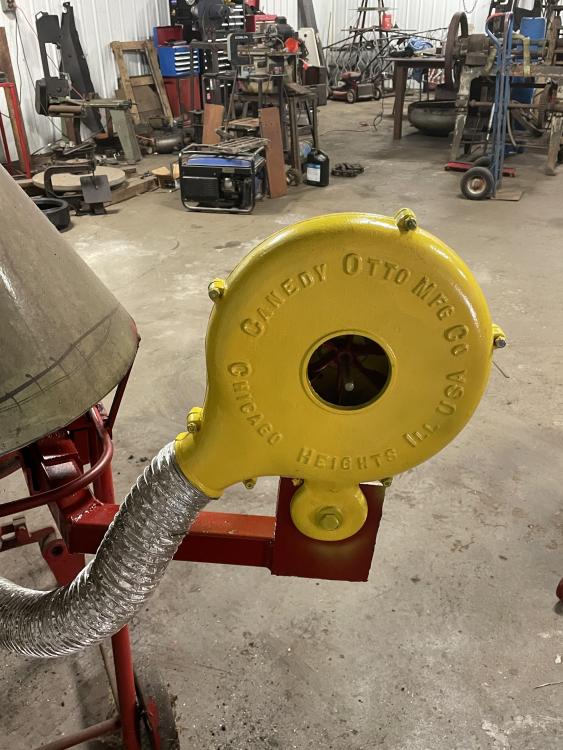
A recently completed project that seems worth sharing…I inherited an old cannedy Otto blower some years ago from a shop clean out when a friend was moving. This poor old blower had lost all its gears and been converted to a belt drive from an electric motor. I needed a hand cranked blower for my portable forge so I piddled a bit with different ideas. Chain sprockets seemed to have potential… then we went through a half dozen gear motors at work in a short span…this is a gearbox off of a sew gear motor. The foot broke off, but it was otherwise perfectly good. It took a bit of fiddling to get it to run, but it actually works pretty well. The original gears would be better of course, but this just bolted into the old gear housing


-
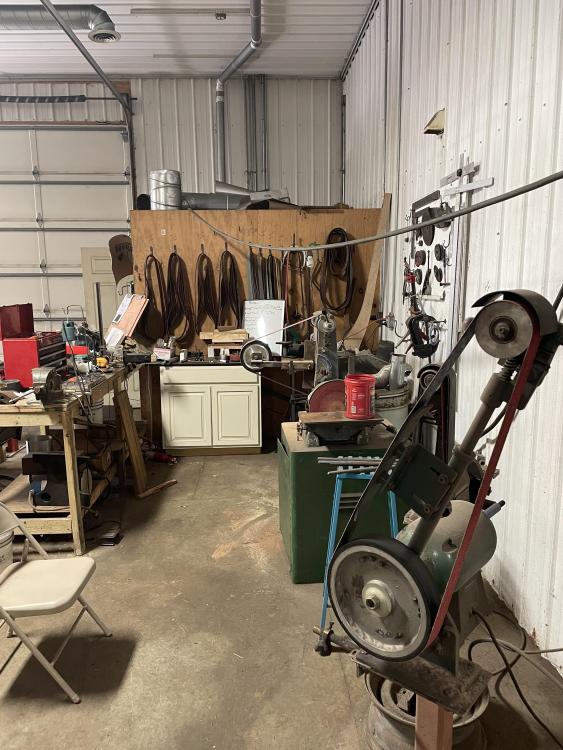
I like the idea of under the floor exhaust lines. Too bad my concrete is already here… the dust hog is outside in the compressor shed it is ducted by two four inch tin pipes overhead. You can see them coming through the wall in the photo I already posted (above my library). I never thought to get pictures, but there are 3 drops on the north and south walls. One is directly above these grinders and was part of the reason to locate them here. I have several of these drums with plans to put a cyclone on at least one and duct to grinders from it to keep sparks out of my filters. I am looking for suggestions too on setting up my grinding area for comfort. I have greatly neglected cold work for a long time and am frustrated by these wide thin blades. ( not really as thin as they need to be) I always ground standing but have seen some who grind sitting. Does it help? The janky nature of the grinder collection I have might be a factor, as is my limited assortment of belts though I feel like it mostly an operator issue. This weekend I am going to try getting some better lighting just for the grinders.

-
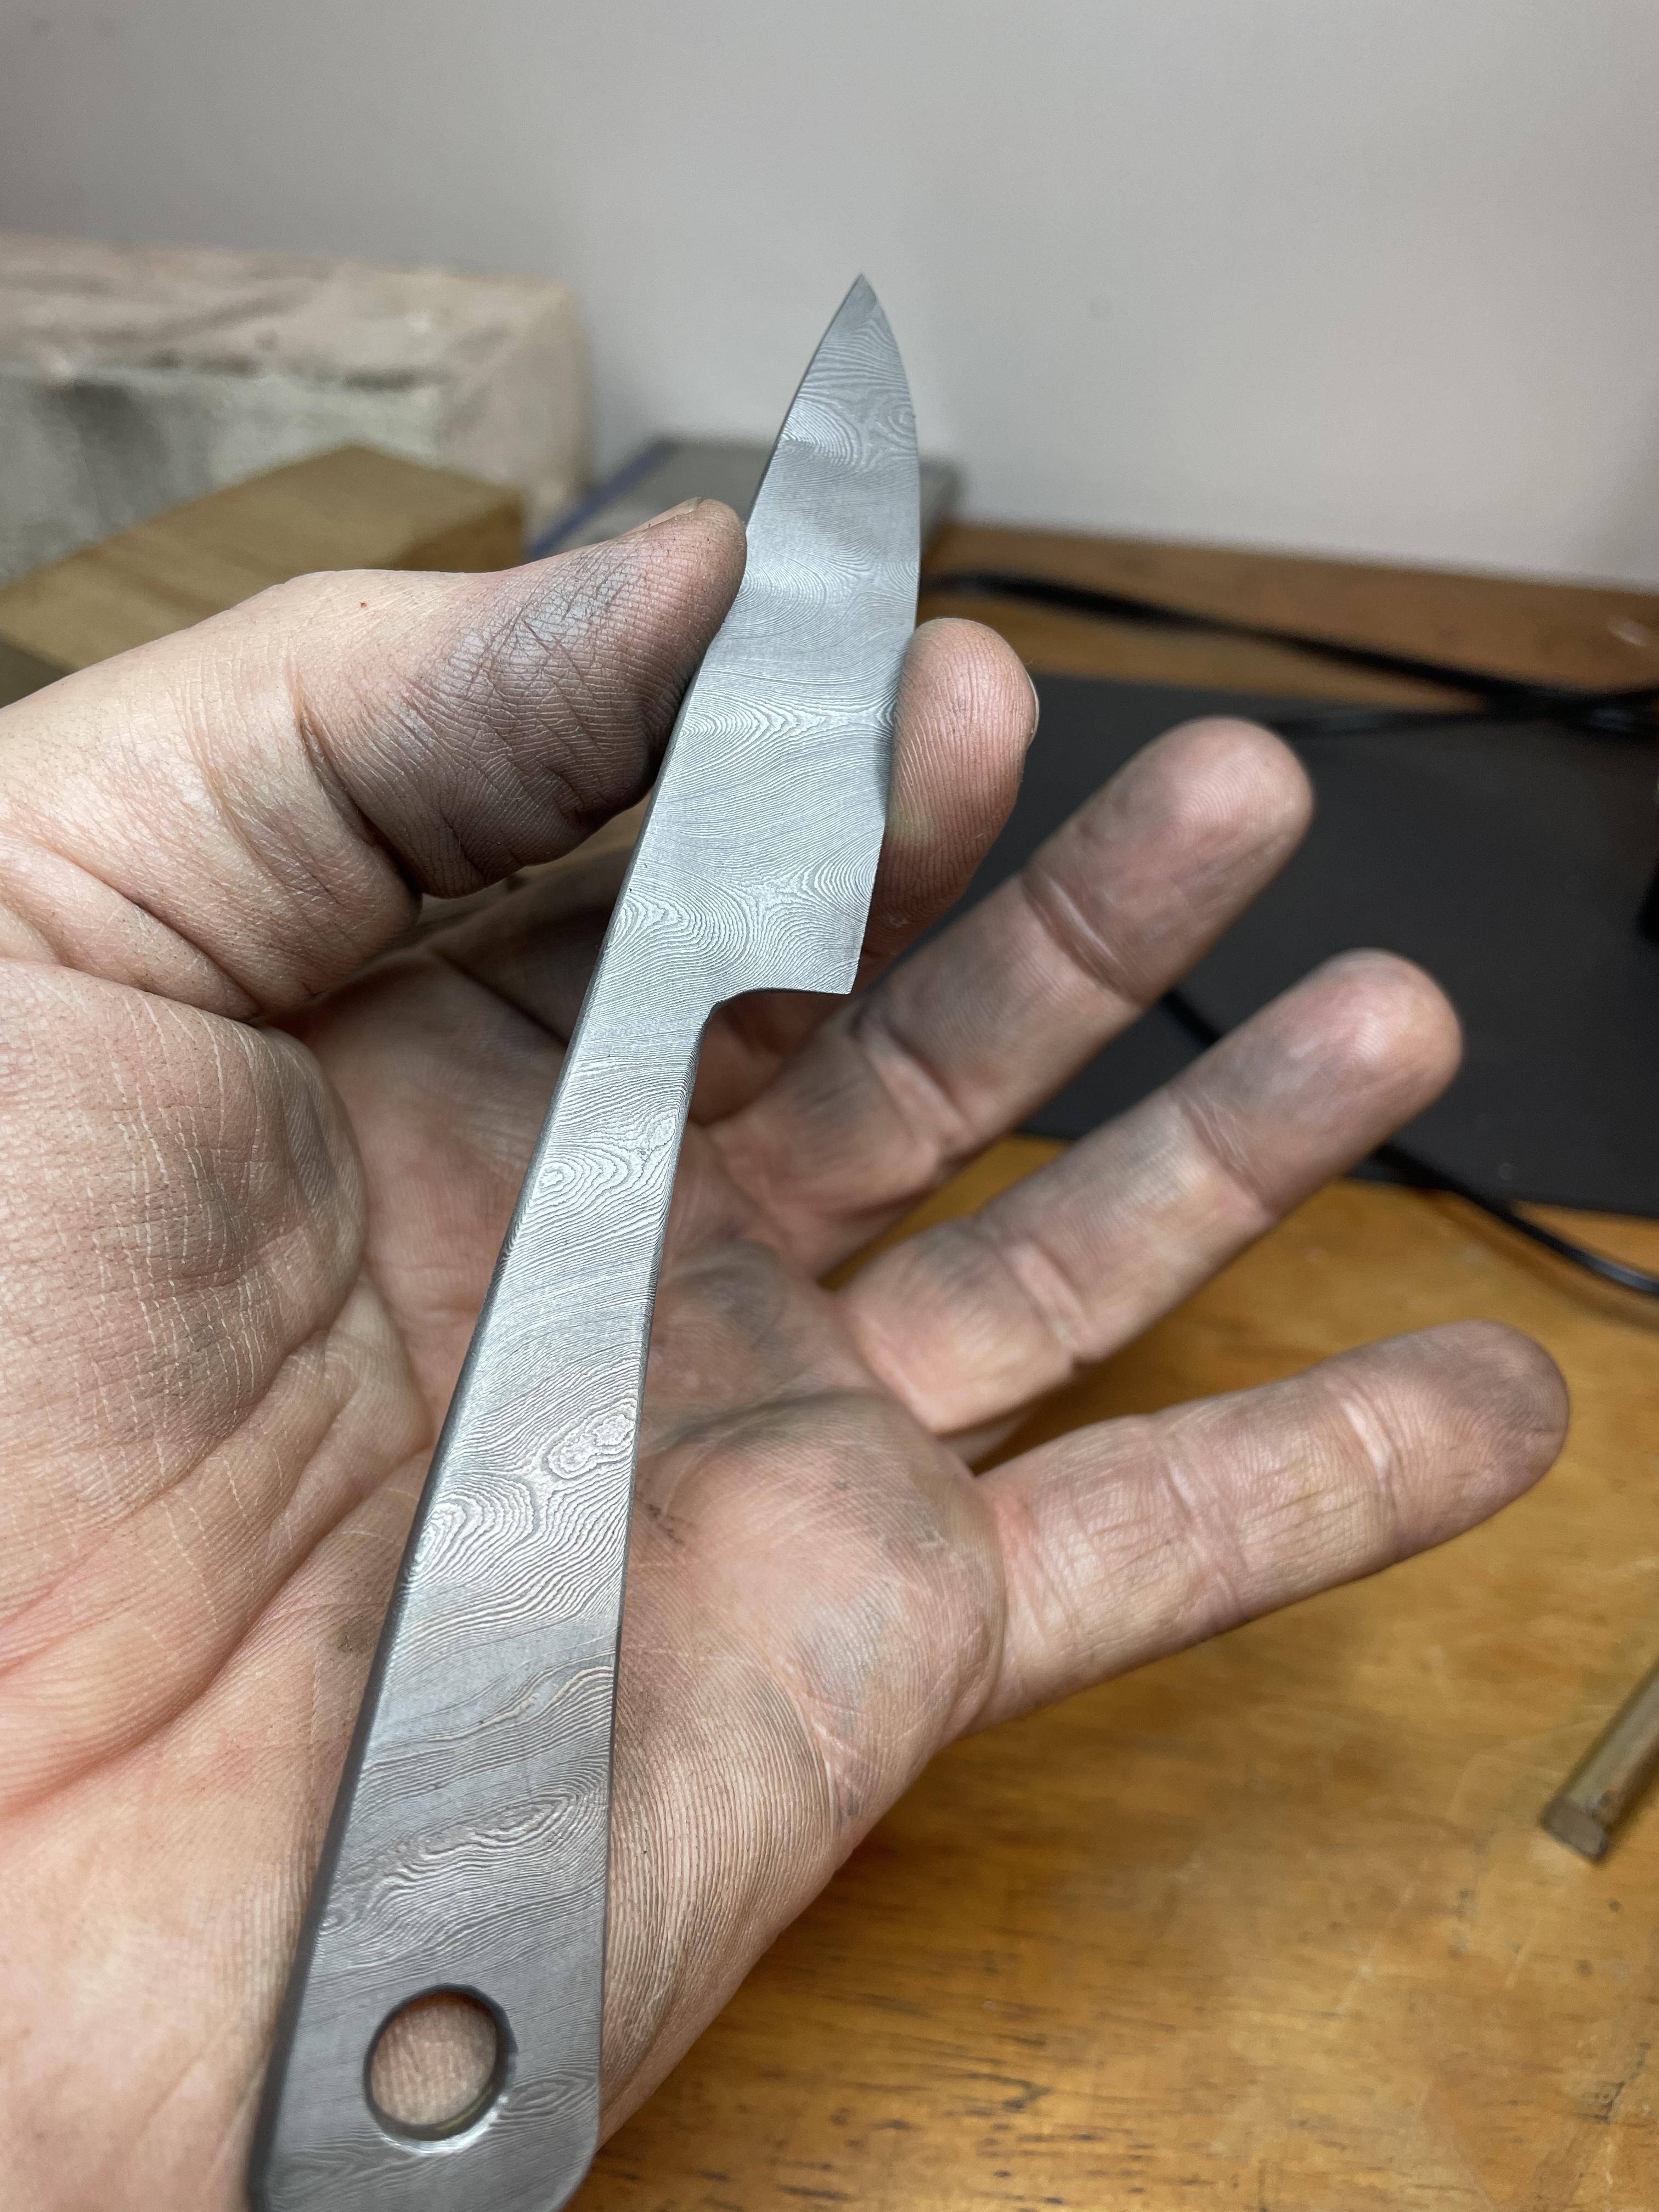
I am playing with kitchen knives and trying to get better at cold end shaping. I have 4 2x72 and a 2x42, as well as a pair of buffers. I have lots of space and a dust Hogg outside with ducting along the wall. I am contemplating setting up half for sitting down and half for standing, at least one to run wet. I currently just have them all lined up along the wall and lighting is not ideal. I suspect there are some tricks to getting grinders set up that makes things easier. Eventually I would like to have a separate room to control dust
-
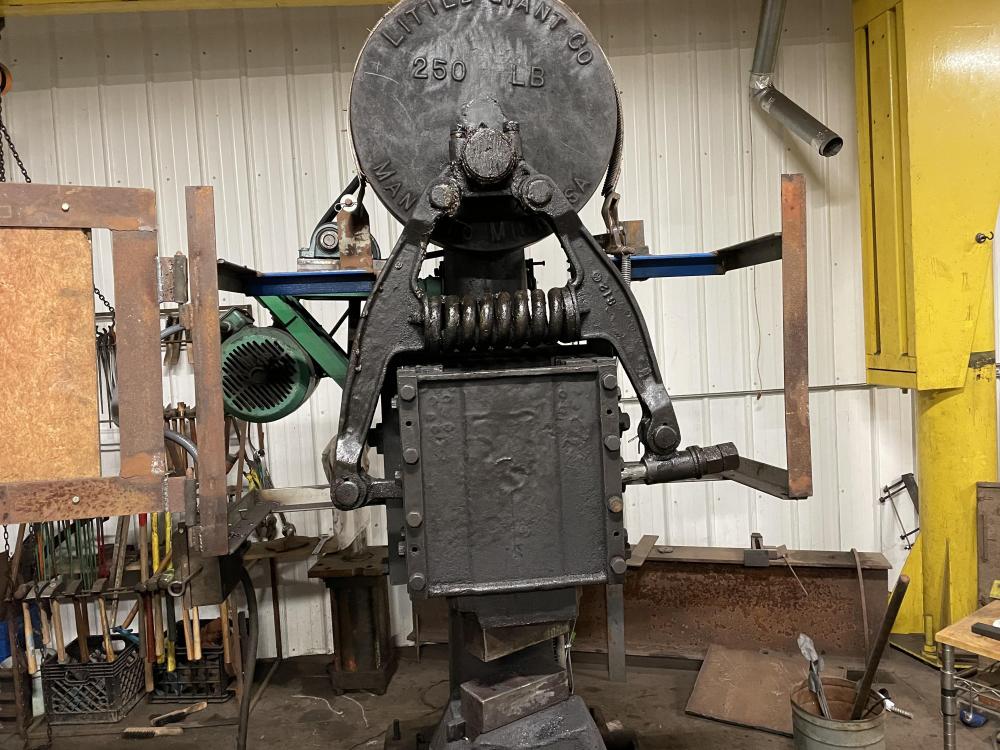
My 250 I have some history on. It sold July of 1920 to a lumberyard owned by a man with the last name Poole, in Columbus Indiana. In 2015 it sold to Craig Kaviar who moved it to his shop. I bought it from craig in early 2017 and moved it late that year after buying a new place to have room for it. I know less about my Bradley. It bears a nameplate from an equipment dealer in Philadelphia. 1897 is the most recent patent date on it so it’s no older than that. I obtained it from a junkyard outside Lexington Ky, and they obtained it from a railroad museum that found it with some other machines in a boxcar bought at auction.
-
I am sure someone here has probably built a kiln before. I have Harold Hoffmans book with its plans for a minuscule kiln for heat treating pocket knife blades and springs. I also have David gingery’s “lil’ Bertha” book. Both are pretty old sources. I have elements, thermocouple bricks and a PID. The Hoffman kiln has an interior that is 2.5x4.5x4.5, which seems small. I have played with the bricks and have an arrangement that is 4.5x4x14. Is there anything I should be looking for in kiln size? Also, I am not familiar with PID wiring. Is there a good guide anyone can recommend?

-
I tried spreading the arm single handed, and was just not able to handle such a big part by myself. Took it to the local blacksmith meeting and the BFH helped me get it spread out. Not quite to finished shape and I hear Clifton giving me hell for not doing it under the power hammer. The remaining shape is easy enough to get on the hammer and there is a lot of extra material to forge down.
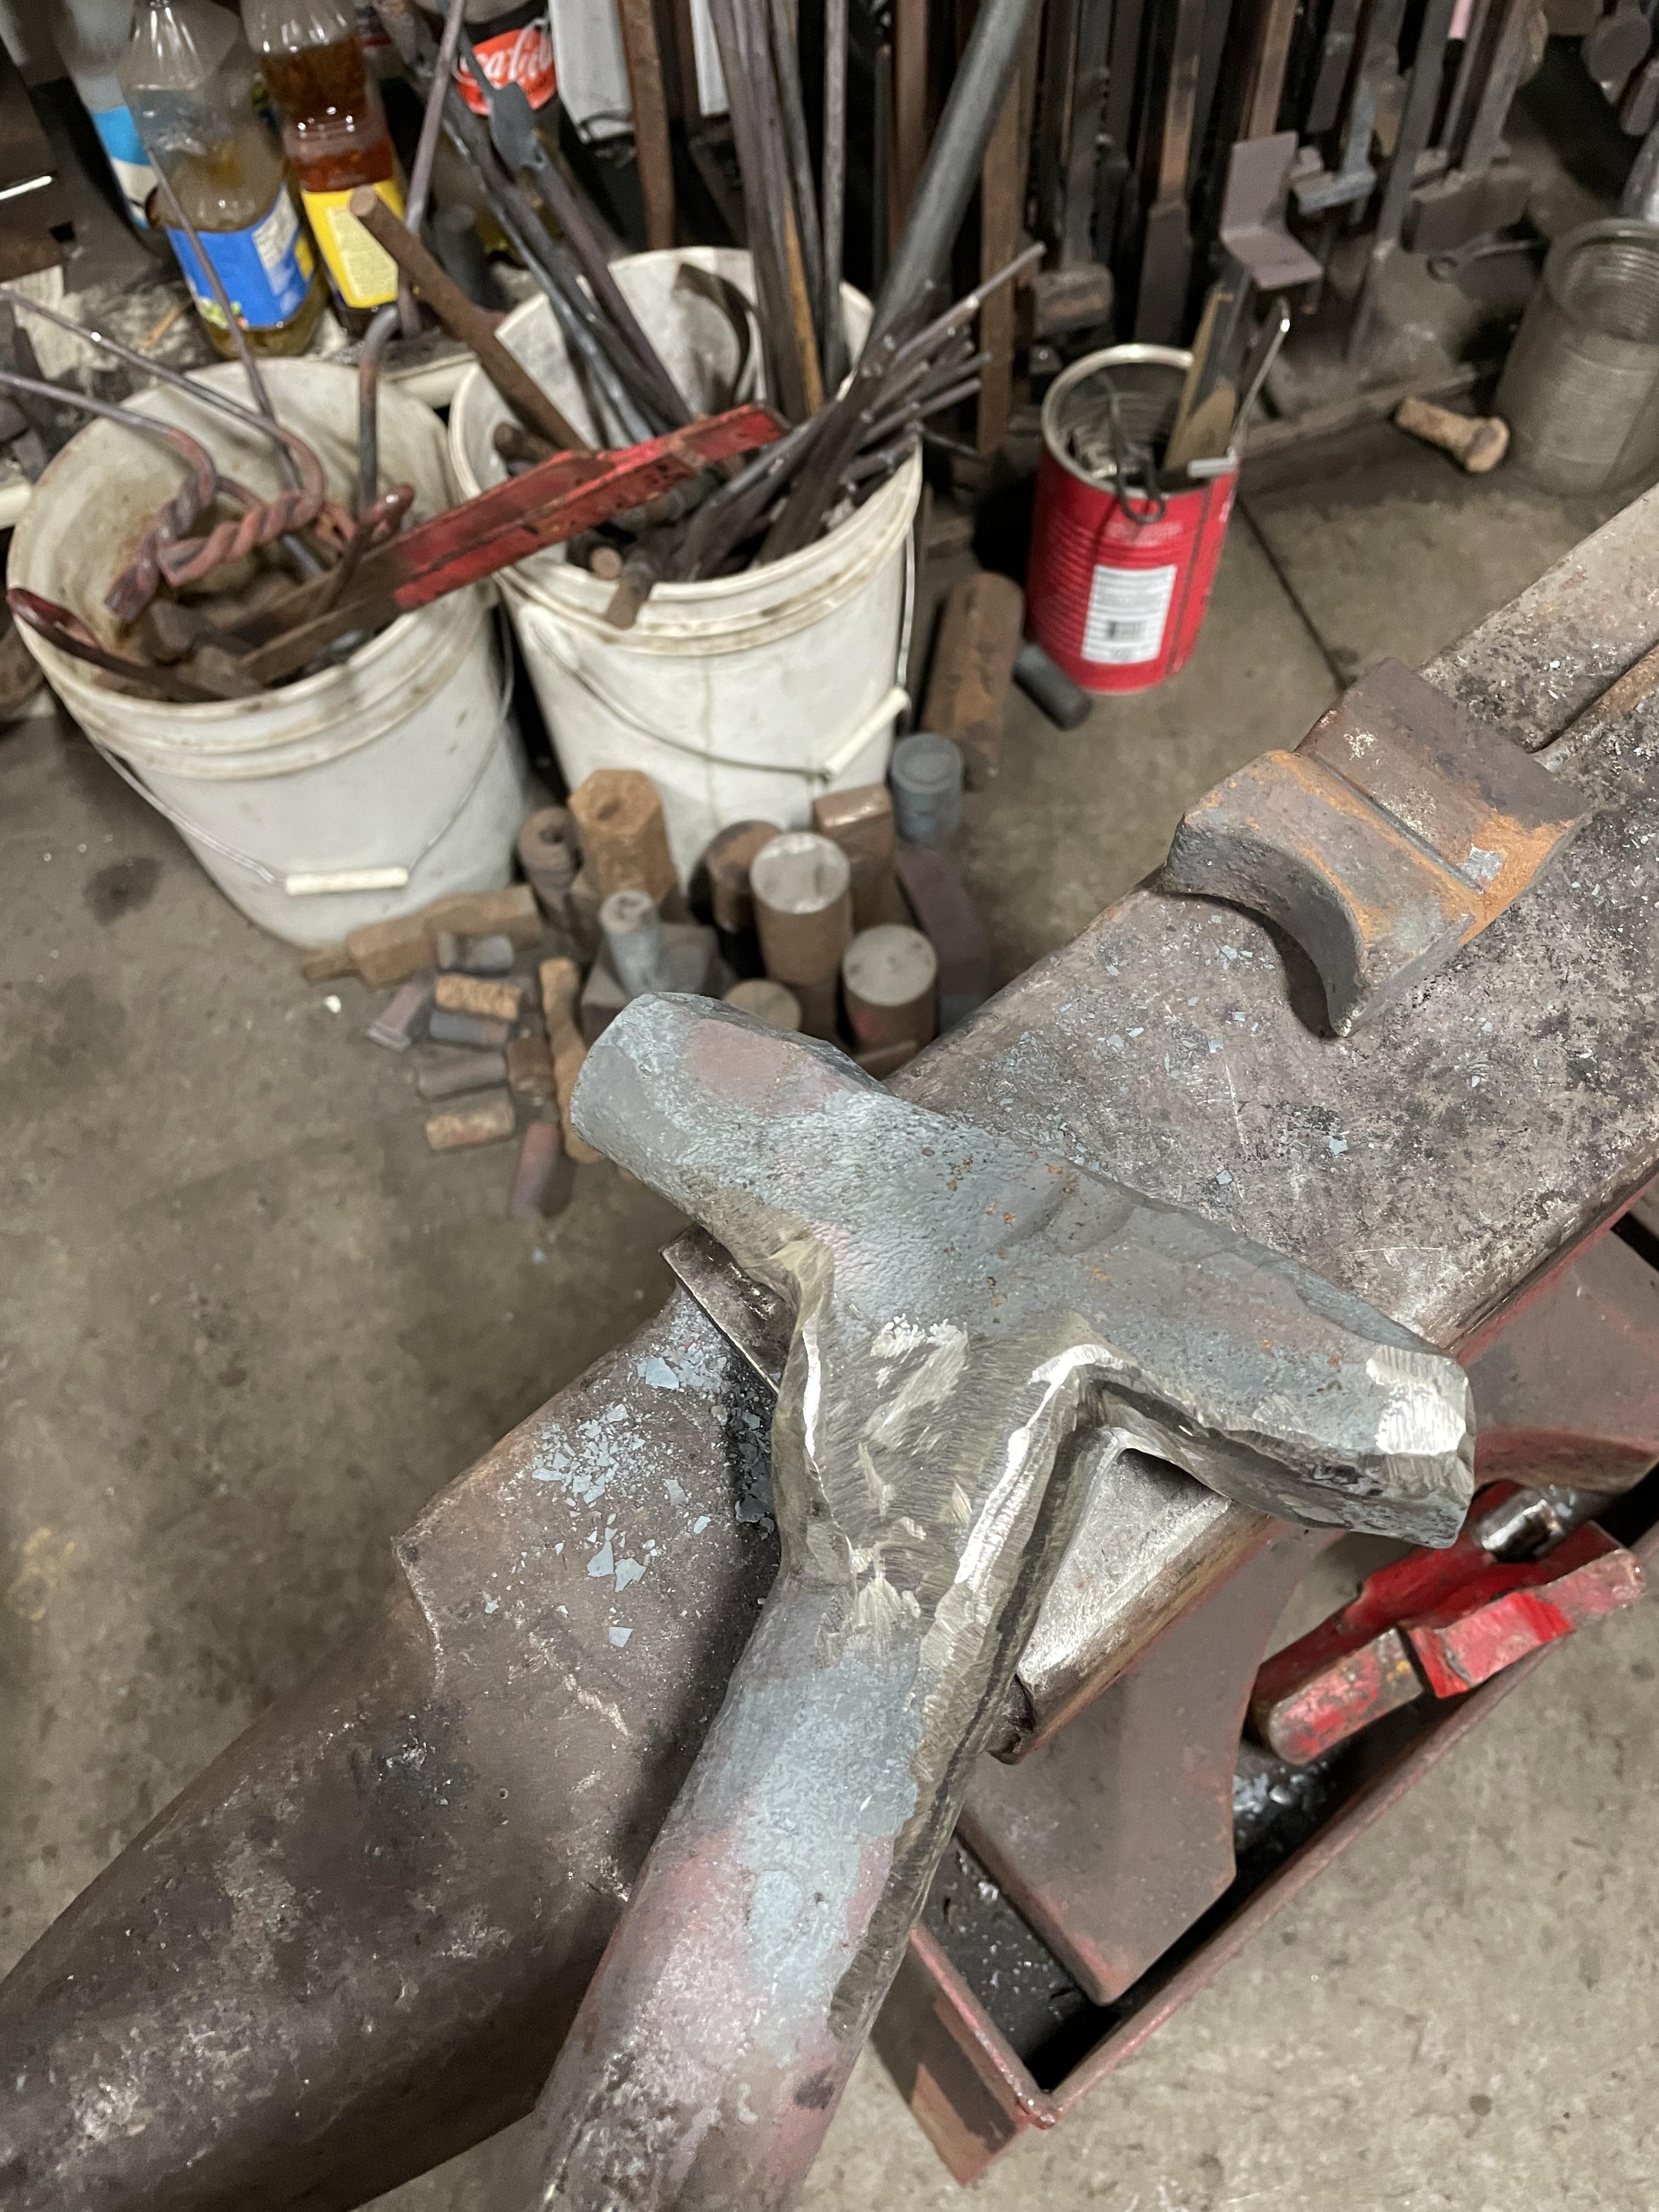
 Trying to take it easy on the gimpy arm, but the Bradley just is not the hammer the 250 is. I split one of the new t bolts. I need to clean out the rag before opening it up. It is not the easiest thing to handle with 4 foot tongs. Both the part and tongs are kind of a handful
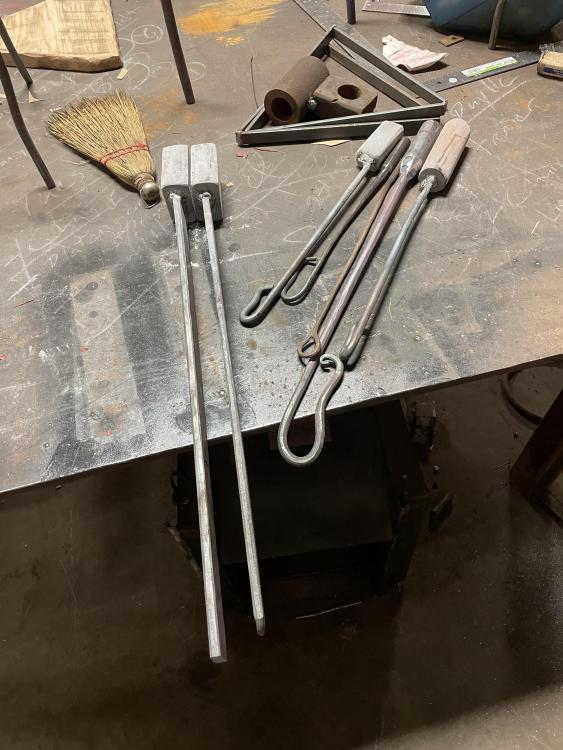
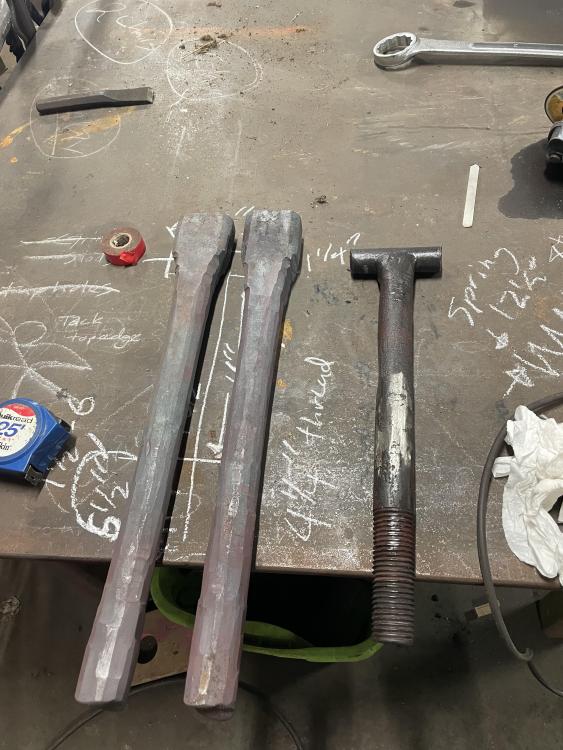
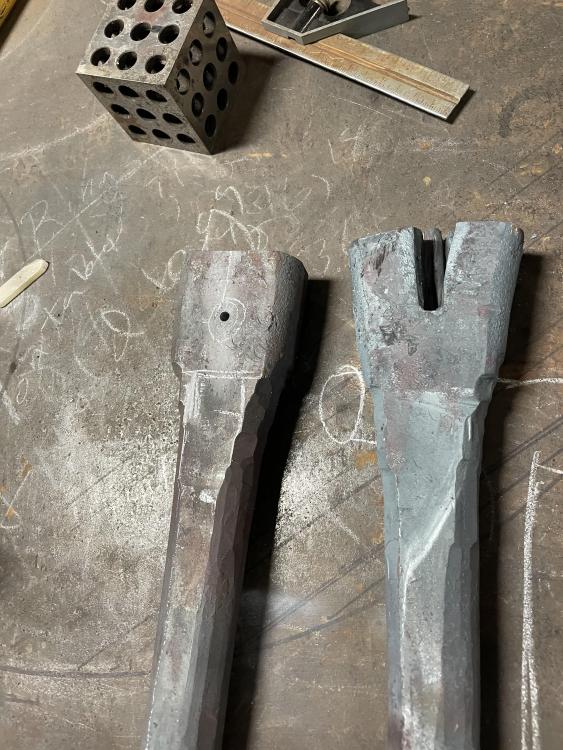 It looks pretty good to be honest. I am not familiar with this exact machine but it is very similar to a little giant. Grease the grease fittings and oil all the ports, and the ram guides. My procedure for my little giant, I start with grease. The points vs to hit, the main clutch bearing and two main shaft bearings. In mine they get grease but most main bearings get oil. The clutch faces need a bit of oil and all the arm pins need a squirt of oil. Get plenty of oil on those guides, and grease that front nipple. Motor oil and plain axel grease are a minimum. I use a heavy graphite loaded lithium grease and bar/chain oil ( heavy gear oil) both are quite thick and sticky. My machines are pretty worn out and heavy oils and grease make up for some sloppy bearings. The sluggishness might be a break, something too tight, or just lack of lubricant. Little giant did not include a break, but some makers did. Running it looks pretty good. Replacing the rubber ( it has nice action for just one slug of rubber) you can get cylindrical “elastomer springs” from Mc Master Carr, tool and die supply houses and some belting/hose suppliers. Measure it now and write it down where you will be able to find it later. I had rubber for my Bradley cast from an ether urethane back in the 90s. You can actually get kits to mix rubber and pour into molds, though I have not done it ( a friend did these for me) The molds were rolled from aluminum flashing and held together with duct tape. I forget the hardness he settled on based on the old rubber, I want to say it was a 40-50 durometer (?) I would check what hardness mold stripper springs are, or take the old one to a belting supplier and let them check it. As long as it isn’t cracked or worn to the point that it moves around when running it should be good though. Changing it is probably going to be challenging with no screw adjustment. Good luck.Gotta make some tools to make new arms… I had blanks roughed out from a while back, but they fell by the wayside. I need swages and blocks to do the forging and the Bradley isn’t up to it. The arm straightened, ground clean, grooved out, welded up and annealed. Ground back round and put back in the hammer. I aim to have new arms in the lathe for threading by the weekend.

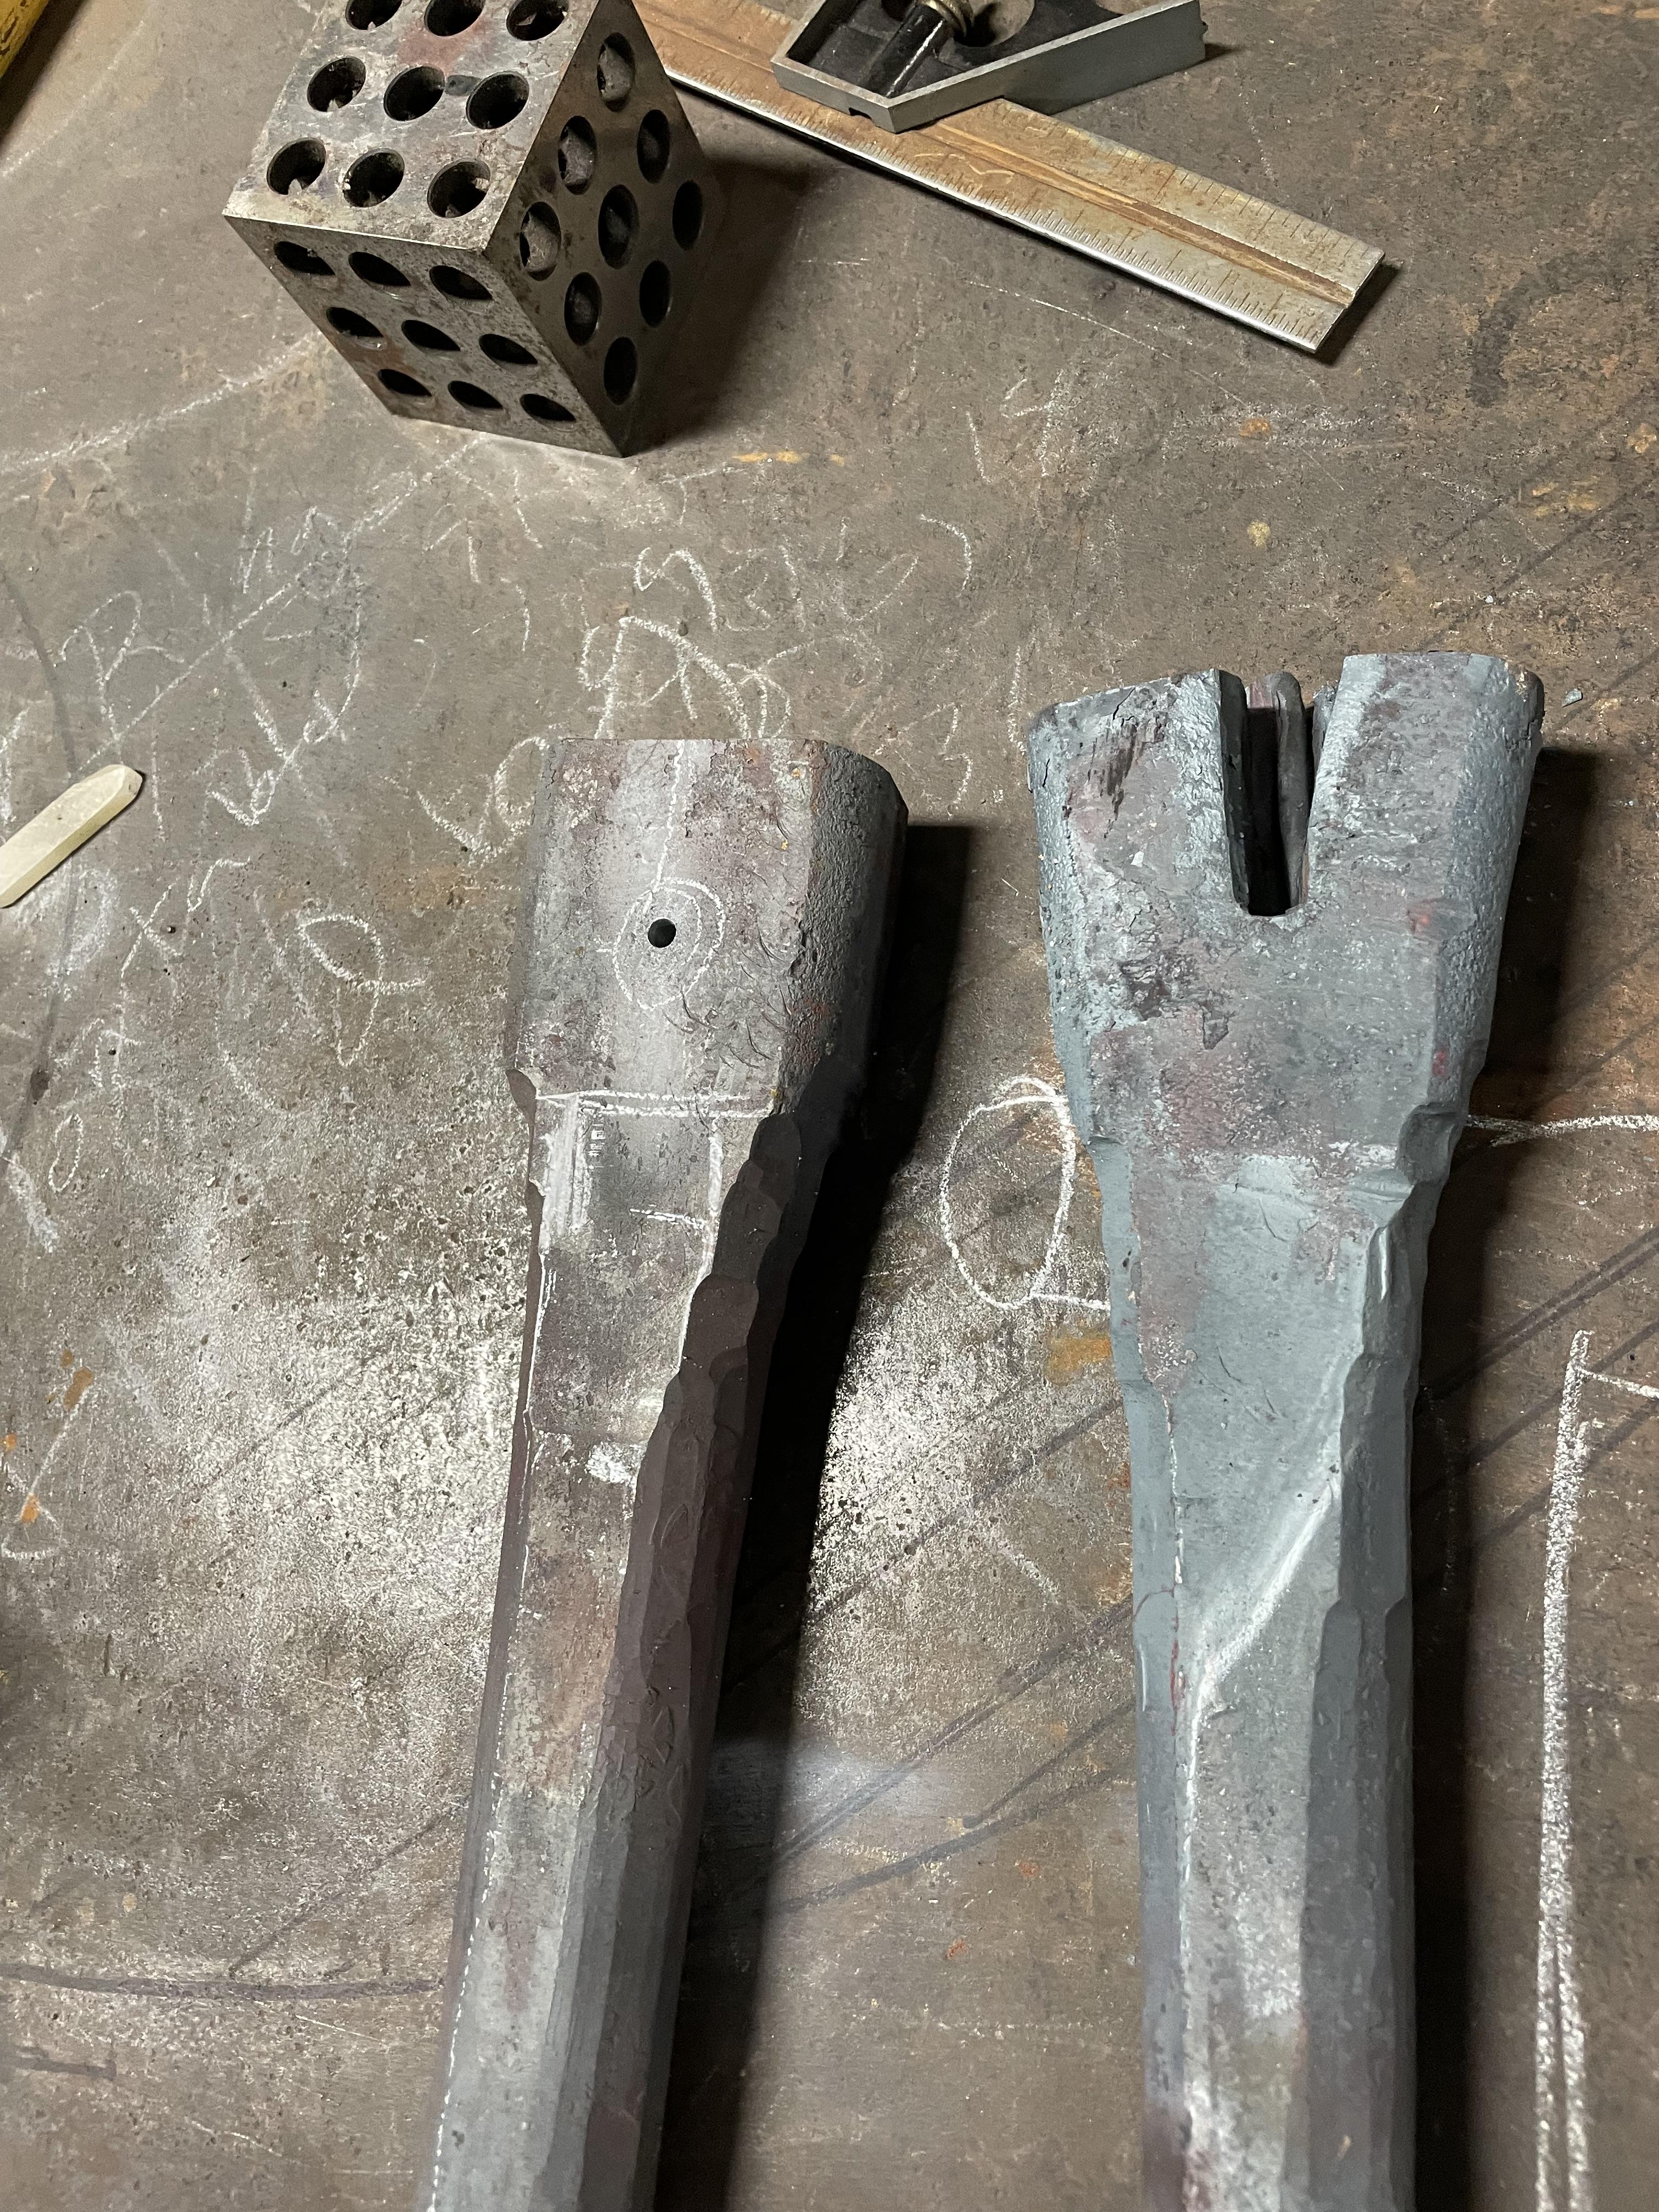
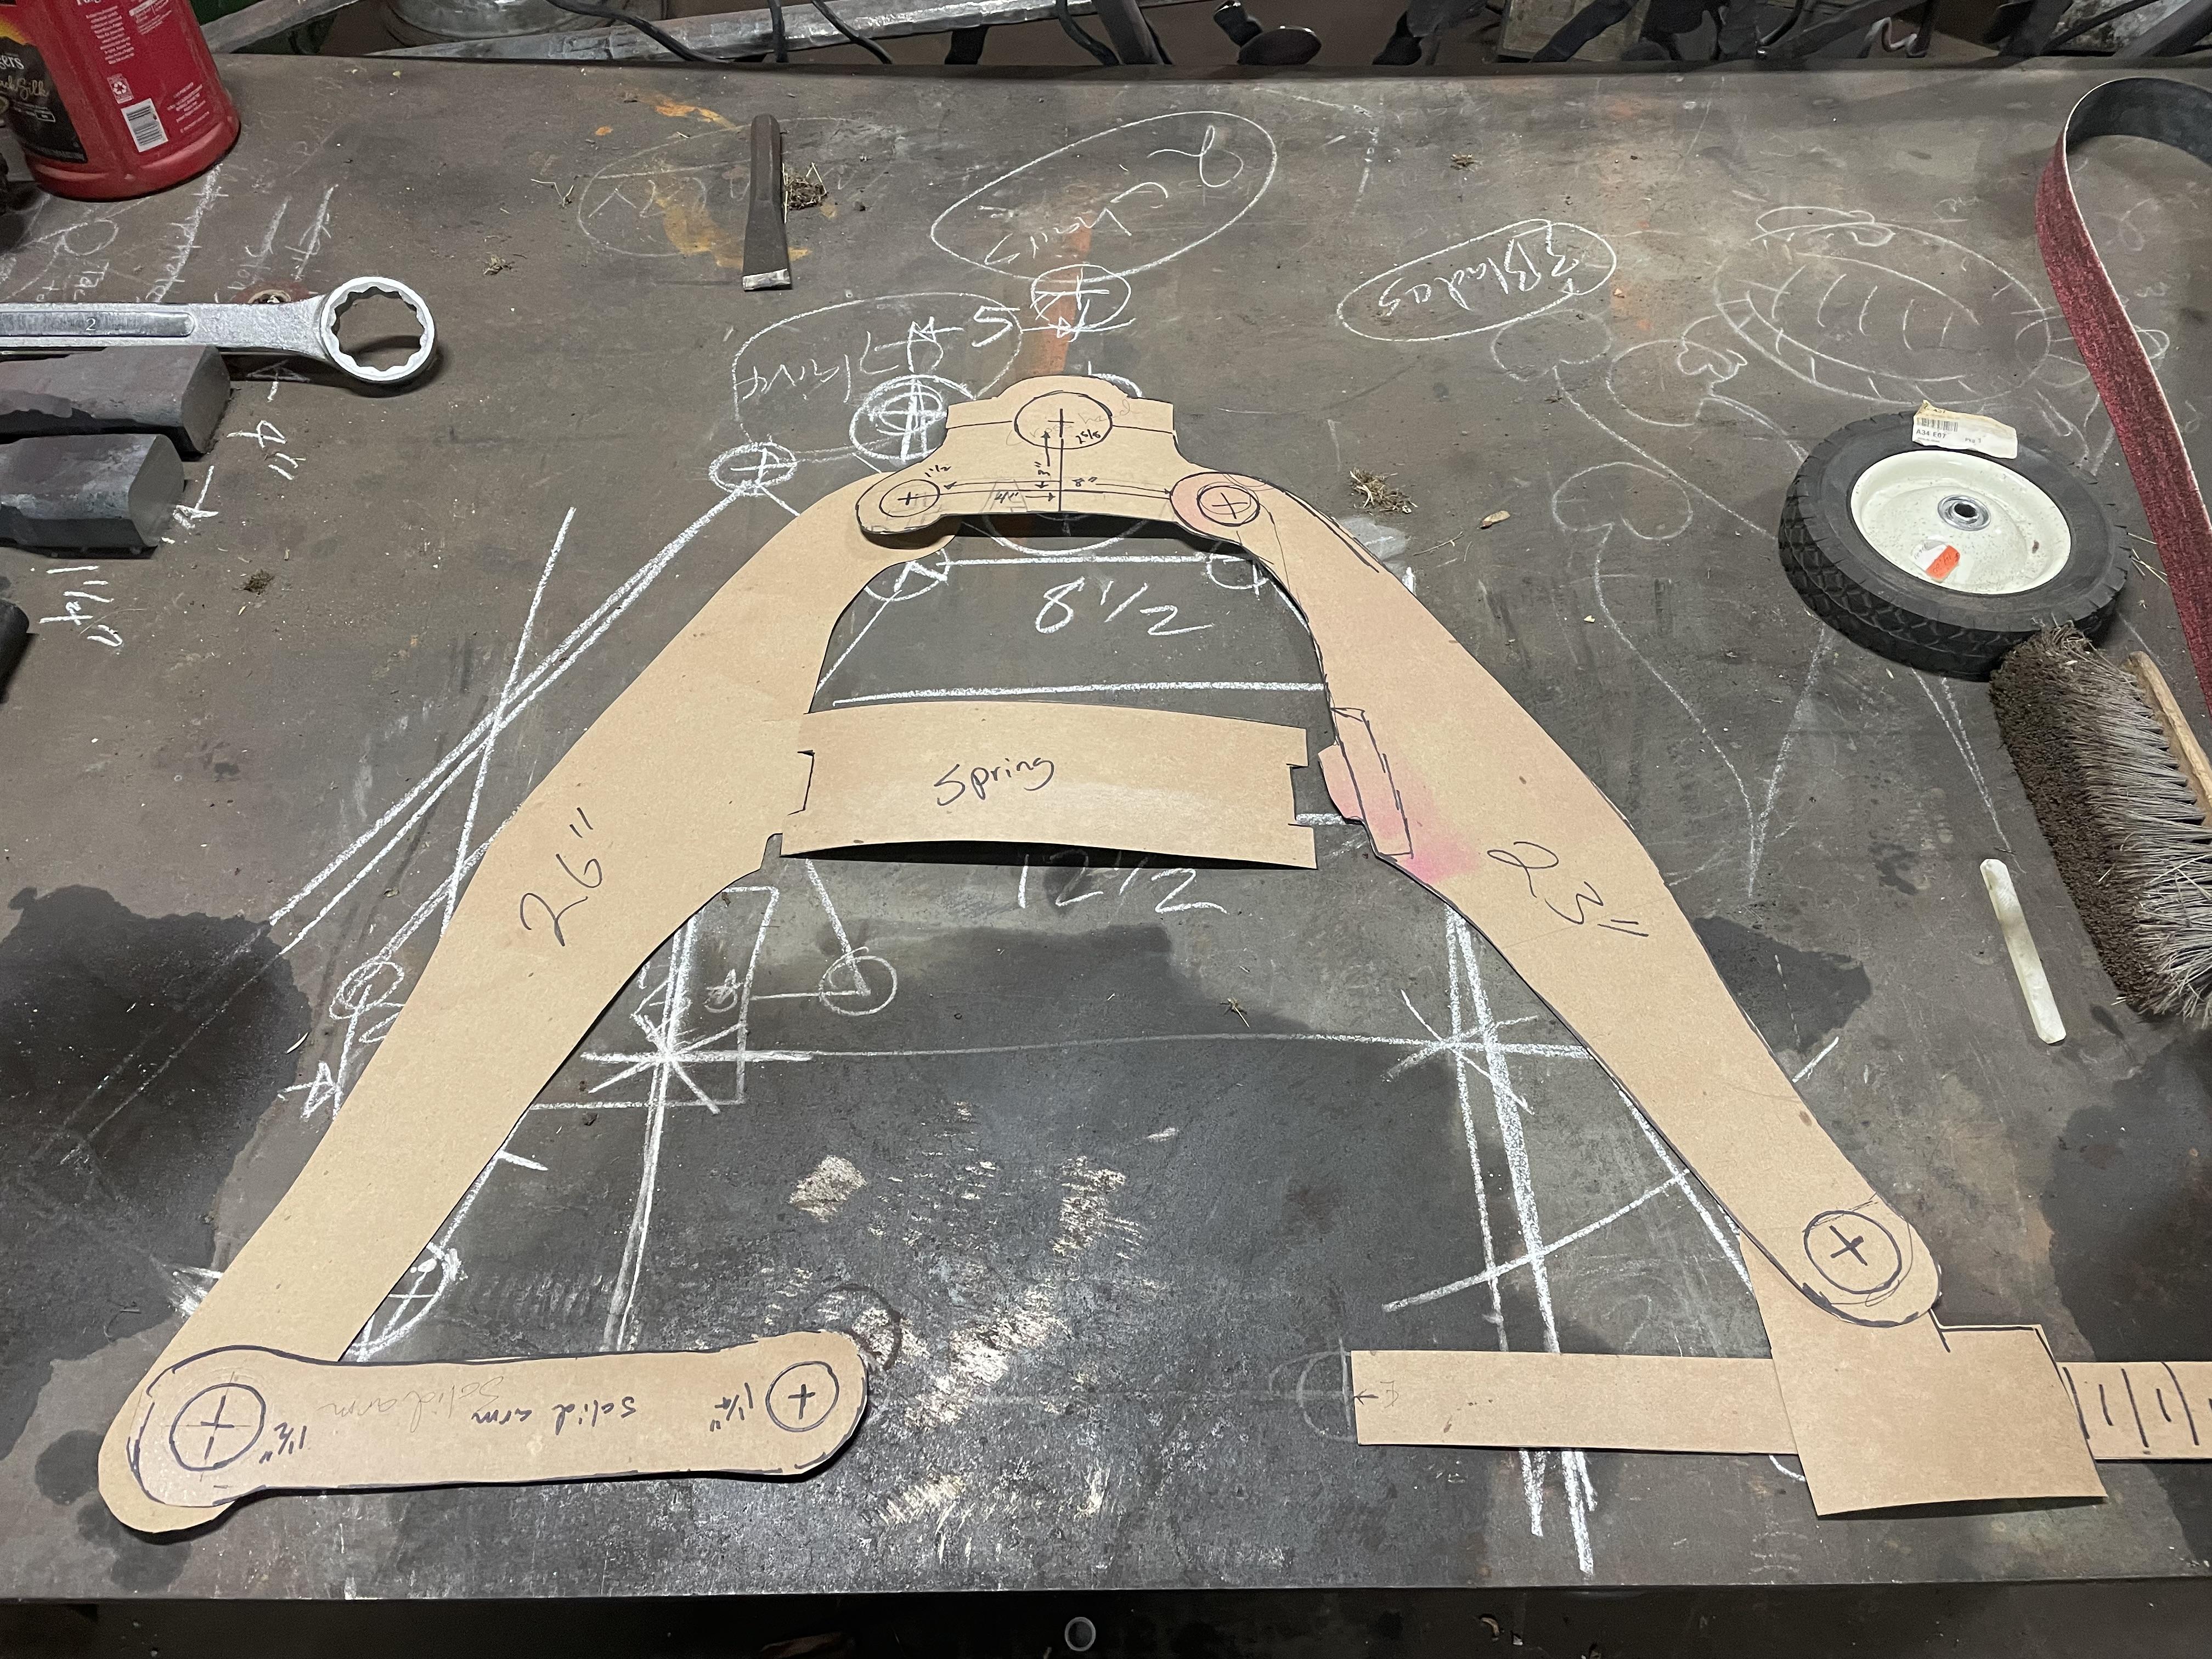
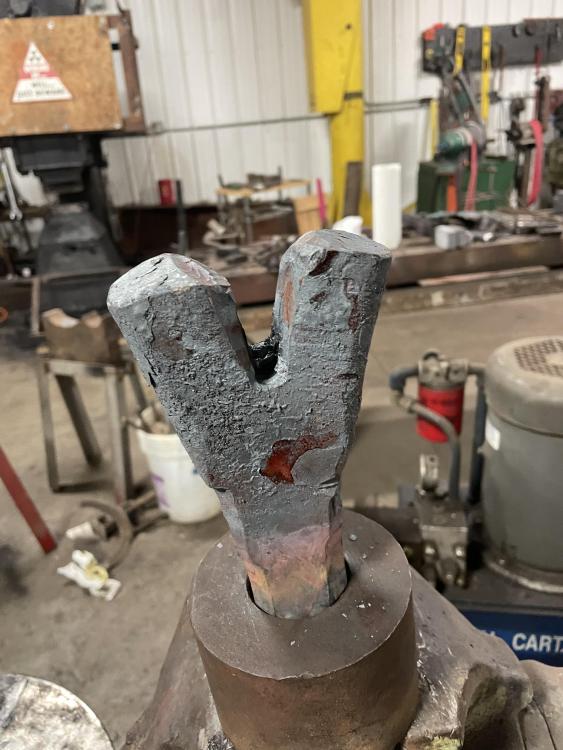
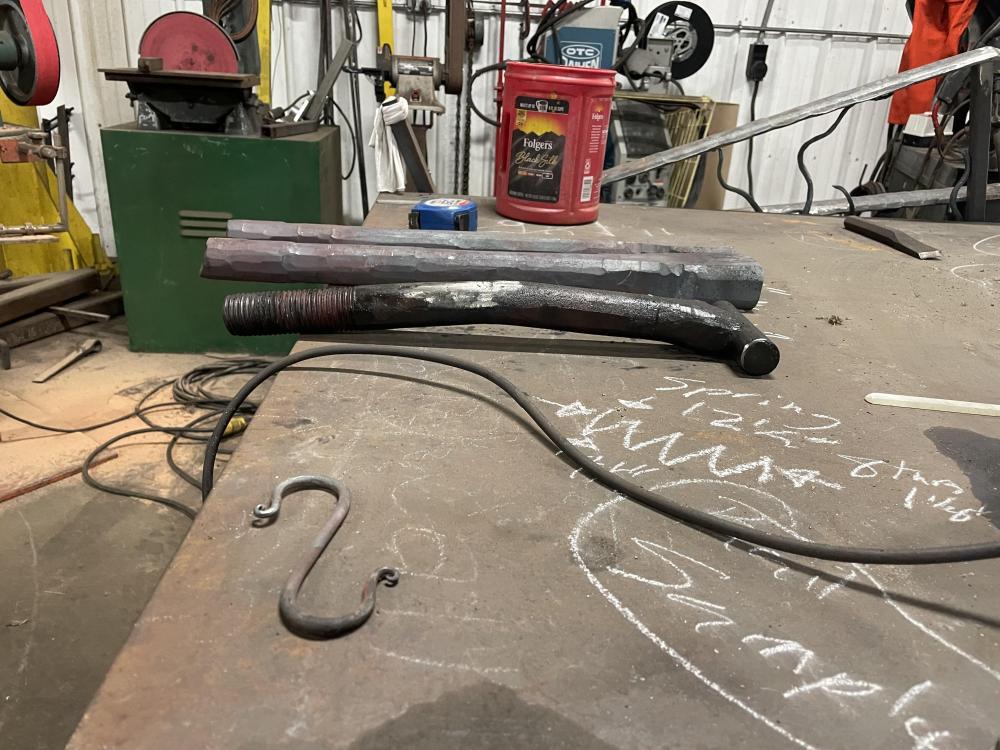
 I think I have an arrangement worked out that allows vertical adjustment. I don’t have the time or materials to really play with this much now, but I do have templates for all the old components plus a few variations. Now if I can only locate a 14” spring… I know there are actually important things I should be doing right now though
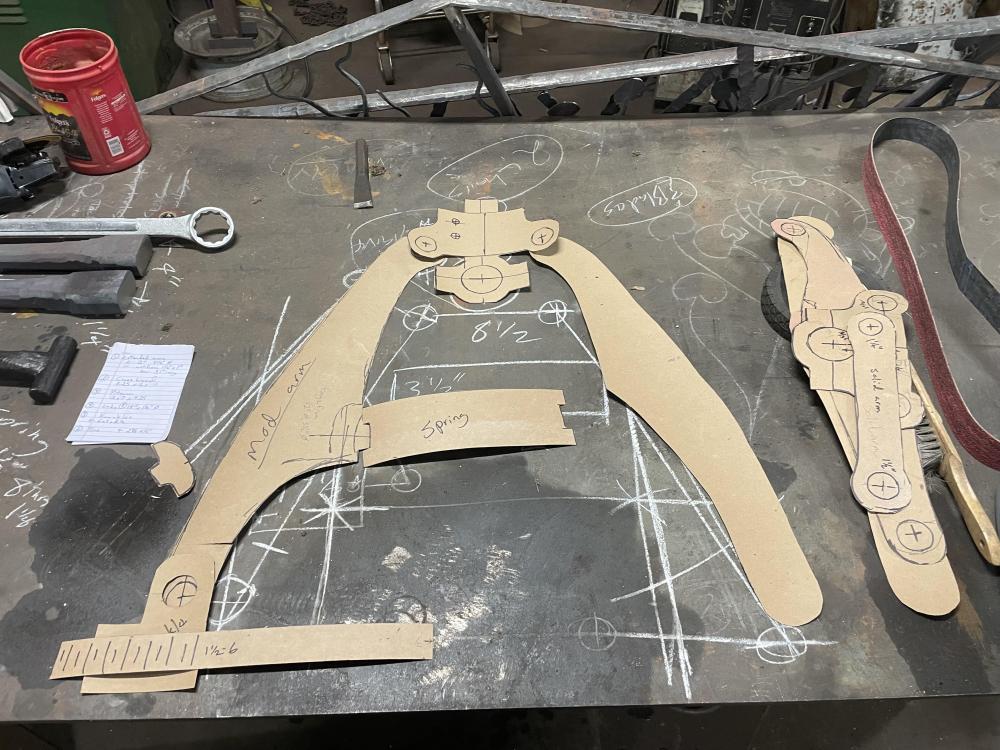 Doing a mock up on the table, I discovered that the long arms are different lengths. The arm to the would link is 26” pin to pin while the adjustable side is 23. Weird..
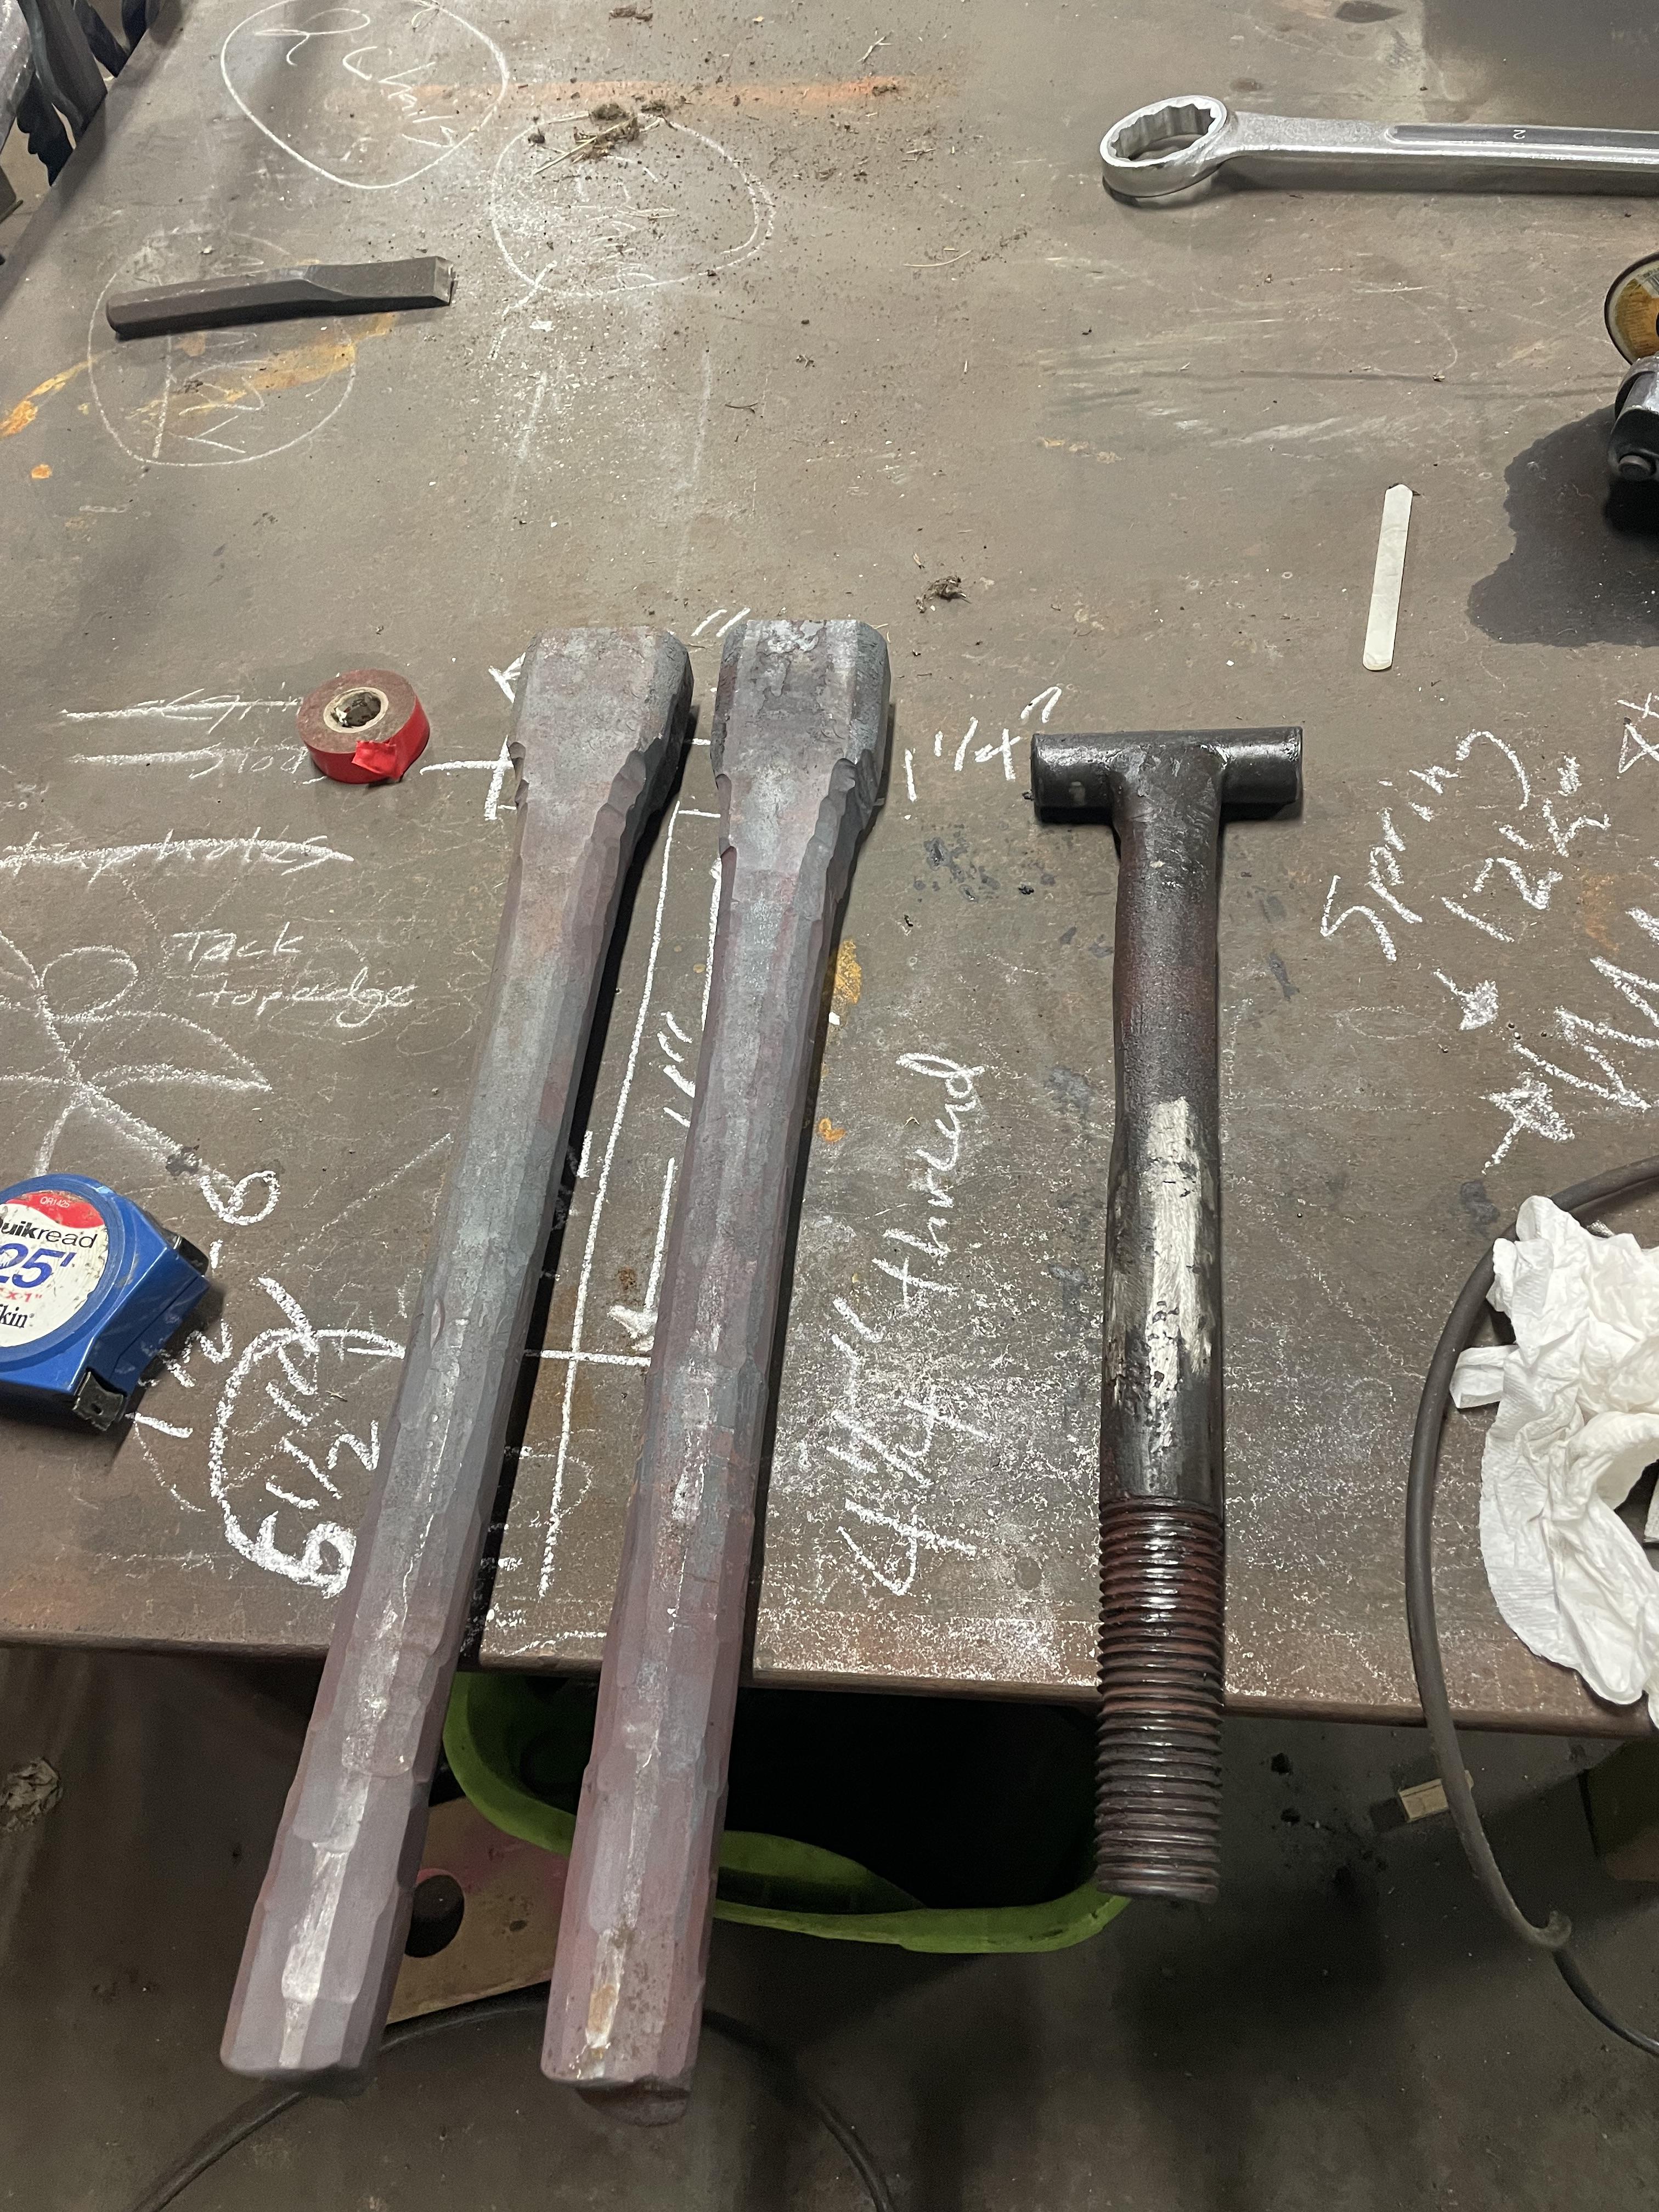
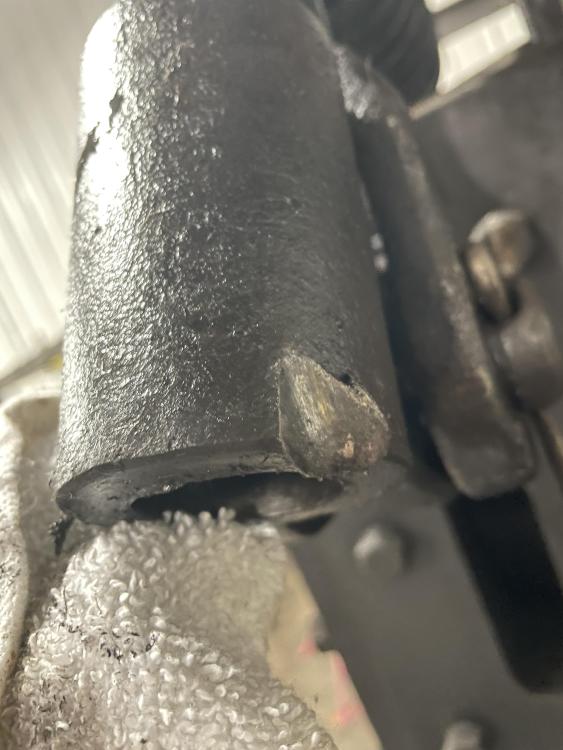
 I am not going to try to straighten this a second time, or risk running with the cracks. It’s not as bad this time. I have been running this hammer pretty sparingly knowing about the arms problems. The replacements got set aside, I should have pushed through and at least gotten the T end forged. I have worked out the threading gears for the big lathe. I don’t think my little atlas could handle the weight of these arms. I am concerned about the impacts I am getting, which may well be the cause of the problem. The knuckle is contacting the guide from time to time. It is noticeable when this happens. I would like to get a new spring, and ideally find one a tad longer. That might help a bit. I know Clifton had springs custom wound somewhere ( pretty sure it was in Chicago) but I can’t find it in my notes. Nor can I find the dimensions he settled on. Does anyone know? Trying to google spring makers gets me a million places that make ball point pen scale springs… none of them seem to play in the league of hot wound springs from 1 1/8”+ wire…
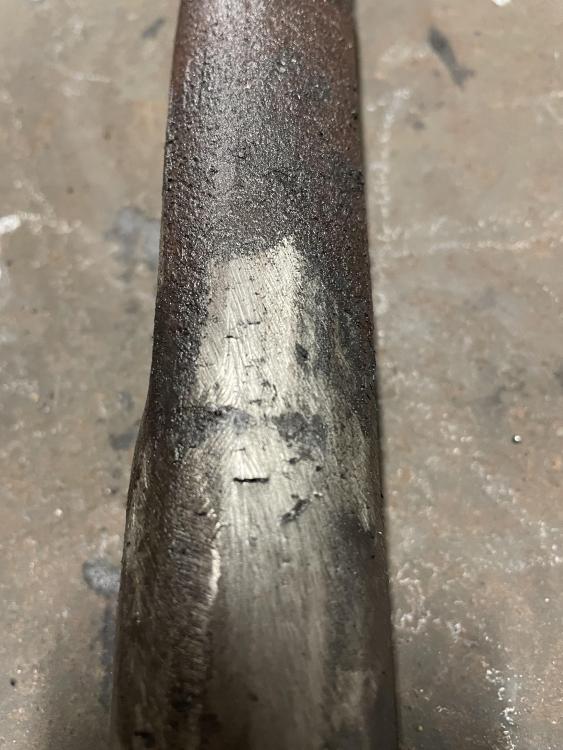

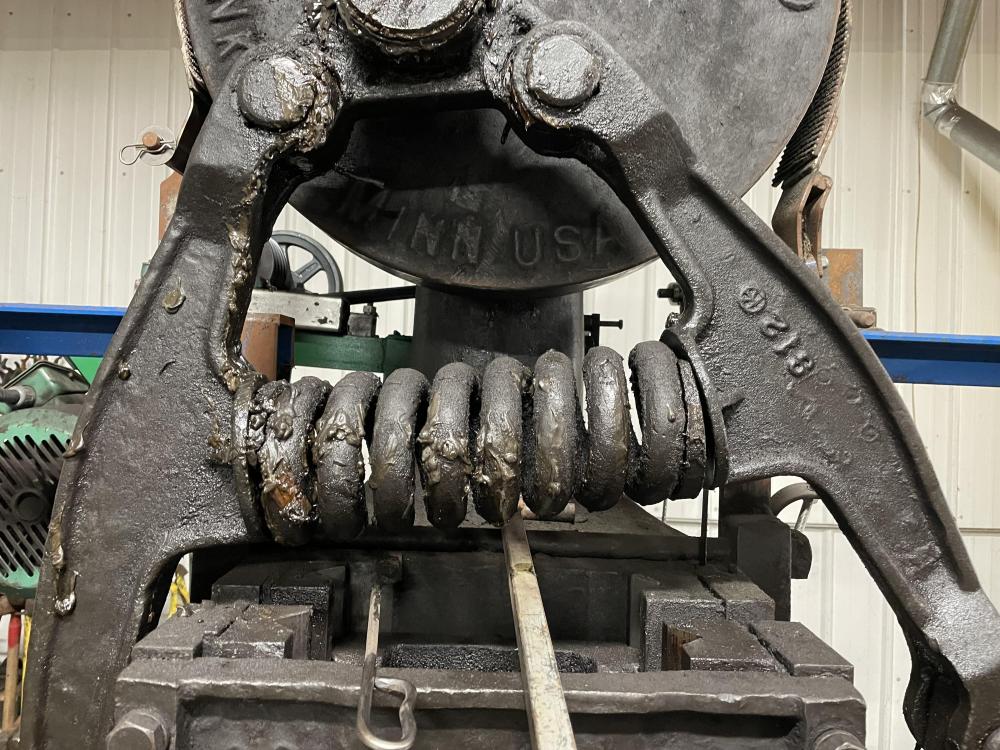 I would tack with nickel rod in a few places. Drill and pin in a few places, then grind deep and wide channels around the break. The pins holding alignment. Preheat as much as possible and peen your weld at each pass. Weld all the way around. Wrap in refractory wool and wire it up tight when done welding- to let it cool slow ( nickel rod isn’t terribly sensitive but it doesn’t hurt)then the hard part, grind, file and scrape the sliding surfaces level. I am sure someone here will sugest something better than nickel rod, but it is what I have the most experience with on castings.Vibrated off its stand. It was hard to keep lined up and was quite noisey. It did work for a bit. The electric motor was far more convenient. I didn’t have power enough in the shop to run it. I ran the lawn mower as a power source until I got rewiredI ran my 75# Bradley off an old snapper riding mower for a few days. It worked but had issues. The electric motor was way less hassleFor a 100 pound hammer a three hp is typical. Some older machines might have a smaller motor, and it really doesn’t hurt to go up to 5hp.Finally found it. My memory was not the most precise it turns out. It is “beginning blacksmithing with projects” by Jim Converse. It goes into depth on chimney design, ventilation, fire maintenance, and anvil dressing.
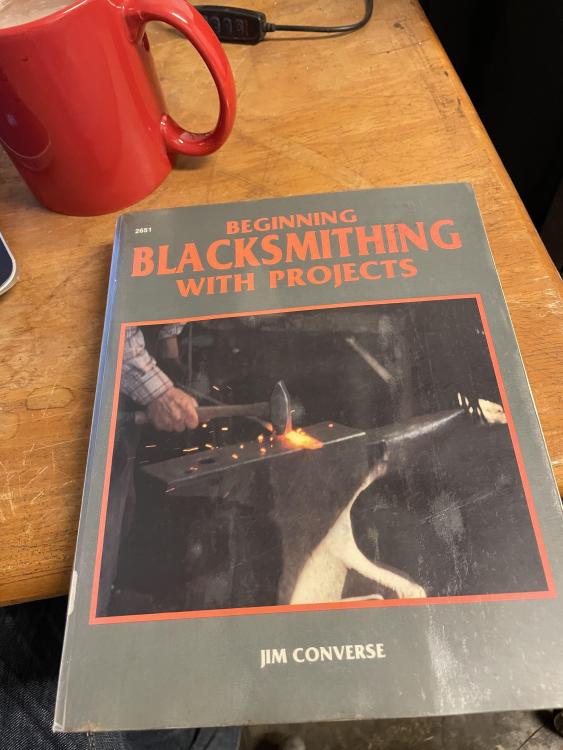 I built a gingery lathe in high school, started the shaper, then happened upon a big commercial shaper for really cheap. I decided I needed to redo the lathe in iron, built a cupola furnace, fired it once and my parents ( and the fire marshal) shut the project down. That was more than 30 years ago so my memory is a bit iffy. I still have half the patterns ( just pulled them out last week) the big thing I recall from the lathe was what a huge pain the bed was. That takes a lot of sand, the flask is unpleasantly huge and it takes a lot of aluminum to fill. The pattern was the worst of the lot to make too. I wish I still had that one…Back in the 90s a lot of work I did came from interior designers and decorators. There was a year in the mid 90s where I don’t think I made much in between drapery rods and hardware. It seemed a lot different then. I have been away for a while but returning, all the folks in that field seem to be just painting homes shades of grey, filling them with cheap big box store furniture and not using any ironwork. Have things really changed that much?You will have to make a tap first. Might as well cut the thread on the plug the same way. While you can lay out 16 marks per inch on a 11/16 plain, wrap in string to connect the marks, scribe the string then file a thread to follow the scribed line, it is way easier and less frustrating to use a lathe…Finished today
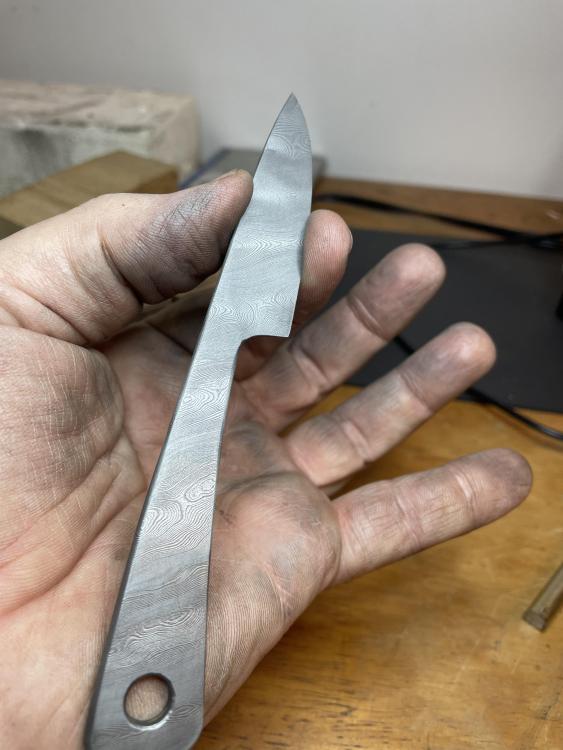 I have been thinking about this. I would like to find some good input but haven’t heard many suggestions about size. Dust collection and air supply is a given. I have a collection of various grinders but plenty of floor space. My original plan was to use a room in the shop that is 8x14, but with 4-6 grinders I think it might get cramped. I am sure someone here has already gone down this path.That looks very weld able. Keeping everything square might be tough, but Nickle rod should do the job. As mentioned though, it will likely break again. This looks like the effect of combo dies side loading the ram. Whatever your solution, work to get all the slop out. The more wobble in the guides the more those dies will impact the casting.The guides can be fabricated from angle and plate. Use a thick piece of angle for the V and cut paper templates from the old guide for side pieces. Burn those from 3/8” (?) plate and hot bend to match the old guide. Clamp all three to the hammer frame and tack together. Remove the assembly and clamp well for welding. Skip around with lots of short beads to control distortion. After welding it won’t hurt to put it on a mill and skim the bolt up surfaces as well as the V.