natkova Posted December 5, 2021 Share Posted December 5, 2021 So I was building forge this week. Went from al variations from bottom returned to.sideblast.forge. Charcoal get stucked in tuyere easy since it is 2'" diameter and look like it.is too.deep. Dont judge my welds iam beginer at.welding , u think iam better smith than welder. Well here are pictures of bottom blast.back to.sideblast and fire. I reliased later.that I used smaller welding rod but.it.will.hold. Might make it litle longer for charcoal but iam in dillema should I stick to bottom blast or side since I use more charcoal and lignite coal I will see. Firepot is kinda good designed since funnel shape dont allow air to escape from fire, it.just go all sides. Dimensiins of firepot 10 inches wide 25'cm 8 nches long 20 cm about And 6 inches depth about.13 cm Quote Link to comment Share on other sites More sharing options...
Irondragon Forge ClayWorks Posted December 5, 2021 Share Posted December 5, 2021 Looks pretty good to me. Quote Link to comment Share on other sites More sharing options...
natkova Posted December 5, 2021 Author Share Posted December 5, 2021 Well i tried bottom blast had trouble with fuel geting cought in squere opening at bottom. so i changed to side blast. Will see do i need to change dimensions. Maybe i will cut it litle bit to sides look too deep for me and my taste. Dont know do i do things right but i like shalowel fires. Quote Link to comment Share on other sites More sharing options...
Frosty Posted December 5, 2021 Share Posted December 5, 2021 I suggest flipping the Tuyere over in your bottom blast. Make the T closer to the fire pot with the long vertical section and ash dump below. Configured as you have it has very little room for ash, clinker and small bits to rest out of the way before it begins to plug your air grate. The junk also has to fall all that distance through the air stream from your blower and the light stuff gets blown back up through the grate. With the long section below the horizontal air supply all the junk that falls through the grate falls to the bottom and cools off out of your way. I THINK that'll solve your problem with the grate plugging up. A rain cap style ash dump lets you empty it once in a while without ever knowing if it's getting full. I rarely burn solid fuel, coal or charcoal but when I do, NONE of my solid fuel forges have a "fire pot." They are all "Duck's Nest" forges and only have a shallow depression between the working fire table and the air grate, maybe 25-30mm. deep and 100mm. +/- wide. I shape my fires with fire brick arrangements around the nest, they can be small and shallow or big roaring monsters. I have a friend who likes to pile coal on the Rivet forge 500cm high and make a giant bonfire. He digs the coal so he can burn it how he likes. Typically I make solid fuel fires long and narrow about 1 brick wide and 2 bricks long, that's not exact and I don't measure when I lay out the bricks around the nest, if it's too small I nudge the bricks out or add, too large I nudge them in or remove. Too shallow stand the bricks on edge, too deep lay them flat. Frosty The Lucky. Quote Link to comment Share on other sites More sharing options...
natkova Posted December 5, 2021 Author Share Posted December 5, 2021 Forsty i did just didnt had picture of it i made longer pipe of course for ash to escape. Well this squere piece is giving me trouble if i made it bigg enaugh more ash wil goo i should let it be drilled holes, but i cu it out, I first drilled holes in circe shape than i tought it will be small air and i used angle grinder to cut it in squere shape T shape is welded with three pipes one pipe go to top into fire pot other go to ash dump and third go to sides. Still i dont know i will maybe make firepot litle more shalwoer dont see sense of making it deep like 4 inches . I only see that as air eat my fuel while my piece of metal is over the top being cold. Figured out how to.make fire more shallow and nothing to be cut.of if.I want.bottom blast I will simply put iron plate over firpot instead of.welding it under and it.give me 2'inches shorter firepot ,.in the same time.I avoid side blast hole that I cutt. And maybe I will make this hole bigger for ash to go there better. And not to.clog up in process. Quote Link to comment Share on other sites More sharing options...
Frosty Posted December 8, 2021 Share Posted December 8, 2021 The hole in the bottom picture is way too small. The one in mine is round and closer to 2" in diameter. My first air grate was a piece of steel plate with holes drilled in it but it plugged too easily and was hard to keep clean without clearing the fire out. I found Glenn's suggestion of welding round steel bar around 3/8" - 1/2" in diameter across the hole with about 3/8" space between them worked really well for me. I rebuilt the bar grate and bent lengths of 3/8" round like hair pins leaving 3/8" space. When bent they are long enough to span the hole and 3 hair pins cover it. The bar grate is easy to keep clear of clinker, ash and crud. You can just draw the fire rake lengthwise down the bars and knock it off, if some won't go through the gap scrape the point of the fire rake in the gap like a tooth pick. The bent hair pin grate will just lay there, you don't need to weld it down which lets it move when you scrape it and helps crud drop through. Frosty The Lucky. Quote Link to comment Share on other sites More sharing options...
natkova Posted December 14, 2021 Author Share Posted December 14, 2021 Well i wil lget to it later. Had some problem with electricity Quote Link to comment Share on other sites More sharing options...
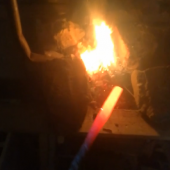
natkova Posted December 19, 2021 Author Share Posted December 19, 2021 Well swince weld were not good enaugh i took it apart welded again and dozens of time i wasnt satisfied broke everything made side blas and welded iron tubing used some clay mud and charcoal. From one side of firepo i build coal showel lol Quote Link to comment Share on other sites More sharing options...
natkova Posted December 19, 2021 Author Share Posted December 19, 2021 Well here.it is since I was buiding bottom blast coal forge I totaly was not forging for weeks. And I decided to forge again even in mud. I kinda find welding annoying but.forging reaxing I hate when I cant.see.what.I work and how I do stuff. So with welding its kinda chase hide face from ark look hide face look. In forging its more open straightforward work. I dont like its heavy bit for coal showel. Ps : it is stick welded Quote Link to comment Share on other sites More sharing options...
Frosty Posted December 19, 2021 Share Posted December 19, 2021 Don't you have an arc welding shield!? Arc welding by turning your head or shading your eyes with a hand or such is a B A D thing! If you're just griping about having to flip the shield down to strike an arc, join the club! I bought an auto darkening welding shield when they got inexpensive enough I could afford. I aim a small flood light in a clamp on fixture at the part I want to weld so I can see it clearly before I strike the arc and the lens darkens. It's just a matter of practice. Frosty The Lucky. Quote Link to comment Share on other sites More sharing options...
natkova Posted December 19, 2021 Author Share Posted December 19, 2021 I have arc welding shield but still i can locate corner i miss it Well i have litle bit rash on right eye never had this easy on me litle bit e itch, Usualy it is liek sandpaper rub yoru eyebal, (had expirence in school) i gues it cought my right eye by suprise why i was peeking and shileding with left hand. Quote Link to comment Share on other sites More sharing options...
Irondragon Forge ClayWorks Posted December 19, 2021 Share Posted December 19, 2021 You are liable to cause serious damage to your eyes welding like that, cataracts come to mind. Quote Link to comment Share on other sites More sharing options...
TWISTEDWILLOW Posted December 20, 2021 Share Posted December 20, 2021 X2 on the auto darkening helmets the prices have really come down on them an they are a breeze to use Quote Link to comment Share on other sites More sharing options...
natkova Posted December 20, 2021 Author Share Posted December 20, 2021 I used shield and it tricked me couple time. You know you poke poke with electrode and suddenly arch and it cought litle right.eye mothing serious. I will try to buy mask.I need two hqnds for welding. Quote Link to comment Share on other sites More sharing options...
Glenn Posted December 20, 2021 Share Posted December 20, 2021 Then you use a stick welder, notice the new rod has metal showing on the end of the rod. After using the rod, the flux forms a donut on the end of the rod. You need to remove the donut to expose metal so you can make electrical contact again. Sometimes you can break this donut by dragging the end of the rod, or by taping the end of the rod on a hard surface. Quote Link to comment Share on other sites More sharing options...
natkova Posted December 20, 2021 Author Share Posted December 20, 2021 Yes I use stick welder and I use this shield. I had welder flash a litle bit, yesterday nothing to serious what I had in school this Is zero. I used shield maybe I need ful helmet. Quote Link to comment Share on other sites More sharing options...
ThomasPowers Posted December 20, 2021 Share Posted December 20, 2021 I found that halogen work lights allowed me to see enough to position the rod and item to be welded with the helmet down before striking the arc. Direct sunlight would work too but it tended to filter in behind the mask and cause problems. Quote Link to comment Share on other sites More sharing options...
natkova Posted December 20, 2021 Author Share Posted December 20, 2021 I think i will buy one of those for safety But really nothing beat good old forging. I could make meme about it and compare two stuff have idea but can't find topic for it. Quote Link to comment Share on other sites More sharing options...
TWISTEDWILLOW Posted December 22, 2021 Share Posted December 22, 2021 I think you will really like working with that hood! Quote Link to comment Share on other sites More sharing options...
Frosty Posted December 22, 2021 Share Posted December 22, 2021 You'll love that welding shield! See if you can find one with the wide lens, that's even better. I always wanted to find a pair of blood shot google eyes to glue to my welding shield but no luck. Of course it wasn't important to look very hard so . . . Just visualize it and pretend I did, okay? Frosty The Lucky. Quote Link to comment Share on other sites More sharing options...
Recommended Posts
Join the conversation
You can post now and register later. If you have an account, sign in now to post with your account.