Shabumi Posted August 23, 2018 Share Posted August 23, 2018 I haven’t been able to light the forge lately, due to the fact that I promised the landlord I wouldn’t light it until fire season ends (mid October usually). And I don’t blame him for asking either, I was on the verge of stopping on my own when I realized that having an open tire rim full of dirt and charcoal with way too much air from a hair dryer going into it wasn’t the smartest way to forge in the middle of the California fire season, especially this year with all the fires we’ve had. So I’ve decided to take this down time and design a better forge. After seeing some threads on the barrel forges about how some people have enough airflow going into the firepot that they didn’t need to start their blower unless they wanted to get to welding temps. That combined with how fast a super sucker can pull air in, I started musing about a blowerless forge. While toying with this concept I came across a book which really started me thinking it could be done. It was the “Eclipse Combustion Engineering Guide”. $4 at a garage sale. It has info on most anything you can think of on combustion engineering, everything from fan laws and blower application, to steam and water boiler requirements, to heat loss/storage of various refractory’s, to weights of metals that fit in varying crucibles for casting, and the various tables and conversion charts in it are nice to have too. After reading this book, and everything else I could get my hands on with info related to this, the idea started forming into a plan. Sure I could make an easier workable forge with what I have, but I have ~2 months before I can use it, so I may as well use that time to design the best forge I can. I will be limited on how I am able to fabricate it due to my lack of welding skills and proper tools, but I know I can make a working prototype with what I do have, self tapping screws and chimney tape. My current build plan involves a washer/dryer stacked combo shell. I will be using charcoal as fuel, so ill start with a firepot similar to the mk3 jabod design, and it is said that charcoal works better with a side draft inlet, so ill go with that. I would like a down draft chimney so i don't have to worry about sparks or fire fleas as much. Im assuming that the equal drop and rise in chimney cancel each other out. The box around firepot will be sealed with openings to the outside, and might be used to recycle some of the combustibles later by closing off outside air and opening up to the inside, but I still haven’t figured those out yet. After measuring everything and computing the pressure differences and frictional losses, and some VERY frustrating moments where my just passing grade in high school algebra 18 years ago wasn’t enough to figure out what I wanted, I realized I was over thinking this thing. So I stepped back and broke it down to the basics. WARNING!!! There is math and technical terminology involved in this post, so if numbers or smart words hurt your head, dont read any further. I know it hurt my head trying to figure it out. You have been warned 1. What makes fire hot? Fire is hot. Its something ingrained in us from the time we could understand what hot was. It has most likely been the goal of all early blacksmiths(historically or total newbies like myself)was to make fire hotter. That’s why the bellows or blow pipe were invented. Whoever invented them probably didn’t know the science behind how they work, but he knew they made his fire a lot hotter than his neighbors. What the bellows/blow pipe do is provide volume control, airspeed control and airflow placement. Many people think its the air speed(velocity) that makes a fire hot. Its not (at least its not the main thing), it’s the amount(volume) of air flowing into it that makes a fire hot, so first I need to find the right volume needed to get fire to welding temps. After a lot of searching online and in my local library came up empty, I ended up finding the info I needed here on ifi and in my garage. I have two different dual action hand pumps that are common for the jabod builds I’ve seen, a red one and a yellow one. Both have been used enough that the company names are worn off, but the red one is one I see in a lot of the pictures. The yellow one is slightly larger than the red one, and the specs printed on the side haven’t worn off. It says it delivers 66 gallons/min at 60 strokes/min (stroke=pull and return to starting position) so ill estimate the red at 60GPM @ 60 strokes/min or 1gal/stroke. I read that to get a mk3 with charcoal as the fuel to welding temp it needs to be pumped more vigorously… Perhaps someone who uses these pumps on the regular could shed a more accurate light on this, but 2 strokes/sec or 120GPM sounds vigorous to me, it may be too much, but I‘d rather have too much airflow that I can reduce than not enough. Target volume(Qt)=120GPM=16ft³/min Ok we now know what we need to make the fire hot. 2. How do I get that air to the fire without a blower/bellows? Natural drafting chimneys (no forced air) get their airflow from the draft effect. Draft effect basically says that the heated air inside is less dense and will naturally try to “float” on the cooler, more dense outside air, moving up out of the chimney and pulling the cooler air in through the openings further down. To find the volume of air moved by the draft effect use this equation*: Q= Stack effect draft volumetric flow rate a. m³/s b. ft³/s C= Discharge coefficient** .6-1 A= Area of chimney exit a. m² b. ft² g= Gravitational acceleration a. 9.81m/s² b. 32.17ft/s² h= height *** a. m b. ft Ti= average inside temp a. °K b. °R To= outside temp a. °K b. °R Use only column a. or column b. DON’T mix them *, this equation is for air inside and outside of chimney, smoke has different density so this equation is only a rough, but close estimate. **, C is based on resistance to flow of orifice transition at entrance to chimney (see below). If fire is inside of chimney, like in a 55gal barrel build then C=1 and can be removed from equation ***, Length is not a factor in h. If chimney is on a diagonal, or there are horizontal sections, then measure from top of chimney straight down to top of air inflow. Lets use my planned forge as an example. Im a lazy American and cant be bothered with trying to learn to convert to m, so ill use column b. C=.72(Chimney transition orifice is reentrant) A=254.5in²=1.77ft² (18in D chimney pipe) g= 32.17ft/s² h= 9ft (will get taller as I can find/afford more chimney) Ti= 800°F= 1259°R (seems to be the consensus of the research I have been able to do as an ‘average‘ fire exhaust temp, ill use it for now as I don’t have any data of my own) To= 70°F= 529°R (will vary day to day, but this gets a good midline ) .72*1.77√2*32.17*9((1259-529)/1259)= 1.27√579.06(.58)= 1.27√335.85= 1.27*18.32=23.27ft³/s=1396.2 ft³/m (as this is a rough estimate ill round up to 1400cfm) Q=1400cfm This means that to get air into the fire pot, I have to have the firepot be part of the ‘closed‘ system of the chimney. If its out of the system then there is no draft to pull the air. Ill need to have a hood that closes around the fire area. 3. How do I get the right amount of air to the fire? I couldn’t find any info on multiple inlets so this is my best educated guess on how to get proper volume to firepot. If the math is off, then it would be from here, but at least it gives me a starting point. I’m guessing that if the target volume is a certain percentage of total volume in, then the target area would be the same percentage of total area in. Volume flow is a constant so Qo=Qi so Qt/Qi SHOULD give us the percentage of flow needed for firepot. Qt= target volume in, Qo=total volume out Qi=total volume in so 16/1400=.0114. If we keep Ai=Ao then we need .0114*254.5in²=2.9in²=At. That means I’d need a hole/pipe with a diameter a little under 2in. Hmmm, that sounds like too large an opening for a side blast, so I can step it down to 2 1½in holes/pipes or 4 1in holes/pipes spread around the firepot as they have roughly the same total area. That would leave me with ~250in² for the work area openings, perhaps a 12.5in radius half circle in front and a 9in radius half circle on each side with doors. That covers volume pretty well, and I know I said volume makes the fire hot, but if that was the only factor then you could build a fire and the air around it would fuel it to forging temperatures and beyond. Remember, the bellows/blow pipe provided volume control, air speed control and airflow placement. We have volume control and placement(into bottom of firepot, within draft effect system) covered. That leaves air speed control. 4. How to find air speed into firepot? With a bellows air speed was adjusted by pumping harder or softer, we don’t have the luxury of being able to go by feel. So first, how to find velocity(V). The simplest way I found is Q=AV… wait that tells us how to get volumetric flow rate from area and velocity, but weren’t we looking for velocity? Oh wait we can convert it over to Q/A=V. There we go, now we can figure this out. Ok if we know that Q=1400ft³/m and A=1.77ft² then V must =791ft/m. That is if we keep the Inflow Area(Ai=Ao) Outflow Area. 5. How do I control the air speed into firepot? This is where the math tells you how a super sucker works. Ai*Vi=Q=Ao*Vo (look familiar). This says that the inflow area multiplied by the inflow velocity is equal to the outflow area multiplied by the outflow velocity and both equal the volume passing through. That means that if you decrease the inflow area that volume must pass through then velocity is gained. We see this in effect with the super sucker. A smaller inflow area pulling the same volume has greater velocity than the outflow area. Now if I need more velocity into fire pot I can reduce total inflow area by reducing work area inlets. If I reduce the Ai to 200in² then I start with the known values 1.77ft²*791ft/m=1400cfm=1.39ft²*Vi, which means Vi=1007ft/m. Now if I reduce Ai then I will be increasing the area ratio between Ai and At, which increases volume through firepot inlet. So I reduce Ai to 200in², then 2.9/200=.0145(new area %) now multiply that by Qi, .0145*1400=20.3cfm. So instead of 16cfm at 791ft/m(9mph) I will have 20.3cfm at 1007ft/m(11.5mph). That will give me more volume at a higher velocity, so I would definitely need a valve to reduce airflow into firebox. So based on what I can figure with my rudimentary math skills and the info I have been able to gather is that a natural draft forge COULD be possible in theory. Now I need to build it and try it out. I will be posting photos of the build, but be warned that it wont be pretty, and will most likely be held together with chimney tape and hope. If it doesn’t work then I can connect the hand pump to it and I will at least have a forge that will be better than the open air tire rim firepot, so it wont be a failure. If it does work, then I can build a better, more substantial one and all that would be needed to make one for different fuels would be to figure out the proper air volume needed to get and keep that fuel at the temp you want. I hope this wasn’t too complex to understand. As this is still in the planning stage, I am open to any questions, comments, clarification, corrections or criticism. Hopefully someone can help with the math in #3 as it is based off my best guess. It might be correct, but I don’t know how to check. Perhaps I’m trying to reinvent the wheel, but isn’t the wheel just a roller reinvented to stay on the object you want moved Ok, ive been typing this for far too long... Time for some sleep. Quote Link to comment Share on other sites More sharing options...
pnut Posted November 5, 2019 Share Posted November 5, 2019 I realize that this post is over a year old but I was wondering if you built what you had in mind or changed the design and how it turned out. I'm just curious as to how it worked out. I've seen small natural draft forges built in small hills and slopes but not one like this. Pnut Quote Link to comment Share on other sites More sharing options...
Shabumi Posted November 25, 2019 Author Share Posted November 25, 2019 Just saw your reply. I haven't built it yet as I realized I was spending more time working on a forge that may or may not work, vs spending the time forging. I ended up buying a second hand 1 burner chili forge for $200. So it's on the back burner for now. I have changed the design a bit for when i do get to it. To start, I realized that the long down draft before the chimney was going to have too much "drag" for a naturally drafted chimney. So it will have to be a side or top draft vs bottom draft. Also the washer/dryer frame I have that was to become the forge body was far from air tight, so all the excess air entering would have reduced the amount of draft i would have had. Current build is a 55 gal drum, with the lid set as a shelf 1/3 way up, fire pot set into lid. Still need to clay it to make it air tight, and to get another lid to make the chimney. Fire pot is 6in diameter, 2 3/4in deep with 5, 3/4 in holes in a star pattern around the sides. Works fine for charcoal with a blower, but still wondering how it'll work without one. Quote Link to comment Share on other sites More sharing options...
pnut Posted November 25, 2019 Share Posted November 25, 2019 It looks interesting for sure. I've never seen a fabbed natural draft forge. Hope you get it ironed out. Keep us posted. Pnut Quote Link to comment Share on other sites More sharing options...
ThomasPowers Posted November 25, 2019 Share Posted November 25, 2019 Alexander Weygers shows a natural draft charcoal forge he built 50+ years ago in "The Modern Blacksmith"---now in reprint as "The Complete Modern Blacksmith" an omnibus with his other metalworking books. As I recall he used a section of irrigation pipe for the chimney and a paint can for the forge with nail holes punched in the bottom and a door to control the air blast and charcoal from his fireplace and used it to forge and heat treat wood engraving chisels. Quote Link to comment Share on other sites More sharing options...
pnut Posted November 25, 2019 Share Posted November 25, 2019 I haven't seen one in person,or heard of anyone using a natural draft forge that wasn't built into a hill. I seen the drawing in Mr Weygers book but not in use. The one you're talking about Thomas is the forge hanging from the tree correct? Pnut Quote Link to comment Share on other sites More sharing options...
ThomasPowers Posted November 25, 2019 Share Posted November 25, 2019 Yup, that's the one. Part of the reason such forges are not more popular may be that we want to look at our metal a lot and such forges need the "door closed" to make a better draft. Quote Link to comment Share on other sites More sharing options...
pnut Posted November 25, 2019 Share Posted November 25, 2019 You could be right about that. The design above is one I've never seen before. That's what has me so curious about it's performance. Pnut Quote Link to comment Share on other sites More sharing options...
Shabumi Posted November 26, 2019 Author Share Posted November 26, 2019 6 hours ago, ThomasPowers said: Part of the reason such forges are not more popular may be that we want to look at our metal a lot and such forges need the "door closed" to make a better draft. This is another problem I've come across, my thoughts were to put small chains hanging very close together in the door to reduce inflow of outside air while still allowing you to see what's going on in the forge. Having an opening behind the firepot for longer pieces would have to have a workaround as well, as any openings would change the flow of the draw. Also I immagine it would have to ramp up to get max airflow and would be a fuel hog if you had it on a "set and forget" setting instead of constantly adjusting airflow. I had seen Weygers forge early on when I was just starting out and had forgot about it until you mentioned it. Perhaps it planted the seed of the idea without my knowing. I'll need to pull out my copy of CMB and look it up again and see if/how he overcame some of the obstacles. Quote Link to comment Share on other sites More sharing options...
MaxwellB Posted November 26, 2019 Share Posted November 26, 2019 Sham, I just put together a forge very similar to your drum forge. I have mine higher though, so I used the brake rotor in the top and am planning on putting another 1/3 of a drum over it for a coal reserve or the like. How does that work for you? How big is your pipe for the blower? I've got mine set up with 1". I'll have to get a better blower as I don't think the hair dryer will have much life. I did a small little test light tonight with it, to see if everything works like I hoped it would, with just a handful of TSC anthracite over some charcoal. Worked fine with the small amount. Wondering about scaling it up to use bigger stock than the little rivet I buried in the coal just to observe. Quote Link to comment Share on other sites More sharing options...
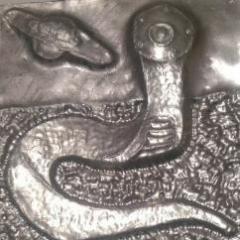
Shabumi Posted November 26, 2019 Author Share Posted November 26, 2019 I currently do most of my work with a gas forge, but this drum works well enough for my experiments. Though it will make metal hot, I doubt the firepot is ideal. I'll work on that after my proof of concept. I'm not using a brake rotor, in fact I'm not sure what it was before I found it. It has 5 holes around the perimeter each about 3/4" in diameter. The open top that you see in the picture was closed with a plate, with what I believe was a cylindrical electric igniter mounted in the center. I had found old soot lining the inside of it when I found it, which is what made me think it'd be a good fire pot. I use it with a hair dryer, blown through dryer ducting with a gate valve on the end, 2.5 inch I think. The gate valve goes into the side of the barrel to the open space below the firepot. The hope is that the gate valve will be enough to control the airflow when the system is put together and I remove the blower entirely Quote Link to comment Share on other sites More sharing options...
ThomasPowers Posted November 26, 2019 Share Posted November 26, 2019 Hmmm Pyrex Porthole? Quote Link to comment Share on other sites More sharing options...
Irondragon Forge ClayWorks Posted November 26, 2019 Share Posted November 26, 2019 I was thinking mica window in the door. 19 hours ago, Shabumi said: small chains hanging very close together in the door Quote Link to comment Share on other sites More sharing options...
Frosty Posted November 27, 2019 Share Posted November 27, 2019 I scratch built a vertical barrel stove years ago and wanted a window in the door. After pricing the stuff they put in stove I nixed the idea but was walking through Fred Meyers and stopped at the covered Pyrex casserole dishes and used the lid for the window. It was WAY cheaper than a 6" square of tempered or mica, etc. and it worked a treat. Sold it years later and last I heard it was still good. Frosty The Lucky. Quote Link to comment Share on other sites More sharing options...
ThomasPowers Posted November 27, 2019 Share Posted November 27, 2019 Just make sure it's the old borosilicate pyrex and not the modern flint stuff they are selling! Quote Link to comment Share on other sites More sharing options...
Shabumi Posted November 28, 2019 Author Share Posted November 28, 2019 Those are great ideas, I'll have to check out what I can find in the thrift shops when I next visit. Quote Link to comment Share on other sites More sharing options...
Recommended Posts
Join the conversation
You can post now and register later. If you have an account, sign in now to post with your account.