Ethan Stone Posted October 26, 2015 Share Posted October 26, 2015 just picked up this little forge for $225, had to take it apart around 5 times to finely git it working. I was wondering how the wooden handle should be attached exactly, and also what brand it is? thanks! Quote Link to comment Share on other sites More sharing options...
Charles R. Stevens Posted October 26, 2015 Share Posted October 26, 2015 Arm looks close, but it needs to be a bit longer. Some are mounted vertical some horizontile. I dont see the pitman arm that goes from the shackle to the flywheel. Dont know the brand, but if you put a cast iron flore drain grate in the bottom and a couple shovels of sand your in buisness. Quote Link to comment Share on other sites More sharing options...
ThomasPowers Posted October 26, 2015 Share Posted October 26, 2015 (edited) Hundreds of companies made similar forges; if it doesn't have any markings the maker is up in the air. A bit high price for one of those in that area and in that condition in my opinion; but it should pay for itself fairly quickly when in working condition. Edited October 26, 2015 by ThomasPowers Quote Link to comment Share on other sites More sharing options...
Ethan Stone Posted October 26, 2015 Author Share Posted October 26, 2015 thanks guys! and another question is how should i clay it? should i use refractory cement or can i make a homed version with plaster and sand? Thanks, Ethan. Quote Link to comment Share on other sites More sharing options...
JME1149 Posted October 26, 2015 Share Posted October 26, 2015 All of this style I've seen have the connector rod hanging from an eye bolt below the arm. Quote Link to comment Share on other sites More sharing options...
Charles R. Stevens Posted October 26, 2015 Share Posted October 26, 2015 If you dont have stock for a handle a wheal barrow handle is a good start Quote Link to comment Share on other sites More sharing options...
Ethan Stone Posted October 27, 2015 Author Share Posted October 27, 2015 So guys how should I clay it? Quote Link to comment Share on other sites More sharing options...
Charles R. Stevens Posted October 28, 2015 Share Posted October 28, 2015 Pesonaly just put a cuple of shovel fulls of sand in it, scoop out a 6" across bowl over the tuyeer and go.clasicaly take some bank clay (the stuff you find on a road cut bank) you want it just barly moist not rock hard or wet and pound it into place with a wooden mallet. Quote Link to comment Share on other sites More sharing options...
matto Posted October 28, 2015 Share Posted October 28, 2015 60/40 mix of Portland cement and perlite or vermiculite. Make some wire rings put a layer of the mix in put wire in then put mix on top of the wire. Form your ducks nest let dry and do a couple of slow heats to finish setting of mix. Mix should be more like mud. Not to runny not to dry. Quote Link to comment Share on other sites More sharing options...
Charles R. Stevens Posted October 28, 2015 Share Posted October 28, 2015 (edited) Portland cement dosnt make a good refractory, heat breaks it down (thats how they make it in the first place) alumina based cements are refractory. A tub of stove cement and vermiculite work, add water to make the cement thin enugh to coat the vermiculite, then paint with a couple of coats of plane stove cement. The problem is that any cement (or clay for that matter) will trap moisture under it and when combined with costics such as ash and cement it will rust the pan out. Sand and ash will to but they dry out must faster. Lining it with adobe is fast and cheap if you want a liner, and a heck of a lot easer to remove later. Edited October 28, 2015 by Charles R. Stevens Quote Link to comment Share on other sites More sharing options...
Ethan Stone Posted October 28, 2015 Author Share Posted October 28, 2015 Portland cement dosnt make a good refractory, heat breaks it down (thats how they make it in the first place) alumina based cements are refractory. A tub of stove cement and vermiculite work, add water to make the cement thin enugh to coat the vermiculite, then paint with a couple of coats of plane stove cement. The problem is that any cement (or clay for that matter) will trap moisture under it and when combined with costics such as ash and cement it will rust the pan out. Sand and ash will to but they dry out must faster. Lining it with adobe is fast and cheap if you want a liner, and a heck of a lot easer to remove later. thanks, were can i get adobe clay? do they sell it at hard were stores? Quote Link to comment Share on other sites More sharing options...
Smoggy Posted October 28, 2015 Share Posted October 28, 2015 Any locally available clay you can dig up Ethan, you only need it damp enough to mold into shape, just pliable, no wetter. As Charles stated bash it down with a mallet, or hammer, or lump of 2x2". Give it a chance to dry out and then fire it up, if it cracks, which it likely will, just plug the crack with a thumb full of the same clay and your good to go.......originally, forges and smelting furnaces where build of clay. Simple, effective, cheap.They are doing some road works opposite my home this week, I'll be over when they start digging to see if I can find a bucket full or two myself for later use...why dig it up myself when they are already doing it!.(Hopefully someone will ask why I want it and start a conversation, then with a bit of luck I'll score some sand, scraps of metal, broken tools.......) . Quote Link to comment Share on other sites More sharing options...
Charles R. Stevens Posted October 28, 2015 Share Posted October 28, 2015 xxxx disapearing post bug! Adobe is clay soil you build houses out off. 10-30% clay 30-90% sand. If you want to buy it, buy fire clay from a good building center and mix it 1 part clay to 2 parts sand. If you want to get fancy wet it with waterglass (a saterated solition od sodiumsilicat in water) More than 1/2 the peaple in the world live in adobe, cob or ramed earth houses. Quote Link to comment Share on other sites More sharing options...
Frosty Posted October 28, 2015 Share Posted October 28, 2015 Don't get fancy, cement of any kind is WAY not good. Just ram some damp clay in the forge an inch or so deep. It's ONLY purpose is to distribute heat, it's not a heat shield, just spreads it out some. Cast iron doesn't LIKE spot heating and can heat check it also doesn't like shock cooling, say dumping water on your fire. All claying does is spread the HOT and slow the chill. Adding perlite or ANY insulation is a complete waste of money. You're NOT making an oven, it's just a fire place. Literally.Heck, spot heat on a sheet steel forge pan will cause warping.Charles's ratio is about right but anywhere close is good.1-3pts sand to 1pt clay. It isn't brain science or rocket chemistry, a good portion of sand allows the clay to expand and contract with minimum checking (cracking). If you use straight clay it WILL check but that's no big deal, not even a hassle just put a little dry dirt in the cracks and it's good.Frosty The Lucky. Quote Link to comment Share on other sites More sharing options...
Ethan Stone Posted October 28, 2015 Author Share Posted October 28, 2015 okay thanks to you all ill try to keep it posted Quote Link to comment Share on other sites More sharing options...
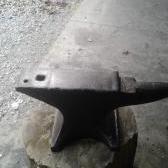
Ethan Stone Posted November 2, 2015 Author Share Posted November 2, 2015 So this is after about a 5 hour burn. and I think I got the handle attached right Quote Link to comment Share on other sites More sharing options...
Charles R. Stevens Posted November 3, 2015 Share Posted November 3, 2015 Looks good from here Quote Link to comment Share on other sites More sharing options...
Recommended Posts
Join the conversation
You can post now and register later. If you have an account, sign in now to post with your account.