April 20, 201412 yr Author I just started moving into a bigger house and shop so no I will have a proper setup for my smithy. Now I gotta start working on a hood for inside the shop. I'm just going to save this one for outdoor demo's. Not to figure out how to make a 10-12 inch chimney that goes out through the wall of the shop.....
April 20, 201412 yr This looks good. I had been keeping my eye out at scrap yards for something to use for a chimney. I'll grab some empty paint cans at work.
April 20, 201412 yr I believe she cut the other side off of that rim, so she'd need to cut up a second rim... or maybe weld a strip of 1/8" flat around the edge of the rim she has in there to raise the edges to a better height? Yes I did cut the rim in half. But I think you're also right that I needed a bigger fire and welding a strip of material around the inside to give more height is a great idea too. There is not much any of us can't do with a welder and an idea. But drafting the smoke away from me is going to be my first priority and also improving my fire. As usual I so appreciate the advice and idea's. Lisa
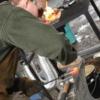
June 6, 201412 yr So I was working on designing a side draft hood for my mobile forge and came up with this. I spend under $2 on the bucket and aluminum duct, cut a big hole in the bucket and cut out an opening in the side and here you go. It just sits on the table and you can fine tune its location to whatever you like. Even used the piece I cut out as a sort of adjustable overhang. And I gotta say it works really well. So all you out there that are in my position of limited time money and resources here is an idea for you. That 5 gallon bucket side draft is perfect for my forge table. Thanks for posting it on here. I have been racking my brain trying to come up with a simple idea for when I get my smithy set up.
June 18, 201412 yr So I was working on designing a side draft hood for my mobile forge and came up with this. I spend under $2 on the bucket and aluminum duct, cut a big hole in the bucket and cut out an opening in the side and here you go. It just sits on the table and you can fine tune its location to whatever you like. Even used the piece I cut out as a sort of adjustable overhang. And I gotta say it works really well. So all you out there that are in my position of limited time money and resources here is an idea for you. Genius! Thankyou thankyou. This should do nicely until I have a more permanent solution for my stationary forge. Awesome idea!
August 5, 201411 yr Dang... I may have overdone it... Haven't cut the hole and installed the side draft yet. Gonna get there. Too much work, too many hobbies, house too old... Is there a limit where the stack can be too high I wonder?
January 26, 201511 yr I just started moving into a bigger house and shop so no I will have a proper setup for my smithy. Now I gotta start working on a hood for inside the shop. I'm just going to save this one for outdoor demo's. Not to figure out how to make a 10-12 inch chimney that goes out through the wall of the shop.....Howdy neighbor, Stayton here. I like your idea at the start of this thread. Is there a local chapter for smithing? I have looked and not found any.
January 26, 201511 yr The vise actually works quite well. If im doing some heavy twisting or something like that sometimes I have to put my foot on the rim and lean into it a bit but other than that I really like it. Everything in my shop has to be mobile so I can have a permanent spot for any of my tools.Resurrected old thread I know but often they are the best! :) Someone over here (Brian Russell?) has a leg vice mounted on an old truck wheel, tyre included! That is very stable, you can stand on the tyre for extra purchase and still tilt the thing over and roll it around the shop easily. A simple 12mm (1/2") or thicker "washer" or ring underneath the brake drum would work well, providing stability and a foot plate with minimal trip hazard, but not the wobble problems you would have with a solid disc and anything less than a perfectly clean and flat floor. My free standing vice is on a tripod frame, built to cope with an earth / wobbly concrete floor, sometimes when the post of the vice is on the high point of the concrete floor and the frame will pivot around that, dragging it a couple of inches to one side sorts it. For filing and hack sawing I usually hook a heel over the bottom rail. The stand was built from hexagon section bar for no other reason than I bought a load from a scrap yard and it was what was available on the rack. On the odd occasion when I have not been able to take a heavy bending job to the fixed vice, I have bolted this one down, the carefully considered design of the foot fixing additions would indicate that we had plenty of time to adapt the stand to a fixture.... Panic? Me? Alan
January 27, 201511 yr Do I remember correctly that you get a little better draw on the chimney if the opening at the bottom, in this case the bucket was a little smaller than the area of the chimney pipe???
Join the conversation
You can post now and register later. If you have an account, sign in now to post with your account.