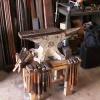
December 28, 201015 yr Hi all, I wanted to share with ya my new material storage rack / material!!!!!! I know as well as anyone how much Craigslist can SUCK. But, sometimes, you strike gold (or in this case....steel). Unfortunately for the guy, he was getting out of the machine shop trade and selling all his stuff. I saw no pictures and he didn't sound like he was going to accommodate my budget. But, I get there, and he's got tens of thousands of dollars in machines and all the tools you would ever need and more. Long story short........I went to look at this rack only, because he said he had gotten rid of all the good steel material he had. (what was good to him and good to me was totally different) SO I got the rack and all of this material for $350 (at least 1500lbs of round, square, rectangle, hex, plate steel, some aluminum, and some steel tubing) I truly got a piece of coal in my stocking this year (GF thinks she's funny) but I must have done something good this year to get a deal like that. P.S. I threw in some pictures of the rest of my shop. It's coming along and all that material and rack fit in nicely.
December 29, 201015 yr Nice shop but you need to move those gas jugs somewhere else unless they have been used to store water. One hot cut off flies onto one of those tanks and you will have a nice little explosion. Preferably to a whole other room where no hot work is being done.
December 29, 201015 yr Author yeah that would not be good............but the three under the bolt bin are empty and the one on the ground was just placed there yesterday. A lot still needs to be organized.
December 29, 201015 yr Author Hey does anyone have any suggestions on getting better suction/draft with my hood. I think i have two problems and i need to over-come them sooner rather than later. First, the pipe is only 8" round. Second, the smoke goes up into the hood and immediately makes an "S" curve out the window, then up. Any suggestions?????
December 30, 201015 yr Hey does anyone have any suggestions on getting better suction/draft with my hood. I think i have two problems and i need to over-come them sooner rather than later. First, the pipe is only 8" round. Second, the smoke goes up into the hood and immediately makes an "S" curve out the window, then up. Any suggestions????? Build a side draft like this and you will have no problem with the smoke. Only problem is you will need to go straight up through the roof. I built mine like this and it works great. http://www.beautifuliron.com/steelhoods.htm There is a thread on here about the Hofi style side draft that might work better for you.
December 30, 201015 yr Hey does anyone have any suggestions on getting better suction/draft with my hood. I think i have two problems and i need to over-come them sooner rather than later. First, the pipe is only 8" round. Second, the smoke goes up into the hood and immediately makes an "S" curve out the window, then up. Any suggestions????? Several things can be done to help draw smoke better. First of all, that type of hood over a fire will seldom work satisfactorily. A side draw setup is much better.... I would make a setup as per the drawing (slanted sides are better), with the forge pushed up against it. The firepot should be within a couple inches of the opening. Also, I would use 10 or 12 inch pipe. The "S" curve is OK as long as you can find elbows for the pipe large enough. When you start your coal fire, crumble a newspaper up in to a ball, light it and put it in the opening (behind the firepot).... This will start the updraft and pull the smoke from your coal fire. Edit... Looks like two of us were typing an answer for you at the same time (with the same solutions)... See the following post for the drawing....
December 30, 201015 yr I forgot to attach this in my last post.... By the way, there needs to be a bottom on the plenum....
December 30, 201015 yr Author I wish i could go straight up and out of the roof, but i am renting my uncle's house and everything i put up i need to be able to take down. That is why i routed the pipe out the window and then up. I like the look of the large hood that i have now, but i found out quickly some of the short comings. Probably the worst thing is that it doesn't catch all the smoke and fumes. Next is the size restrictions of the work piece i am able to put between the forge table and the hood. After some thought i think I'm leaning toward the Hofi style side draft. And i would have no problem building that style box and taking it out of the bottom window and then up. ( i tried to draw it) Well i think i'm learning.......slowly ;)
December 30, 201015 yr Check out this old conversation in the forum. Scroll down to see how Hofi did just what has been said so far! The BluePrint doe's not seem to be available right now. But this will show it! http://www.iforgeiro...-forge-chimney/ Ted T
December 30, 201015 yr I wish i could go straight up and out of the roof, but i am renting my uncle's house and everything i put up i need to be able to take down. That is why i routed the pipe out the window and then up. I like the look of the large hood that i have now, but i found out quickly some of the short comings. Probably the worst thing is that it doesn't catch all the smoke and fumes. Next is the size restrictions of the work piece i am able to put between the forge table and the hood. After some thought i think I'm leaning toward the Hofi style side draft. And i would have no problem building that style box and taking it out of the bottom window and then up. ( i tried to draw it) Well i think i'm learning.......slowly I think that is your best option. Let us know how it works and of course take pictures.
January 2, 201115 yr Author ok fellas, I worked all weekend, fab-ing the my new Hofi style hood, and i am so happy the way it can out. Here are some pictures (per request). I have not lit a good fire yet but i did light some newspaper in the back and some more in the firepot, just for a test run, and it looks like it will work just as it is supposed to!!!! The only thing i wish to add is a lock on the outside access door (because there are little kids that live and play next door, and i dont want them getting into it.) Ill try to post some pictures of when i light the forge and i really test the hood's performance!!! I added some other pictures of the two newest newest additions to my shop. One is the chop saw. I have wanted one for soooo long!! Home depot on sale!!!! And the second is the voltage regulator. My dad gave it to me so now i can use it to dial my blower in perfectly!!!
January 5, 201115 yr Author no questions, comments or conserns???? Im suprised!!!! Help me out guys, i need some input
January 5, 201115 yr no questions, comments or conserns???? Im suprised!!!! Help me out guys, i need some input Looks like a nice job. It should draw well now. Lets see a picture with some fire. It also looks like plenty of room to heat your lunch burrito on top. Bob
January 5, 201115 yr What type burritos you plannin` to cook?I may be over for lunch depending on the type.No beans for me though,unless they`re black beans,then I`ll chance it and bring the Beano. Oh yeah,cool hood.Fire it up so we can get to cookin`. :)
January 5, 201115 yr Good looking set up. Where did you get your pipe (chimney)? What diameter is it? And yes, let's see 'er in action! Don
January 5, 201115 yr Good set up! IF you do have any problem with draw it would be due to the chimney diameter, make it bigger, and the height of the stack in regards to the peak of the roof. Usually the chimney should be two feet higher than the peak if within 10 feet of it. Also the cap needs to be above the pipe at least as high as the diameter of the pipe. Now to do some hammering!
January 6, 201115 yr Author Burritos, grilled cheese, hotdogs and burgers, whatever you want. Just remember....BYOB. HAHA!! Yeah i knew from the start that the pipe diameter was not optimal. It is 8" round HVAC galvanized duct. But it is the biggest Home Depot or Lowes carries, and i can't afford 12" diameter stainless pipe. The cap on the pipe is something i made at home. And it actually has 10 inches on expanded metal mesh after the pipe and before the cap. I should be good there. And i still have some extra scrap pieces of the 8" pipe, i will be raising the height more above the hoof line. Thanks for the input. I will update with some photos of it in action very soon.
January 6, 201115 yr You can snap two pieces of pipe together to get a larger diameter pipe.... side to side...
January 6, 201115 yr Yeah i knew from the start that the pipe diameter was not optimal. It is 8" round HVAC galvanized duct. But it is the biggest Home Depot or Lowes carries, and i can't afford 12" diameter stainless pipe. The cap on the pipe is something i made at home. And it actually has 10 inches on expanded metal mesh after the pipe and before the cap. I should be good there. And i still have some extra scrap pieces of the 8" pipe, i will be raising the height more above the hoof line. Keep an eye open on craigslist - I got my 12" chimney pipe for $1/ft. Granted, it is hot pink... but it was affordable! Works good too - even with the bends in it.
January 6, 201115 yr I picked up a couple of 10" x 10' spiral seamed ducts for US$4 a piece at the local re-store. Also a lot of HVAC companies have a scrap pile of pipe or renovation companies might be in the middle of a job and have a 14 yard dumpster full of sections. Ask and you can be amazed what you can get when you explain what you are using it for!
January 7, 201115 yr A general rule about building good drafting chimneys is that they should extend about 2ft higher than the highest part of the roof.
January 7, 201115 yr Author <br />A general rule about building good drafting chimneys is that they should extend about 2ft higher than the highest part of the roof.<br /><br /><br /><br /> Why is that? Is it so the air can move past it more freely when it is in more open air?
Join the conversation
You can post now and register later. If you have an account, sign in now to post with your account.