Bantou
-
Posts
221 -
Joined
-
Last visited
Content Type
Profiles
Forums
Articles
Gallery
Downloads
Events
Everything posted by Bantou
-
I believe it’s 3/4.” I’ll measure it when I get home this evening.
-

JLP Blacksmith Teaching Center.
Bantou replied to jlpservicesinc's topic in Building, Designing a Shop
I haven’t read the NEC book. My job stops at the weather head/meter base. As a rural co-op, we have our own spec book from US DA. I’m sure it meets NEC requirements for power lines, but I’ve never looked at them. -
Still holding up ok?
-
JLP Blacksmith Teaching Center.
Bantou replied to jlpservicesinc's topic in Building, Designing a Shop
That’s why poles don’t typically catch fire in a heavy rain storm. Rain water doesn’t conduct electricity very well since it is mostly pure. Where we run into problems is when the insulators get dirty. Around here, most of our pole fires happen during the plowing and cotton harvest seasons. In a dry year, the plows can kick up enough dust to coat the insulators. When the cotton gins are running, they produce all kinds of dust as well. If we have a sudden downpour, the rain water can pick up enough minerals and dirt to allow the electricity to track to the pole. If we get a gentle rain, it will wash the insulators clean but won’t arc up because it comes off in droplets instead of a stream. -
Blacksmith Sayings Proverbs
Bantou replied to Borntoolate's topic in Blacksmithing, General Discussion
Sending someone after the sky hook or wire stretcher is another of our favorites. -
JLP Blacksmith Teaching Center.
Bantou replied to jlpservicesinc's topic in Building, Designing a Shop
I’m guessing that the soil in those places is heavy sand. Sand and electricity do weird things. My brother found a 7.2kv line hot on the ground in sand. He said when they found it, kids were jumping over it like it was a log. -
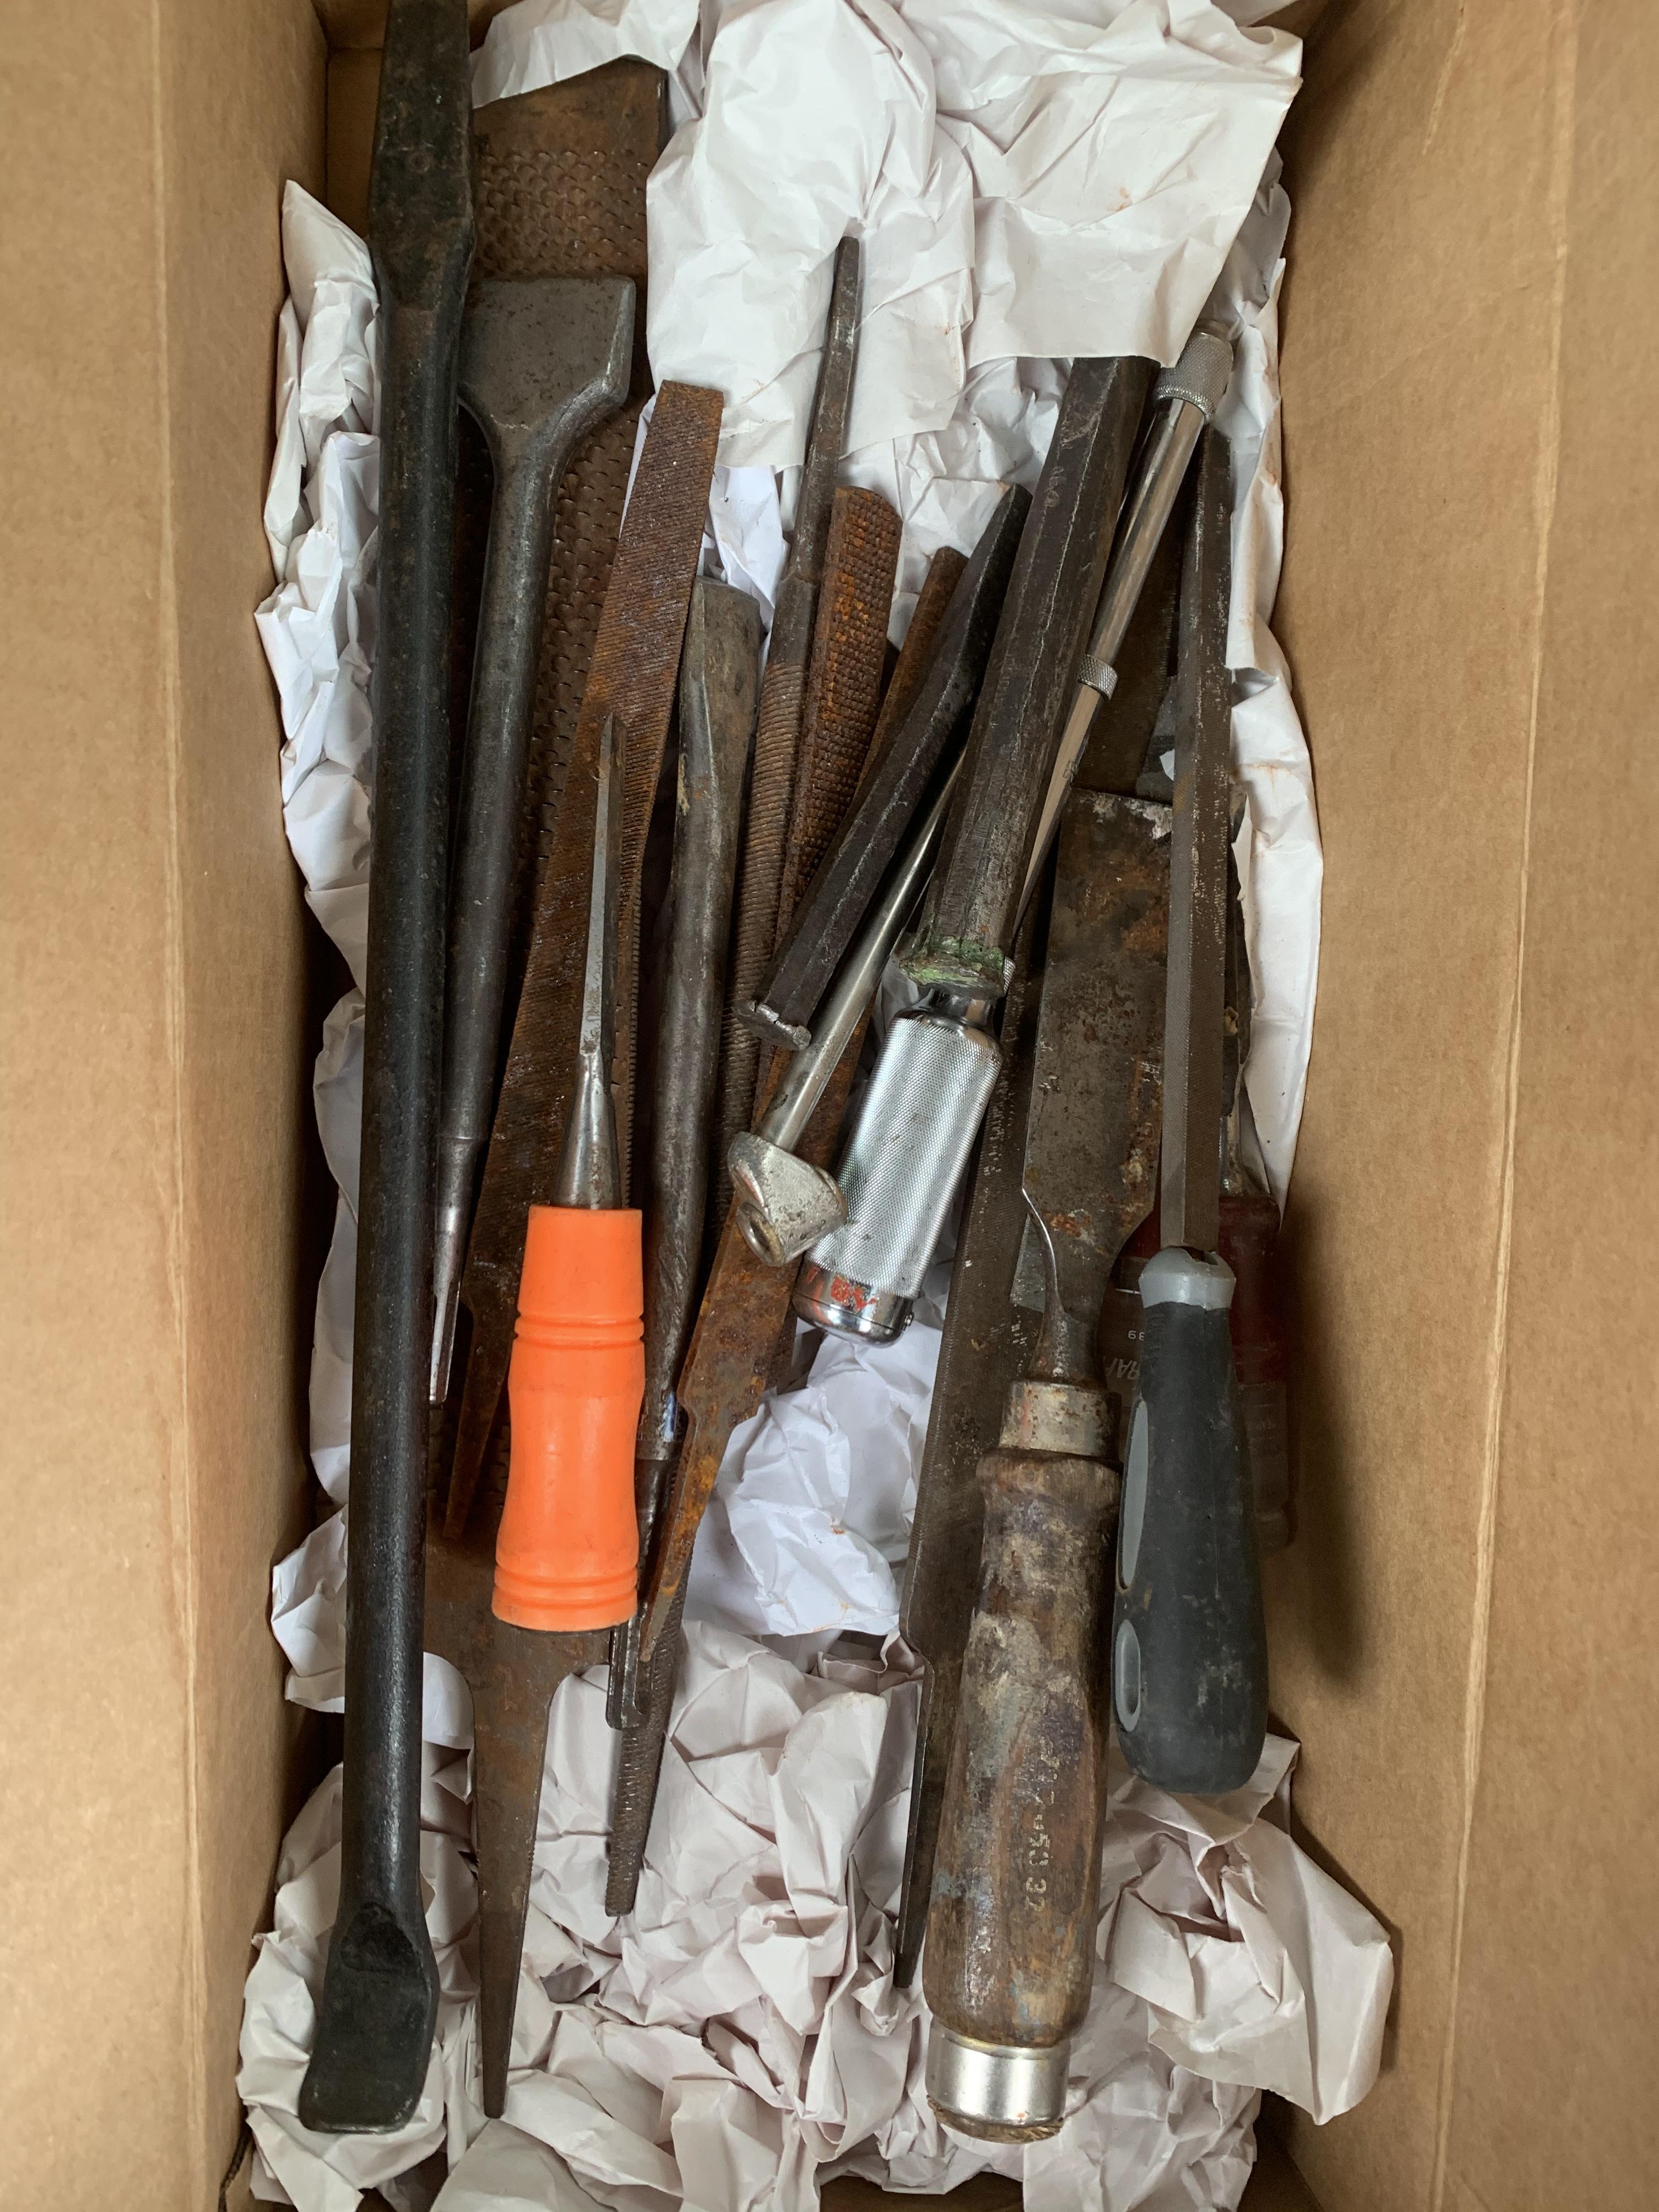
Paid $12.50 + an hour and a half of drive time for this box of files and chisels. Not a bad deal at all for what I got. It’s probably $100+ worth of files and chisels if I were to buy them new.

-
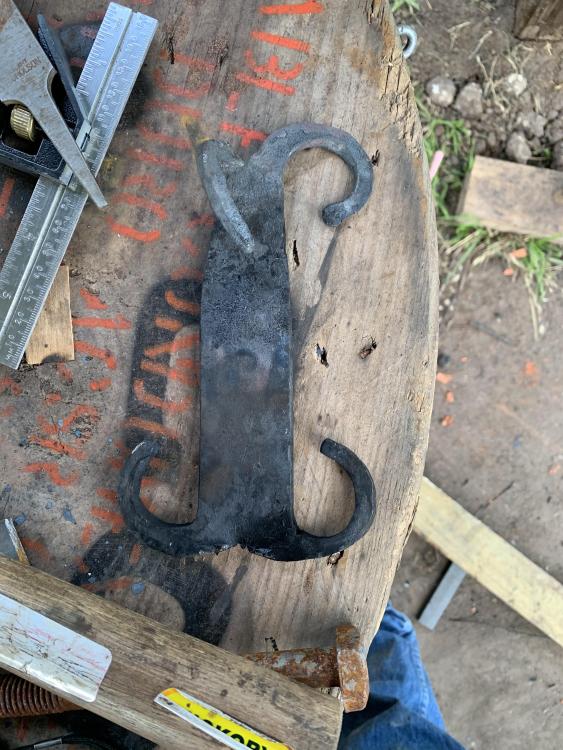
No I turn them after tapering. The process I tried first was: Split, fold one back, taper, curl, straighten out folded side, taper, curl. Now I’m trying: taper, split, curl. After re-measuring the mark on my anvil, the tapers are actually 3” long instead of 2.5”. I like that length, I just need to get the thickness right now. I might try one at 2.5 just to see if I like that measurement better with the thicker finials.
-
JLP Blacksmith Teaching Center.
Bantou replied to jlpservicesinc's topic in Building, Designing a Shop
I said that mostly as a joke. I can’t tell you how much ground rod you need for a dead short in the panel (my knowledge stops just past the weather head). I know that we require them to provide a path to ground in case the house loses other paths. I’ve seen faucets in a barn pick up voltage because it lost its ground. Electricity will ALWAYS seek a path to ground and plumbing is usually a convenient one. Spec is a 5/8th rod driven 8 ft deep. -
I knew the ones on the bottom were going to be too thin as soon as I cut them. It wasn’t so much a matter of overworking them on the horn as it was not having enough material to start with. I did the curls in two heats each with only minor adjustments made on the second heat. I’ll give just tapering to length a try. A smarter man would probably call this a wash and start making smaller things with easy to follow plans until his skills improved more. Unfortunately, I’m bullheaded and don’t like a project “beating me.” So, I’ll probably keep beating my head against this thing until I get it figured out or get a concussion. Part of my problem with this set was fighting my tongs. The flat stock kept sliding around in my tongs making it difficult to maintain a good angle for the taper. It isn’t a problem with the actual project because the bar is long enough to work without tongs. If I need to work a short piece of flat stock again, I’m making an attempt at goose neck tongs. The ones on top were done by splitting the bar, then tapering. I switched methods because I was struggling to get both sides uniform. One side would be thinner than the other, so I’d draw the thick one down a little. Then the one I was working on was thinner, rinse and repeat until I had two, mile long tapers that looked more like tooth picks than anything else.
-
JLP Blacksmith Teaching Center.
Bantou replied to jlpservicesinc's topic in Building, Designing a Shop
Didn’t you give me tips about using a hacksaw earlier? If it’s that hard to drive, they aren’t going to pull it up to check it. -
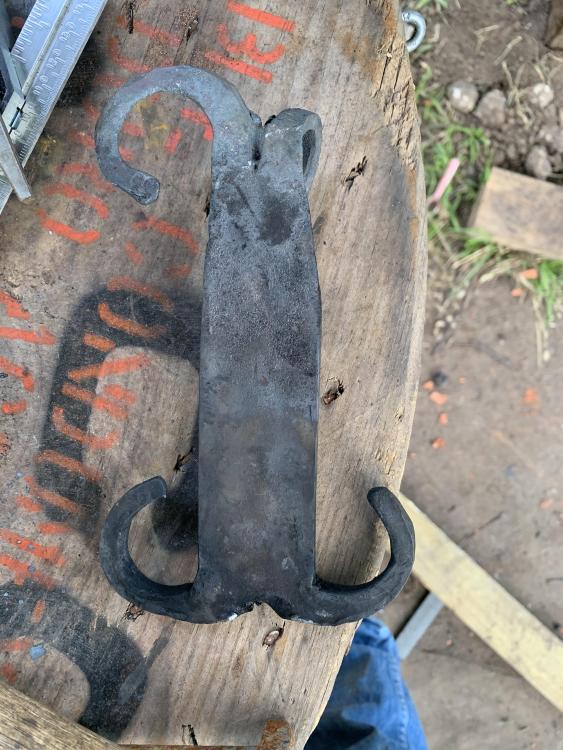
Made another attempt at the split. It came out better than the last one but I still need practice. I tried cutting from both sides this time and wound up with a bigger mess on the cut than before. My opposing cut marks were off just enough that I was basically upsetting one side while cutting the other... I didn’t measure it, but they can’t have been off by more than 1/32.” I gave up trying to make the cut with a hardy tool. It’s a struggle to keep the cut in-line when I can’t see it. I did a better job of stopping the taper at the correct place this time and I’m happy with the length of the finials. They need to be a little thicker though. I set my mark at 1 1/8” using the formula I worked out in another post (1.5 x width of stock x .5) which gave me ~ 2 1/4” of taper. Next time, I think I’ll set the mark at 1 1/4” and stop my taper early to get a thicker finial. The ends will draw down to a better point as I work them on the horn anyway. new ones on bottoms.
-
JLP Blacksmith Teaching Center.
Bantou replied to jlpservicesinc's topic in Building, Designing a Shop
Even better! Lol. I saw the driver laying there and assumed she was beating them in by hand. The co-op I used to work for wouldn’t let us put them in the pole holes under the pole. Spec is 2’ off the pole and 1’ under ground level (not that it really makes any difference, in the ground is in the ground). I was the new guy at the time so I got to drive the ground rods. Had to use the driver for the first couple weeks until somebody had mercy and showed me how to float them in. -
If they work let me know. I’m debating putting an upset right in front of the center punch to start the taper and give me a visual reference.
-
JLP Blacksmith Teaching Center.
Bantou replied to jlpservicesinc's topic in Building, Designing a Shop
When driving ground rods, it’s usually easier to “float” them in. Jam the rod into the ground by hand several times until you have ~6” of rod in the ground. With the rod in the ground, move it in a circle until you have created a “funnel.” Remove the rod (it should come out easily at this point) and fill the hole with water. Work the rod up and down in the hole without jamming it into the bottom (it will get stuck if you hit the bottom too hard), you are basically creating a water hammer to move the dirt. When the rod starts to feel “sticky” in the hole, remove and add more water. Rinse and repeat until the rod is at desired depth leaving about 6-12” extra. Drive the last little bit with a sledge to “seat” the rod in the hole. This method works extremely well in sandy soil (I can have an 8’ rod in, in less than a minute) and better than a hammer or driver in clay soils. Rocky soil is about the only time a driver is more efficient. -
Blacksmith Sayings Proverbs
Bantou replied to Borntoolate's topic in Blacksmithing, General Discussion
In linework, we call that “checking the pitch.” It is a much loved tradition for messing with the new guy. You ask if he has checked the pitch of “x” tool yet. It is vitally important, you see, to have tools with the appropriate pitch for “x” voltage, otherwise it will resonate with the sin wave of the voltage and destroy itself in your hand. When he give you a baffled look, you offer to show him how to check the pitch. If he is foolish enough to actually hand you “x” tool, you turn around and throw (pitch) it as hard as you can (preferably into something troublesome to retrieve it from). Then you turn back around and calmly tell him “pitch seems fine to me.” Everyone gets a laugh, you get called a few names not appropriate for this forum, and then he usually gets help retrieving the tool or a new one if it gets lost. To be clear, this isn’t something you do on the first day. It’s usually done once you know the guy a little and have started to build a relationship with him. Typically around week two or three with the crew, when he is still green enough not to know better but seasoned enough to roll with the punches. -
What did you do in the shop today?
Bantou replied to Mark Ling's topic in Blacksmithing, General Discussion
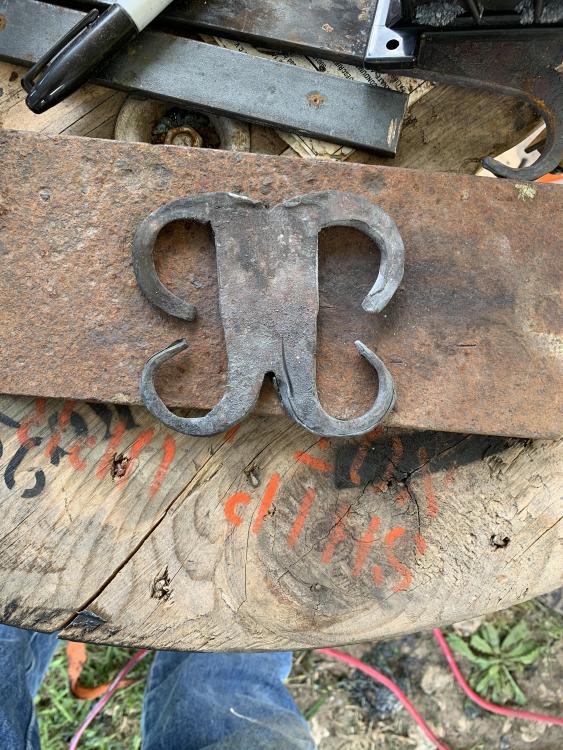
Spent several hours working at and on the JABOD today. I cut the fire backer off to give me better access to the fire (forgot to take pictures). FYI, a thin metal cutoff wheel doesn’t work well on brick. I burned off a 1/4 of the wheel for two ~1/2” cuts; then I went and bought a masonry wheel. I Worked on a new to me technique for finials. It didn’t turn out great but I have a good idea of what went wrong. I’m going to try again tomorrow and hopefully have better results. I ran out of time to finish the second side. Not a big deal since it was just a practice piece anyway. The top side is the new technique, bottom is old.
-
Working on a technique for finial for a cross. It’s far from perfect but I’m making progress. This was my second attempt using a new method. Instead of splitting then tapering, I tapered it then split. I definitely got a more symmetrical shape on the tapers that way. I wasn’t paying enough attention when drawing down the taper and tapered it a little too far back. I need to find a better way of marking where I want the taper to start. I have a hard time seeing the center punch at much above a bright red heat. I need to make the split a little sooner (maybe 3/4 drawn down). The side I got completed drew out a little more as I was working it on the horn. I also need to work on my cuts. I had a hard time getting the cut all the way through and wound up with a lot of burr that would need to be dealt with on a finished project. I have a couple of ideas on how to fix the burr and get a better cut that I will try tomorrow. The top one is the current progress. The bottom is one I did by splitting them drawing.

-
You Alaskans and your temperatures 74 is barely shorts weather. 70-85 is perfect weather for forging. Warm enough to be comfortable in jeans and a t-shirt but cool enough that you don’t sweat to death even next to the forge. It doesn’t get miserable until it gets over 90. On the other hand, anything under 50 means hovering over the forge in a hoodie. When it gets below 40, I may have to break out the Carhart LOL.
-
You might be addicted to blacksmithing if you...
Bantou replied to divermike's topic in Blacksmithing, General Discussion
I can’t say that the smell of coal smoke reminds me of home, but it does have a certain nostalgia about it. It makes me think of simpler times before the world went crazy(er?). Times when a man’s word was worth something more than noise and living simply was a good thing, not weird. I’m a bit of a romantic though. The forge to me is a sanctuary from the craziness that our modern life has become. It has the added advantage of allowing me take the day’s frustration and use it to create or learn something. -
What did you do in the shop today?
Bantou replied to Mark Ling's topic in Blacksmithing, General Discussion
Right! I dream of making worth that looks that good some day. Alexandr, is that door knocker two pieces riveted together? If so, how did you achieve such a perfect pyramid shape on the head? -
You might be addicted to blacksmithing if you...
Bantou replied to divermike's topic in Blacksmithing, General Discussion
You might be addicted to blacksmithing if: You suddenly realize that you the reason you are grouchy is that you haven’t fired up the forge in several days. -
I’ll give them a try but I tend to learn better from a book than a video. Something about text helps keep the ADD squirrels in-line. Thomas, I downloaded a copy of The Complete Modern Blacksmith. It is definitely more my speed. His list of “essential starting tools” is a bit daunting but he makes good suggestions for building your own power tools.
-
Do you have a recommendation for a better one? I’ve read The Artist Blacksmith by Peter Parkinson. It was informative but I found it lacking in detail for a beginner.
-
I’m finding that out. I’ve switched from deep reading to skimming most of it. When I find something interesting, I back up and slow down.