Bantou
-
Posts
221 -
Joined
-
Last visited
Content Type
Profiles
Forums
Articles
Gallery
Downloads
Events
Everything posted by Bantou
-
When done properly, the technique I’m using actually looks pretty organic and gives a nice tapered point without having to draw it out. This is the piece I did using the same technique in a class. I’m going to try your technique though. Keeping both cuts perfectly straight and even is a bear. Having to only make one cut would definitely have its advantages. It would also save me about 3” of material per cross assuming my math is right. I haven’t read that one yet. I just finished The Artist Blacksmith the other night. It provided a good overview but I need something more in-depth now. I’ll definitely check it out. Thank you for the suggestion.

-

My first Hot Cut Hardy tool
Bantou replied to Bantou's topic in Hot Cuts, Anvil devils, metal cutting on the anvil.
I know it can be done, I just don’t want to do it. I hacksaws are one of my least favorite tools to use. -
My first Hot Cut Hardy tool
Bantou replied to Bantou's topic in Hot Cuts, Anvil devils, metal cutting on the anvil.
Thomas, what do you use to cut the axels? I don’t have a torch yet and probably won’t for a while. I keep the bucket of water near the forge to wet the coal. The guy I bought it from told me to keep it damp if I didn’t want my whole forge on fire. I can cut it easily with a file. -
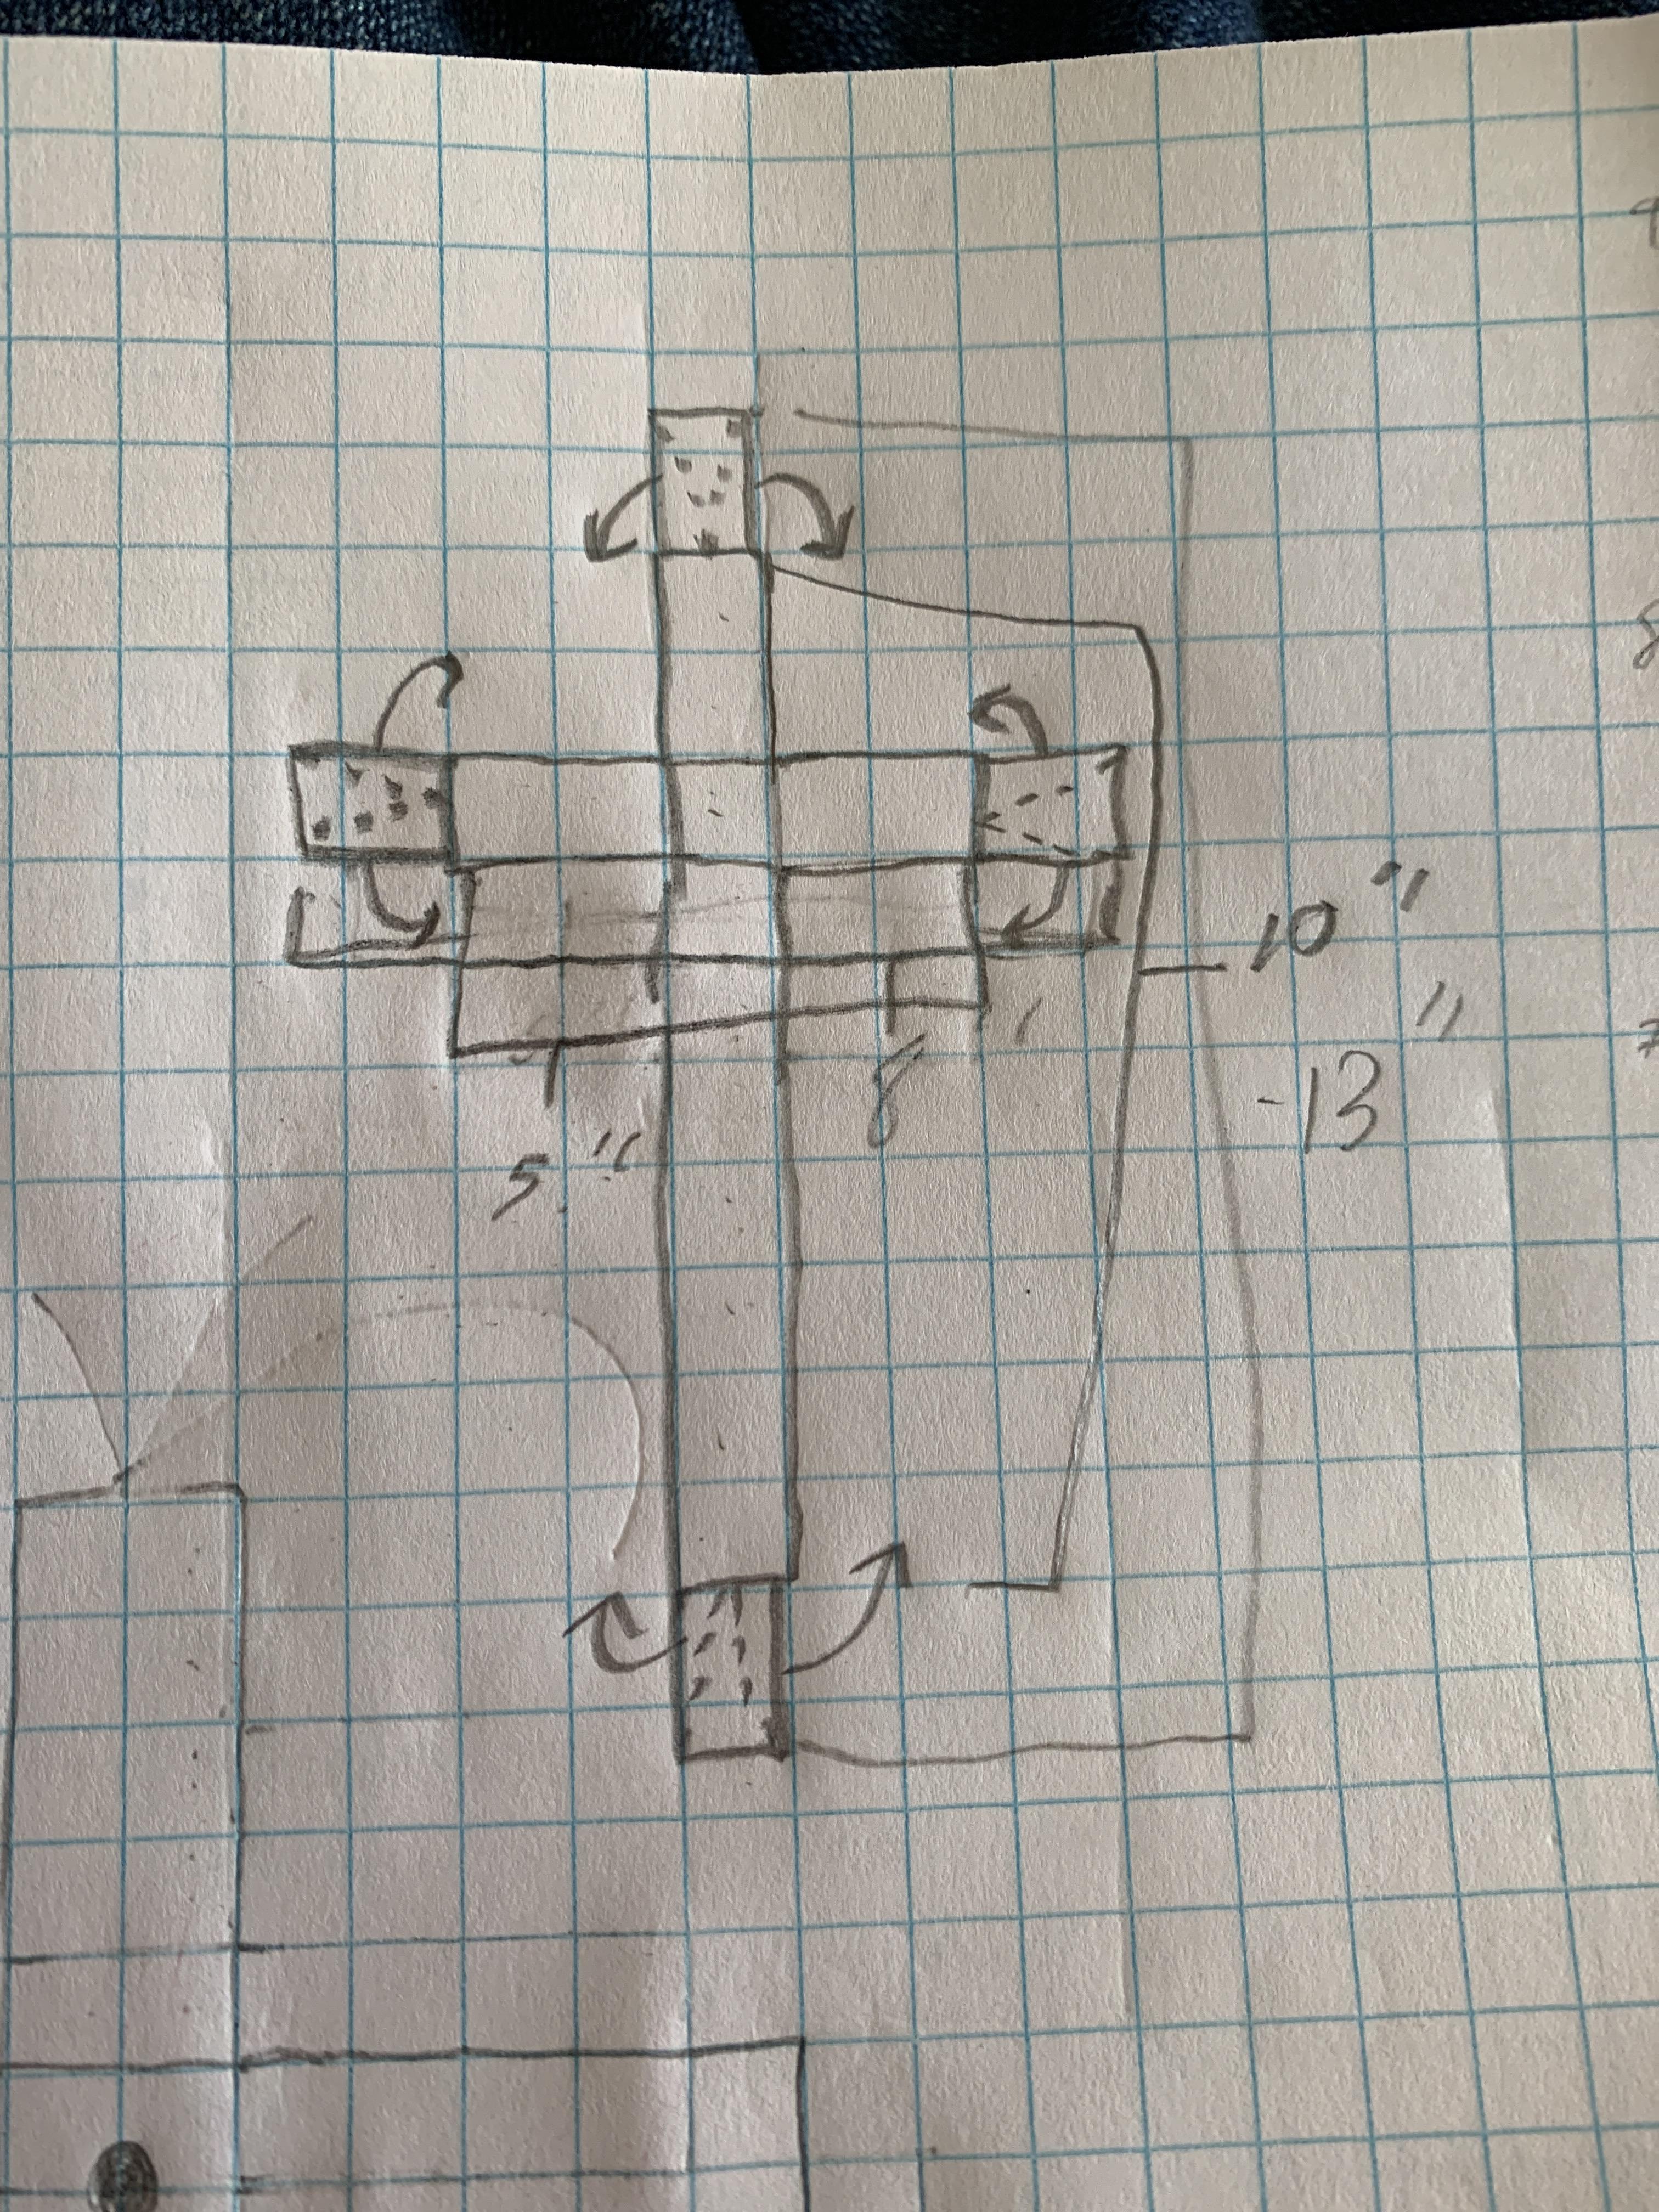
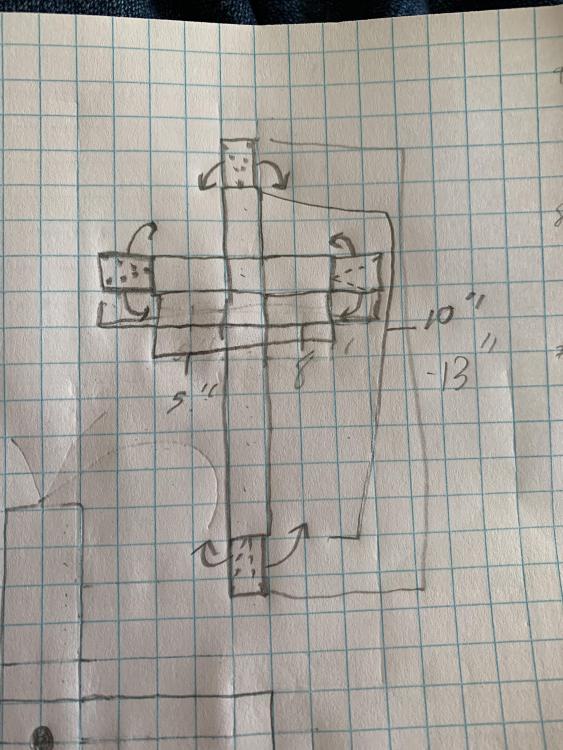
After measuring the piece I did for my class and experimenting with Play-doh, 1.5x the width of the bar appears to be about the right length for the split. Final drawing plan:
-
You are probably right. I was thinking 24” because that’s what looked best when I drew it out using 2” stock. If I drop the stock size down to 1” it would make a more manageable size. I want to engrave the reference for each mom’s favorite Bible verse on the long side. I was originally thinking 2” so I would have plenty of room for the engraving. Looking at it again, I think 1” will still give me plenty of room and may even look better.
-
I was thinking I had done it with 1/8 before but it was 3/16. I was originally thinking 1/4 but I’m afraid that would be too heavy for a wall hanger. Edit to add: Disregard the above. I found a chart for bar stock weight by foot. Made of 1/4”x2” the cross will weigh ~6lbs. 6lbs should be fine for wall art.
-
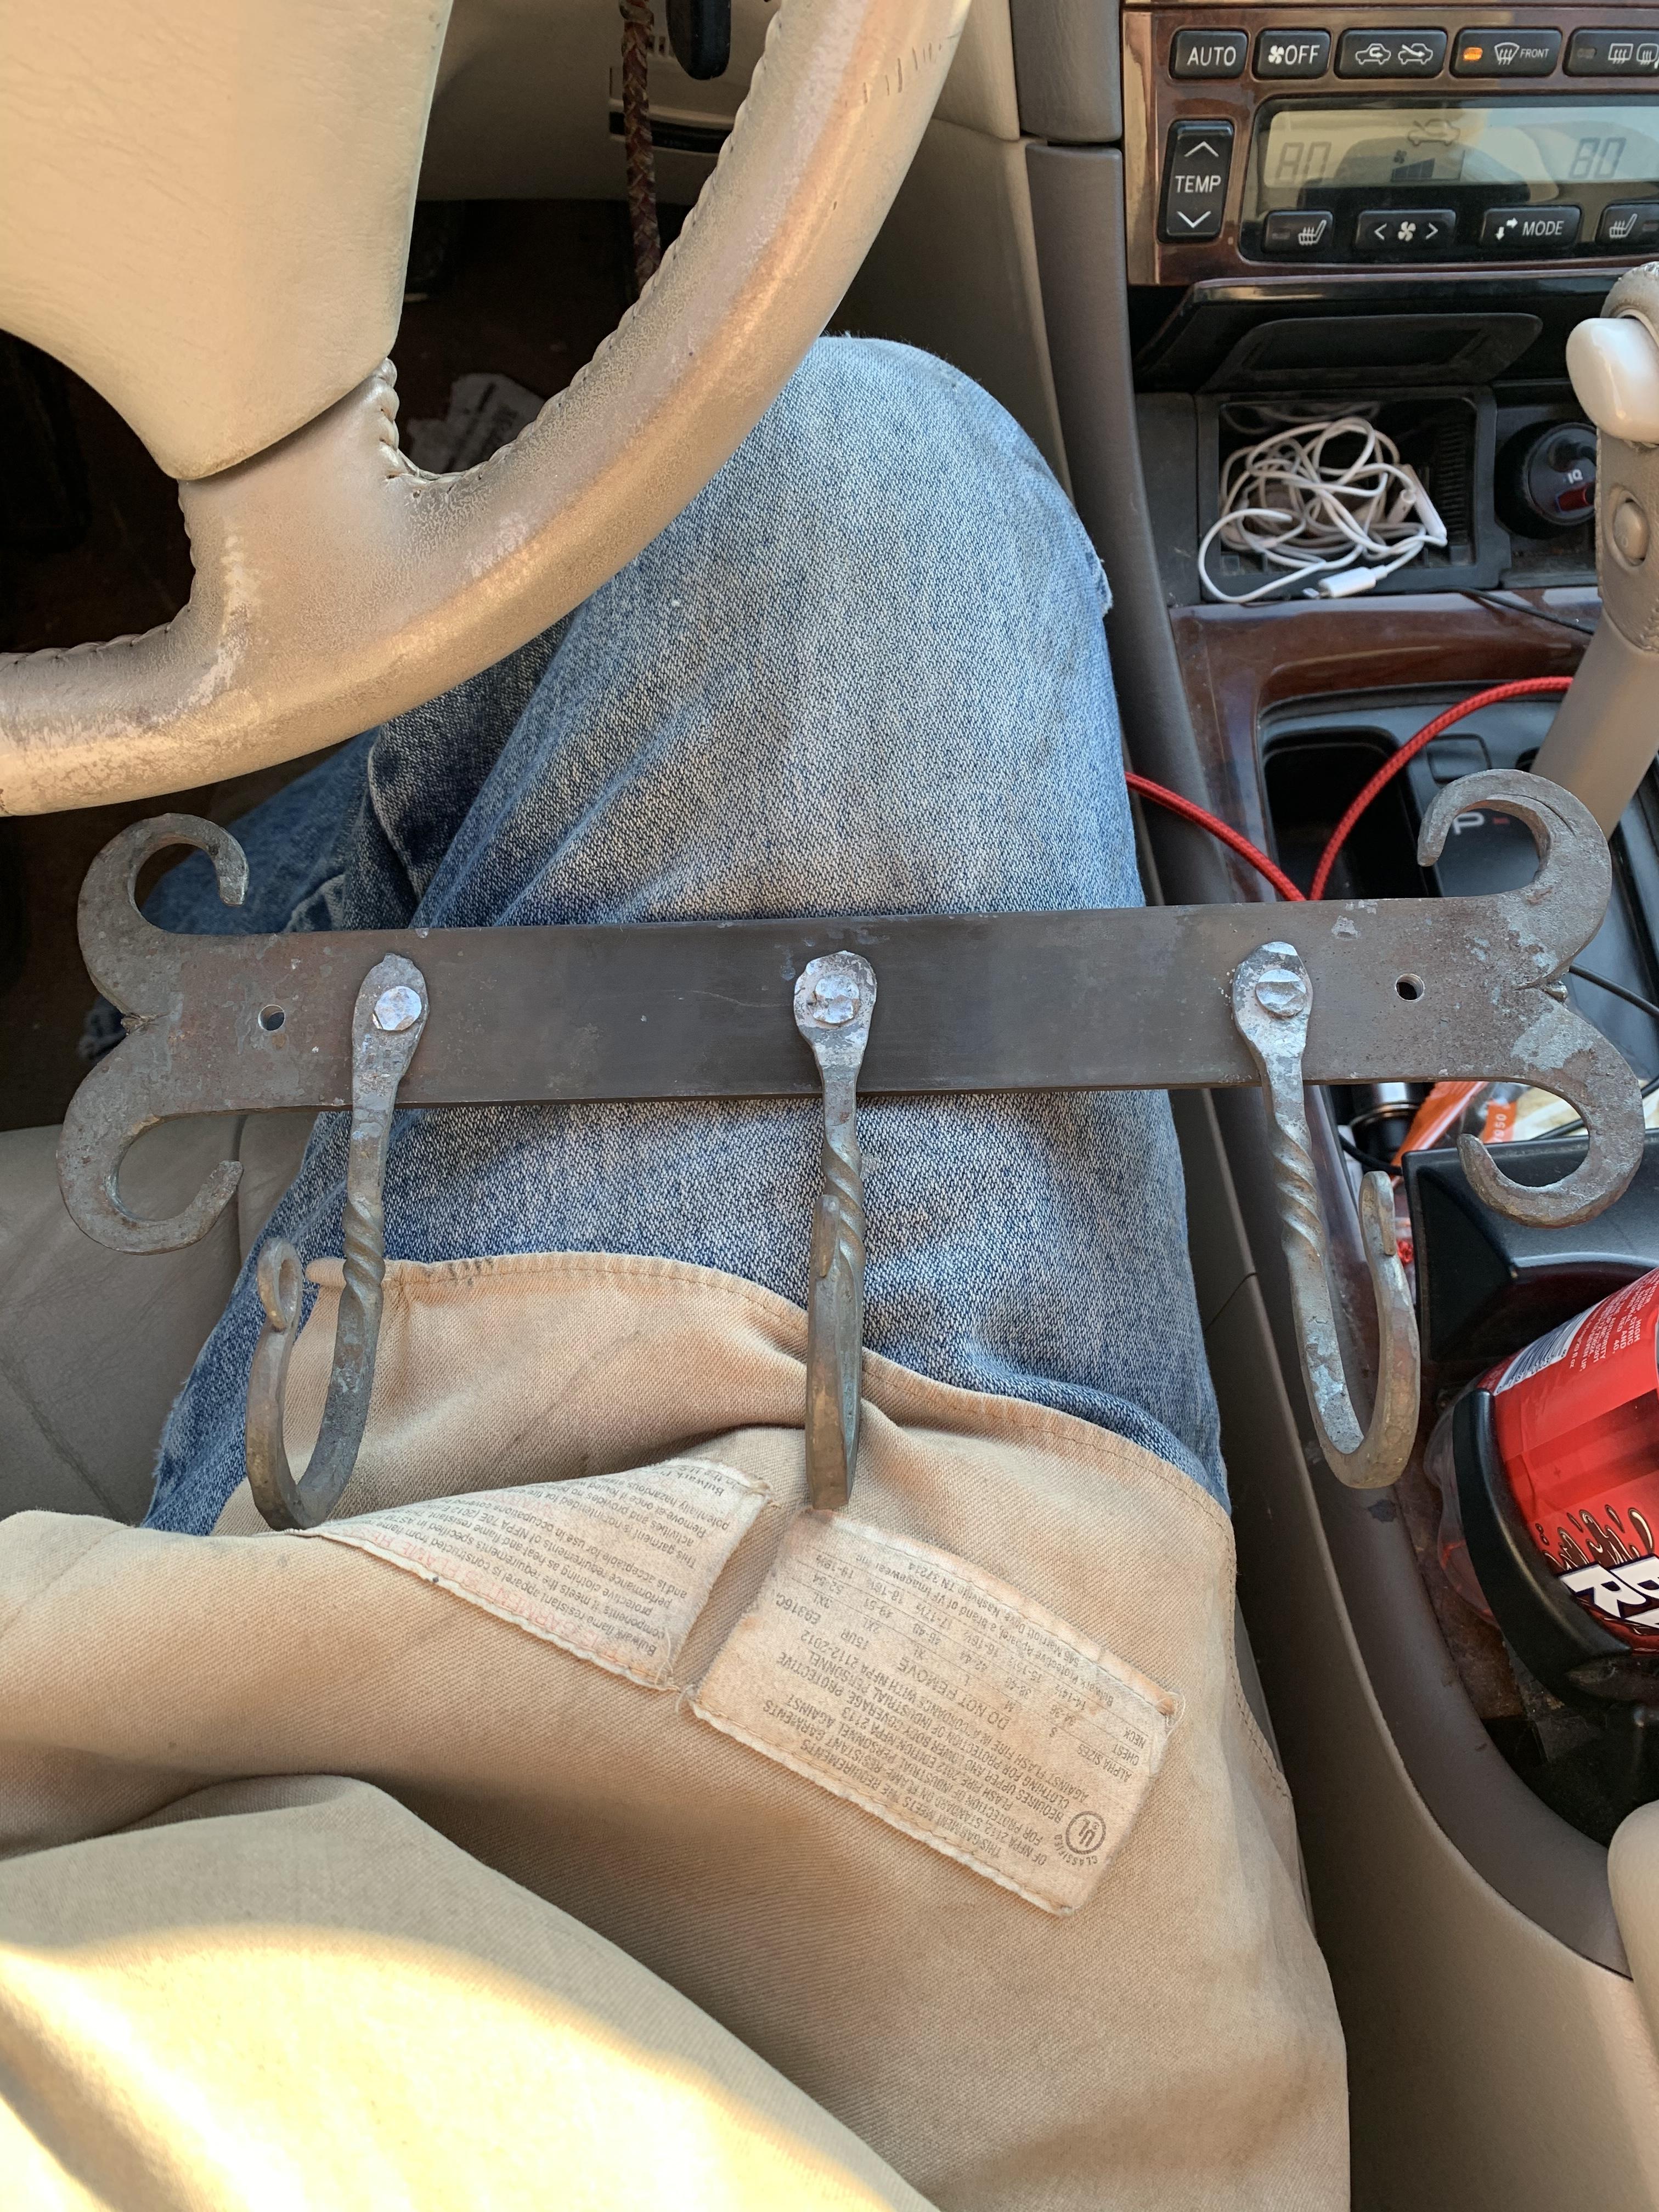
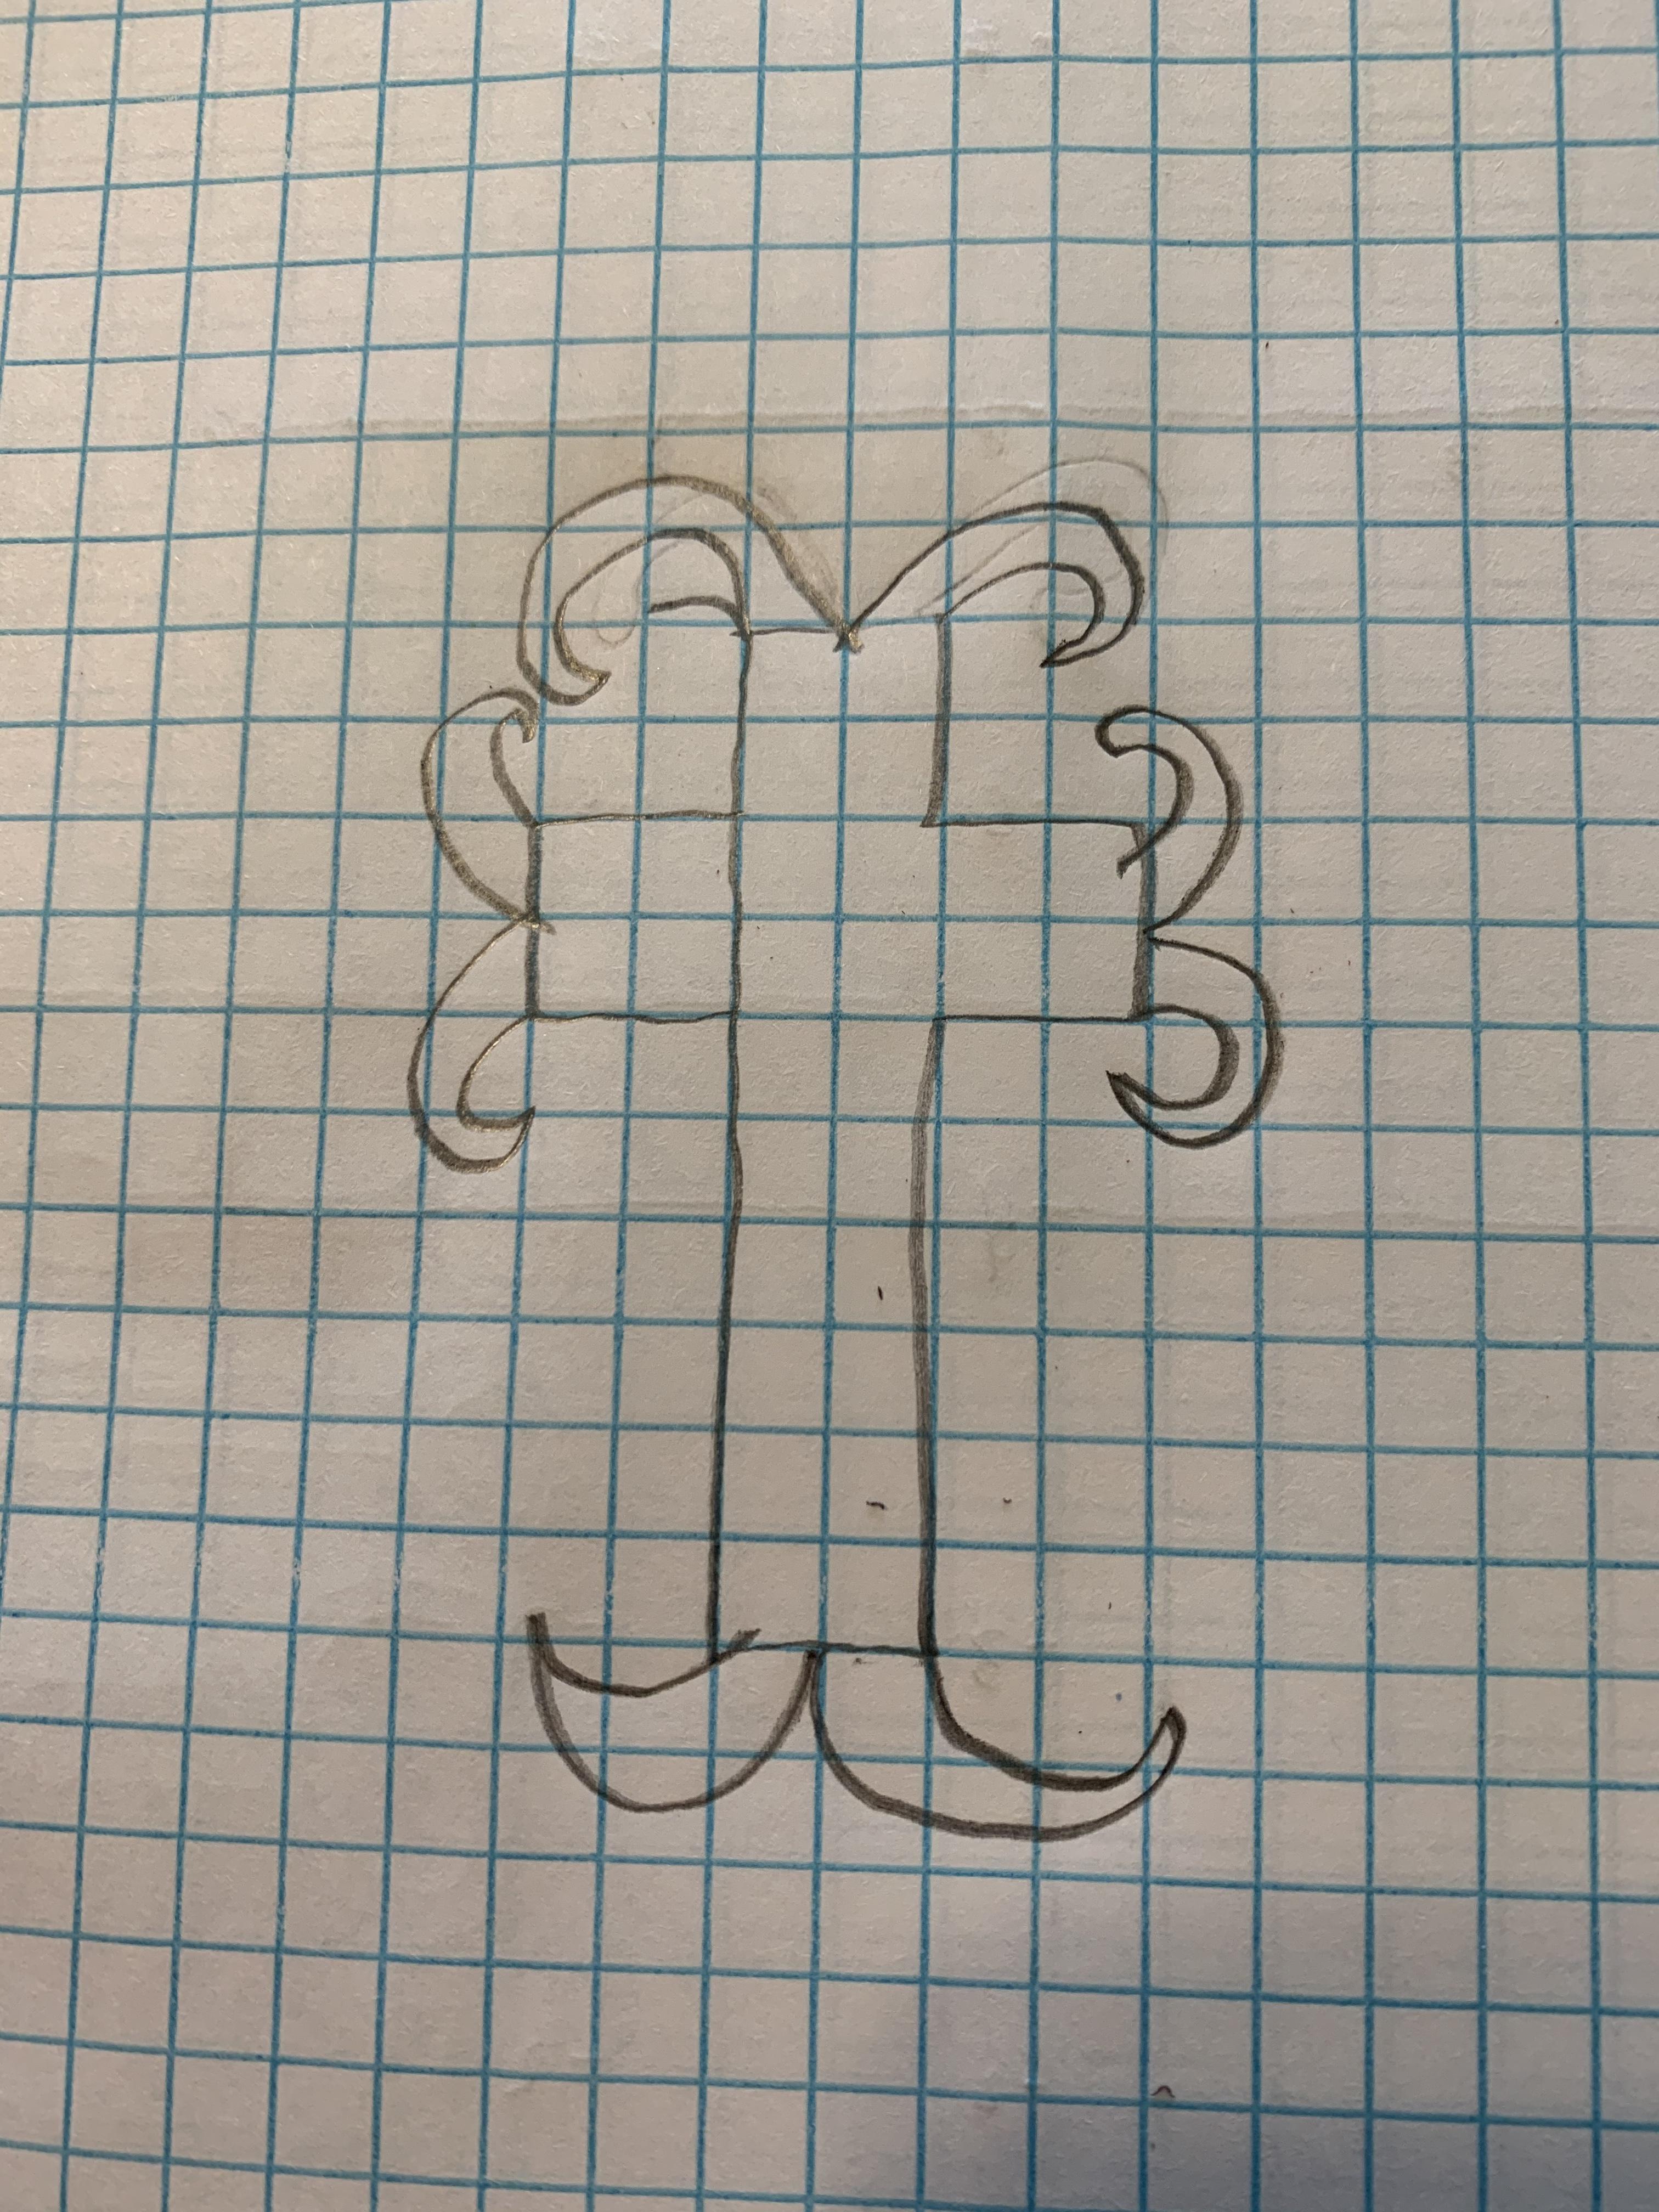
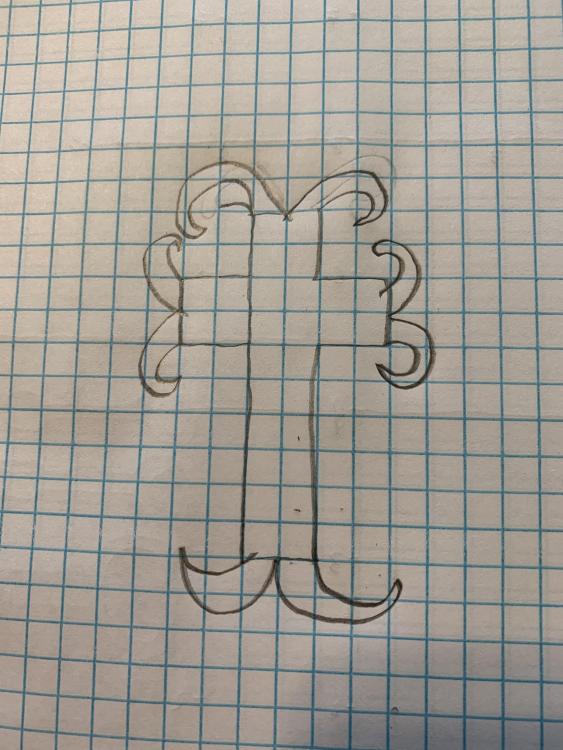
Is there a good ratio for a split curl (hopefully that’s the correct term)? I’m working on a few decorative crosses for Mother’s Day presents. The plan is to use 2x1/8” flat bar, split the ends down the middle and curl them back towards the bar. I’m having trouble figuring out how much length to add for the split though. I want the solid parts of the bars to be 24” for the vertical piece and 12” for the horizontal piece. Picture of the idea in case I’m using the wrong term. As always, you’ll have to forgive my art skills.
-
My first Hot Cut Hardy tool
Bantou replied to Bantou's topic in Hot Cuts, Anvil devils, metal cutting on the anvil.
The only tool rental place less than an hour away (yay for rural Texas) didn’t have any. There is a concrete construction company I’m planning on trying if I can ever make it by when they are open. I was planning on normalizing it because I water quenched the end several times during the upset to control where the metal went. Do you think it will be ok as is? It got reheated several times while forging the working end. I put it back in the water at a black heat after forging so that I could file the edge. -
My first Hot Cut Hardy tool
Bantou replied to Bantou's topic in Hot Cuts, Anvil devils, metal cutting on the anvil.
I’m planning on just normalizing the hot cut and leaving it soft for now. My hammer technique and accuracy need improvement before I feel comfortable swinging a heavy piece of hardened steel at a sharp piece of hardened steel. I can always touch up the Hardy with a file or bench grinder as needed. That or jackhammer bits were the original plan but I was having a hard time finding either one locally. I’m pretty sure I know where to get some sucker rod but it’s a three hour drive one way. My family owns some property in the middle of what used to be oil country. The last well was capped several years ago but I bet I can find some rods laying around if I look hard enough. -
My first Hot Cut Hardy tool
Bantou replied to Bantou's topic in Hot Cuts, Anvil devils, metal cutting on the anvil.
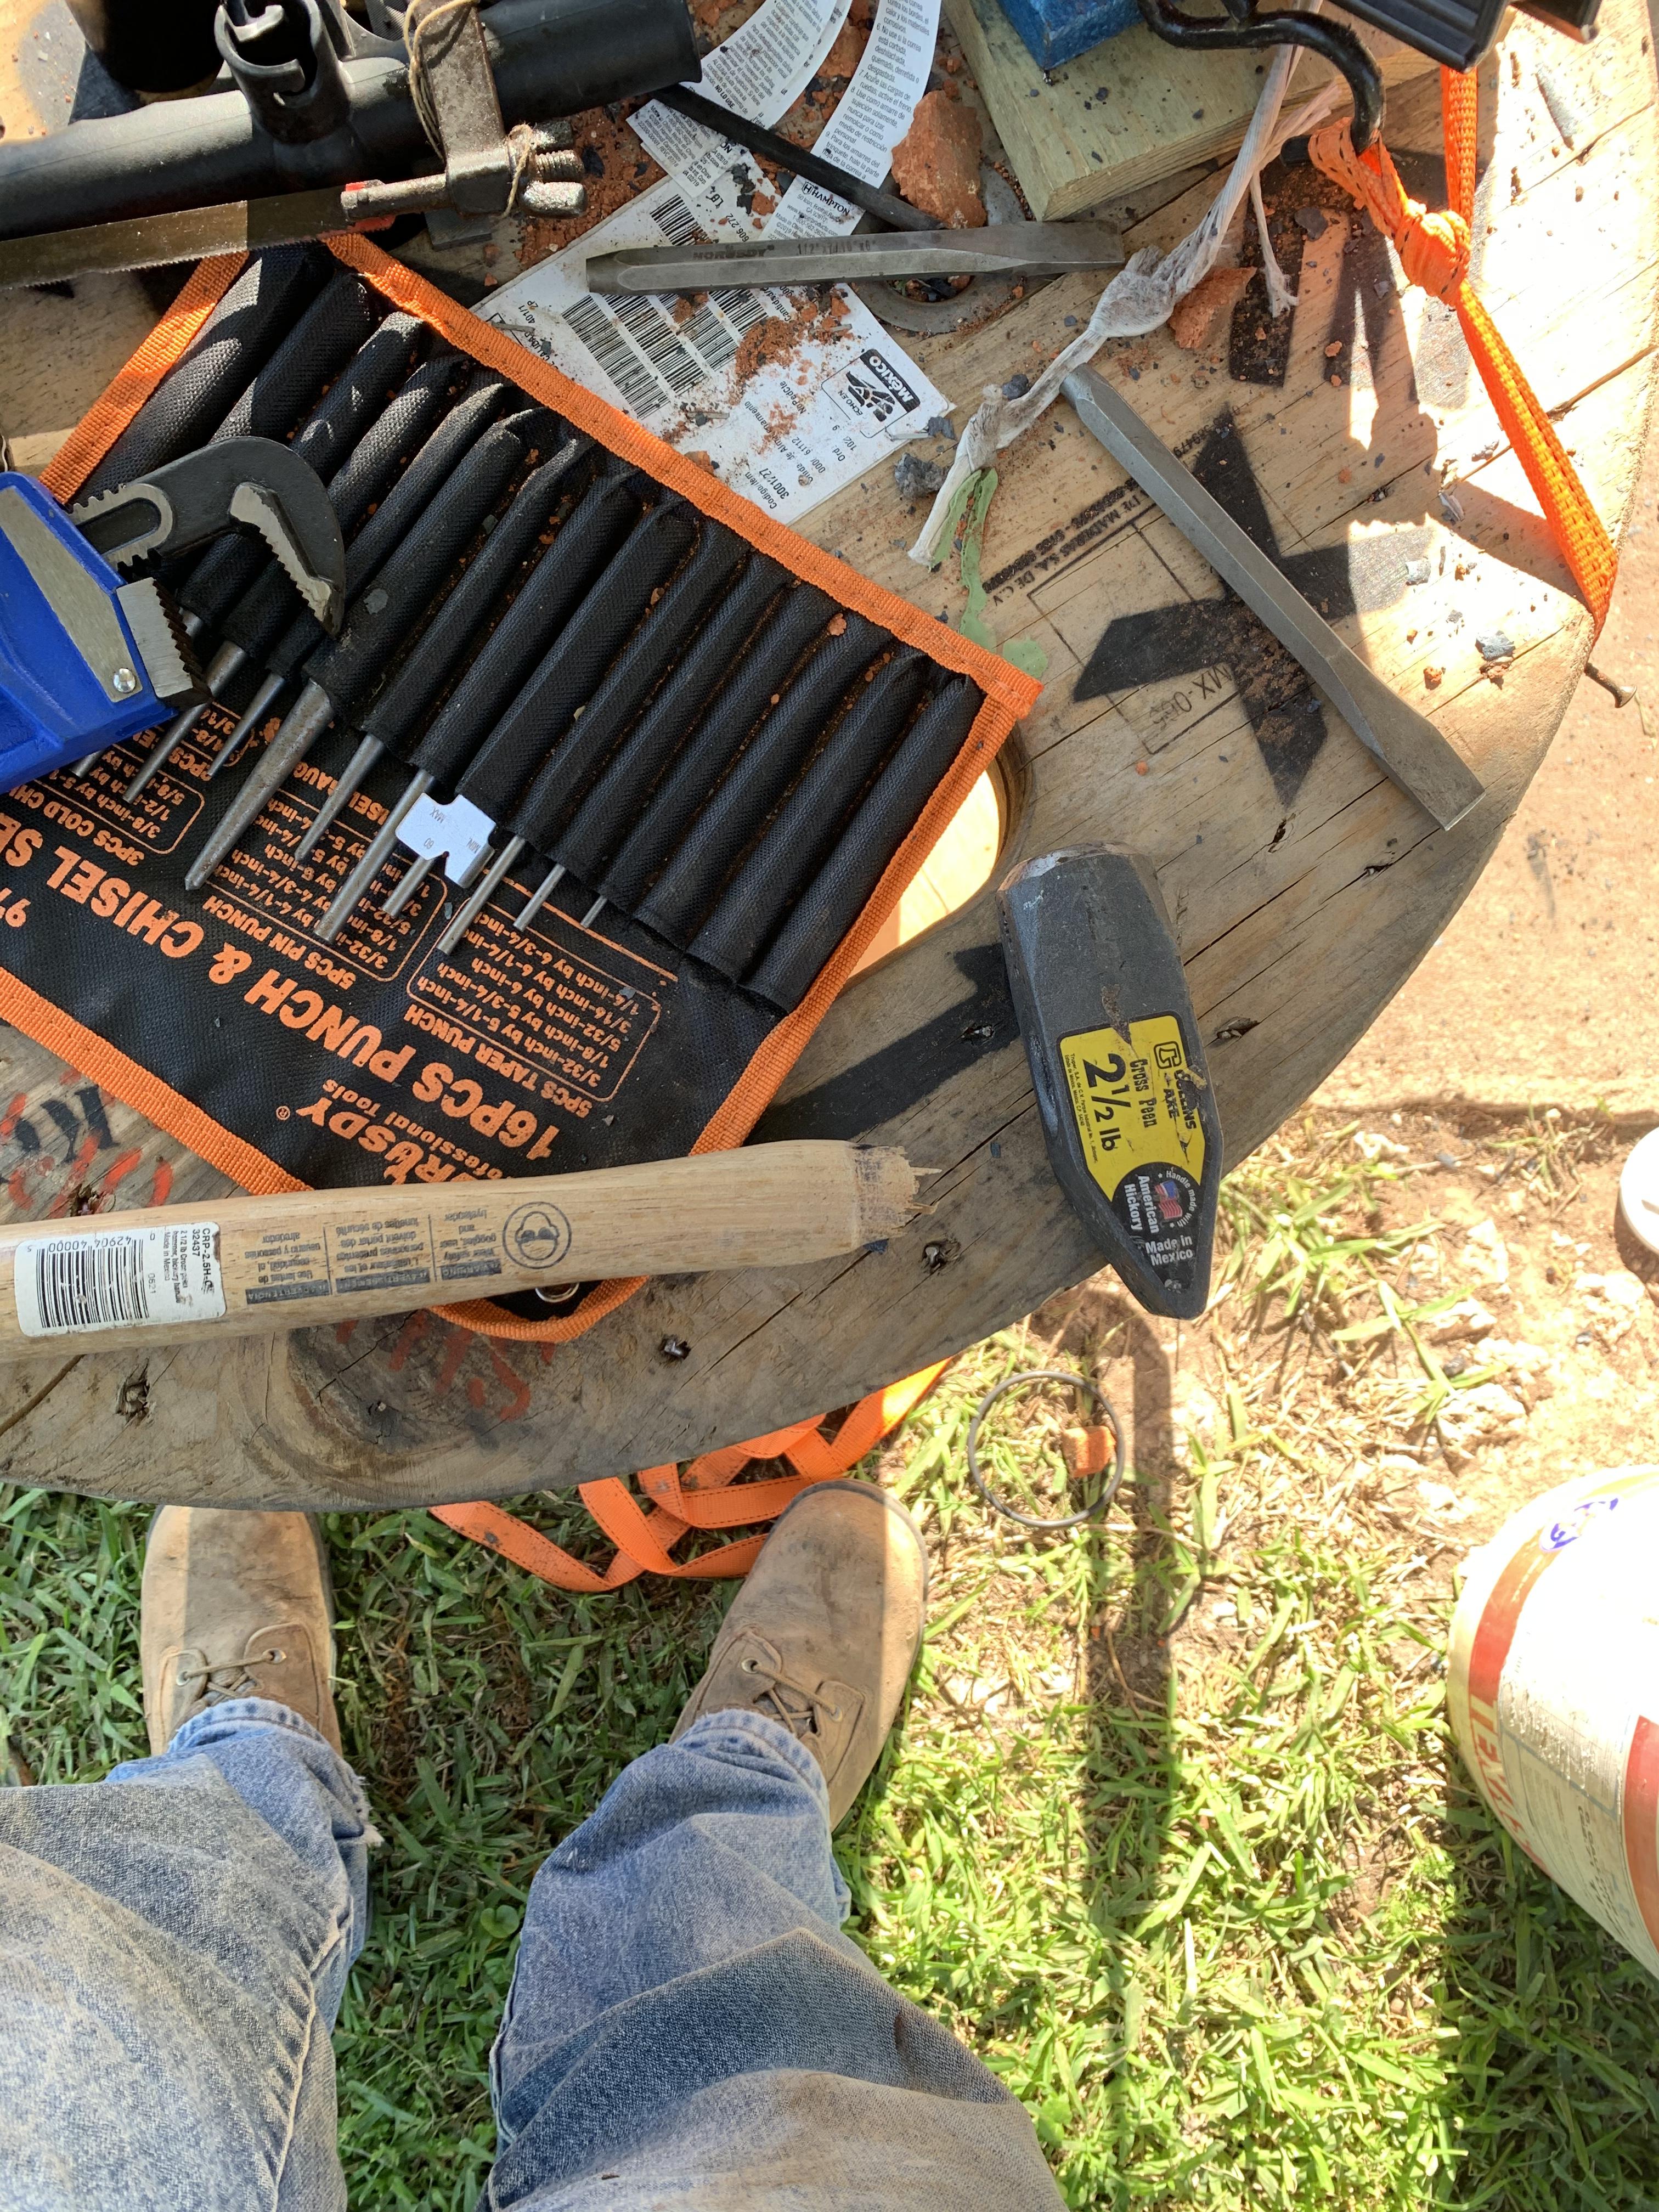
I’m not sure what steel mine is. It’s made from a piece of 3/4” sway bar off a truck. Im guessing it’s some form of medium carbon steel but I don’t know for sure. I’m planning on leaving it soft and just touching up with a file or grinder when needed. The next one I make will probably get hardened. I’m not planning on cutting anything big with it and my hammer control is so-so right now. I didn’t make the hammer. It’s a 2 1/2 pound cross peen from ACE. It just hasn’t been dressed yet because I didn’t have an angle grinder. I picked up a grinder and flap disk today though so it will be dressed soon. -
That may be a good thing Frosty. If my shop constantly smelled like donuts, I’d have to buy a donut shop just to feed the cravings.
-
It’s a temporary set up. So far I haven’t had an issue. The plan is to set it in sand or on a stump once I’m sure I like the height it is at. Once I have it on its permanent stand, I’ll chain or bolt it down.
-
My first Hot Cut Hardy tool
Bantou replied to Bantou's topic in Hot Cuts, Anvil devils, metal cutting on the anvil.
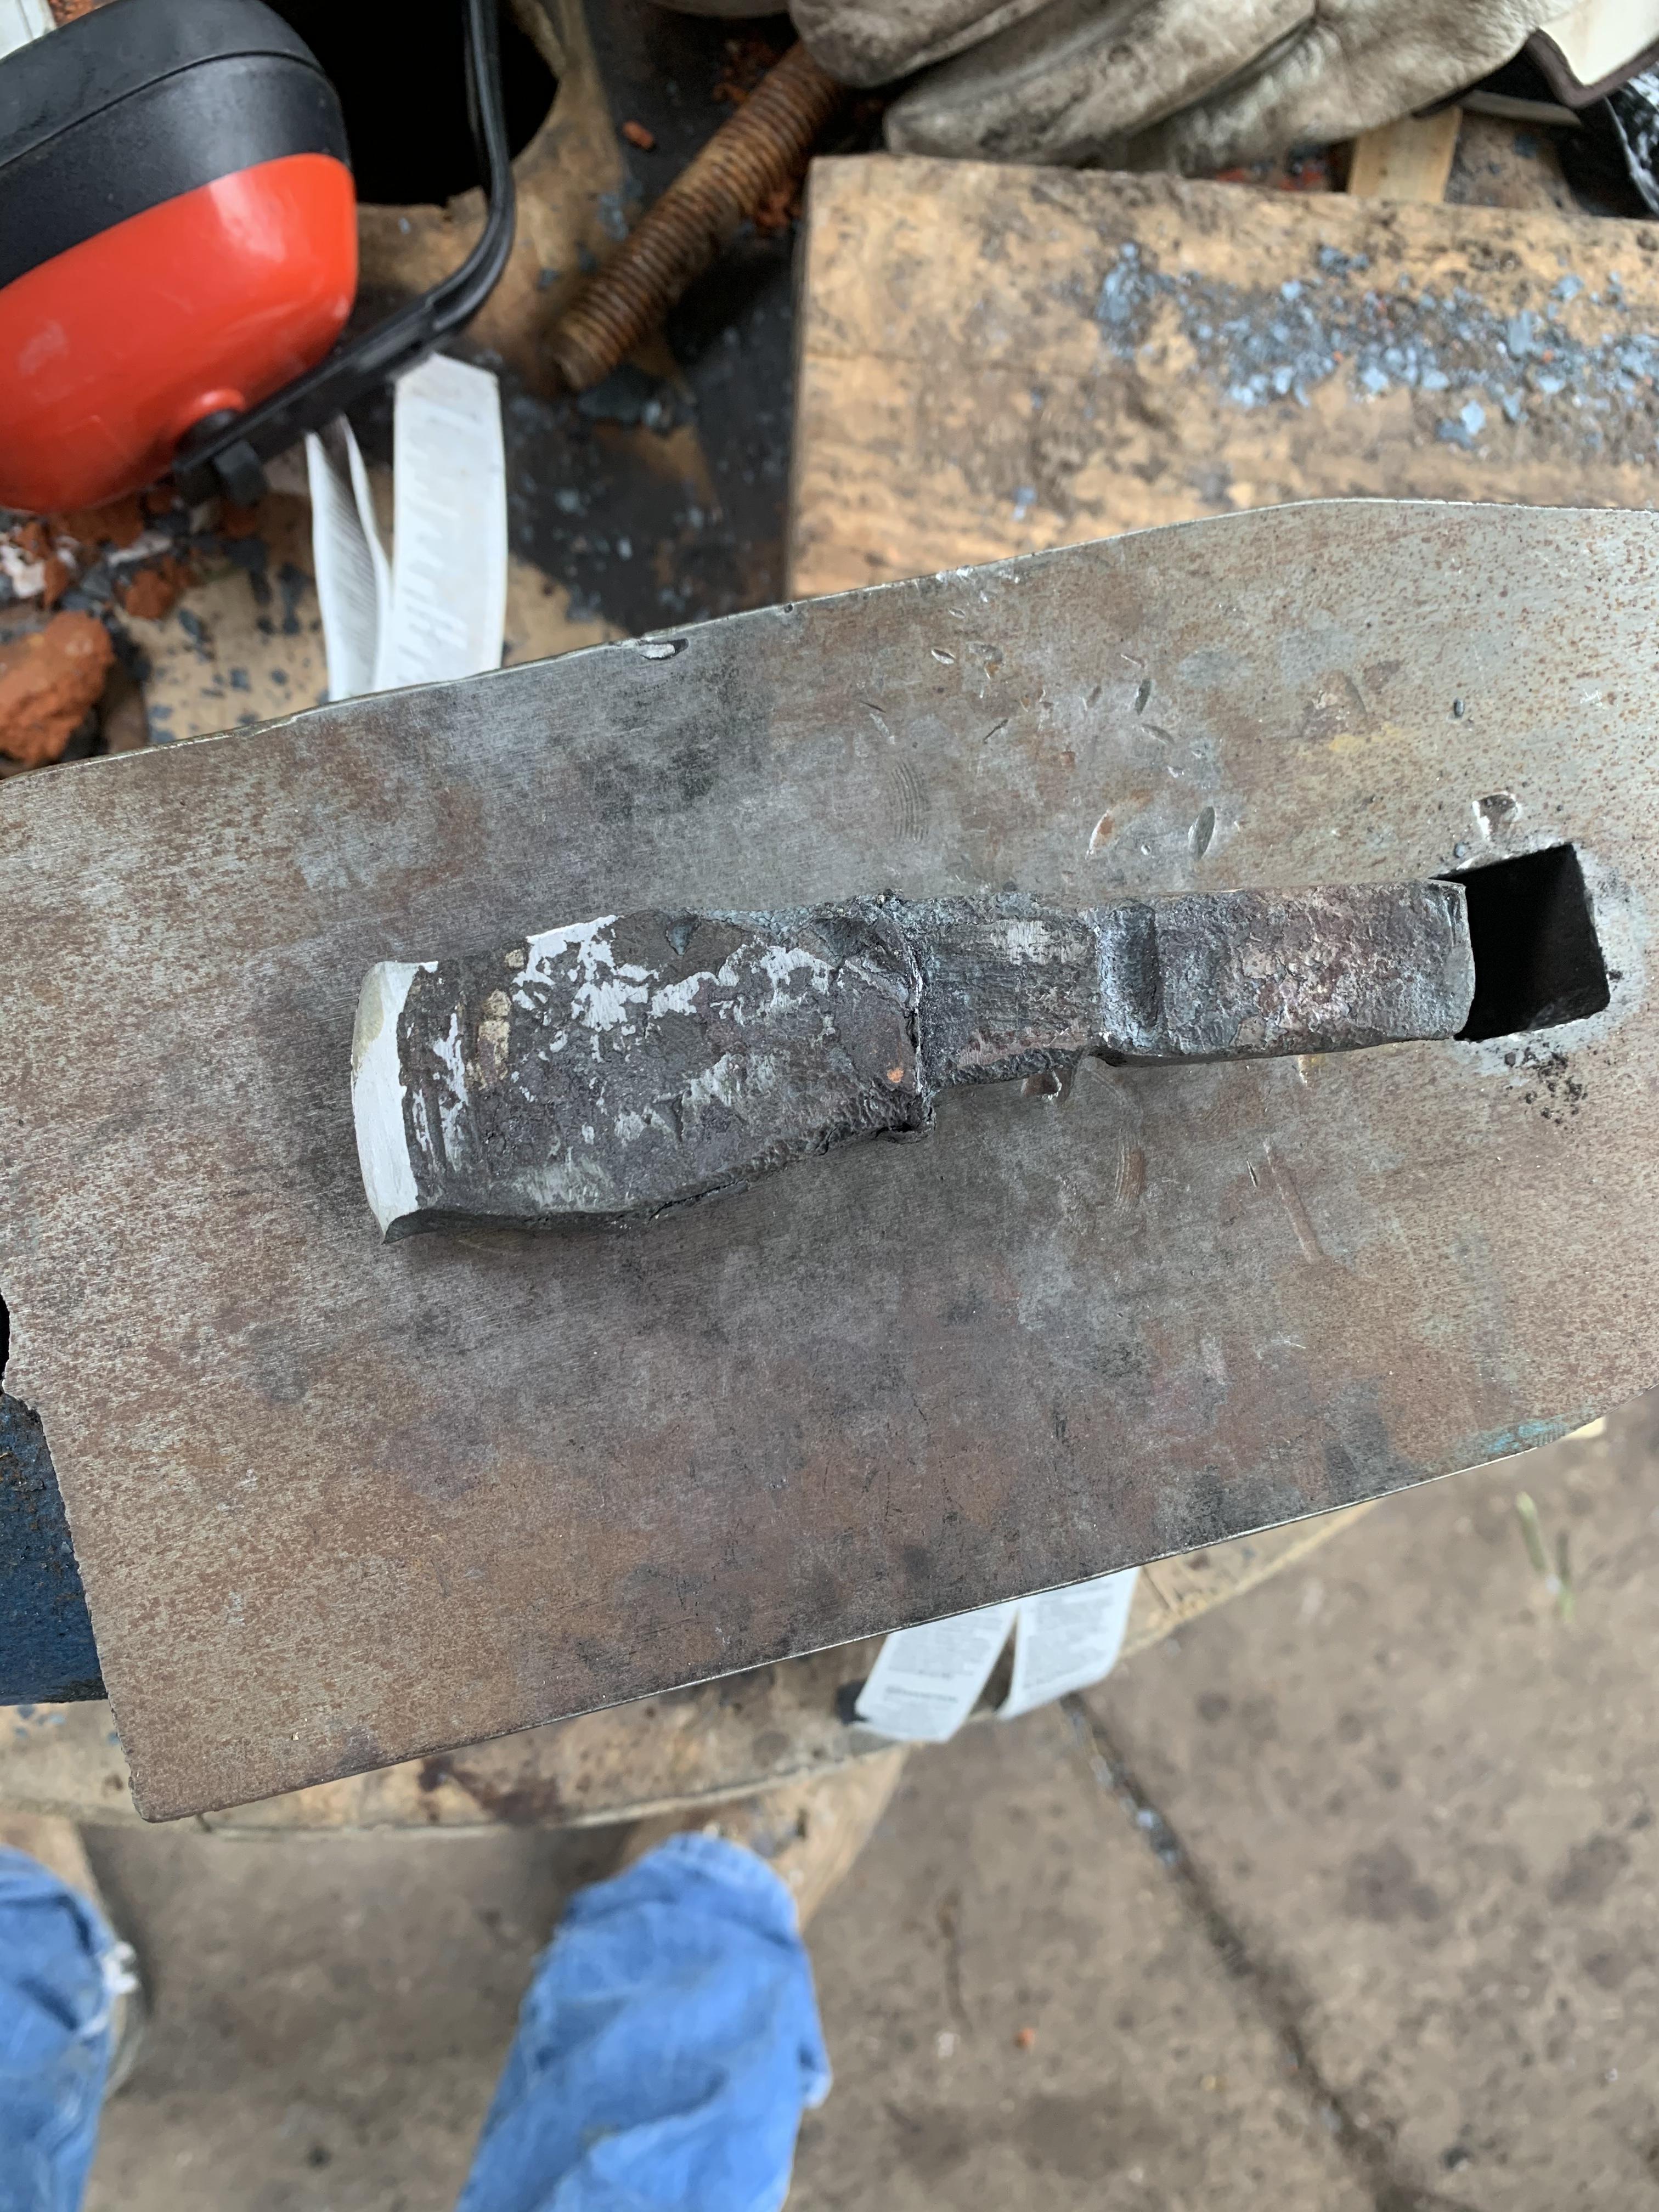
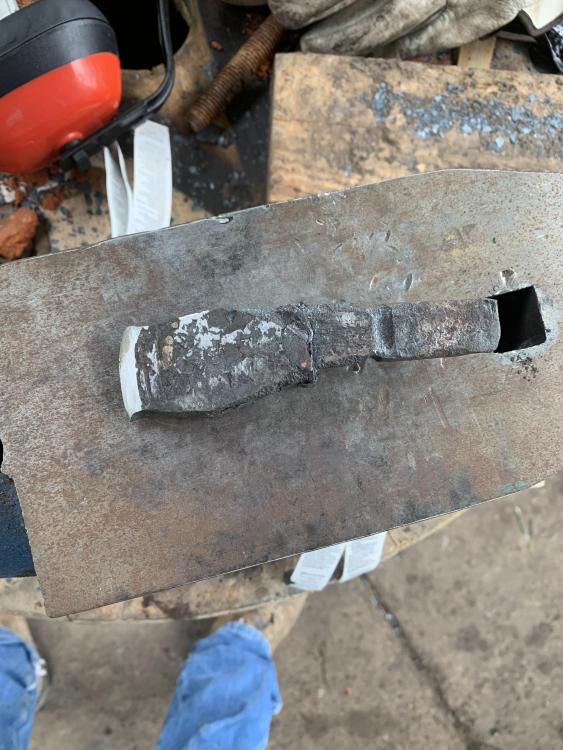
I’ll definitely try the horn on the next one. The marks in the shank came from an attempt to use a piece of 1/4” round as a bottom fuller to start the shoulder. I’m not planning on cutting anything larger than 1/2-5/8” on it. Anything bigger will get cut with the angle grinder for now. Once I get a little more experience under my belt, I’ll try to make a better on. My next several projects are going to be made out of 3/8” round. I’m making some decorative stuff for Mother’s Day. -
My first Hot Cut Hardy tool
Bantou replied to Bantou's topic in Hot Cuts, Anvil devils, metal cutting on the anvil.
It’s in the plan. I don’t have an angle grinder yet. I tried with a file and finally gave up. It was working but I would have been at it for hours. I’ll pick one up tomorrow when I get the bench grinder. I know HF doesn’t make the best quality tools but they will work for the time being. -
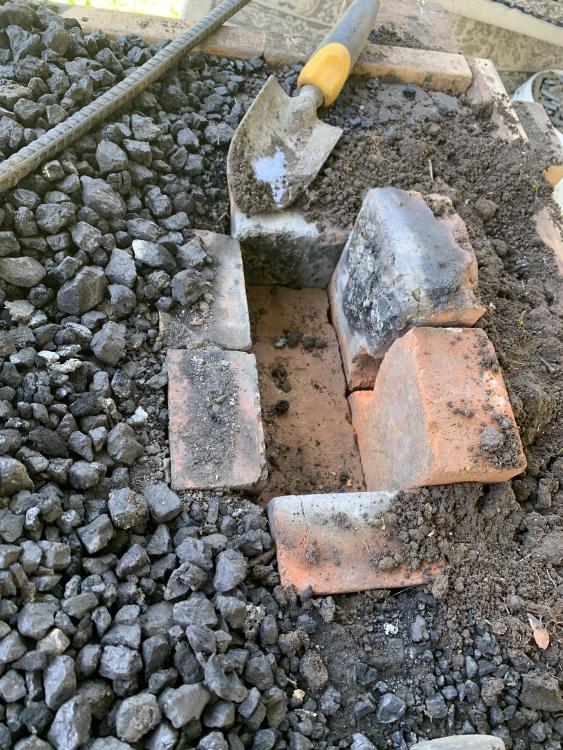
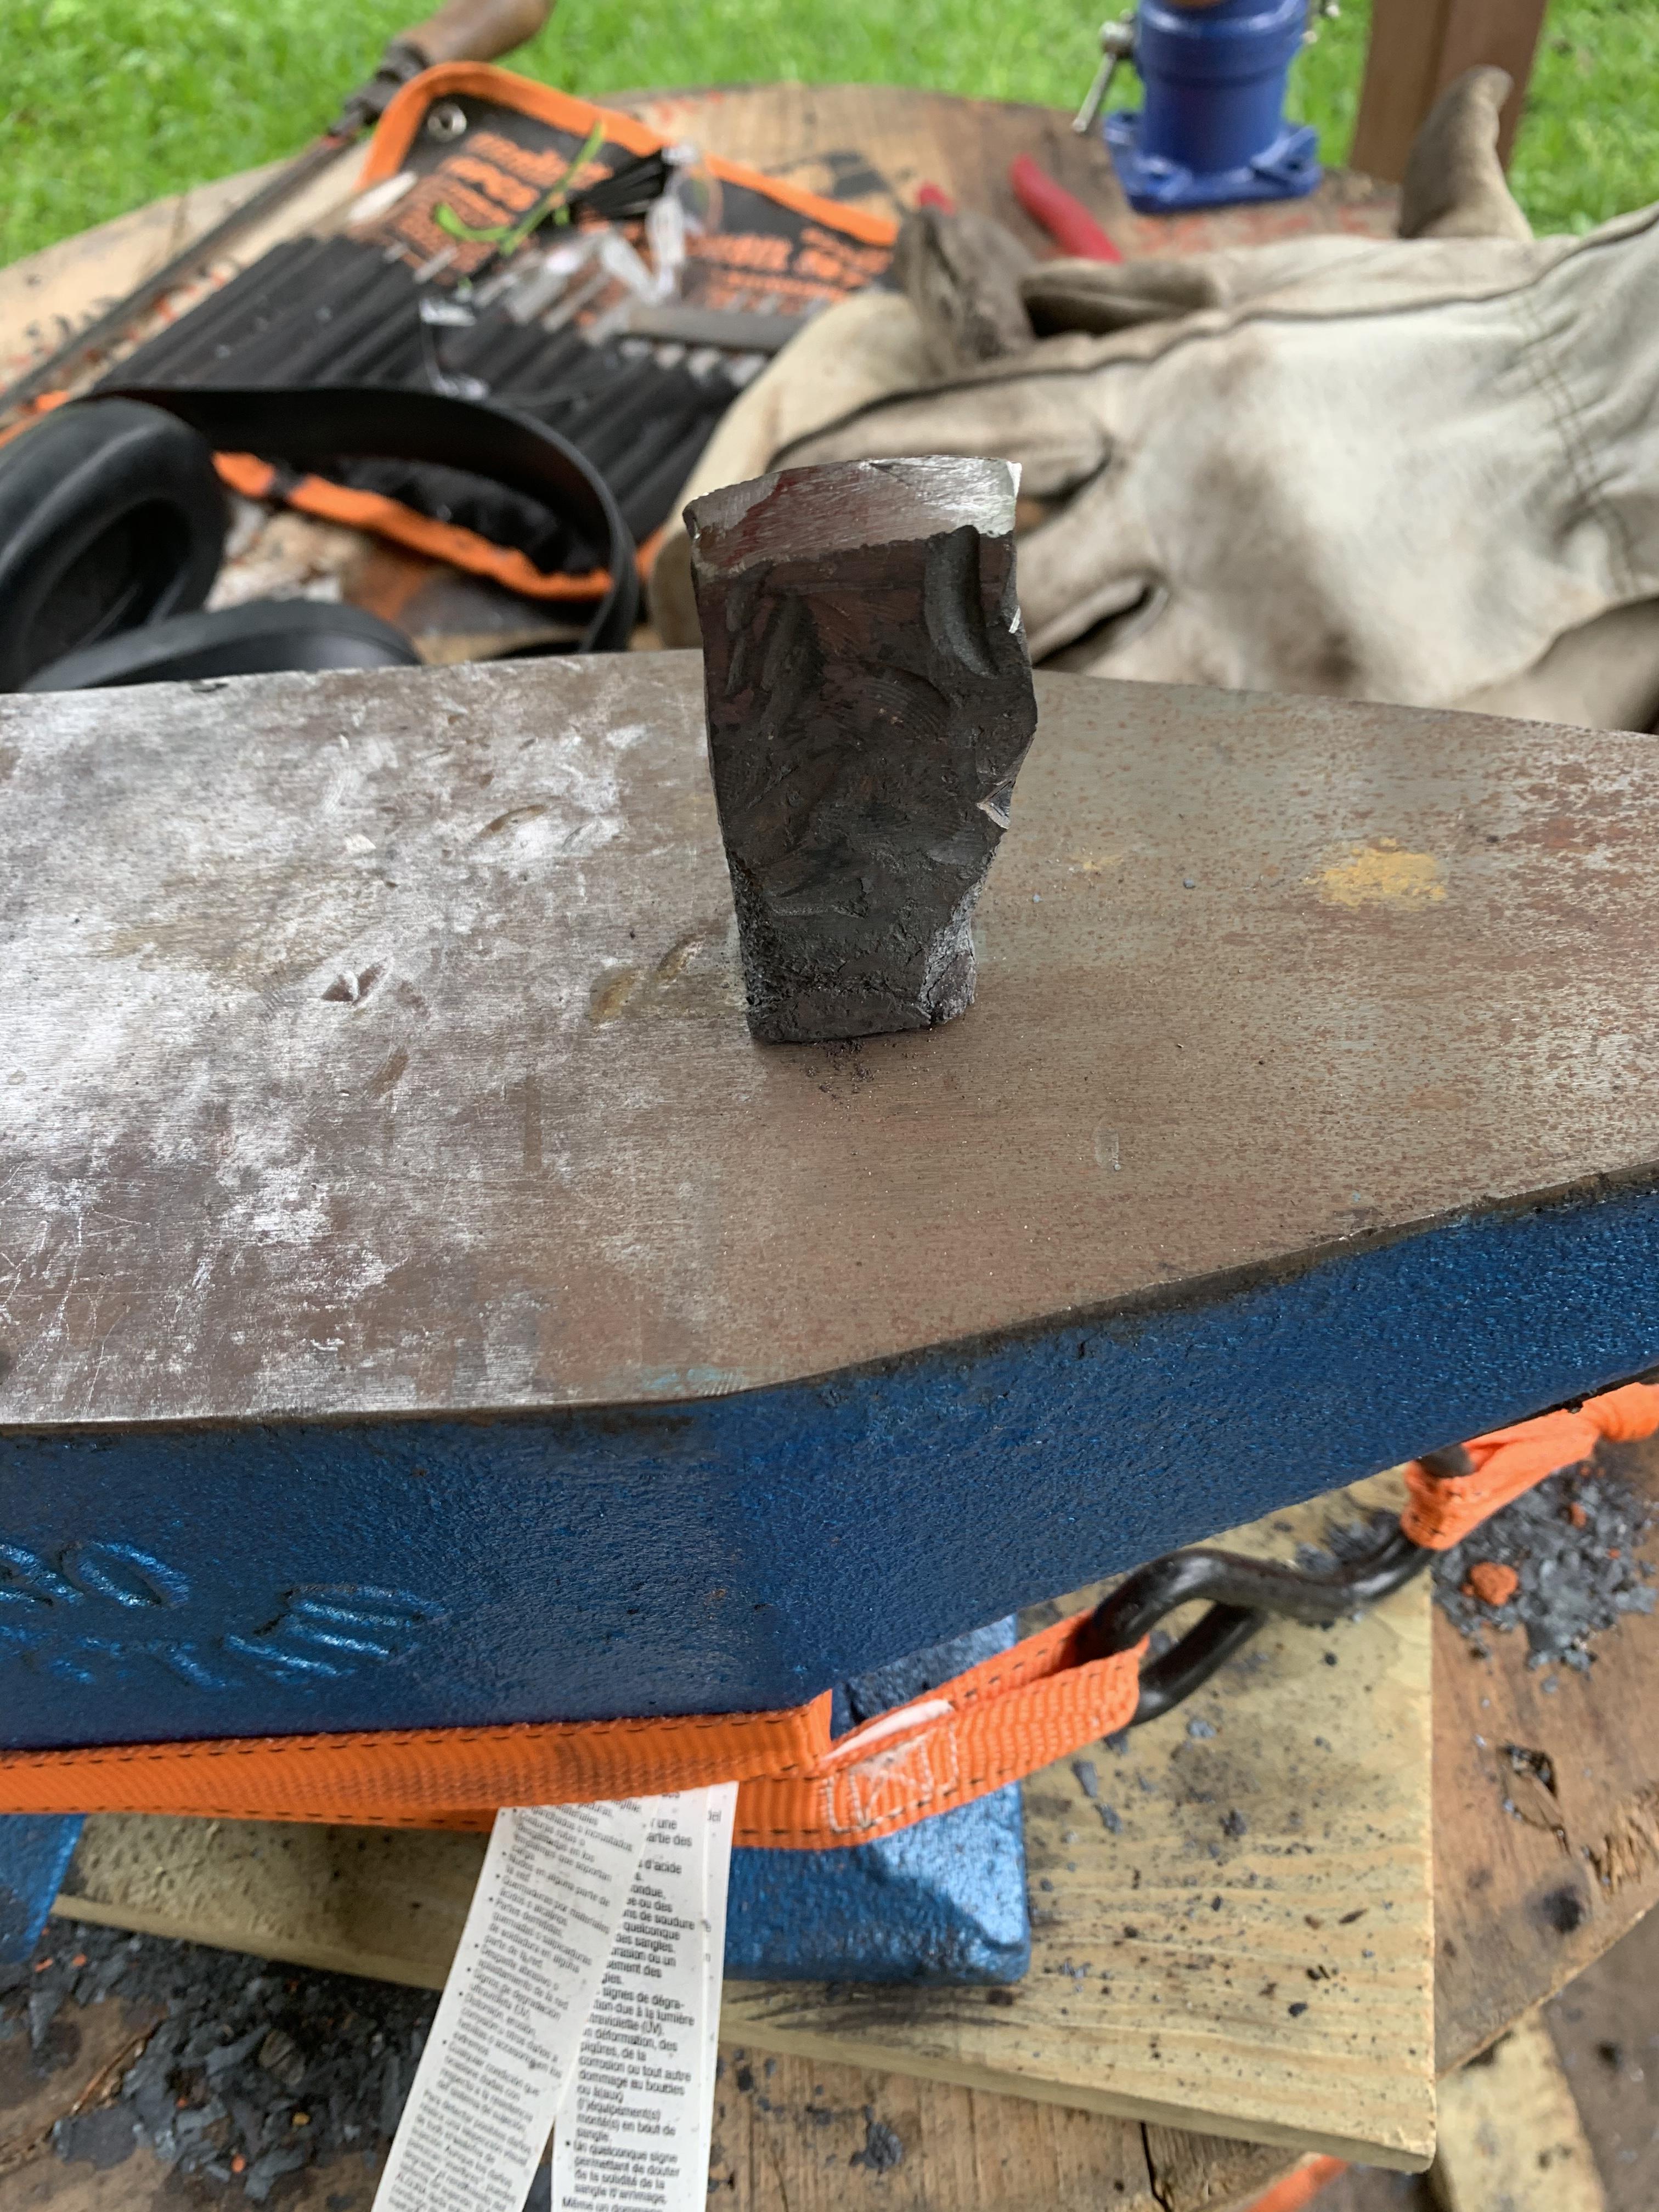
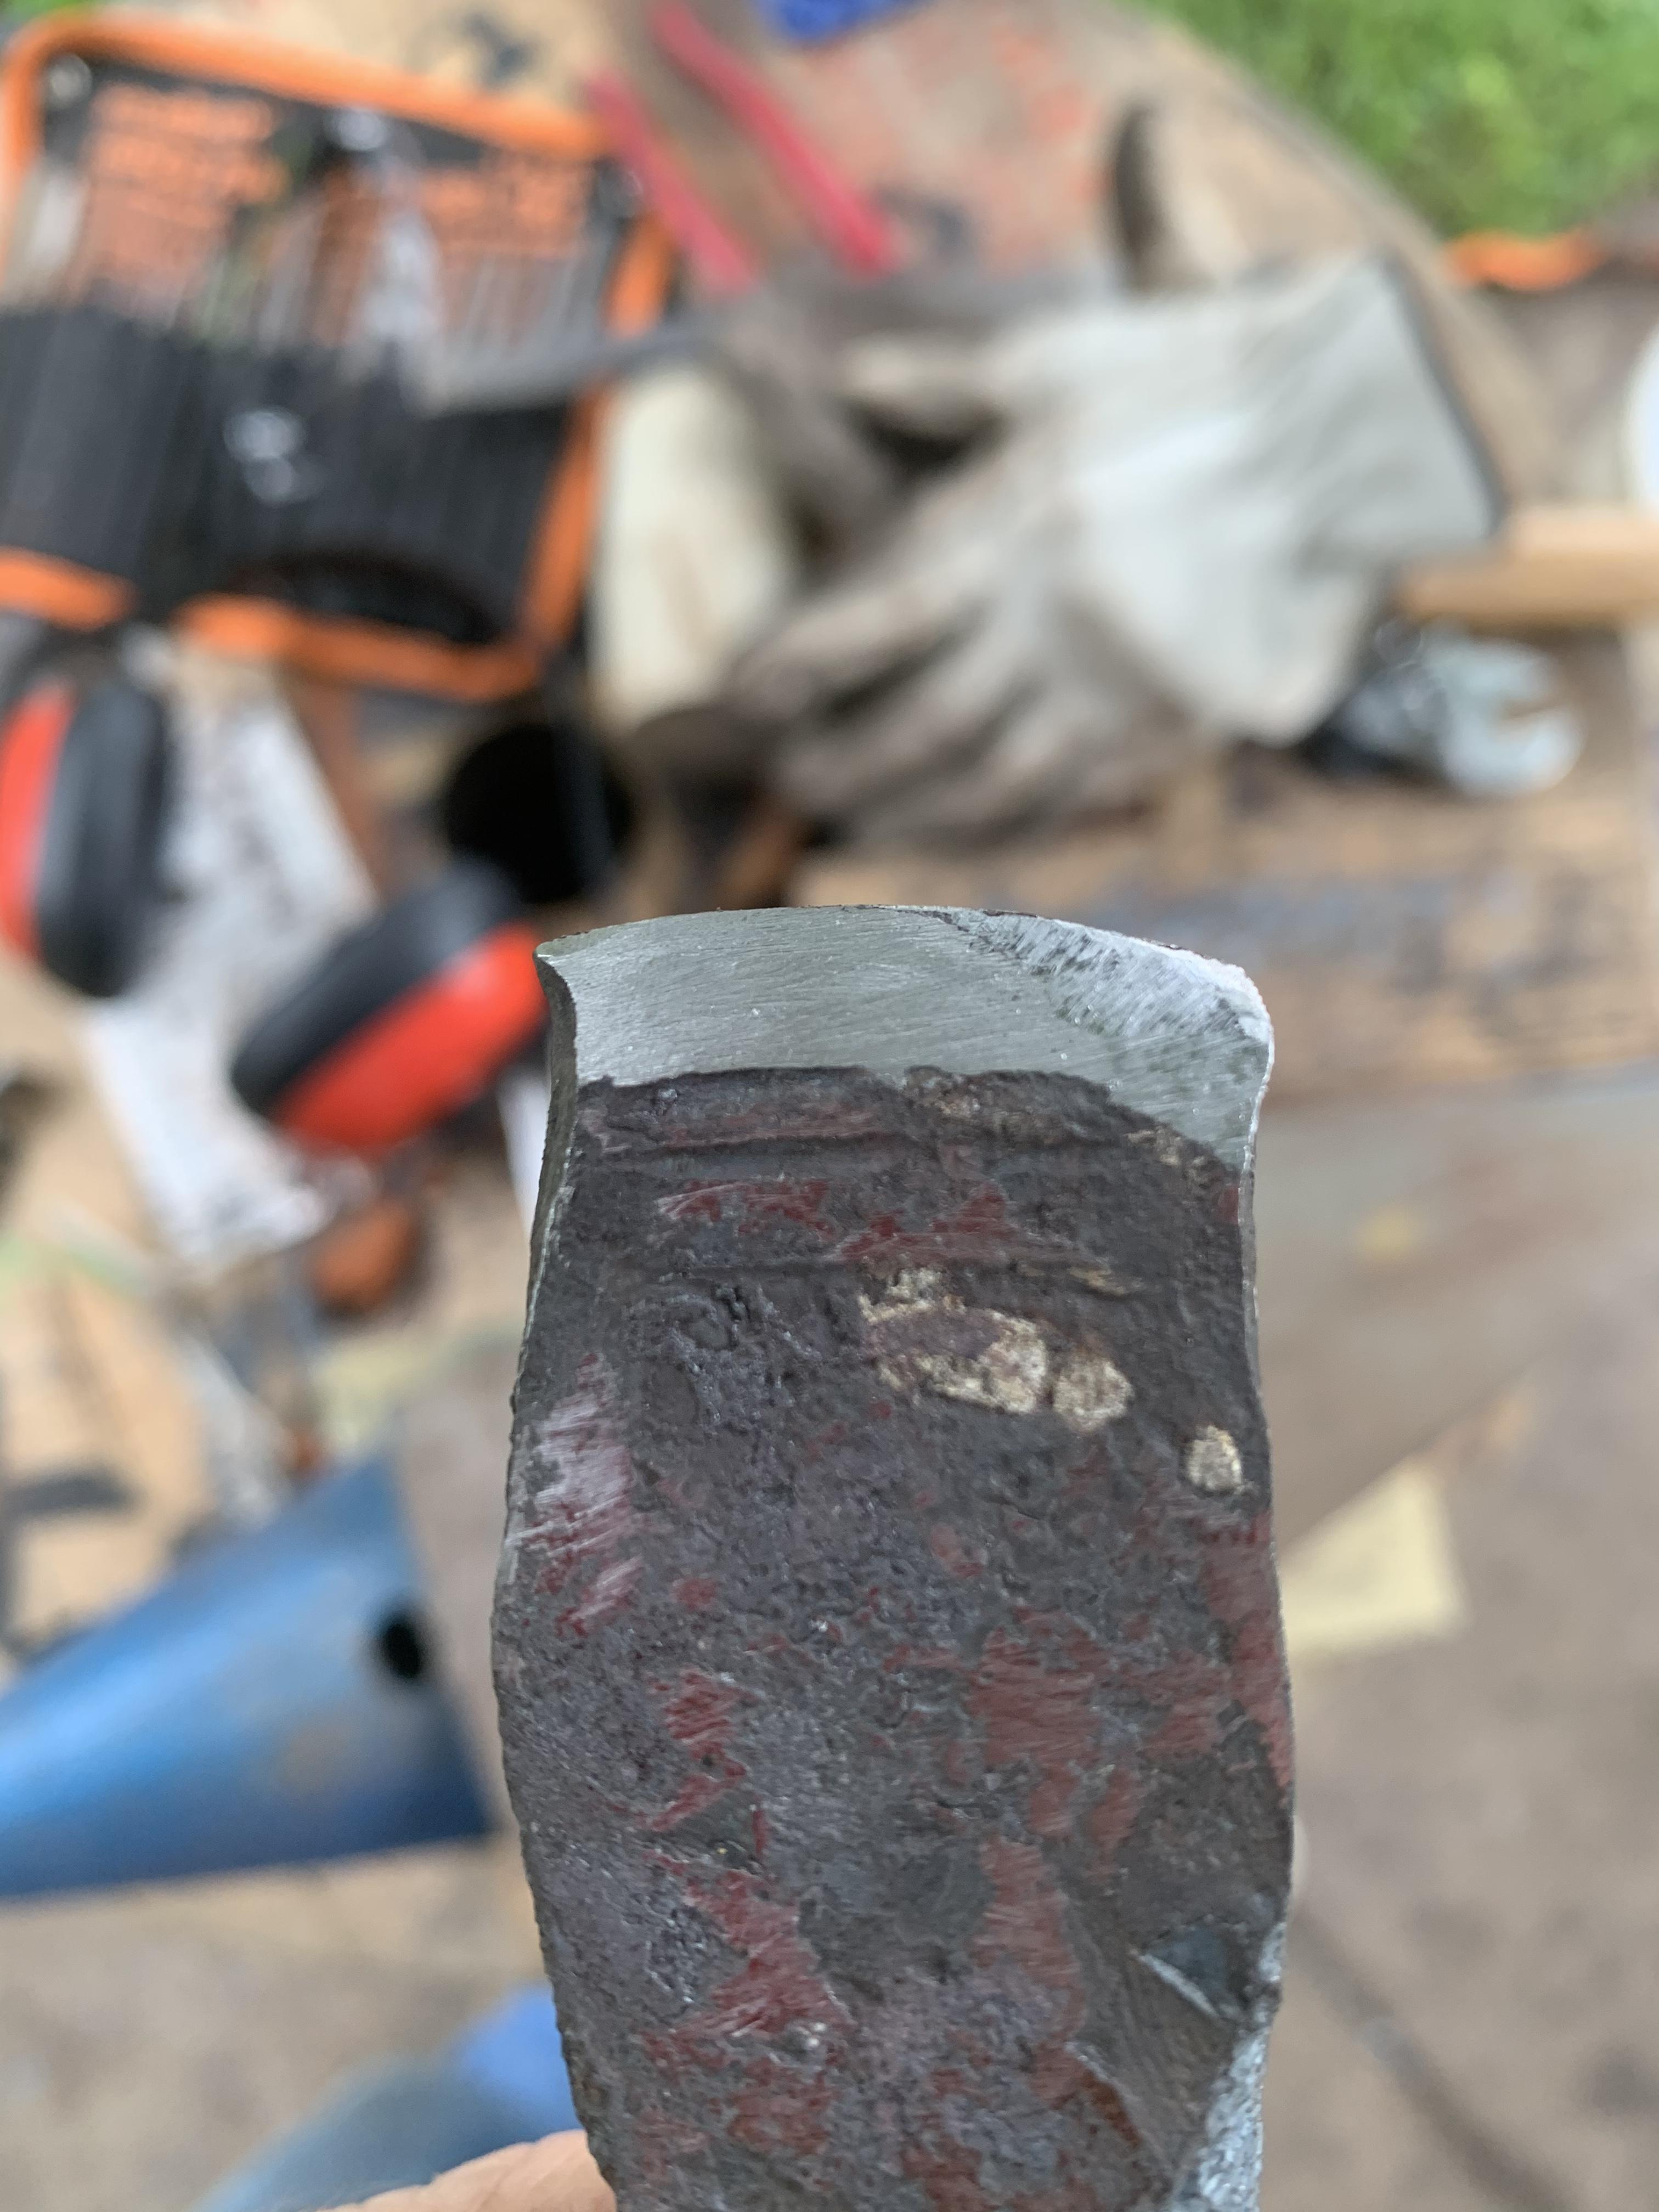
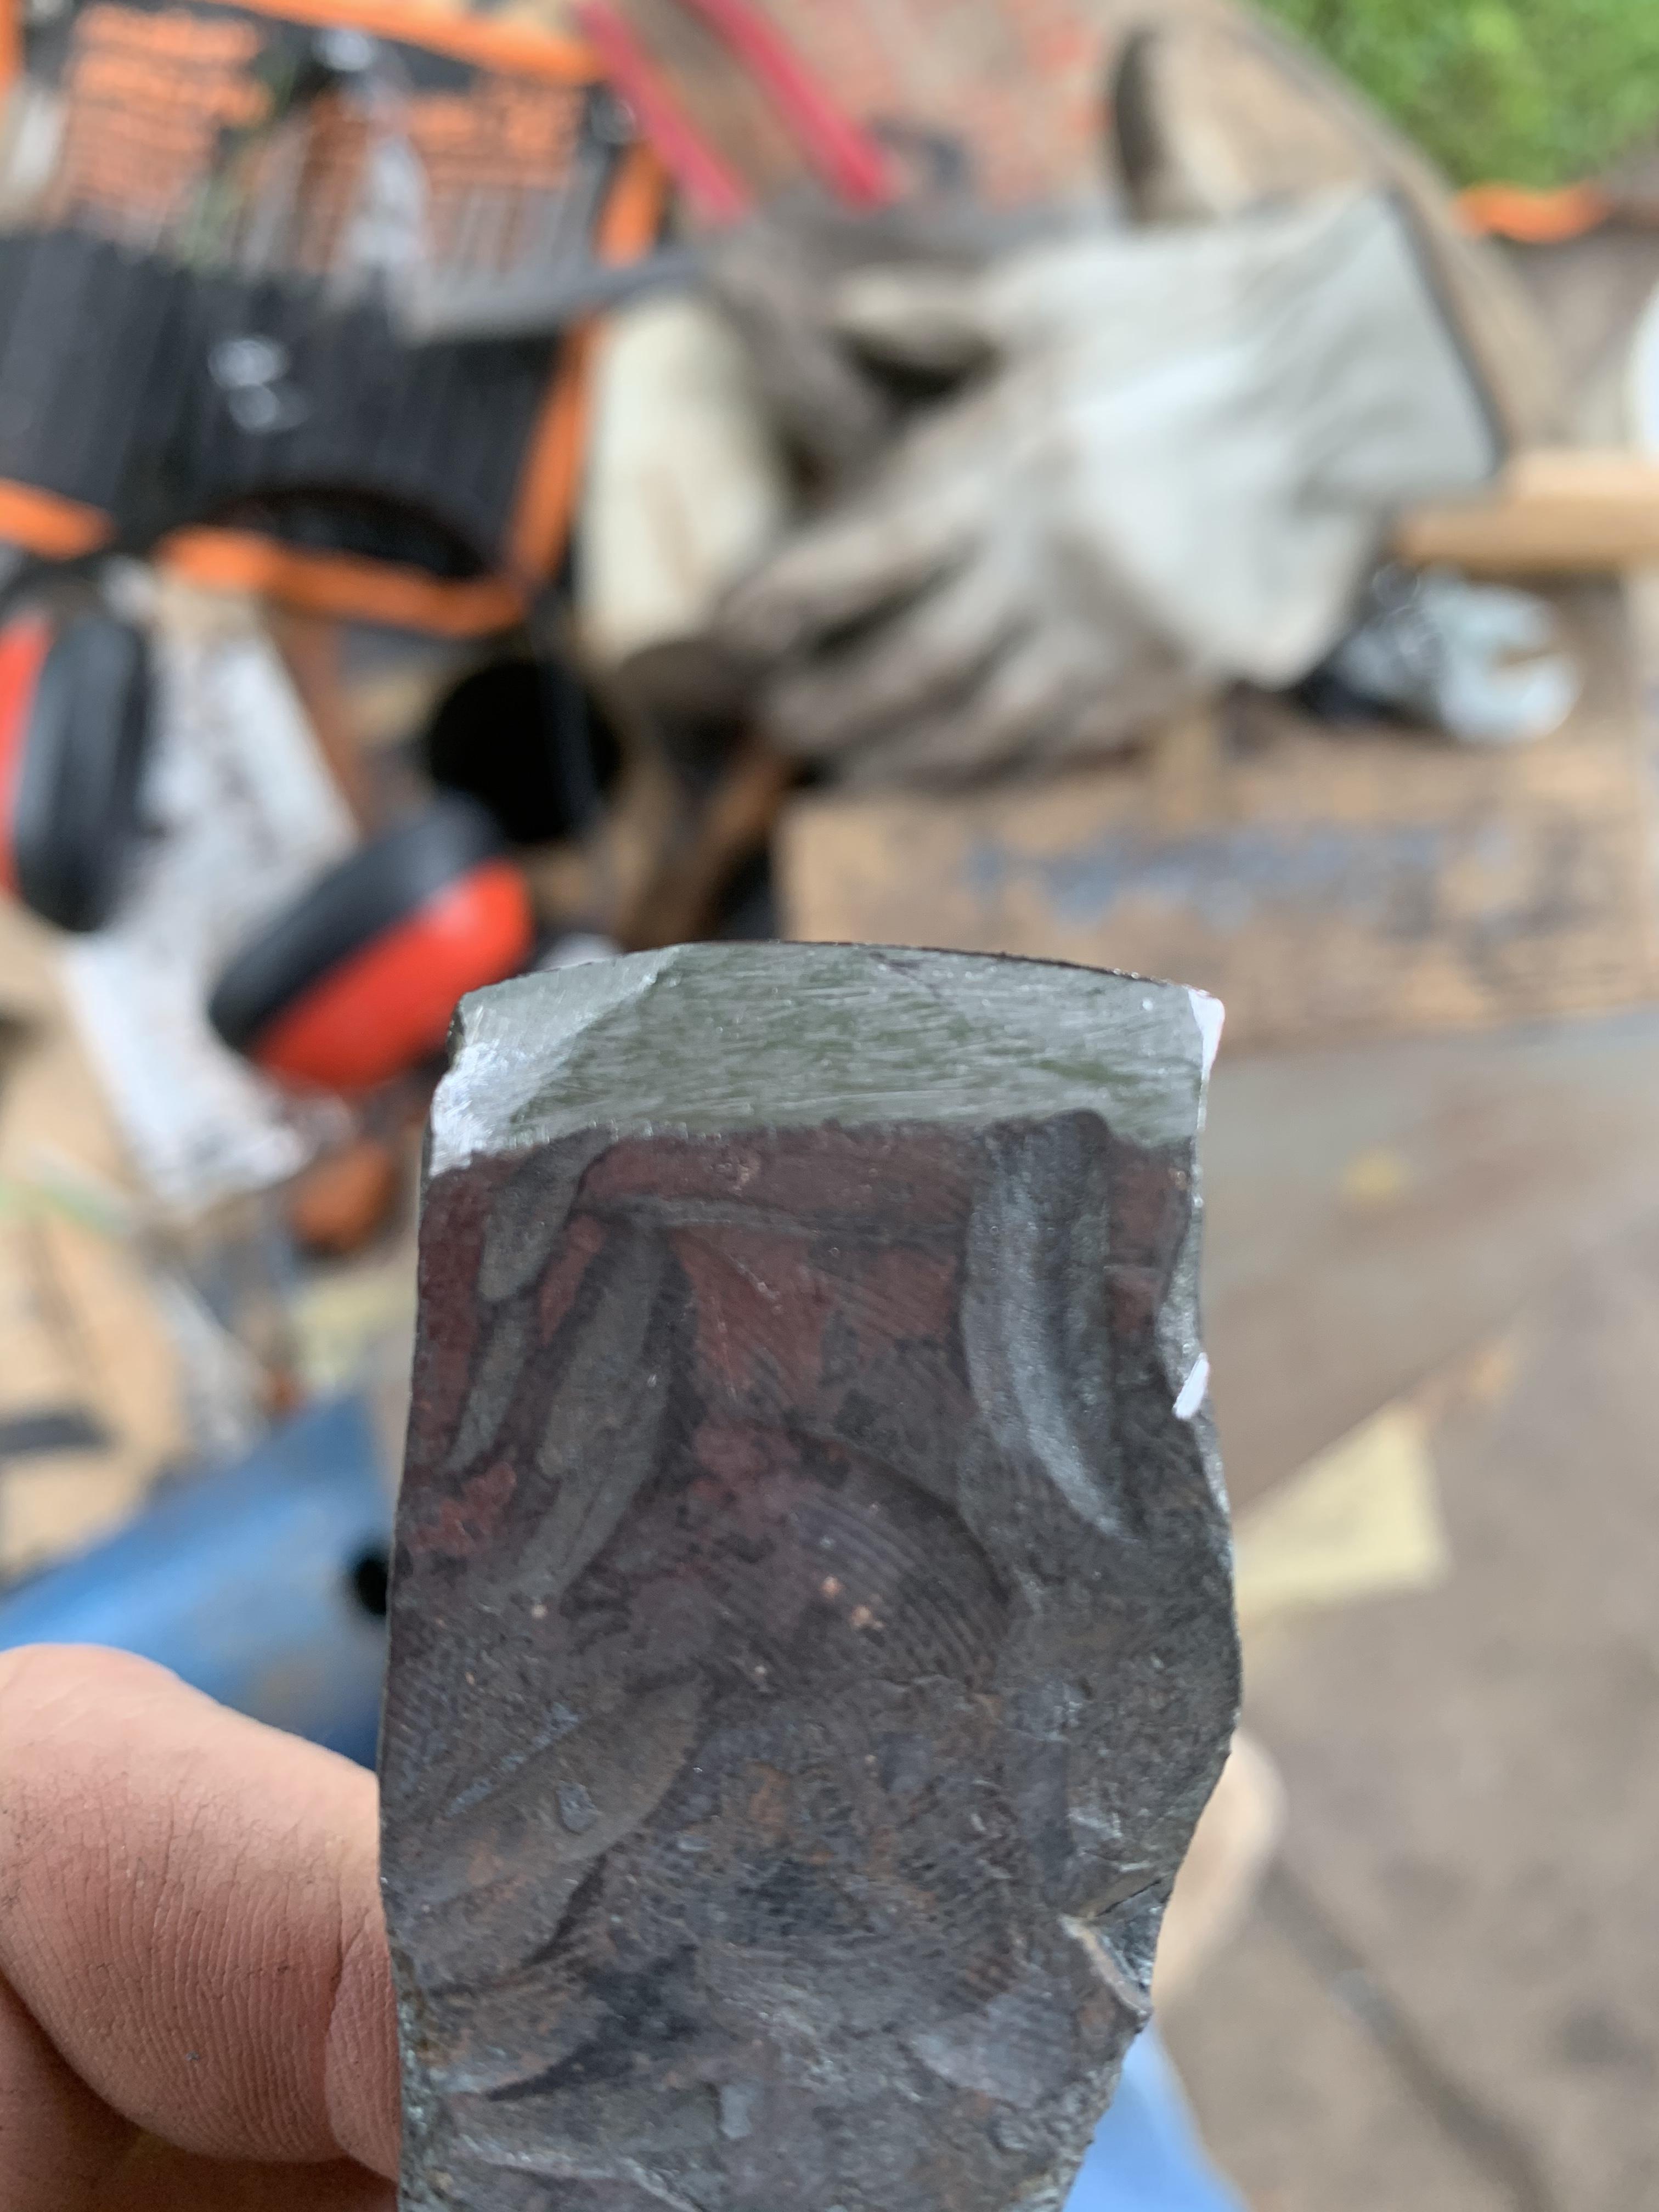
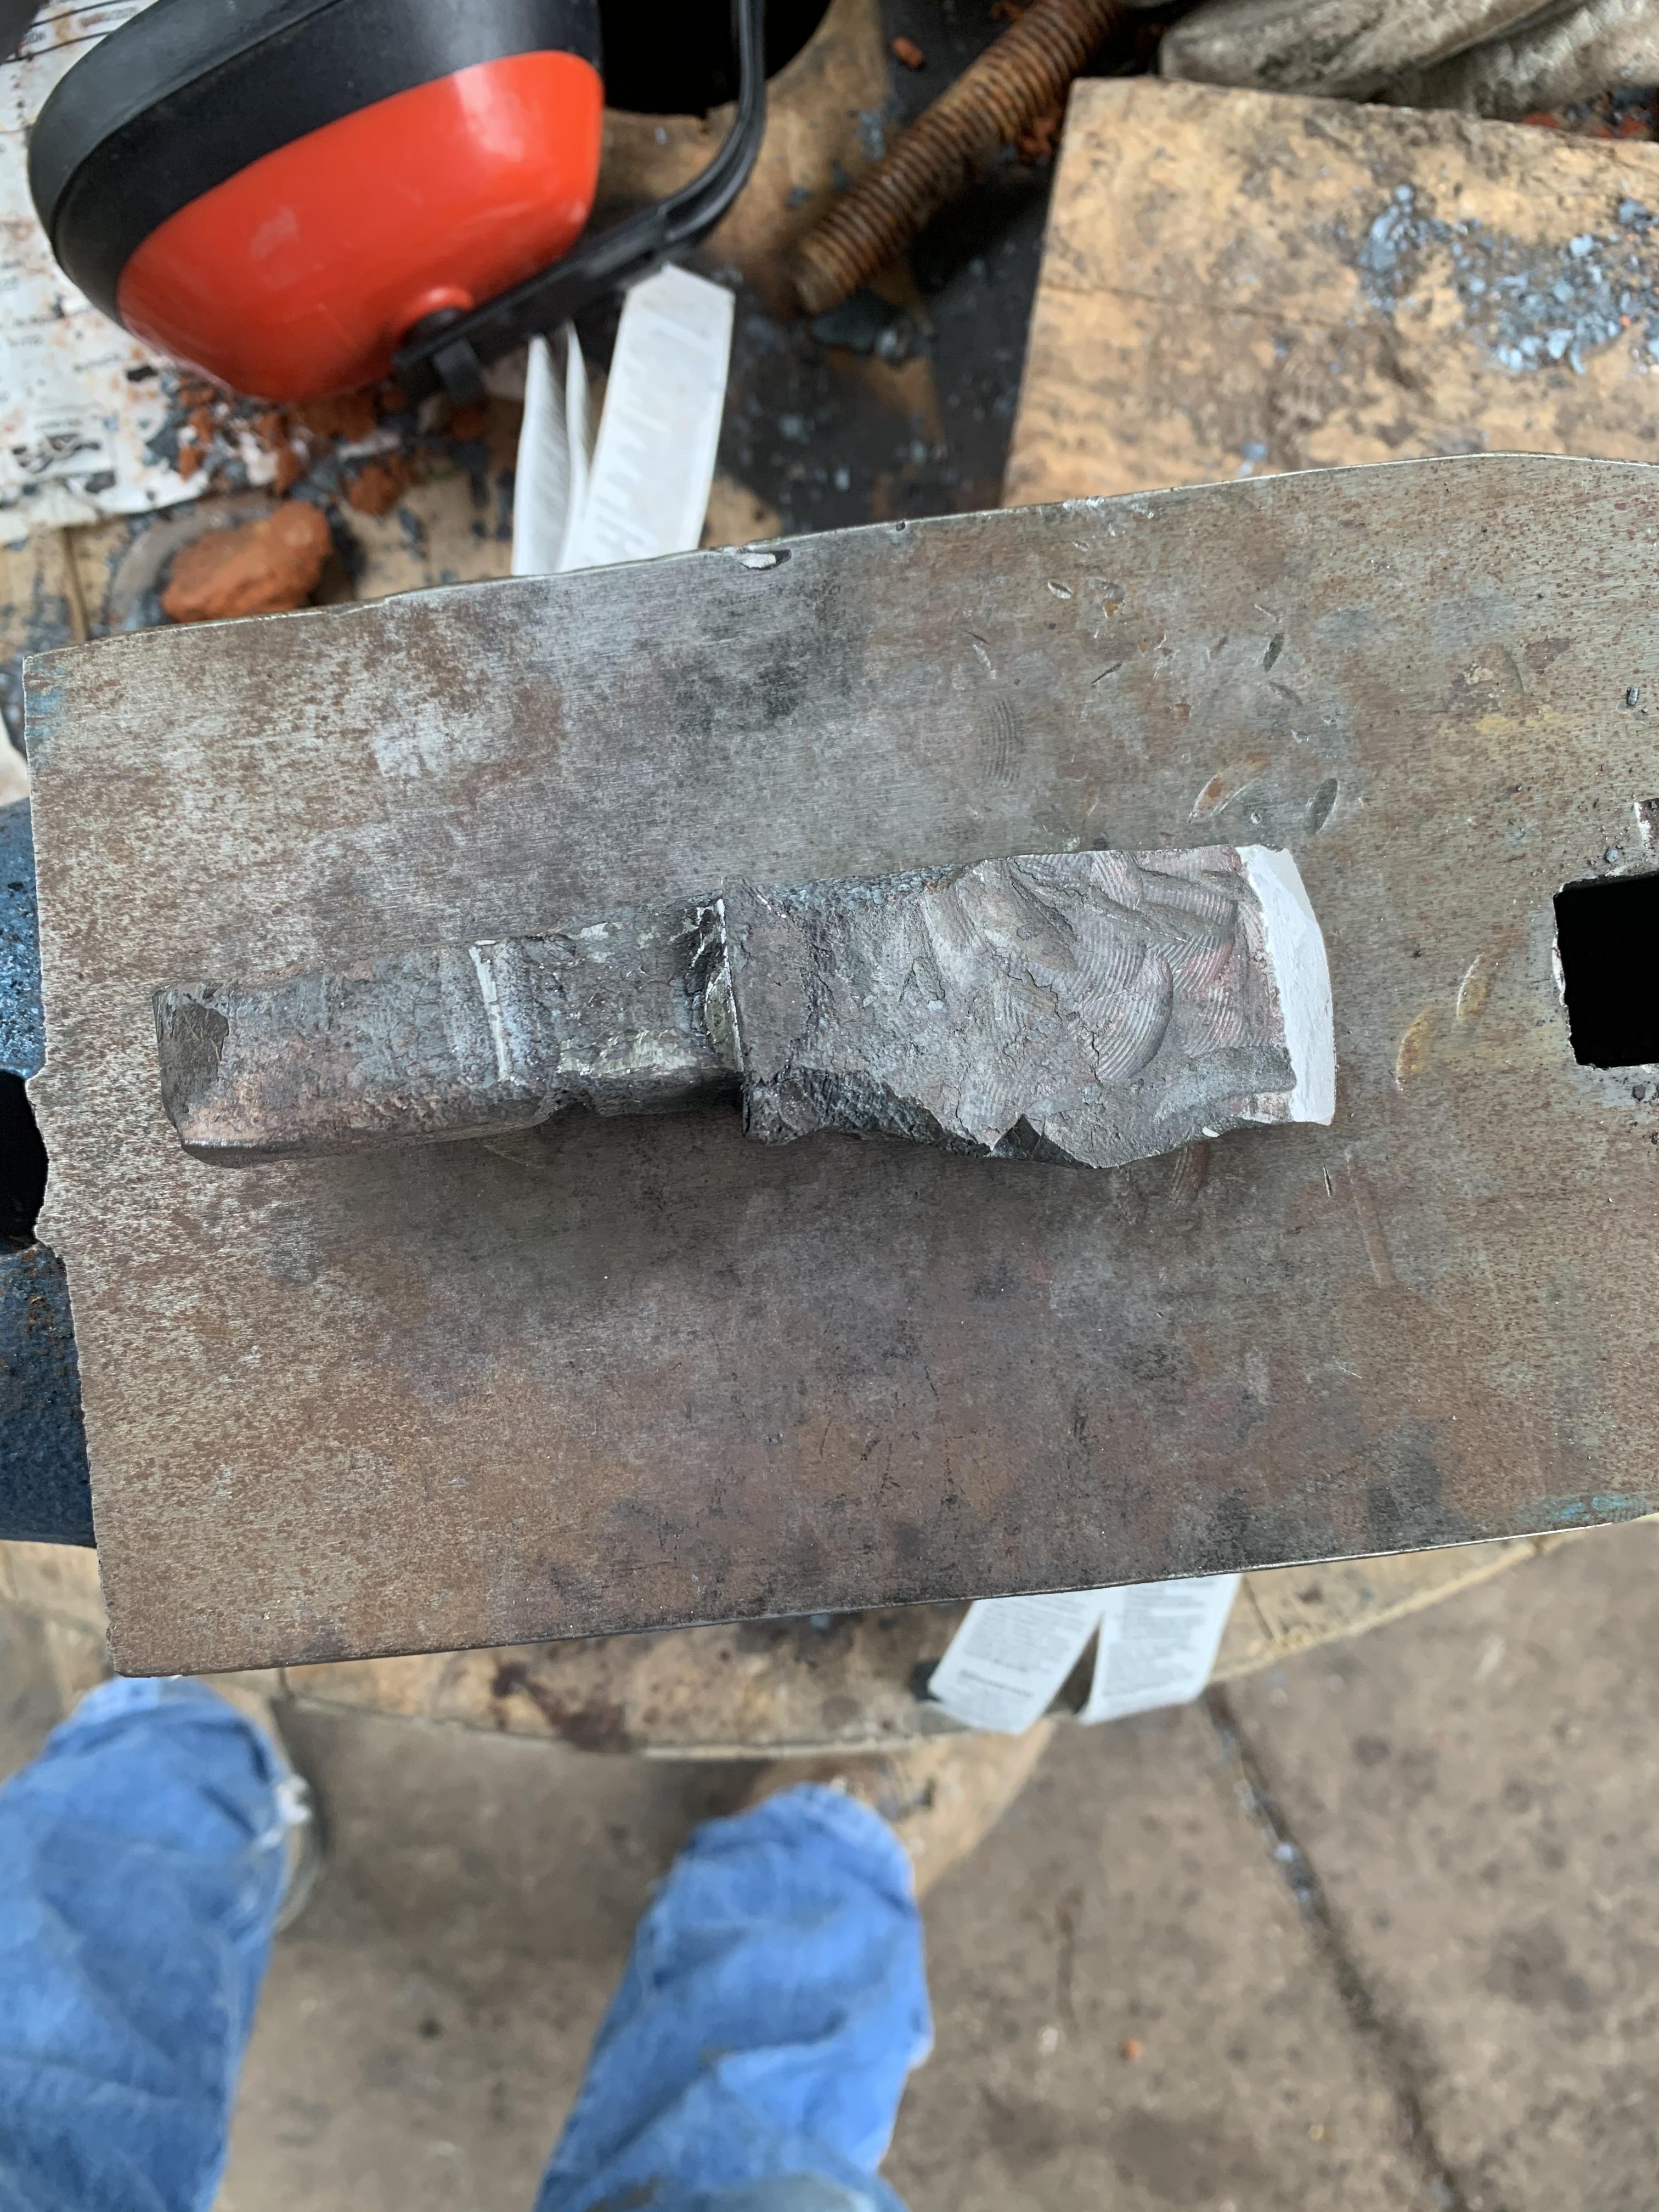
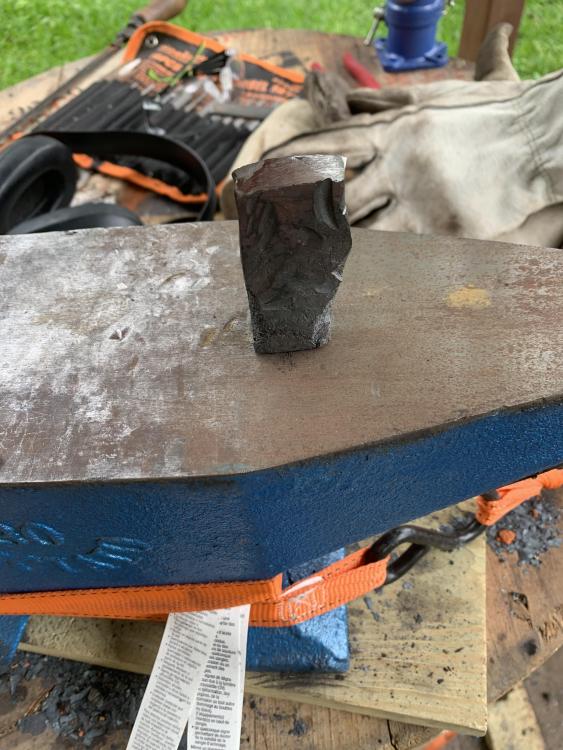
Like several others, I’m going to start cataloguing my work here. It certainly isn’t pretty right now but hopefully it will improve with time and practice. My first attempt at a hot cut hardy. It certainly isn’t pretty but I think it will be functional once I get the cold shut out of the cutting edge.


-
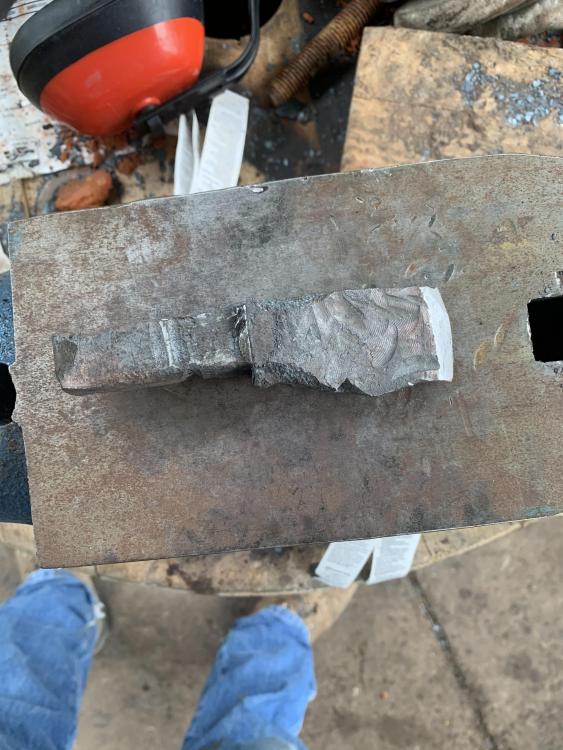
I made my first hot cut hardy over the last couple of days. Calling it rough would be an understatement. I’m not happy with the way the shoulder turned out and there is a cold shut right below the cutting edge that needs to be ground out. It is covered in marks from the cross peen that I didn’t get out fully and the shape isn’t exactly what I was going for. My biggest mistake was starting with stock that was too small. The starting size of the stock was the same as my hardy. After multiple attempts, I was able to upset the entire piece enough to make it work. The upset wasn’t even though and made it difficult to tell if I had the piece trued up perfectly. As a result, the portion that I drew down to fit the hardy wound up being slightly off center. When I set the shoulder, I wound up with barely a lip on two sides and an acceptable shoulder on the other two. Looking back, I could have saved myself hours of work and wound up with a better tool by just hunting down the appropriate sized stock. I’m hard headed though and was bound and determined to “make it work.” The cold shut was caused by a fish lip that I didn’t catch in time. When I tried to correct it, it folded over instead of flattening out. I was hoping that it had happened early enough in the forging process to not wind up on the cutting edge. I know better now. I’m going to pick up a HF bench grinder tomorrow (people around here on FB market place, Craigslist, etc want new prices for “antique grinders”) and try and grind out the shut. It’s just too deep for me to reasonably get out with a file. I was able to get a nice radius on the edge though and managed to shape it enough while forging that sharpening it with a file wasn’t unbearable. It also fits snugly in the hardy without being so tight that I will have to beat it out. If it fails, I’m not going to be heart broken. I learned a lot and that is my main goal right now. I’m going to be cutting small stock with it though so I think it will be ok.


-
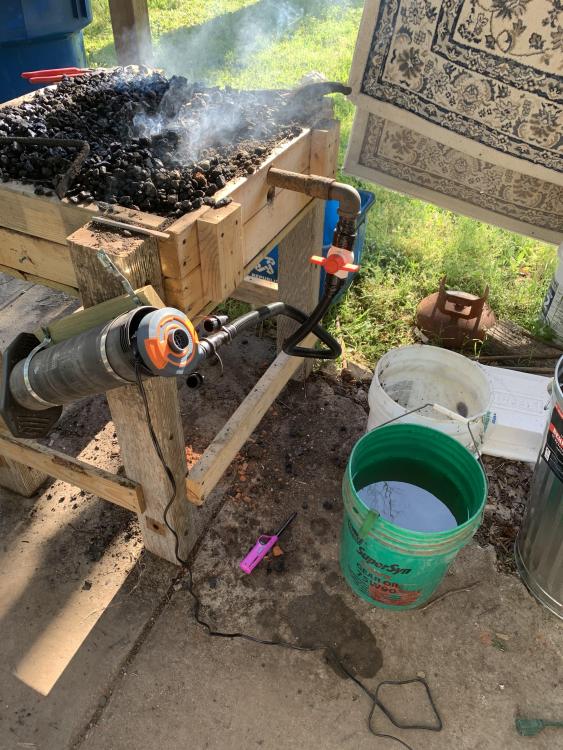
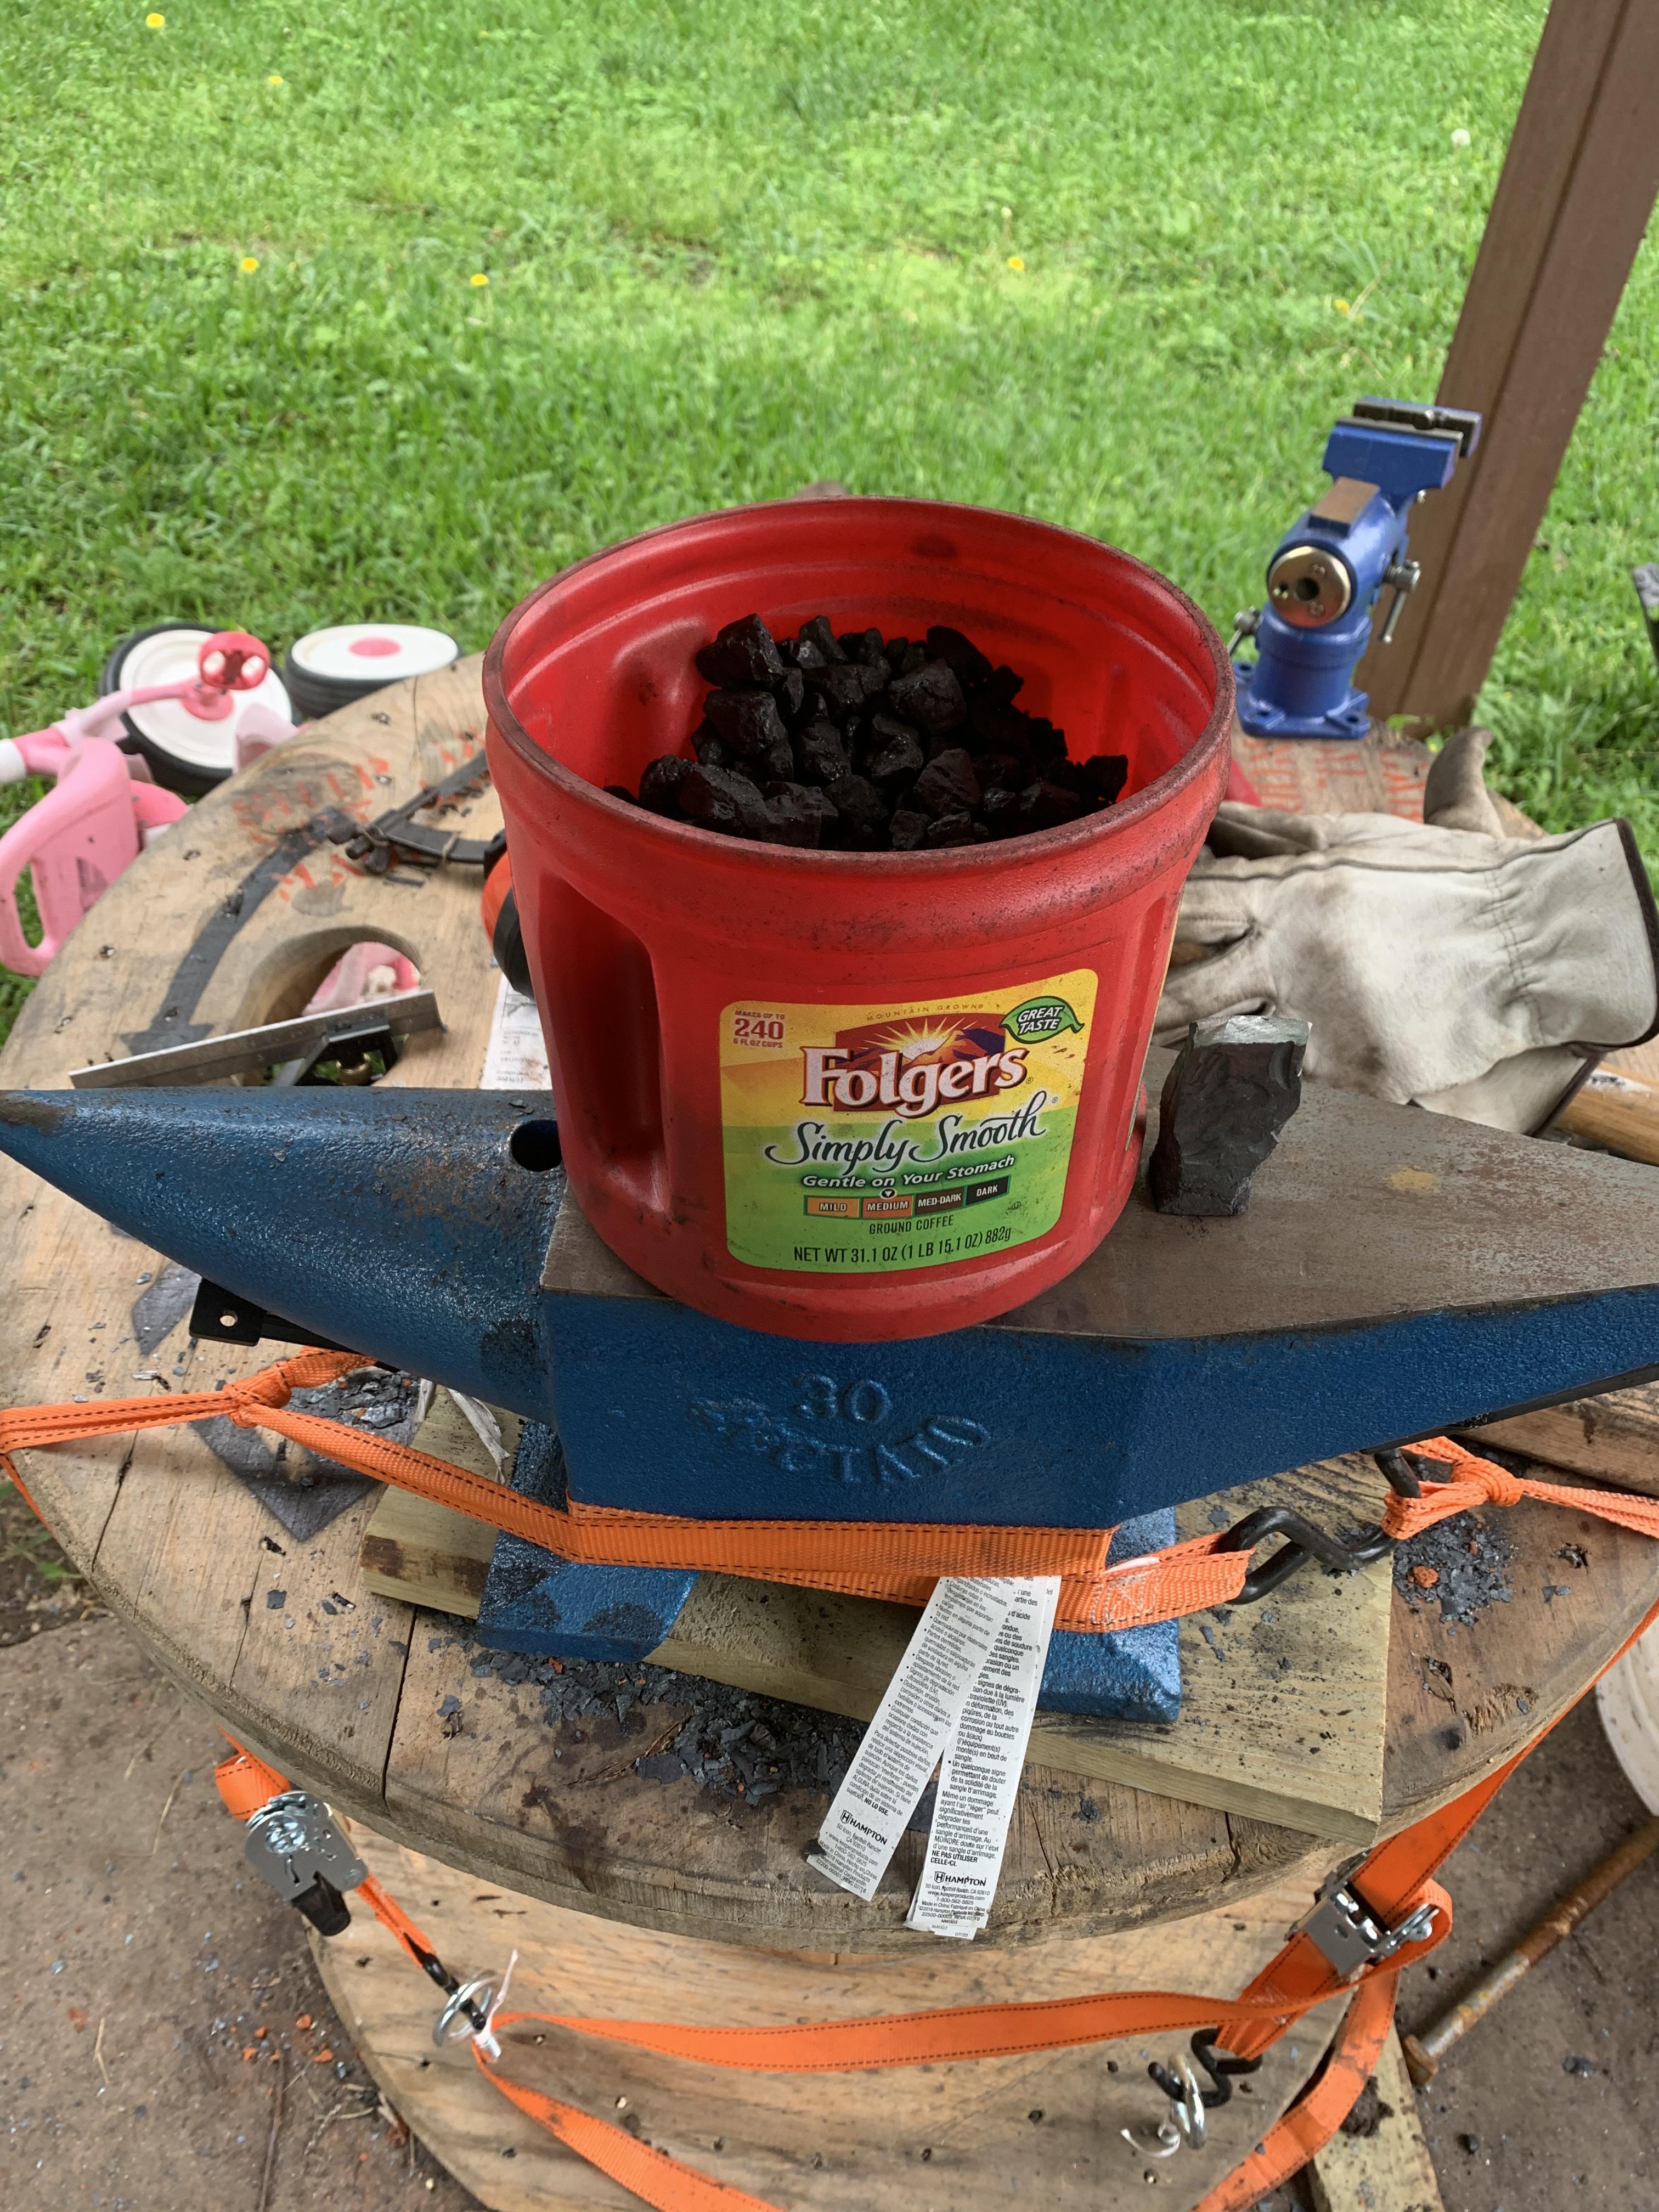
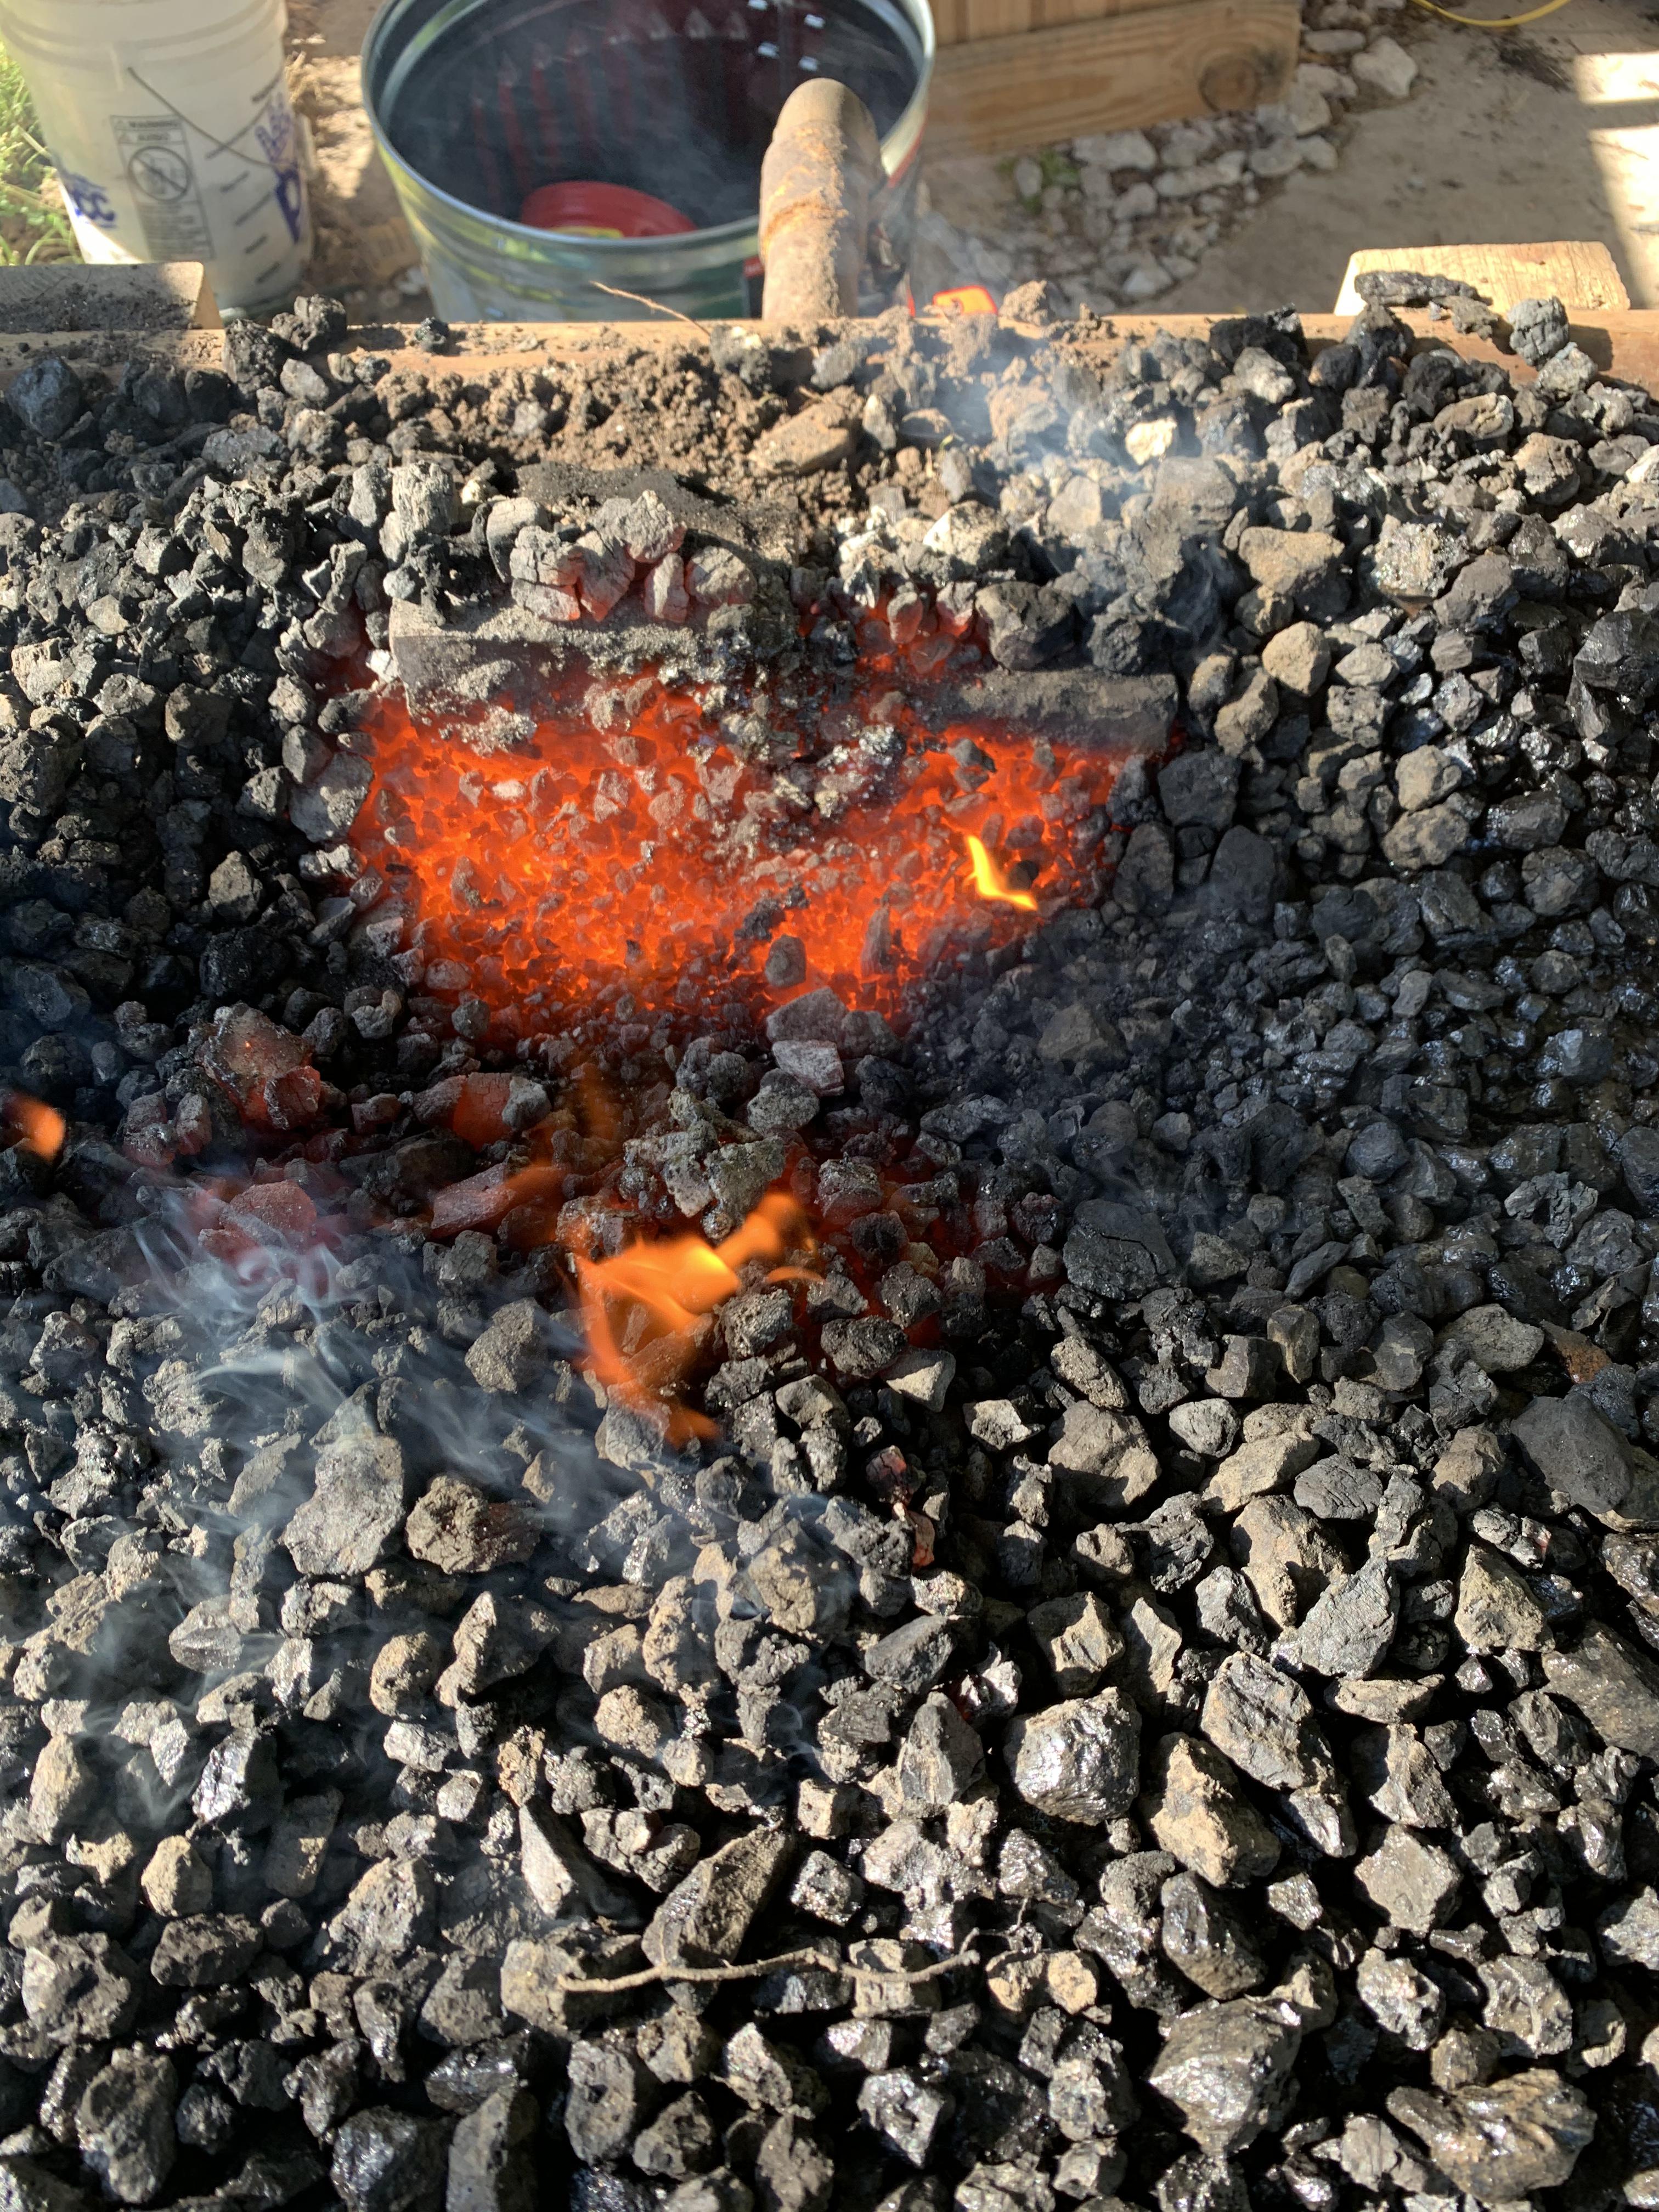
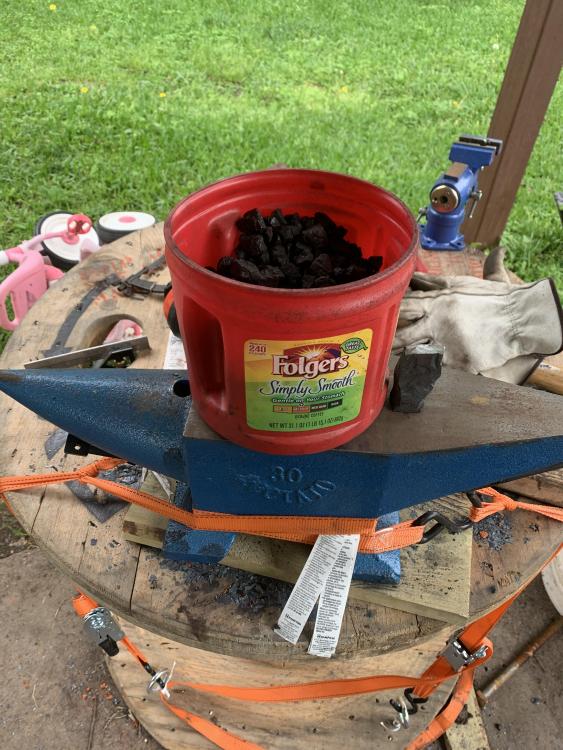
Picture of approximate coal consumption for 2 1/2 hours of forging. I seem to be burning roughly the same amount of coal per hour as I did when taking my class.
-
The more you know lol. I always assumed Pam was vegetable oil. I wonder if Moly would solve my clinker issue. It’s melting point is well over 4,000F and there doesn’t seem to be any health related issues with heating it.
-
Thanks for the tip. I don’t have any silicone on hand but I’m pretty sure the mrs. keeps Pam in stock.
-
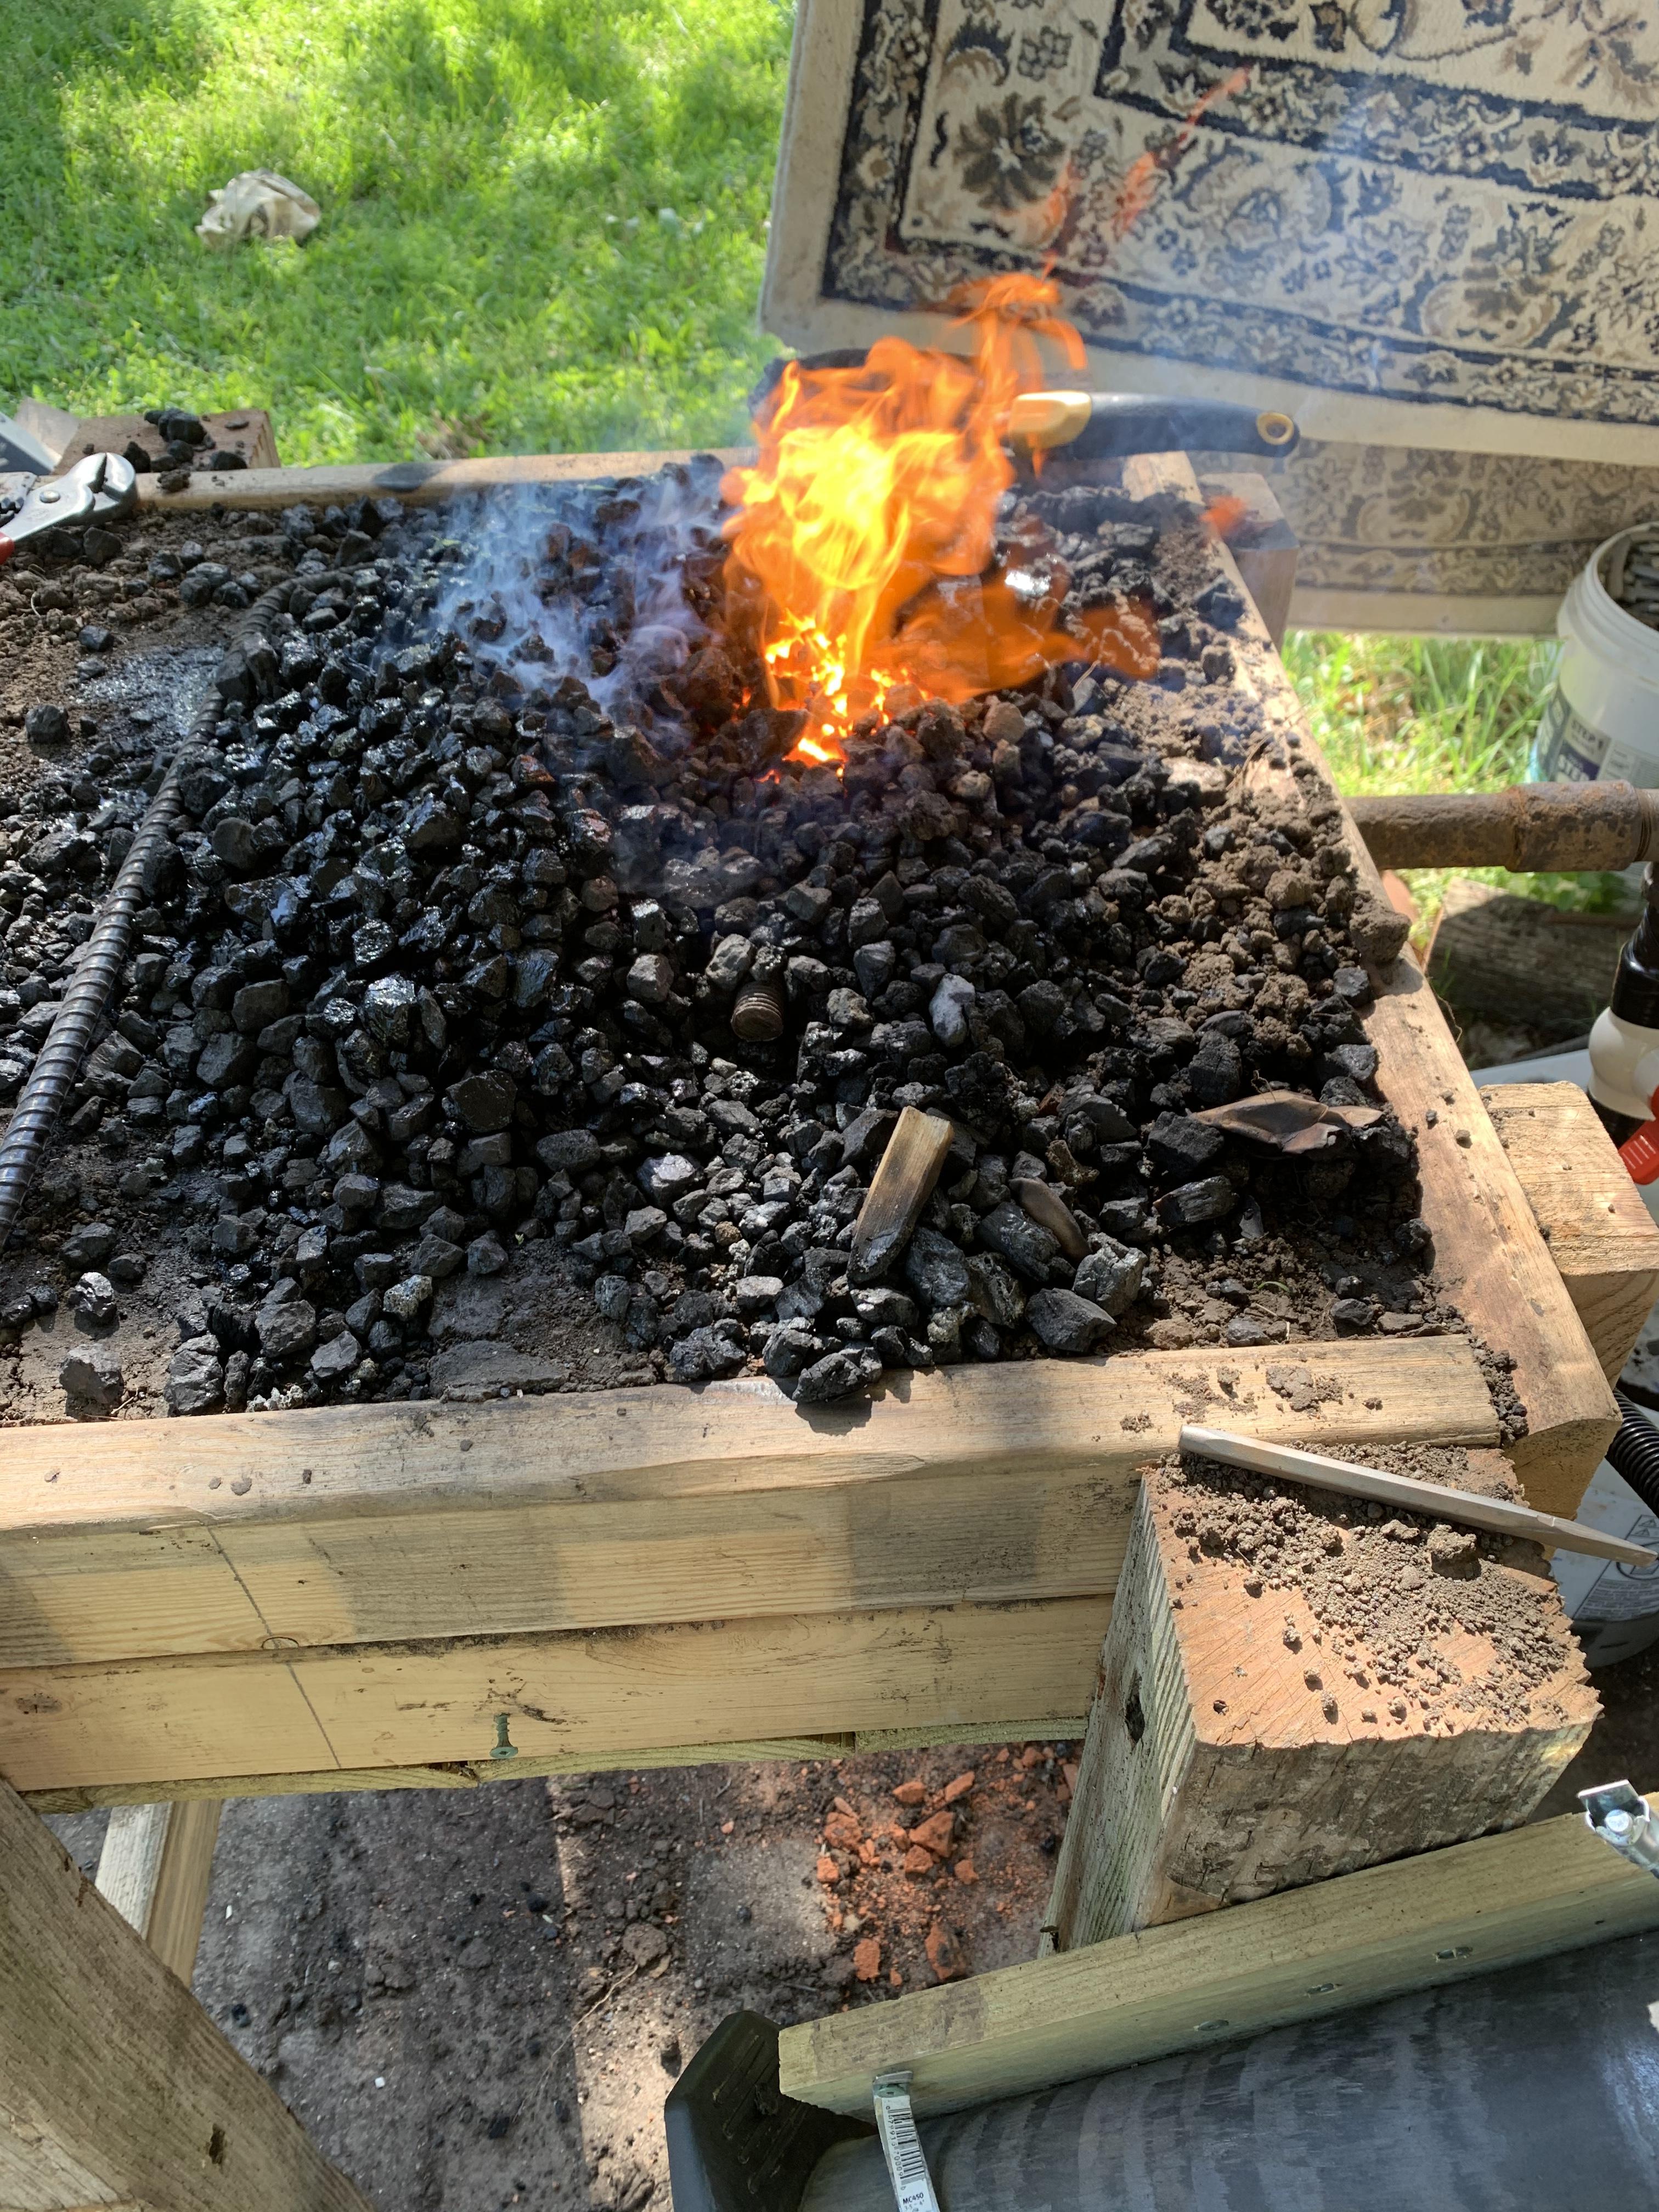
Fired her up again today and got the air just about dialed in. My mark for the “sweet spot” on my valve is just a little bit off. I need to move the handle just past the mark in order to get it right. I let the fire get too big a couple of times thinking I had the valve on the money. I wasn’t able to disassemble the valve. It is a pvc ball valve meant for water lines and is formed to be a solid unit. Interestingly enough, squirting PB blaster into it just gummed it up worse. PB is supposed to be safe for pvc but I had to put vise-grips on the valve to comfortably adjust it after adding the PB. I’ll probably wind up changing it for a brass valve at some point. Right now I’m saving money for a post vise. I changed the way I stack my coal. Instead of one big mound, I built a small mound over the fire and piled the rest beside it; close enough to coke up but far enough away to not fall in. I keep just enough coke on top of the fire for it to stay black. With the large mound, I was disturbing the fire too much and putting green coal in it every time I added or removed stock. With this method, I can easily rake the coke back onto the fire without mixing in a bunch of green coal. I tried two different methods of putting the stock in the fire (stabbing it in and working it in from the top) with similar results on the large pile. Between the two changes, I was able to reduce my coal usage to about a scoop’s worth over 2 1/2 hours (I use a medium sized Folgers can for my scoop). I could have reduced this some with better fire management. It’s a learning curve and will be a bit before it all becomes habit I’m sure. Clinker build up on the bricks over my tuyere is becoming interesting. The hottest part of my fire is against the brick. After about two hours of forging, there was close to a half inch of clinker built up on the brick. I had to chip it off to access my best heat. It was easy enough to chip off with my rake but I need to remember to keep an eye on it or figure out how to stop it from sticking. I also need to find a way to quiet the mattress pump. I think Charles mentioned a way to do it somewhere but I can’t remember it now. I’ll try and dig it up before I fire the forge up again.
-
It should work. What the box is made out of doesn’t really matter. A piece of advice I learned the hard way, follow Charles’ build to the letter. You will save yourself weeks of fiddling and frustration.
-
I was leaning more toward something keychain sized. He doesn’t strike me as the type to wear something like that.
-
That’s not a bad idea. I’ll probably try both and see which one I like better.
-
I’m planning on tinkering with the air later. I know I was probably running it hotter than necessary. I was just happy it was actually working for today. I had the valve at about 3/4 open while heating and then shut it when I wasn’t using the fire. Half open wasn’t enough to heat the 3/4 piece of sway bar I was making the hardy tool out of. I’m sure there is a sweet spot in there somewhere. It will just take some playing with to find it. I’m not sure if I can take that valve apart or not. I’ll look at it tomorrow and see. It would definitely benefit from a shot of lube though. Worst cast, I can squirt some silicone up in there with the ball closed and then wiggle it back and forth some to work the lube around.
-
Eureka! It works. Eats coal like a wild thing but I can work metal at least. Finally finished my set of tongs and got started on a hot cut hardy tool. Unfortunately, I missed a strike while upsetting and the hammer handle suffered a catastrophic failure. Took me forever to find the hammer head. It wound up a full 18’ away from the anvil behind me. I had a spare hickory handle that fit it. I just need to sand and finish the handle. I need to turn it around though, the tuyere angles a little to the far side and the fire follows. I could pull the bricks and shift everything over but it’s a lot easier just to put a brick in the “cold” side and turn the forge around.