Bantou
-
Posts
221 -
Joined
-
Last visited
Content Type
Profiles
Forums
Articles
Gallery
Downloads
Events
Everything posted by Bantou
-
I might have if my air pump hadn’t broken on me... the o-ring gave out after less than a week of use. Looks like I’m headed to Wally World for an electric pump. Starting to wonder if the pump hasn’t been half of my problem
-
Frosty, I shallowed up the fire pot this morning. It now sits at 2 1/4” (roughly the same as the short side of a brick), which is about what Charles’ is. I kept a slight downward angle on the tuyere. I’ll post an update with pictures after I get it fired up.
-
I just realized I never asked any questions. That’s what I get for posting after 11pm local LOL. Think this idea will work? Do I need the solder or will it be strong enough on its own?
-
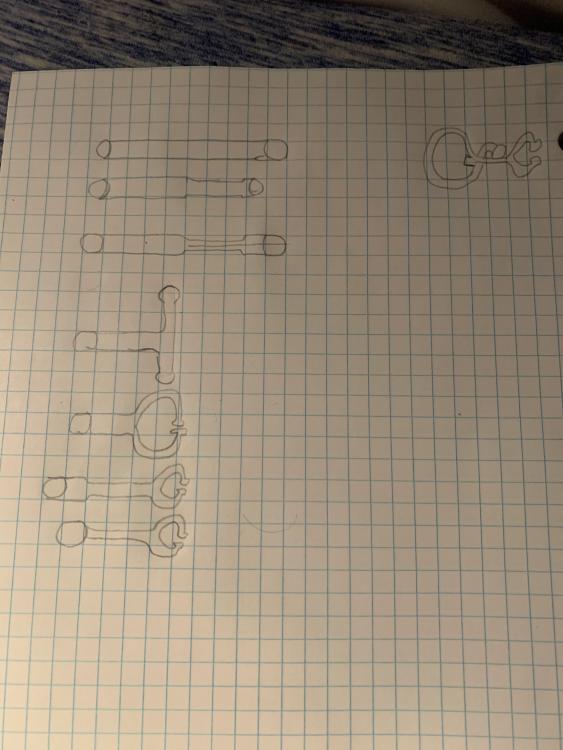
I’m wanting to make a stethoscope shaped bottle opener to thank my doctor for access to his substantial pile of old red bricks. After mulling it over for a few days, this is my idea: Take a chunk of either 3/8 or half 1/2 round stock; square up one end and split; bend split ends to form a “T”; slightly draw out and round each side, leaving about 1/4” on each end larger for the “ear pieces”; bend splits back to desired shape using vise and horn to form the “head set”; slightly taper the other end, leaving 1/2-3/8” the original size on the end to form the “chest piece”; flatten and round out the “chest piece”; bend the “tubing” into a figure 8 with the top loop being ~1” in diameter and the “chest piece” sitting next to the start of the split; punch a tab where the figure 8 crosses itself; solder the cross together for added stability. You’ll have to forgive my drawings, art was never one of my better classes. The length of each section is still TBD. I need to do more research into calculating stock length before I have a good estimate.
-
 A little bit of necromancy here I know, but I have questions about the tire iron video. Is forming the cutting edge out of the tire iron cup ok? To me, it looks risky. What prevents the edge from splitting open? I guess it would be ok if you forge weld the two sides together (assuming that can be done); but, I don’t think he did that.
 -
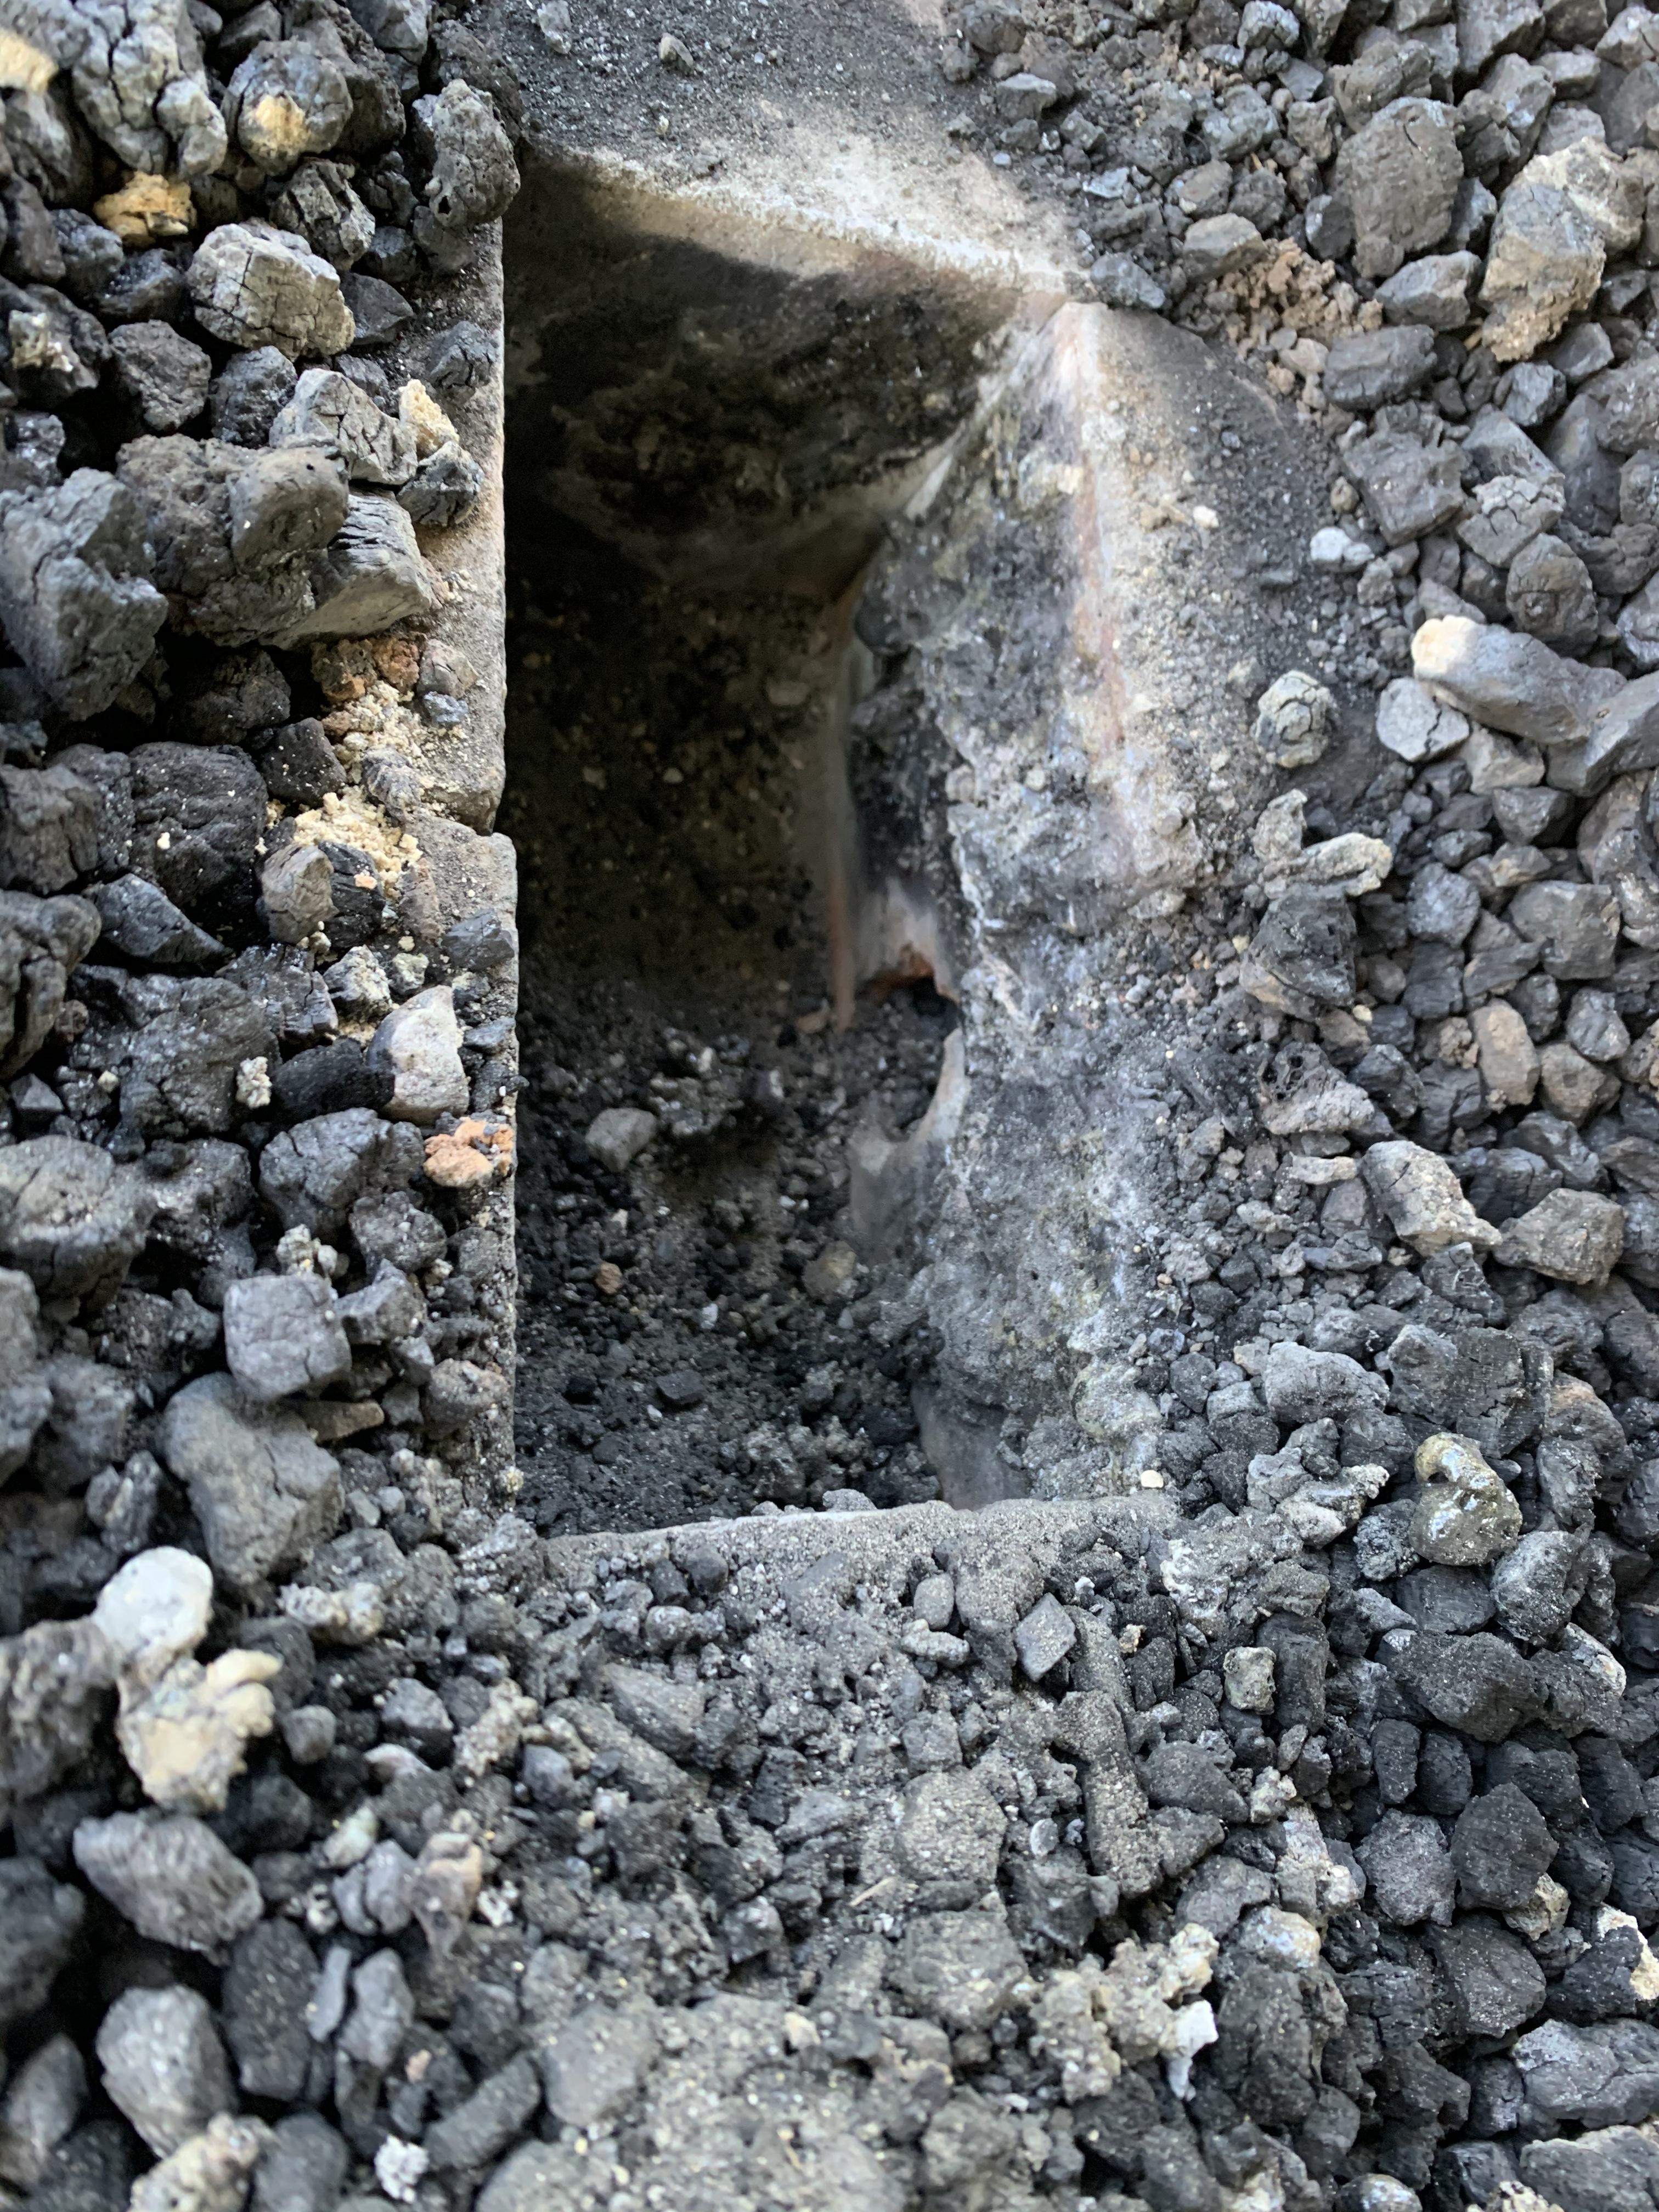
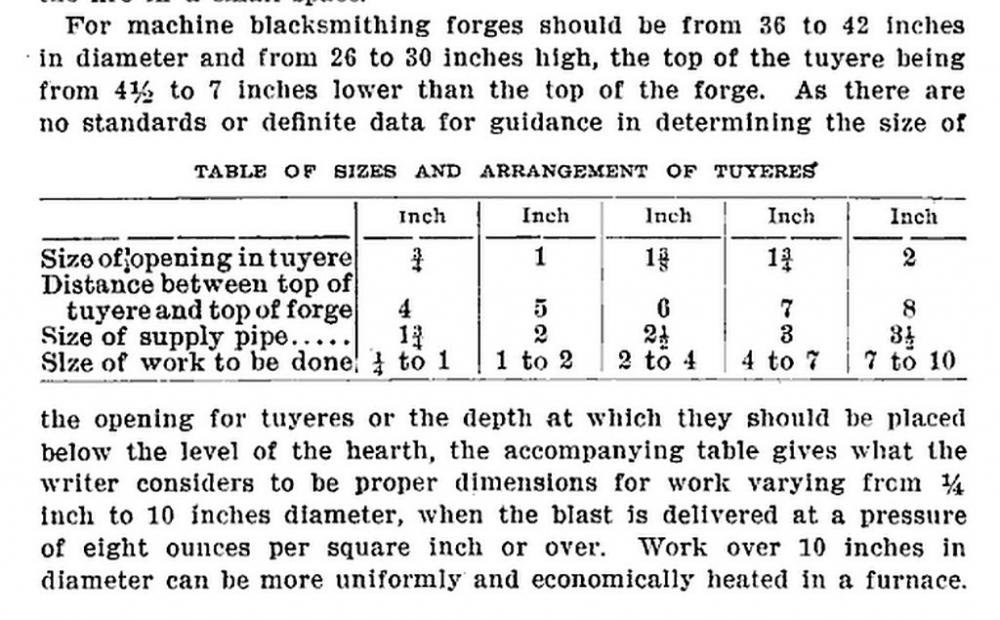
Pnut, that’s probably what I’m going to have to do. I built it at ~4” deep based on this chart: It was part of Charles’s post about the anatomy of a side blast forge. He mentions somewhere that a coal fire needs to be deeper than a charcoal fire in a side blast. My, apparently faulty, assumption was that I would need a deeper fire pot since the MKIII was designed for charcoal. Hopefully, raising the bottom of the pot fixes my issue. This thing has been kicking my backside for going on two weeks now. I cleaned out the pot this morning. The bricks held up better than I originally thought. The two on the back of the pot took some damage above where the tuyere comes in but not a significant amount. There is some clinker adheared to the bricks but I should be able to chip it off without an issue.
-
The convenience is worth the extra money to me. I can pick up what I need in less than two hours vs taking a whole day for more coal than I can reasonably store in a neighborhood. If I had one or two more people to split it with, then yeah absolutely worth it.
-
I’m honestly not sure you would come out that much ahead by the time you count in food, fuel, and possibly a hotel. Not to mention having to commit an entire day/day and a half just to getting coal. You are looking at a minimum of $150 in fuel alone. Plus, I don’t know many hobbiests that need or can reasonably store a ton of coal. Assuming 50lb bags, that’s 40 bags of coal. I doubt many of us would go through half of that in a year. If you were doing a group buy where you could split the cost among several people or smithing full time, it would absolutely be worth it. As a single hobbiest though, it would be a tough sell for me.
-
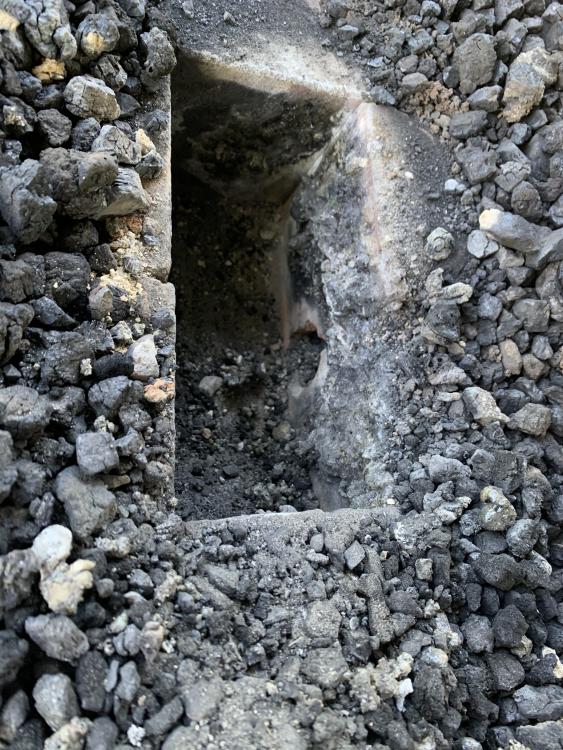
The weather died down and I was able to fire up the forge this evening. It works but just barely. The heat wants to sit way down in the fire. If I scrape the coal mound into a donut shape, I can see where the coal is a nice whiteish yellow. It’s ~2” below the hearth. I can push it up with enough air. It just takes a long time to get there and dies back down as soon as I quit pumping. After a couple hours, just getting 1/4 round up to a workable temperature was a beating. I’m sure clinker was a factor toward the end. I pulled about a fist sized chunk out of the bottom after it had cooled down. Getting a good heat was a struggle from the start though. I can raise the tuyere some to hopefully solve the clinker blockage. I’m wondering if I need to reduce its size though. Going from a 1” pipe to a 3/4” pipe should increase my pressure with a given volume of air. I’m hoping that by increasing the pressure, I can raise the heart of the fire without having to pump so hard for so long. I’ll do a post-mortem on the brick tomorrow. I know some of it melted but I won’t know how much until the sun comes up tomorrow.
-
Depending on where you are located in DFW, it might be worth making a trip down to Homestead Heritage in Waco. They order coal in by the train load for their smithy and to sell to local smiths. I picked up 100lbs a couple weeks ago for $32+ tax. The size of the coal can vary some but the current batch is a good nut (?) size. The pieces range between a peanut and a walnut in size. You need to call ahead though. They keep the coal in a coal pile and will need time to get it bagged up. I usually call a couple days before I’m planning on heading down there.
-
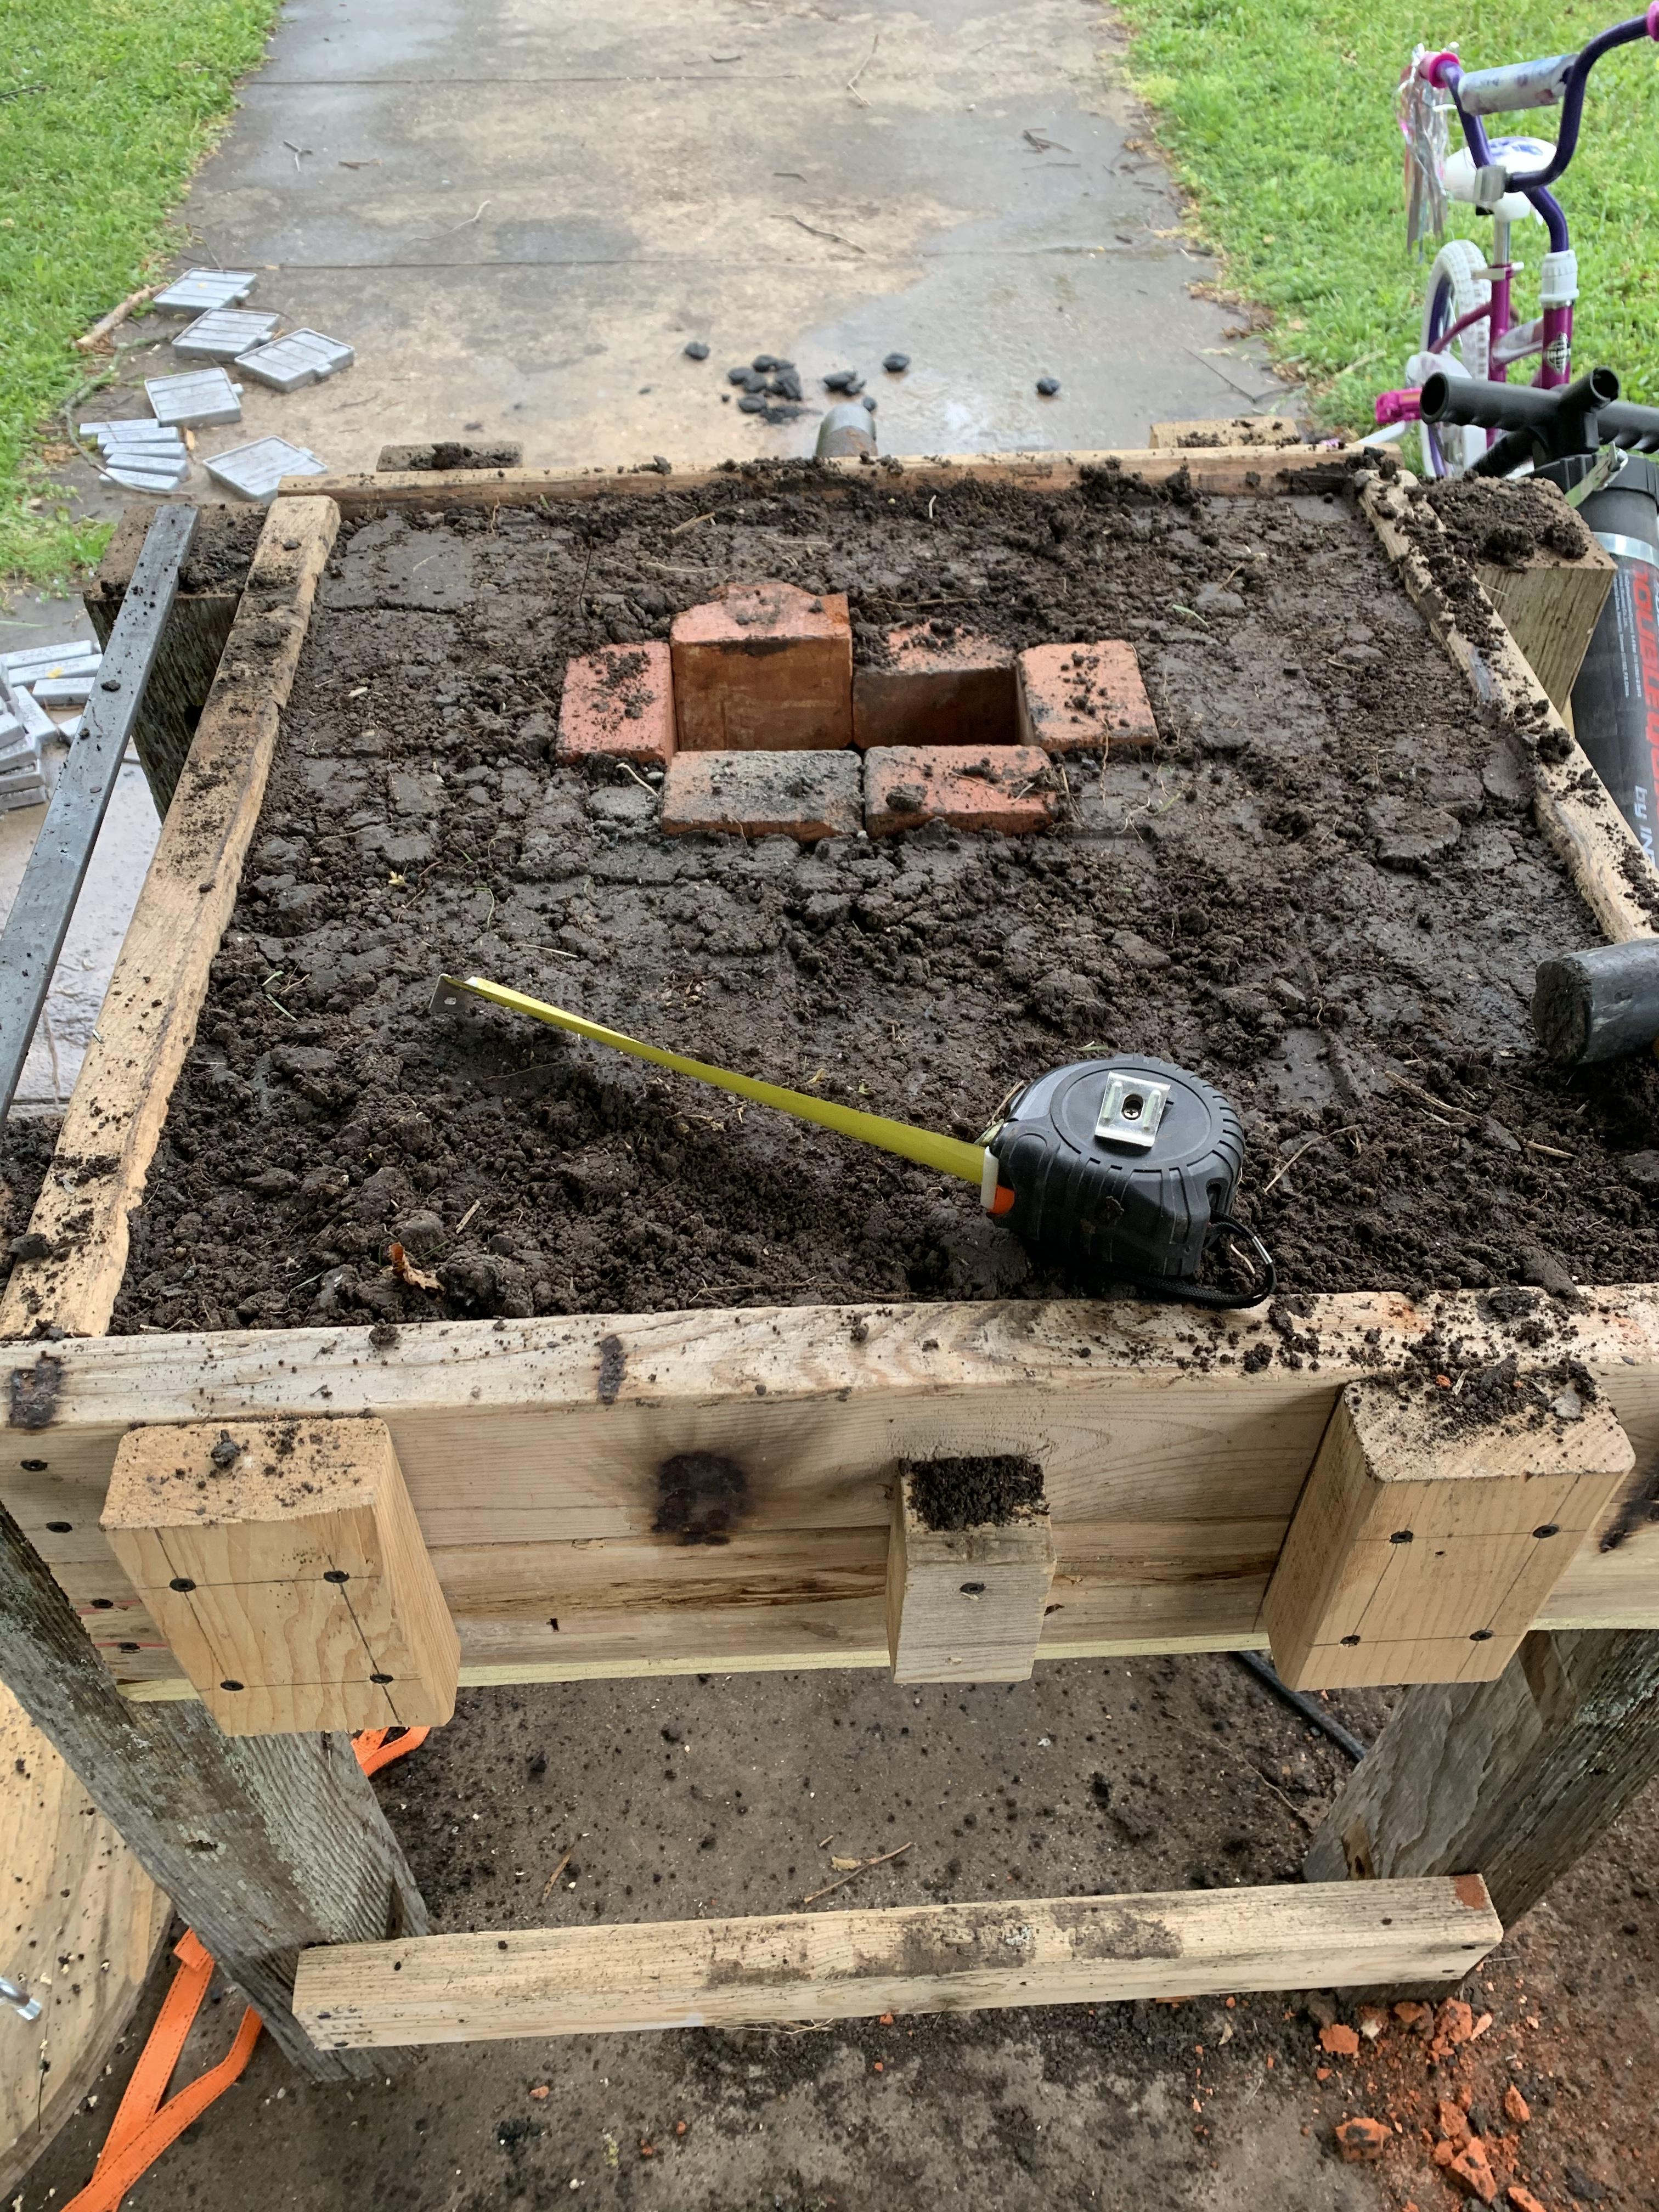
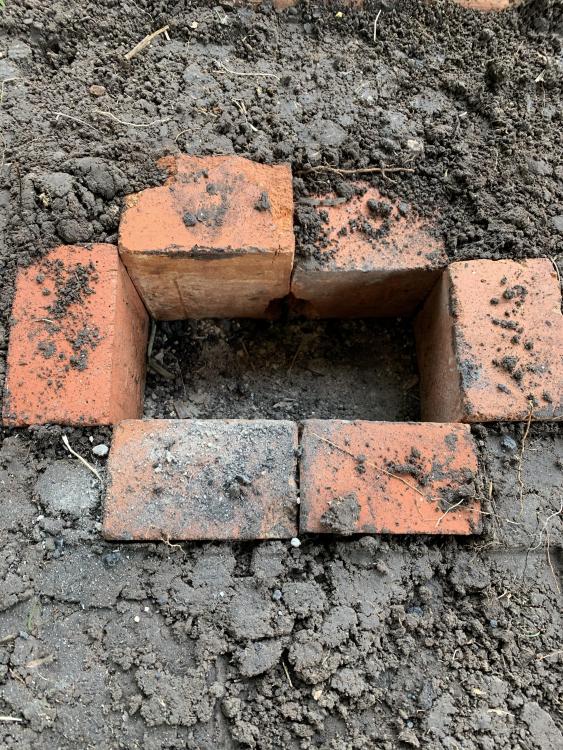
Modifications complete! The fire pot is ~8x4x4”. Tuyere has been moved ~1” backward with a hole chiseled in the brick. I put a 90* elbow and a short nipple on the pipe to hopefully prevent it from melting again (thanks again for the suggestion Frosty). It’s currently spitting rain and forecast to get worse so firing it up may have to wait until the weather improves tomorrow. Or, I may get impatient and rearrange the carport to make it work. The next modification will probably be wheels of some kind to make it easier to move around. I’m debating between casters on all four legs and an axle and wheels on one side only.

-
Found some brick finally. My doctor, of all people, had several walls worth of it stacked up in his shed. Apparently the guy who used to own the house collected them. I got 12 bricks and the promise that I could come get more whenever I needed them. He will be getting a stethoscope bottle opener as soon as I figure out how to do it. Modifications are now under way. We’ll see how it turns out. I didn’t have enough time to finish it tonight. I don’t think the neighbors would appreciate me chipping brick at 10pm. I’ll upload a picture once I have it done. Frosty, thanks for the advice about the elbow. I think I have one laying around and they are cheap enough if not. I wasn’t looking forward to cutting another chunk of pipe with my hacksaw. The problem with my current set up is that the sides of the “fire pot” melt into clinker and either wind up in the bottom or pull away when I clean it out. I’m currently having to rebuild the “pot” every time I want to use it. I tried lining it with clay from deeper in the ground (roughly 1 1/2’) but got the same result. It was wet when I started the fire, no idea if that makes a difference. With the humidity we’ve been having, I would have been without a forge for several days to a week if I waited for it to completely dry. I’m not expecting the bricks to last forever. I’m giving them a try because it’s what Charles used on his MKIII. I know they will melt at some point and I’m going to have to leave a layer of ash in the bottom to prevent the clinker from sticking. If it doesn’t work, I’m not out anything but a little bit of time. Plus, experimentation is half the fun. It’s got to be better than rebuilding the thing every time I want to use it though.
-
The first time it happened, it was still wet. I fired it up again last night with the dirt dry and lost another side of my fire pot. I also melted the air hose at the tuyere. The tuyere wasn’t hot but the air/smoke coming up it while inactive was enough to melt the thin plastic hose. When I rebuild the fire pot it, I’ll put a longer pipe in it. For now, I’m just holding the air hose in the pipe when I need air.
-
I used my top soil because it is supposed to be very high in clay content. It’s called Black Gumbo or Gumbo soil depending on where you are. When wet, it is so sticky that it will gum up motocross bikes. When dry, you need a rock bar to dig in it. If you catch it at the perfect consistency, you can work it like modeling clay. Plus, it was under my feet and free.
-
Well, I’m going to have to do something different with the fire pot. The dirt melted instead of hardening like I thought it would. Going to talk to a guy tomorrow that built a brick house last year. Hopefully he will still have some of the extras.
-
I’d rather save the tool steel for the countless hardened tools I need to make. My blacksmithing tool inventory right now consists of a hammer, JABOD, 66lb Chinese cast steel anvil, and a cheap chisel/punch set I bought to get me through until I can make my own. I have some leaf springs off an F250, a couple sway bars, and the tire iron to work with for that. I’m still trying to find a good source for soft steel. Living in rural Texas makes finding good known steel for a reasonable price a challenge sometimes.
-
Pnut, after a little tinkering, I was able to mount the air pump on the side. You were right, it is much easier and more comfortable to use that way. The only downside is that my handle has to point to the back of the forge making it difficult to tell what my metal is doing in the fire. Frosty, I’ll have to give that a try. I’m still experimenting with fire management and whether to build a mound or a trench. The guy that taught my class had us mound the coal on both sides of the fire pot, more or less forming a trench, and then just scrape in the coked coal as we needed it. Glenn recommends building a mound in the sticky he made on the subject, though there was some heated debate about it from other members.
-
I’ll take another look at it. When I mocked it up the first time, the hose kept drifting over the fire pot. I’ll have to look into the ducks nest. That isn’t a concept I’ve run across yet. The way you are describing banking the coal is more or less the way I was taught to do it. The first set of “pop rocks” came from starting the fire with green coal (I didn’t have any coke yet). The second set came from attempting to insulate the fire with coal on top. I read about guys doing it on here but I don’t think I had a good grasp on the concept.
-
That was the way I wanted to mount it but the hose connection on mine is at the handle instead of at the base. If I mount it the way Charles mounted his, I’ll be dragging the hose over the fire as I pump. The pump I ordered looked exactly like the one Charles used. Apparently Intex changed the design and Amazon never updated their pictures. Shrinking the size of the fire pot helped significantly. I got out and played around with it after my last update. It is now ~5 1/2” in circumference with a lot less slope. The sweet spot is now ~1/2” below the top of the table. I’m going to try adjusting the tuyere angle up a little and raise the bottom of the pot an inch or so. I may wind up switching the fire pot to something like on the MkIII but I don’t have any brick laying around right now. I can scrounge some where I hunt, but it’s a 3 hour drive one way. I was also under the impression that coal needs a deeper fire than charcoal. It’s been a while since I looked over that thread though so I could be wrong. Changing how I used the pump also made an improvement. It seems to prefer short quick strokes over long hard ones... I was able to get the fire hotter faster doing it this way, without wearing myself out. I went with the manual pump solely for fuel economy. I’m terrible about remember to close the valve while working the metal on a constant air supply.
-
I’m really glad I found this. I was about to cannibalize one for a set of tongs. Sounds like it would have been a waste of good tool steel.
-
How much do you pay for coal?
Bantou replied to P. Bedard's topic in Solid Fuels: Coal, Coke, Charcoal, Wood, etc
$16 a 50lb bag at Homestead Forge in Waco, TX as of yesterday. They bag it up out of their coal pile so you have to call a day or so in advance. -
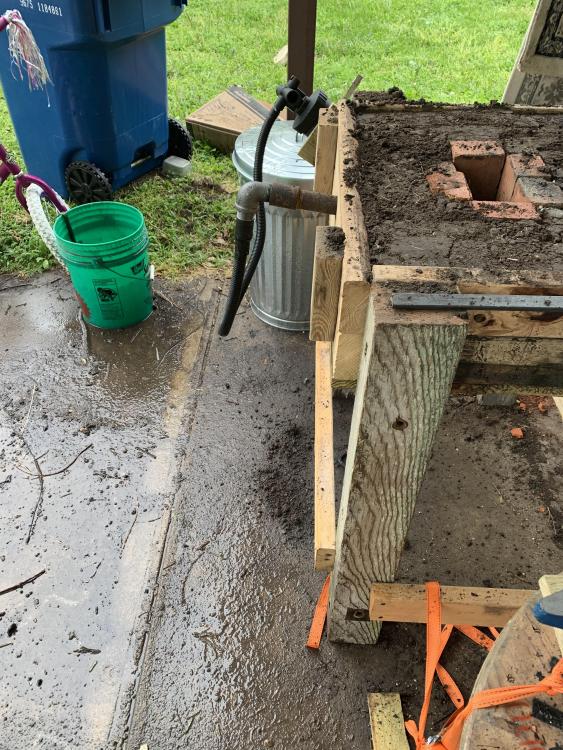
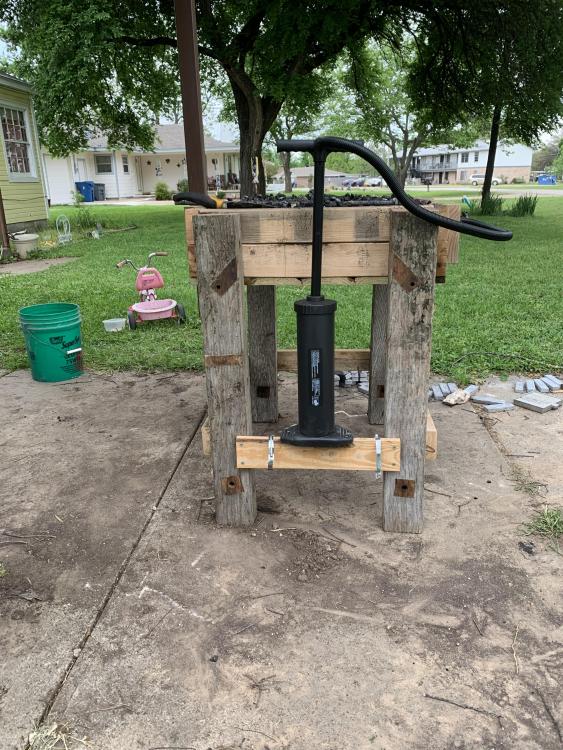
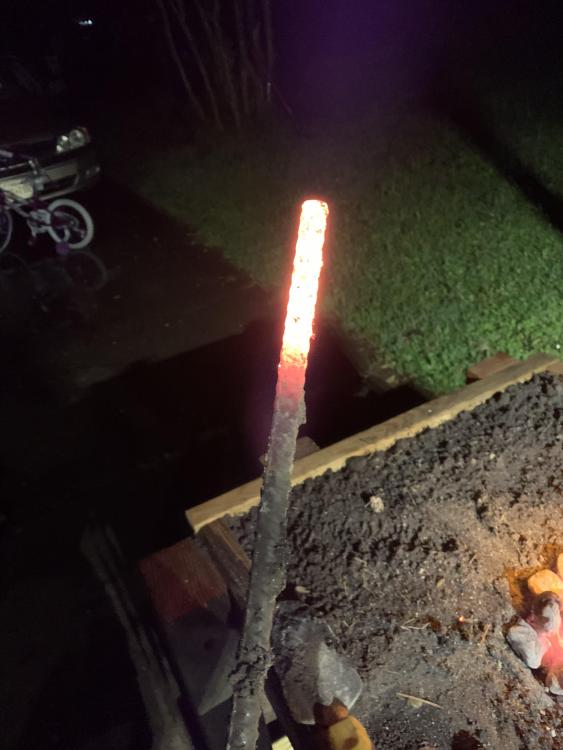
I fired it up with coal today. I learned quite a few things: 1. The hot spot of my fire is about to 2” below the top of the box. I had to put the end of my 1/2” stock pretty deep in the fire to get it hot enough to melt (I did this on purpose). The charcoal hotspot was about even with the top of the box. I’m going to try adjusting the size and slope of the fire pot first to try and correct this. It is currently ~7” in circumference with a slope similar to a tank damn. I’m going to try for 6” and steeper walls. If that doesn’t work, I’ll try adjusting the angle of the tuyere. It is currently angled slightly downward and I had smoke pouring out of it a couple of times. I’m hoping that if I angle it upward it will move the hotspot up. Worst case, I can alway drill another hole and move it up. 2. I need to shrink the size of the fire pot. It burned through close to 2 medium sized coffee cans of coal in ~45 minutes. 3. The rule of wind and smoke applies to a forge as much as a campfire. I turned the forge around to get the bellows out of the smoke and the wind changed directions on me. 4. Because of lesson three, I NEED to put a chimney on the thing. I nearly scorched my beard when the wind picked up and blew the flames at me. Plus, green coal smoke is... less than pleasant to breathe. 5. I either need a different air supply to start the fire, or need to get in better shape. I was sucking nearly as much air as the bellows by the time I got it going good. 6. Damp coal will sometimes exploded in the fire pot. I had several pieces pop and come flying out of the forge while I was pumping the bellows. I had raked some of it on top of my fire hoping to raise the hotspot some. 7. I need to mount my air pump differently. The one I received has the hose connection on the handle instead of the air camber for some stupid reason. I currently have it mounted to the top of one of the kicker boards (see picture). It puts the handle about 3” above the top of the table at the end of the upstroke. As it sits, it exposes me to the fire when the wind shifts and is aggravating the tendinitis in my right wrist.
-
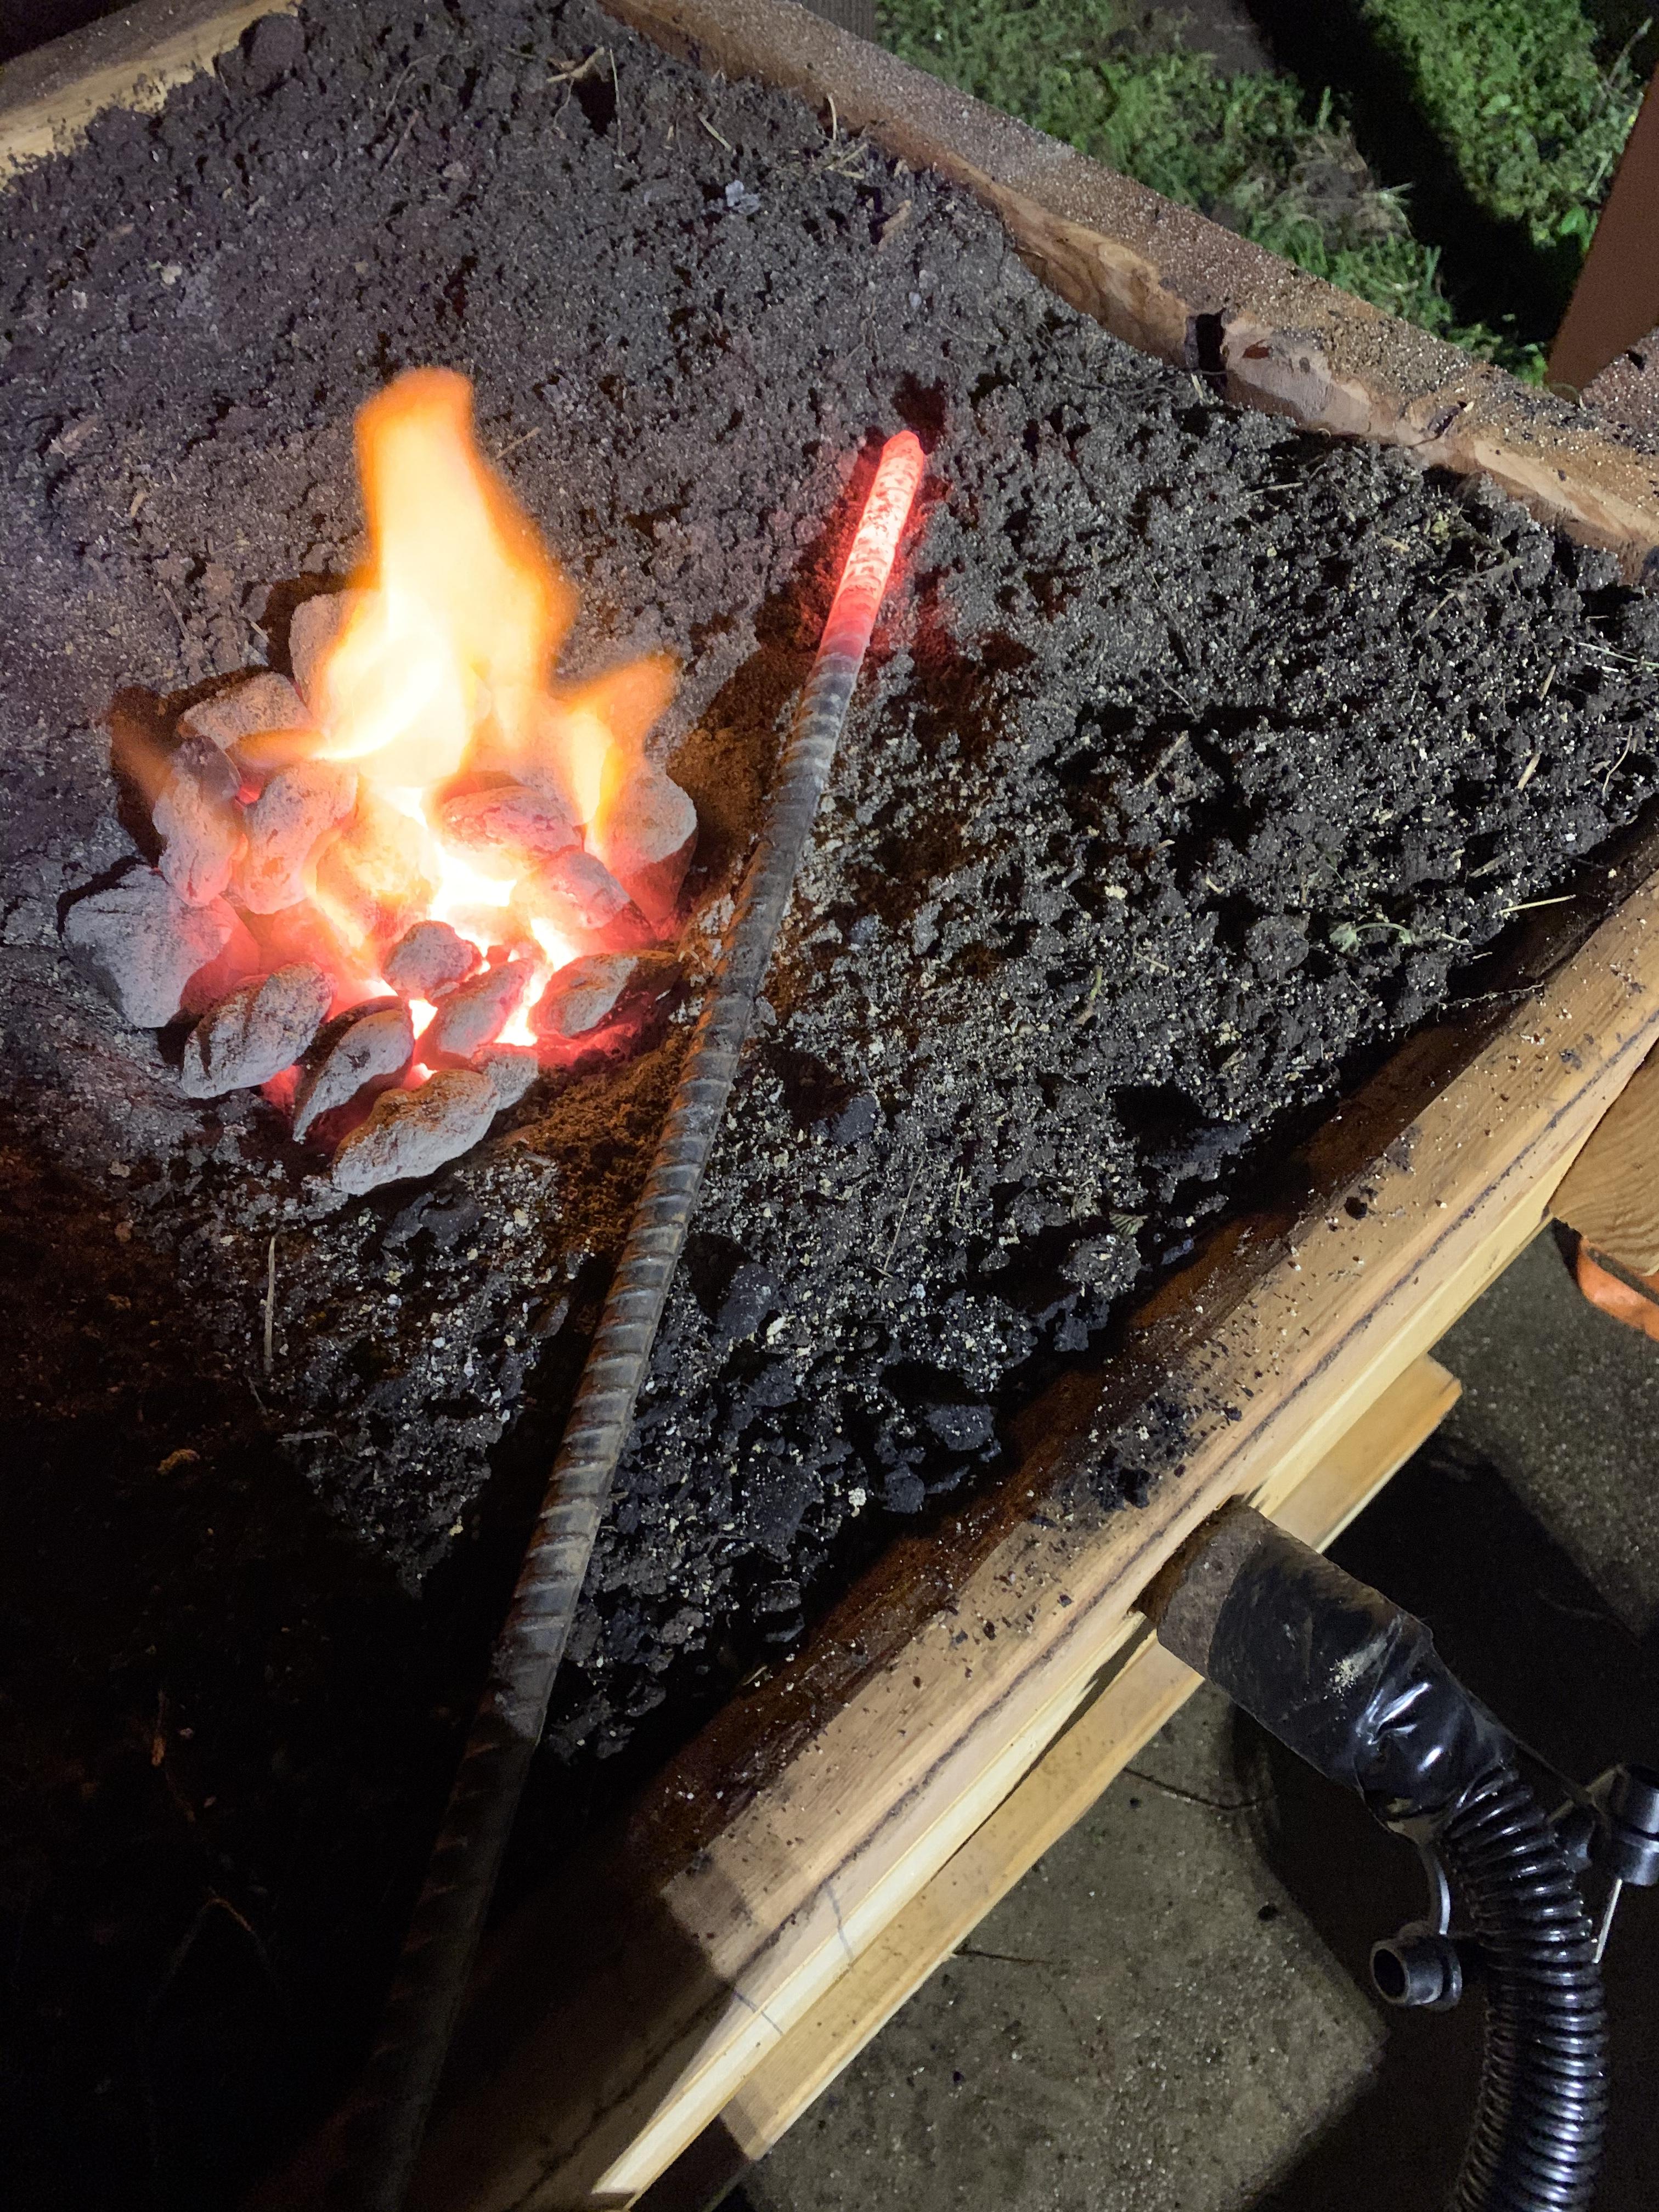
It works! I got impatient and decided to give it a test run with charcoal briquettes and some rebar a had laying around. Yes I know, both are horrible materials to forge with (you can slap my hand later). It got a 1/2” piece of rebar up to forging heat even with the limitations of briquettes (the neighbors probably thought I was setting off a fountain). I’m still waiting on my anvil so I didn’t move any metal tonight. However, as a proof of concept I’m happy with it. edit to add: I probably could have gotten the rebar hotter with better air control but I’m not going to waste anymore time on briquettes. I’ll learn more after I get my coal tomorrow.

-
I’ll give that a try. We were just hitting them with the pointed side of the cross peen before putting them on the hearth during the class. It worked as long as you didn’t mind chasing the odd piece of coal across the forge lol.
-
It’s bituminous. There is a blacksmith shop about an hour south of me that has it shipped in via train and sells the excess at just over cost. The only down side is that the size is larger than ideal so you have to break some of it up. I took my first class from them and will be taking more as money allows. The master smith supposedly spent some time in Israel training under Hofi. I more than likely could have gotten into smithing cheaper, but I decided to splurge on a 66lb Acciaio anvil instead of scrounging a piece of steel to hammer on. I wanted something with a horn, hardy, and pritchel and I’ve heard good things about them.