Bantou
-
Posts
221 -
Joined
-
Last visited
Content Type
Profiles
Forums
Articles
Gallery
Downloads
Events
Everything posted by Bantou
-
That’s good to know. I don’t have any experience with bottom blast forges. I built my JABOD as a side draft because it was easier to make.
-
I just ordered it (Merry Christmas to me!). It supposed to be here sometime next week. I’ll post a review once I have it up and running.
-
After gaining more experience, I have re-evaluated my opinion. Any idea if they are still open for business? Google shows them to be permanently closed.
-
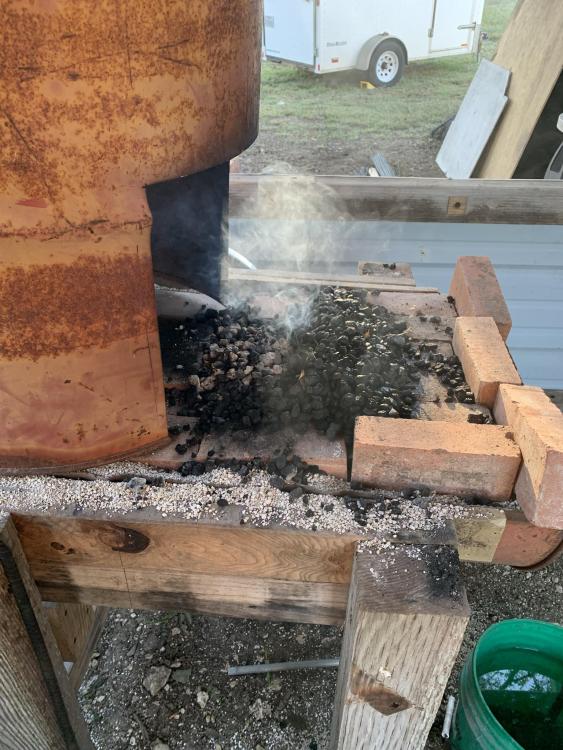
Has anybody tried the Simond welded firepot? It is a good deal thinner than one from centaur forge but it’s also 1/2 of the price. My JABOD works great but I’m tired of dealing with cracked bricks and clinker building up on the bricks over the tuyere.
-
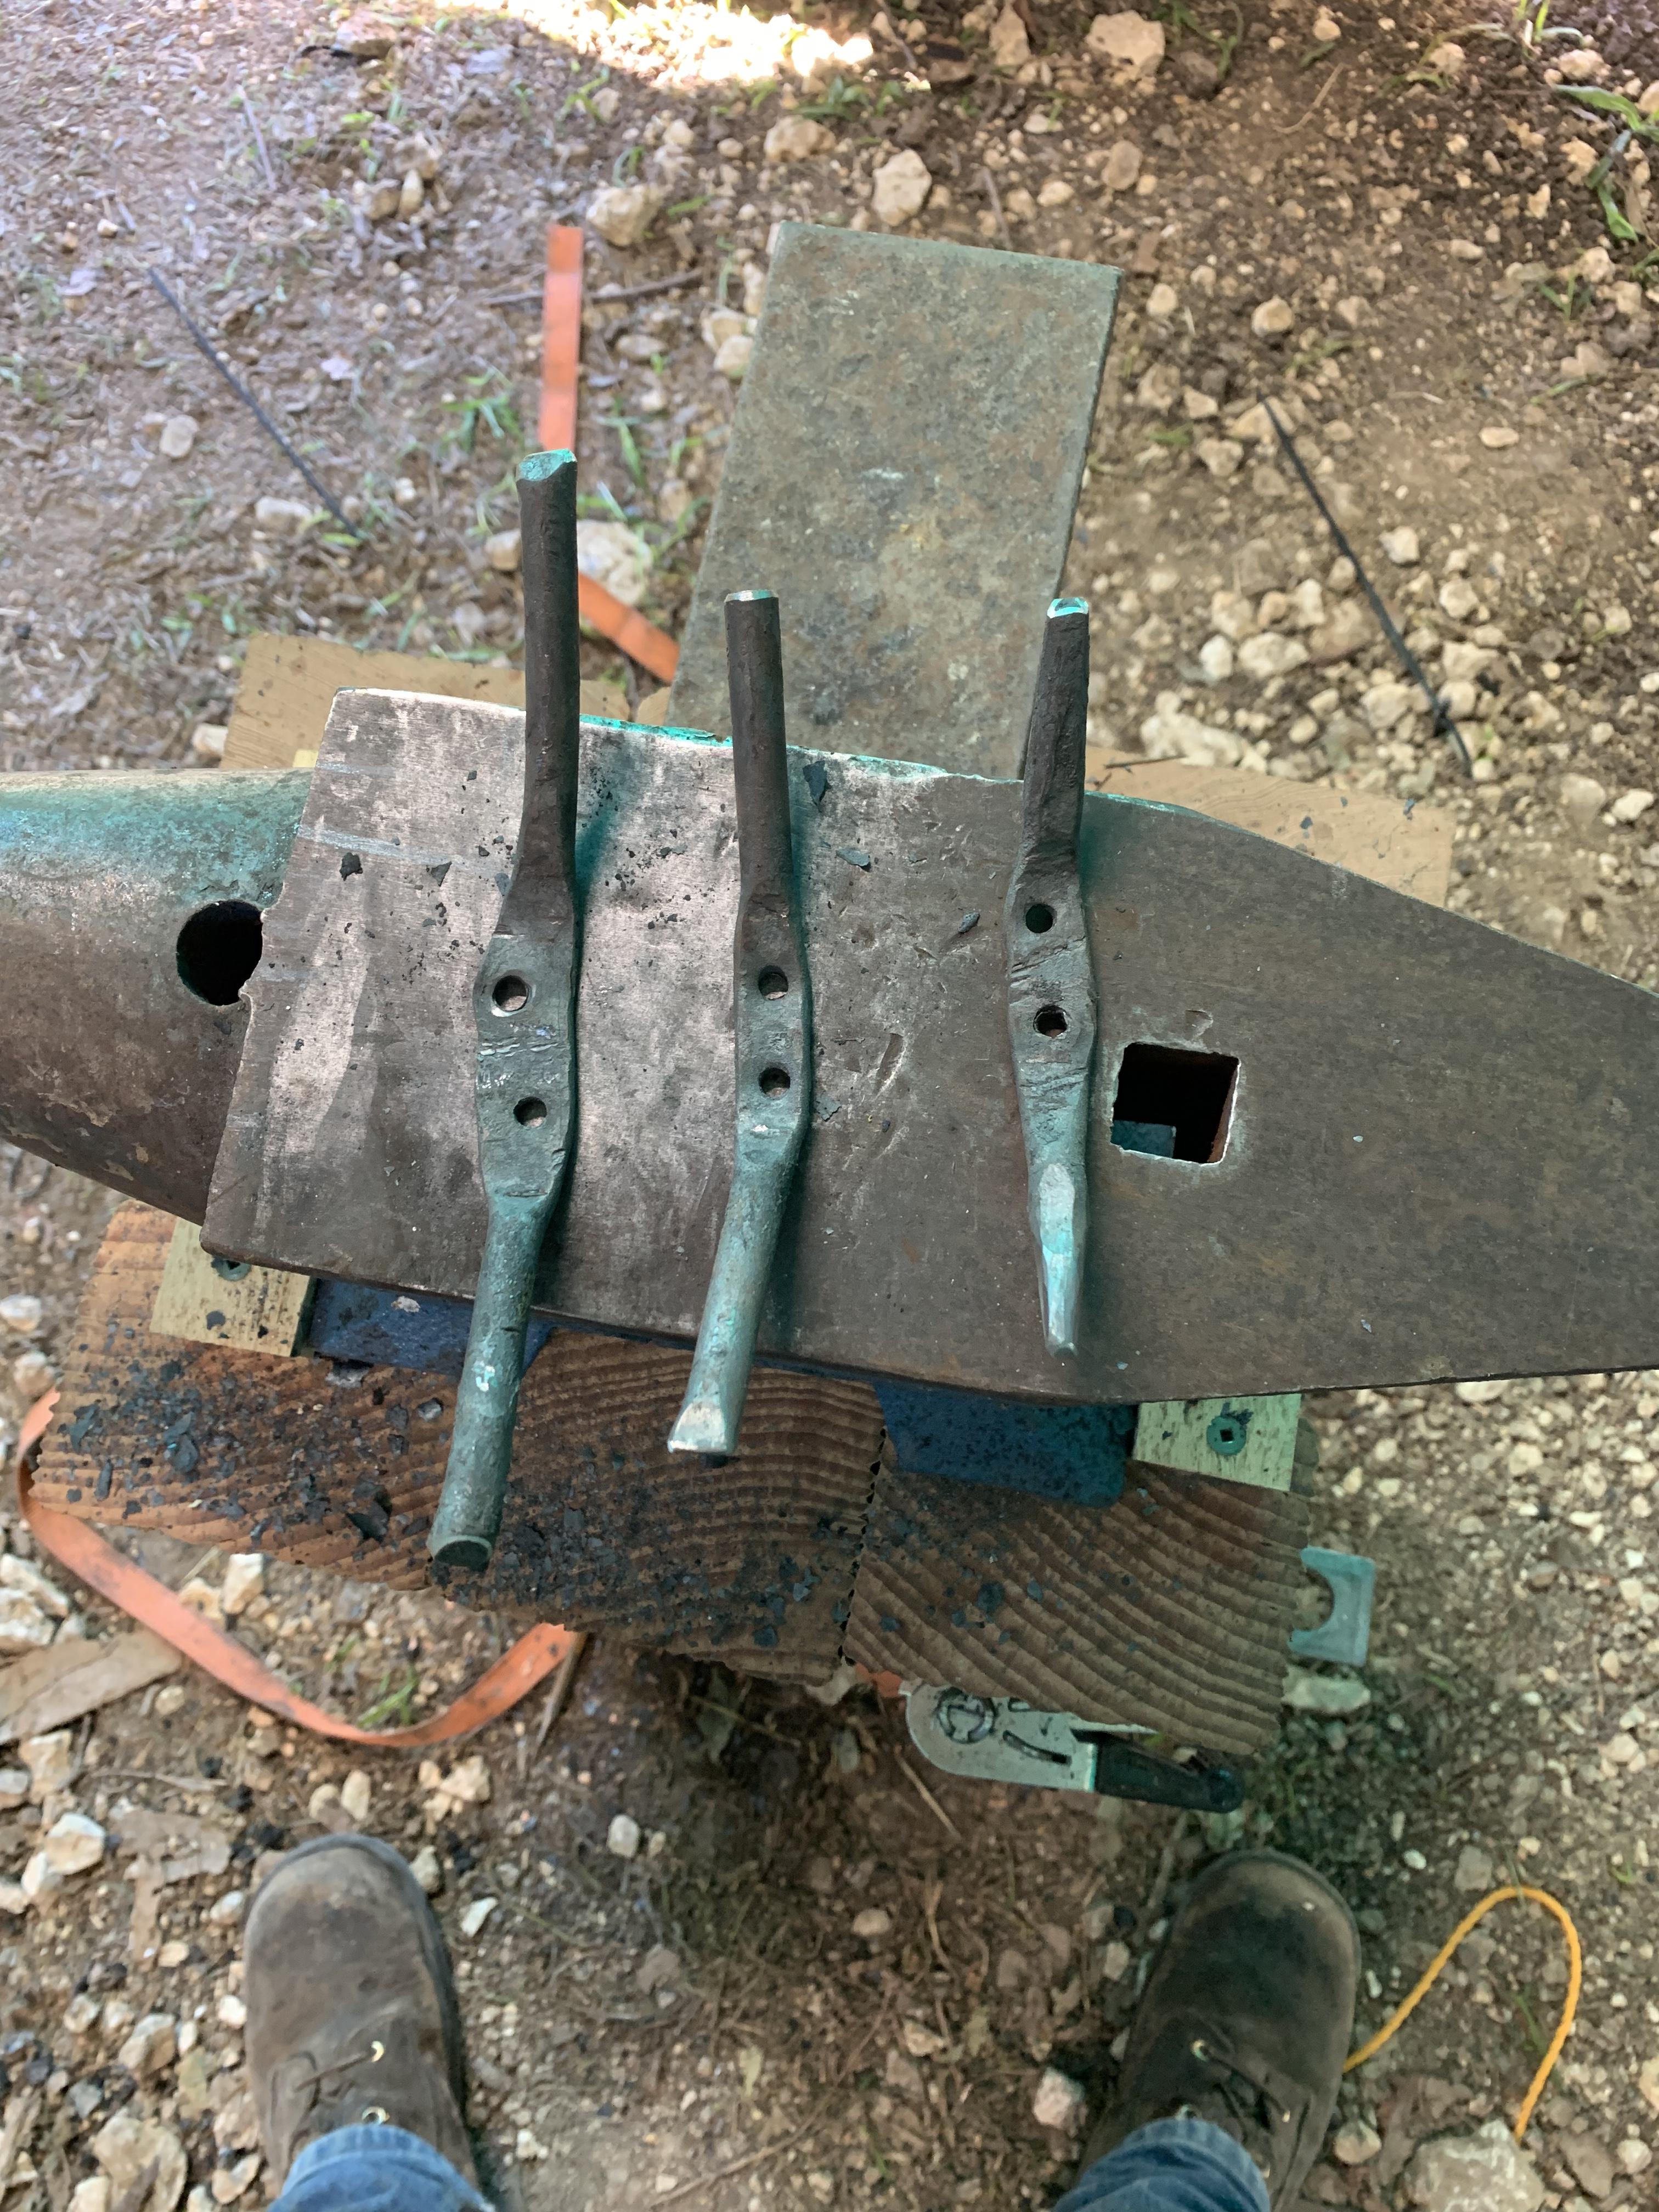
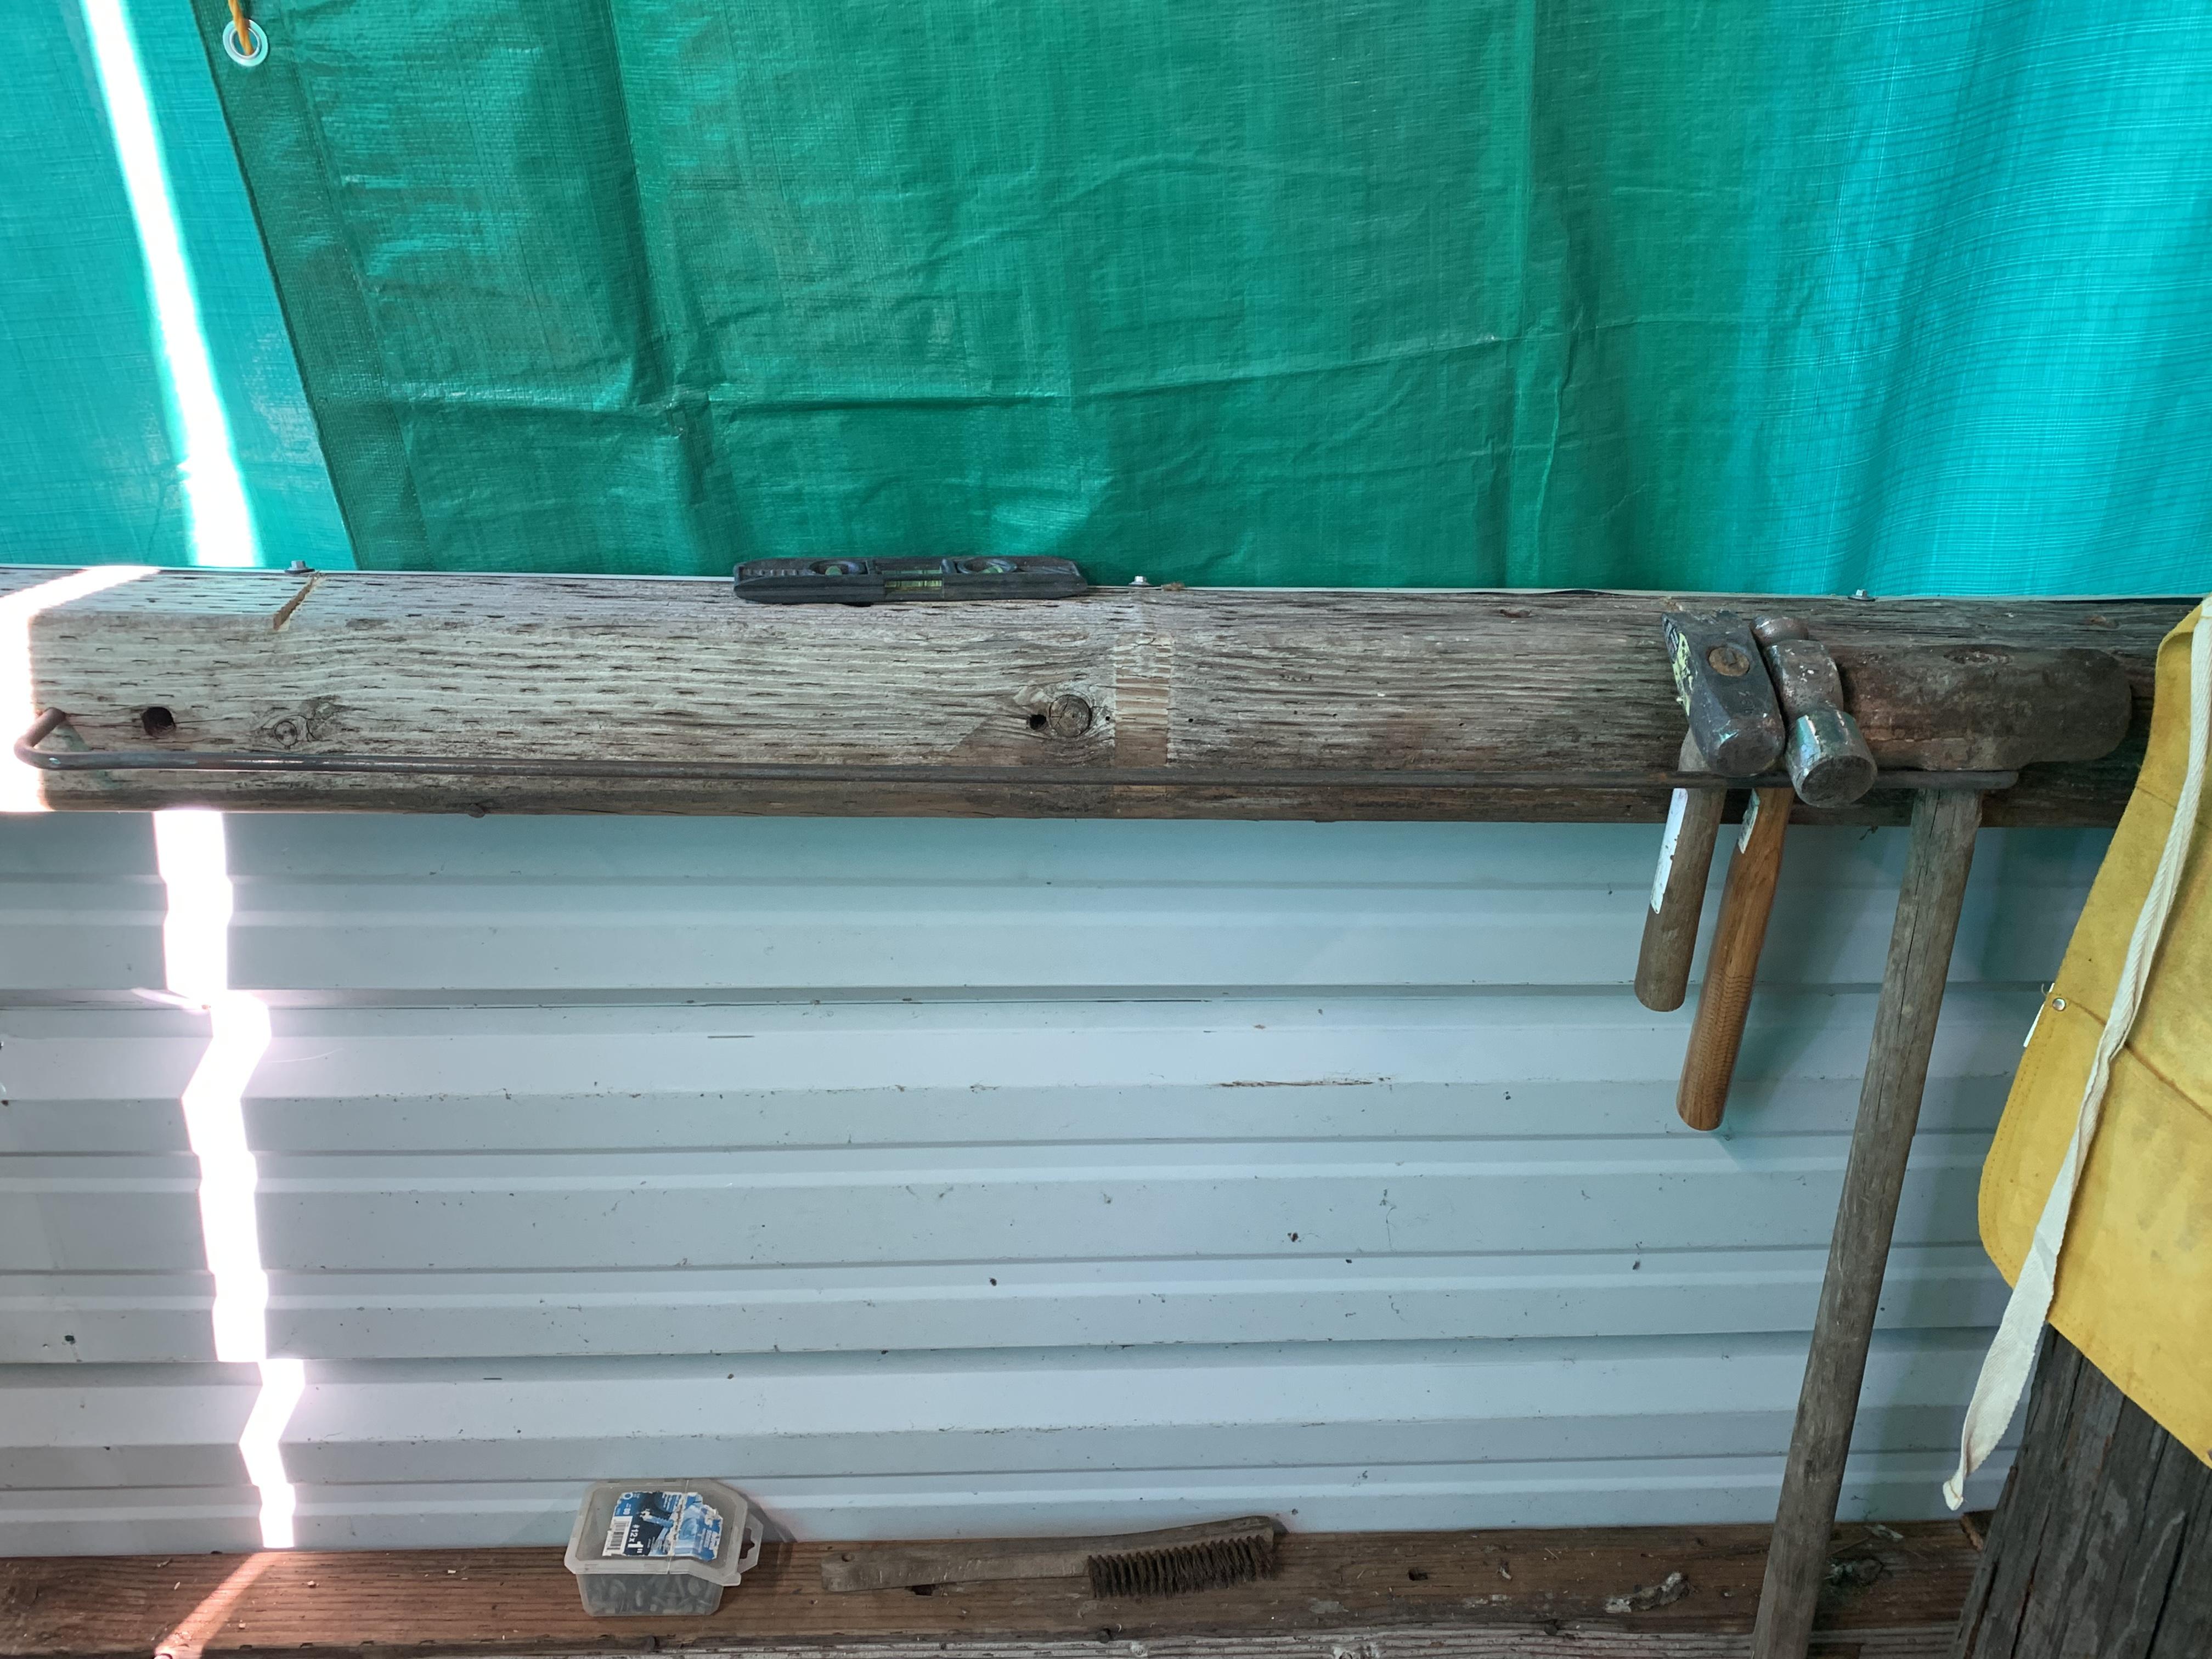
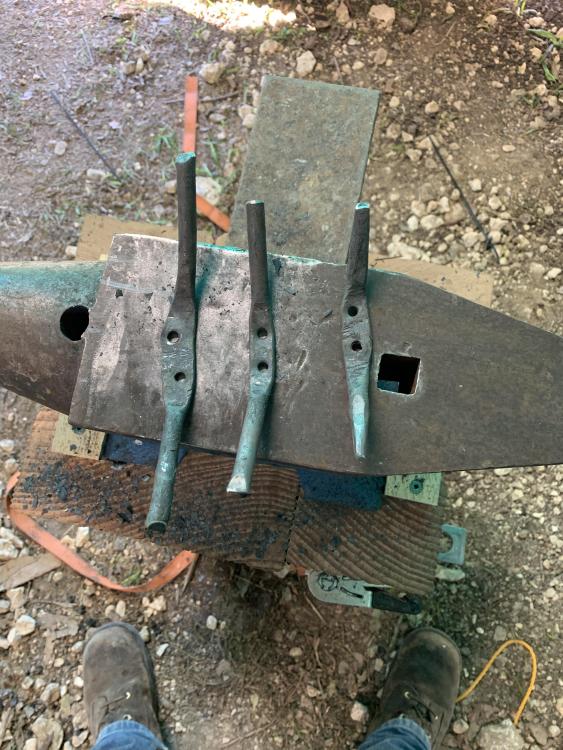
Made some stuff for the new smithy yesterday. I didn’t realize how much of a perishable skill smithing is. After ~5 month hiatus, I was struggling to do basic things like punch holes and draw consistent tapers. I made a few cleats for the tarp ropes and a hammer/tong rack.

-

Building a New Smithy (picture heavy)
Bantou replied to Bantou's topic in Building, Designing a Shop
Unfortunately, I don’t know anyone who does HVAC. I wonder how well an HVAC in-line blower would do. Amazon has some cheap that push plenty of CFM but I haven’t found info on PSI yet. -
Building a New Smithy (picture heavy)
Bantou replied to Bantou's topic in Building, Designing a Shop
Somebody on a different platform recommended getting a bathroom vent fan. Apparently it pushes as much air as a hand crank and is much quieter than the air mattress pump. -
Building a New Smithy (picture heavy)
Bantou replied to Bantou's topic in Building, Designing a Shop
Barring another “snowpocalyp,” the white stuff is much less a concern than high winds and sideways rain. One of my aunts actually used to do graphic design. She is going to work up a “Bantou Forge” logo for me in exchange for smithing work. It’s going to be a minimalist bull skull (something that will make a decent touch mark) as an homage to my moniker’s origins. “Bantou” was my first World of Warcraft character, a Tauren (bovine race) hunter. -
Building a New Smithy (picture heavy)
Bantou replied to Bantou's topic in Building, Designing a Shop
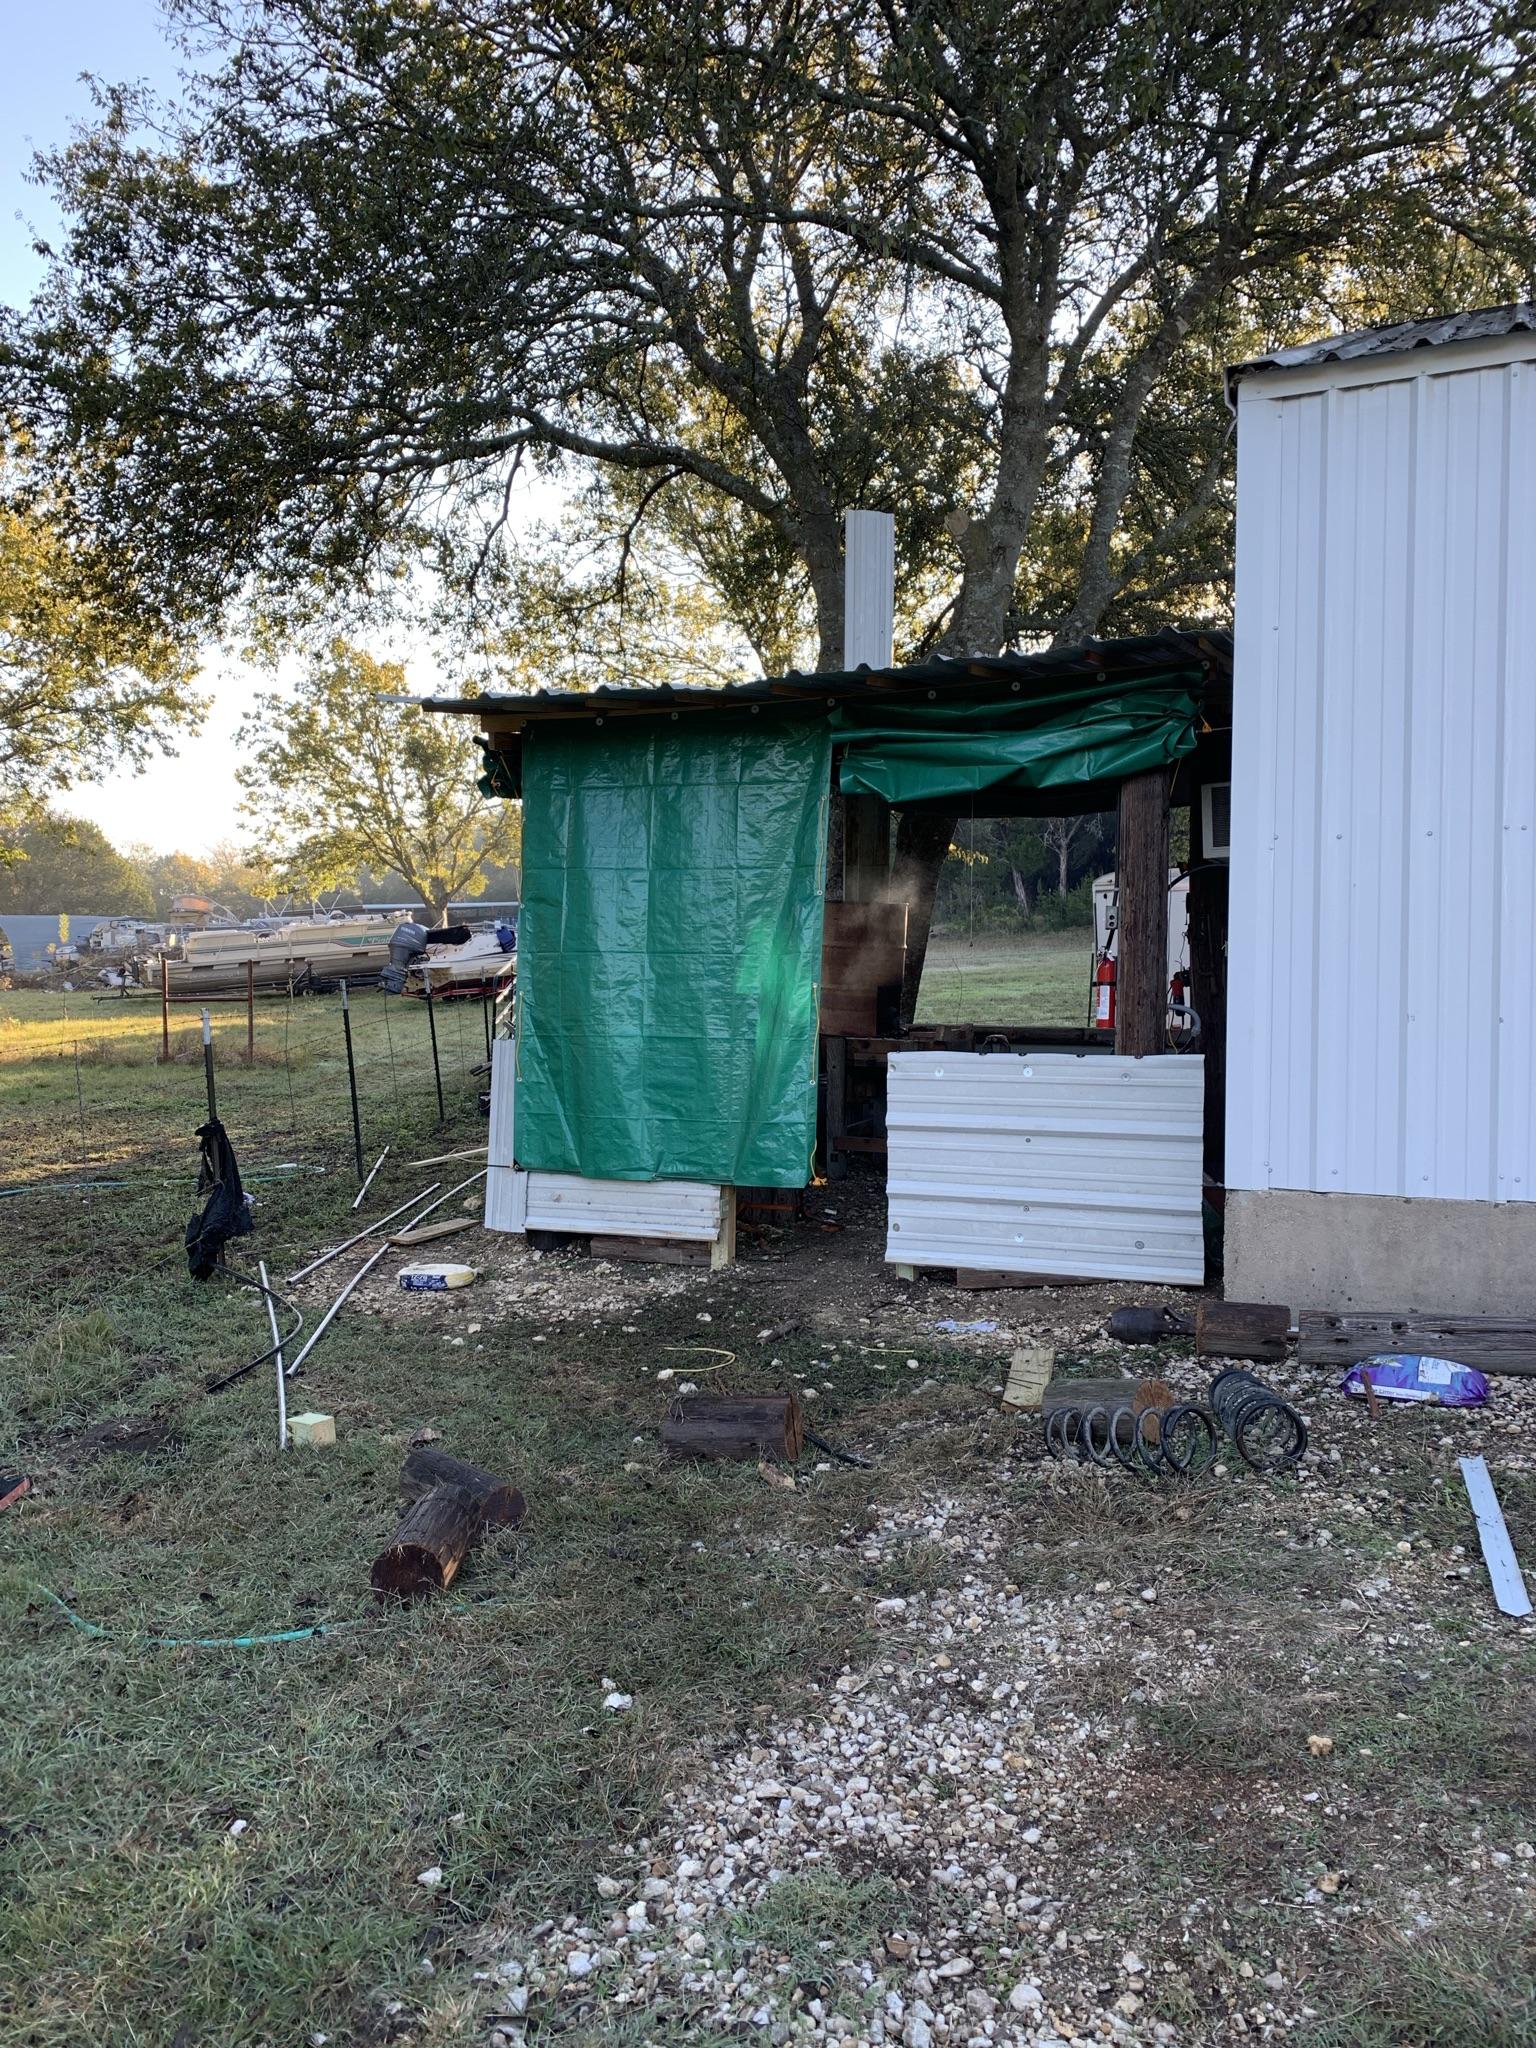
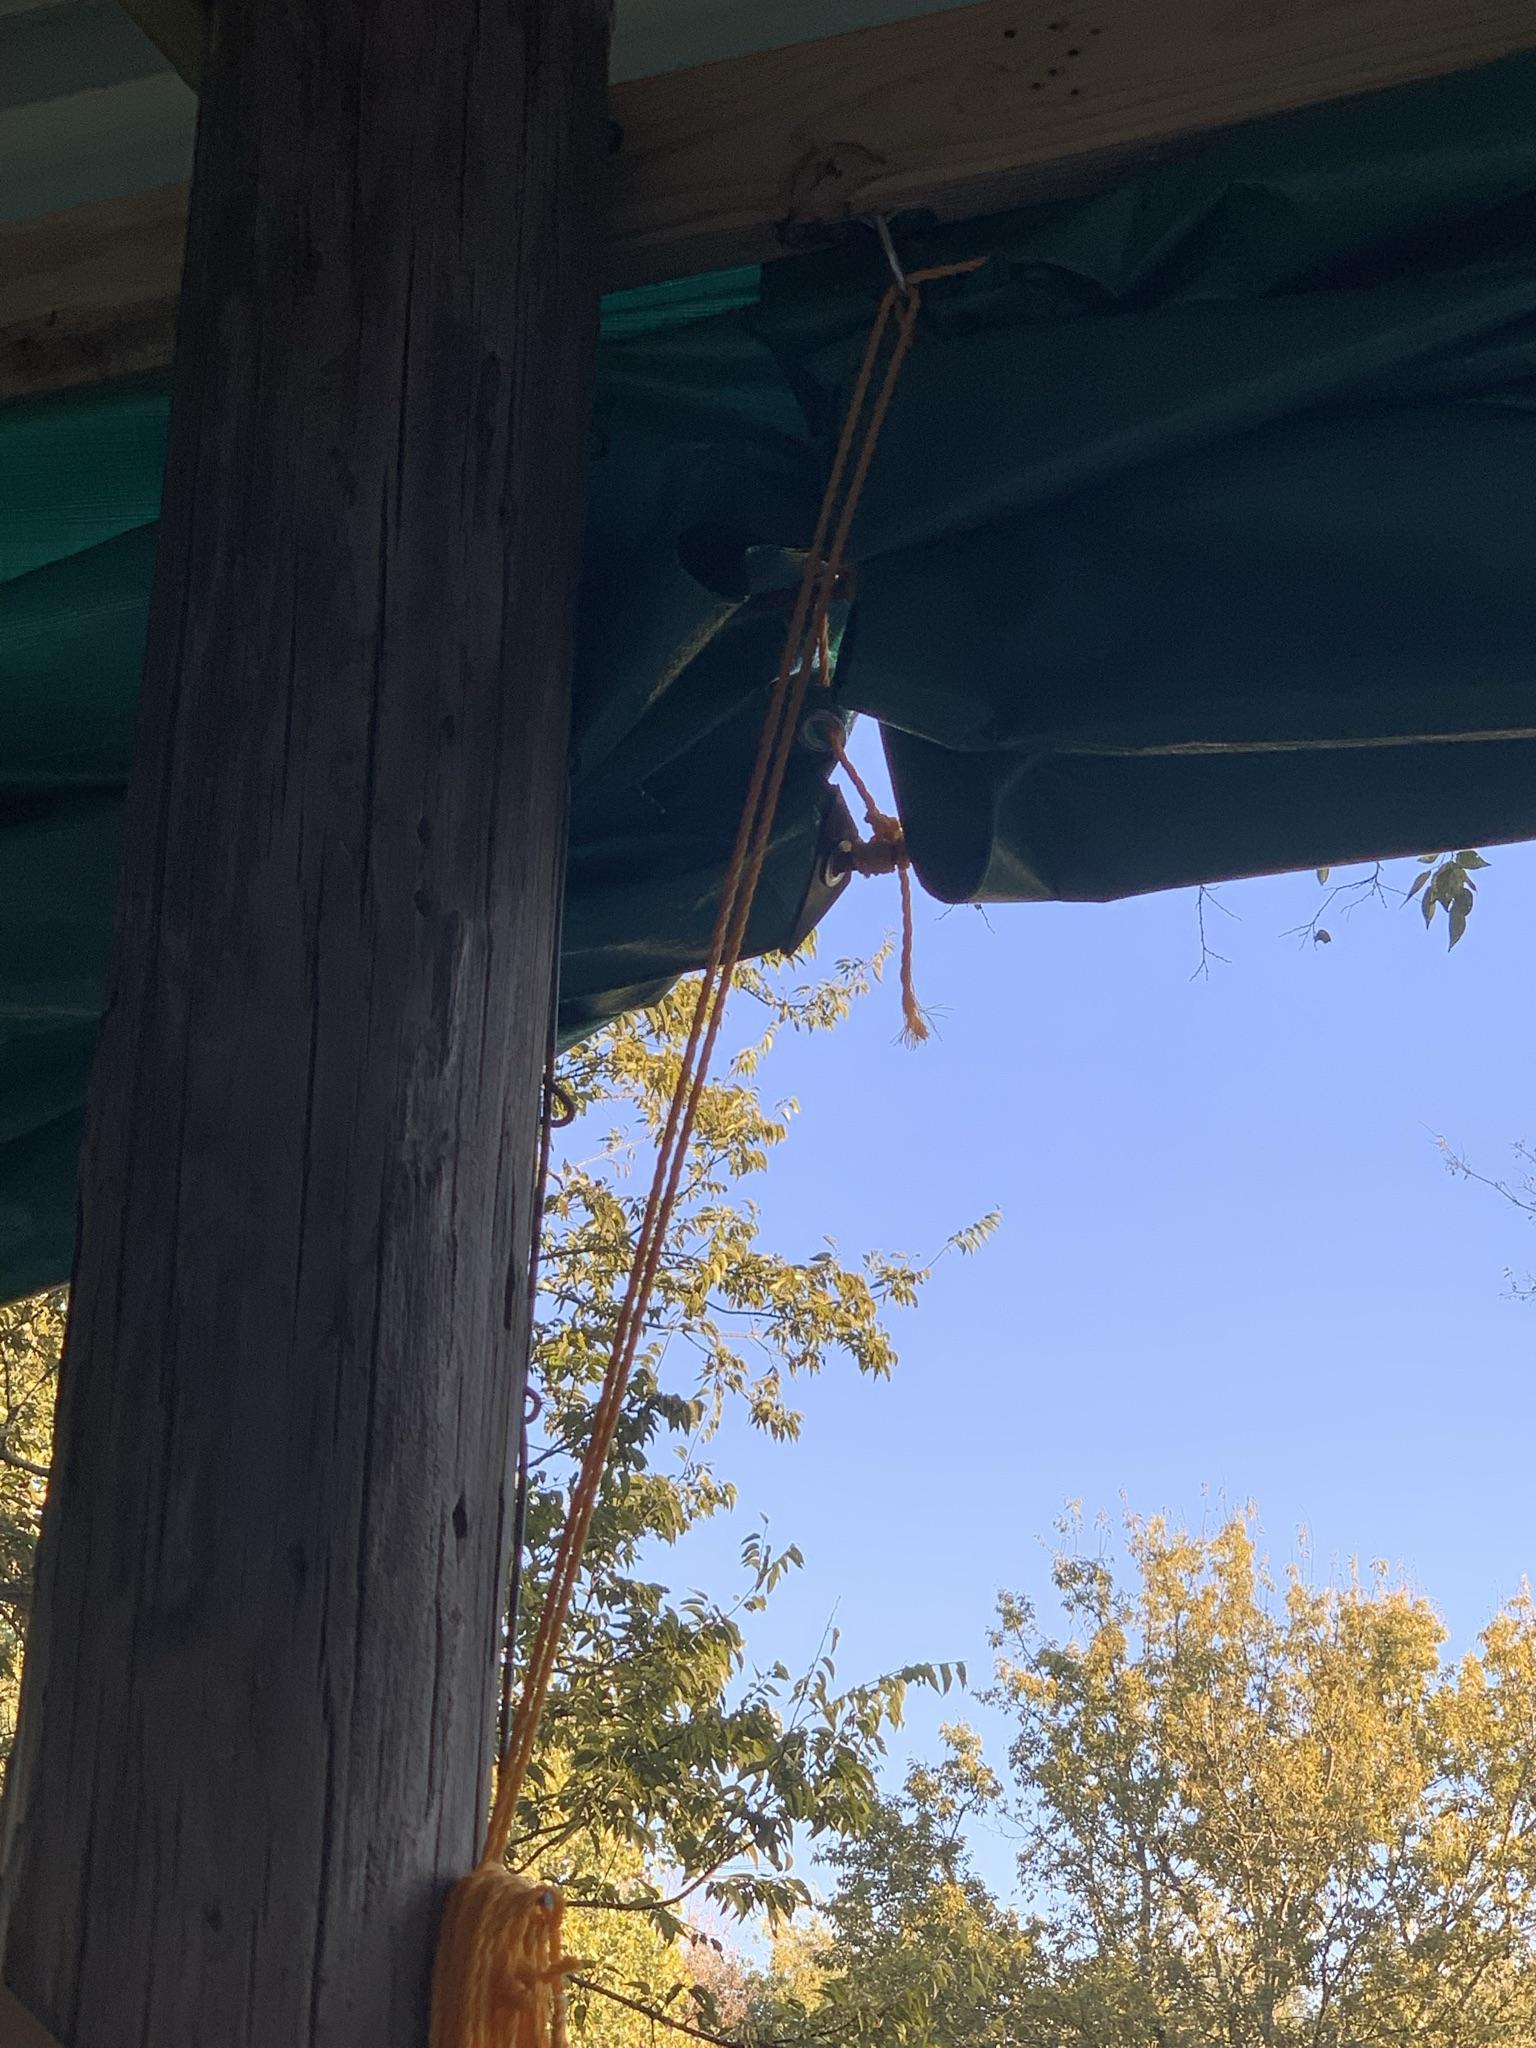
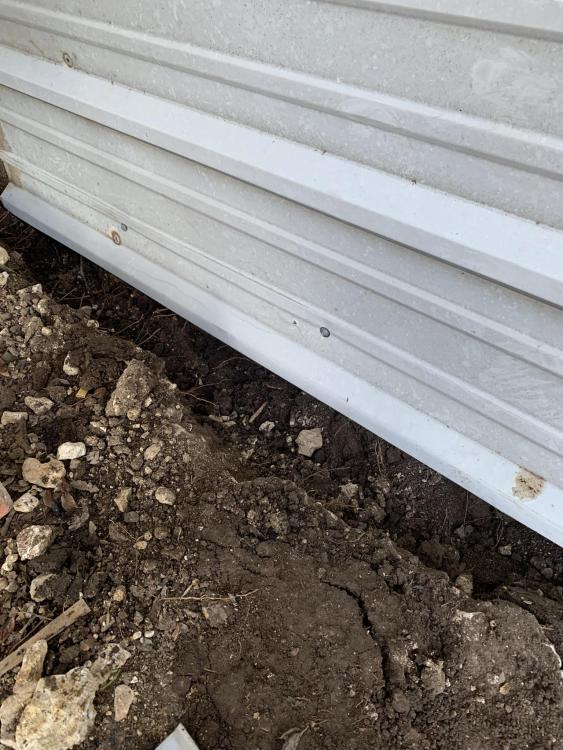
I got the half walls in, the chimney run, and the ropes in the tarps. I had to get a little creative with the ropes for the tarps down the long wall because they overlap. I still need to flash in the chimney where it goes through the roof and on top of the side draft hood. Even with the chimney just sitting on top of the barrel, it draws well enough that my vape is more likely to smoke up the smithy than the coal is. It is fully functional now and just needs some clean-up from construction and organization. I tied both ropes for the tarps together so that both sides come up at the same time. The ropes are run through trailer anchor points because pulleys would have taken up too much space and were too expensive. The air mattress inflator was obnoxiously loud inside the building so I ran the hose under the wall and put the inflator under a bucket. It is still annoying but tolerable now. I’m kicking around some ideas on a more permanent solution. The last major issue (that I know of) to be conquered was how to prevent water from running through the building (it sits in the watershed from the hill behind it). The solution presented itself when I got ready to put the walls on. The R-panel refused to bend where I wanted it to, to screw the top down to the rail. As a result, I had to bury the bottom 2-3” of the panel on the uphill side of the structure. In theory, this should force the water around my building instead of through it.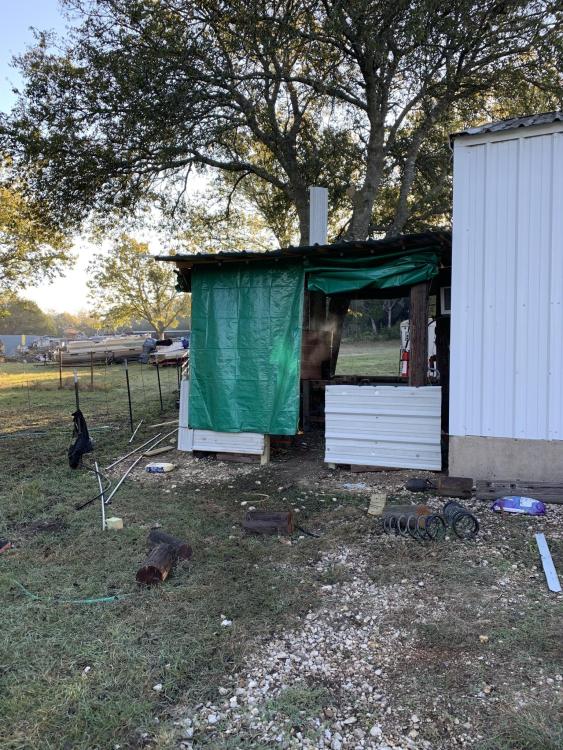


-
Building a New Smithy (picture heavy)
Bantou replied to Bantou's topic in Building, Designing a Shop
It’s been my experience that a decent hand blower works as well or better for that. A good gas hand blower is nearly as strong as a backpack and it’s easier to get under and around things. -
Building a New Smithy (picture heavy)
Bantou replied to Bantou's topic in Building, Designing a Shop
It’s not quite that bad here. We typically have anywhere from 1-20 mph winds. If a storm rolls in, it’s entirely possible to see 70mph+ gusts though, even without a tornado. We had sustained winds of 40-50 mph with gusts of 60+ one day last week without a storm. We might have 2-3 days like that in a year. -
Building a New Smithy (picture heavy)
Bantou replied to Bantou's topic in Building, Designing a Shop
Frosty, mine is getting to an age where she really enjoys it. I think next year I’m going to have to suck it up and dress up as well. Thomas, there are pieces of 3/8 round stock through the bottoms of some of it. The idea is to weave some rope through the verticals sides and tie it off to the round stock. In theory, the tarps should go up and down like a set of Venetian blinds. I ran out of pieces of 3/8 that were a good length before getting them all done and didn’t have time to cut the rest. With the way storms can get here in Texas, I need a way to secure the tarps beyond just weight. I’m afraid that without some kind of tie down system, any weight I put on the bottoms of the tarps will just give more momentum to rips the tarps loose when the wind gets bad . -
Building a New Smithy (picture heavy)
Bantou replied to Bantou's topic in Building, Designing a Shop
It’s nearly there (I swear I say that every weekend and then spend all of the next working on it). The half walls are ready for siding and the tarps are hung. I had to pick my daughter up from her mother earlier than normal today so that we could go trick or treating and didn’t have enough time to do all of it. The tarps were the highest priority because it is supposed to rain this week. They aren’t going to keep out everything; but they should keep things relatively dry. I have them secured to the structure with screws and fender washers on the top, and zip ties on the bottom. The zip ties are just a temporary measure to keep the tarps from blowing around if it gets stormy instead of just rainy. Once I have the siding on, I’m going to use either hooks screwed into the bottom board of the wall or tent stakes as anchor points and either bungee cords or a rope and prusik to keep the tarps taught. -
Building a New Smithy (picture heavy)
Bantou replied to Bantou's topic in Building, Designing a Shop
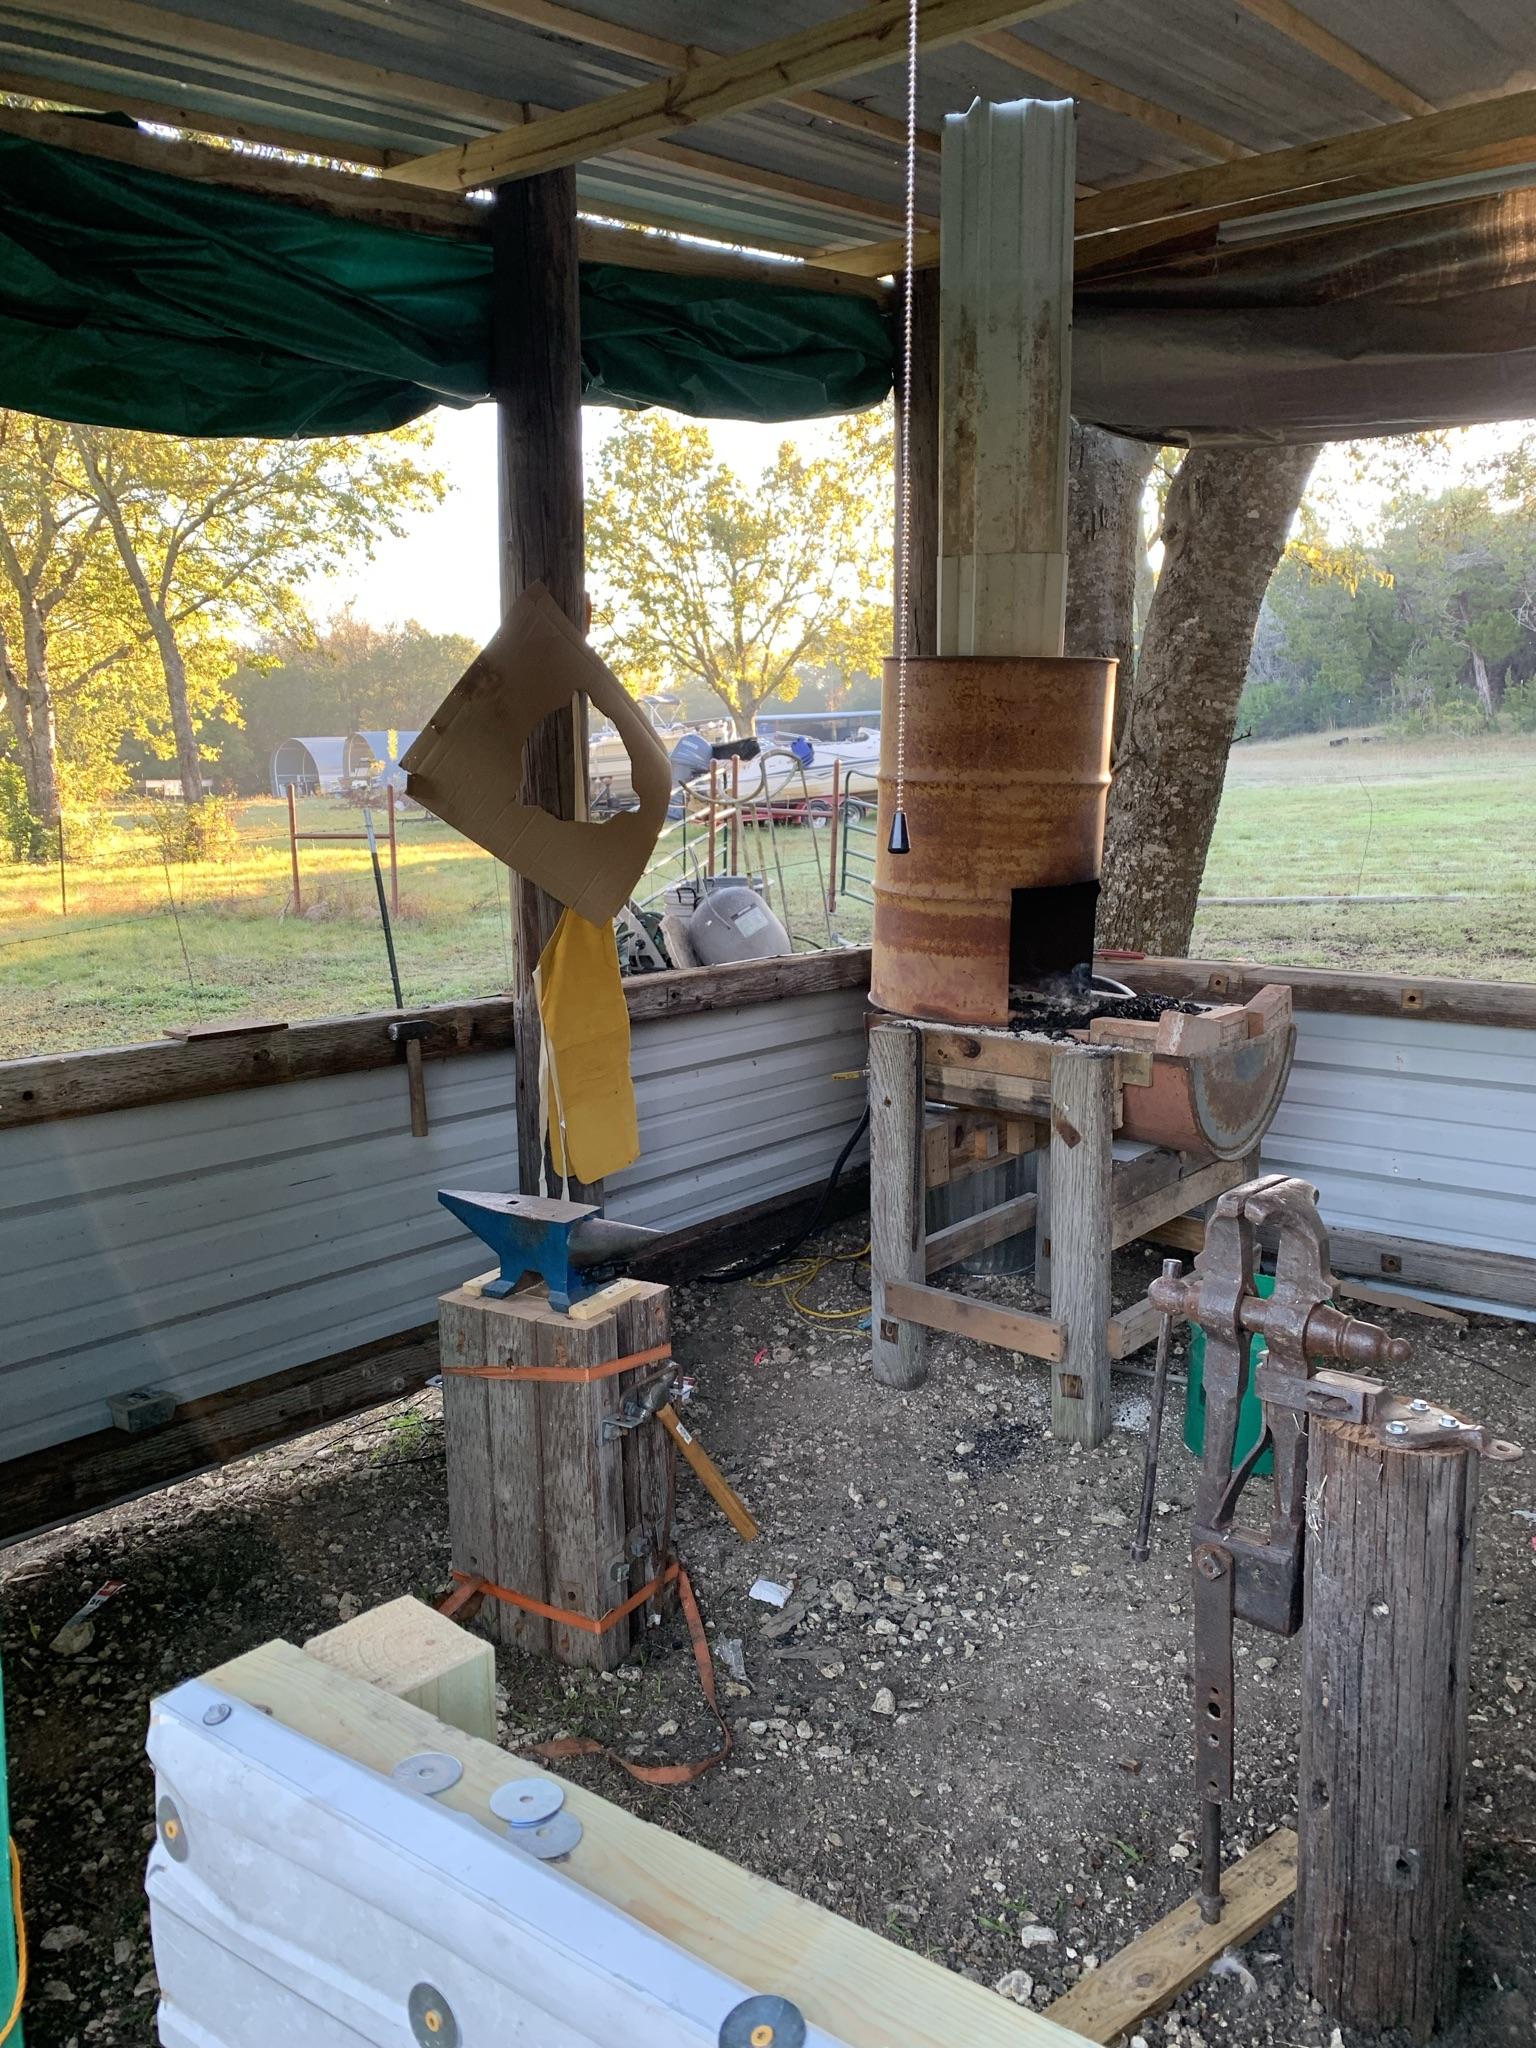
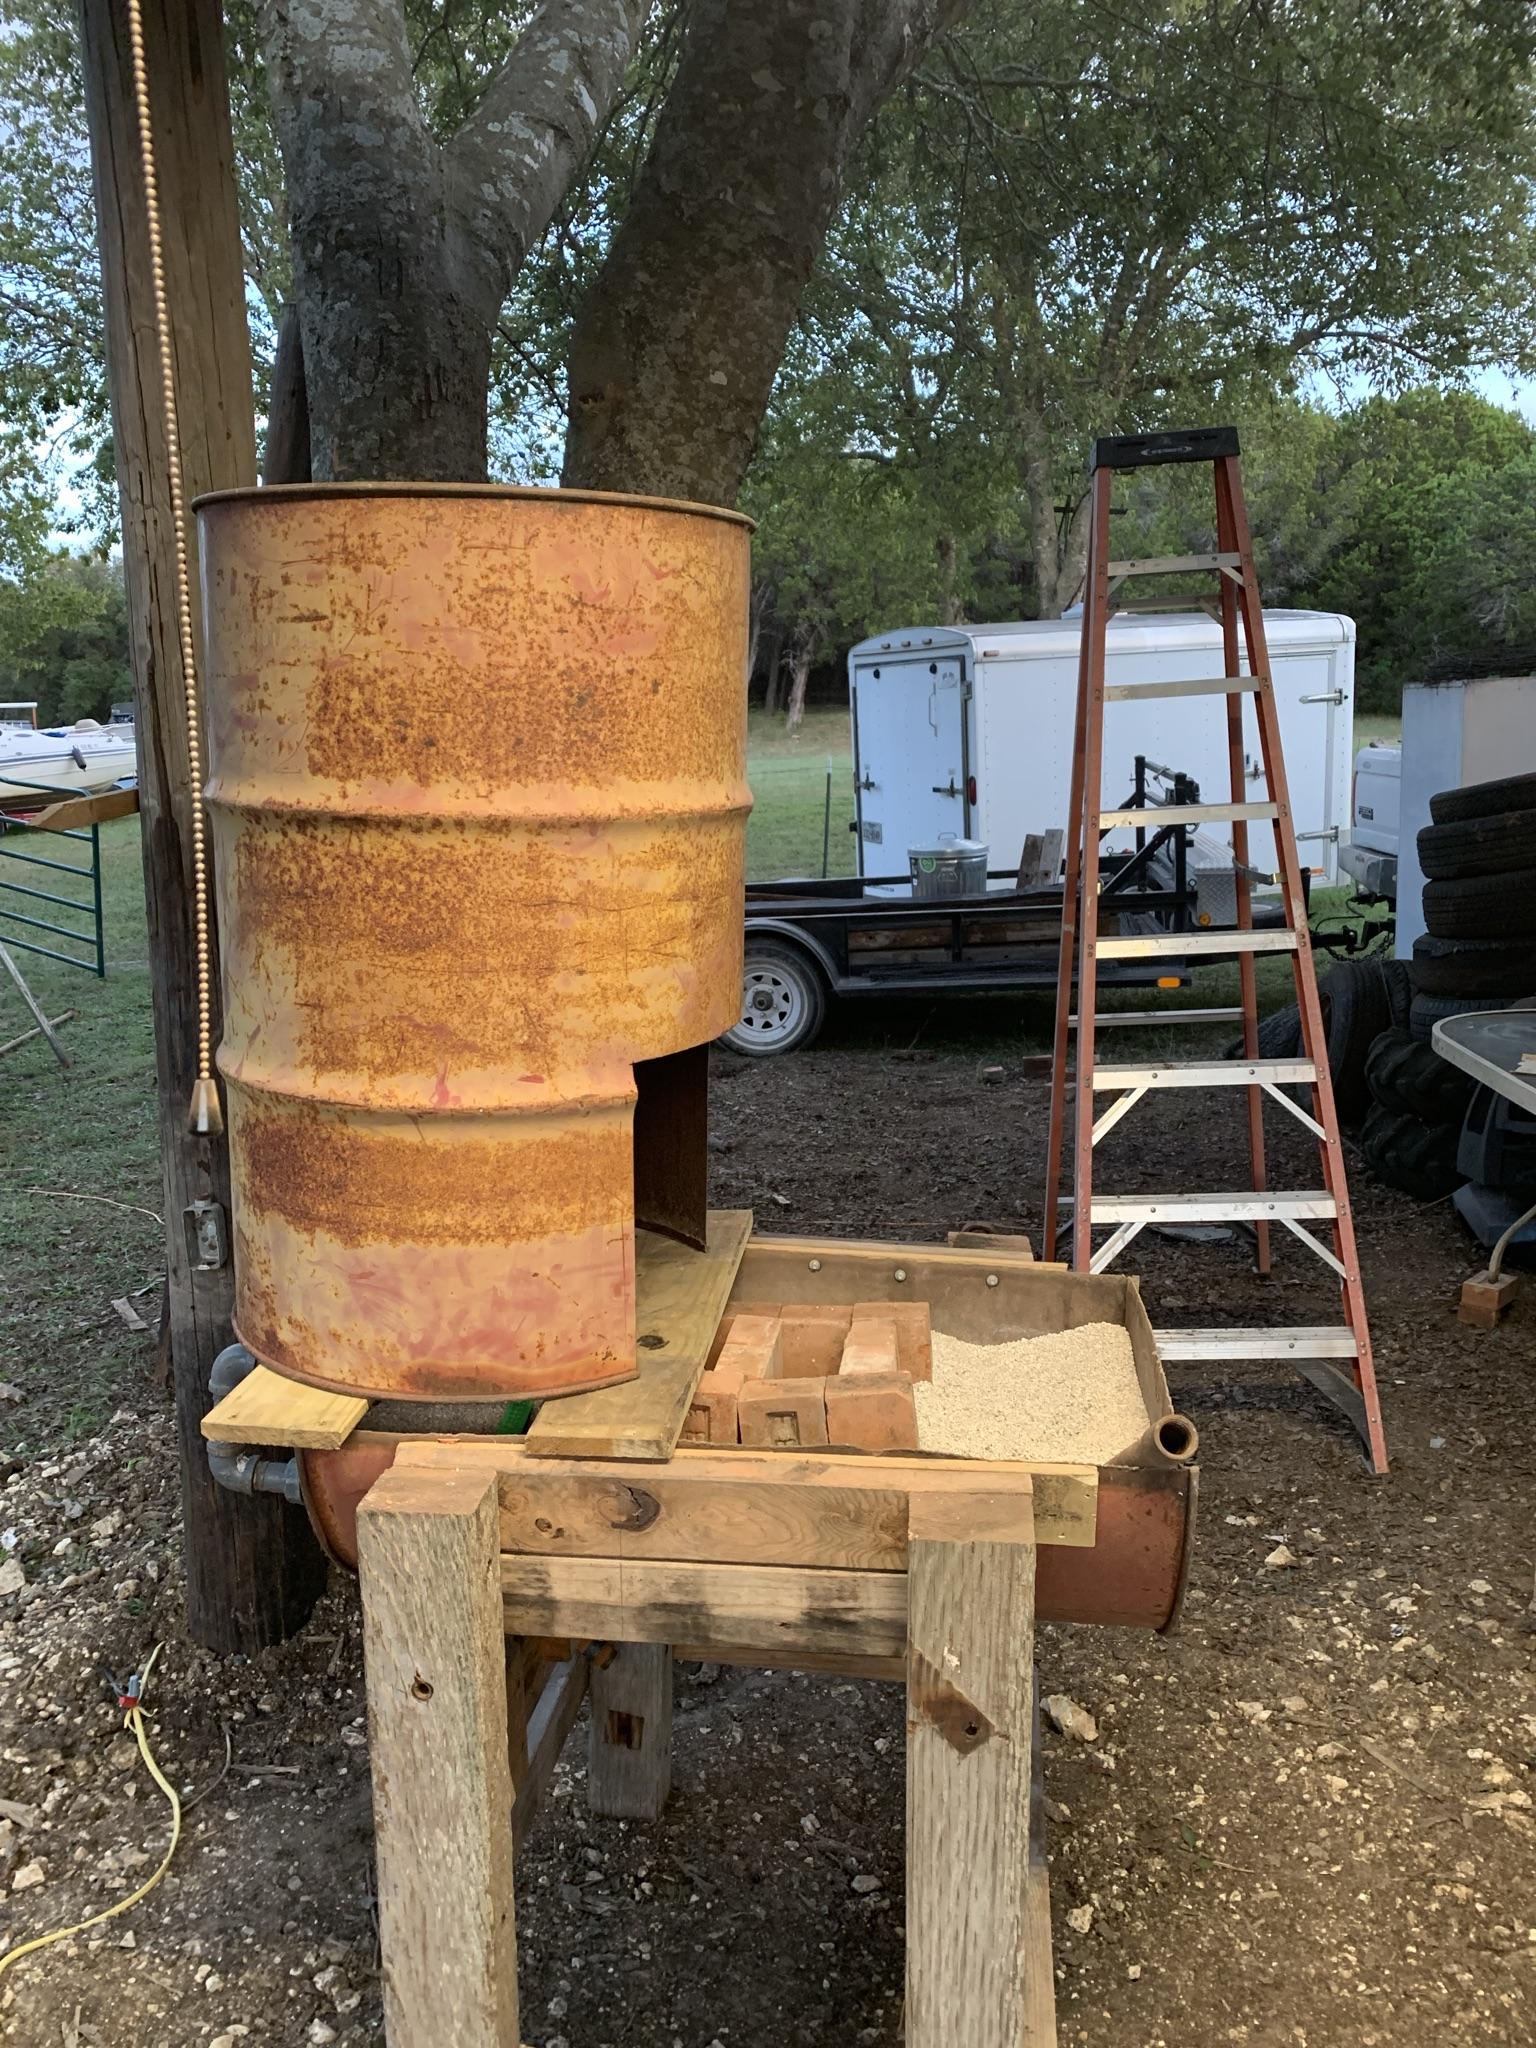
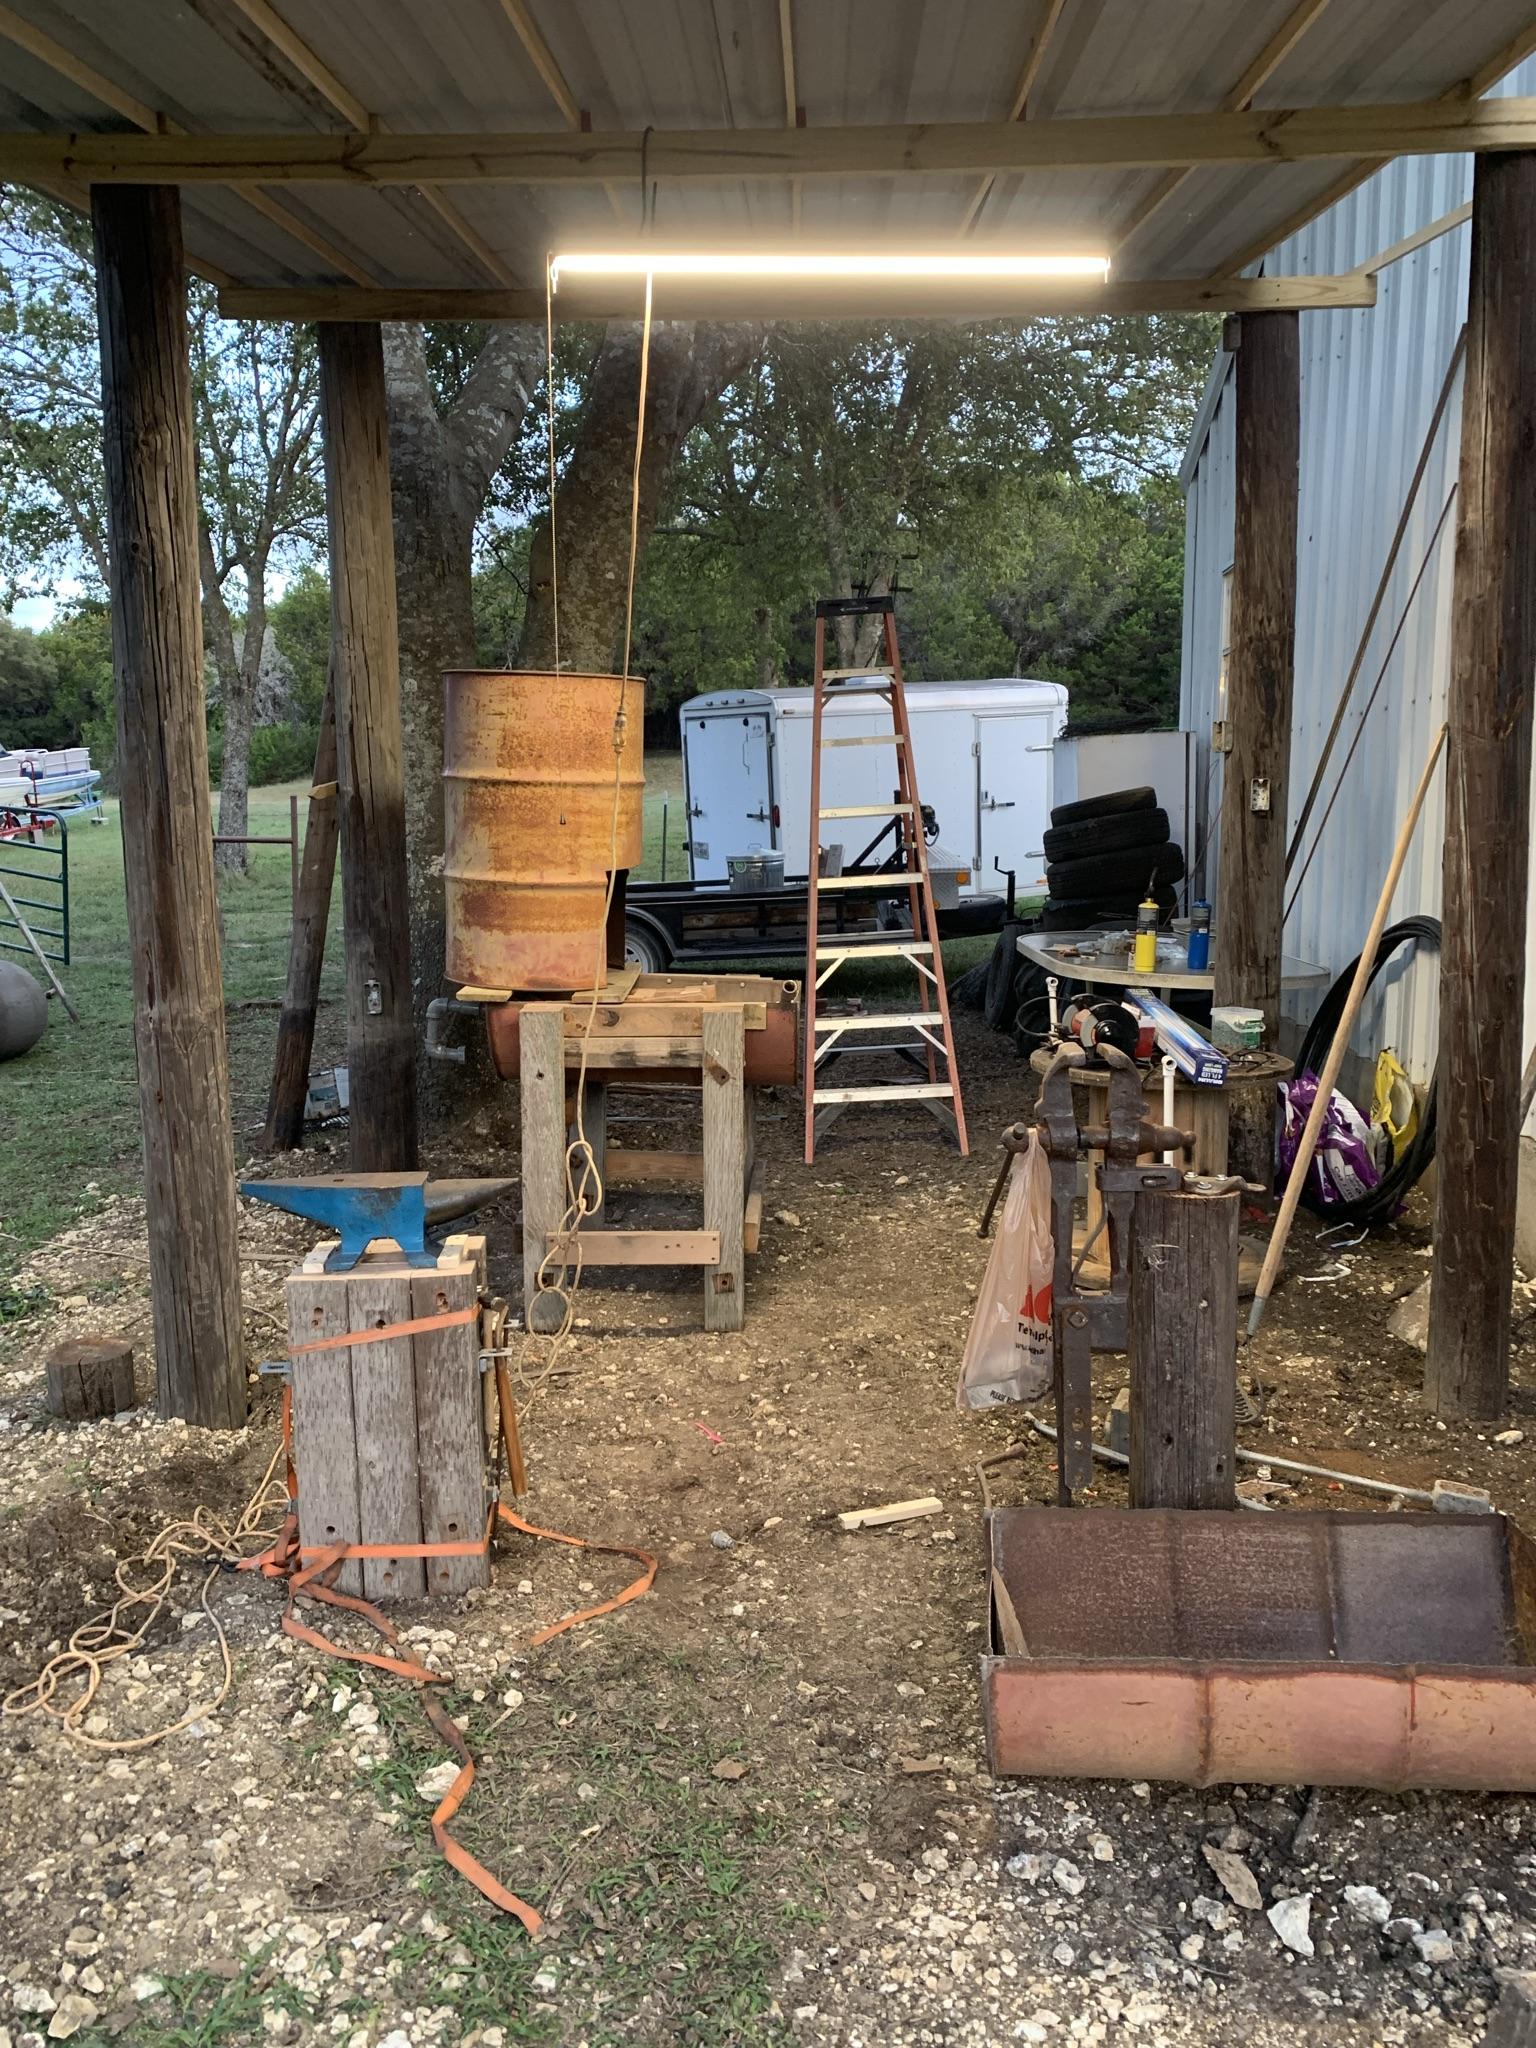
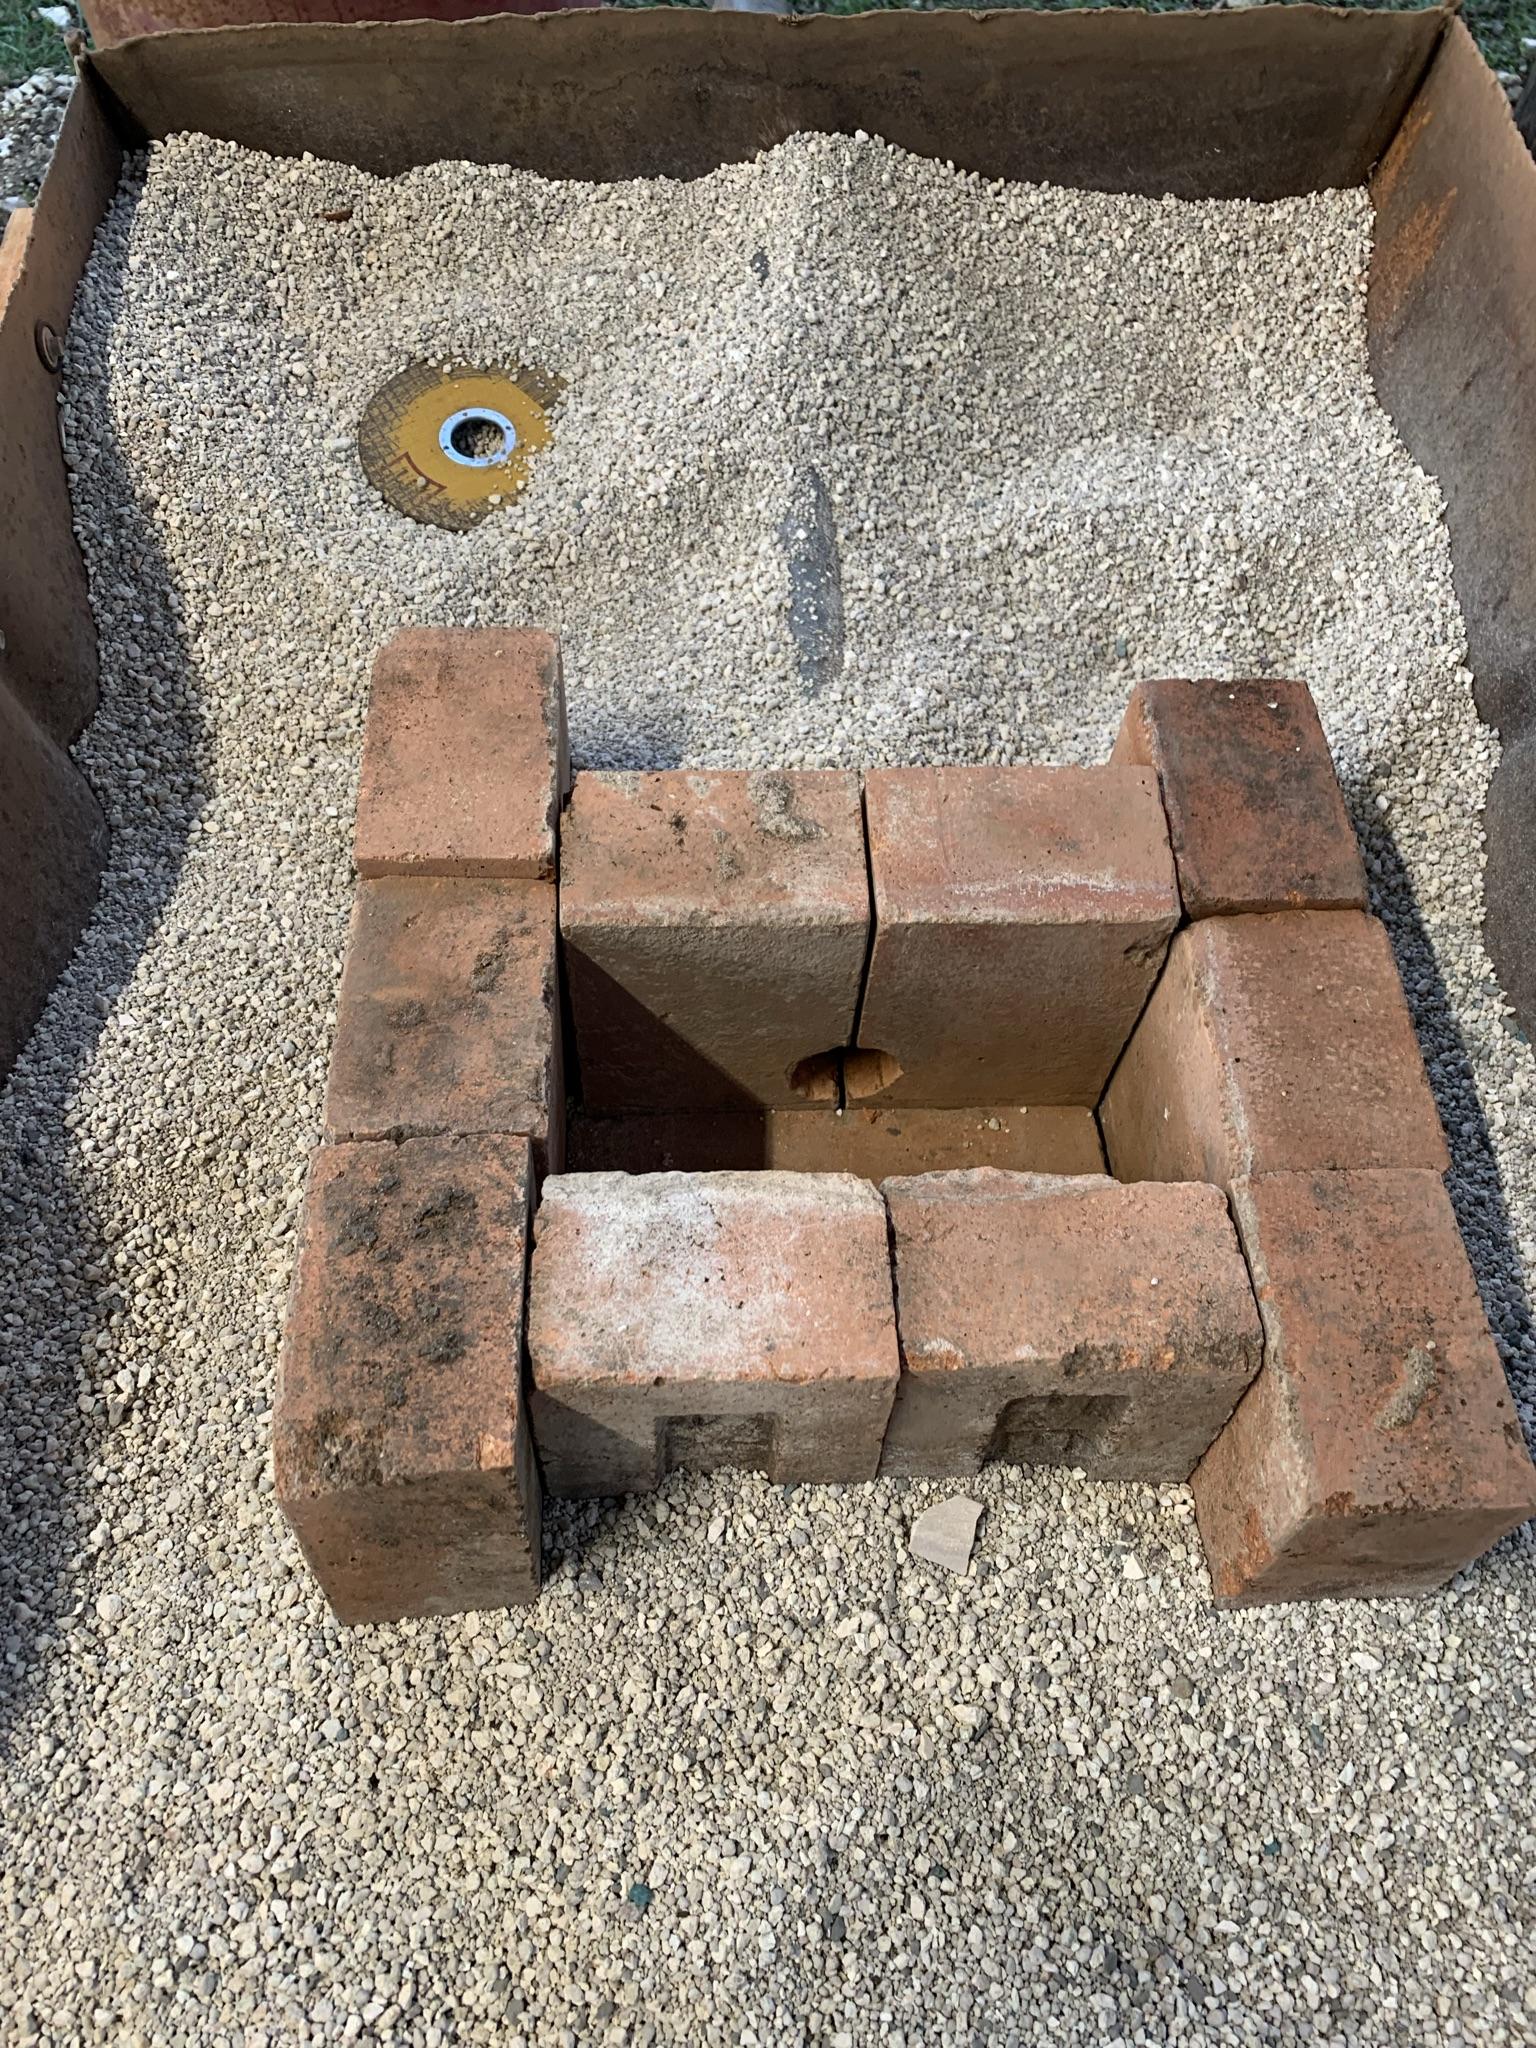
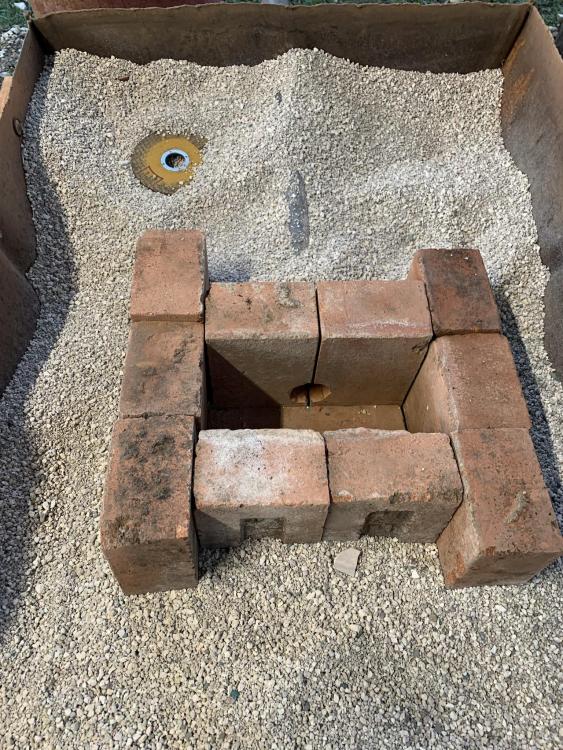
I gave the new JABOD a test fire last night and ran into two issues. First, the kitty litter kept getting mixed into the coal. Second, after about 30 minutes, my blower could not push enough air to get the fire hot all the way to the top; it shot a beautiful flame out from between the two bricks surrounding the pipe though. I should really know better than to try and “improve” on a proven design by now lol. The post mortem this morning revealed a massive chunk of clinker completely encasing the turyere and significantly melted bricks above it. I went back with the tried and true design today with the addition of a brick hearth to keep my coal out of the litter. It isn’t pretty by any means but I think it will work well enough for my purposes. I also got the last of the roof on, most of the half wall framed in, and the chimney put together. With any luck, I should have a completed smithy (excluding the work bench and storage) to show off by tomorrow afternoon. -
Building a New Smithy (picture heavy)
Bantou replied to Bantou's topic in Building, Designing a Shop
I’ll post pics once I get them done. I got everything wired in today and hot. I now have a fully functional, if a little rough around the edges, smithy. I still need to put the half walls on, run the chimney, and build the work bench; but, I can at least get back to forging again. -
Building a New Smithy (picture heavy)
Bantou replied to Bantou's topic in Building, Designing a Shop
Pics of the supports for the side draft? -
Building a New Smithy (picture heavy)
Bantou replied to Bantou's topic in Building, Designing a Shop
That gives me an idea… I want to be able to lift the assembly up if I need a longer fire. I could split one end of a bar into thirds to form a claw on the bottom and split it in half on the other end to form a “whale tale.” In theory, I should be able to lift the barrel up when needed and then set the “claws” back over the tops of the legs when I’m done. -
Building a New Smithy (picture heavy)
Bantou replied to Bantou's topic in Building, Designing a Shop
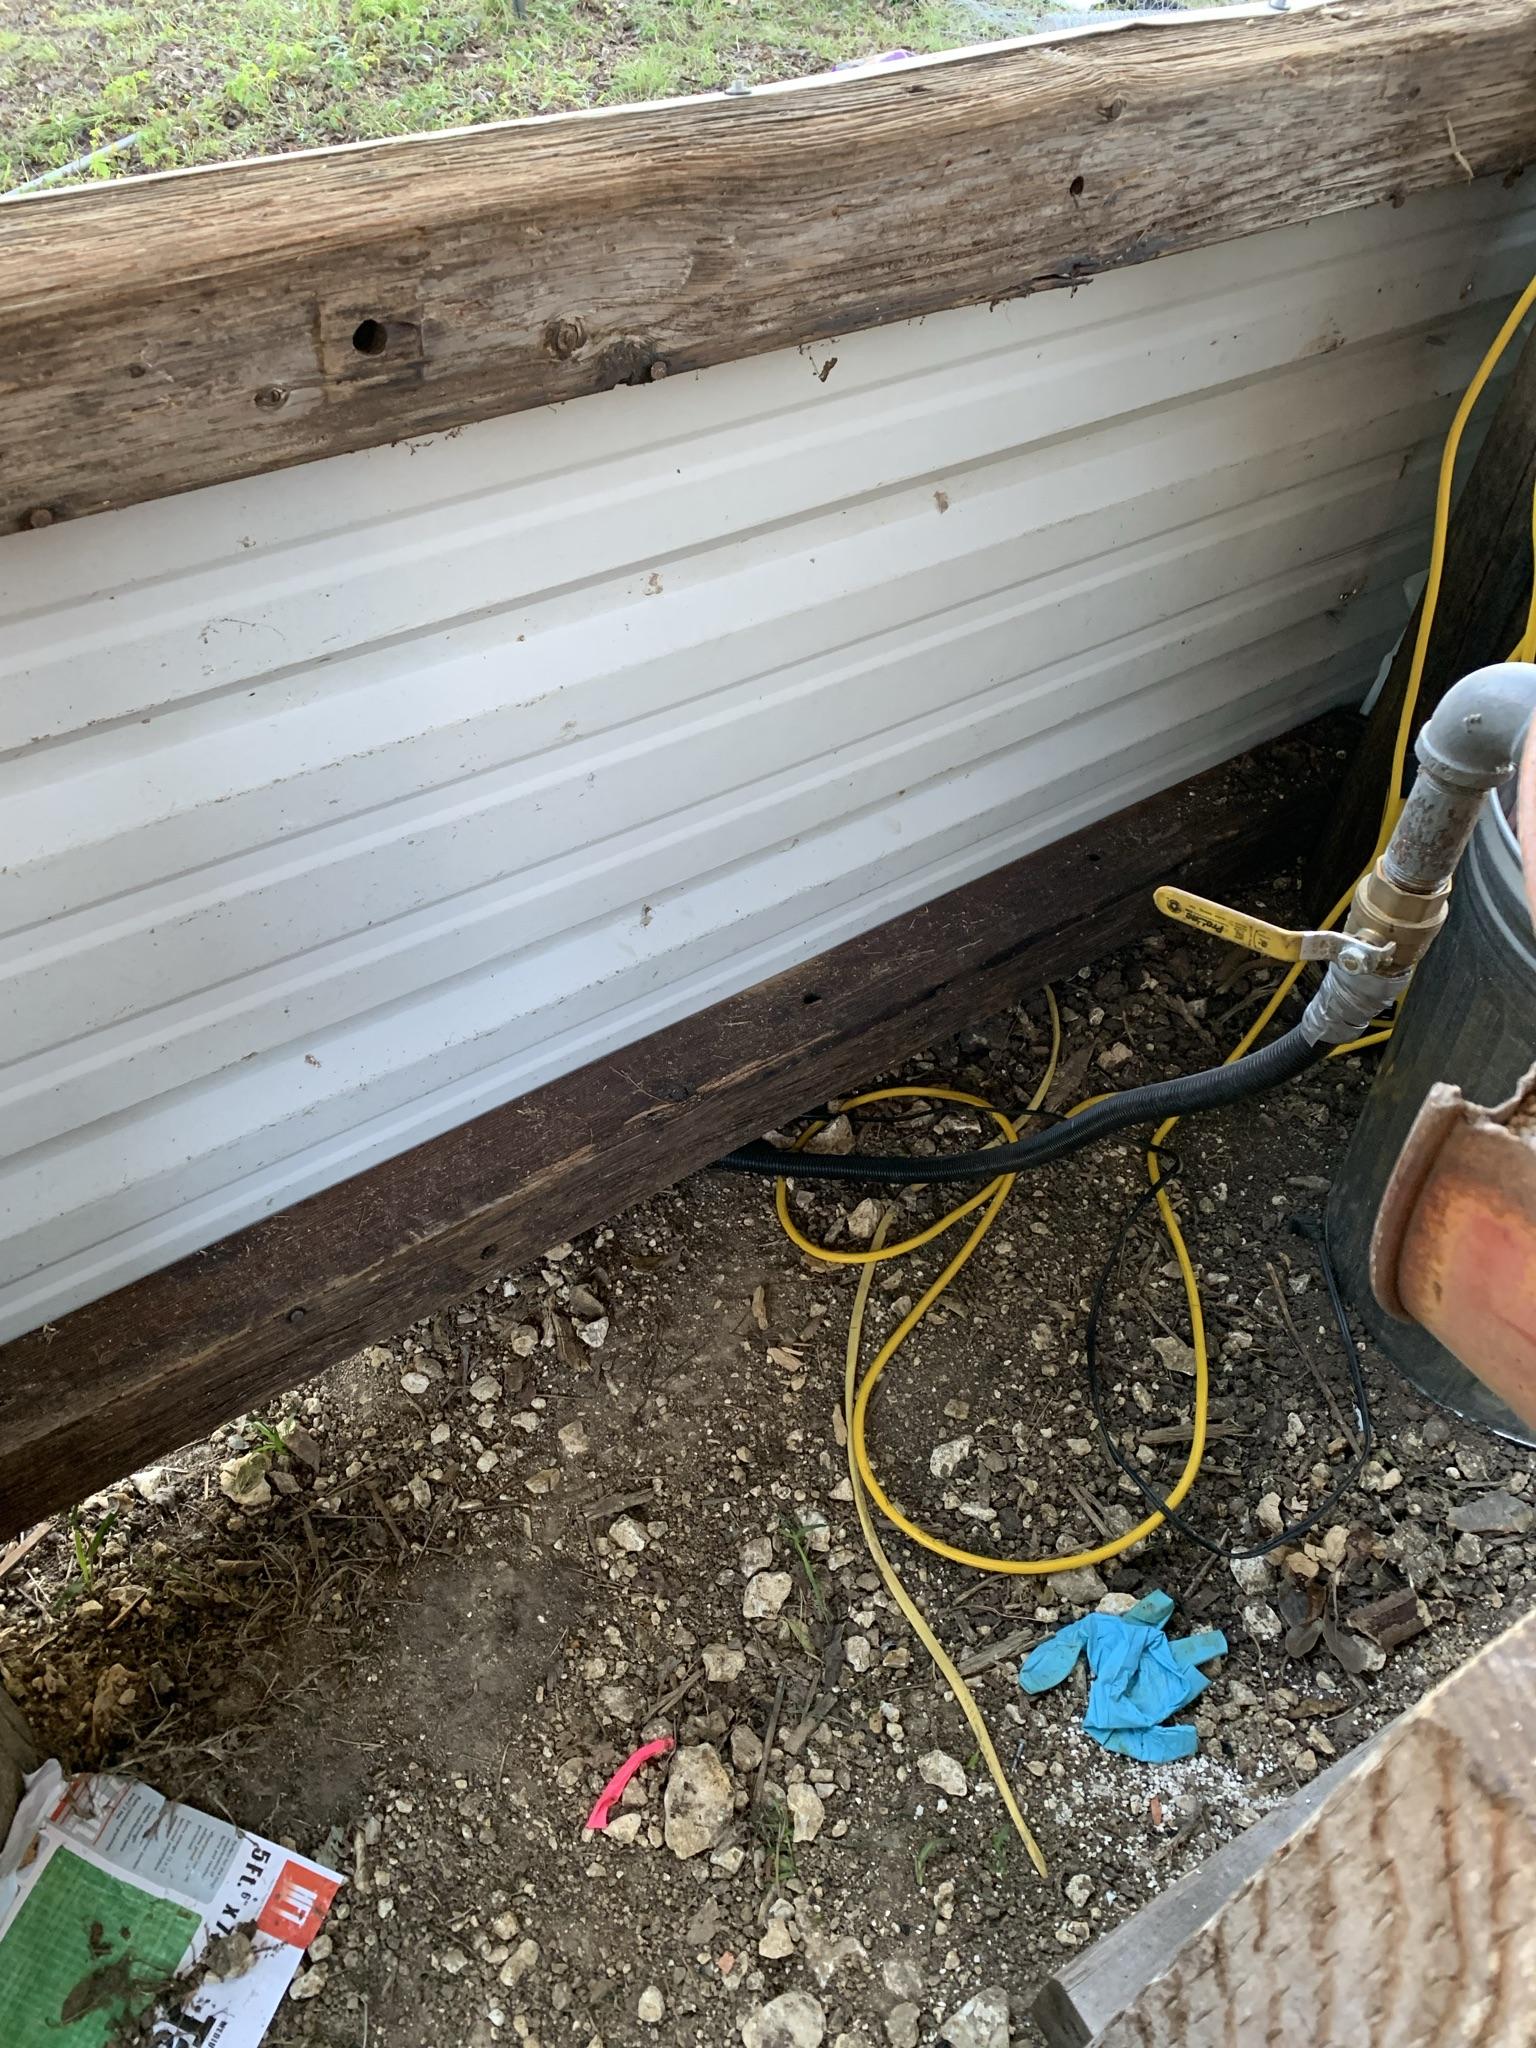
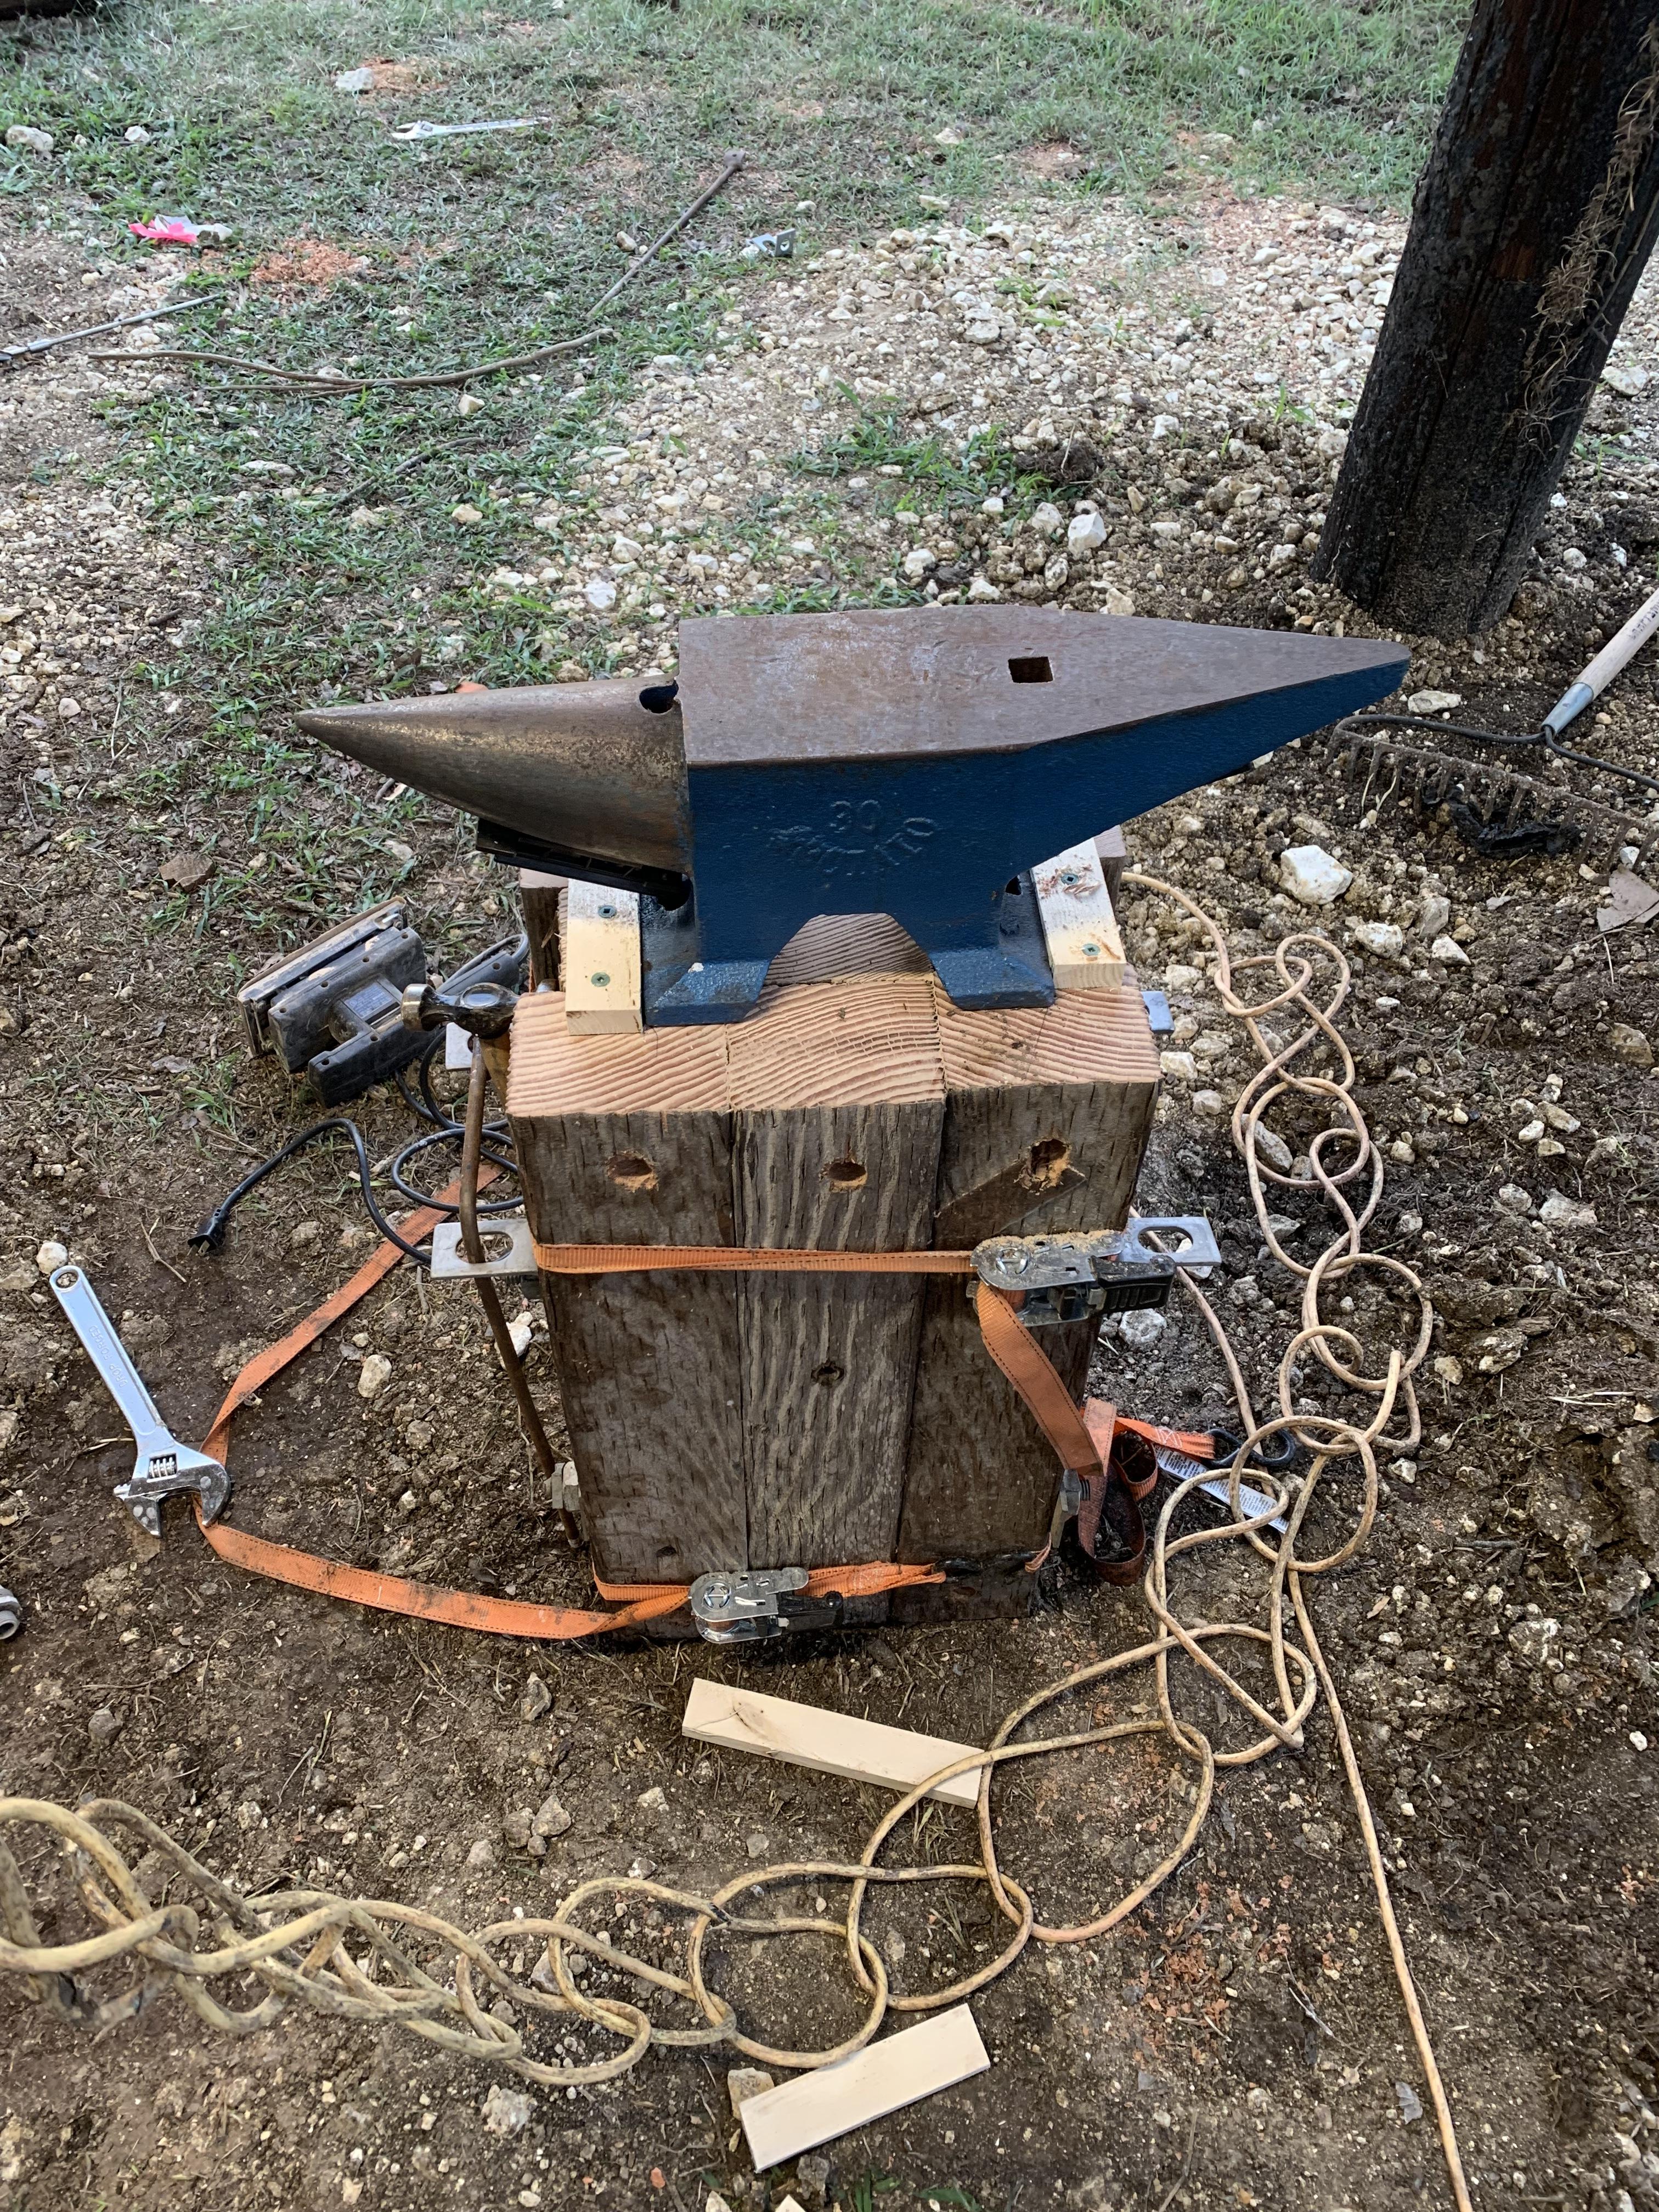
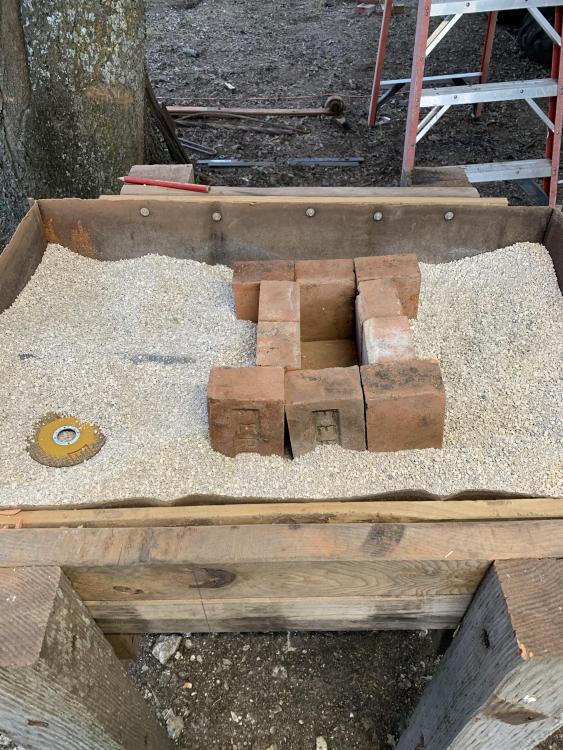
I finally got a chance to work on the new smithy some this weekend. It is still rough around the edges but it’s finished enough to be functional. The Roof is now mostly on, I flubbed the math on how man panels I was going to need though and wound up needing one more than I had cut. The post vice is set but I need some bigger lag screws for the mount. It wants to twist and walk around a little with the 5/8 lags I have in it. The anvil stand is cut, sanded, and bolted on one side. It is held together with ratchet straps until I can scrounge some more bolts to do the other side. My JBOD 2.0 needs one more bag of cat litter to be flush with the edge of the drum (I added more after the pictures were taken), and I need to figure out how to permanently attach the side draft flue to the forge body. It sits up relatively well on its own but I’d like it to be more stable. I’m leaning towards “L” brackets or something along those lines but I haven’t made up my mind for sure yet. The new fire box is 4” deep instead of the original 2”. From what I’ve read since making the 1.0, you need about 4” of depth with coal to get into a neutral fire. Since the 2.0 is loose fill, it will be much easier to modify and tweak to my changing needs than the original model. The packed dirt of the original was basically baked into rock. It came out in four lumps that I’m going to have to take a sledge hammer to, to break up. The next steps are going to be finishing the roof, installing the chimney, and hanging the lights in their final position. After that, I need to run the electrical, put cross arms and R panel around the building to make a combined railing/half wall, hang the tarps that will make up the rest of the walls (plastic for now but I’ll eventually replace them with canvas), and figure it out organization/storage. Eventually, the wire reel that is serving as a work bench will be replaced with an actual work bench. Is there any reason I can’t use rolled up R panel for the chimney? It’s roughly the same thickness as single wall chimney pipe, can be interlocked, and is free. The chimney will be running straight up through the roof without any bends or deviations.


-
Building a New Smithy (picture heavy)
Bantou replied to Bantou's topic in Building, Designing a Shop
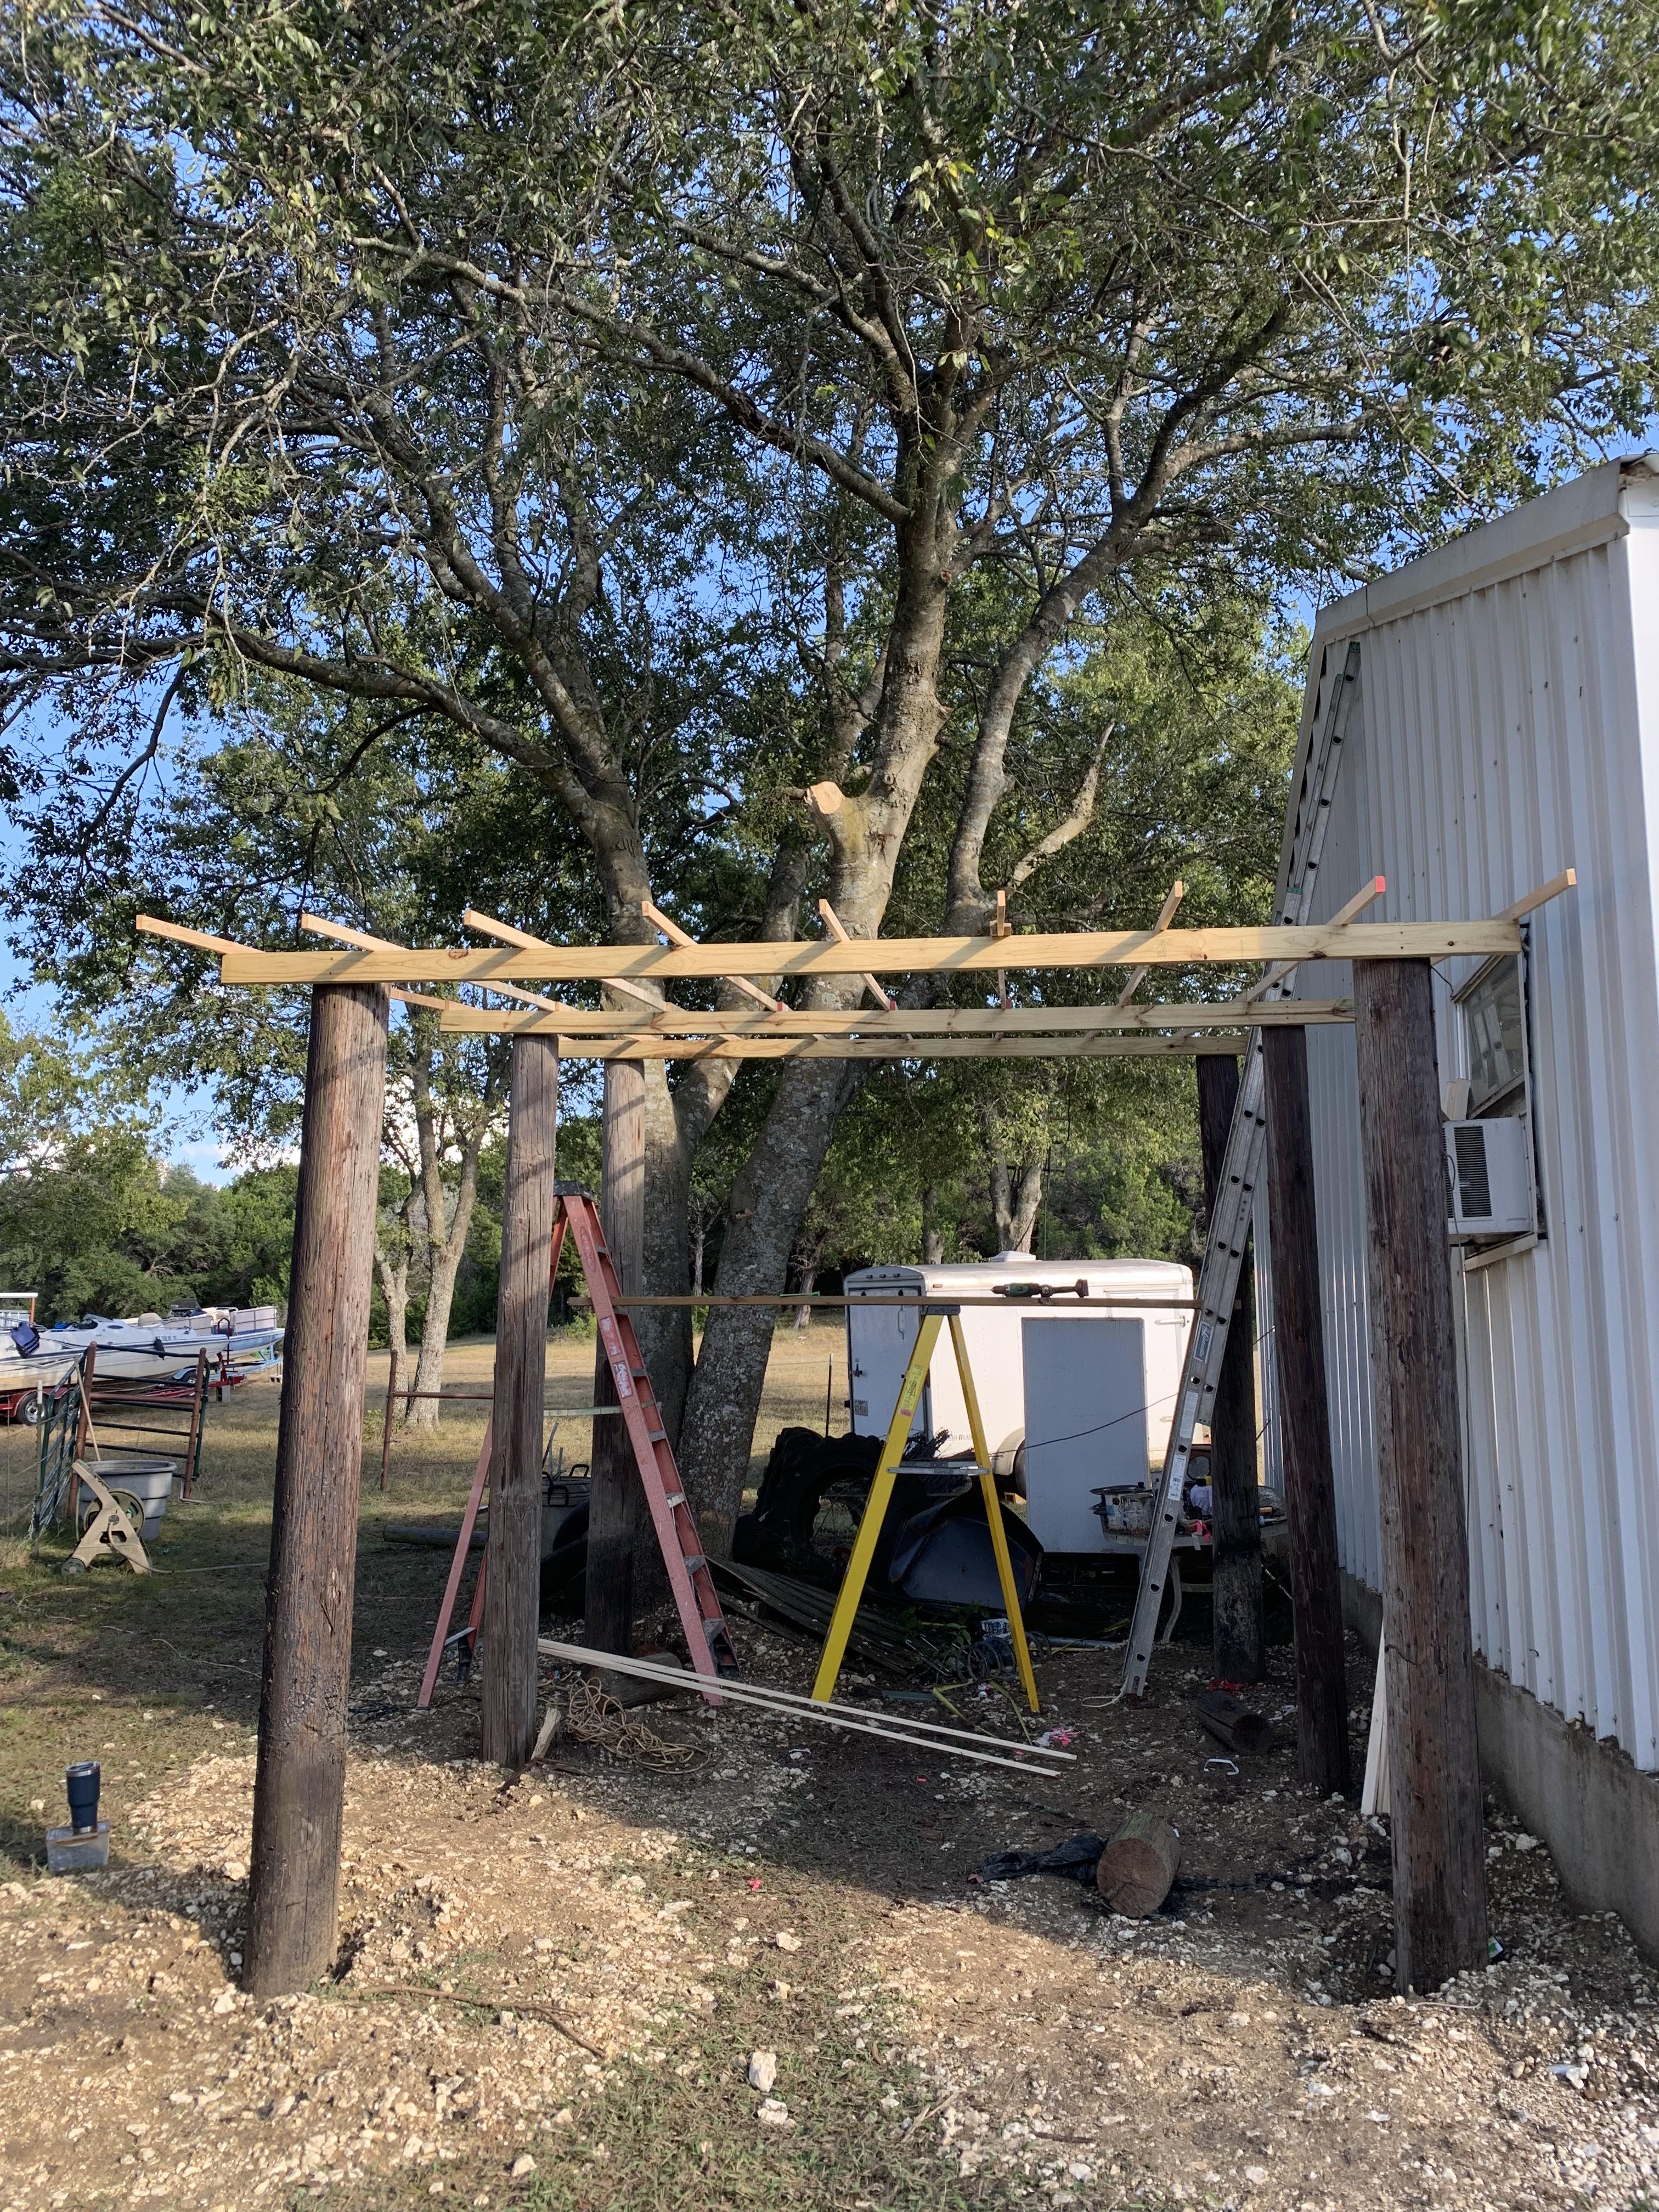
Got the roof framed in today. I’m picking up the roof material tomorrow morning. Hopefully I’ll have the roof on and a decent start on getting things set up by tomorrow afternoon.
-
Building a New Smithy (picture heavy)
Bantou replied to Bantou's topic in Building, Designing a Shop
“Do not build a box so you can think outside the box. With no box, everything is either a possibility, or an opportunity.” That’s some solid life advice right there. Reminds me of the story about the physics student who solved an “unsolvable” equation because he didn’t know it couldn’t be solved. As to the rest, I’ve had more problems solved here than I can remember the solutions to; most of them I didn’t know I had. -
Building a New Smithy (picture heavy)
Bantou replied to Bantou's topic in Building, Designing a Shop
Probably something like what I’m doing right now; stuffed into 5 gallon buckets or laid in a pile on the ground. -
Building a New Smithy (picture heavy)
Bantou replied to Bantou's topic in Building, Designing a Shop
I thought about that. The only wall I can really put it on is the one closest to the other building, if I want to be able to enclose the building in the winter. I’m not sure that there is enough room over there to allow adequate access with brackets mounted on the outside. I’d love to have a display like the one you have. I can get 3” schedule 80 pvc cut offs for free from work though. So, I’ll probably just use those. -
Building a New Smithy (picture heavy)
Bantou replied to Bantou's topic in Building, Designing a Shop
And again, something stupid simple that hadn’t even crossed my mind. Thank you. -
Building a New Smithy (picture heavy)
Bantou replied to Bantou's topic in Building, Designing a Shop
This level of advice is why I love this site. I have my stock cut into 10’ sections because it is easier to handle and will fit in the truck bed. The poles are ~6ft apart. I was planning on putting the brackets on the first two poles and leaving the back pole bare for a work bench. It wouldn’t be hard to frame in something to add an extra bracket or two. I was already planning to hang a set of brackets for the two diameters I typically use and a third set for oddball sizes. Thinking about it, I may add some more brackets for different types of stock as well (square, flat, etc). Using pipe to store my short pieces hadn’t even crossed my mind though. Right now, I only keep a maximum of 100’ of any given stock on hand at a time. Most of my projects only use a couple feet of steel (steak flippers, grilling tools, bottle openers, etc). I have some ideas for larger projects but I haven’t drawn them up yet, let alone attempted them. -
Building a New Smithy (picture heavy)
Bantou replied to Bantou's topic in Building, Designing a Shop
I work with small stock <1” and usually either 3/8” or 1/2” so maybe 300 hundred pounds max over two brackets. The poles should support just about anything I can put on them. They are retired utility poles buried 4ft deep and tied together with 2x4’s. You’re recommending something like this?