TheWanderingLlama
Members
-
Joined
-
Last visited
Everything posted by TheWanderingLlama
-
Iron Dragon: Yes, I saw several threads on that on here. Seems like the major concern is that they are higher carbon, so provided that they are treated as such they can be repurposed and make for some good tongs. So respect the working temperature range, don’t quench, and normalize after forging. Any other wisdom? Many of them are more modern tools - really good bosses that have been machined To counter that, there are a couple that were forged from hoof rasps... Before my available tools were constraining my potential projects. Now I feel like like a whole new set of things has been unlocked. That is a good feeling - no longer in tong making purgatory...
-
JHCC: Yes, I need to do that. It has been more fun using it that writing it up... I have all of the pictures - just need to sit down and to it.
-
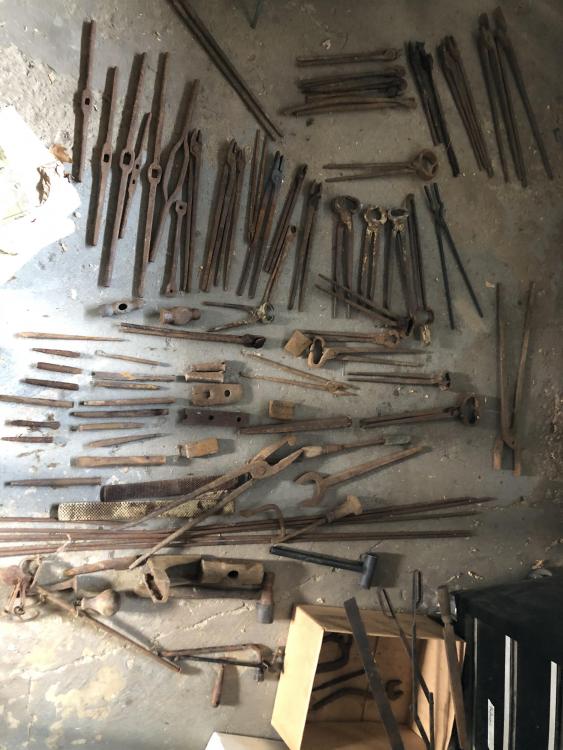
Pics below on my $50 bonanza, but a little prelude first. Haven’t posted in a bit but have been steadily working on stuff. Got a post vise (JHCC’s) refurbished and a propane forge which as been great for suburban blacksmithing. Made a hot chisel and a two pairs of tongs. Some drive hooks and letter openers. Processed some salvage steel into manageable pieces. Modified an engineers hammer to have a more appropriate (wider radius) peen. Etc. Also practiced (and succeeded) in forge welding mild steel. My It Followed Me Home update is I just picked up all this from a local guy plus a 24” piece of rail for $50. I felt a little guilty to be honest, but I gave him his asking price and he seemed happy enough to pass it along and see it used. The general blacksmith tongs are all in various degrees of disrepair (and some beyond repair) - but most of them just need a bit of dressing up and the rivet tightened. There are several pairs of hoof nippers and they are all in generally good shape. I don’t plan on nipping any hooves any time soon, so those might become something else as needed. Several of the items are wrought iron which is pretty cool. My tong supply just swelled from 3 to many fold more. Plus all kinds of other goodies. I was planning on being in “tool making” mode for a while longer - this is a great time saver.
-
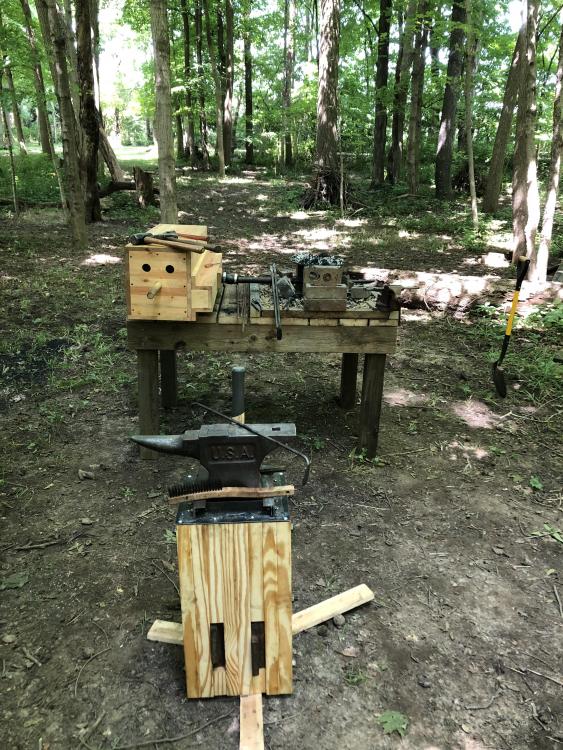
Still very much a beginner, but I did my first bit of forging with charcoal in a hole in the ground. I did a JABOD as well with scrap lumber. Then embedded a rotor firepot into the JABOD. Currently using a brake rotor firepot that sits on bricks over a heavy table (from scrap deck wood...) with gravel on top to provide fireproofing. Each was an upgrade from the last and none of them cost any money. I would strongly advise to keep it cheap until you figure out if the hobby will stick Here is a picture of my current setup - not glamorous but it works for what I am doing.
-
Thomas: Would you be able to share your “bow hack saw” blade suggestions? Length / TPI / width for cutting thick ~ 2” steel stock by hand? I recall you suggesting relatively coarse teeth? Just wondering what has worked for you since it is an “off-label” use. I have a very non-mechanized shop and I find myself using a hacksaw all of time. The extra stroke would be a boon plus a little more mass to provide down force would be nice. I have some old-school, springy grade bed frame angle I was thinking could be made into an H-frame buck saw. Thank you!
-
Hah!
-
I am also very new to smithing. My advice is just to not get caught up and needing a particular thing yet. Scale your work with what you have access to and see if the hobby sticks. Patiently acquire what you can on the cheap/free. If you get to the point where your ambition for doing something outstrips your current gear AND you have been at it for a while - then start thinking about investing more cash/effort to get something. You will find that if you see the world through “can I use that for smithing?” eyes you will suddenly come across lots of useful things. With this frame of mind, you might find yourself with a pile of materials to work with, hammers acquired from relatives, an variety of makeshift anvils, etc. If you shape your projects by what you DO have - then you will be much happier in the early stages As others have said, the place not to skimp is to make sure you have the right PPE.
-
Glenn suggested I reorganize the list by Manufacturer and weight (rather than randomly by weight...) and add $/lb. The price for the Ridgid is from a website with a 10% discount applied for new customers - it also includes shipping. Manufacturer Weight (lb) Cost w/o Shipping $/lb Hoffman 105 $825 $7.86 Hoffman 115 $845 $7.35 Hoffman 325 $2,250 $6.92 Holland 85 $650 $7.65 Holland 100 $700 $7.00 Holland 125 $925 $7.40 Holland 140 $950 $6.79 Holland 260 $1,850 $7.12 Holland 440 $2,600 $5.91 Kanca 165 $925 $5.61 Nimba 120 $975 $8.13 Nimba 260 $1,805 $6.94 Nimba 450 $2,576 $5.72 Old World 70 $475 $6.79 Old World 110 $775 $7.05 Old World 115 $800 $6.96 Old World 118 $850 $7.20 Old World 167 $1,125 $6.74 Old World 176 $1,200 $6.82 Old World 205 $1,250 $6.10 Old World 220 $1,508 $6.85 Old World 260 $1,625 $6.25 Old World 585 $3,750 $6.41 Ridgid 165 $1,193 $7.23
-
Eric, here is a list I have been putting together. From my (beginner!) research, these all seem to be quality anvils. I am certain there are more. These are all blacksmithing anvils - not farrier patterns. Most recommendations I have read have been 150-200 pounds for a single smith as a more than adequate size for most work. I currently work on a 65 pound anvil and it does fine for me right now provided it is well secured. Manufacturer Weight Cost Holland 125 $925 Holland 100 $700 Holland 440 $2,600 Holland 260 $1,850 Holland 140 $950 Holland 85 $650 Old World 118 $850 Old World 167 $1,125 Old World 260 $1,625 Old World 115 $800 Old World 176 $1,200 Old World 220 $1,508 Old World 585 $3,750 Old World 70 $475 Old World 110 $775 Old World 205 $1,250 Hoffman 325 $2,250 Hoffman 115 $845 Hoffman 105 $825 Nimba 450 $2,576 Nimba 260 $1,805 Nimba 120 $975 Ridgid 165 $1,193 Kanca 165 $925
-
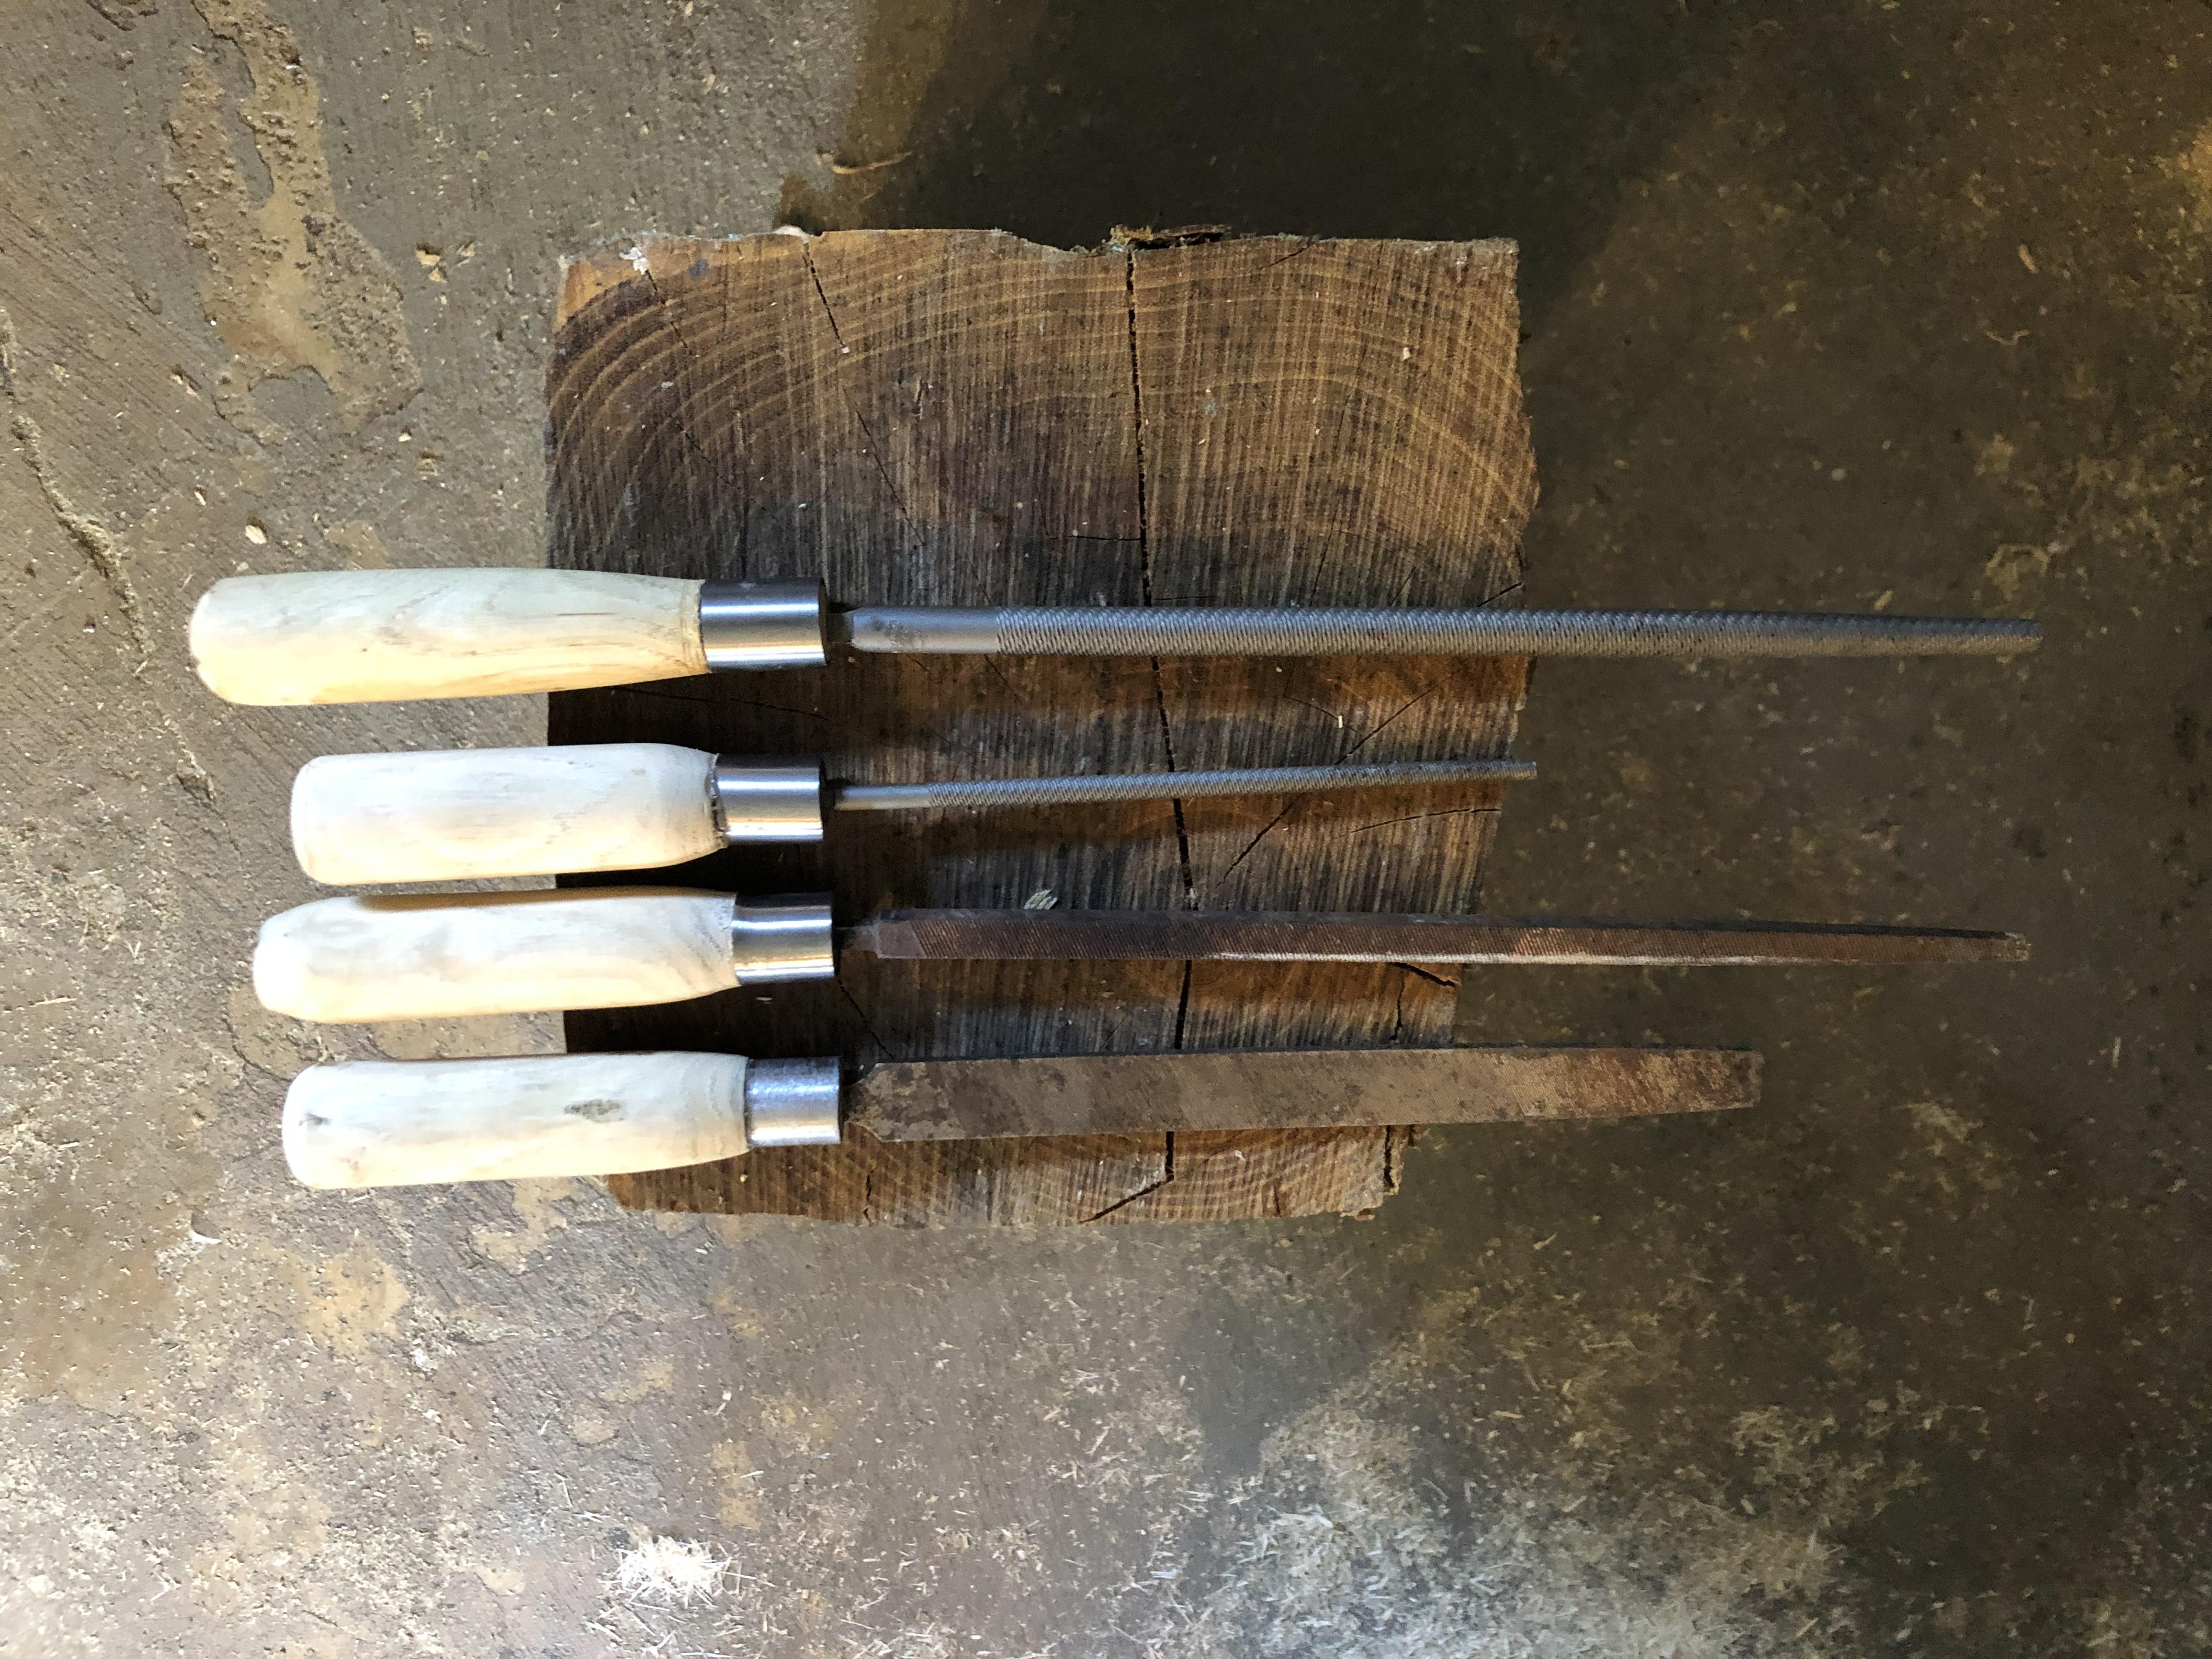
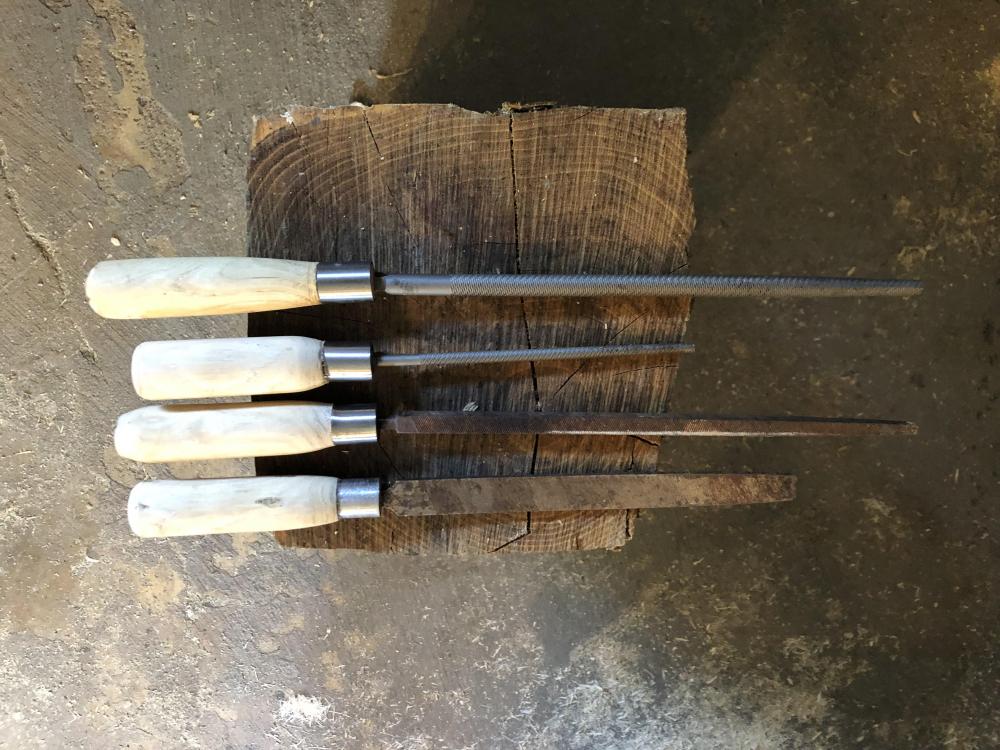
Blacksmithing adjacent, but my daughter and I got the salvaged wood lathe up and running. It was just two spindles - so we had to make a frame, tool holder, hold downs for the spindles, etc. She is in middle-school and has really taken to doing things like this. We are currently making file handles for all of the files I have scrounged up. Four down, several more to go... The wood is just some sugar maple branches I had drying in the shed for random things The ferrules are scrap tubing from the scrap bin at work. They were quite tough - given what is was from I think it was likely 4140. It will be nice to not have to swap handles on files for so many reasons!
-
This is where my current little one came from. As suggested, I have ceased even browsing on eBay/Craigslist. Things are laughable. Hoping to get some small gift items made up as conversation starters for the holidays. Many of my family and extended family have family farms or are in the trades. Fertile ground I hope.
-
I chuckled at that one. That is my attitude about cars as well. Cars wear out faster than most tools and are certainly the most expensive tool that most people are ever going to buy. Not begrudging car collectors as I see the value in that as a hobby (just like having an anvil with history) - just not my thing.
-
I am pretty astounded at the asking price for vintage anvils. Of course, this example is particularly astounding. I did a quick spreadsheet the other day for new anvils that people generally agreed were good value brands and prices ranged from $5.60 to $8.13 per pound. Smaller anvils tended to be higher per pound generally. Many of the asking prices for used anvils are in (or above) a new anvil. I am looking for a tool, not a collectors item - so I am not willing to pay for history but understand some people are. I have pretty much given up on trying to purchase a vintage anvil that has already been “found.” It is either find one on my own from a person who is happy to see it go to a good home and will take lower price - or buy new. I had a good conversation with a local smith as part of my TPAAAT’ing. He had an anvil that he used regularly for several years that had been repaired with welded mild steel faceplate as well as the horn having cracked off and rewelded. Since he used the anvil and it was working for him, it was valuable to him. But it was not worth his price of $3 per pound to me. Particularly when I am in a day trip from a few places that sell quality new anvil at $6 per pound. Despite the the deal being a bust, he gave me a ton of great information - so it was a great connection to make.
-
As a beginner, I feel guilty about having to use non-forging “corrective measures” on the things I have made. I do my best to figure out what went wrong and fix it at the anvil. Sometimes the fix is just beyond my skill level and I break out the file, drill, or (gasp) grinder and touch it up. That is just part of the learning cycle. For something like tongs which are a necessary tool, I am more apt to resort to whatever means possible to get a functional pair of tongs. I need them to continue learning other things and tongs are a challenging piece for me now. It is still important to learn what went wrong, but at times it may be OK to take the easy way out. My first pair of tongs has drilled holes and a bolt for a rivet. I practiced punching holes and realized that if I did that I would likely mangle my tongs with my current skill level. If I would have tried to complete them on the anvil they would have ended up a tangled wreck - instead - they are an ugly but useful set of tongs. Same with the hardy tools I made recently, there was zero forging involved. Forging would have been the “right way” to do it - but a big job for me right now in both time/skill/stamina. Because it was a bit further up the skill ladder for me and I needed the tooIs - I went to work with hacksaw, file, and grinder and got the job done. I learned more from that experience then simply buying them, so I still came out ahead. That is just my two-cents. Forging is definitely a humbling activity...
-
I have been using my own using wood in Ohio for my small scale use - so no experience with your native woods. I can say that the charcoal comes out much better than store bought - smaller chunks and less sparks. I just need to filter out the fines and dump it in the forge. There are lots of very complex ways of making charcoal and also very simple ways. I so far have just gone with the simpler ways since I have access to what is effectively unlimited amounts of deadfall wood. I am happy to share what has worked for me - this is also the same setup I use when I cook camp meals to get a good bed of coals. Just much larger...
-
I should be more explicit in what I write. I did this with the shop vac outlet anchored and pointing in the direction of the tuyere with a large gap. Then moved it a little closer and so forth. An unregulated shop vac would be a disaster as we all can agree. I struggled and was greatly discouraged initially thinking it was the forge shape, tuyere size, charcoal size, etc. simply because the blower I was using seemed to be oversized from the impression I got. As a debugging step with a rational approach, the shop vac allowed me to determine what the issue was and allowed me to progress.
-
Scooter: I struggled a bit with my charcoal forge and went through a couple of different designs. The main issue I had was an underpowered blower. Charcoal doesn’t need a lot of air - which is true - but blower characteristics are all quite different. I was using a squirrel cage blower with a ~5” diameter rotor which “should” have moved plenty of air. The pressure versus flow characteristics were such that it did not. To debug things and see what “real air” will do, I would suggest playing around a bit with a shop vac. This is a horrible blower as it is loud, large, expensive, etc. BUT it will provide plenty of air. If you have a means to hold a 6” diameter “ball” of charcoal and blow air through it you will get to forging tends. The shop vac will take the “not enough air” issue out of the equation so you can verify that your forge shape is at least doable and you can see with your eyes what the right amount of air can do. Be careful if you go this route - you don’t want to hook the shop vac up directly to your tuyere or it will blow the charcoal right out of the forge (which needless to say is dangerous.). I was struggling with getting the hot spot high enough not to have to angle my work down into the forge to find it. Once I did this it convinced me that the issue was by blower. I then built a box bellows and it solved the problem.
-
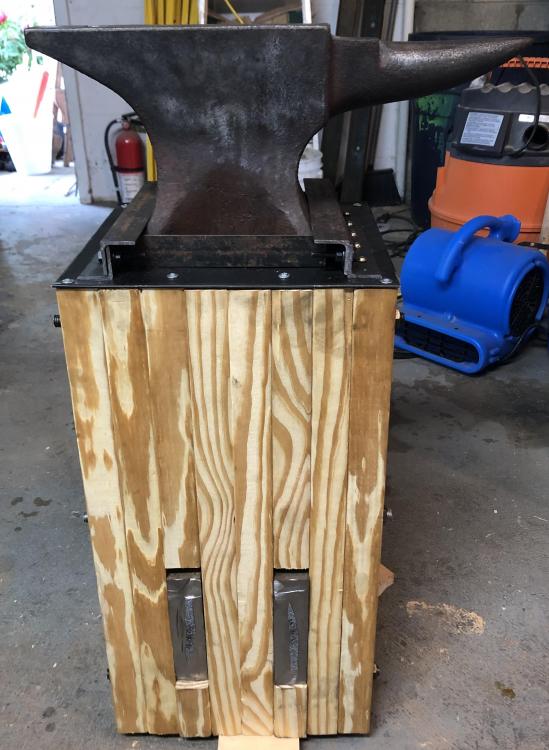
I needed a better way of anchoring my 65 pound anvil - previously it was screwed into a stump with some long deck screws through some 1/4” thick brackets. The connection to the stump was generally sound, but the stump still moved around. I also needed something I could tear down easily. It was also a little fussy - sometimes it would come loose a bit and require adjustment. I just finished the rough work on the stand below. Still need to get rid of some burrs (says my left ring finger muffled through a bandaid), add some foot pads, and give it some boiled linseed oil. Would like to add some kind of means to hold a few tools/hammers as well. I made it out of 2x12’s that are joined with six pieces of 1/2” all thread. I imbedded two halves of a ~50 pound cast iron forklift weight to give it some more mass on the bottom. These can be removed if needed to make it lighter for transport. There is an angle rails all the way around. The angle iron on the right side is actually a hold down - the two 1/4” bolts squeeze it down onto the top of the anvil feet and press it in. Undoing those to bolts allow me to lift the horn up and slide the anvil out. I also cut up a square of sheet metal to put on the top of the stump to give a little protection from hot stuff. I whacked some aluminum to see how much it has improved things. Seems to me much better. Previously a blow on the horn was a disaster - the whole thing would walk around. I ended up doing a little circle dance as I forged. Then while heating I would pick it up and orient it back the way it started. Frustrating... I have been forging outside so far, so I am thinking to make some diagonal holes inward through the base so I can drive some long stakes through as well. That will hopefully make the most out of this little guy. Still TPAAAT’ing for a larger anvil - hoping to find something 150-200 pounds. I hope the effort expended on this will appease the anvil gods and attract an anvil.
-
TheWanderingLlama replied to TheWanderingLlama's topic in Hot Cuts, Anvil devils, metal cutting on the anvil.Pnut: Wow, that is quite simple. Thanks for the image.
-
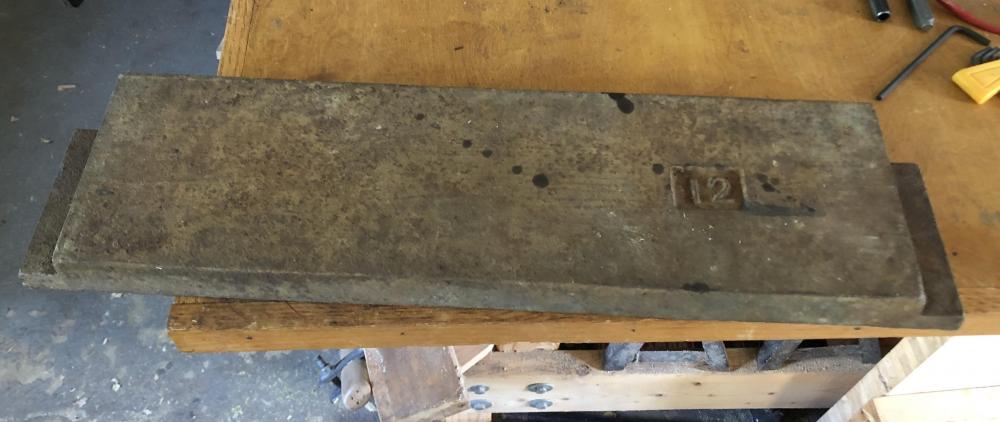
Hah. Or maybe put the new stuff under the older stuff??? More work, but better strategy - also first-in-first-our inventory management... ”Honey, is your pile of junk getting bigger?” ”Why would you think that? It looks like the same stuff as always to me?” Then, like to proverbial frog in the pot, the pile slowly grows to envelop the entire side of the garage - yet inexplicably seems to be comprised of the same stuff. And also a confession, this came home with me from work yesterday... 50 pound cast iron weight. I am making a stacked 2x12 anvil stand and going to slot the bottom out to hold this guy cut into two pieces. With my little 55 pound anvil I need some more mass to make it less tippy.
-
TheWanderingLlama replied to TheWanderingLlama's topic in Hot Cuts, Anvil devils, metal cutting on the anvil.Thanks Charles. Would you have any reservations about forging to fit on this little anvil? I was a little leery of anything that might me “wedge-like” going on there with the not-so-robust dimensions. There is a joke there about giving my anvil a wedgie - but I am not through my first cup of coffee so I will just leave it... Also: Thanks for curating all of the great info on charcoal forges. That was a real enabler for me to get started. Added: Halfway through the coffee. “Wedgie” and “anvil crack” popped into my head. I am worried what the second half will bring - I am channeling my inner 10 year old apparently.
-
TheWanderingLlama replied to TheWanderingLlama's topic in Hot Cuts, Anvil devils, metal cutting on the anvil.Frosty: Thanks. Thomas: I am running some leads on some bigger anvils in central Ohio. I am hoping you left some for me before you moved... Now that I have an anvil to mess around with I can hopefully be patient and persistent and TPAAT myself to an upgrade.
-
TheWanderingLlama replied to TheWanderingLlama's topic in Hot Cuts, Anvil devils, metal cutting on the anvil.Thanks for the terminology lesson - lots to learn... I had come across the anvil devil term before but not yet tracked down what it was. It is important to use the language correctly - particularly when asking for help - otherwise I will confuse my would-be-helpers needlessly. I did see that most hot cut surfaces are curved. For this quick one I figure straight was OK since I am only working with small stock. I was also lazy since this was all cutting, grinding, and filing.
-
So far she has been interested but not yet involved. As a surrogate I have managed to get the kids involved - so that provides a little bit of cover... The deal we have now is that the garage is my space and we are fine with the two cars on the driveway as long as I take care of the snow/ice on her car. Good deal as far as I am concerned. We live in the suburbs on a small house - so space is a premium both indoor and out. With Covid going on our kids are going to be home for at least the start of the school year. So I am going to plan some “shop class” activities for them. Again - good thing to do AND great cover for the hobby...
-
NREL has this system which can get up to 3000 C with 10 kW of power: NREL's High-Flux Solar Furnace (HFSF) I dare somebody to forge in that...