North State
Members
-
Joined
-
Last visited
Everything posted by North State
-
Wow! Has it been almost a year since I posted? Well in some ways I fell like I have been dragging my feet. In other ways, I feel like I have been making some measured forward progress. I did narrow the length of the overall body by 4-5 inches. I also flattened out the forge floor and sides. Thus making the interior volume smaller by about 1/3. My thinking is that with less volume, I hope to be able to reach forging temperature quicker and with less fuel. I hope to be able to fashion an idle/full control valve so I will have to rotate my burners so I can arrange the pipe fittings. Maybe I can use one burner for standard forging, and if I need the second for welding etc, I will have it already in place. The biggest advice I can offer to the rest of the newbies like me, is read and take the sage advice of the forge veterans on the forum. Unfortunately, I began assembling my forge before I found the forum and what I spent a lot of time and effort making what would take about 20 minutes with both burners going north of 15psi. My regret and stubbornness has brought me right back to some of the advice found earlier in this thread with a much smaller design.
-
I'm not sure it helps, but my 3/4 NA's use a .033 might tip... so Irondragon's .036 should get you headed in the right direction, Binesman.
-
IgnrntNewb, I too consider myself an extreme novice. I see a lot of similarities between what you have shaping up and the one I built. Mine is 19" long, 7" dia and after the fact, I learned the sq.in. suggestion of 350. It takes both my 3/4 burners to get it hot. If I had it to do over I would build it shorter. As for securing your burners, have a look at the pictures on my thread and see what you think. They stay put and it doesnt affect the flame that I can tell.
-
Samj1425, any luck on the torch tip burner? Im kinda curious. On mine, I used .030 mig tips tapped into a brass nipple, which runs cross-ways through a 1"x3/4" Bell reducer. It puts put adequate enough fuel to accomodate the NA air intake. I suppose there is some room for dampering the air intake amd refining my flame, but with two burners, the complete firebox gets cherry red within 15-20 minutes. Would sure like to know if your idea has gotten off the ground.
-
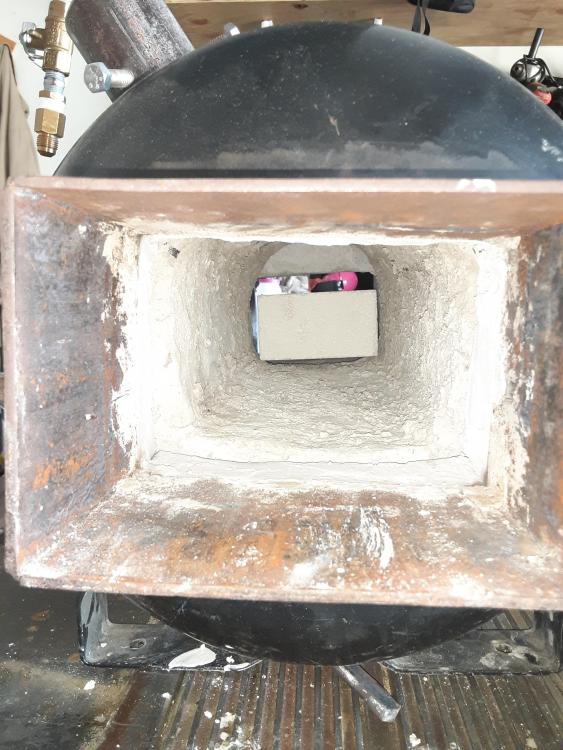
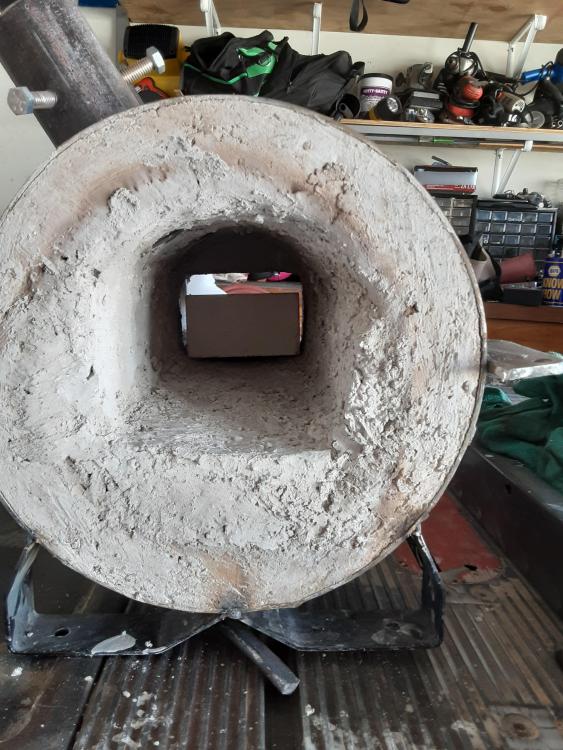
Thanks, Buzzkill. Yes i think that was some of the chemical moisture cooking off as its been set up for a couple months before being ran this hard. I am either going to trowel in a forge floor to use up some reale state or cut about 2.5 inches off either end. If I cut the ends, i am going to have to relocate the hinges and latches. I havent heated up anything significant yet. As for my purpose, I plan on experimenting with seeing how different metals heat, move and forge. Then i plan on moving to small things like leaves, bottle openers, steak turners and maybe oyster shuckers as I live in a coastal town. Ultimately, I dont plan on forging a claymore or anything huge, but I definitely would like to forge a knife. Thanks again for all the help and advice!
-
-
-
Great advice, Thomas. Do you have a thread with pictures of your rig? Kraitok, my air tank was approx 11" in diameter and 19" not including the doors. I have approx 2" or so of wool/refractory inside which gives me something in the neighborhood of 7"x19" fire box. If i build another one, I am going to either do one that has more girth and less lemght or a square one. Said somewhere in this thread, 350 or so cu.in. is the sweet spot between using a single burner and not wasting excess fuel.
-
Alright then, best of luck I look forward to seeing how yours turns out. I would just advise to do what youre doing. This forum is a wealth of knowledge. Glean all you can. Dont be bashful about asking for help. On a side note, I got into a fight with an angle grinder today and after an 8cm gash and 19 stitches to the left forearm.(not forge related) I guess I will have time to tune burners and reduce the internal volume of my firebox. Above all else, please be careful. We are dealing with some dangerous stuff! For what its worth, I had on double eye protection, ear plugs kevlar gloves long pants and composite toes. Even with extreme precaution, things can go side ways.
-
EDL, thats hilarious! Yeah i was aware of the difference, but it seemed that Google wasnt so much. Anyhow, I have recieved a GOB (eastern North Carolina term) of great tips and advice. I like to feel like I have really stretched the more experienced member's knowledge more than their patience! Dobt wait til then to begin accumulating materials to build your rig! Good luck and if you need any help, IFI is the right place!
-
-
Tim, that looks great! Is that with one burner? If so, what is the size? 3/4"? Also, about how much run time does it take to get your forge that hot? Nevermind about the size and number of burners, I zoomed in on your first picture and I think youre using a ribbon burner. Correct? Anyhow, how long does it take to get get to temp with it?
-
-
-
-
-
Buzzkill thats some good advice. Being that I am a big novice, I just did things arbitrarily. Having zero experience to go on, I figured a firebox diameter of at least 6" would accomodate what I want to do. I just took the air compressor tank and used it at the length it was manufactured. Mr. Powers, I totally agree with the dump truck analogy. I know a novice painter need not focus much beyond primary colors, but I wanted to be able to grow into things somewhat before having to build another one. I was thinking along those lines when my good friend offered me an old compressor tabk to use early on. It is 20 gallons! Twice as big as mine! I would be even more on a fools erand! To answer both of you guys, I dont have an exact "thing" I am setting out to forge. I have been facinated by metal working, specifically blacksmithing for as long as I can remember. So my intentions were to start out small and heat some metal of varying compositions merely to see how they respond to the heat. Then once I have expored that, I want to try my hand at forging functional things (in no particular order) increasing in diffuculty... Tongs, bottle openers, steak turners, knives. I definitely dont think I want to undertake swords. So I wont be needing that dump truck! As for the size, I am exploring options on reducing the size. I think I could farily easily, cut the shell with a cutting wheel, then use a masonary bit to trim the refractory. I will have to move my hinges and latches, but hey, I'm becoming used to modification!
-
Hey Buzzkill, I have been brewing on your last reply. I did the math and with a radius of 3" and a total lenght of 19", if my figures are correct, I am looking at like 537 or so cu.in. I didnt figure 6" round opening was too large, but does the 19" deep firebox put me over size for an efficient rig? And what is the relationship between regulator setting/number of burners/fuel consumption/internal heat roduction? I still have the sleeve for a second burner. I can appreciate how far I've come, however there is plenty for me to learn as I tune the old girl.
-
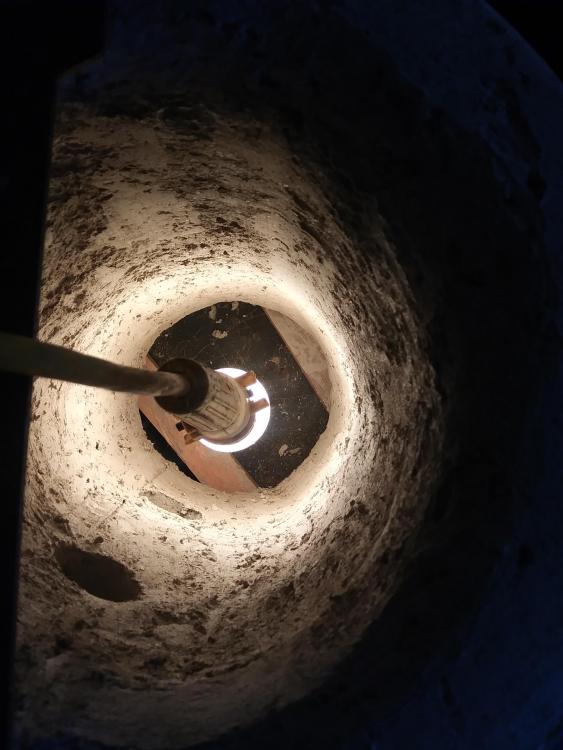
Ok Swedefiddle, youre right about the time I had it going. Less than 15-20minutes. As for the 'babys-breath' can you tell me more about this? Honestly, this is the first time I have heard of it. Buzzkill, yes its a 3/4" nipple that flares out with a 3/4" to 1" bell reducer. I want to grind out the threads on the 1" side. I think that will refine the flame shape even more. I haven't calculated the volume of the fire box, but I cant see it being 350 or more cu. in. Also, yes they are firebricks in the opening. I was trying to trap as much heat in as possible. And, boy, do the get HOT! A lot of what i am trying to figure out is how long would it take to get the firebox up to temp. And the fuel balance between two burners. Mikey, I was really happy withthe flame. Like I said, I generally followed the instructions on the video that i posted when I started this thread. I have read a lot of burner threads that were not as successful as mine turned out.
-
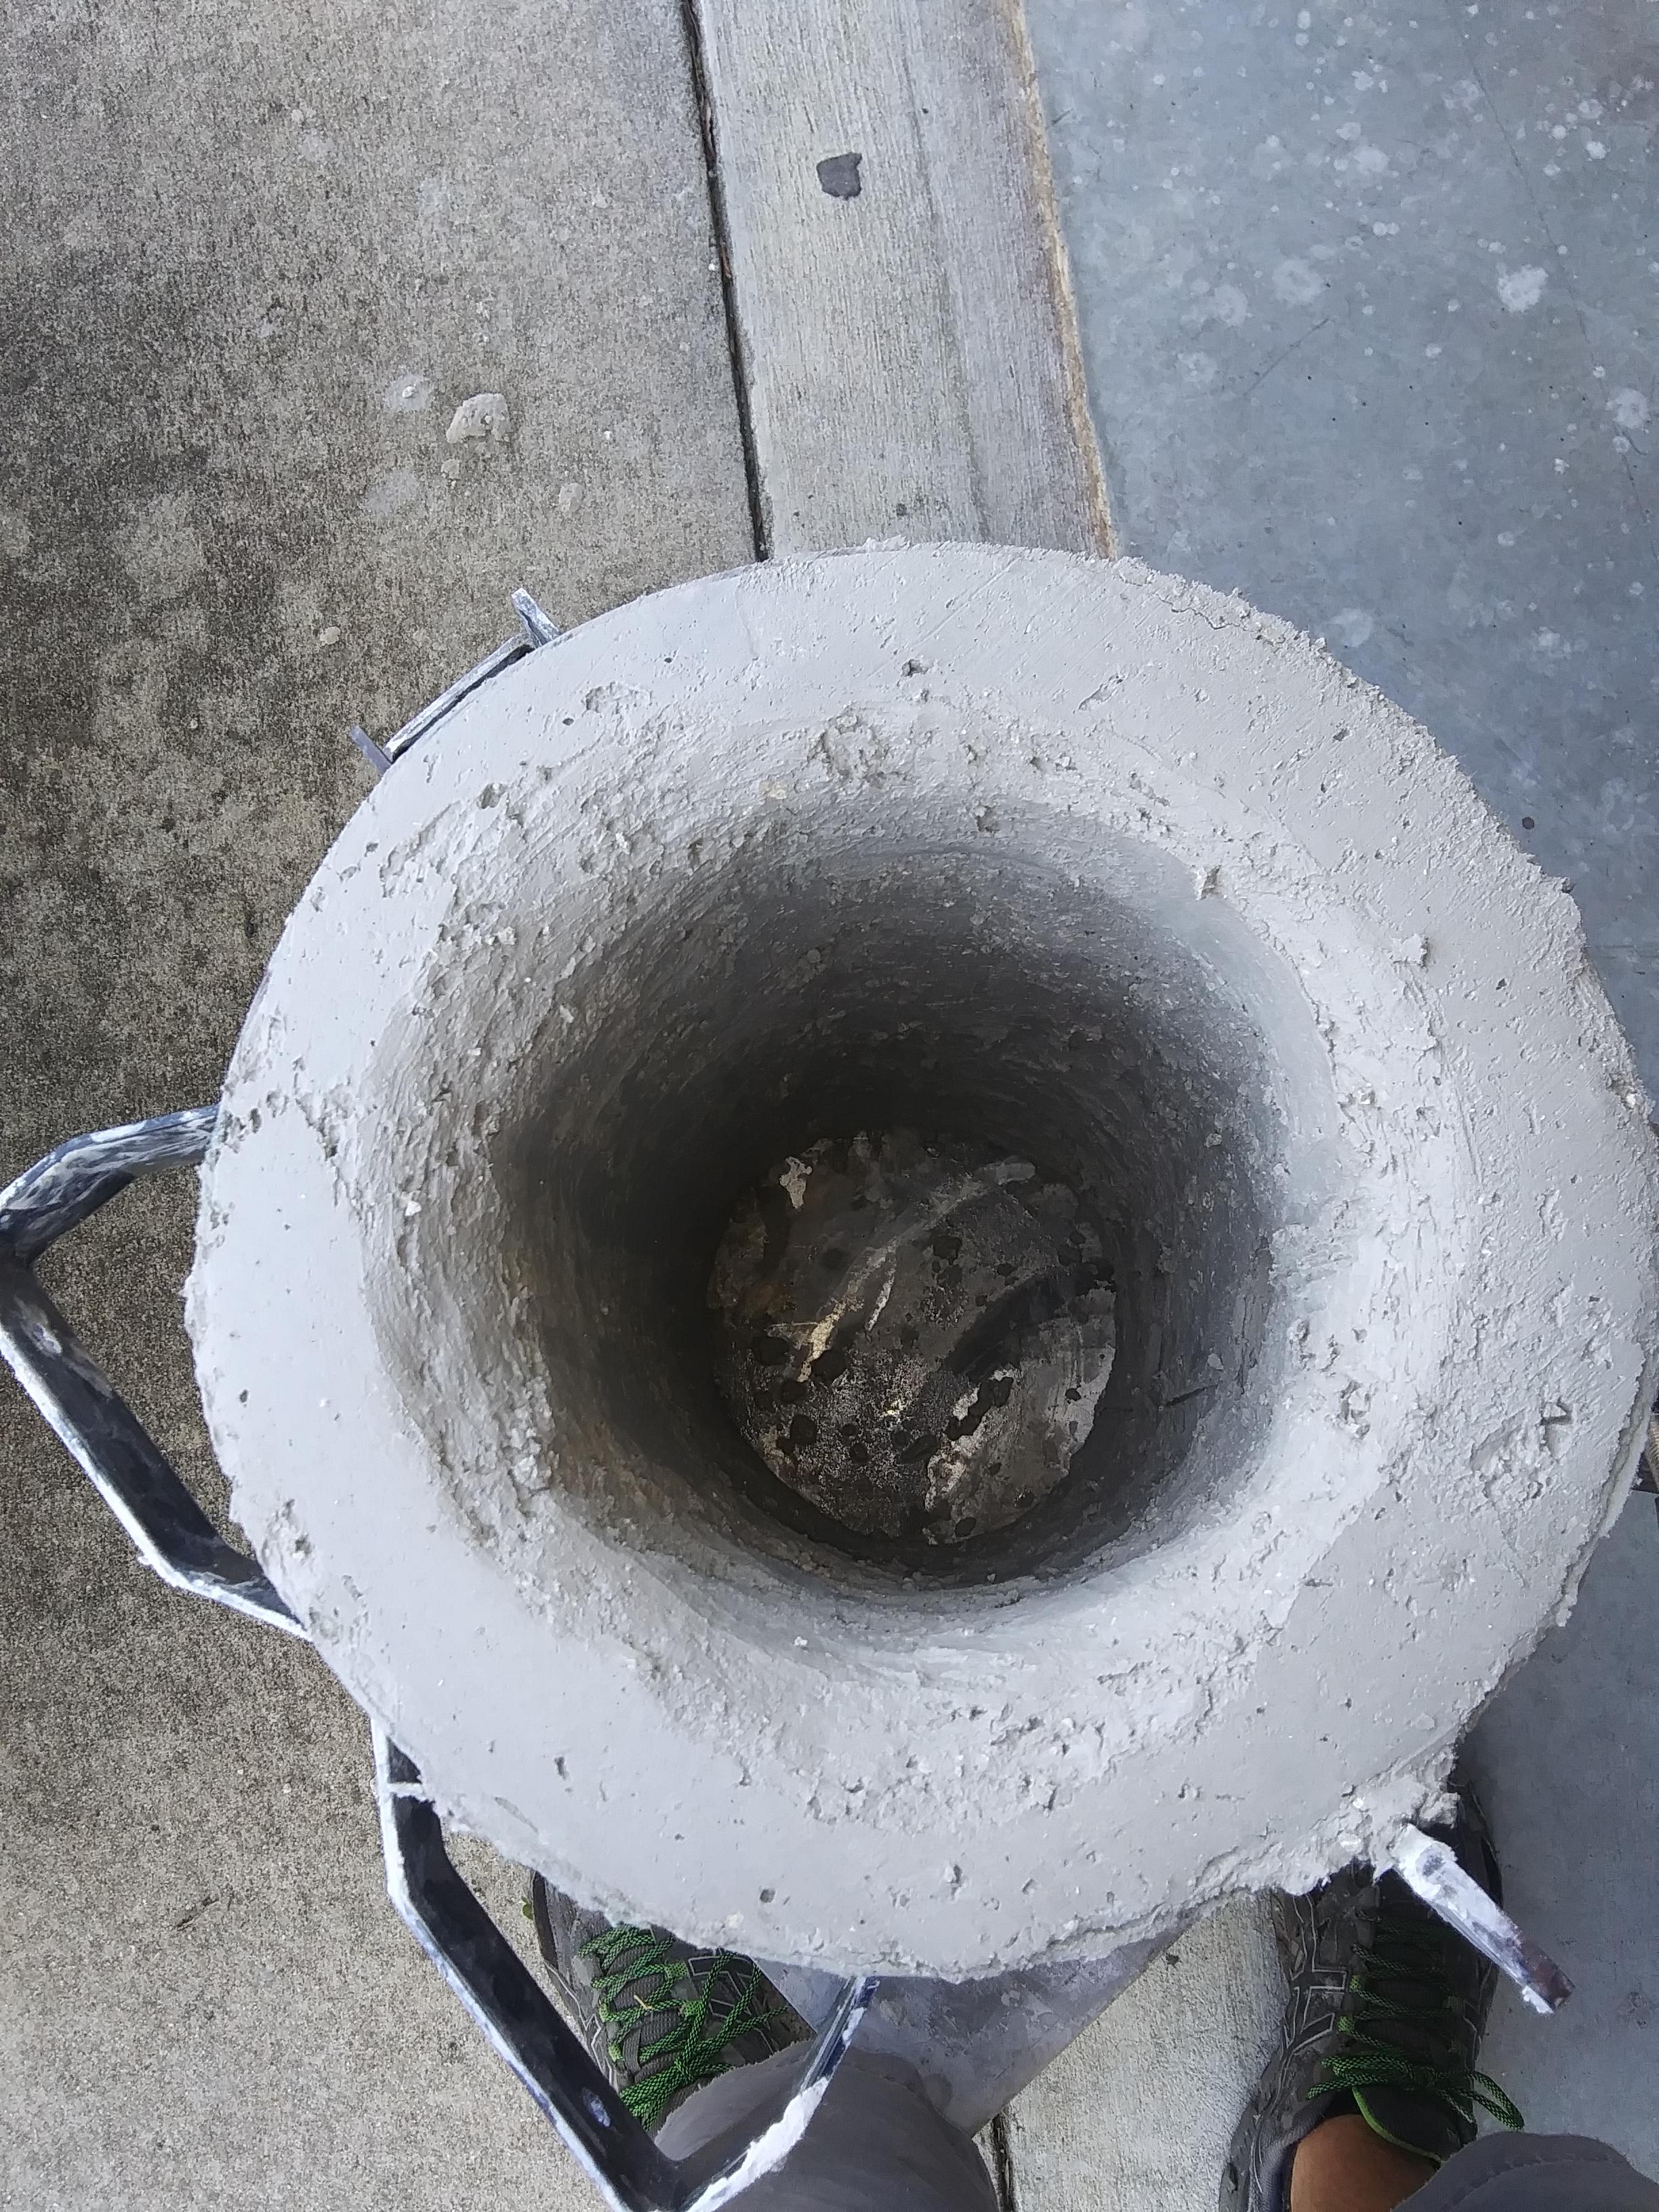
Just a quick update video. There is a lawnmower blade in one end and a piece of half inch no name solid stock in the other. Since I am so unfamiliar as to how the forge responds to heat and how the metal reacts, I just stuck a couple pieces of junk metal in to see how they take heat. I ran the forge for about 5-10 minutes at around 20-30lb pressure on the regulator. Both pieces of metal got cherry farily easily and fairly quick. I only have one burner in. The only time I tried two didnt turn out as smoothly as with one. Im going to have to study on it some more. Probably have to put throttle valves in and gag one so it doesnt steal all the fuel from the second burner. Take aways: 1. I still have a ton to learn. 2. The neighbors are going to hate all the racket associated with forging. 3. It was enormous fun! How does the flame shape look to yall? Is there any thing else I need to consider? I am going to look up some pf that reflective paint to coat the inside with also. 20191020_165311.mp4
-
Heard the rubber mallet one also! My roomate in college was known for saying "...and what he doesn't tear up, he looks on!" Refering to me! Anyhow. Fun times! Much appreciation to your grandfather! I have tons of respect for our great military! I am a civil servant on a marine base in eastern NC. Those Devil Dogs are tough!
-
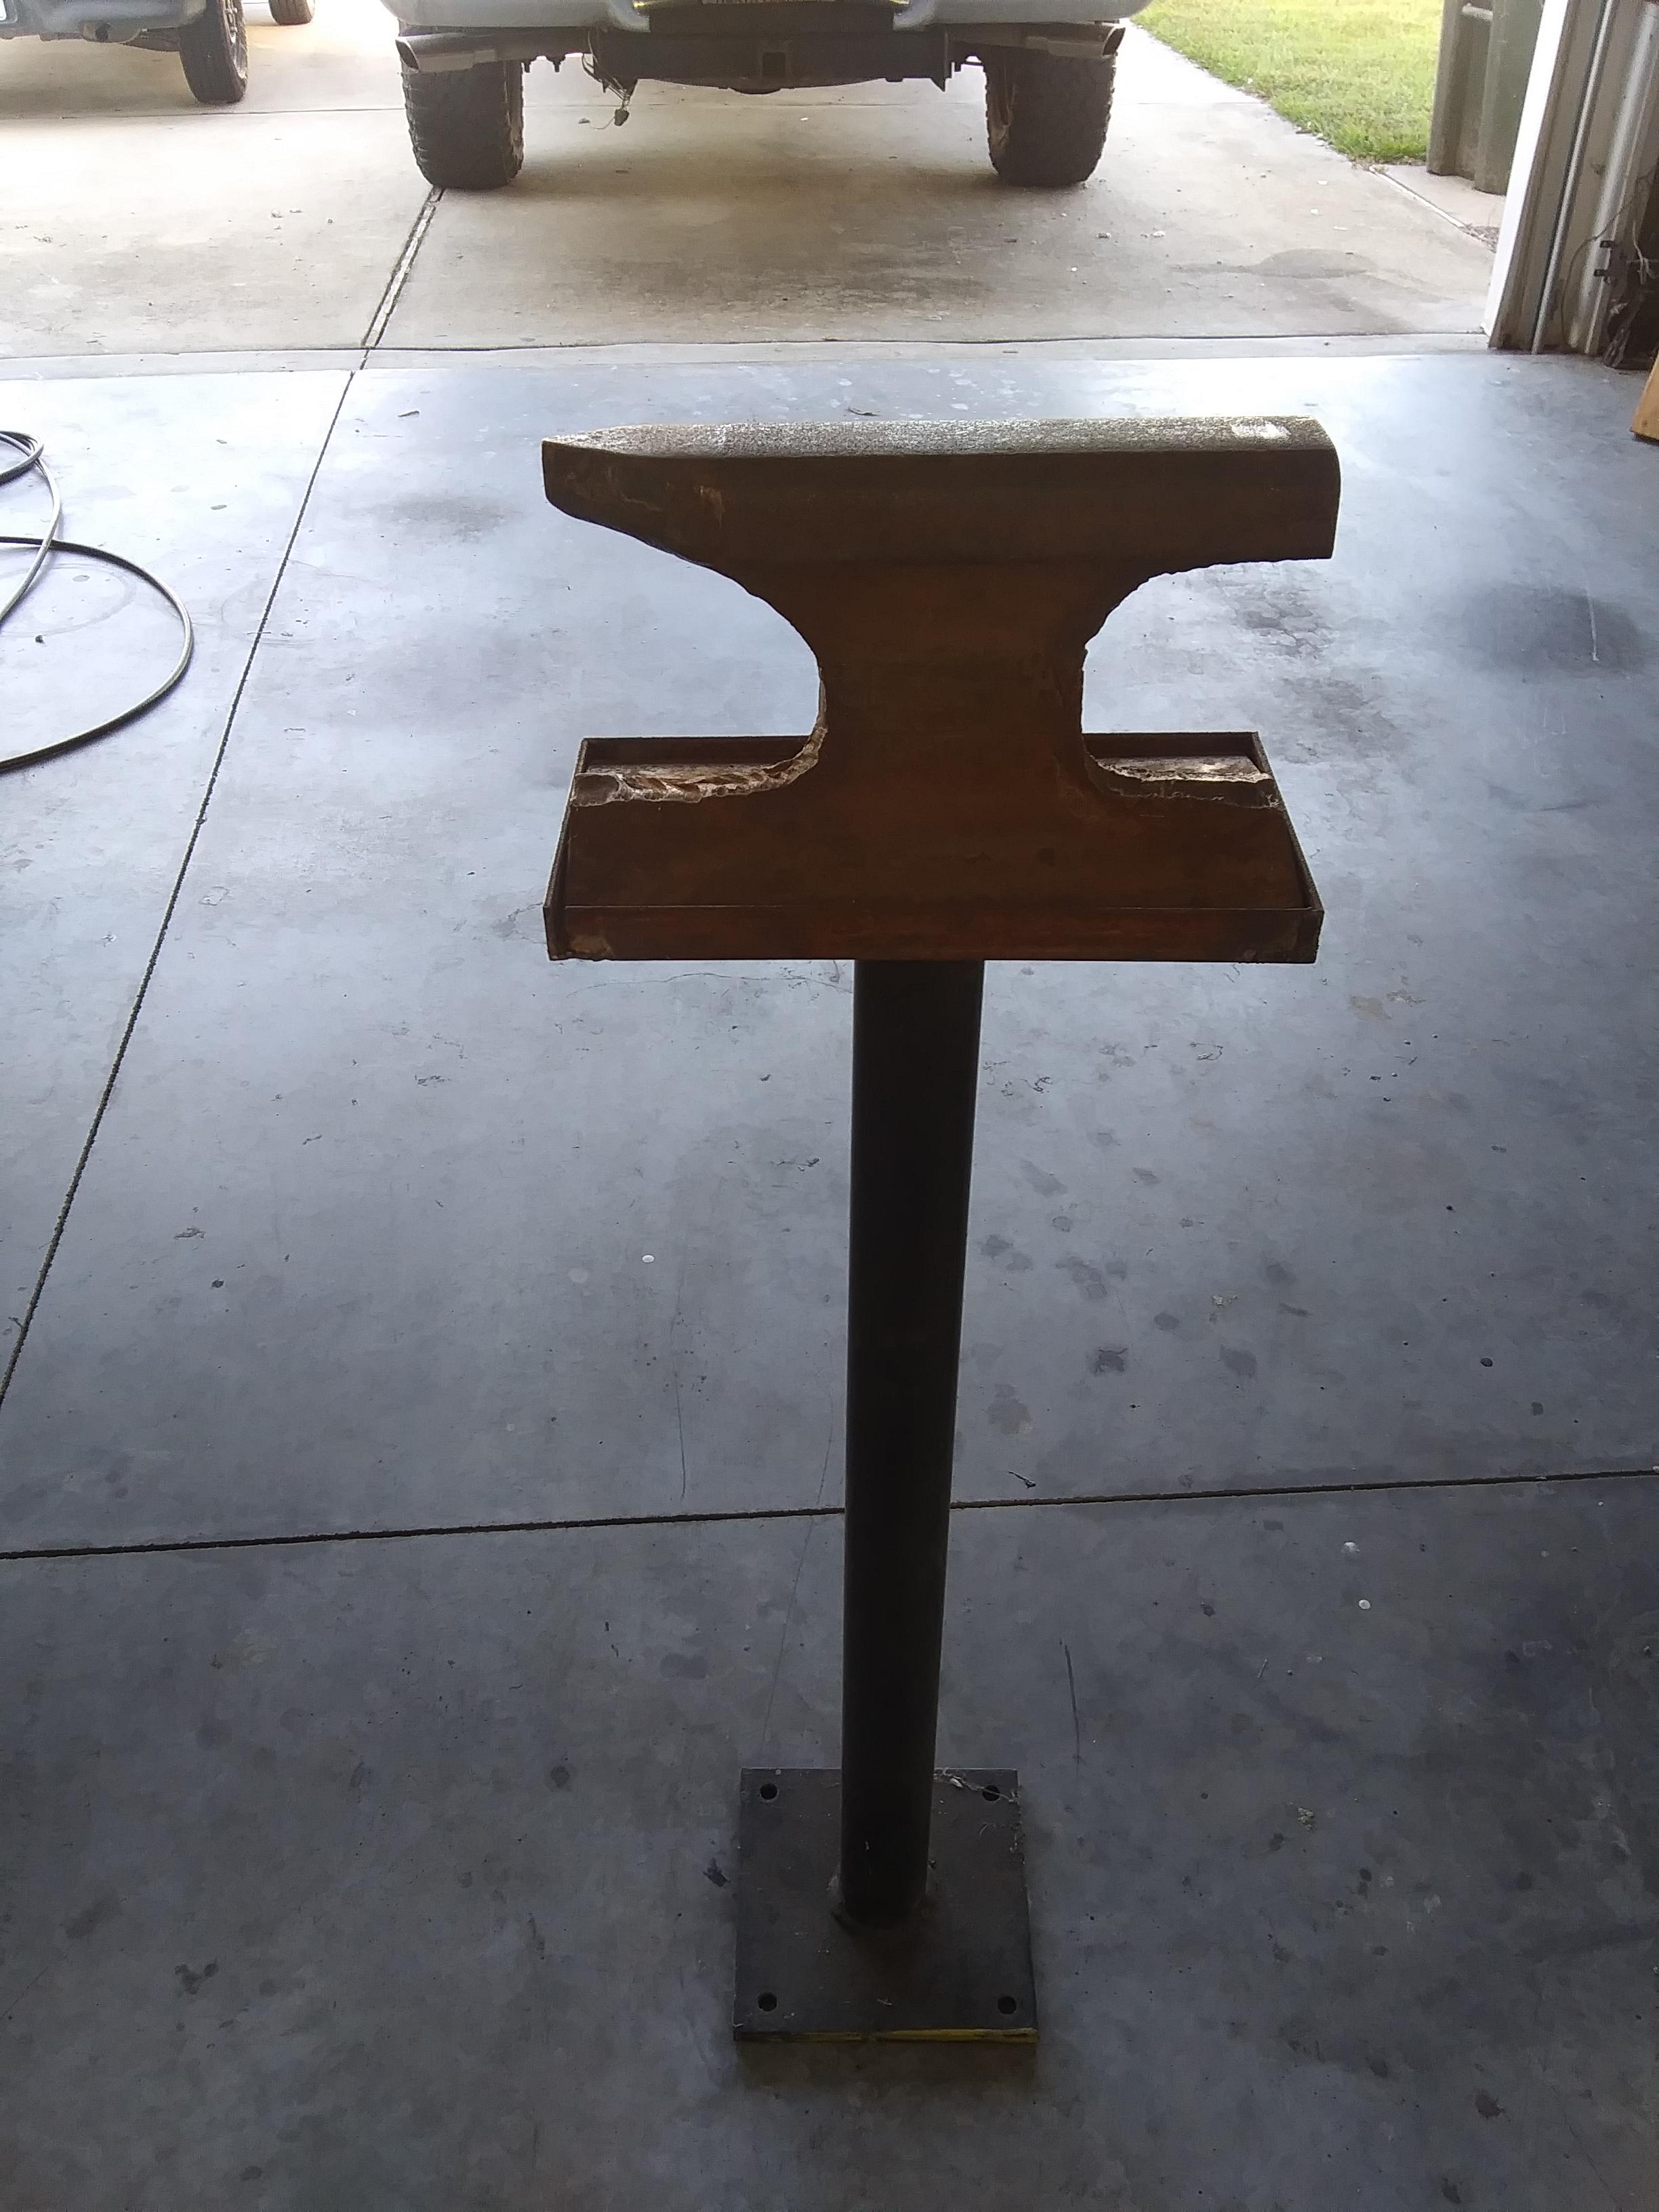
PNUT, i read somewhere that people had put theirs in a bag or container. Honestly, i forgot all about that step. The guy I got it from said in the industry where it is used, the best way to cure this type is to put heat to it. Low-fire or a lamp. Im glad it didnt crack. I will see how it takes heat when i get the lids fitted back up. Frosty, holy cow! 350lb hammer! Wow! I also have a piece of steel that looks like a big hockey puck. It is about 4" diameter and about 4" tall. Theyre used on rail cars to roll with the weight of liquid in tank cars. They dampen the "slosh" when the train stopps. It is good and flat, i just wish it were bigger! I also have 2 pieces of plate steel that are about 2.5-3" thick, I believe. Youre right though, whatever you use to bang out stuff with ends up being the anvil. My dad always said I could tear up an anvil... Hopefully i wont prove him right.
-
Yeah, Frosty, being an extreme novice, I cant swear to the technical aspects. However it didnt crack over night and it seems to be extremely hard... We shall see shortly how it performs. I see your point, Thomas, about the sweet spot. If this hobby of mine, turns into a habit, i hope to be able to justify a few hundred in a real anvil someday.
-
-
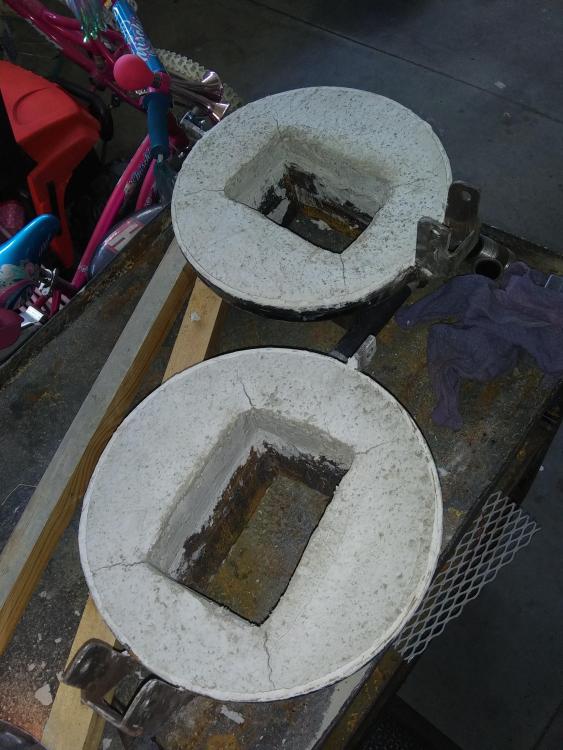
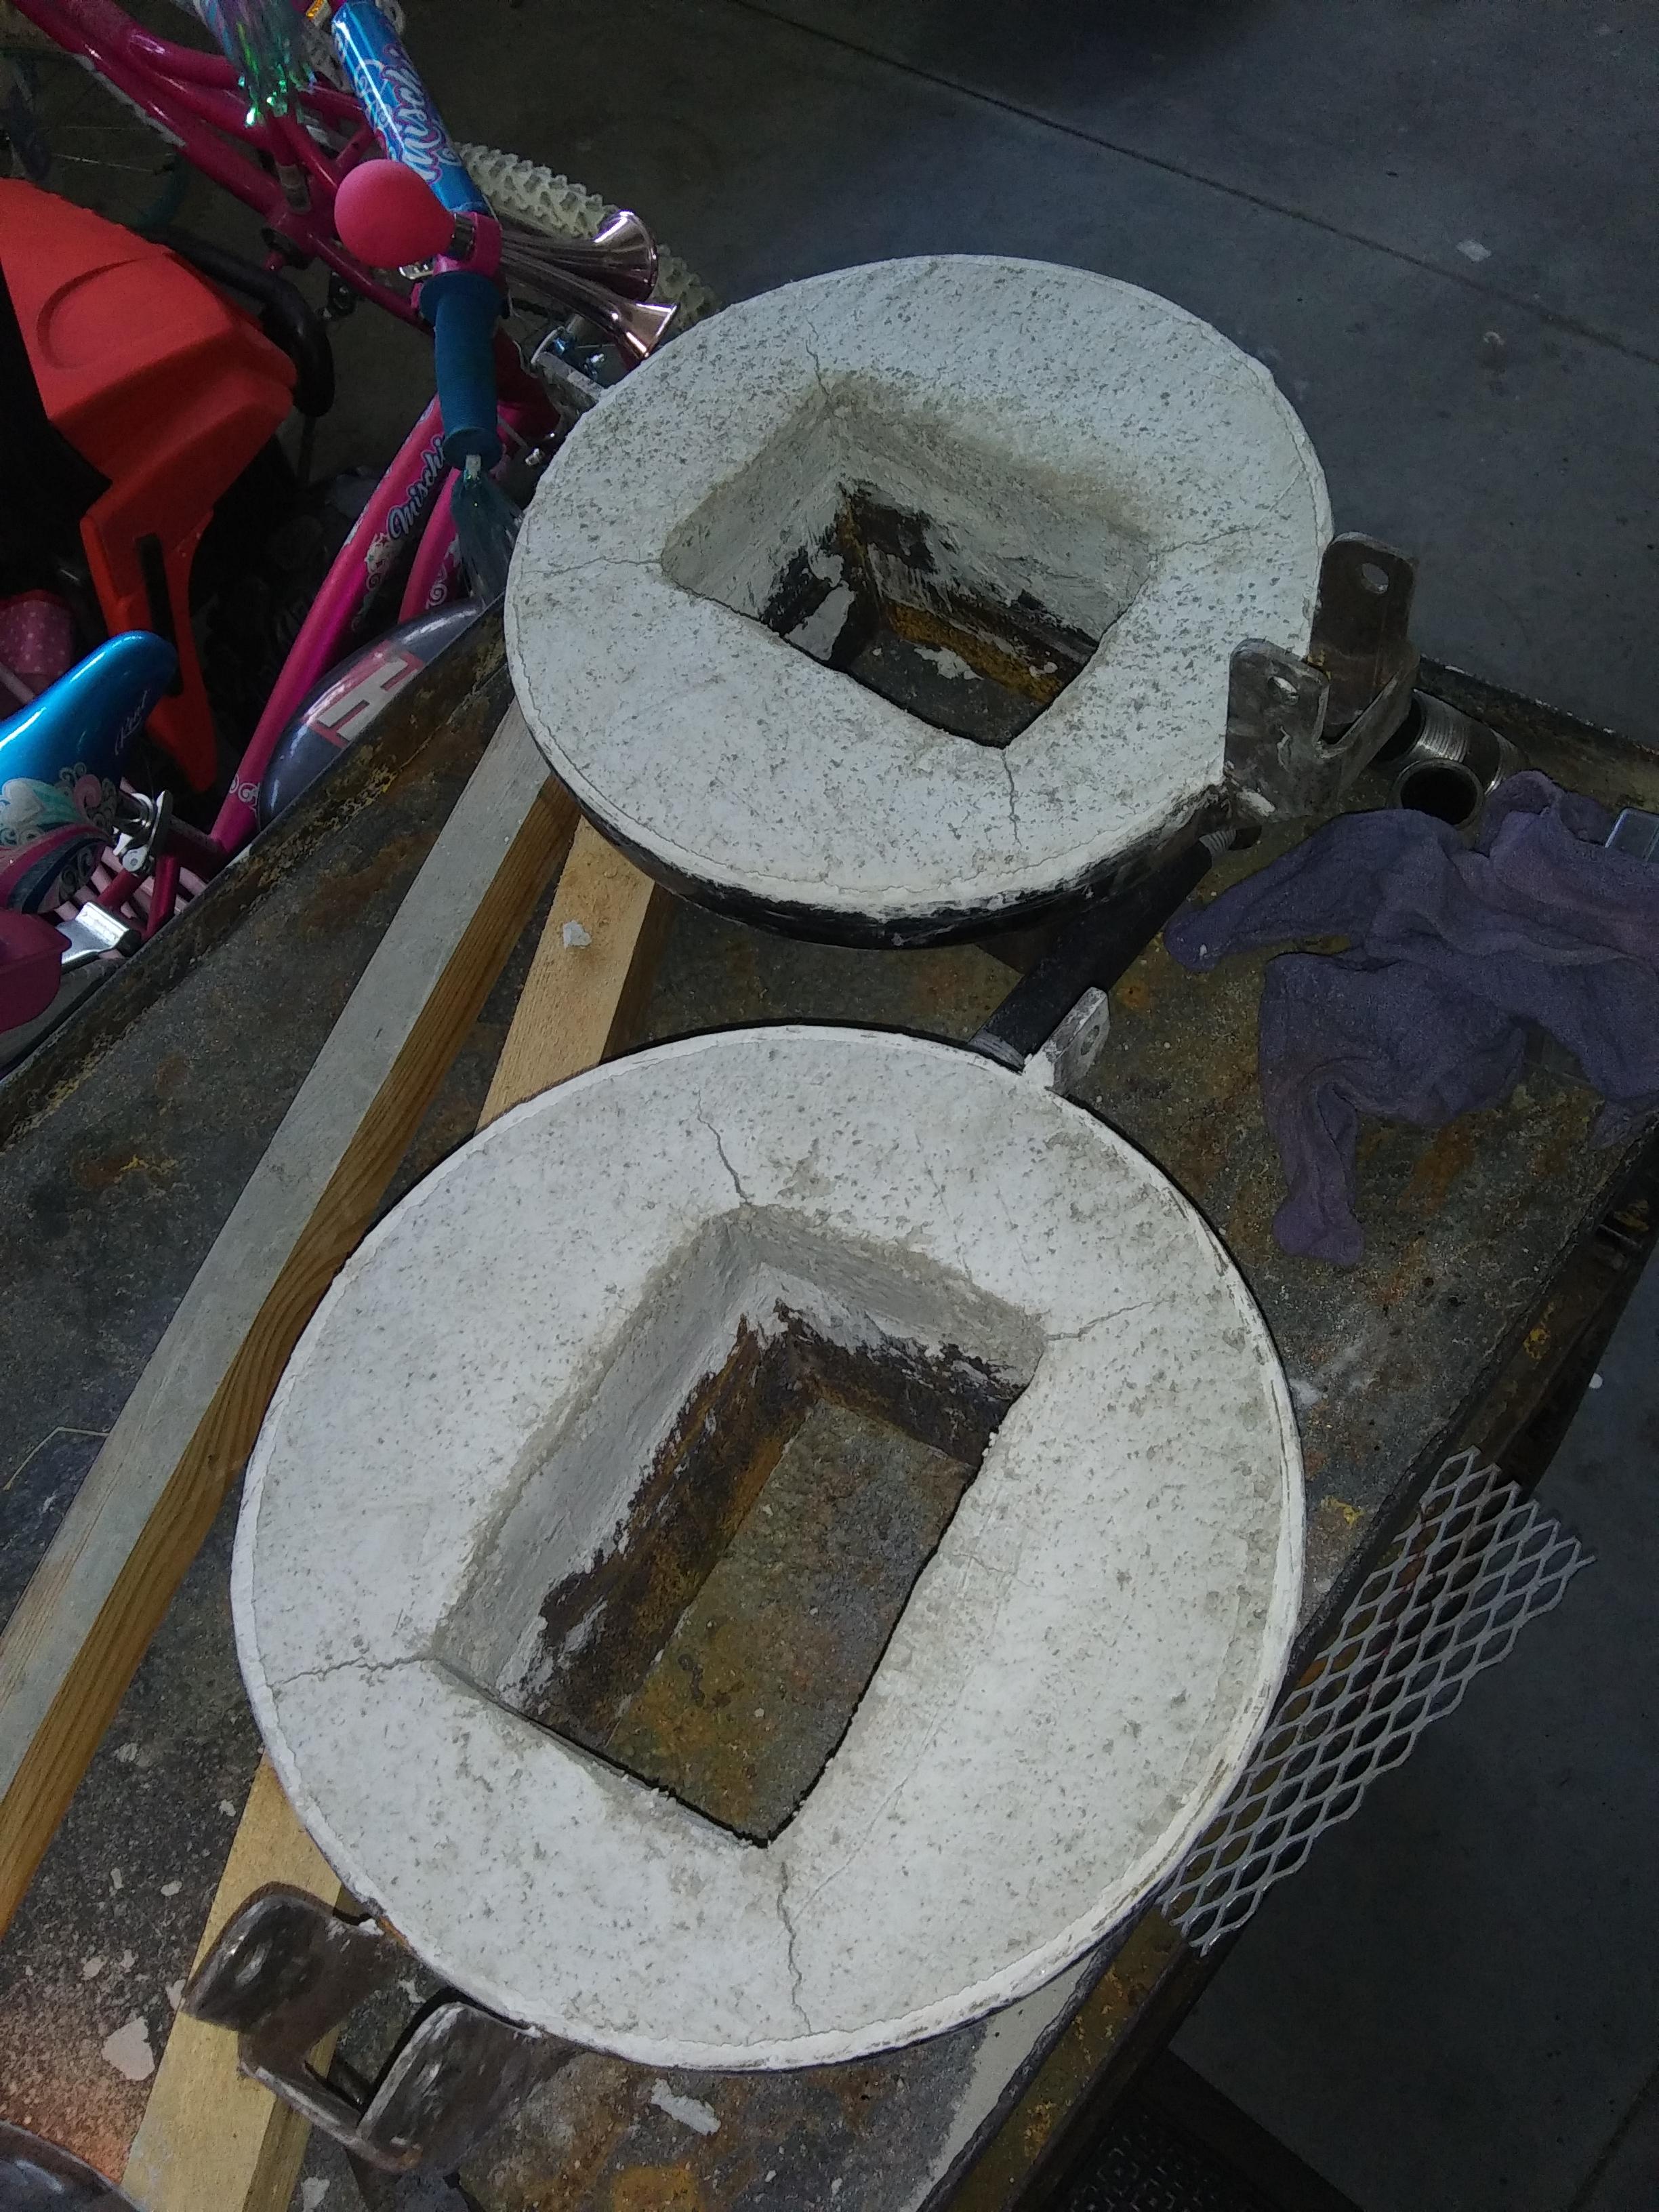
...ever see that episode of Andy Griffith, where the city slicker comes to sleepy Mayberry? He's all in a hustle and bustle to get where he was going, but due to car trouble, he got held up. The slow pace of town was very irritating to the man and he was heard several times saying "For the love-of-Mike, just DO IT! DO IT!" Well, thats how you guys have mist likely felt with my questions ands and anxieties with this forge build. After a long wait on the refractory, I finally DID IT! I practiced my mixture consistency on the lids. It was more down and dirty than I wanted, not as smooth outcome as the first go at the refractory, but overall I am very happy with it so far. As I trowled it in and rolled the shell, I found that the mud tried to peel off as gravity worked against me. Not to be deterred, I trowled in as much as I could and then stood the shell on end to do the last bit. Thankfully, it held together so far. I lowered a drop light inside to slowly heat out the moisture. Should I worry about the cracks in the corners of the door openings? Can I just patch them after it cures? As always, thanks for all the helpful advice. Hopefully soon, I will put the burner(s) back in and see how she does.