Marcus_Aurelius
-
Posts
68 -
Joined
-
Last visited
Content Type
Profiles
Forums
Articles
Gallery
Downloads
Events
Everything posted by Marcus_Aurelius
-
While I do not have any pictures, a new welder and auto-darkening helmet followed me home, they are both Hobart products! I am pumped to be able to use the welder to create new tooling and expand what I can make....hopefully my welding skills get better soon -GolFisHunt - That is a really nice looking vise, whats the jaw size and weight? I have a post vise that looks extremely similar, do you know the maker? Or are there any visible markings?
-

Musical forging
Marcus_Aurelius replied to Nobody Special's topic in Blacksmithing, General Discussion
Greetings all, The anvil is used sometimes as a musical Instrument. About a year ago I played the solo trumpet part for second suite in F by Gustov Holst. The 3rd movement is called “Song of the Blacksmith”, an it involves an anvil. There are specific moments where the ring of the anvil sounds throughout the song, I offered to bring my Peter Wright in as the original score called for a real anvil, but the director went for a brake drum instead . I’ve linked the song https://m.youtube.com/watch?v=7nz7tvRdL94 (I do not believe this link breaks the rules, if it does, sincere apologies.) -Mark -
What did you do in the shop today?
Marcus_Aurelius replied to Mark Ling's topic in Blacksmithing, General Discussion
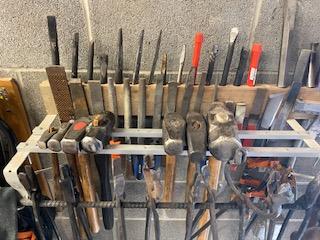
I love the look of those metal flowers! I used to have a ton of copper sheet laying around... maybe I'll give that a shot. I like the NARB, JHCC, I am on my way to order parts for my own build. I got some good work done in the shop, which was getting a little cluttered and disorganized. I was thinking of the layout and realized its inefficiency. Here was my solution! Basically there are two right angled supports meant for a shelf that hold the whole abomination together. On the backside there is a 2-4 that I drilled 3/4 holes to fit my hand tools, on the side of the wood I hot glued in some cheap neodymium magnets that are holding the majority of my files and other oddities. The hammers are on two channels of aluminum in the middle and finally the tongs are on a chunk of rebar that sits nicely on a hook on the end of the right angles. On the end of the rebar I can hang PPE and jackets. Overall its a big improvement from past, of course as this addiction takes its natural course I will need to expand as more tools are piled on. - Mark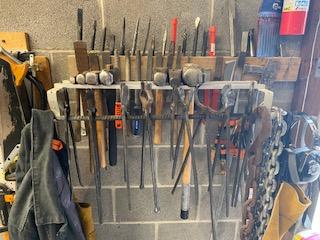
-
What did you do in the shop today?
Marcus_Aurelius replied to Mark Ling's topic in Blacksmithing, General Discussion
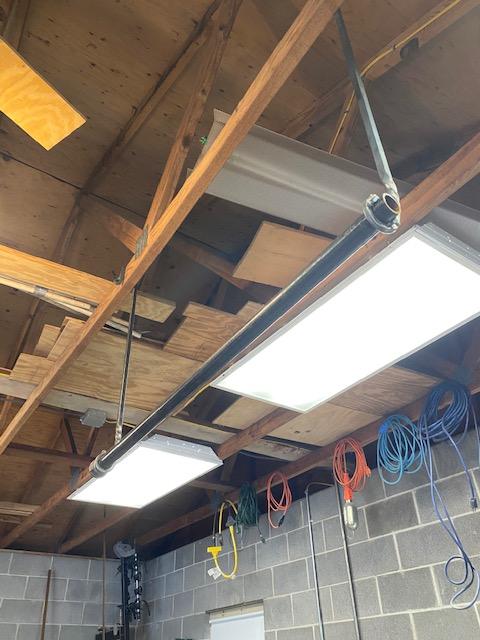
I love the look of the forge John! I’ve been thinking about building a new forge. I’ve been using my current model hard this last week due to the quarantine (The forge is on its last leg, and needs an upgrade). Are you going to build a NARB or blown ribbon? Anyways got some good work done in the shop, right before everything closed up I took a trip to Logan steel and rounded up some half inch square and made a sweet pull-bar out of it. The half inch square hook on nicely to the rafters, then on the bottom a 1.5 inch pipe runs through the hook. This is a good addition to the shop especially with gym closing down.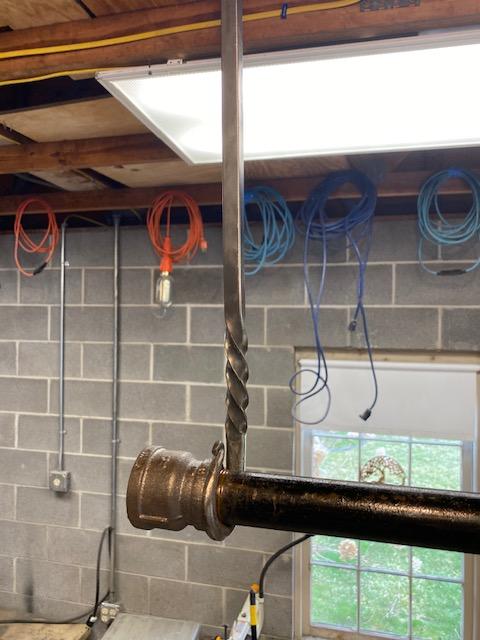

-
Show me your Bottle Openers!
Marcus_Aurelius replied to Arbalist's topic in Blacksmithing, General Discussion
Welcome to the Forum! I wold estimate that it took me around 30-45 min to make both of the bottle-openers. (Keep in mind I had two pieces of steel in the fire) -
Show me your Bottle Openers!
Marcus_Aurelius replied to Arbalist's topic in Blacksmithing, General Discussion
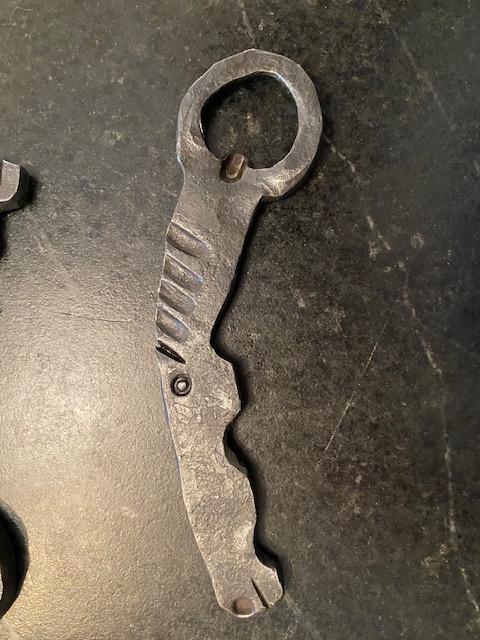
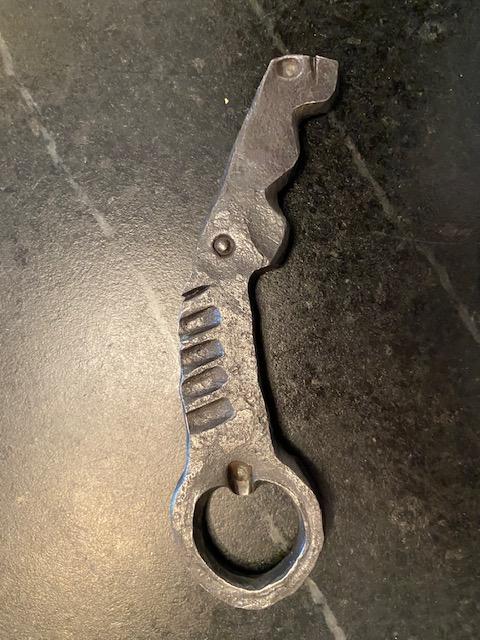
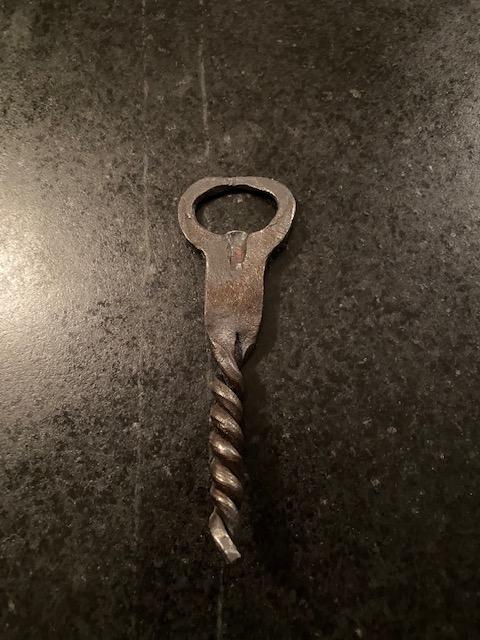
Forged out some new horse head bottle-openers. Quite pleased with how they turned out! For my taste the head is still to geometric and angled, on the next batch I will smooth out the lines. -Mark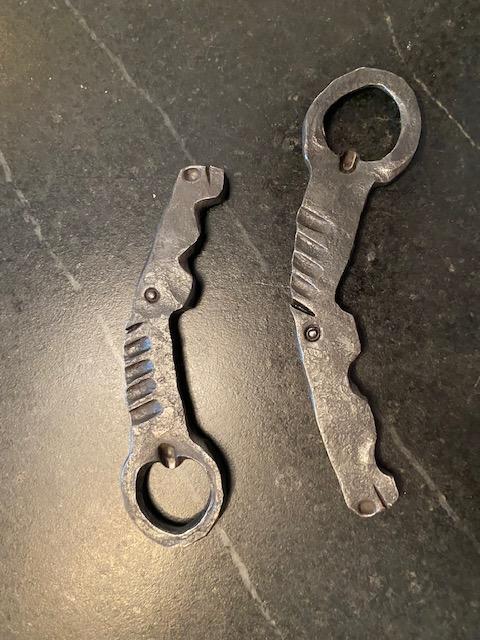
-
Show me your Bottle Openers!
Marcus_Aurelius replied to Arbalist's topic in Blacksmithing, General Discussion
Spent some time last weekend forging out my first horse head bottle opener, and surprisingly went really well! I ran out of flat bar, so I opted to do some extra hammering to flatten some 5/8 round bar. I unfortunately decided to make the head double sided . I ended up fighting myself with the fuller marks on the mane, forged one side and the other faded . one side is smiling the other is frowning
-
Stress Fracture in Railroad Anchor
Marcus_Aurelius replied to Marcus_Aurelius's topic in Blacksmithing, General Discussion
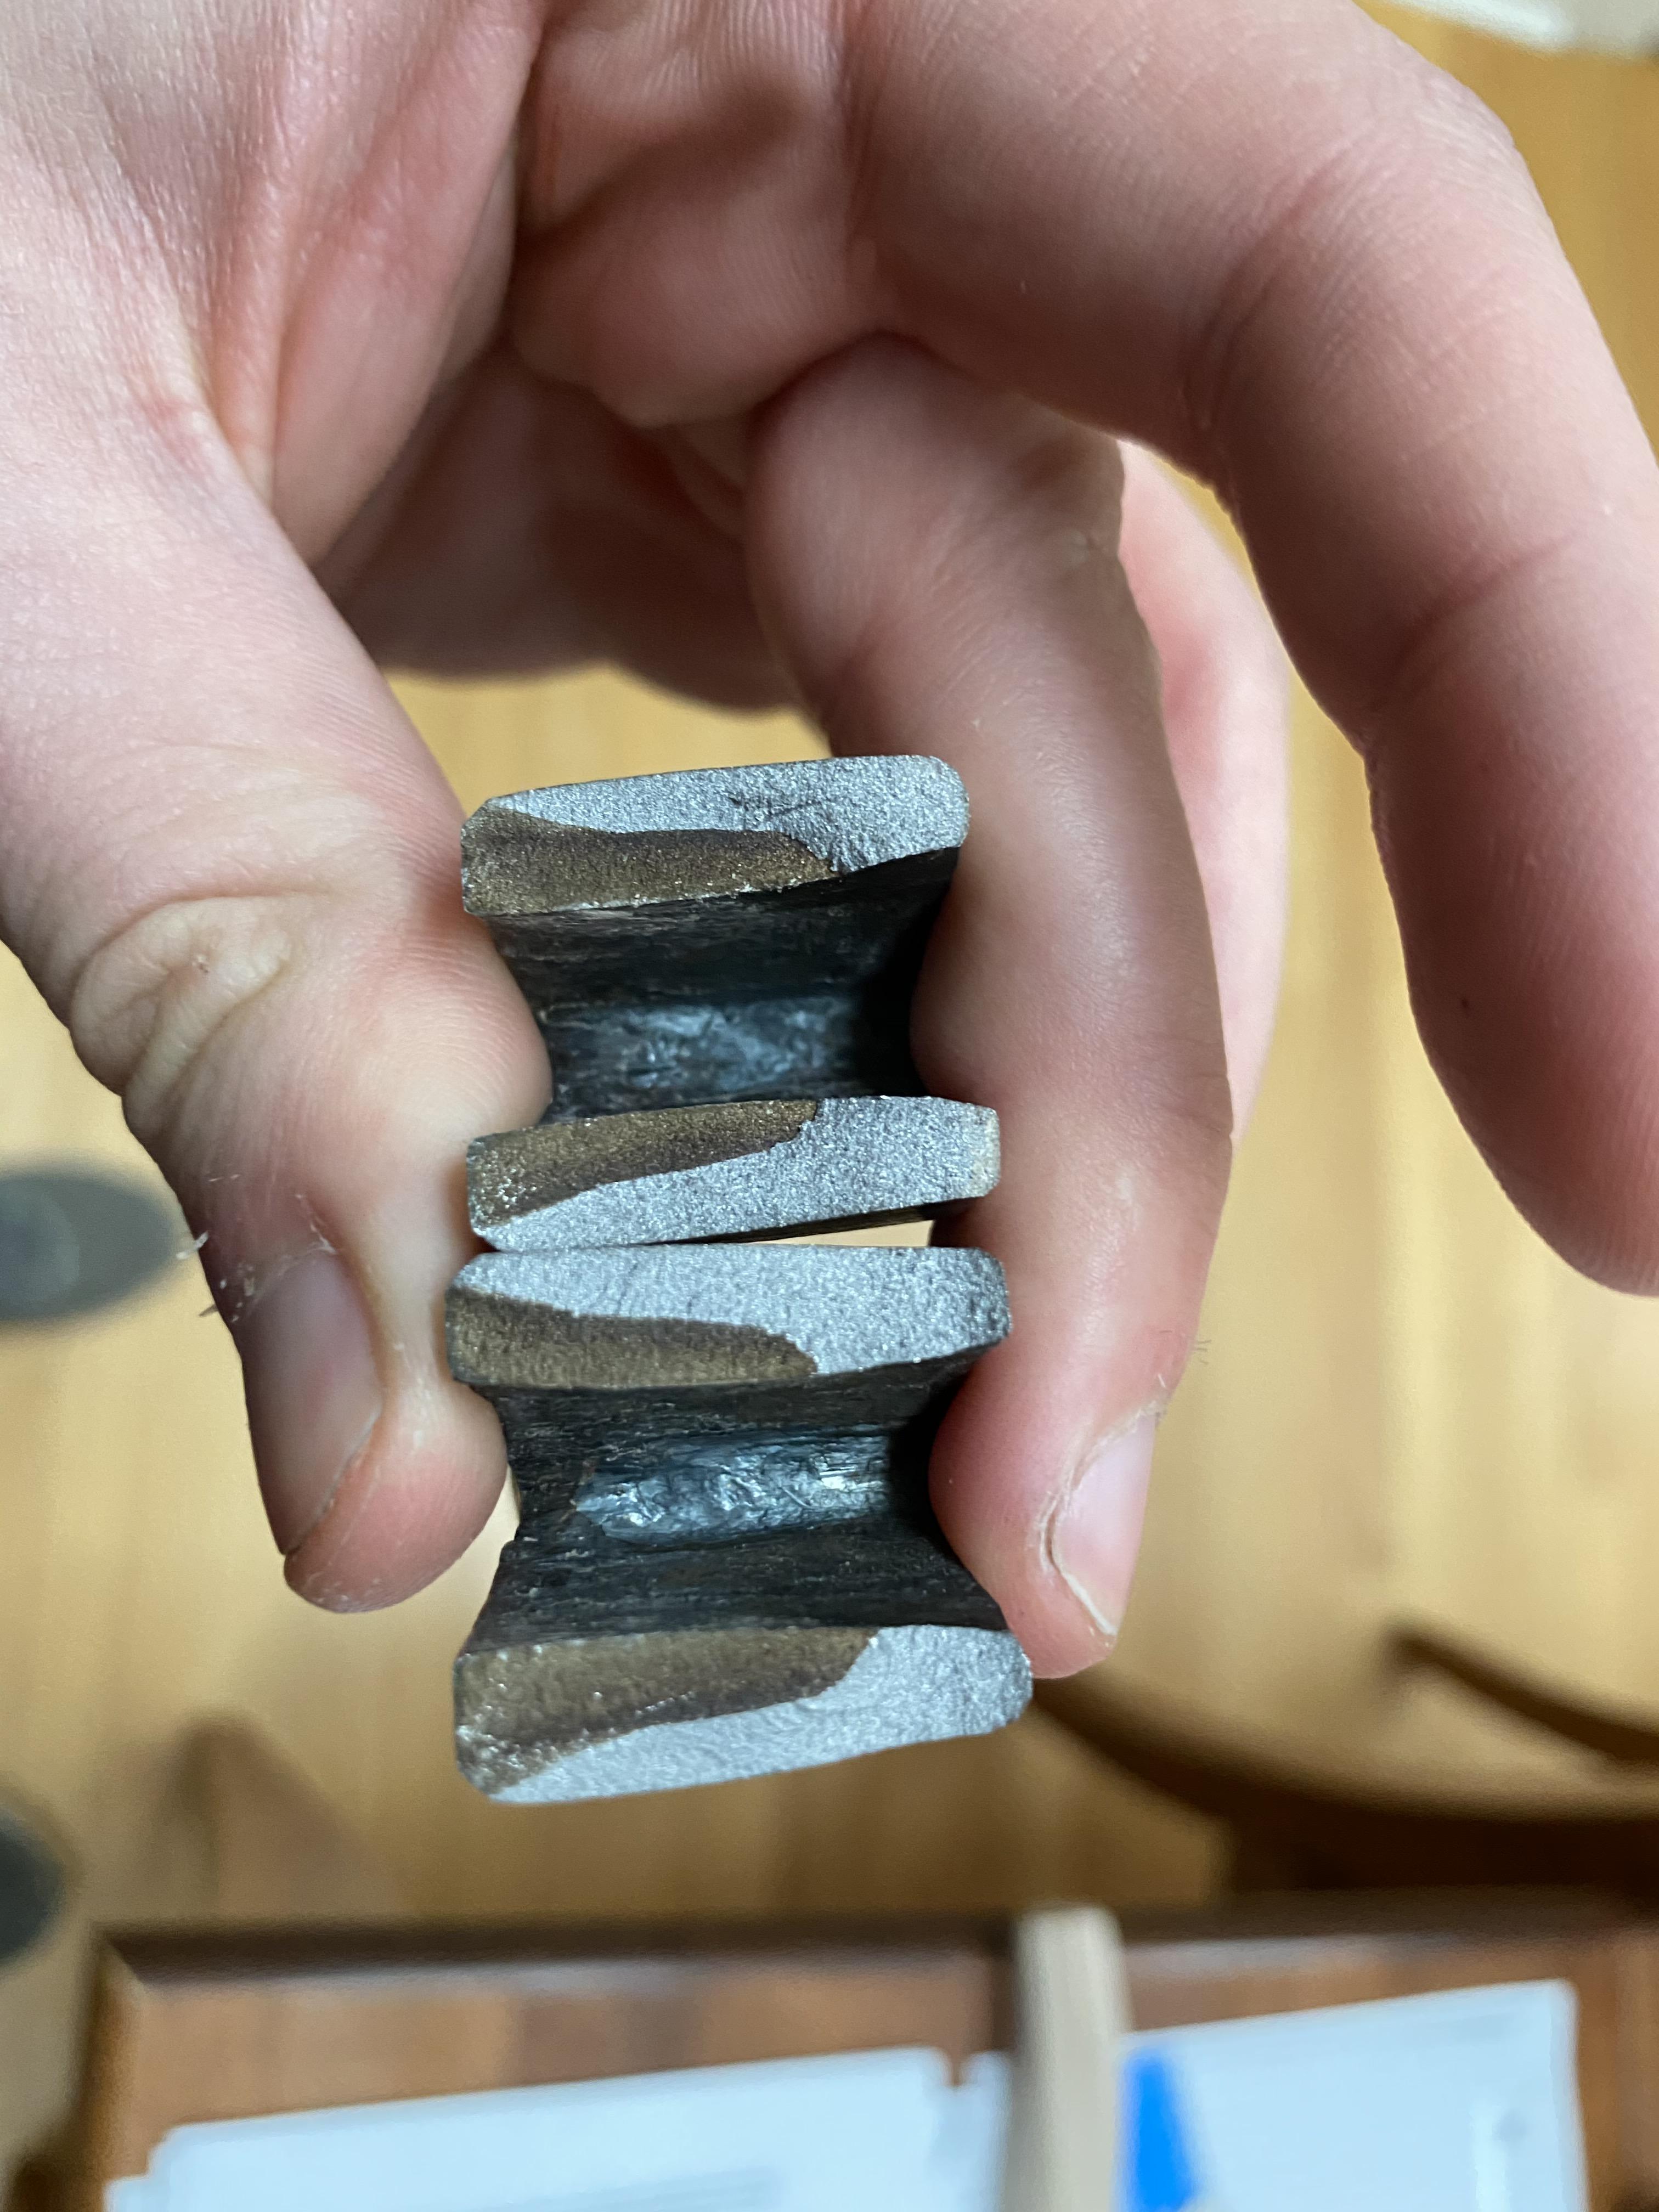
That seems to be the most logical problem, at the time I was punching the eye the forge was running out of fuel and dropping in tempature, the drift must have cooled the eye to much. The picture exaggerates the grain of the metal, but it is larger then I was hoping. The steel was normalized 3 times at subsequently lower temperatures, unfortunately the eye was hotter then the working end throughout the process. Then, heated to non-magnetic and quenched the working end in water, waited 20 seconds and quenched the rest (in hindsight I could have used the residual heat from the eye to temper the rest instead). Beforehand, I tested a section of the anchor by quenching it in warmed oil, didn’t get as hard as I expected so opted for the water. As soon as the quench was complete I popped the tool into into a pre warmed toaster oven set at 425. I did one more tempering cycle a day later and used a torch to soften the striking an eye section. it is quite the anchor, took a heavy beating to get it to move. thanks for all the comments - Mark -
Stress Fracture in Railroad Anchor
Marcus_Aurelius replied to Marcus_Aurelius's topic in Blacksmithing, General Discussion
Goods - yes, the eye was punched round, ovalized, and refined on a makeshift drift. It is entirely possible that an errant hammer blow hit the metal when it was to cold. I did consciously place the steel back in the forge when it cooled below an orange or cherry red heat, but I could have defiantly had a miss wack. I do not believe the eye was to hard. I tempered the striking end and the eye of the tool twice after the heat treatment on the rest of the tool was finished. The anchor I used was unusually thick compared to the ones I have seen before, the anchor second from the right. The failure happened after forging was complete during the handling process. lots of interesting thoughts here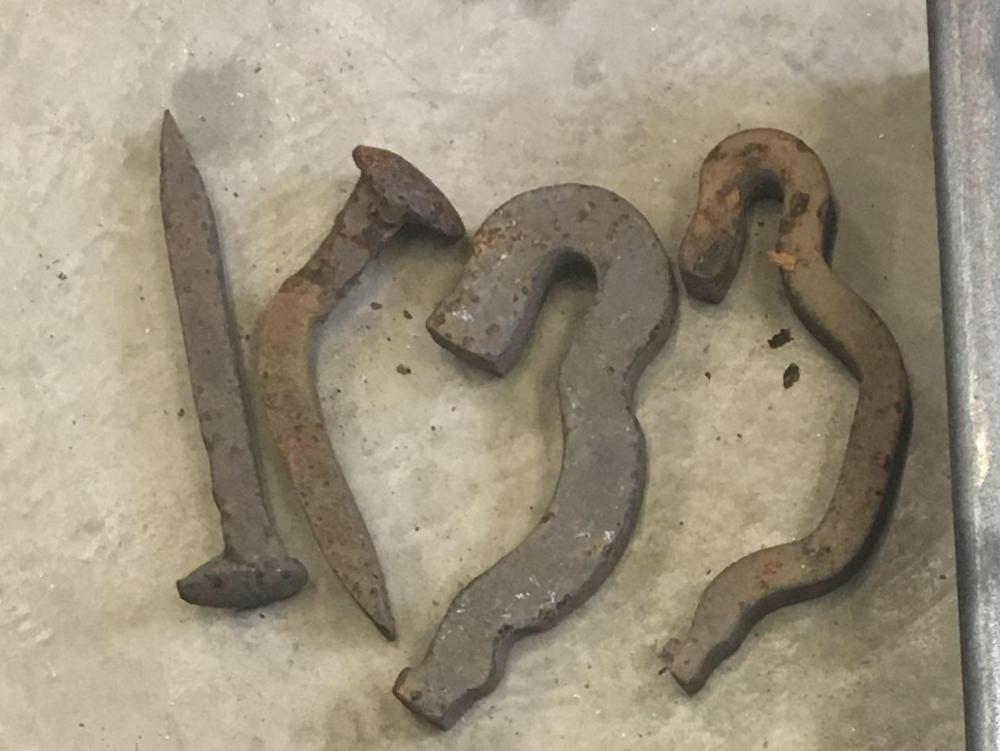
-
Stress Fracture in Railroad Anchor
Marcus_Aurelius replied to Marcus_Aurelius's topic in Blacksmithing, General Discussion
Very interesting. To clarify, ‘beach marks’ show cycles of stress? Interrupted use that propagates the crack in small increments. So then the final crack must have happened suddenly. No I do not see any jagged pieces, but on the top piece there seems to be areas that could be pried of with a fingernail, almost as if the crack persists farther into the steel. -Mark -
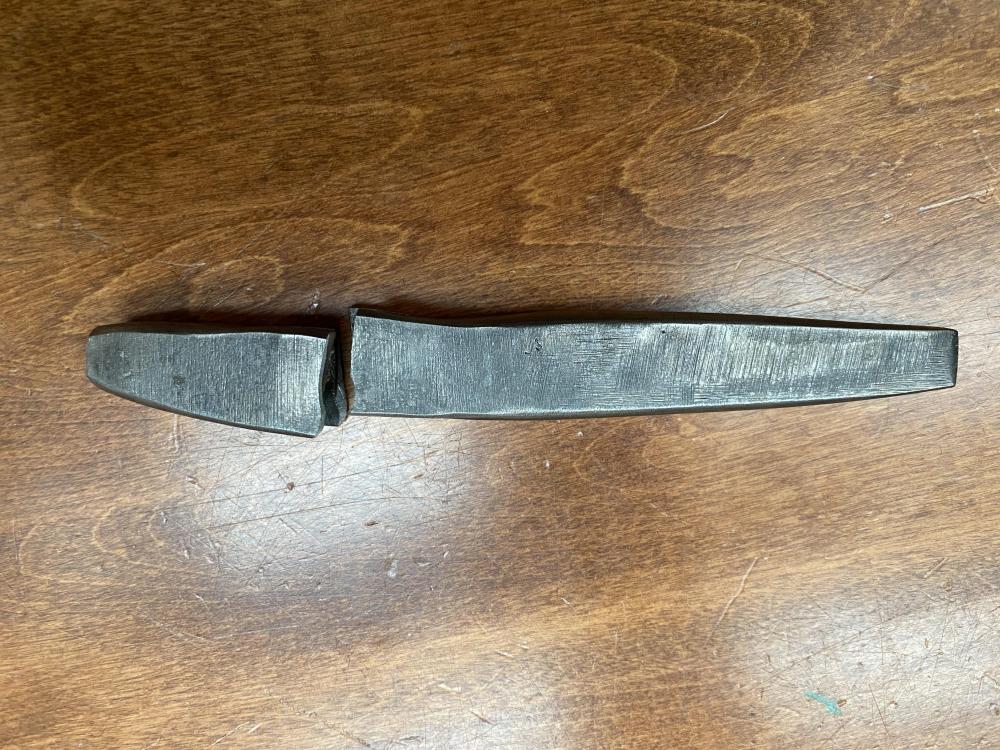
Hi All, Recently I have been forging a handled slot punch from an old rusty railroad anchor. To my dismay as I was driving the handle into the eye, the tool split in half . Surprisingly I was not terrible upset as it is better to have failed now and not when striking with an 8 pound sledge. From the short two years of forging I have done I have never had a tool fail from what I believe to be a stress fracture (kinda exciting). It appears the fracture was preexisting and not caused by poor heat management. As shown by the picture the crack seems to be symmetrical on both sides of the eye, I must have punched straight through the fracture. Further the fracture seems to be discolored looking life rust, is this typical? There also is a slight 'lip' between the fracture and the rest of the area. Thought I might share. -Mark


-
What did you do in the shop today?
Marcus_Aurelius replied to Mark Ling's topic in Blacksmithing, General Discussion
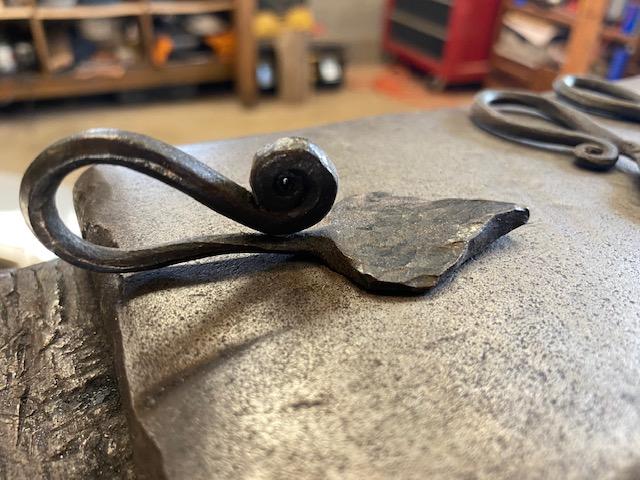
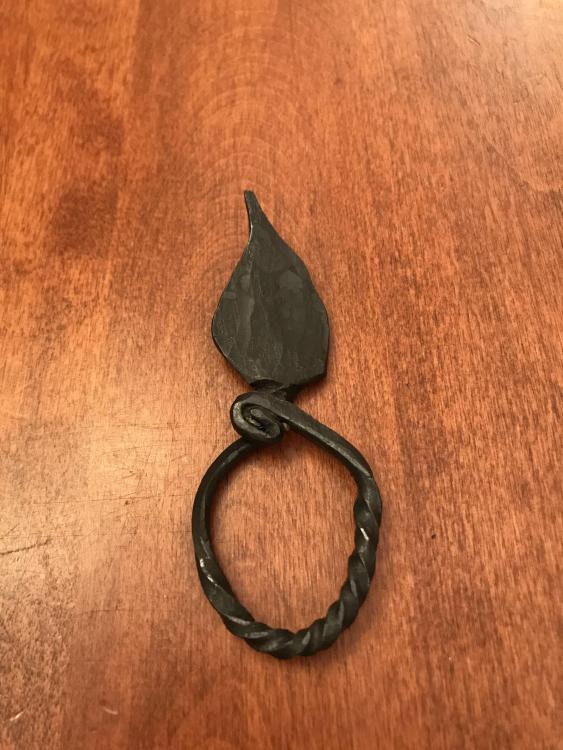
Took some time in the shop last weekend to forge out a present for a friend who recently celebrated his birthday. The leaf was supposed to be a keychain but I ended up getting ahead of myself and forging it from 3/4 round. It’s a around 8 inches long, so more along the lines of a wall decoration. I’m happy with the design but I need to work on cleaning up the decorations on the leaf especially the fuller marks on the sides. - Mark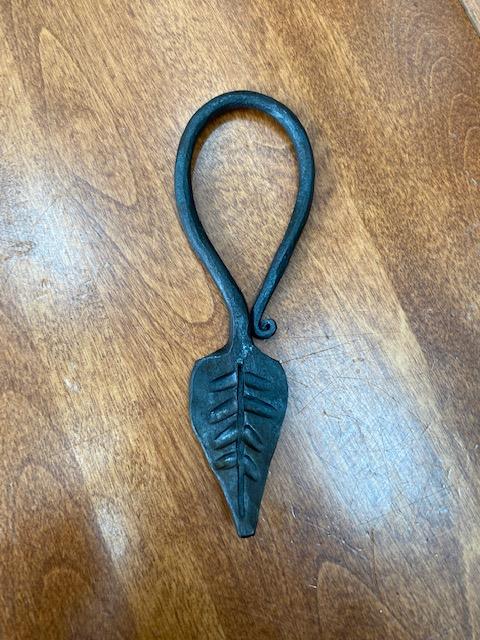
-
How do i know if my knives are ready to sell?
Marcus_Aurelius replied to Virusds's topic in Knife Making
As a amateur bladesmith myself here is my opinion: I agree with Pnut that a blade is ready to sell when someone is willing to buy it. But there are a couple of things that you should take into account. First you are responsible to sell a knife that is made well enough that it is safe to use. This means that it needs to be properly forged and heat treated. For example, a chopper needs to be able to withstand vibrations and strong blows, if it is to brittle it poses a threat to the user and anyone near by. Depending on the heat treatment you can change the properties of the steel to fit its need. That’s just my 2¢. Also and this is up to your prerogative, you should set a standard for blades that leave the shop. Make a blade you are pleased with and one that you have done your best to make sure it is “perfect”. All blades you sell should meet this standard, this will increase your skill as a maker. welcome to IFI there are a lots of great things here, Mark -
Those are some great stories. I do have a couple of small burls that where freshly cut about 2 weeks ago, still got way to much time until they dry out . I love that curly maple! Great contrast and absolutely stunning. I’m partial to red maple burl myself, which conviently is some of the burl that is drying in the shop.
-
Chris, Great looking knife and I really dig the look. I make a blade once in a while and I am just getting started in the journey like you. Recently I have used eastern red cedar for my handles but I’m looking to branch out for a hidden tang blade I’m working on. Where or how do you source you wood? Did you order the elm burl online or buy it from a local store? To comment on the tapered tang: As I understand it (this may be wrong so take this with a grain of salt) the tapered tang helps to transition the vibrational node to the bottom of the handle which is only important on much bigger blades. Otherwise it is to help balance and reduce the weight of a blade. -Mark
-
What did you do in the shop today?
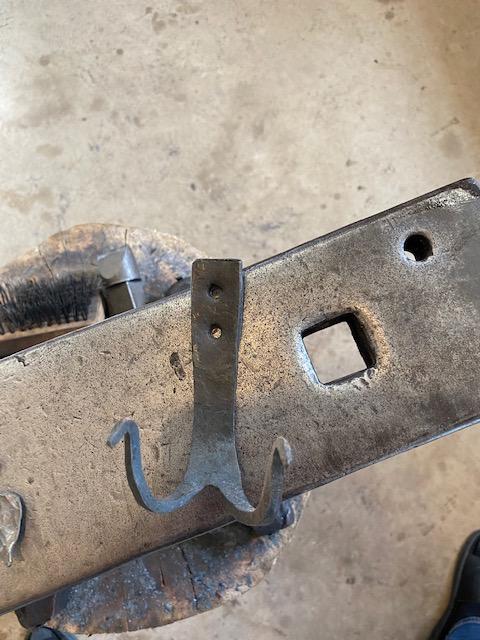
Marcus_Aurelius replied to Mark Ling's topic in Blacksmithing, General Discussion
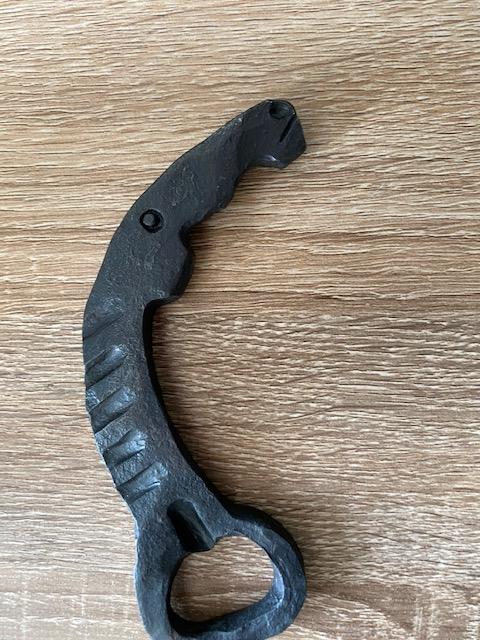
This is my work from the last couple of weeks, when I have found time to light the fire. I have forged a couple of leaves, I have started to refine the process and get some better texturing (getting my own style! ). Among the leaves is a little 'heart leaf' which was a Christmas gift for my sister. Also a hook that looks like talons for leather aprons, and a new twist on the bottle opener. -Mark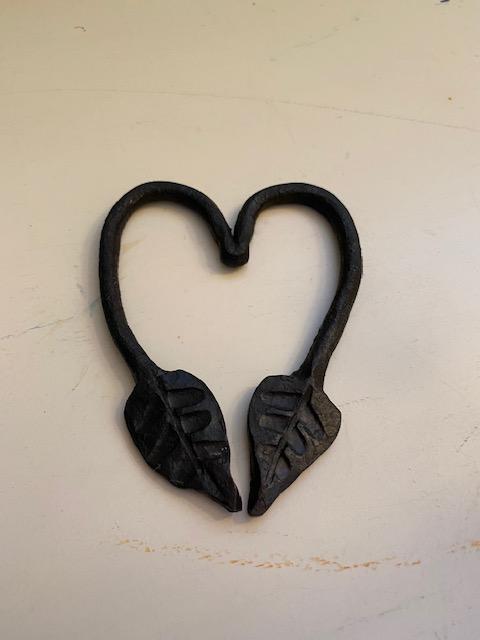
-
Good to see another member from Connecticut! Its a very nice looking anvil and a big one for sure. In general I would say it resembles my Peter Wright, specifically the square holes on the sides of the anvil (under the horn and heel) and on the base. I am no expert on identifying anvils so don't take my word for it, are there any other markings? Perhaps on the front of the anvil? 50% rebound is below what is preferred but it should still work, its ready for some hot steel to clean the face. -Mark
-
What did you do in the shop today?
Marcus_Aurelius replied to Mark Ling's topic in Blacksmithing, General Discussion
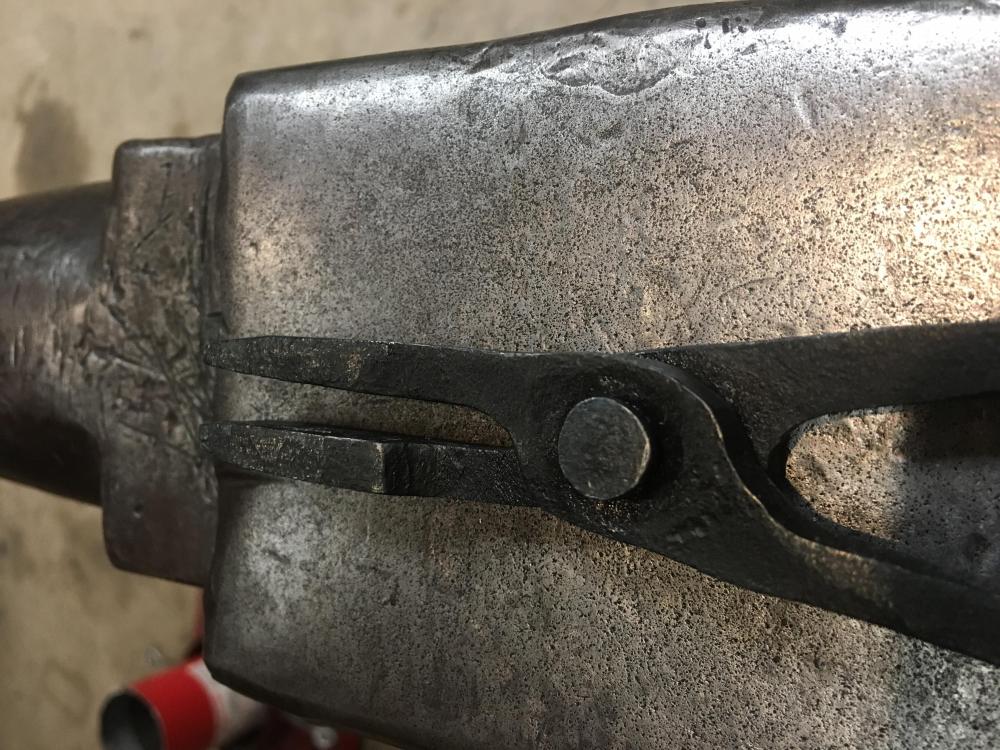
I agree with the others, looks like something that was molten, probably the remnants of a thermite weld. Anyways, got the chance to do some forging this weekend and knocked out a new pair of flat jaw tongs. I tried a couple of new things this time around such as rounding the reins and bending the end of them. I have been trying to make better and more refined tongs, these are definitely on that road. The next ones will be some scrolling tongs. I also forged out a herb chopper from some extra 1095, unfortunately I do not have any pictures of the chopper.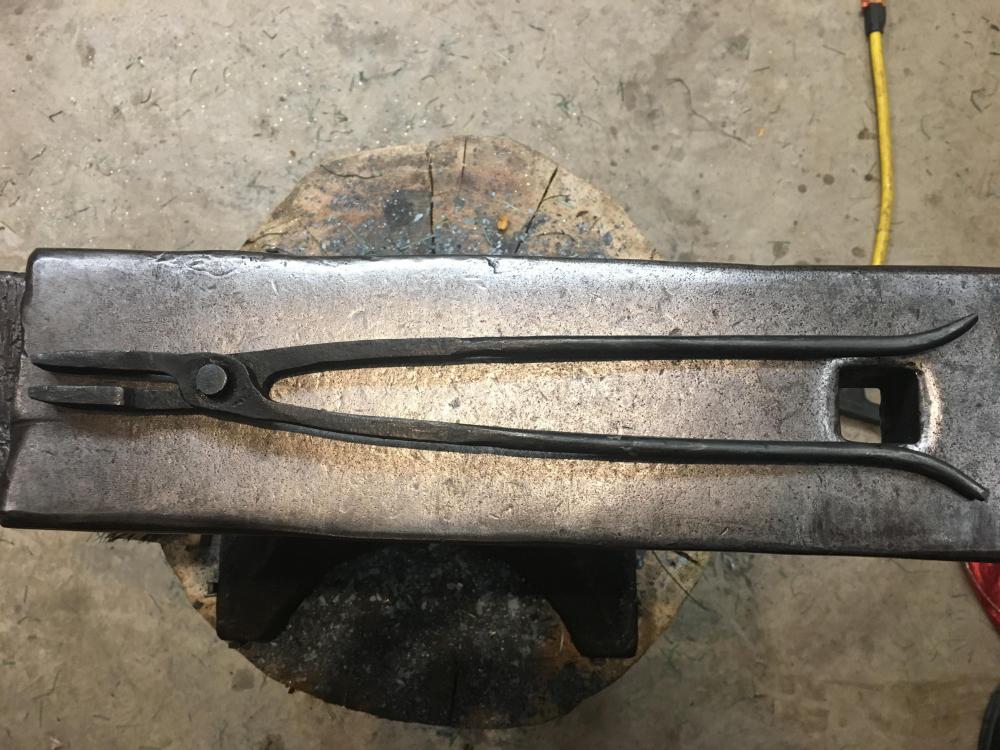
-
Lots of excellent comments, yes I agree TP explained it well. -Mark
-
I actually prefer the sway in my anvil, I do agree that it can be beneficial to straighten stock and have no intention of changing my anvil in anyway. I am simply curious to why the high quality wrought iron will sway more then the impure wrought iron. -Mark
-
That is what I have always heard as well, anvils with high quality wrought iron are more likely to have sway. Why do you think this is? Under pure speculation I could consider that 'contaminants' could strengthen the iron in some way. As I understand it adding certain metals such as chromium to steel can increase its strength and rigidity as it is more difficult for the iron atoms to move around the larger chromium atom requiring more force and higher heats to move the metal. Could it be that low grade wrought iron has certain contaminants that strengthen it over its higher grade counterpart much like the chromium in certain steel alloys? I don't mean to hijack this thread with a off topic question. Just and interesting thought. -Mark
-
I have a old Peter Wright, it is in good condition with a little sway which I do not mind. Mine is a wrought iron body and weighs 180 pounds, pre 1900s. Overall they are great anvils and will last as long as you take care of them. -Mark
-
What did you do in the shop today?
Marcus_Aurelius replied to Mark Ling's topic in Blacksmithing, General Discussion
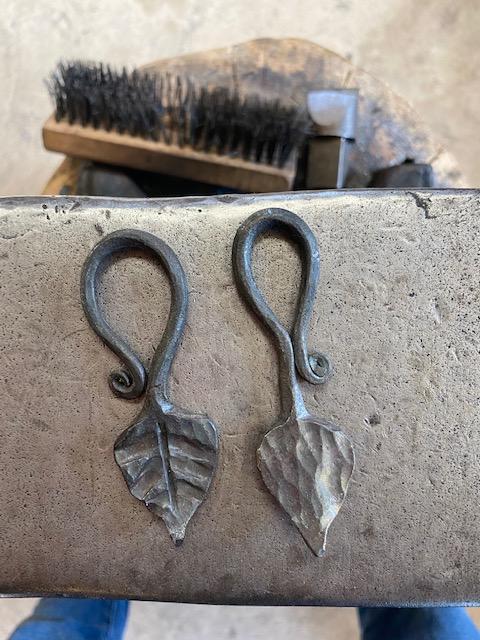
Had the chance to get in the shop today, forged out a couple of leaves which came out really nice. -Mark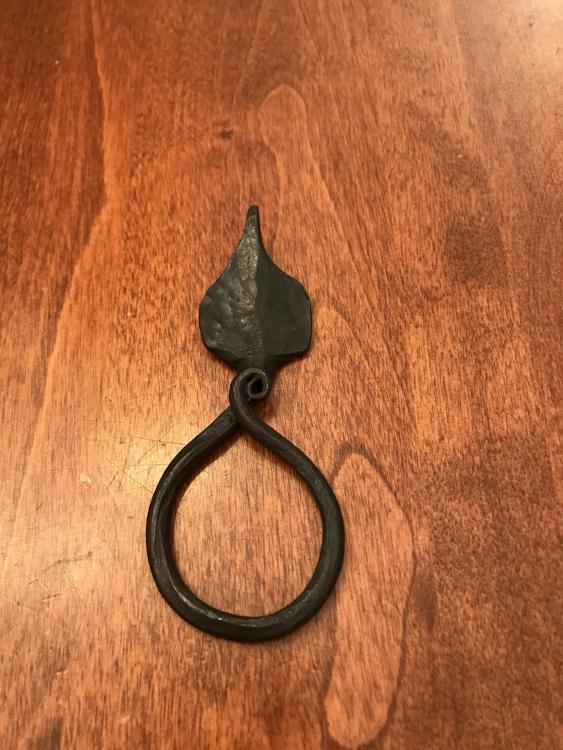
-
How about this one?
Marcus_Aurelius replied to paintedshrubbery's topic in Anvils, Swage Blocks, and Mandrels
Looks very similar to a colonial I found a while back, but in much better condition. It looks to be in functioning order, I would go for it and use it. -
Thanks for all the info, I was thinking the same thing about the regarding the braze weld. Could be a fun hobby to get into sometime in the future