Marcus_Aurelius
-
Posts
68 -
Joined
-
Last visited
Content Type
Profiles
Forums
Articles
Gallery
Downloads
Events
Everything posted by Marcus_Aurelius
-
Thanks for all the info, tungsten carbide is some tough stuff SLAG - I will avoid grinding on them from now on. Unfortunately I do not have much use for those chisels, I'll clean em up a bit and remove the gunk on them and go from there. -Mark
-
I have only done a quick glance on the web, I was planning on looking more at carbide tips later tonight. my fault on the ‘carbon steel’ it was meant to read “medium to high” carbon steel - Mark
-
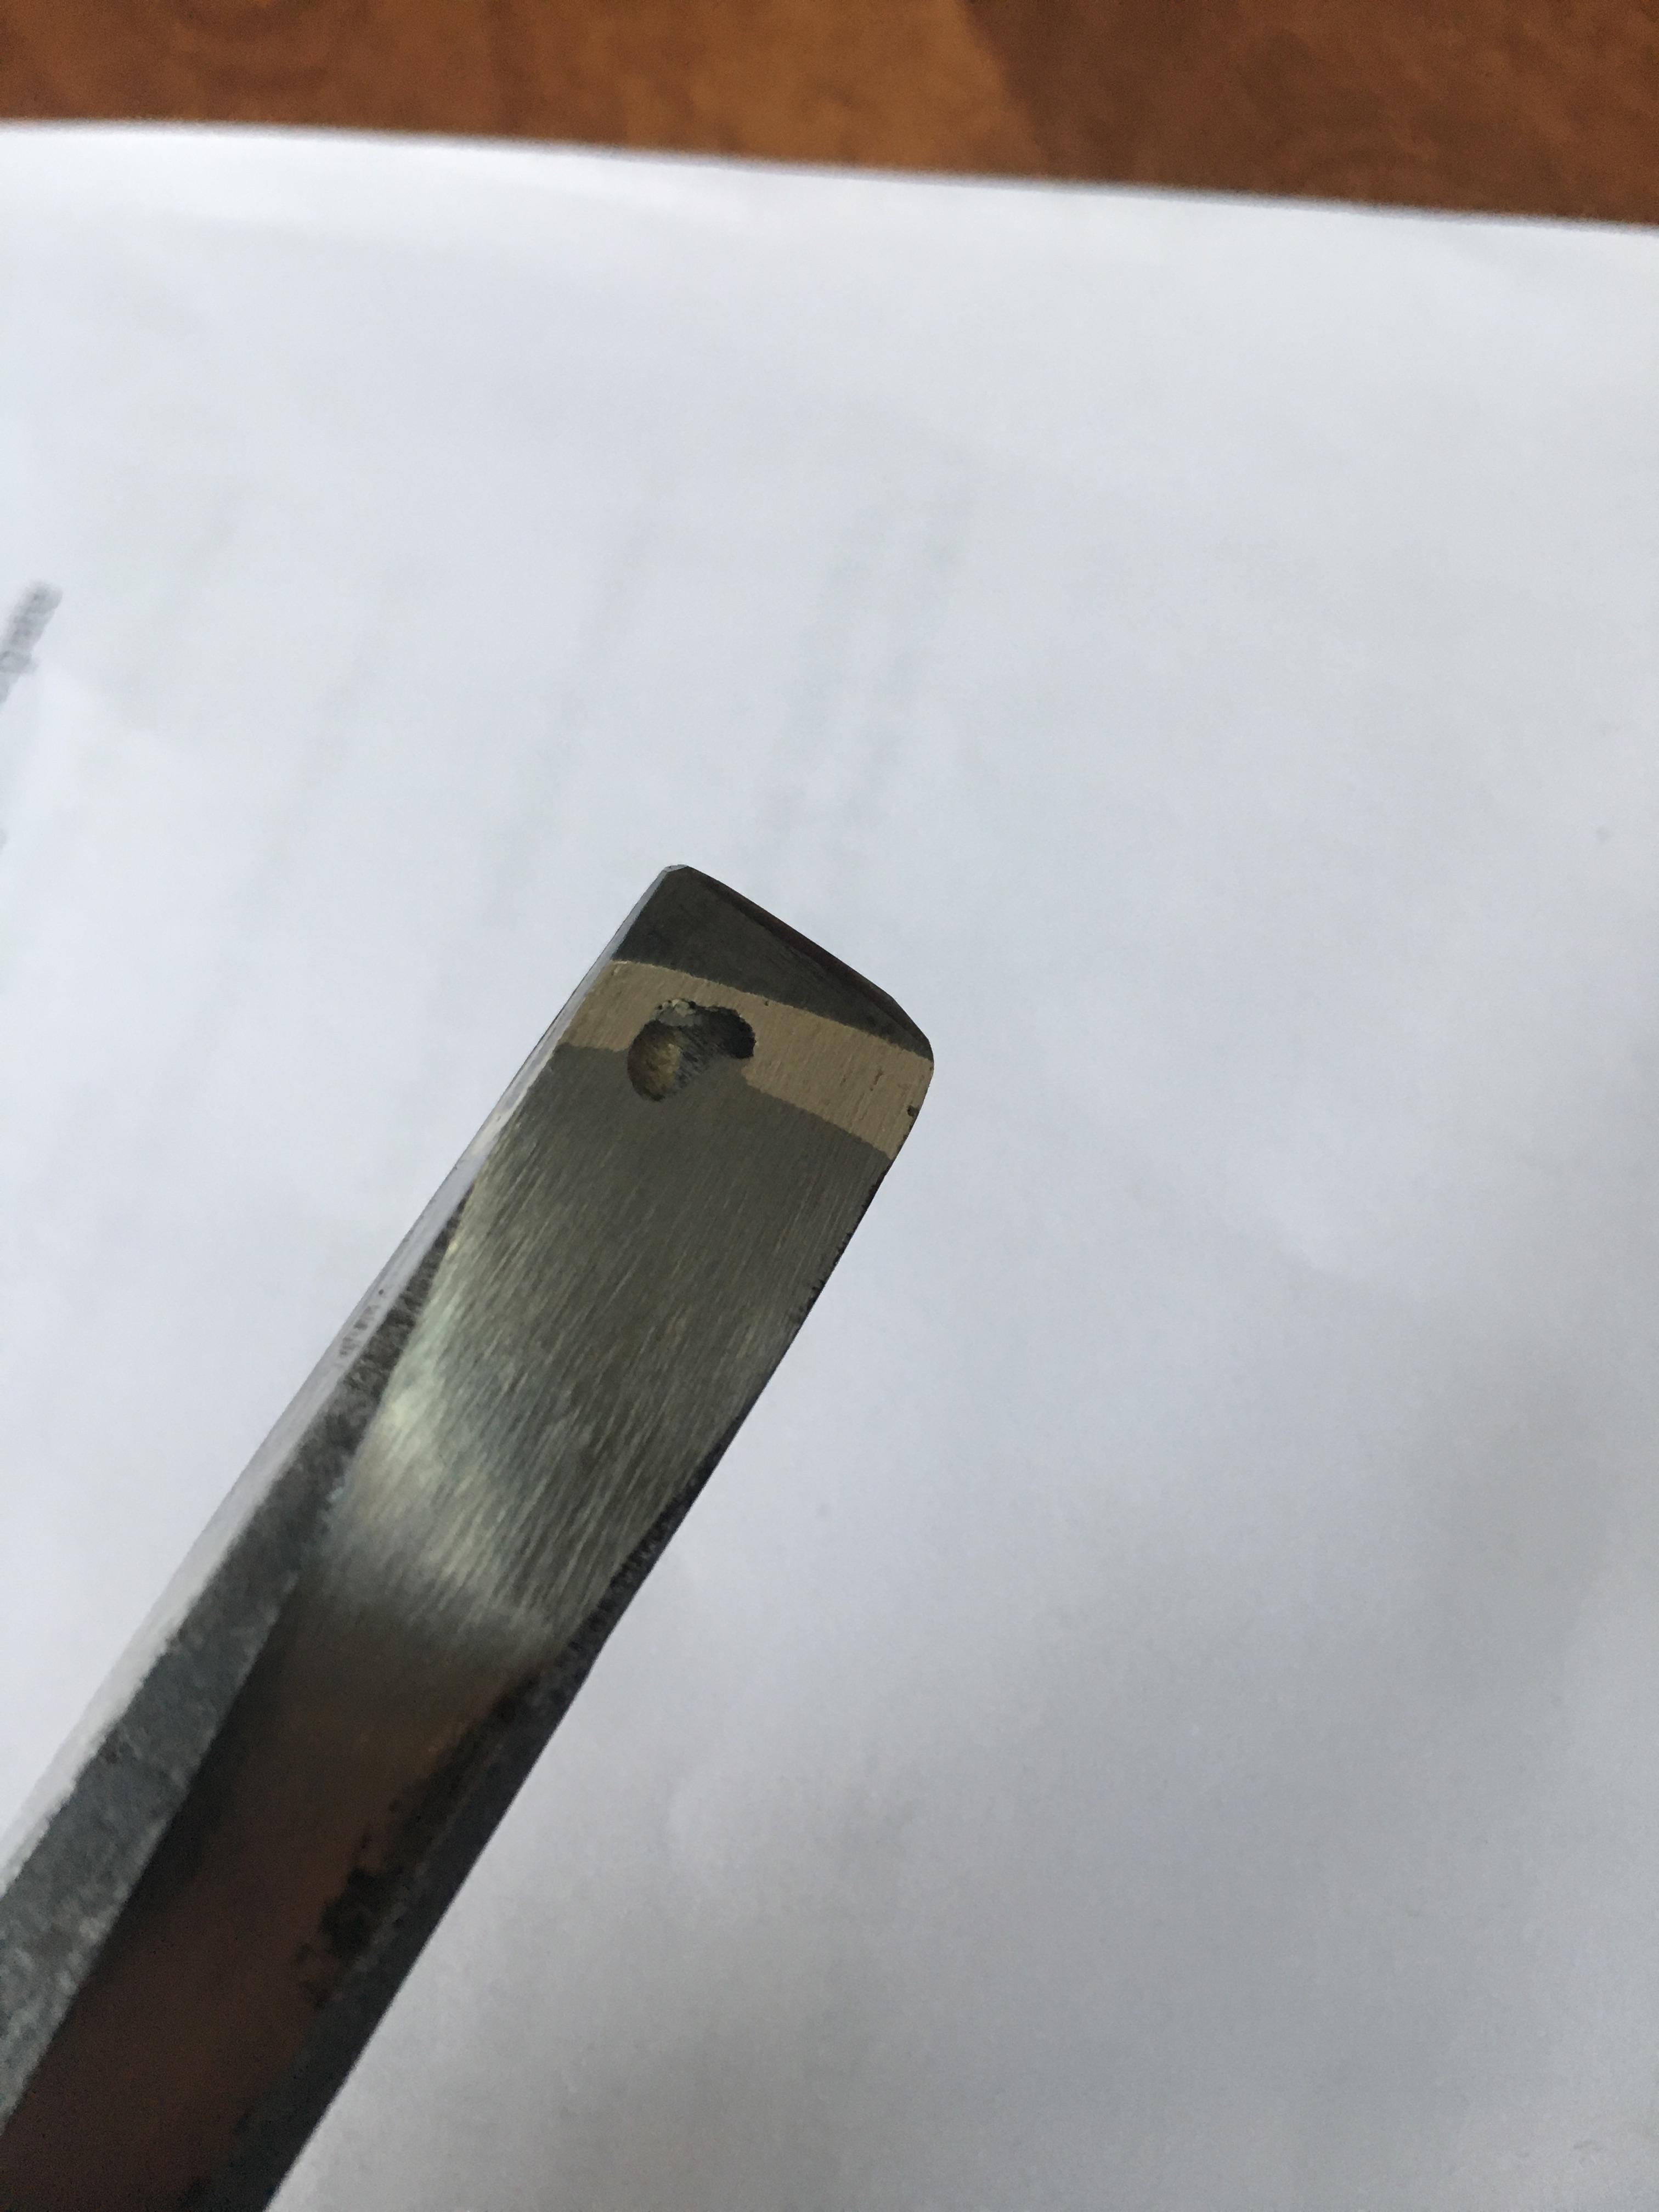
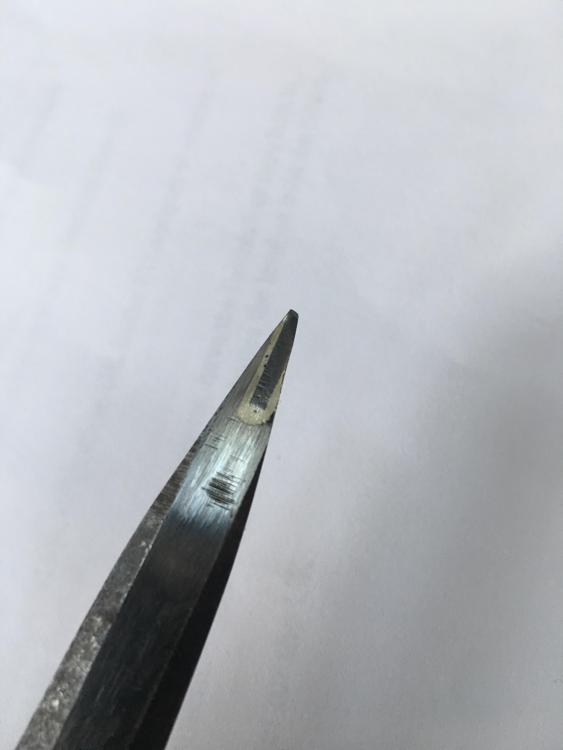
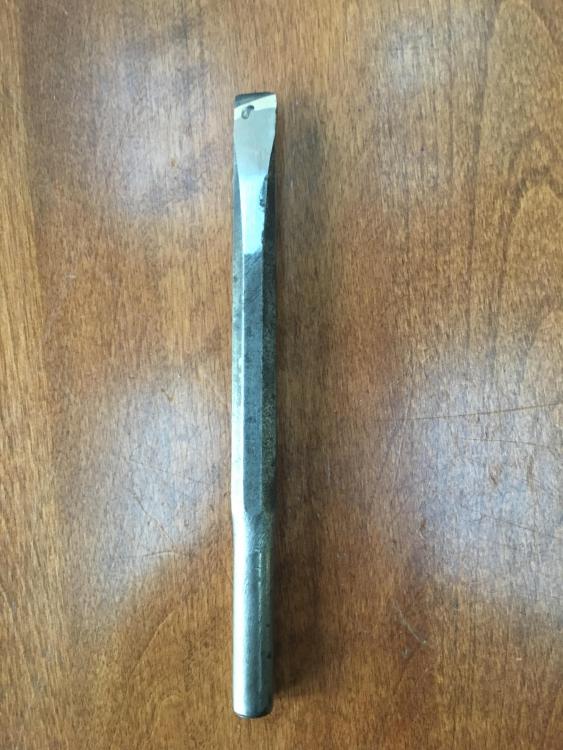
Some time ago a family friend was kind enough to gift me a ton of old marble tools including a good set of marble chisels. The chisels are a carbon steel with some metal inserted for the cutting edge. This edge is the metal in concern. It does not appear to welded in but instead some sort of brazing as evident by the goldish colored material between the body of the chisel and the cutting edge. I do not believe it to be any kind of steel alloy. Here are my observations: 1. The metal will not show oxidization colors when heated up. 2. Will not polish like steel (a darker appearance) 3. It is incredible hard and will even leave a deep scratch in hardened 1095. 4. The metal is extremely brittle and will shatter if dropped 5. A 80 grit ceramic belt will barely touch the metal 6. The sparks created from the grinder do not extend more then a 1/8 inch from the contact point with the grinder 7. the sparks do not show any 'flares' or 'fireworks' Unfortunately the cutting edge is to hard to even use against hot steel, I have tried to draw back the hardness but to no success. I do not know what kind of metal this is, maybe a carbide alloy? Thoughts? -Mark

-

What did you do in the shop today?
Marcus_Aurelius replied to Mark Ling's topic in Blacksmithing, General Discussion
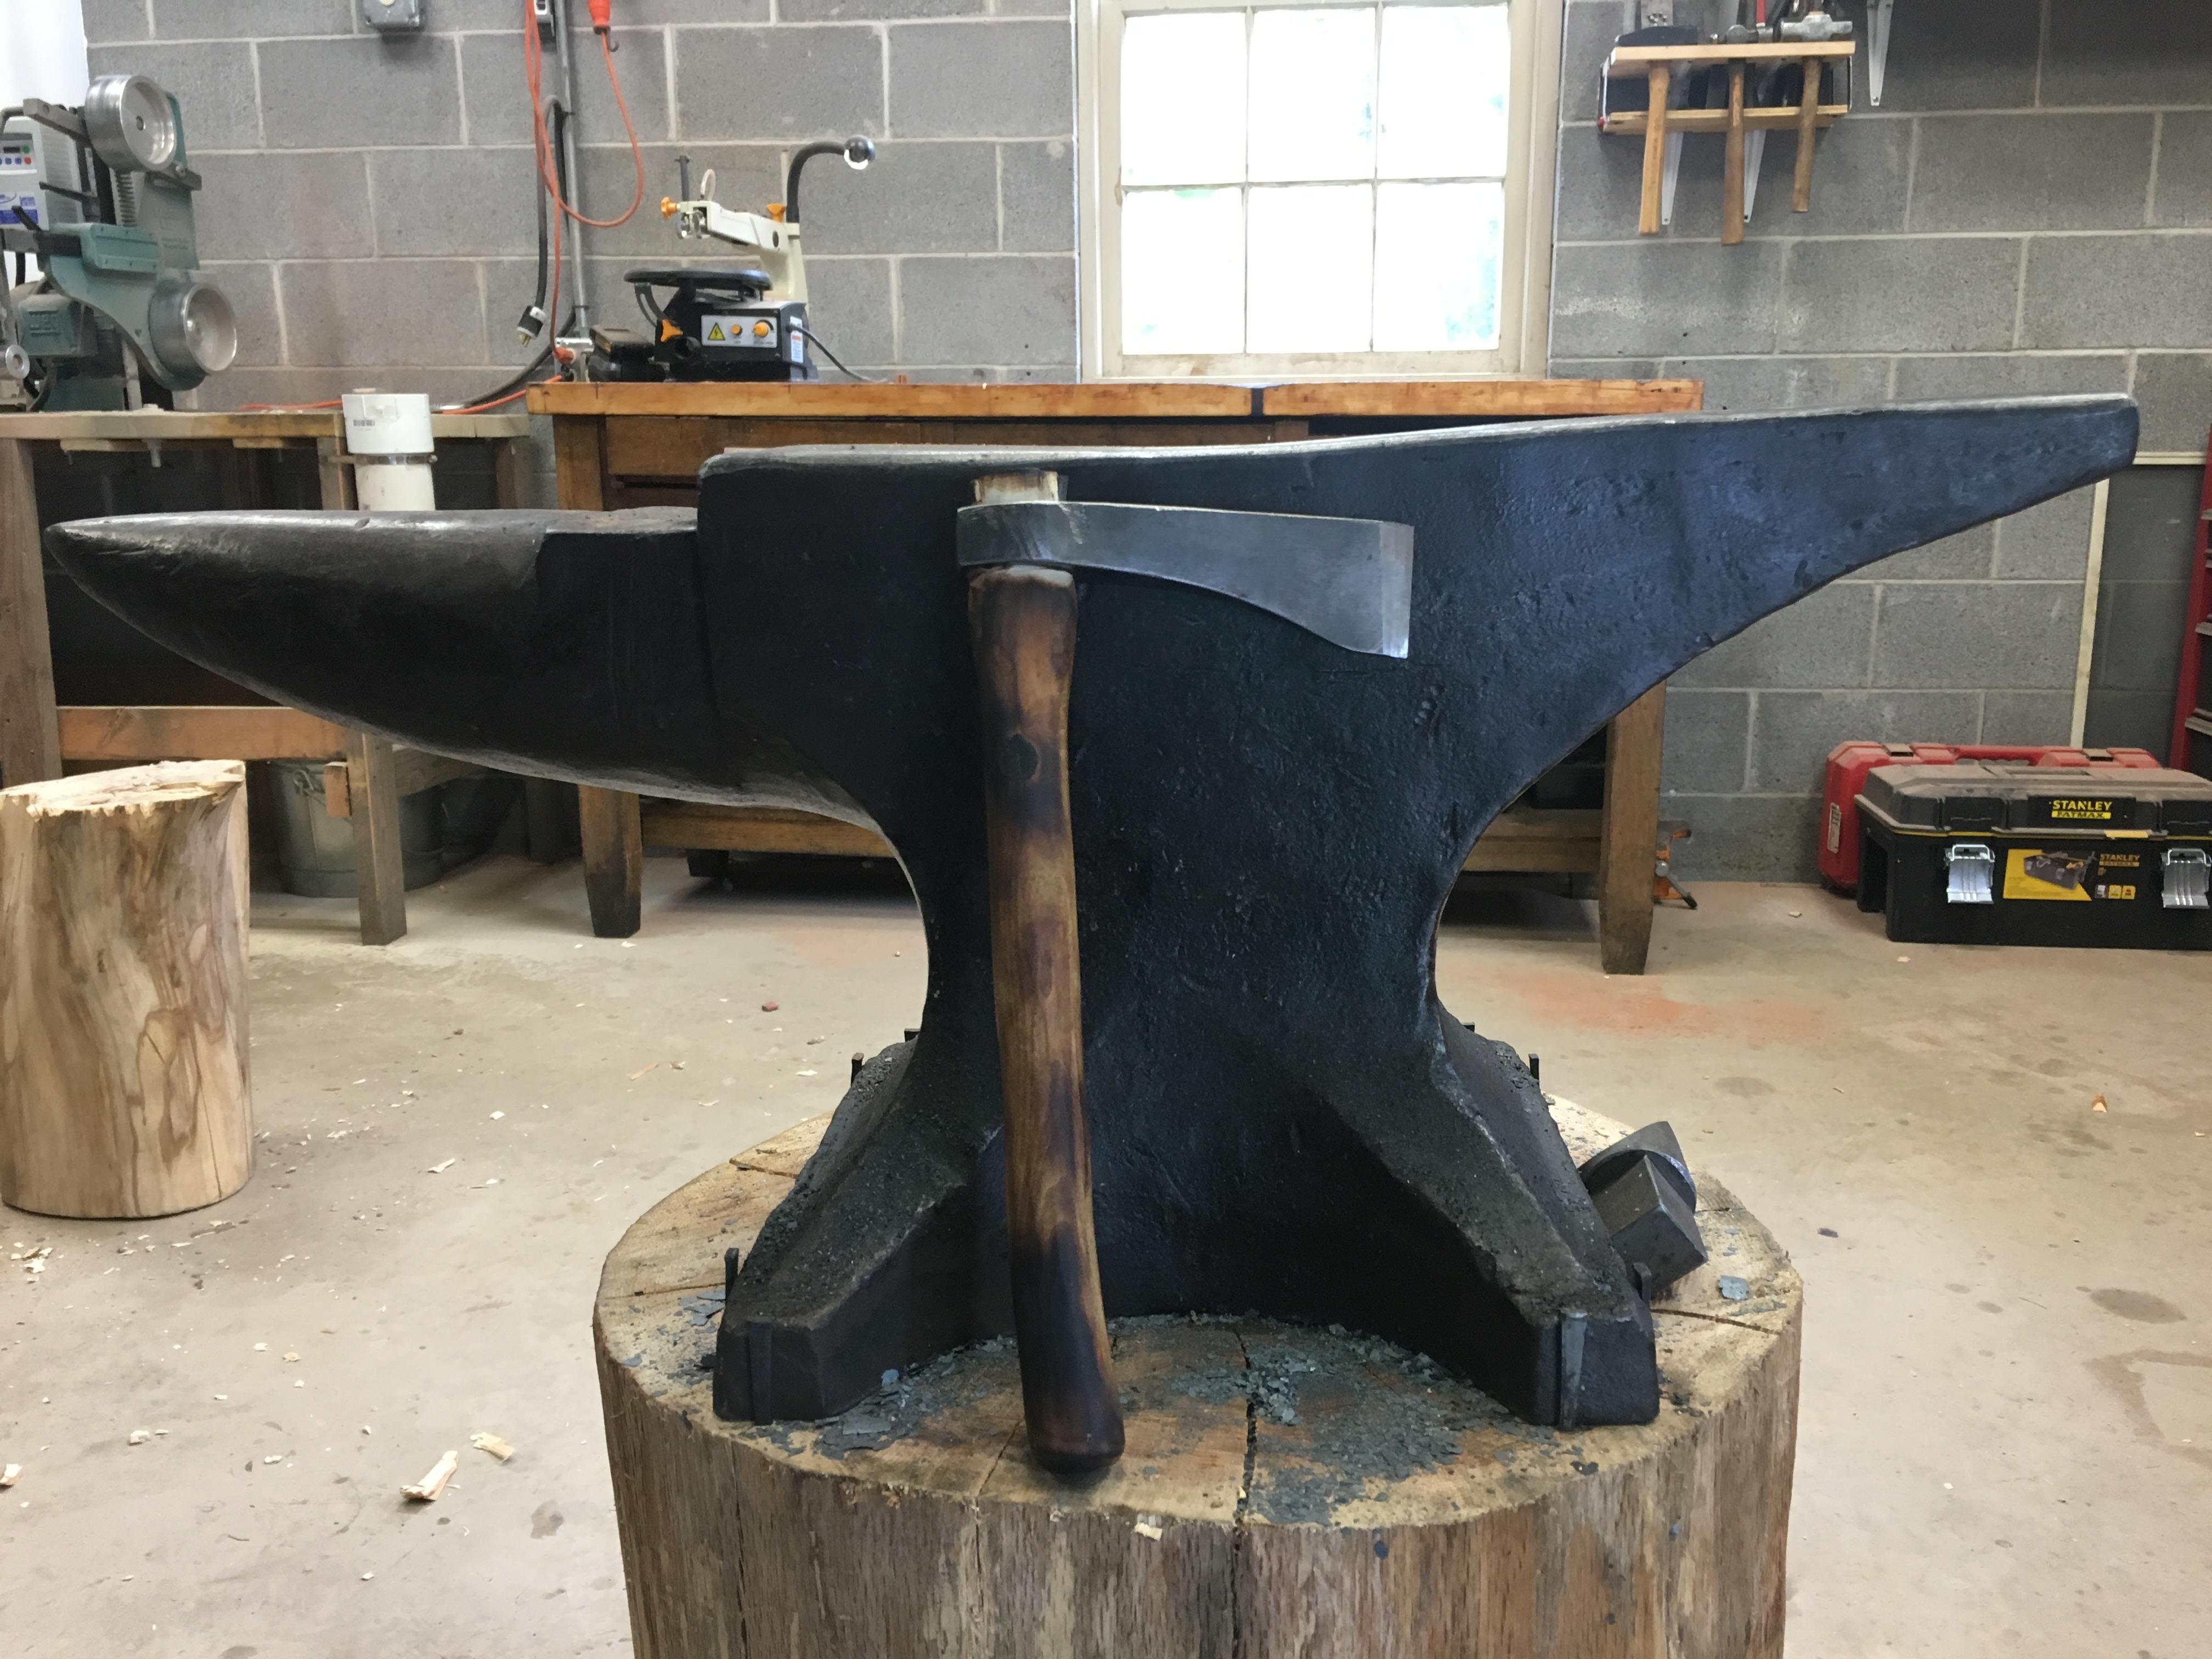
Finished up the most recent project, a nice little hatchet for those long hikes. The hatchet head is made from a really thick railroad anchor and the handle is made from ash. I used a torch to burn the wood and I finished it with some blacksmith goop while the wood was still warm. I have never used the goop on wood but it gave a very nice coating. Definitely a project full of learning, its not perfect, the hatchet head is a tad loose on the ash, no matter how much I wedge it still loosened. I believe this is because I did not use the proper drift so the eye does not have the classic hourglass shape on the inside. I tried to correct this to some degree with files but to no apparent effect.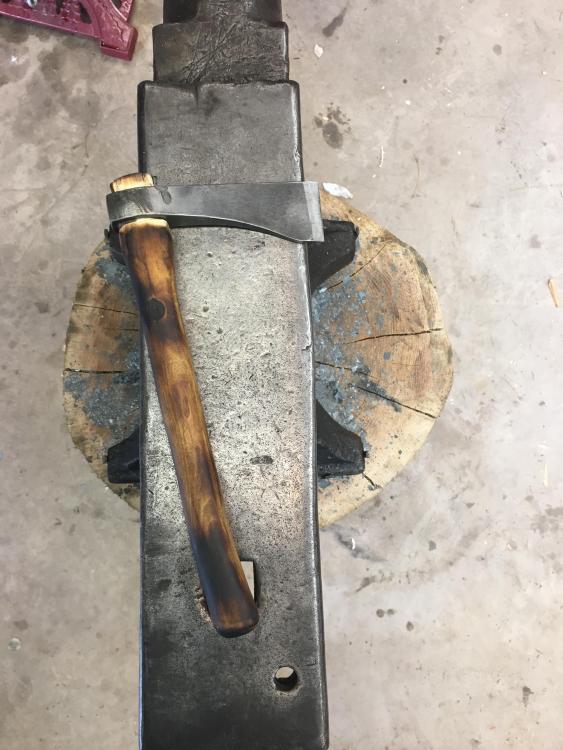

-
What did you do in the shop today?
Marcus_Aurelius replied to Mark Ling's topic in Blacksmithing, General Discussion
Outstanding! I have gotten a whole ton of the red cedar from a cedar grove on a local mountain, its great wood to work with, and it smells good! -
What did you do in the shop today?
Marcus_Aurelius replied to Mark Ling's topic in Blacksmithing, General Discussion
The Cedars here are relatively hard, this handle was made from a suppressed tree that had incredible tight ring growth (about 80 years in a two inch section) maybe that increases its hardness? -
What did you do in the shop today?
Marcus_Aurelius replied to Mark Ling's topic in Blacksmithing, General Discussion
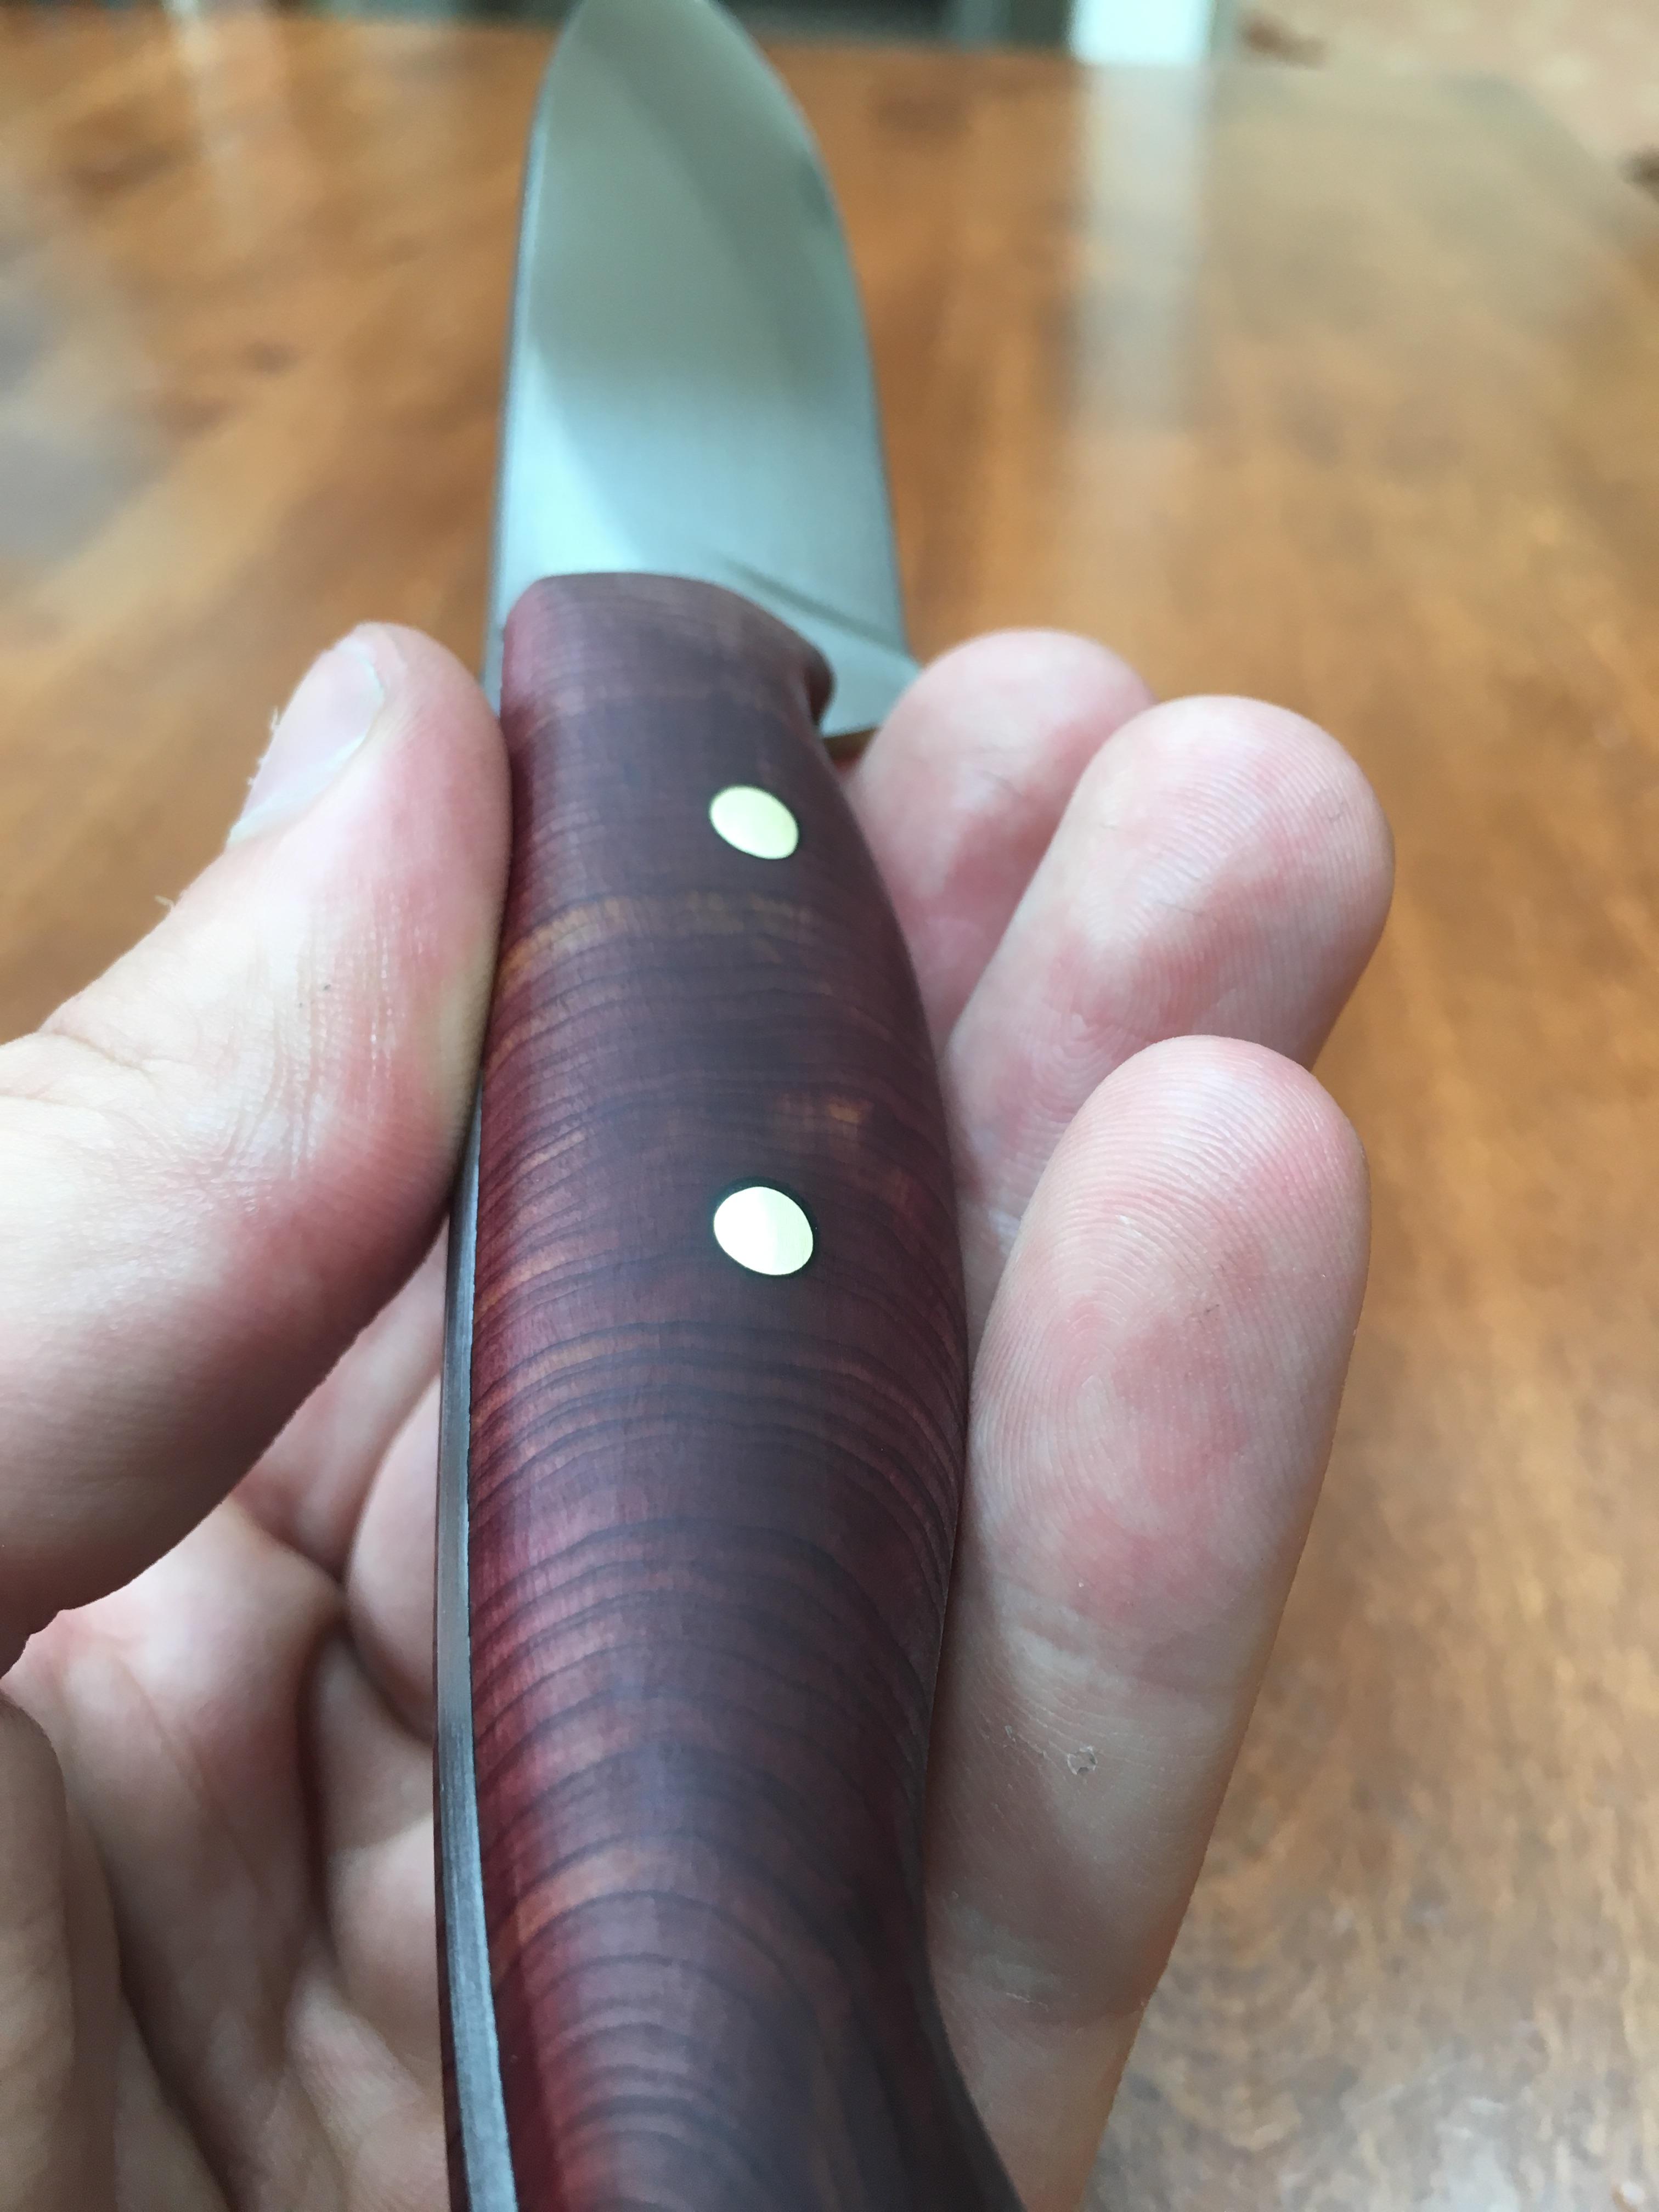
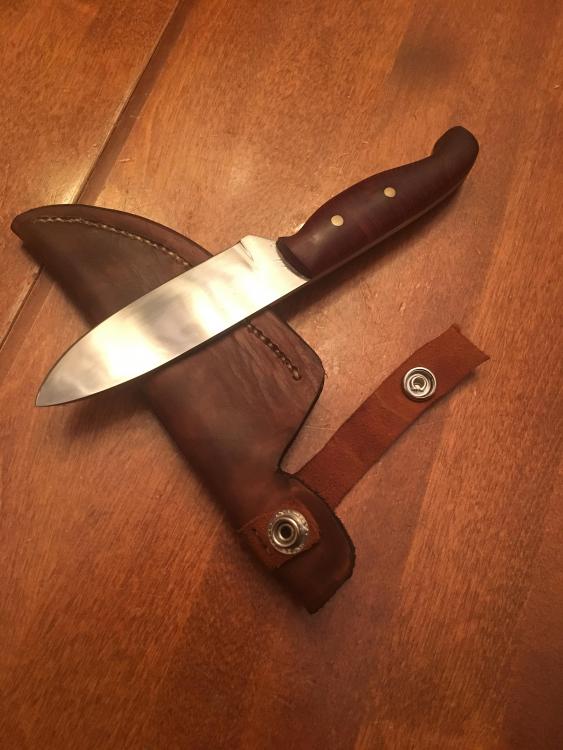
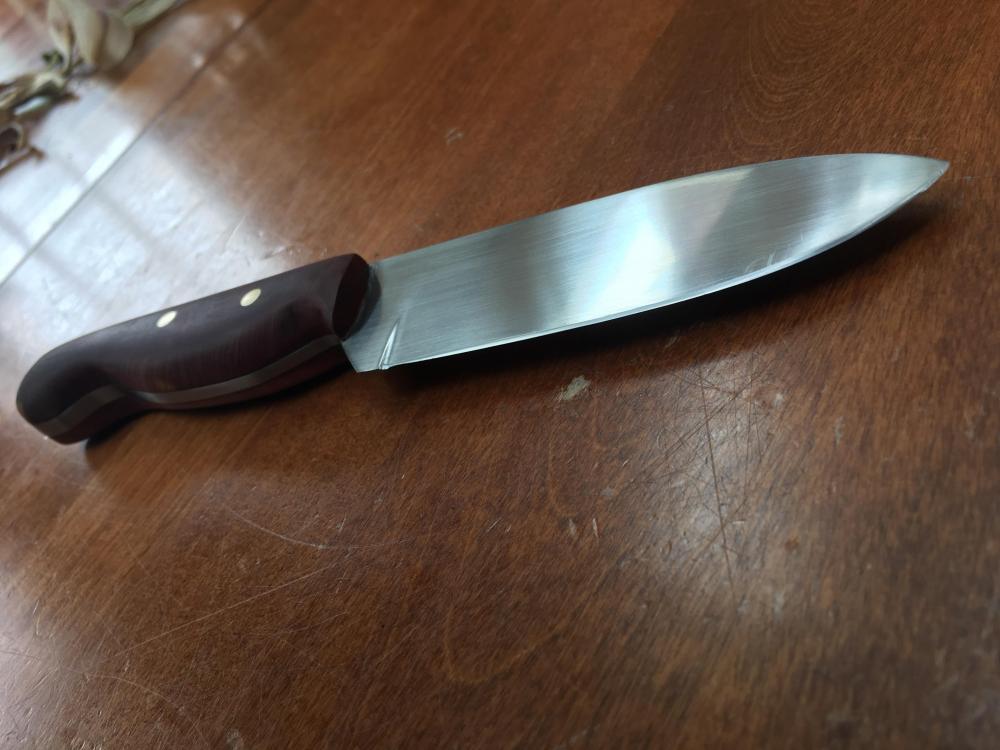
Been working on an outdoors knife for quite some time now. Finally put the finishing touches on it and I am thrilled by the way it turned out. This project was quite the learning experience especially the getting the leather sheath put together, leather really doesn't move like steel !! The blade is made out of 1084 with an Eastern Red Cedar handle (becoming a favorite for handle materials).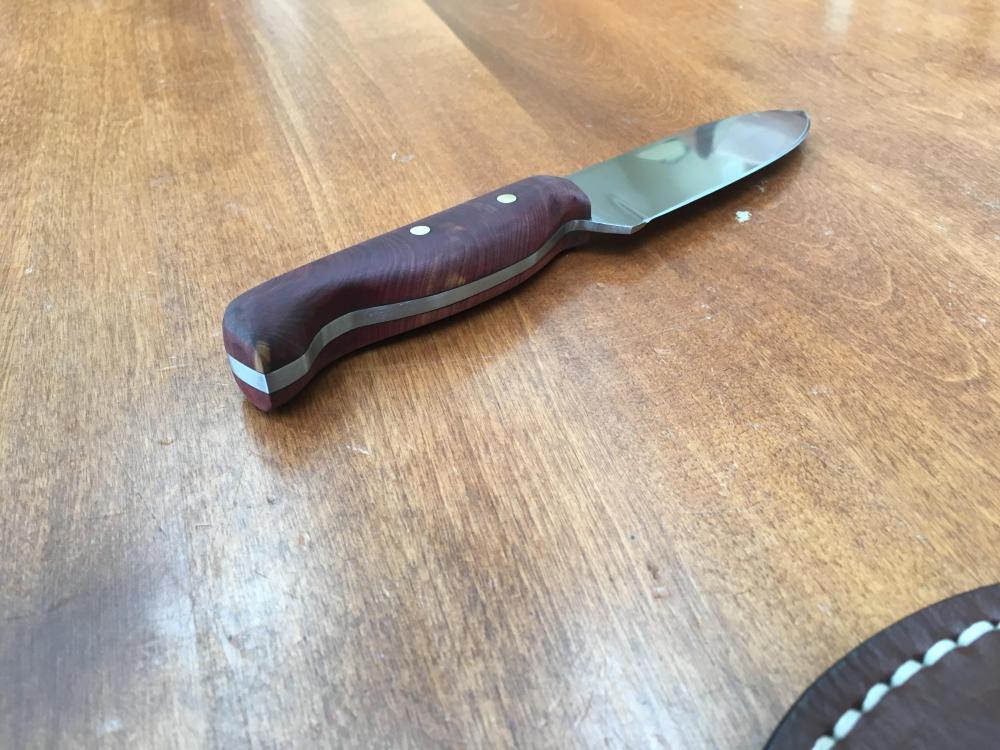

-
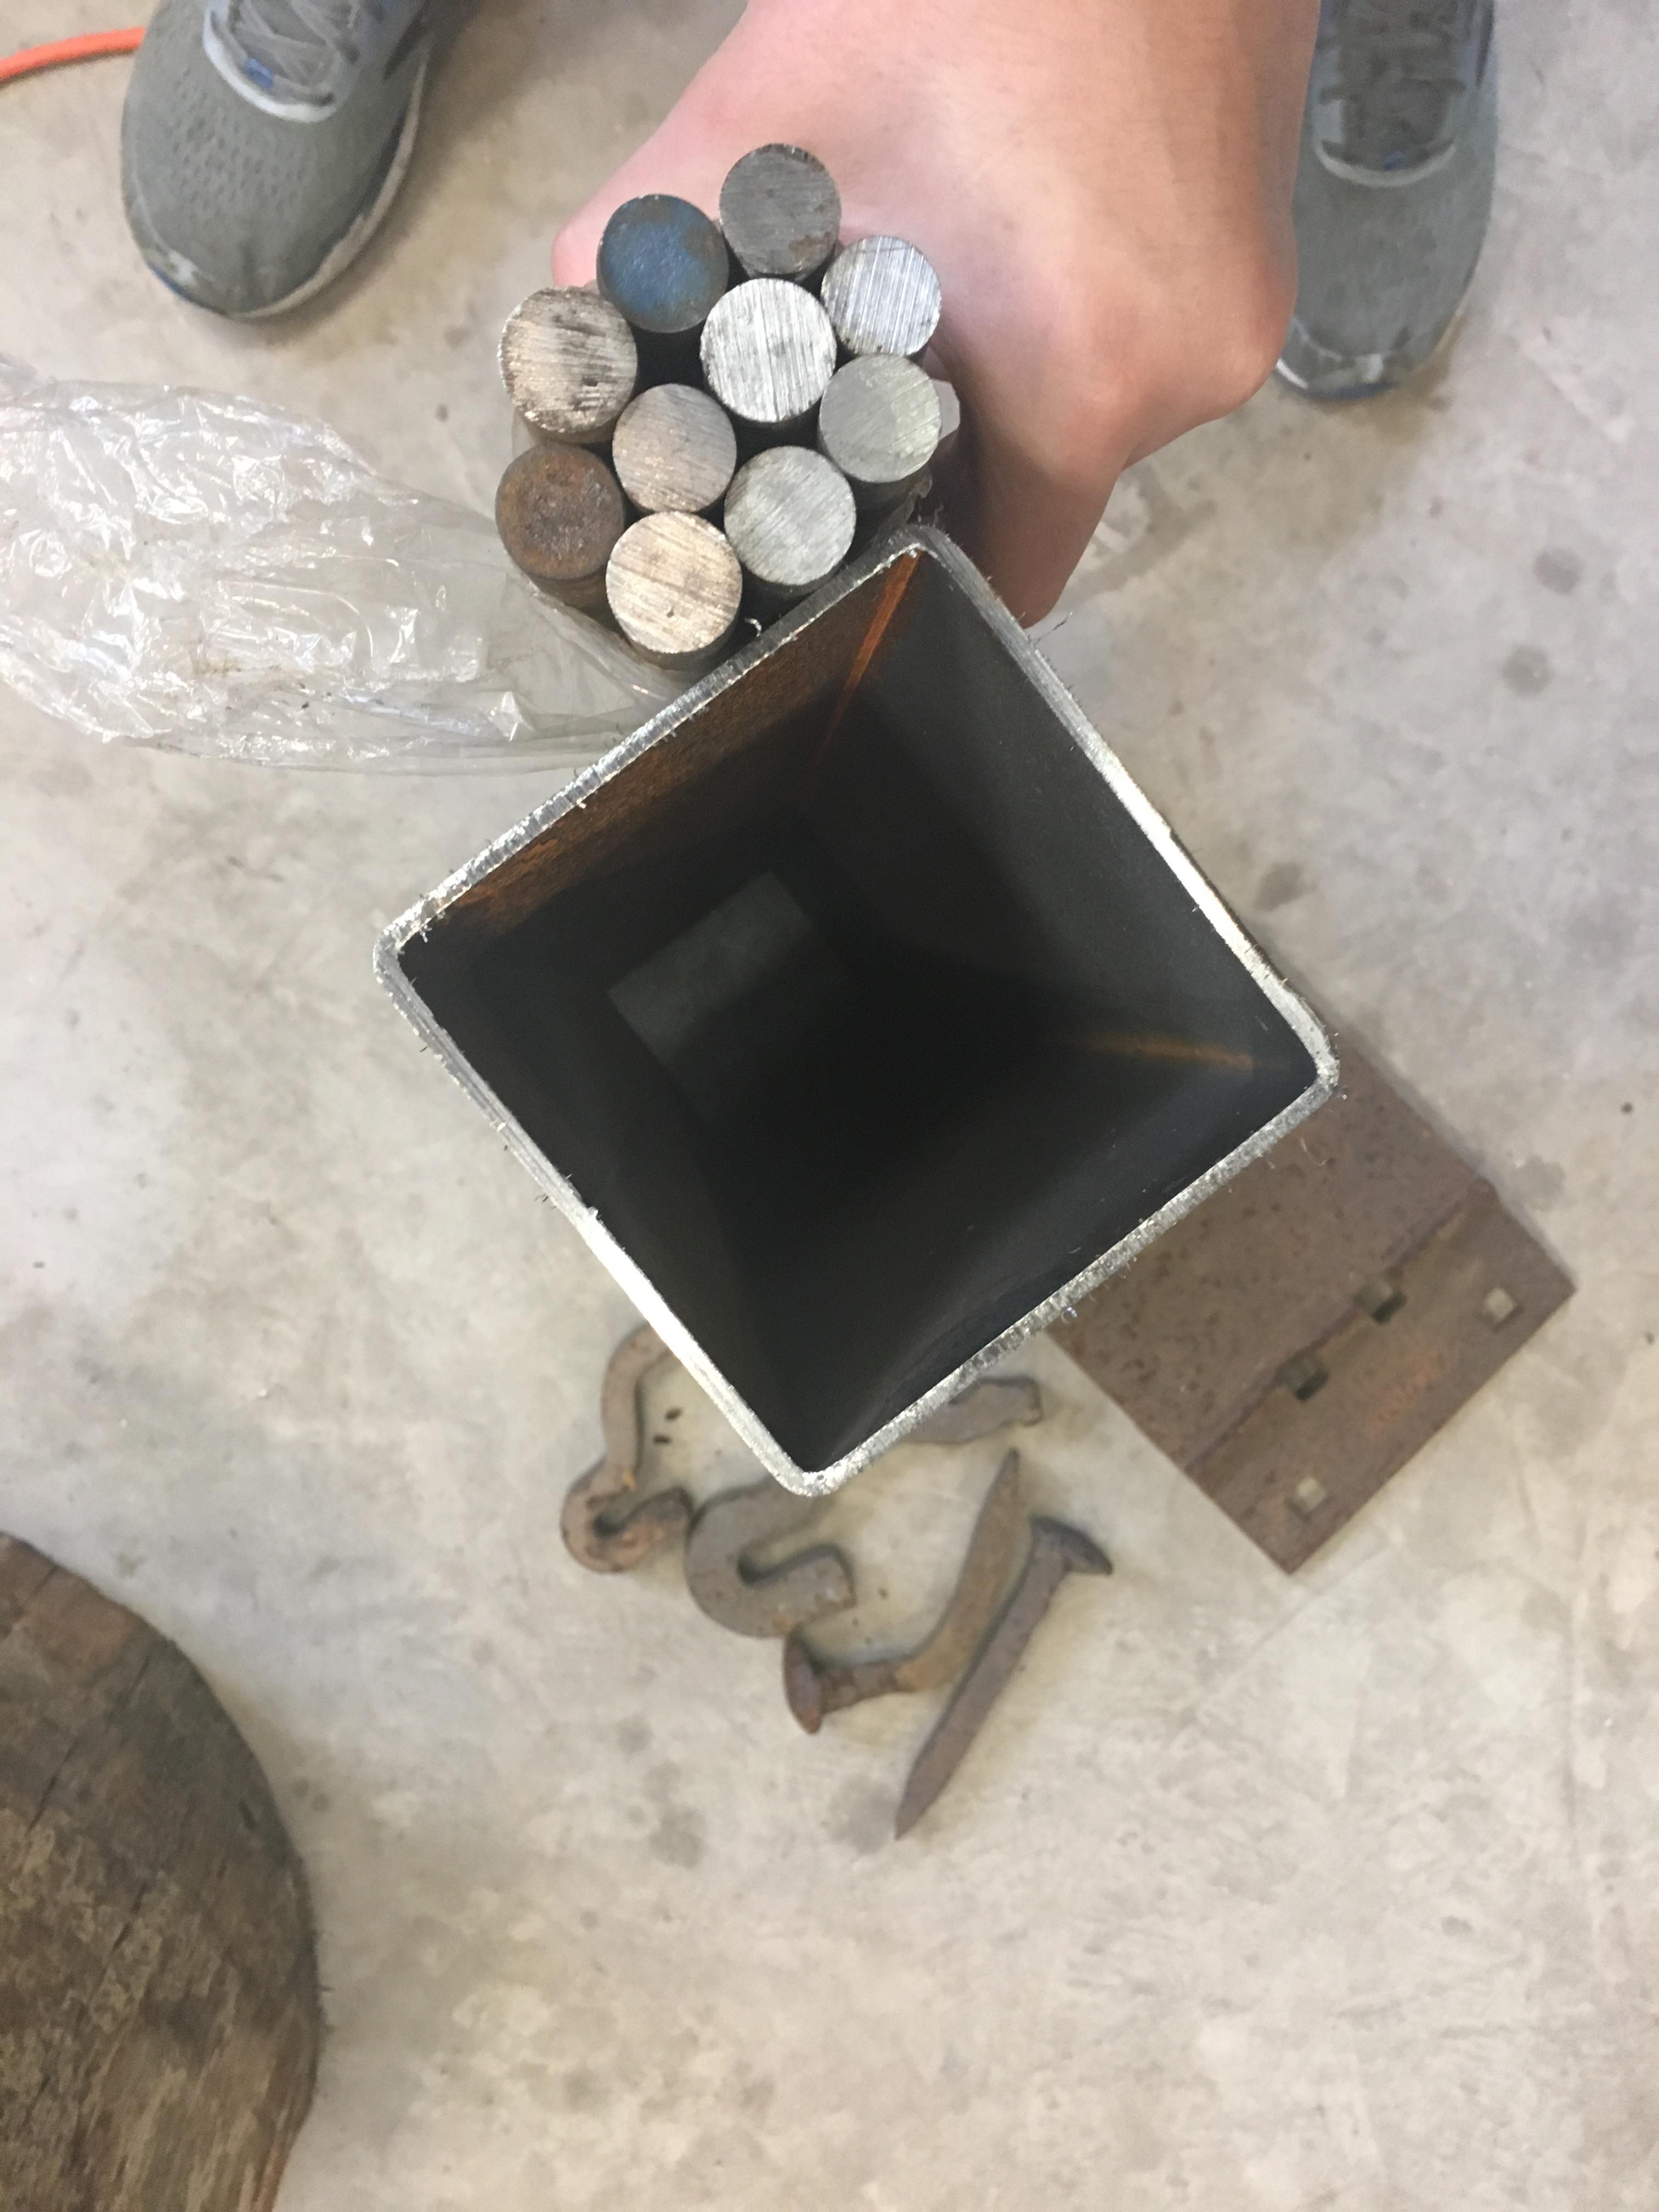
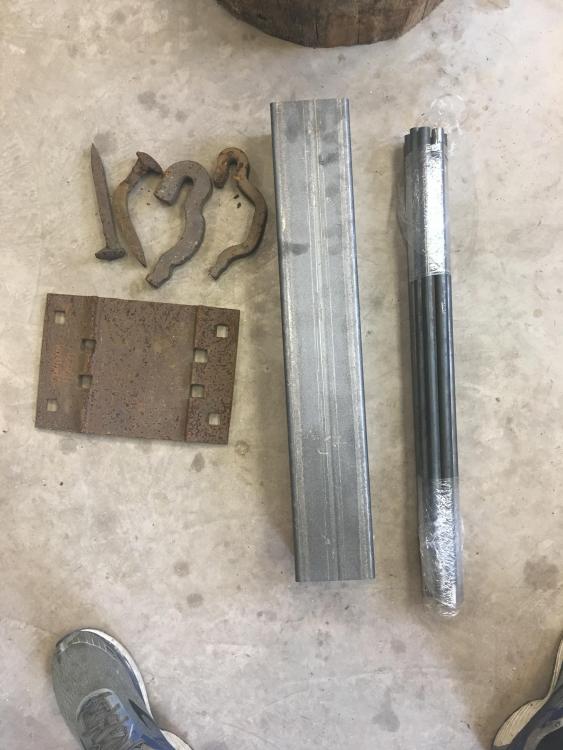
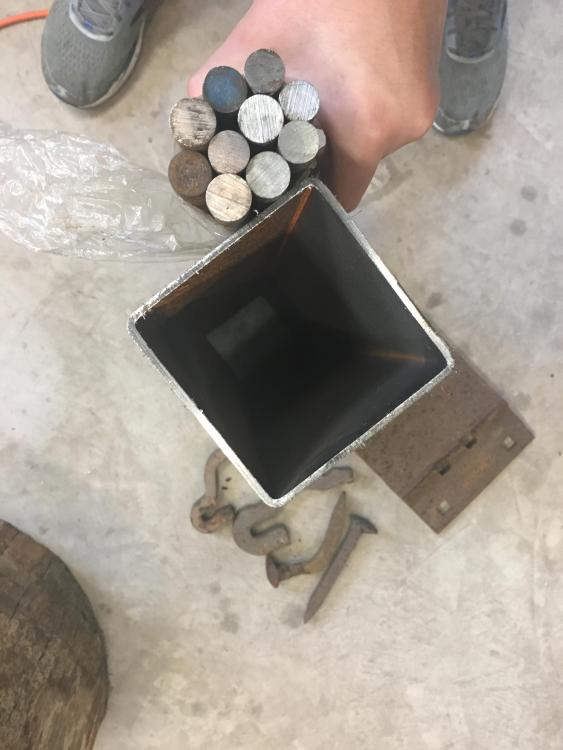
Took a free day to take a spin over to Logan Steel, came back with a nice score. Got a couple of railroad anchors, spikes, and a nice tie plate. A 3inch square tube which may make a nice quench tank... (just need to find a darn welder ), and finally 10 pieces of mystery round stock. One of the employees said anything not directly labeled is A36 but it was in a box labeled chisel stock... Will do a hardness test later.
-
The rigidizer will help keep the wool in one spot and to some degree the harmful particles in. What I do is first I spray the wool with rigidizer (you buy the stuff online or make your own) and let it dry in the sun. Once it is cured I spritz on some water and add the refractory coating. The water helps let the refractory stick to the surface of the wool, and is especially important if you are using Kast-O-Lite as if the wool is dry it will suck the water right out of the Kast-O-Lite which is a water setting mix. Regardless, I would recommend you use Satanite and apply it in multiple small coatings until you have reached a good 1/4". After each layer let it dry in the sun or use a small light bulb to heat the inside. Once that is all said and done finish curing the coating with increasing heats in with the forge. The Satinite does tend to crack so make sure you have some more handy to do repair jobs. I would be careful with that mesh over your wool if you do apply a refractory coating. The expansion of the mesh as it is heated may crack the refractory. -Mark Gas Forge Refractories and Supplies
-
Before you fire it up make sure you cover the ceramic wool with a refractory such as Satanite, maybe you could coat it with the refractory you have already been using. When the wool gets up to temp it will release fibers that are pretty nasty to breath in, you definitely want to avoid that. With only hard refractory that forge is going to have trouble heating up without using tons of fuel. If its not efficient I would look into using that ceramic wool for the interior. Regardless I am excited to see it burning! -Mark
-
Show me your Bottle Openers!
Marcus_Aurelius replied to Arbalist's topic in Blacksmithing, General Discussion
Forged my first "functioning" bottle opener today With Lou L and JHCC!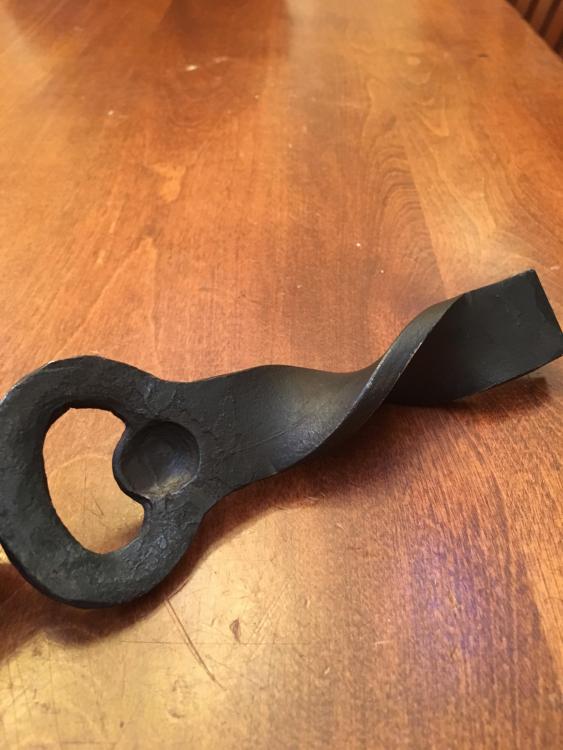
-
What did you do in the shop today?
Marcus_Aurelius replied to Mark Ling's topic in Blacksmithing, General Discussion
That looks great! I have a ton of eastern red cedar wood that is upward of 200 years old with tight ring growth, I'll try the linseed oil, it should make those rings pop. -
What did you do in the shop today?
Marcus_Aurelius replied to Mark Ling's topic in Blacksmithing, General Discussion
I love the look of the walnut! how did you finish it? What oils or what not did you coat it with? I've been playing around with cedar wood and have been using danish oil, but it darkens it a little to much in my opinion. - Mark -
Anvil advice
Marcus_Aurelius replied to AbandonedOtter's topic in Anvils, Swage Blocks, and Mandrels
Looks like a great find! I have an old Peter Wright with a wrought iron body, it has about a quarter inch sway but it face is hard and it works great. I would suggest leaving the anvil as is and working with it for a while before deciding on modifications. -Mark -
Colonial Anvil ID
Marcus_Aurelius replied to Marcus_Aurelius's topic in Anvils, Swage Blocks, and Mandrels
Thanks for the invitation, sounds like a great idea! -
Colonial Anvil ID
Marcus_Aurelius replied to Marcus_Aurelius's topic in Anvils, Swage Blocks, and Mandrels
The anvil definitely has seen better days, I can't imagine the difficulty it would take to restore it closer to its original beauty. I am not part of the Connecticut Blacksmith Guild but I have considered joining and attending events. I am relatively new to smithing (about a year or so of hammering) and I have always heard about the importance of attending events and classes, maybe its time to finally do that and learn from a blacksmith face to face. -
Colonial Anvil ID
Marcus_Aurelius replied to Marcus_Aurelius's topic in Anvils, Swage Blocks, and Mandrels
Thanks for all the responses, I'll let the anvil slide on over to someone who needs it more, it definitely is a cool find. -Mark -
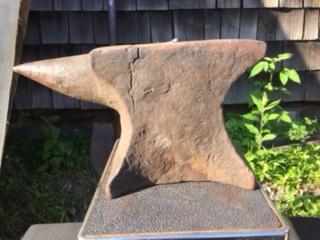
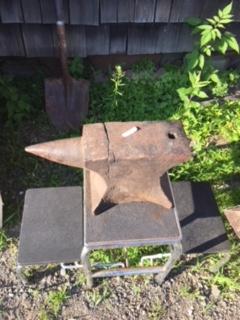
Hello all, I found what I believe to be a colonial anvil at an antique store in Canton, CT (the precise weight is unknown but I would guess 85 pounds or so). It was selling for 100 dollars. Considering its condition would this be worth buying? There appears to be two cracks, one running down the side that is less then a centimeter deep, and a larger crack on the top surface. I am not an expert on Anvil restoration but I know it is possible to repair cracks in some cases. Is this crack to severe to weld or can it be used regardless of the crack? Any idea on the time period of the anvil or any other useful bits of information regarding these styles of anvils. Currently I have a 180 pound Peter Wright so I do not need another anvil but considering the history of this particular piece maybe its worth buying. Thanks, Mark