671jungle
-
Posts
455 -
Joined
-
Last visited
Content Type
Profiles
Forums
Articles
Gallery
Downloads
Events
Everything posted by 671jungle
-
Naturally Aspirated Ribbon Burner. Photo heavy.
671jungle replied to Frosty's topic in Ribbon Burners
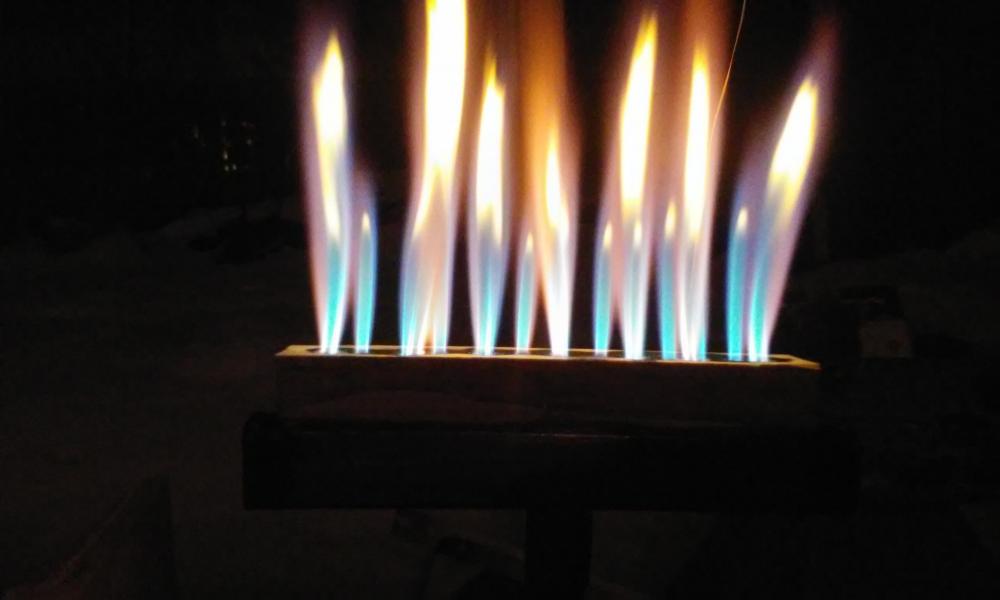
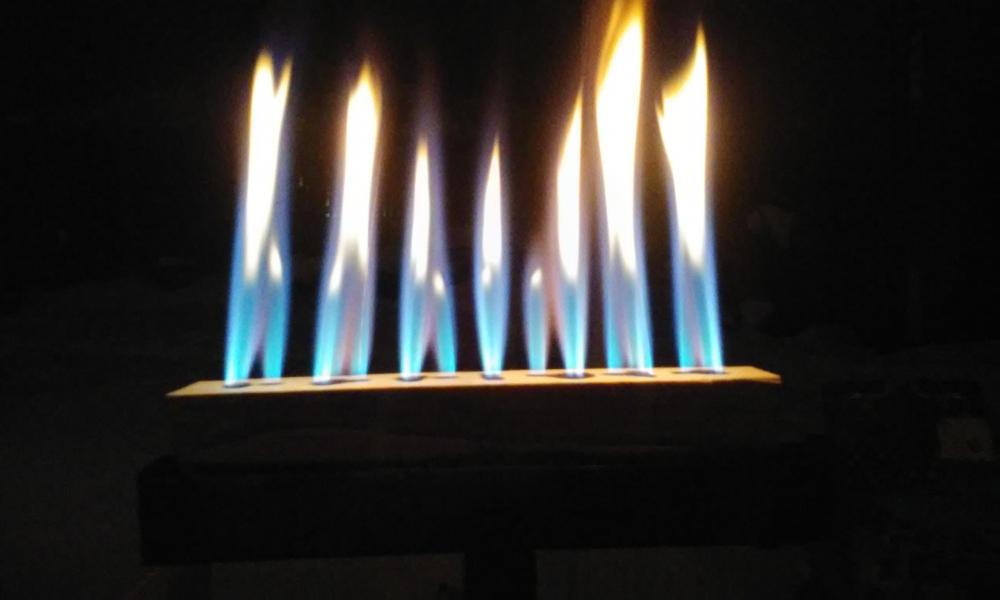
Thanks Frosty. You and Mikes knowledge and experience has been critical in this project of mine and many others. Much appreciated. Used the same block but drilled seven more holes. One between each row of three. Seems to run a bit better. Still some lift when I try to tune the 1/2" Mikey. The lift is happening when the jet is around 1/4" down the throat. Stabilizes around an 1" down the throat but is very candle-like and rich. More holes? Or make the single holes slightly larger? Perhaps lengthen the choke slots (2"x3/8")? I remember reading anywhere past 2" length is waste. Anyway, this is fun stuff! Also I am using a .025 jet. Smaller May be what is needed? -
Naturally Aspirated Ribbon Burner. Photo heavy.
671jungle replied to Frosty's topic in Ribbon Burners
Thanks Frosty. You and Mikes knowledge and experience has been critical in this project of mine and many others. Much appreciated. Used the same block but drilled seven more holes. One between each row of three. Seems to run a bit better. Still some lift when I try to tune the 1/2" Mikey. The lift is happening when the jet is around 1/4" down the throat. Stabilizes around an 1" down the throat but is very candle-like and rich. More holes? Or make the single holes slightly larger? Perhaps lengthen the choke slots (2"x3/8")? I remember reading anywhere past 2" length is waste. Anyway, this is fun stuff!
-
Naturally Aspirated Ribbon Burner. Photo heavy.
671jungle replied to Frosty's topic in Ribbon Burners
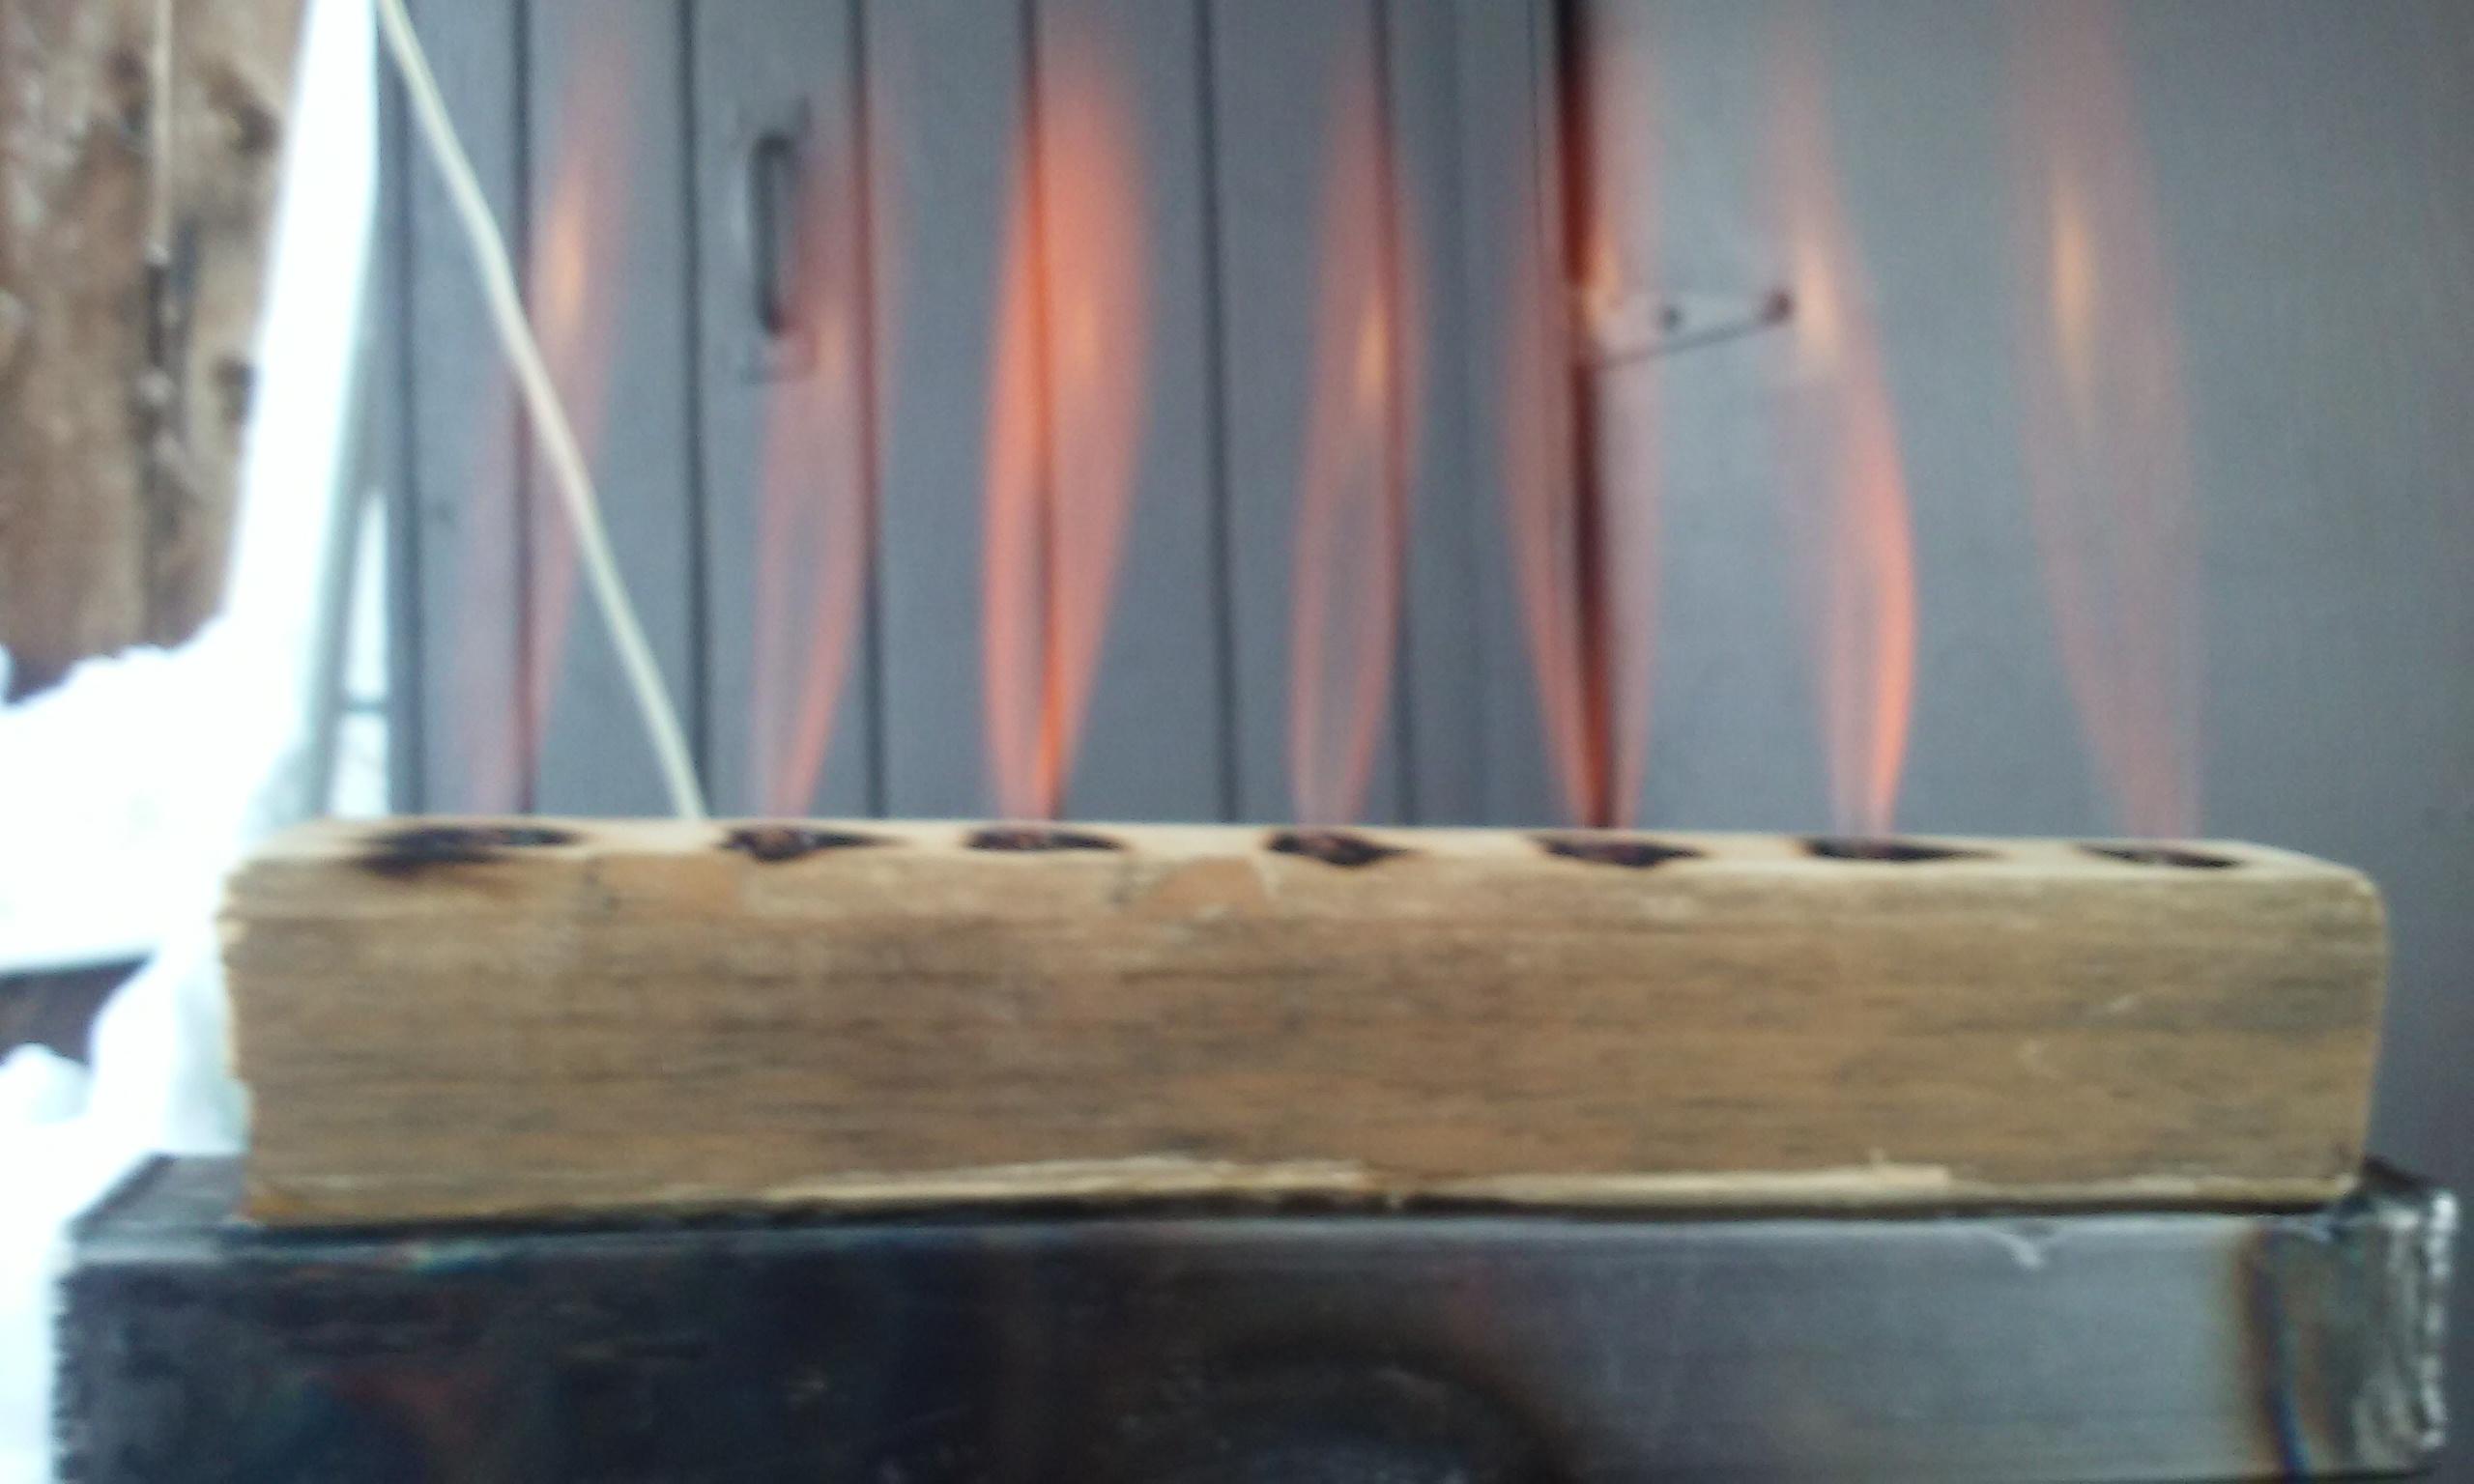
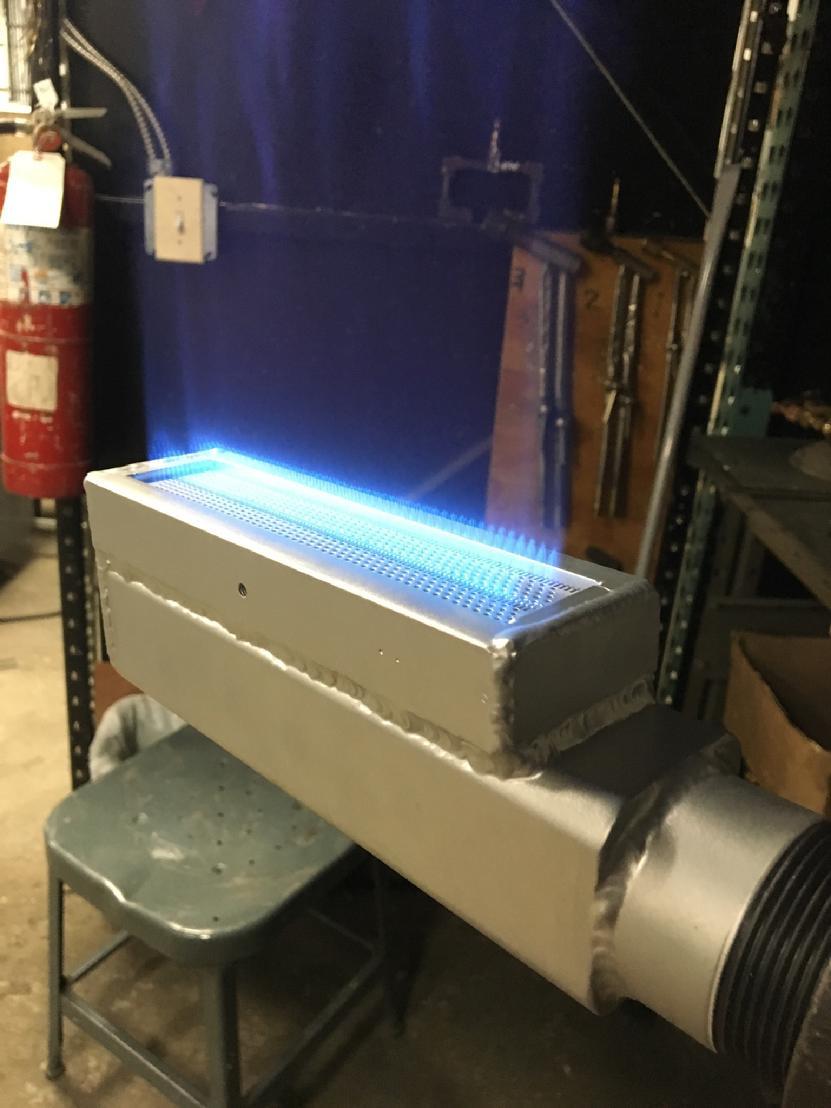
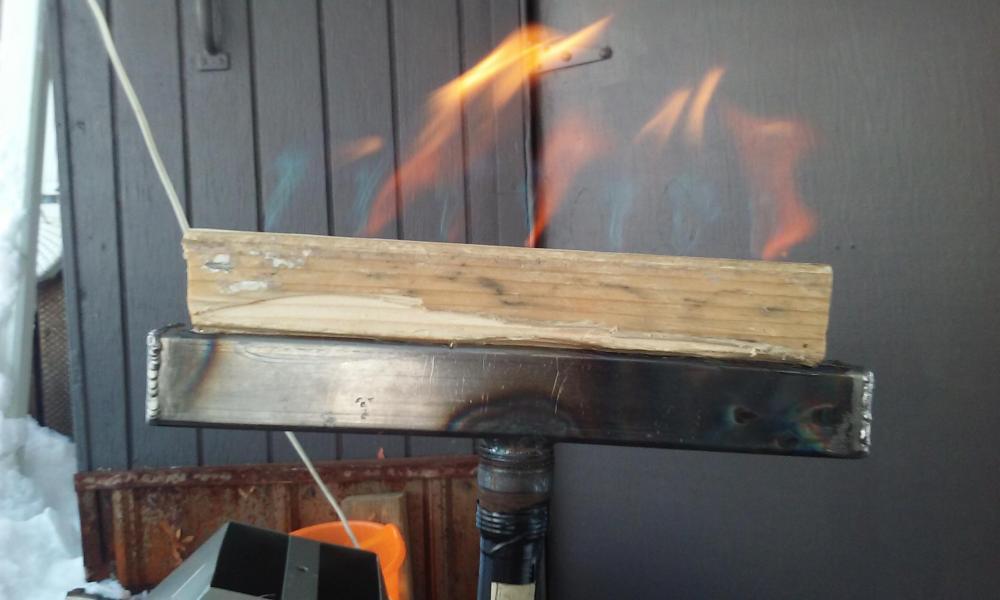
1st test block fired with 1/2" Mikey injector. Couldn't get it to roar consistently. (Induction issue?) Didn't backfire and was blowing out at higher psi ranges(5-10). 1 1/4" x 9"ish plenum 3x7 rows of coffee straw O.D. holes. One more row might do it without too much back pressure from the forge? I hope I'm understanding the direction I'm going about back pressure. 2nd shows those demented candles Frosty mentioned at the beginning of creation.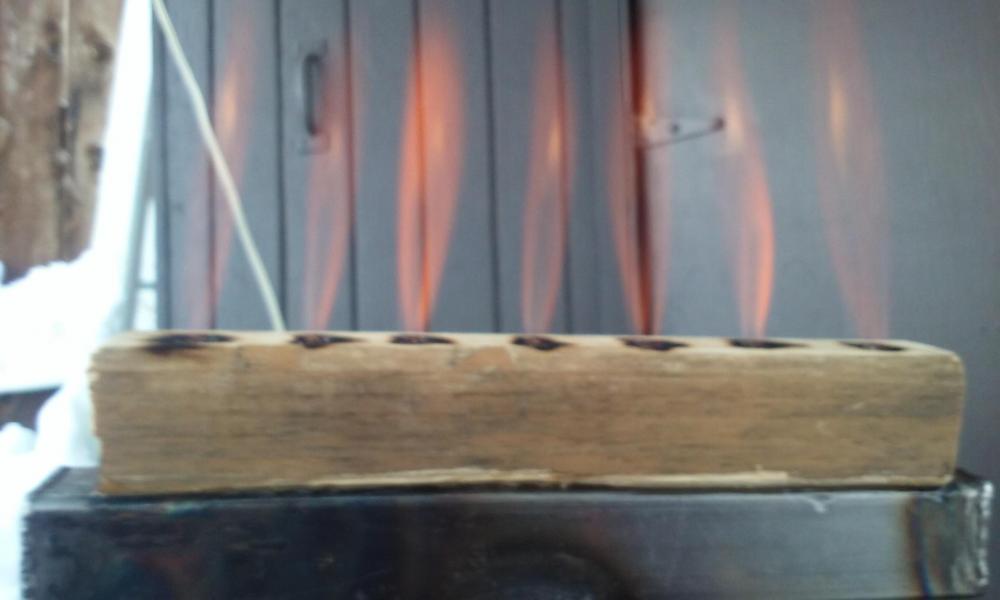
-
Naturally Aspirated Ribbon Burner. Photo heavy.
671jungle replied to Frosty's topic in Ribbon Burners
I was wondering the same thing. Especially with a smaller plenum. I think the baffle in the Emmerling design serves to deflect the FAM from concentrating on the immediate nozzlettes and helps slow velocity. -
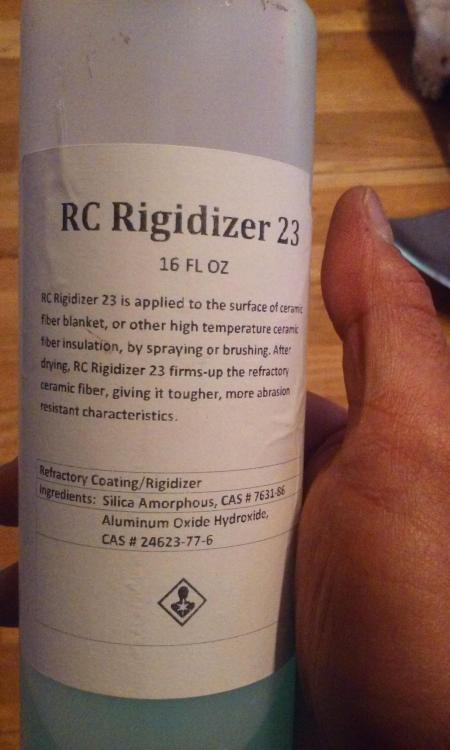
reading through and researching and can't find info on what kind of fumed silica to use. I've seen hydrophobic, aerosil?, amorphous. Are they all the same/colloidal? Joann fabric sells amorphous silica which is the same as the RC rigidizer 23 I let freeze and waste. Is there a reliable brand I can buy?
-
Naturally Aspirated Ribbon Burner. Photo heavy.
671jungle replied to Frosty's topic in Ribbon Burners
All good Frosty! We need room for other lifestuff! Keep perlite away from 1st layers. Only as outside layer. Understood. I was going to fuse the perlite between the 2 layers of wool with rigidizer for the dome. Maybe more trouble than it's worth. But I will stray from using it in the floor. So from what I understand. Pressure from jet entrains air into mixer tube increasing velocity while lowering pressure completing FAM. Reaching the plenum, velocity slows and pressure increases in the plenum. FAM velocity increases again while in the nozzlettes creating All the little high output flames? -
Naturally Aspirated Ribbon Burner. Photo heavy.
671jungle replied to Frosty's topic in Ribbon Burners
Ditching the pre made faces. Casting instead. Go figure Just wondering if the 1/2" burner will work with this 1 1/4" plenum. I plan on using stir straws for nozzle holes. I know it's a thing of ratios. How much space in the plenum is needed? I will use two 1" wool split with a layer of perlite rigidized in place and a thin layer of kasto 30 for the dome. A layer of wool covered by mostly perlite glued together with a little kasto for the floor. Any tips?


-
3D printed plastic burner experiments (photo heavy)
671jungle replied to Another FrankenBurner's topic in Gas Forges
This is very cool! A game changer. The evolutionary chain is about to take a leap forward. Following closely. -
Naturally Aspirated Ribbon Burner. Photo heavy.
671jungle replied to Frosty's topic in Ribbon Burners
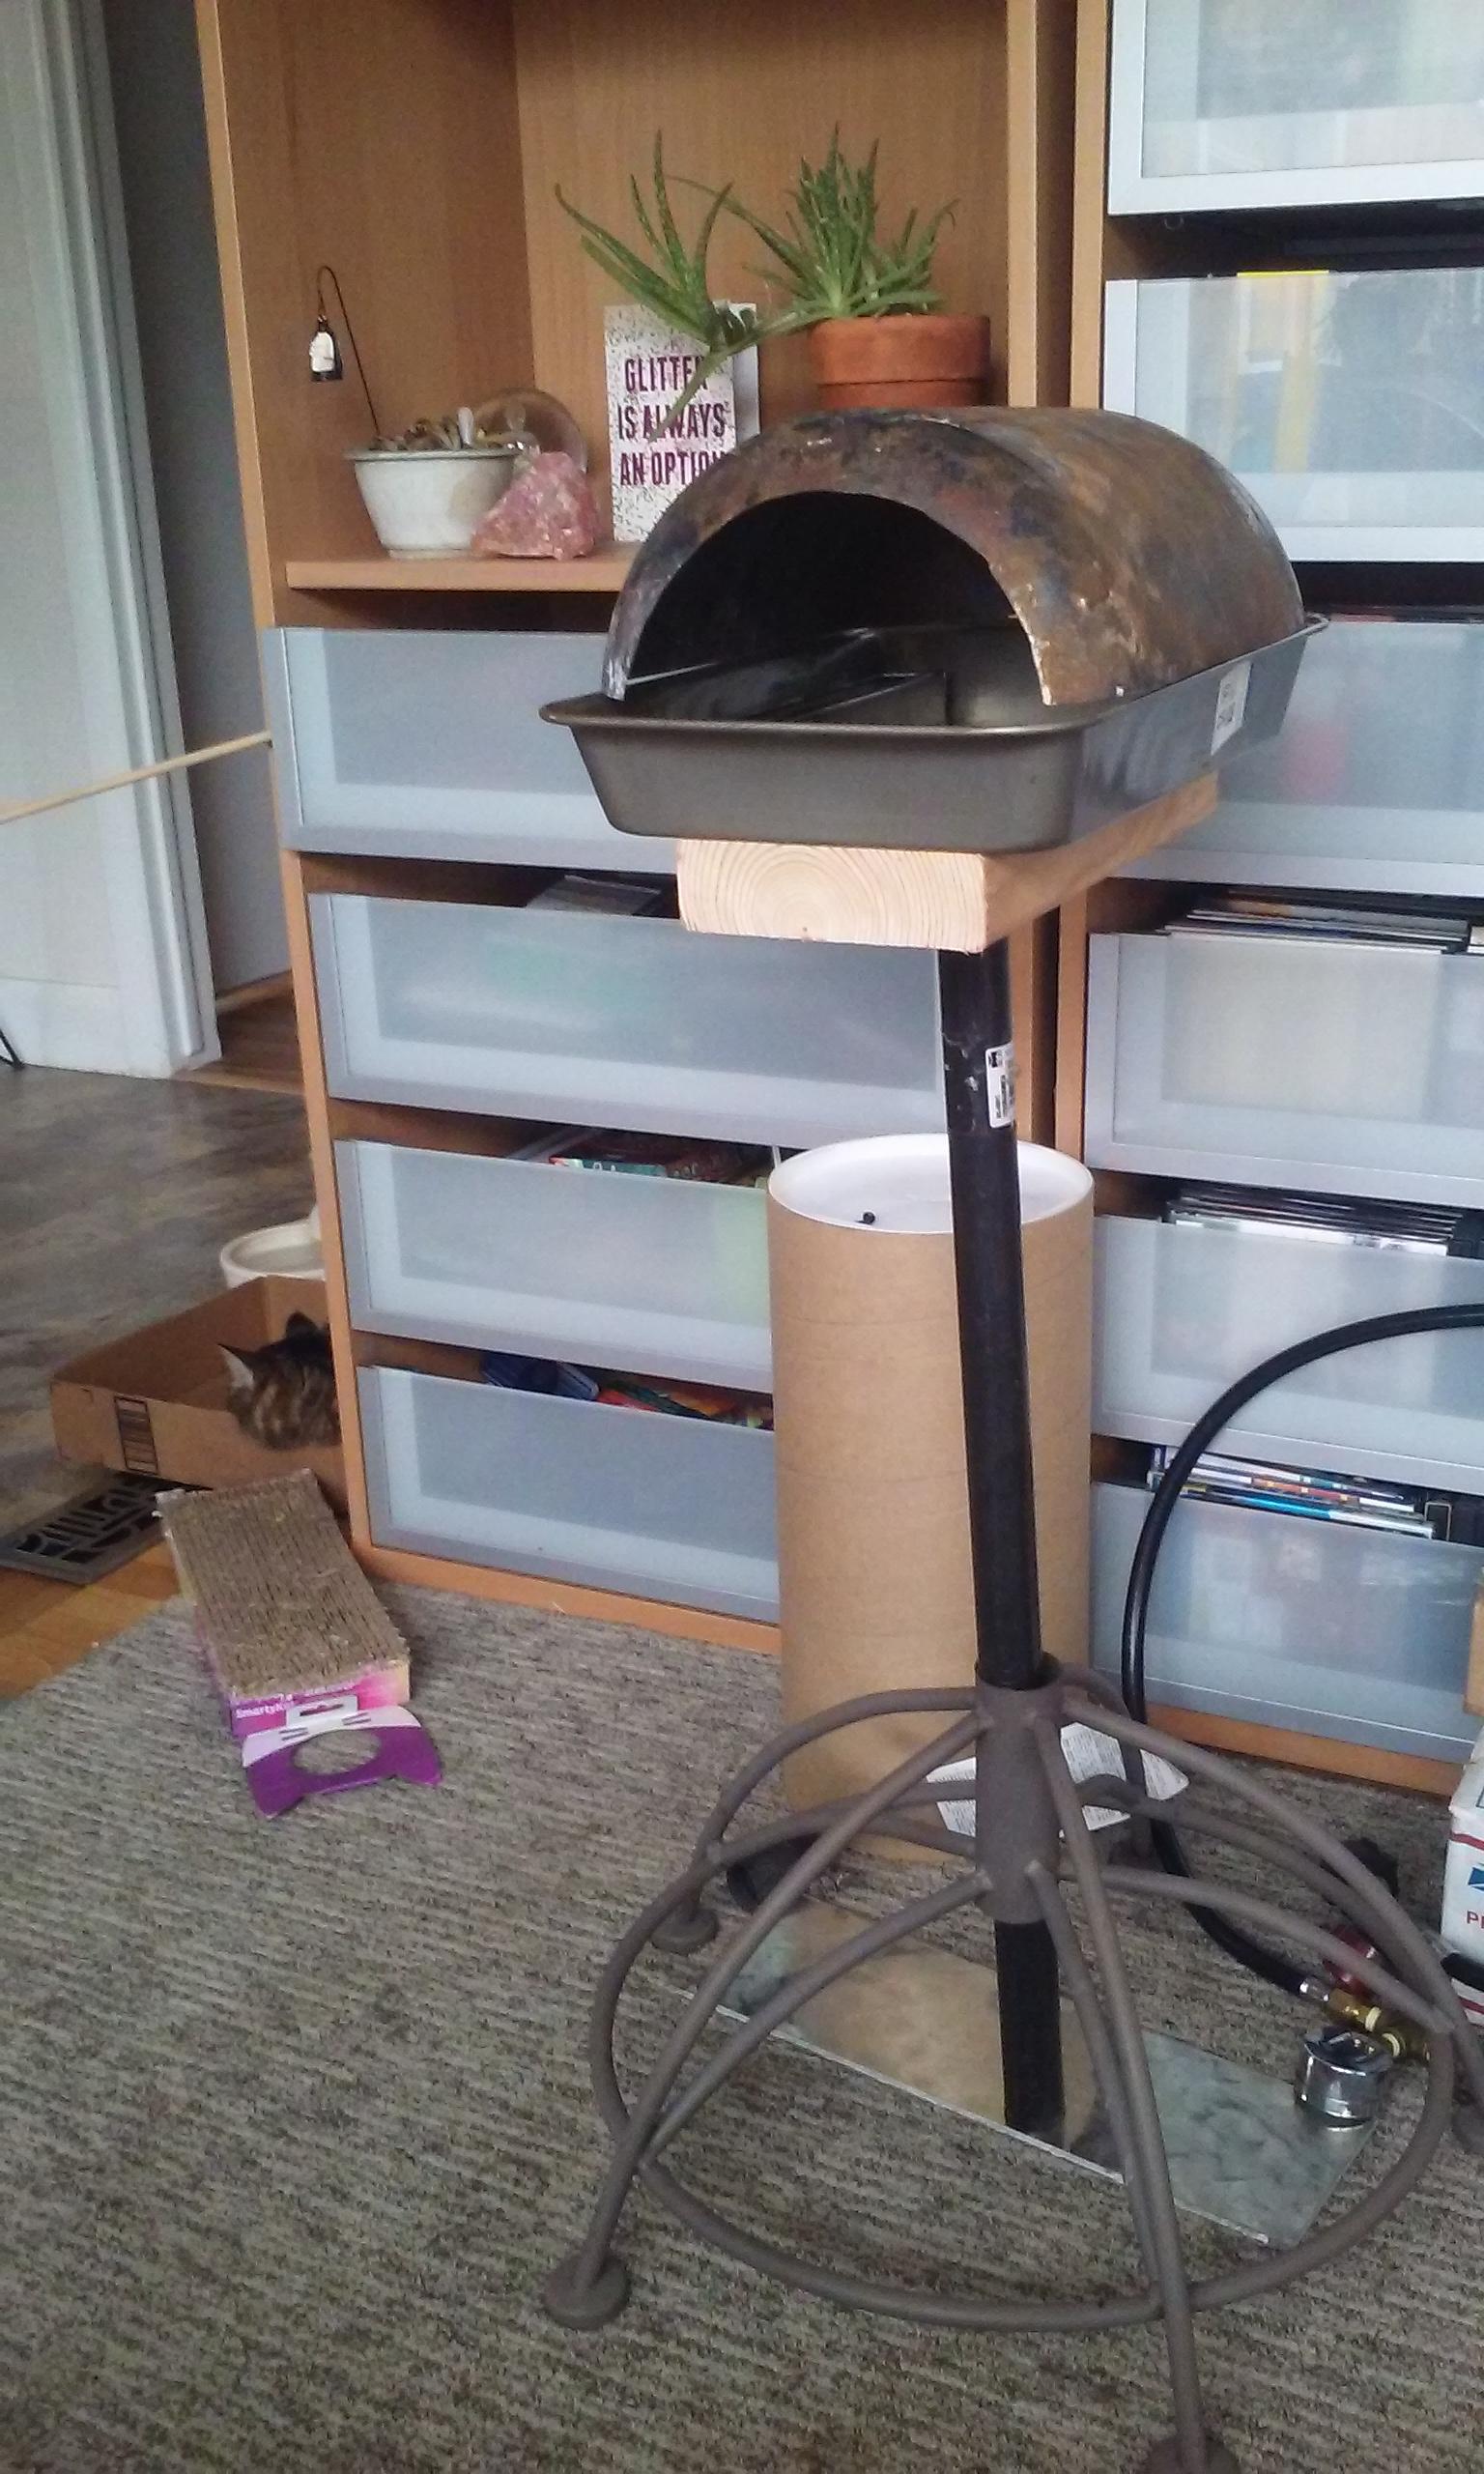
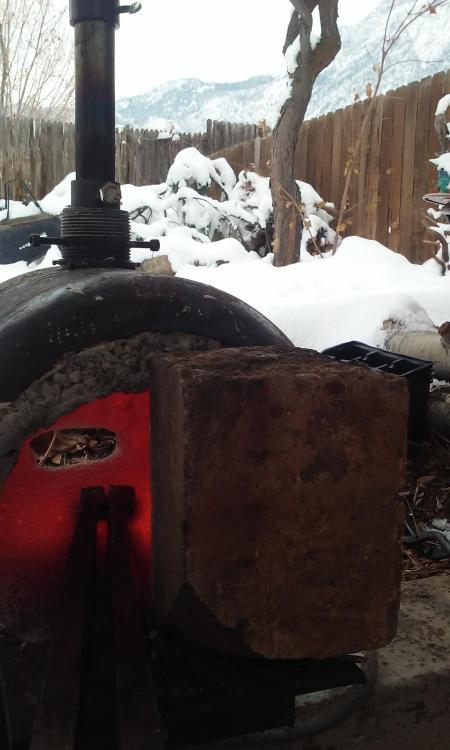
Put'em in the forge and brought up to yellow during a short session (about an hour). Took em out after cooling and still as hard as they were before. Stuffed a 1/2" sidearm with a plenum from a bag balm tin, glued all the seams with kitty litter and experiment test fired. It lit immediately and turned up to about 5 psi before backfiring. A little adjusting and got it roaring before the tin warped and failed. But results were already in! It works! Now for a design. I can't think of any way to secure the pre Made faces to anything other than making a mold and surrounding with kasto. Lol, might as well just cast an actual ribbon. But I have these and paid for them. Creative tank needs replenishing.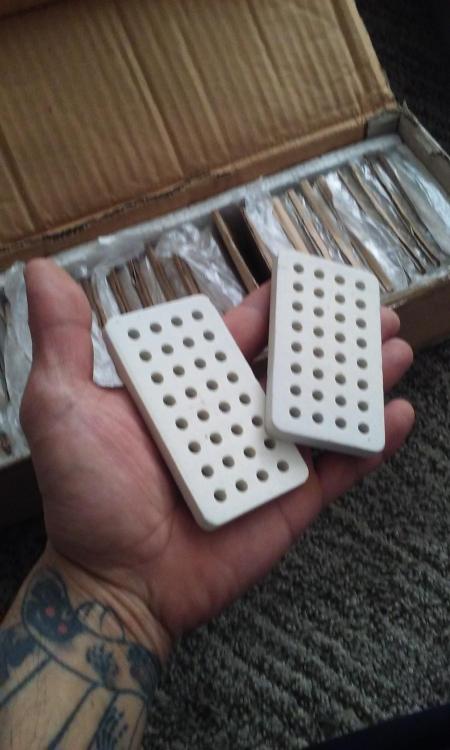
-
Naturally Aspirated Ribbon Burner. Photo heavy.
671jungle replied to Frosty's topic in Ribbon Burners
I ordered those Ceramic bbq blocks. I will fire test them in the forge and see how well they hold up before fabricating to them. It would be nice to have pre made flame faces. Im sure I will need to stack to avoid super heating and ignition in the plenum. But then again, I have no idea what I'm doing. -
Naturally Aspirated Ribbon Burner. Photo heavy.
671jungle replied to Frosty's topic in Ribbon Burners
https://www.amazon.com/gp/product/B013H6PHE2/ref=oh_aui_detailpage_o01_s00?ie=UTF8&psc=1 these might be of interest -
Naturally Aspirated Ribbon Burner. Photo heavy.
671jungle replied to Frosty's topic in Ribbon Burners
http://www.cotronics.com/vo/cotr/cm_1.htm -
Naturally Aspirated Ribbon Burner. Photo heavy.
671jungle replied to Frosty's topic in Ribbon Burners
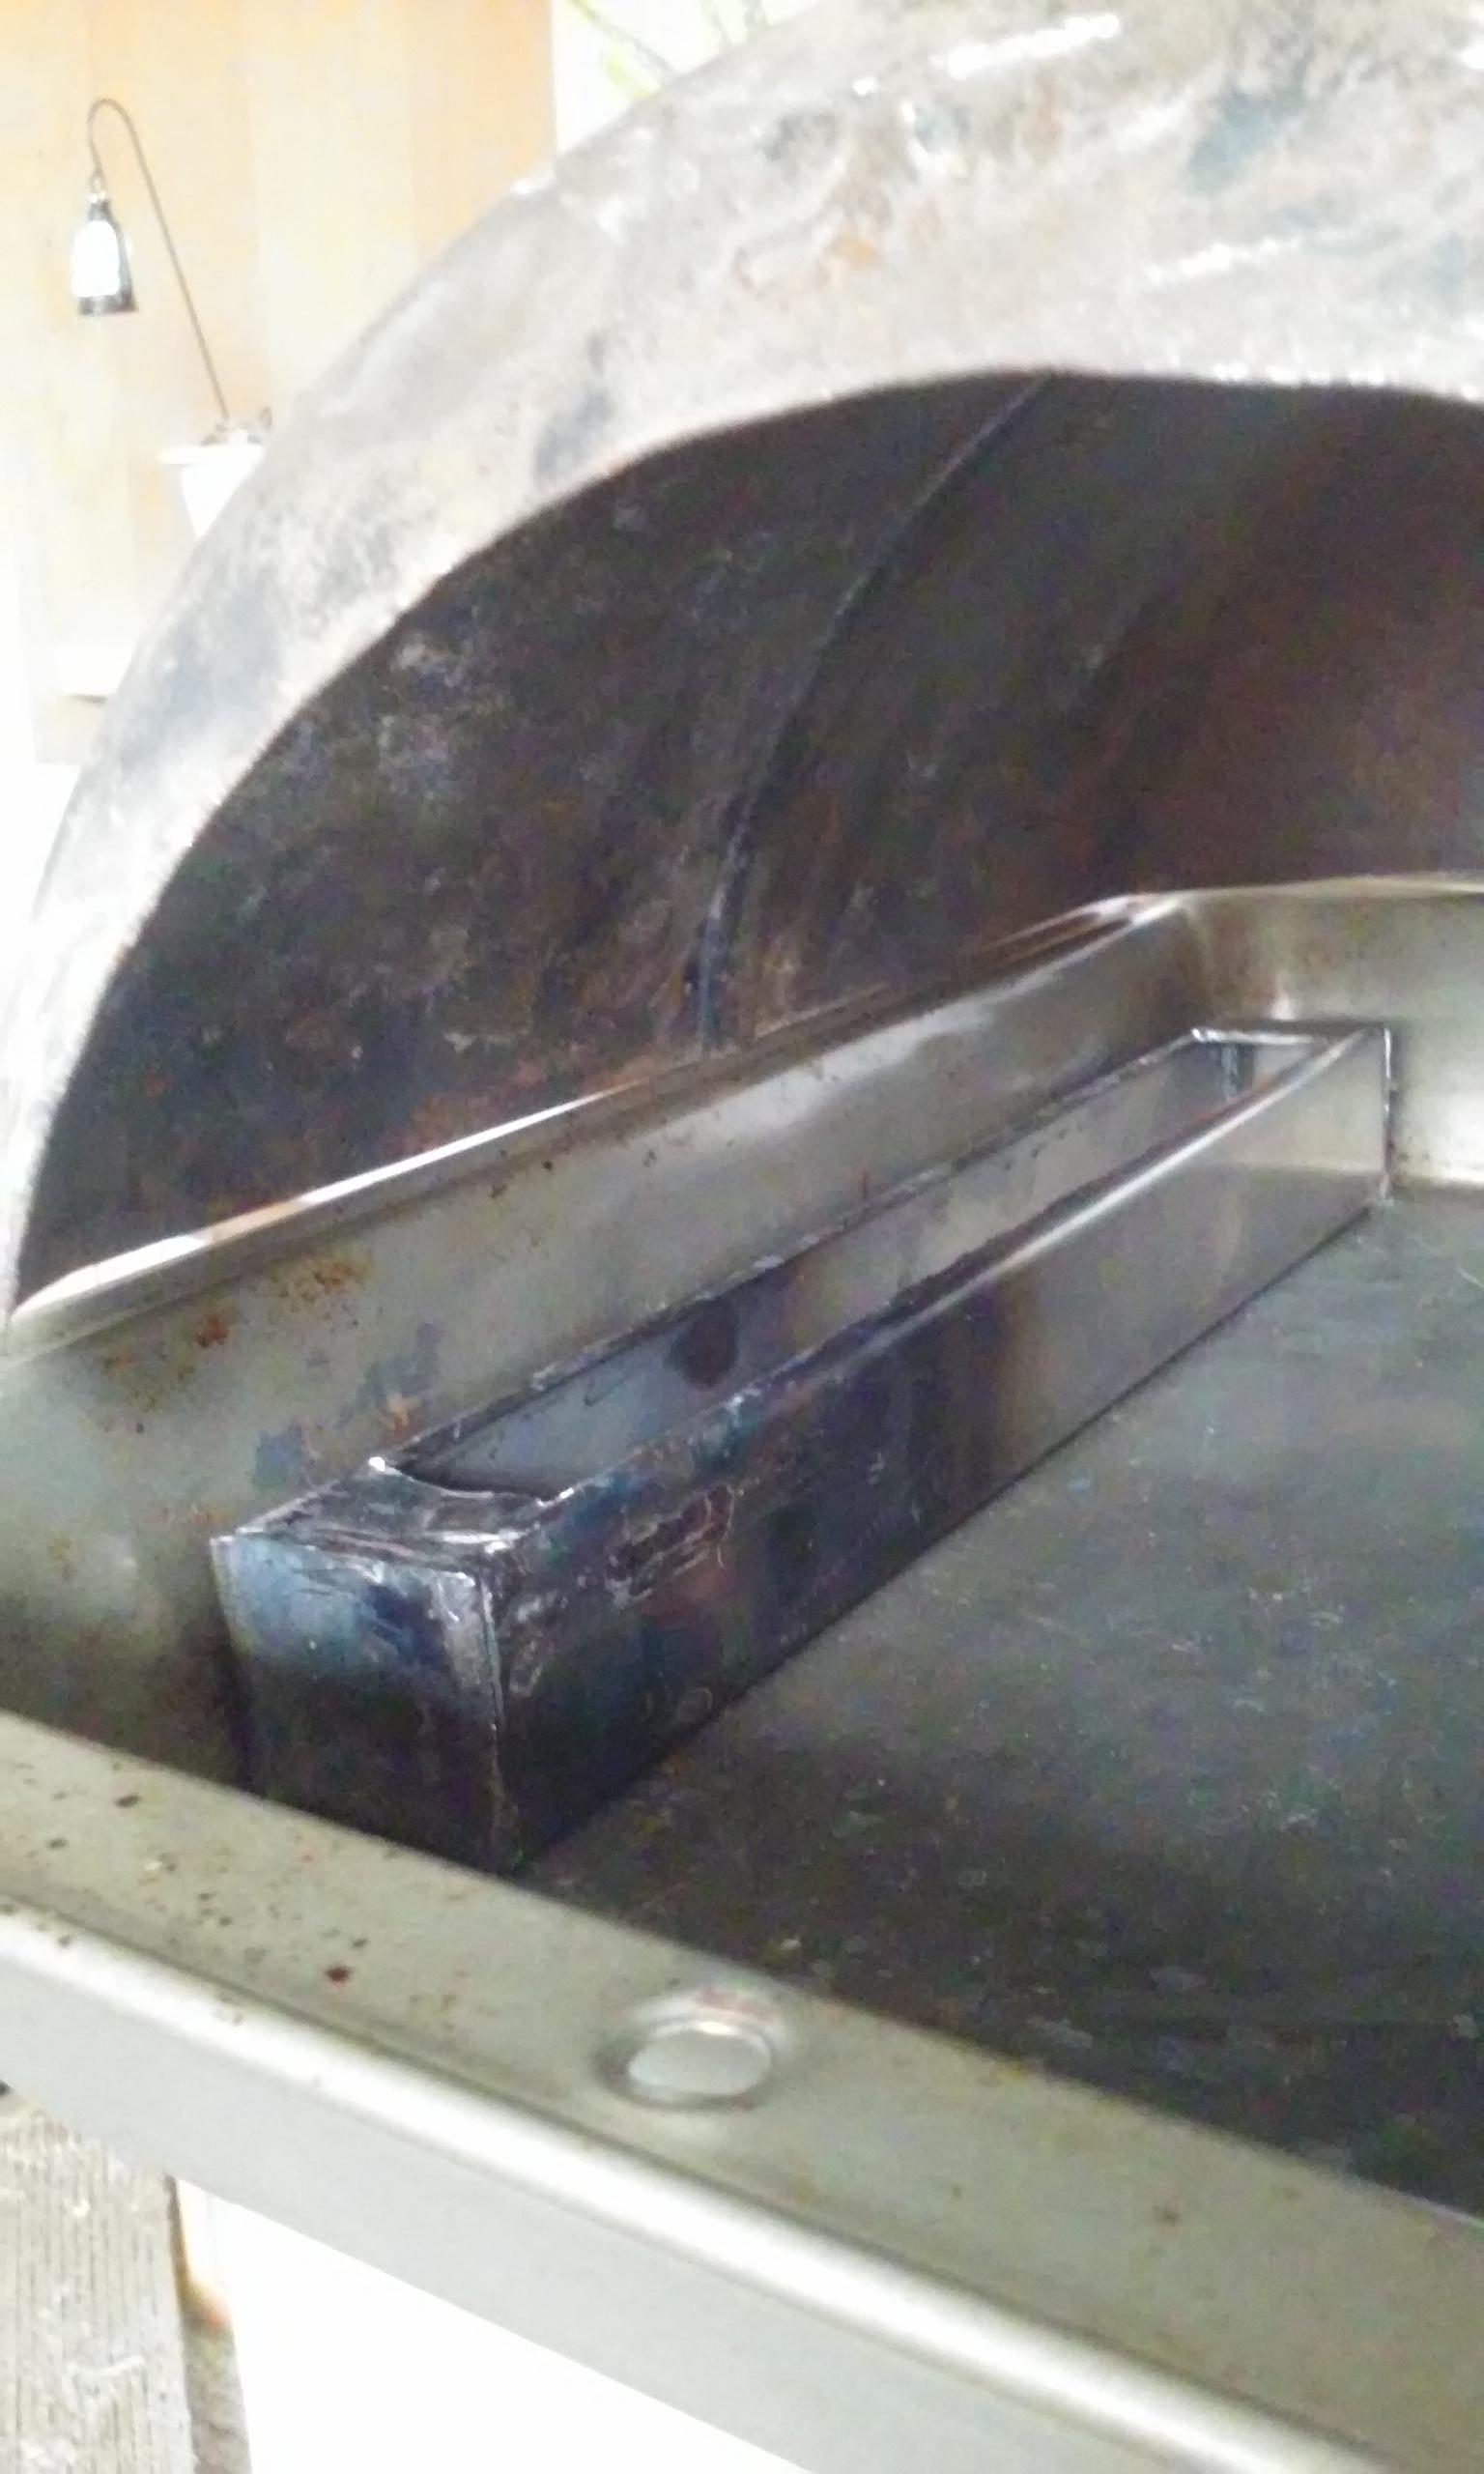
Very nice build indeed. I wondered about the fire brick being used that way also. Just built a 1/2" side arm burner, this is going to be an experimental build in the quest for efficiency. A small 4x4x6ish chamber with an entire side being a burner face consisting of many much smaller outlets. Material being maybe a drilled ceramic plate or heavy screen of some sort. The emphasis is on the smaller screen-like outlets.This is a completely for fun and experimental build! thanks for ideas and input! -
Naturally Aspirated Ribbon Burner. Photo heavy.
671jungle replied to Frosty's topic in Ribbon Burners
They are very "cool" looking flames, kinda velvety. I was thinking a whole wall of a rectangular forge could be a burner. Maybe the side for controllability. The face would be a challenge to get right. There are many outlets and getting that ratio would mean lots of tedious effort in testing. Especially for a NA. Even if ratios are balanced, what would the face be made of? I didnt find any info on materials. Ceramic maybe?
-
Naturally Aspirated Ribbon Burner. Photo heavy.
671jungle replied to Frosty's topic in Ribbon Burners
Could a home made AGF type ribbon be made? Could it be made NA? If so, would it be practical in a forge? http://www.agfburner.com/home.html -
A collection of improvised anvils
671jungle replied to Charles R. Stevens's topic in Anvils, Swage Blocks, and Mandrels
Fixed it, I think.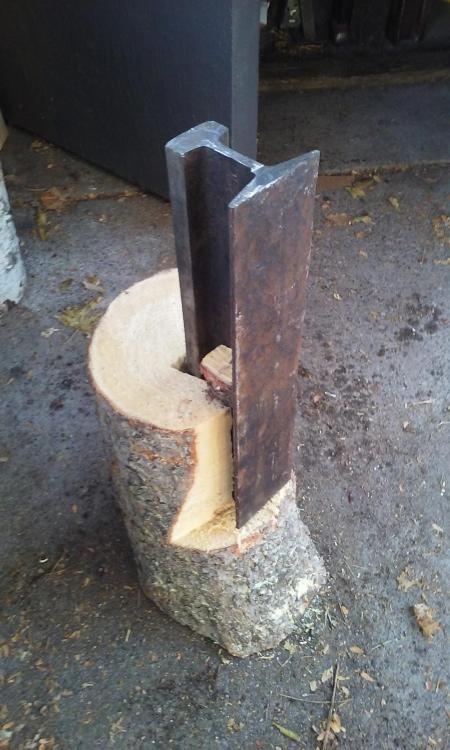
-
A collection of improvised anvils
671jungle replied to Charles R. Stevens's topic in Anvils, Swage Blocks, and Mandrels
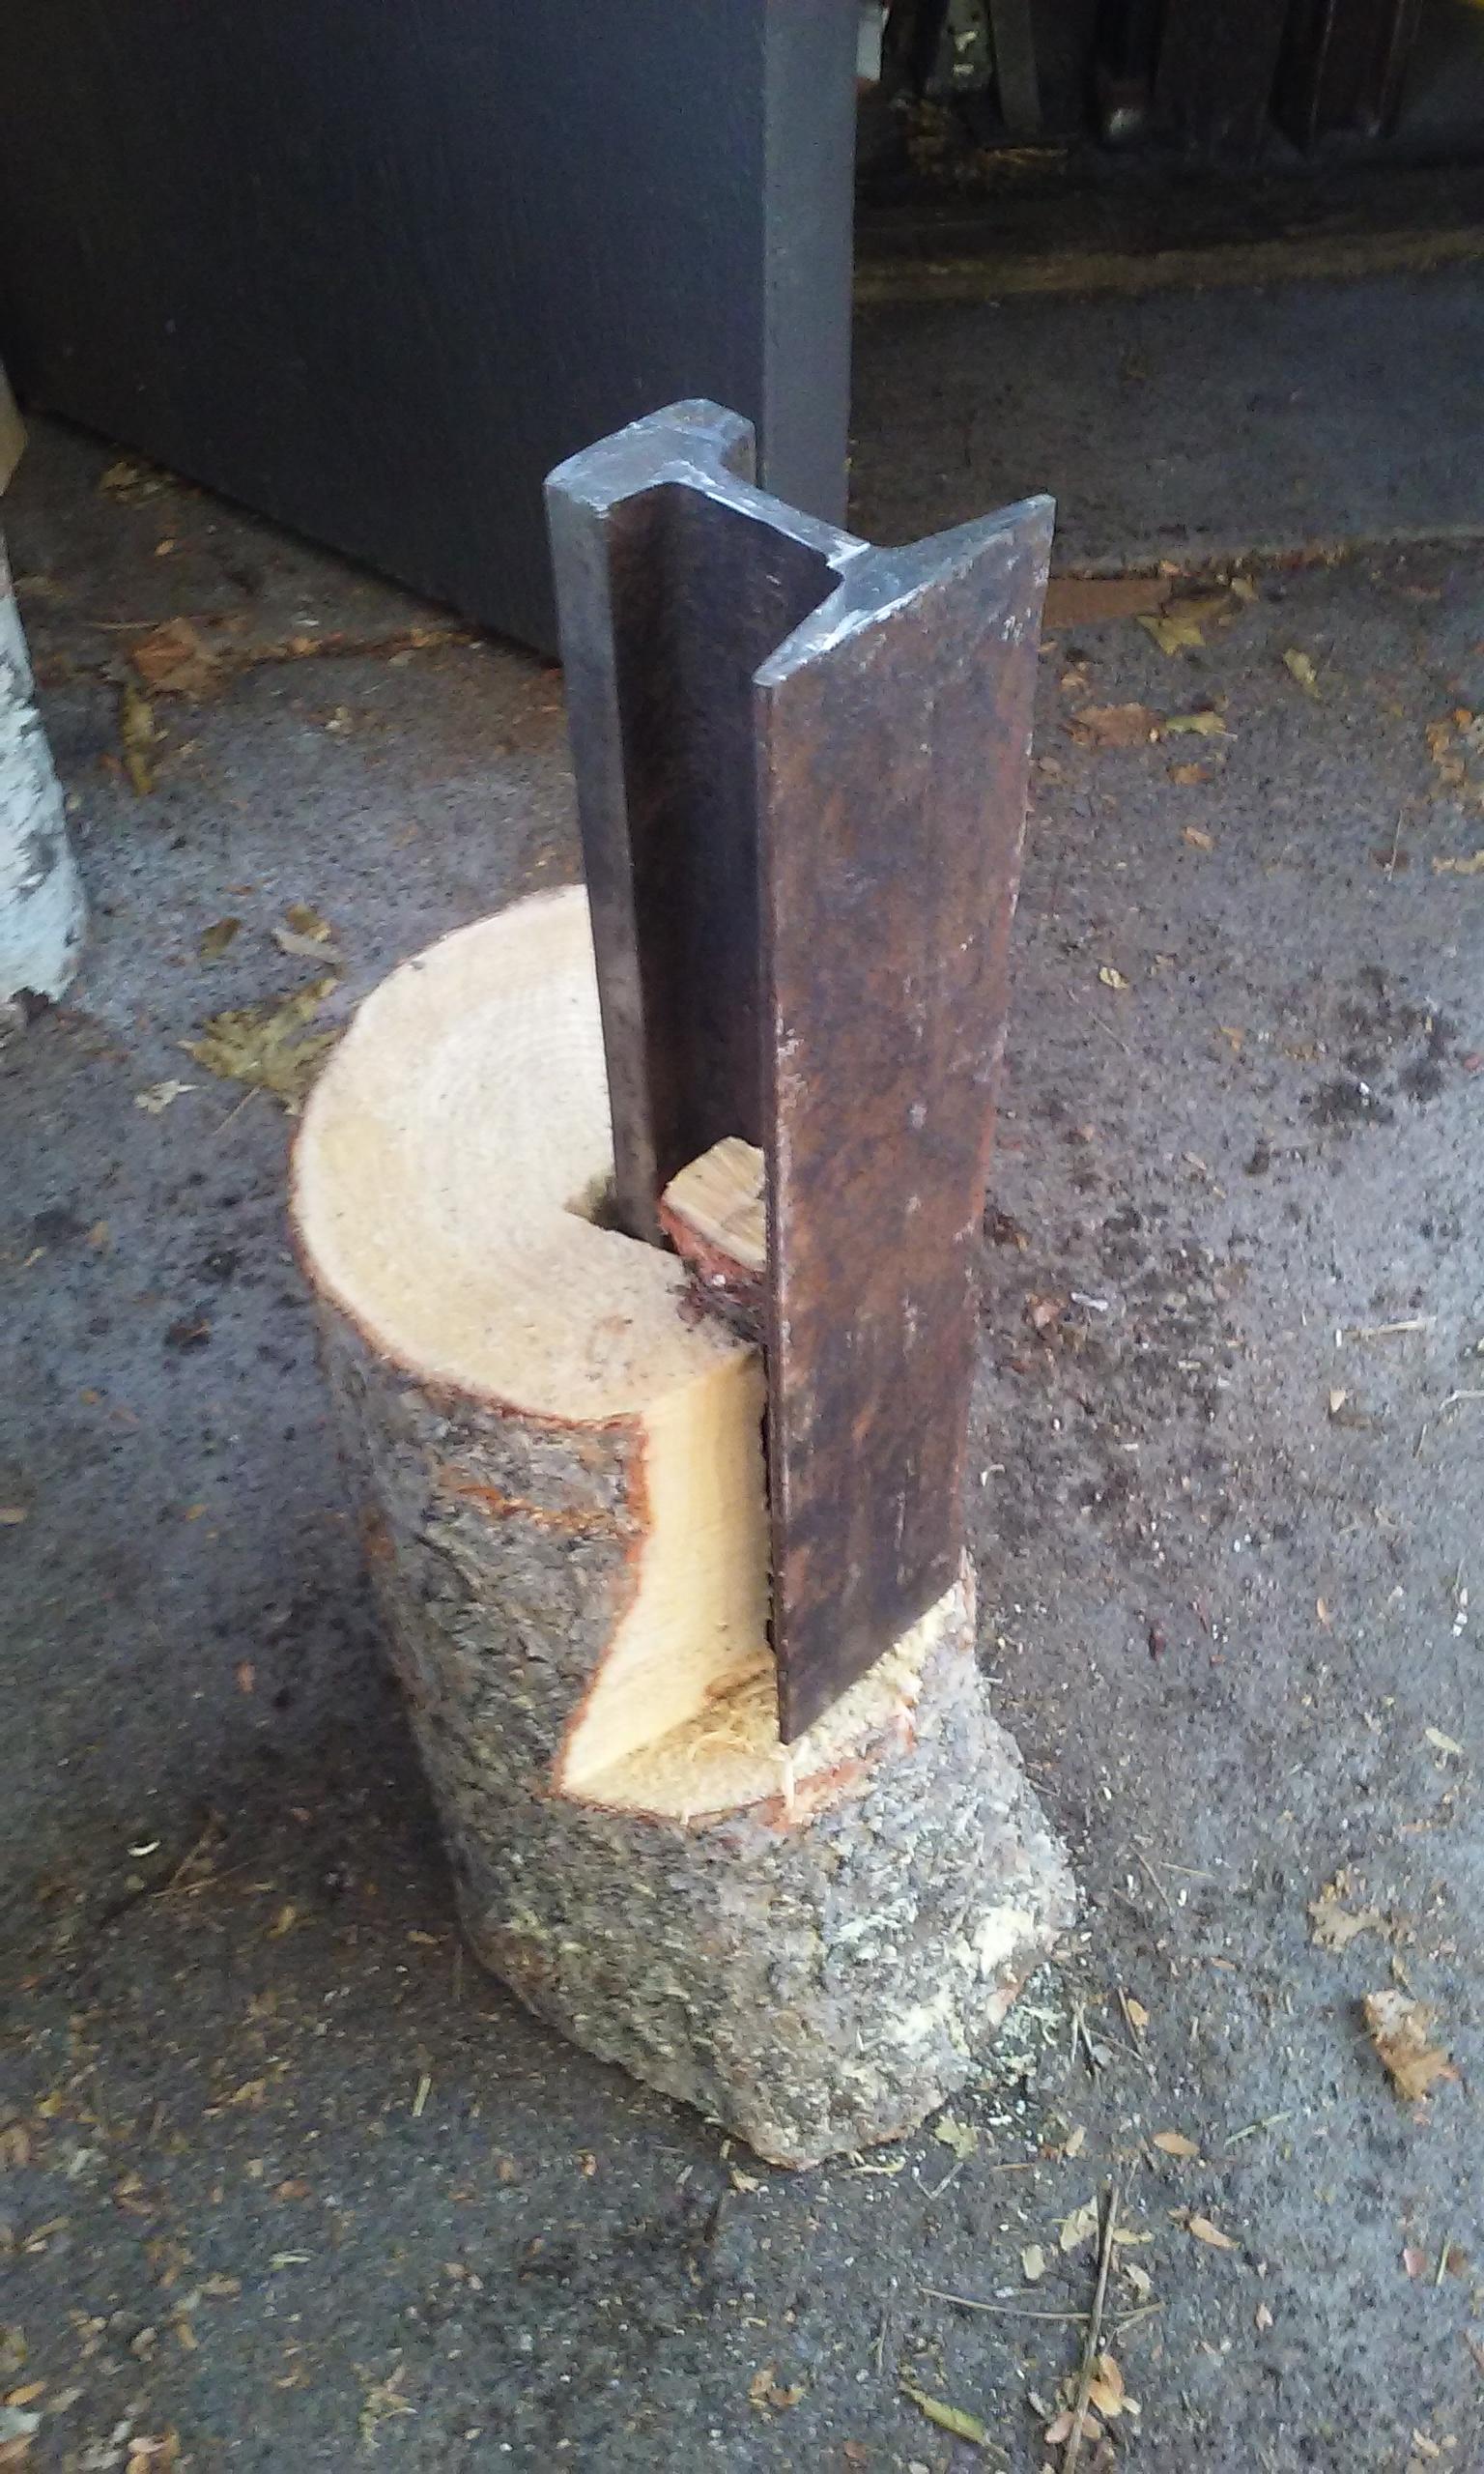
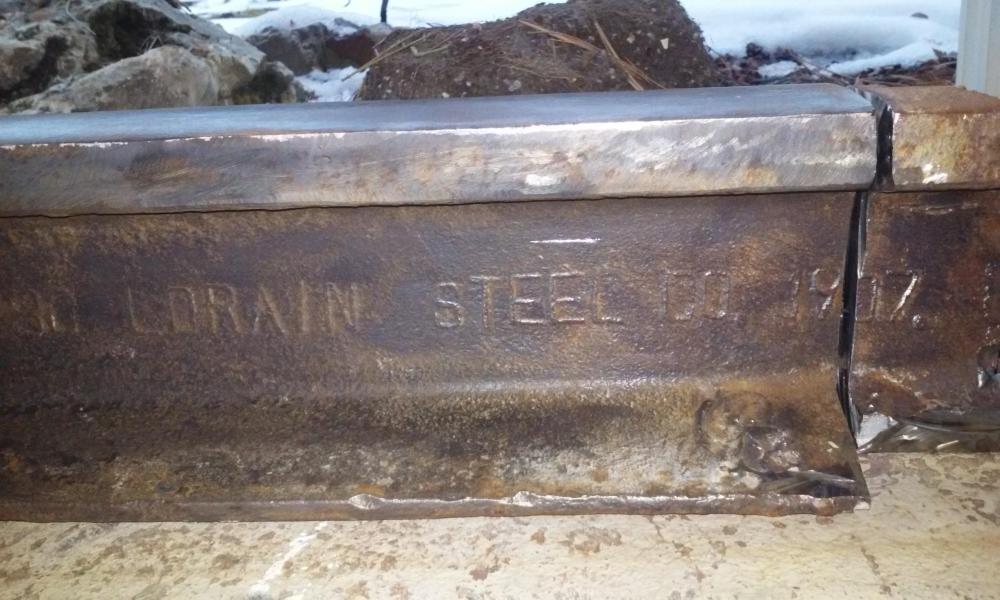
i was wondering about that. I may just do that. I got the whole thing free as one piece. I chopped it up like so. I know there are special treatments for this stuff, being its probably manganese steel. I was going to take it to a weld shop or friend. Any Tips? -
A collection of improvised anvils
671jungle replied to Charles R. Stevens's topic in Anvils, Swage Blocks, and Mandrels
face 9 1/2" x 2" Height 25 3/3" have not welded or weighed it yet, i guesstimate 75-80lbs
-
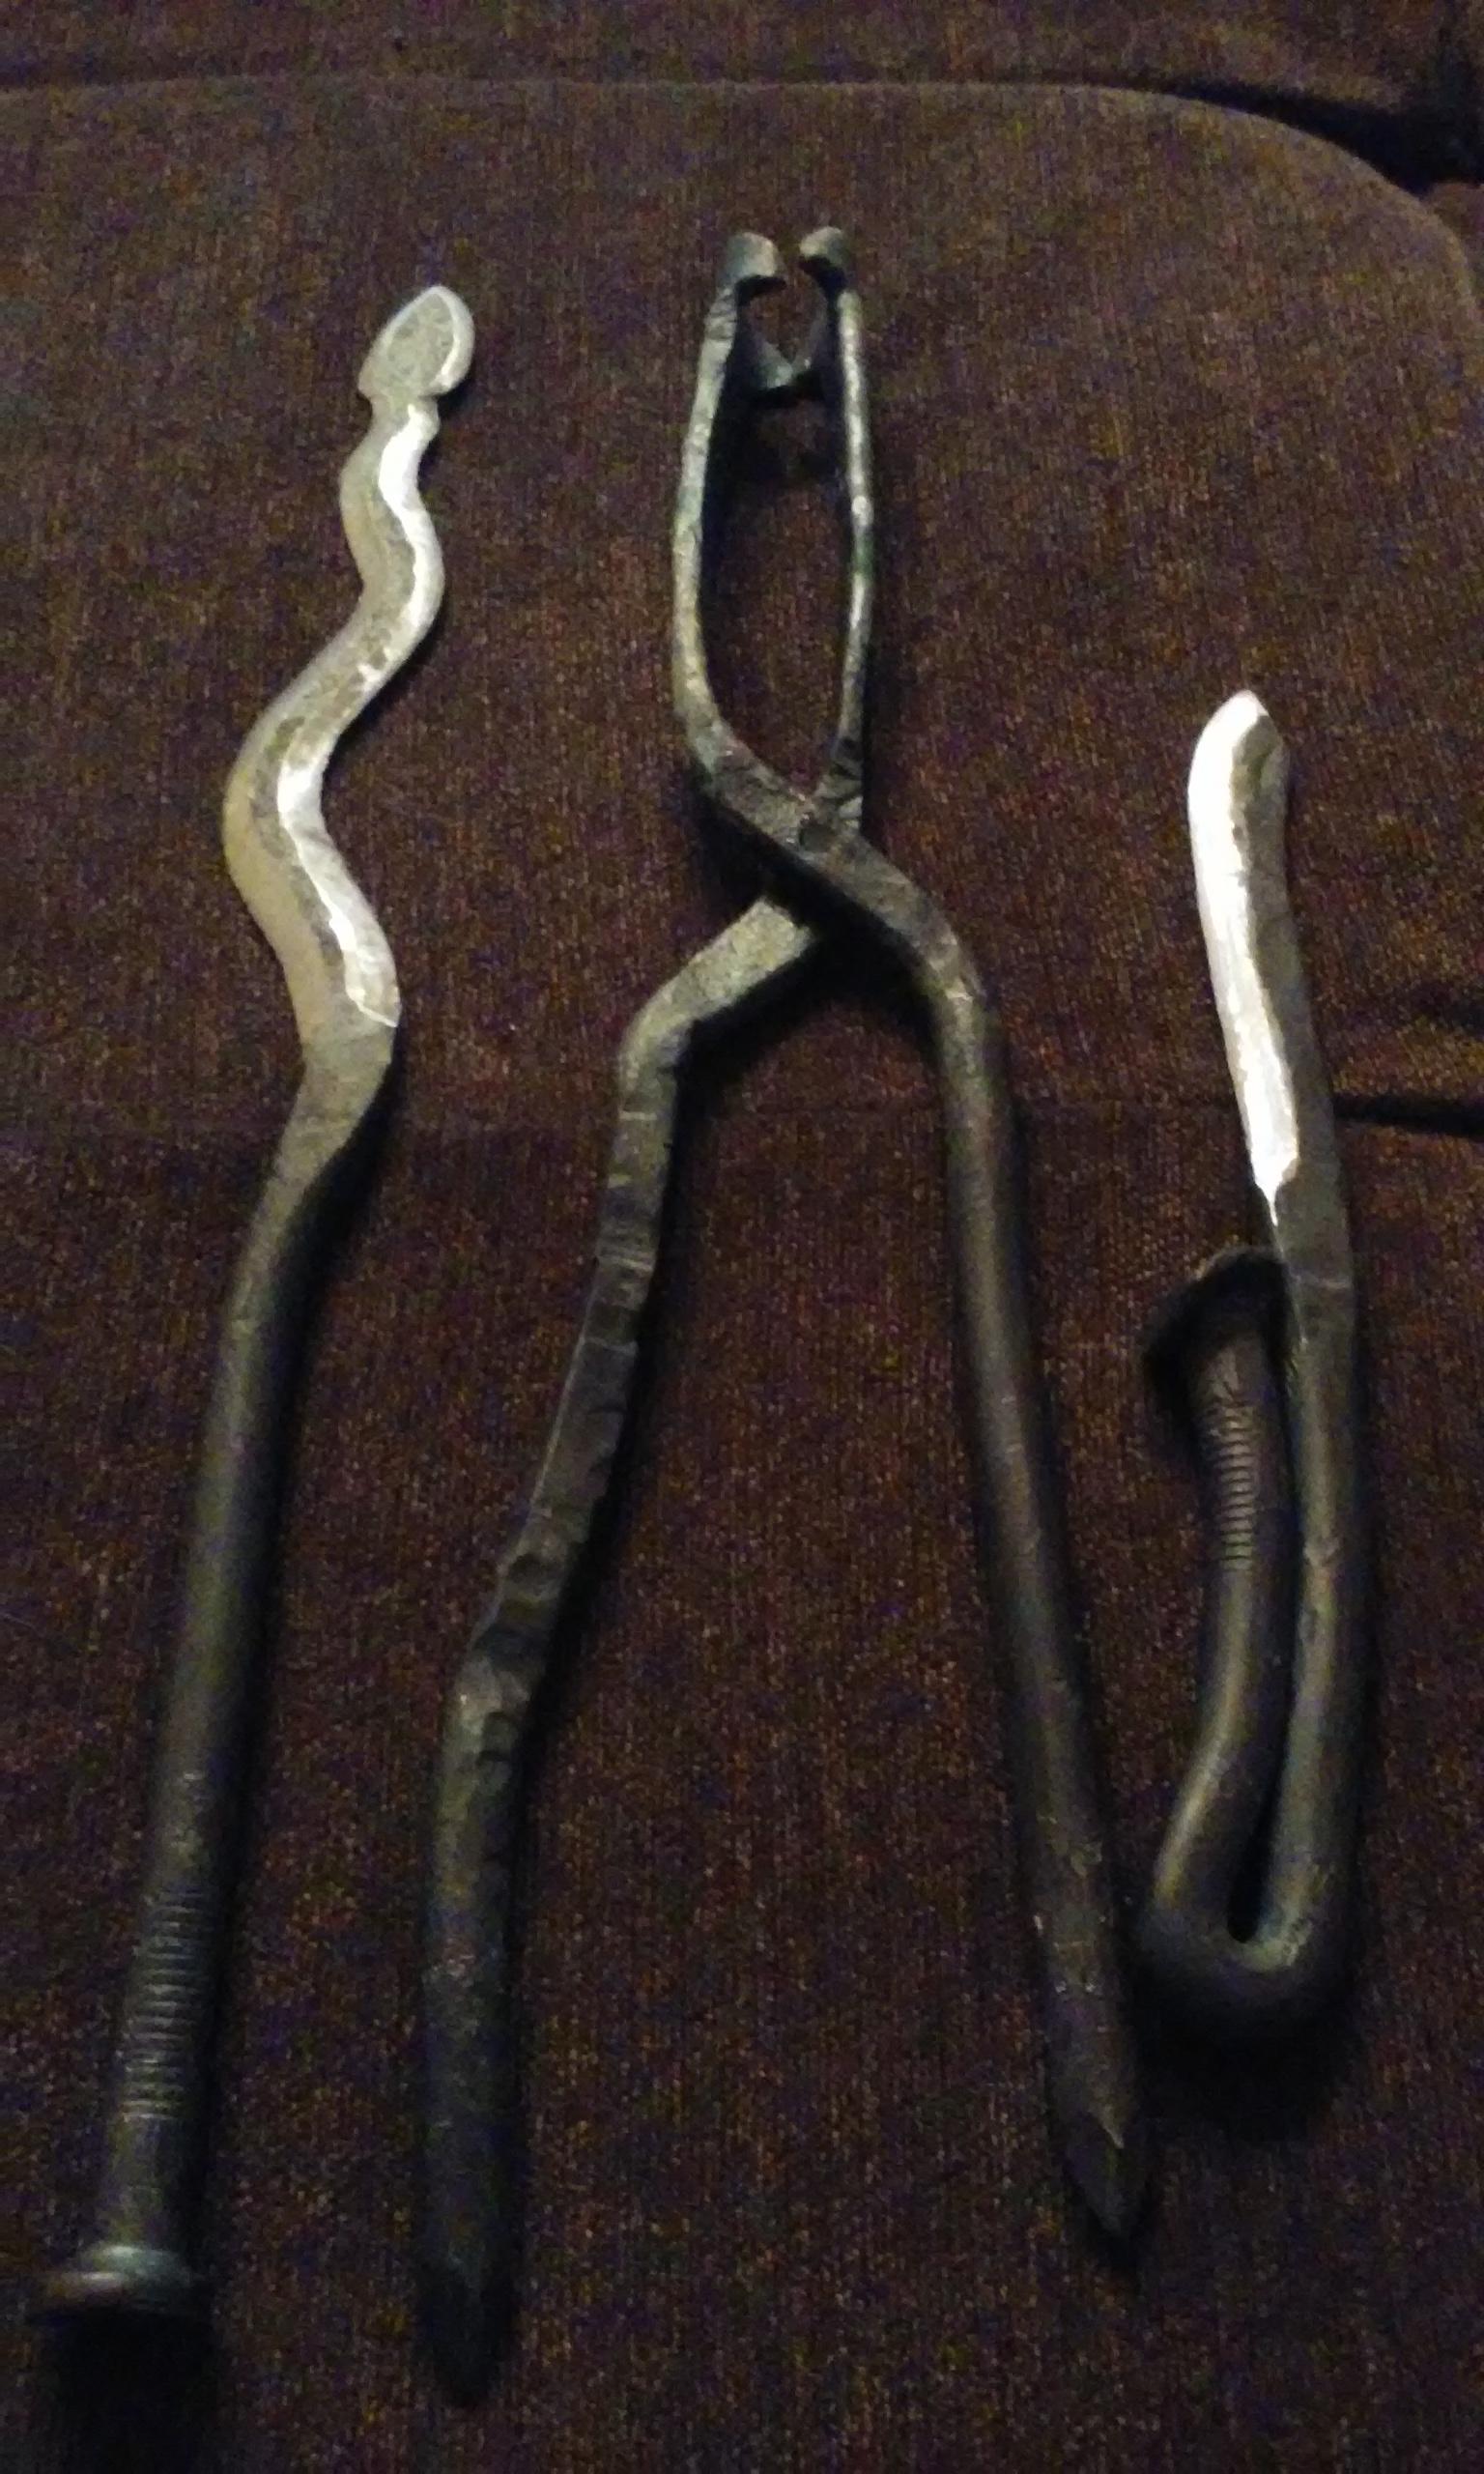
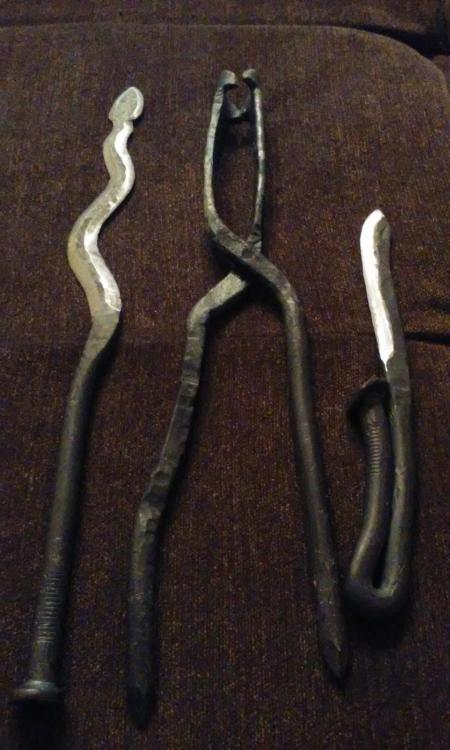
First three things made. Sorry attempt at tongs not knowing what real ones even looked like. Second attempt cooling in the off forge. Working on an upright rail track anvil. I have about 4 1/2'. Also working on getting a better hammer, the claw rings like crazy!
-
-
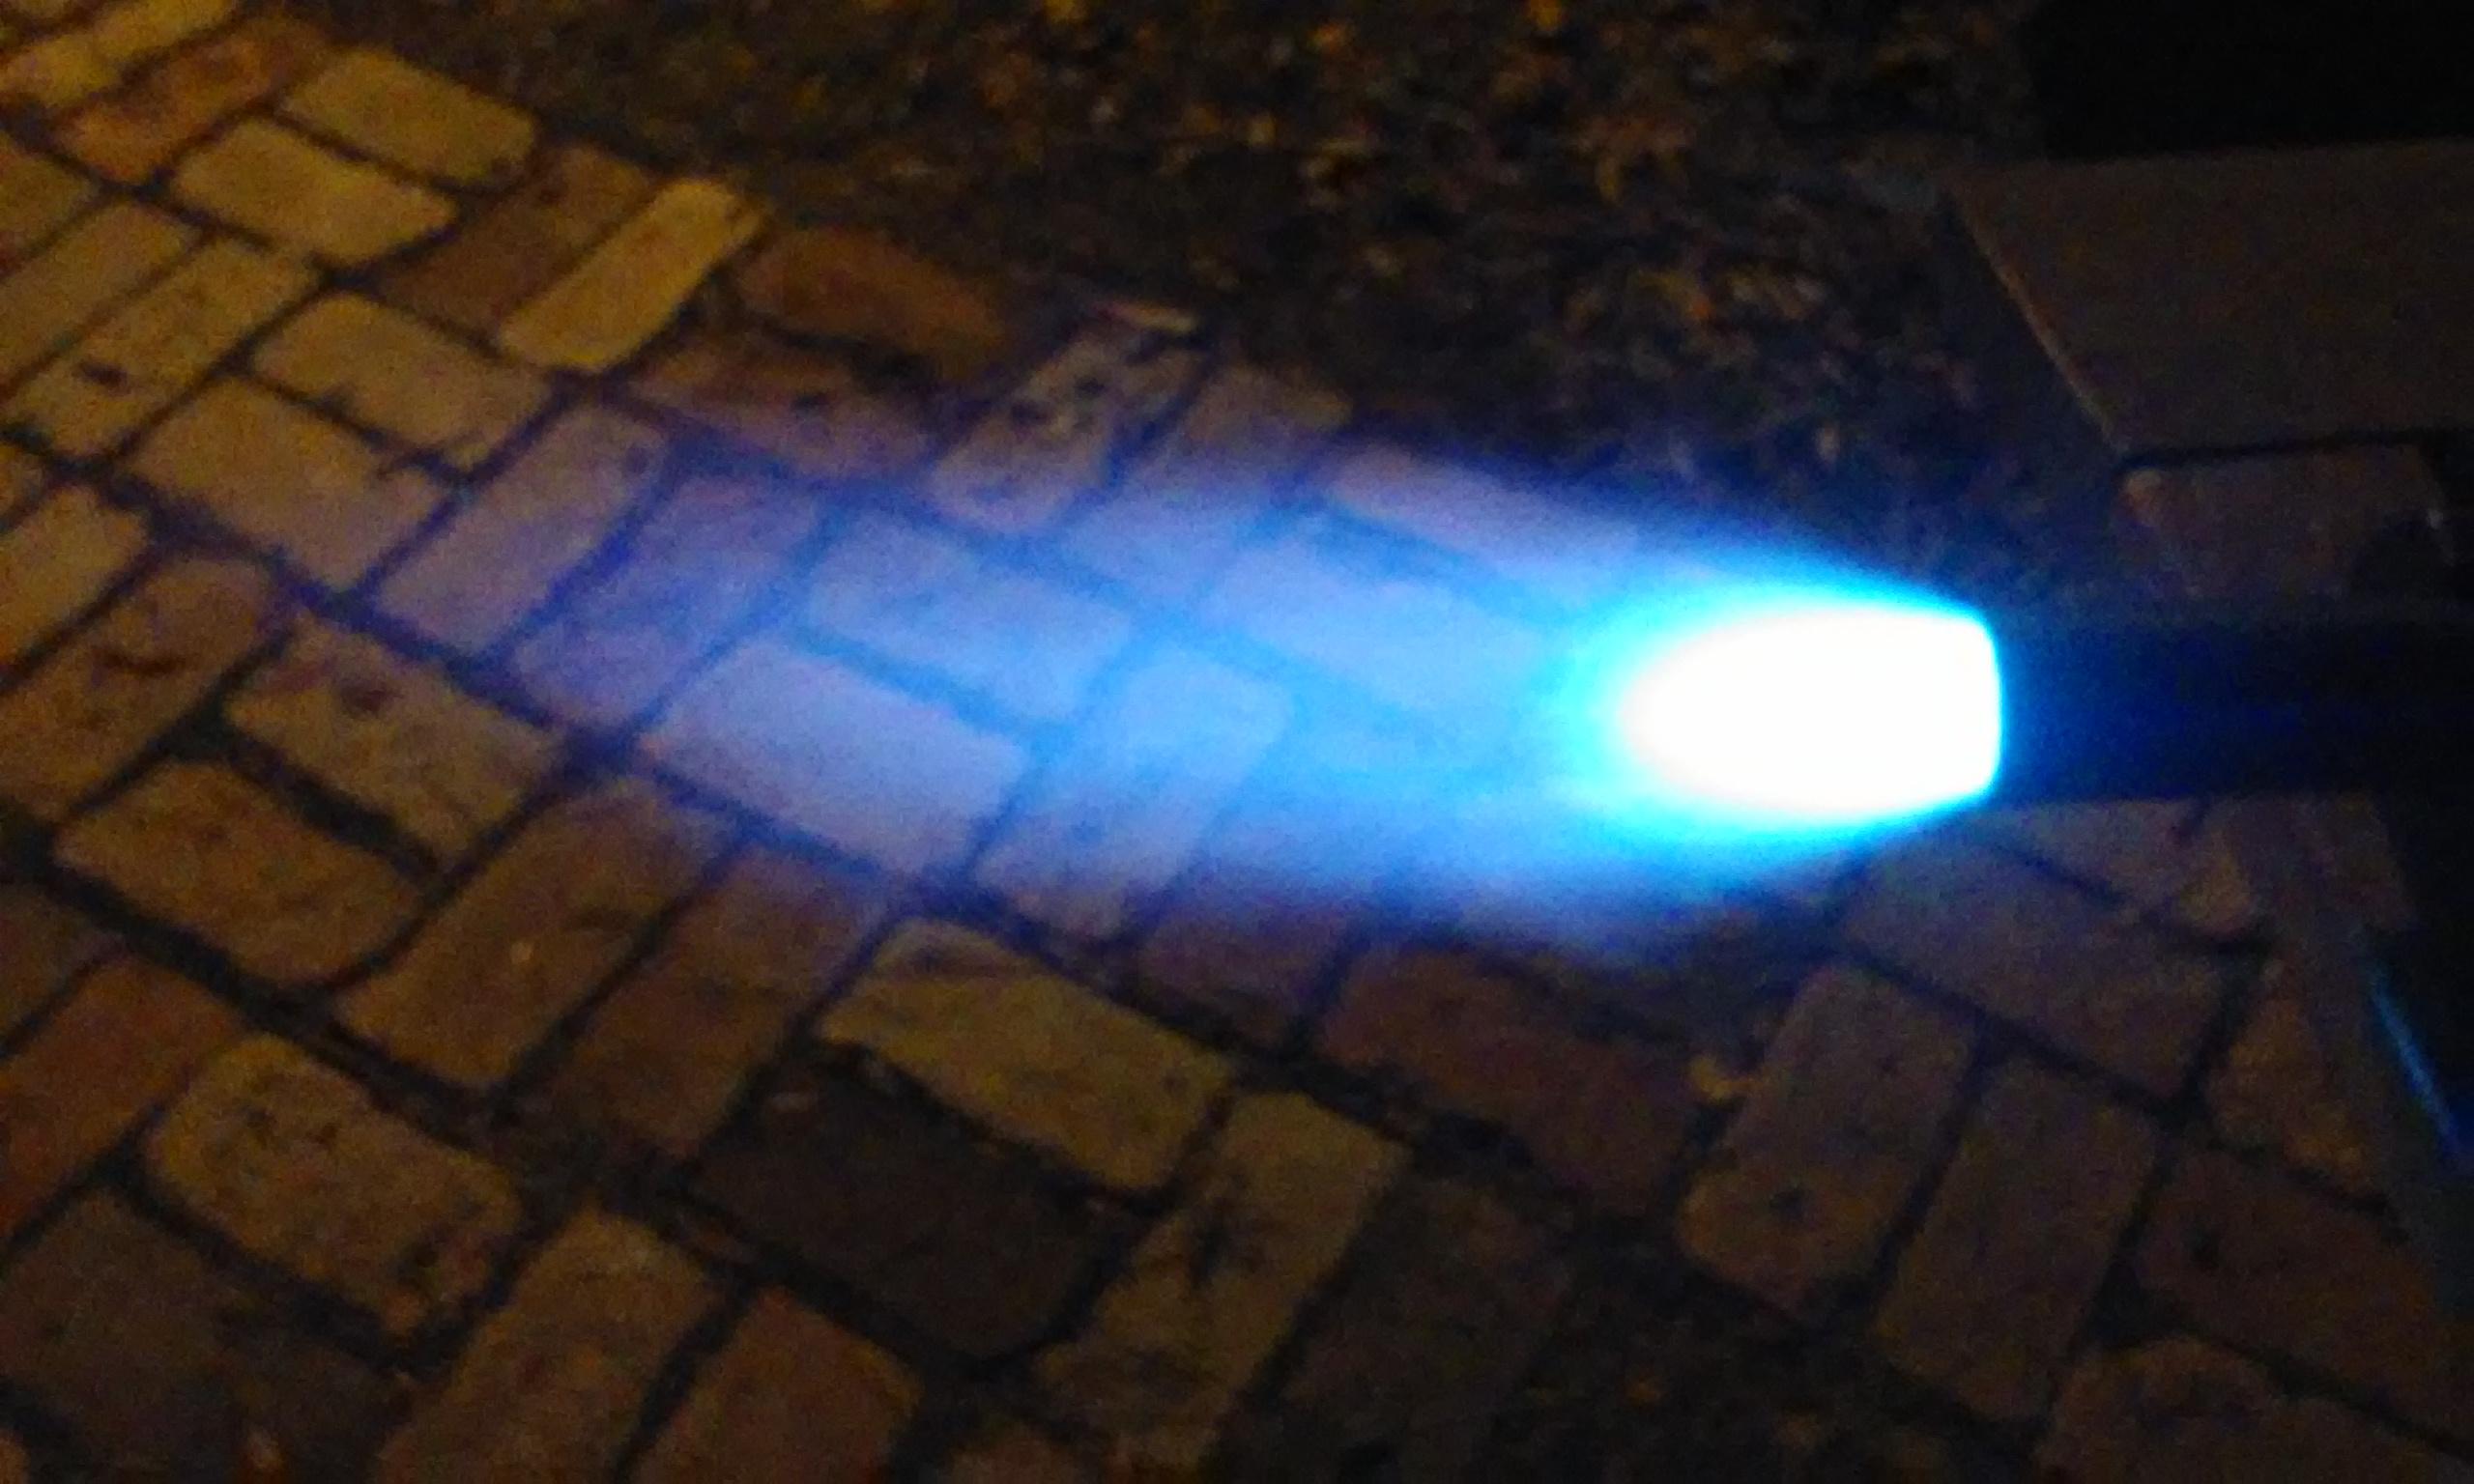
Ah, principle! These are super simple.
-
-
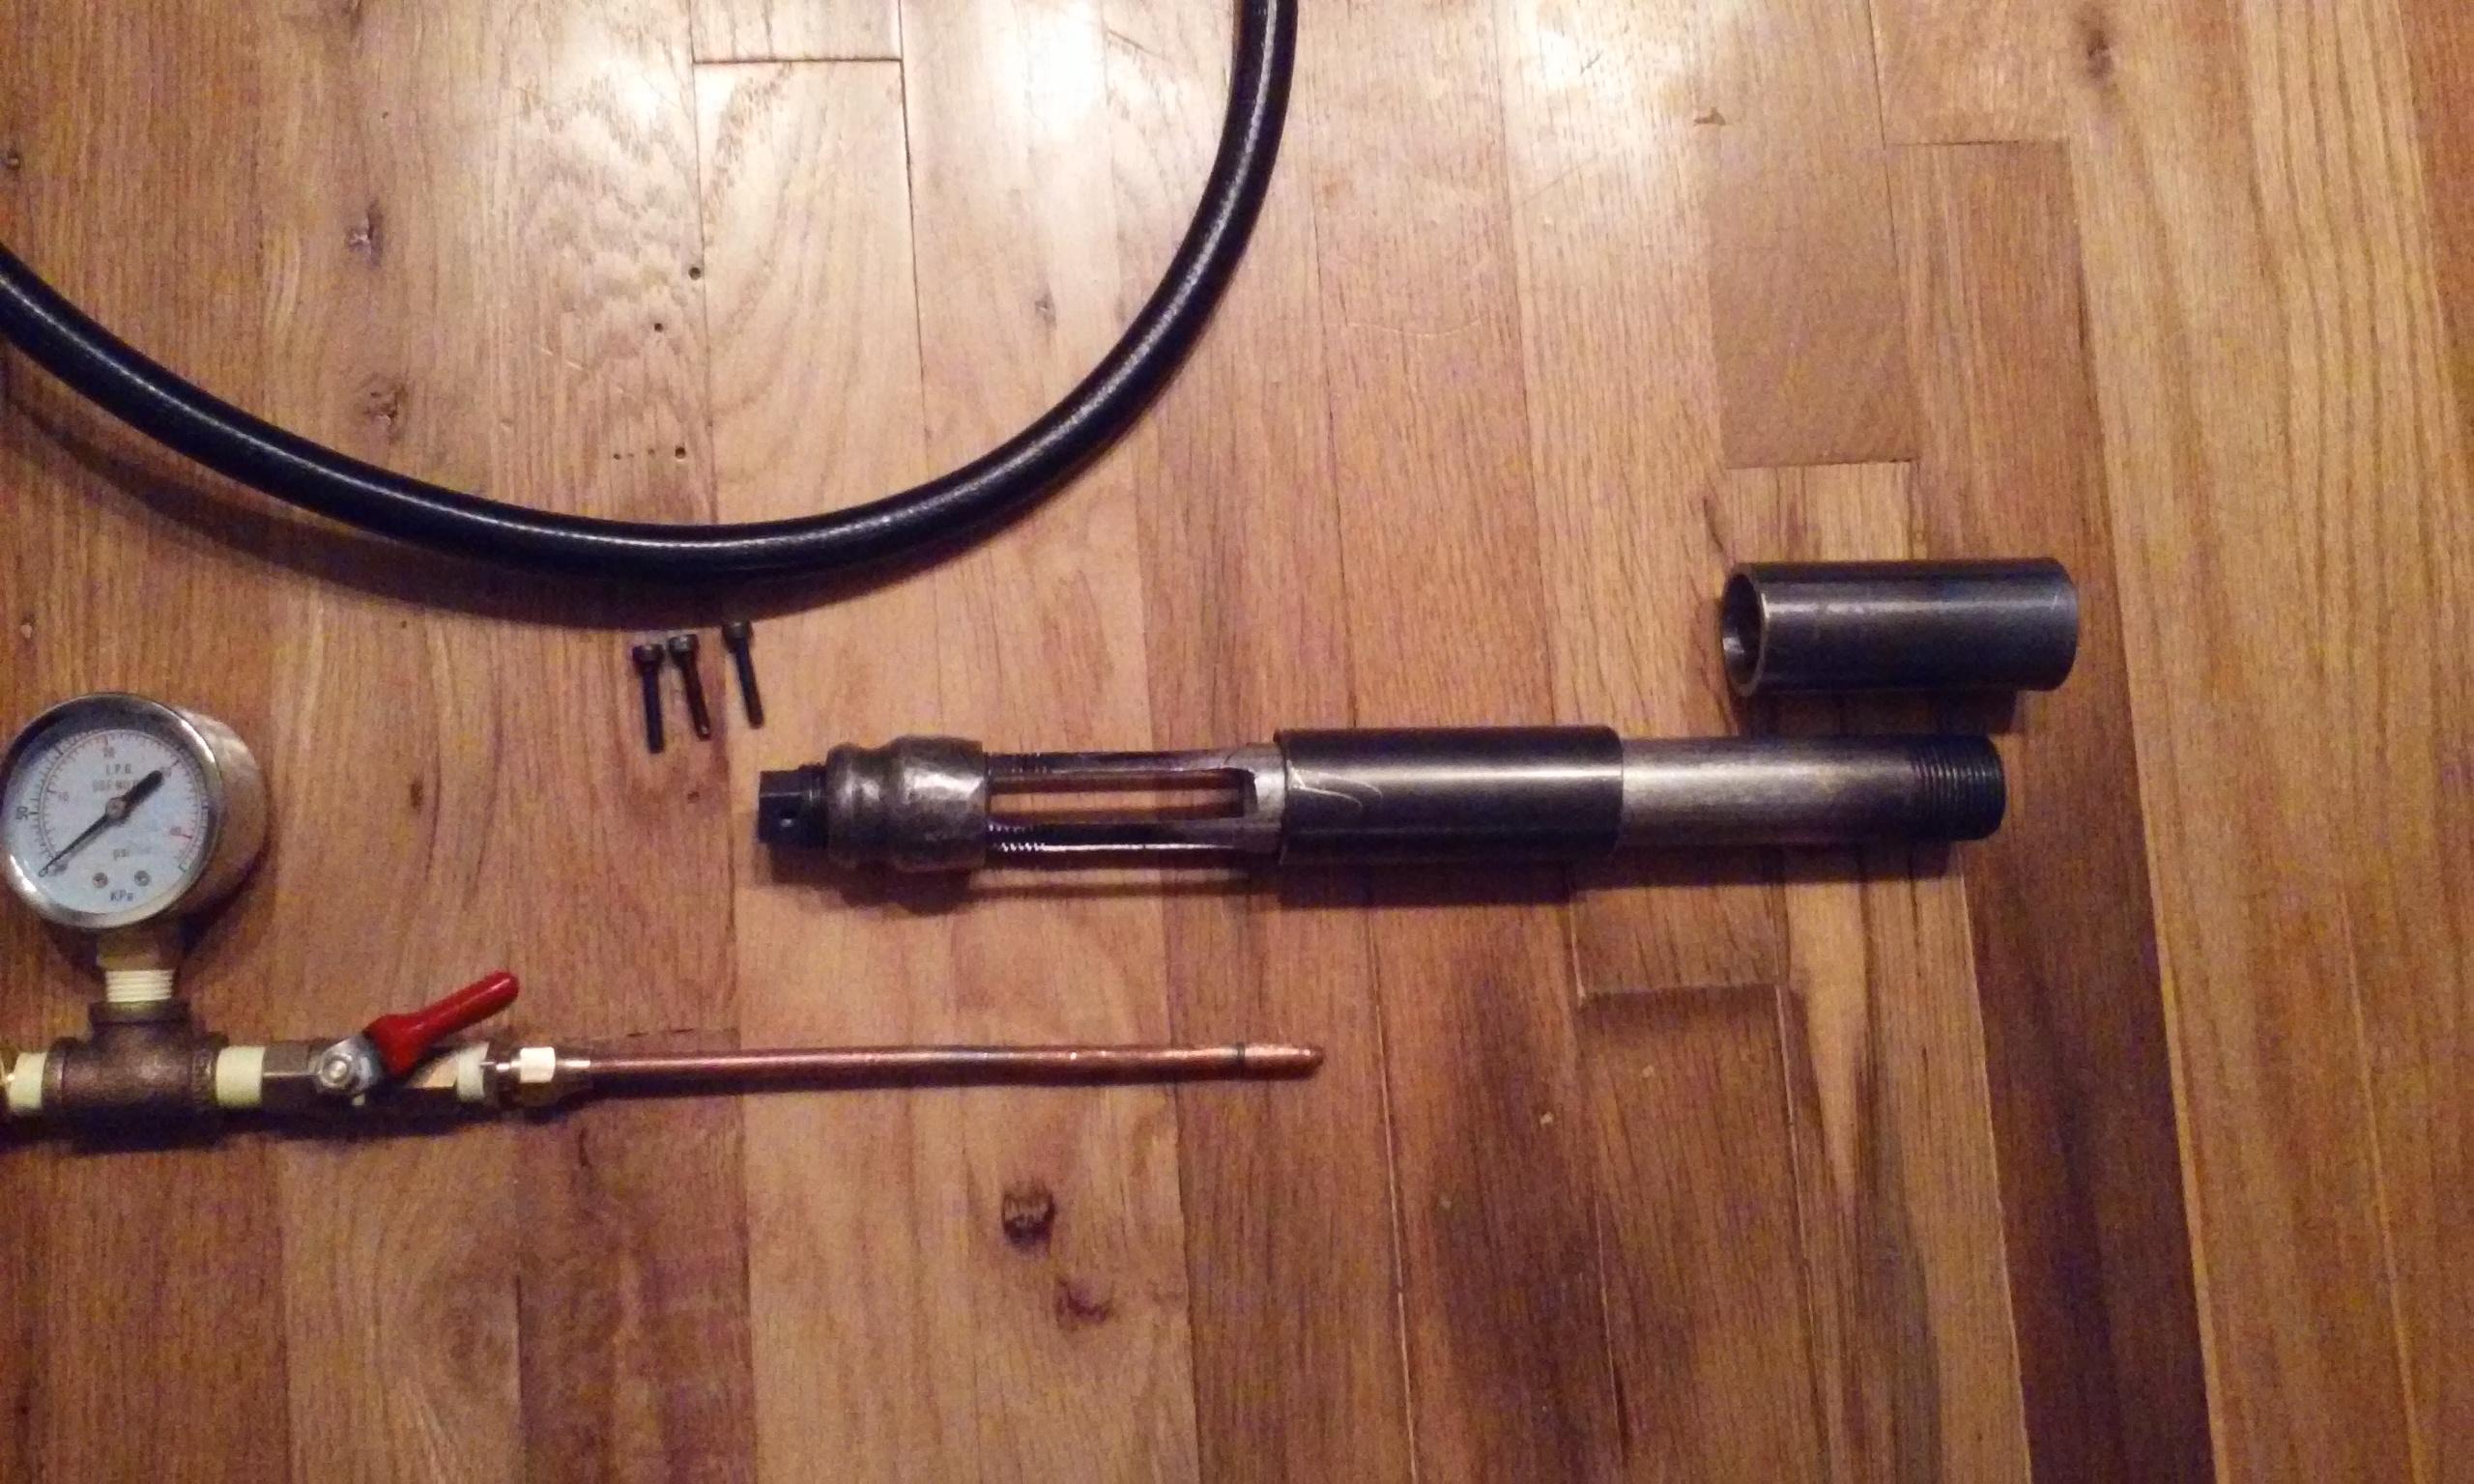
Funny you should say that. I've been daydreaming of a 3/8 burner for brazing and such. Maybe a modified side arm. The mikey ain't an easy task, and those needle filings are good at keeping things restless. I just ordered some of those diamond deburrers. Mike, your replies and information are priceless. Especially after the humorous yet constructive criticism on other threads. It's quite entertaining. Some take it way too personal. I think I have learned to read on and decipher before posting. Oh and trust the experience of elder curmudgeons. Thanks again.
-
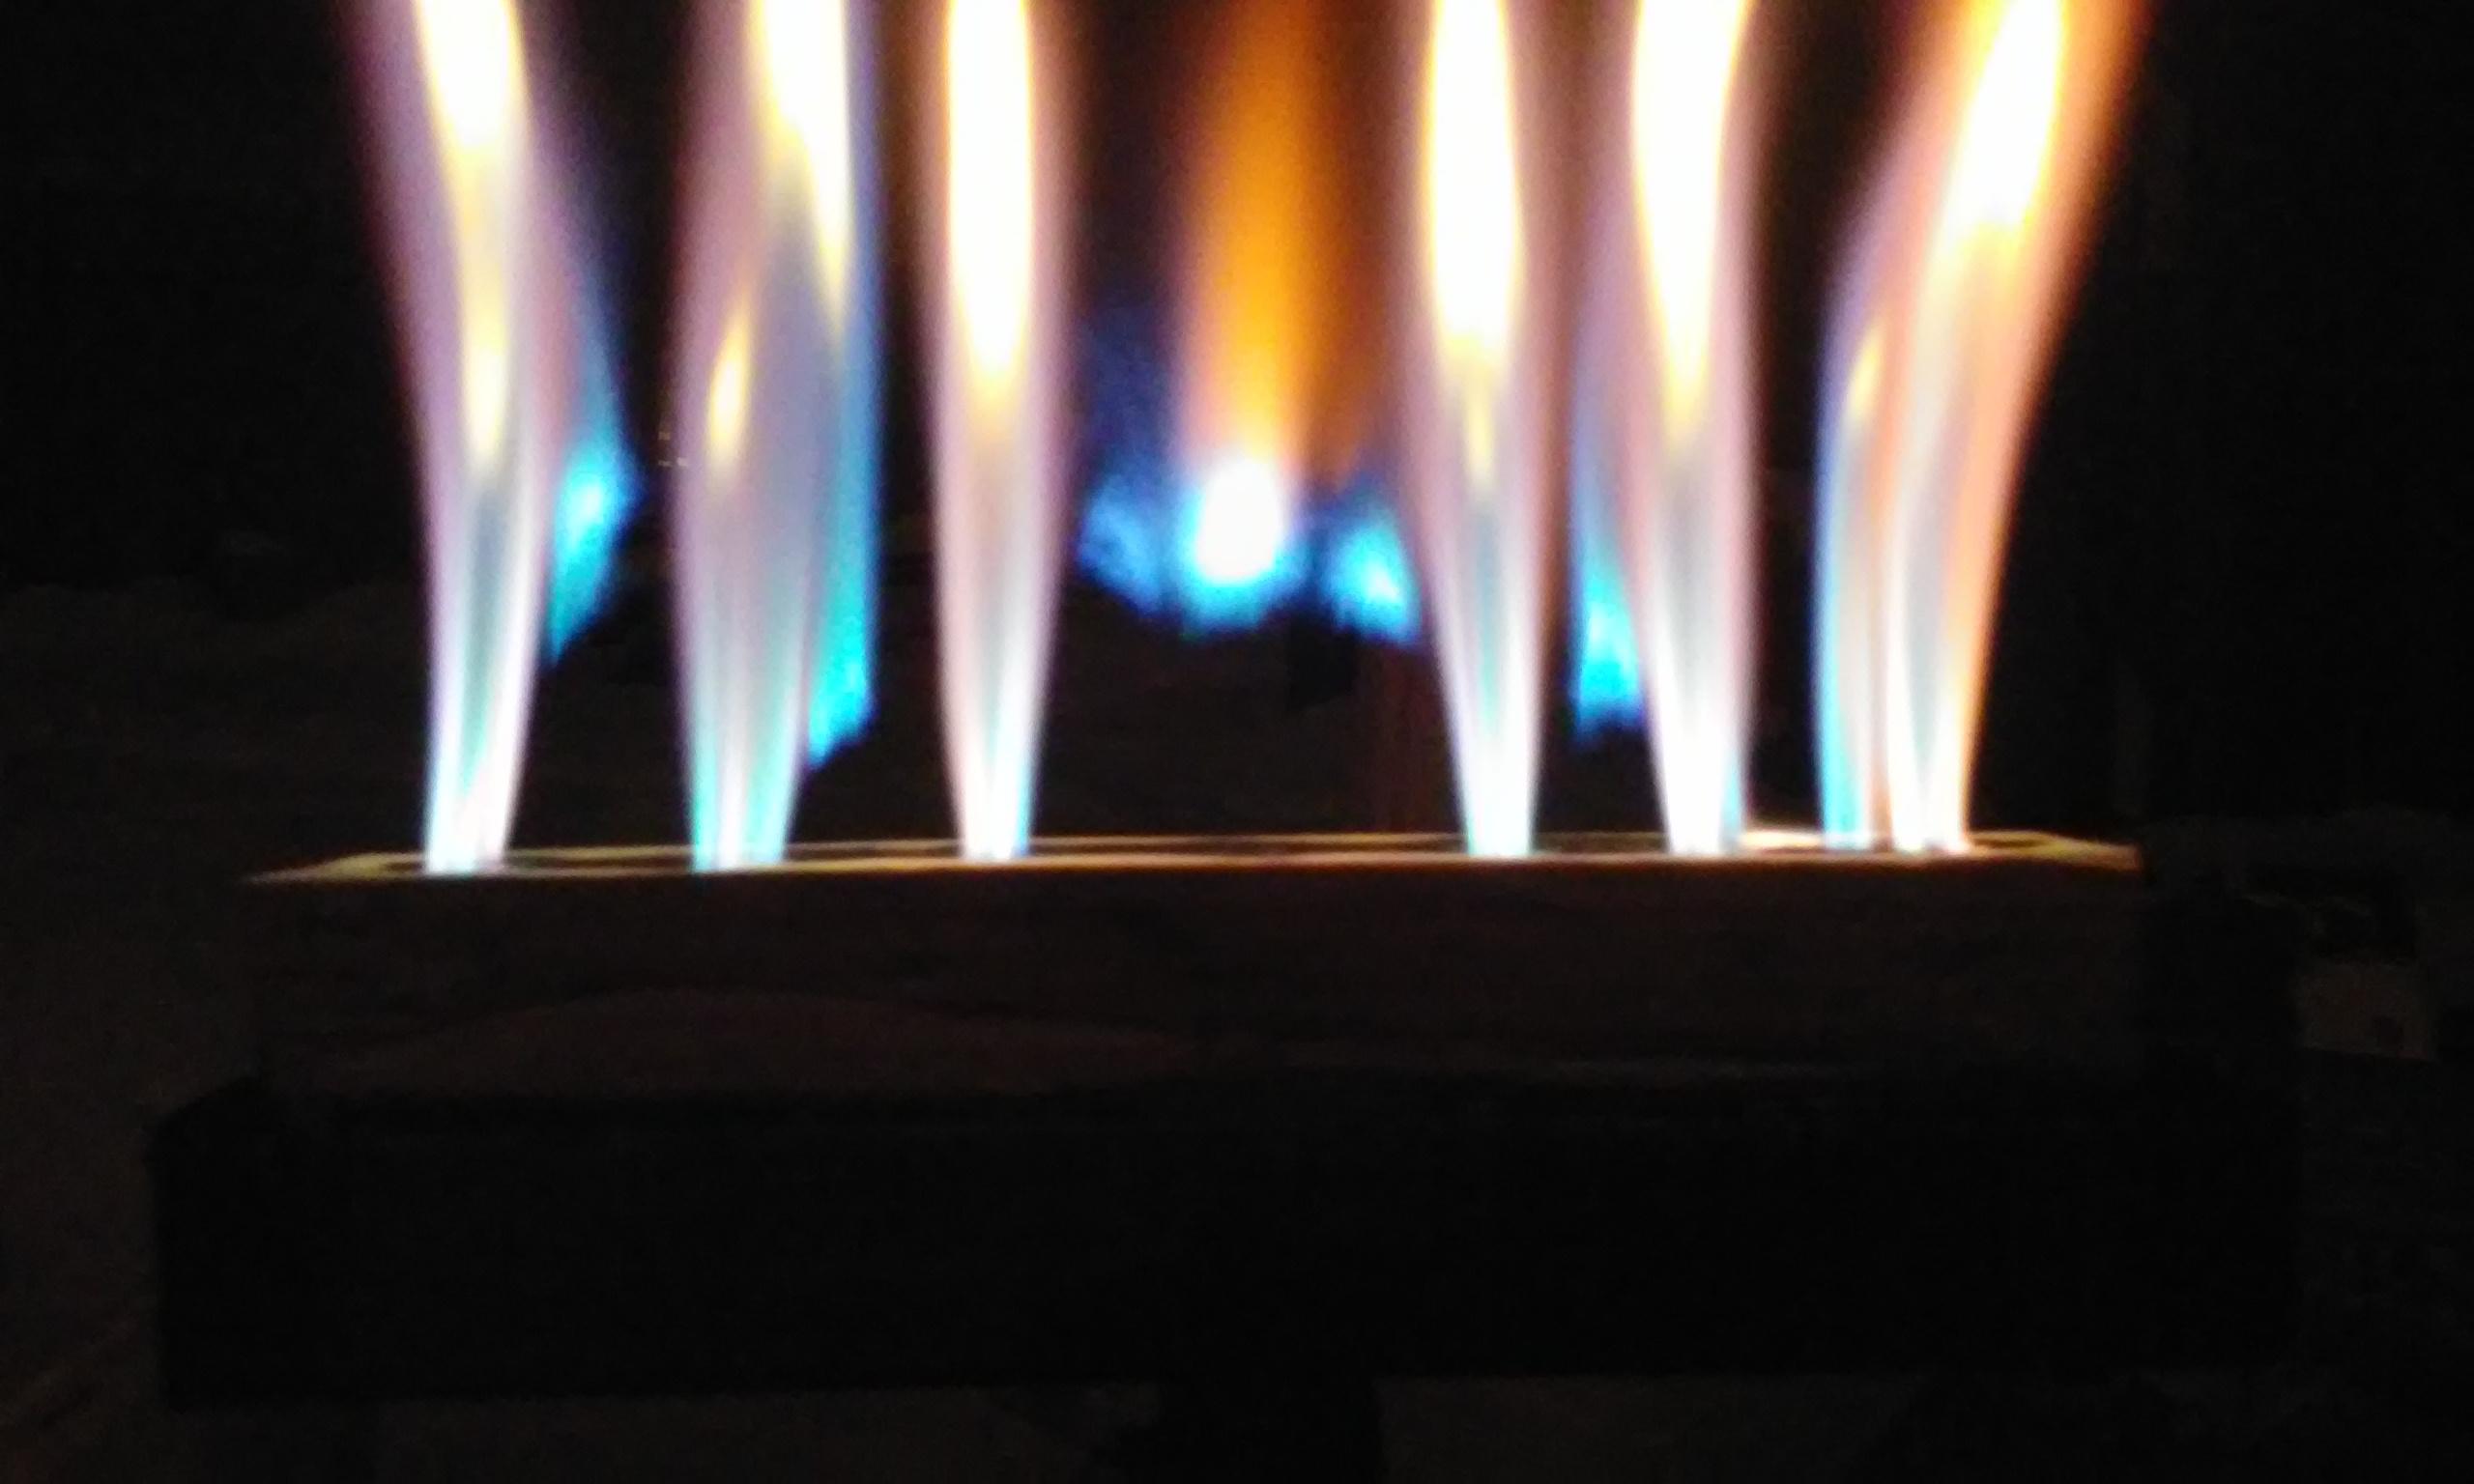
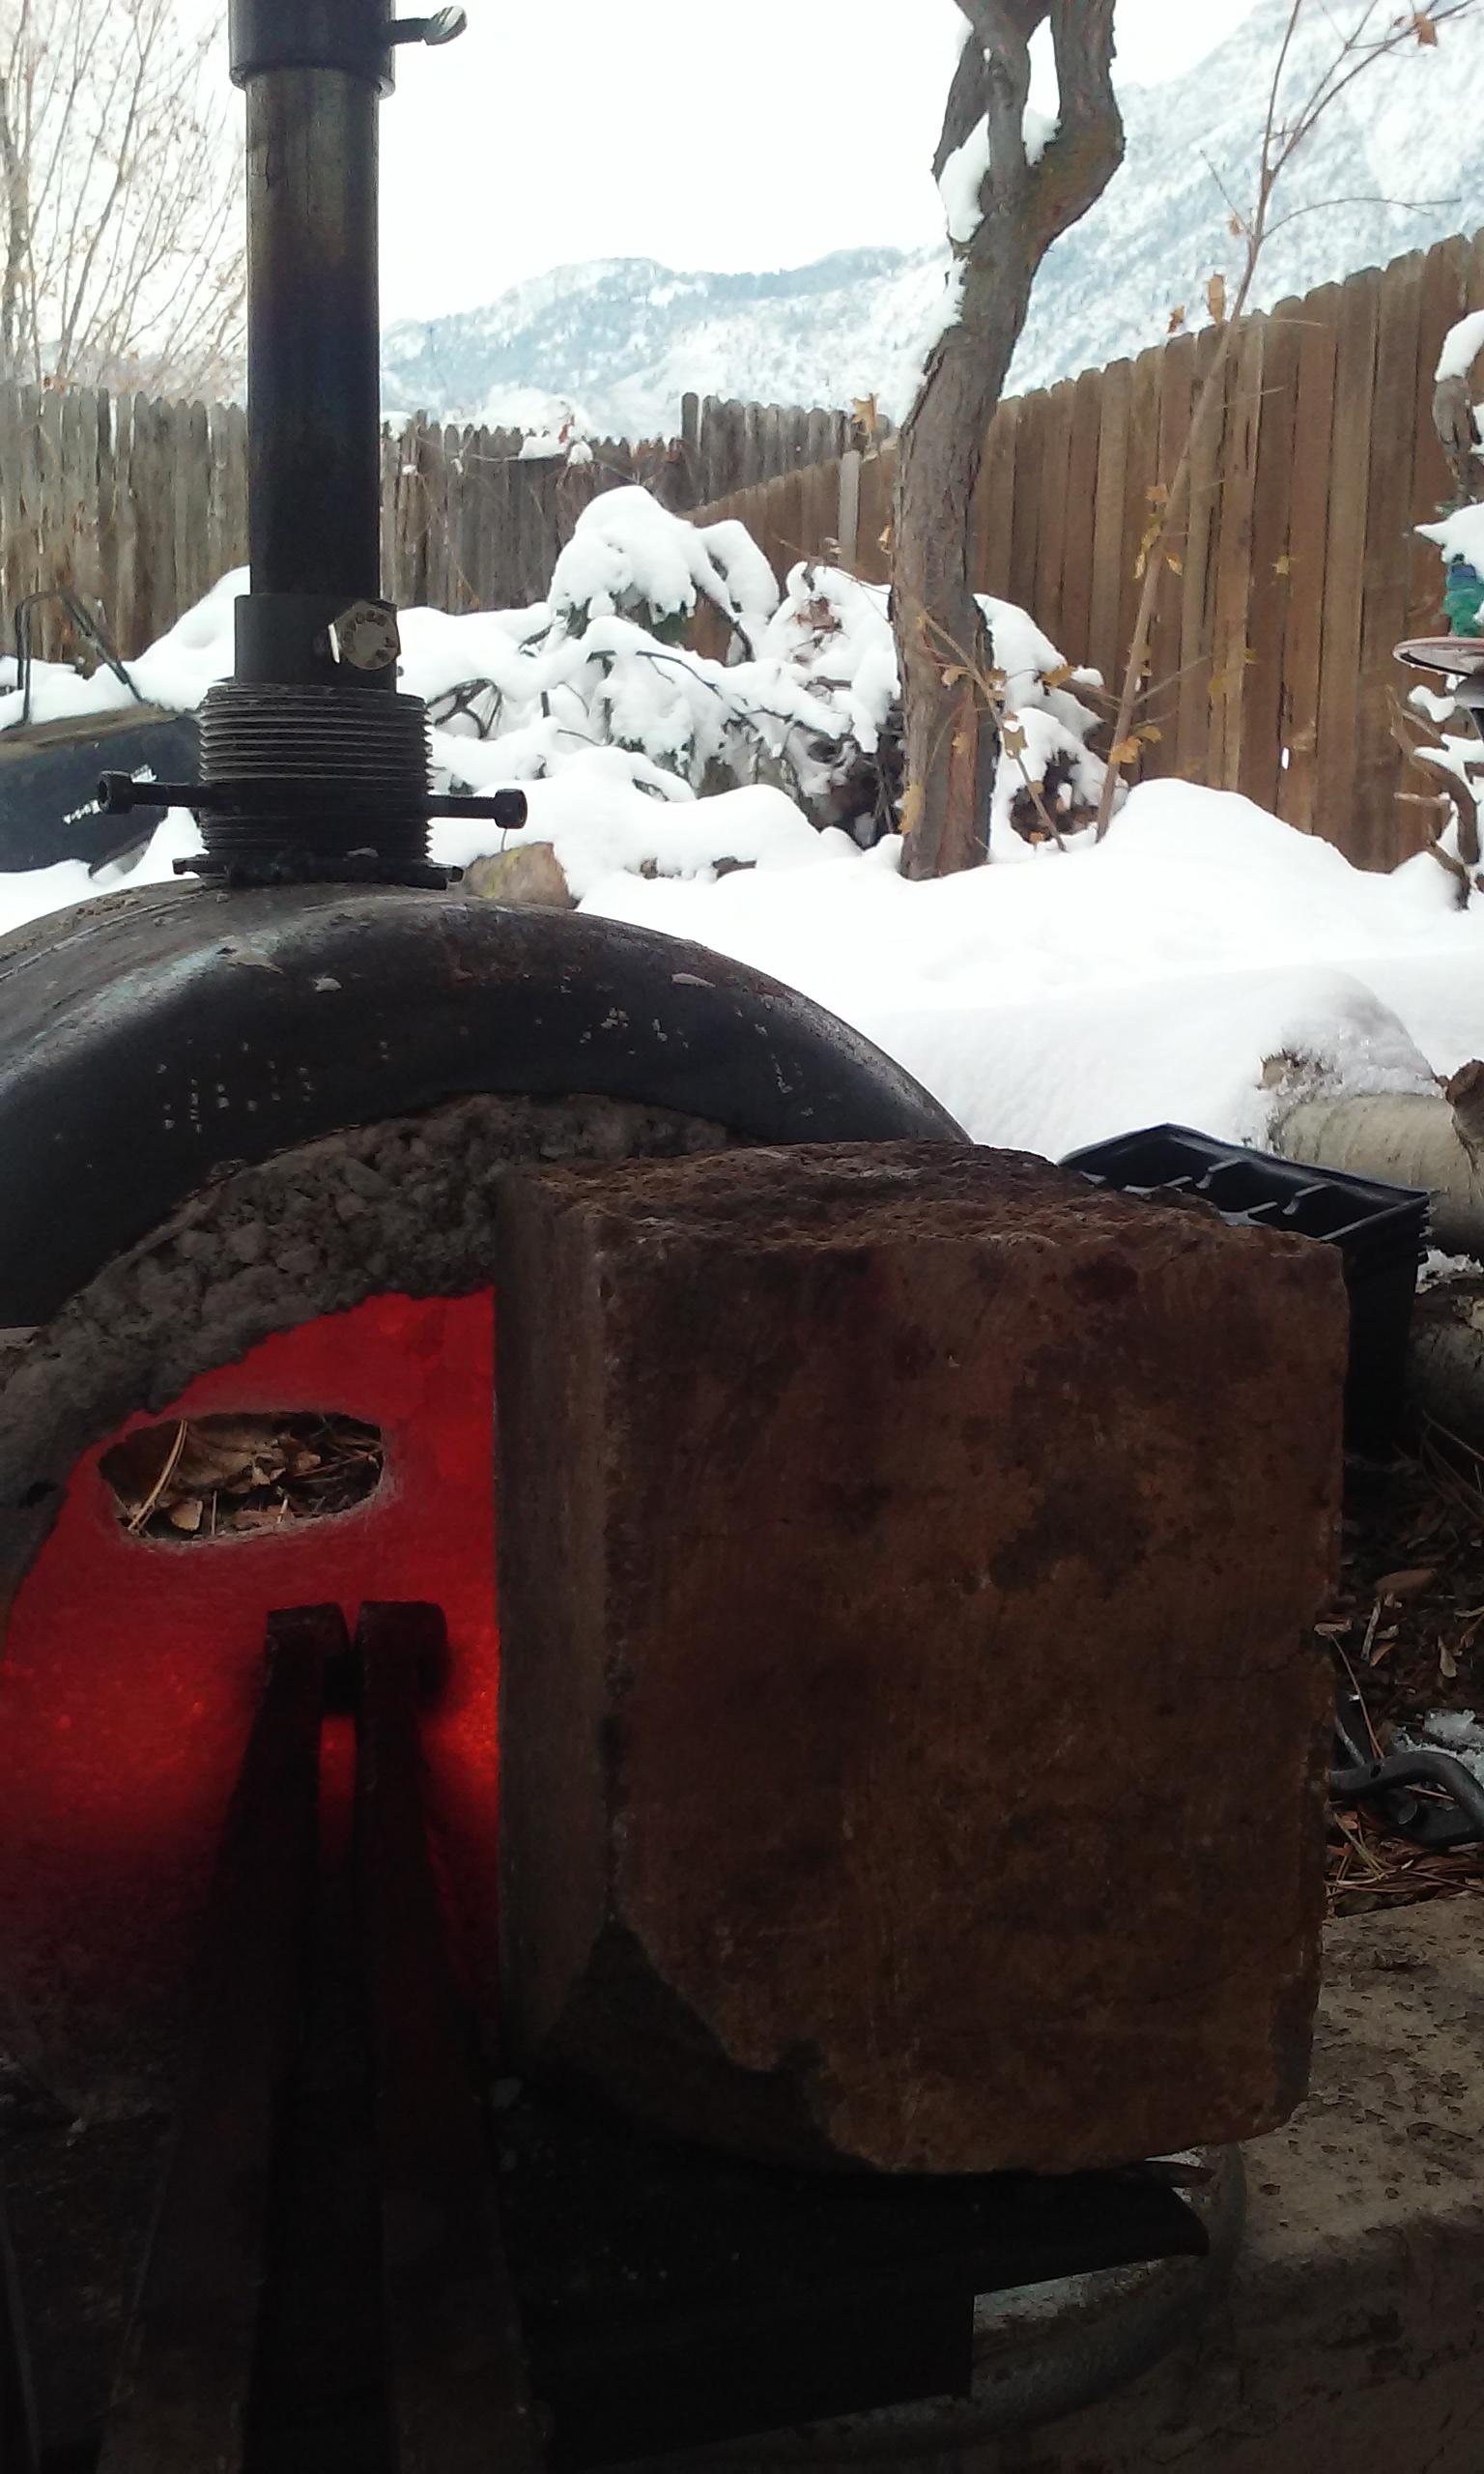
So, as many before me I'm sure, I am diverting from my "what ifs" to proven methods. Going with inswool and kasto. While I wait for more kasto, I've completed the burner. Finally! Let me just say the satisfaction of hearing that roar for the first time is exhilarating! So tinkering and tuning Im looking for the neutral burn. Did I find it? Should I move this conversation? I still plan on experimenting with the :t-rex style burner.

-
Was not aware of exploding mortar. Been doing all my research on burners and not paying attention to other details. I guess there is no getting around expensive shipping for kastolite 30. I don't want to handle the ceramic blanket if I don't have to, But will if needed. Can I cast the whole thing in kastolite 30? Will that be ok?
-
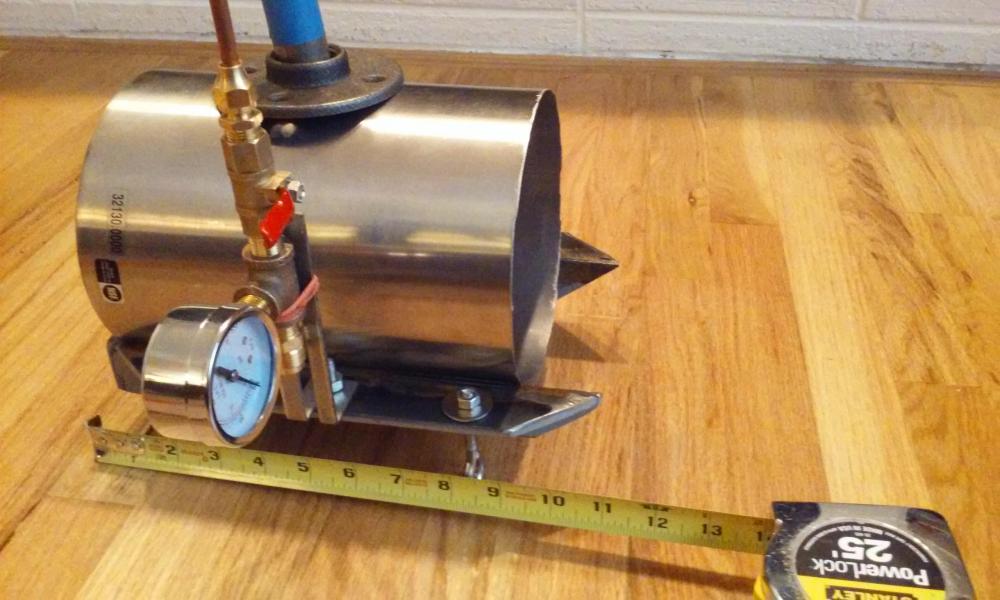
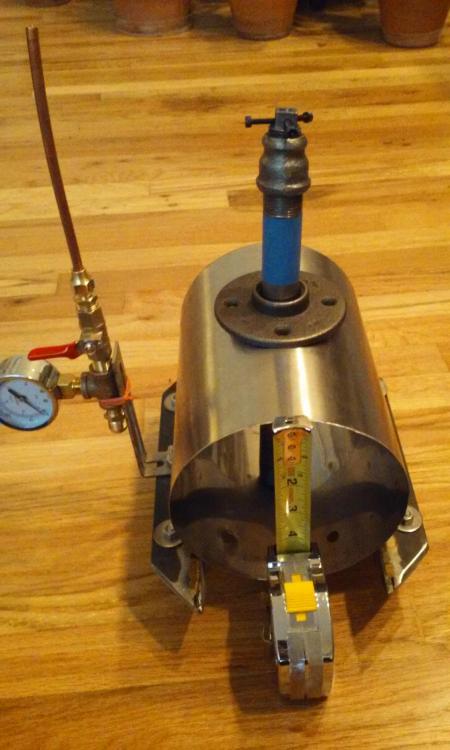
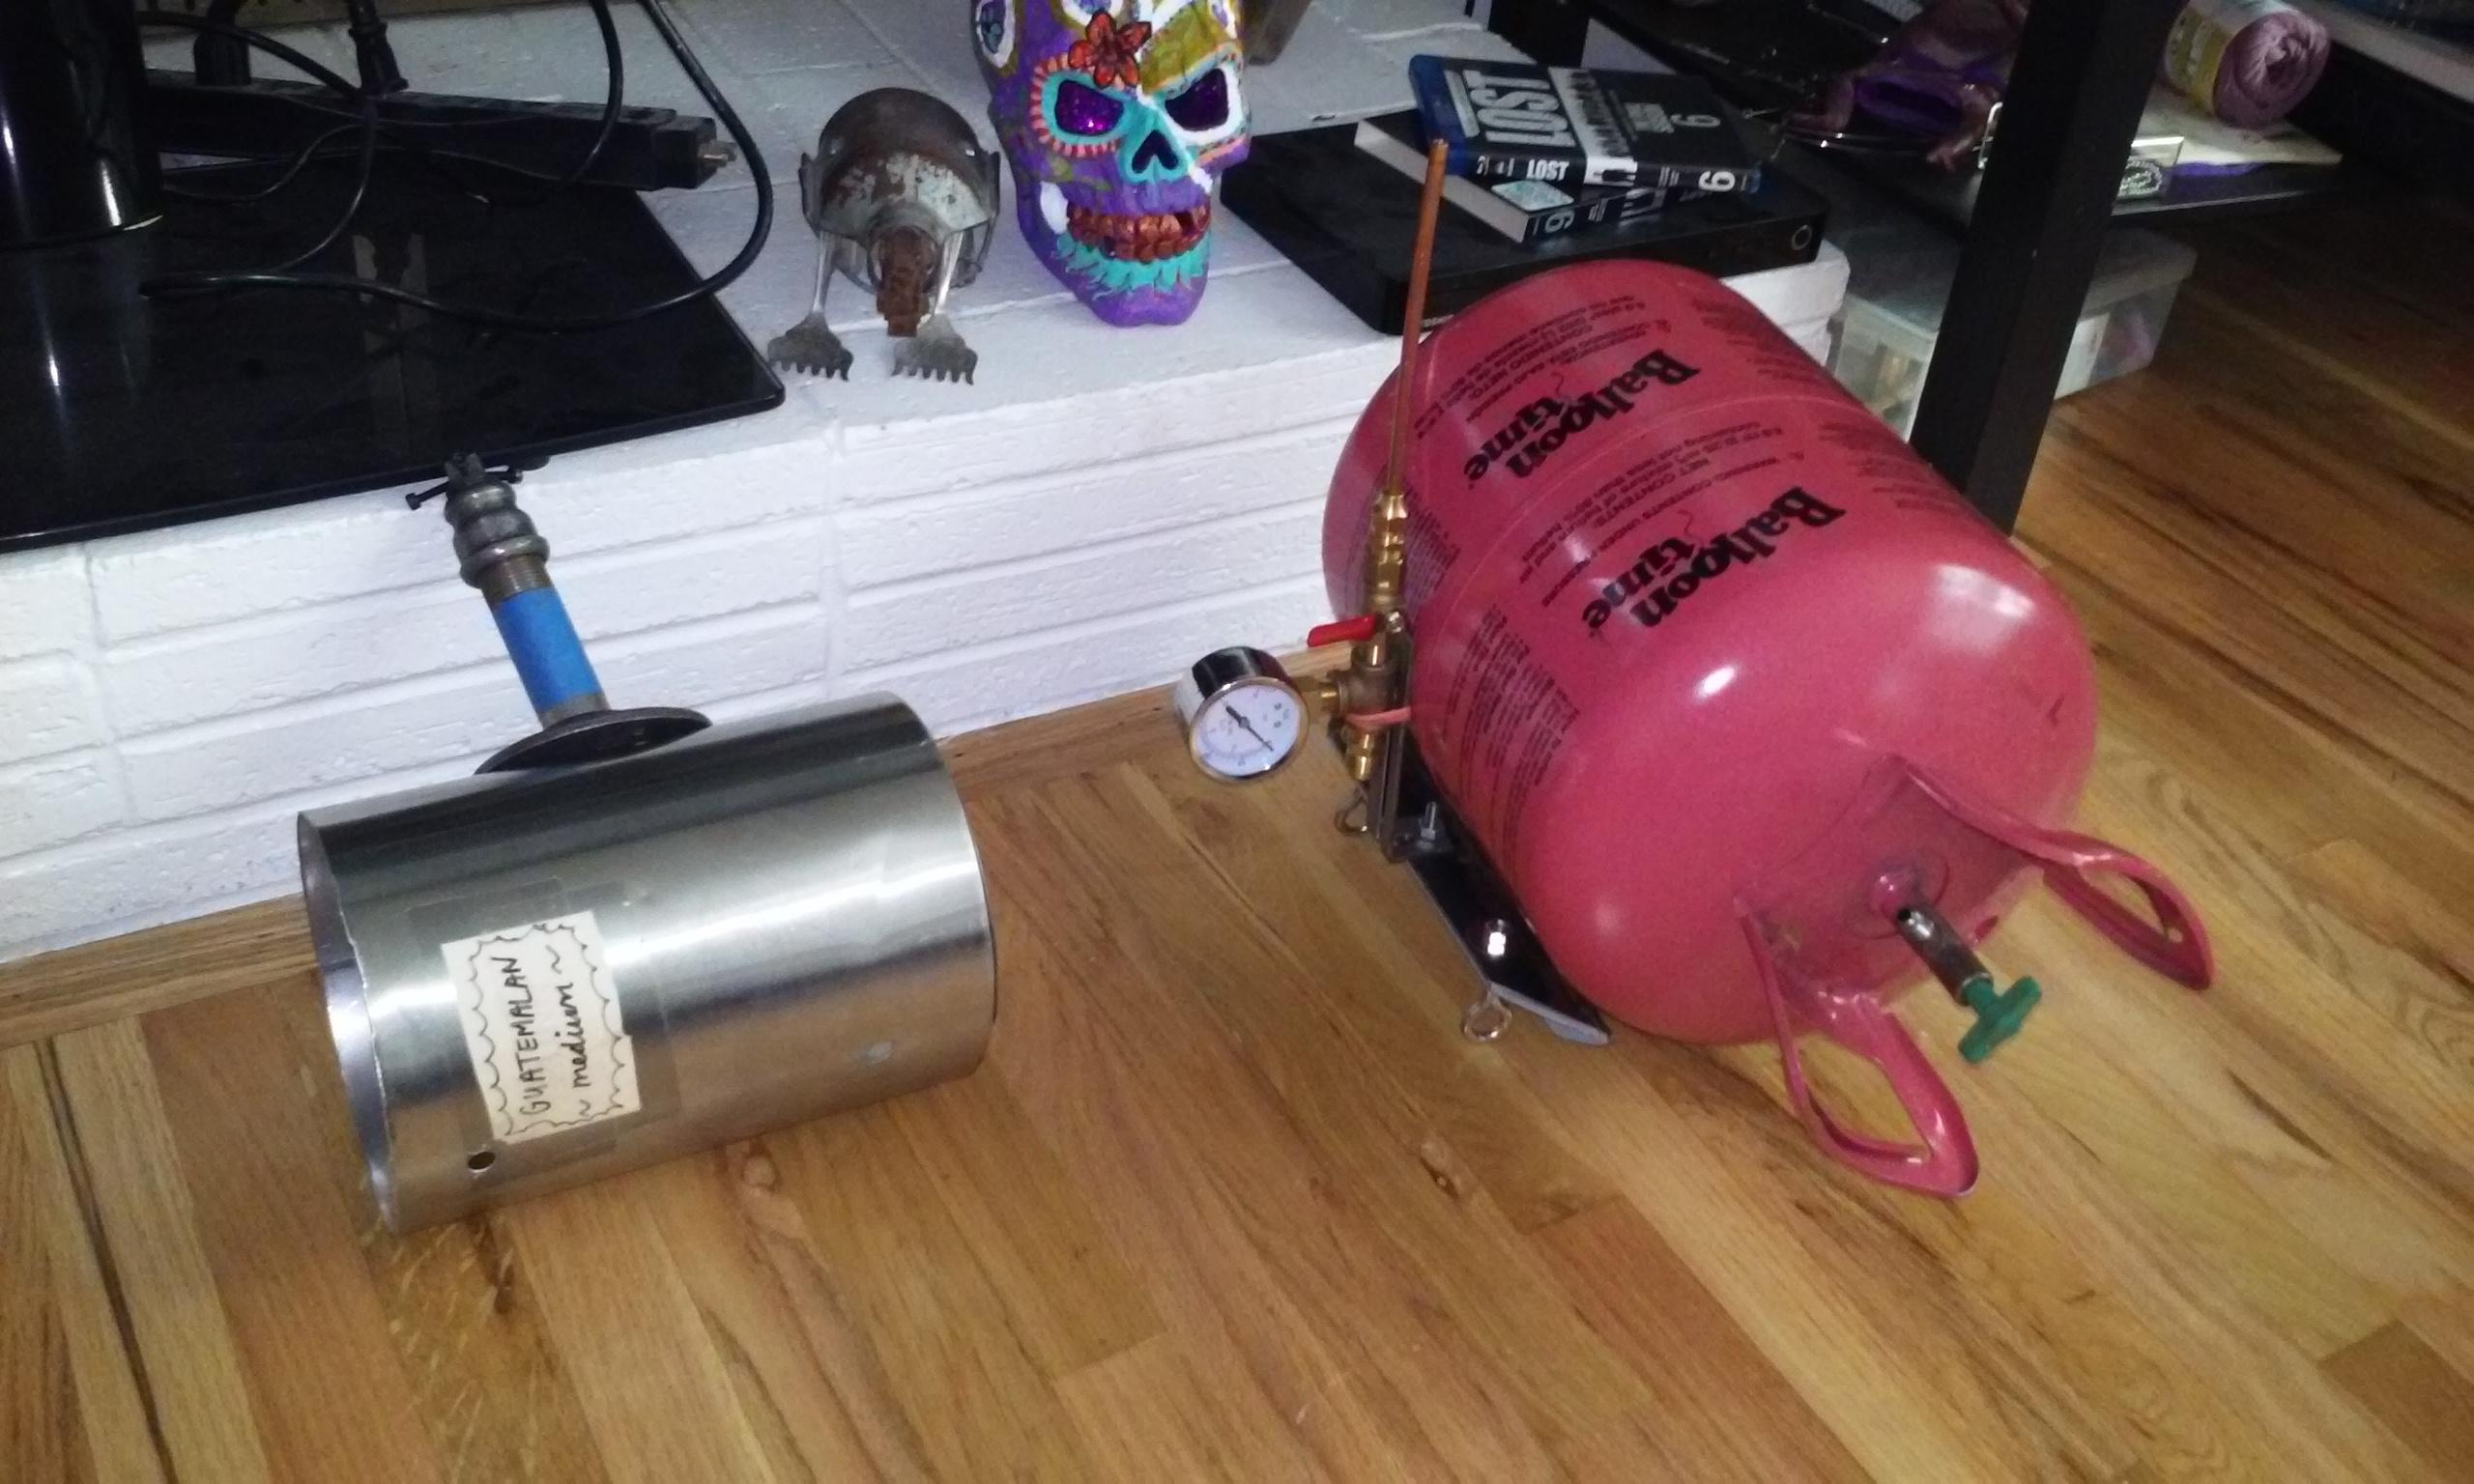
Thanks Mikey, I will heed your warning and make a bigger body. Maybe this helium tank? With minor tweaks in the side arm the dimensions will still work with the frame. As far as mixing perlite with mortar for "fill", how fluffy should it be? Just enough mortar to hold the perlite? I understand I don't want too much of a heat sink yet want some retention. Some sweet spot must be met.

-
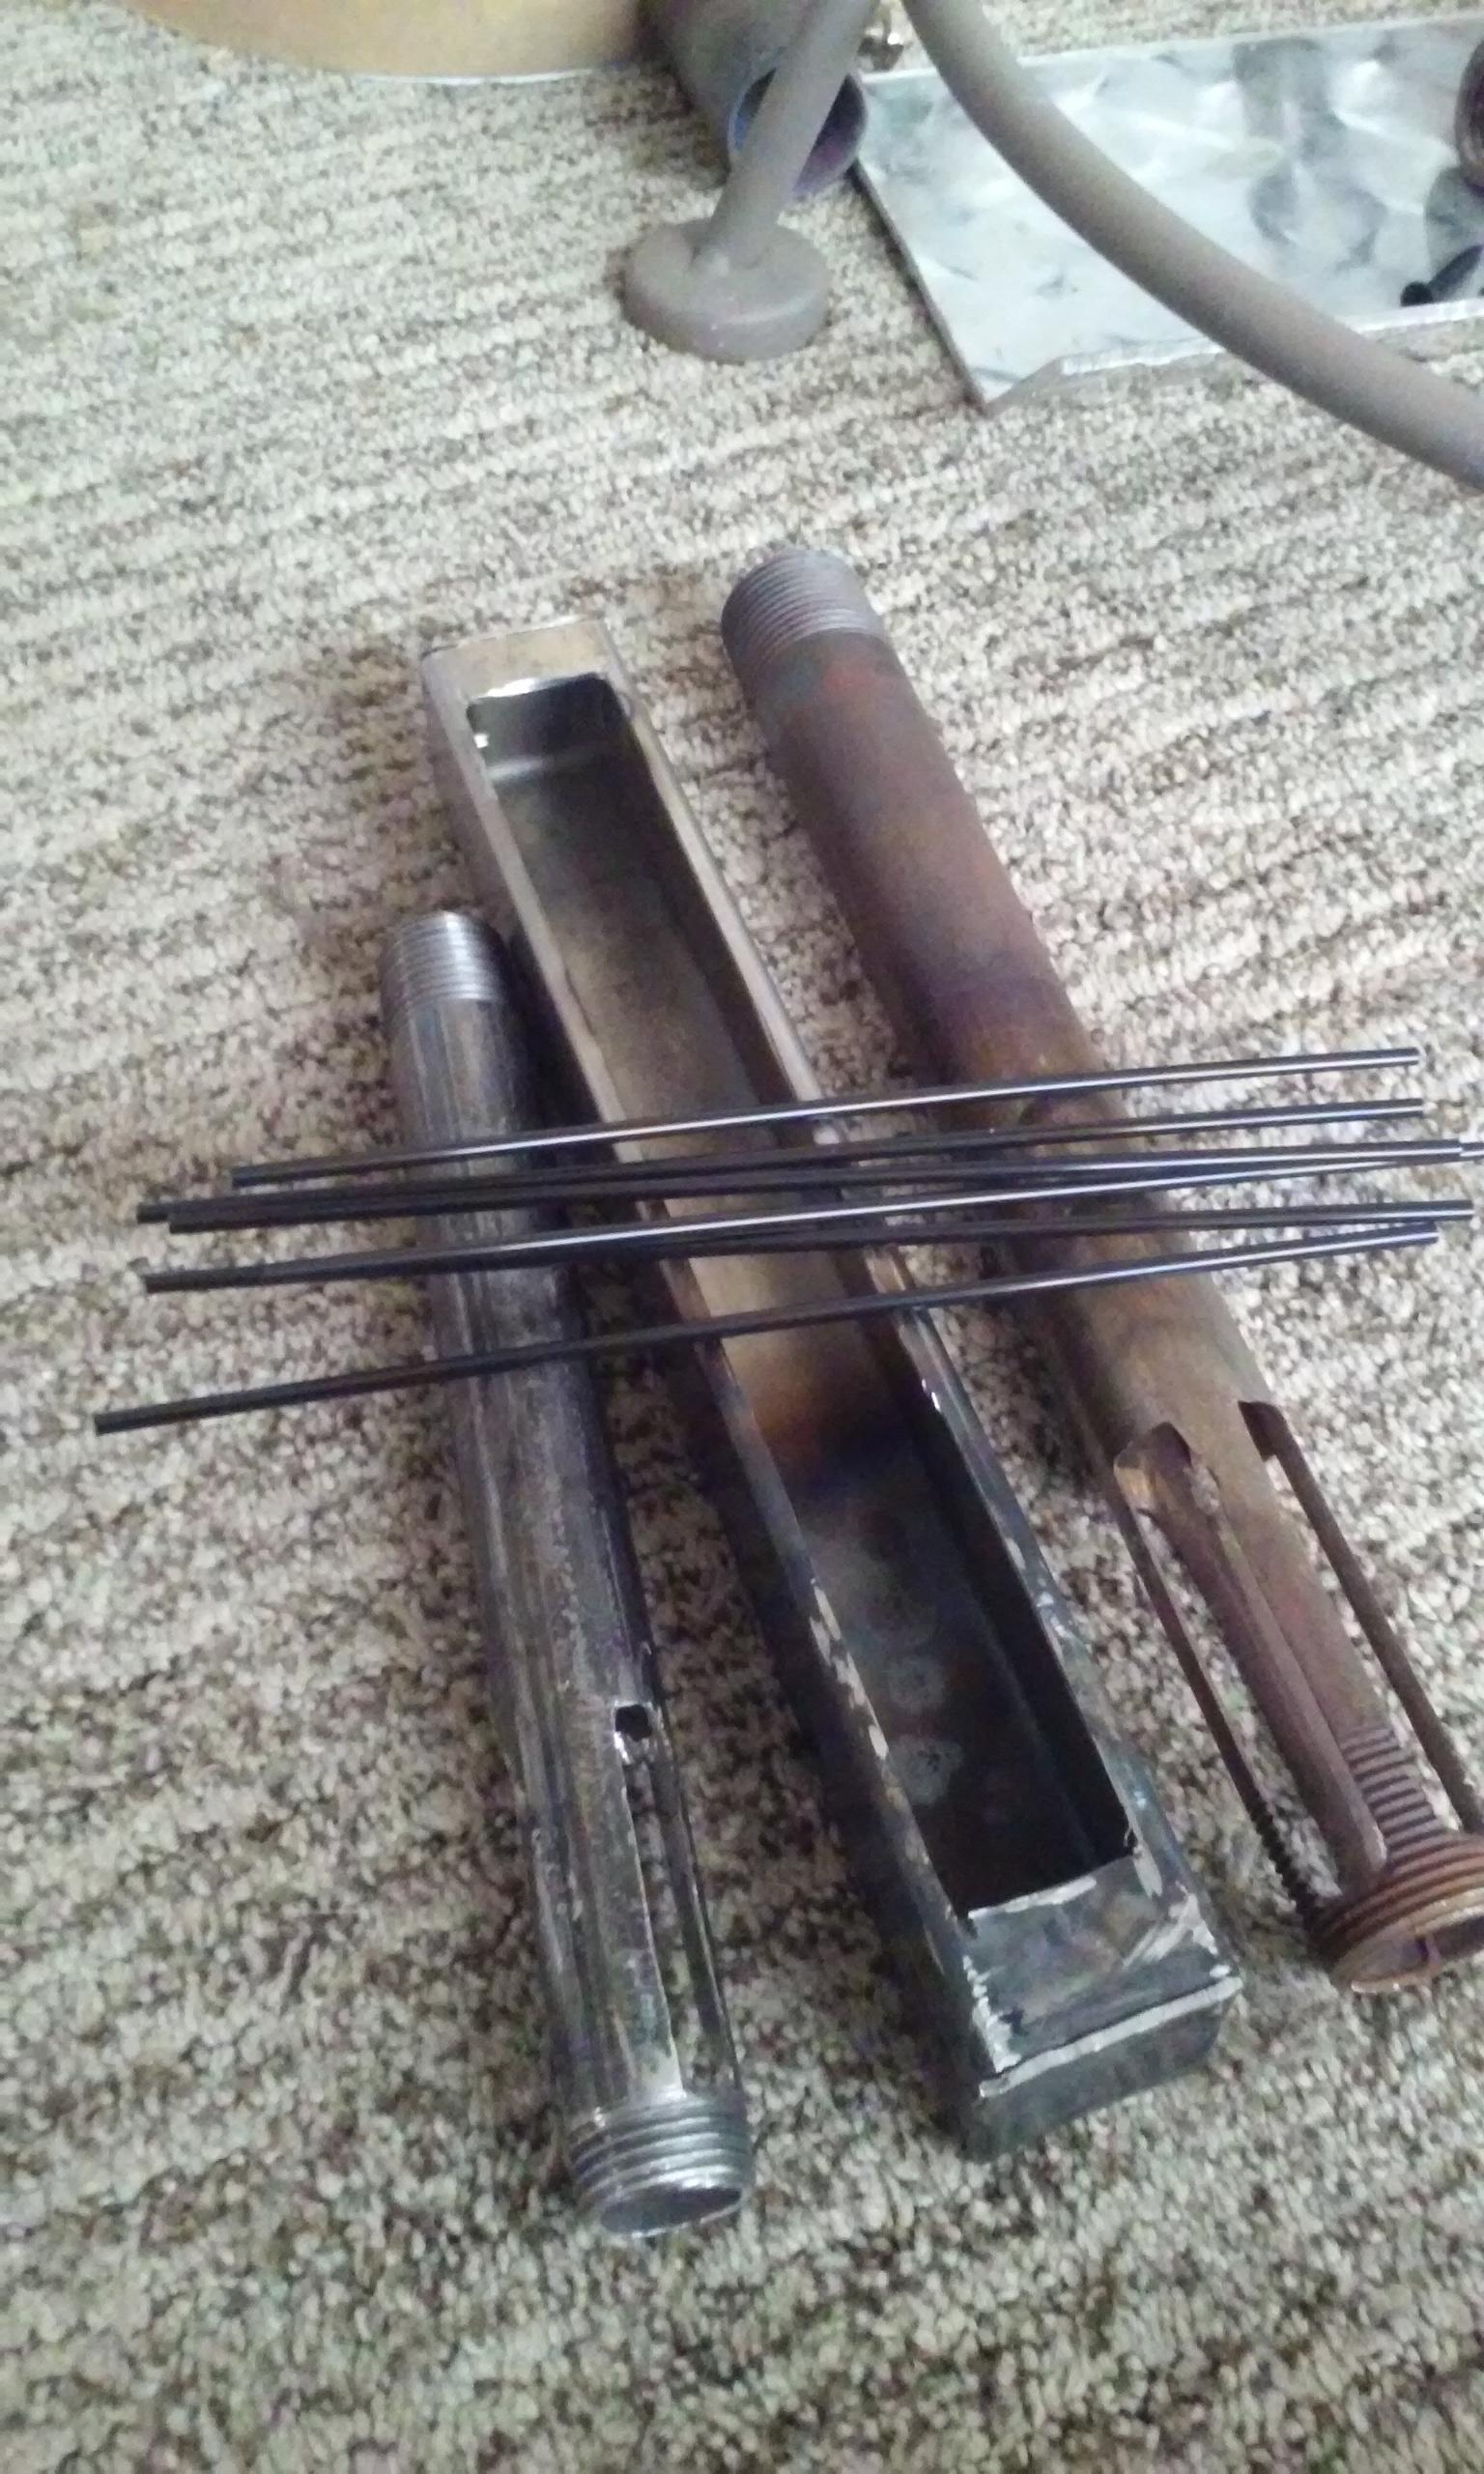
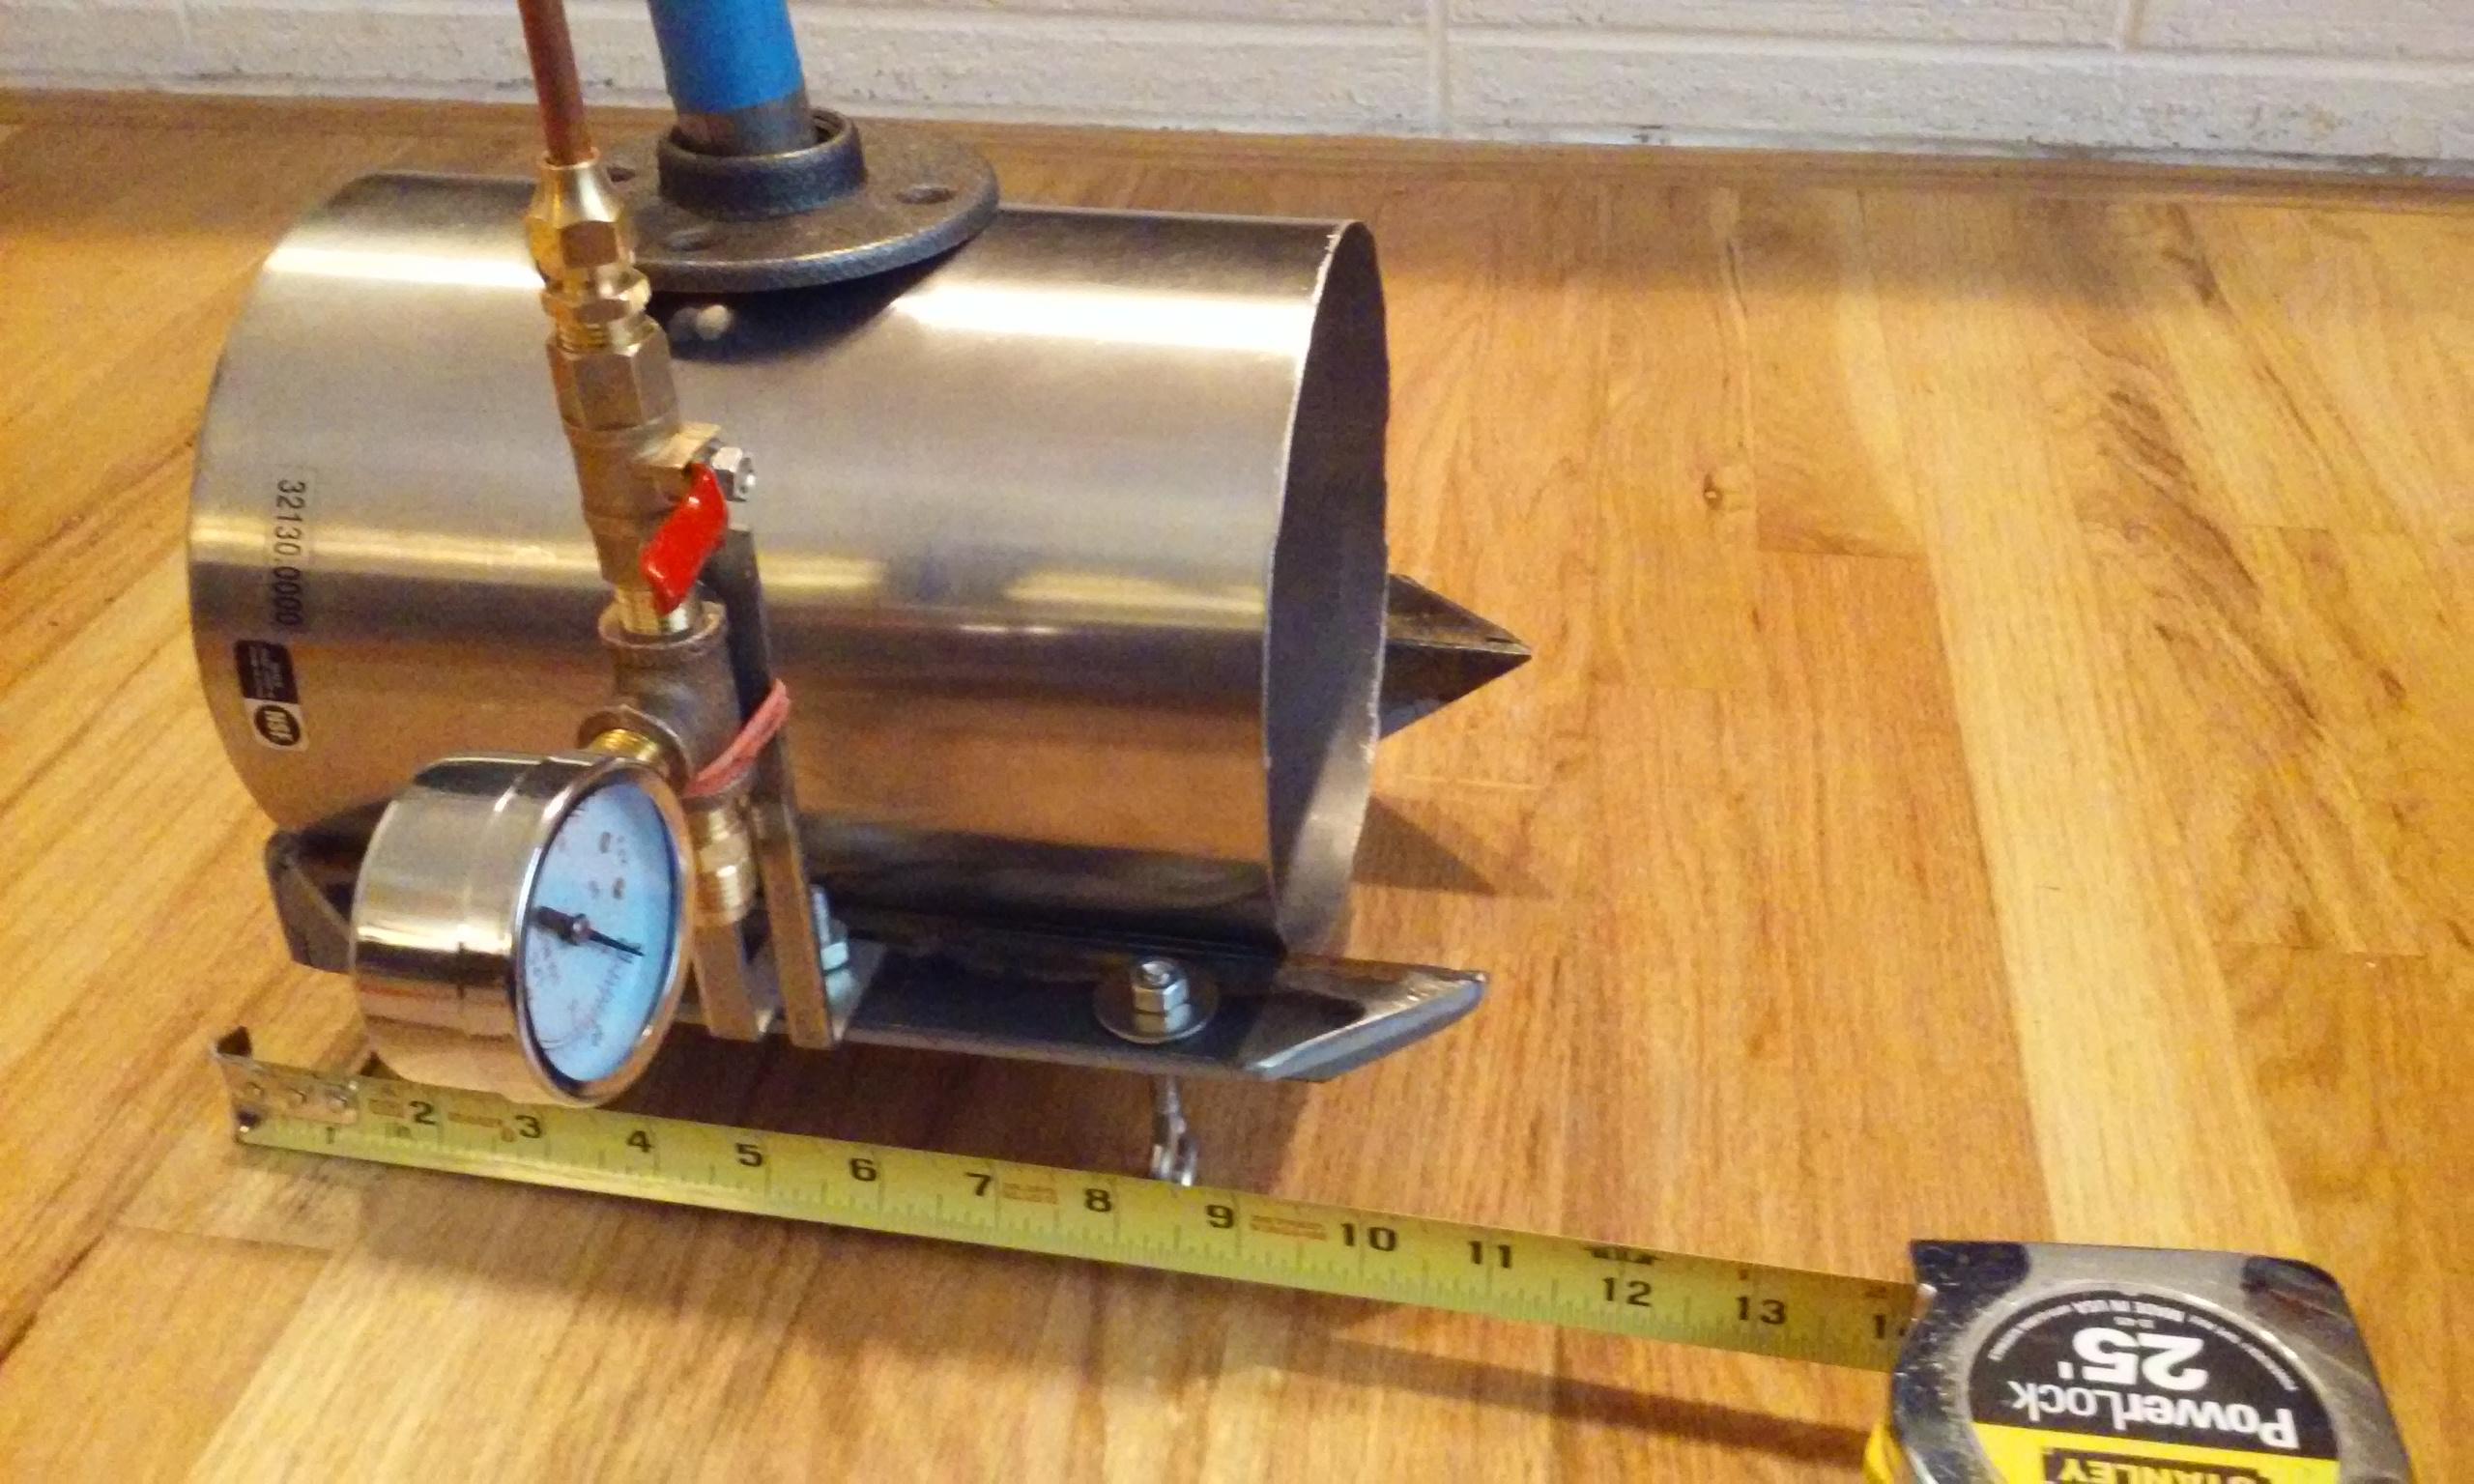
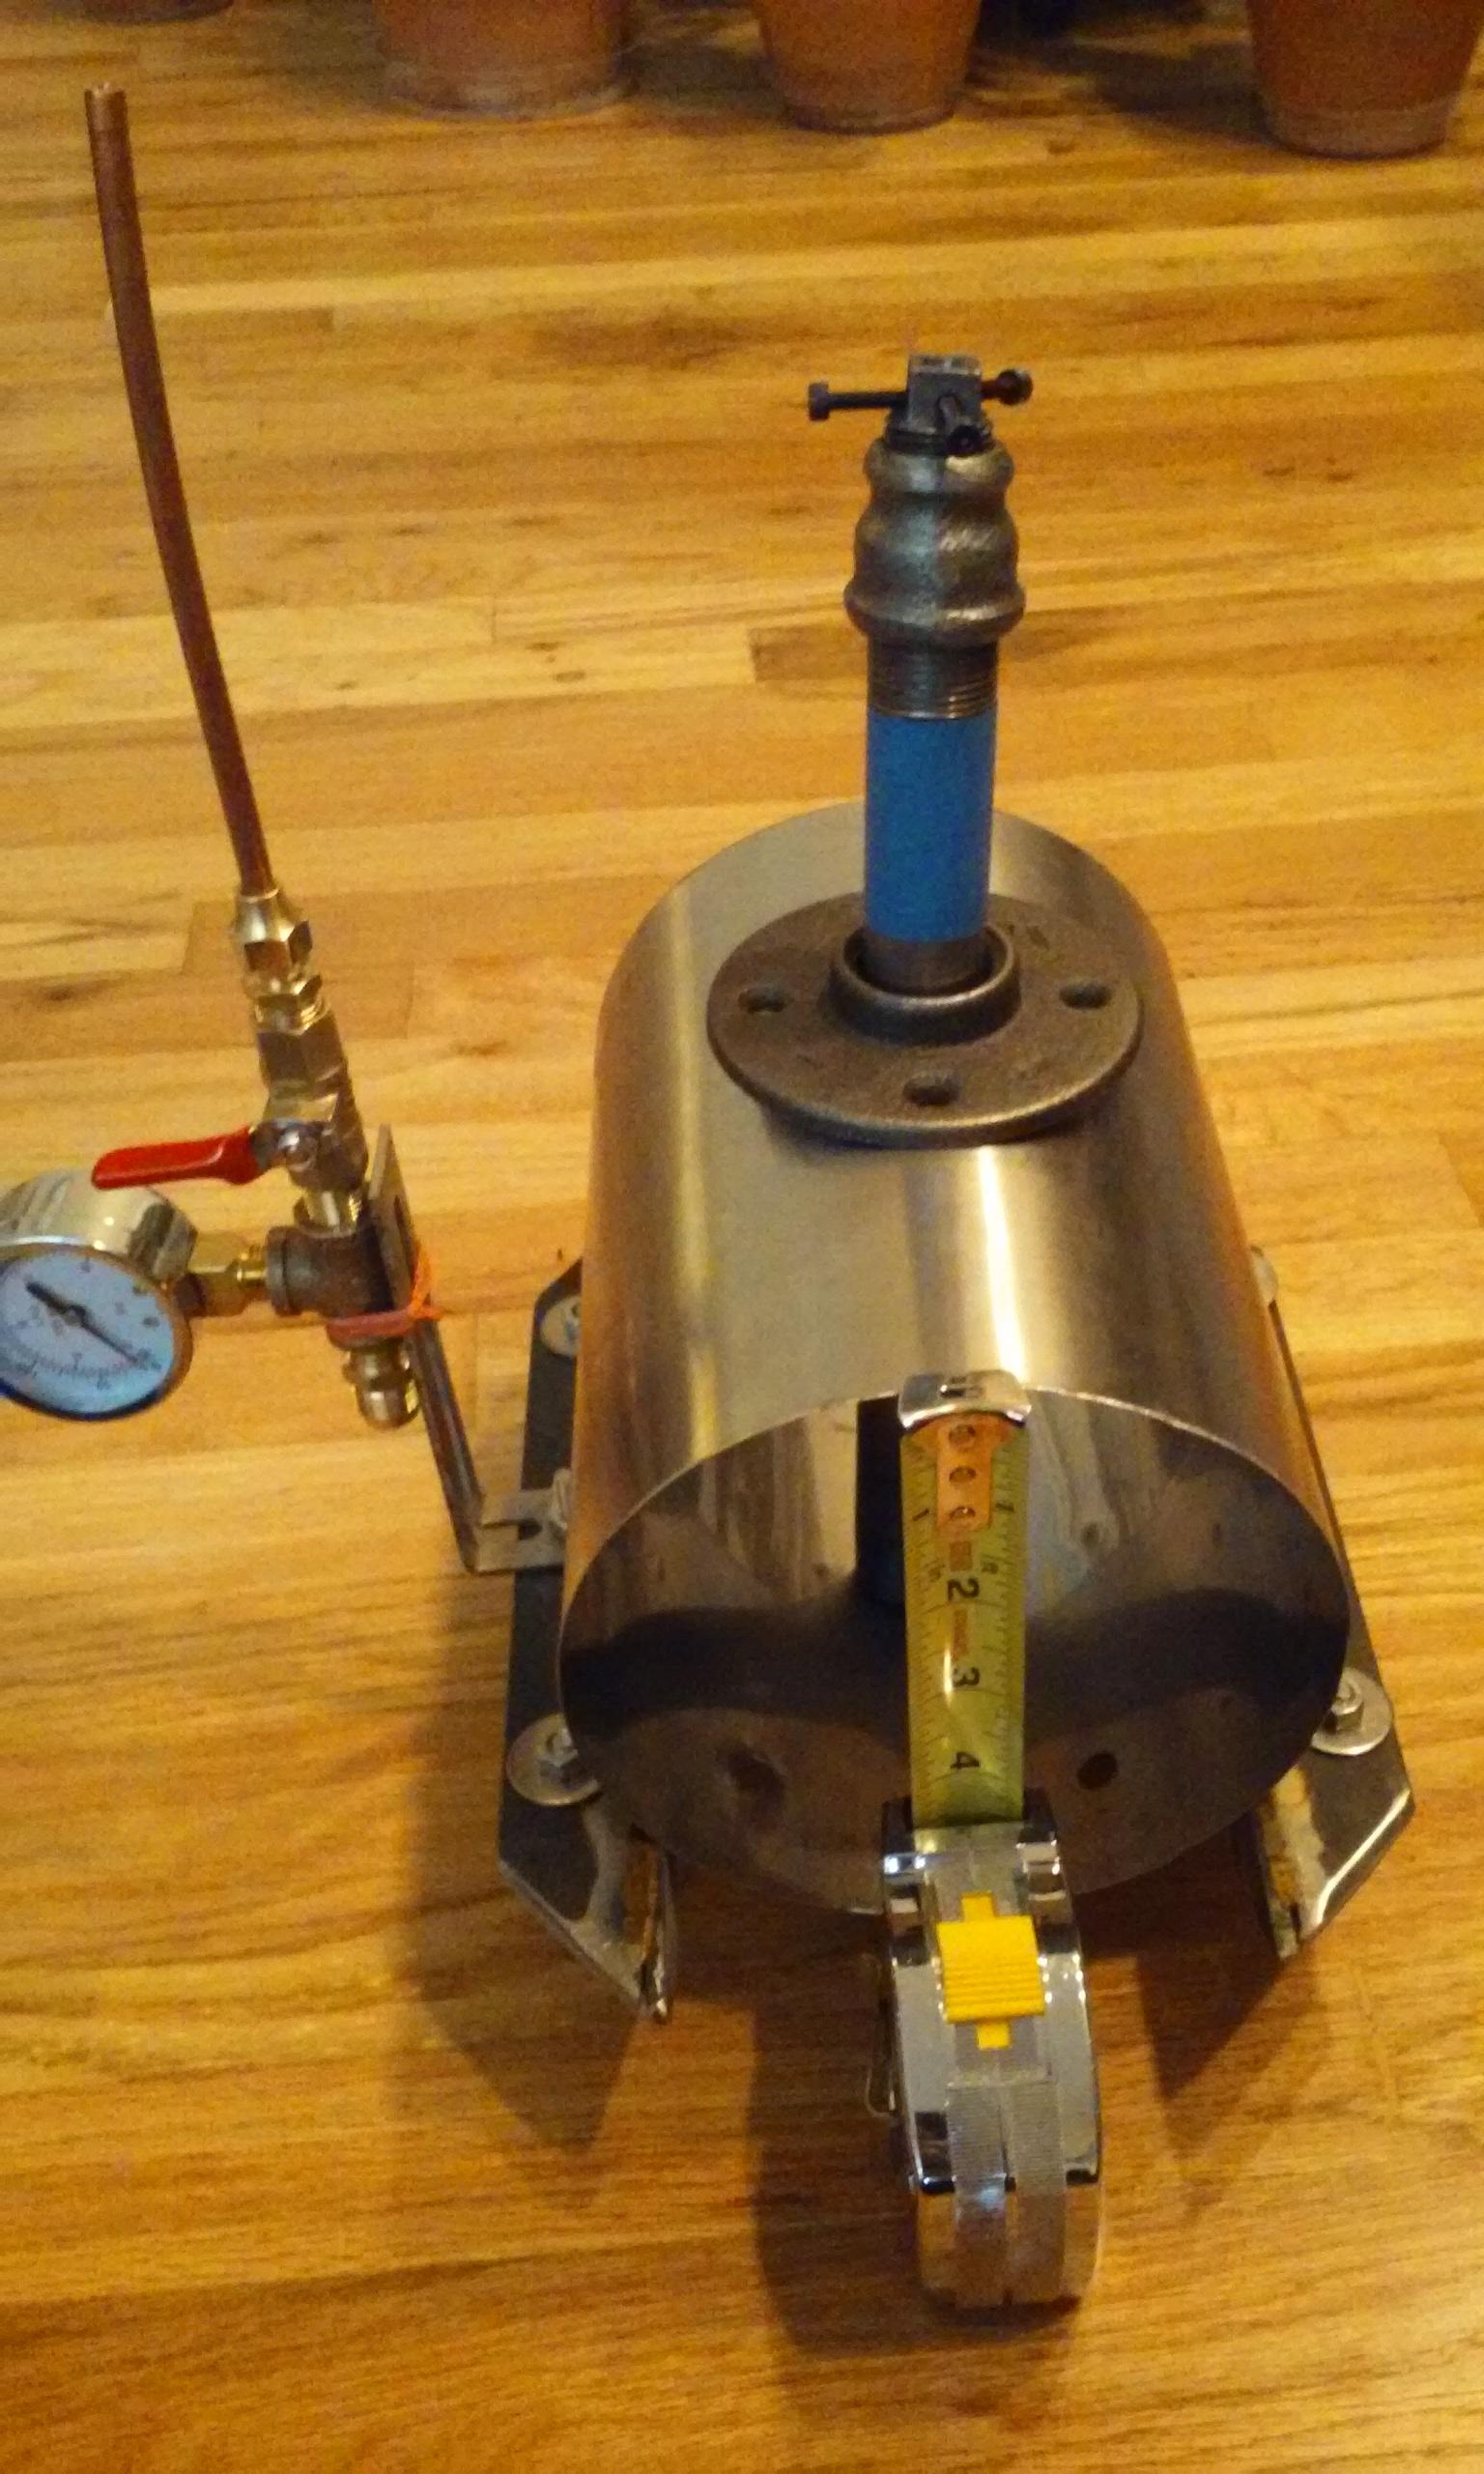
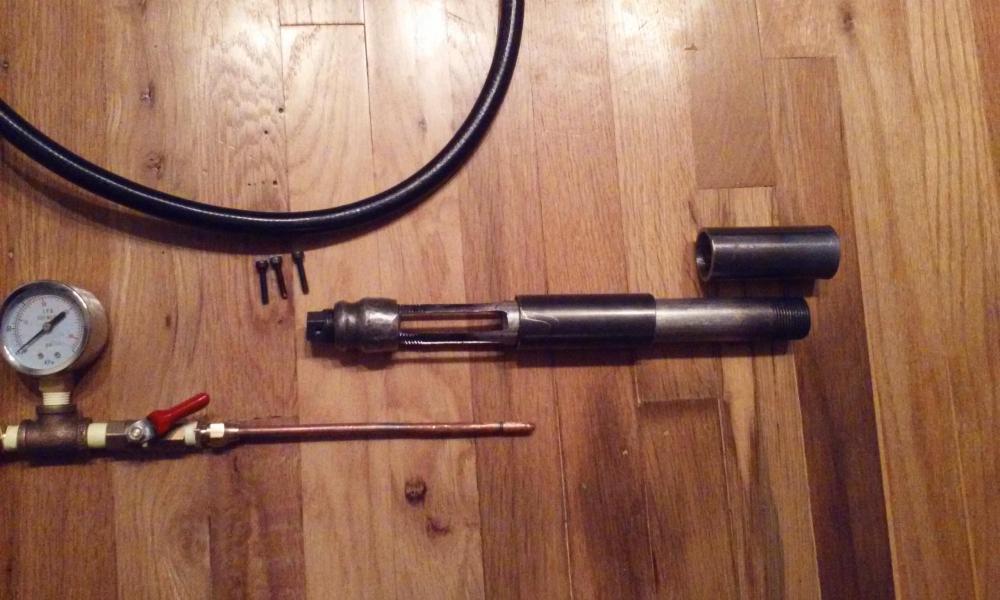
Here's where I've come. Stainless everywhere! Still some work. Slots in tube, longer joemac style injector to reach burner, and cast. But I only have 5# kastolite30. I have high strength mortar too. And perlite. Could I mix and match or assign? Thanks for all the info and critiques!