671jungle
-
Posts
455 -
Joined
-
Last visited
Content Type
Profiles
Forums
Articles
Gallery
Downloads
Events
Everything posted by 671jungle
-
I have neighbors north and south, a park on the east and a street with a neighbor across it on the west. I don’t see much of any of them except in passing. I work outside and was thinking of some kind dampening enclosure. Just enough to muffle the ping and maybe direct it upward instead of into the living rooms and bedrooms of unsuspecting sleepyheads. I have thought about similar projects. If the greenhouse busts this year it may become the new “shop”. Ive been pondering the idea of using cattle panels to frame up a small sound deflecting anvil house
-
Would like to smith at night while not disturbing neighbors. East side is void of residents. Ideas?
-
Found this lathe in the ol’ metal bin. gonna clean it up after Vegas trip baby! hopefully nothin follows me home from there..
-
This is when you have reached Jedi master level.
-
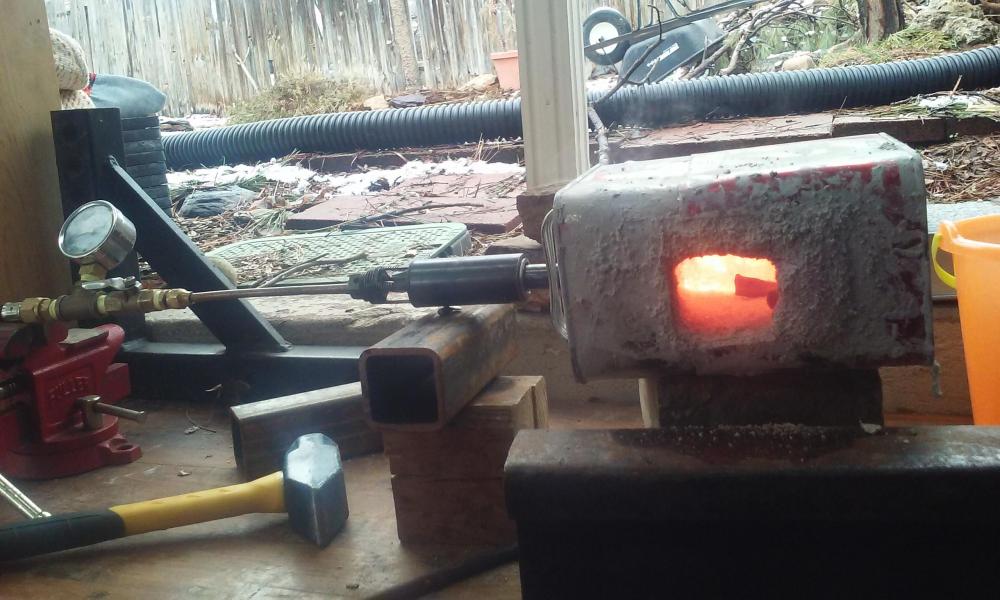
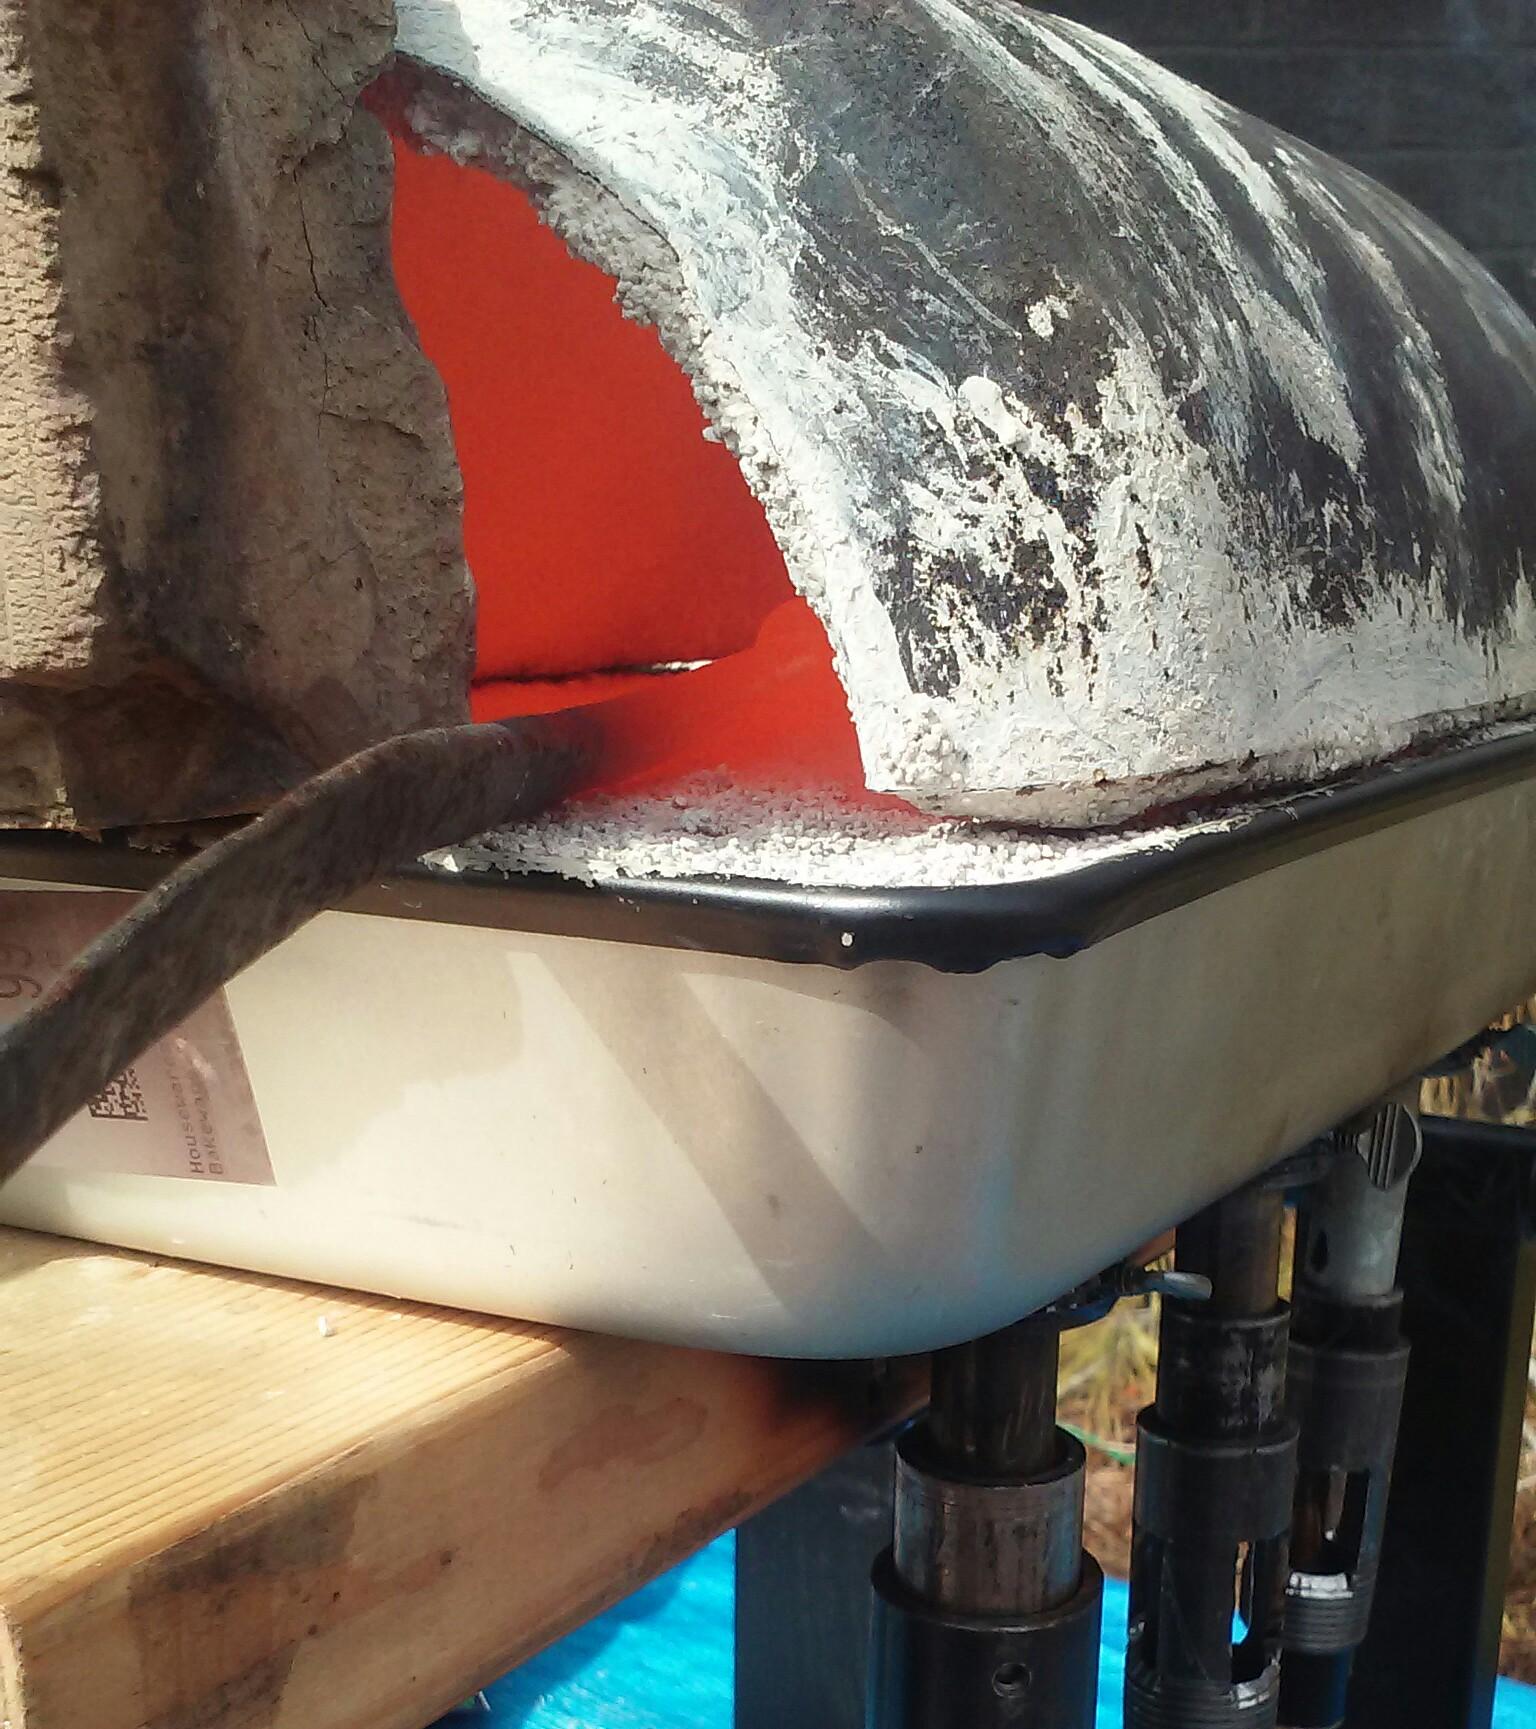
1st test drive. Still needs the seal and some tuning. Overall pretty happy with the design. The nice even heat and low turn down will be handy to HT small knives when I eventually learn that skill. These after about 5 min. Run time.

-
here is a video of that F-16 jet engine being tested. I put a link as well as to not jam up interwebs. Its pretty fantastic! https://youtu.be/Oj4w7i-TqsE
-
Thanks Mike! Its an honor to have your help with all this, and a pleasure to knock over your apple cart! Question, Do you think one of these would suffice in a small melter? Say... a coffee can size?
-
This thread just got REAL real. Some important information here. This type of mindful safety is extremely valuable. Not everyone thinks about toxic gasses when cutting into something. Or the mixing of certain things and heat. Thank you for sharing
-
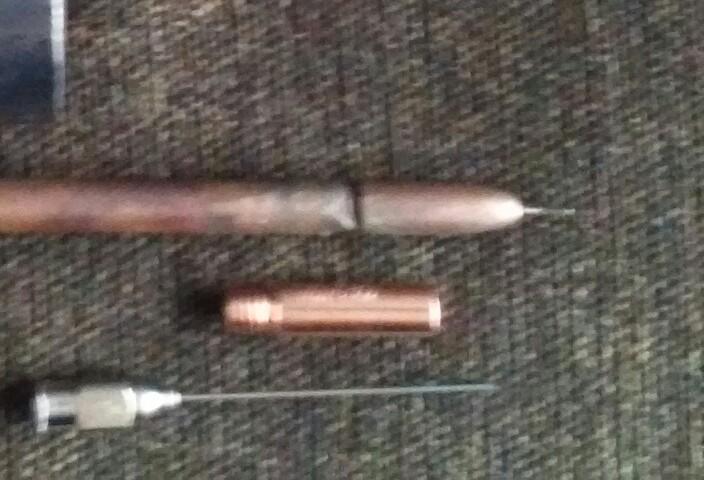
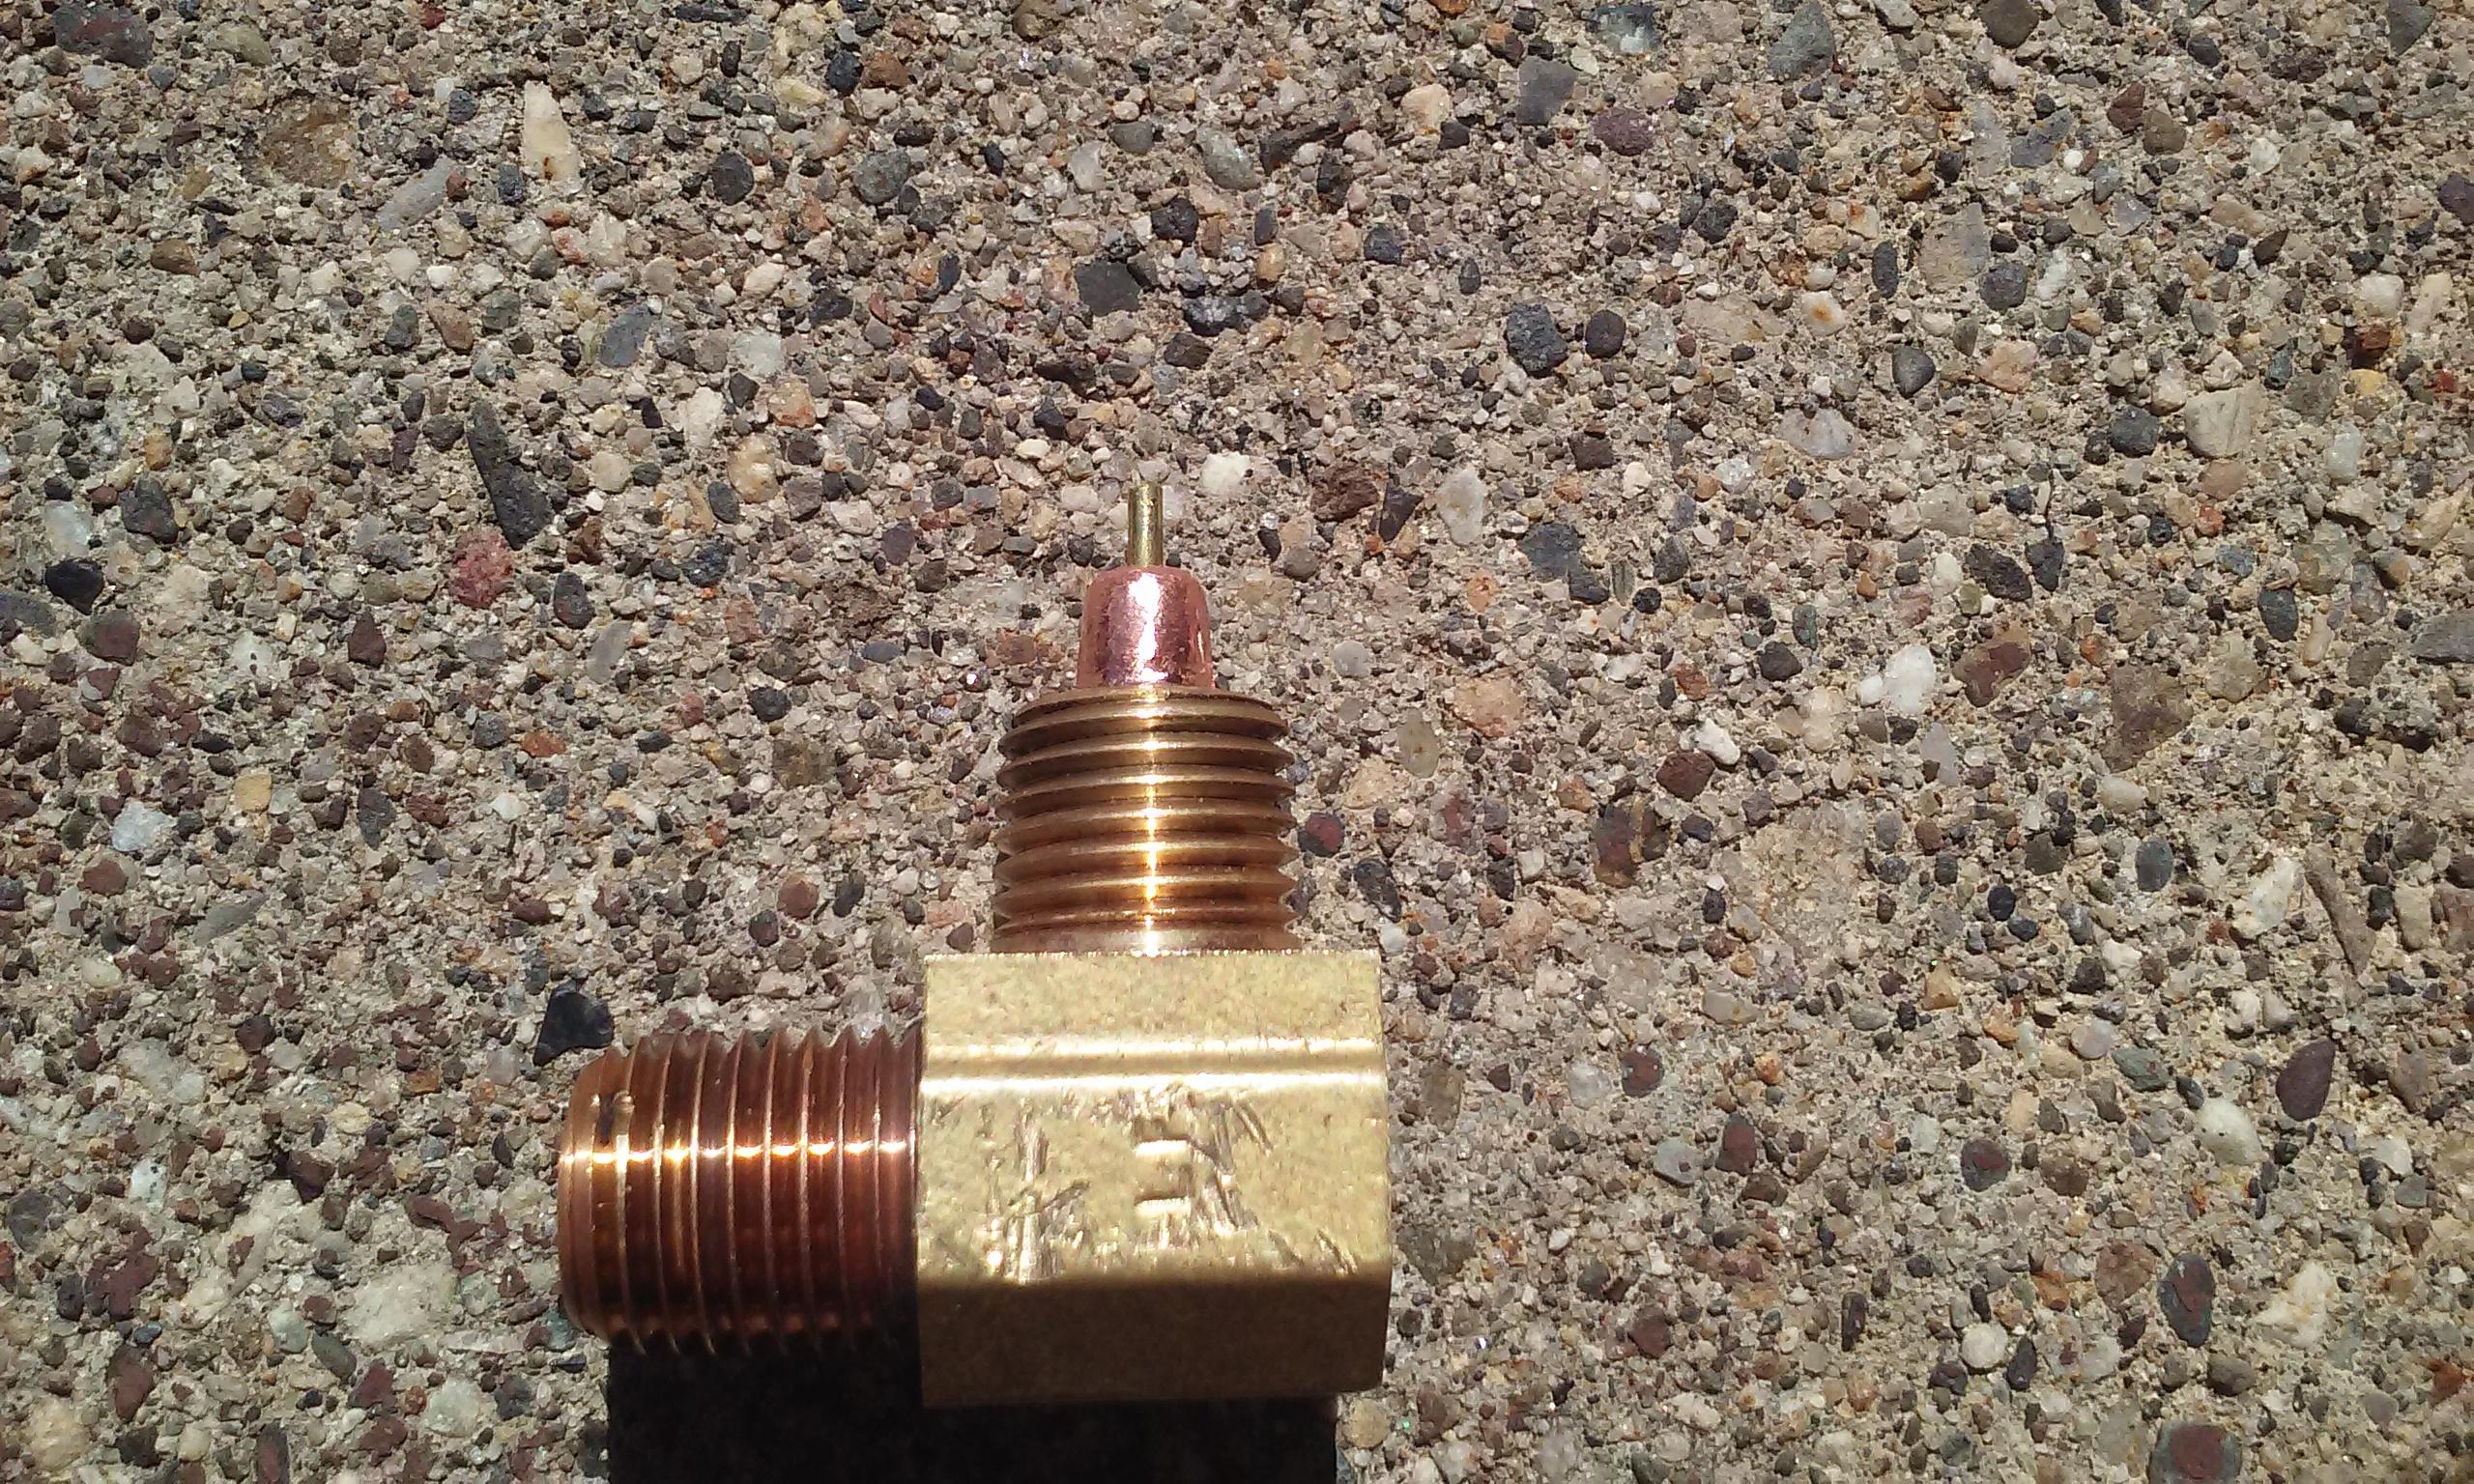
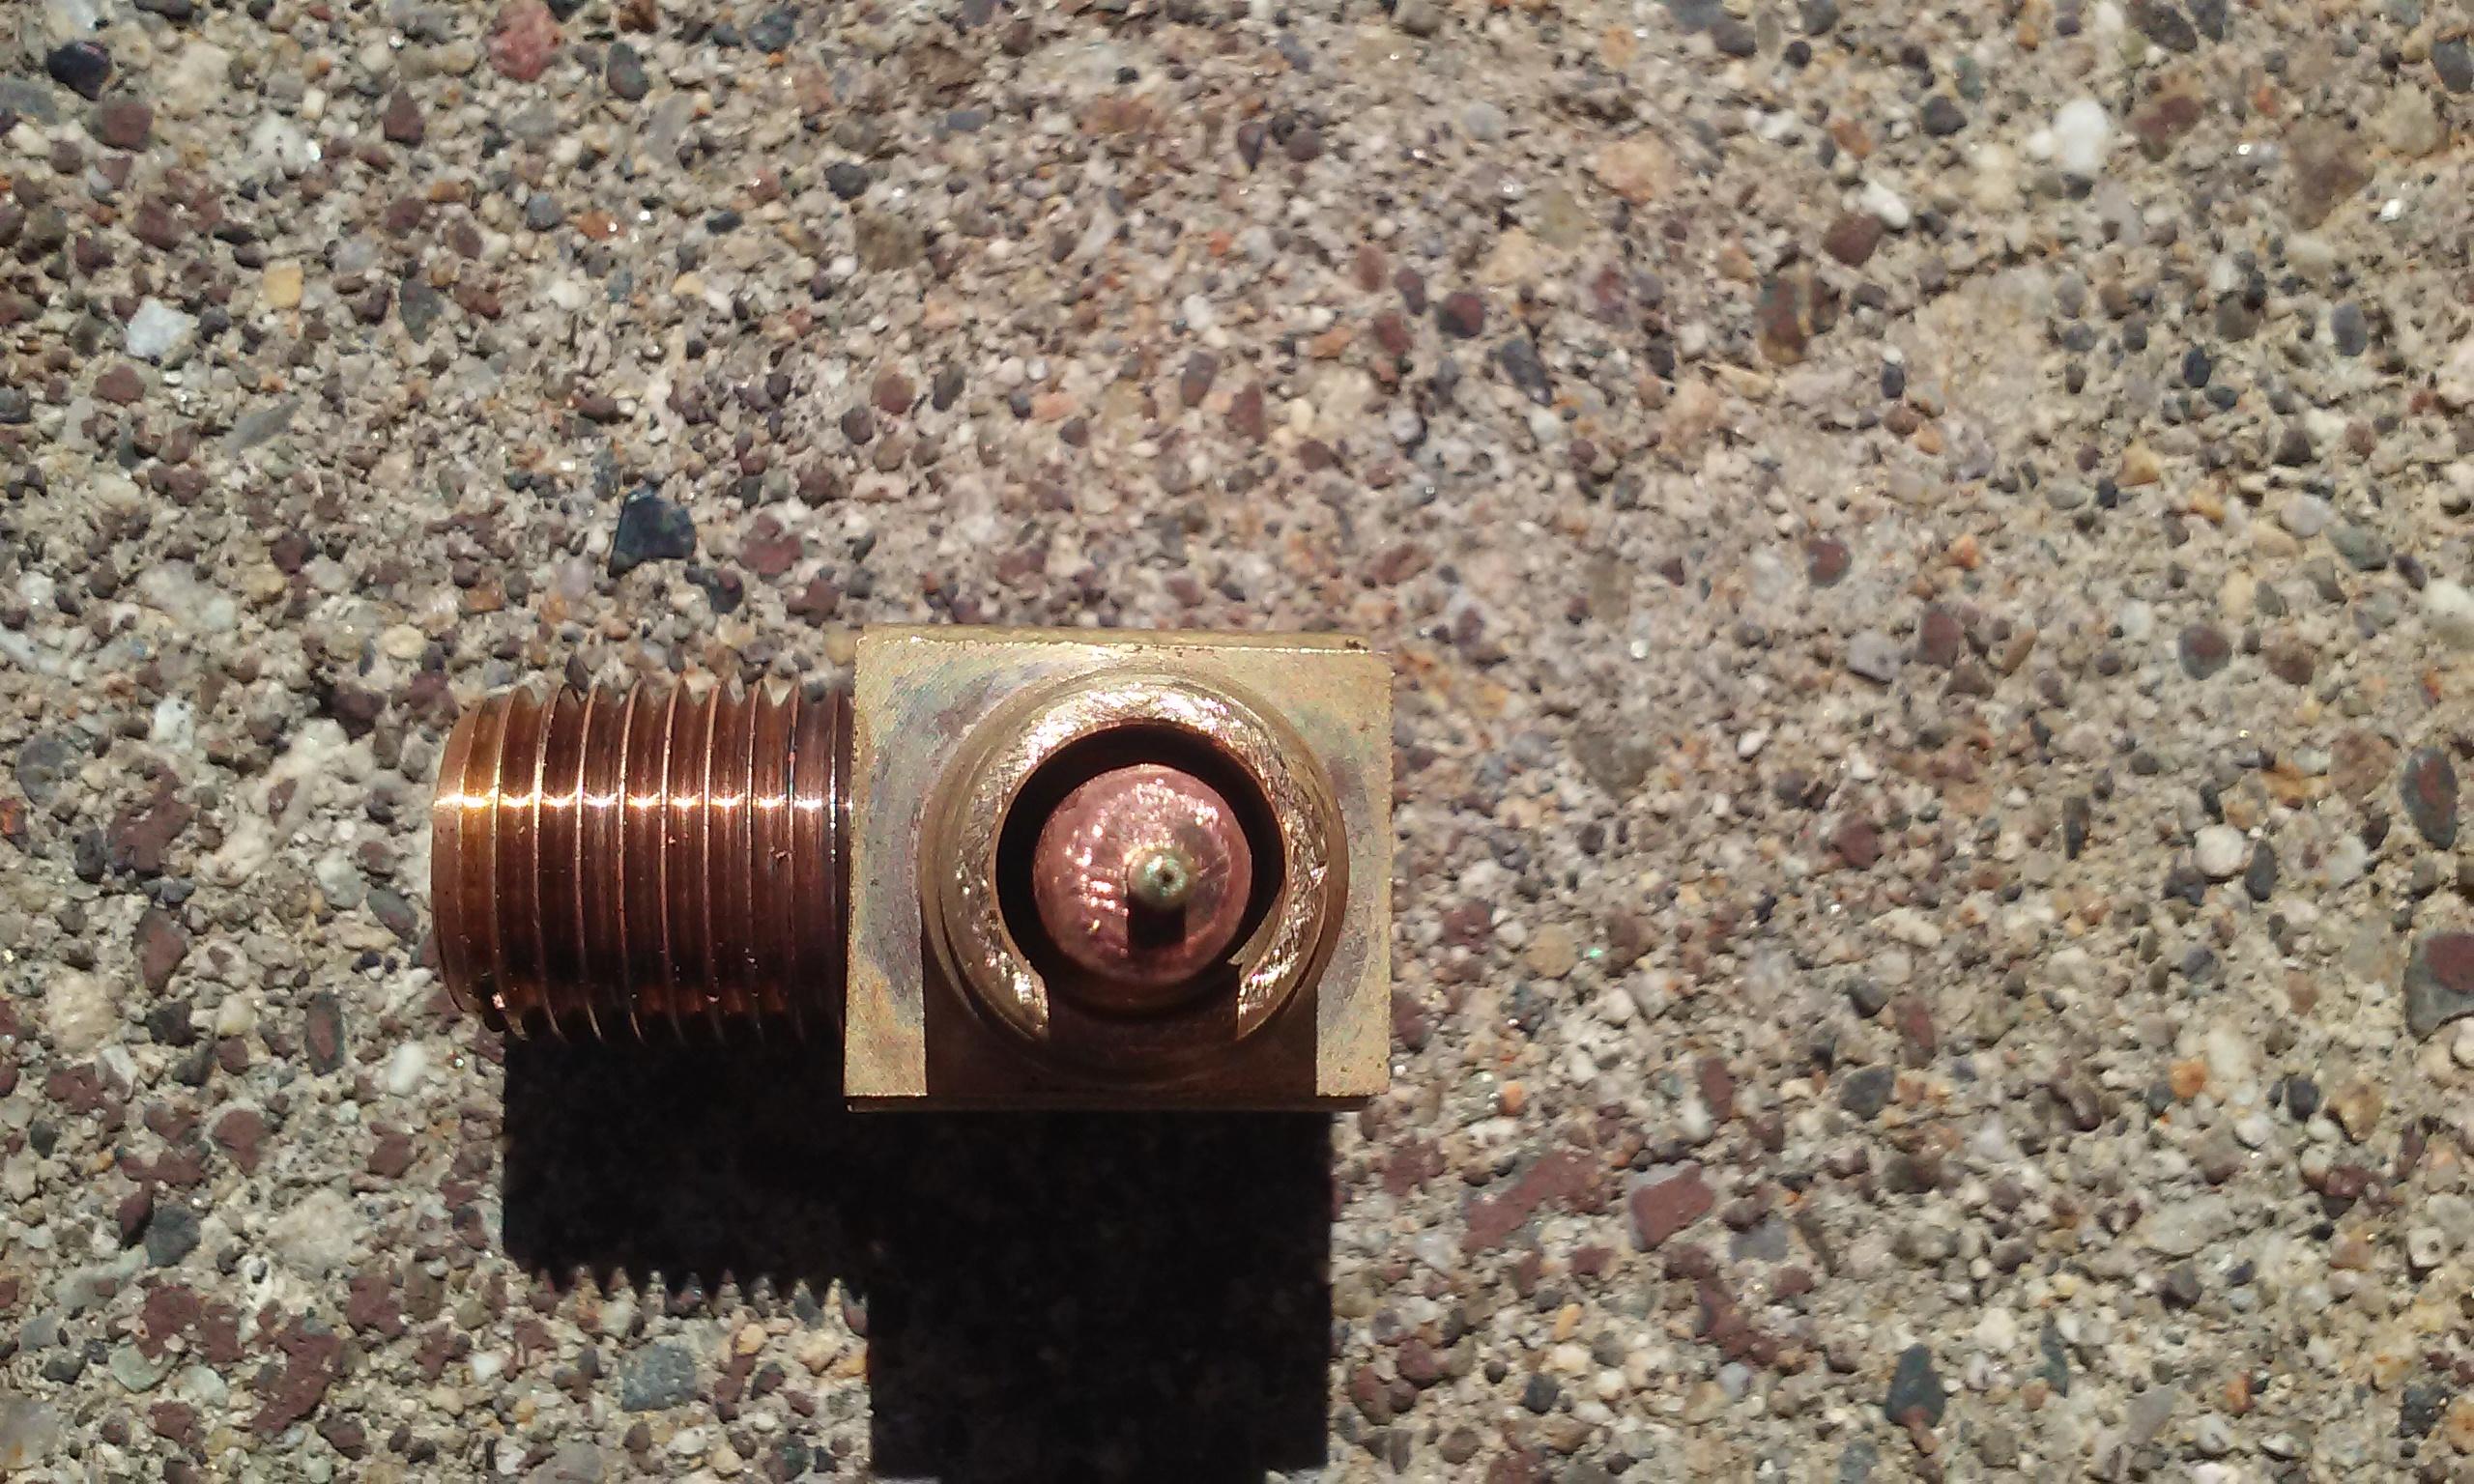
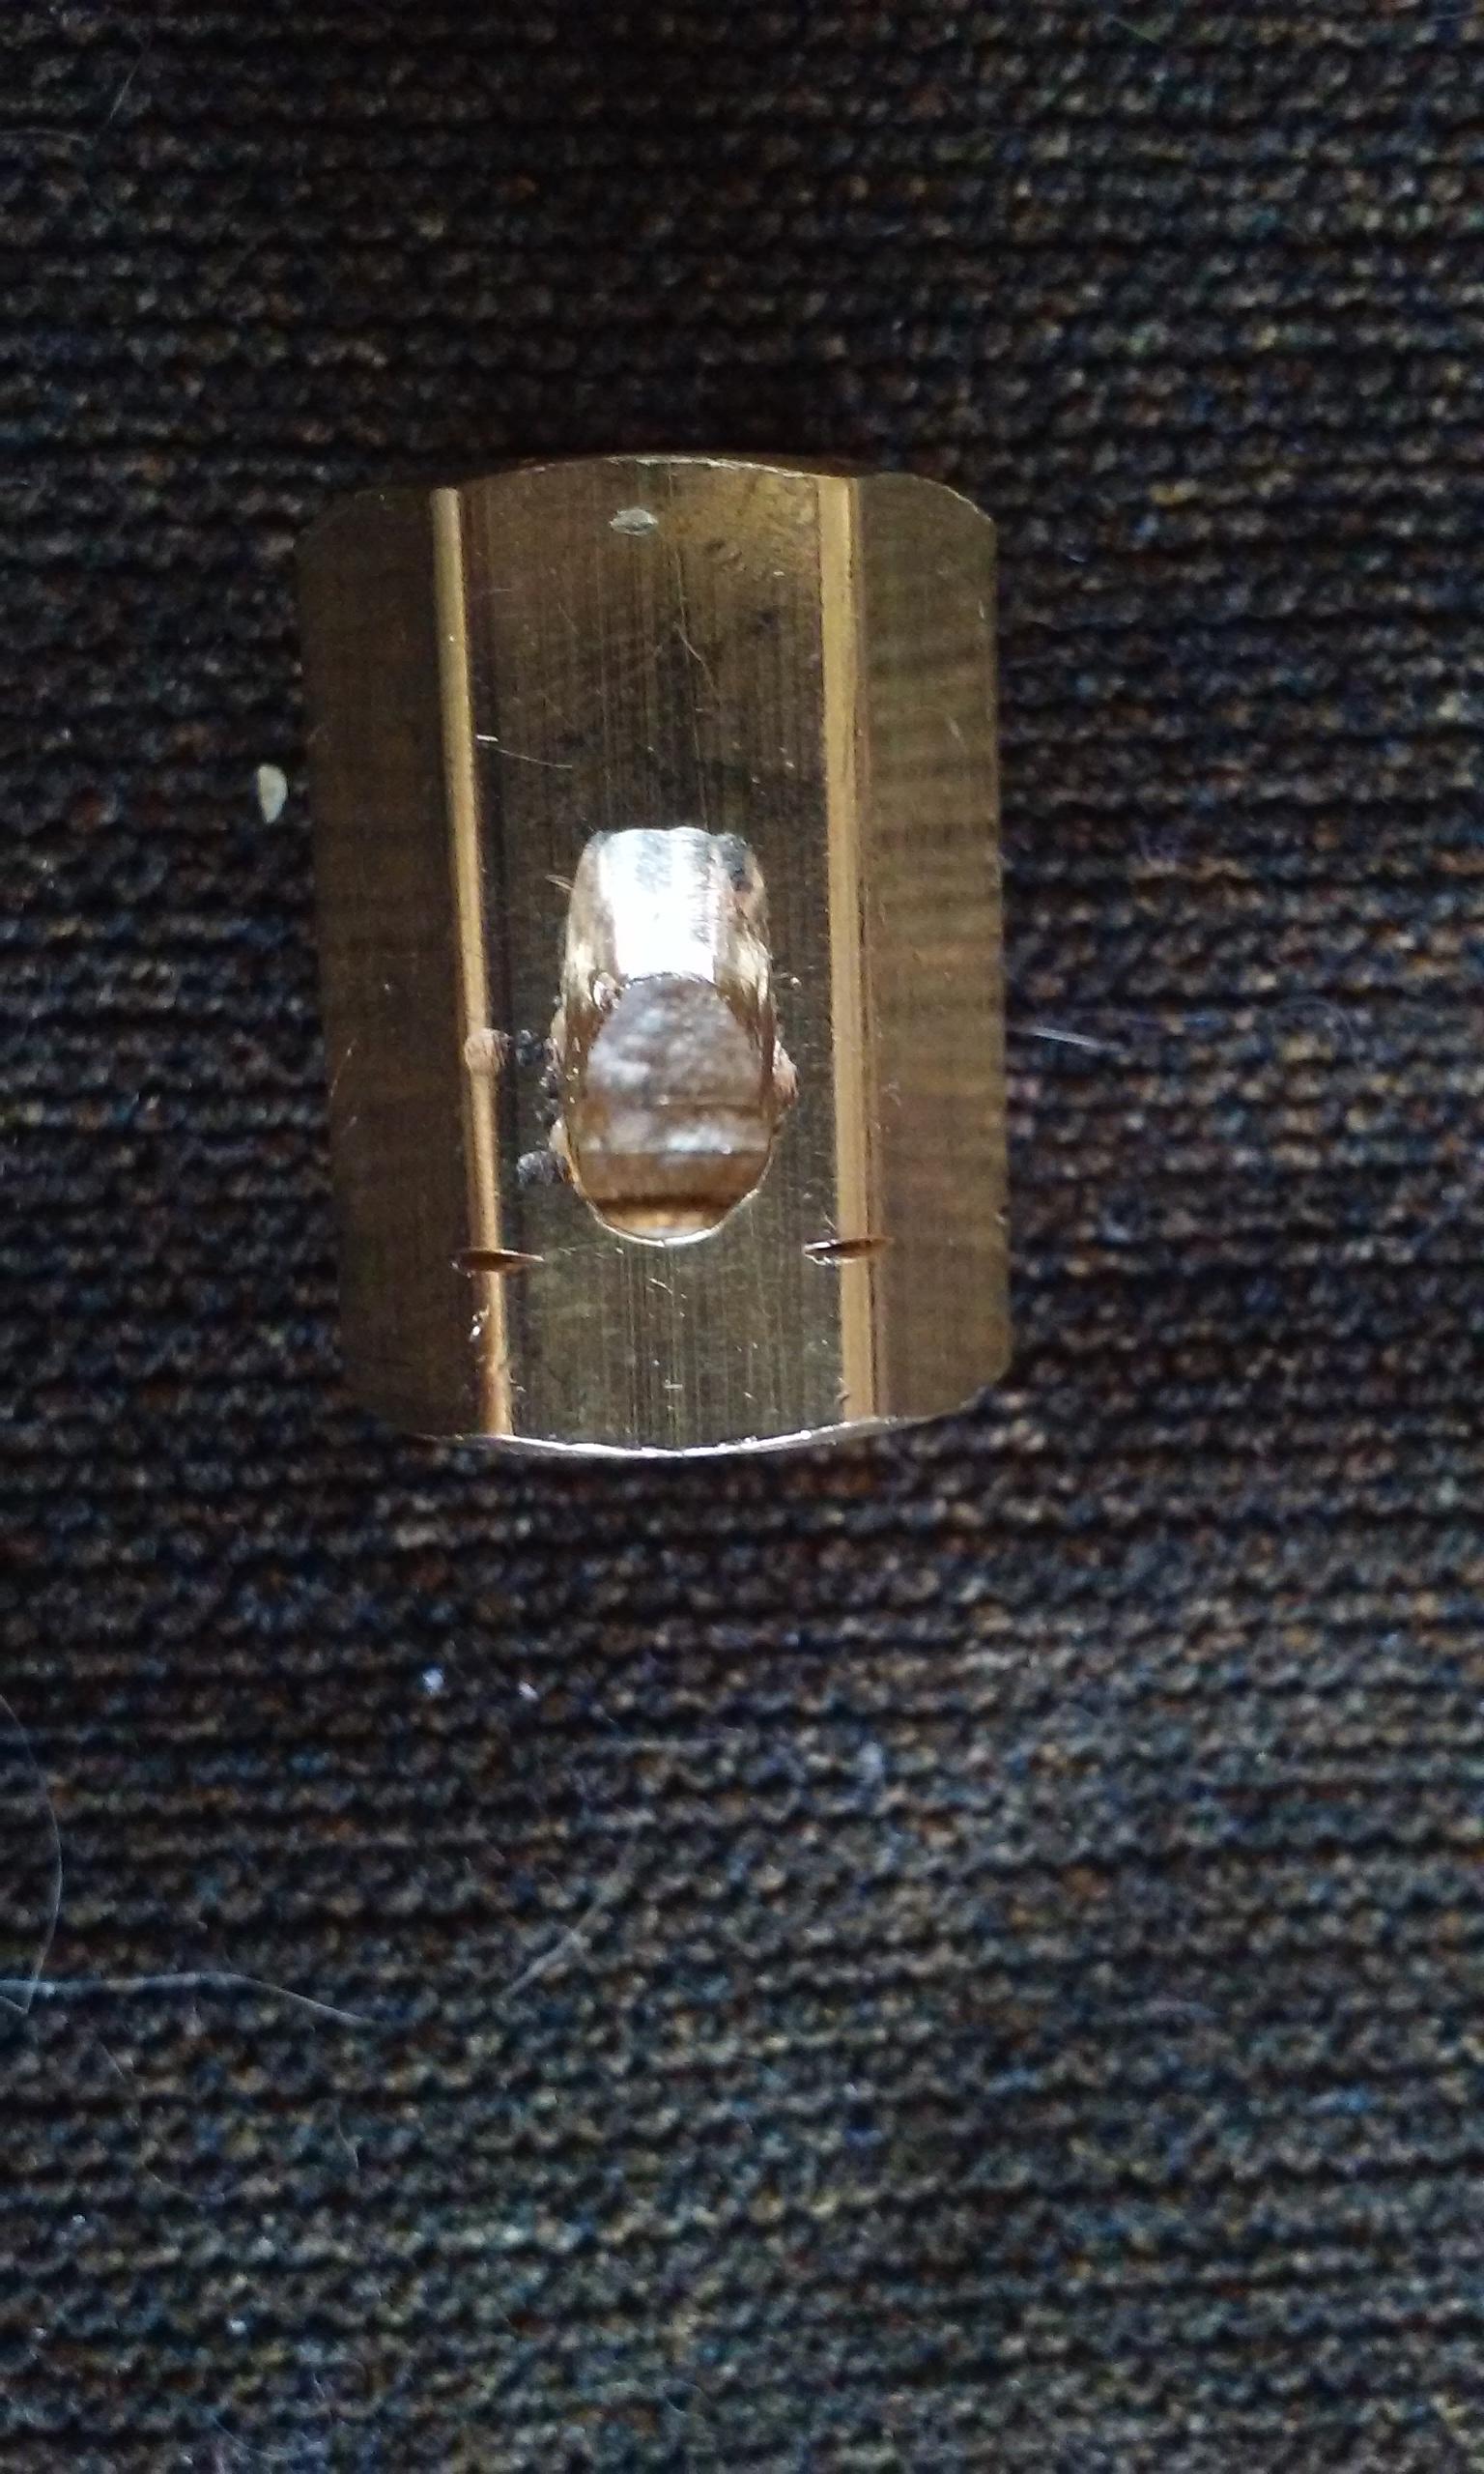
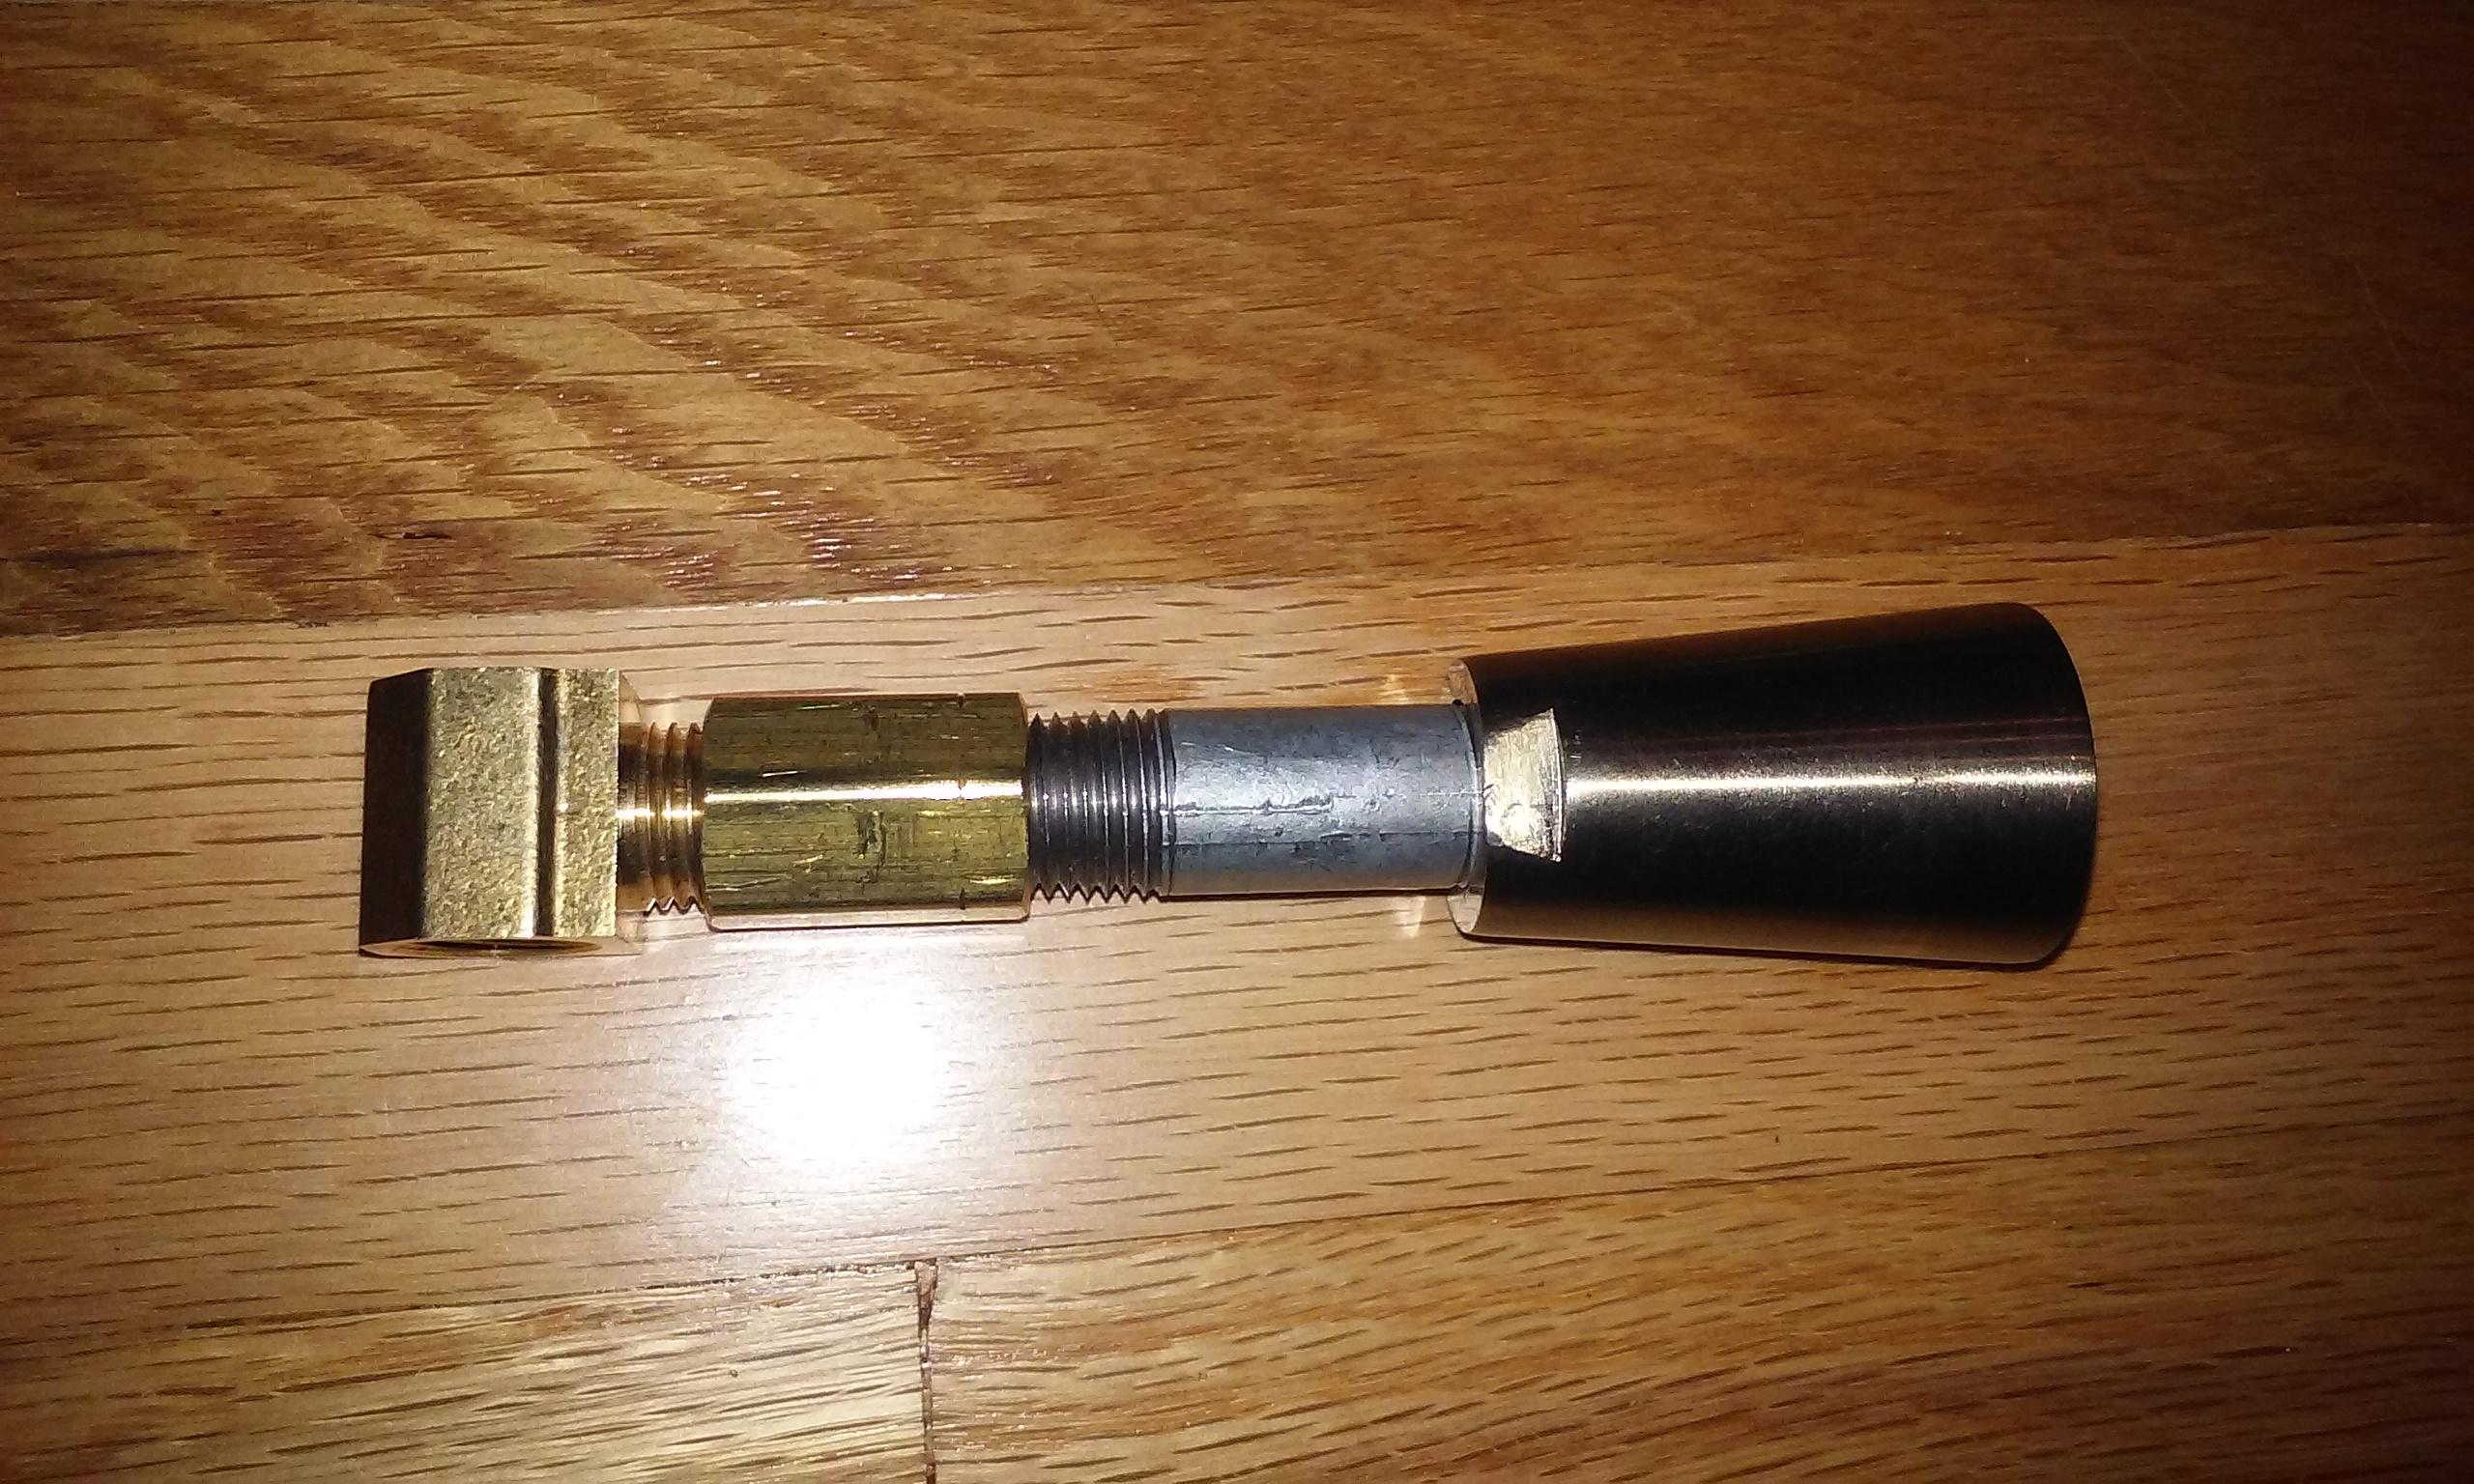
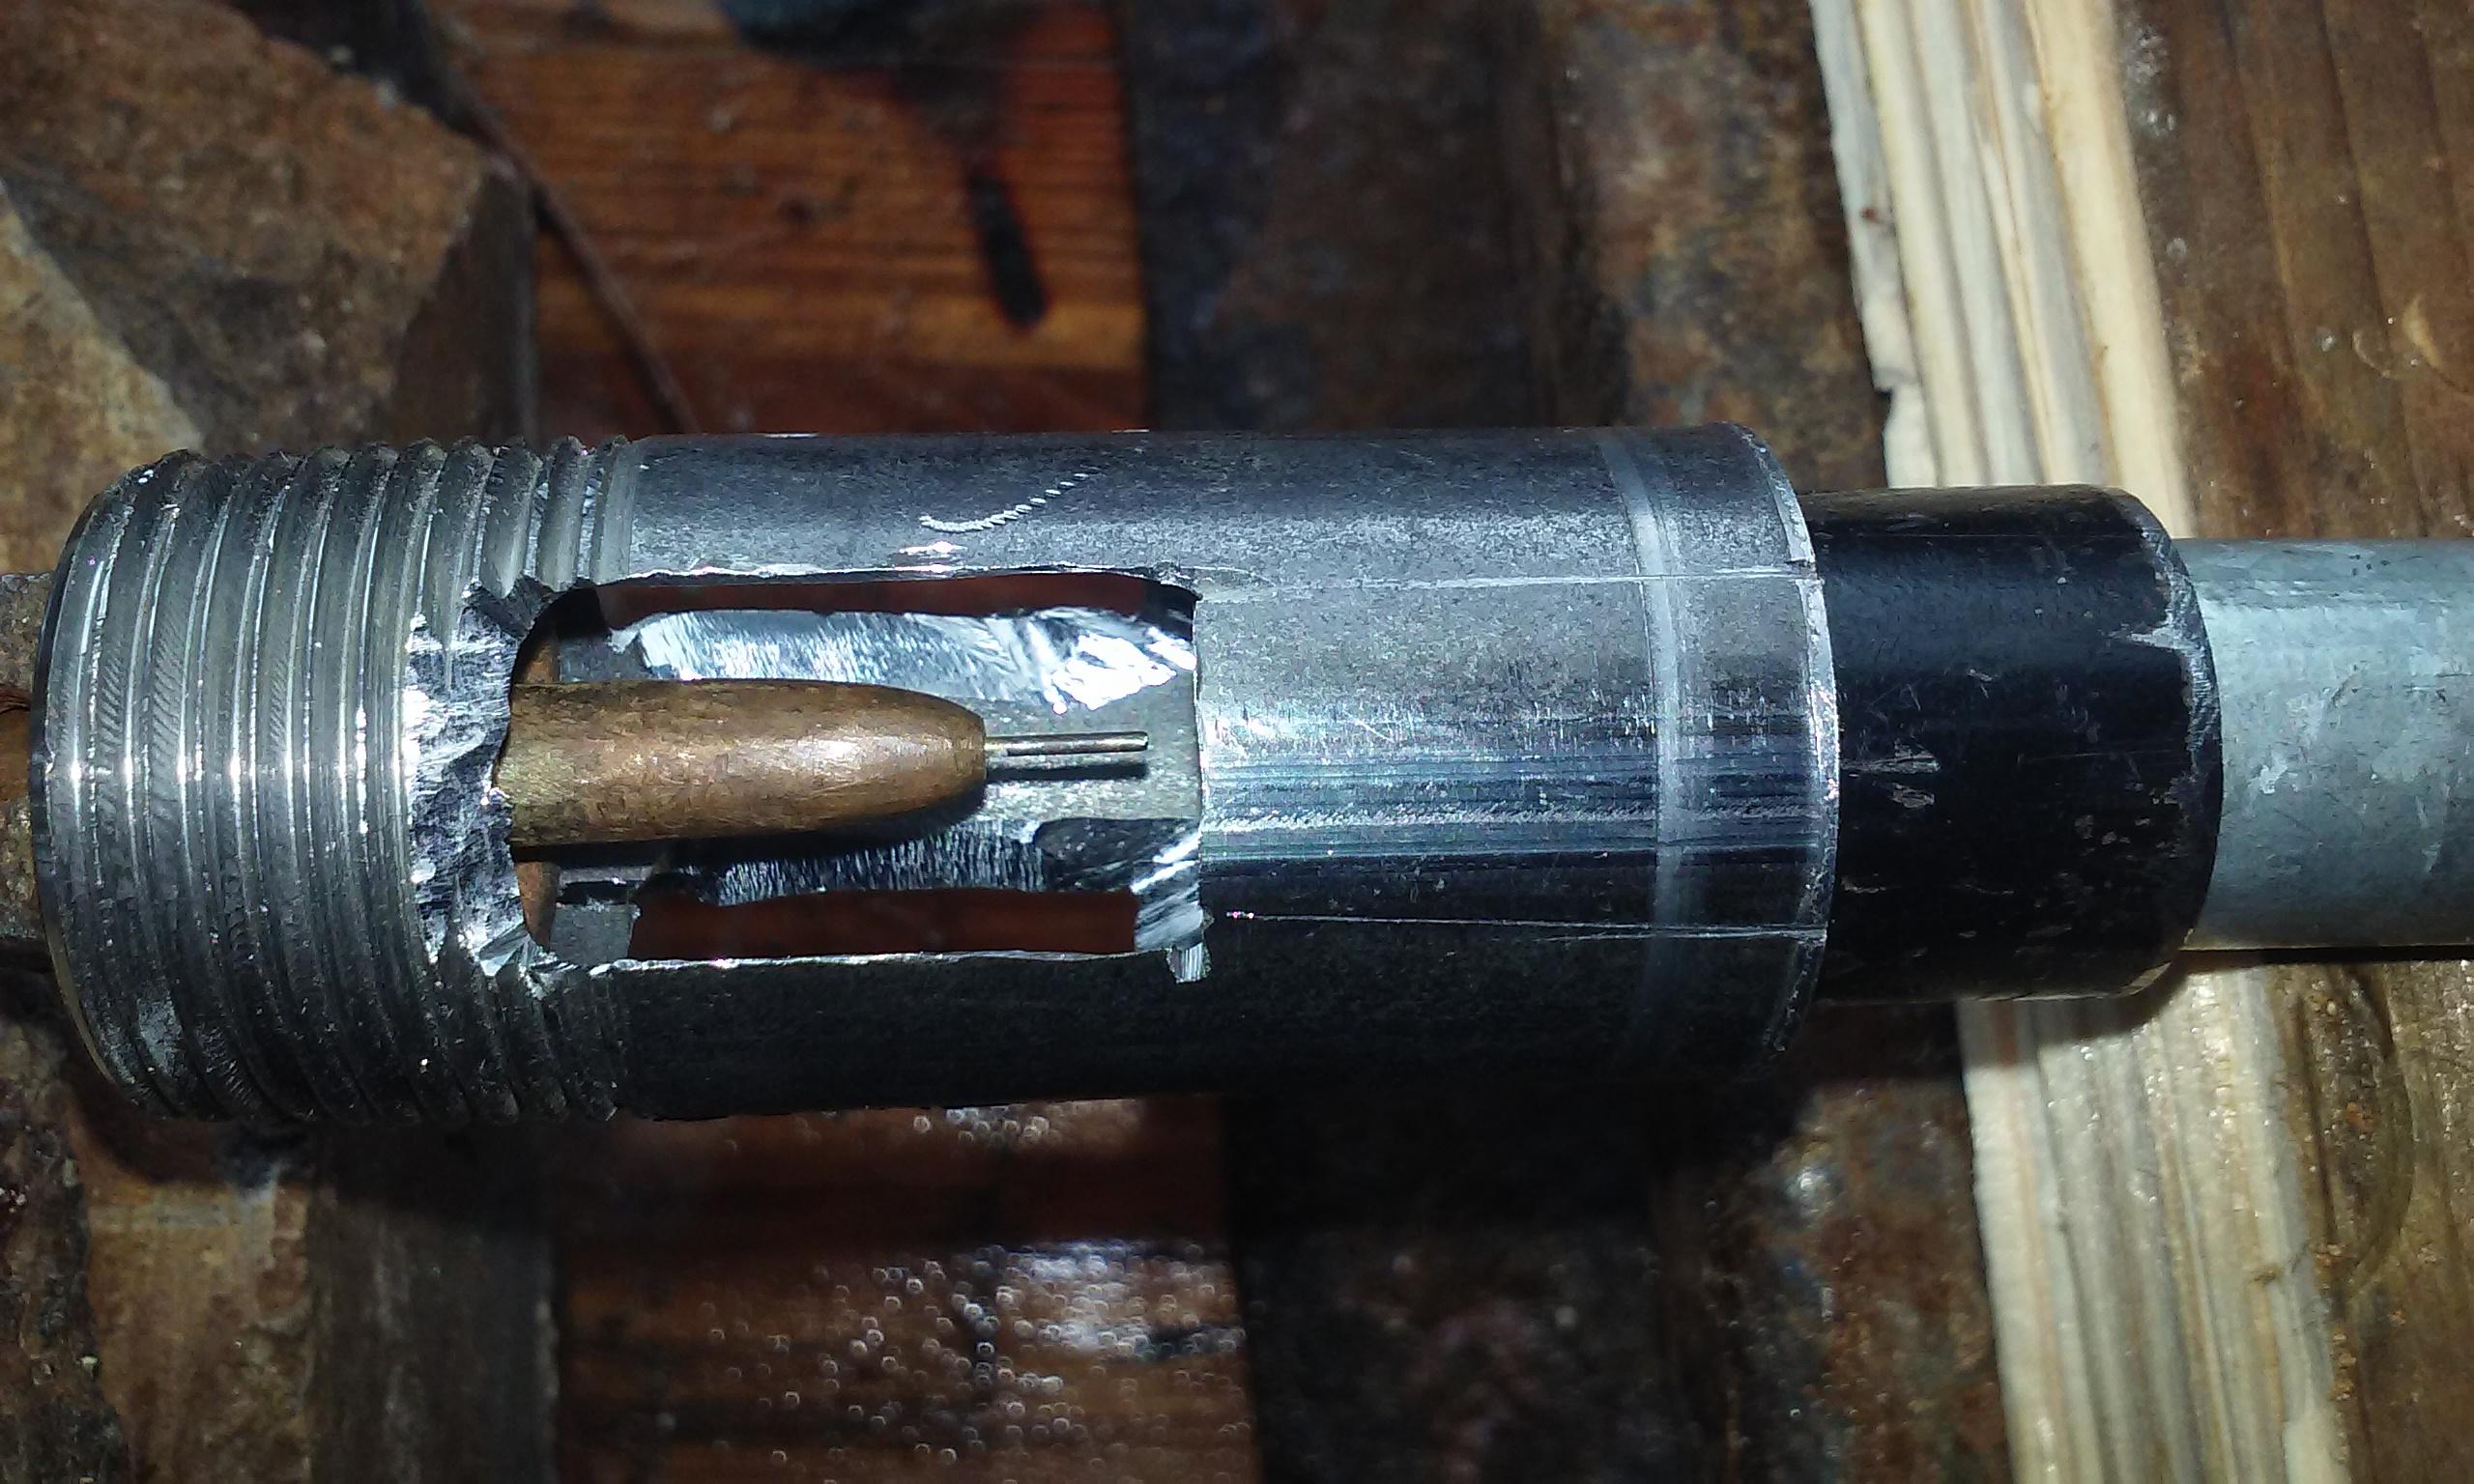
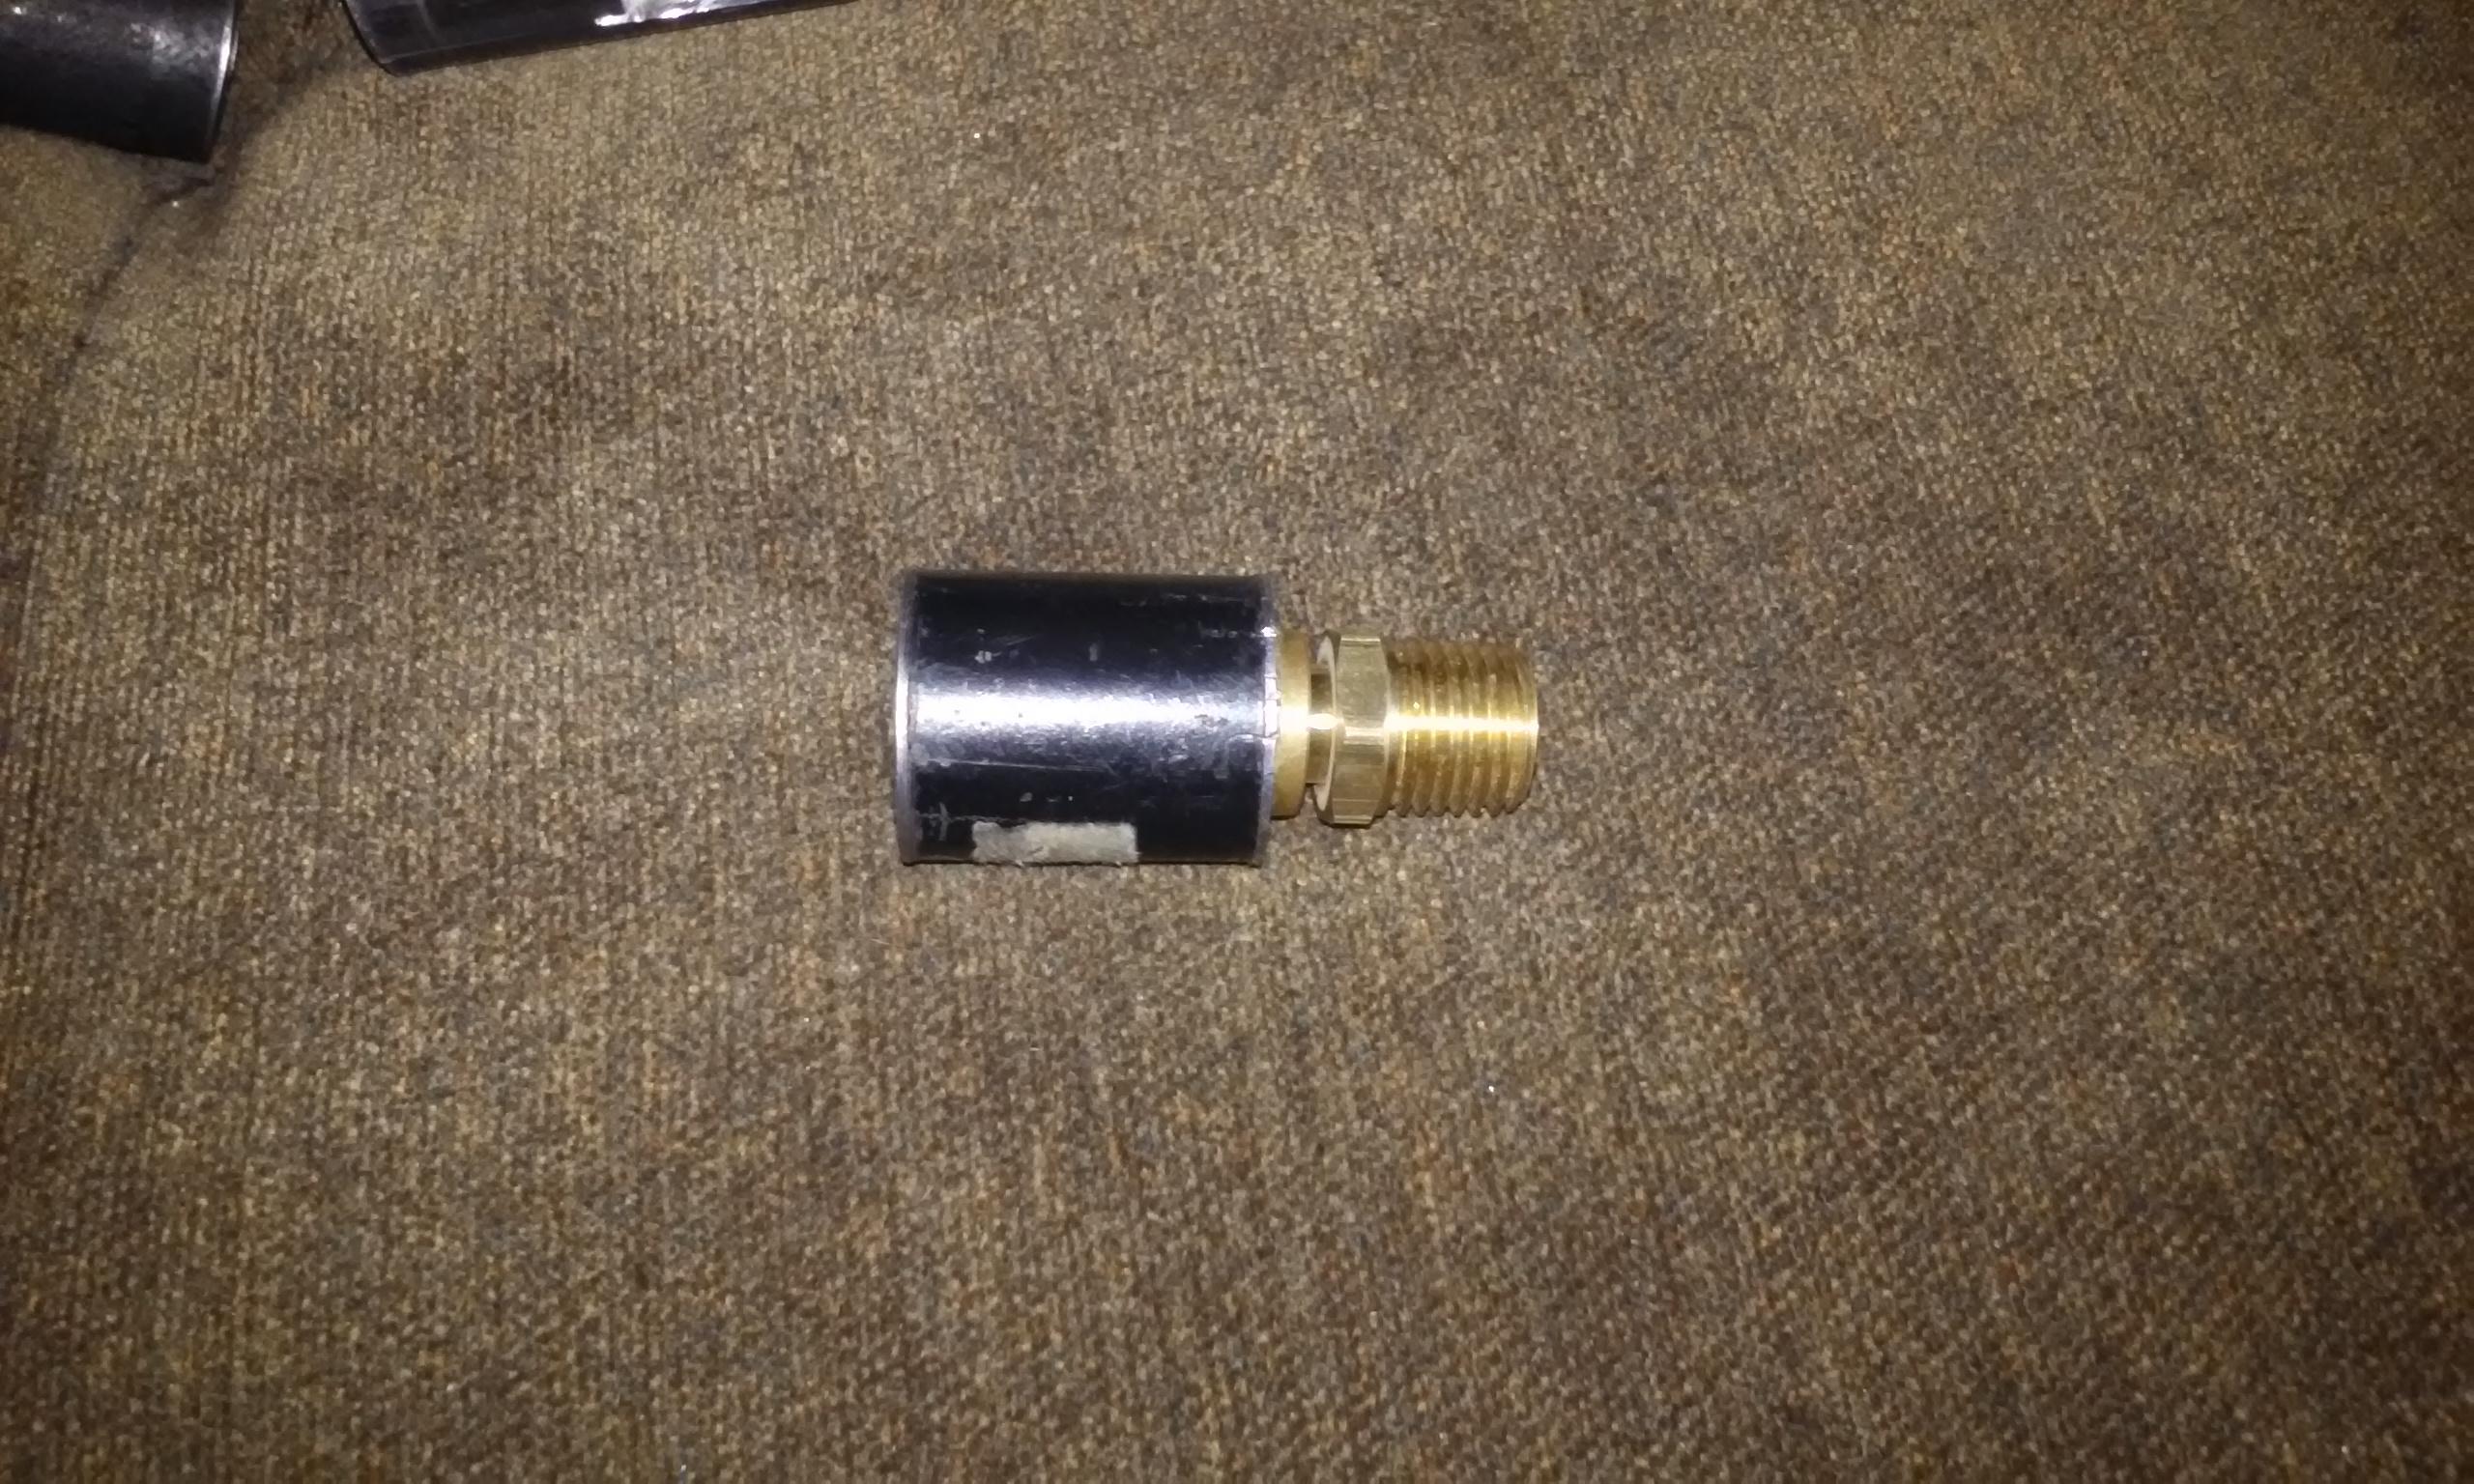
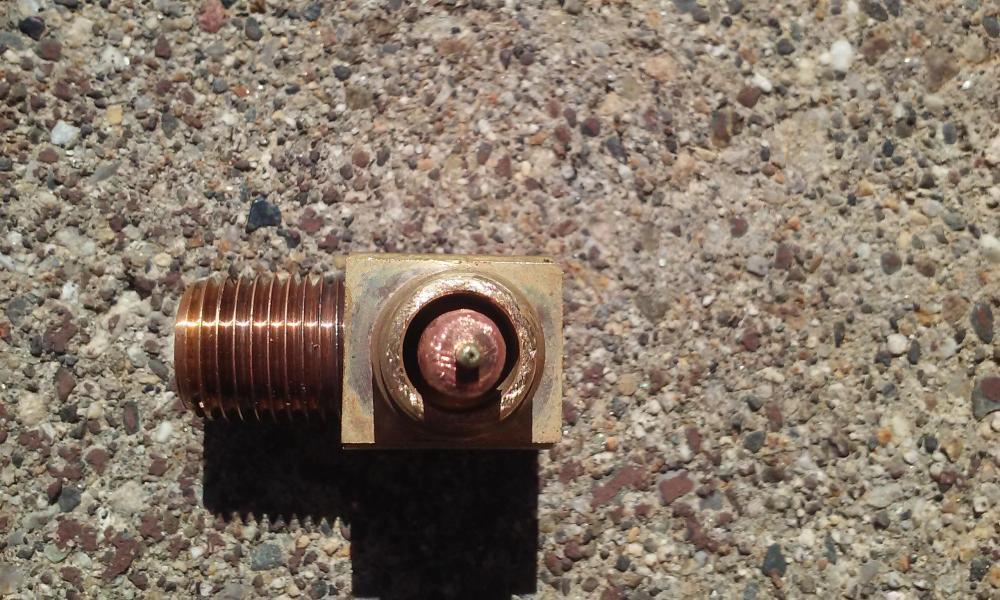
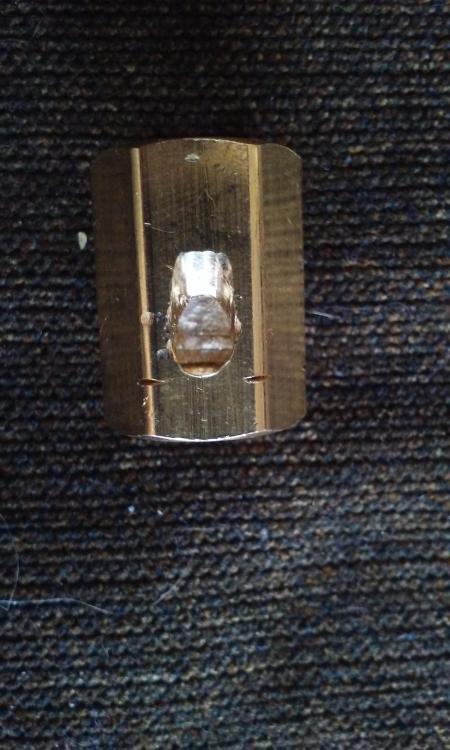
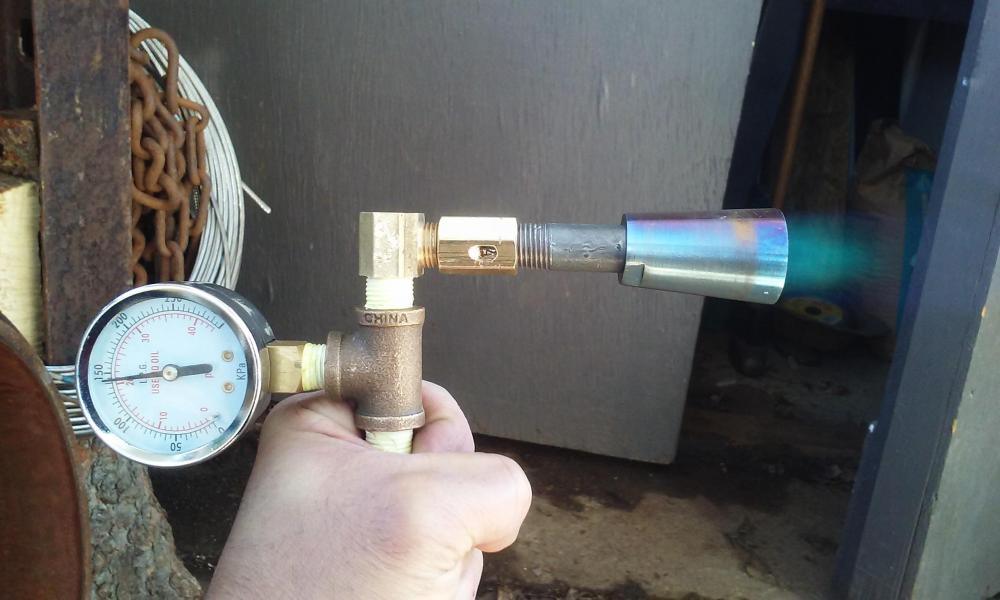
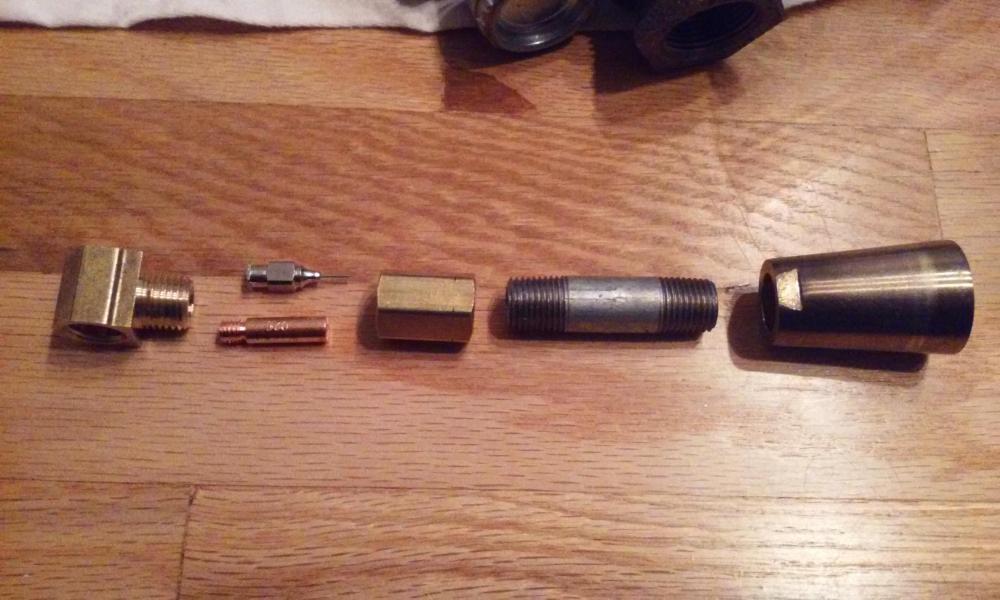
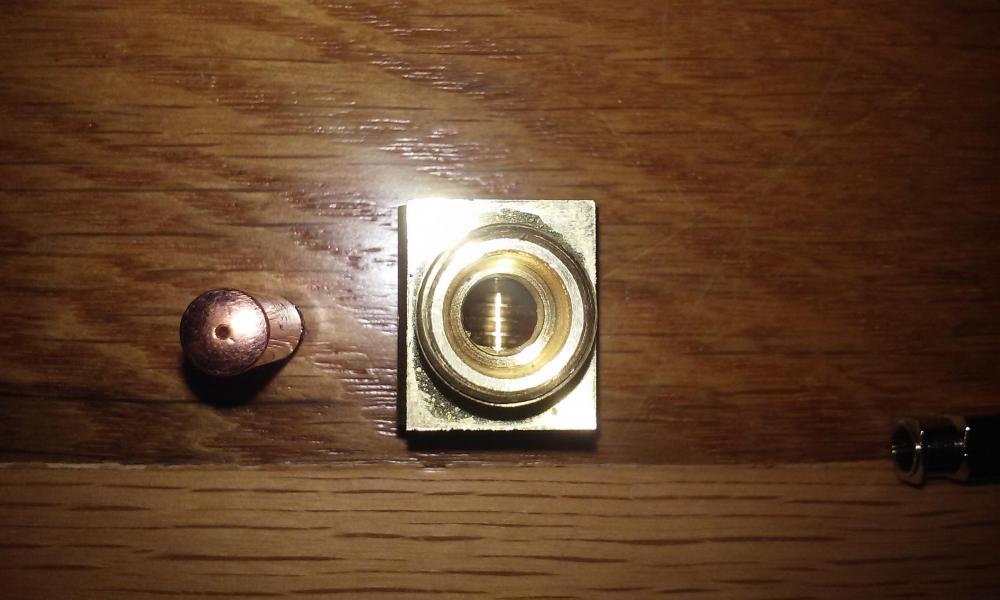
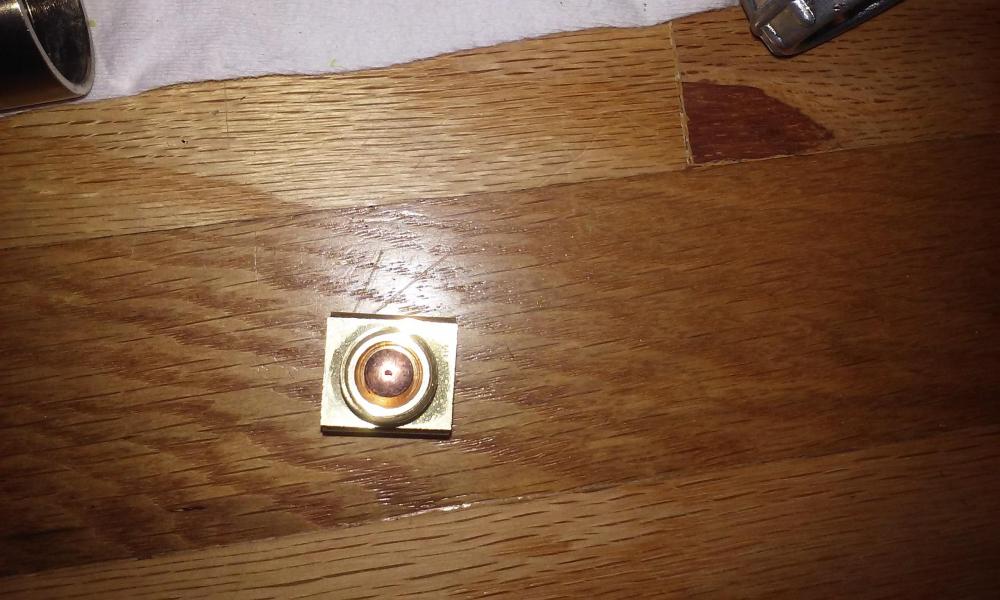
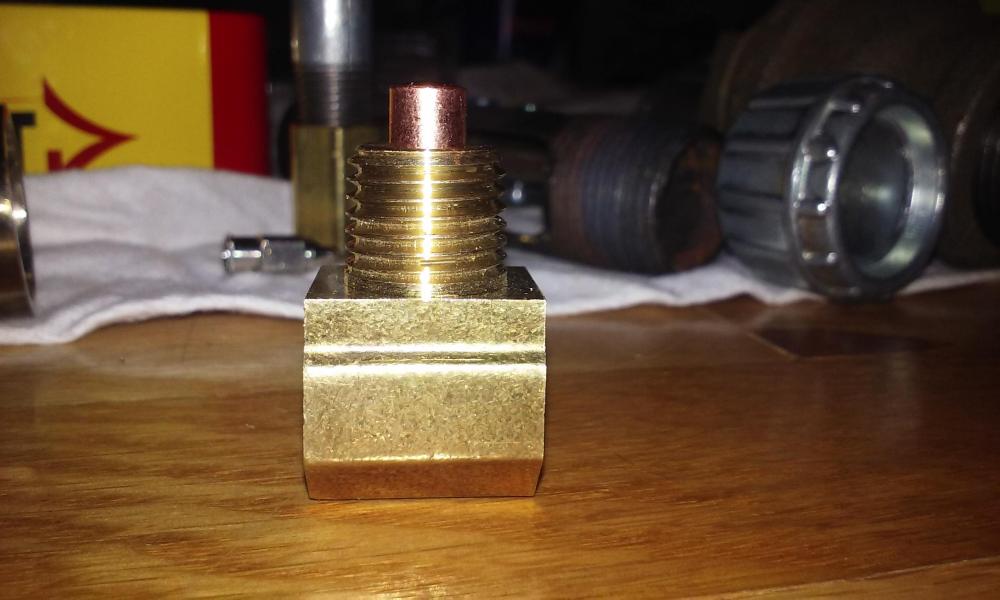
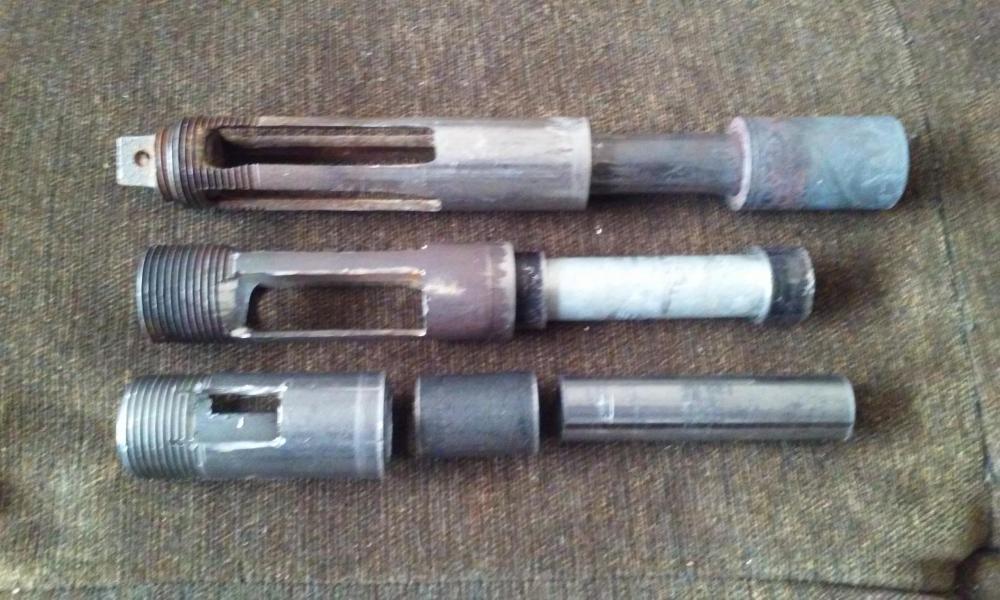
.015 brass tube came in today so I got busy. Pressed the .025 mig tip into the elbow and checked for air leaks. Drilled out the tip by hand with tiny drills. (A bit tedious but worth the effort and minimizes damaging the small tool.) After desired depth, I went back with a smaller bit to get a taper and ensure the seal. Cut the tube, sanded even, cleaned out the orifice and slowly pressed it into the .025 mig tip using a small vice, being sure not to bend the tube. Cleaned orifice again. Drilled holes and cleaned out the interior of the coupling (air chamber). Also gave them their first round of bevel and enlarging treatment. Barrel cut to meet intake then beveled. Rich burn. Tomorrow I will continue to enlarge until I get a slightly reducing flame. Oh and strip the galvy! This thing fired up as soon as I struck the lighter. And is stable through the reg. range.


-
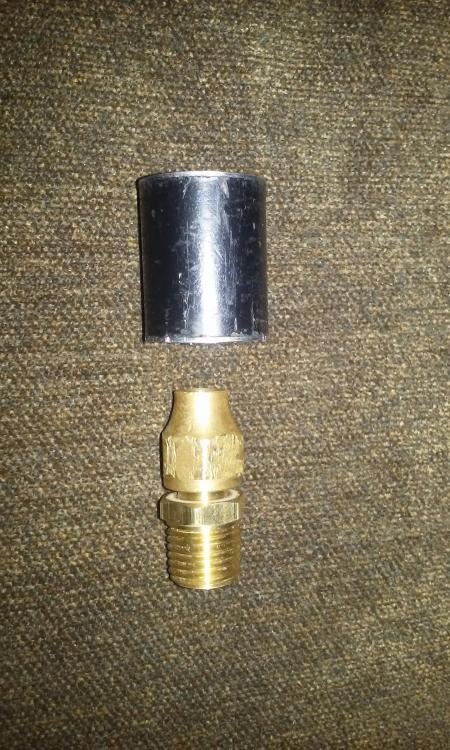
1/4" idea. Jet: mig tip fitted with .015 capillary tube and soldered into 1/4" elbow. Air chamber: coupling with 3 slots cut into every other side. Interior sanded smooth. Barrel: 1/4" pipe beveled on chamber side for fam flow. (the galvy will be soaked) Nozzle: ??? Currently have this stainless fitting I will try to tailer it to. Just a little experiment for a high power hand torch. Per Mikey's challenge, though not quite the same design.

-
nevermind, after looking at some its pretty straight forward. Thanks!
-
I have never worked with coal. When I was getting started coal was where I was leaning. But we have air quality issues Here in SLC so I figured I wouldn't contribute. One of these days I will have to work on one. For tradition sake! Can you show me your setup? That is what I was thinking but haven't looked at any plans yet, I would to get some insight.
-
We made a pound cake the other night, went to work and there was pound cake there too. Been taking challenges lately. I'll have to get the timing right, I am at elevation.
-
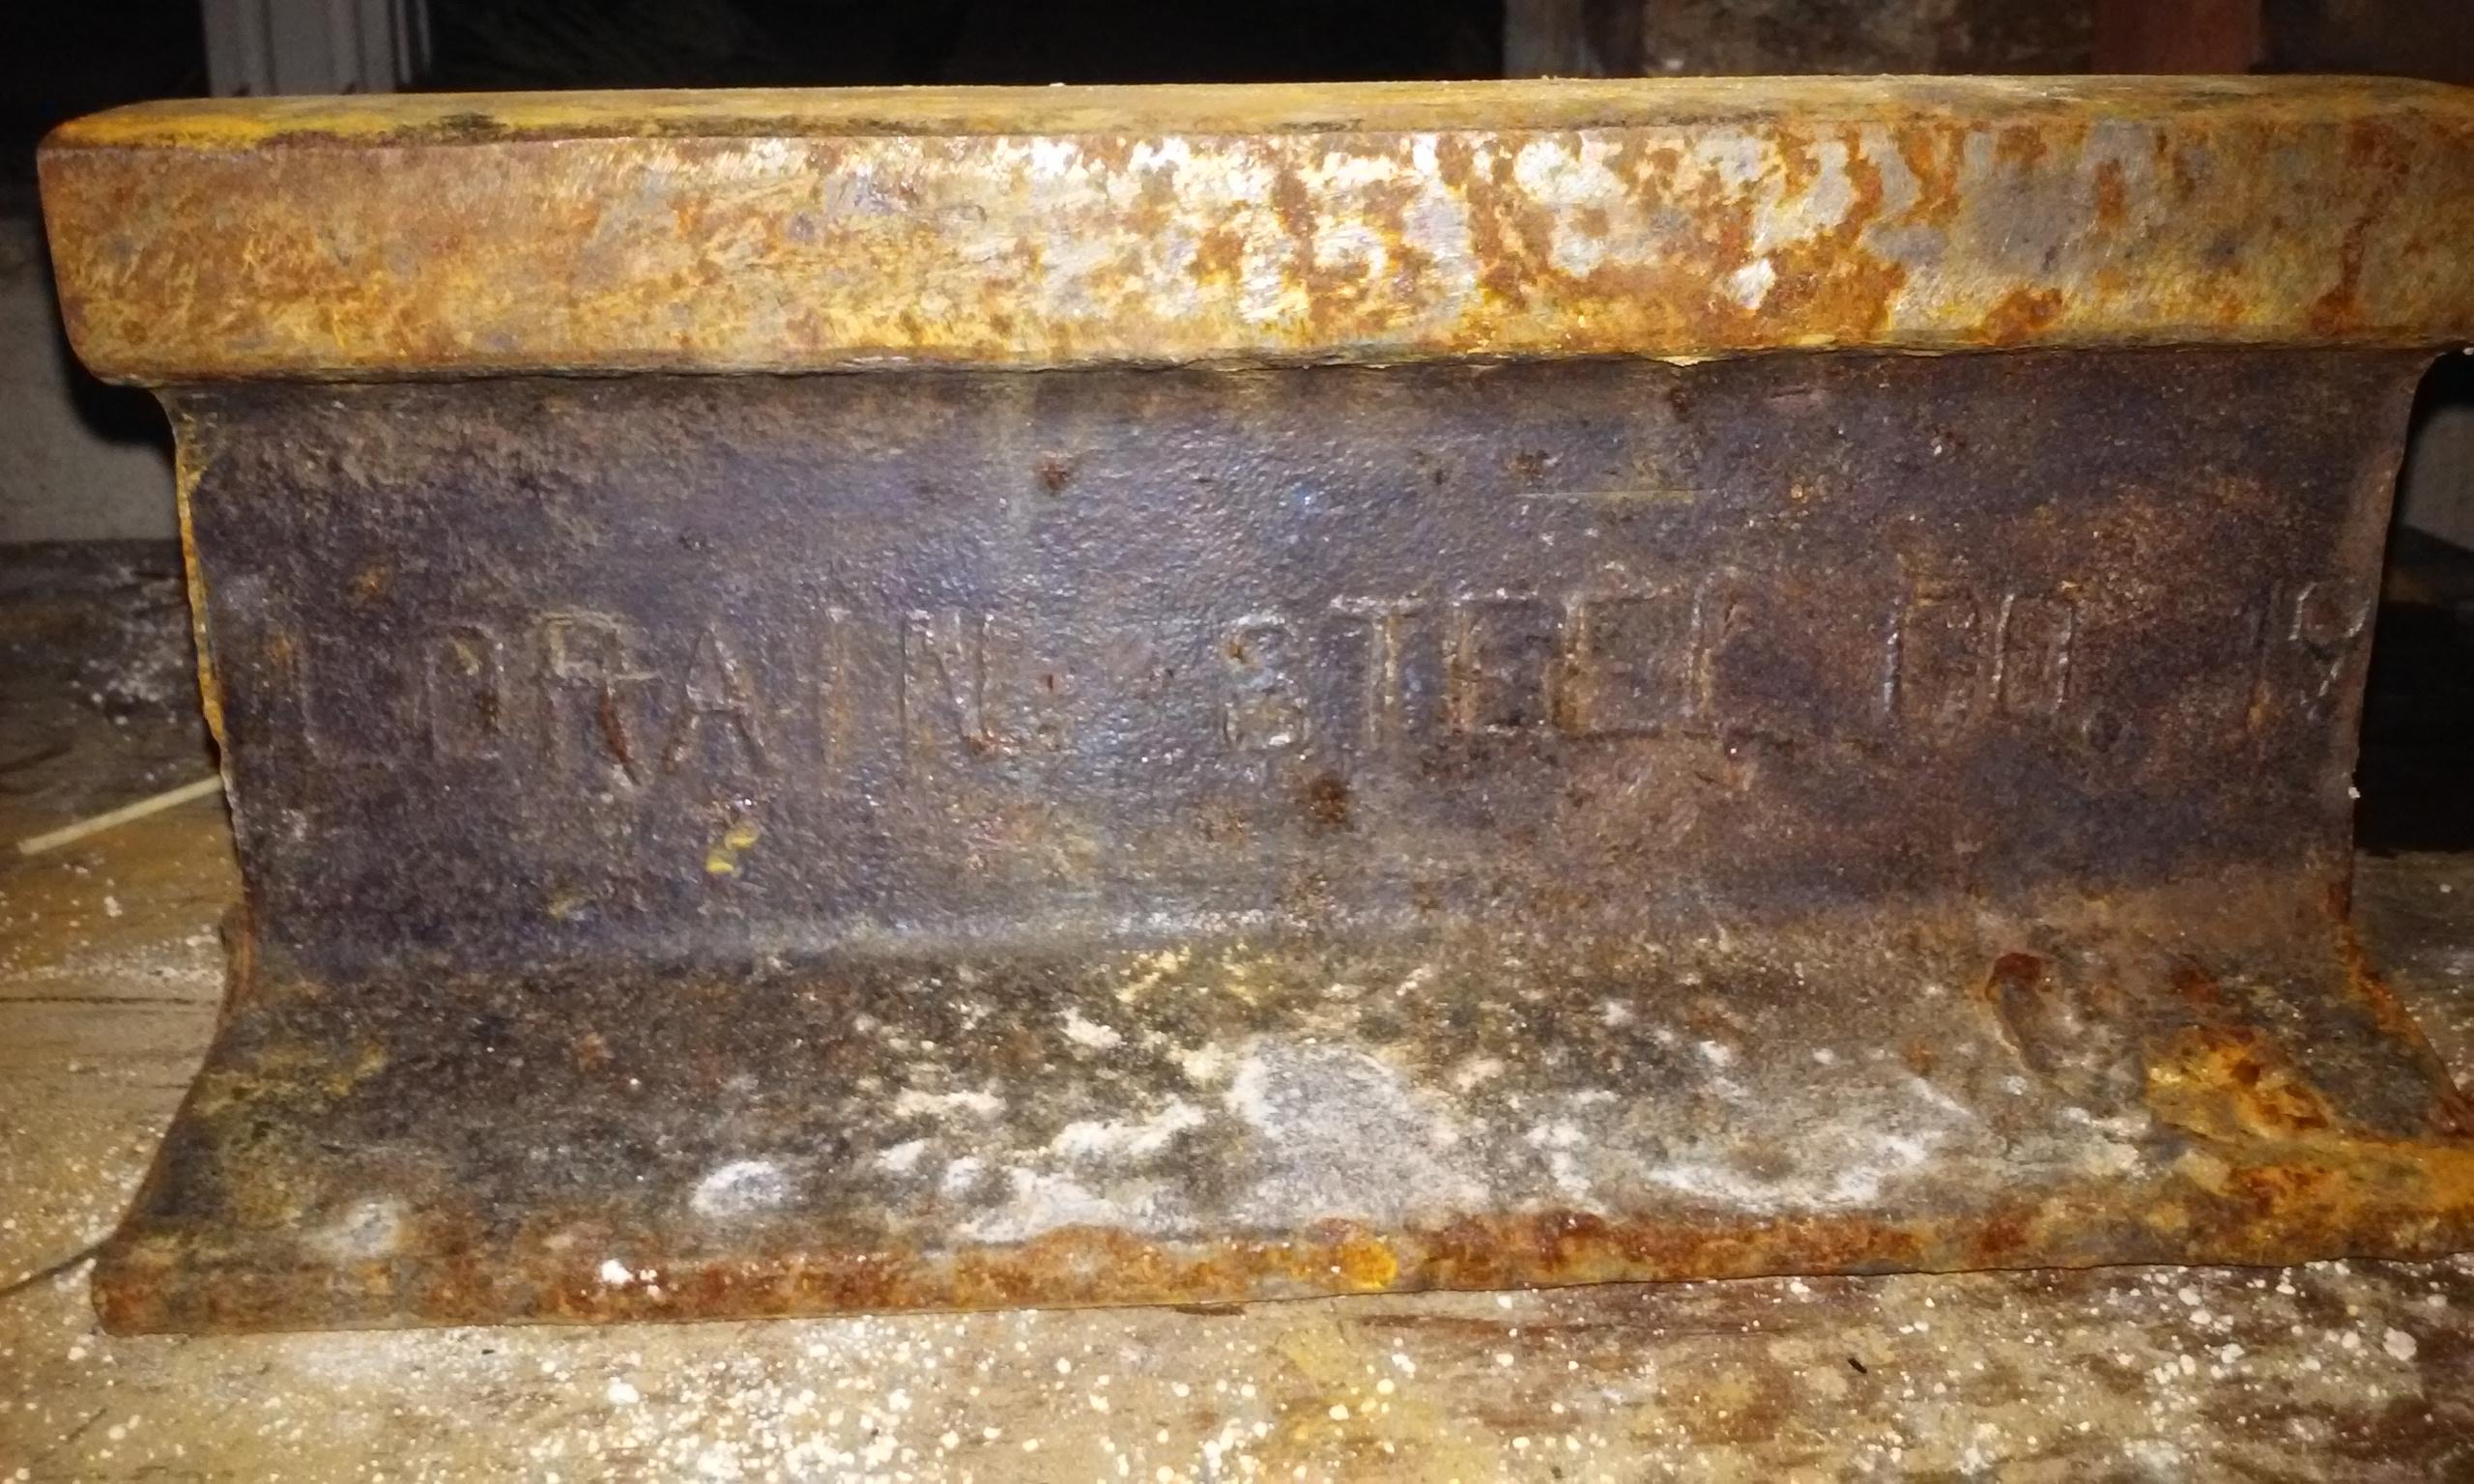
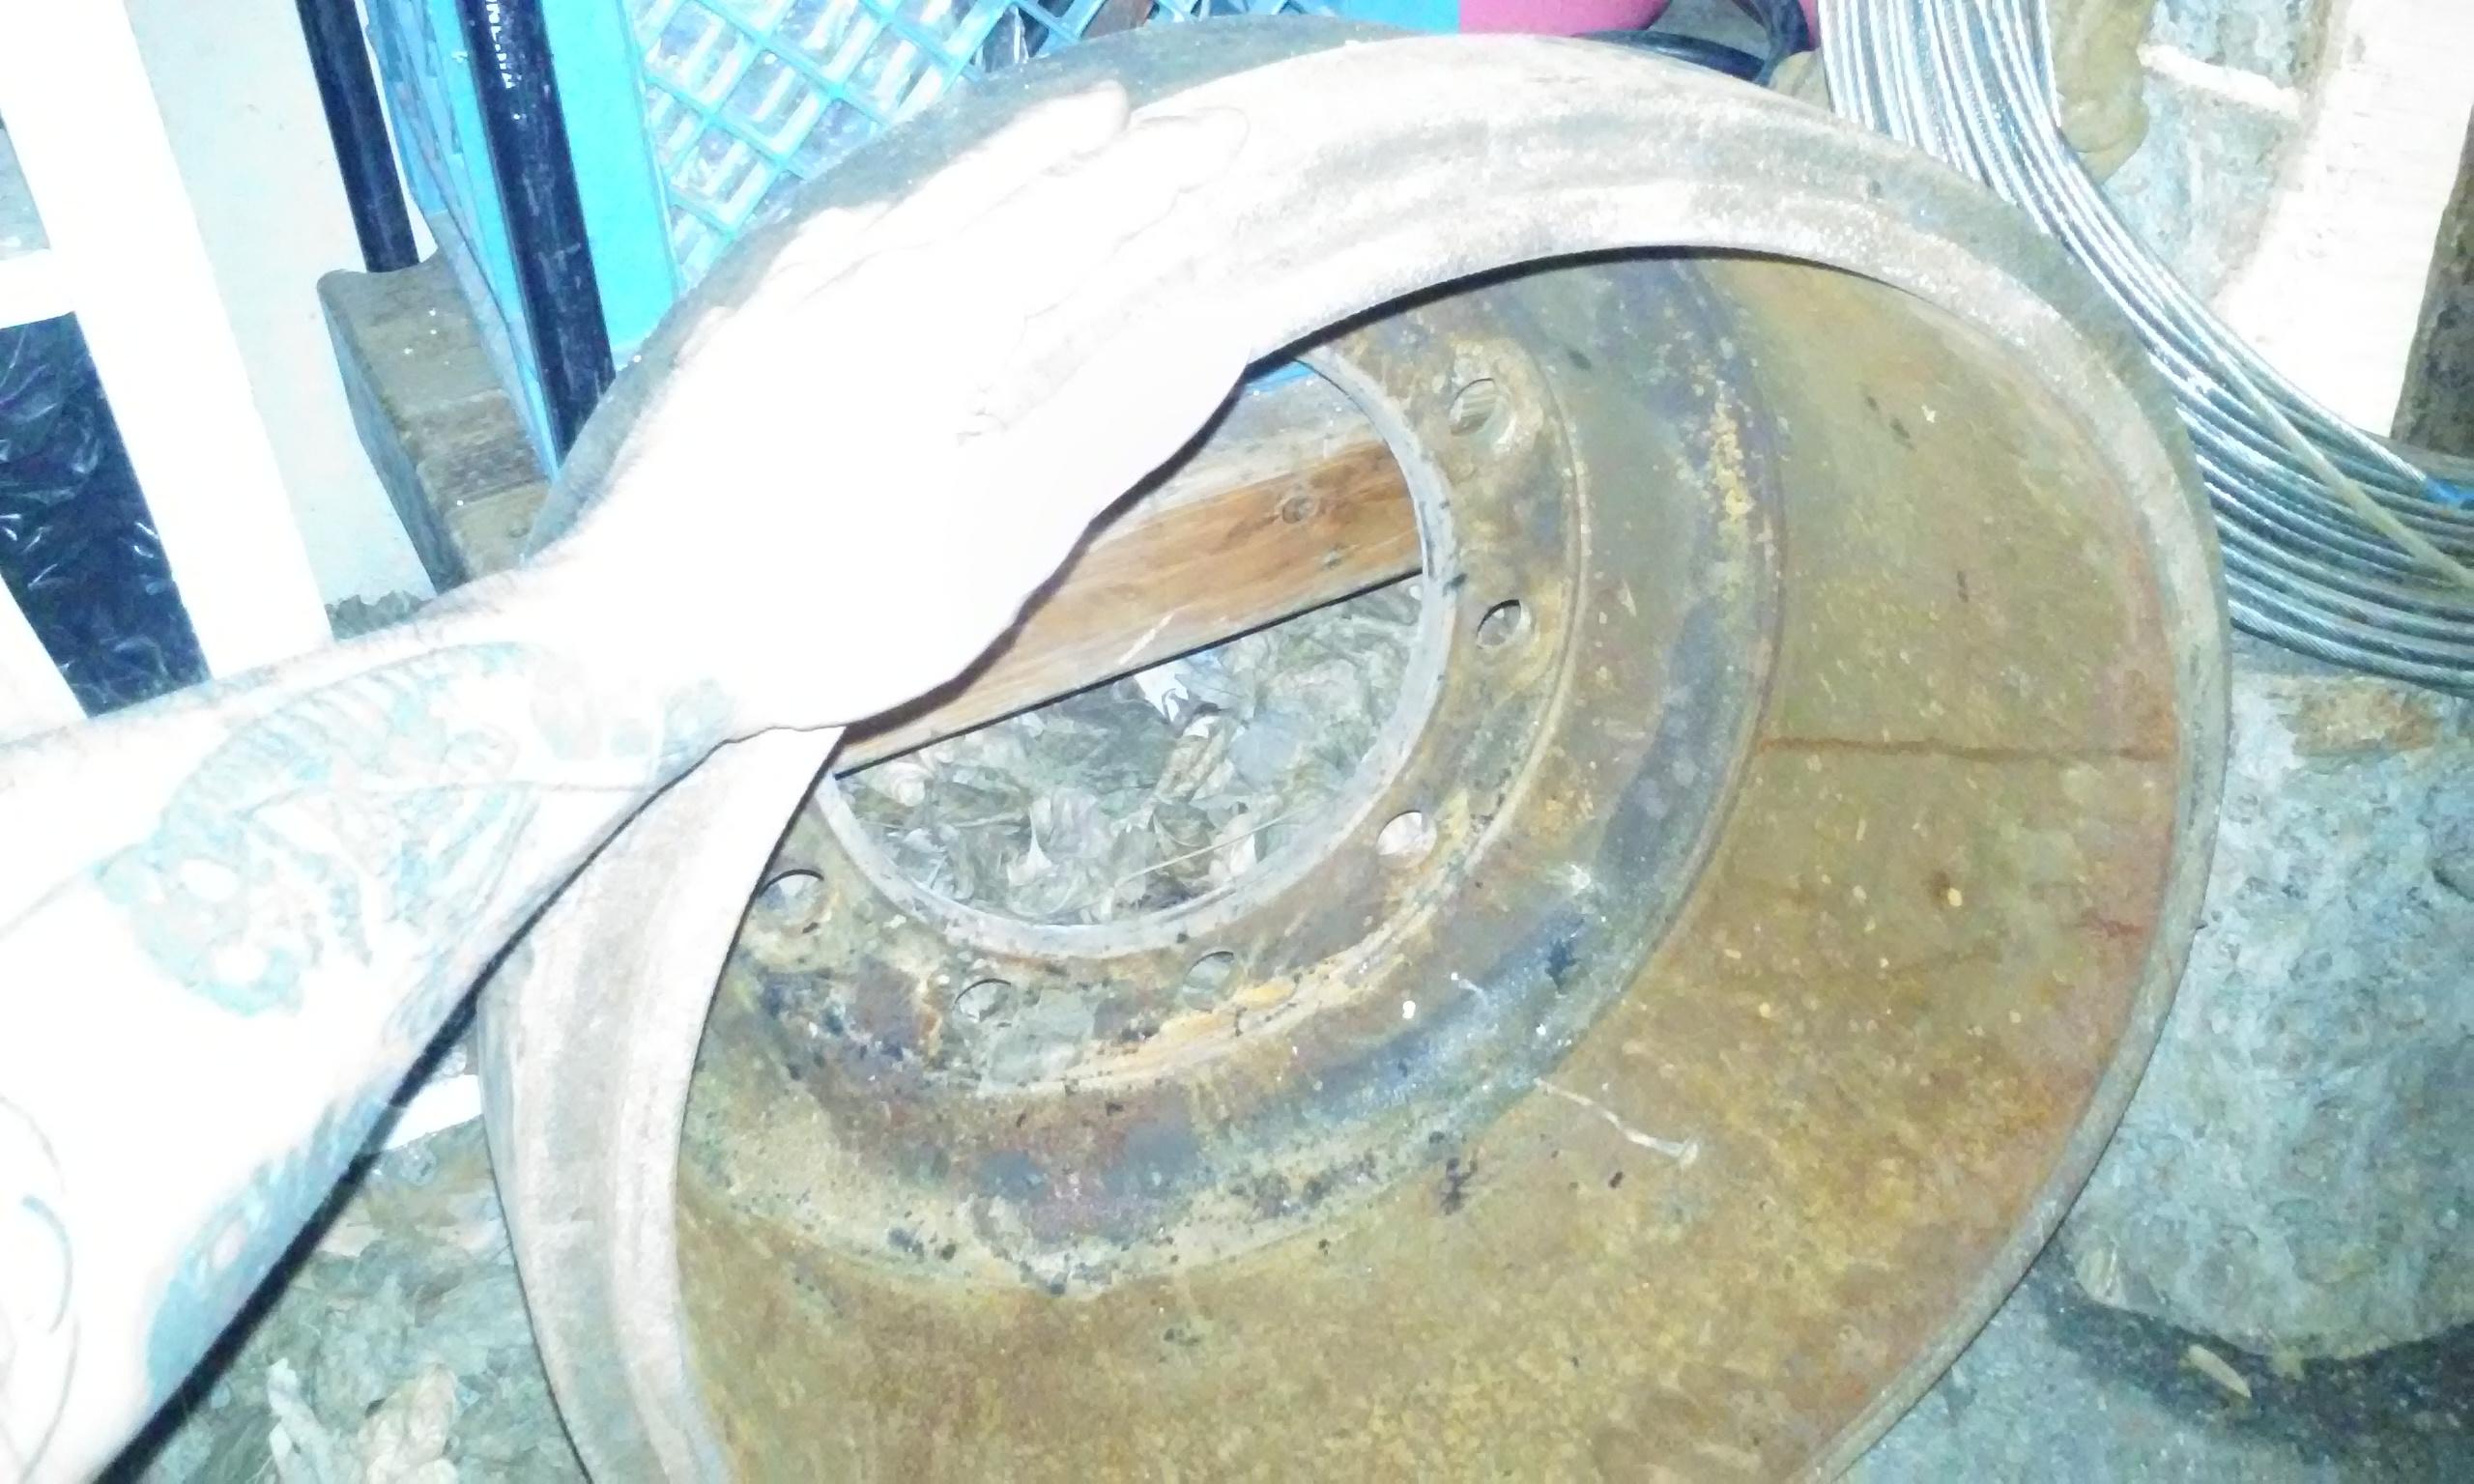
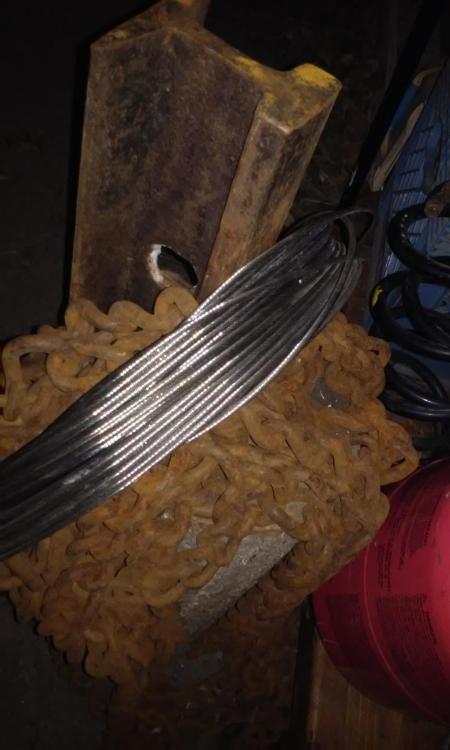
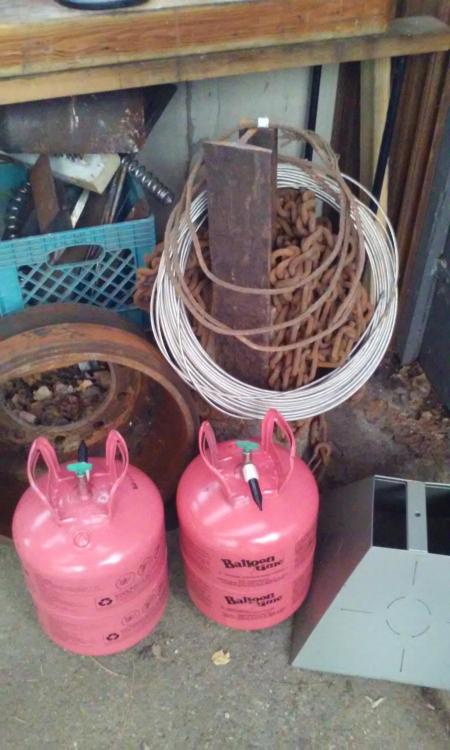
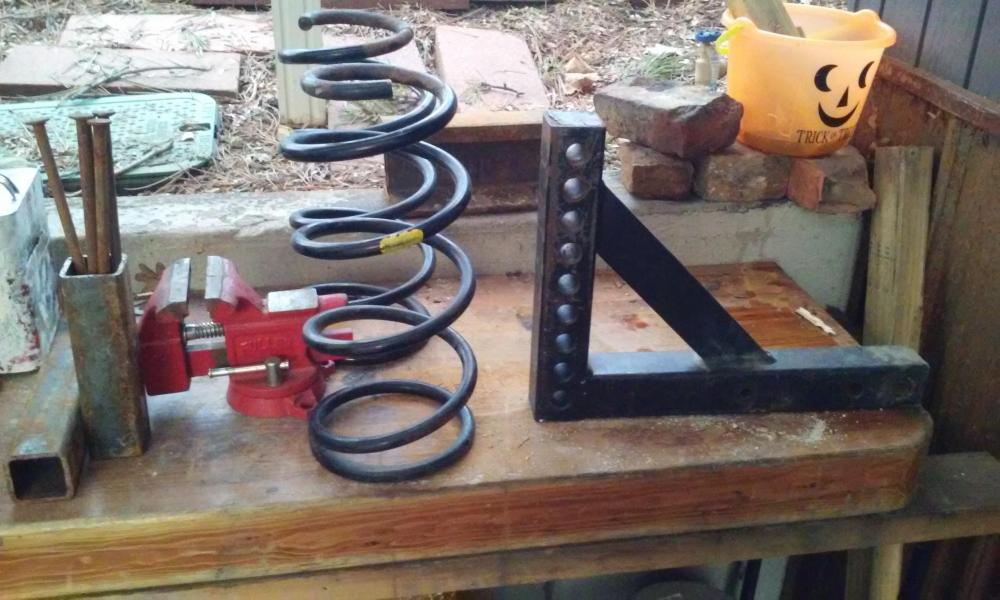
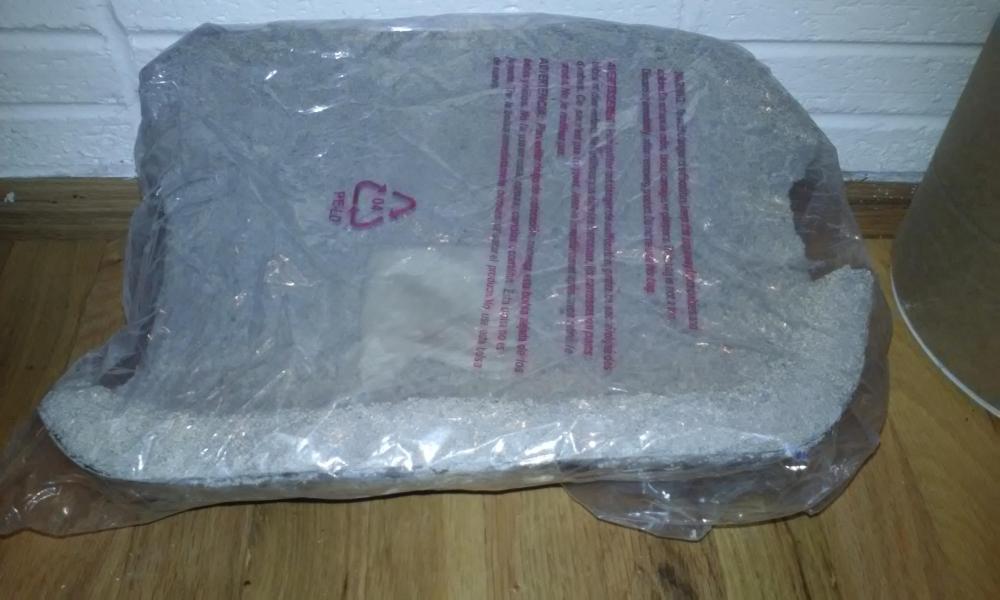
The local recycle center in Park City has a full size dumpster dedicated to metal that they leave open 24hrs. I get most of my material here. Here are just a few of the treasures (depending who you ask) that I foster. The railroad anvil was given to me as a 6' piece I believe it read 1912? The other half of the # is lodged in the base of the stump. The chain I believe is from a giant plow or truck. all one piece, it is close to #75 if not more. It was left at the dumpsters base in a milk crate. Probably too heavy to lift. The stainless wire was bought for $4 dollars at the recycle center. 2"x2" square tube from weld shop scrap bin in SLC. Springs, helium tanks, solid L shaped thing with holes, vice, and coffee can full of them nails all found in dumpster among many others. Giant drum I also pulled out (super sketchy) weighs a lot! Kudos to whoever lifted it up in there. It is much heavier than the chain. Not sure what it will be, but it's METAL! I will try to remember to get a shot of this place next time I'm there. It's pretty awesome! Judy


-
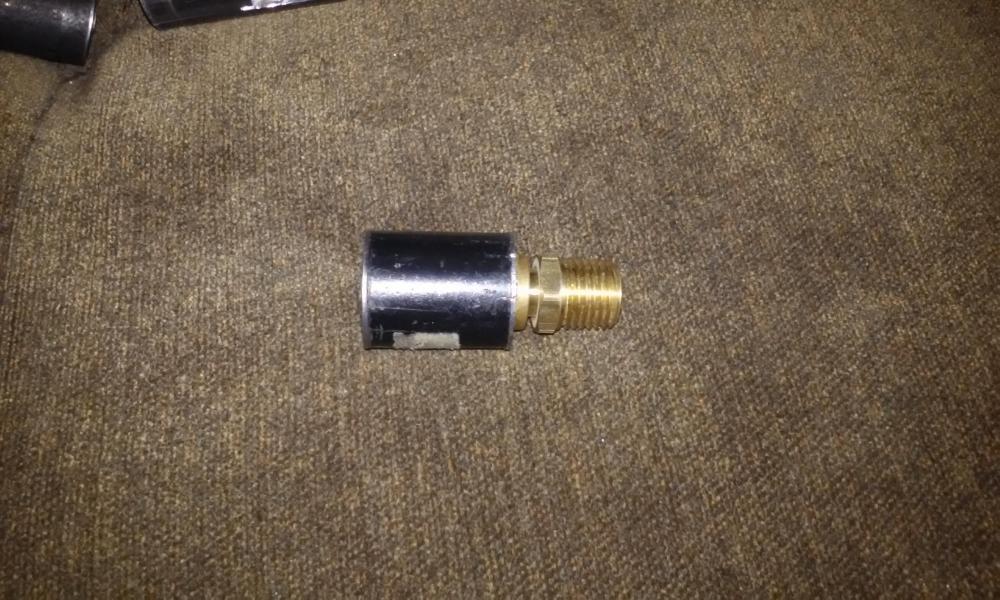
Thanks! Actually I was going to use them for the 1/4" build. A little handheld rocket sounds helpful! But since they are brass and of a smaller orifice size then most burners I could enlarge them to suit.
-
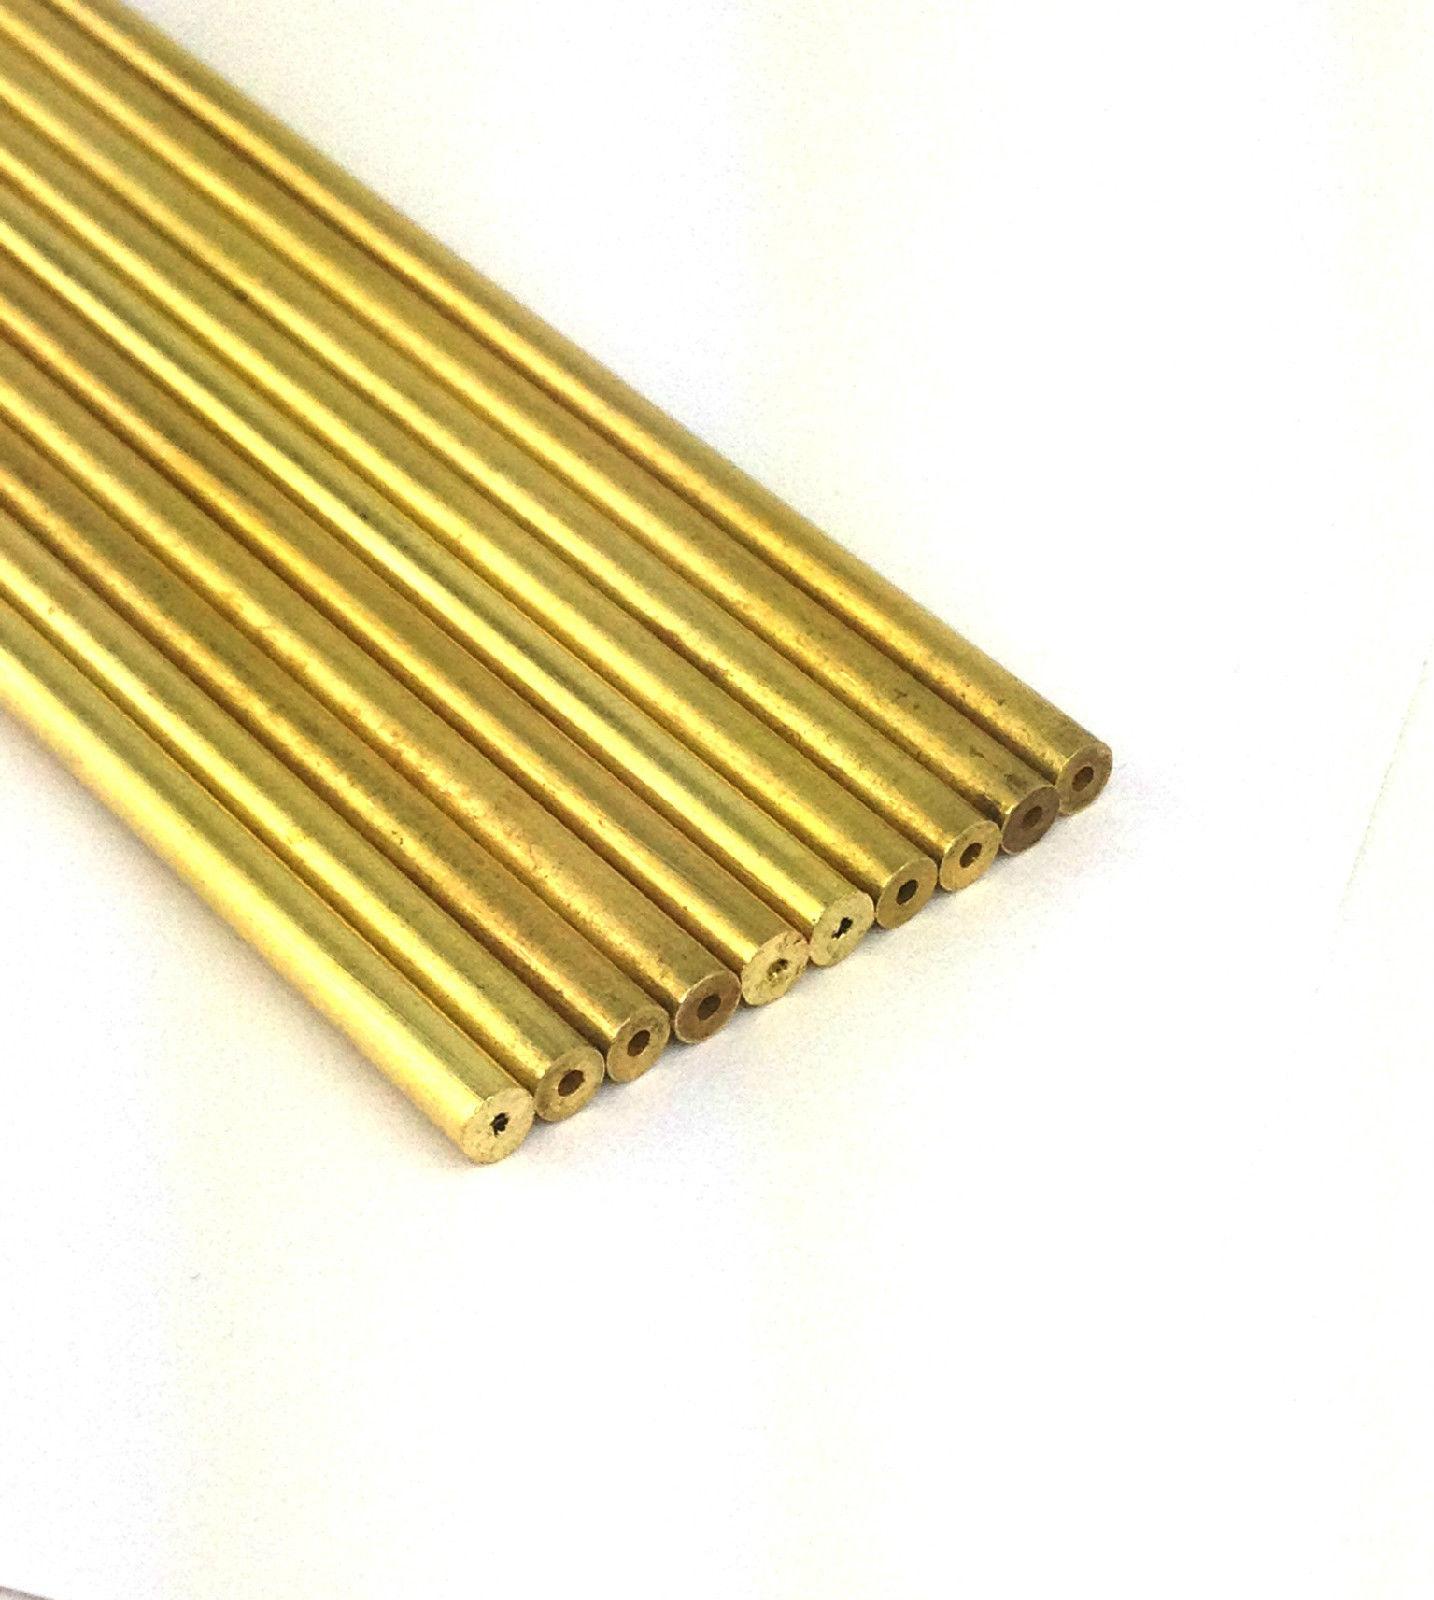
these are about $4.00 + shipping on ebay. Do you think they are too fragile to work with? DRAWN BRASS TUBES .0620 OD X .015 ID X 16"L (LOT OF 10)

-
Oh boy, now I'm thinking of putting individual valves on all three burners to utilize as many as I need. Makers mind. That is what I was thinking, since buttering things up is in these days. I like D Rotblatts suggestion of changing the shell. Judy
-
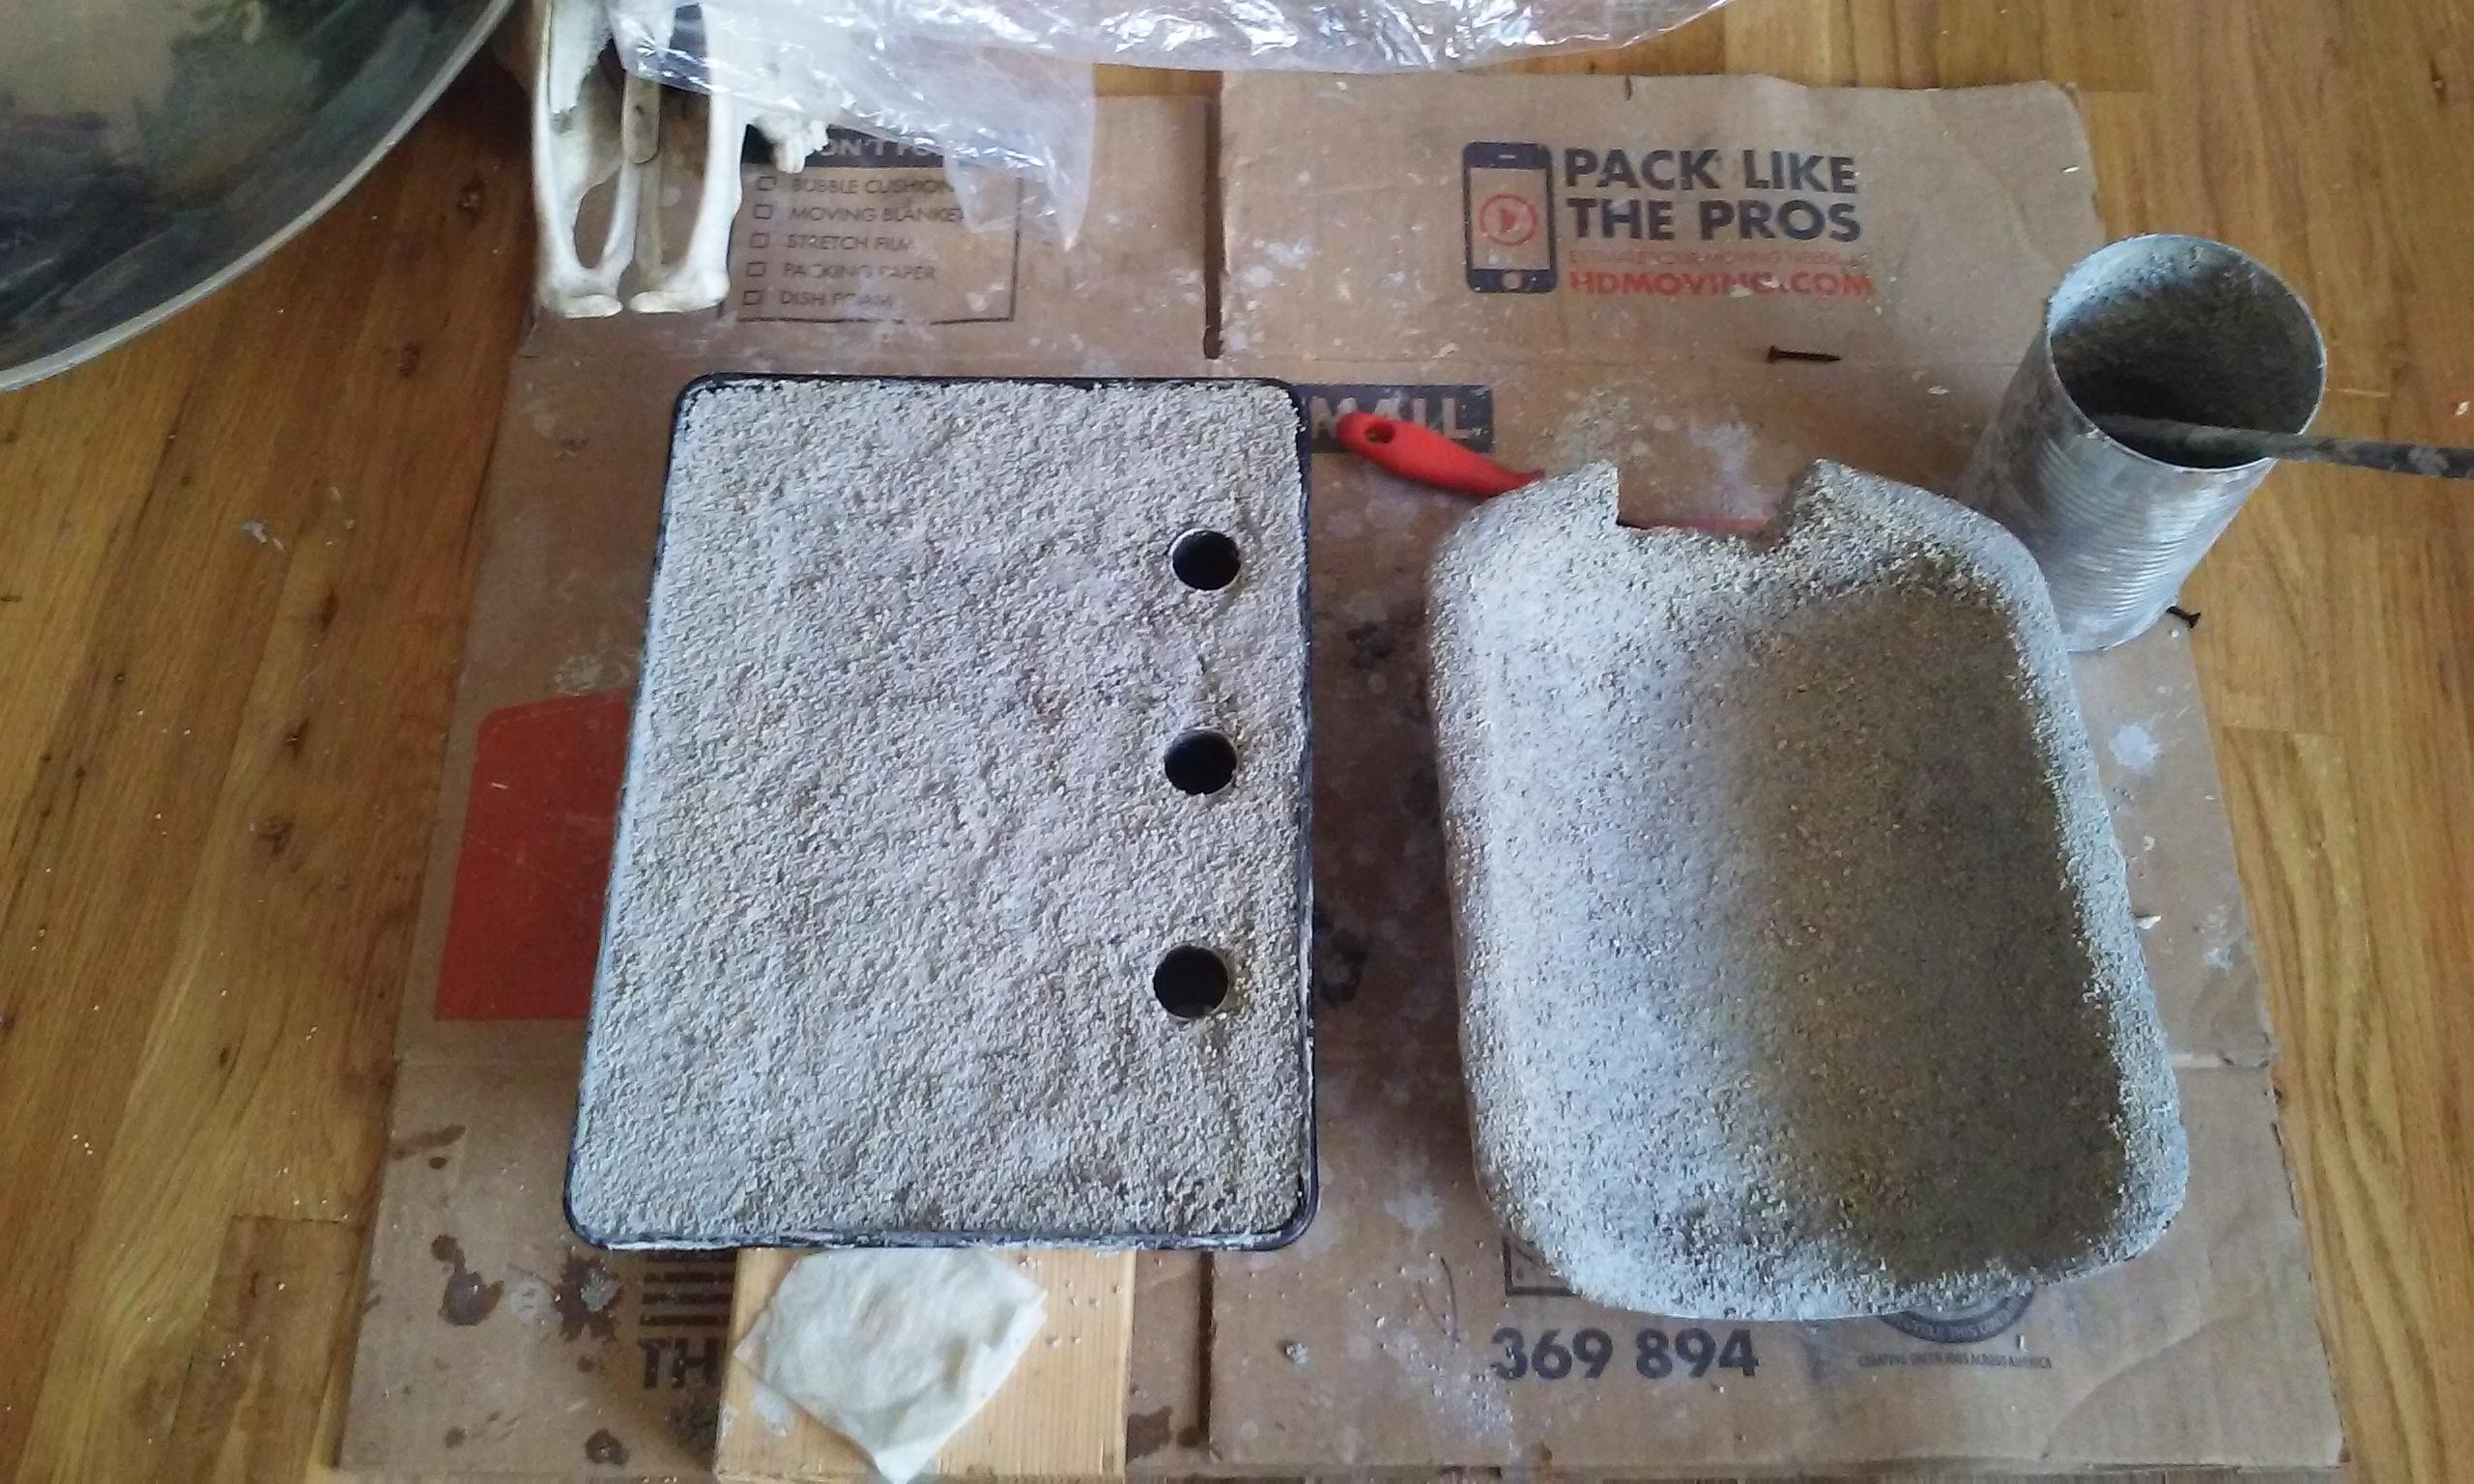
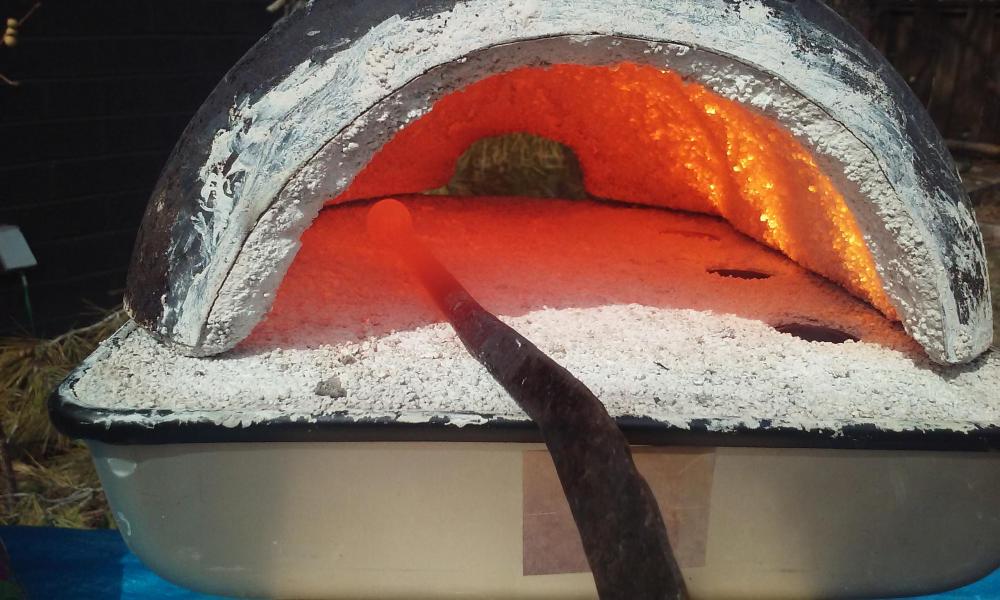
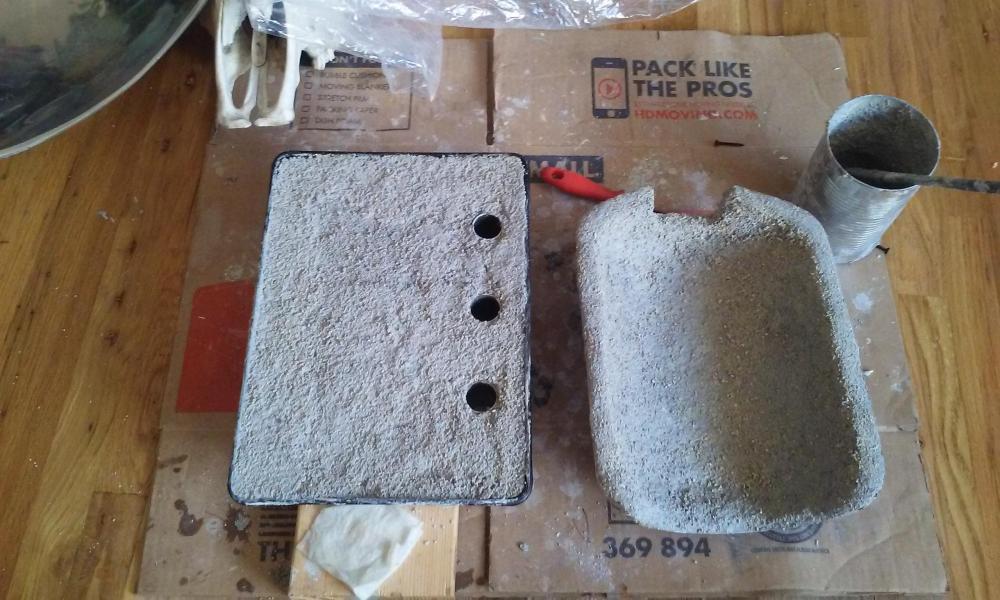
Shells casted and curing. I am wondering about the joining of the two. Thinking of strapping them together then patching the seams with Kasto. Any thoughts?
-
Thank you Mike. This was originally designed for a single 1/2" ribbon but the ease of construction of the 3/8" has changed my mind...for now.
-
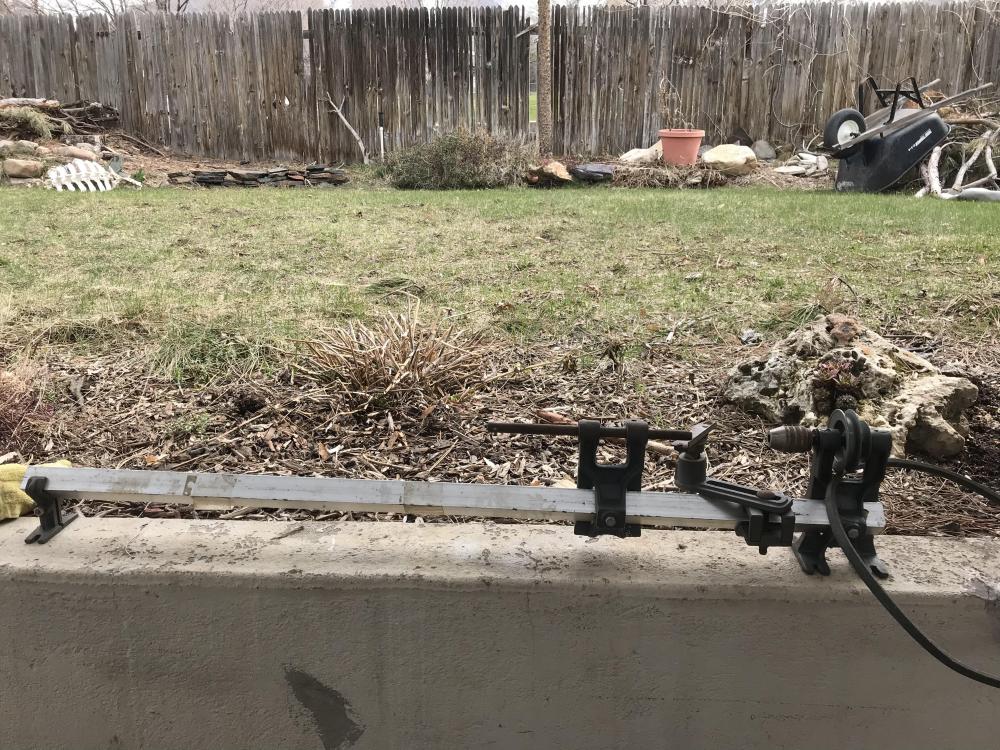
Half cake pan, half helium tank. Pan will be filled to 1/2" to the top of the ports with perlite. Then a 1/2" of blanket rigidized and coated with Kasto. This is a bottom burner mounted forge powered by three 3/8" burners. Overkill? I think maybe! But it will be hot overkill. I am wondering about rigidizing the perlite? If it can be rigidized. Or glued together with silica.

-
Challenge accepted. I'll have to break out the ol' monacle and forceps. What orifice size would you recommend starting at? I can barely see the orifice on a small bottle torch.
-
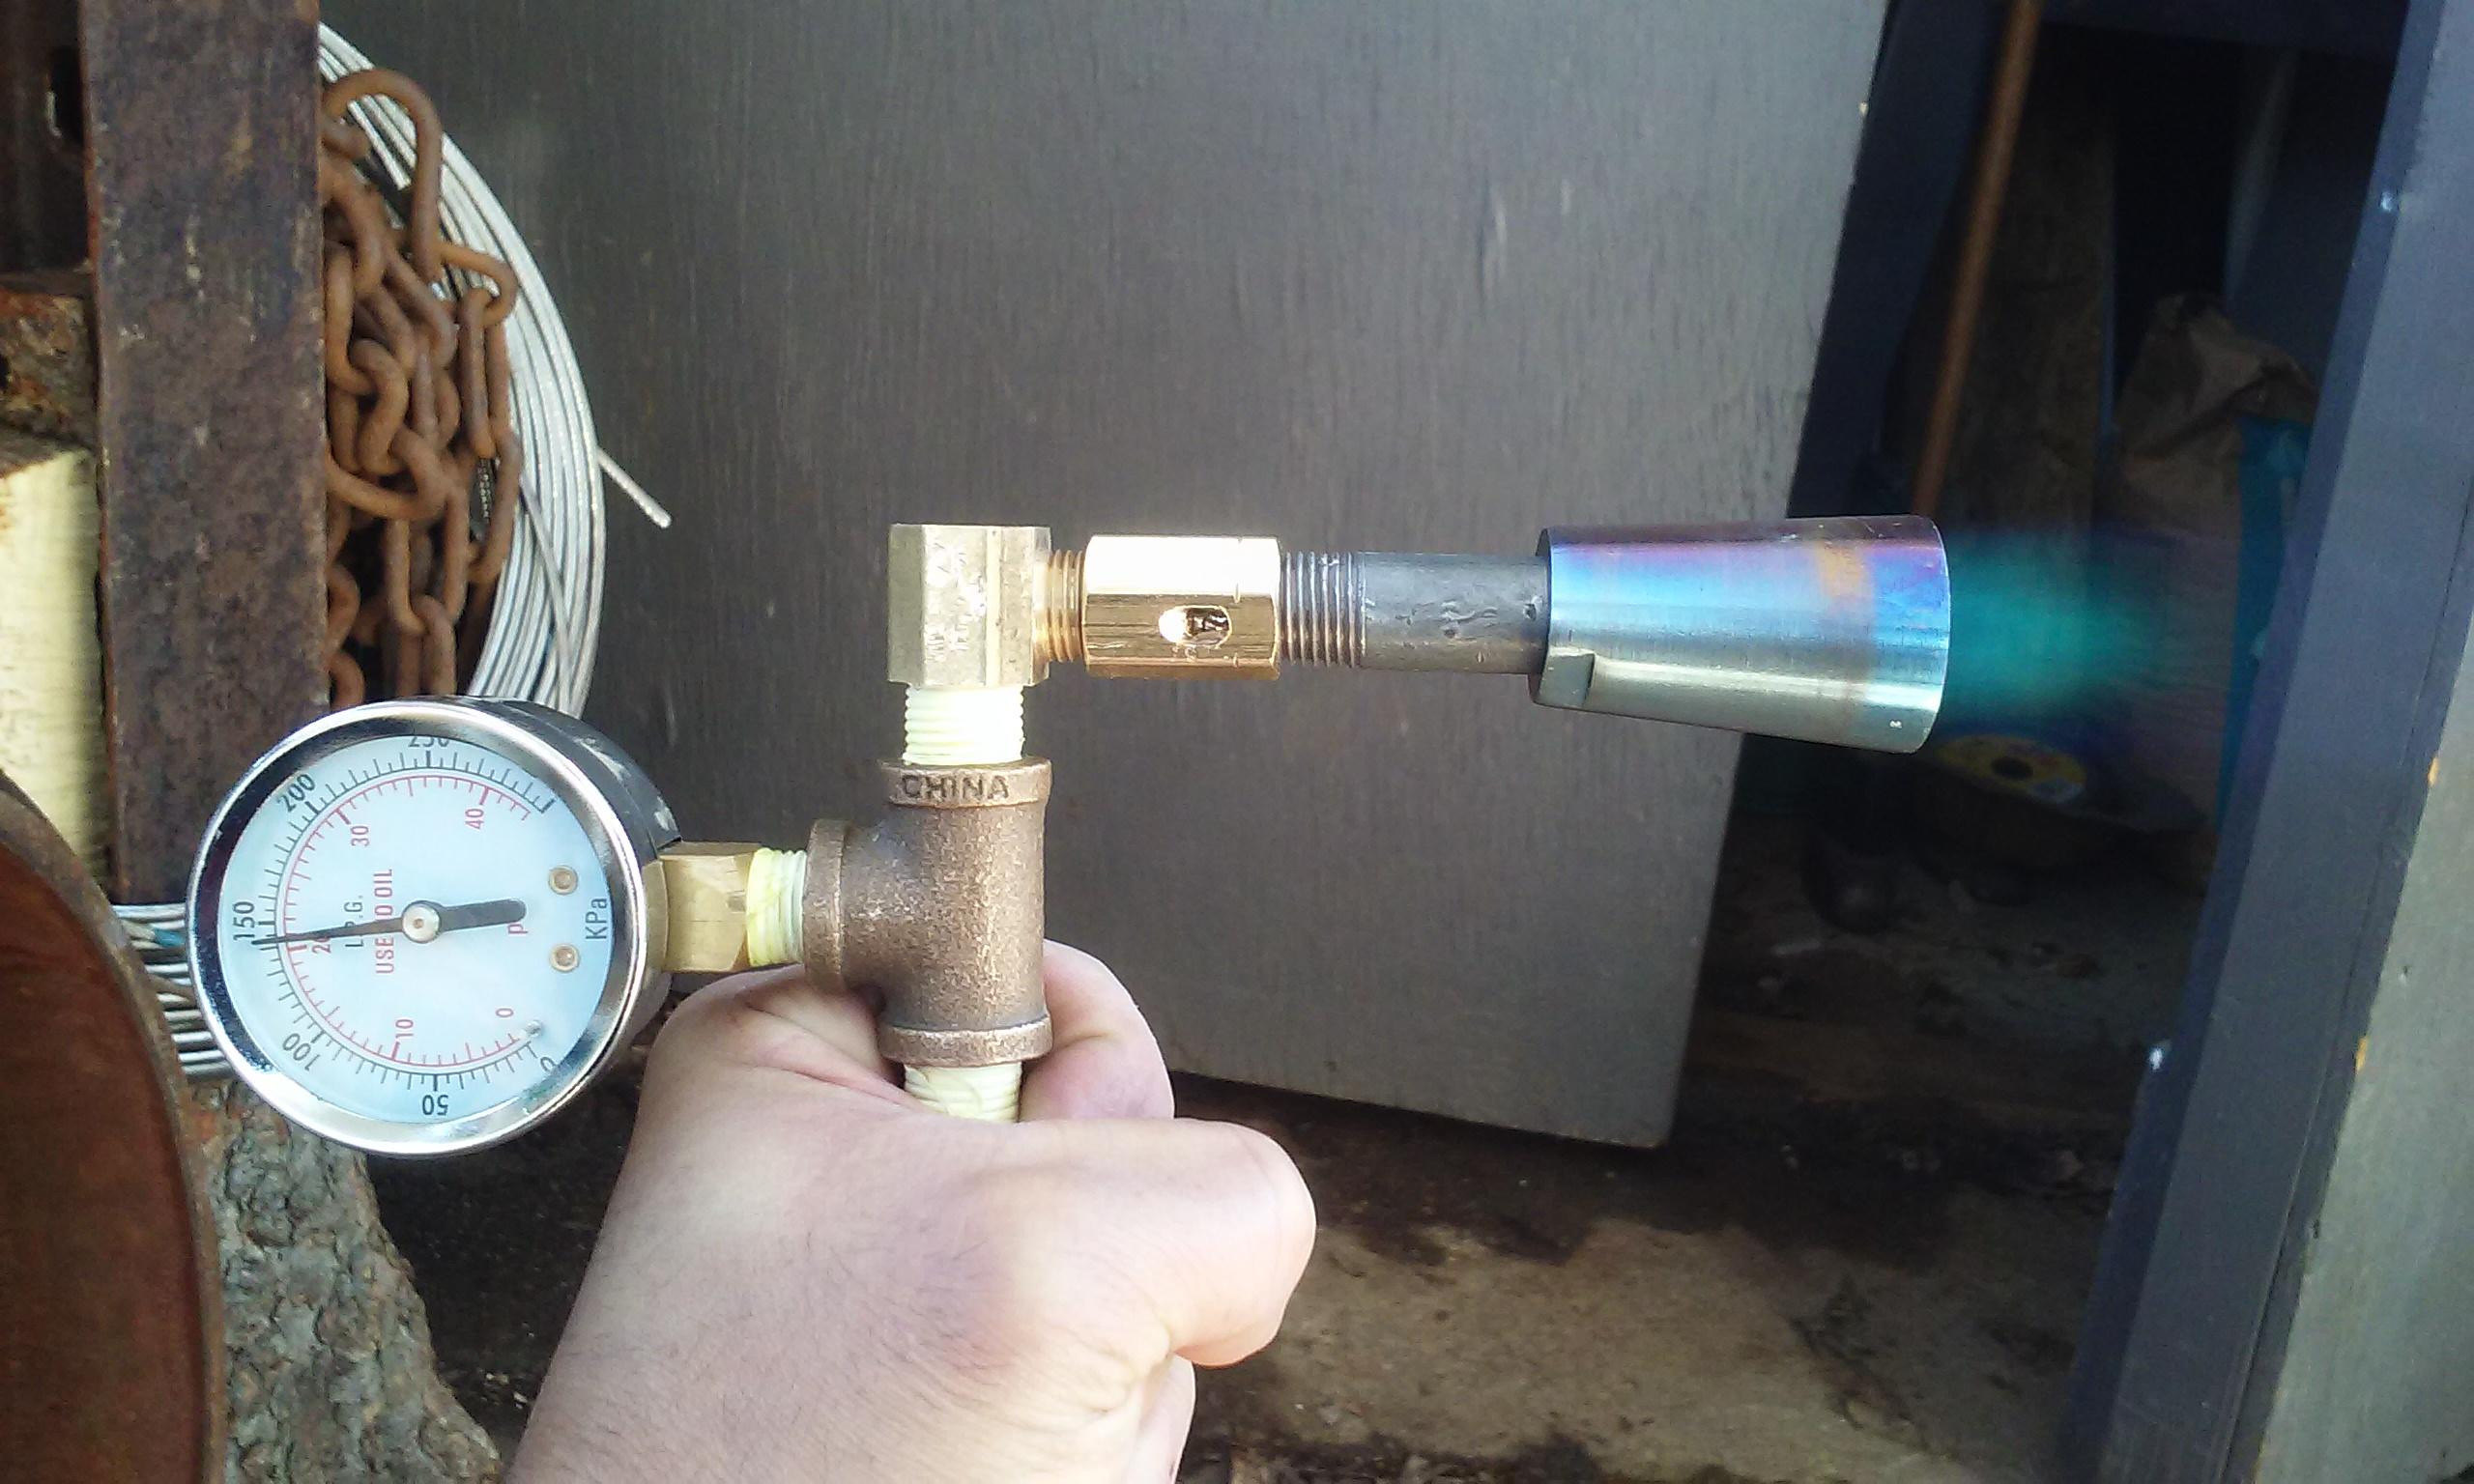
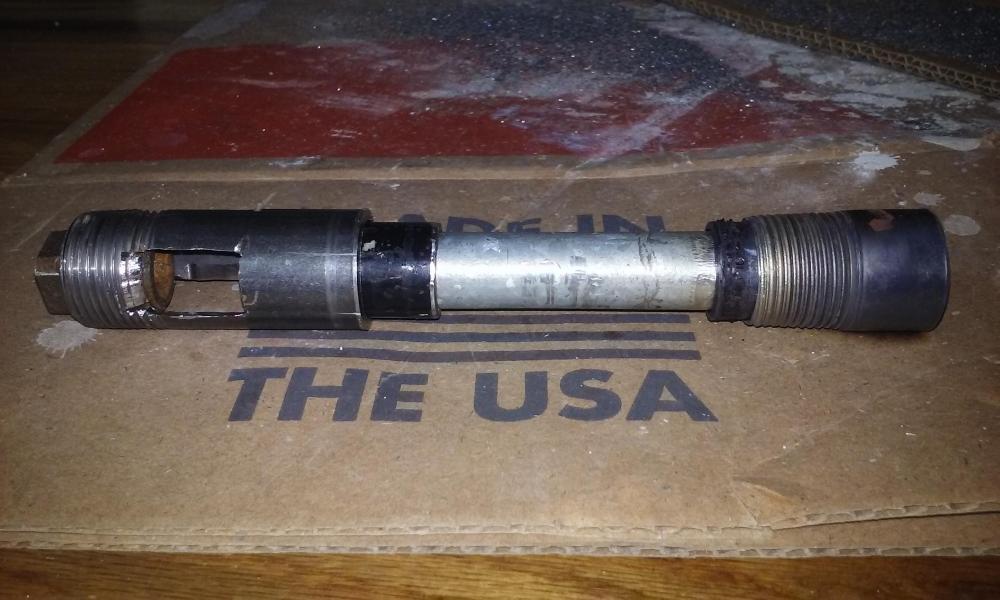
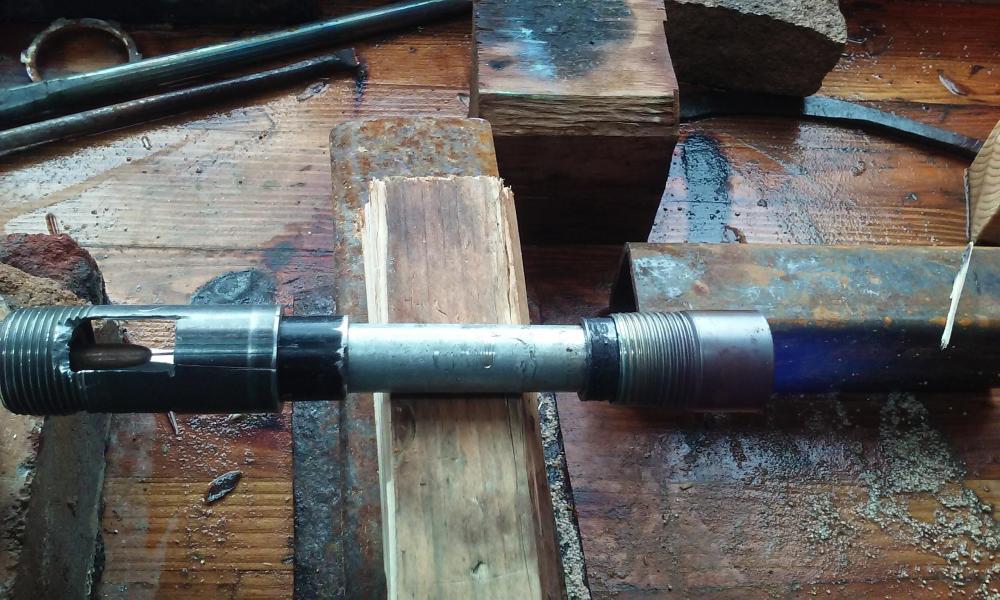
Thanks for the help and encouragement along the way. This pet project means a lot to me. Mike, Frosty and others have been a huge contribution. Also the new ideas from AnotherFrankenBurner keep interest fresh while projects are on hold. Latest design seems to be a success. Shorter chamber and intake slots allows jet to be closer to throat reducing wind interference. Thanks D. Rottblat! It like it's siblings is smooth throughout the psi range (1-25).

-
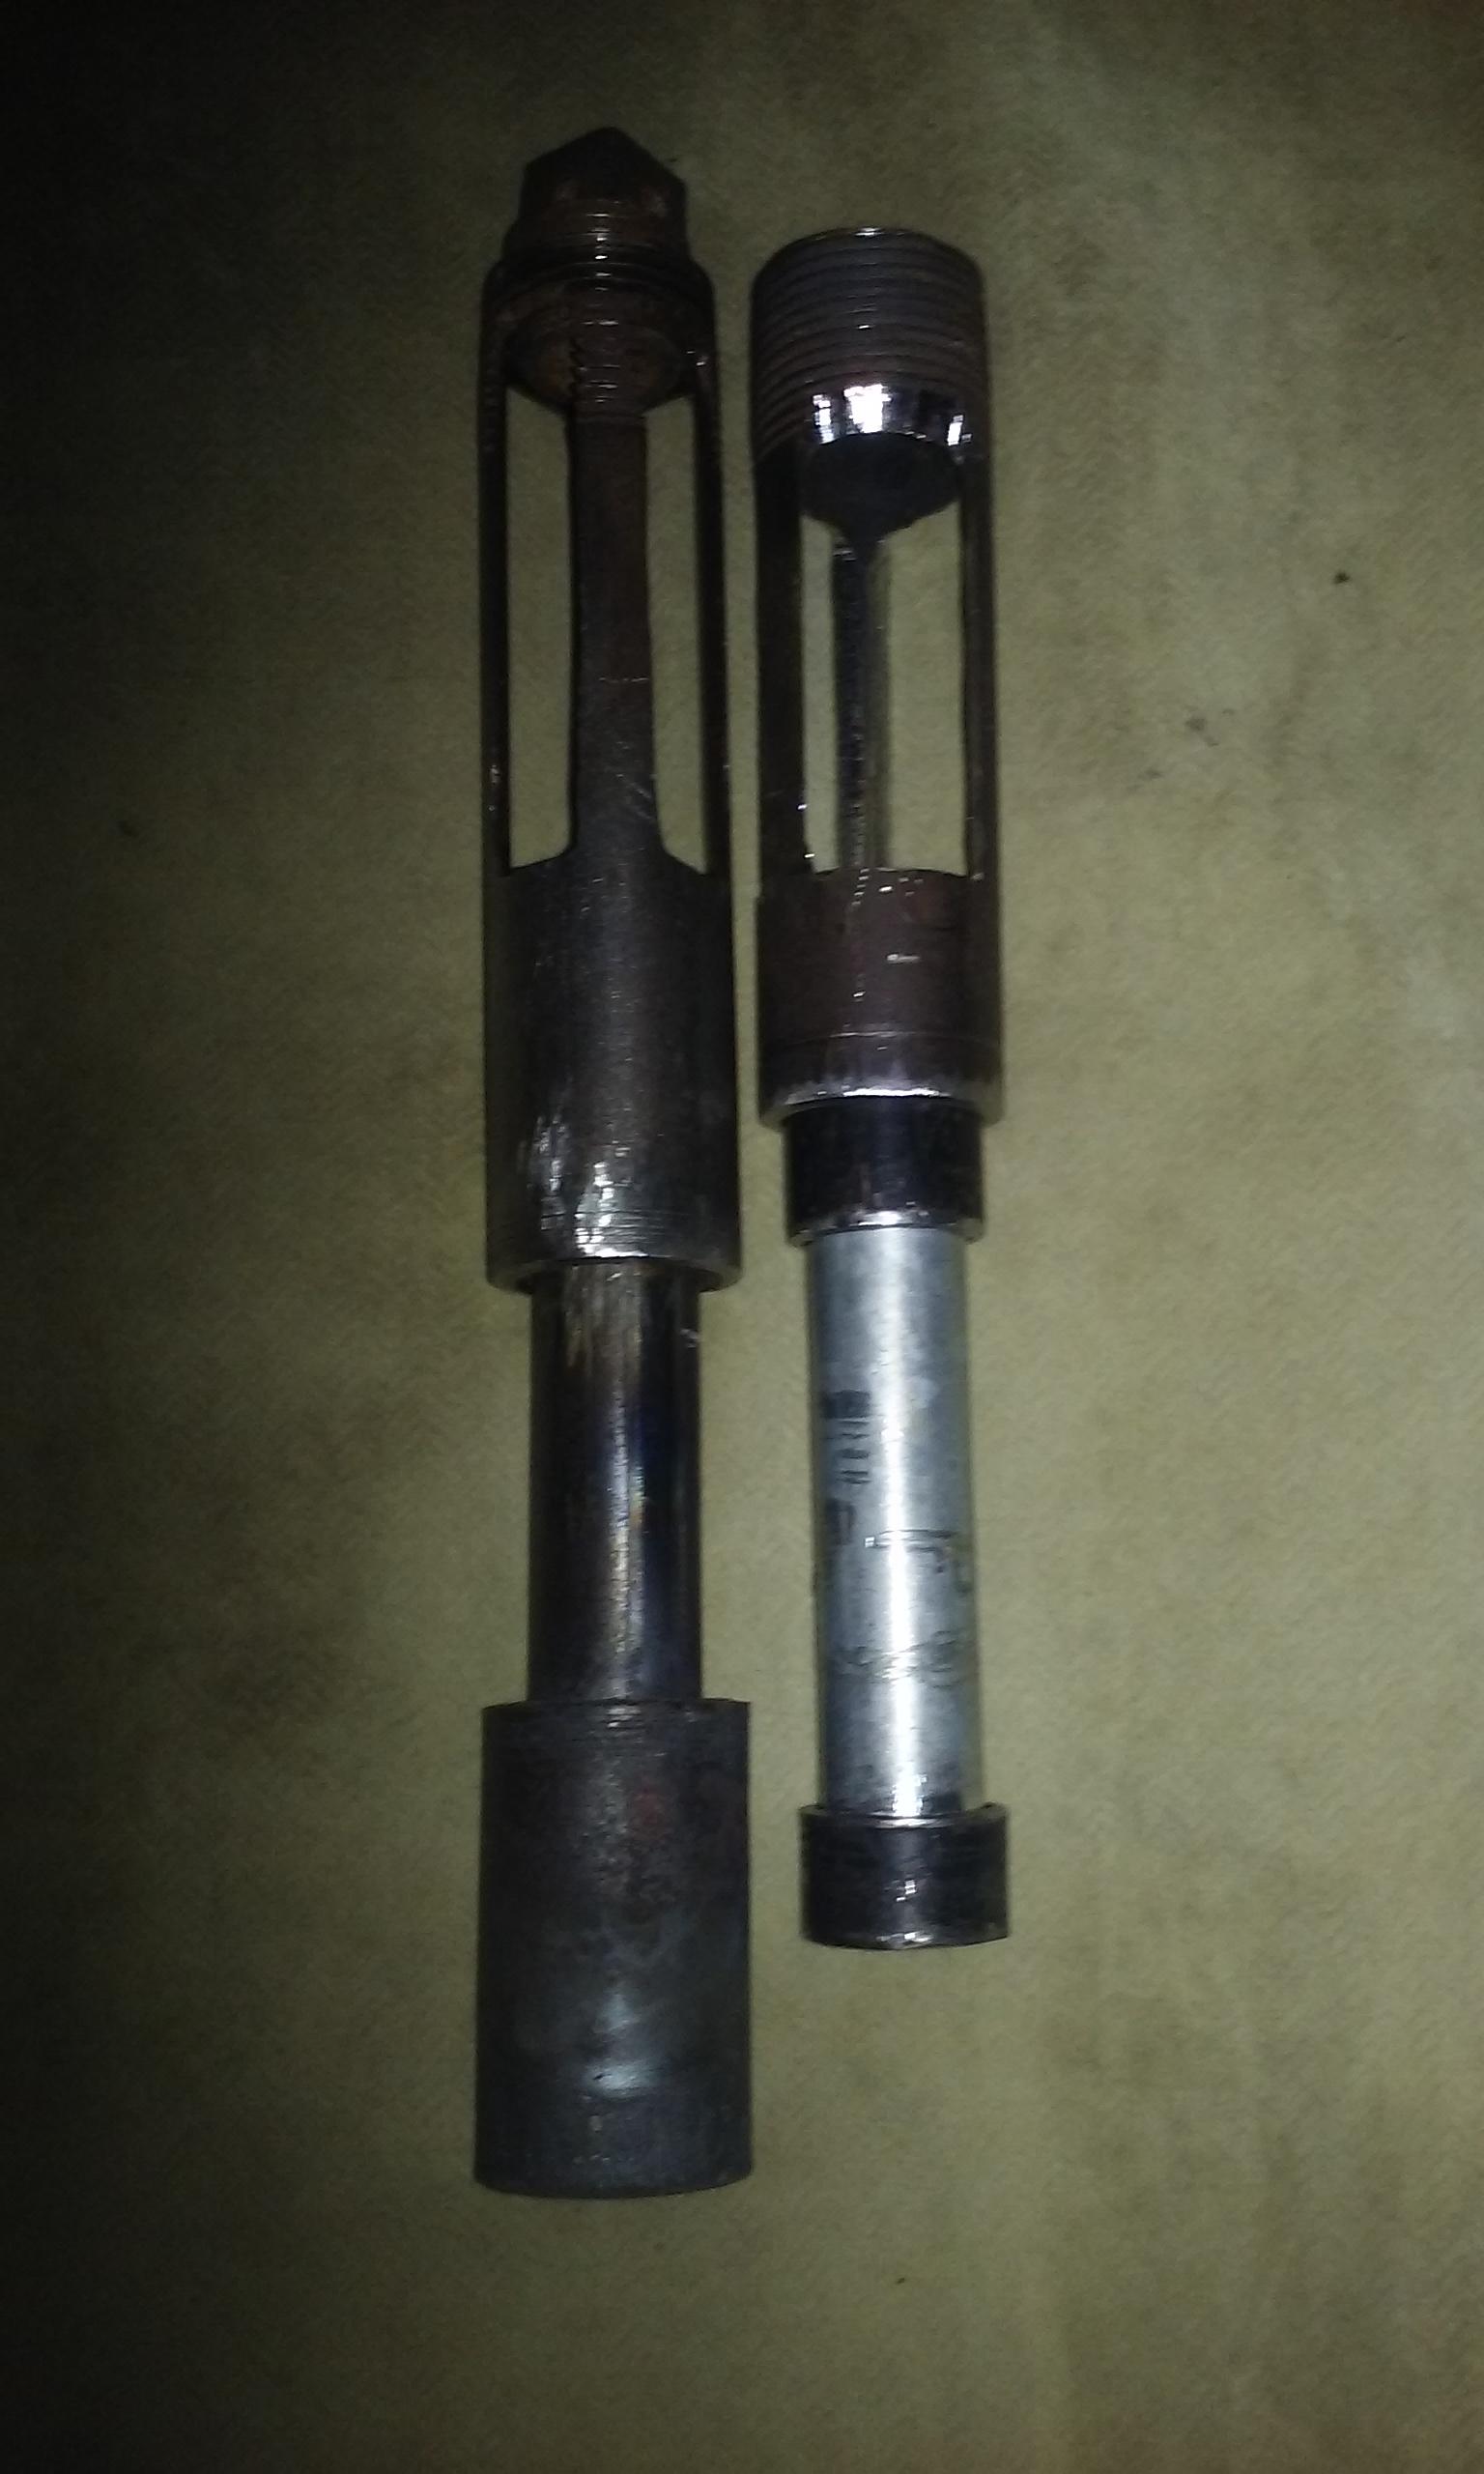
Once it is in the sweet spot adjustments shouldn't be needed? I think I have found a stable way to secure the jet but doesn't leave room for adjusting. It just so happens the 1/4" flare unit slides snuggly into 1/2" pipe, which then slides snuggly into the end of the 3/4" chamber. . I made another 3/8" with the same dimensions as the first 2 except for a shorter air chamber with shorter and narrower slots. It still needs beveling and such so haven't tested. I am trying for maximum induction that could be controlled by the choke but not so much that the extra air is useless. I guess there wouldn't be a flame if it was that lean. But I figured I'd get rid of dead space/length. Thanks for the input everyone! I feel an addiction setting in.
-
Yes it does! Since I didnt know exactly what i was doing I made it a bit long (way too long)! The final burners will have same dimensions all round and a different jet setup. There will be three 3/8" burners in that half a helium tank forge. The copper tubing as a jet connected straight to the gas is tough to get accurate as one piece. I was thinking of employing your Frosty T jet setup as it is threaded solid into the head of the burner eliminating the mechanical stress and use hoses to connect. Any tips? This made me chuckle.
-
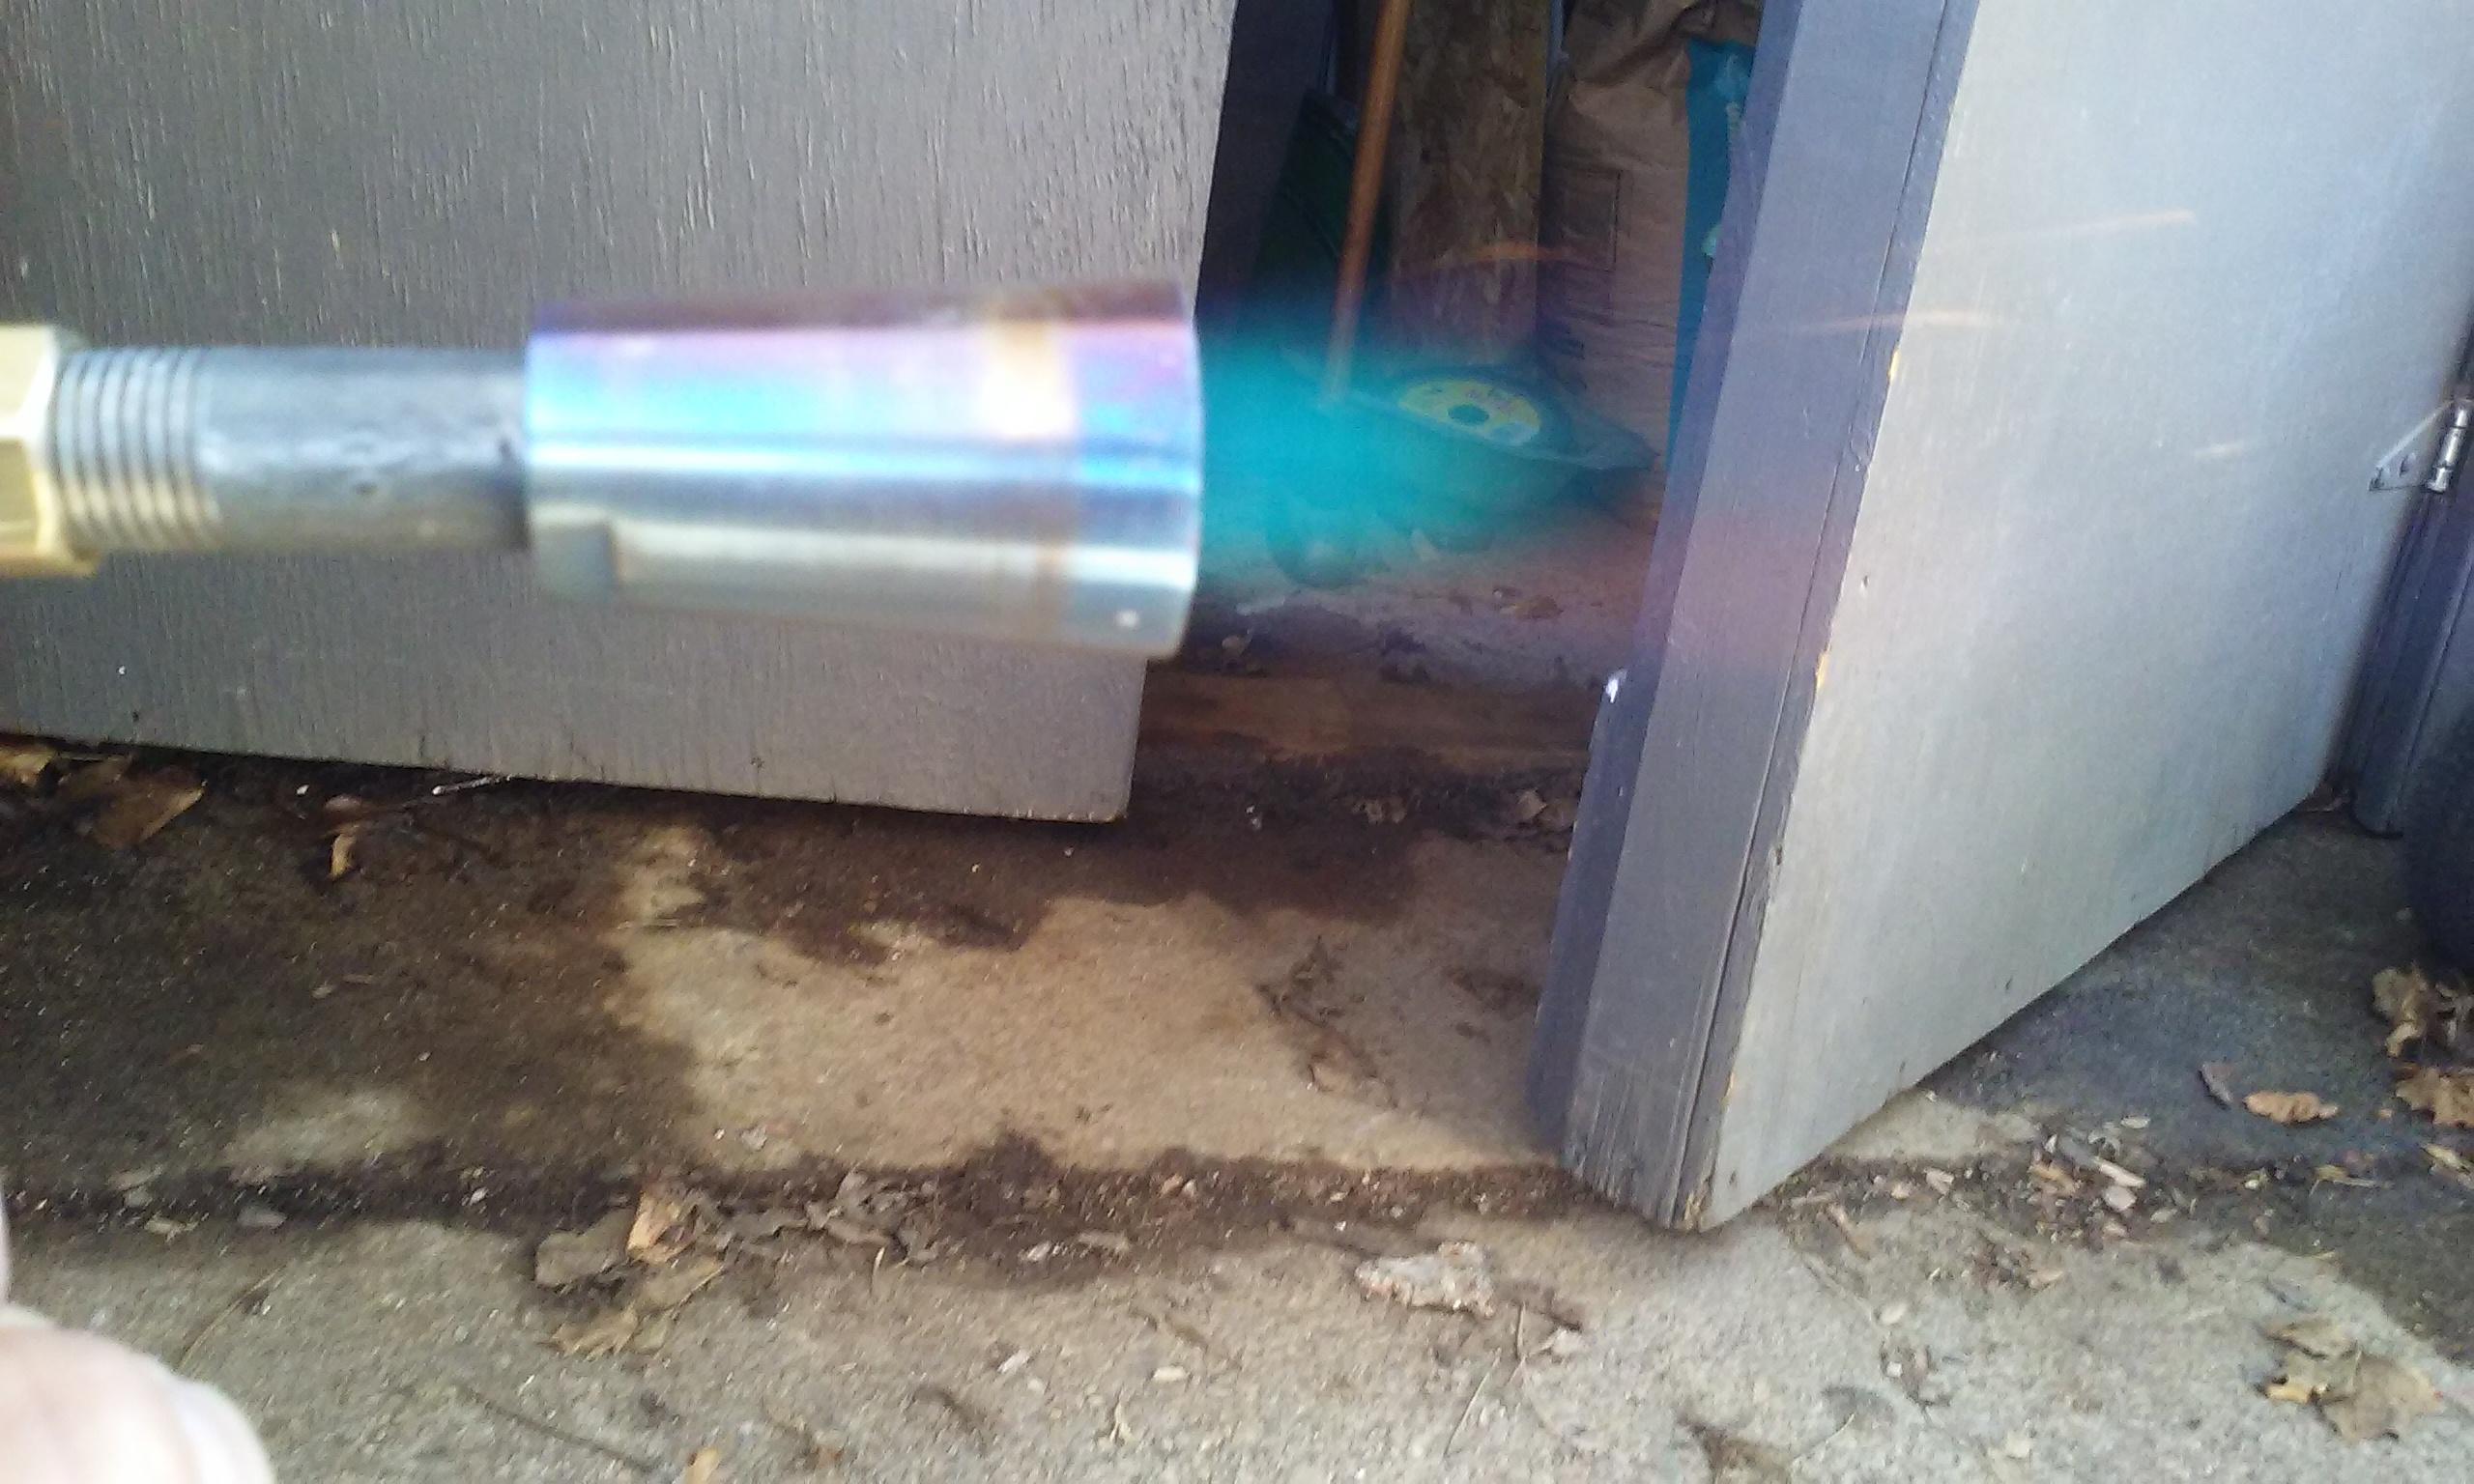
This is similar with the beveled choke so far up acting like the start of the throat. However the jet does like to be further back. I wonder if the much larger air chamber has something to do with it. Also the jet is pretty long. Trimming it back may allow it to be placed closer to the throat. I made another to play with. With some tweaks. The next one will have shorter slots further back on the chamber. Don't mind the galvy, it's gonna have a bath.