
.jpg.02cdc5b3ade6d35c797a0e2d05542f39.jpg)
Howling dog forge
-
Posts
106 -
Joined
-
Last visited
Content Type
Profiles
Forums
Articles
Gallery
Downloads
Events
Everything posted by Howling dog forge
-
A little update: The Dog kind of blew it on this one. I was using a 2"X3/4" T for the burner and Frosty specifically stated a 1"X3/4" T. I don't have any idea why I decided to be creative with this but I just made the change. Still in the tuning stages but everything is working fine so far. I am hoping for a bit more of a reducing flame from this configuration and initially it was a bit more difficult to light so we shall see. The good side of this is that 2" t's are rather expensive and not available at my local despot.
-
A needed repair, entirely my fault that it broke out . Now to see if it will stay fixed.
-
kind of thinking 5x5 by 7" long with diagonal burner placement. sliding doors both ends. pretty much the same as the dog box only smaller.
-
Hey guys I have a burner situation I would like to discuss and this is the best place I know for an intelligent conversation about such things. The Dog box has a few hours on it and it is everything I asked for but it seems to be a bit large for what I am doing right now. Yea I know "350in³ too large, How will you ever forge a cutlass in that?". I have been working mostly with tools and trinkets and can see having a long term use for something in the 150in³ volume. I am very fond of the "T" burner, it is so simple and elegant I can't see using anything else but the question is, am I overpowering the small volume box with a 1/2 in "T" burner??
-
And just one more thing, thanks to all you guys in this forum, I learned enough cool stuff to make this happen. And I appreciate it very much.
-
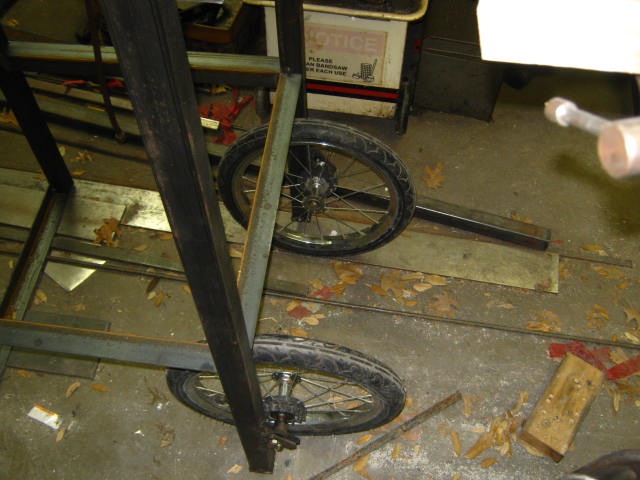
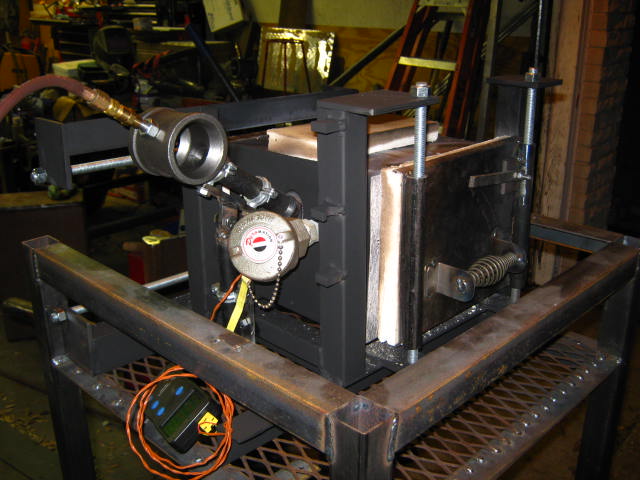
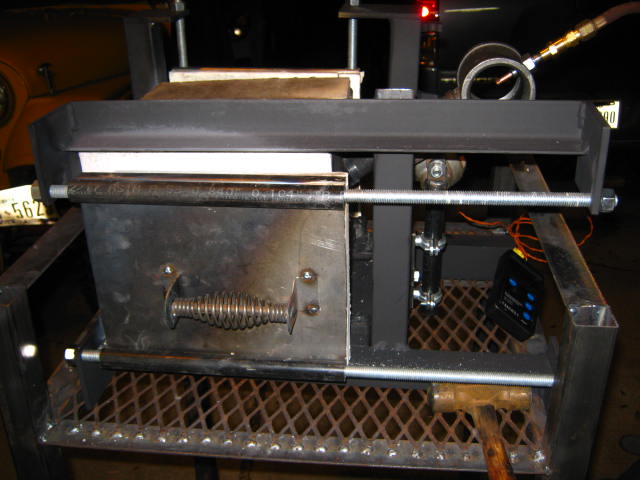
I guess this finishes up this chapter. the doors work quite well and don't bind, I upgraded the regulator to a 2 stage and things are a lot smoother I don't think the B tank regulator was giving me the volume I needed. The cart / stand is working well and makes transport and loading pretty easy, it likes to ride in the truck on it's left side, did I mention that the forge is bolted to the stand?? The wheels are a bit wobbly, I drilled a 17/32 hole for the 1/2" axles to make them as easy as possible to insert and remove I guess that 33/64th may have been a better choice. the 100HT did make some difference but kind of hard to qualify how much. I am going to use this for a while and see how it holds up and performs , I Have cranked it up to 20 PSIG and it responds well so I think the burner is capable of more than I am using. I am thinking of doing another box for modular refractory panels, so panels could be replaced individually and be all pre fired and ready to work. And there is the possibility of putting two box's end to end with a gasket between for those that need the 700 in³ or the 20" length with two burners. Interesting possibilities.
-
ship done sailed and was put on. would it be advantageous to put zirconium silicate in the 100 ht??
-
https://www.itccoatings.com/new-products/itc-100-ht-ceramic-coating
-
slight change in subject gentlemen. should the 100 HT be applied before, after or makes no difference in respect to firing the Kastolite??
-
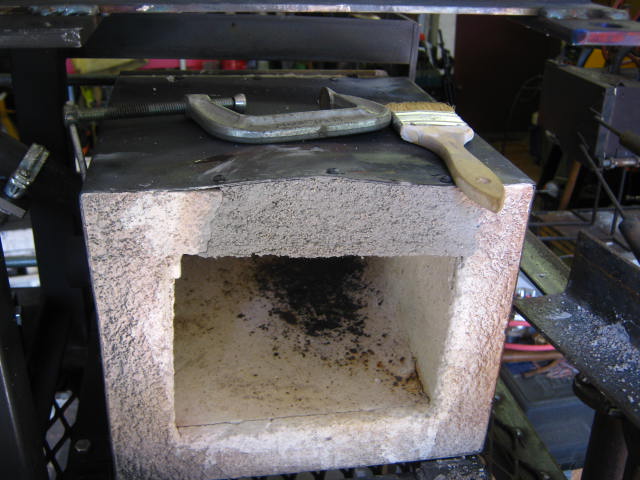
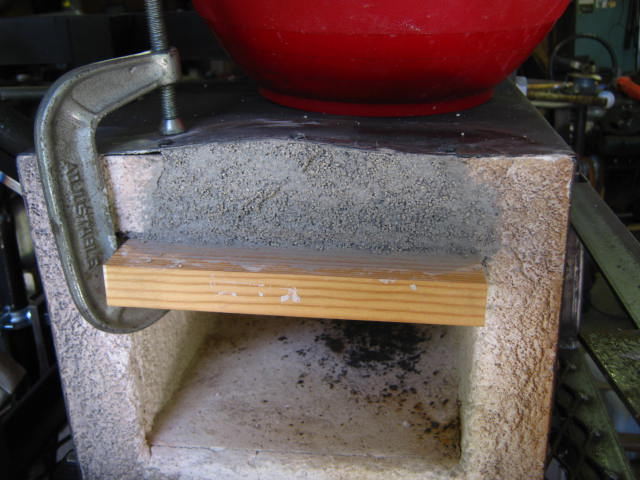
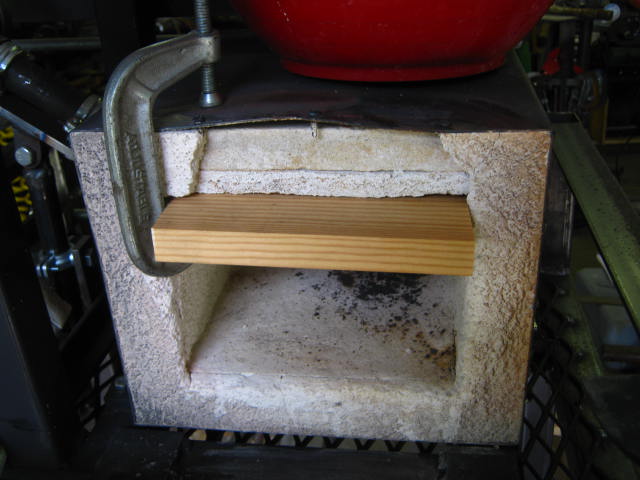
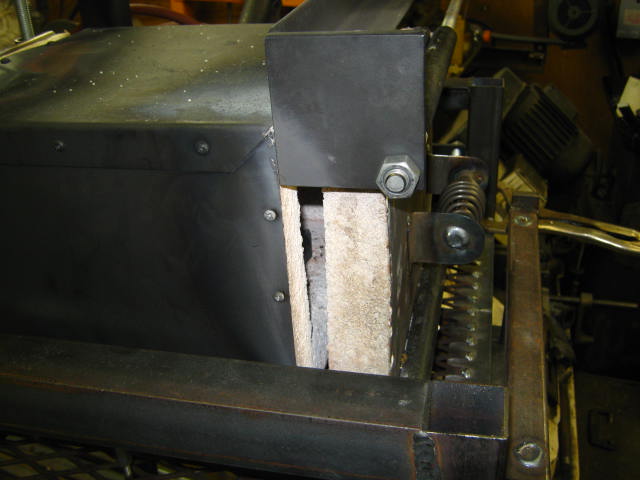
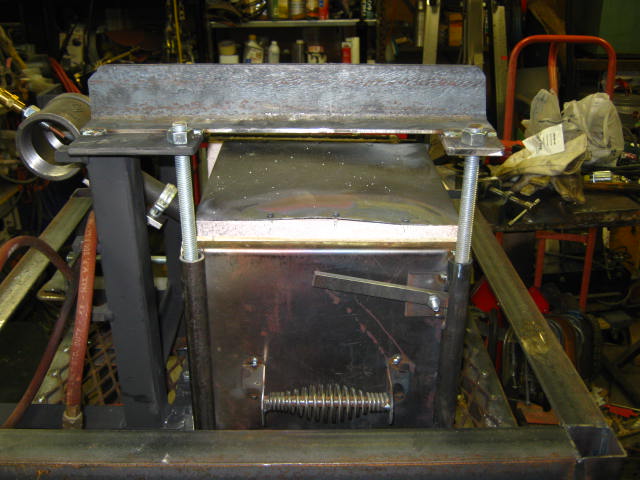
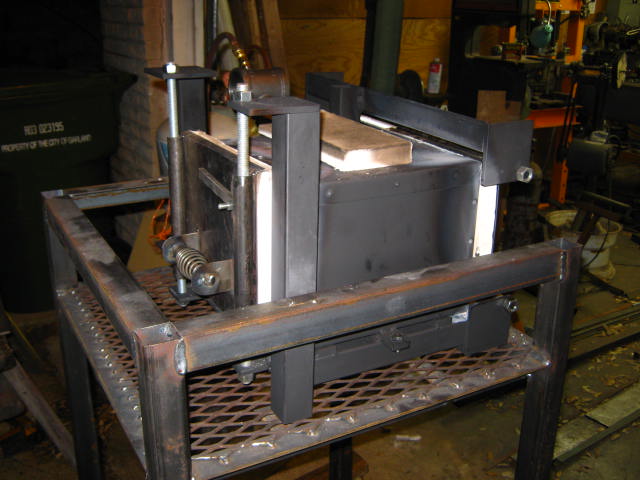
lift door update, everything is on one upright so I do not have to worry about one of the uprights getting out of line with the other, hope that makes sense. Hope it works. . refractory failure?? no just me not paying attention, I put a scrap of duraboard on the top to see if it changed the exhaust color and it did not but it did heat the sheet metal red hot and warp the daylights out of it. lesson learned and hopefully it won't fall out any time soon. I put a 1/2" layer of Kastolite on the sliding door, don't know what to say other than it stayed there and reflected heat quite well as far as I could see. Not exactly forge related but I mounted removable wheels on the stand and made provisions to bolt the forge in place. Will be putting removable handles on the back side, clamped some square tube on just to try and it worked quite well. Tomorrow I paint on the 100 HT can't wait to see how much difference that makes. Annealed some truck axle for hammers and swedges this morning and it took about 10 minutes to bring roughly 5# of steel to forging temp from dead cold. I was impressed.
-
Is there any development on the Bentonite/Zirconium silicate reflective coating??
-
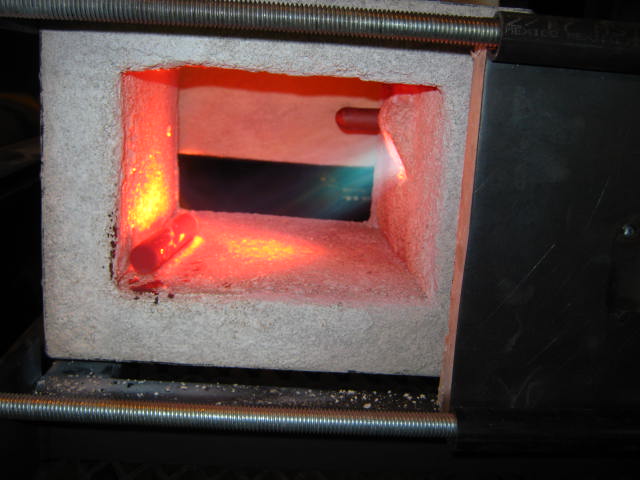
Information you may be interested in Bright yellow heat @15 PSIG using .11 oz fuel/hr/in³. works out to about 2.4 pounds of liquid per hour. If it wouldn't freeze up I could run about 8 hours± on 20 pound tank.
-
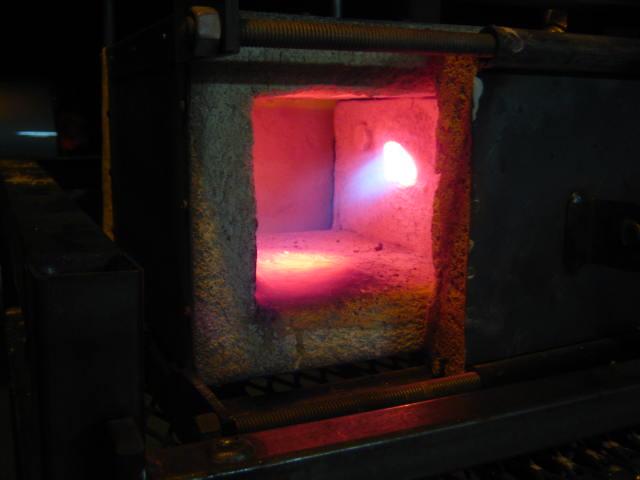
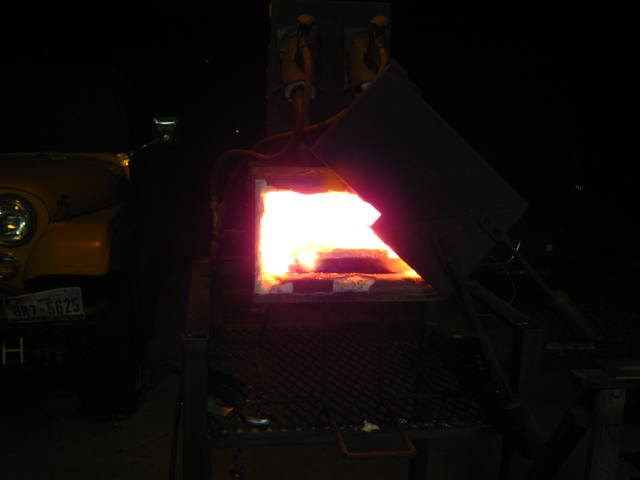
put everything together and fired it up, Some mistakes were made and changes are planned, the thermocouple was a waste of time and money, it works OK but I think the position is a bit of a problem. the lift door locked up as the support heated, easy enough to fix that one, I think 1/4" kastolite is better than 1/2", it takes too long to heat up and go infrared. I think I may change the 35º burner angle to 45º. I managed a 3 layer faggot weld in 3/8" round without much problem. All in all I think it shows promise. The first picture is after it was off for 10 minutes or o and I lit it for affect. tune in next week when we cut some of it apart and re weld it. I think I would like to see what a .030 mig tip will do as well.
-
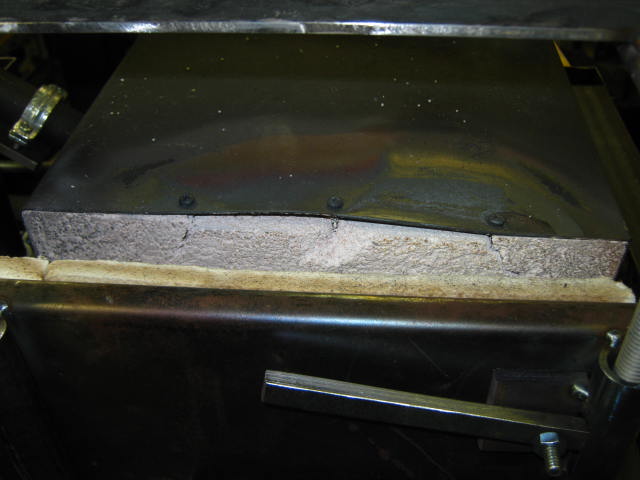
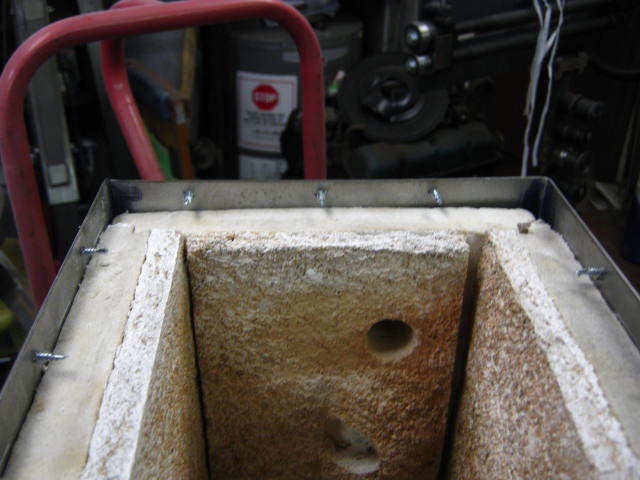
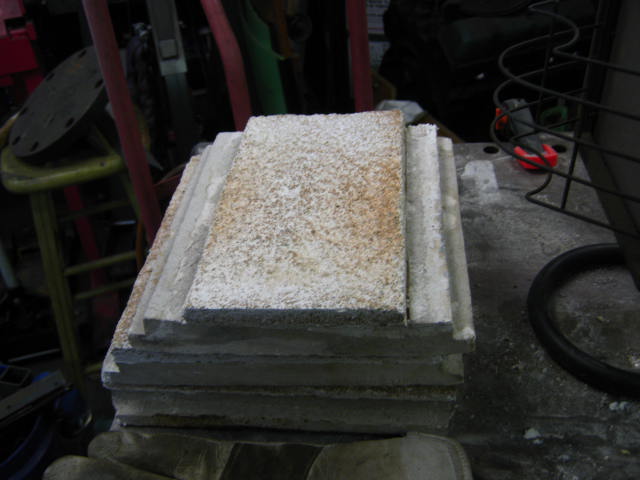
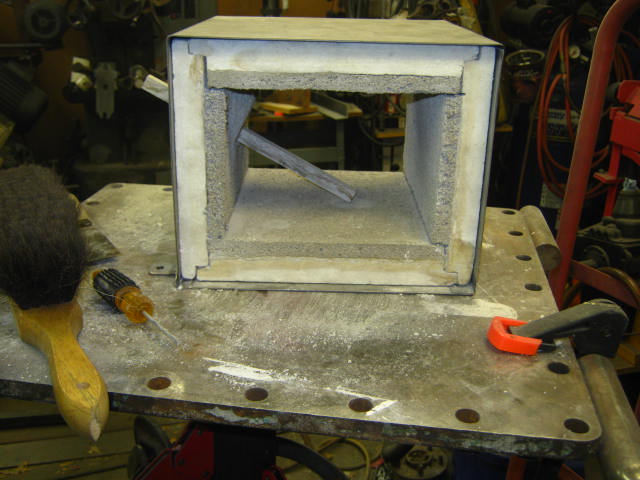
I put my panels in the oven at 350º for 30 minutes just to be sure they were dry, and then put them into my old forge at 2100º for 20 minutes and slow cooled. assembly showed a very marked shrinkage, No wonder monolithic cast cracks. Now to decide what to do with the gaps, I can leave them, fill them with kastolite or fill them with Kowool. I am going to put a 1/2" face on the openings if for no other reason than to protect the soft refractory.

-
I like the hex idea, I would go with 1" duraboard and 1/4" of Kastolite 30 and two 3/4" burners, making the bottom removable for cleaning is an option, I would think.
-
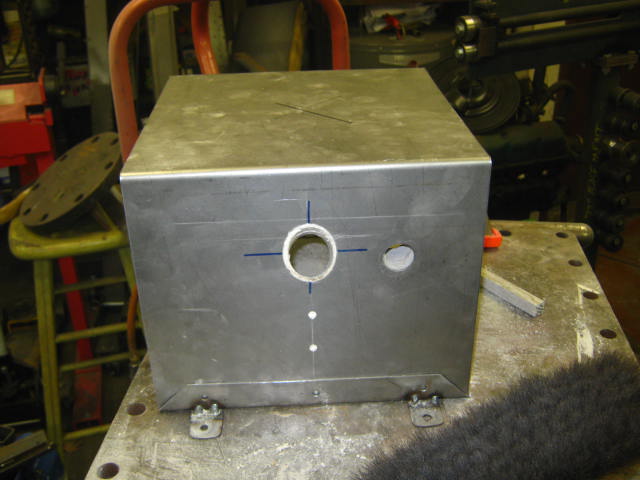
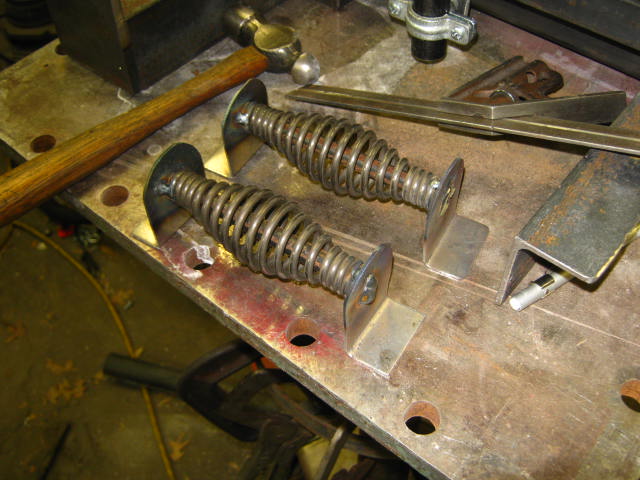
trial fit of bottom and sides, angle of burner path. Holes line up pretty well. so far so good.
-
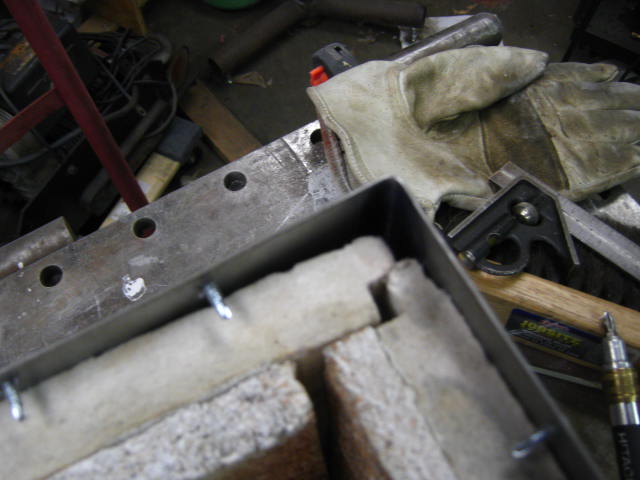
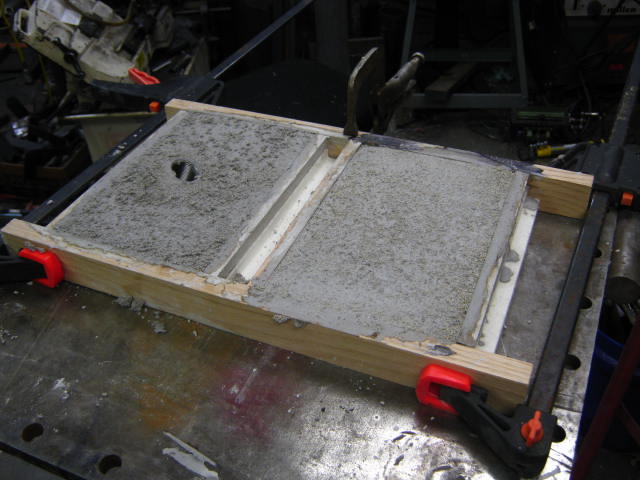
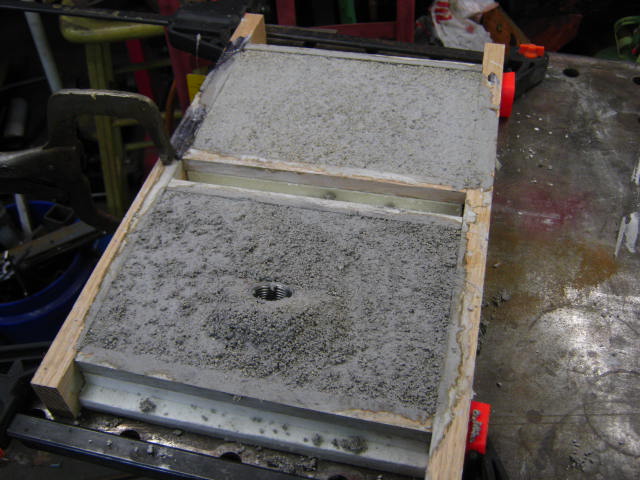
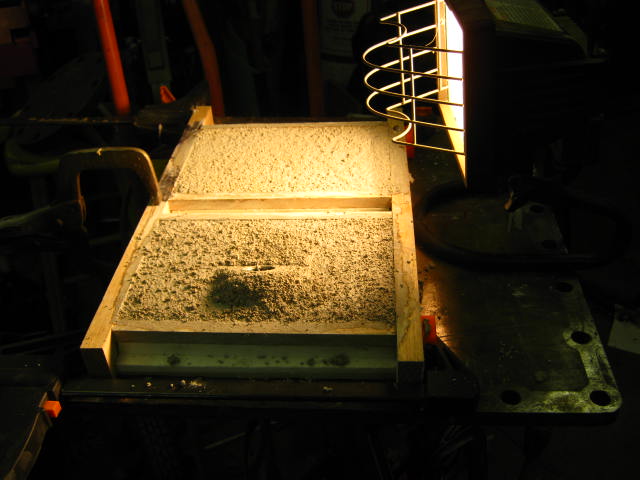
this is how the holes were cut. And now for some more mud, 3# for the two sides. I have been using a halogen work light to start the drying process, a couple of hours so I can pull the forms and let it harden for a few days. I am hopeing that the coupling will wiggle free of the refractory, I did not use any kind of parting agent. With luck it will shrink?
-
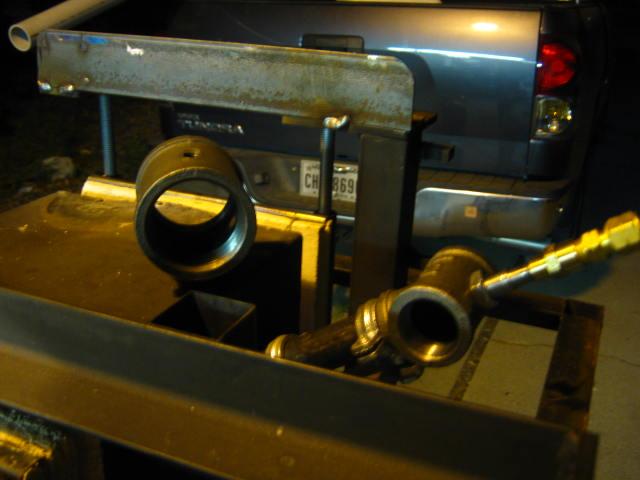
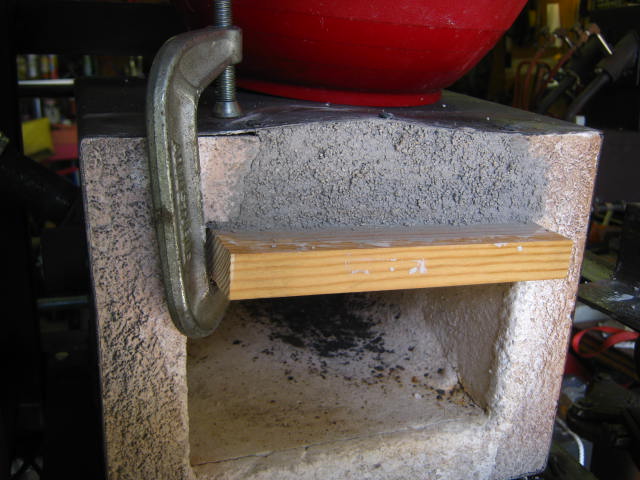
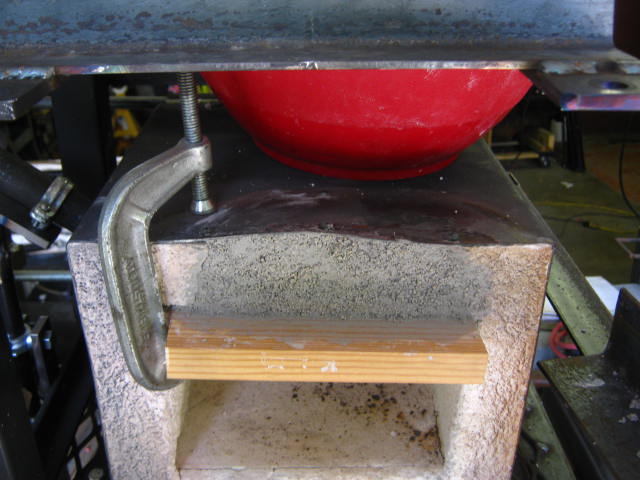
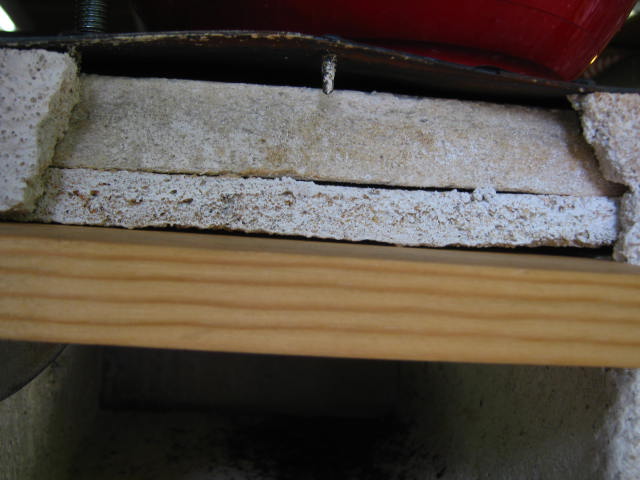
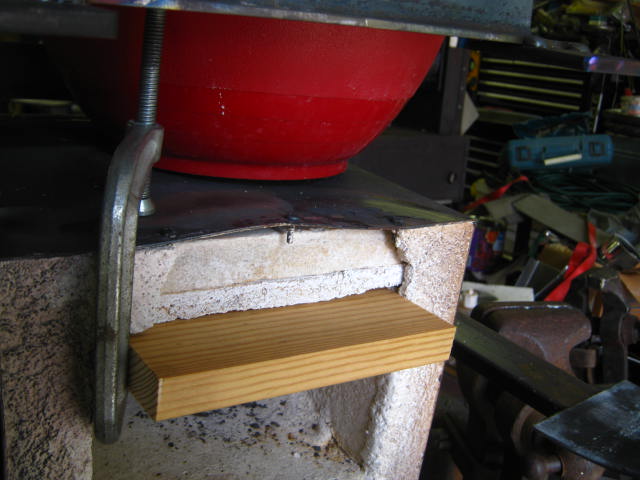
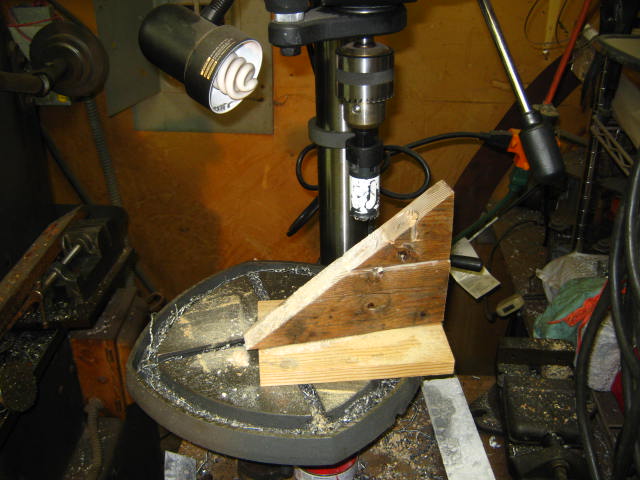
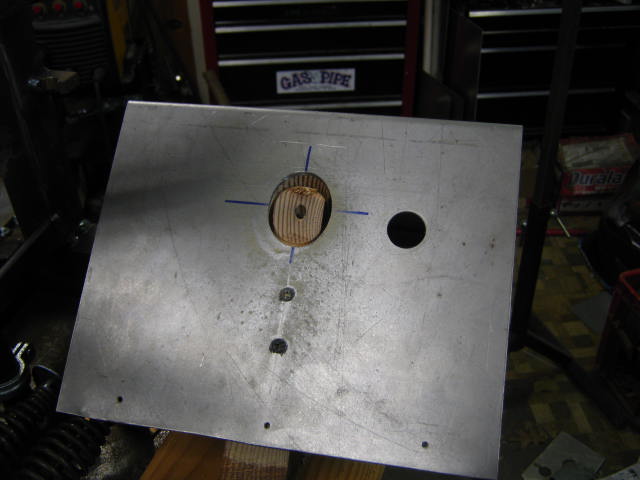
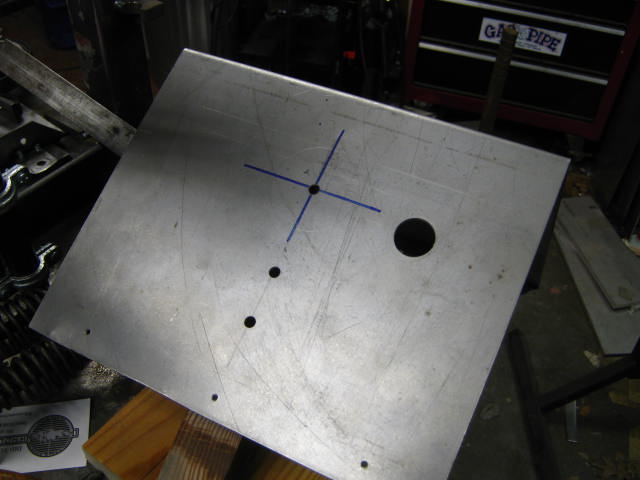
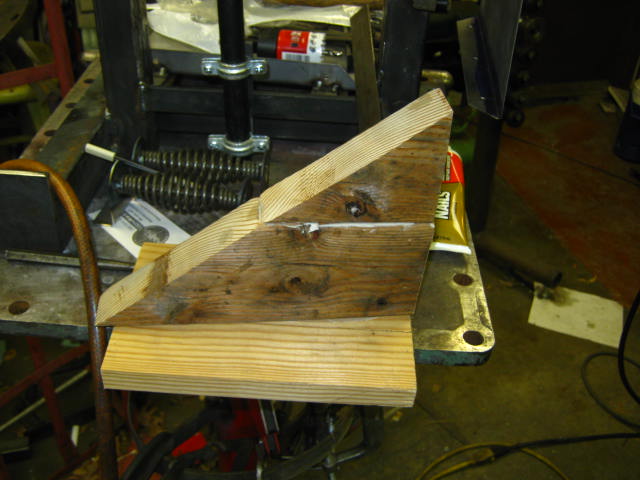
Trying a side mount with a 35 º off horizontal tilt, should put flame path on the floor with with as long a flame path as possible. First the fixture, not much to look at but it worked pretty well. could have been one 2 x 8 but didn't have a section so a little liquid nails did the trick. For some reason it slid around on the base after I left it. not really a problem. could not think of a way to clamp the sheet metal to the wood so a couple extra holes for sheet rock screws and the 7/8" hole is for a thermocouple. I used a 1 1/2" hole saw to cut the steel. and a 1" to cut the refractory, don't forget your PPE s on this one, makes a very fine dust.


-
.thumb.jpg.50fad68380cc1afd2d4c77b15961dfa0.jpg) How about a 8" x 8" x 1" block of a real known tool steel drilled and counter sunk to line with drilled and tapped holes in large block. Harden the 1" plate and bolt it on. I don't know about you but I would be hard pressed to heat the 1" much less the 12" to harden it. I would think it would eventually work harden, I guess, would start by beating radius on edges rather than grinding.
How about a 8" x 8" x 1" block of a real known tool steel drilled and counter sunk to line with drilled and tapped holes in large block. Harden the 1" plate and bolt it on. I don't know about you but I would be hard pressed to heat the 1" much less the 12" to harden it. I would think it would eventually work harden, I guess, would start by beating radius on edges rather than grinding. -
look at the entries posted 2/19 and 2/27.
-
That's interesting, thank you.
-
Carving Letters in Steel.
Howling dog forge replied to VaughnT's topic in Metal Sculpture & Carvings
I am wondering if you could do the chisel work and then do the scroll. -
what kind of a date would you put on "earlier"??
-
Just thought I should post something, did something stupid and took a fall. Broke my little finger and cracked a rib so I will be out of the shop for a week or so. these are pretty cool. handles for the doors. Hoping for minimal heat transfer, maximum heat dispersal. we shall see.
-
interesting gentlemen thank you.