JPH
-
Posts
807 -
Joined
-
Last visited
Content Type
Profiles
Forums
Articles
Gallery
Downloads
Events
Everything posted by JPH
-
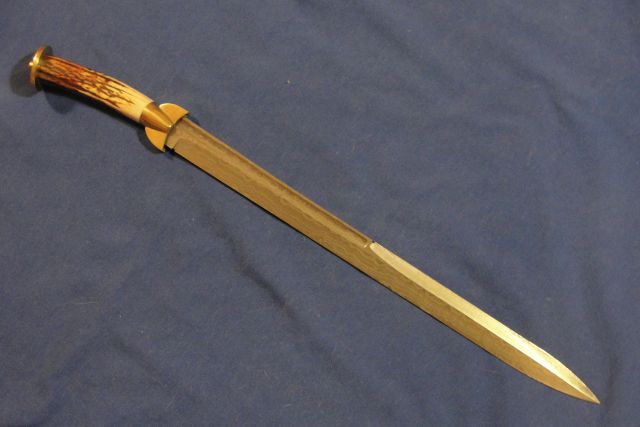
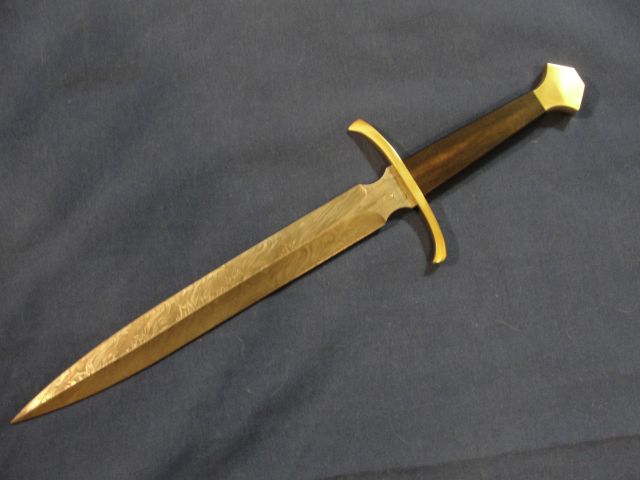
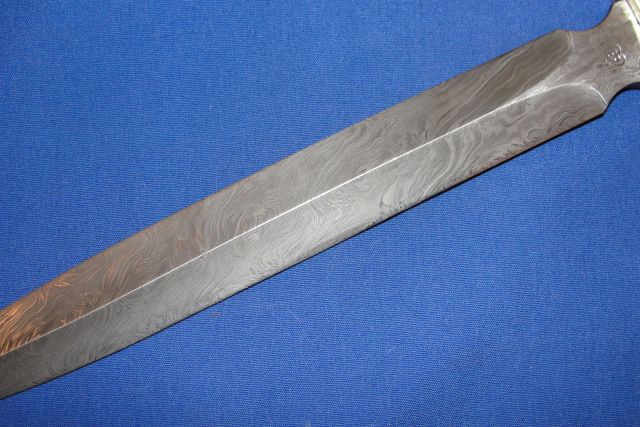
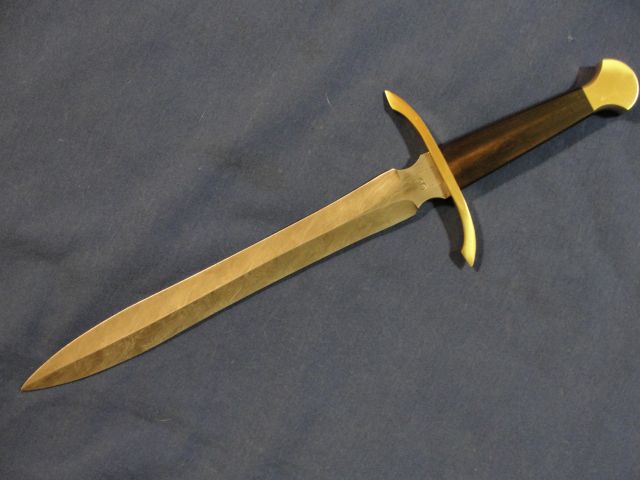
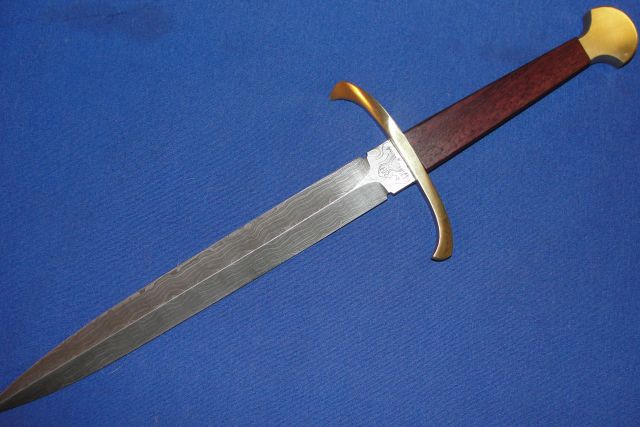
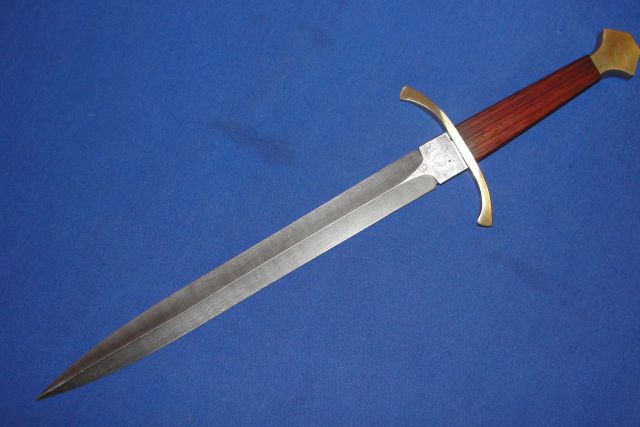
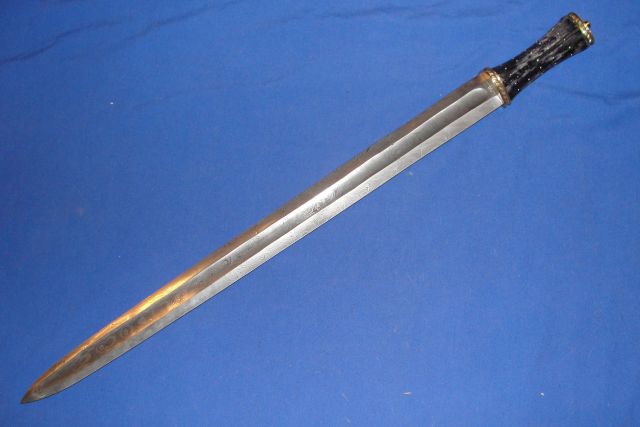
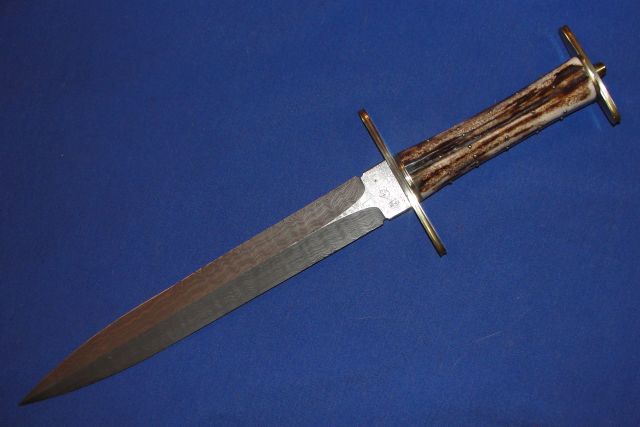
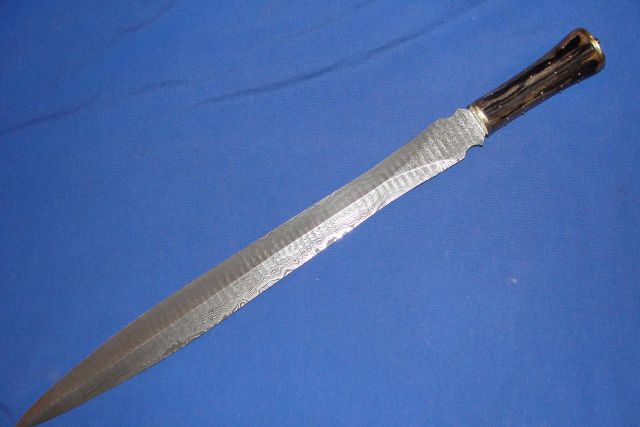
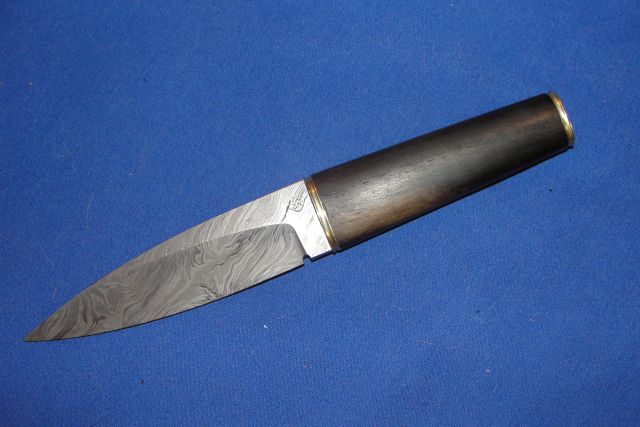
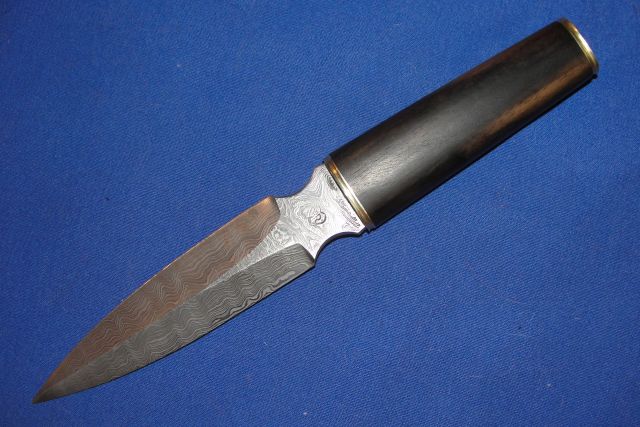
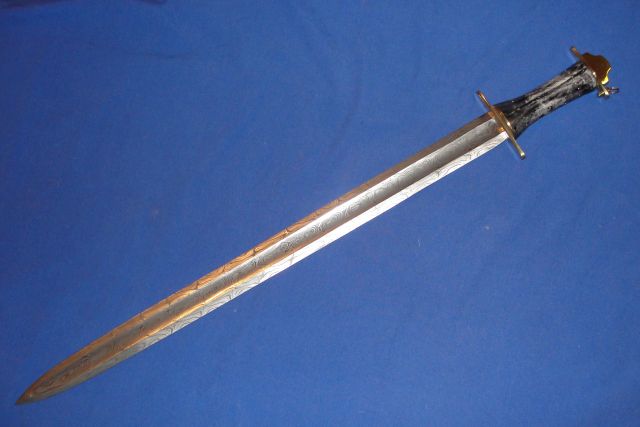
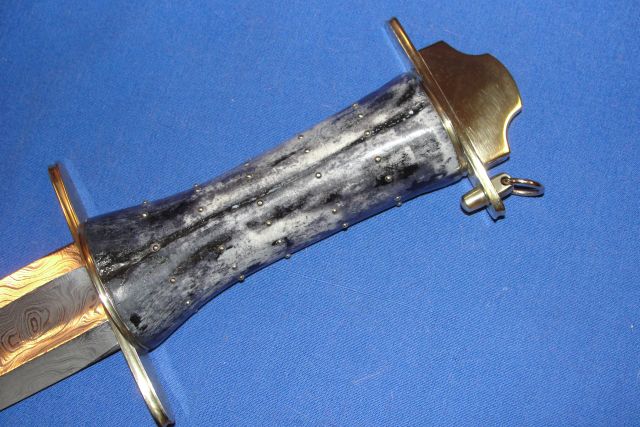
Hey!! I was puttering about in my studio with a hour or so on "dead time" so I hammered out 8 Rail Road spike blades..as well as writing an article on this for my web site...Sooo I though I would share a bit as far as how I do a RR spike knife... Forging a knife from a rail road spike is something that has become quite popular of late...and here is how I do it. I make mine a bit differently than most other so, however a word first about RR spikes. Most RR spikes have very little carbon will simply not harden enough to make a "using" knife...however there are a few that are marked "HC" that have a smidge more carbon that when properly heat treated can make a some acceptable knife. Contrary to popular belief the "HC" does not mean "High Carbon" but from my sources at Union Pacific RR it means "Higher Carbon"... from the way it works..I would say that the C content is about 40 points...BARELY enough to just start to get hard enough to take an edge,...BUT it is enough to harden to a point where the blade can be used..as I mentioned above..when properly heat treated. Step one: The spike is flattened, starting from the head and then working down the spike shaft. This will be the gripping area. Now..to carefully flatten head section and "blend" it into the start of the spike and continue to flatten this out until you have a flat area about 4" long or so...NO longer than 5".. that will result with a grip area that is a good bit too long and that will "throw off" the lines of the finished blade Once this area is flattened and drawn out the thickness is checked for uniformity and overall "blending" of the head and grip area. When this is done, flatten and spread the remaining spike to form the blade. It doesn't look like there is much material there to make a blade more than a couple of inches long but there is. The blade is forged flat and is widened and drawn out into a rough forged shape As you can see there is a considerable amount of material in one of these spikes after all and you can forge out a pretty good sized "user" knife in a variety of blade shapes and styles. Working from the tip back, start to flatten and spread the blade. Widen as you go and then start in on the distal taper. When you get to the riccasso end... carefully widen this area and make sure the whole forging "blends" well into the shape you want. After the blade is forged out and shaped into the rough shape of what you want to make, this rough forging still needs to be profiled to final shape. Note: at this point the edge bevels have been formed ("packed") and the knife is pretty much in its final cross section. Now is the time to do any refinements and make certain that there are no drastic changes in cross section and that everything "flows" into everything else The next step is blade profiling and grinding the blade edges.. This is done either by hand with a file or a high speed grinder. Here the knife takes on its final "finished" shape. This will be a rather quick process as everything should be pretty well shaped by the forging, and the edge bevels , already being "set" by the hammer shouldn't take much time at all to clean up. Now it is ready for thermal treatment. Thermal treatment consists of two normalizing cycles, which is bringing the entire forging up to approx 1600 degrees F and letting furnace cool over night. You want this steel to be totally relaxed and soft before hardening. After the normalization is completed (this is done to make sure the steel grain is not enlarged, and hence "ruined") the blade is ready to harden. Now since this is a plain carbon steel that has what I feel to be the minimum amount of carbon in it to harden into a cutting edge, I have found that a water/brine quench works best. I use the same basic brine mix that I use when doing refractory thermal treatment (for a "temperline" using clay and 1045/1050 steels) except for a RR spike I use the quench at a temperature that is a good deal lower ambient room temperature instead of heating it to 240 degrees F as I do for the refractory methods. The quench I use is a caustic soda brine mixed from common salt, sodium hydroxide and water. The blade is heated to non magnetic and then held there for 1 minute to ensure uniform heating throughout the thickness. After the soak the blade is removed and then quickly quenched point first to help prevent warpage. Once the blade is hardened it is tempered to a light straw colour (approx 440 degrees F.) and then allowed to air cool. After cooling is is final ground, being very careful to make sure that the steel is not overheated..this could result in "soft spots" in the blade..and these are NOT acceptable Here is the finished blade shown with the "raw material".. These spikes, when properly worked can make some very tough and serviceable knives..when properly heat treated.. They make a very unique blade that is only limited in its design by your own imagination! I hope this works!!!
-
Steve..Yeah I taught Laddy-Buck..I still miss that old man... just goes to show ya that you CAN teach an old dog... JPH
-
Thank you for the kind words.. This is just one of many of the blades that I have made over the 10 years and a bit that I have been doing this.. Believe me if I can do this pretty much anyone can... JPH
-

Why I stopped listening to experts
JPH replied to rookieironman's topic in Blacksmithing, General Discussion
Oh boy this is great....love it... OK..there are experts that have walked the walk...paid their dues and otherwise worked their ways up from nothing (no one is born knowing how to do this stuff..more on this in a bit...) to being considered an "expert/authority" in the field..not by themselves personally but by others who are already respected in said field. There is a place for "book learnin' " as well as the experience OJT side.. Study is fine..it opens the door...but actually DOING the work..well that walks you through the door... Then there are the "experts" that read a blog or webpage and now they know it all...about everything..and the ones that are the best are the folks that say my family have been blacksmiths for 11 generations so by birth I know it already...Oh please....get a grip....it takes all kinds to make the world...but still... Argue all you want about the specifics and technicalities...it all comes down to when the hammer hits..does it work? You can know what works for this or that..that is the practical side of this...the side that does the actual work...without knowing the why it works....that is the academic side...the "whys"...this does what it does... To me...you need some of both to get good at this...simple as that. Yeah...ya all can say " What the heck does this guy know anyways?? He doesn't belong to the ABS, Knifemaker's Guild or anything..." and you'd be 100% right..I don't...but I have been doing this for a couple years and a bit and I picked up ALOT of "stuff" in doing so...and I can tell you all this...all of one side, whether it is the academic or the practical isn't best way to go about anything... What matters most is the ability to learn something and then use it.. Some things some folks are "naturals" at...others have to try harder...you see it every day... in just about every field and line of work.. All I can say is if you want to get good at this and improve your skill set...get our there and DO IT... Simple as that.... which brings me to a side note on "experts"... Yes experts..the second kind mentioned above..we all know the types...we have seen them many times make fools of themselves...usually they just do something that is so totally over the top and ridiculous that you laugh so hard you wet yourself..or usually you just shake your head and ask "why ?".. Well most of the time that is fine..no harm done..but in this field.. these guys can get you FUBAR'd . As I have said before...we are not making toys or widgets here... just about everything out in my studio can mess you up... Remember hand tools injure...power tools maim... and before you try anything suggested by one of these "experts"..please think it through... Hope this helps... JPH -
Hello: When you have been doing this for as long as I have (close to 5 decades...)you get "fast" simply by knowing what to do and when to do it. Contrary to popular belief pattern welding is not all that difficult. It can take some time depending upon the pattern you wish to create. Ladder pattern blades are some of the fastest ones to make...as it is more or less lamination followed by grooving and flattening... Composite twist/built composite and mosaic patterned blades can take a lot longer to assemble and hammer out. Believe me..if a ham handed hammerhead like me can do this stuff just about anyone can...It just takes practice and a bit of stubbornness and dedication.. JPH
-
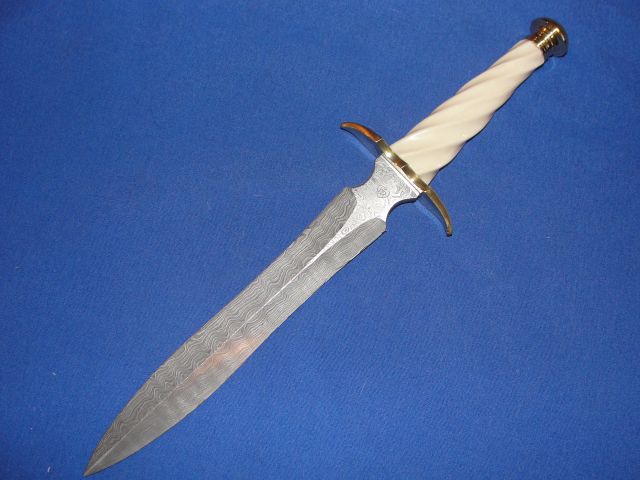
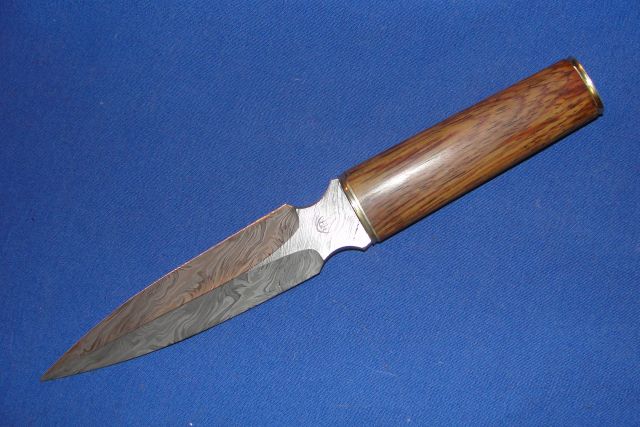
Hello: Something I whipped out yesterday for RPFS. 1095/L-6 with some meteorite thrown in. The grip is a nice hunk of Sambar stag that I have had for oh the last 20 years or so..bought it when you could still find it and it wasn't priced at a ridiculous level.(I still have about 100 or so pieces of his stuff..getting really pricey IF you can find it.).....This one will be sent down to my E-Vile minions for next weekend... Turned out pretty good for a few hours of puttering about.... JPH
-
geeeze...I sell 1 1/4" x 36" x a healthy 1/4" bar of ladder pattern 1095/L-6 for $450.00. surface ground clean and light etched to show...gotta raise my prices...well..maybe not... JPH
-
Hello: Ref workshops and classes..I do offer them...for details see my website... Regards my location..I will be moving to florid and setting up large studio there to accommodate more equipment as well as a couple more people which will make classes more enjoyable... Back to work for me JPH
-
Hello: Whether it is Bakelite or Catalin..it "tested" as Bakelite when I got it....All I know is it sure is pretty...That's all I can tell ya...I went and bought he rest of what the guy had so I have a small supply and I AM going to use it..believe me!! JPH
-
Kozzy: From what I can tell the pre 1940's Bakelite is quite different from what is marketed under the same name nowadays. The "Old Stuff" came in quite alot of colour variations and it was very popular as a jewelry item as well ..made into bracelets, earrings and SLTT.. I was able to obtain a few more pieces (in fact I bought all that the fellow had left) I even got some of the "red amber" stuff..looks odd but you never know till ya get into it what it will turn out like... All I know is I had to work it real slow and careful and it did take a beautiful polish..A better polish than I have ever seen on any of the other resin based material like micarta....probably due to the earlier process/materials used back then... I think they came out pretty good... JPH
-
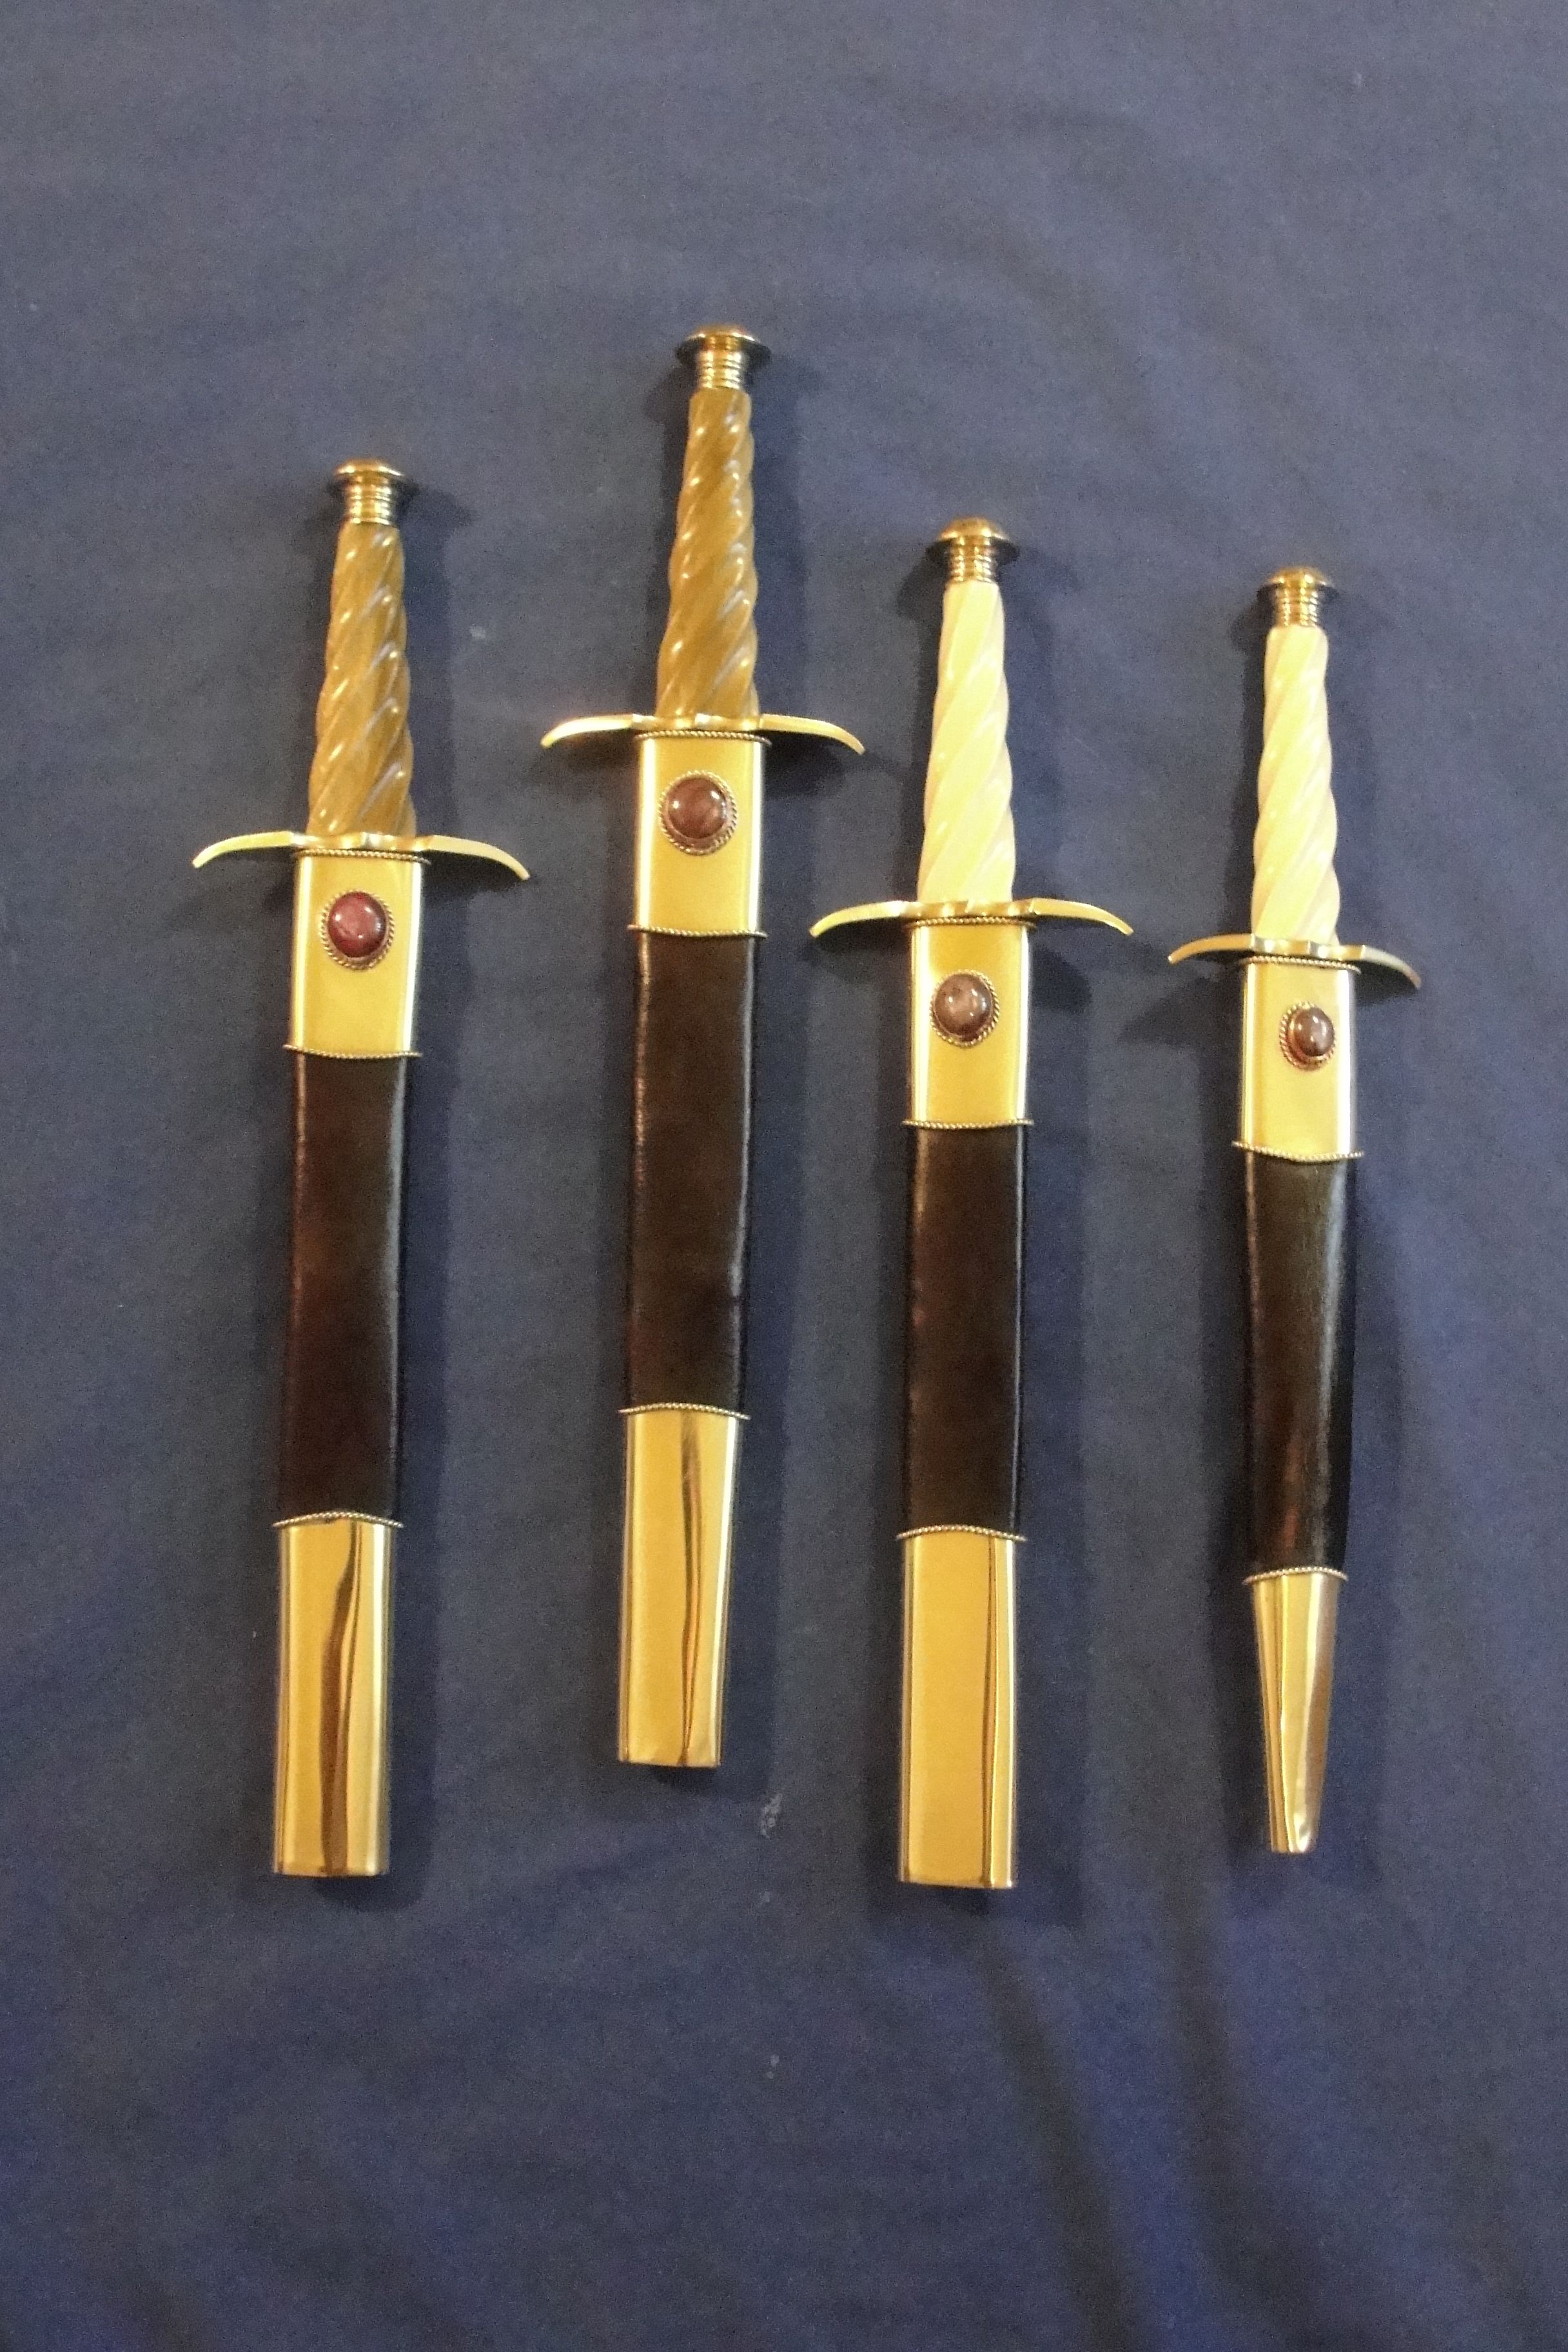
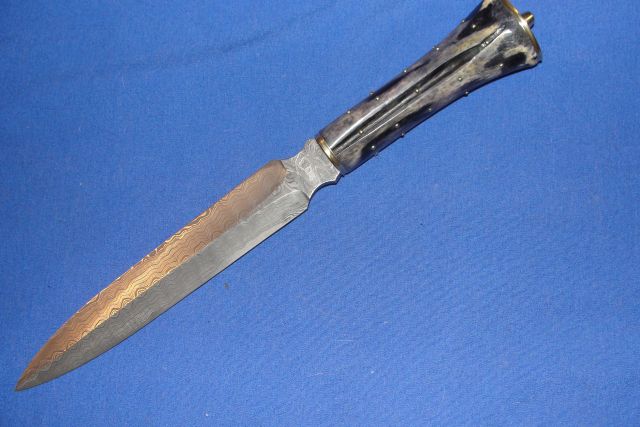
Hello: Here are a few things I whipped out with some 100 year old (Pre WWI) Bakelite for the grips. I never used his material before so this was all new to me.. The white Bakelite I cannot tell from ivory from an arm's length away..that is probably why they used this stuff for billiard balls..The "horn" Bakelite was very interesting to finish and turned out quite lovely...All is all I like this material...too bad there isn't muck of it available anymore... All 4 pieces are PW blades and the sheaths set with star rubies or sapphires... Hope the pics turn out JPH (These ARE available on my website starting tonight if anyone is interested..)

-
Benton: Actually it makes it a bit higher in pitch more along the lines of a whistle than a swoosh.... Now you have to get your blade speed up due to the shorter blade length in order to get proper tachi-kaze... JPH Let me hunt up the pics of my "cutter" swords if ya want...
-
Brother Thomas... Back in my wild and misspent youth I got involved in far too many social situations that resulted in blood being spilled in various ways and for various reasons..I do not miss that at all. My arms, chest and abdomen look like a road map of California...But they managed to more or less put me back together good enough... But now I am feeling all those bumps I got... JPH
-
Brother Thos: The last time i needed sutures that I couldn't put in meself was in my right hand and it was well..rather "juicy" (I slipped while doing the final polish on a No-Dachi) so wrapped it up in a semi clean shop towel and I drove myself across town to the VA hospital out here...It was the first time they ever treated a sword wound...My how the military has changed...back in the day they use to treat a LOT of sword wounds...Anyway....well an hour and a half and 11 sutures later I was headed home...had to do some real dancing to get then to let me drive myself home too!! Pansy butts.... JPH
-
Geeze...you cut up one guy ONCE and you never live it down... JPH
-
Hello: First off: Steve..scraping in a BO-Hi/groove is not all that hard...yeah t takes a wee bit of time but not as much as you may think...once you get it it started it goes pretty quickly...Just make sure your blade is SOFT and the cutter is sharp and properly hardened.. On the fittings. I get these from an Art Foundry in Taiwan that specializes in fine sculptural and artistic castings. These were done in bronze with gold and silver leaf details...everything else I did here. I am just happy to be done (more or less) with the series..As it is I never even want to THINK about doing another Japanese sword again...Tire of slicing myself to ribbons... Thank you all for the kind words.. JPH
-
JHCC: You mentioned Thelonius Monk?? In a description of MY work\??? Oh man.. OH MAN... I am humbled by that comparison.. beyond belief, and I mean by beyond words ... (And to those who do not know WHO Thelonius Monk is...You need to expand your knowledge base..in other words....so sad.. so sad indeed)... THANK YOU!! JPH
-
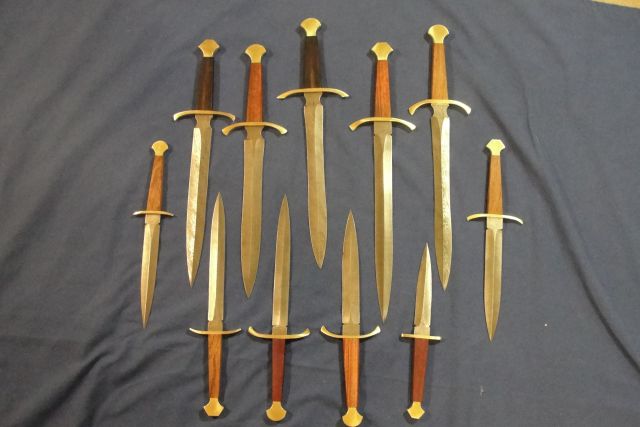
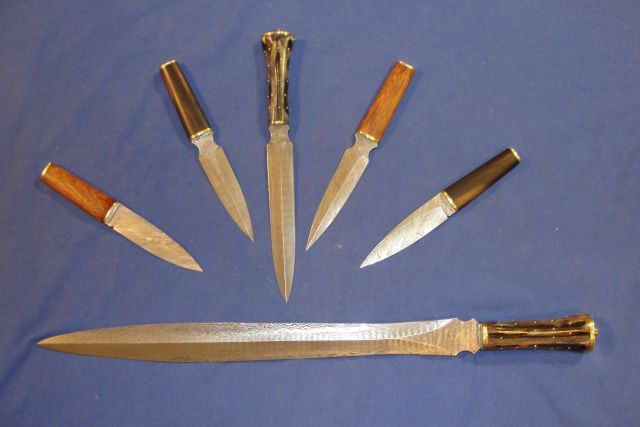
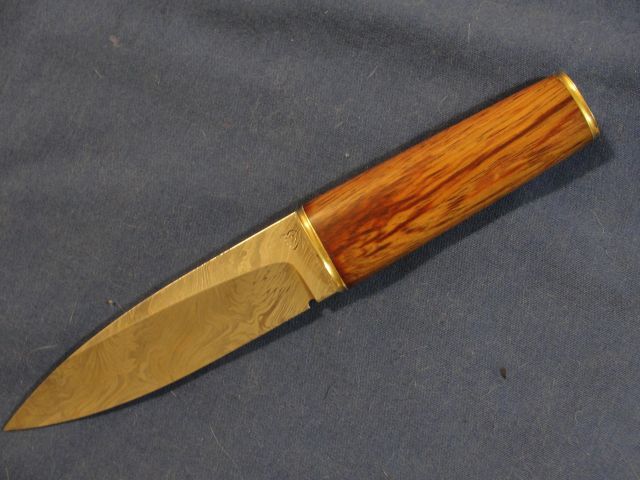
Hello: Here is the first batch that I started on the 2nd of this month..site stock mostly..various patterns and hardwoods..just plain simple stuff...some more of my "bacon and beans" blades that I can't seem to make fast enough...turned out OK if ya ask me..I am building stuff for my show season now so...still have like 8 more PW pieces to finish and then I start on welded cable and high carbon... No rest for the wicked.. JPH
-
I agree with Lil Stevie...not bad at all for s first attempt... JPH
-
Hello: Here's one I just finished up tonight..turned out OK if ya ask me..not too bad at all.. 1070/L6 and some meteoric iron blade...Bovine Ivory grip and well..it looks good to me JPH
-
Hello: Thank you for the kind words....these are not fancy at all..really... just simple work for the site. These are my "bacon and beans" sort of stuff.. Anyway..here are two more pieces I finished about an hour ago. Both are mounted in Bovine Ivory and one is in my "Solar Storm" pattern and the other is "Ladder". Phosphor bronze mounts and well, these ones went together really nice, at least I think so. I will be finishing up a PW sword tomorrow..I will post pics as soon as that one is done as well. JPH

-
Hello: Just finished these at 0300hrs this AM..Just a few pieces that are bacon and beans stock for he website. All are lam 1095/L-6 and meteoric iron. Some have Coco-Bolo or Royal Ebony..the others have Bovine Ivory. I hope that my shipment of Bone shows up soon cause I am almost out! Didn't turn out all that bad given the fact that it's just table/site stock. Nothing really "fancy" or anything..Got a couple more I am finishing today as well.. Gotta keep the critters fed..Plus the Missus will be having her surgery PDQ and I gotta come up with the lucre for our part.. So... Back to work for me!! JPH
-
Hello: I agree with Brother Thomas.."shiv/shank" quality on the "knives"... However that wall/coat hook is half way decent, but you need hammer control..make a few 100 more of those and by then you should have a good grasp on hammer use... Get away from that re-bar...that is the worse stuff out there.... JPH
-
Northwoodsman.. I hate to be a nudge...however I am still waiting for you to post ANY of your work...you talked the talk..now it is time to walk the walk... I showed you my Bonefides.. Where are yours?? And just to make things even more interesting here is one I finished a couple of hours ago... We are waiting... Awe us as you said you could do.. JPH (the Cantankerous Old Man)

-
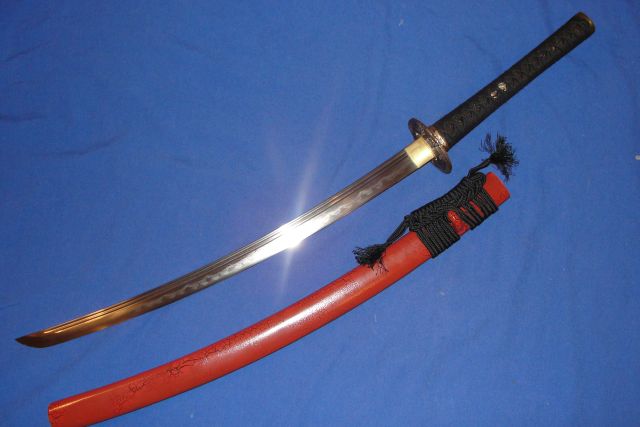
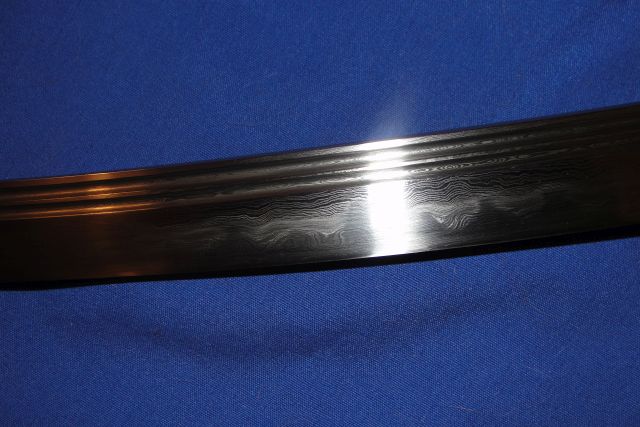
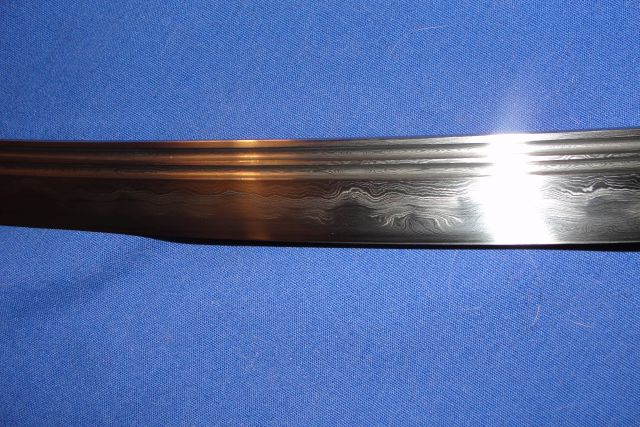
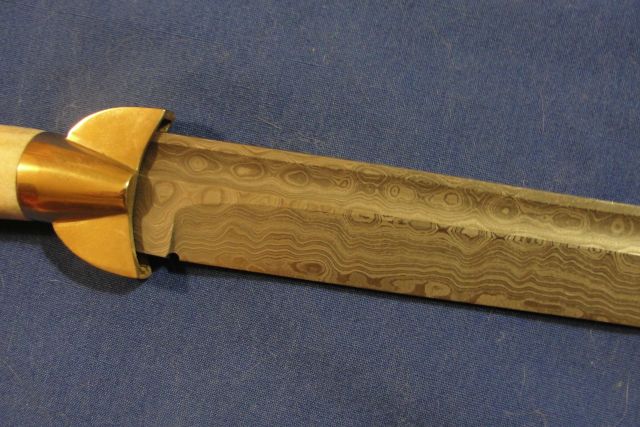
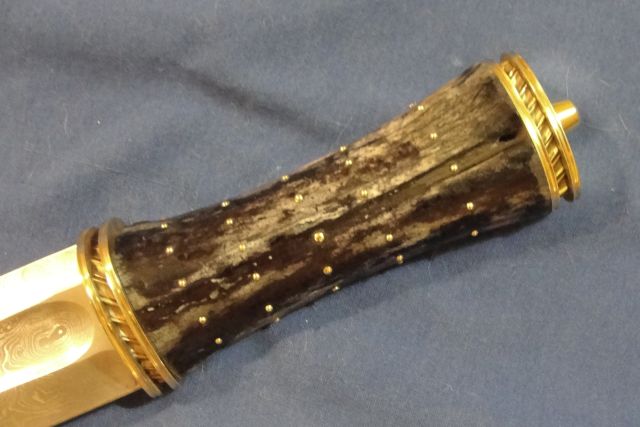
Hello: Here is a prototype piece for book IV..done in the Japanese style of Shinogi-Zukuri. The blade is laminated 1070 and L6 steels in the Kobuse method of construction around a mild steel/iron core. The blade length is 22 3/4" and it has two (2) scraped in Bo-Hi on each side. OAL is 34 1/4". The Hada is very interesting and I would call it Mokume-Gane Hada. The Hamon is vibrant and it is much more active than you are able to see in my feeble photos.. I wish I knew how to take better pics.. The Tsuka is blood red Samegawa under black silk and is mounted in a "Hawk" motif. The Siya is wood with black lacquer under red cracked lac and that is sealed with 6 coats of a hard, clear lacquer.. All in all I would say that this one turned out pretty good for someone who isn't all that well "known" for this sorta stuff... JPH