gmbobnick
-
Posts
124 -
Joined
-
Last visited
Content Type
Profiles
Forums
Articles
Gallery
Downloads
Events
Everything posted by gmbobnick
-

Log Peeling Draw Knife
gmbobnick replied to gmbobnick's topic in Axes, Hatchets, Hawks, Choppers, etc
What would you charge for 2 of these? I am flattered, but I suggest checking out Barr Quarton who has an on-line store and makes a far better tool than I could provide. -
Using Coal Fines
gmbobnick replied to gmbobnick's topic in Solid Fuels: Coal, Coke, Charcoal, Wood, etc
Thank you all -
Using Coal Fines
gmbobnick replied to gmbobnick's topic in Solid Fuels: Coal, Coke, Charcoal, Wood, etc
Yes, bituminous. -
I have around 1000# of coal fines that I need to use. I can use a little wetted fines to pack around and help manage my fire, but there is still a lot left. The thought of forming/pressing it into small chunks (briquettes) to make a better fuel comes to mind. But I am not sure how that would be done properly and usefully for forging. Any ideas out there? Forging or otherwise.
-
Forging a Soil/dirt drill or auger ?
gmbobnick replied to BartW's topic in Tools, general discussion
Not sure what you have for steel and tools/equipment, but consider driving a pipe into the ground with a hard beveled rim to cut the roots. Need to rig up a drop weight to drive with. Make mud out of whats in the pipe and bail it out. You can either leave the pipe in, or pull it as you backfill. If the ground is hard forget this. -
Log Peeling Draw Knife
gmbobnick replied to gmbobnick's topic in Axes, Hatchets, Hawks, Choppers, etc
I know some potters that fire their clay with various types of bark to produce different colors and effects on what they make. One came and gathered up a bunch of pine, willow and elm bark around my firewood pile and seemed pleased. -
Log Peeling Draw Knife
gmbobnick replied to gmbobnick's topic in Axes, Hatchets, Hawks, Choppers, etc
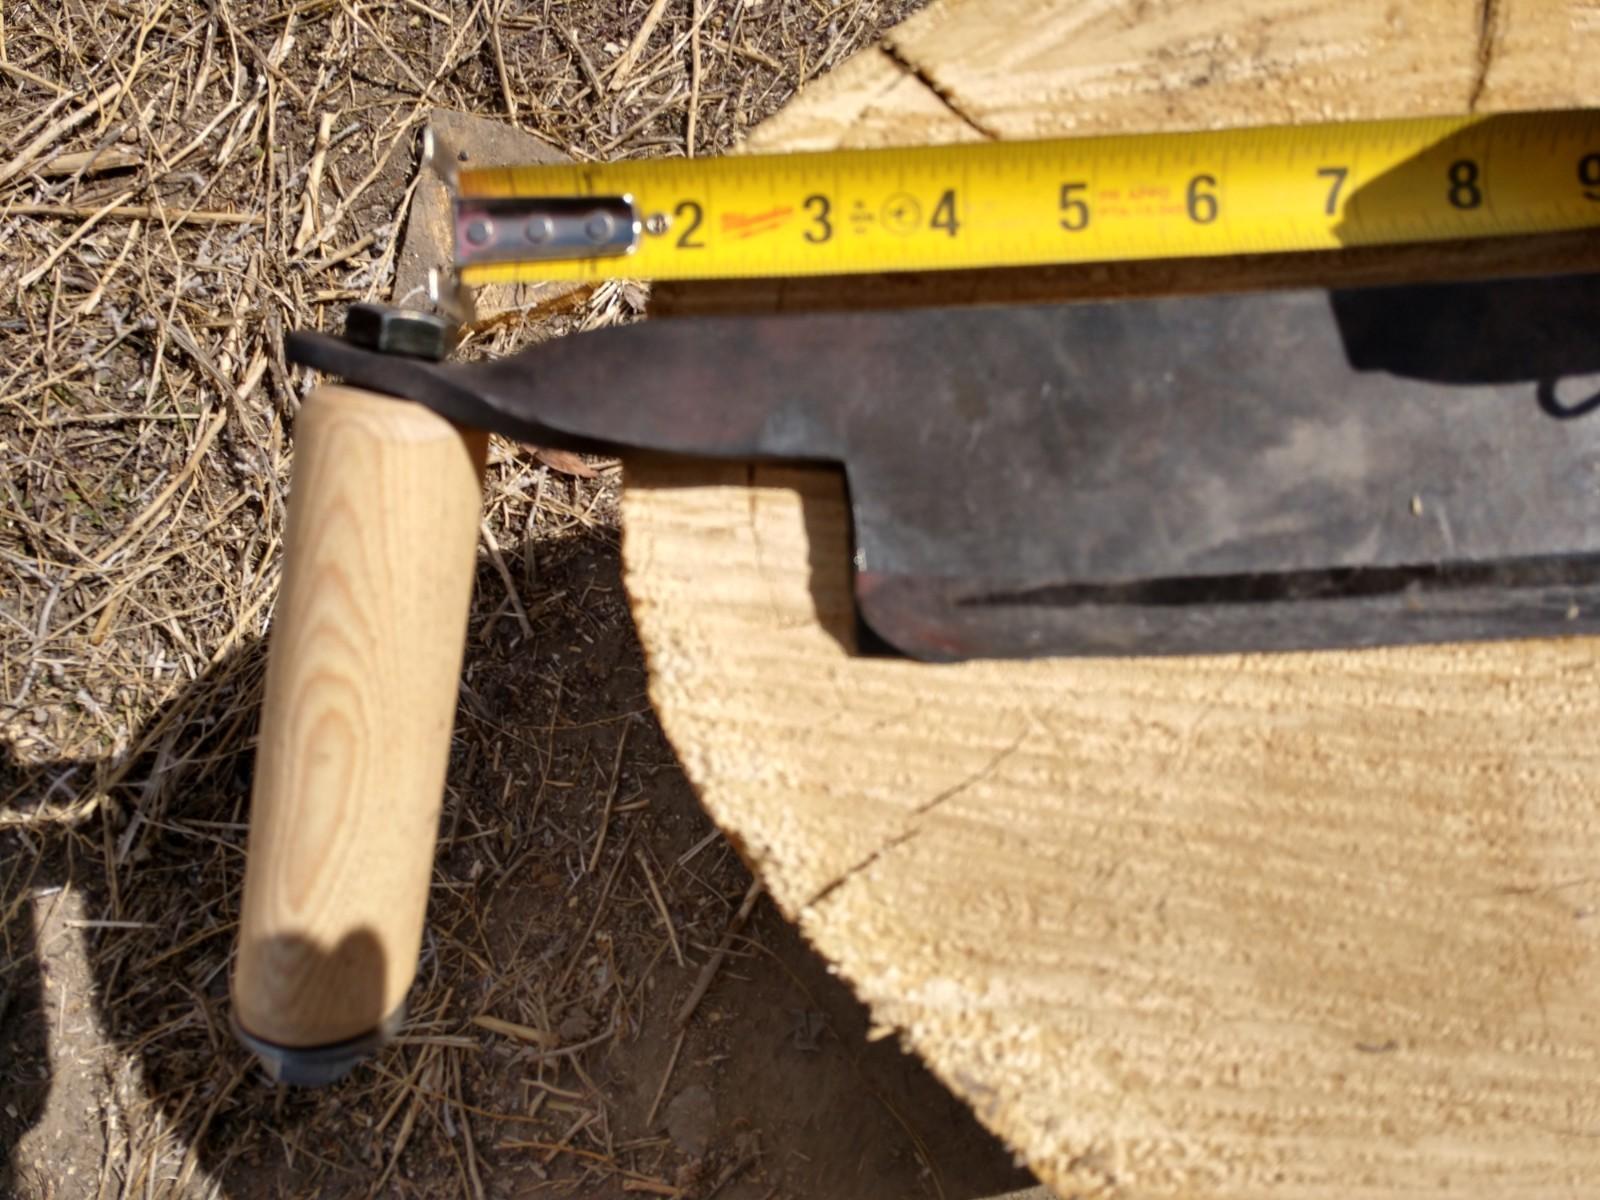
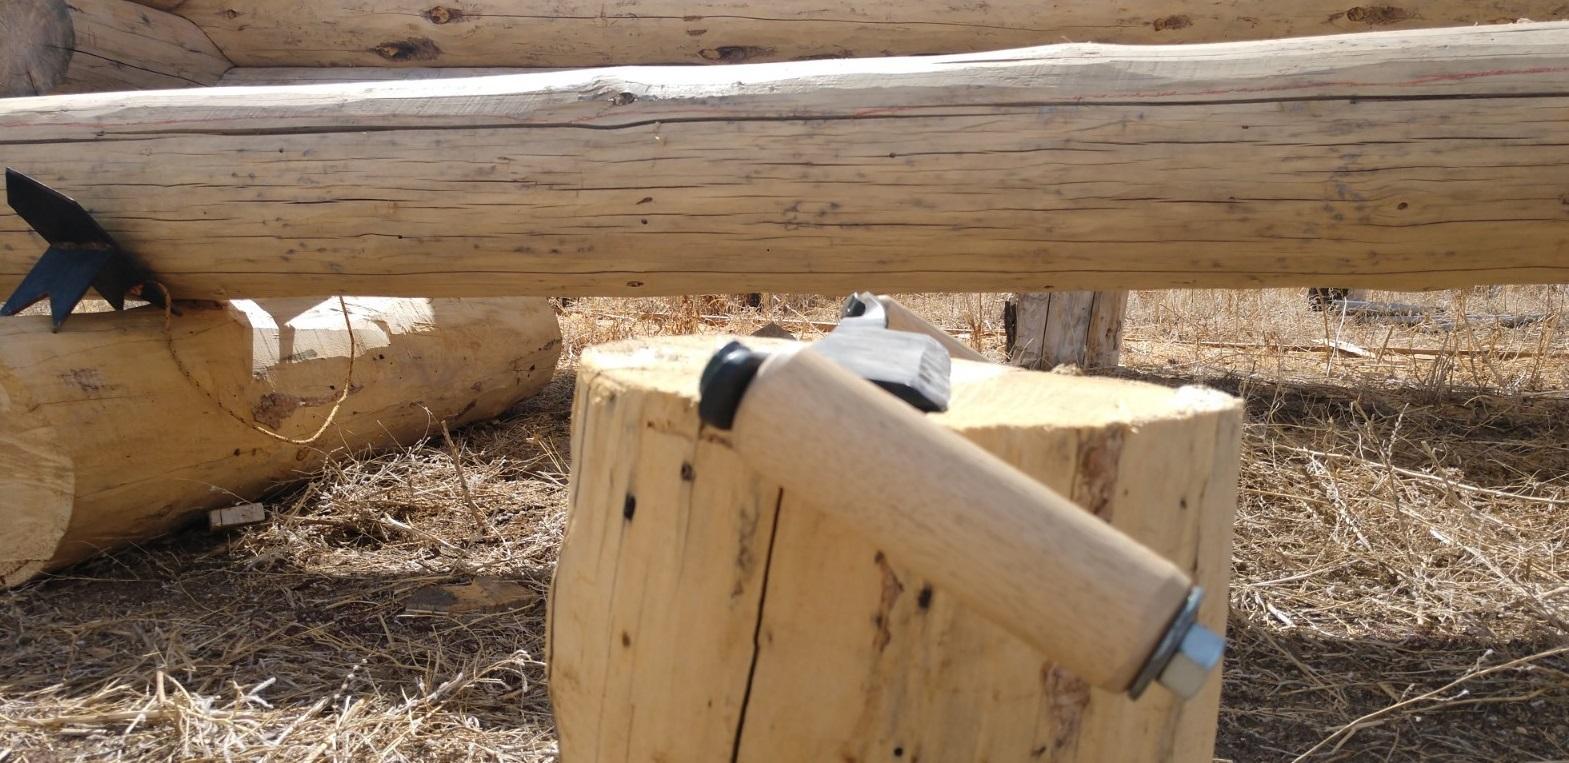
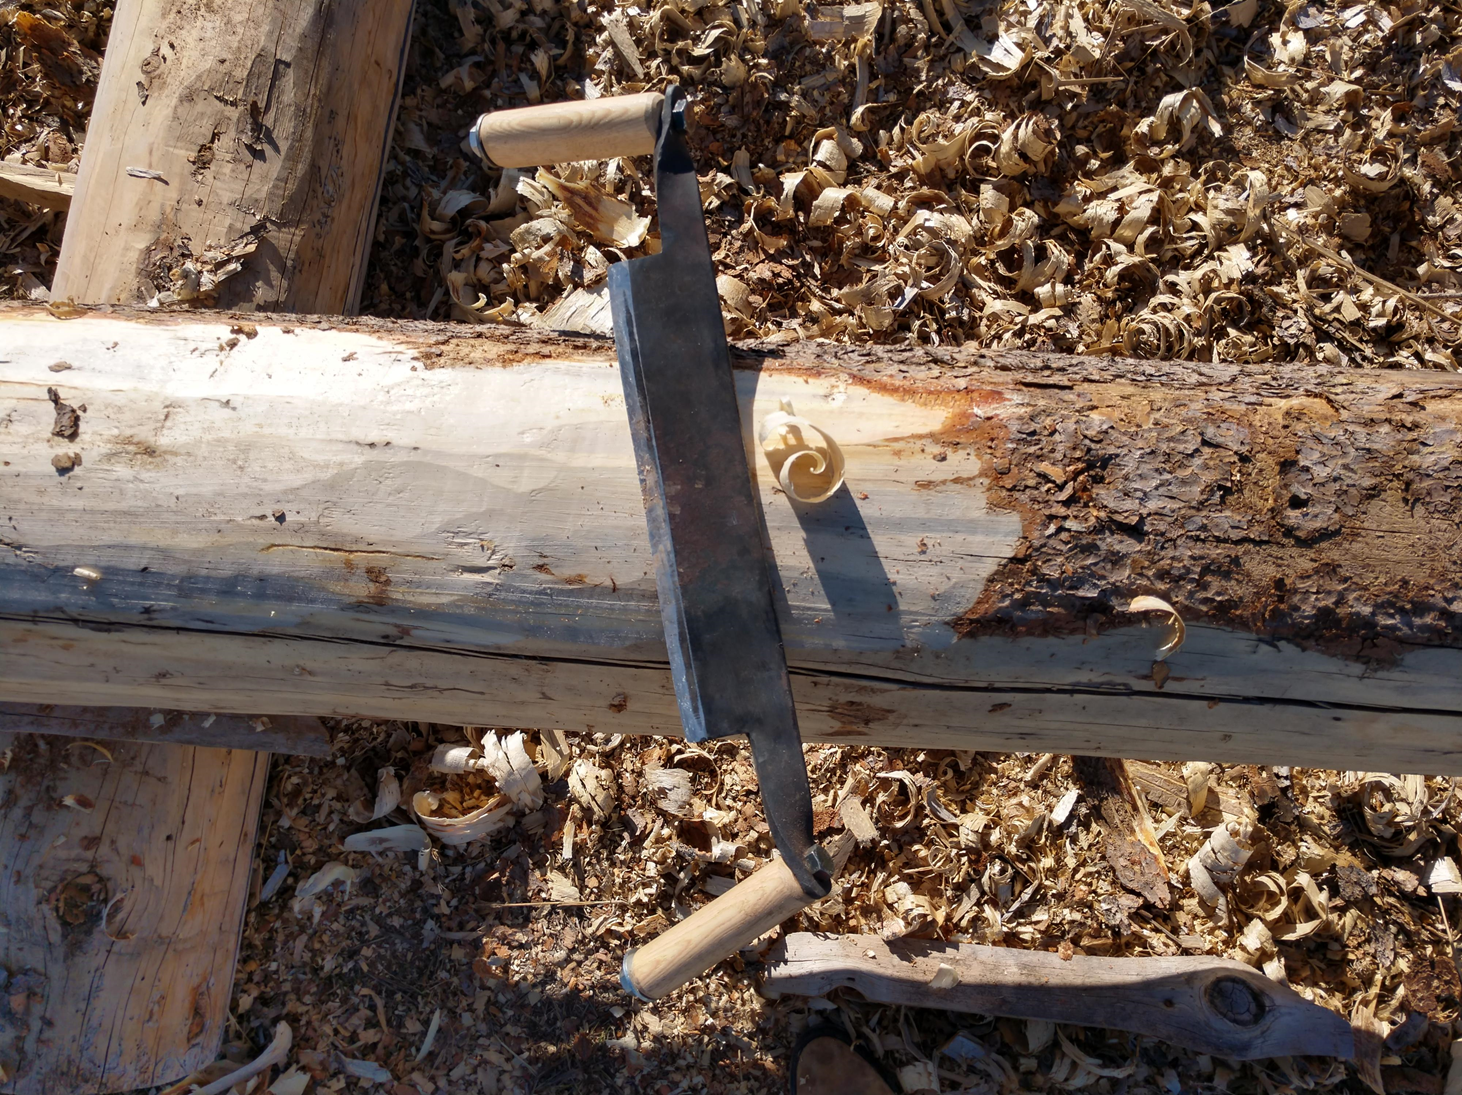
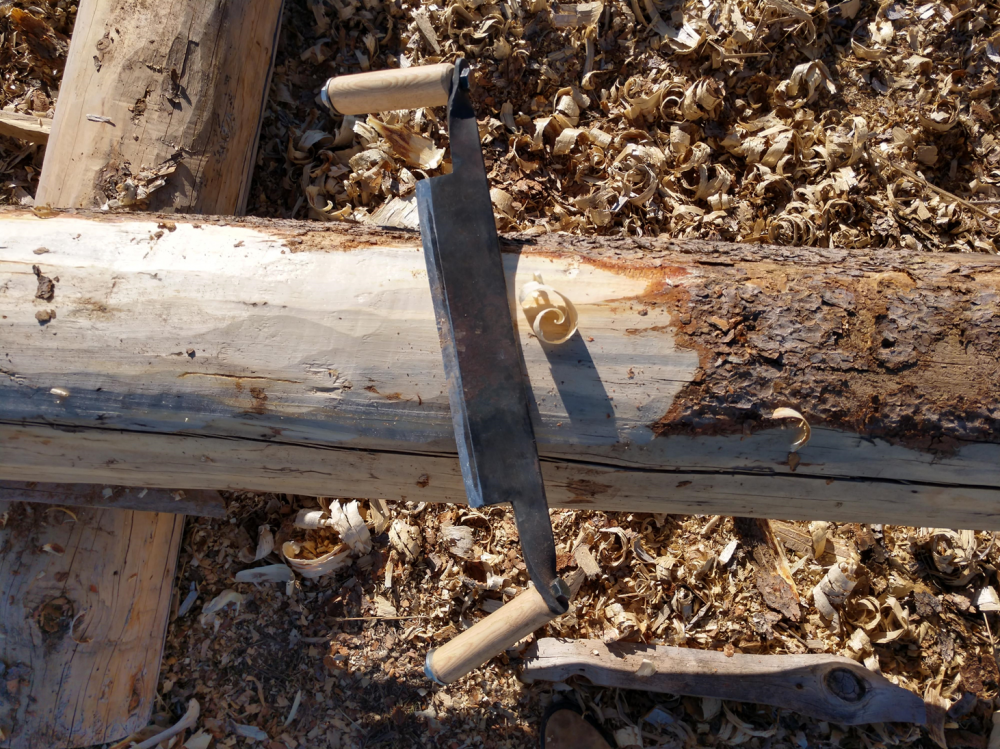
I suspect different kinds of bark might need slight modifications in design. I am peeling very dry, lodgepole pine. Sometimes I am just shaving grayed-wood and not even bark. Weight is definitely a plus. The tool is resting/sliding on the log for both push and pull, so the extra weight is not tiring. Its kind of fun when you see a knot coming...as I try to glide through it without hesitation. I have never seen a beveled radius at the ends of a draw knife blade. I guess I would need to create a ricasso of sorts there to carry a useful bevel around the radius. -
Log Peeling Draw Knife
gmbobnick replied to gmbobnick's topic in Axes, Hatchets, Hawks, Choppers, etc
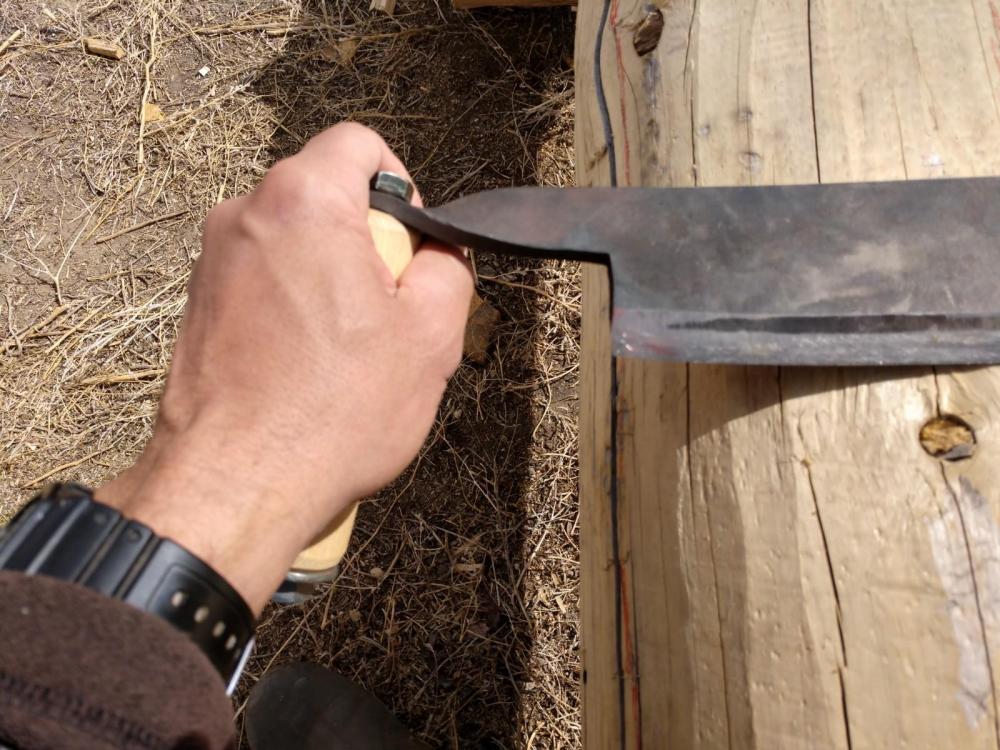
For sure! This gives me an excuse to escape my "social distancing" office and get some fresh air. The photo quality isn't as good, but should help. I used a piece of electrician's tape to show what I meant about the radius in the first photo.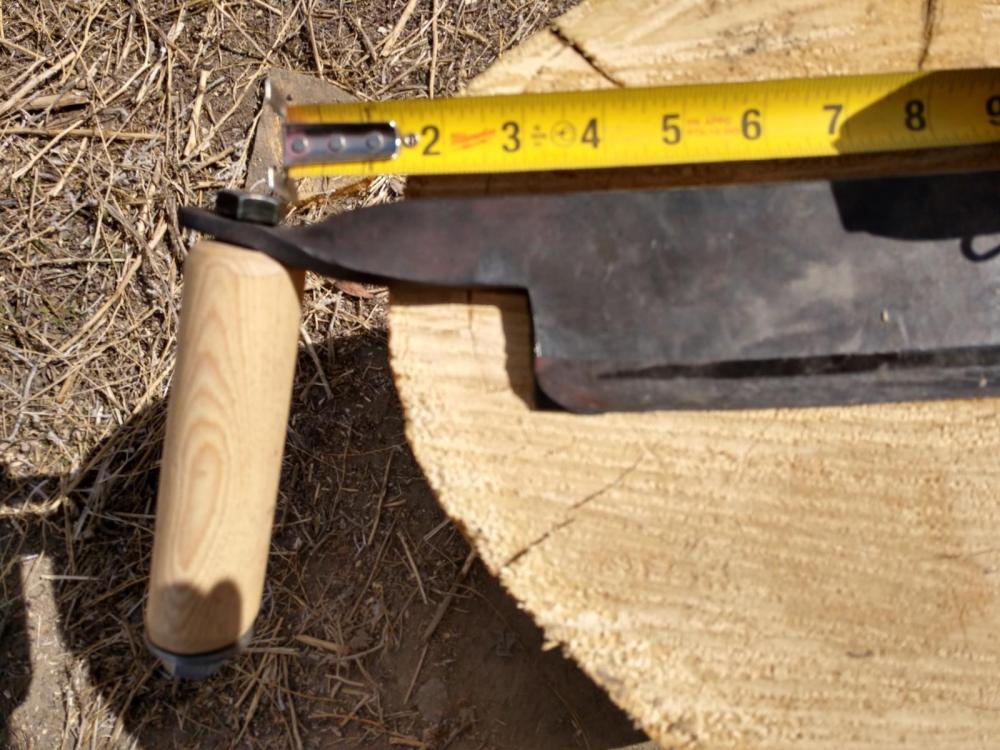

-
I have used 5 different draw knives for peeling logs (mostly loaners) all varying in terms of length, weight, handle design etc. It’s given me an opportunity to look critically at the tool for the purpose of peeling logs. Here is what I have learned for any who would want to make their own tool: Weight: One of the most critical factors. Weight helps drive through bumps and small knots. It produces a smooth cut with little or no chatter marks. Weight is achieved obviously through blade thickness, width and length, but there is a nice balance, which are other factors to discuss. Length: Length adds weight, which is important to function. But there is a point where greater length is not comfortable even if no longer useful for cutting. I find an overall tool length at 20 or so inches to be about right for ergonomic comfort/fit. It allows a nice direct pull from my shoulders, as I use my back for pulling more than my arms. A blade-edge length of 12” works with this overall length as will be mentioned later. The actual wood peel is only an inch or two wide so there is no relationship here to blade length. Blade Width: I don’t find any important issues with width other than for adding weight and stiffness…3 inches is fine. Stiffness: This is important. Flex robs ability to cut a clean, flat swath. Flex also diffuses the focus of force where I want it to be applied. Virtually no flex is allowed within the range of force I am physically able to put on it. I suppose it will flex minutely, but I don’t want to see it when I work the blade. Thickness: This factor goes to weight and rigidity. I find about 3/8” is good for the size of knife that meets my length and stiffness criteria. Handle Design: Since I am pulling, some way to keep the handle from slipping my grip is obviously important, especially when working a hard spot. I don’t want to grip the handle too hard to accomplish this, because after hours of peeling, your grip could crush the Pastors hand when you walk out of church service. The handle doesn’t have to be complicated or fancy. A shapely curve in the grip is nice and sensible, but not necessary. I want the handle stem short enough so that I can hook a finger around the back of the knife for extra hold when I need it. Otherwise a round/oval handle section about 5 inches long that fits the hand comfortably is fine. Handle Angle: Another important factor. Its about ergonomics and being able to put downward pressure on the cutting edge as you pull. A modest downward angle with respect to the blade flat is what I want. Handles should also be splayed outward to help prevent slip and reduce stress on the wrist. I can’t give design angles because that has to be custom fit for optimal results. Designing how the handle attaches to the blade is important to allow that fit and adjustment. See my closure to this post for how this can be done. Bevel: First the blade should only have a simple/single bevel on one side...like a chisel. I discovered that if you are going to cut with the bevel side down, it had better be dead-flat or slightly hollowed. Any convexity…and I mean any.. will dramatically reduce cutting efficiency. The edge will fight against itself as you pull. I also discovered that I am still horrible at getting a nice grind whether flat or hollow. But no worries. One side of the blade is truly flat anyway. Drawing with the bevel up produces satisfactory results. Since I will be sharpening the blade in the field, I will be less likely to consistently keep a flat bevel over time, but not a problem if bevel is up. Maybe not so much a problem sharpening with a hollow ground blade. As for bevel angle …when cutting bevel side up…I say 25 to 27 degrees works fine on a flat grind. I don’t feel compelled to experiment further unless maybe if I should want a blade that cuts bevel side down. Handle to Edge Clearance: Its good to have a gap of several (3 or so) inches between the handle and the end of the cutting edge. This will allow working the blade edge into tight spots around knots or depressions. I am thinking of maybe even putting a radius on the cutting edge on the corners to make it even better for that purpose…so I don’t have too sharp a point. Steel: Ahhh…the thing we all love the best about knives. As with any other knife, there are many opinions about steel. My thing is I want to keep the blade razor keen. I like to sharpen. Its comforting for me…like thumb sucking I suppose. I sharpen frequently and I use a stone, so I want to feel like I can restore the edge quickly and consistently on a long blade…so not too hard of steel. If you want a blade that cuts bevel side down, then I would advise a HARD blade so that less than perfect sharpening will not create convexity. One knife I used cuts best bevel side down, but it was made from an industrial planer blade and it is HARD and stays flat and sharp a long, long time. There isn’t anything demanding about toughness for peeling bark, so I don’t think that is a big issue. Frankly, I just don’t see where one needs to spend a great length of time researching and studying the best steel for this purpose, so long as it has at least a modest amount of carbon so that it can be hardened to whatever hardness ones heart desires, and kept sharp for at least a day of peeling. That covers the key points I can think of. Anyway, after experimenting with different knives I of course came up with my own. I am delighted with it! The one improvement I think is putting a beveled radius on the corners rather than a 90 corner. I made it from a truck leaf spring, two ½-inch bolts and a piece of sledge hammer handle. A useful part of this design is how the handles are fastened to the blade. The attitude of the handles is easily tweaked to my liking. Remove handles, clamp the blade in a vice at the end of the cutting edge (I like to think the vise jaws act like a heat sink), torch the twist and adjust as needed…without messing with blade properties. I am curious what any others out there have found about design and construction of such a tool. Let me know!
-
Eye- and mind bending events on my Puukko horizon
gmbobnick replied to templehound's topic in Knife Making
Spectacular! It's amazing how the lines of the knife handle change so subtlely from crudely utilitarian to gracefully artistic. You have both the eye and the skill for the art templehound. -
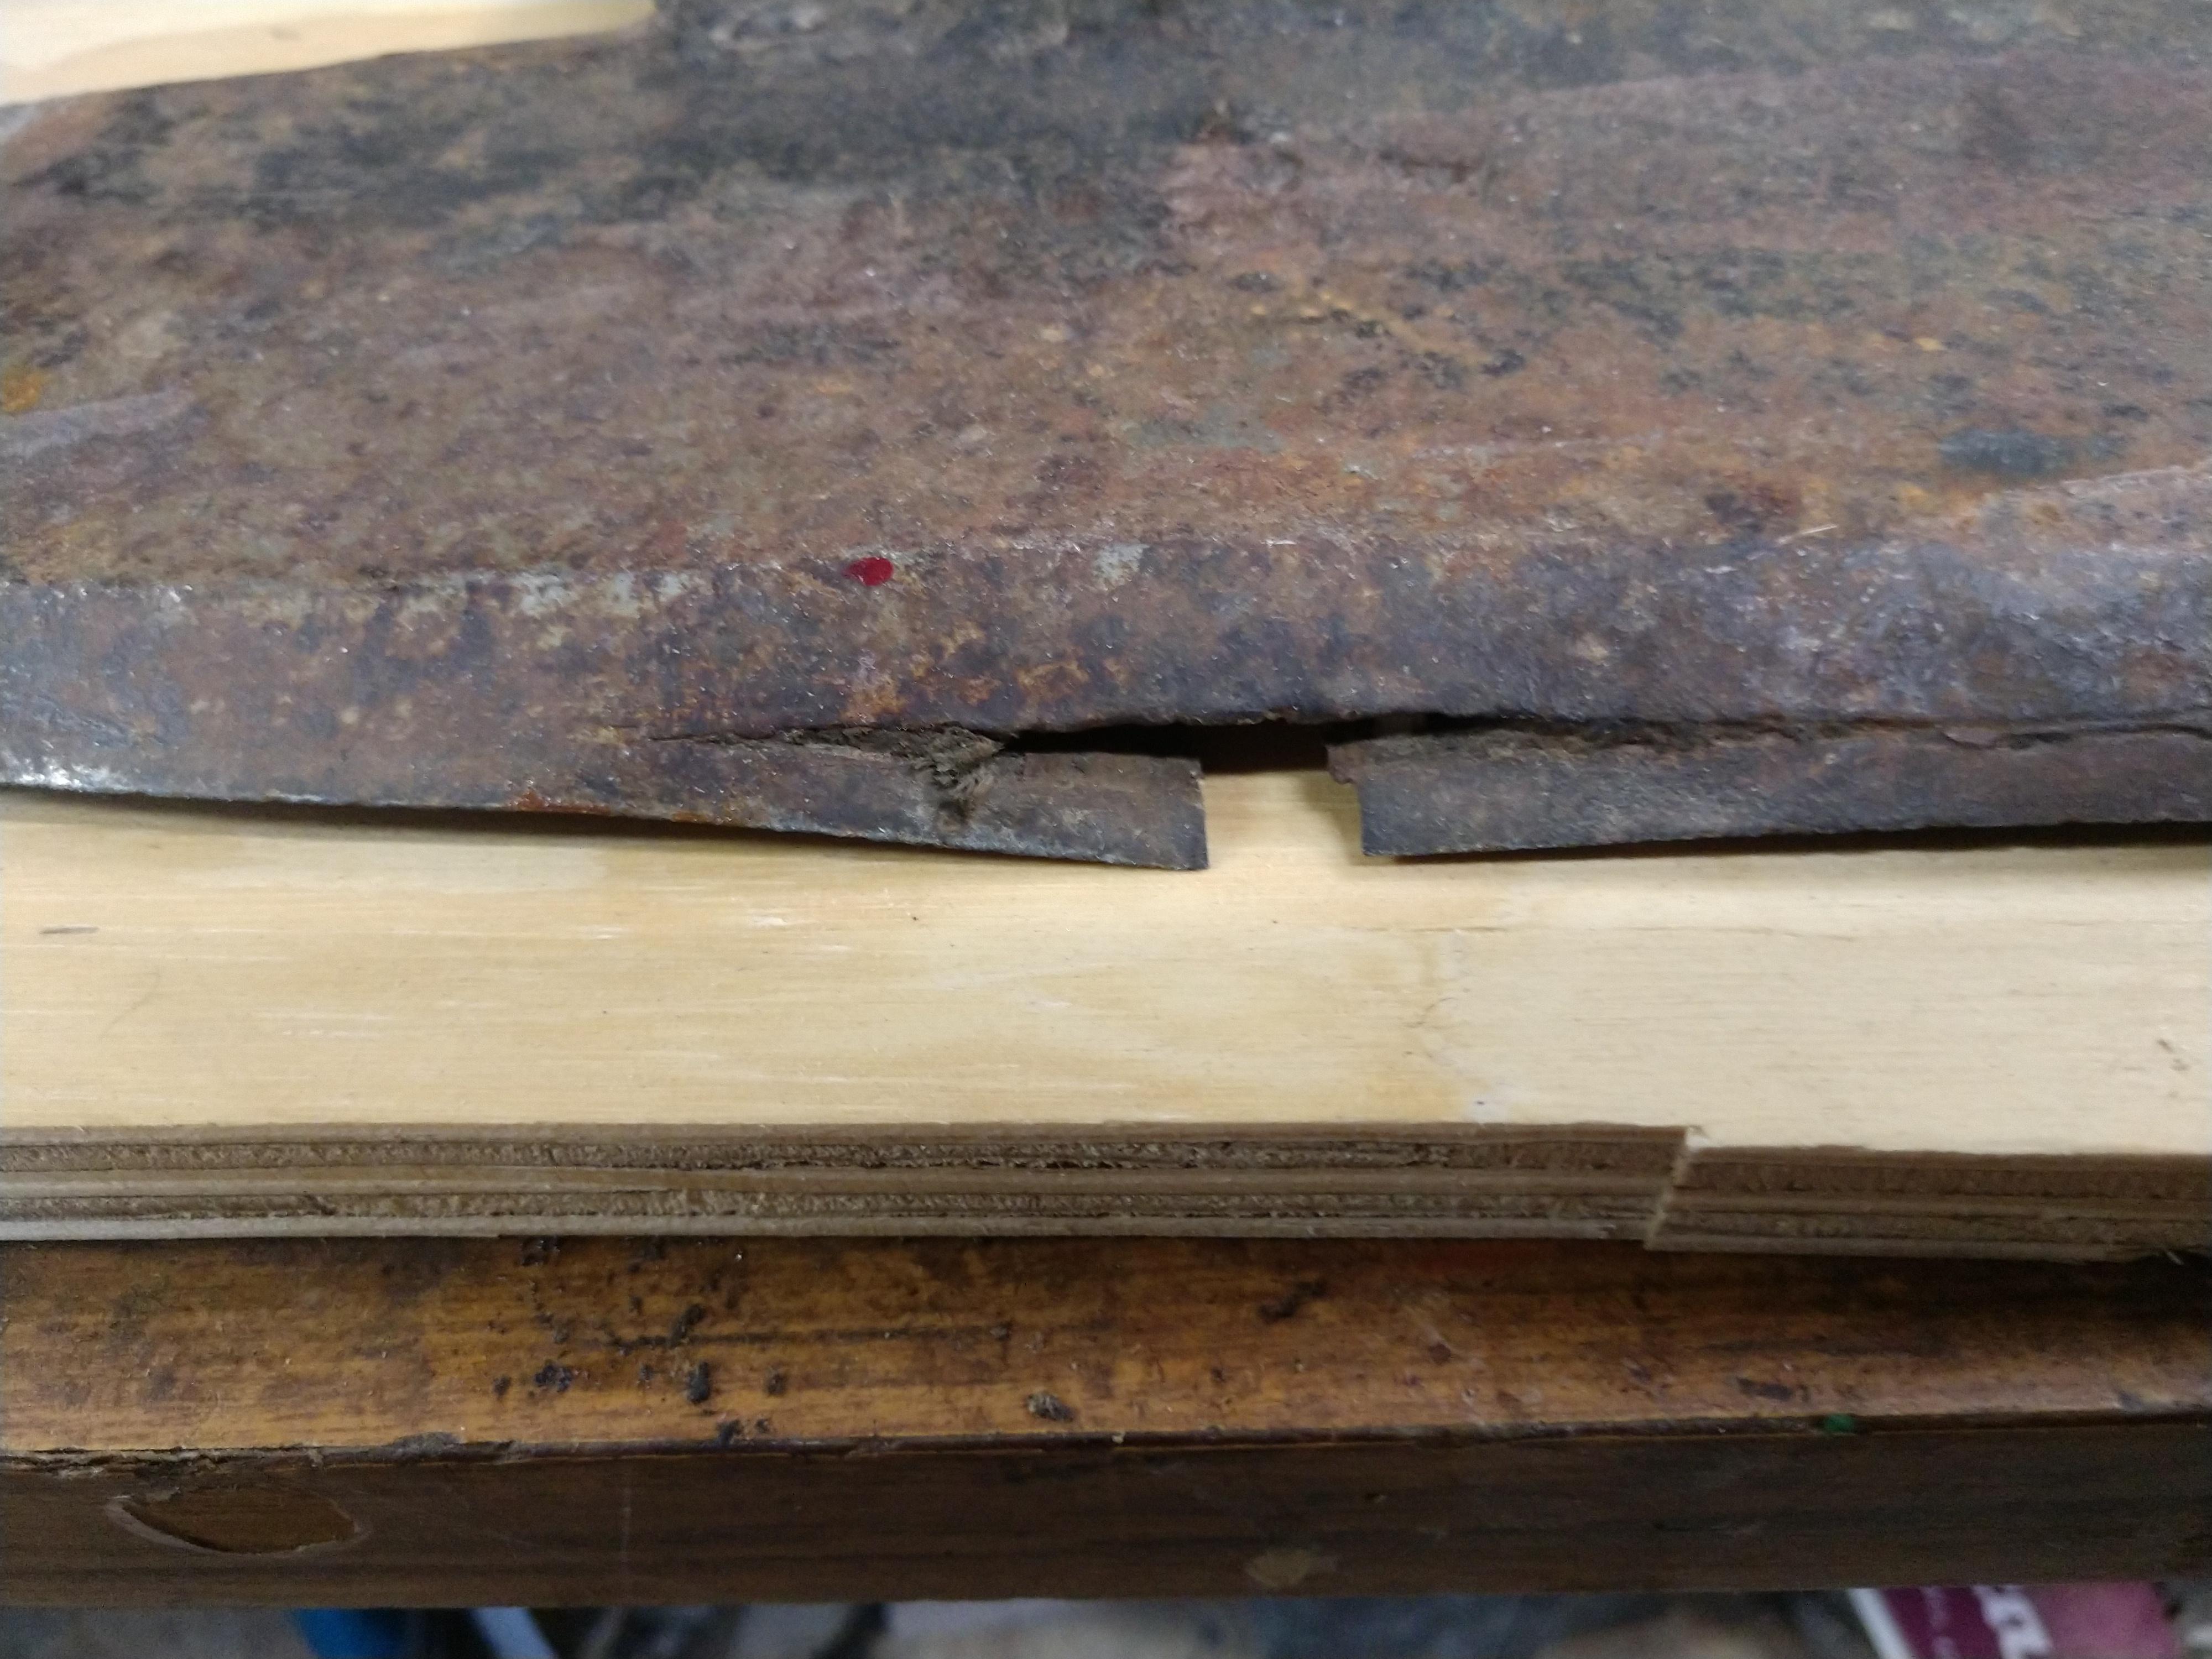
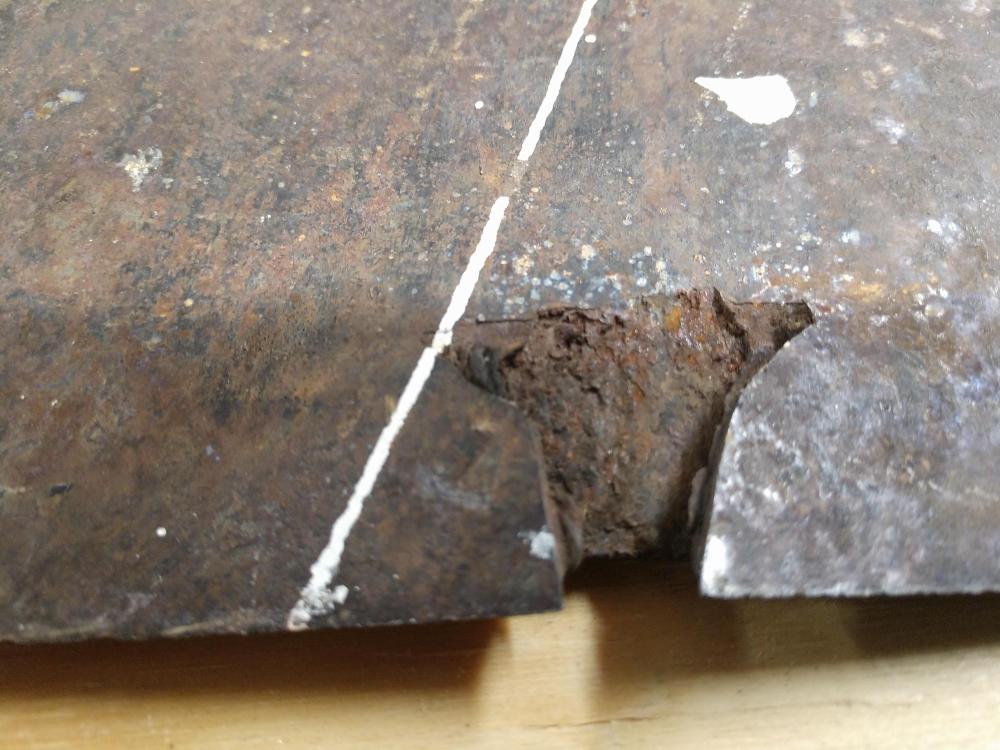
Thank you for the prompt response Latticino. I don't think I am up to replacing the entire 12 inch section with a forge weld. I don't think I can get proper heat full length. Might be best to set this project aside until I get more experience.
-
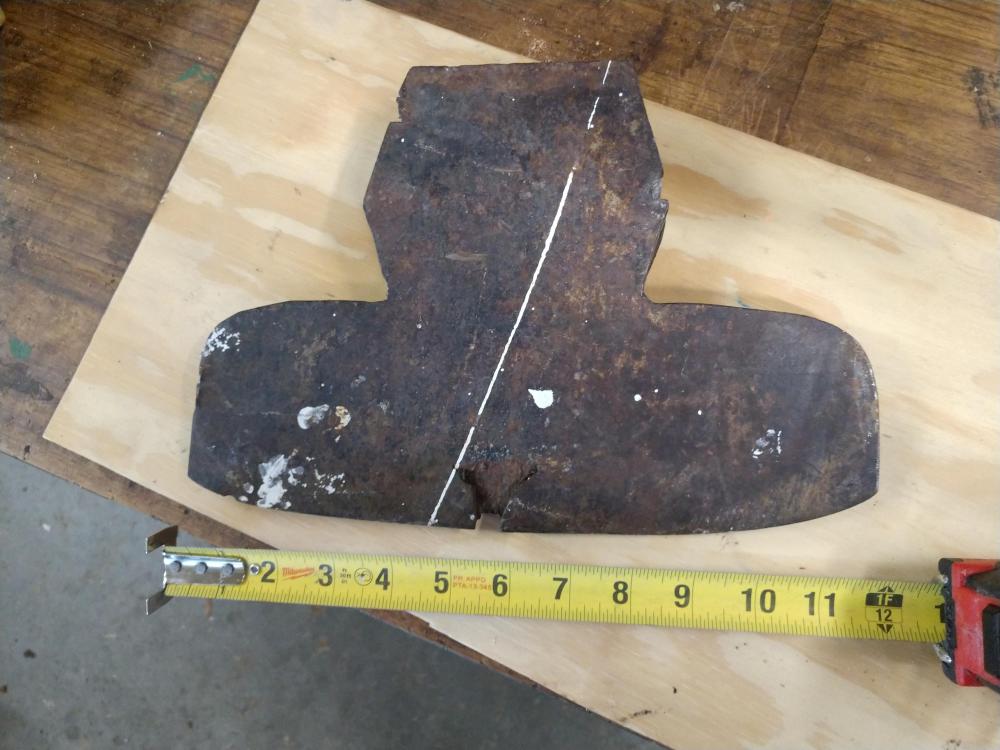
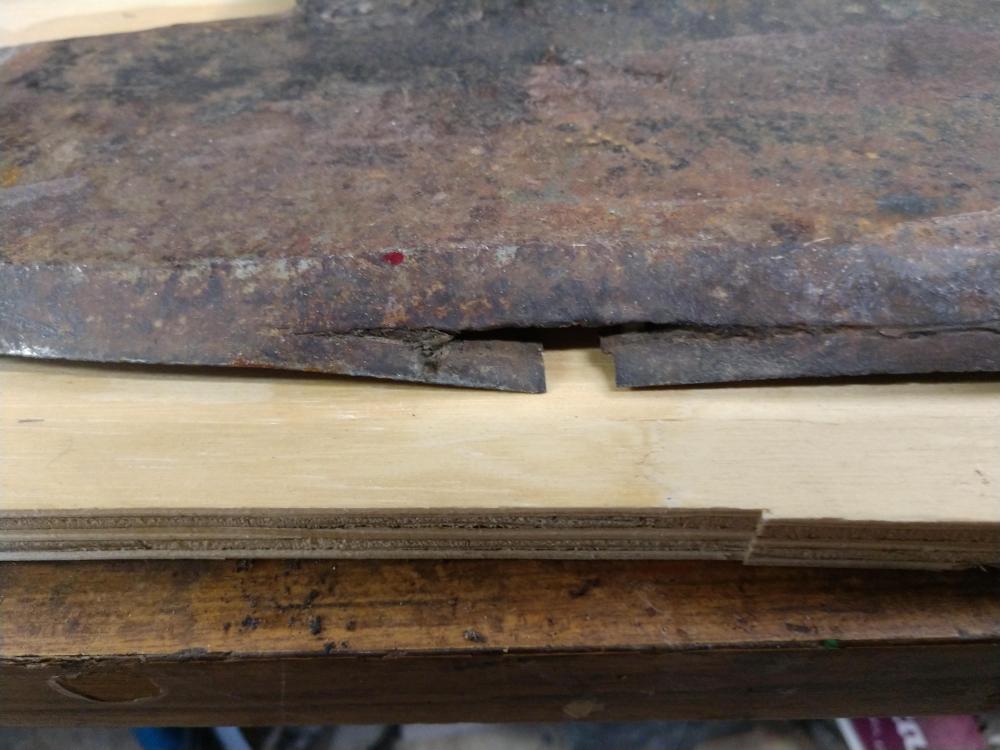
A friend gave me this old damaged Ax. I would like to restore it. Thinking I need to cut out the damaged inlay section and forge weld in a new piece...probably 1070 steel. Any suggestions before I embark? Is repair of this going to be folly?

-
Tooling direction... need advice.
gmbobnick replied to Allen Corneau's topic in Tools, general discussion
Although I suspect my smithing skills pale in comparison to many of those who have responded, there is a philosophy regarding your question that I can speak to. I see often where passion for doing something is satisfied by accumulating the hard, physical objects associated with the pursuit. Big box sporting goods stores have made fortunes from people who spend a couple precious days each year hunting and fishing. Build it and they will come is a phrase that sort of fits here. My suggested philosophy is to focus energy on the heart of what you want to do and not the peripheral things. The great joy of blacksmithing is you can do that while building a tool collection. The great dilemma though is finding the time to do it. While we have dreams to build cool stuff for others to use and admire, doing a quality job takes lots of time to master all the techniques. We can master them by making tools, seeing what works, how it works and how to apply that knowledge to the next conundrum. If we can be satisfied most of the time with little successes by making quality tools, the time spent making the really rewarding projects will become increasingly more productive and better spent. My scrap pile is full of things I didnt have the skills yet to build. Otherwise I dont have much to add to the wisdom shared above. I like your brazier by the way. Never heard of that before. I appreciate your effort to get all the curved pieces to match, particularly the rolled ends at the top. -
What did you do in the shop today?
gmbobnick replied to Mark Ling's topic in Blacksmithing, General Discussion
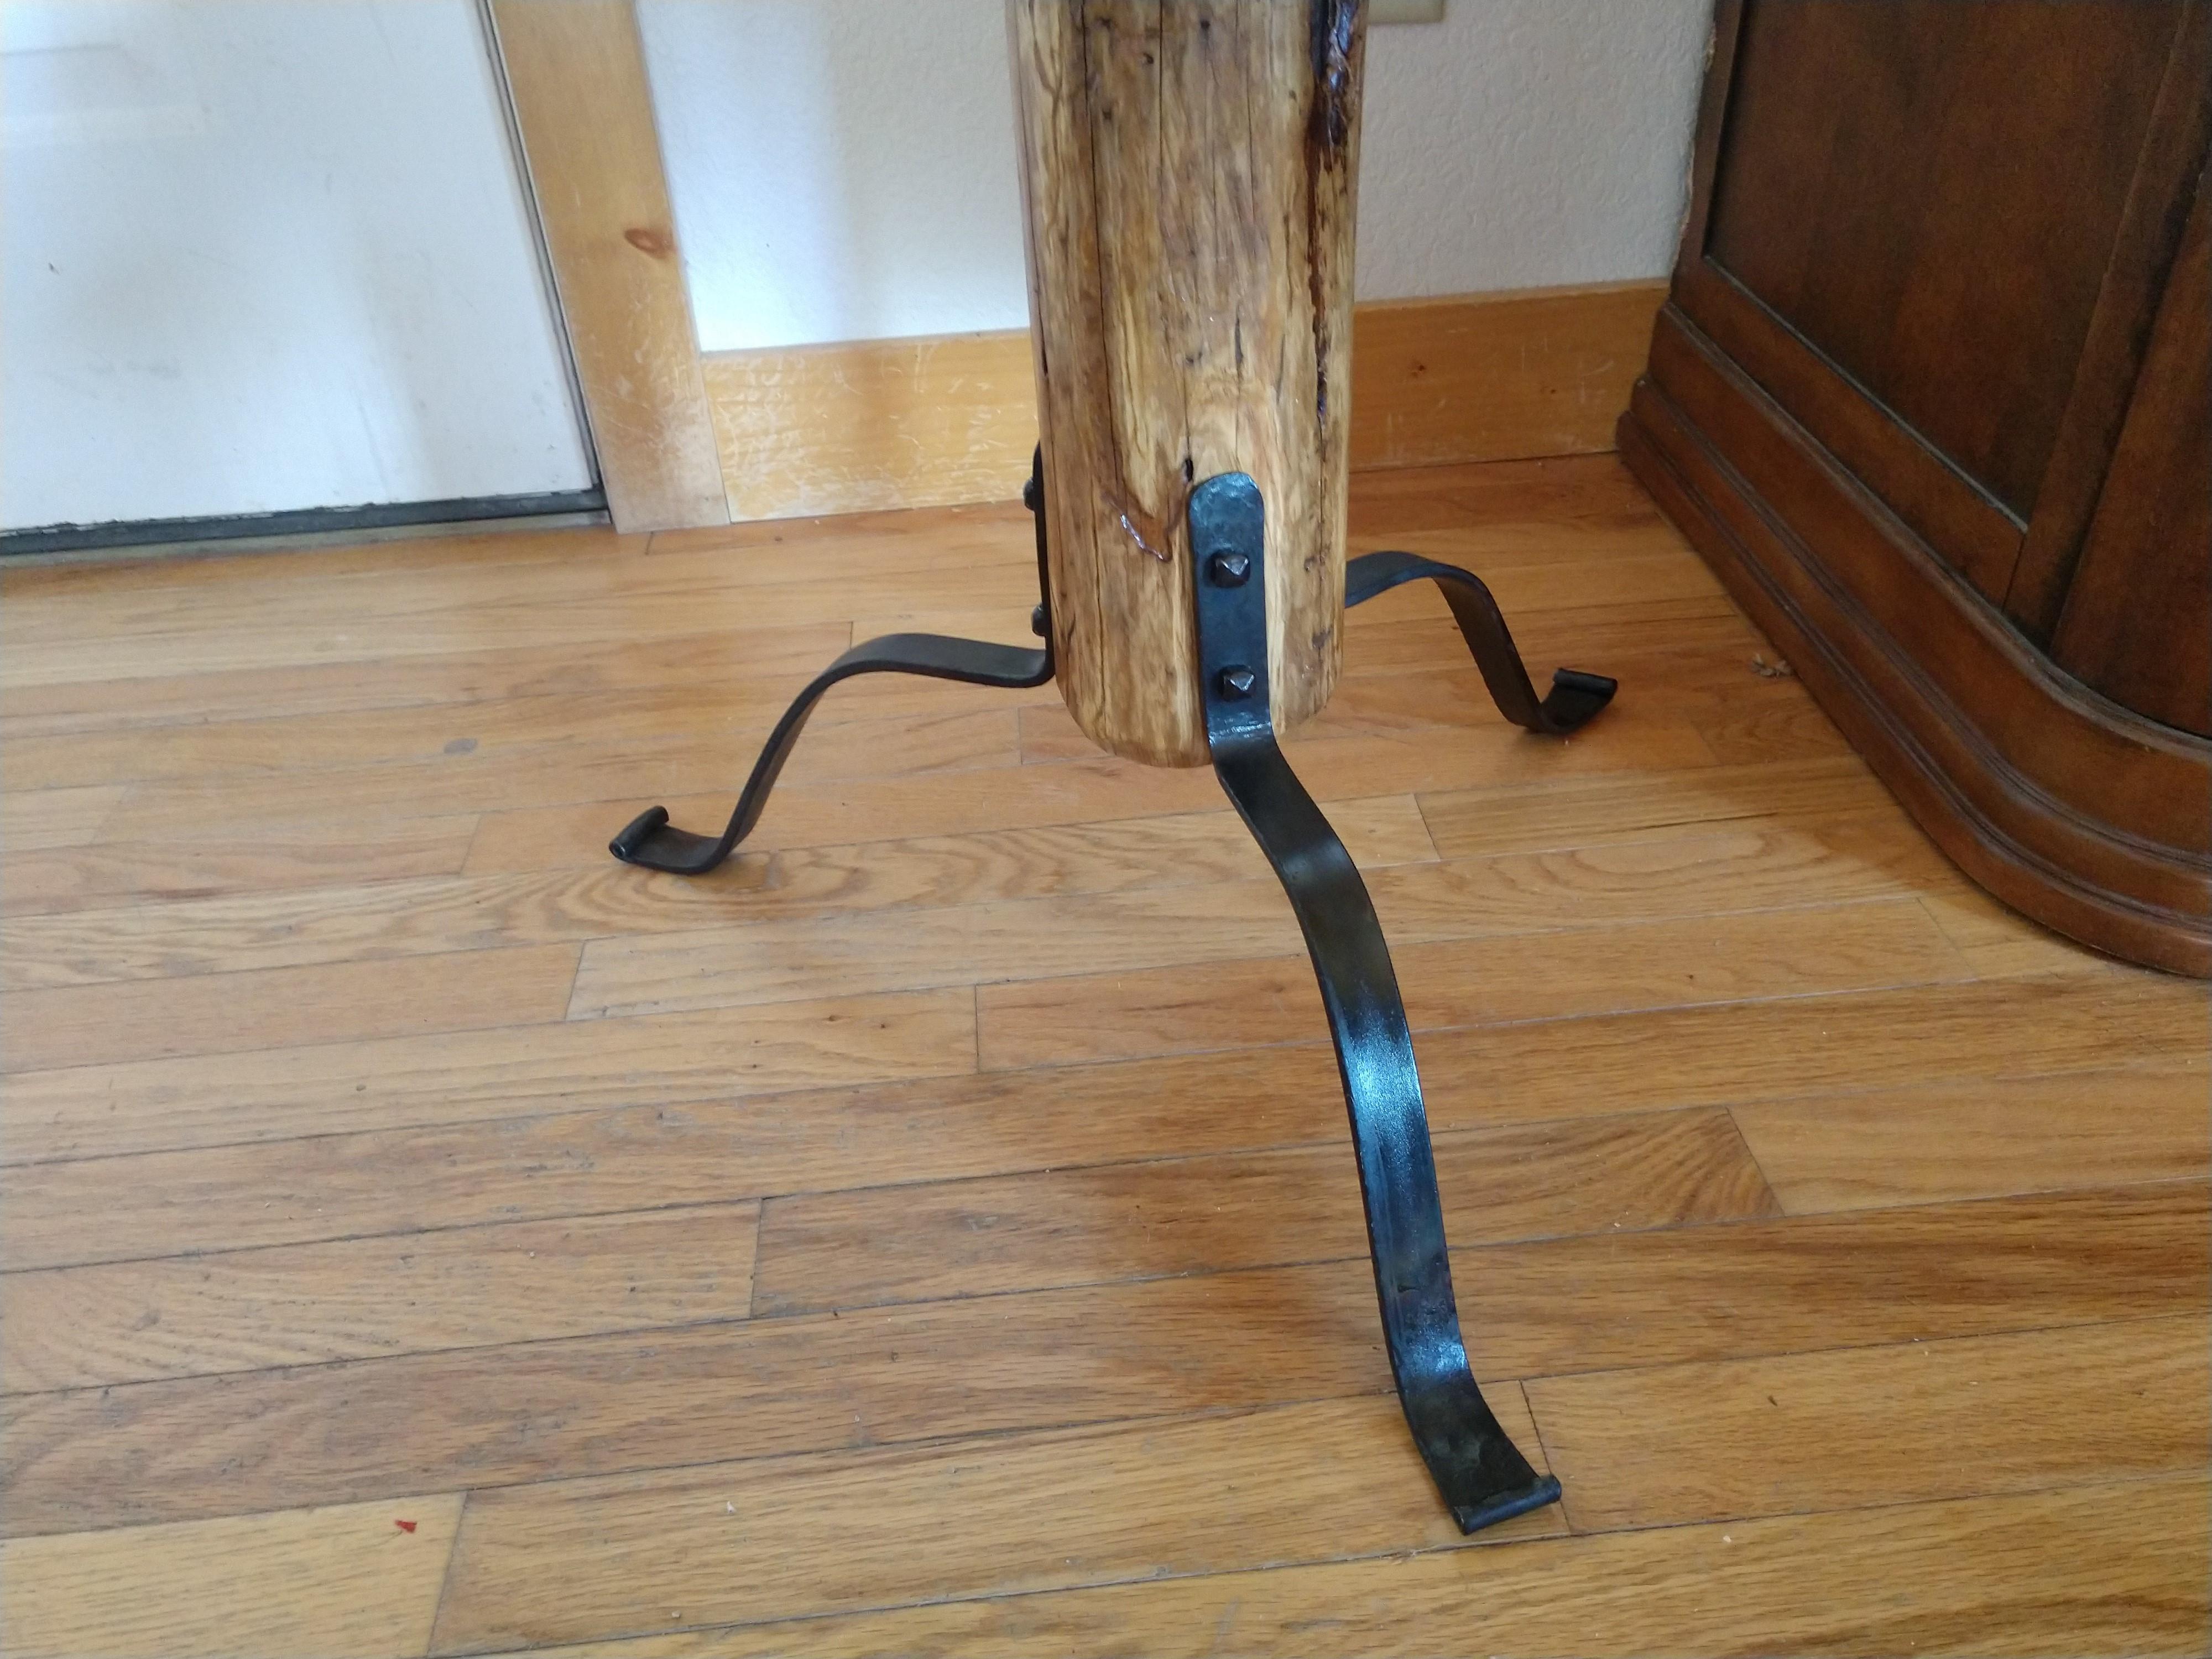
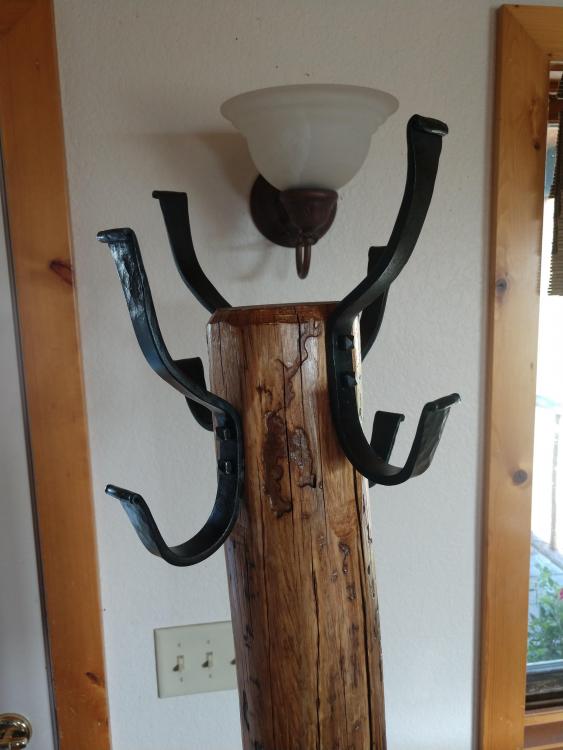
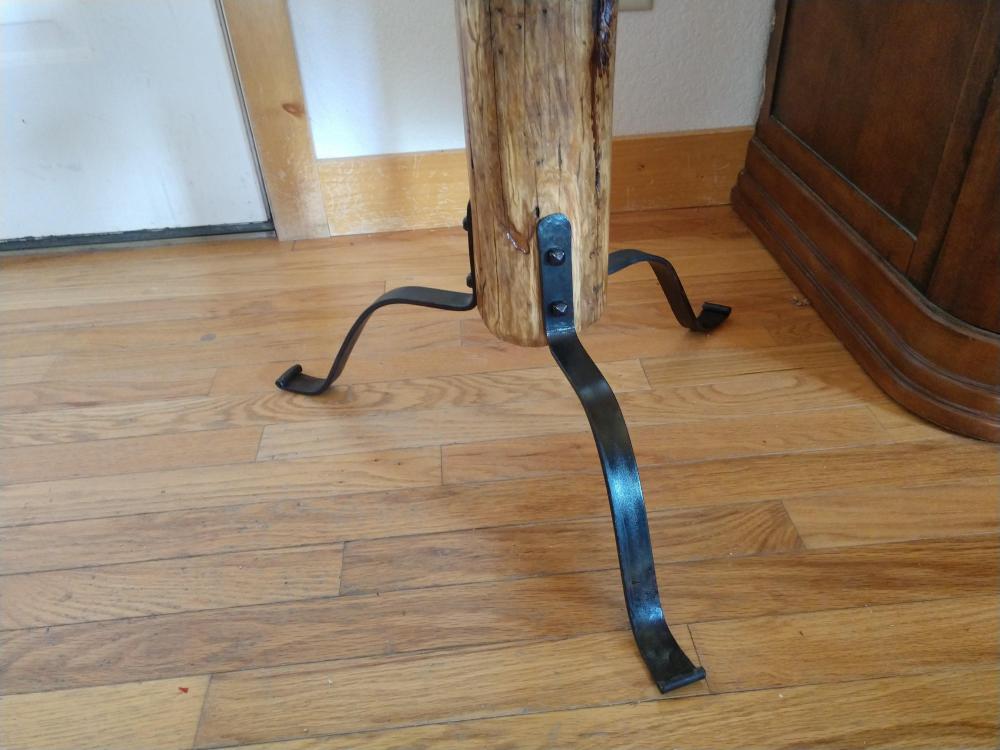
Completed my first piece of furniture since I started this blacksmith hobby over a year ago. I immediately gave it to a friend who gave me the anvil which really got me going. The anvil came with a farm he bought. He is going to put the coat rack in his new real estate office.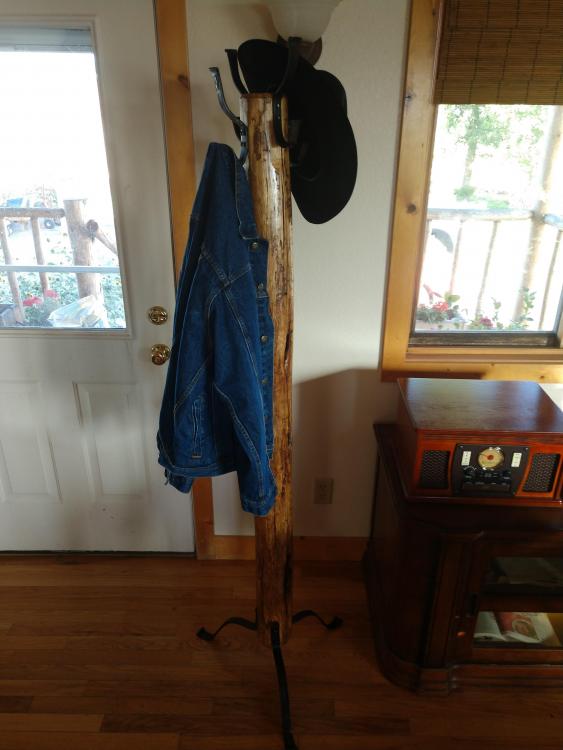
-
Wow Jim...this is eye candy for someone expanding their tooling by re-purposing stuff. I just got a whole bunch of ideas. Thanks for sharing!
-
You might check out "Six Sigma" as a way to get on top of such recurring problems and the inefficiencies they cause. Essentially, one tackles the process problem(s) by defining it, measuring it, analyzing, improving and finally controlling it. It relies heavily on statistics. Not hard to find info about it on the web, and there is even a book called "Six Sigma for Dummies" out there.
-
What did you do in the shop today?
gmbobnick replied to Mark Ling's topic in Blacksmithing, General Discussion
Is this hammer grammar...Grammar Hammer? (or maybe just spelling, but I couldn't resist) -
What did you do in the shop today?
gmbobnick replied to Mark Ling's topic in Blacksmithing, General Discussion
Congratulations Daswulf! I think you will need that to keep the boys away in a few years -
Now that is a vivid image and imagination! Beautiful knife Mr. Fry...anyone would be proud to own
-
Blacksmithing is an archaic industry dwarfed by technology. However it survives as an art instead of an industry. A blacksmithing business model - based on costs and production rate - just doesn't work. While industry profits by decreasing the inputs and increasing the output, art is just the opposite...its path to profit is where input is increased and output is decreased, so long as there is demand. ...so back to work getting better at the art.
-
Well I got 2.5 tons of coal for $100. That would be a steal at $1 per 50# bag…for those that buy coal at Tractor Supply (notwithstanding BTU differences). I like the challenge of frugality…leaves more to be generous with where it counts.
-
I concur with Frosty. I may be a greenhorn blacksmith but spent 34 years as a geotechnical (soil and foundation) engineer. I have a 10x16 shop. I leveled the soil, scuffed the surface with a rake, moistened it to a damp condition, then evenly spread 2 - 94 lb. bags of cement powder over the entire surface. I used the rake to work the cement into the upper 2 inches or so, then tamped it by dropping the squared off end of a log on it (too cheap to rent a compactor...but admittedly that would have been better). Then I let it setup for a few days. I scored about 10 pails of crushed chips for road surfacing and spread that over it...but that is not necessary. Looks neat but don't drop a rivet and expect to find it. The floor is nice and stable. I think it is a little better than just packed soil. Cost me $22. Did I mention that I am cheap?
-
I use an old steel toolbox for oil. I like the ability to close lid to keep stuff out of the oil when not in use. I have a metal 5 gallon pail for water.
-
What did you do in the shop today?
gmbobnick replied to Mark Ling's topic in Blacksmithing, General Discussion
So they say, but sheds water better -
How to make a perfect forge weld, every time.
gmbobnick replied to Glenn's topic in Blacksmithing, General Discussion
After trying to follow some of these posts, I am beginning to see why bottle openers are such a popular project for those that haunt this web site. Evidently they were out quickly? Perhaps those who take a shine to tipping a brown bottle with one hand and typing out blacksmithing rhetoric with the other should consider using something like 1080 for their openers so they last longer. Tempered to light straw. Meanwhile I am going to wash the mud out of my fur and try welding again later.