Ranchmanben
Members
-
Joined
-
Last visited
Everything posted by Ranchmanben
-
Why does the carbide need to be removed?
-
Makes sense. I wasn’t sure if it was a twist pattern since it had been cut and restacked.
-
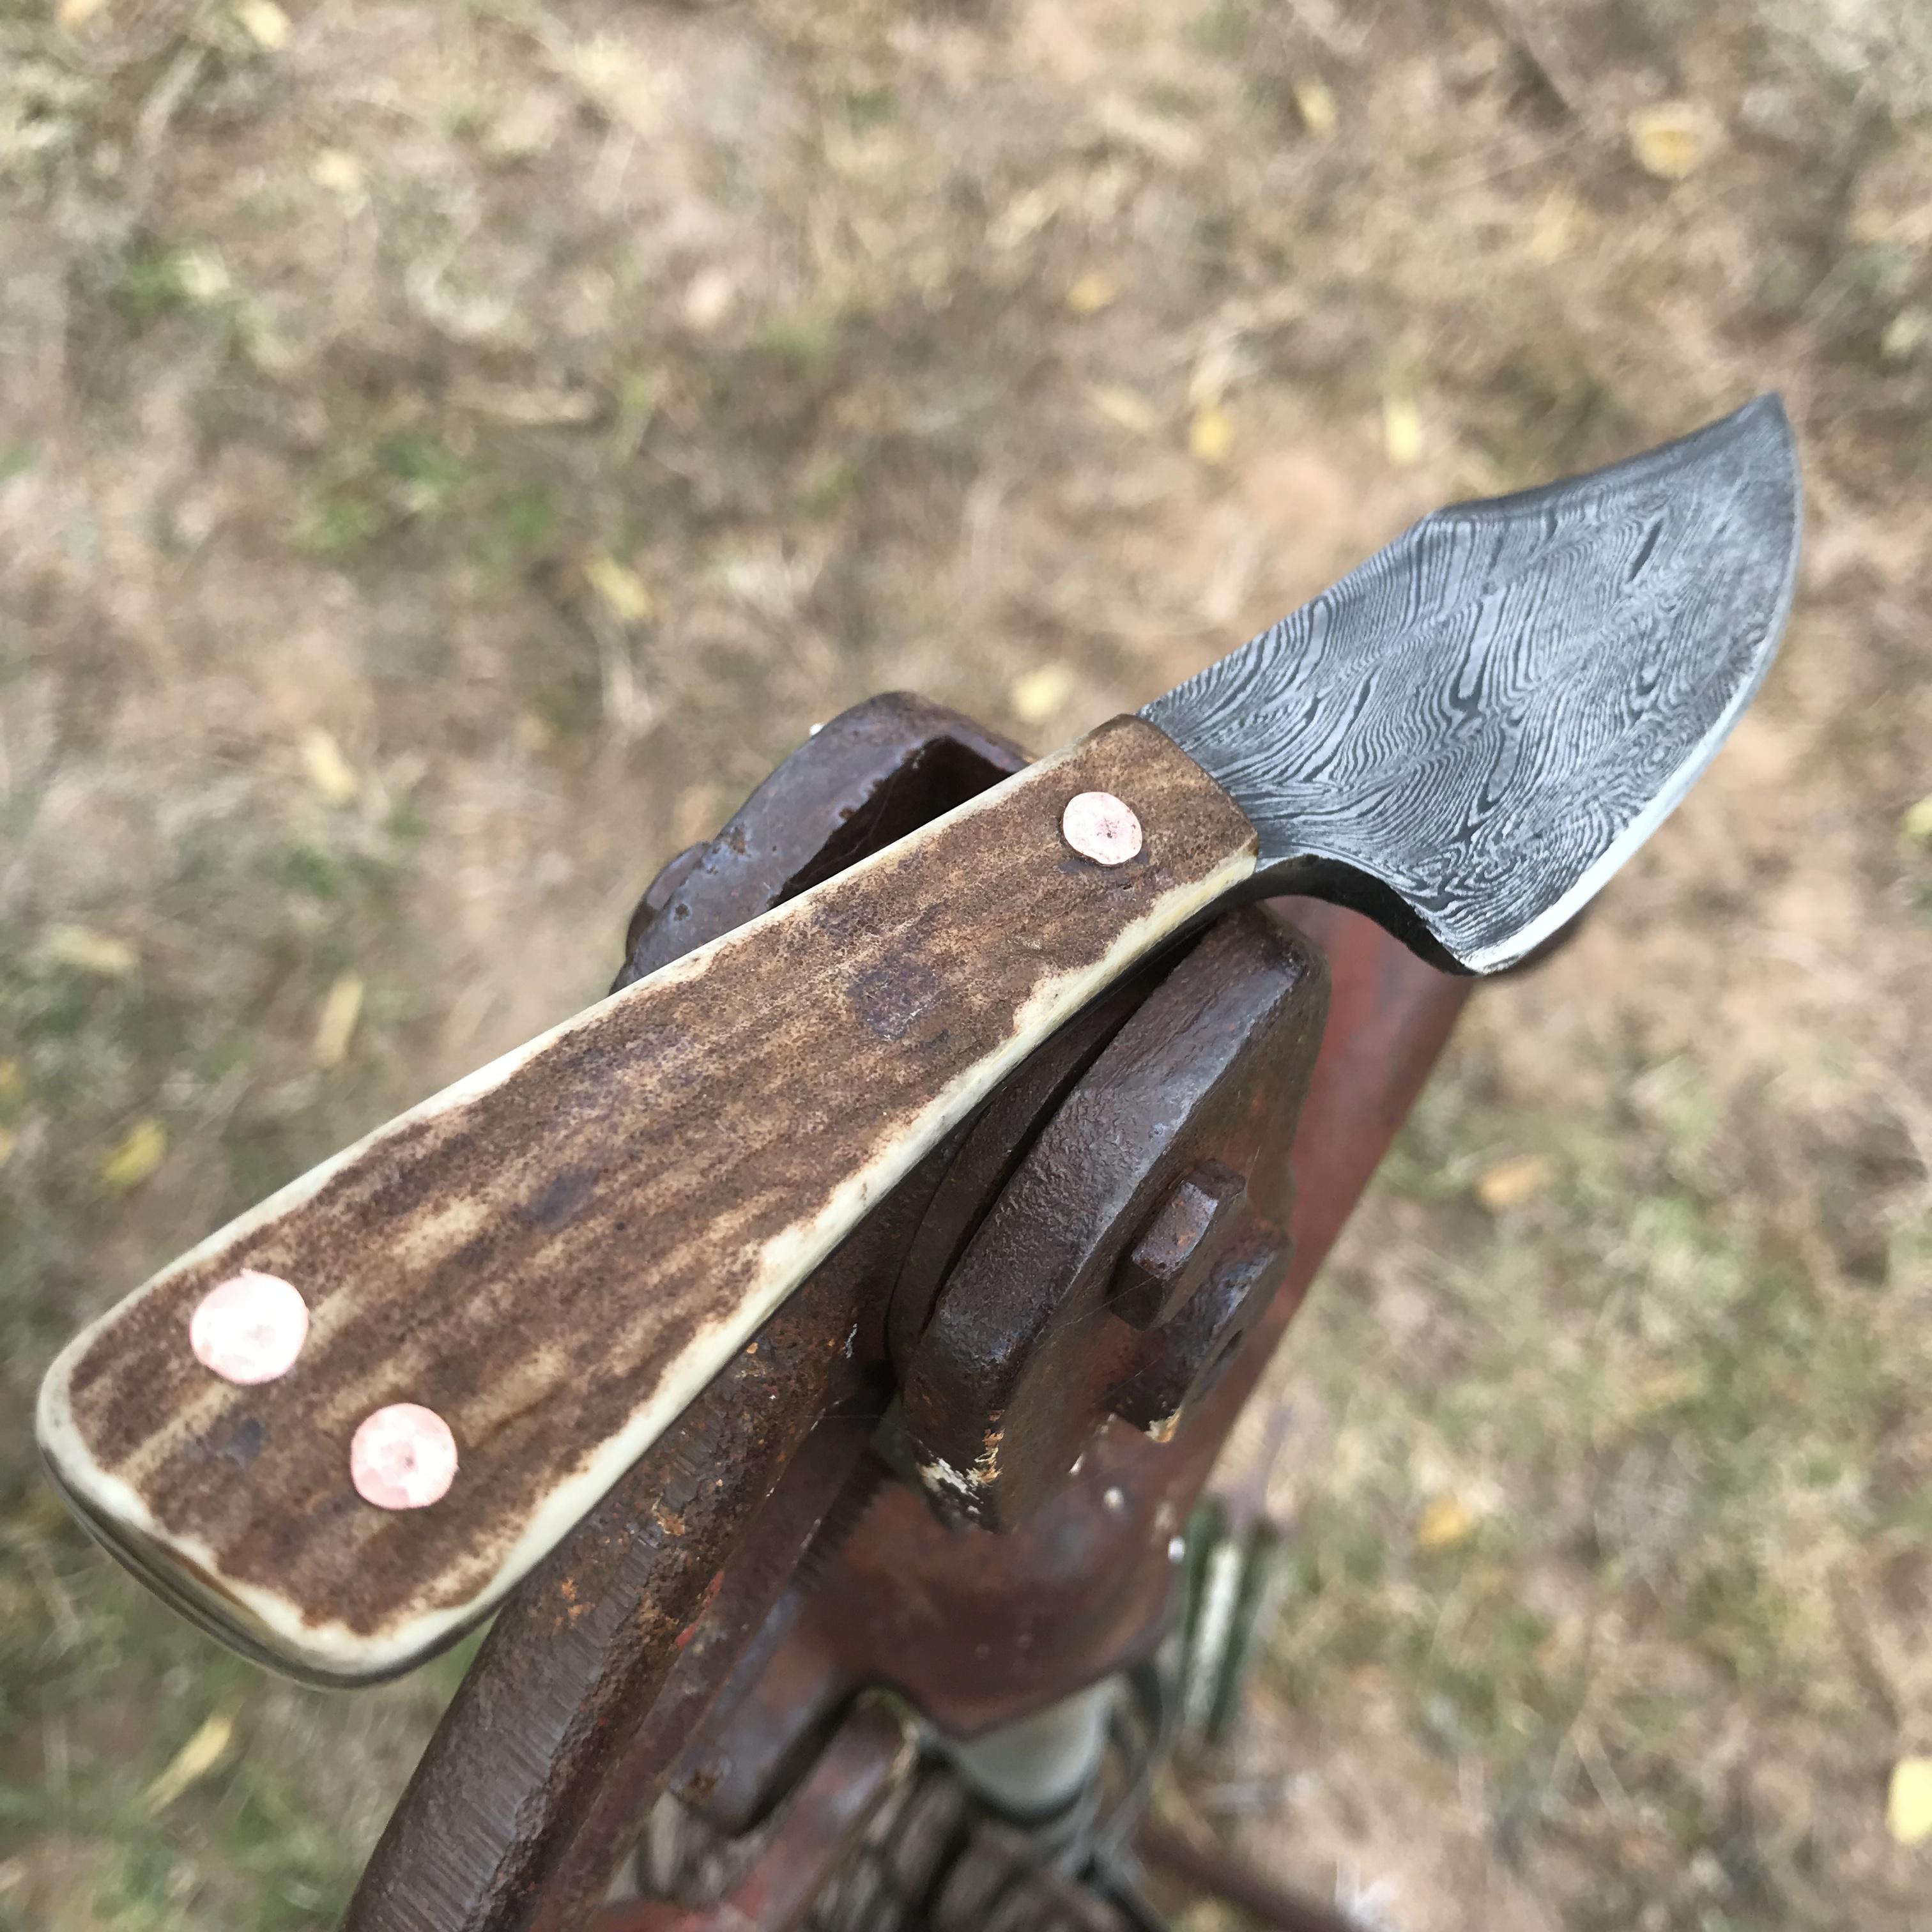
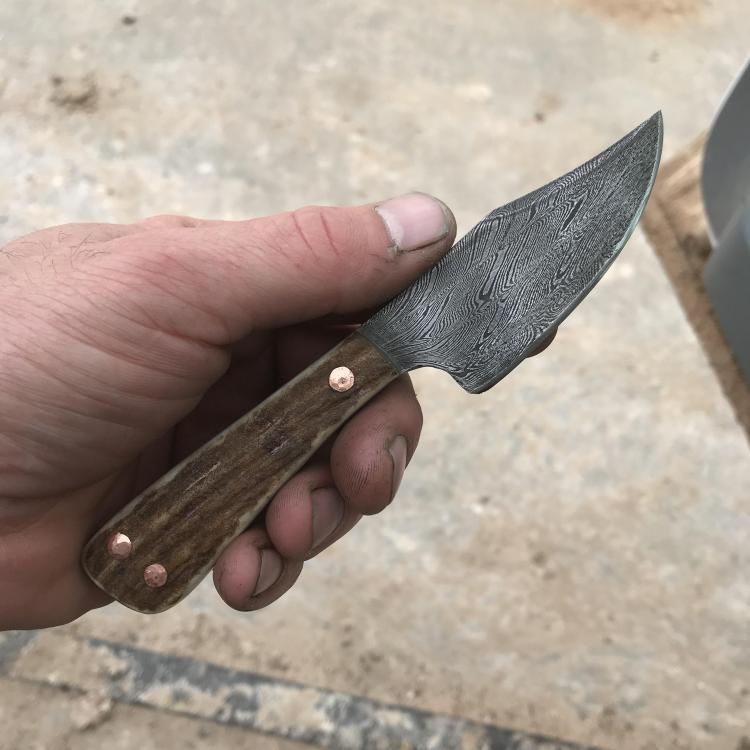
Thank you. I’m not even sure this qualifies as a pattern weld though. I layered a bunch of steel, cut it in thirds and welded it again. Then twisted it a bunch, hammered it back square. Cut it into thirds, stacked it and hammered it into a knife shape. Maybe thats a pattern maybe that a random pattern. One think I noticed was how much steel I wasted with end pieces and grinding.
-
Thanks Das.
-
Thank you. No reason to be scared of trying something new. I waste metal all the time trying new things.
-
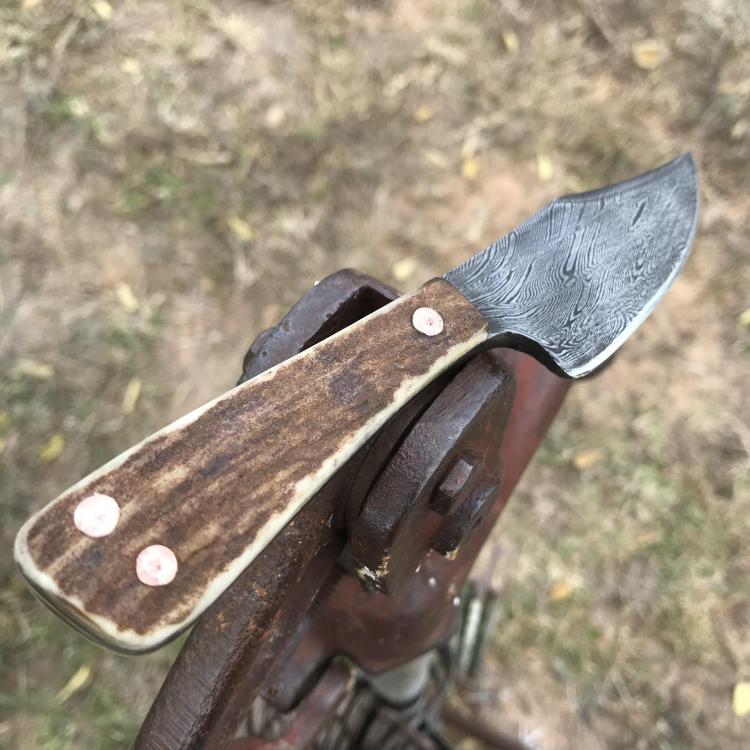
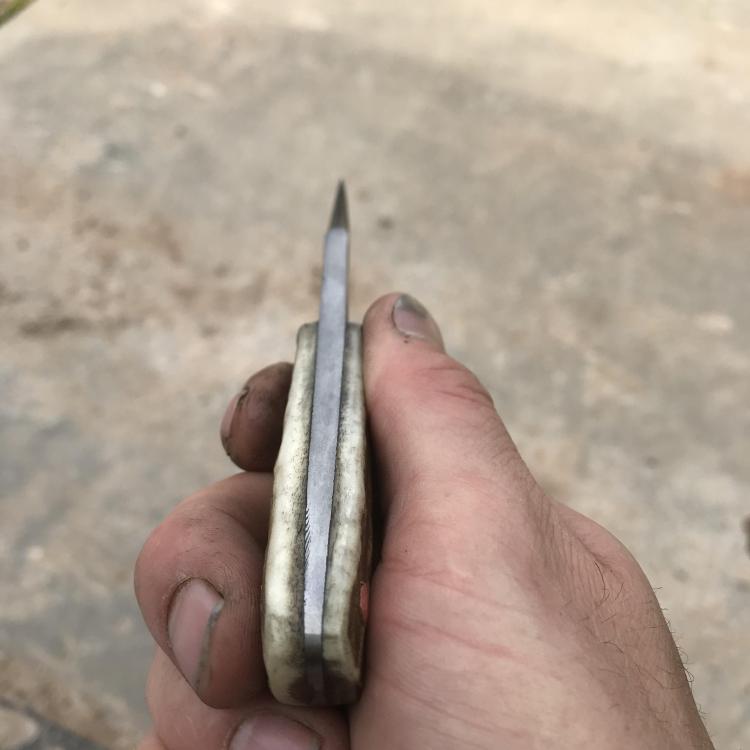
Finally made my first knife. Made from mystery metals with sparks I liked. Not sure how many layers or what the pattern would be called if it even has a name. Elk handles with copper rivets.
-
I thought it looked like a Trenton too. I kinda want to call them and offer $100 just to put in the yard or to have the wrought iron. I’ve always had the desire to polish up an entire anvil then etch it.
-
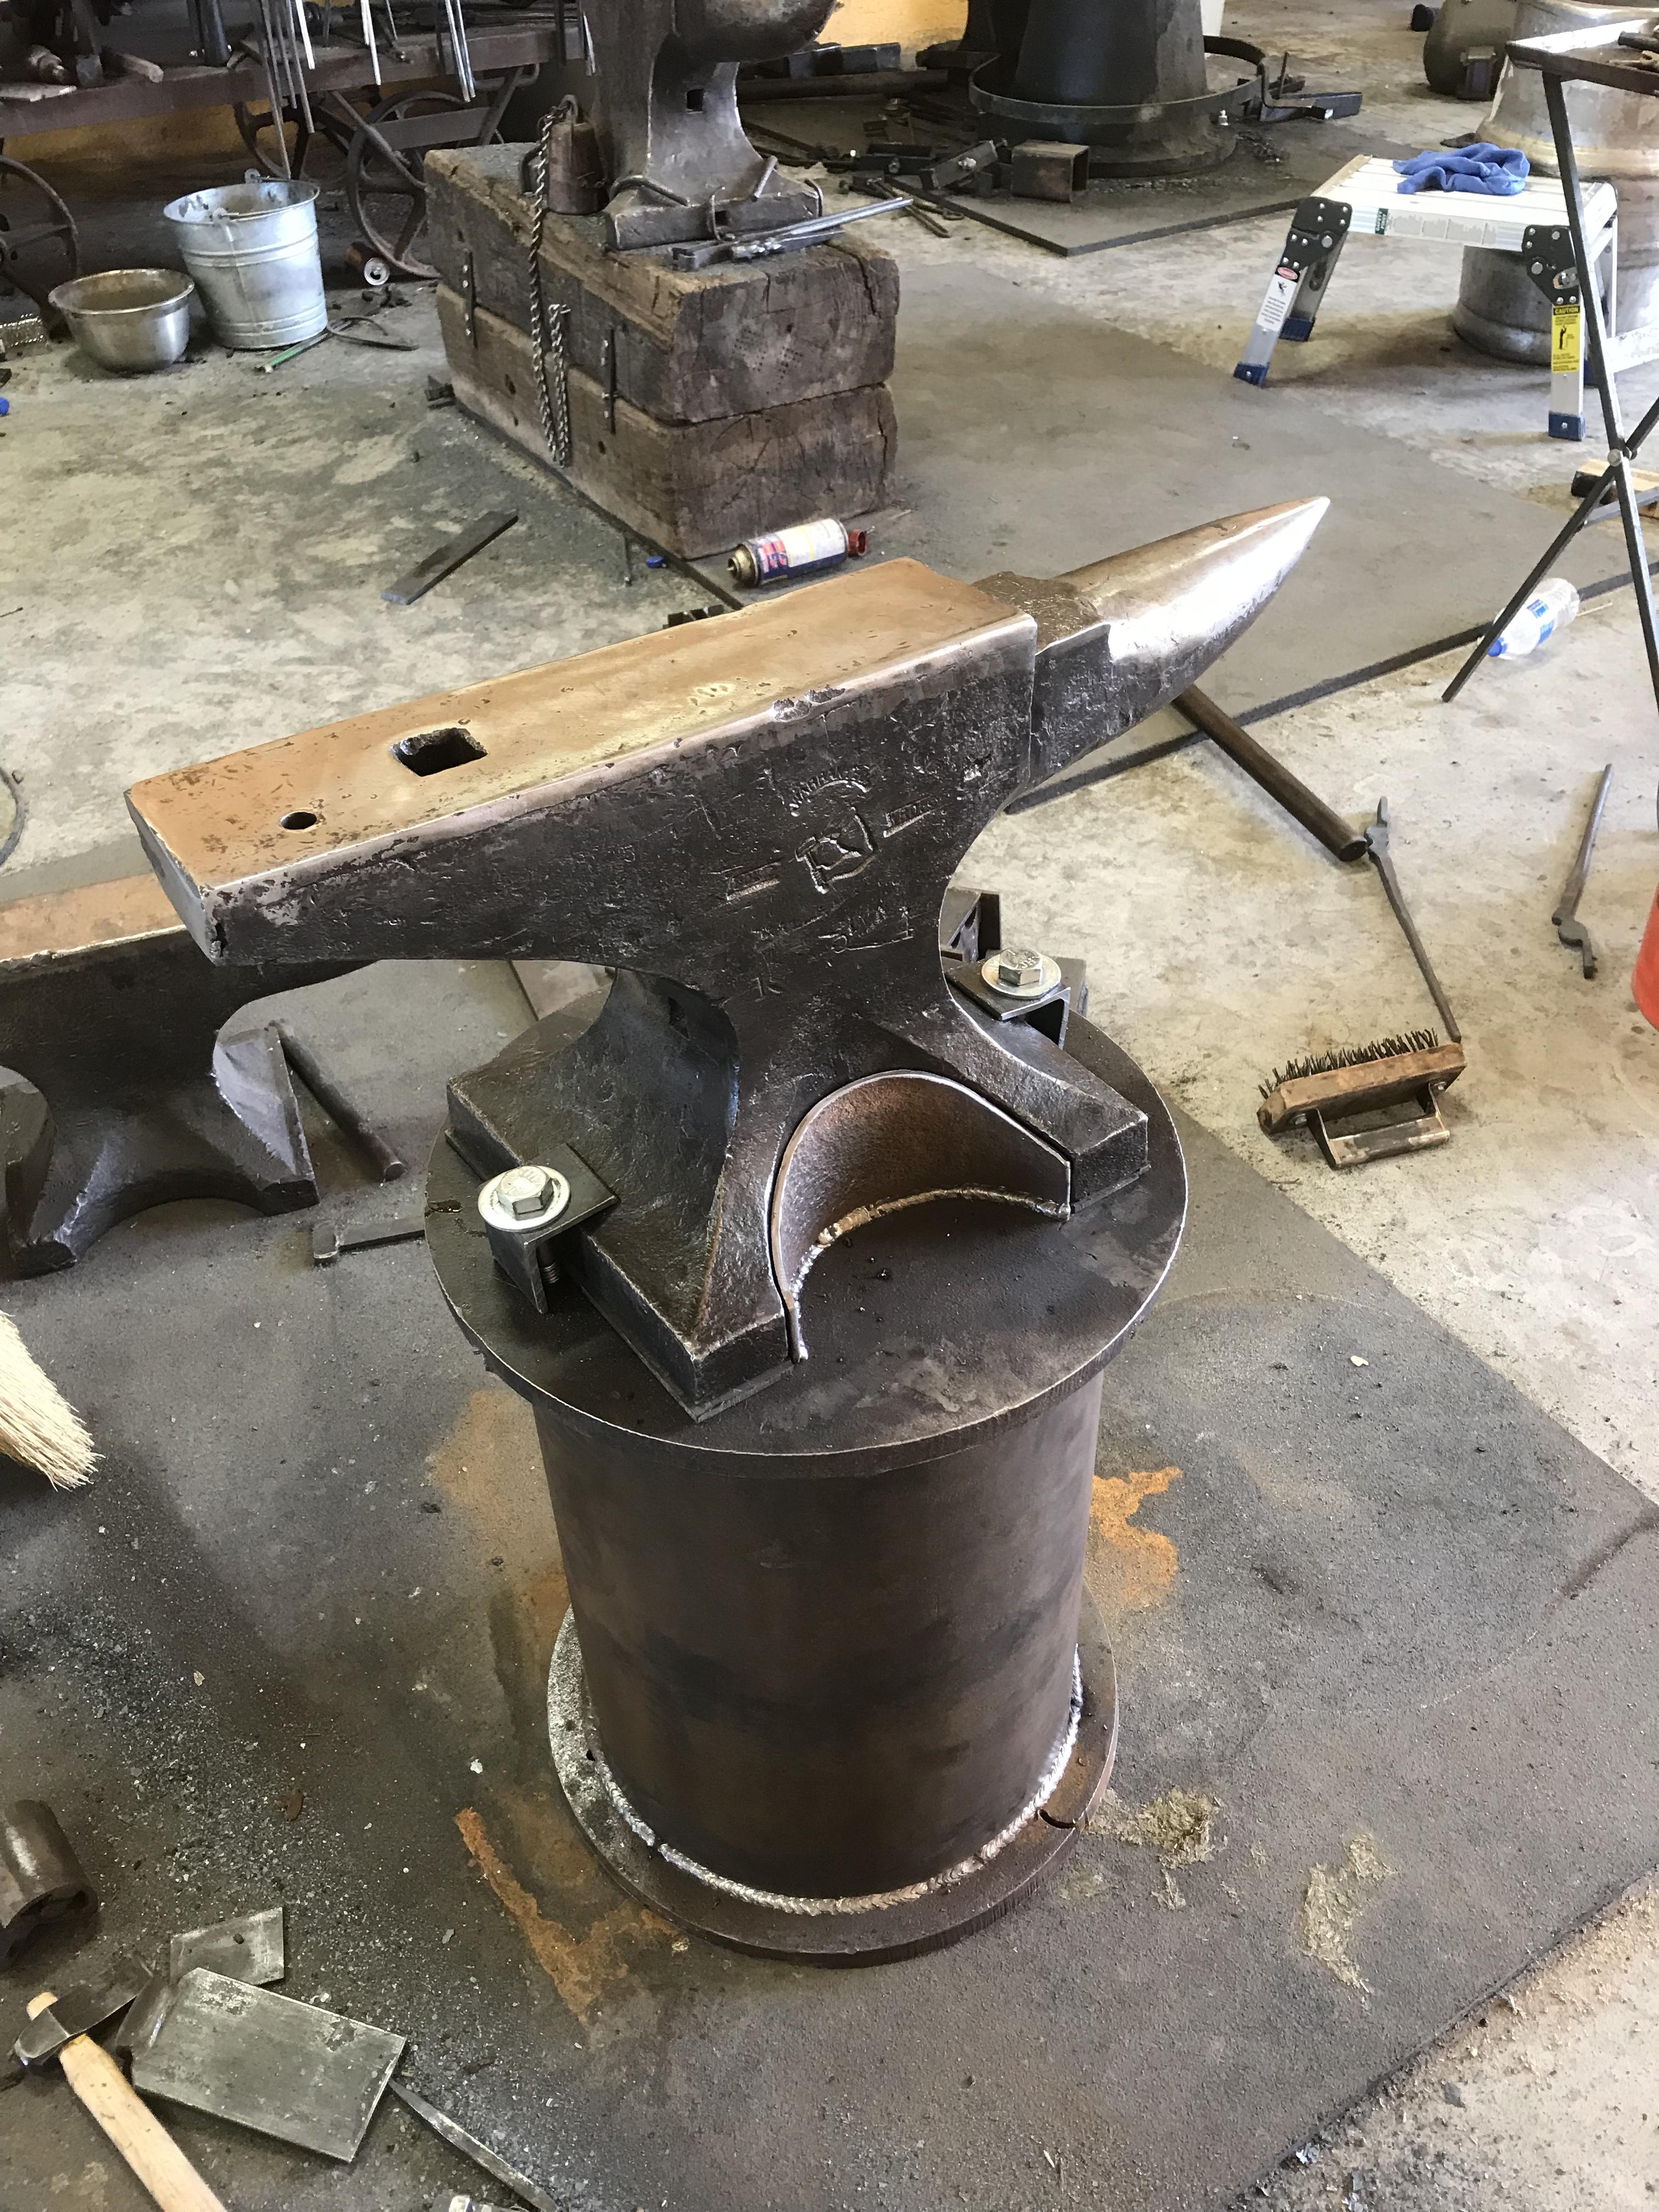
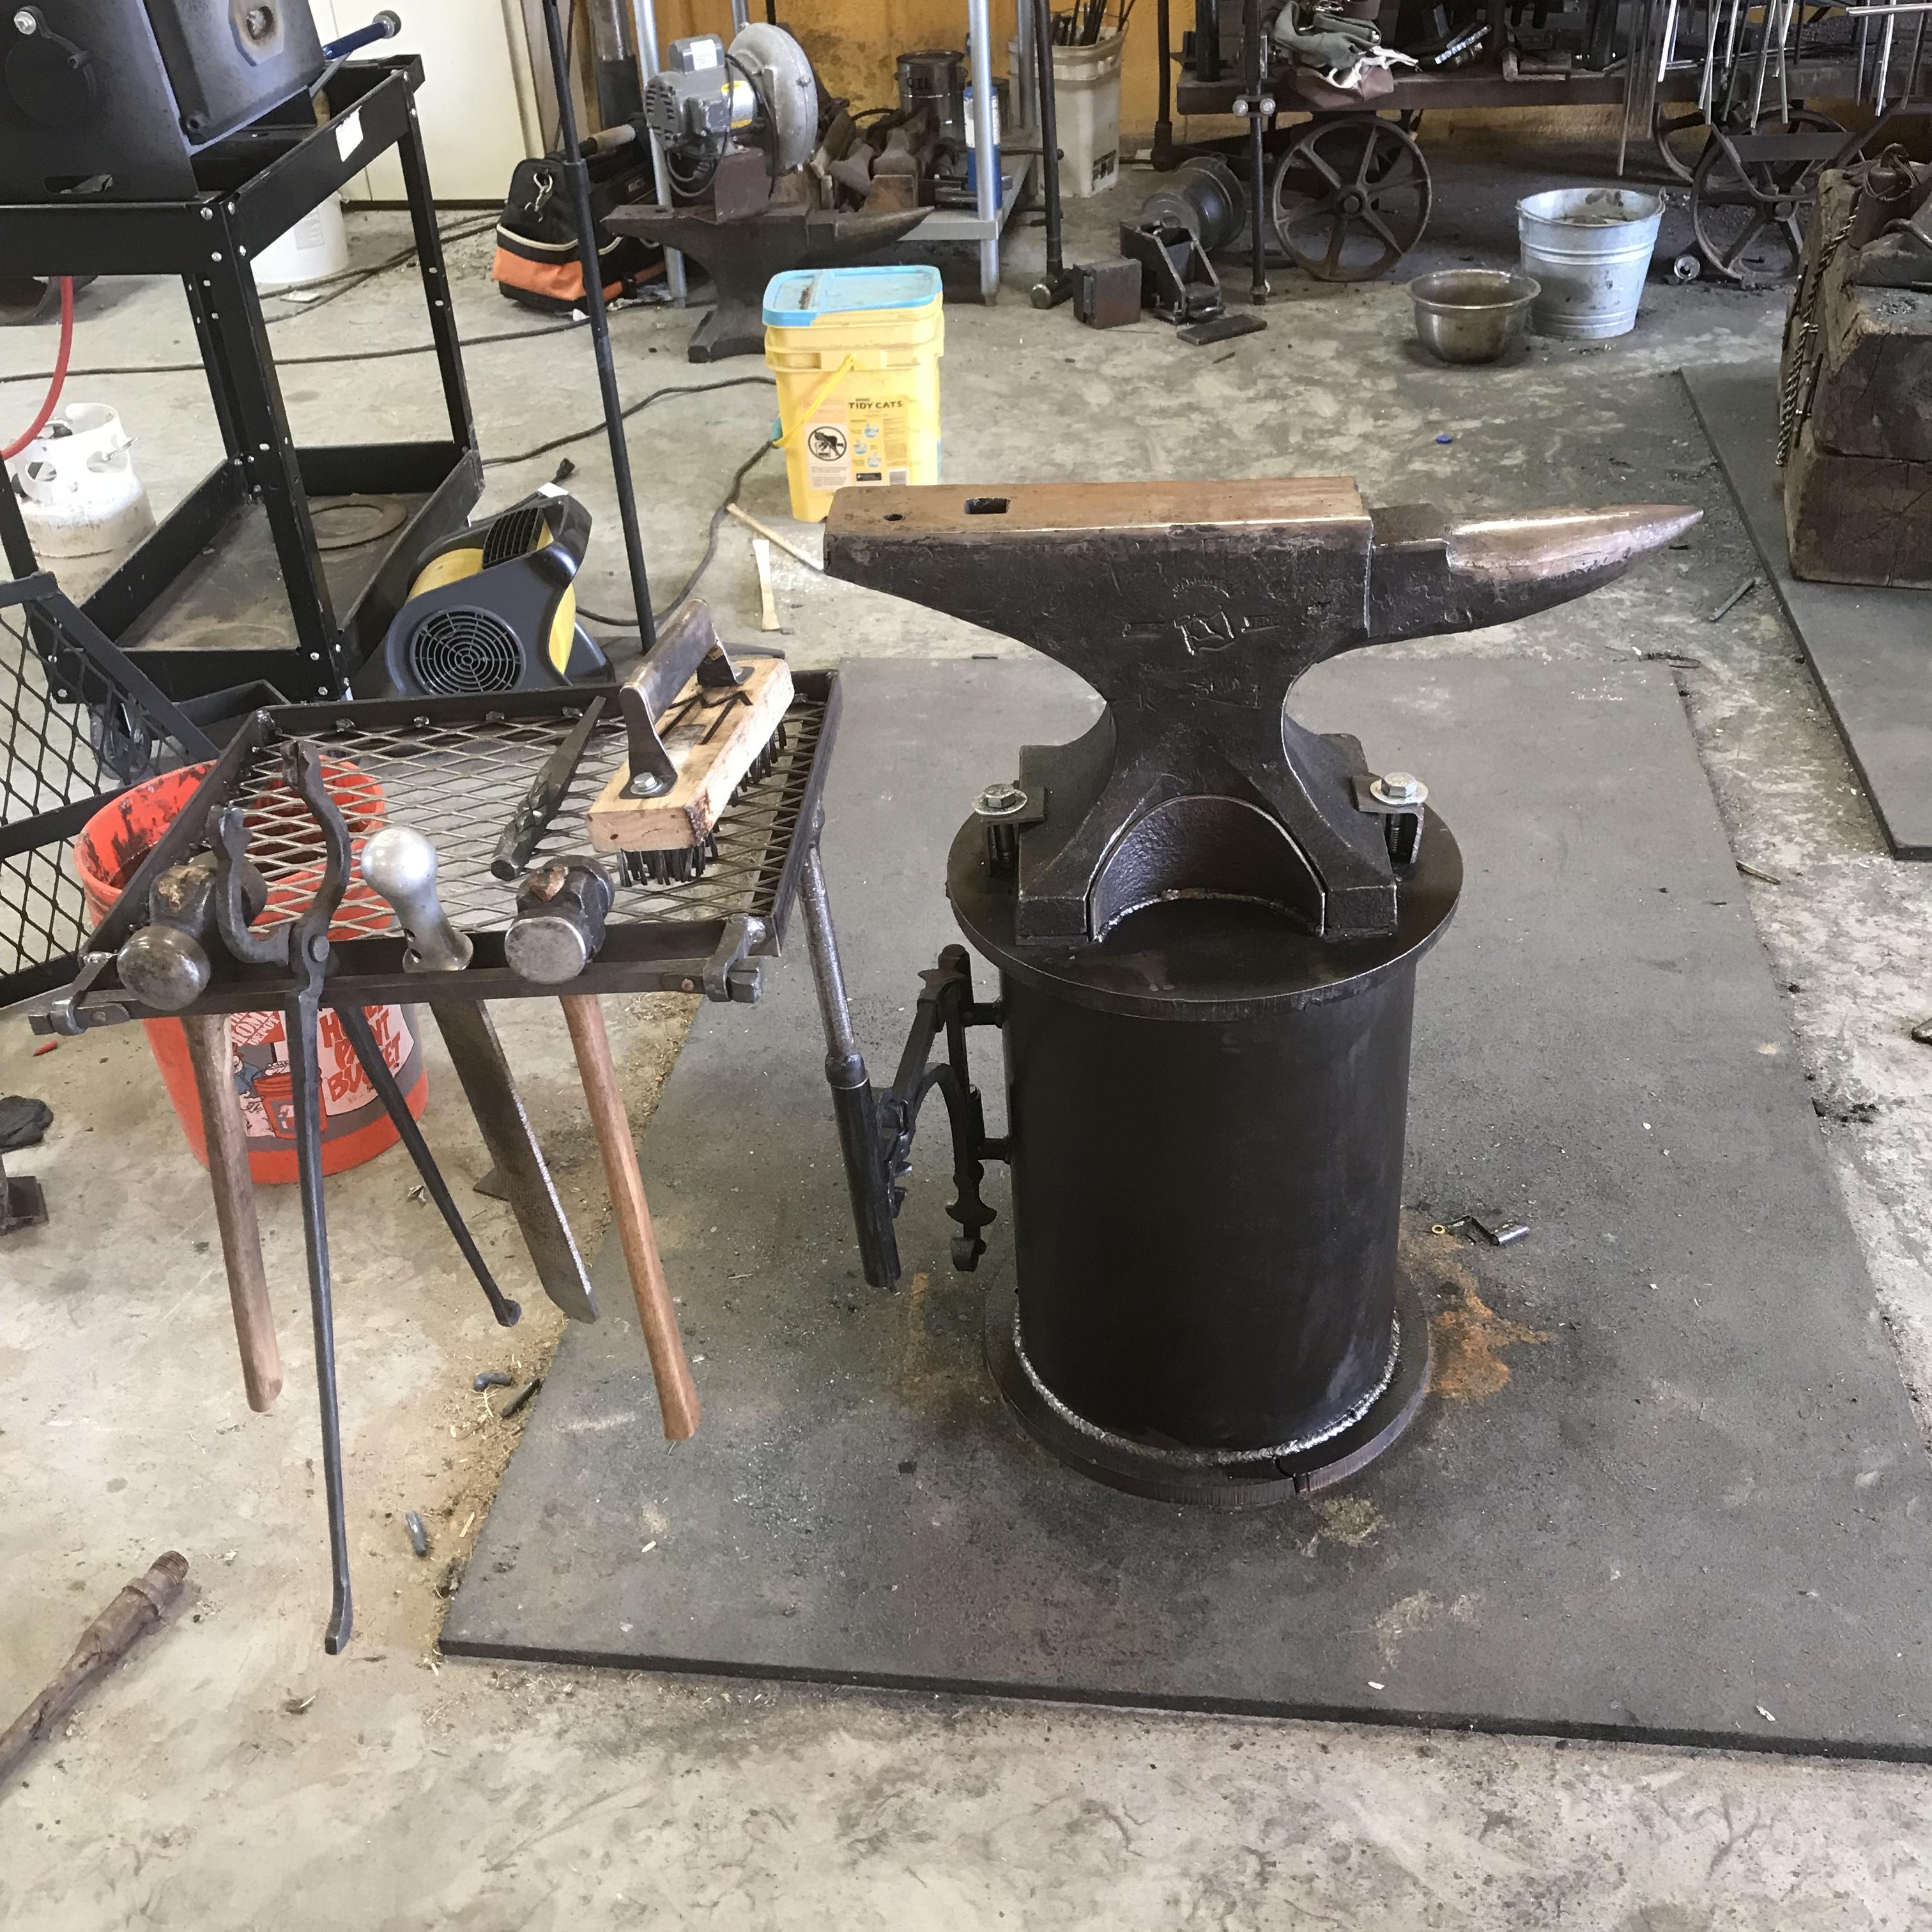
Looks like this stand was well thought out and equally well executed. Any idea what the total weight of anvil and stand is? How hard it will be to move should the need arise? A hard to move anvil stand is a plus in my book. My only gripe, which is personal preference, is I couldn’t operate with the tray under the horn or the tools under the heel. I’ve got that issue with one of my own anvil stands. It’s nice to have a place for tools but certianly restricts full use of the anvil.
-
Here’s another beauty missing most of the face where you want it. $700 This one is a little sad, looks like it would have been a nice anvil. I love that super thin heel. Must not have gotten the face welded.

-
It certianly is a tool addiction but you get to make your own tools! I keep meaning to get over to a SCABA meeting too but seems like I’m always tied up on those weekends.
-
If you’re asking about the handle, I finish sand all my handles to 120 with a palm sander. Any finer than that and it gets too slick once oiled. On my personal handles I rarely go finer than 80 grit on the palm sander, I like the slightly coarser finish once it’s been soaked in blo for a bit. I do nearly all the shaping of the handles with a bandsaw and spindle sander before hitting them with the palm sander to smooth any angular spots I missed. For the hammer heads, the edges get a final pass on a 400 grit belt. The faces I jump from a 400 to 1200grit then finish with a cloth belt and some sort of yellow polishing compound I had laying around.
-
You might take a look at a bench grinder with a multi tool attachment. Though I’m finally at a point of looking at 2x72 grinders, you can do a lot, and I have, on a 2x36 grinder
-
It is fitting since the farrier it’s headed to lives in Amarillo.
-
It’s something different but I don’t actually like the yellow. Plus it stained my hands yellow.
-
-
A couple of hammers hung on bois d’arc that were mighty old fence posts I pulled out of the ground. The the super yellow one is 2lbs the other is 1.5lbs.

-
I could see that use. Luckily I’ve got other anvils I can use for that.
-
Jennifer, I’ve never had much of an issue with not being able to pass material through the hardy hole. If I need that kind of room I go to the post vise.
-
Take a looks at the second Mark Aspey book. Tells you everything you need to know about traditional joinery and how to make the tools you need. They’re sort of pricey but the best, easy to follow smithing books I’ve seen.Good hustle Mark! I hope the sales were good.Looks really good. You light look into making a collaring vise to keep everything tight when closing the collar.I guess the idea is that you’ll be able to unbolt it from the floor and move it if you need to?That’s not going anywhere fast. One question I’ve got, how are you going to make sure the concrete fills all the voids underneath the steel plate the anvil will sit on? Never mind, I think I see now. The steel plate will not be in place when pouring the post. Let me see if I have the process right. You pour the concrete to a level just flush with the top of the angle iron then screw the plate to the angle iron? If this is right, I’d suggest welding some rebar stingers to the bottom of the plate to extra reinforce the connection of steel plate to concrete.I don’t guess I’ve ever seen a wedge that’s an X. I’ve had a couple that were straight with two cross bars on them. I kinda like the idea of a little x.