Brian Hibbert
-
Posts
64 -
Joined
-
Last visited
Content Type
Profiles
Forums
Articles
Gallery
Downloads
Events
Everything posted by Brian Hibbert
-
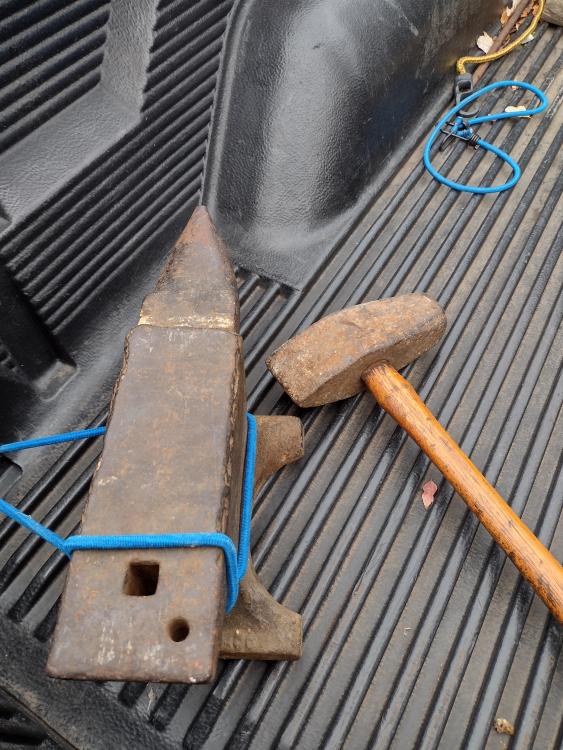
I went to an auction this morning and got a small (50 lb?) Vulcan anvil and a largish sledge with a straight peen.
-
Budget forge success
Brian Hibbert replied to WyomingWhitetail's topic in Blacksmithing, General Discussion
Nice hooks. And that's a great improvised anvil. Lots of mass on the flat surface, a hardy hole and a horn! -
Glad to know the warning wasn't needed and it sounds like your bolt is safe. I have a bucket with some largish bolts with a golden colored plating which I think (but am not sure) is cadmium. I got them off some old equipment racks that were being dismantled many decades ago. They don't rust. I'd never put them anywhere near a forge or welder.
-
Be careful with the bolt. Many are plated with other metals that are toxic. If it's just steel go ahead, but if it's a different color, you might want to reconsider.
-
It's an air supply and should work fine. You will need a way to control the air flow, either speed control of the blower or an air gate in the line.
-
Yeah, I thought they looked perfect for rails too, but I'm not aware of any rail manufacturing in this area. If they were used for laying track, that's a likely explanation. They certainly look like your picture. The previous owner of the house worked on barges and carted home all sorts of stuff. He may have picked them up somewhere else along the river.
-
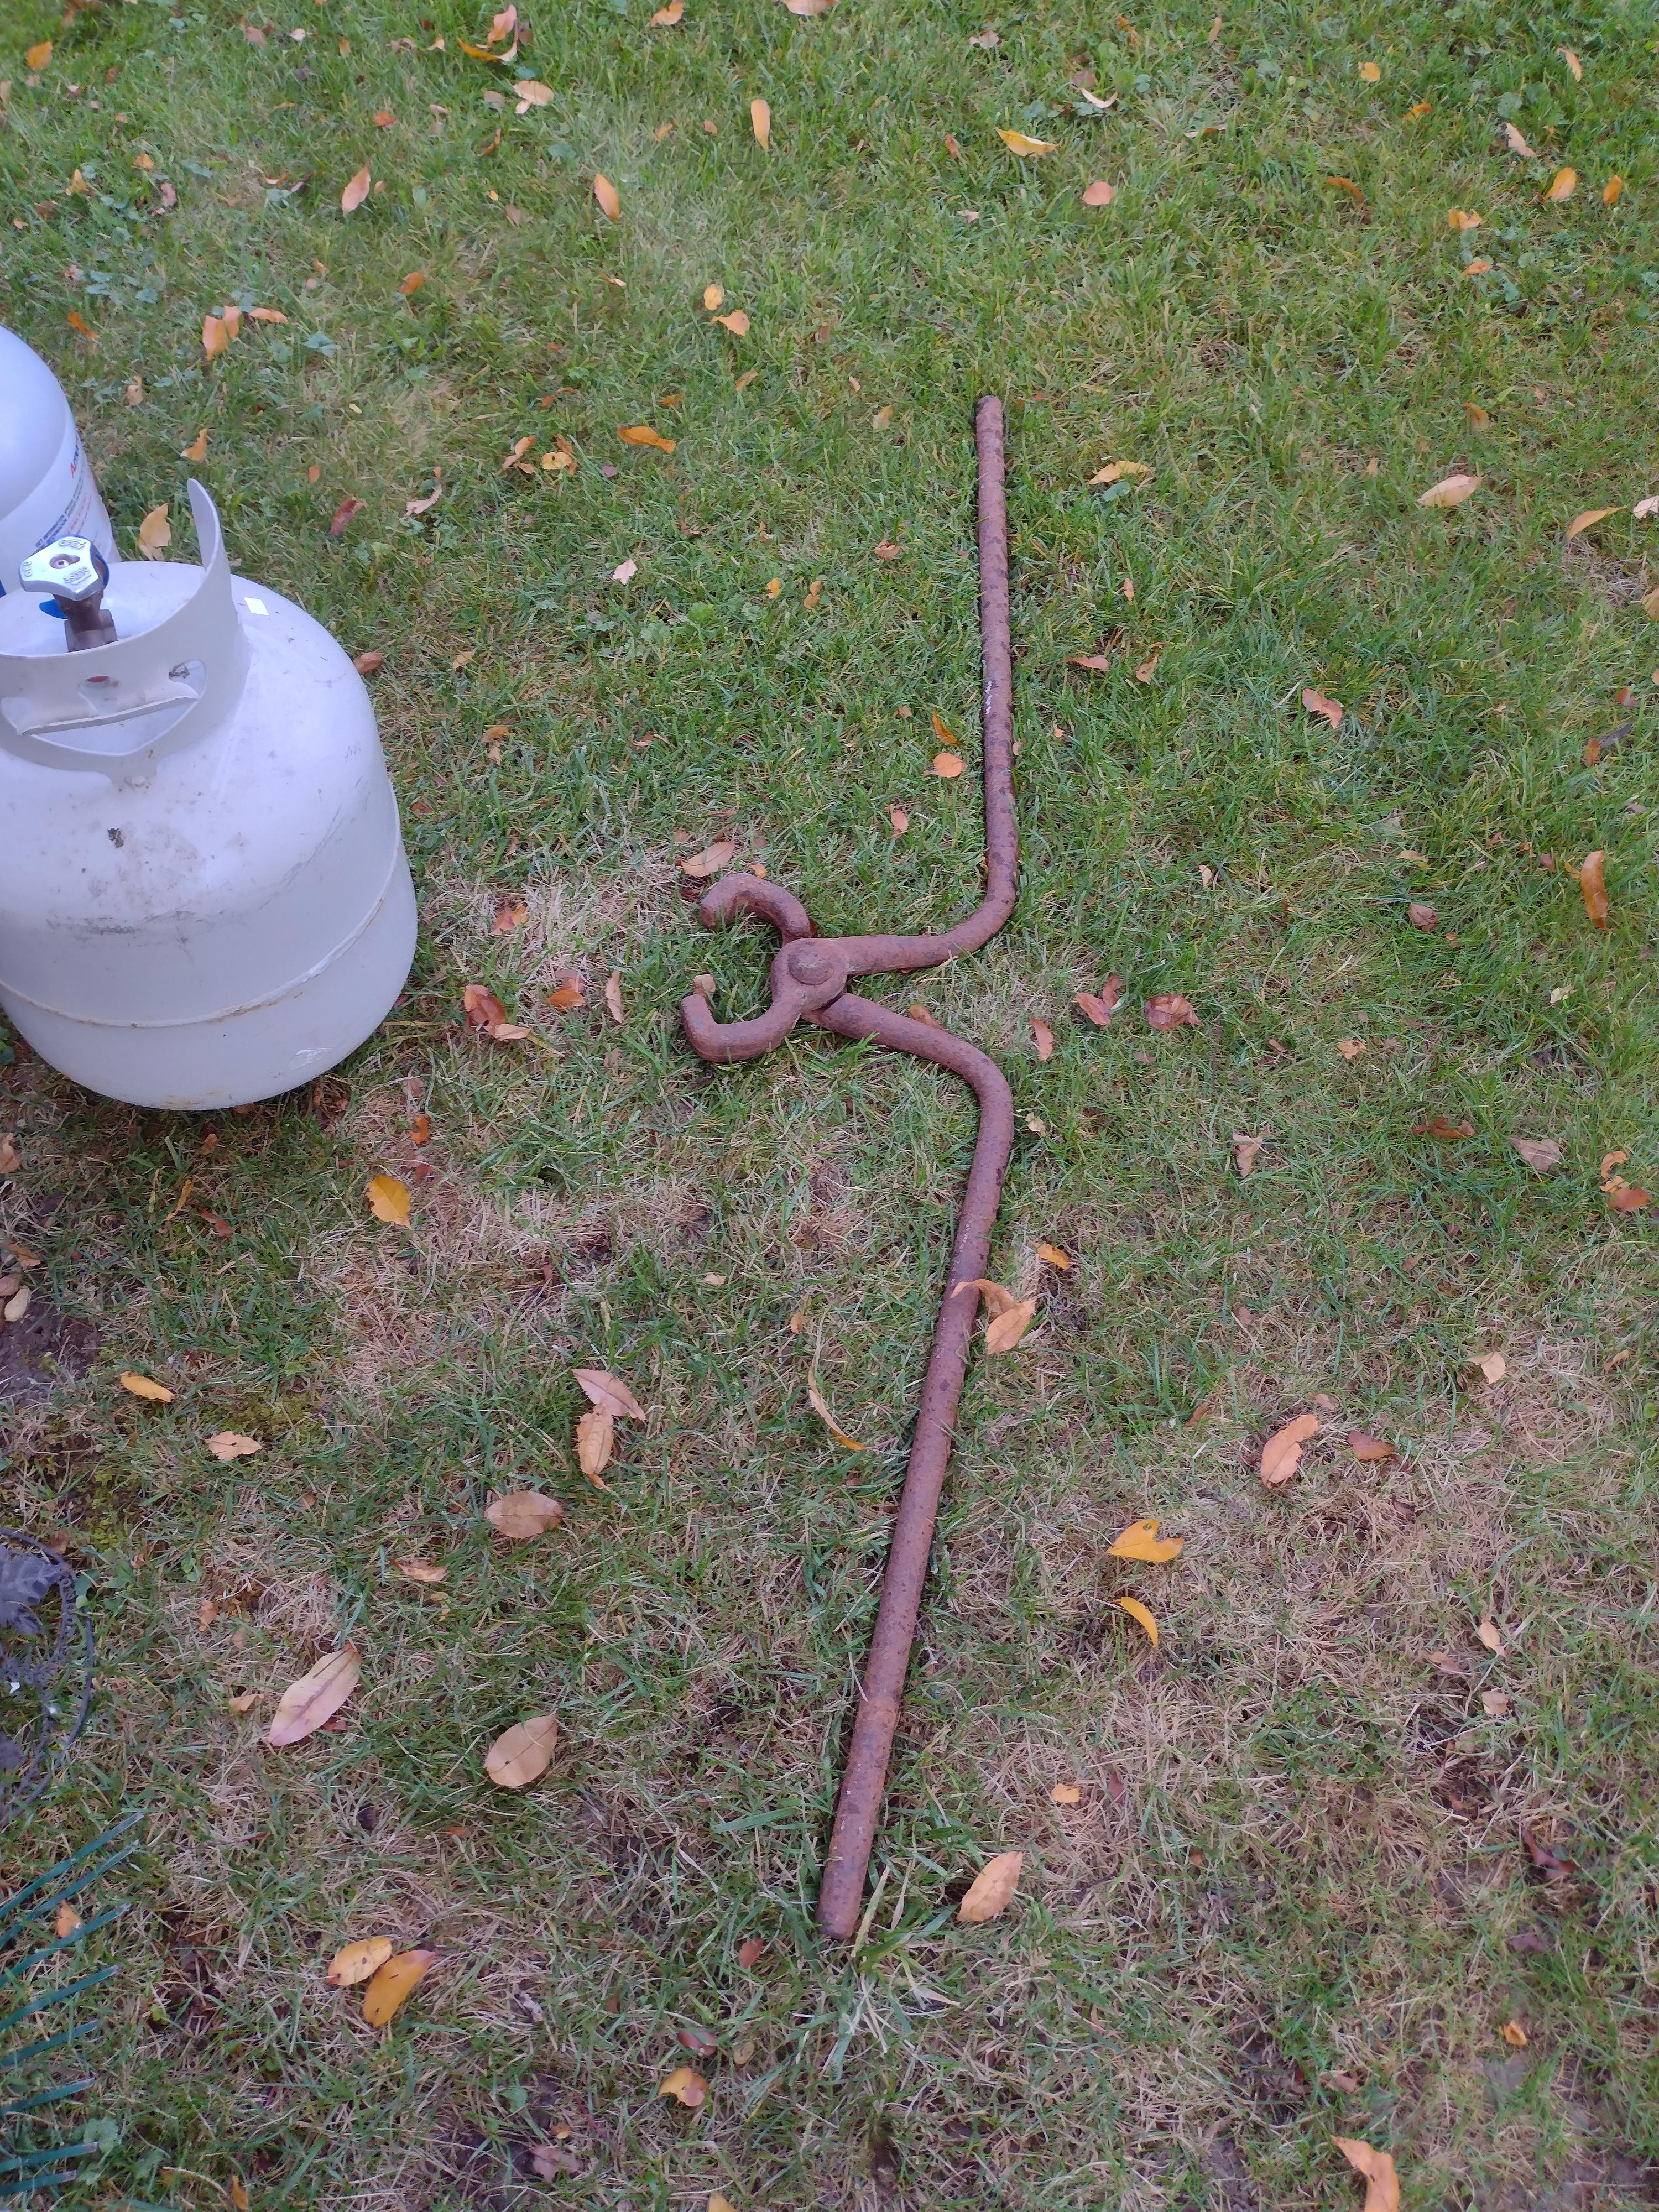
A "small" pair of tongs that was in the back yard at my stepson's house. The reigns are 1" round bar. I don't think I'll be able to use them one handed. They appear to be for 2 men to lift a billet or large work piece. I don't think rail was ever made in this area, but we do have Caterpillar, Keystone (now Liberty Steel), Wabco (now Komatsu) and several other steel and manufacturing companies that may have needed them

-
Trouble dialing in new propane forge....
Brian Hibbert replied to ForgingChaos's topic in Gas Forges
Welcome aboard! Move the burner tube back up so it's maybe 1/4" above the insulation. leaving it out will burn the ends off the tube. From the photos it looks like you don't have any coating on the insulation. You should look at some of the refractory threads and get a rigidizer on the insulation followed by cast refractory. The rigidizer helps firm up the insulation and keep the fibers in place and the cast refractory and IR coatings provide a solid wall and reflactive surface to keep the heat inside the forge. Plain insulation probably isn't retaining enough heat. My Mr. Volcano came with rigidizer and "Satanite" cast refrractory so that's what I used, but there are better combinations. Again there are many discussions here. There are also lengthy discussions on gas forges and burners. Some of the talk about how to tell if you fuel air mixture is good. If you are trying to search the site, google works well if you add Ste: www.iforgeiron.com to the end of your search. -
What did you do in the shop today?
Brian Hibbert replied to Mark Ling's topic in Blacksmithing, General Discussion
Good! It should be on display. -
What did you do in the shop today?
Brian Hibbert replied to Mark Ling's topic in Blacksmithing, General Discussion
That turned out beautifully. May I ask what you will do with it? If you don't have a plan for it (since you claim that's just a practice piece) I'd suggest a frame (or shadowbox) to hang it on the wall. Even as practice that's a piece of art. -
Frosty, your snippet reminded me of "Success is 10% inspiration and 90% perspiration." from Thomas Edison (sometimes I've seen genius instead of success) But I prefer Jefferson's "I am a great believer in luck, and I find the harder I work, the more I have of it."
-
Reasonable price for this Trenton
Brian Hibbert replied to Michael_Tricam's topic in Anvils, Swage Blocks, and Mandrels
As long as you use it over the years, that tool will pay for itself and an extra hundred or so won't matter in the long run. As George and Daswulf said, it you're happy, it was an excellent buy. From the pictures, it looks to be in great condition, so you got a great tool that you can handle down to your grandchildren. -
Reasonable price for this Trenton
Brian Hibbert replied to Michael_Tricam's topic in Anvils, Swage Blocks, and Mandrels
I've been happy (so far) with the Harbor Freight 65 lb cast steel Doyle anvil for $150 (if I had waited 3 weeks I could have had 25% off). DON'T get the blue cast iron one. It's small, but currently meets my needs and was a significant improvement over the sledge hammer head I was using. I'm a literal "back yard blacksmith" and the lighter weight is a plus at the moment since I have to move everything out of the shed when I want to do something and all back in when I'm done. If you'll need to move it regularly, you might want to consider one of the small alternatives. That said, I'm not sure how much of an improvement the small anvils would be over a rail track anvil. -
I just saw this video of Mike Rowe at Dragon Forge in Colorado on YouTube.. It was released last month. I guess it took a FEW years for them to make it public, but it was well done. Looks like everyone was having fun,
-
Trying to solve the problem with grandfathers forge.
Brian Hibbert replied to Kogut's topic in Solid Fuel Forges
Personally, I'd be inclined to keep my initials as my screen name and would call out the idiots who conflate unrelated things and become offended. I DO appreciate Kogut's efforts to not offend though. Welcome aboard! -
What did you do in the shop today?
Brian Hibbert replied to Mark Ling's topic in Blacksmithing, General Discussion
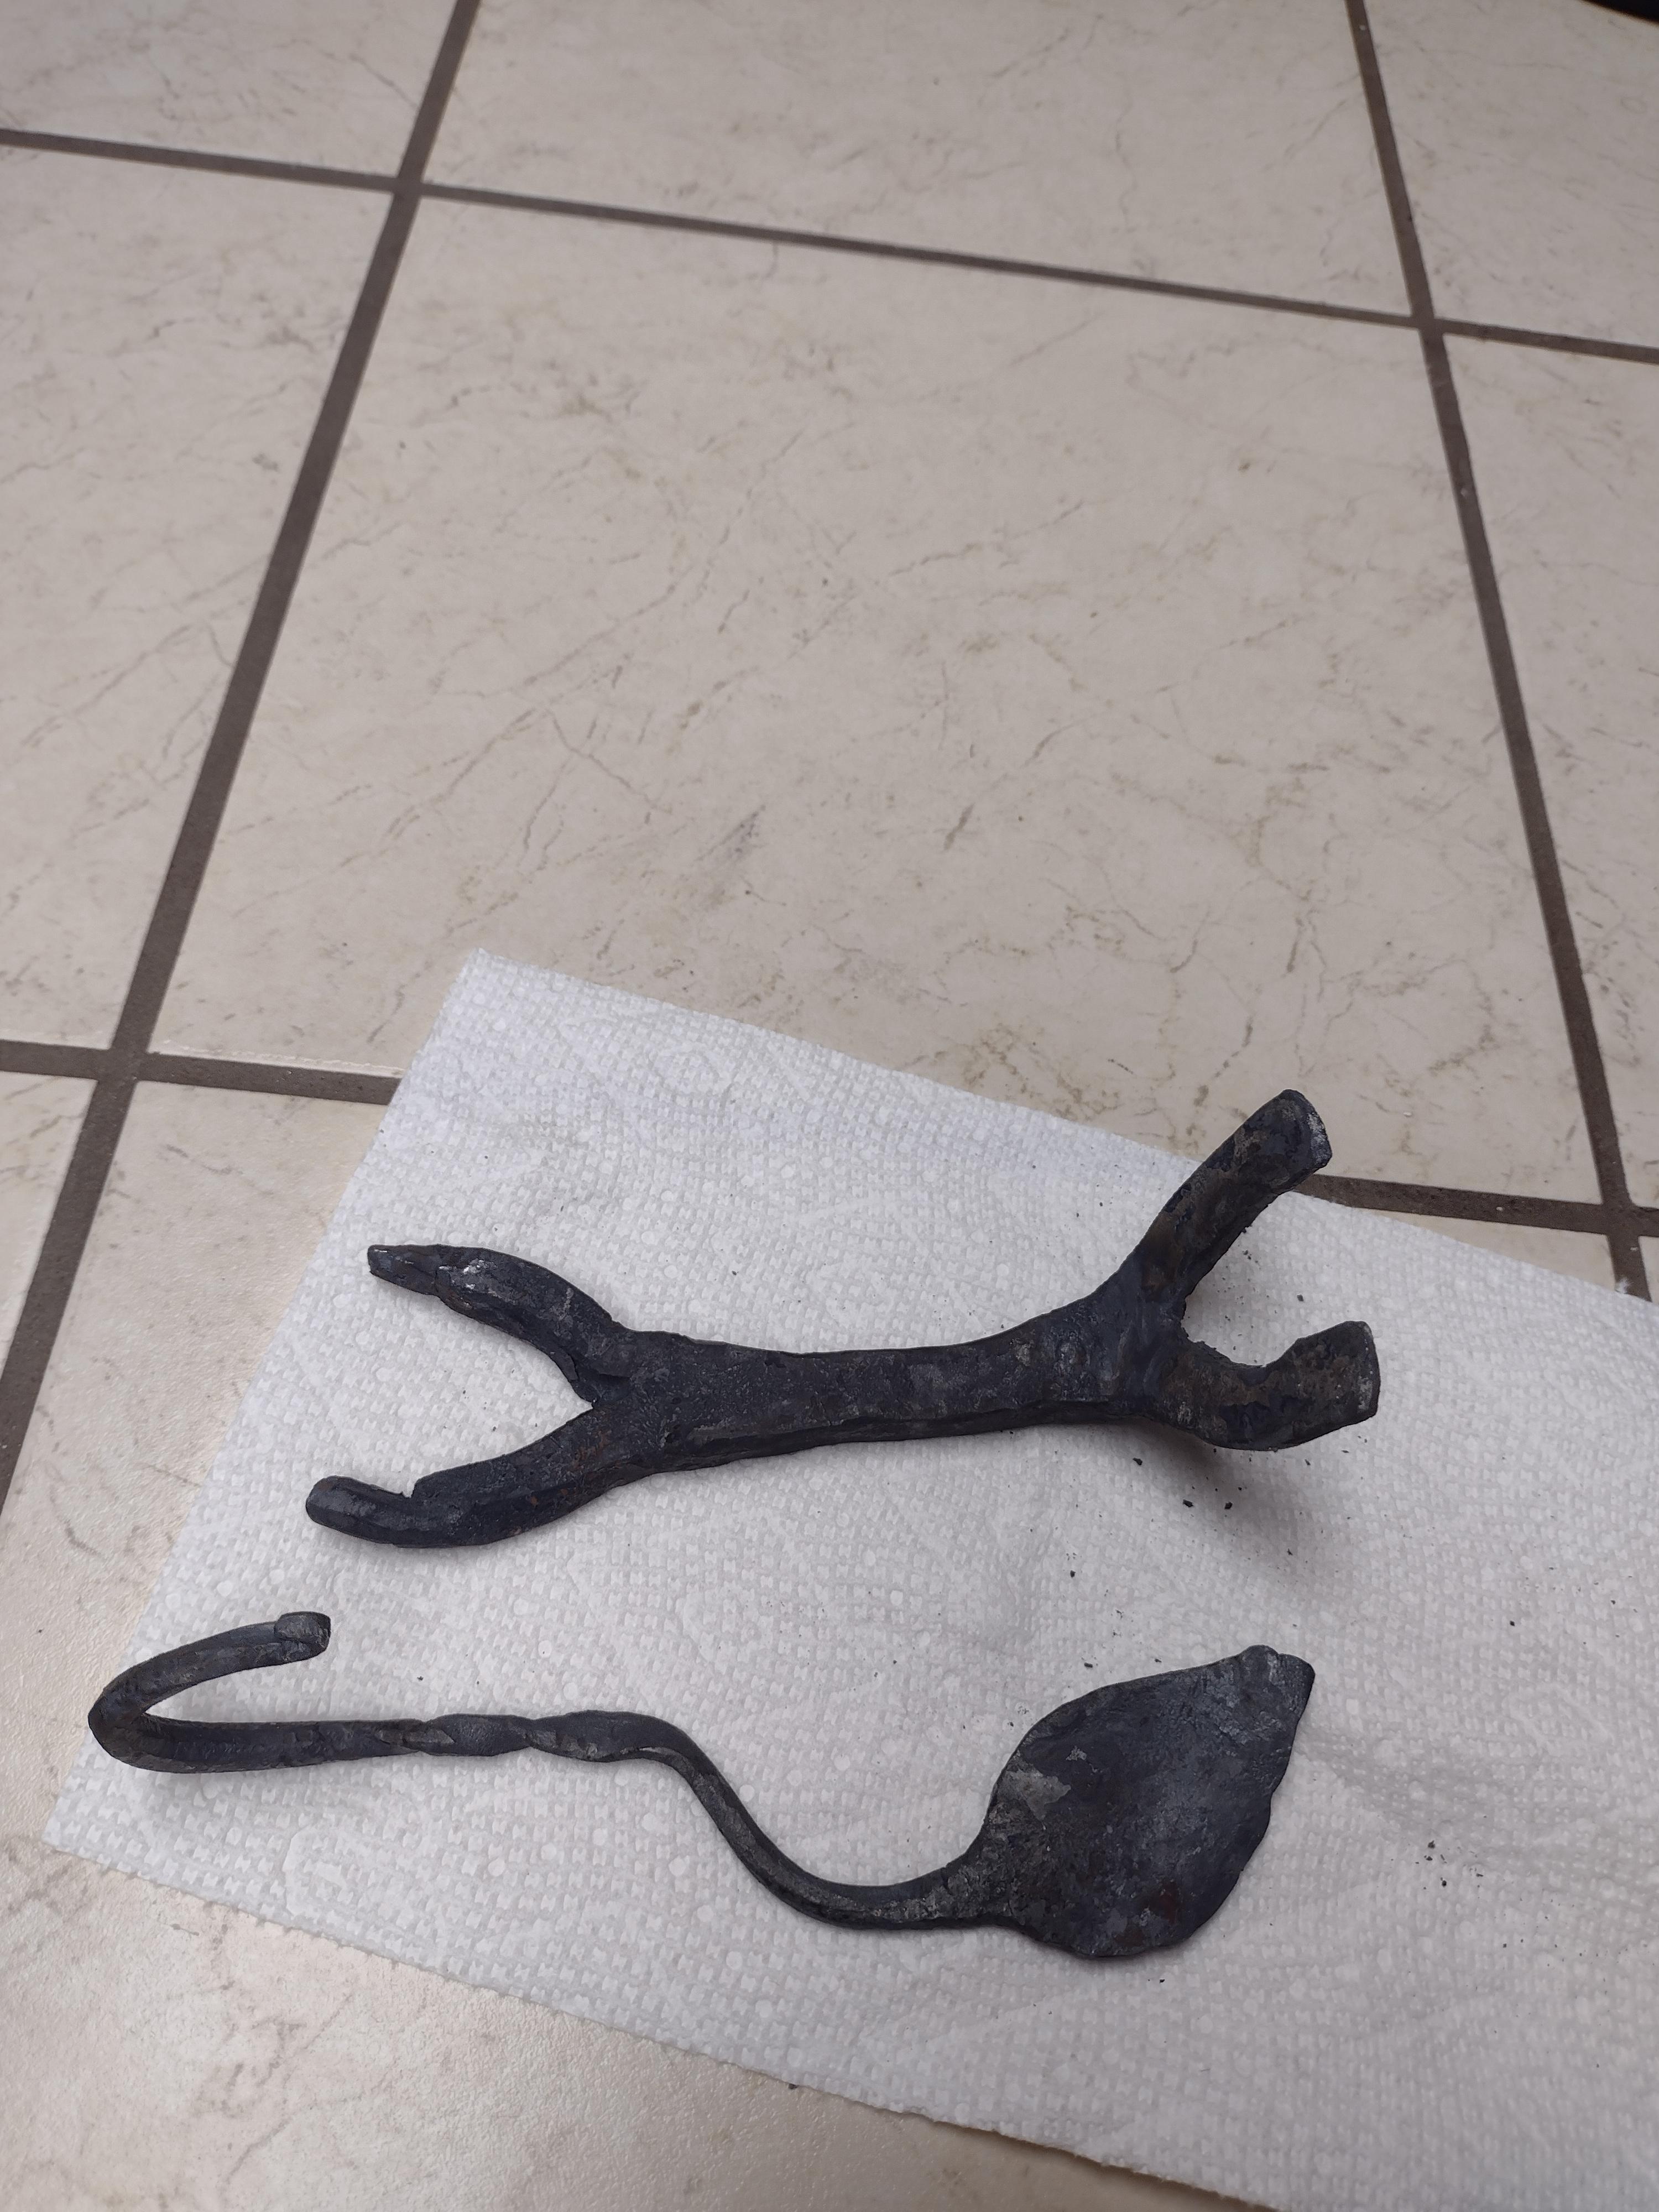
The first of 3 legs for my cauldron stand (started with 4" of 1 inch round bar). And a leaf hook. I haven't done any cleaning or finish on them and I may do more work on that stand leg.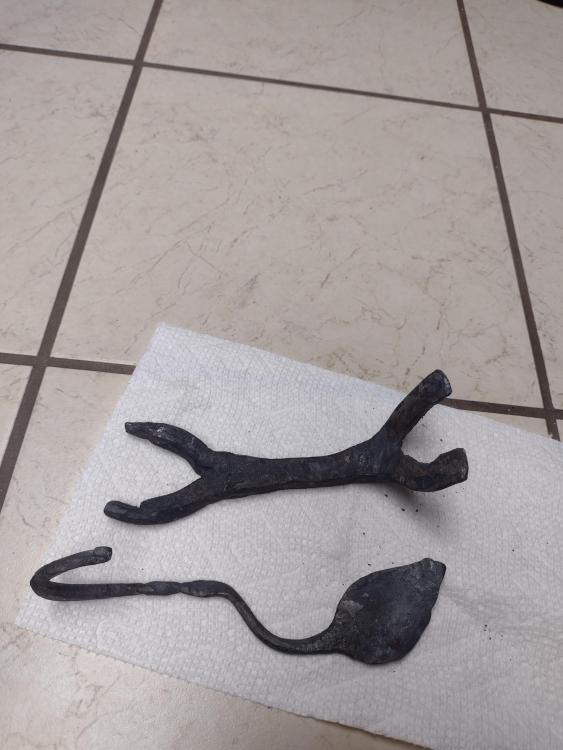
-
No, but I can't say my work is at the quality level where I'd notice anyway.
-
I bought one a few weeks ago to replace the sledge hammer head I was using. It's a huge improvement and seems a usable tool, but then I've never used a Soderfors to compare against. Mine has a few minor surface flaws that I didn't see until it got soot and scale dust on it. But considering the price and source, I wasn't expecting perfection.
-
I think Iron dragon has it right that it's a coning tool. I found pictures of modern coning tools and the business end had similar shape and slits in them. I didn't see pictures of hand tool versions, but that was just a quick Google search.
-
I was probably trying to over simplify, these cauldrons were most likely used for all those things and more. George's guess at rendering for lard is likely correct given the old house and barn where they were found, the house was on the edge of a small town and definitely had animals in its past. It's unlikely they were limited to only that use though. Anything that needed a large container to heat things would have called for them. Good tools are not limited to only one use. I know making your own soap is now an artisan thing, but I remember my grandmother making lye soap when I was very young. I can't remember her making it by the time I was in my teens though. I think maybe finances got better and spending money on fancy store bought things like soap became OK.
-
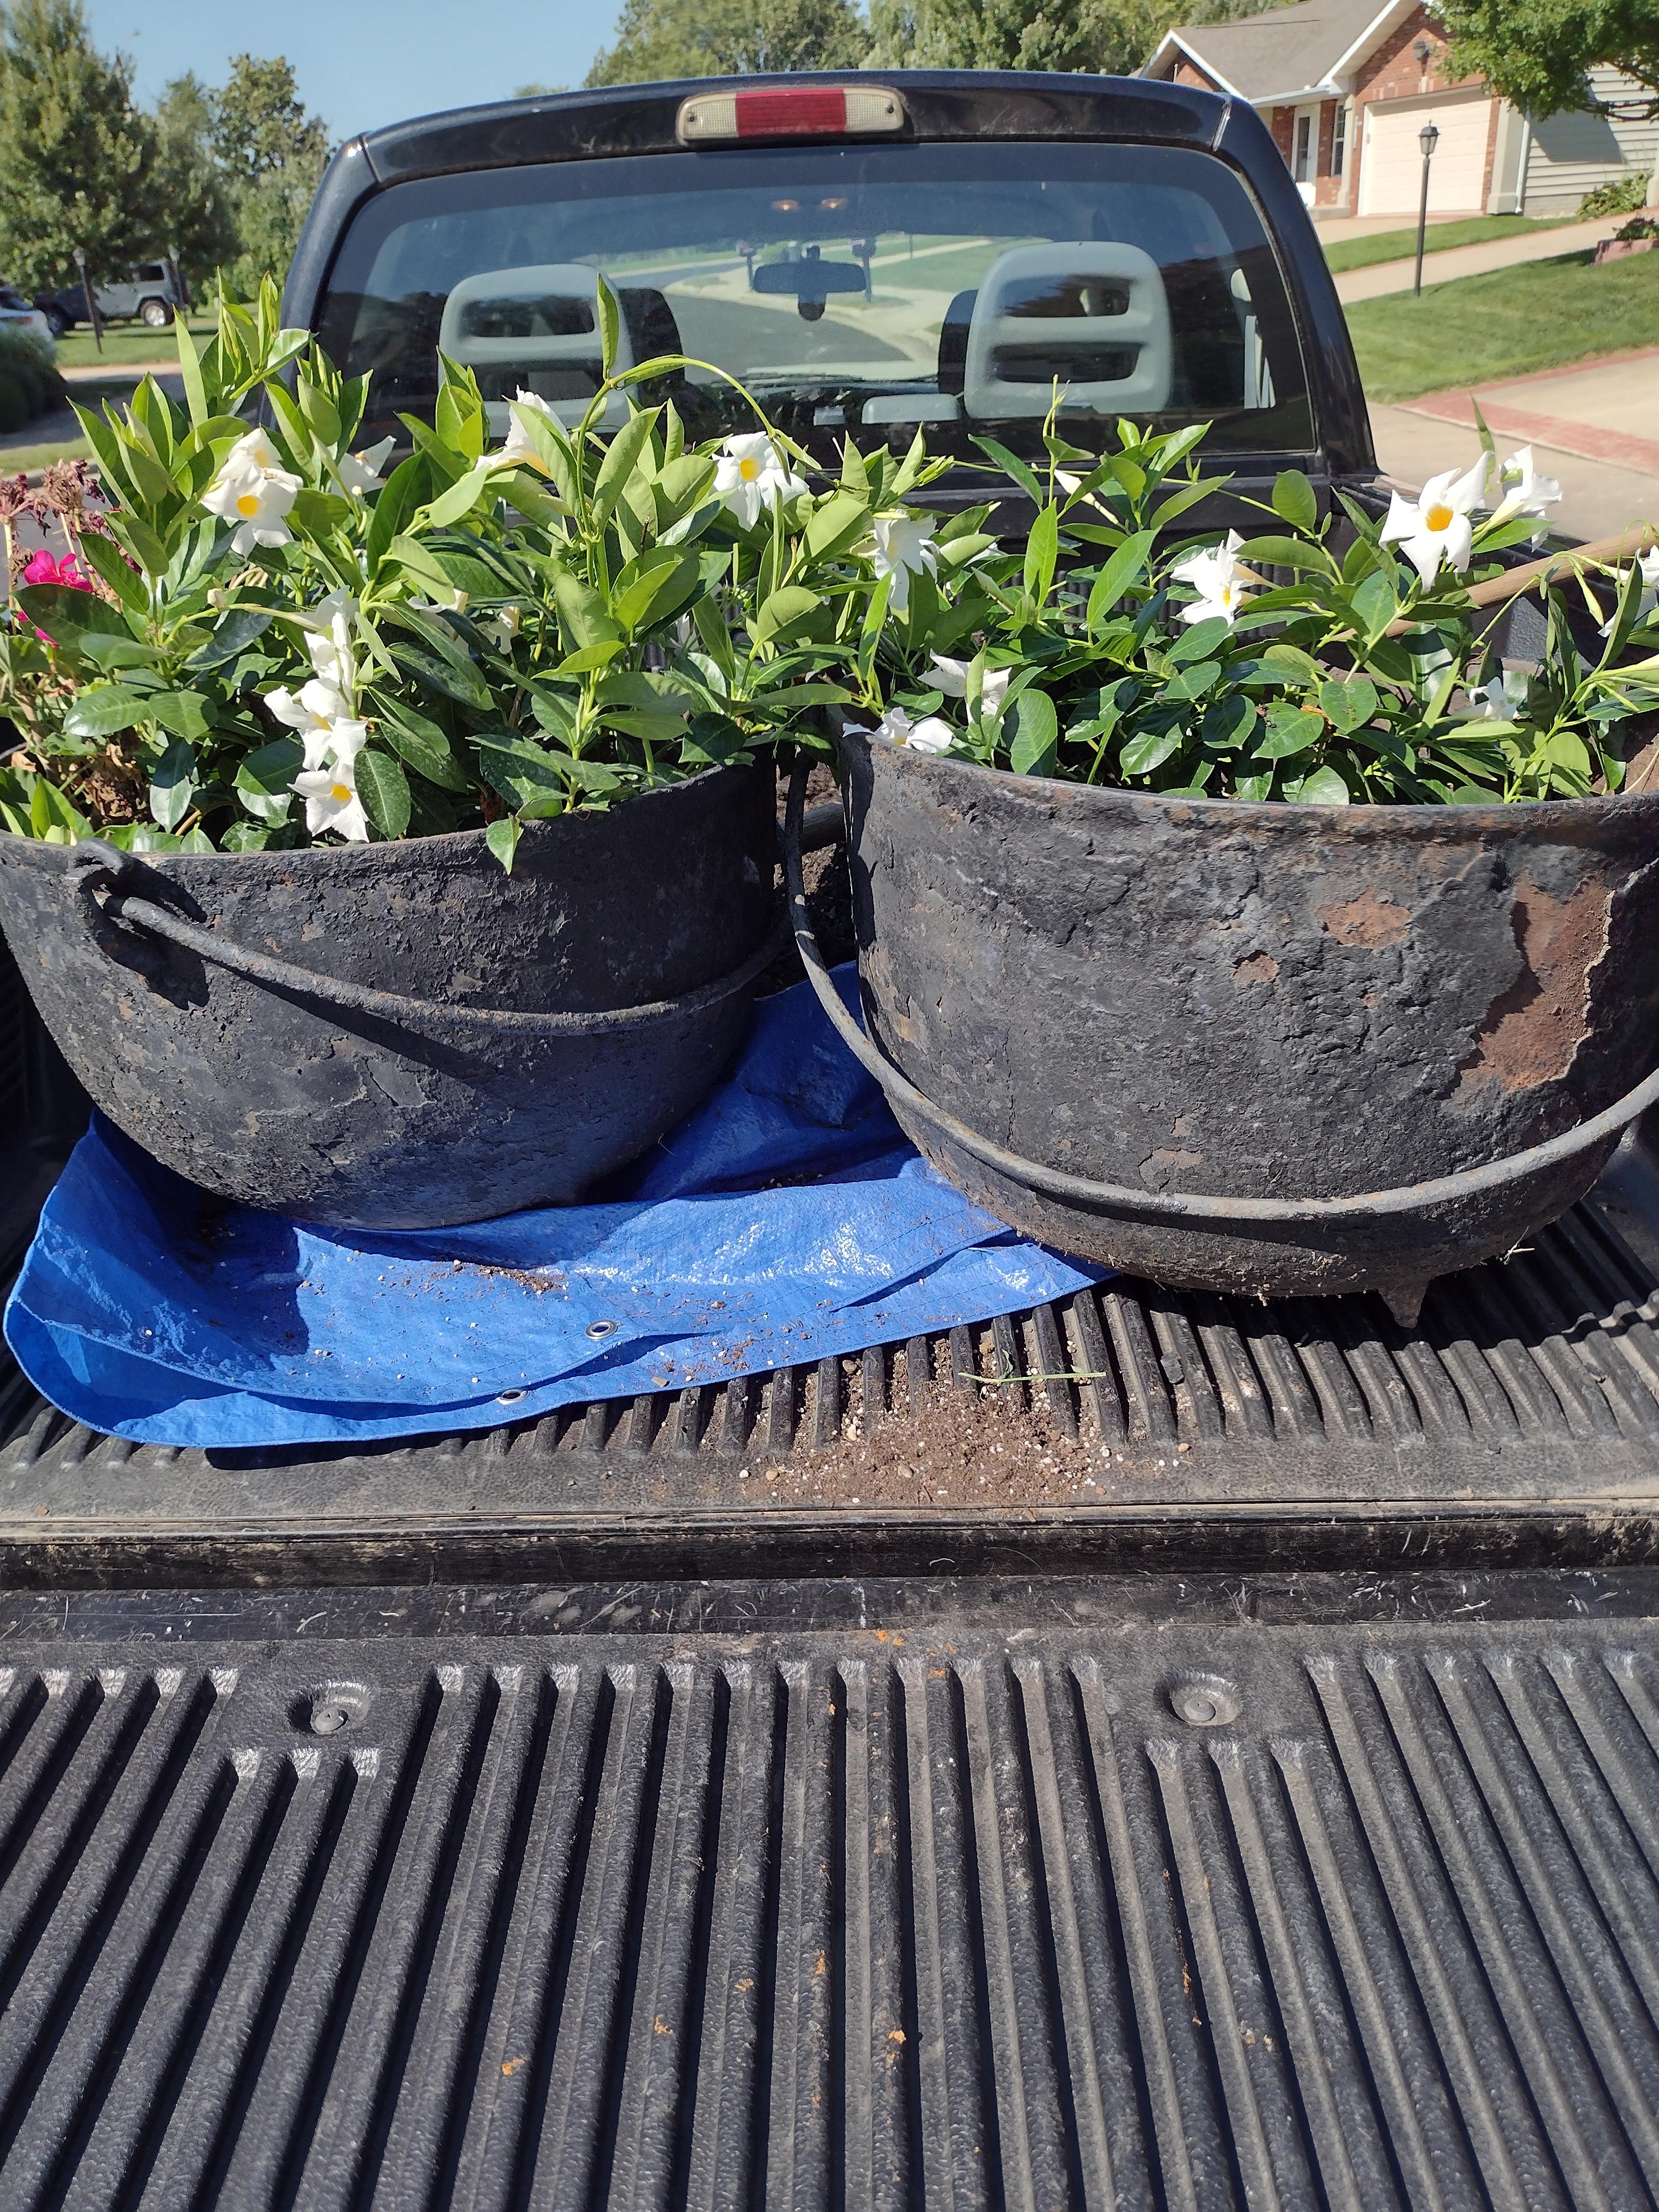
Yes, they're going to be put back into service as flower pots. The stands are a good excuse to try new things at the forge. And like iron dragon said, unless I can find someone that knows how to weld cast iron properly to fill the holes, there'll be no soup for you. Cauldrons huh? I think I will start calling them that. It's much better than just "big cast iron pots". I don't really know what they were originally used for, but we have been speculating that they were used to render fat to make lye soap. Like you say, 25 gallons each is a bit more soup than we can eat.
-
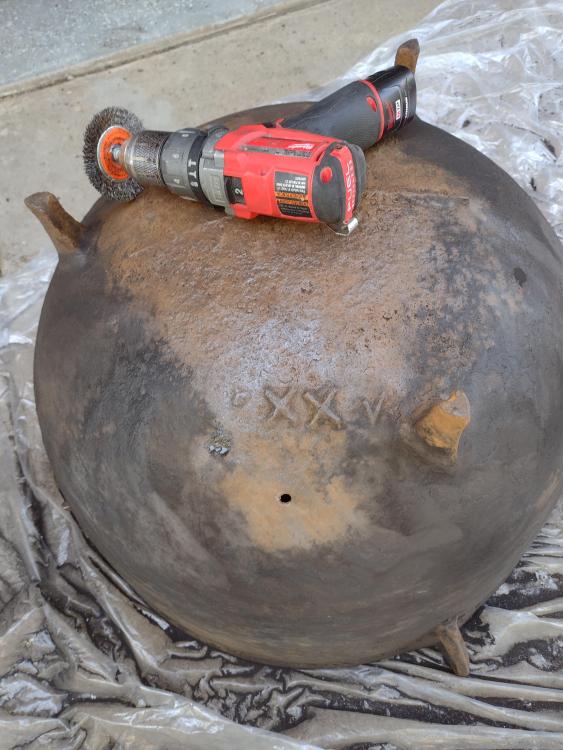
I got a couple of cast iron pots from my mother. They were found in a barn when they moved into a house when I was a toddler. She's used them as flower planters for 60 years. I'm told they had 'wrought iron's stands when they found them, but a truck backed over one and she's not sure what happened to the other. They're 24" diameter and the only marking I can see is xxv on the bottom and 25 at one of the handle loops. I assume that's 25 gallons, but just guessing. I'm planning to make a couple new stands out of 3/8 round bar and probably 1/2 round to make the legs with scrolls at the feet.

-
Prayers and condolences Glenn, family and friends
Brian Hibbert replied to Frosty's topic in Prayer List
My deepest sympathy for Glenn's family. I will keep you in my prayers. -
Principles of Estimating
Brian Hibbert replied to rockstar.esq's topic in The Business Side of Blacksmithing
At my work, we use an estimating formula that I believe can be used for any manufacturing process. Each job is broken down into steps (different options for the end product have more steps). You might break down a project into cutting, forging, heat treating and final assembly. If there are multiple separate component types to be made for a project they are each a separate step. Each step has costs associated with it. Setup fixed labor costs+ setup fixed material costs + setup labor per unit * number of units + Setup material per unit * number of units + run labor per unit * number of units + material per unit * number of units Then add each step together for your total costs and multiply by your markup for the final price. If you want different markups for different parts of the job, do the markup calculation on each step before adding them together. Setup costs include the time and material needed to adjust machinery to get things right before the production run starts and any other costs that are per job rather than variable per unit. In the case of blacksmithing, it might be the time and material needed to make a jig or other special tool for the job. Run costs are pretty straight forward. They're the actual cost of the materials in each unit (including wastage) and the time it takes to do the step. Note that some tasks can be pure fixed setup costs (0 for everything else) or pure labor costs have no setup costs, etc. Just put zeros in where the costs aren't needed. This is a pretty flexible way to break down the cost of a project and come up with a close estimation of a price. -
I saw a YouTube video yesterday from some guy going by "Joe the Builder". At first I thought, "Hey a Frosty burner!" but then the guy started doing some really strange stuff with the fittings. He tapped the T for the mig tip, then tapped the 1/8 MPT for the bit of mig tip extending through the T, then brazed together some brass fittings to the 1/8 mpt. His mixing tube was about 12" on a 3/4" pipe. AND he put a galvanized bell on the end for a flare! A bit scary and I'm not going to link the video to give him more traffic. I HOPE people won't follow his construction techniques.