bobasaurus
-
Posts
170 -
Joined
-
Last visited
Content Type
Profiles
Forums
Articles
Gallery
Downloads
Events
Everything posted by bobasaurus
-
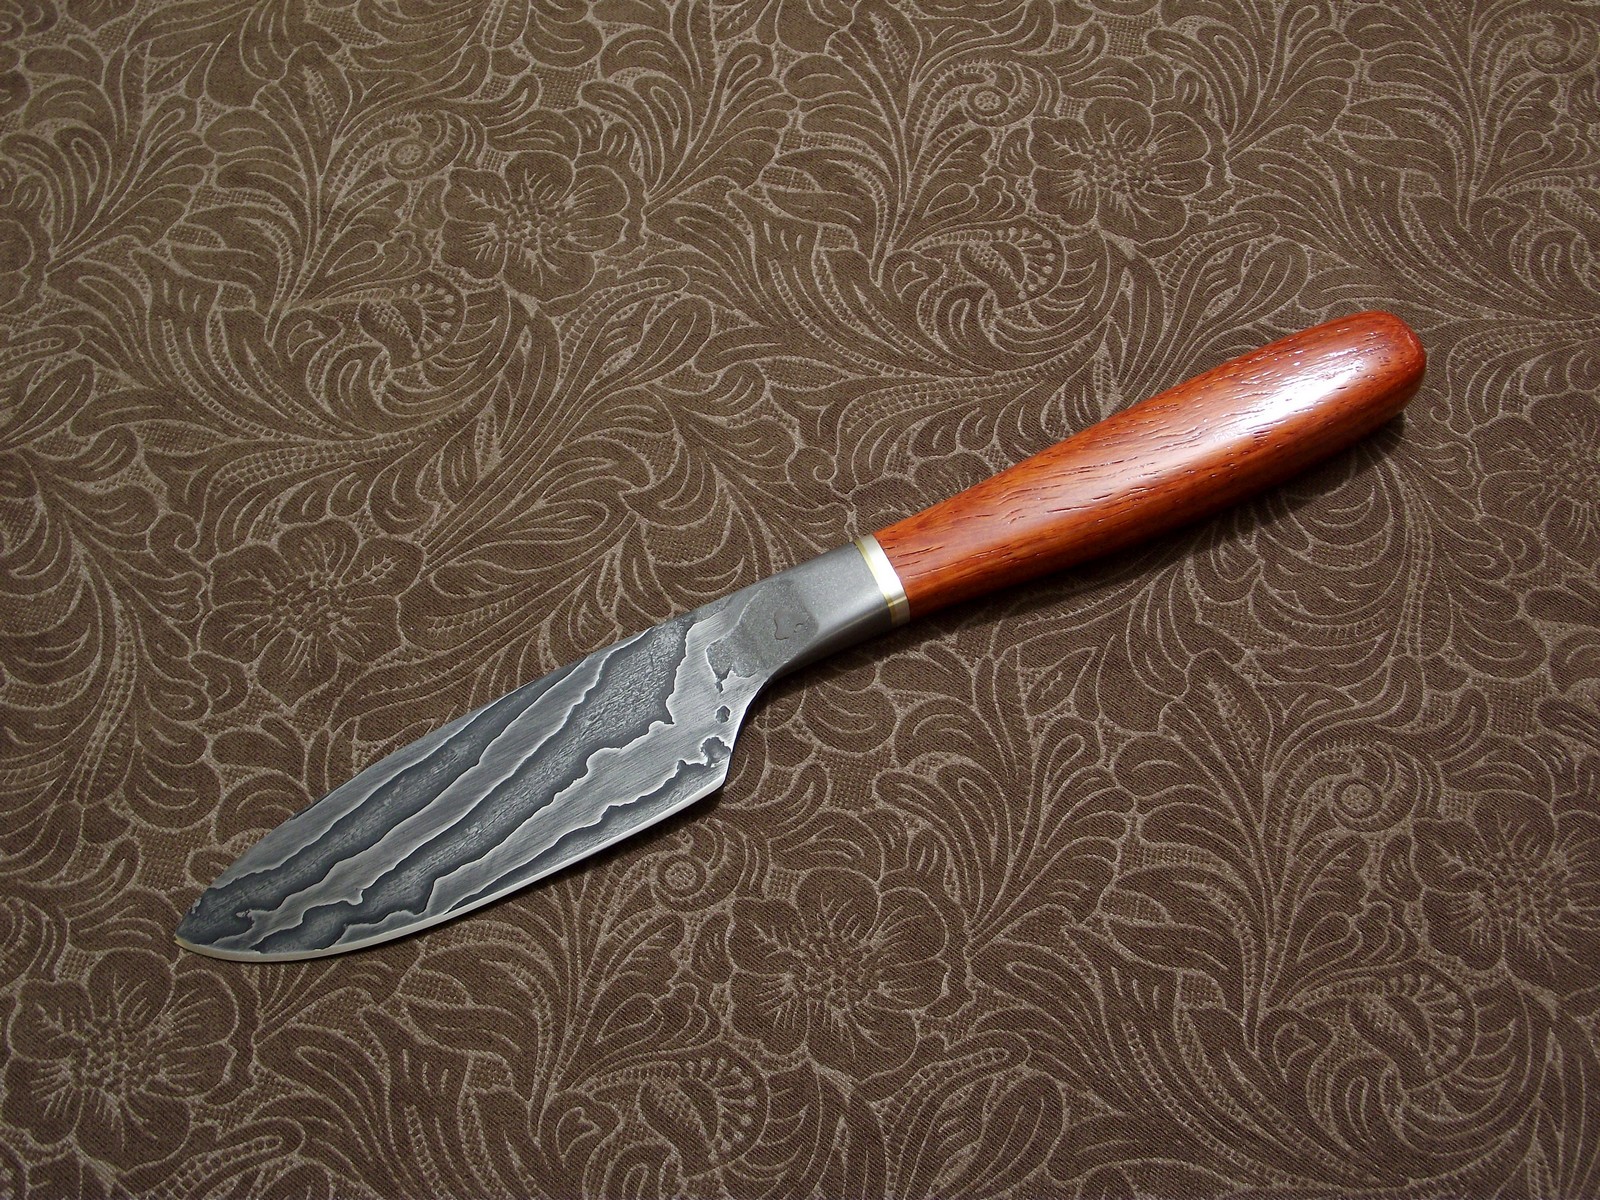
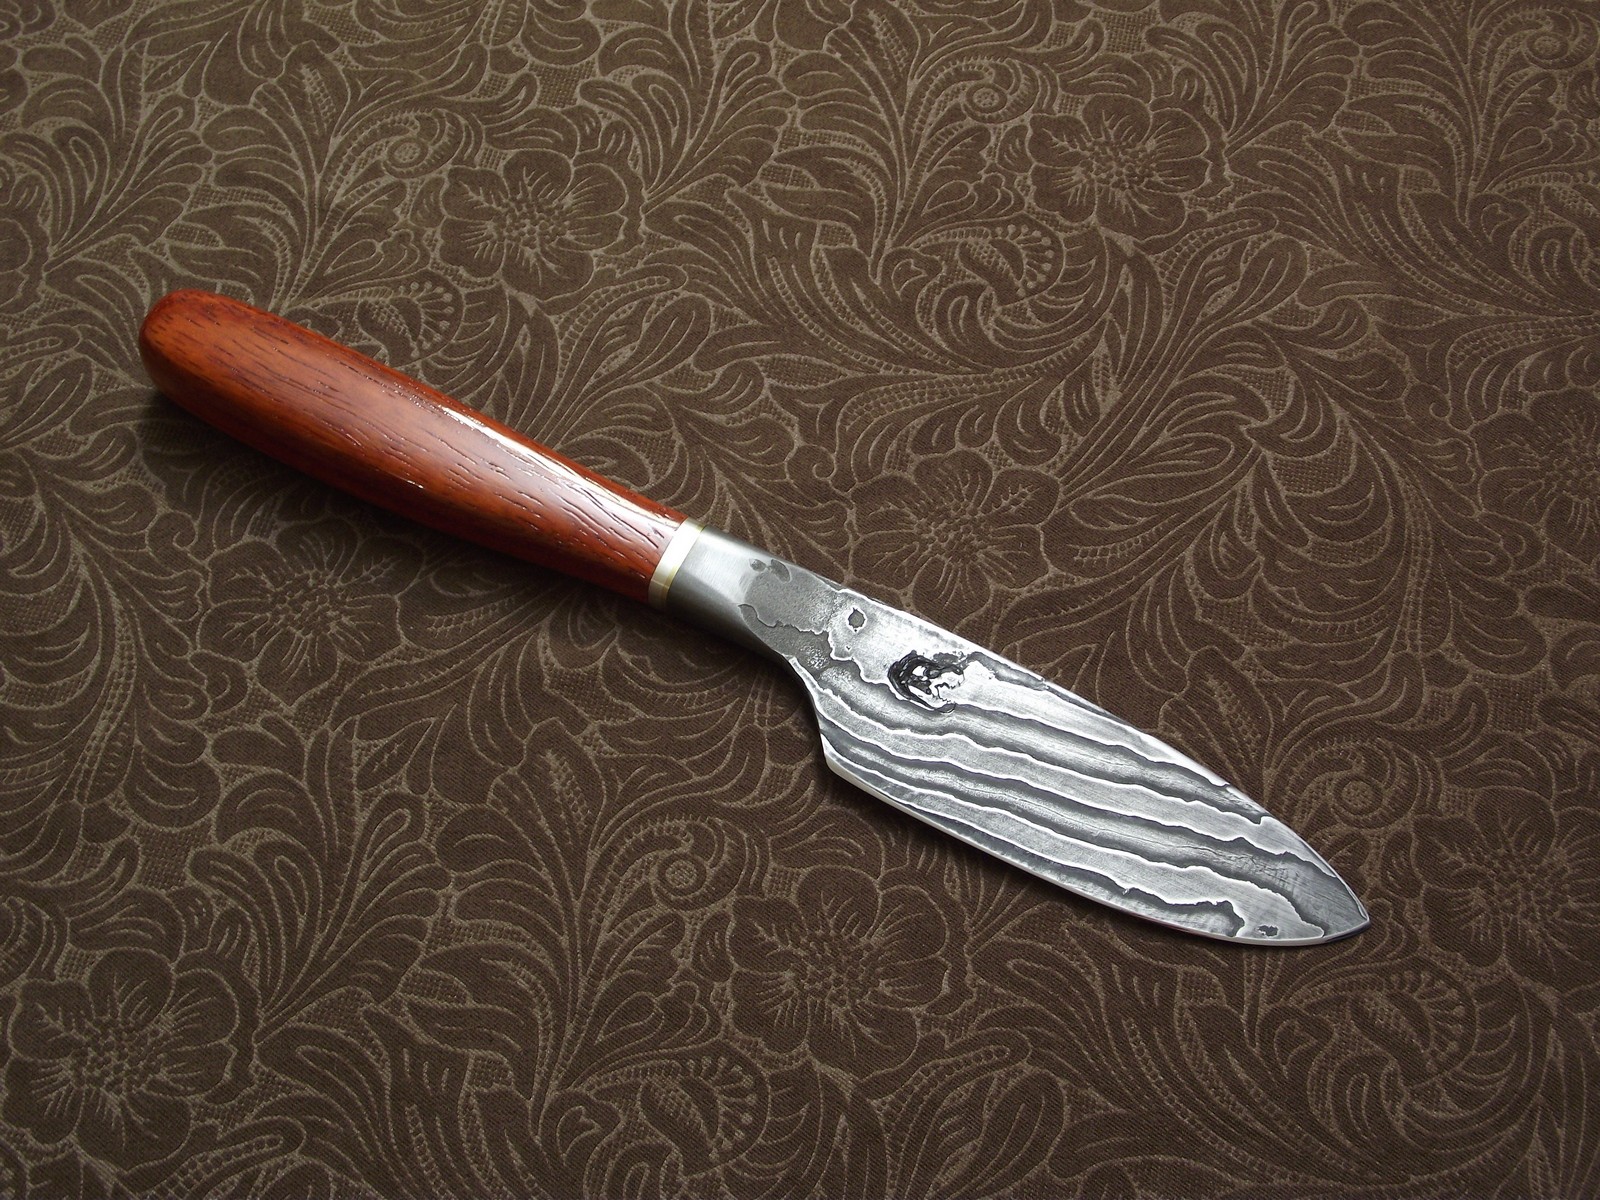
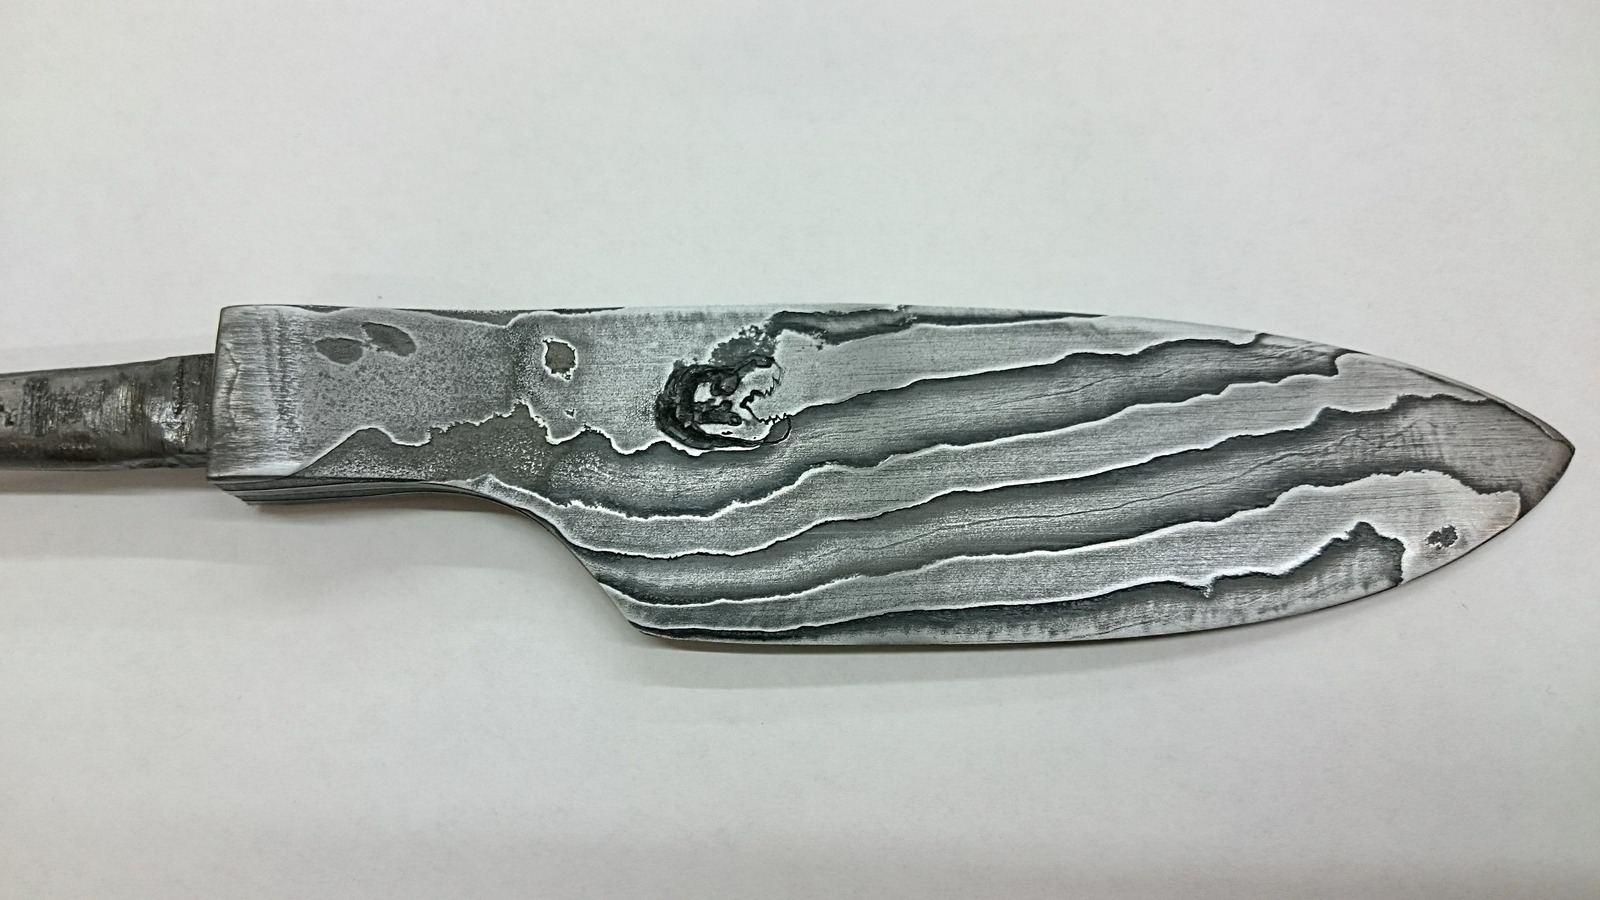
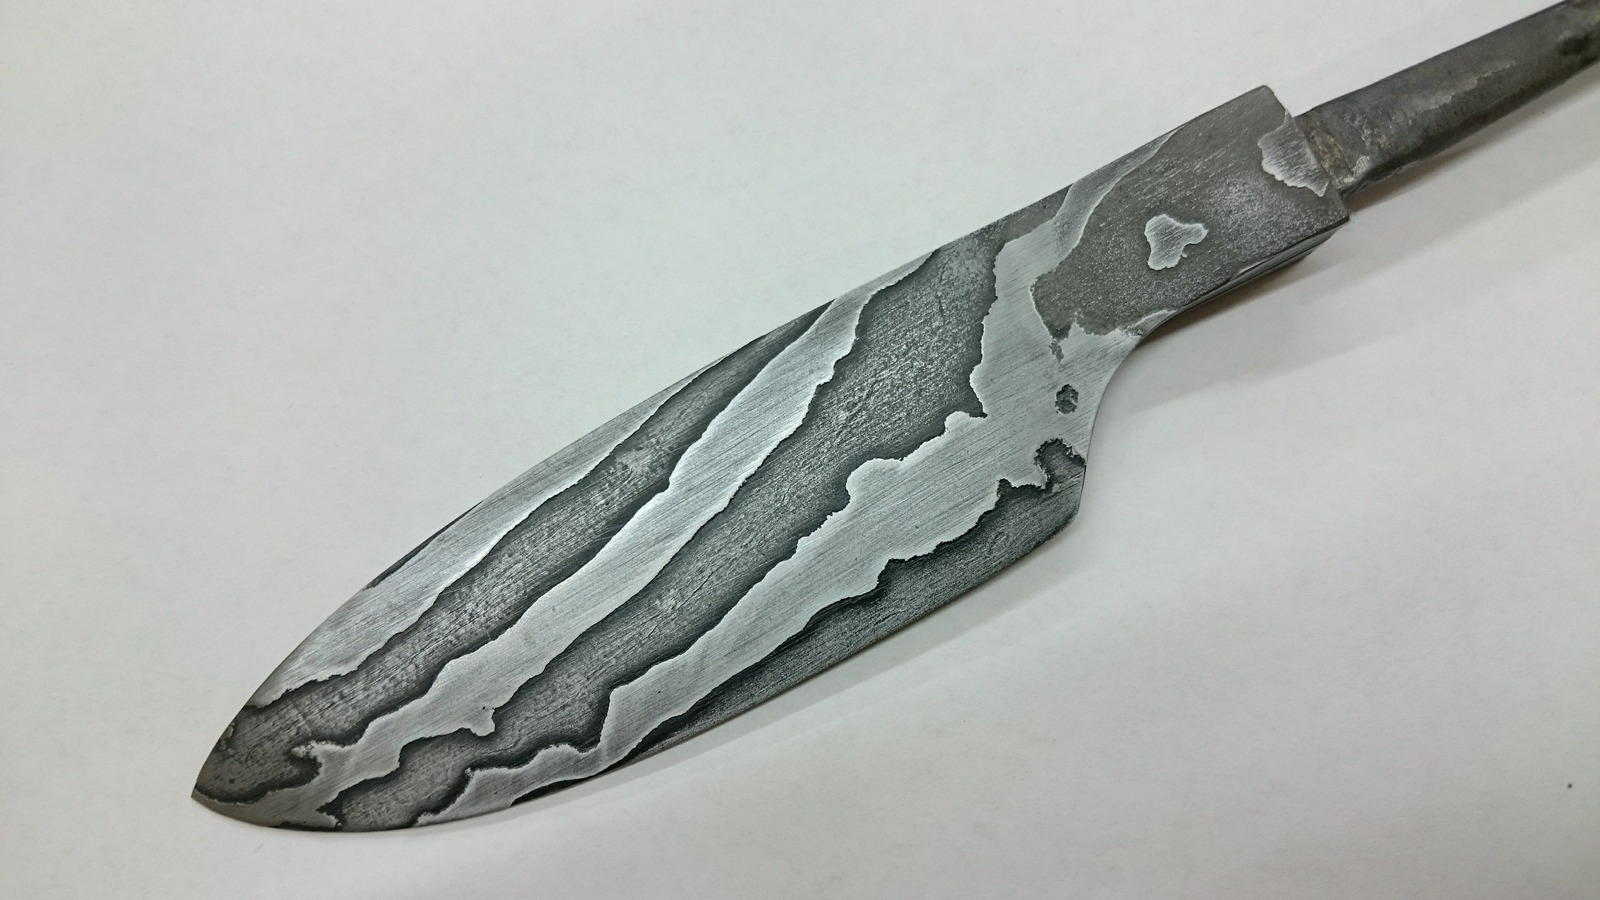
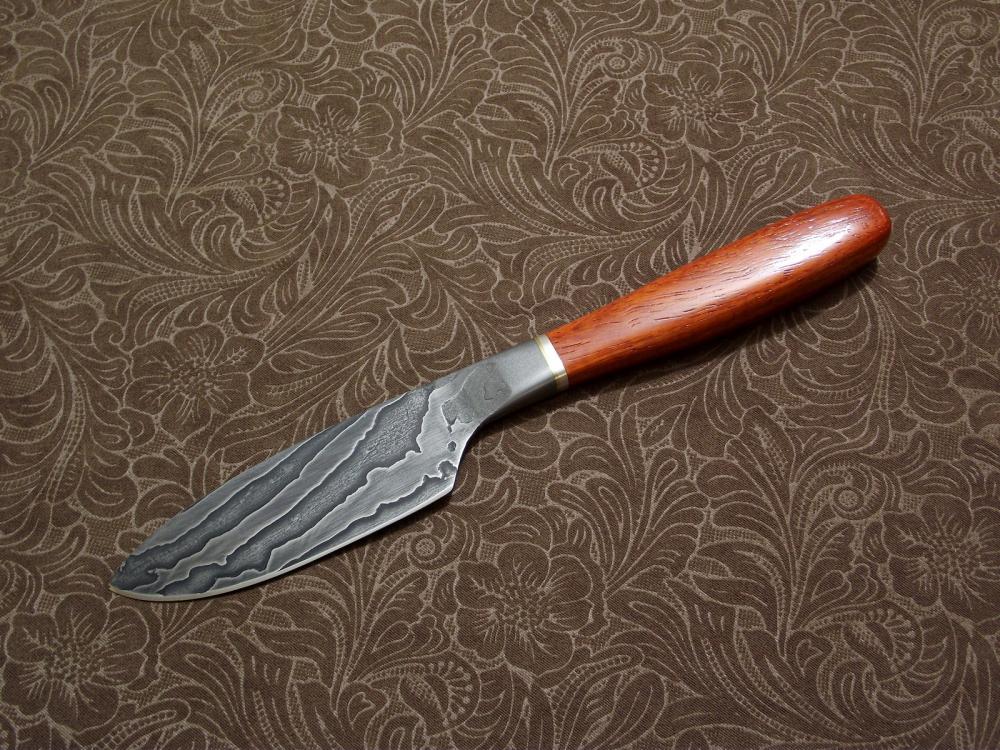
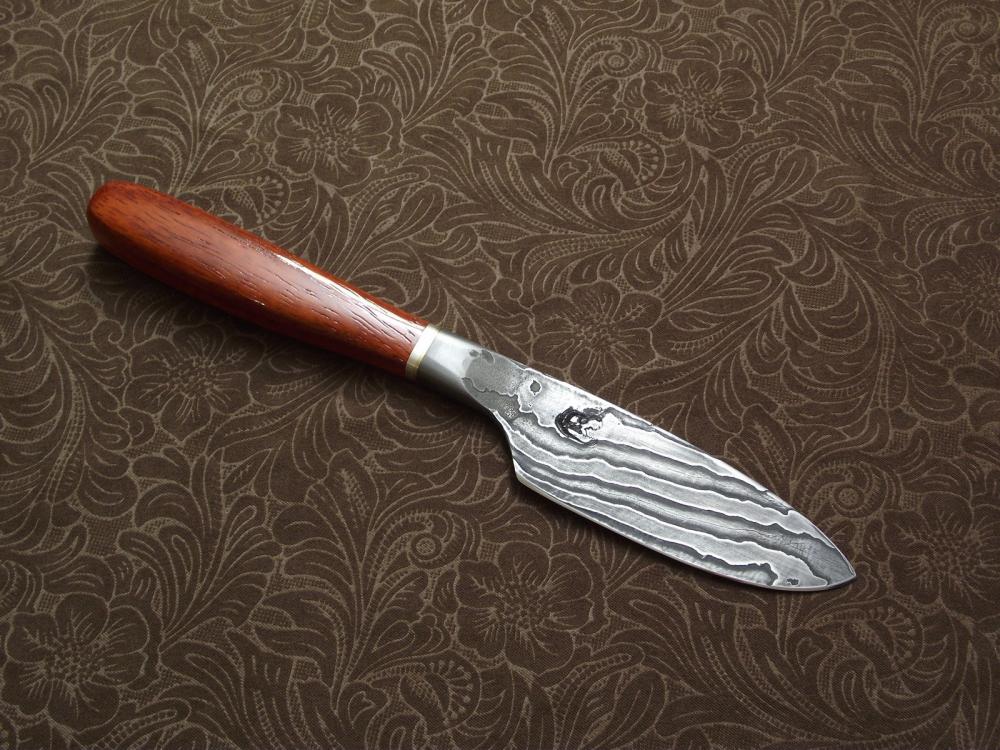
I just finished this damascus integral bolster chef knife. I forged the low-layer damascus billet out of 1080 and 15n20, then shaped the knife. The handle is padauk, with a brass and silver spacer. More pics here: http://imgur.com/a/VkkLQ
-
Ah, I must be seeing the reflected light. Looks great, I'm impressed at the results.
-
I don't have a lot of grinding equipment, so I mostly used a 3/4" dia sanding drum on my flex shaft grinder. I honed it with a dowel in my wood lathe coated in green chromium oxide compound.
-
That's interesting, I'll have to finish reading the set. The washer idea is clever, I just made an integral bolster knife where this trick would have been useful.
-
Thanks. I'm not super happy with the shape, but the fit is tight and it works well. My father used it for anticlastic raising last weekend and it worked well.
-
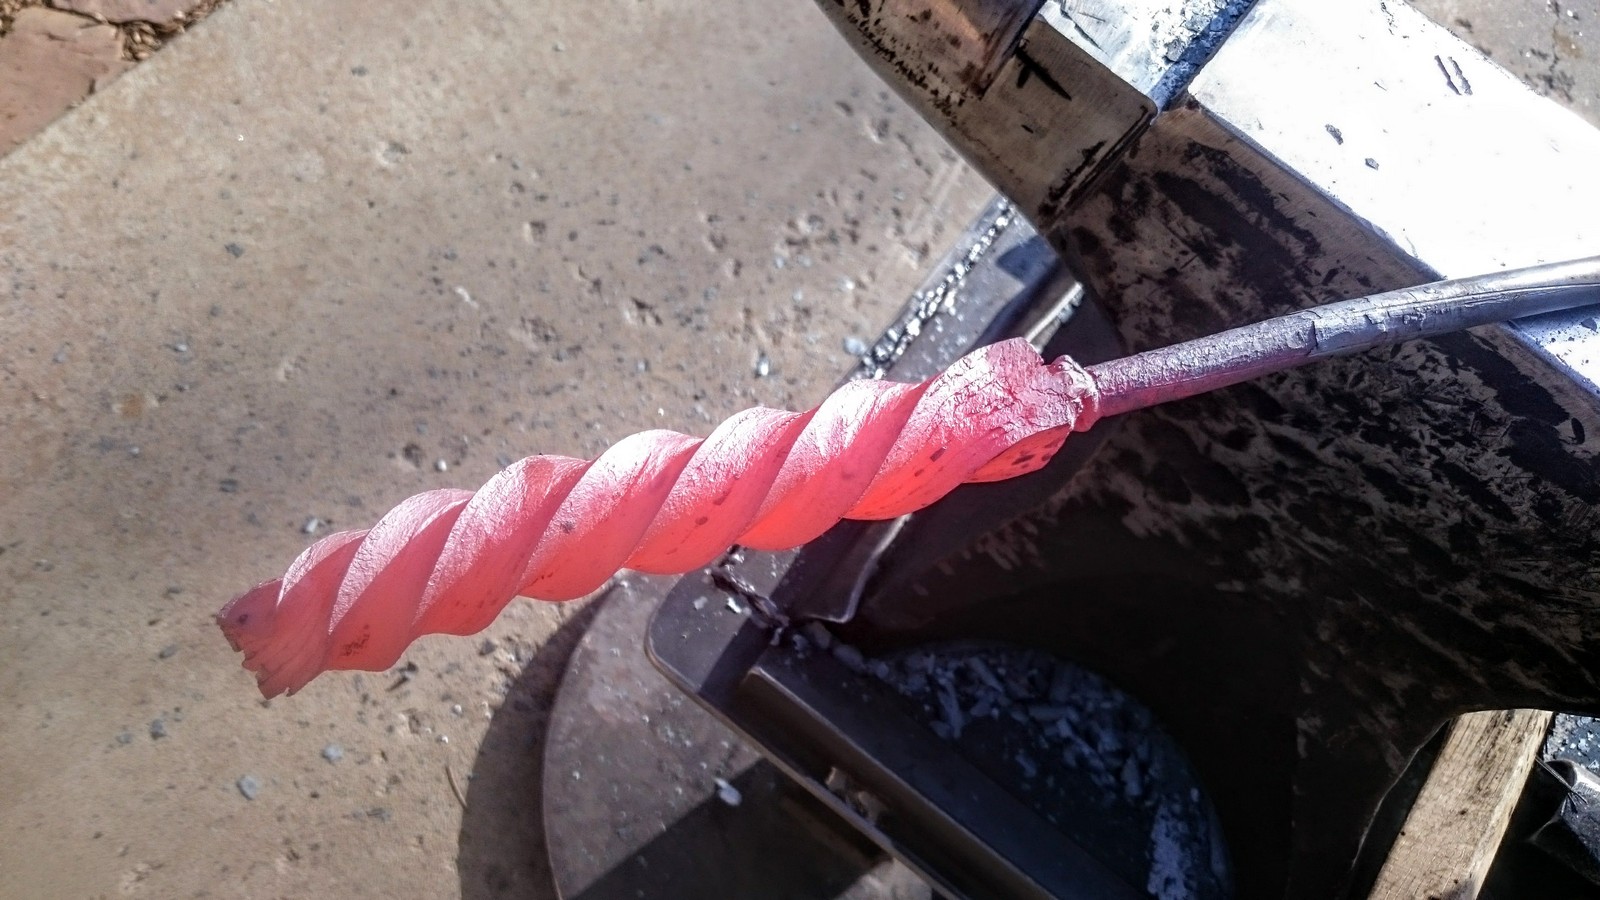
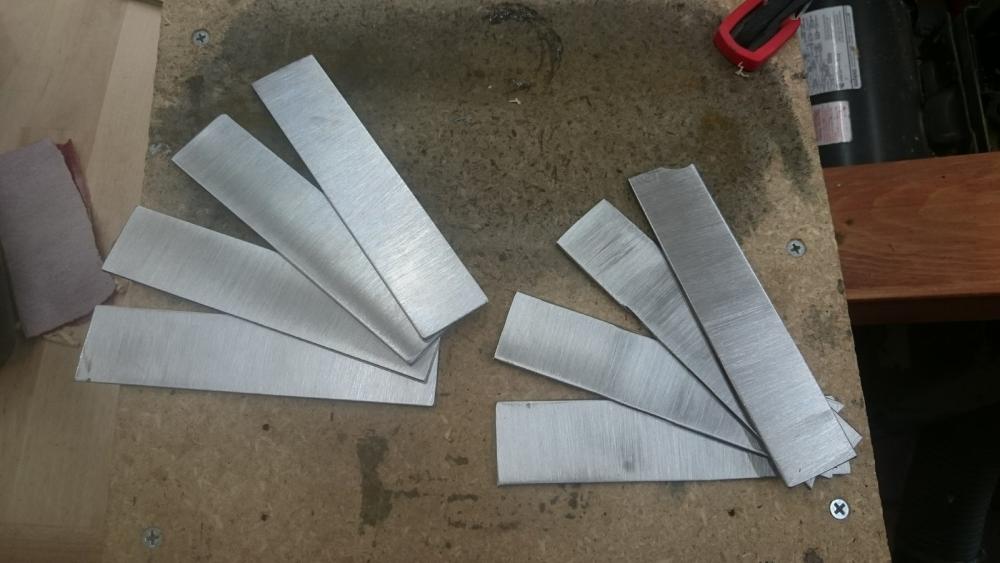
Thanks. It was 4 layers each of 1080 and 15n20. The 1080 was 1/8" thick, the 15n20 a bit thinner. I ended up with about a square cross section after forge welding.
-
Here is a small integral bolster chef knife I made from the remainder of my low layer count damascus billet. Still needs a handle.


-
Thanks. The handle ended up a little small, I might wrap it with something on the grip area.
-
I finished it up today with a mahogany handle. Came out a bit small on the gripping end, might have to wrap it with something. More pics: http://imgur.com/a/5ULYa


-
Looks great, love the wavy lines. Do you grind hollows on the bevels?
-
Those really look great, I'm impressed that you can make such even spirals down the handles.
-
Looks awesome, neat to see a coffee etch look so good. I like the heat coloring.
-

Ball Peen Hammer Hawk
bobasaurus replied to rifleshooter2's topic in Axes, Hatchets, Hawks, Choppers, etc
That's so clean and nice. -
Damascus Mouse Hawk
bobasaurus replied to Benton Frisse's topic in Axes, Hatchets, Hawks, Choppers, etc
Looks awesome. I just did my first real damascus and it was a chore. I etched in 50/50 ferric chloride + vinegar mix, and it turned the entire thing pitch black so I had to sand back some. I think a ferric and water mix would work better next time, or maybe vinegar and water like your mix. -
I have a garage full of interesting woods to try. I think one with too much figure would clash. Wish my redheart was dry, but it needs a few more months at least... it's my favorite wood. Maybe walnut.
-
What did you do in the shop today?
bobasaurus replied to Mark Ling's topic in Blacksmithing, General Discussion
That's a sweet grinder, wish I had one like it. I like the double tool arm setup. Nice job. I bought that dvd a while back but haven't gotten to watch it yet. I did make a socket chisel from one of his other videos, though. -
John, it sounds like maybe the D gain of your PID controller is a bit high... over-reacting to the slope of the temperature rise? I want to build one of these myself someday. Where did you get the insulated firebrick?
-
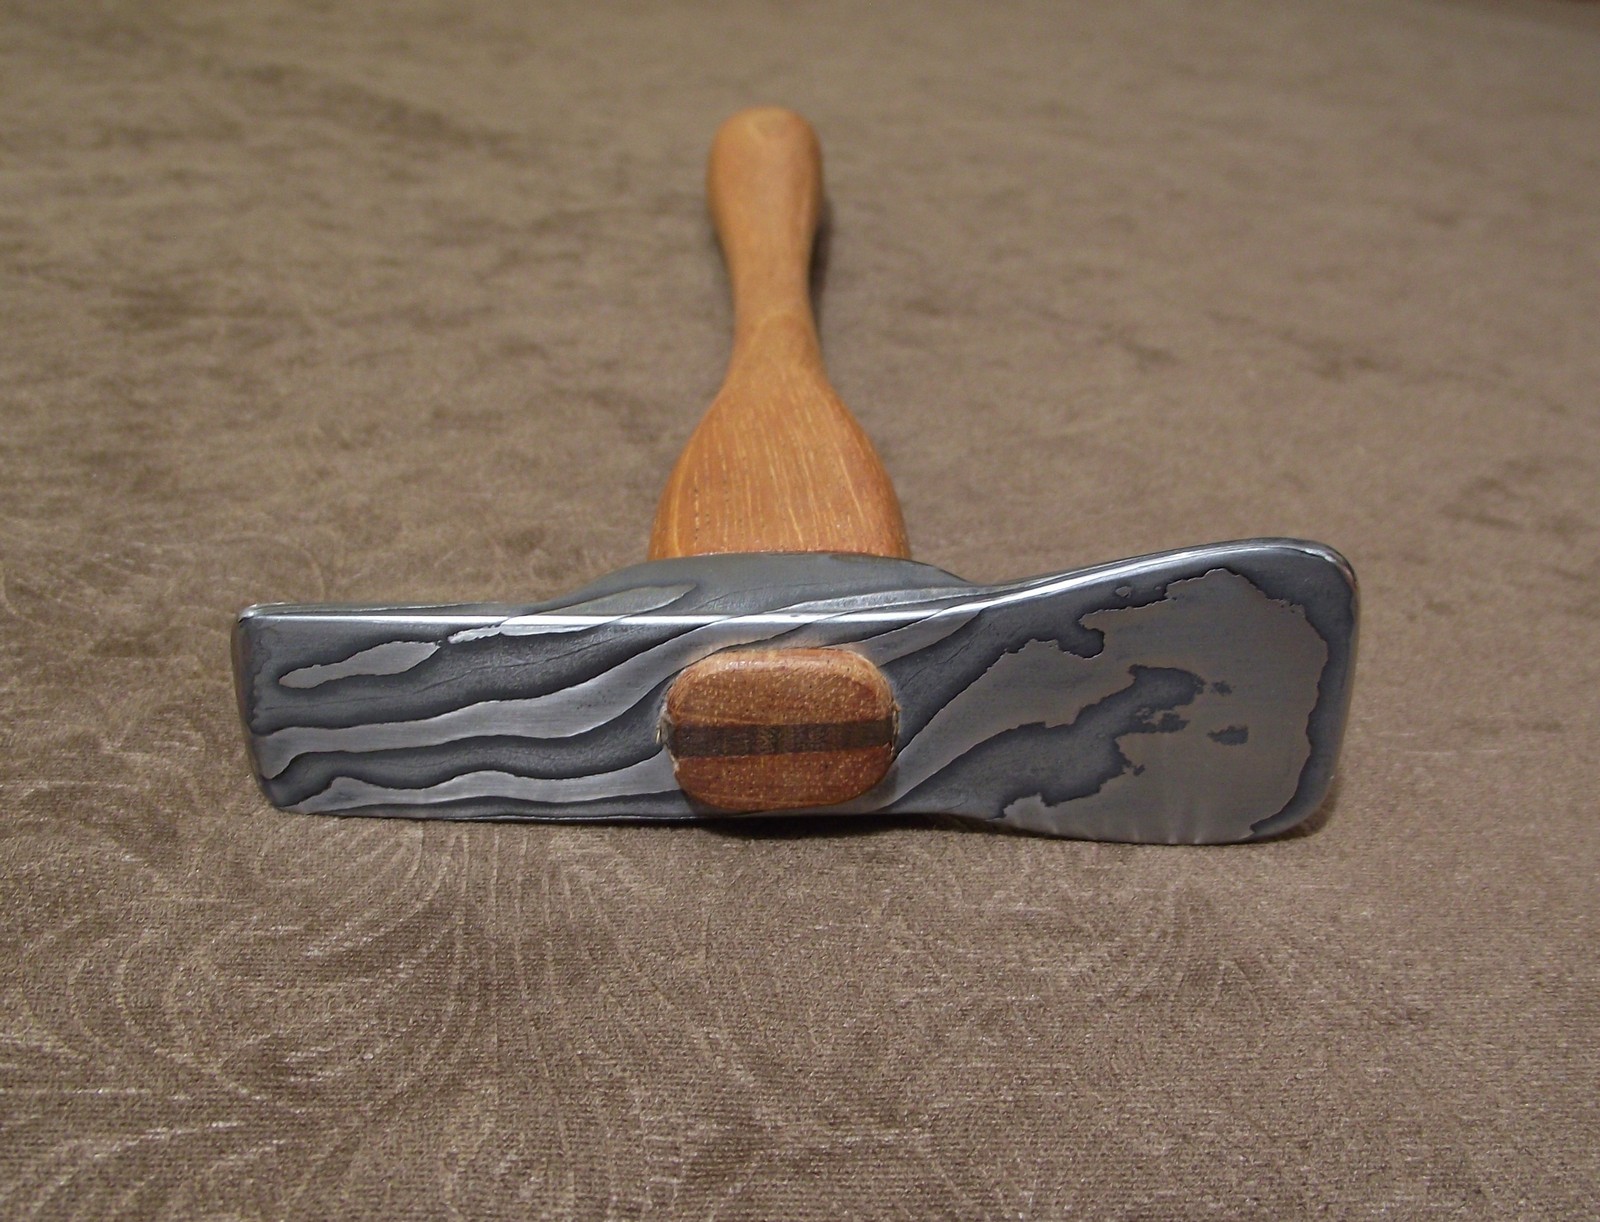
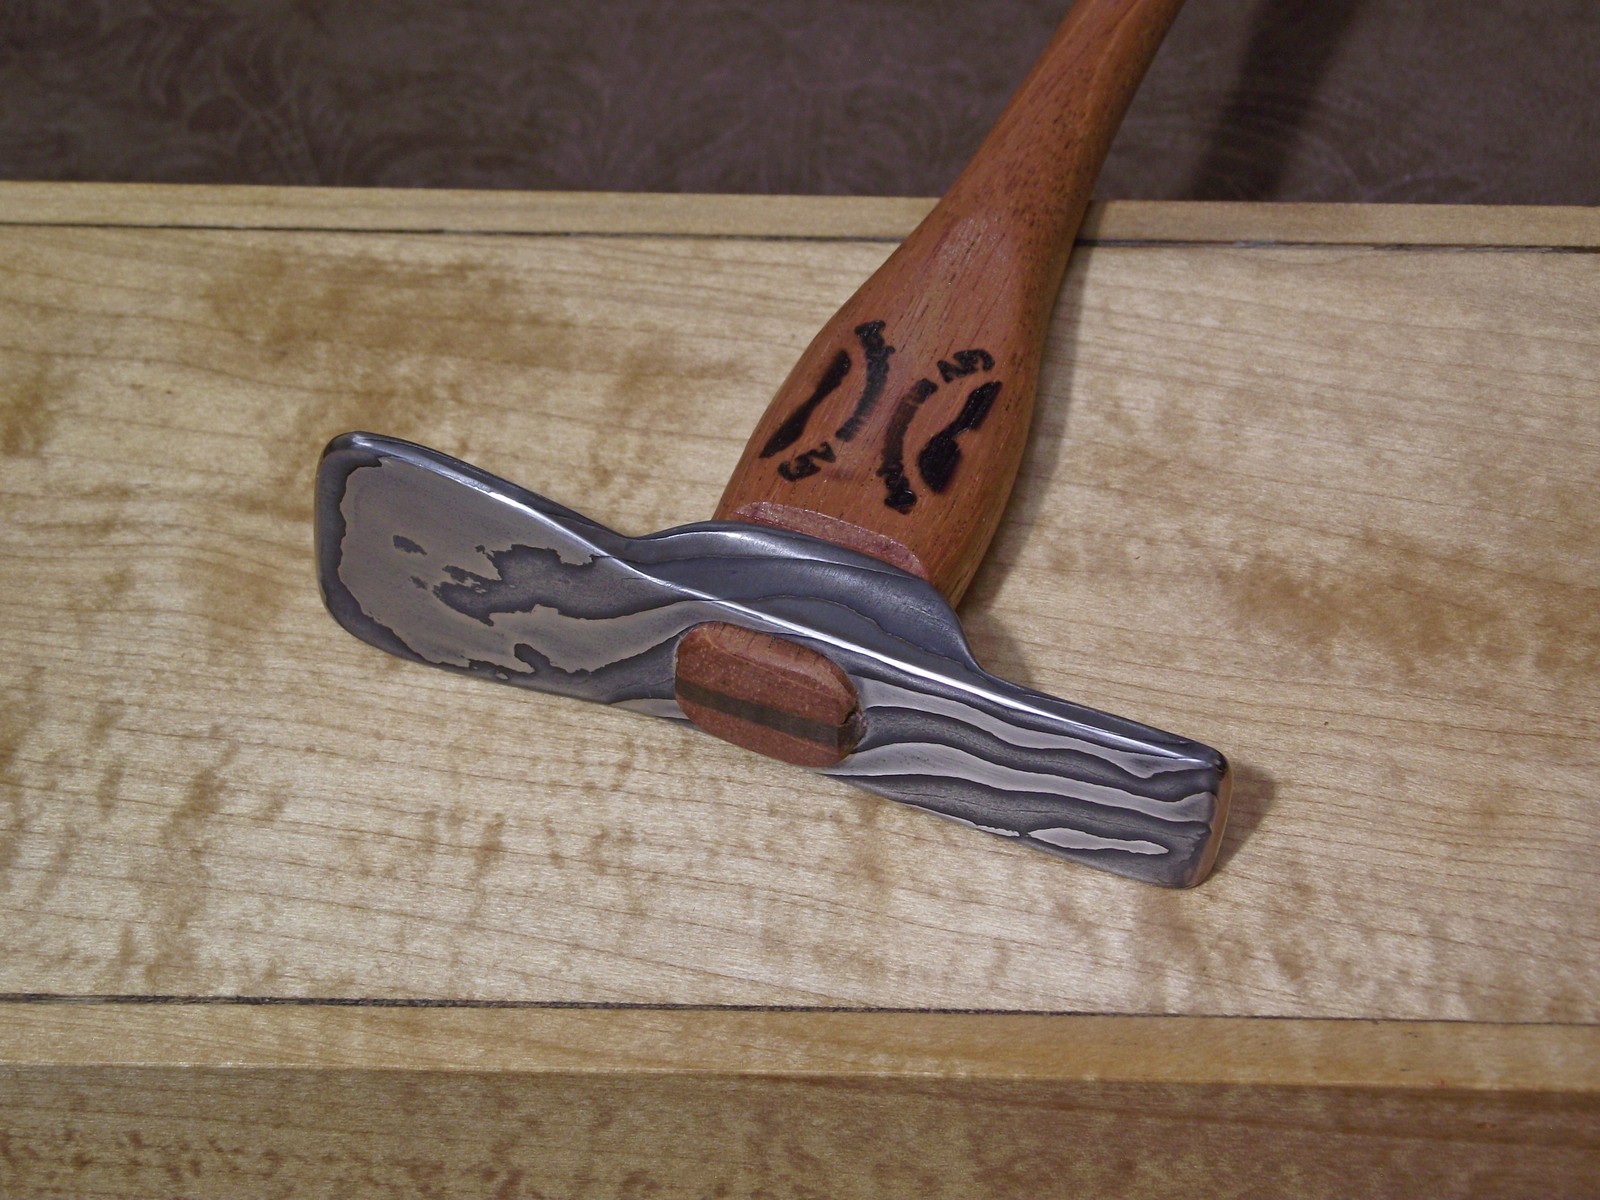
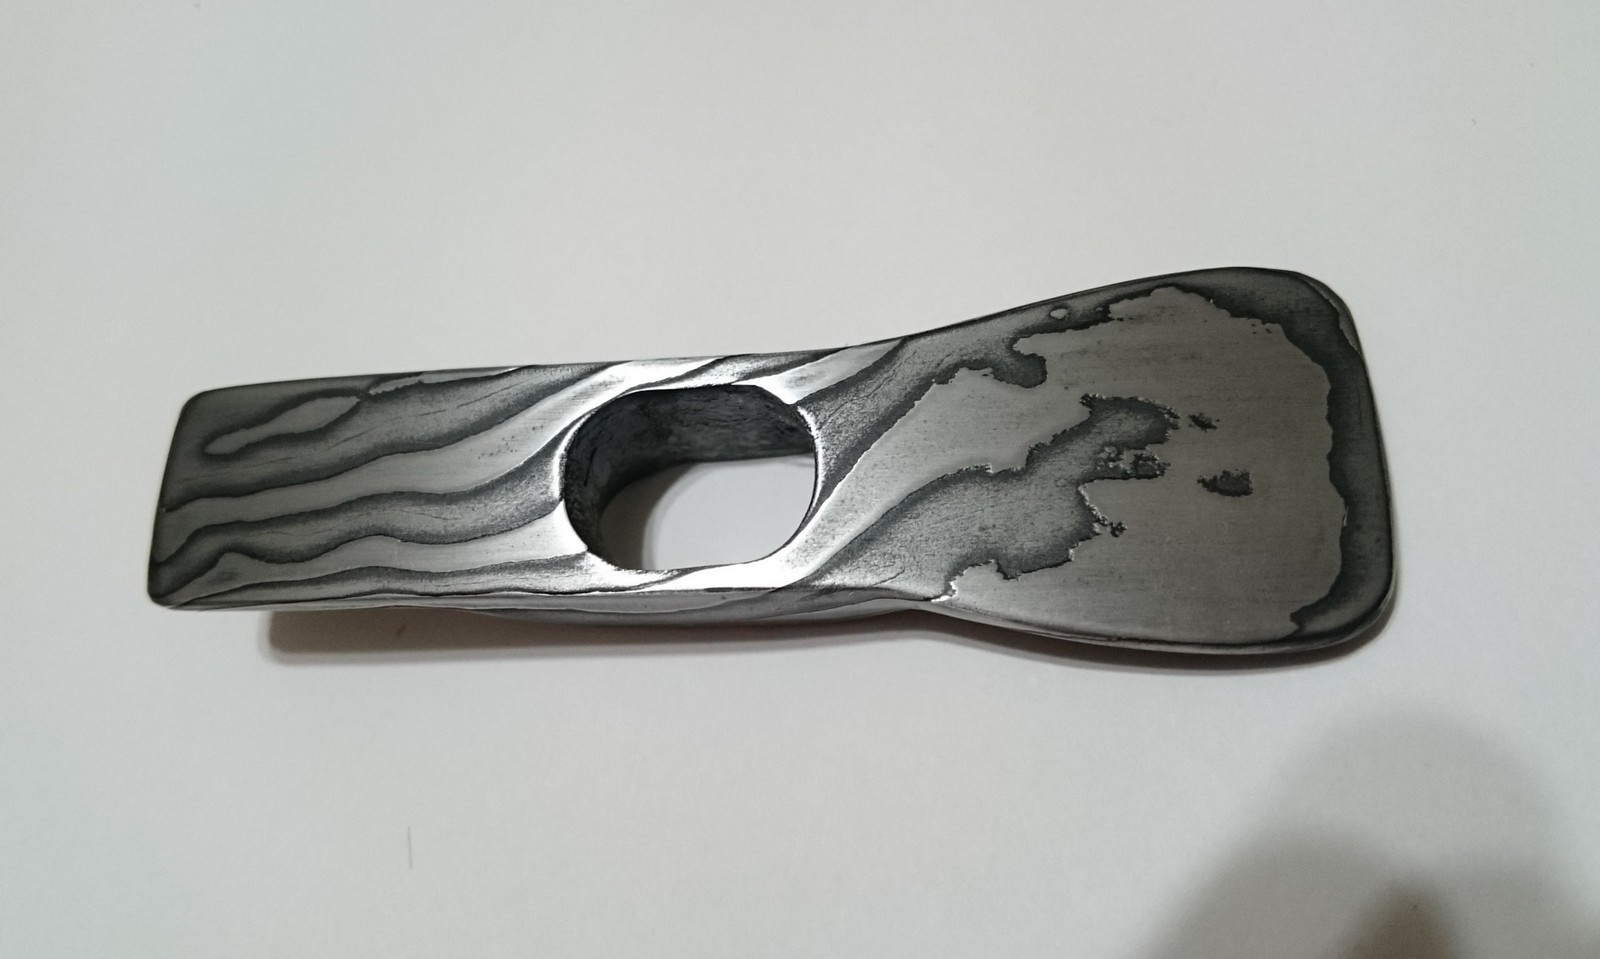
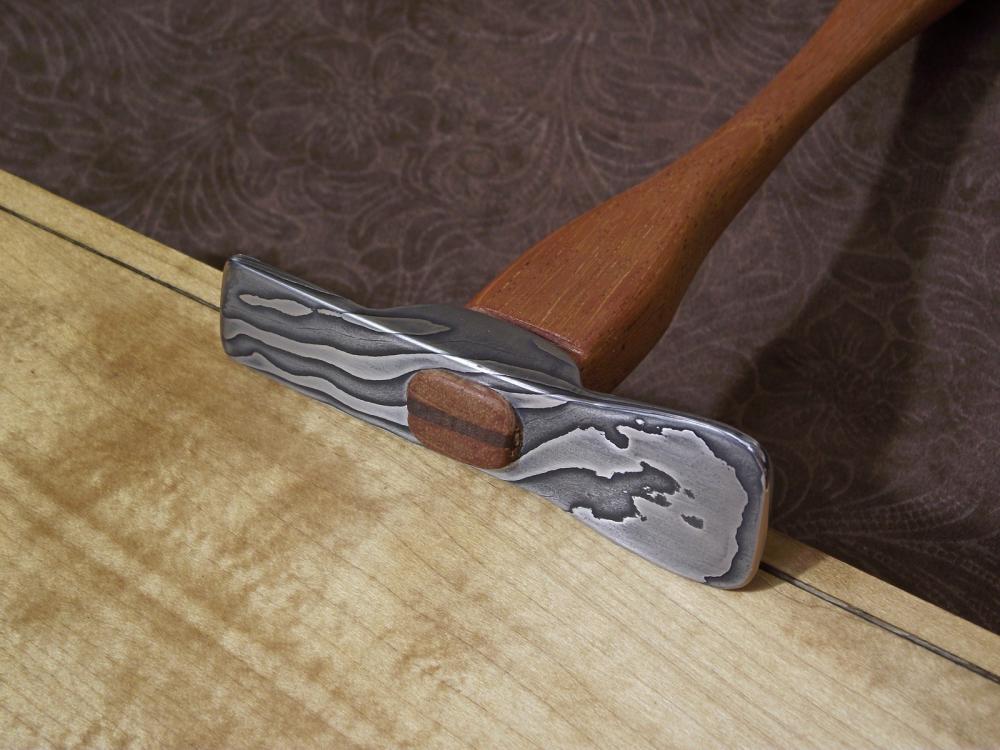
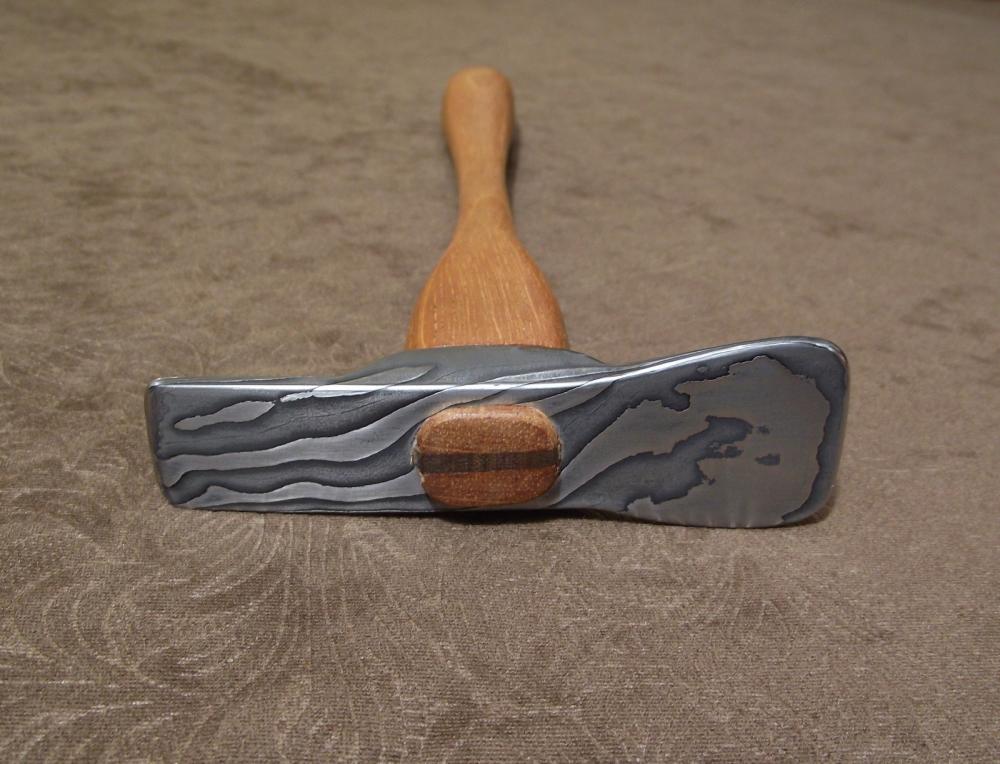
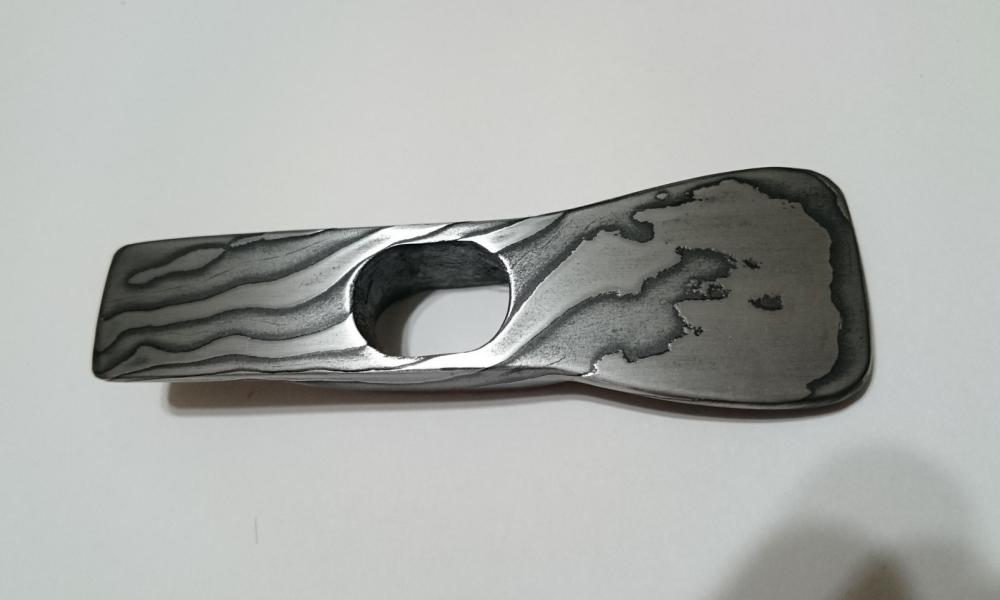
I made this little jewelers raising hammer as a test project out of my first damascus billet. It has a very low layer count (about 8... maybe 7 after grinding), but I think the pattern is neat. The layers were 1080 and 15n20. Etched in a 50/50 mix of ferric chloride and white vinegar then sanded back at 600 grit. I still need to fit a handle.

-
I picked up that book, it's a good read. Thanks for the recommendation. It's interesting how he prefers stock removal to forging in the early chapters.
-
What is Progen? Google isn't helping me here. Thanks for the welding tips. That was maybe the third thing I'd ever welded. My helmet is so dark I can't see for crap before starting, and even during the weld it's really dim. I'm still getting used to the setup and settings on the welder. I have a Millermatic 141, and I'm pushing it past the max rated thickness for sure.
-
That's why I wear a face shield.
-
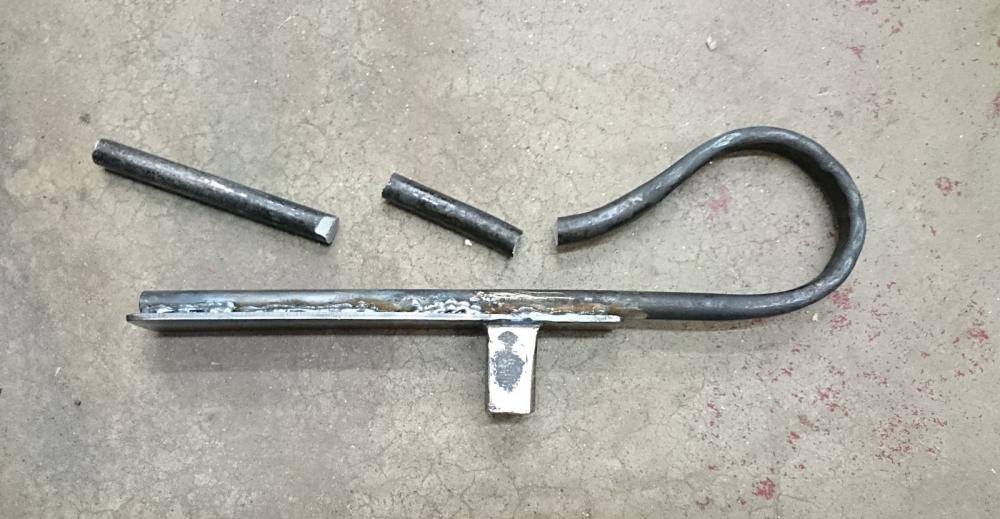
Well, you all can say told you so, it snapped like a twig on first use. It then snapped again when I continued using the stub. Hard tempered shank is not the way to go here. I made another, this time tempering much softer (well past blue).
-
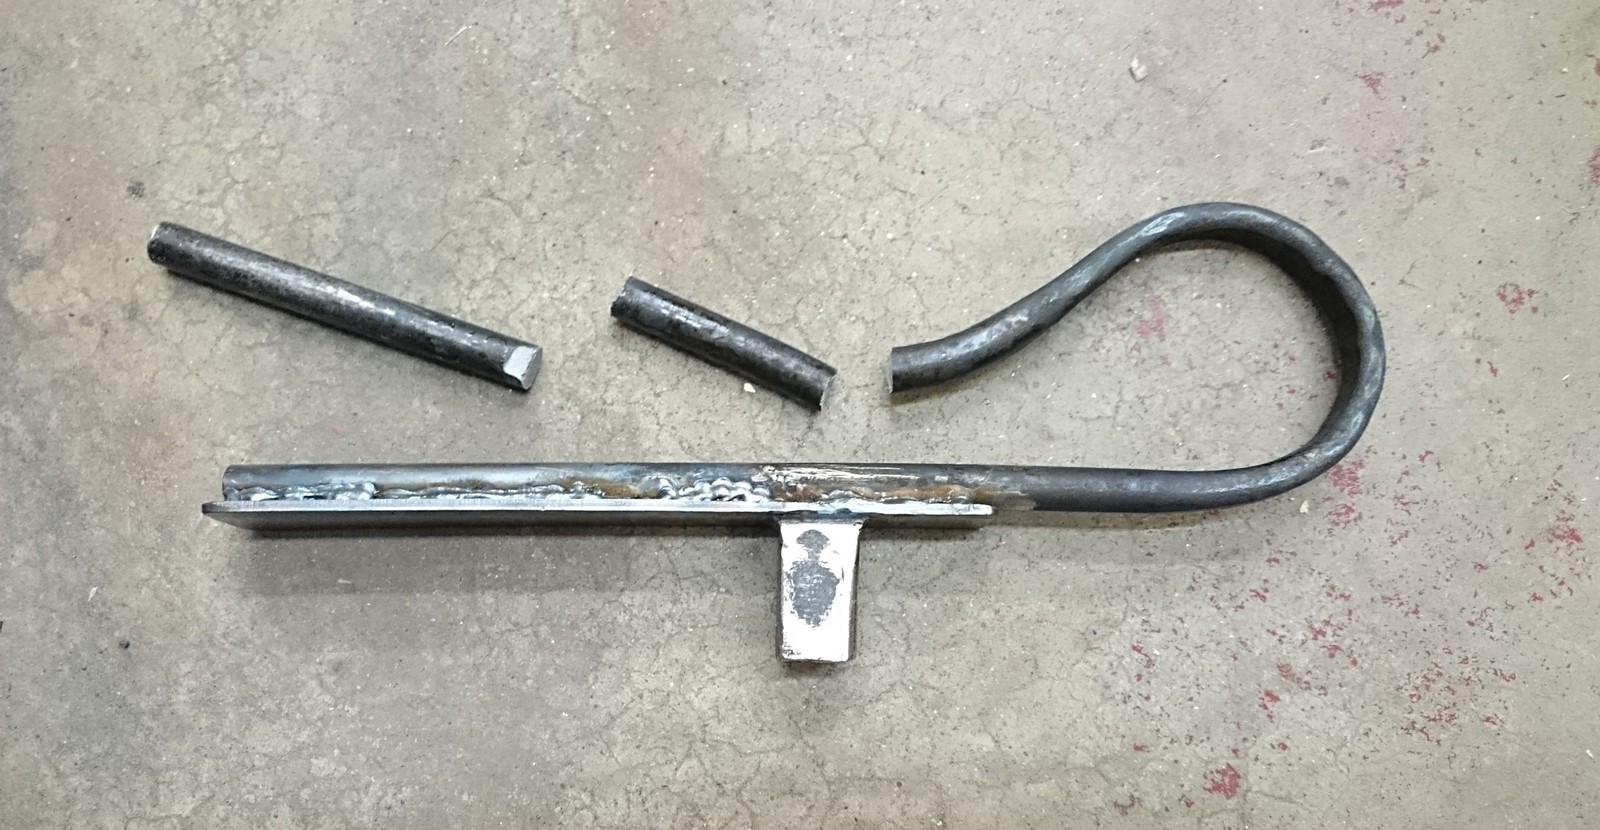
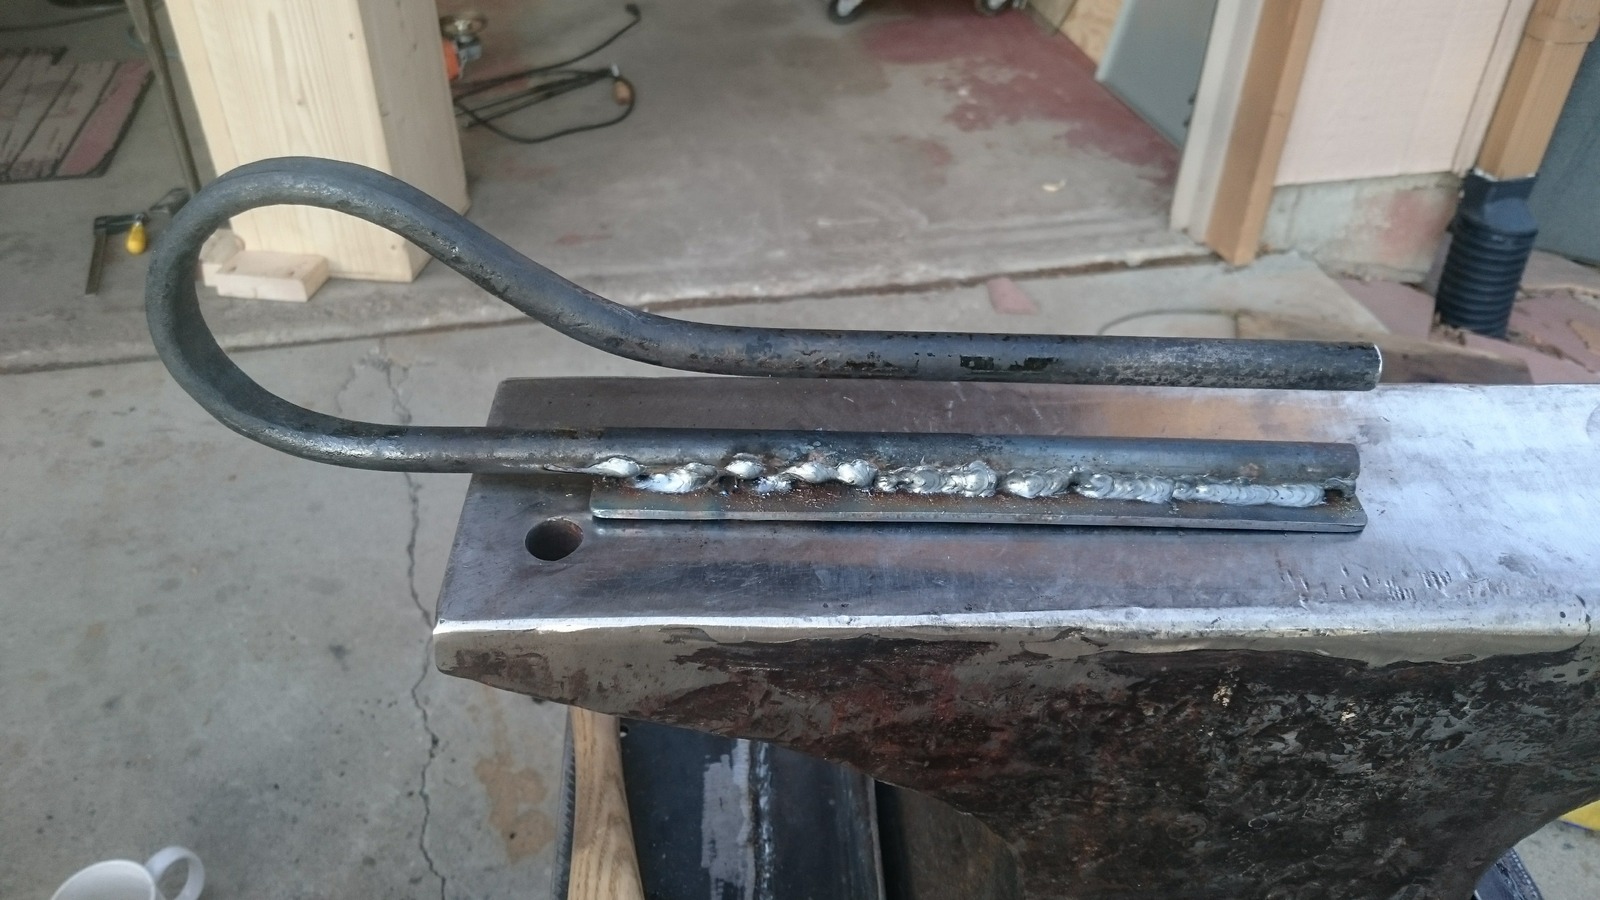
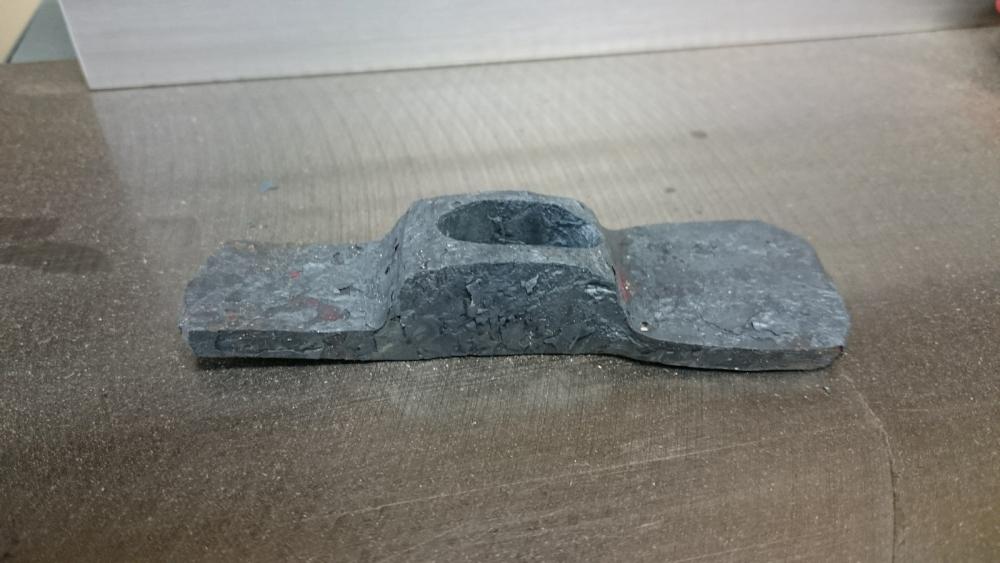
I ground it a bit thinner and tempered the spring section softer. Seems to have helped some. I do need a sacrificial soft-faced hammer. I'll use a cheap chinese 4 lb sledge for now and see how it goes. I just dressed all my hammer faces, don't want to ding them up again.
-
stockmaker, that's a nice looking spring setup. I had some O1 laying around so I used it... I don't have access to coil springs, and ordering more traditional spring steel stock online doesn't cost any less than O1 drill rod. At least it'll hold up. Downside is it dents my hammer face when using it. Maybe I'll soften up the top bar at least.
-
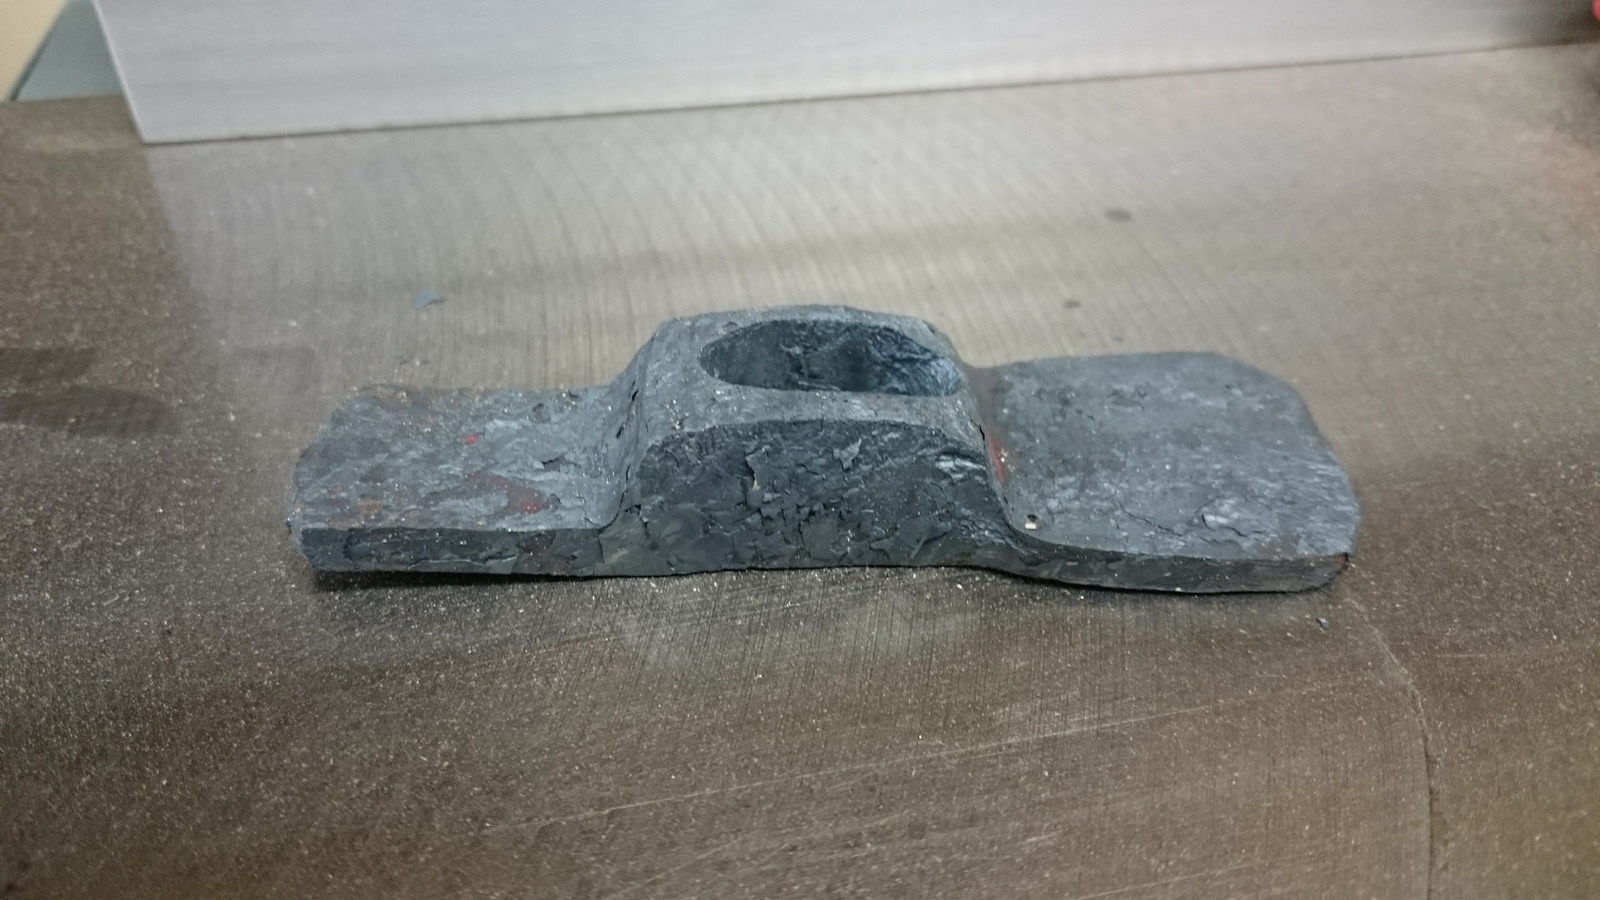
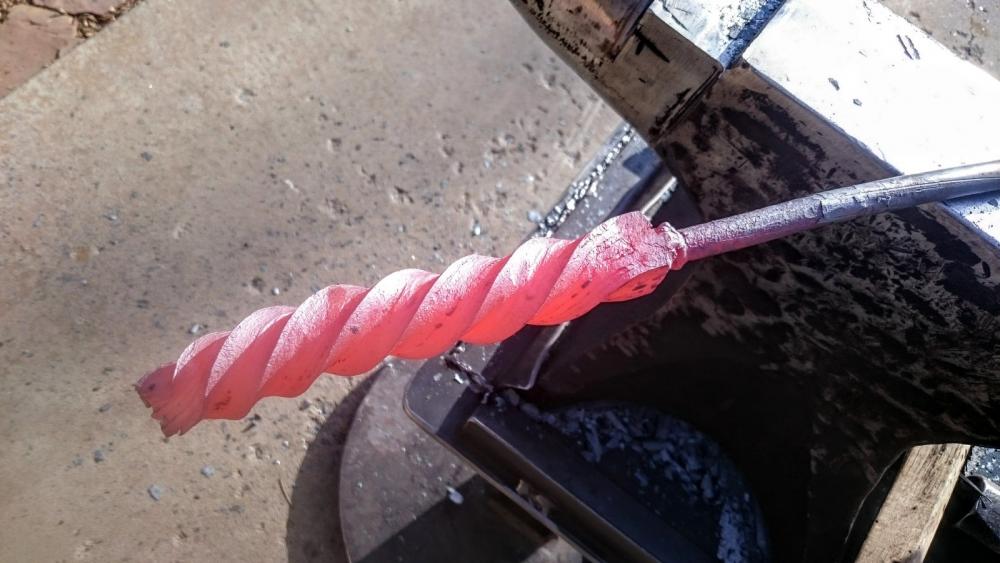
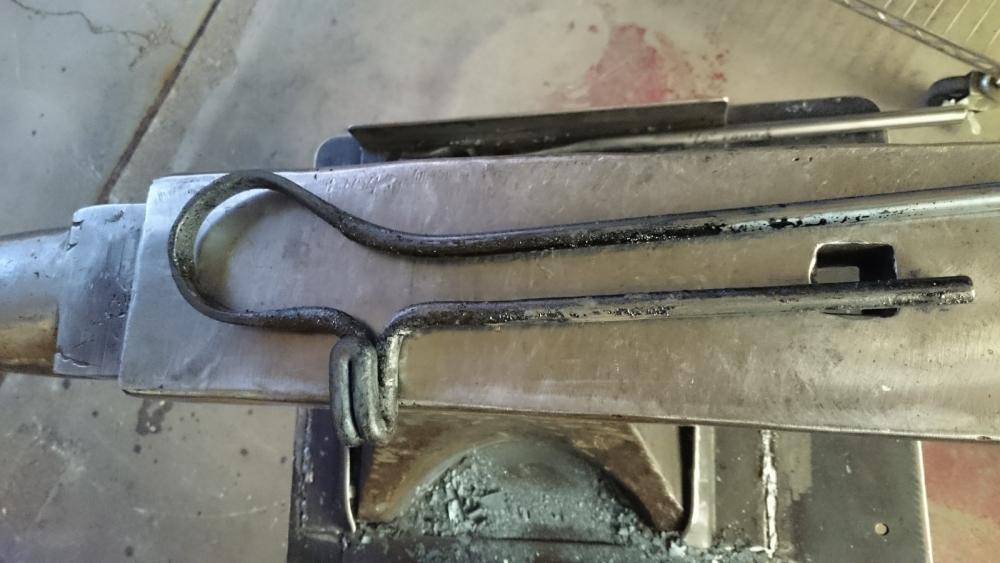
I made my first spring fuller today from 1/2" O1 rod, a base plate, and some angle iron welded into a hardy shank (not pictured). After shaping, I hardened the whole rod then tempered it to about 425 deg F, then later drew a softer temper on the spring section. The shape turned out okay, though the spring is on the strong side. Next time I'll try to draw out the spring area thinner. I am a very amateur welder, so my weld line looks terrible but should hold. Wish I was better with the mig.