

Daswulf
-
Posts
9,756 -
Joined
-
Last visited
Content Type
Profiles
Forums
Articles
Gallery
Downloads
Events
Posts posted by Daswulf
-
-
I got ideas for the one, im gonna make marcy help me
") can't wait to try it out, i have to light the forge to treat it in the morning, so who knows what may happen.
can't wait to try it out, i have to light the forge to treat it in the morning, so who knows what may happen.She wasn't striking for you?
-
Now wall hangers, that is a different story. You could buy a piece of cold rolled flat bar. Grind it down, put a polish on it, add a decorative hilt and have a wall hanger as good as any sold at the decorator's Stores.It i self it is an interesting exercise and not as easy as it sounds because of the effort required in grinding and filing. It is the sort of practice one would have to do to learn how to work the real thing.
I've made some and i can see how doing that on something hardened like a Real sword would be a real challenge.
Anytime you want Cliff. I am retired military, so I work at my leisure . Have 2 forges 1 coal , 1 propane , 2 peter wrights one 200 lb and one 500 lb. I also have Japanese anvil made by tom Clark in Steelville Mo. plenty of grinders , and a 3000 SF shop. I now live in Park hills , Mo Near Farmington , Mo. .. Bubba
if I could come watch You "or any other of the great blade makers here" work, that would be the best vacation id ever spent. i'd even let you knot my head if i didnt learn right
") haha.
haha. -
Looks Great! where's the picture of it sizzling steak so we can all drool?
")
-
Nice work
where's that Knife at? haha -
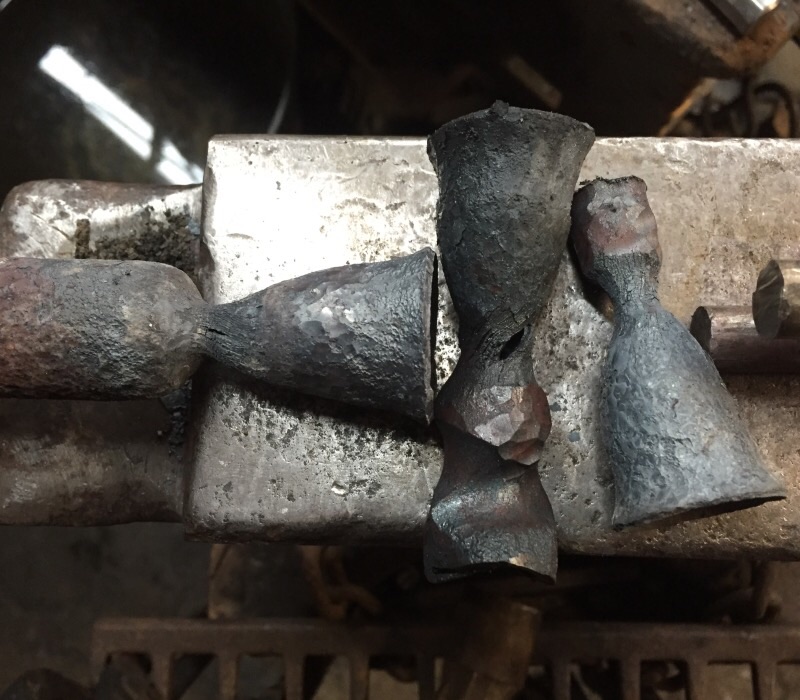
I had a little better luck tonight, sorry didn't finish the piece or get pictures, but got a long winded phonecall conversation from a friend. will get pictures tomorrow if i can. did still have problems but i didn't try to taper in the bottom by the fuller as much. think i have some usable pieces and suspect the rustiness and quality of the pipe to be part culprit for the issues until i get my hands on some better pipe.
I appreciate the ideas guys.
IronWolf, i was just trying to flare it out a little for looks not to make the whole thing bigger diameter really, and havn't had much problem there. it's been harder for me to taper the pipe in more at the bottom by the fuller for some reason. and thats when i get the cracks.
John B, possibly for that i should be using the straight pein that RT redid for me that has a wider radius but the cracks are happening before hand. as for the rotating on the hits i tried to pay attention to that more this time and actually While fullering it dosn't Look to be twisting it's while i was working the rest that it seems to twist, or atleast show it. i tried to work it like Glenn said and couldn't get the taper before the fullering that i wanted but with flaring and then fullering i did still get a minor twist crack on one. but i also still lightly worked them after for the look.. Ugh.. my bad.. i'm going to try some new pipe and see what i get out of it. it could be this pipe or My working it. i even kept an even heat in between where i fullered on both sides this time thinking i under heated half last time.
-
I see what you mean about that DSW. If i get into a more important project with these i'll look into getting higher quality pipe. As for this it was just to give it a go and see how it worked. I'll try the above mentioned by Glenn and see if it goes better for now. Not that it's great to try to get proper results from lesser materials in testing or learning but until I get to a supplier i'm working with the scrap at hand.
-
Thanks Glenn, I'll give it another go like that. I did remember you mentioning blocking off the other end of the pipe in a talk before and did that. no problems there
-
last night I found a piece of pipe in my scrap pile and had been wanting to make candle holders. Using my spring fuller I tapered off the section to use as the "cup" for the candle and it went well. I then took it to the anvil horn to flare the top then taper off the lower part of the "cup" a bit and I noticed I'm twisting the part I fullered, and it's splitting. The last one I even tried to pay more attention and tried to go easier and watch to see how I was getting this twist but couldn't really see how.
Looking at the tutorial that I hadn't looked at for a while I pretty much answered my own problem as they flared the cup before spring fullering the section. Still would like to achieve a hammered look and maybe there's a better way then what I'm doing in getting the the fullered area twisted and split.

-
Wow I didn't realize this post started picking up steam again! But all this talk of cookies and bacon I might have to make some maple bacon chocolate chip cookies. Cover all the bases, right?
i'll be waiting
-
If it helps, I'm forging a new gambrel hook for slaughtering Bacon (the pig).
I'd love to see it as i've only fabricated a couple for deer and attempted to forge one for smaller game but i wasnt happy with the result.
-
Beautiful, the handle gives adds alot of character to the clean looking blade.
-
Nice ram heads Ausfire.
Of course, my local team is the Browns. Anyone making a bottle opener shaped like a pile of dung?
I've made a few but threw them in the scrap pile.

-
Sorry I can't tell from the photos. Could try setting it on the bathroom scale if ya got one.
-
That would be a Hay Budden. I have one similar.
-
Thanks j.w.s
-
Nice work Jeremy.
How do you keep from beating up the edges of the twists when you bend it round?
-
this a good begginer project? And do you think I can get away with using vise grips or a pair of flat jaws?
Might be a little tough holding the spike with flat jaws. I have bolt tongs and even them being round give me a little slippage but I've used them with a bunch of spikes so far. Can you hold a spike to work it with what you have?
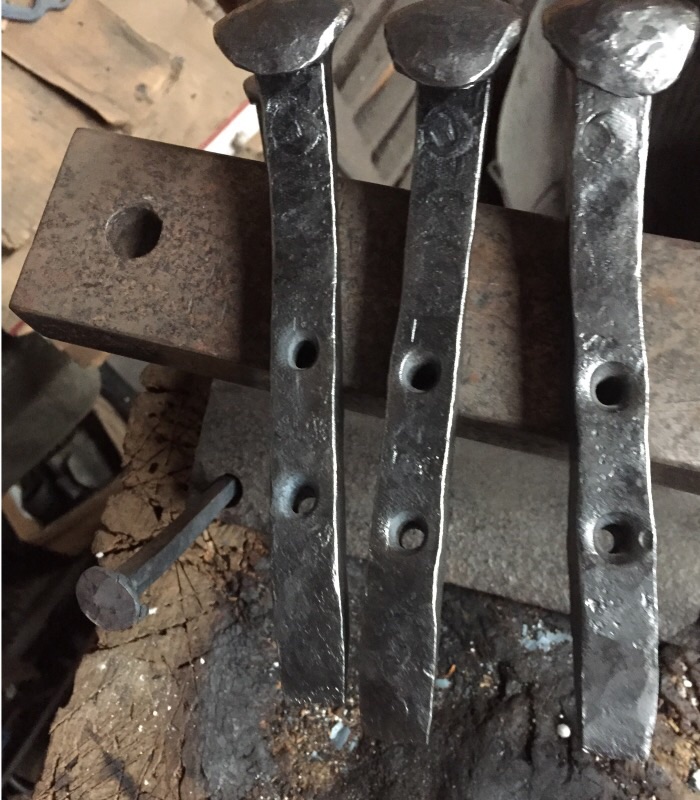
I also used a hold down to hold the spike for initial punching of the holes. The holes could be drilled tho.
If you think you can hold the spike with what you have to work with then give it a try. If not make a pair of tongs to hold a spike
-
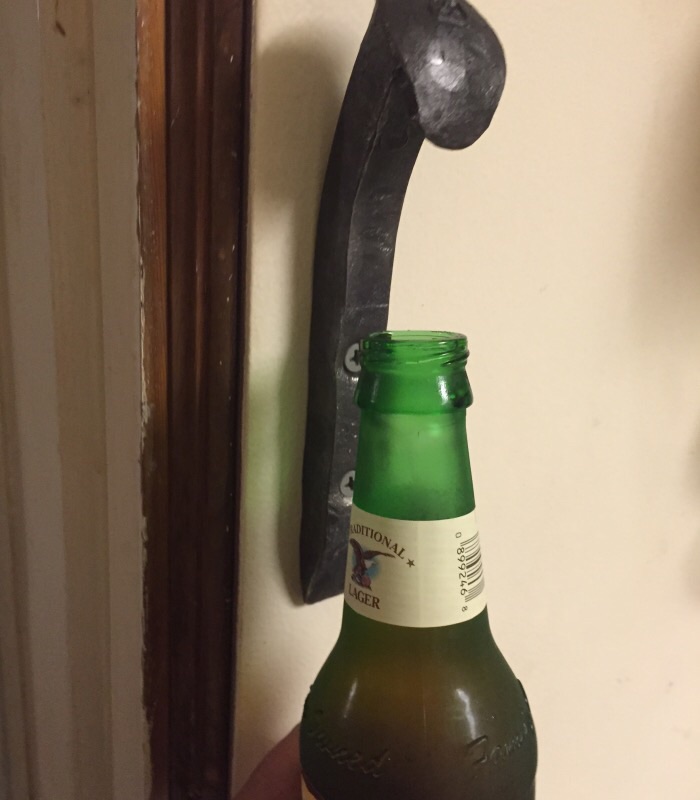
Arkie that was an interesting watch. all info helps at this point tho it is a bit of a different concept for what i'm doing. but Thanks again and it's more knowledge for me that i didnt know. i got the other two openers folded down a bit more and they are working perfectly. honestly it's just a matter of the shape of the front under part of the rr spike head. i'd like to squish it with minimal damage to the top face. Tho making a hammer like Gary did is now in my head to try to fit to the job.
-
really nice idea that I might steal and make for my dad, as long as you don't mind. Seems like a simple forging process, although getting the head at the correct angle seems a bit difficult.
wasn't my idea to begin with but I liked it as well. Go for it.
-
Thanks guys. I'm starting to get better at punching holes. And I read about counter sinking holes on here and had a "duh" moment.
Frosty, I'm using a mix of beeswax, linseed oil, and turpentine. Applying it while it's about too hot to hold without a glove then wipe the excess off. Usually let things cool down to wire wheel them first then warm them back up on the dying fire when I'm done forging.
You can mail your openers to me for proofing
Jim, yeah, I have to thin the front lip and fold it around a bit for it to bite the cap. It's too thick to get away with not thinning it out. I'm still trying to find an easier way to do that more cleanly. So far I'm going between the post vice and that little rail anvil.
-
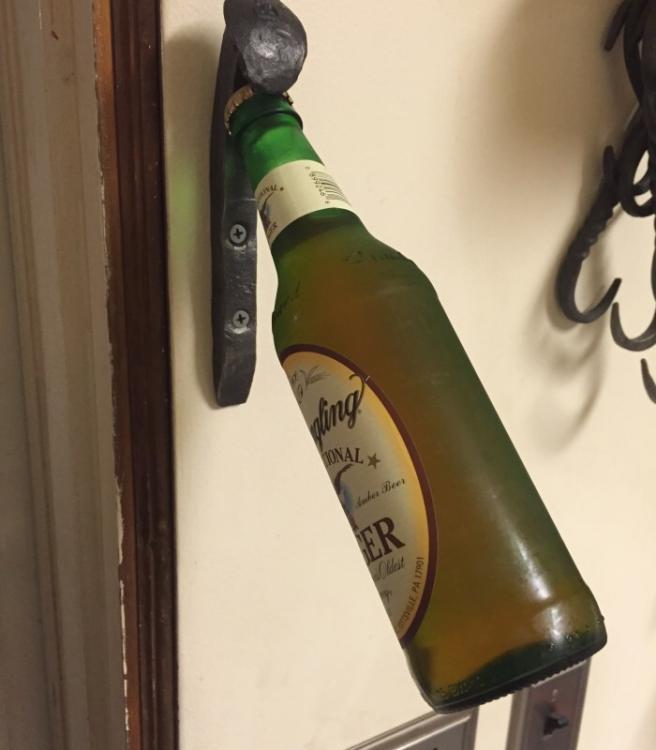
They look pretty nice. Potential buyers like being able to see transition forged into recognizable items. It's one reason RR spikes make such popular products. How do they work? I see a lot of intensive testing there.
Frosty The Lucky.
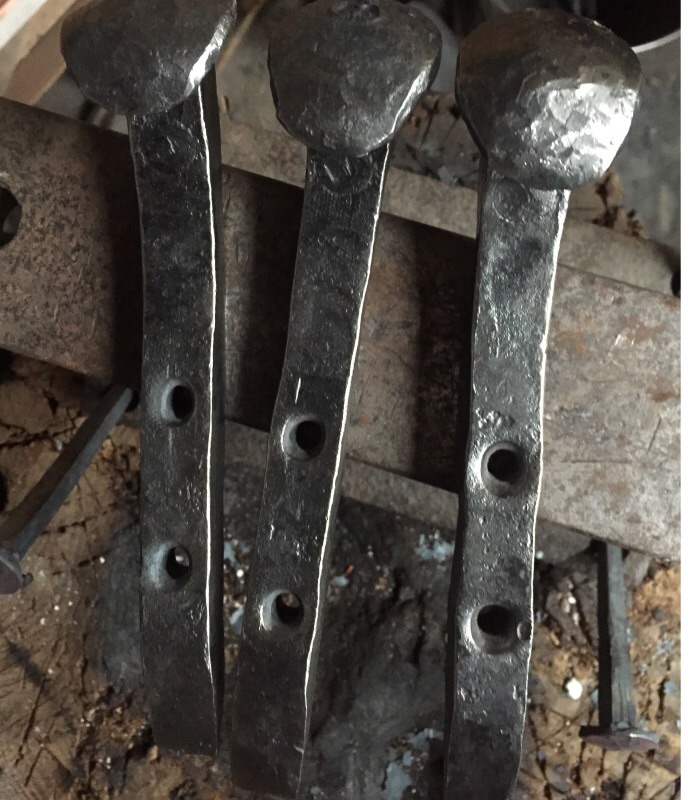
one works great. Other two need a light tweak to bite the lid a hair better but overall whoevers design it is it works. Had a happy customer today when he got it.
-
ok so i saw this on google images and my friend liked it enough to want one so i tried to make 4 but made 3. not my design but i don't know who to credit so i'll just post it.


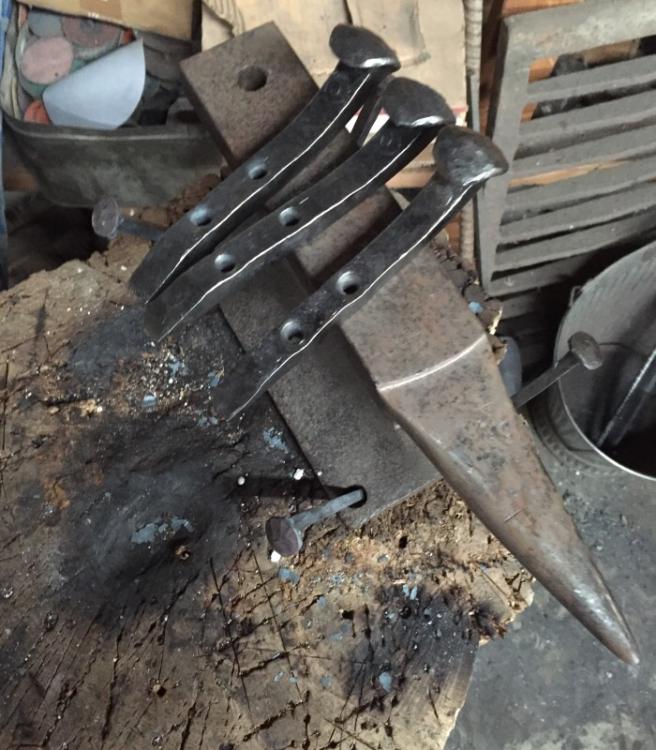

cheers
-
Sounds like a good road trip for next year.
-
there you go. and take a lil cash in your pocket. explain to them what you want to do, and what you are looking for and they may be nice and help you out. nice rectangular or square hunk of steel would be great but remember it dosnt have to be limited to that.


My First Hammer
in Hand Hammers
Posted
well she was working on something atleast but you two need to work as a team and not in competition.") then you can say "WE made this or that" and not "I", man you two got it made. you both have the same awesome hobby that you can Forge into something great together. you could be a great team. keep at it! and always have fun.
then you can say "WE made this or that" and not "I", man you two got it made. you both have the same awesome hobby that you can Forge into something great together. you could be a great team. keep at it! and always have fun.