Scrambler82
-
Posts
814 -
Joined
-
Last visited
Content Type
Profiles
Forums
Articles
Gallery
Downloads
Events
Everything posted by Scrambler82
-
Hello to all, I hope everyone had a great Christmas and New Years ! I have been away from the Site for a while, remodeling and getting the new Barn together has taken up a lot of time and effort ! I have been reading a lot on Striking Anvils and have an opinion that a good Striking Anvil needs to be taller than wider. I thought if I ever decided I needed one I would look for a block of rectangular steel in the 4-5" X 10-12" area and approximately 15" or more in length. Above is just my thoughts, feel free to comment. My question is, size aside, "Is it better to have a wider or narrower piece of steel for the striking area and just how large is too big vs too small in length" ? I know... How big does an anvil need to be ! Everyone is different and we all get the size we think is correct but I guess What I am after , "Is there an optimum size for a home made Striking Anvil" ? Thanks ahead of time for your opinions.
-
$Change$ can build up fast, saving change for a year, maybe a little less, paid for round trip to Florida for two from Boston, 1st Class. Been saving ever since, two years now, will have to wait to see how much... also the grand daughter, she love to play with the change bucket... Loves to take some with her too !
-

Baby Got a New Pair of Shoes
Scrambler82 replied to stuarthesmith's topic in Anvils, Swage Blocks, and Mandrels
Impressive block of wood ! Why did you use the block on its side ? Would think the grain structure would hold up better in compression when stood on end ! Novice asking for knowledge ! -
New Anvil, Peter Wright, 1 1 22
Scrambler82 replied to Scrambler82's topic in Anvils, Swage Blocks, and Mandrels
deleted by OP ! -
New Anvil, Peter Wright, 1 1 22
Scrambler82 replied to Scrambler82's topic in Anvils, Swage Blocks, and Mandrels
Pictures missing, here are a few.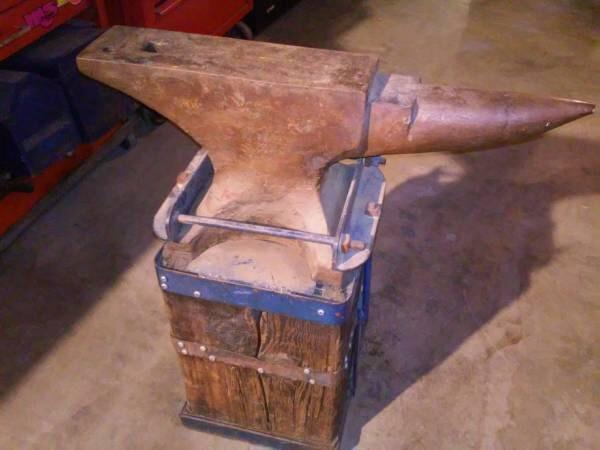

-
New Anvil, Peter Wright, 1 1 22
Scrambler82 replied to Scrambler82's topic in Anvils, Swage Blocks, and Mandrels
Looks like I am a novice typist too ! The "pre1988" should have been "pre 1888". I am happy to have found this anvil, after buying a Vulcan to get something done and losing three other because of price, I jumped on this one. Thanks to all that have posted, I am learning as we go. -
New Anvil, Peter Wright, 1 1 22
Scrambler82 replied to Scrambler82's topic in Anvils, Swage Blocks, and Mandrels
Thks, I thought it was just the pictures, I checked it at the sellers site and didn't see the dip. Got it home and looked closer and there is was. I am hopping for a lot of,use from her. Doesn't say England, but I read without England puts it in a range of pre 1988. I am a novice/noob on anything Blacksmith I am just quoting. -
New Anvil, Peter Wright, 1 1 22
Scrambler82 replied to Scrambler82's topic in Anvils, Swage Blocks, and Mandrels
Does anyone know the year of manufacture of this anvil. -
New Anvil, Peter Wright, 1 1 22
Scrambler82 replied to Scrambler82's topic in Anvils, Swage Blocks, and Mandrels
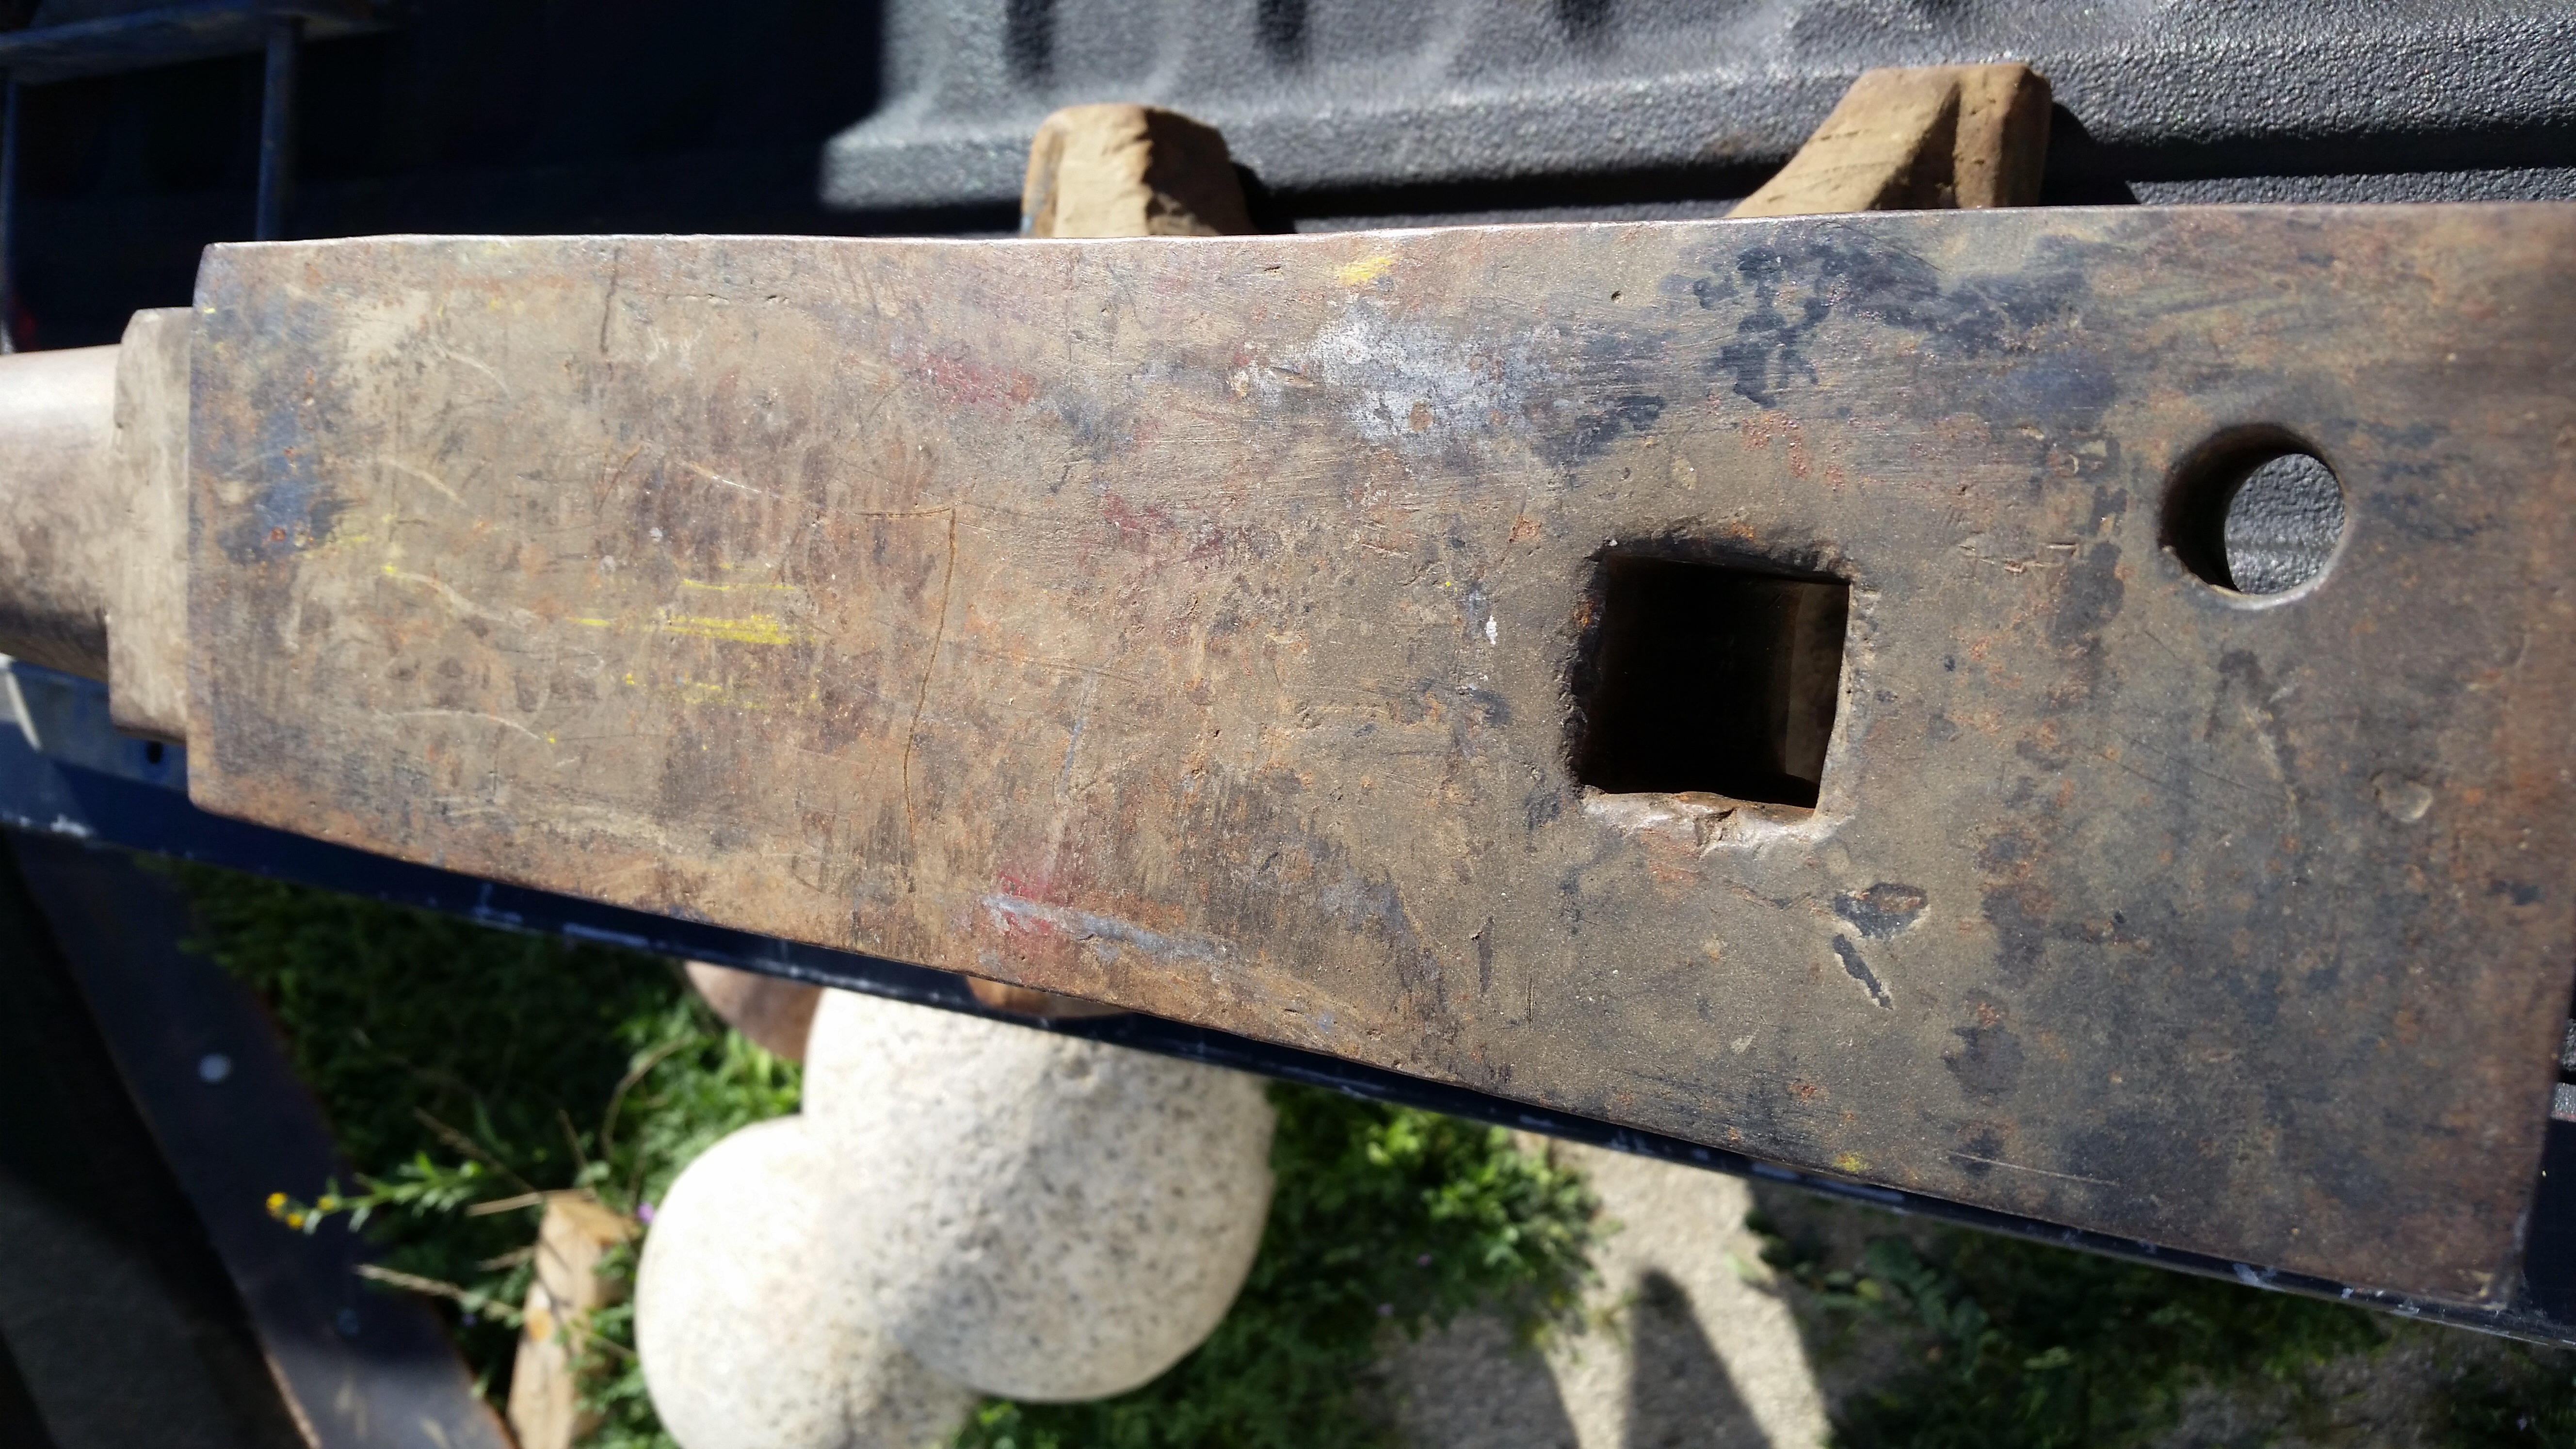
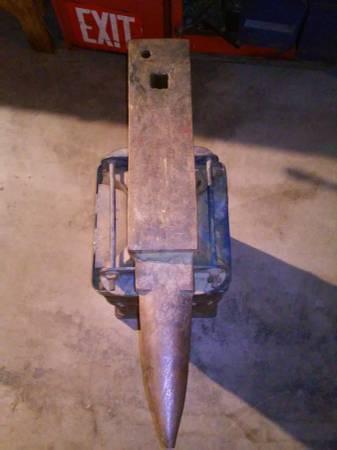
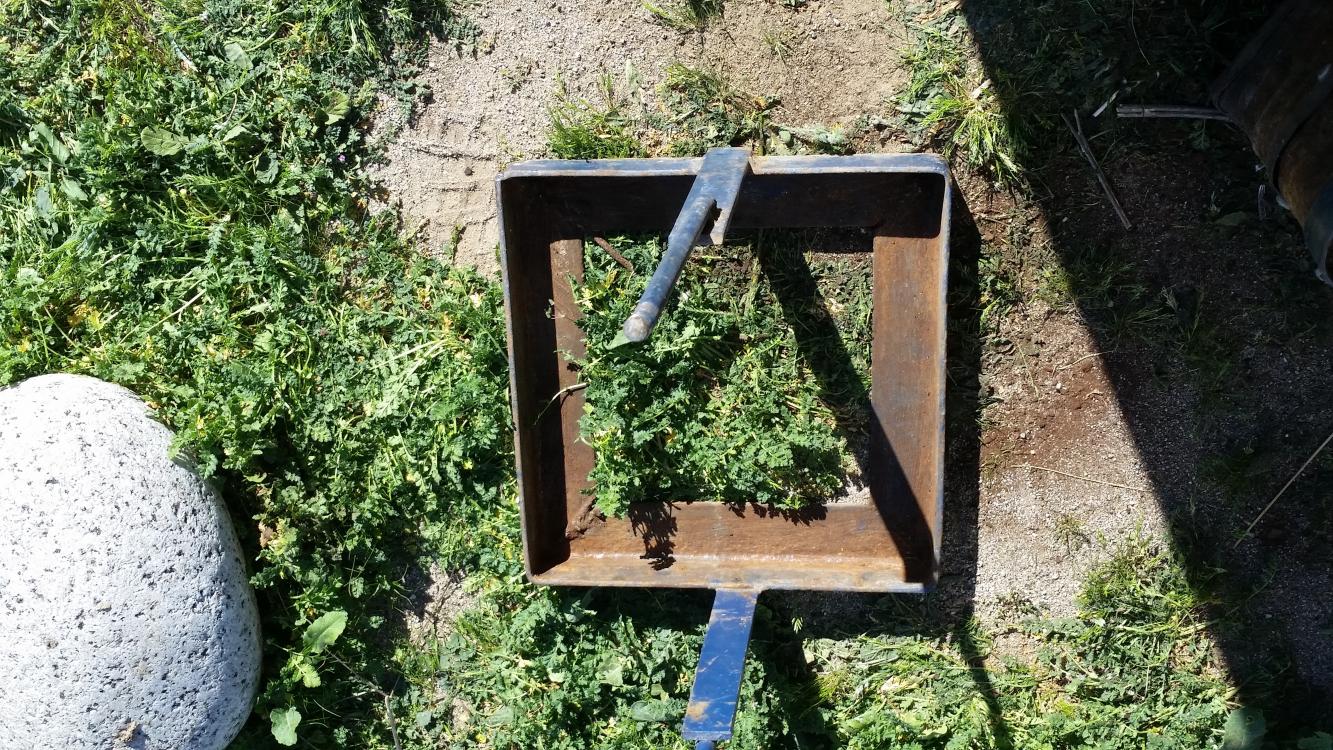
Next is the base, there is a portion of the feet on either side that looks like it was designed for a clamp of some sort. The angle iron used by this stand uses this "step" to lock the anvil down. Can anyone tell me two things, one is this a normal PW foot and two is it an indicator of the year of manufacturer. Oh Ya, last but not least, the top of the anvil has a slight dip on the left side, lookin from the rear. Right side is flat, left is dipped approximately 1/16" to 3/32", doesn't seems bad. -
New Anvil, Peter Wright, 1 1 22
Scrambler82 replied to Scrambler82's topic in Anvils, Swage Blocks, and Mandrels
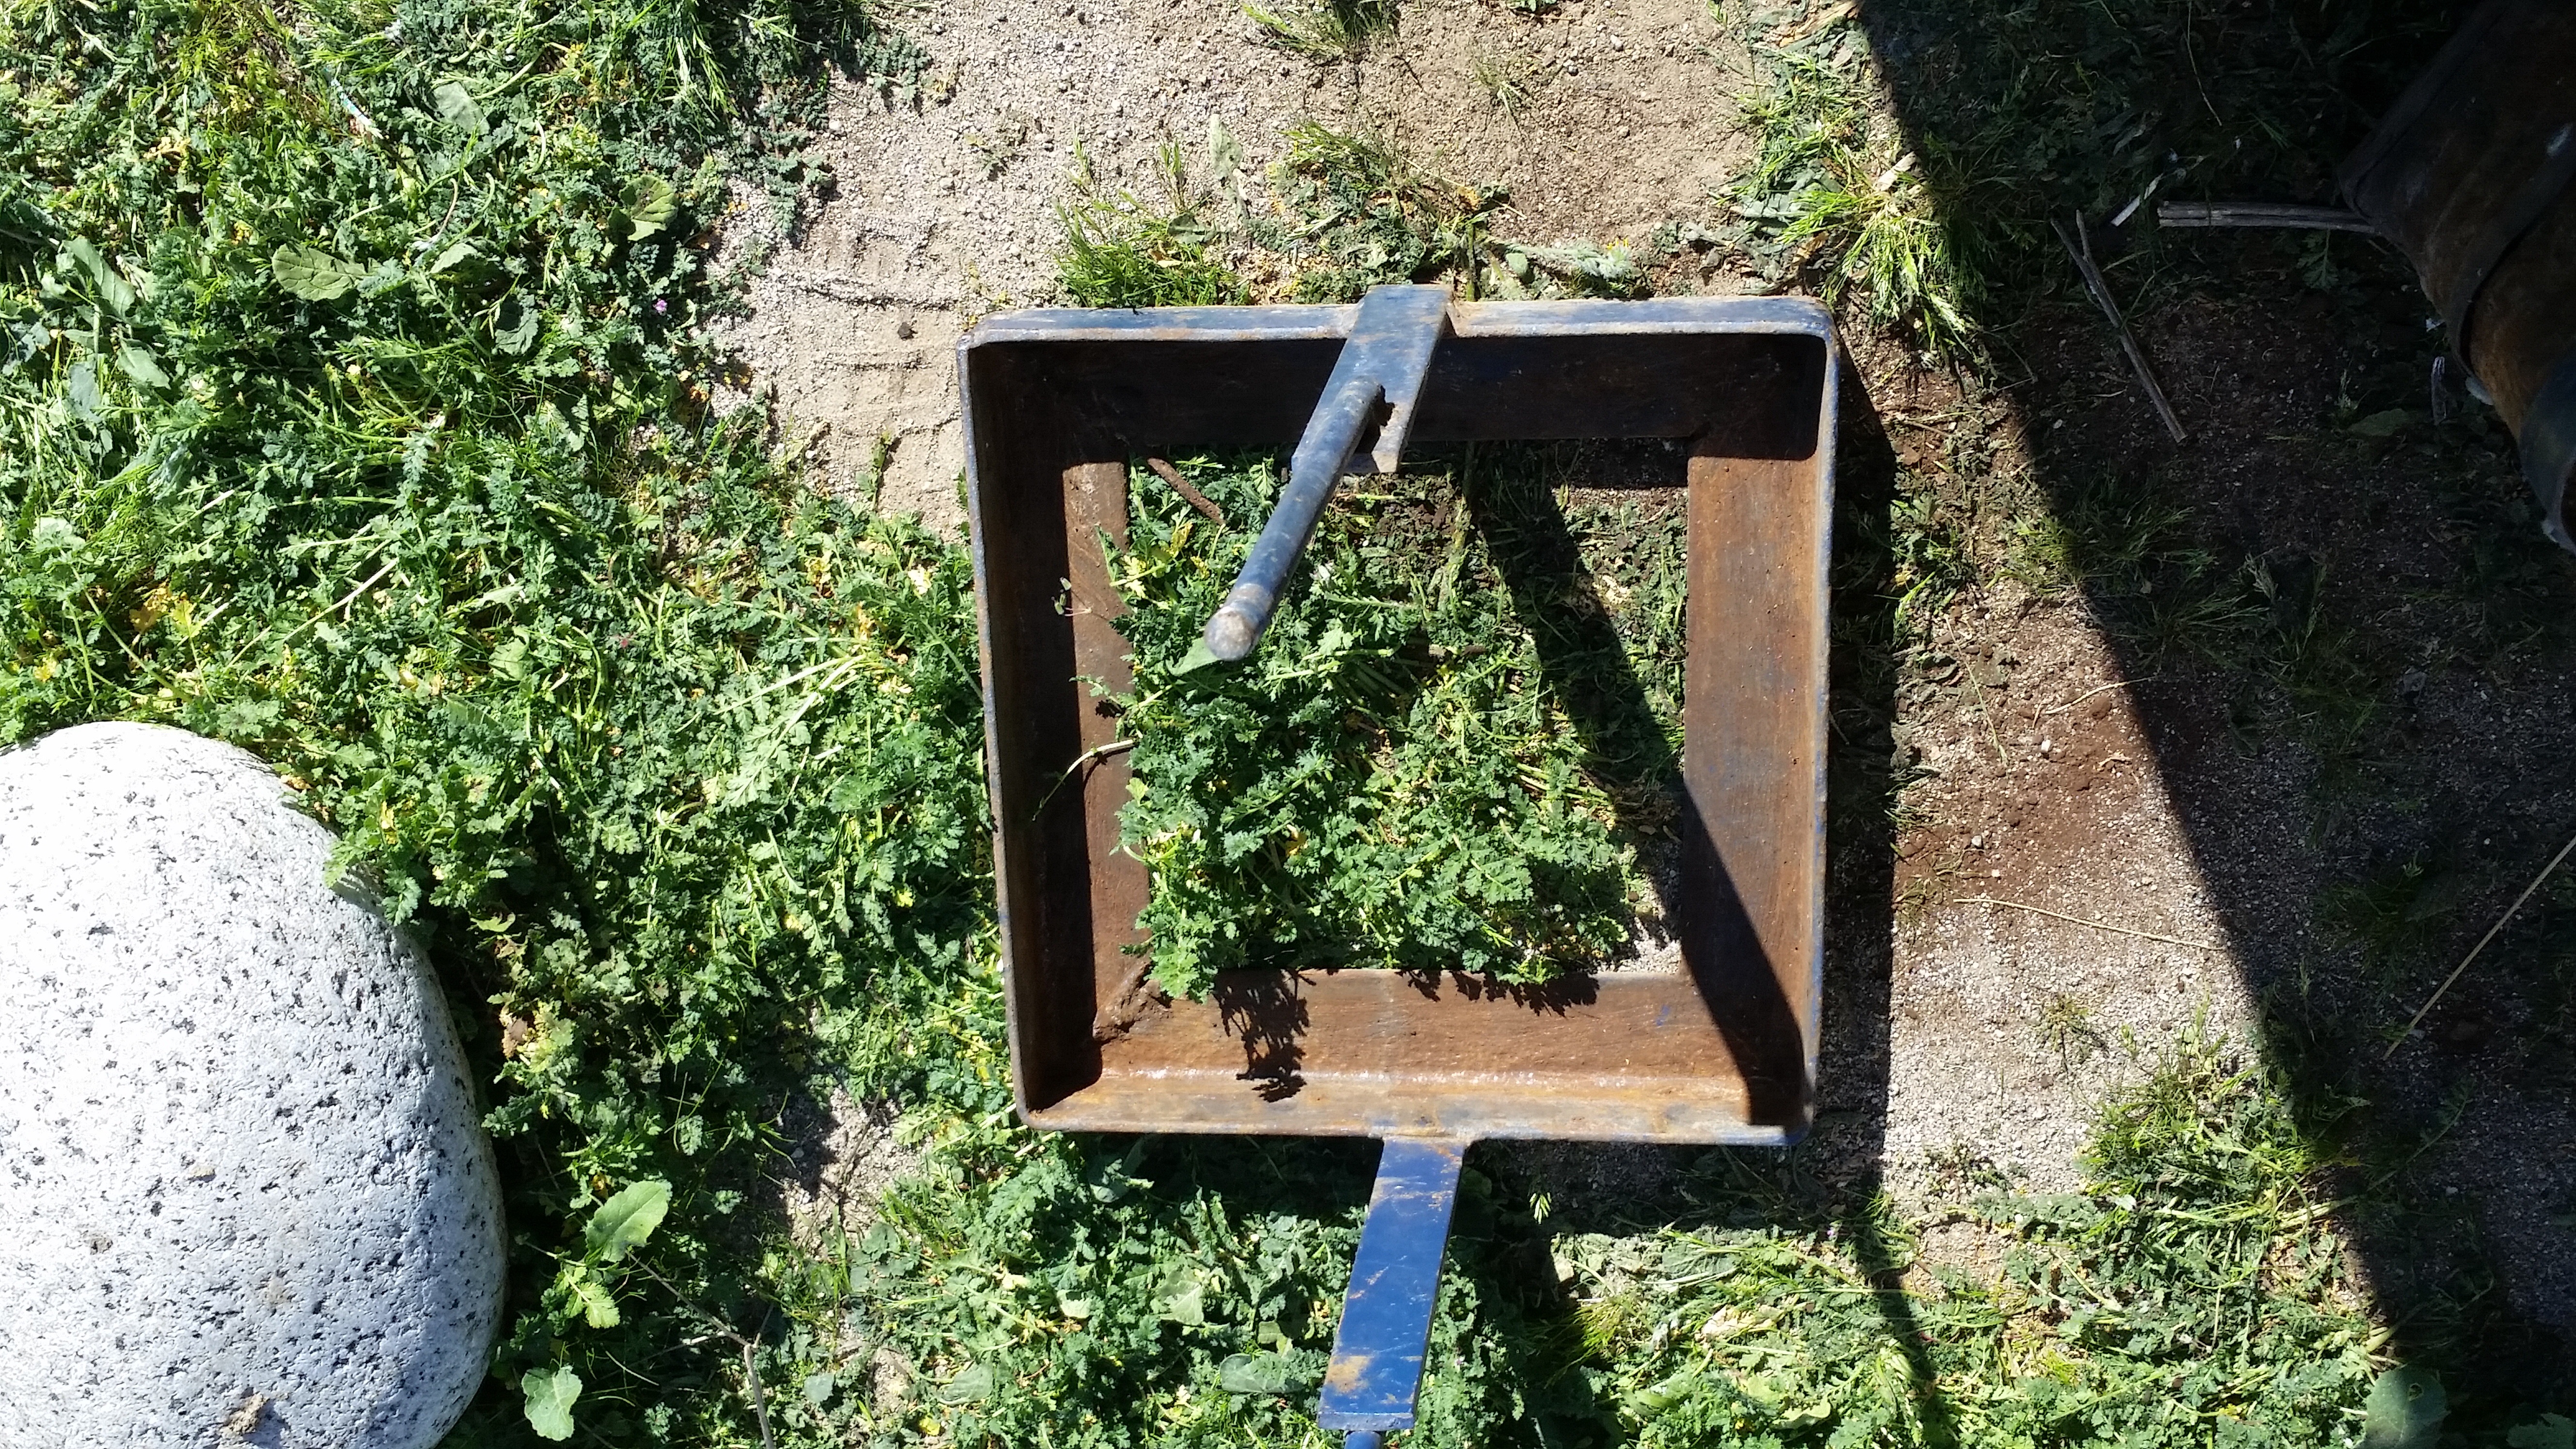
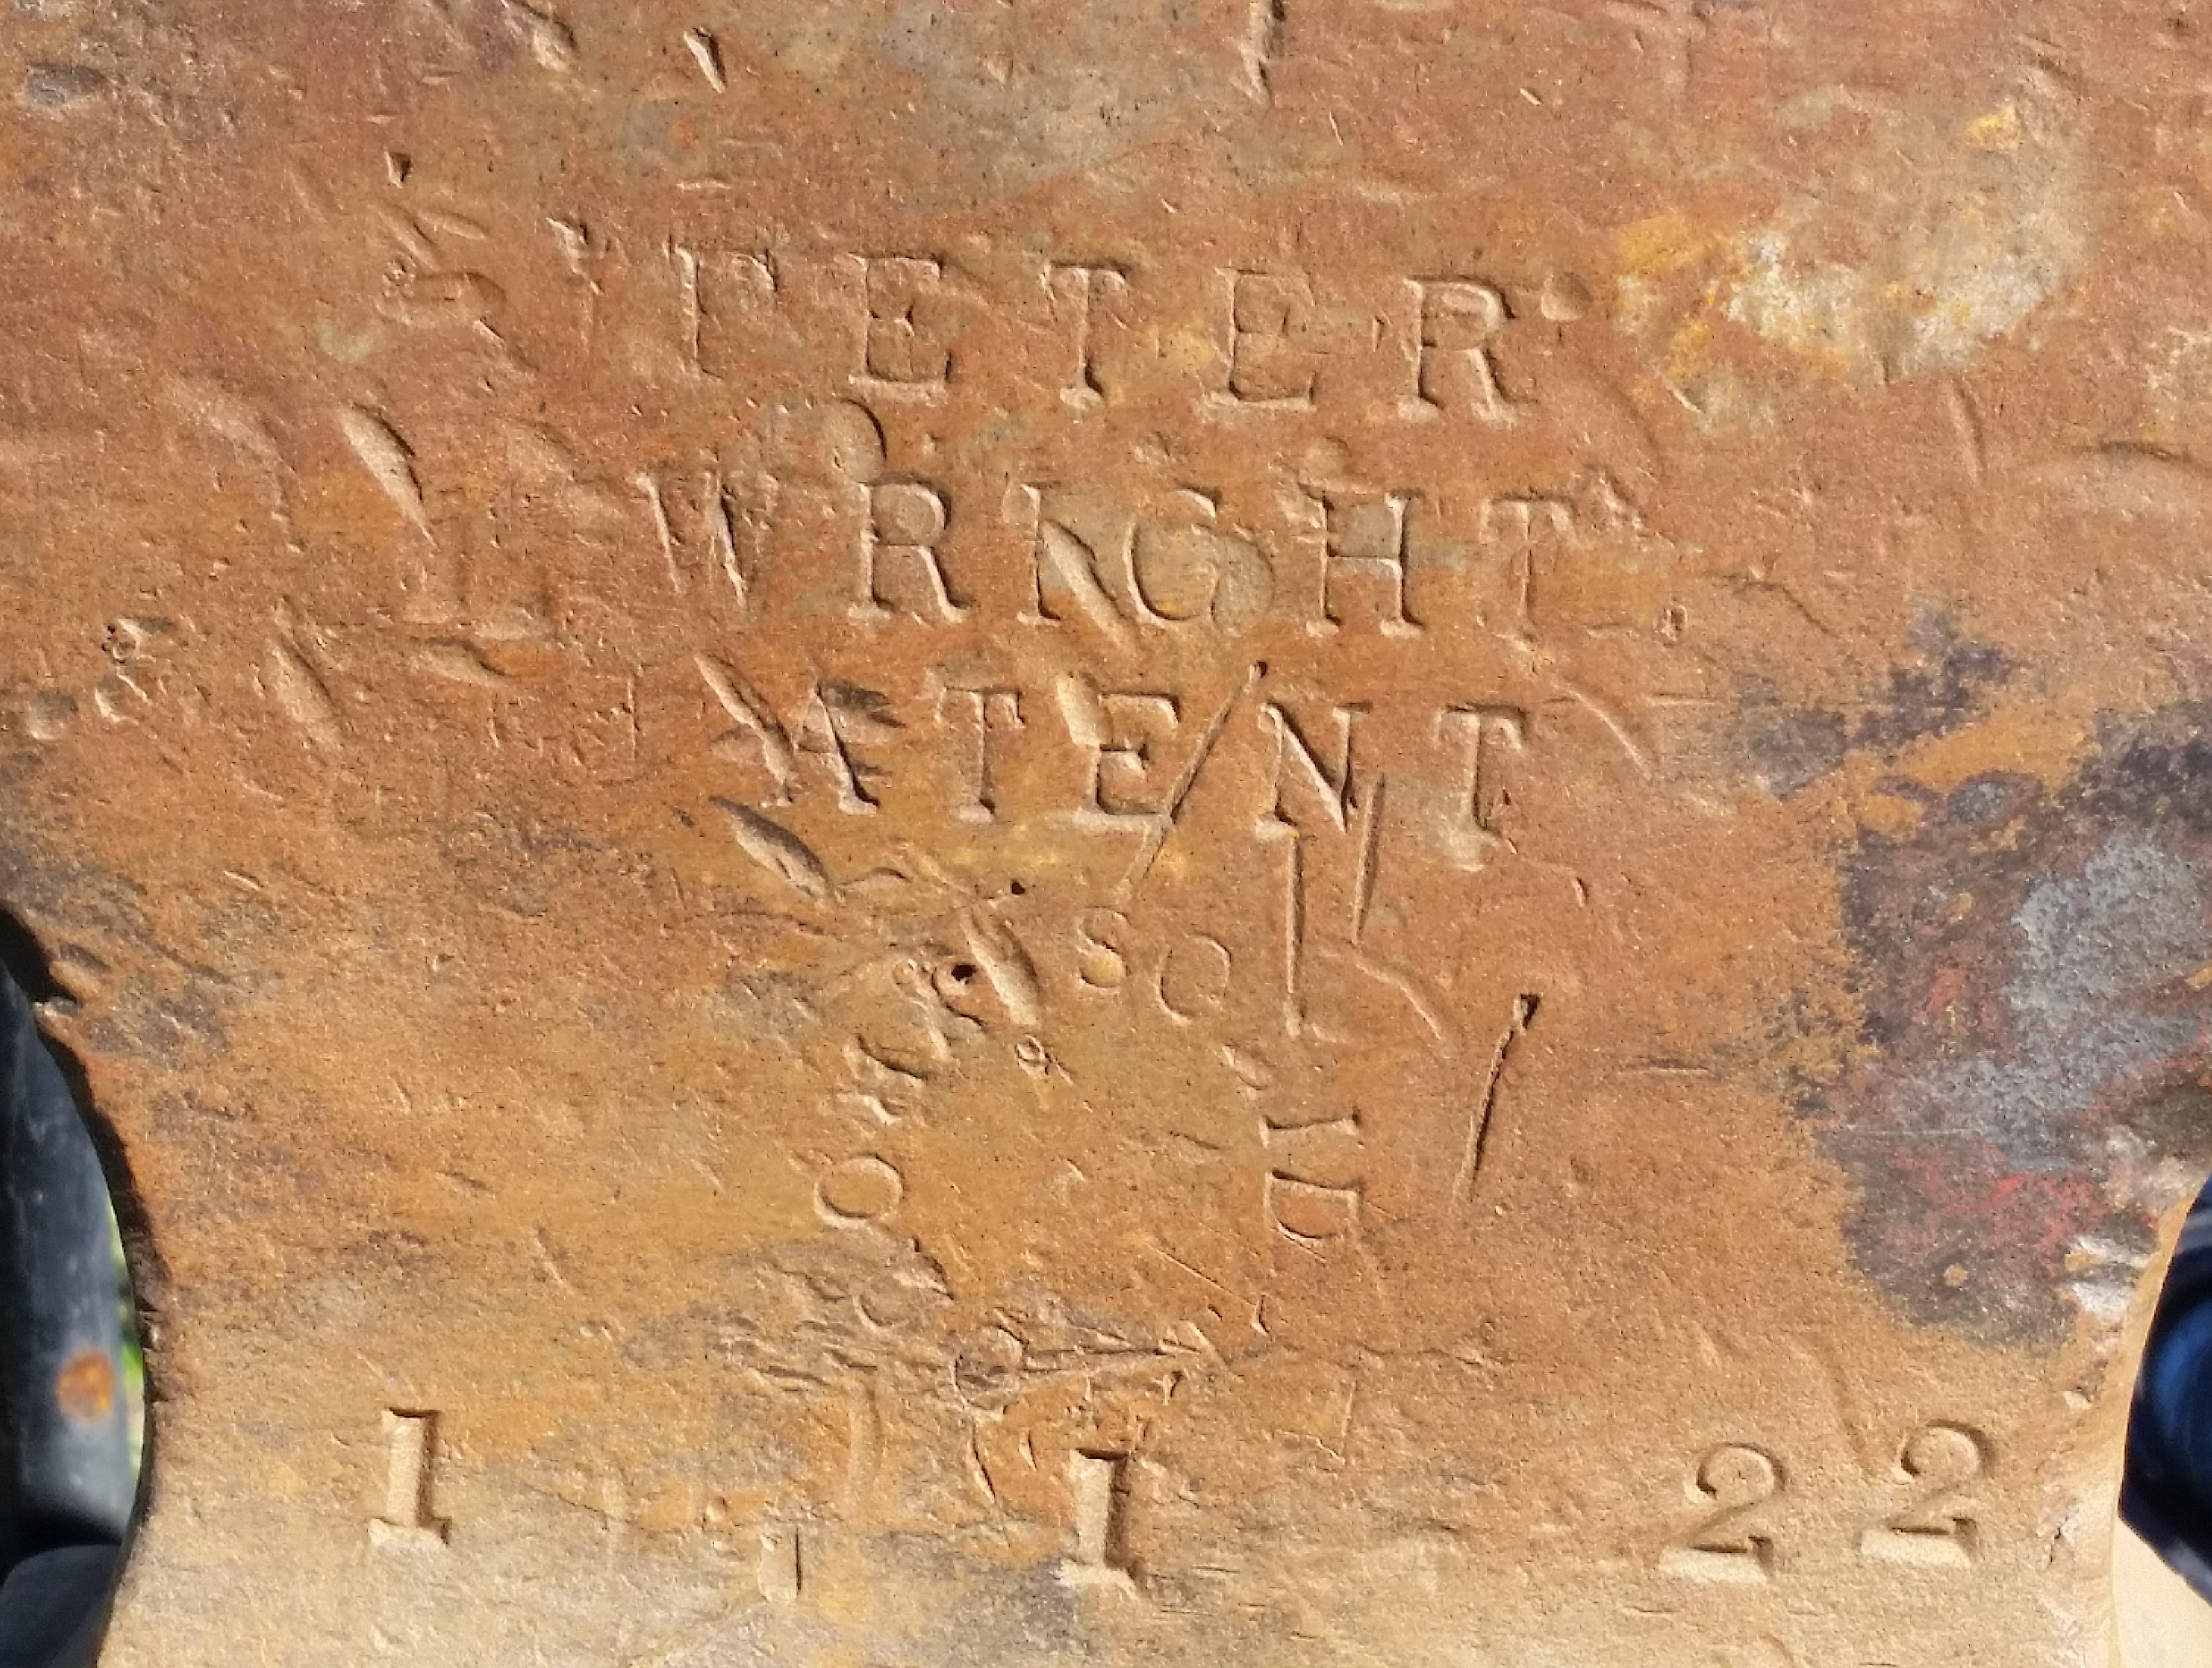
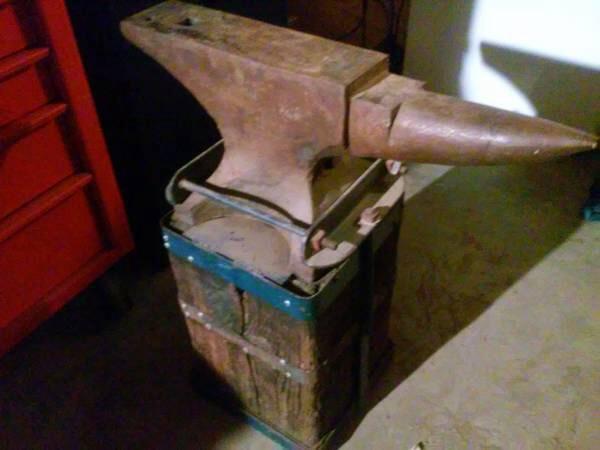
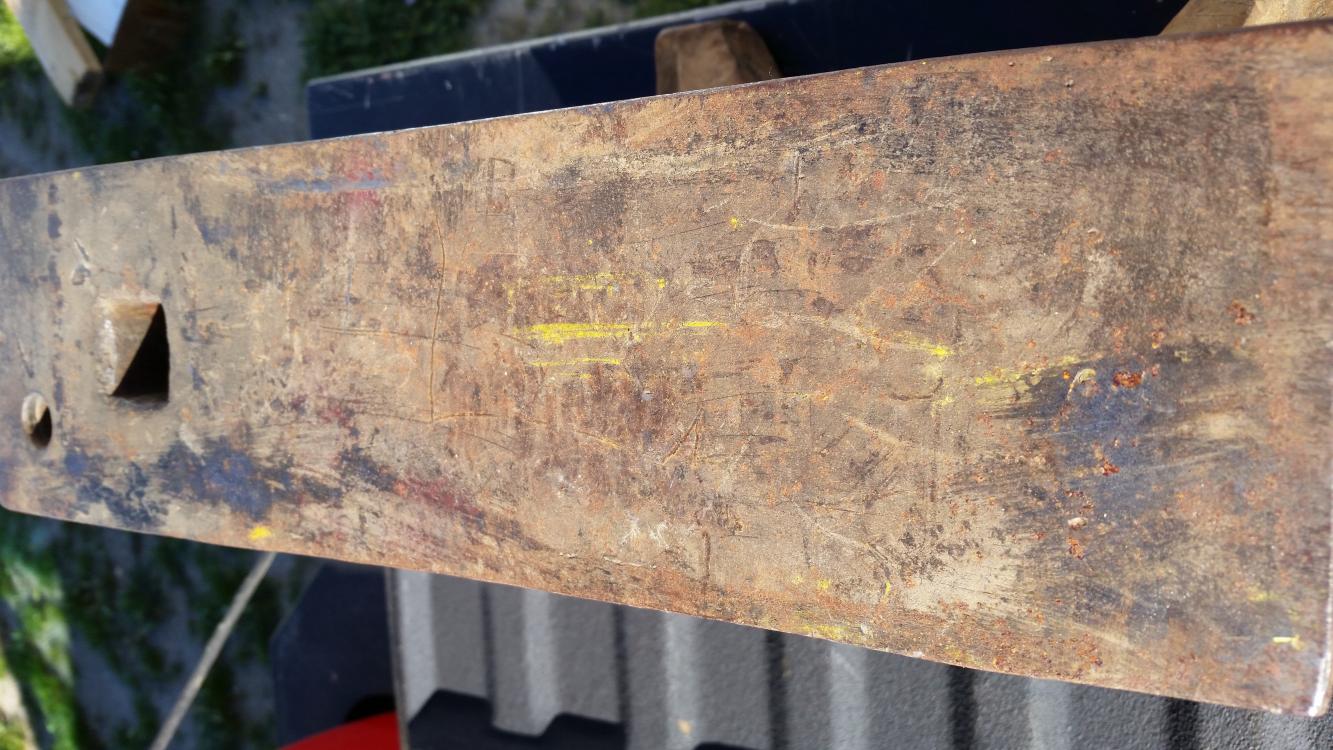
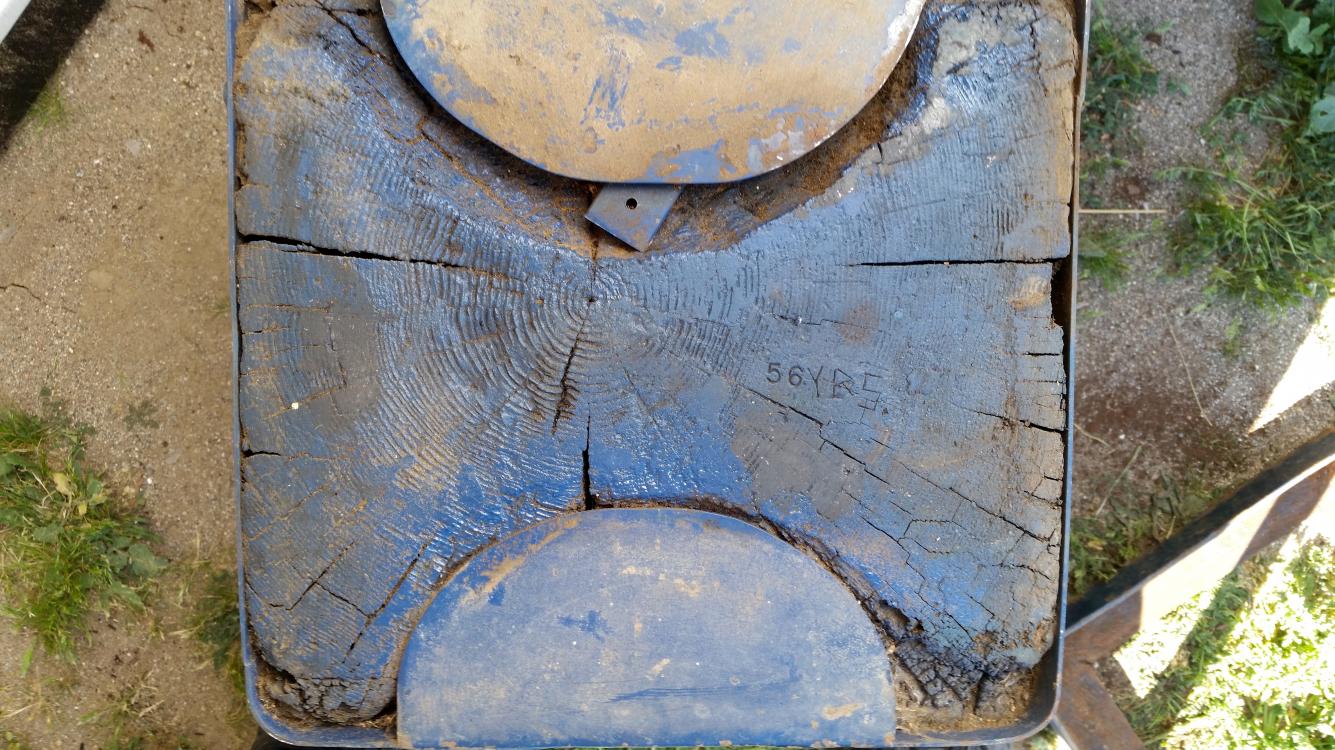
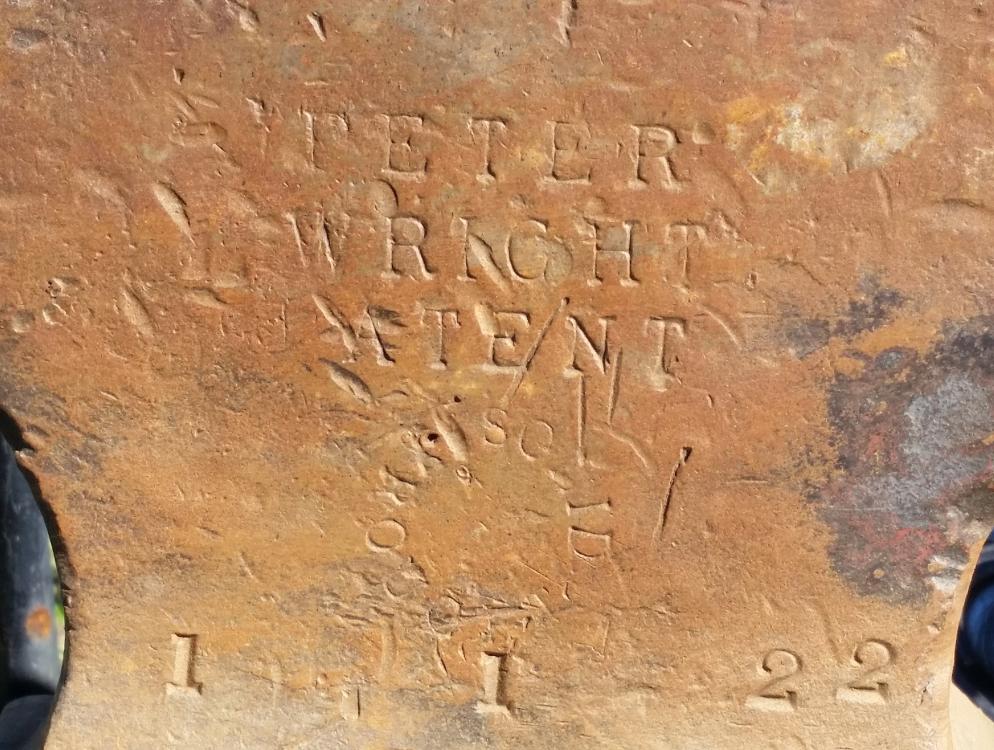
Took a closer look at the stand I got with the Anvil. The year thing may or may not be a year after all. It has the "56" but after it there is what I thought was initials but the letters indicate "yrs", so the whole thing is saying "56years", the yrs could have been added later on but who knows. There are no markings on the stand other than the 56. Here is a picture of the top showing not only the markings but also that the stand is made from the center of a tree, sweet. Here is a picture of the clamping device, angle iron around the bottom with EOS welded to wraps, welded to the angle iron. Then there are other angle pieces across the anvil bolted to the rods. Ok back to the Anvil, the side markings, the PW is there and then a circle of letters is the "Solid Wrought ", then the weight. There is a stamped in #160 but I think that had to e added later on, not sure when. No other lettering on the anvil but there is a double star on one foot. Sorry tried to flip the picture, keeps coming out upside down. -
New Anvil, Peter Wright, 1 1 22
Scrambler82 replied to Scrambler82's topic in Anvils, Swage Blocks, and Mandrels
The picture kind of show a dip in the top but it is straight, I used a 3' square to check. The stand took all the ringing away, that surprised me. I think the hold down is a great idea, it would a ashame to separate the stand from the anvil but I may have appease the wife with a token repurposed piece of wood. I have wanted to build one of the 2x12 stands since I first rear about the build so I really won't be unhappy. Sluice box, Thks for the input, I used your ideas for the first check out, got disappointed in the sound BUT THEN the ring came and wow I was a happy hunter. As I said up a sentence or two, the stand removed all the noise. -
New Anvil, Peter Wright, 1 1 22
Scrambler82 replied to Scrambler82's topic in Anvils, Swage Blocks, and Mandrels
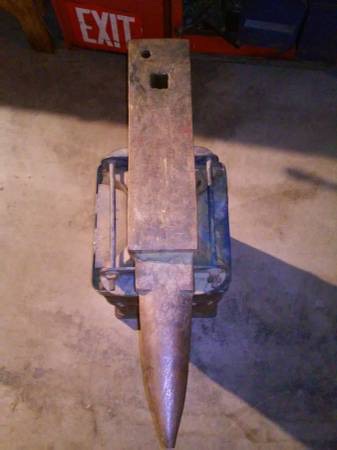
Ok guys, went to check out and buy the anvil. We rolled it out of the corner, it is on an old block and with a clamp that is nice. Notice the clamping is threaded rods attached to an angle iron base. Anyway... I took a 3 lb hammer with me, took it out and hit the side of the horn and tail and wham I bam... thud, thud, thud. What is this ! Dropped the hammer on the top middle and thud, man does this sound like $hit. The guy wanted to know what was wrong, I told him it sounds like it is worn out but there is no wear to prove it. I thought unless the base is absorbing the sound, I asked if we could undo the clamping. He agreed and a struck again with the hammer... Silence... It rang like a bell, both end and the top. The hammer recoiled almost 100% of the drop and the 1" ball bearing make the whole trip... ! As far as I am concerned it is a winner plus and I lucked out. I asked about where it came from, the seller responded from his father, my first thought was his dad must have past and he was selling everything but it turns out his dad got it five or so years back from where he worked and it was in a corner not being used AND they were going to throw it out, man do you believe it. So what I think I got is an anvil that has been stored in a corner of a shop not being used for who knows how long. I am smiling to say the least. The side of the anvil say," Peter Wright, Patented". There is a ring of letters that are a little hard to read and then "1 1 22" which I think is the weight of 162 lbs. The wooden base, a squared off tree trunk, has a "56" stamped in it with someone's initials scratched in next to it, not sure if this means the base was attached in 1956 or what but I will look over the base before reattaching the anvil and write down anything I see. So thanks to all for the advice, thanks for the support from this site... I missed out on a few other anvil because I didn't want to pay the price but this time I got a good deal and I think an excellent anvil. Good comes to those who wait, thank you God. Any input would be appreciated. I will repost the pictures for those like me who don't want to reread. -
New Anvil, Peter Wright, 1 1 22
Scrambler82 replied to Scrambler82's topic in Anvils, Swage Blocks, and Mandrels
Thanks Steve, picking it up on Saturday unless it goes real bad on the hammer test. LTR -
New Anvil, Peter Wright, 1 1 22
Scrambler82 replied to Scrambler82's topic in Anvils, Swage Blocks, and Mandrels
Thks for your comments. I guess I thought the PW was a forged unit, there are square holes on both ends; we will see Saturday. I am paying a little more than a wanted to but I lost three other because of price, hoping this one will be the Big Bang. Top appears straight. -
Looking at an Anvil tomorrow. Says Peter Wright on the side. Anything I should look for ? It has the Forging Holes in the front and rear about mid section. Thks for any help.
-
Was wondering... Smoke ! If I happen to have a large hammer, and wanted to turn it into a hardie tool, is I t possible to cut the hammer in half and weld on a stake the needed size ? Can this be applied to other junk hammers ? Thanks.
-
Back to ID'g this Anvil. There is a "10" under the horn which I have read indicates it is 100 lb unit. Under the heel is what I am having trouble with, the casted numbers are hard to read, paint and other thing are muting the characters. It appears to be a 61, a 6?, not sure, a sixty something. Is there a special way to clean up cast in numbering or emblems ? The rest of the anvil is in great condition but the area with the date and the emblem is muted.
-
Thks, waiting to see some pictures. Maybe one of the weld itself. Ltr
-
Are these Hardie Tools any good ?
Scrambler82 replied to Scrambler82's topic in Tools, general discussion
Thks for the comments. -
Are these Hardie Tools any good ?
Scrambler82 replied to Scrambler82's topic in Tools, general discussion
Can 7/8" shanks be reworked to fit a 3/4" hole ? Drawing it out to fit or grinding to fit, which would be the better way ? -
Thks for the info. This Vulcan Anvil came from a Pawn Shop. Was thinking it was in someone's estate that got pawned, maybe a hide away and was never used. Looks good and hoping for the best.
-
Are these Hardie Tools any good ?
Scrambler82 replied to Scrambler82's topic in Tools, general discussion
Looking in the Hardie Hole on my anvil, it appears to be at a slight angle. The side seem to be straight. I will get out the measuring tools and see what I come up with. Does a Hardie tool have a. Long shank to it ? How long should it be ? Thanks for all of the info guys, appreciated. What is the portion of the tool called that fits in the Hardie hole ? I would call it the shank but not sure of the terminology. Either way... how long should the part going in the Hardie hole be ? Thanks for all of the information. I have learned something today, so it is a good day. -
Glenn, The paint looks like it was put on by the seller for the anvil to look good. I don't believe it is original. Was thinking just stripping the paint with either a wire brush or some light duty paint stripper, still up on the air on it. Just want no paint... just me. Ok on the pritchel hole and the spelling, what about the Hardie Hole, anything to look for or any special way to approach the reworking of it. I was thinking attempting to measure the depth of the straightest part, then determine what the acceptable length of the shank of the tool should be. If what I have is acceptable, thinking maybe I should cut the tools accordingly.
-
I would like to see a demo too and the Miller Nmae on the side but it does seem intriguing. Reliability and duty cycle will need to be proven.
-
Are these Hardie Tools any good ?
Scrambler82 replied to Scrambler82's topic in Tools, general discussion
Another thought... Is the Hardie Hole suppose to be straight thru, I would think so. What if it isn't ? Thks