
kubiack
-
Posts
323 -
Joined
-
Last visited
Content Type
Profiles
Forums
Articles
Gallery
Downloads
Events
Everything posted by kubiack
-
Oh ya a 300 amp or better Syncrowave would do. Is that XMT on top how do you like stick welding with it compared to a transformer machine?
-
Correct, the Hobart is not considered an industrial machine. I have a friend who is a Miller sales rep and he told me the only difference in the Hobart machines is the windings are not as large and so the duty cycle is less. They do have the same warrantee as Miller so if you can live with the duty cycle it is a good machine. I have had both a Thunderbolt and a Stickmate and have been very happy with both. I don’t weld for a living and most of my shop time is not spent welding so the duty cycle has never been a problem for me. I do long for a hulking beast of a welder that sits in the corner and scares visitors to the shop. I’m keeping my eyes open for a Miller 330AB/P or other obnoxiously large machine.
-
If you are going to upgrade a stick welder to TIG you will need to make sure that the machine is capable of DC welding. The minimum setup is known as scratch start TIG you will need a bottle of argon, flow meter, and a TIG torch with a valve in the handle. This setup will get you welding steel but not aluminum. Not many stick welders are capable of adding on a foot pedal so you will have to set the amperage at the machine. The Miller Dial Arc can have a foot peddle added to it but they are very expensive about $500 new and are seldom on Ebay. I have done quite a bit of welding on a scratch start TIG and once you get the hang of it you can do some very nice welding with it. Out of the list I would go with the Dial Arc and forget about the foot pedal. If you want something new I would also suggest looking at the Hobart Stickmate they are made in the US by Miller but cost less.
-
I thought the same thing, it is obvious once you see it but it would not have occurred to me without having scene it first. I think made from a single piece would be strongest but would like to hear from the more experienced along with an explanation as to why. My inclination it that any time a weld is made there is the possibility for less than 100% fusion.
-
The Aug 2012 Saltfork newsletter shows how to make a 4 tine hay fork without welding. I think something similar could be done for 3 tines.
-
Since you already have a plate for the top and are considering drilling holes in it to use as a platen I would look at the Stronghand BuildPro Welding Tables. You obviously would not need the table but could use the same size holes and use their clamps and accessories. I have found their products to be very good quality and reasonably priced. They are much more affordable then the ones for Weldsale or Acorn platens. http://www.stronghandtools.com/pdf_ctlg/2012_BuildPro_catalog_1up_hq.pdf
-
Looks like you have a good start on your table. I too wanted a platen table but could not find anything locally or affordable so I built my own. This probably wont work for you since you already have the steel for the top. The top of my table is made up of 6" C-Channel spaced 1.5" apart. This allows C-Clamps to be used anywhere on the table. If one piece gets too worn or warped it can easily be replaced. It is not as flat as a cast iron platen but I have shimmed each piece to the accuracy of the C-Channel and it is fine for the work I do. I also have two sockets on each end where I can mount tools such a vise or grinder. This is not my design I saw it on the Practical Machinist web site.
-
Thanks Dodge. Its pretty easy to make up any kind of tool holders with the frame there to weld to. The back has two racks for hardy tools and the right side holds wire brushes and a hot cut. I may add some thing on the front to hold punches and chisels. The thing I like the most about it is the adjustable height. Since I'm still pretty new to this and did not know exactly what height I would be comfortable working I can easily experiment. Since changing heights can be done without much trouble it can be changed to accommodation small or large stock, at this point I'm not really sure how much benefit that will be.
-
This is one I recently made up. I used one very similar at the Gunter's school and liked it very much. The block is made up of 2x12 bolted together with all thread. The frame bolts to the floor and the anvil and block are cinched down with the chain. The height of the anvil is adjustable by placing wood blocking under the 2x12'. There are tool holders on the sides and back of the frame. I'm sill in the process of getting my shop setup and equipment built so it is not yet bolted down in its final location.
-
Hammer Size versus Work Size?
kubiack replied to Crunch's topic in Power Hammers, Treadle Hammers, Olivers
Ok I see. So if you follow the math out for Group A with 2.25" stock the 100lb hammer falls just short of the the recommended energy needed and you would be better served by moving up one hammer size. -
Hammer Size versus Work Size?
kubiack replied to Crunch's topic in Power Hammers, Treadle Hammers, Olivers
Dillon, Am I reading this right? A 100lb hammer is rated for occasional forging of 3.25" square stock operating at 50 psi. For regular production forging the upper limit is 2.25" square stock at 105 psi and as the size decreases the PSI increases. -
Hammer Size versus Work Size?
kubiack replied to Crunch's topic in Power Hammers, Treadle Hammers, Olivers
Here is a video from Matchless of a rebuilt 25lb hammer drawing 2" round. This is the maximum capacity for a 25lb hammer per the specs on the Little Giant web site. The hammer is in top shape and he is using drawing dies but I think it does a respectable job on the 2". Sure it is not the hammer for doing production forging in that size range but I can't say the specs on the Little Giant are too out of line. http://www.youtube.com/watch?v=e5IjfCz92_I -
Are you going to rebuild this hammer and put it up for sale or is it going into your personal collection? I bet there are a lot of people around here who would like to have a hammer that small.
-
Are there any plans to make this anvil in a large size, say something close to 500 pounds? I like the pattern and it would be nice to have something to compete with the other large anvils currently in production.
-
Hammer Size versus Work Size?
kubiack replied to Crunch's topic in Power Hammers, Treadle Hammers, Olivers
I’m not going to disagree with you that it would be inefficient to work that large of stock with either hammer. I would assume that these would be the upper limits and you would not want to forge anything that large with them if you did not have to. I do think seeing what the manufacture considers rated capacity can give you a better idea of what you can actually use them for, cut it by a 1/3 to a ½ and you should be pretty safe. A lot of people do not have the time, money, and space to set up a 250 pound hammer but a 50# LG sitting on timbers could give just about anyone the capacity to work 1.5” inch and larger on rare occasion. -
Hammer Size versus Work Size?
kubiack replied to Crunch's topic in Power Hammers, Treadle Hammers, Olivers
According to the Little Giant website a 25# hammer is rated at 2” round and a 50# hammer is rated at 3” round. http://www.littlegianthammer.com/pdf_files/Useful%20Information.pdf -
Thanks Randy, I guess a hammer head was not the best example for what I really had in mind. The hammer head would be fully supported by the die and once you had it aligned it is not going to move. I was really thinking of punching holes in a long bar where you have to support the one end while operating the press. If doing a series of holes you could set up in-feed and out-feed supports on either side of the press. With the dies set very close it might not be a big deal to support the material for the fraction of an inch until it is gets squeezed by the dies. Maybe it is just seeing all the commercial press made with the cylinder on top that makes it seem like that is the best way to do it. Dan, I’m looking forward to see how you project turns out.
-
I was thinking cylinders on top just for the fact that the steel is stationary while you are trying to keep it square and level in the dies. It seems like punching a hole for a hammer eye would be easer if the hammer head was not moving. I have watched Randy’s videos and it does not look like this would not be a problem for most work done on the press but for some it would be. I also like how compact and how little material he used in his press. However I think if building a large base or bolting it down works fine in your shop the cylinders on top is the way to go. Randy could you comment on using the press with your piece moving instead of stationary. If I remember correctly you said in another post that you rarely use your press for punching.
-
Jimmy can you explain how the cylinders will equalize? I have no experience with hydraulics other than what I have read, mostly on this forum, and what you are saying contradicts what others have previously said. In the previous post Grant stated that the cylinder with the least resistance will want to travel ahead. Larry posted a picture of a press that the splitter valve and Richard Furrer said his press had one also.
-
I will be watching this build with interest as I am also planning to build a press like Randy’s in the near future but with the cylinders above as you are doing. My thoughts after reading the post I linked to earlier were that Randy has already proven that it works well without the splitter. If you keep the cylinders as close together as possible and the guide system roughly equivalent to what he has done it should also work well. Building the frame will be the same whether you use the valve or not. So why not build it and do some testing with very small loads to see if it binds. If it does you can always add the splitter valve in later or rebuild the guides and make them longer than 8”. Fe-Wood did you build your press with two cylinders and how did it work out?
-
There was a thread on IFI that dealt with this subject. I will see if I can add a link. http://www.iforgeiron.com/topic/16384-spring-return-for-hydraulic-press/
-
Have you used the coke from TFS? I am pretty sure it is L Brand coke.
-
Hey guys thanks for the replies. I’m a member of the Saltfork Craftsman but their closet coal pile is about 7 hours one way. I took a class with the Gunter’s and their coal was great but it is 6 hours away. I was hoping for something a little closer so I did not have to buy such a large supply to make the trip worth while. I was really hoping to find a source of coke locally as my situation would be better off with the least amount of smoke possible. The closest I have found is Texas Farrier Supply in Kennedale Texas which would be about 5 hours away. I am in that area several times a year anyway visiting family and friends. I think I will buy the coke when I’m out that way and use lump charcoal in the between times.
-
Does anyone know of a coal or coke source in West Texas specifically Lubbock? I have looked high and low, checked the yellow pages, talked to the local farriers and farm supply stores and can not find anything. I am beginning to think I will either have to use charcoal, corn, or have it shipped in.
-
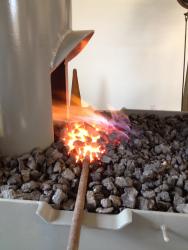
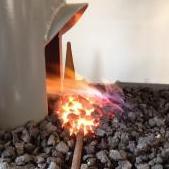
I had a conversation with Mark Aspery about his forge and thought I would include what I learned here. His fire pan is 2’ by 2’ which is big enough for the fire. One a little larger like 3’ by 4’ is nice because it gives you more room when cleaning out the fire and you also have a place at the front where you can lay your tools and such. His pan is 10” deep with the center of the blast pipe 4” from the bottom. The pan is filled with 6” of dirt. A hole is dug out around the tuyure and shaped as needed for the fire. Above the dirt is fuel waiting to be fed into the fire. With this arrangement he has to slightly angle the piece to be heated to get it into the heart of the fire. For heating long bars the sides of the forge pan need small removable doors. Which when removed allow the bar to sit lower in the pan and in the heart of the fire. He likes to have the water jacket tapered for two reasons. The first is that it prevents steam pockets from building up at the front of the pipe which could cause a burn through. The second is it keeps the area in contact with the fire small. If it is too large it can actually cool the fire. His flu is not attached to the forge but sits in the pan supported by the tuyure.