DRoberts
Members
-
Joined
-
Last visited
Everything posted by DRoberts
-
I tried soldering some copper together for the first time tonight and it went horribly. While looking around at different soldering pastes I ran across this thing. Looks like some kind of chemical bonding agent that doesn't require heat. says it sets in 5 seconds. anyone ever use this? Application is on a habaki wedge insert. http://www.acehardware.com/product/index.jsp?productId=2278592
-
Something I often tell my network engineering students applies here. Knowing what you don't know is just as important as knowing what you do know. What can impress an instructor of any craft is a student who is willing to study, accepting of the fact that in the beginning there is far more knowledge that they are unaware of that is missing, and to approach both with patience, humility and respect toward the instructor. I have studied and practiced the content that these fine gentlemen have provided to keep the craft alive for over 2 years now. This site is a treasure trove of knowledge, its appalling to me to see instructional content dismissed in a manner that belittles the instructor. I for one would like to thank the master craftsmen of this site for all the time, effort and patience they put into both maintaining this site and it's public user base. I hope comments like those from the OP do not discourage any of you from posting in the future. There ARE grateful people out there willing to learn.
-
thats why i made 2.
-
looking back on the build log - '?do=embed' frameborder='0' data-embedContent>> some of the first advice i was given was that the air holes were too deep, that turned out to be spot on.
-
some V's ive seen are open on the edge so the depth is a mute point, but if you're going enclosed on all sides and dont intend on making a fireball the size of a truck tire when you forge, i'd go about 3 to 5'' for wood "chunks" about half the size of your fist. ive had to fight to keep coals high enough in the deep V forge pictured above every time i fired it up. you may hear other opinions to the contrary, but this has been my experience with raw wood smithing.
-
they dont even get warm to the touch. been using it nearly every day since jan 2013 without issue. it's fine.
-
been using nothing but raw wood for a year now. im doing a similar setup and found that if the V is too deep it gets very difficult to get hot coals built up to where its level with the top plate of the forge. it limits you to only what you can push down into the V. if you need to heat the center of a longer bar if the V is too deep you'll end up with all the heat down in the V and none of it flush with the face of the forge where the bar stock is lying. i recently lopped off the V with my plasma cutter and am in the process of shortening it to bring the coals level closer to the face of the forge. origionally it was about 10'' deep, now it will be about 3'' deep. i also use a brake drum with a high wall welded around the edge that works very well with raw wood. i have a slot cut into the add-on 10 gauge steel so that the stock can lay flat at about the 2.5'' level with a good 4'' of raw wood/forming charcoal above it. you'll achieve much greater success if you chop your wood up into chunks about half the size of your fist as well. you want lots of exposed surface area for quick charcoal conversion. let the wood cook for a while on low air flow while you prep up and constantly add as much wood as you can pile on top without it falling off for a steady supply of heat about half way down the wood stack. brake drum with high wall welded on Deep V forge - too deep in my opinion. most of the hot charcoal rests at the bottom of the V, the wood simply burns too fast to establish a hot coal line above the face of the forge. in this picture you can see what i'm talking about - the bar stock in there has to be pointed down into the V to reach the heat. http://davidproberts.com/2013/01/04/big-forge-build-log/
-
pretty, kind of looks like a bollock dagger. need closeup of the blades.
-
i really like the way the grooves in the stag handle are extended into the metal a few mm's. really visually merges the handle components. haven't seen that before.
-
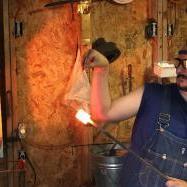
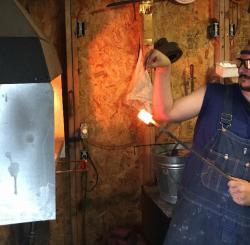
for me i find great enjoyment in the hot metal work. it lets me really focus on the task at hand and gets my mind off the stresses of work. i like developing a skill that lets me turn something considered trash into something i can use. with every hammer blow being able to see the minute changes in the metal has some strange satisfying quality to it.
-
-
In an effort to try learning various knife styles this I went with a dagger type knife to try my hand at my first guard and hollowed out one piece handle. I made many mistakes on this piece that were irreversible without starting over but I also learned a great deal from the process. There are 3 sections on the blade where i hammered too thin (left dark discoloring to show the uneven center line). At the bottom right corner of one side I hit entirely way too hard with the rounded face of of my rounding hammer and sunk 5 craters into the blade so deep they were below the grinding line. The bevels are entirely hammer made, not ground down from flat bar. The guard is made from the same steel as the blade, land rover coil spring 9260 or 5260 probably. By using such a hard piece of metal for the guard I went with hot punch and drifted the slot on both sides. Needle file work on the corners. The pommel is not attached yet, that will have to wait till my tap and die set comes in, but overall the look will be about the same. The handle is cedar heartwood harvested myself at a local paintball field I volunteer at. Due to the various mistakes in the blade I did not put too much effort into fine decor like I had intended. This knife I made for myself as part of the learning process. At best a functional 'pig sticker' to play with. I will be making a layered sheath for it and may try to line the outer side of the sheath with squirrel fur. Vegetable oil quench, 400F for an hour temper, HCL bath to remove scale, rough sanding. Full size pics at http://davidproberts.com/2014/01/29/knife-wip-pics/
-
-
i read a method where a guy made fine sawdust from the handle material and mixed it in with 2 part epoxy real good and used that to fill the gap, dont remember where i read that tho.
-
awesome work. what heat source do you use for welding?
-
i *think* he's part Cherokee, I've seen pictures of one of his outfits and its the spitting image of the famous Sequoya pointing to the alphabet painting, another one as a union soldier. i didn't ask the details.
-
just gave the knife to the owner, he's super happy. he says he's been showing pictures to his other re-enactment buddies - they want price quotes for several more knives similar to this one and by the sound of it are very eager to get them made. all in all a good first experience at making something and getting paid for it, a milestone for me at the least. Thanks for the community input on making it (more) historically accurate. final pic of the handle redo.
-
new handle in place, will round the edges and stain tomorrow.
-
learn something new every day, i had no idea muriatic = hydrochloric. just had to look that up.
-
Thanks Rich. I definitely want to change the tube thing. It didn't even cross my mind at the time I put it in. This knife is really the first one I've made that I wasn't ashamed to show to people and I want to really nail it. A co-worker of mine said at lunch that they think muriatic acid will turn steel a bright clean shine instead of black as I just assumed it would, can someone chime in on that for me I've yet to use mine, picked up a gallon 2 days ago. If that's right I could try the wax coating idea and go from the muriatic bath strait to boiling vinegar to turn the fabricated corrosion pits dark and the rest of the blade not so dark as it melts the wax off.
-
i was thinking as long as im redoing the handle i'll toy with grain raising with a blow torch and steel wool. as for selling the item new, the knife will probably never be used and is destined to be a part of a costume, maybe unsheathed to show it to people who ask about it once or twice a year. aged look was important to the owner. i'll post pics of modifications from community input this weekend.
-
thats 3 out of 3 against the tube, it comes out this evening and i'll remake the handle. i still have the weekend before i give it to the guy. i went with the vinegar bath while forge-dirty in an attempt at the "old' look, but i was toying with another idea i'll run by you guys. i thought it might be possible to dunk the entire blade in molten wax and manually carve out little pits all over before hanging it suspended in muriatic acid. (no idea how long it would take, till now i've only used vinegar. i setup an acid bath tube in the shop and filled it with muriatic this week so i have the option if needed.) the method of making the spots look random is what leaned me away from it. some kind of spikey roller tool might do it, like the stitching wheel used in leather working, but an inch wide.
-
so is it the brass tube that you don't favor? the only thing i wasnt particularly happy with was the sheath. might remake it with more native american tones.
-
you're fine nit pick all ya want for conversations sake.
-
these are the approximate dimensions he wanted. http://www.trackofthewolf.com/Categories/PartDetail.aspx/464/1/KNIFE-SCALP here are images of the English scalping type knives he liked. he does civil war and some other native american type reenactment functions.