DRoberts
Members
-
Joined
-
Last visited
Everything posted by DRoberts
-
Pure silver inlay OSU, Oklahoma State University. Made for a charity raffle at work.
-
Understanding how a crystal formation occurs in volcanic activity is much like what happens in steel. Liquid magma dumped straight into the ocean instantly solidifies, locking in the natural state of the magma. If allowed to cool slowly over thousands of years the different elements begin to clump together forming crystals. Quartz, silver, gold. Cripple Creek Colorado is an excellent geological example of this. This same concept can be applied to heat treating. Instead of thousands of years as a time metric, you're dealing with seconds. The normalizing process I find particularly interesting. If you do several normalization cycles each time lowering the temperature you take it to prior to air cooling you can produce a very fine micro grain structure. Each time you normalize the crystalline structure has time to grow as it cools. The goal is to take your metal and make the entire piece uniform in its crystalline structure, with the smallest crystal growth possible. For example, lets say you are working with CPM S110V (my favorite fillet knife material for my personal blades) stainless. This would be the correct heat treatment for the blade. All steel manufacturers include data sheets for their products. It doesn't have to be a special alloy steel, you can find these data sheets for many common metals both stainless and non-stainless. Crucible Industries makes S110V, the data sheet can be found here: http://www.crucible.com/PDFs/DataSheets2010/Datasheet CPM S110Vv12010.pdf CPM S110V much be quenched at 2150F. That would be your minimum temperature for normalization cycles. This is the austenitization temperature. It should be non-magnetic, and the lowest temperature that loosens the bonds between the crystalline lattice in the material. ~~Normallization~~ Cycle 1: Set your soak temp for 2250F and soak for 1hr. This will homogenize - think of it as almost liquidizing the crystalline structures in place, they are still there roughly but are in a state where they will reform once cooled the bonds that hold them together are broken, but they are still there "thermal memory". You will never completely get rid of them without melting down the steel. The higher your temp is the longer it takes to cool. You want to start above your quench temperature, but without excessive heat. Go with the closest margin of error your heat treat furnace can achieve. Given the same rate of cooling in air a higher starting temperature will result in larger crystals. This is important to remember. Once you start your normalization cycles you want to make sure you never cycle at a higher temperature than your last cycle. If you do it will continue to improve uniformity, but not so much the grain size. By reducing the temperature a bit on every cycle you both create uniformity of crystalline structure AND force smaller crystals by reducing the time in which the crystals have to grow. Cycle 2: Set soak temp for 2225F and soak for 30mins, air cool. This slightly lower temperature will reduce the time it takes for the steel to cool below the austenitization temperature. The crystals that formed in the first cycle will be unable to reform to their original size and the micro-stresses of the crystal formation will force the bigger crystals (thermal memory here) from the previous cycle to break up. This is very good. Cycle 3: Set soak temp for 2200F and soak for 20mins, air cool. Again lowering the temperature a bit forces the thermal memory of the previous cycle to break up even smaller. Cycle 4: Set soak temp for 2175F and soak for 20mins, air cool. At this point you have a very uniform crystalline structure throughout your steel and a very small grain structure. By stepping down your temperature each cycle you have forced less of the crystals to homogenize each time, creating an effect that fills in the gaps so to speak between the larger left over crystalline structures that formed during the first 2 or 3 cycles. ~~Quench~~ At this point you want to go for your quench at 2150F. - - Note this is below the normalization heats. If you go above your normalization heat temps you ruin the work you have done by the step down cycle. Make sure you never do this, never quench from a heat higher than your normalization heats. This is an extremely important concept - the longer your steel remains takes to cool the larger your grain structure will be. You want your steel conditioned perfectly by the normalization process so that when you go for a quench you can do it right at the austenitization temperature. If you skip the normalization structure you lock in whatever stresses and non-uniform crystal growth size is in the steel. This is why you see smiths on forged in fire quenching at cherry red end up with high performing hardness and those quenching at bright yellow end up with chipping and rolling. Both are hard, but only one is strong. This is also why quenching in water is very dangerous for steels with high rates of crystalline formation. Where pure iron may survive, high carbon alloy steel with very complex crystalline and even carbide micro structures just shatter like glass under that amount of stress. After the quench the uniform/tiny crystal formations are set. ~~Temper ~~ Set soak temp for 975F and soak for 2 hours. Make sure it completely cools to room temp each time. Repeat 2 more times.
-
-
I have an ATS34 knife from Alaskan knife maker Gordon Parrish from a flea market that best I can figure was made in early 80's. It has a bit of corrosion from air moisture, seller said it had been in a sock drawer as long as he had had it. Looks like dark almost black rust. from my reading it's about the same stuff as CMP154. S110V is supposed to have much better corrosion resistance, and from the looks of it much better edge holding. https://www.google.com/url?hl=en&q=https://web.archive.org/web/20110204132459/http://parrishknivesalaska.com/&source=gmail&ust=1487109711458000&usg=AFQjCNHbHPTciGYsJdUELu7p47bOjvq1-w Found some threads by Phil Wilson on a forum talking about it, looks like he prefers S30V for fillet and only uses S110V on thicker knives. http://www.seamountknifeworks.com/gallery.htm - love the fillet knives he has up on this page He speaks on it a bit here http://www.bladeforums.com/forums/showthread.php/634089-S125V-vs-S110V-vs-S90V-vs-S30V/page2
-
-
Not sure on the flexibility, yesterday I made a blank of a 9'' blade from 1095 to compare it to in that respect. I'd prefer less flexibility so it doesn't lose some of the meat from flex while pressing against the spine of the fish. It's just like 40-50$ a pop per attempt on this stuff. I *suspect* that the cobalt in there will reduce flexibility.
-
Fillet blades, specifically longer ones used for larger fish. 8-10'' edge. Wouldn't even attempt to forge it. It's available in a 2-5mm thickness this would just be a grind and treat. The only knives i can find made from it are little folders by spiderco so I'm not sure how a longer edge would compare to 440C or S30V.
-
When my furnace arrives I would like to try working some of this steel. Looking for comments of any kind from folks that have worked it. https://www.alphaknifesupply.com/Pictures/Info/Steel/CPMS110V-DS.pdf Carbon 2.8% Chromium 14.0% Vanadium 9.0% Niobium (Columbium) 3.5% Molybdenum 3.5% Cobalt 2.0%
-
caught another good size gar this last weekend. ended up with about a 1x1 foot square hide cut. got it scraped and salted on a press right now, will have a pretty cool looking handle pic soon.
-
love the handle.
-
Hand chiseled poplar glued with wood specific gorilla glue - it claims to be water proof once hardened. working on it slowly as i have time. going to wrap about half the saya with the same leather cord as the handle, which i still need to re-wrap with a same underlay of some sort. i wanted to use gar scales.
-
didnt have any problems with warping. by the time this thing was drawn out to proper length it had been heated prolly 50+ times over a years worth of messing with it. i straighten the coil out while yellow/high orange hot all at once with a tree stump and 4x4 low on the jeep then pound away. gave it a few normalization heats before the quench just to be safe though. all my work is done with wood. i welded that forge together to where i can just dump raw wood on top and by the time it settles down to my working area it's all nice hot charcoal. the hamon was visible prior to the ferric chloride dip, but it was pretty ugly. I'll try lemon juice on my next one. i got some sodium persulfate etchant but havent tried it yet, dunno what to expect from that one yet. kind words always appreciated. thanks.
-
bend continuously - I mean bend it to any extreme and it wont break. for example i bought a few super cheap china katanas (like 20 bucks) for gag gifts bout 5 years ago. you could wrap the blades completely around a flag pole several times and they wouldn't break. like wrapping wire around a fence post. no strength, no hardness. if i pulled a sword to 65 degrees released and had a 10 degree bend set in the blade but 120 degrees snapped it that would be not a continuous bend. so like if i could take a blade and bend it into a circle that would be baaaad.
-
You can see the coil that was from the same spring as the sword in this pic.
-
very nice, what material is the guard and pommel?
-
i did some temper testing with the coil spring stuff i've been working with. sounds like the same stuff you're working with most likely. made about 1/8th inch thick 1'' wide unfinished blade points to test with. i didnt see much difference between the zero temper and 30 minute @ 400F temper with water quench. both snapped like glass without flexing much. vegetable oil and a 1hr temper @ 400F had great flex but still broke before bending. water or vegetable quench with 2hr temper @ 400F resulted in great flex and very small bend prior to the breaking point. i used a big catfish scale i had to pull on the tips, the breaking points of water quench without temper didnt take much at all, the 30 minute temper i couldnt see a difference in the weight of the pull. the veg and 2hr temper was WAY higher weight on the breaking point. i made a couple graphs (this was about a year ago) of my testing i might be able to find. i was trying to pinpoint where the break/bend graphs intersect to get the most out of the blade. one graph for water one for vegetable oil. x axis i used weight and y axis temper time at 400F. i formed the opinion that i would like my blades to have good flex, bend before breaking, but never bend continuously without breaking. peanut oil will smoke and burn at 440F making it easy to manage temperature wise. just heat the vat of oil up till it smokes and soak a blade in it for a couple hours. i found this page to be a good tool for picking tempering mediums. http://www.goodeatsfanpage.com/collectedinfo/oilsmokepoints.htm
-
i do have one question though that maybe someone can answer for me. i was surprised at the resulting color of the ferric chloride bath in that i expected the softer metal to take on more darkness than the hardened metal exposed during the quench. Walter sorrells blades blades have the opposite color http://waltersorrellsblades.com/gallery/ , hard edge white soft back black. is he using a different chem to achieve this? or a laminate outer with some nickle type of metal? i've looked at some of the build logs and it doesnt look like they're laminate.
-
yep coil spring. straightened it out and hand hammered. i'll have to measure it but they were the thickest ones from my metal stockpile. it was a big chore hammering it all out. i need the hammer practice and i really enjoy hitting hot metal. while it was enough stock to make the sword it did limit my options a bit - hence the hira zukuri bevel to. i was very efficient with the metal with almost no needed stock removal from the pre-quench finish. used satanite furnace cement and water in a plastic kiddie pool for the quench. tempered in an oven i made from pipe fed by exhaust from a cast iron stove at 400F for 2hrs. heat controlled by varying the air flow on the stove with a smoker thermometer in the pipe. i need to weigh it though, i designed it to be light weight and it sure is. holding one of my china bought katana's feels more like an axe in my hand when held. going from that to this sword you can REALLY feel the weight distribution is different. the weight of the sword feels much more centered, not tip heavy like my others. i don't have any tameshigiri but it cuts rolled up card board just fine.
-
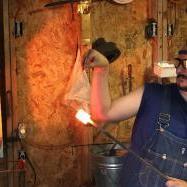
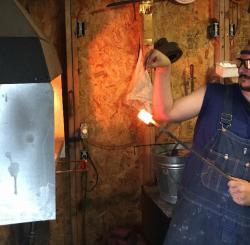
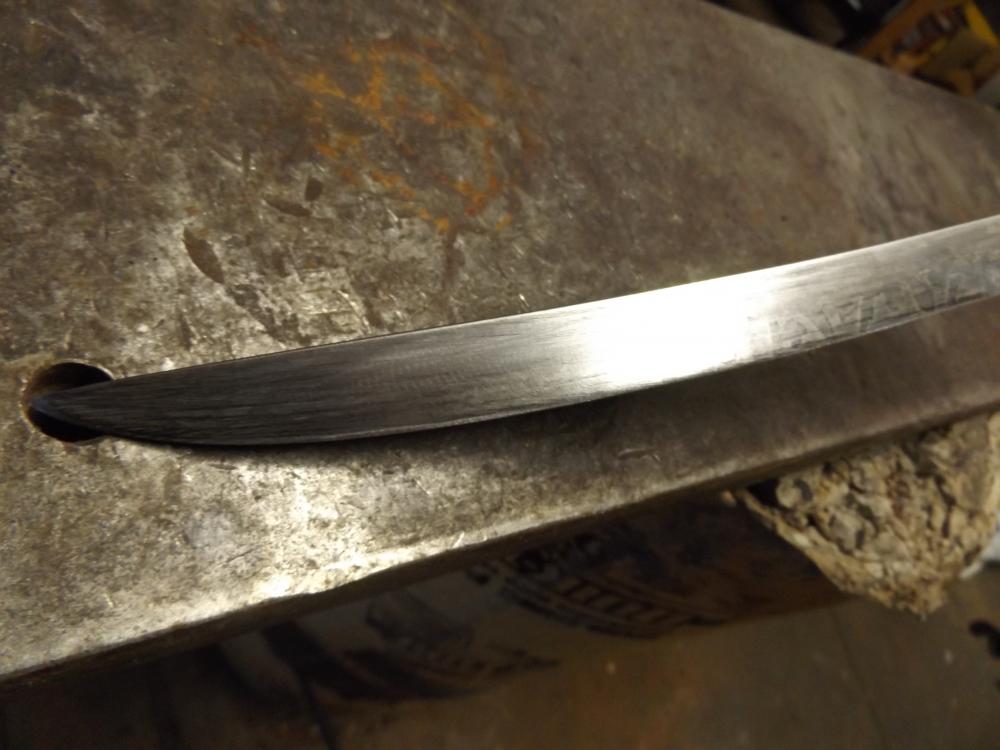
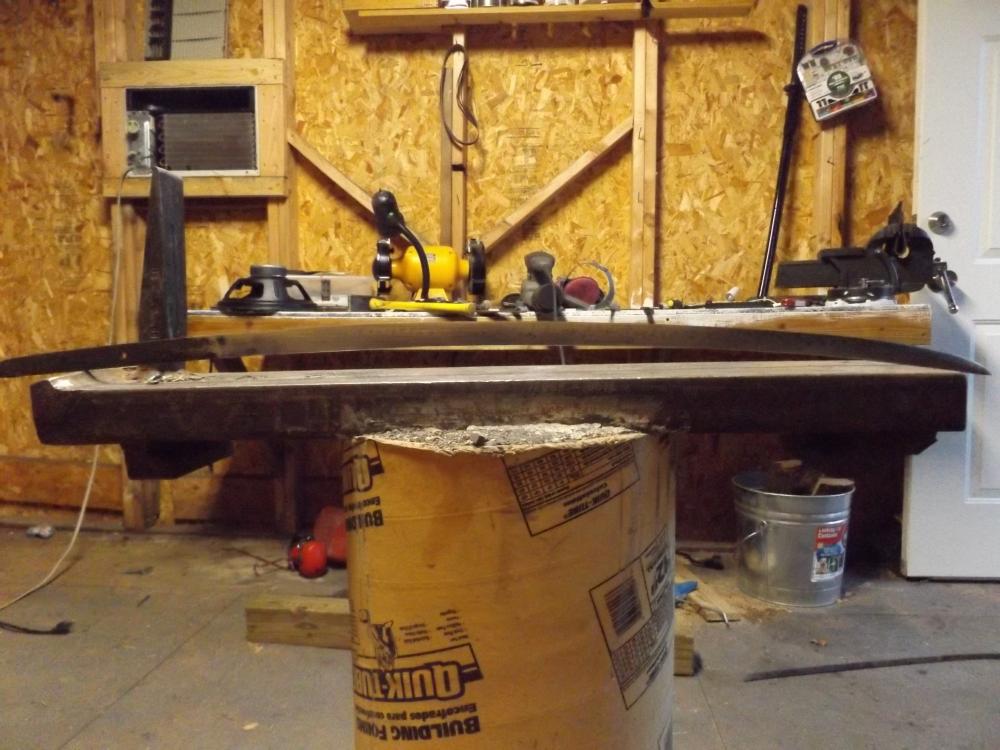
Be gentle it's the first sword I've ever attempted. Smithed from a land rover coil spring. Learned and applied many new principles as I worked on this. The hamon isn't great but it's there. Going to add some kind of thin hide under the wrappings, menuki and saya, but the blade itself is done. A lot of firsts with this learning sword - First time copper welding, first time differential hardening, first time doing ferric chloride. Worked on it infrequently for a year with breaks in between to make a few other things and fish a lot. There is a lot about this sword that is very basic, but it is very functional and I learned from a great many mistakes along the way. Most enjoyable experience I had while making this was watching the blade take shape, curving back on itself as the furnace cement crackled and flew off the blunt side of the blade. It was like watching the sword be born.
-
sadly the gar skin ended up as a bunch of scales in a pile. gonna have to go with something else. im a big time catfish guy, may use catfish skull bones to carve the menuki; i have some pretty big blue cat skulls lying around in the back. gonna put some pics of the hamon up in the sword forum in a minute.
-
Still working on it. put on a temporary leather cord wrap on the handle for a test look. Don't have a closeup of the hamon but it looks pretty good. more pics later after more progress. First sword ever, learning a lot loving the work.
-
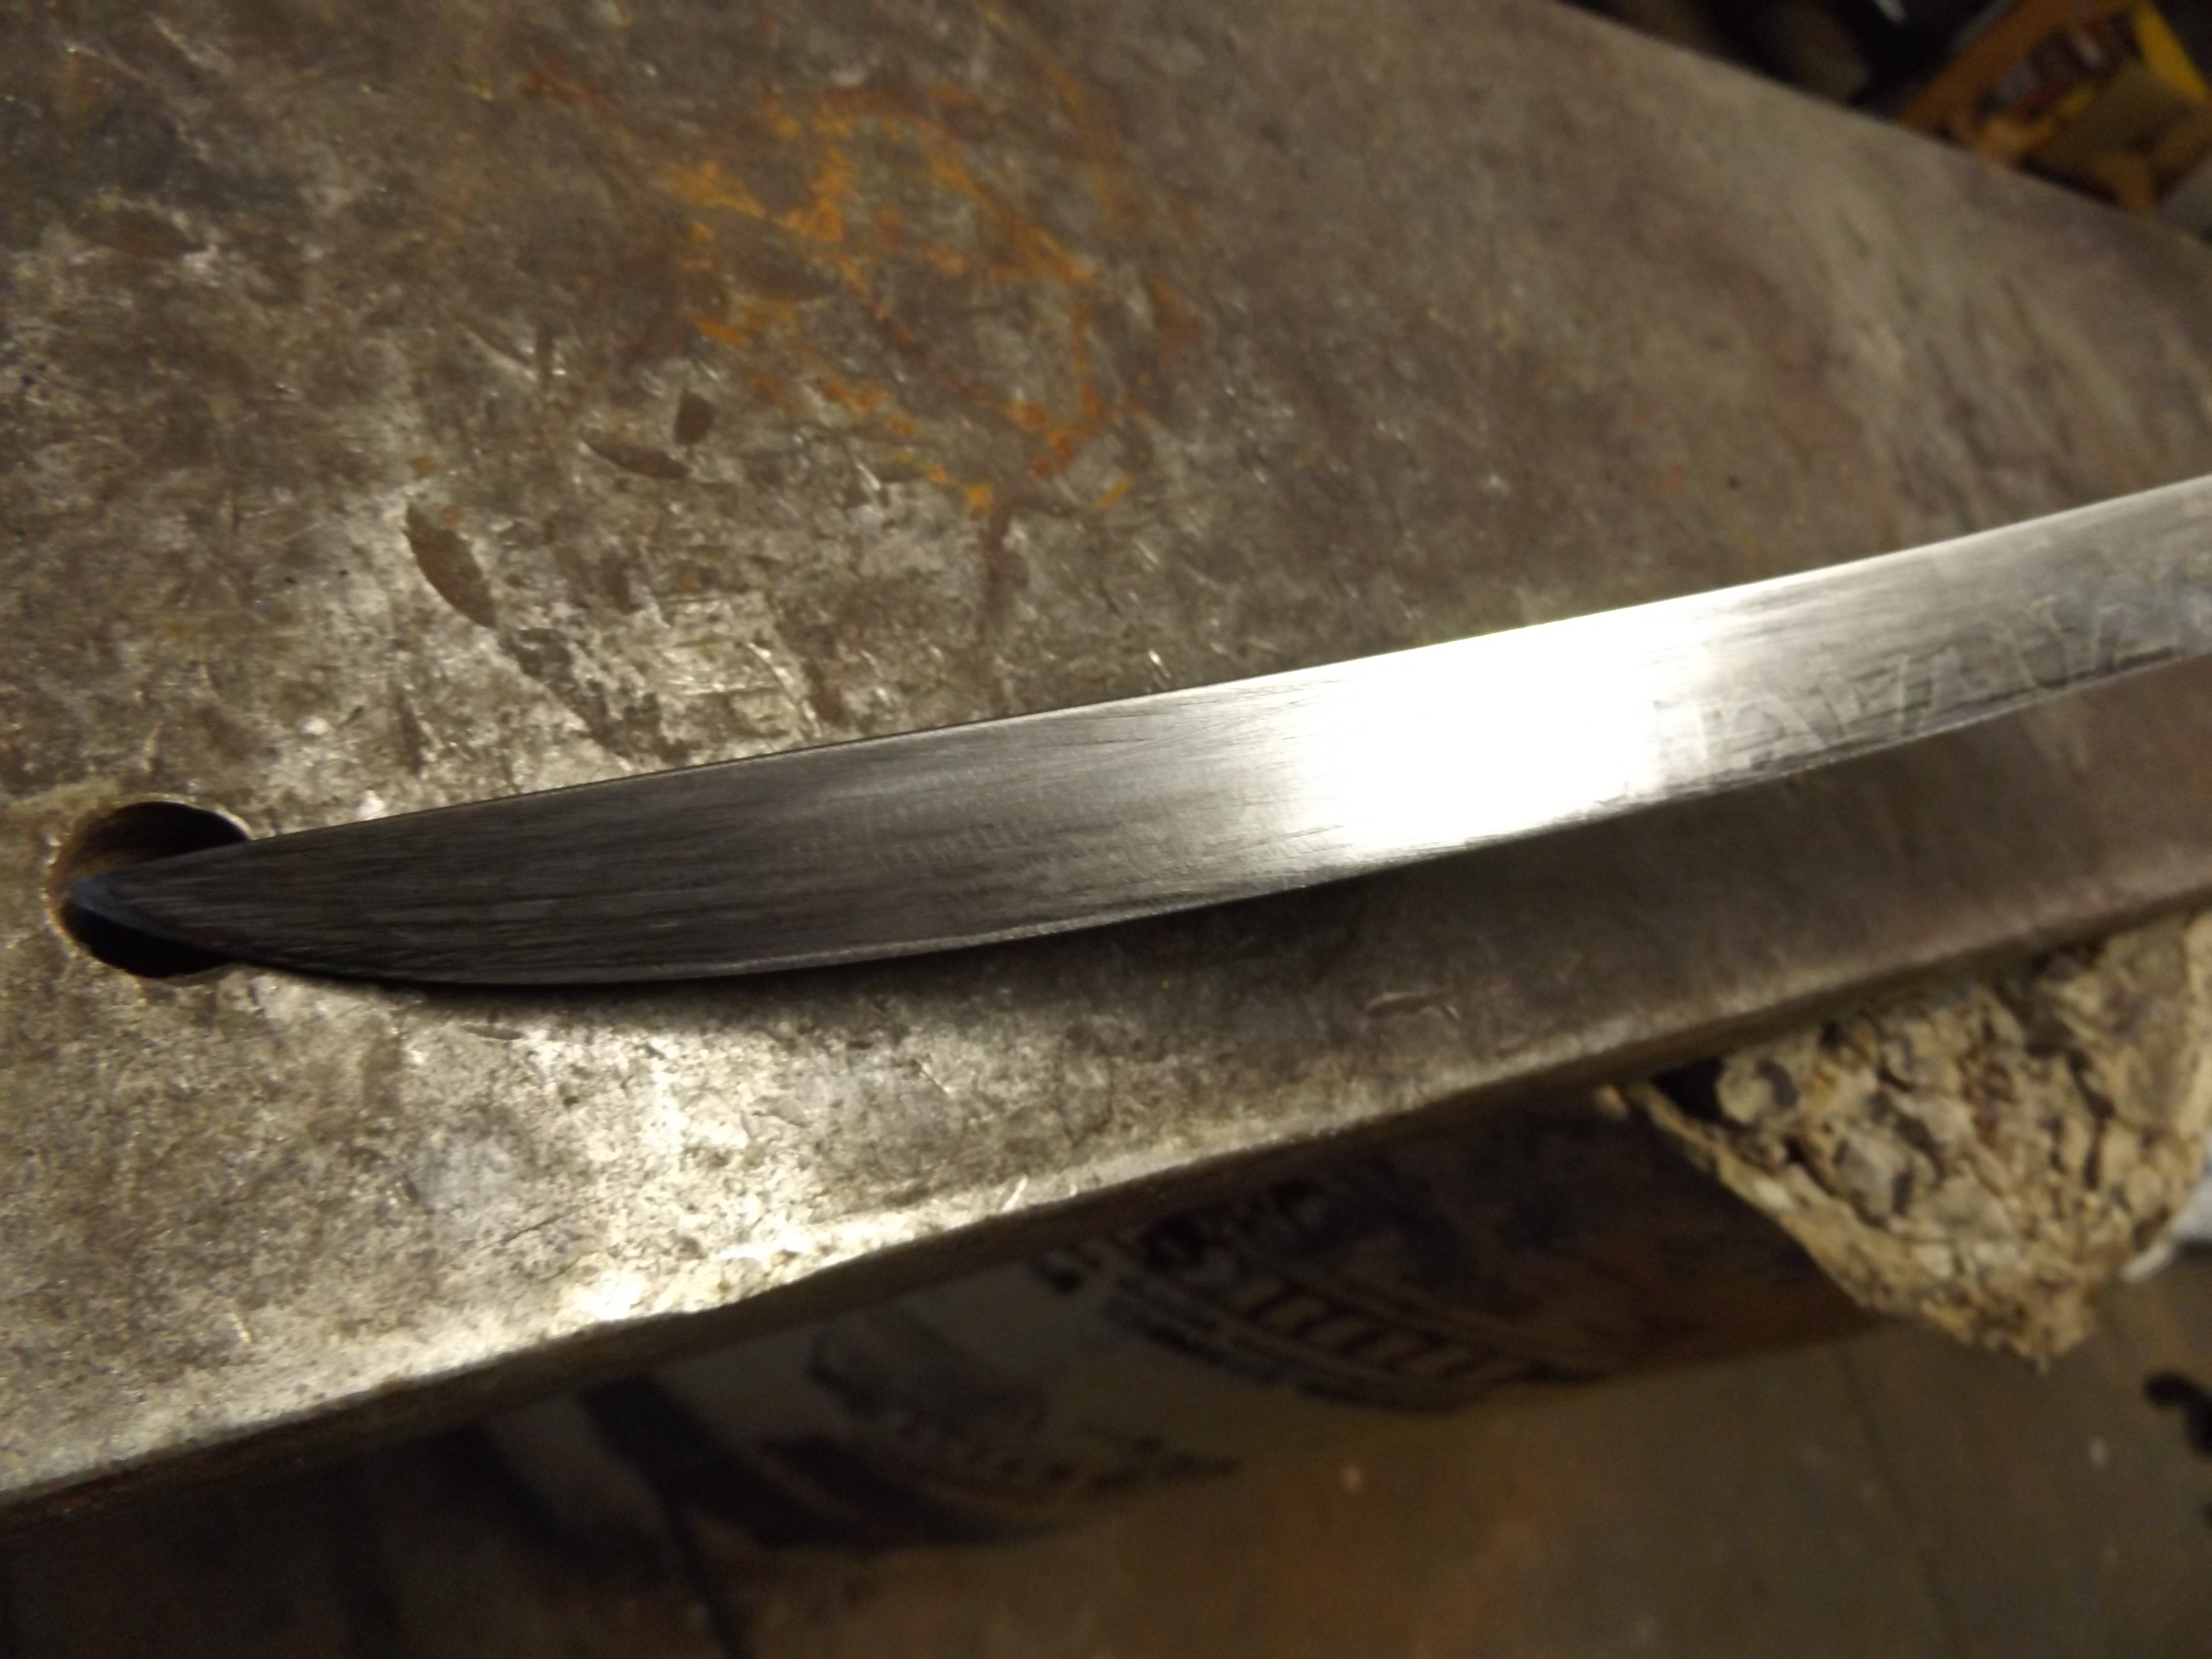
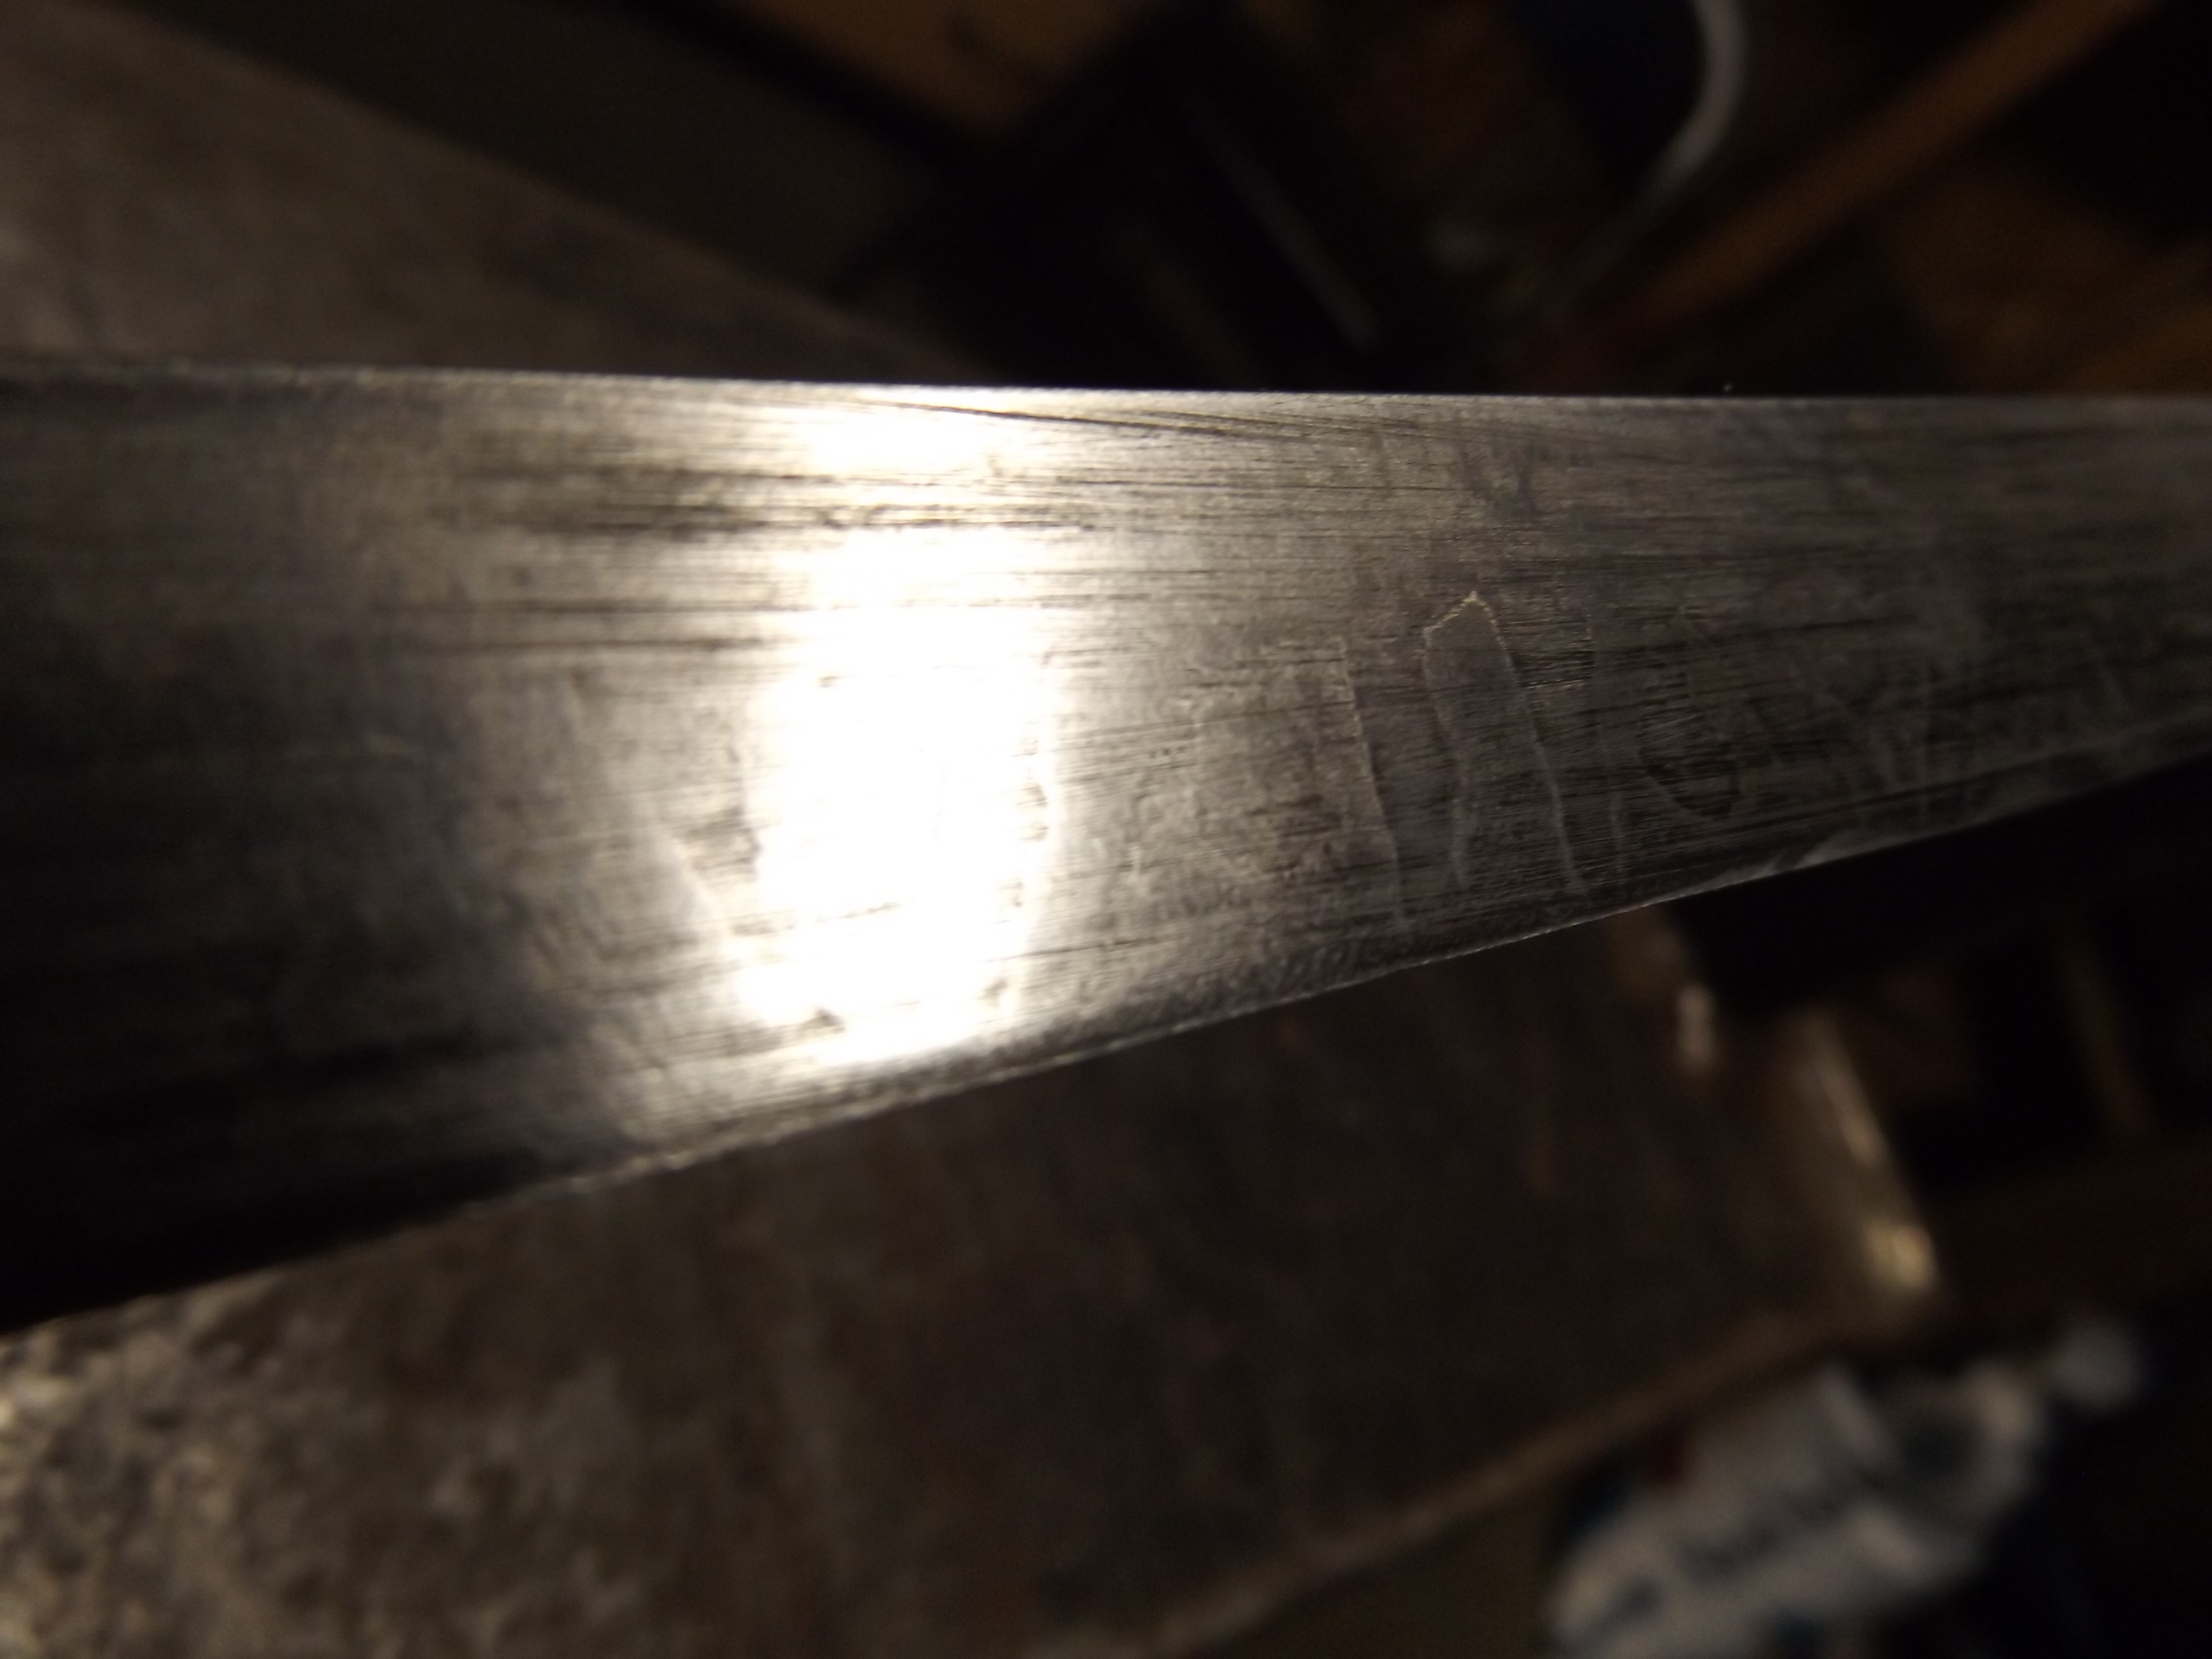
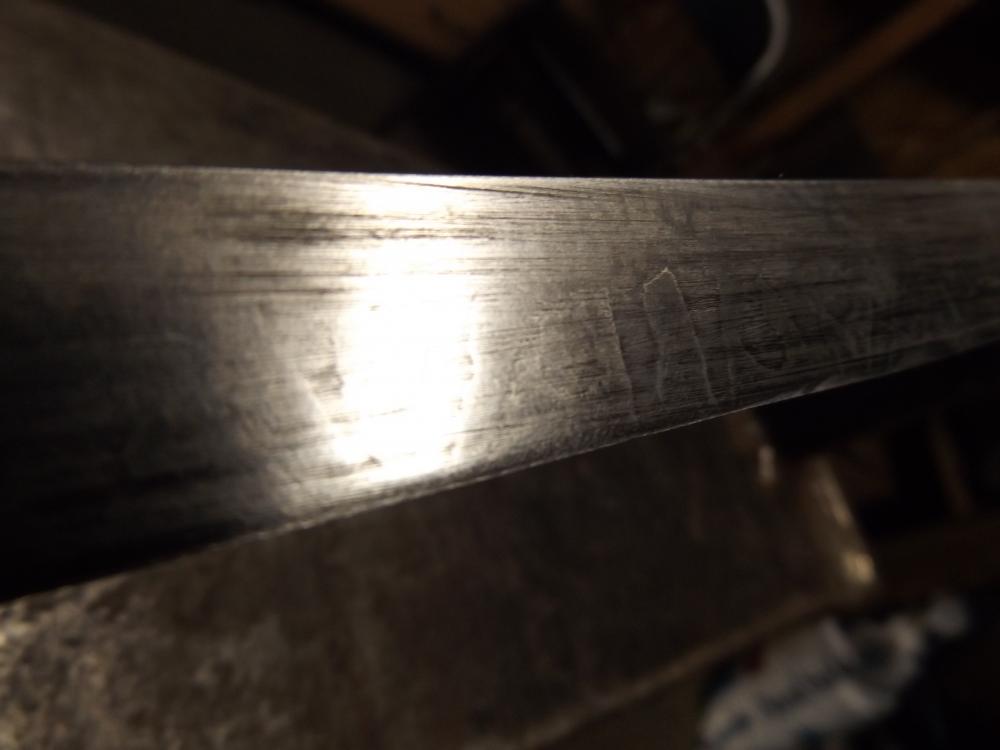
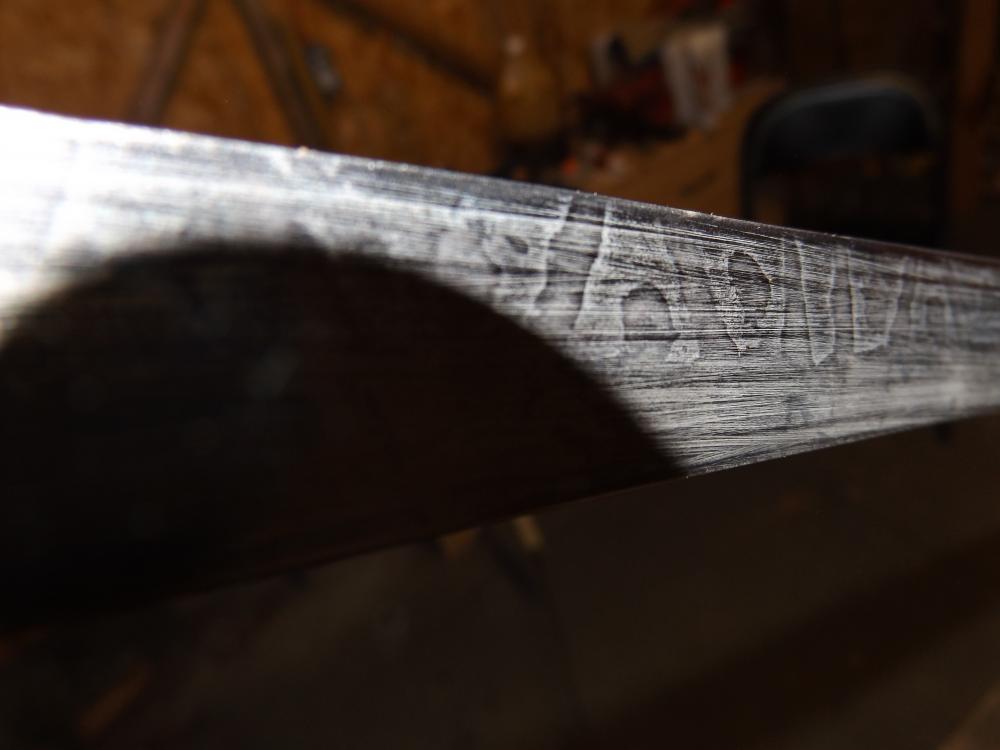
found the pics of the hamon coming out. http://davidproberts.com/2015/07/25/found-the-tachi-pics-blacksmithing/
-
all completely myself. habaki, seppa's are done, working on tsuba now then fuchi/kashira. not sure what XXXXXXXX im gonna do for menuki, but for the skin wrap under the cord i have alligator gar skin cured up and ready to go, will be wrapped around walnut. like the rest of my work i try to supply as much as i can first hand. in this case this young (small scales) alligator gar i caught is the willing donor.
-
attempt at hira zukuri tachi. goals: super light weight, simple enough to not bite off more than i can chew on the first bite, and as much done by hand (ie no power tools) as possible. first large blade, first Japanese style blade. lots of mistakes, but leaps and bounds past that stupid butter knife on the OP. wanted to experience first hand watching the back and forth curving of a differential quench. hearing the furnace cement crack and fly off as the blade curved backwards more and more was exhilarating. land rover coil spring. completely hammered, filed and sanded by hand. heated with wood. still have a ways to go, but far enough to throw some pics up.
-
my first attempt was with lead based solder, big mistake. bought the 98/2 tin/silver wire with flux paste afterwards. by the 3rd attempt i nailed it. had a little sliver of tin discoloration, will use larger copper wedges in the future to fix.