blacksmith-450
-
Posts
378 -
Joined
-
Last visited
Content Type
Profiles
Forums
Articles
Gallery
Downloads
Events
Everything posted by blacksmith-450
-
Thank you !
-
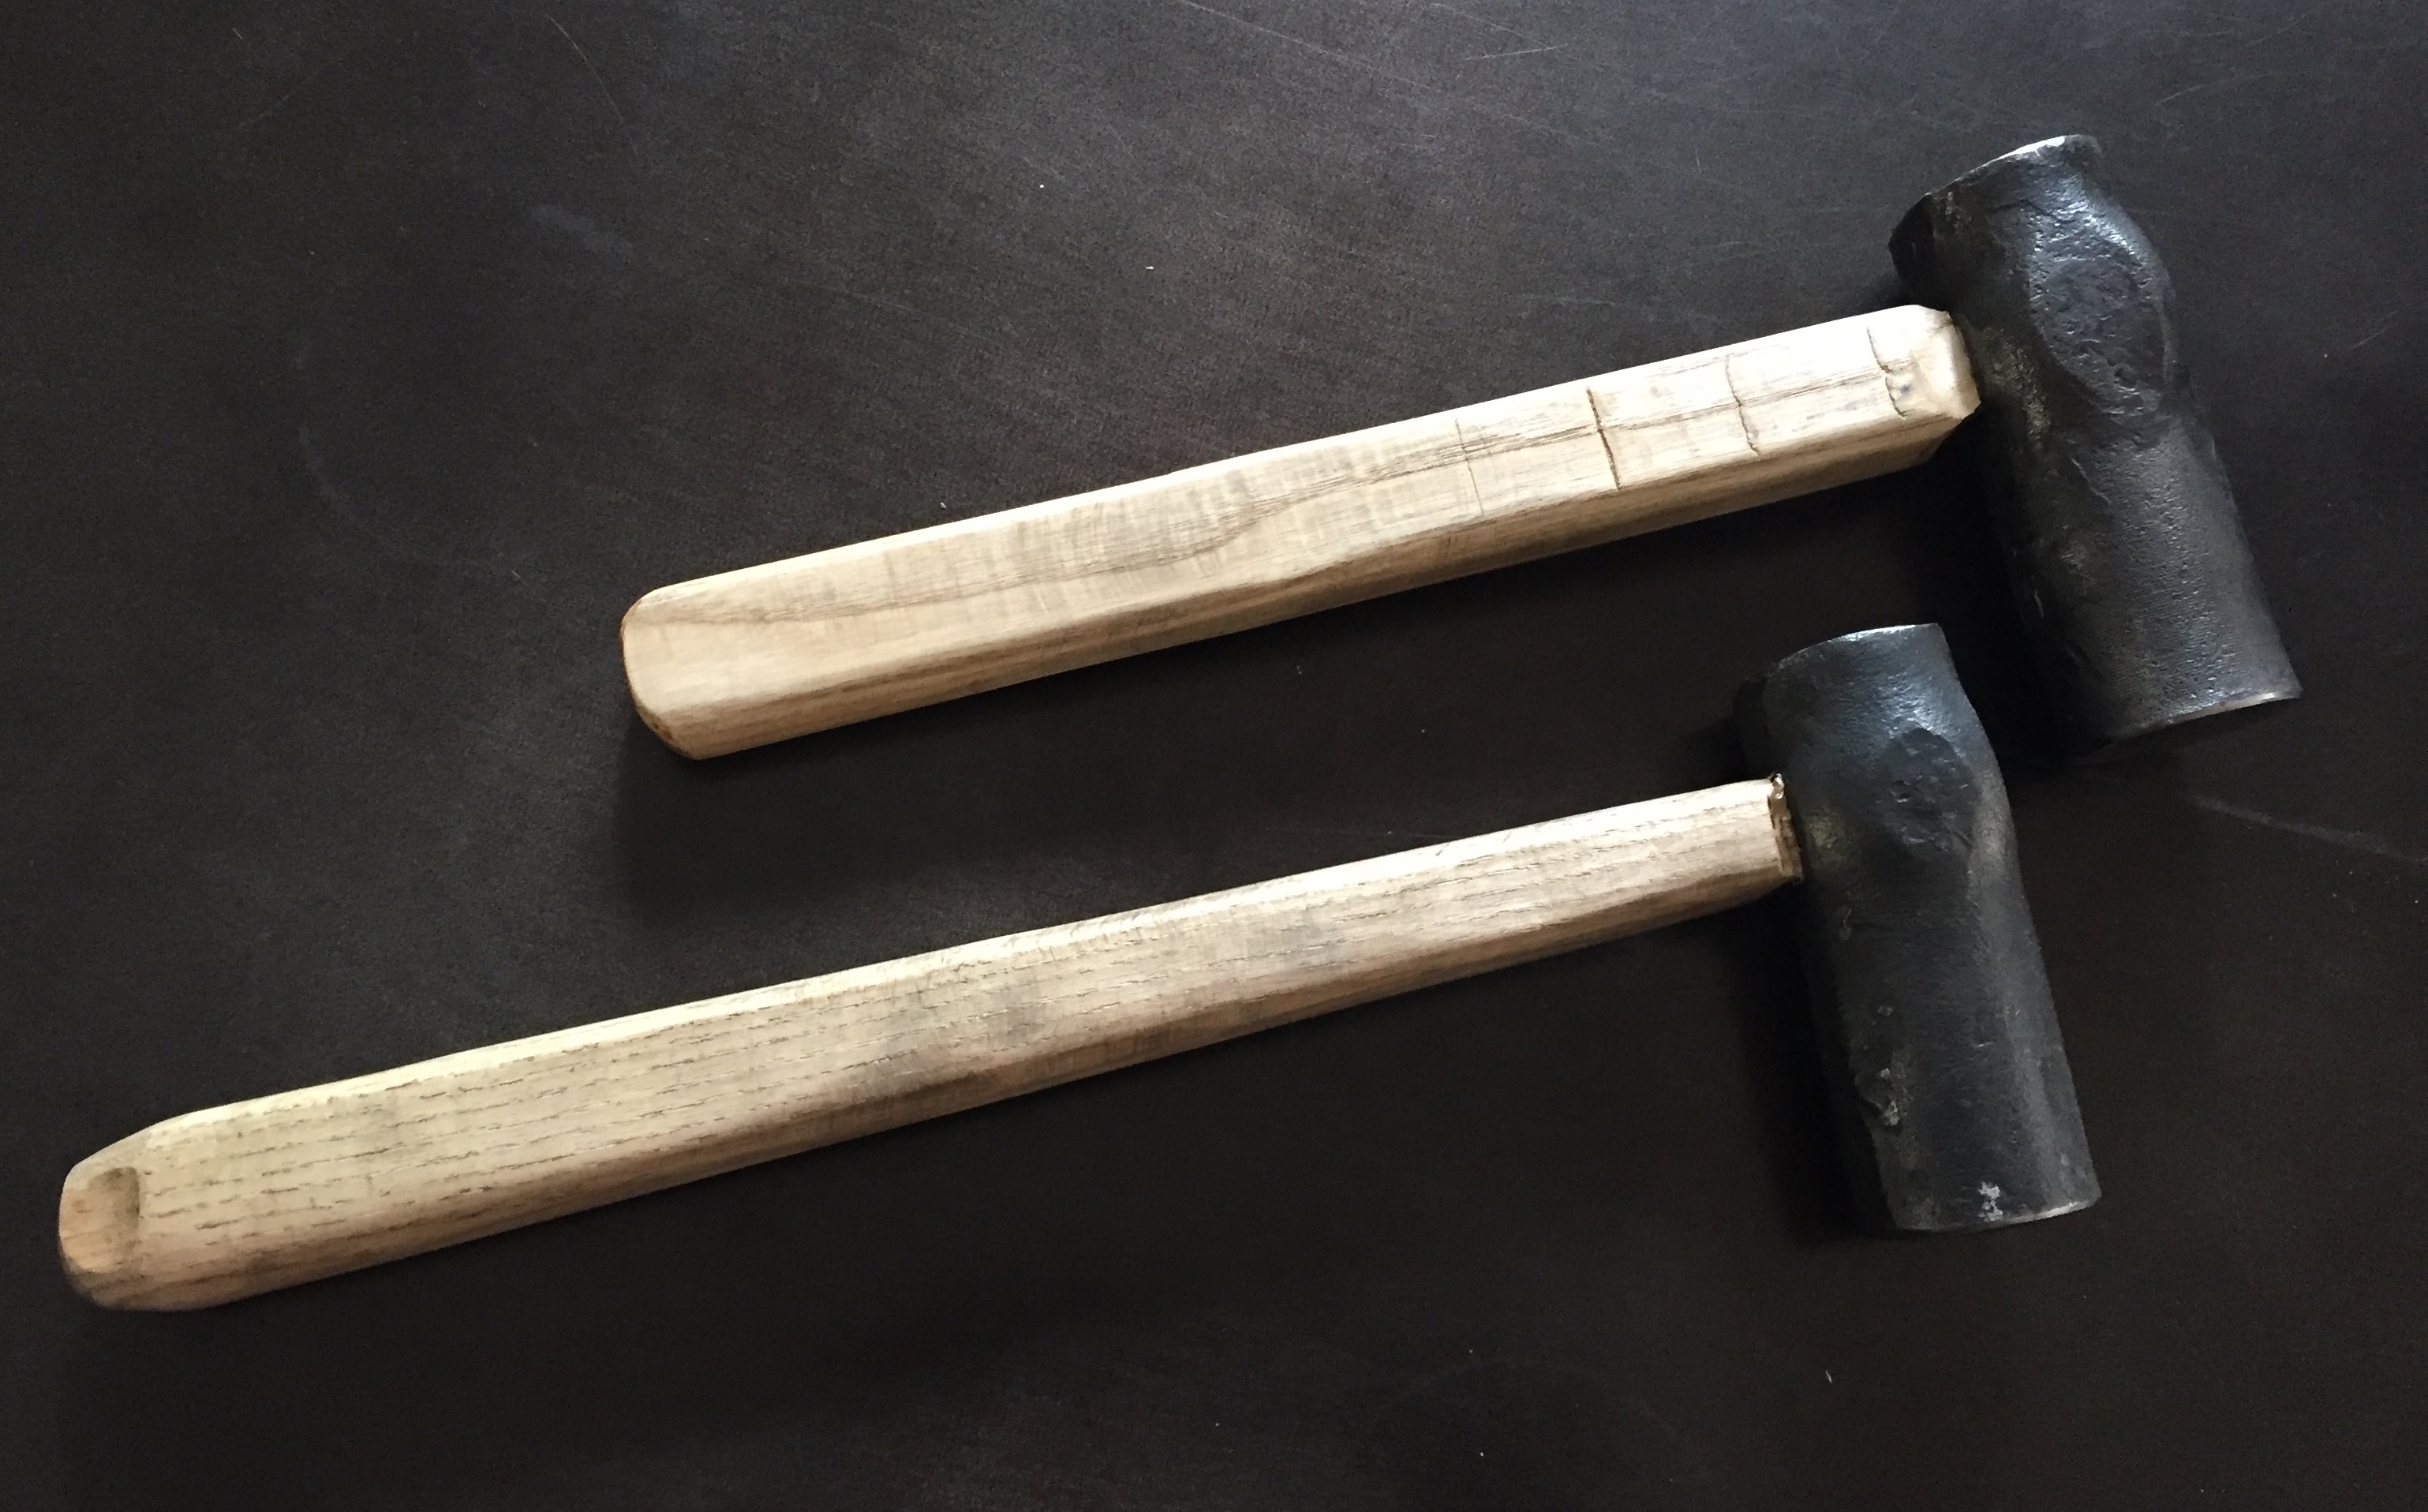
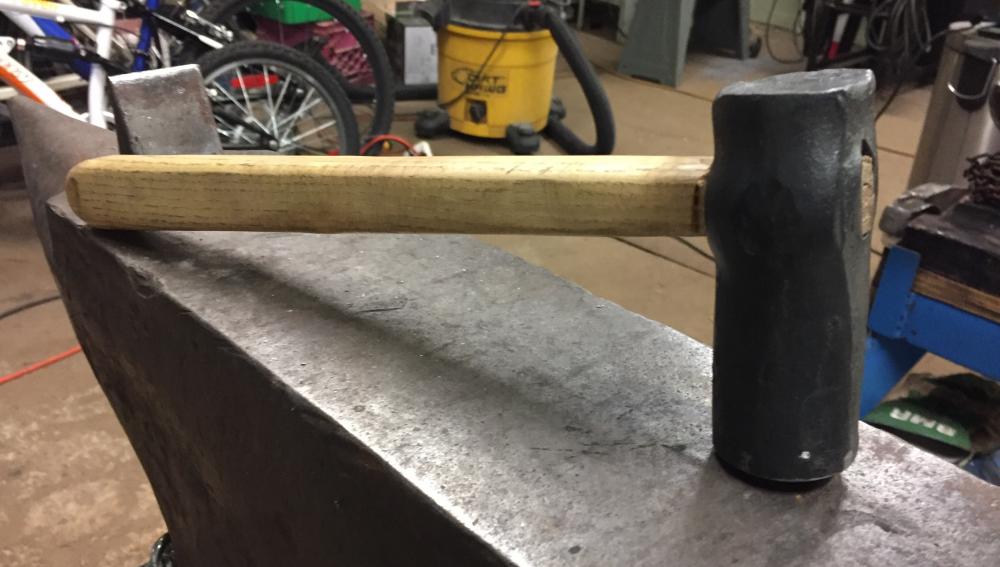
Head - Face ??? help me with my english ! LOL !!! Forge from an found axel, maybe 1040.... ?


-
Hello from Montreal south-shore
blacksmith-450 replied to blacksmith-450's topic in Introduce Yourself
You're right... -
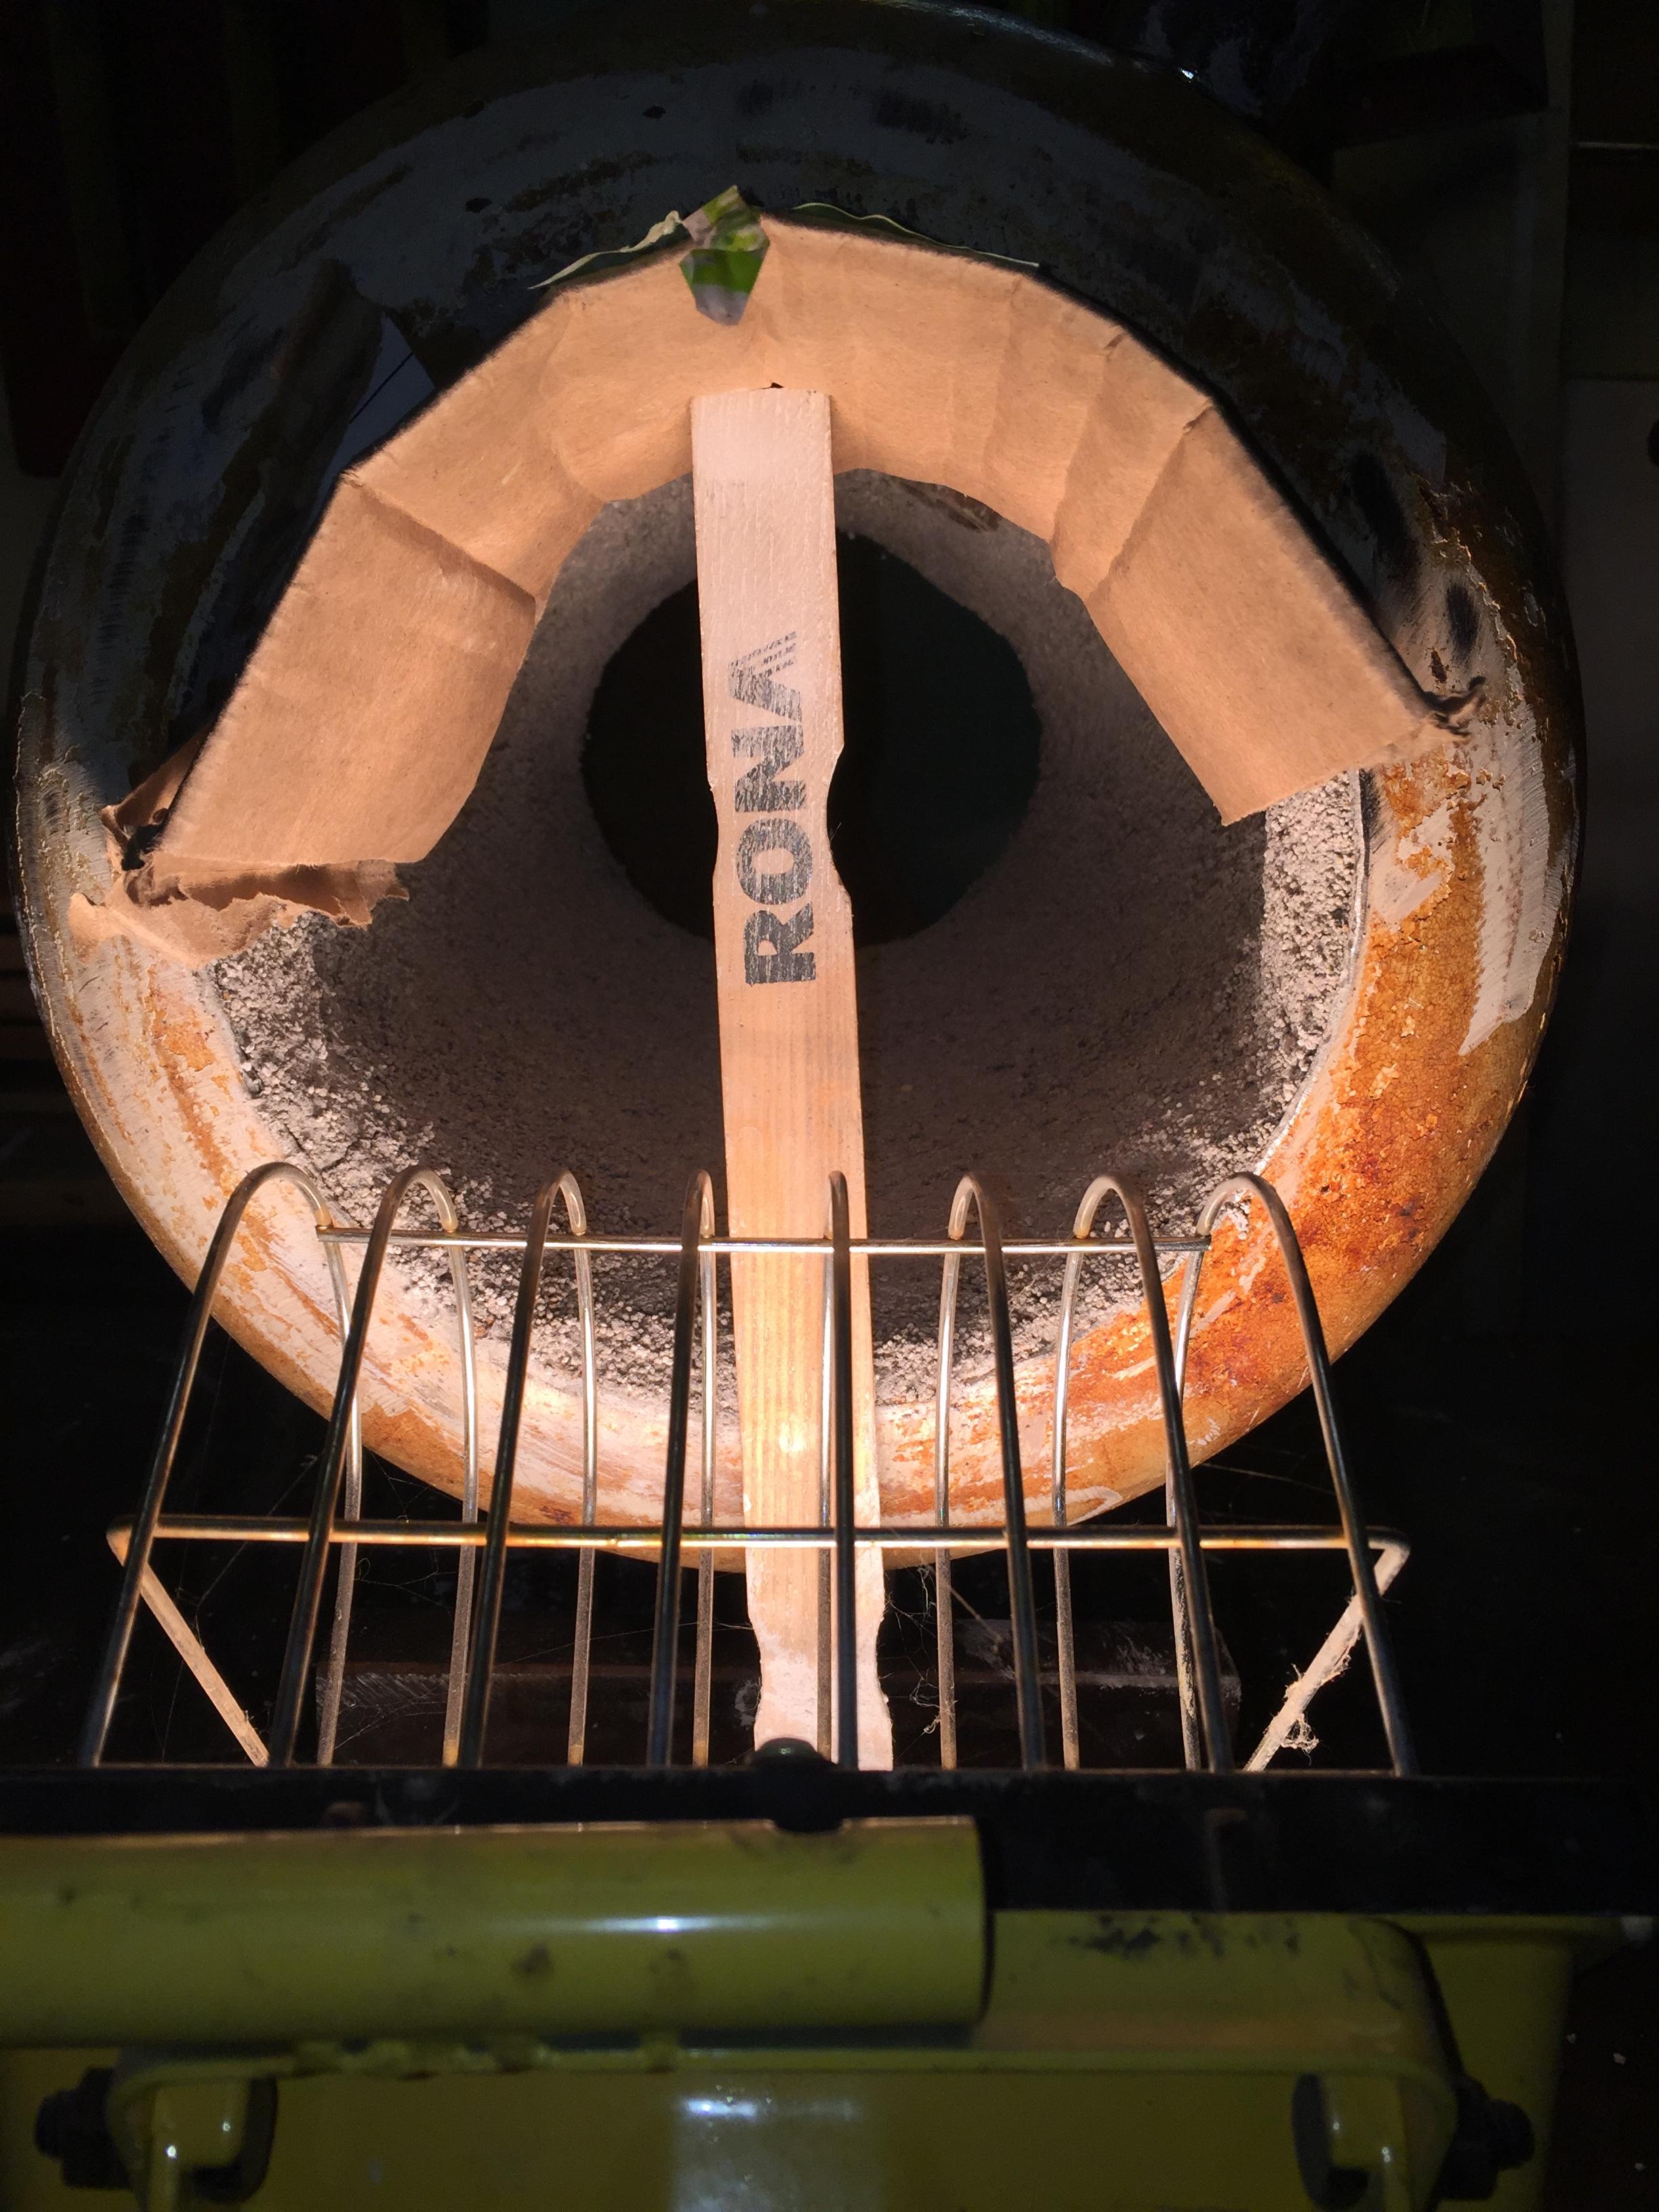
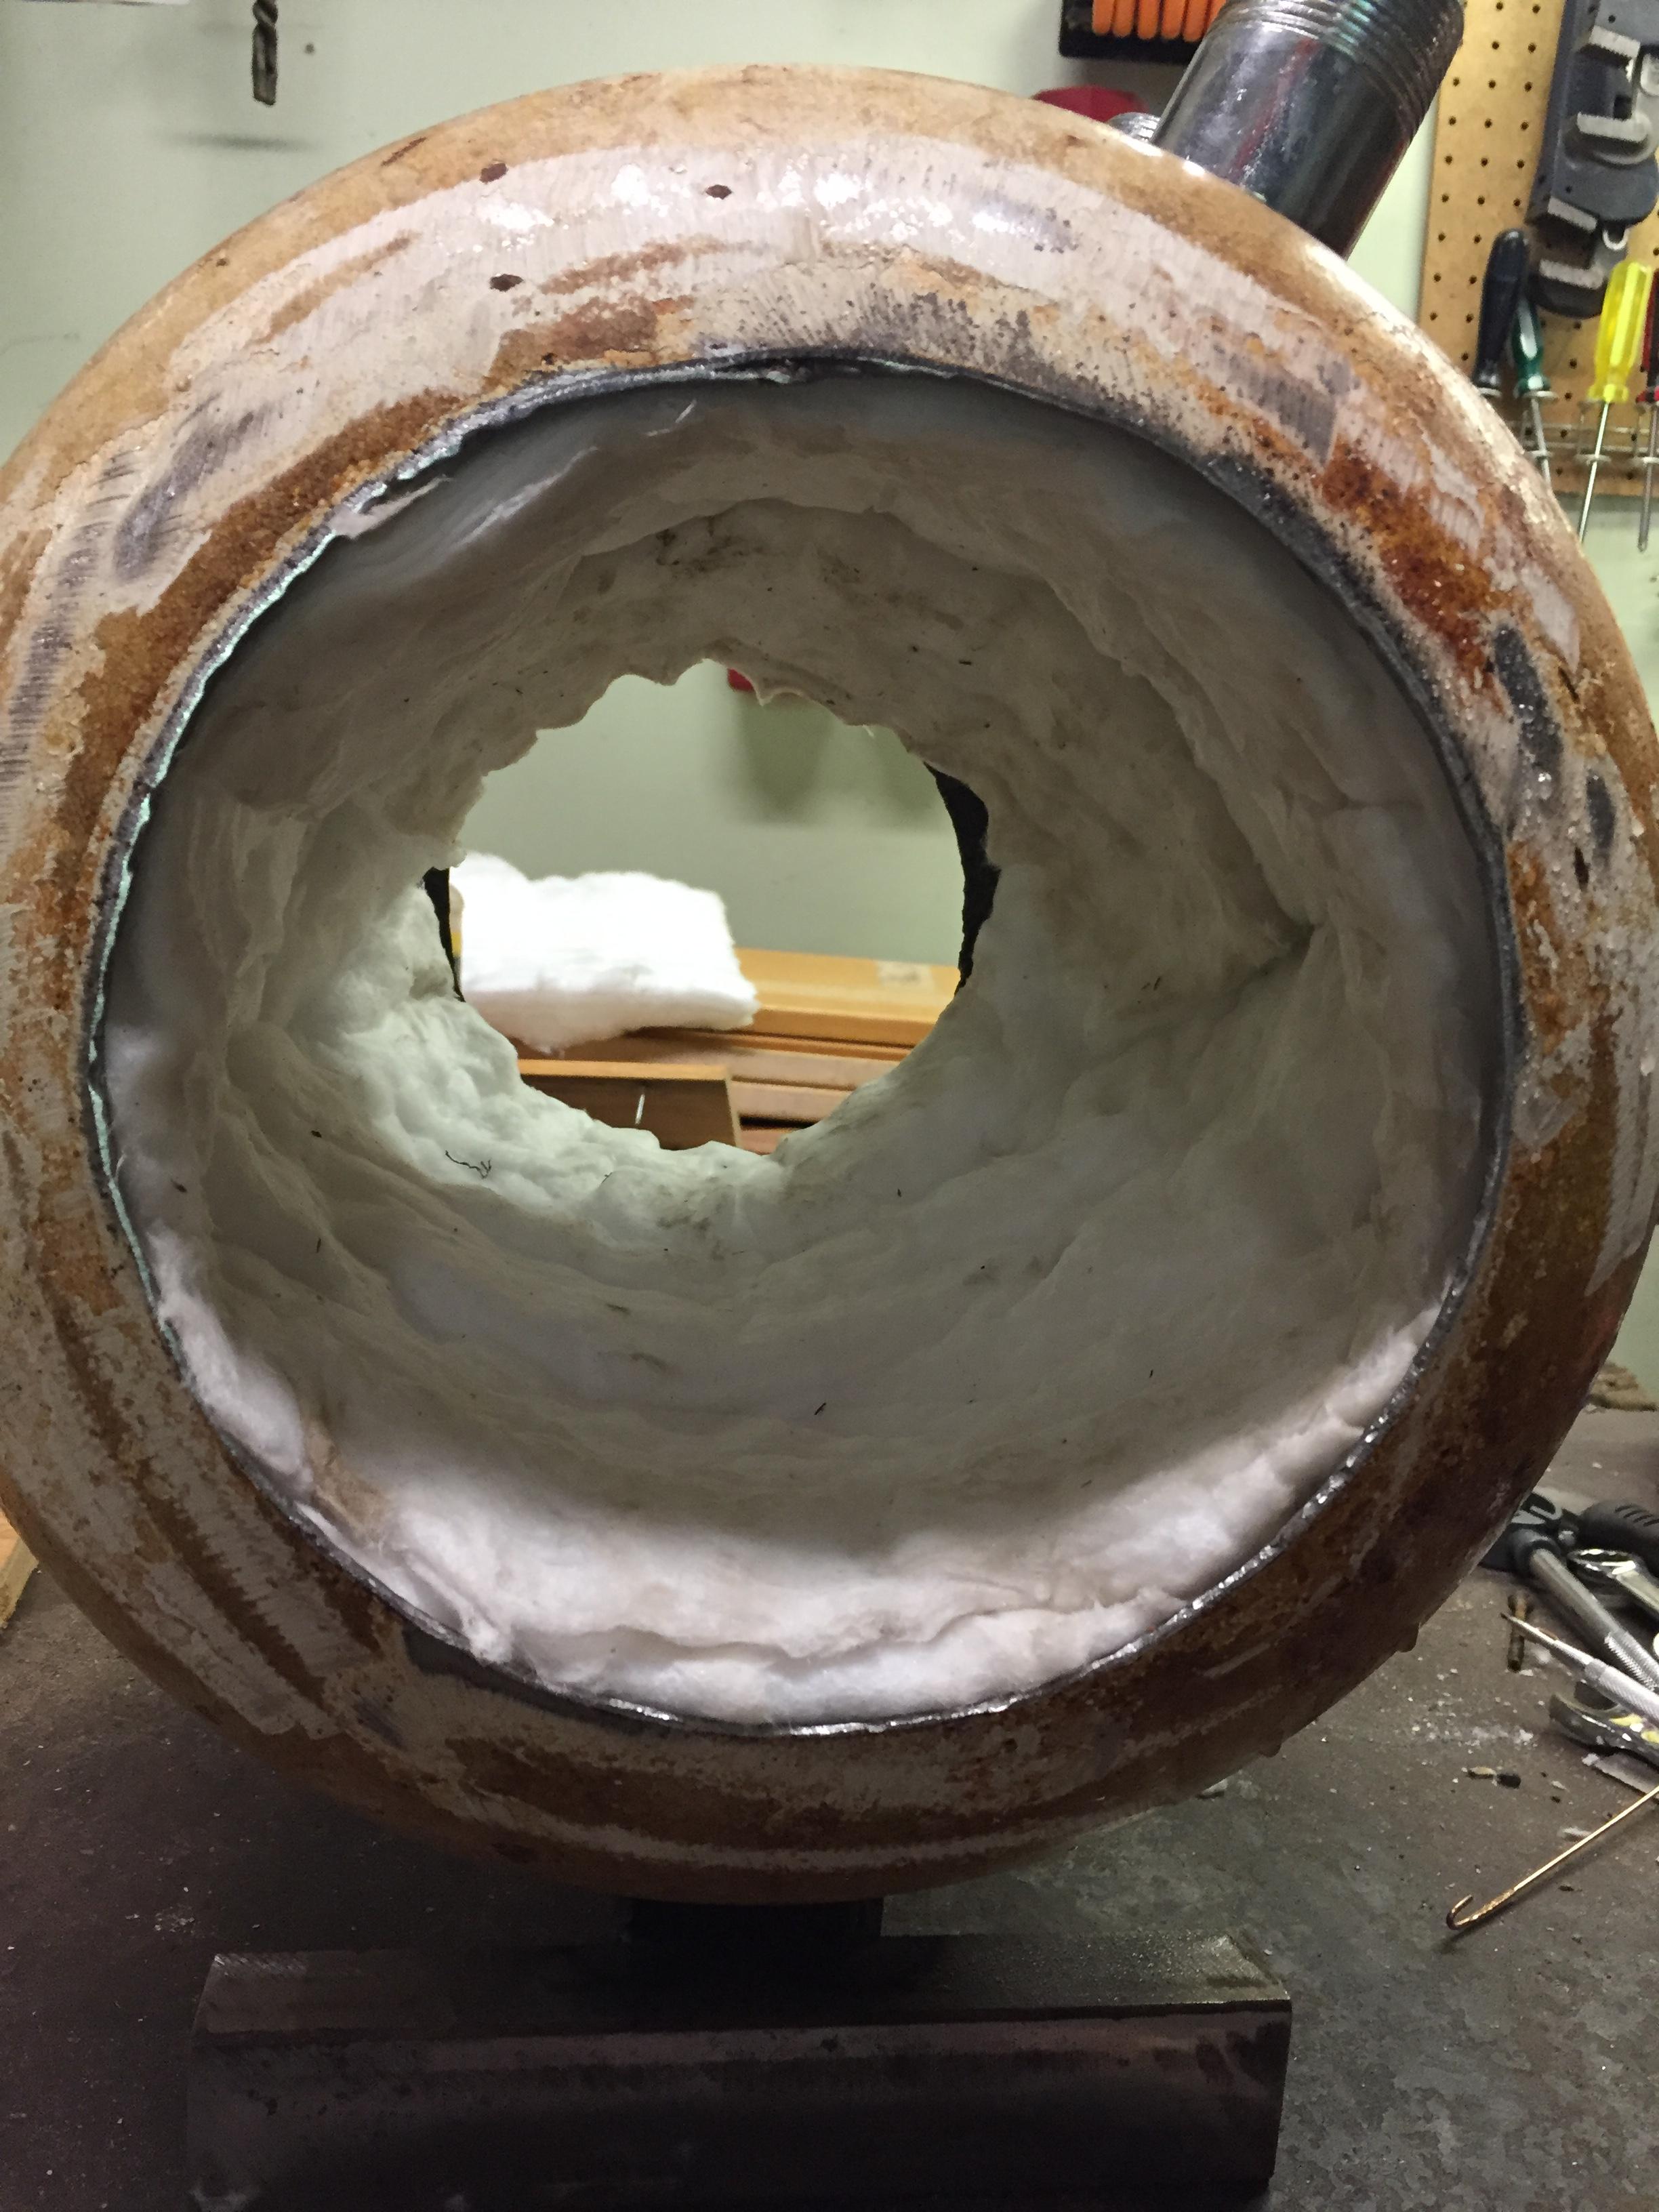
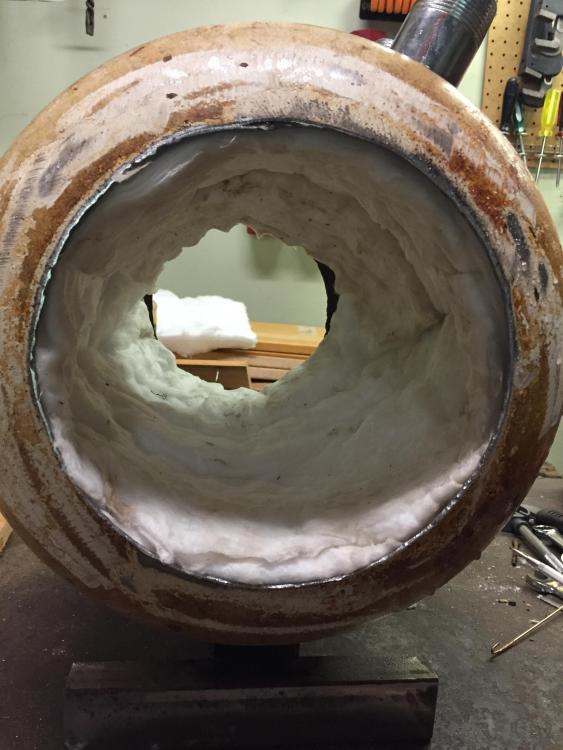
I applied the Kast-O-Lite, it went well but I concluded that I should have done it on 2-3 days instead of the same day. I should have done the third part of the bottom, wait until it is dry, turn a third, repeat for a third and finish the last third. To think that it is quite dry and to continue quickly is a mistake IMHO. My result looks OK, but the next one will be done with the sequence of thirds.


-
Salut Antoine, Glad to see U here. Ben
-
Hello from Montreal south-shore
blacksmith-450 replied to blacksmith-450's topic in Introduce Yourself
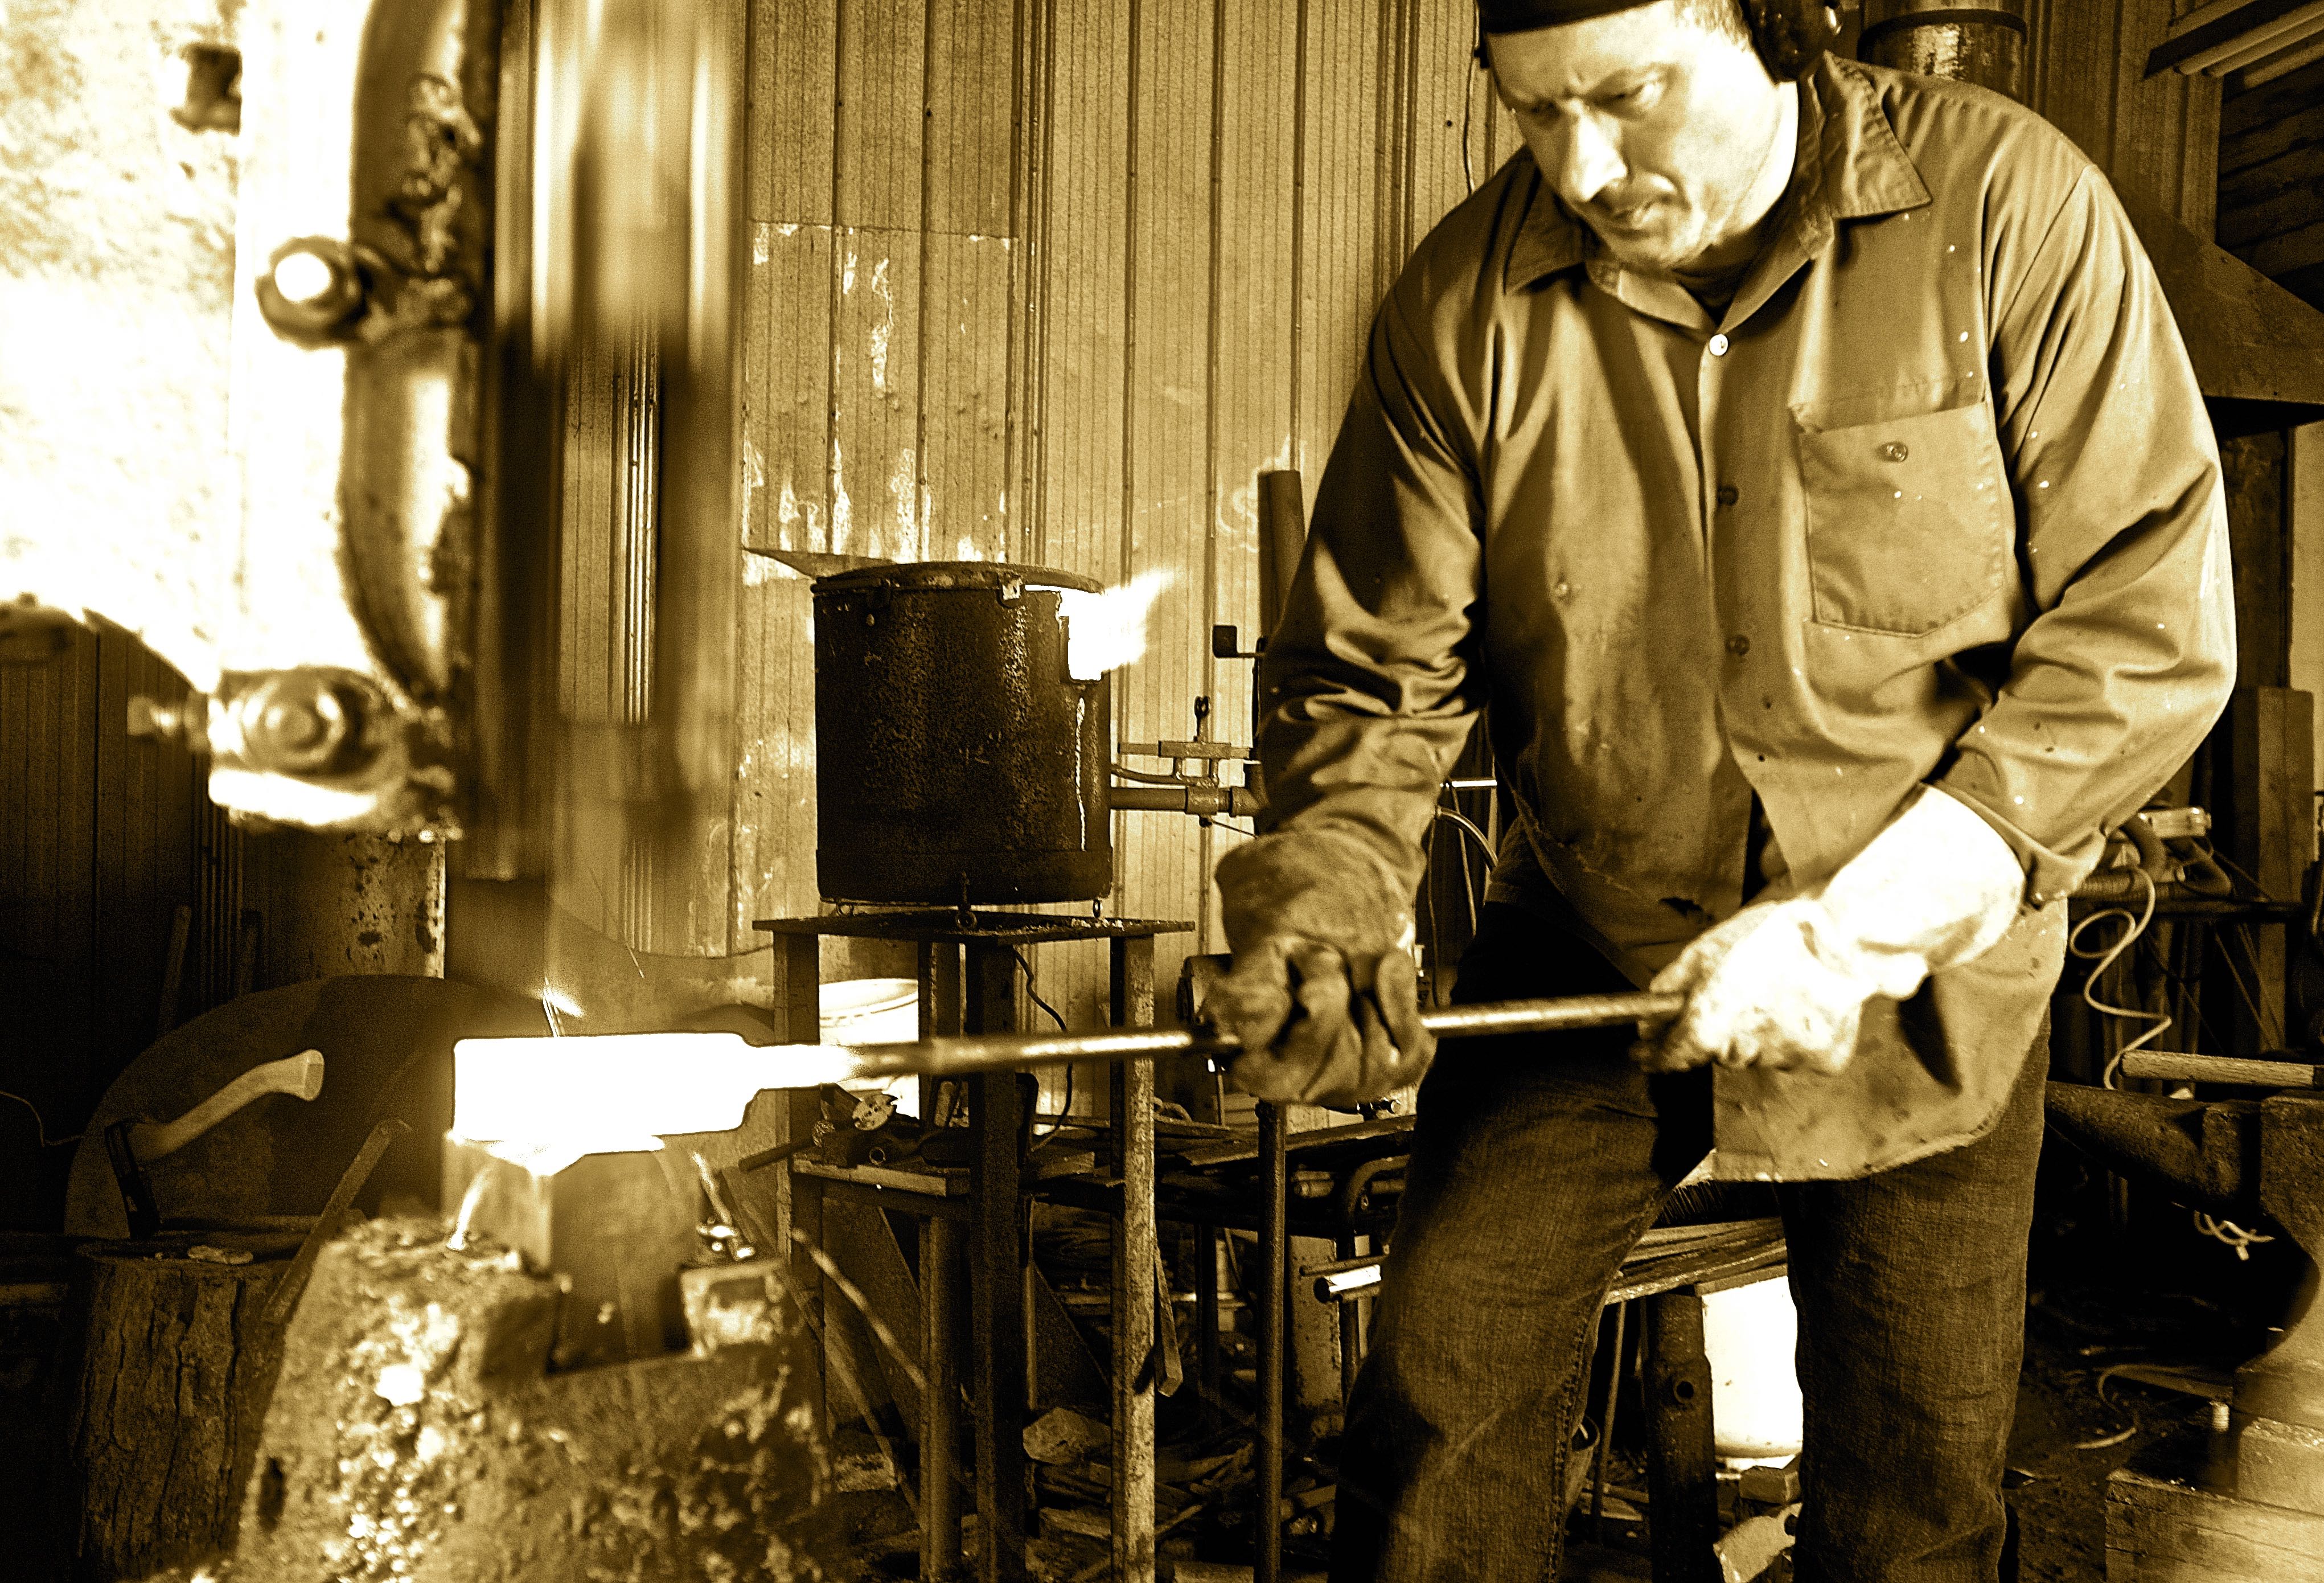
A picture says more than a thousand words : ME !
-
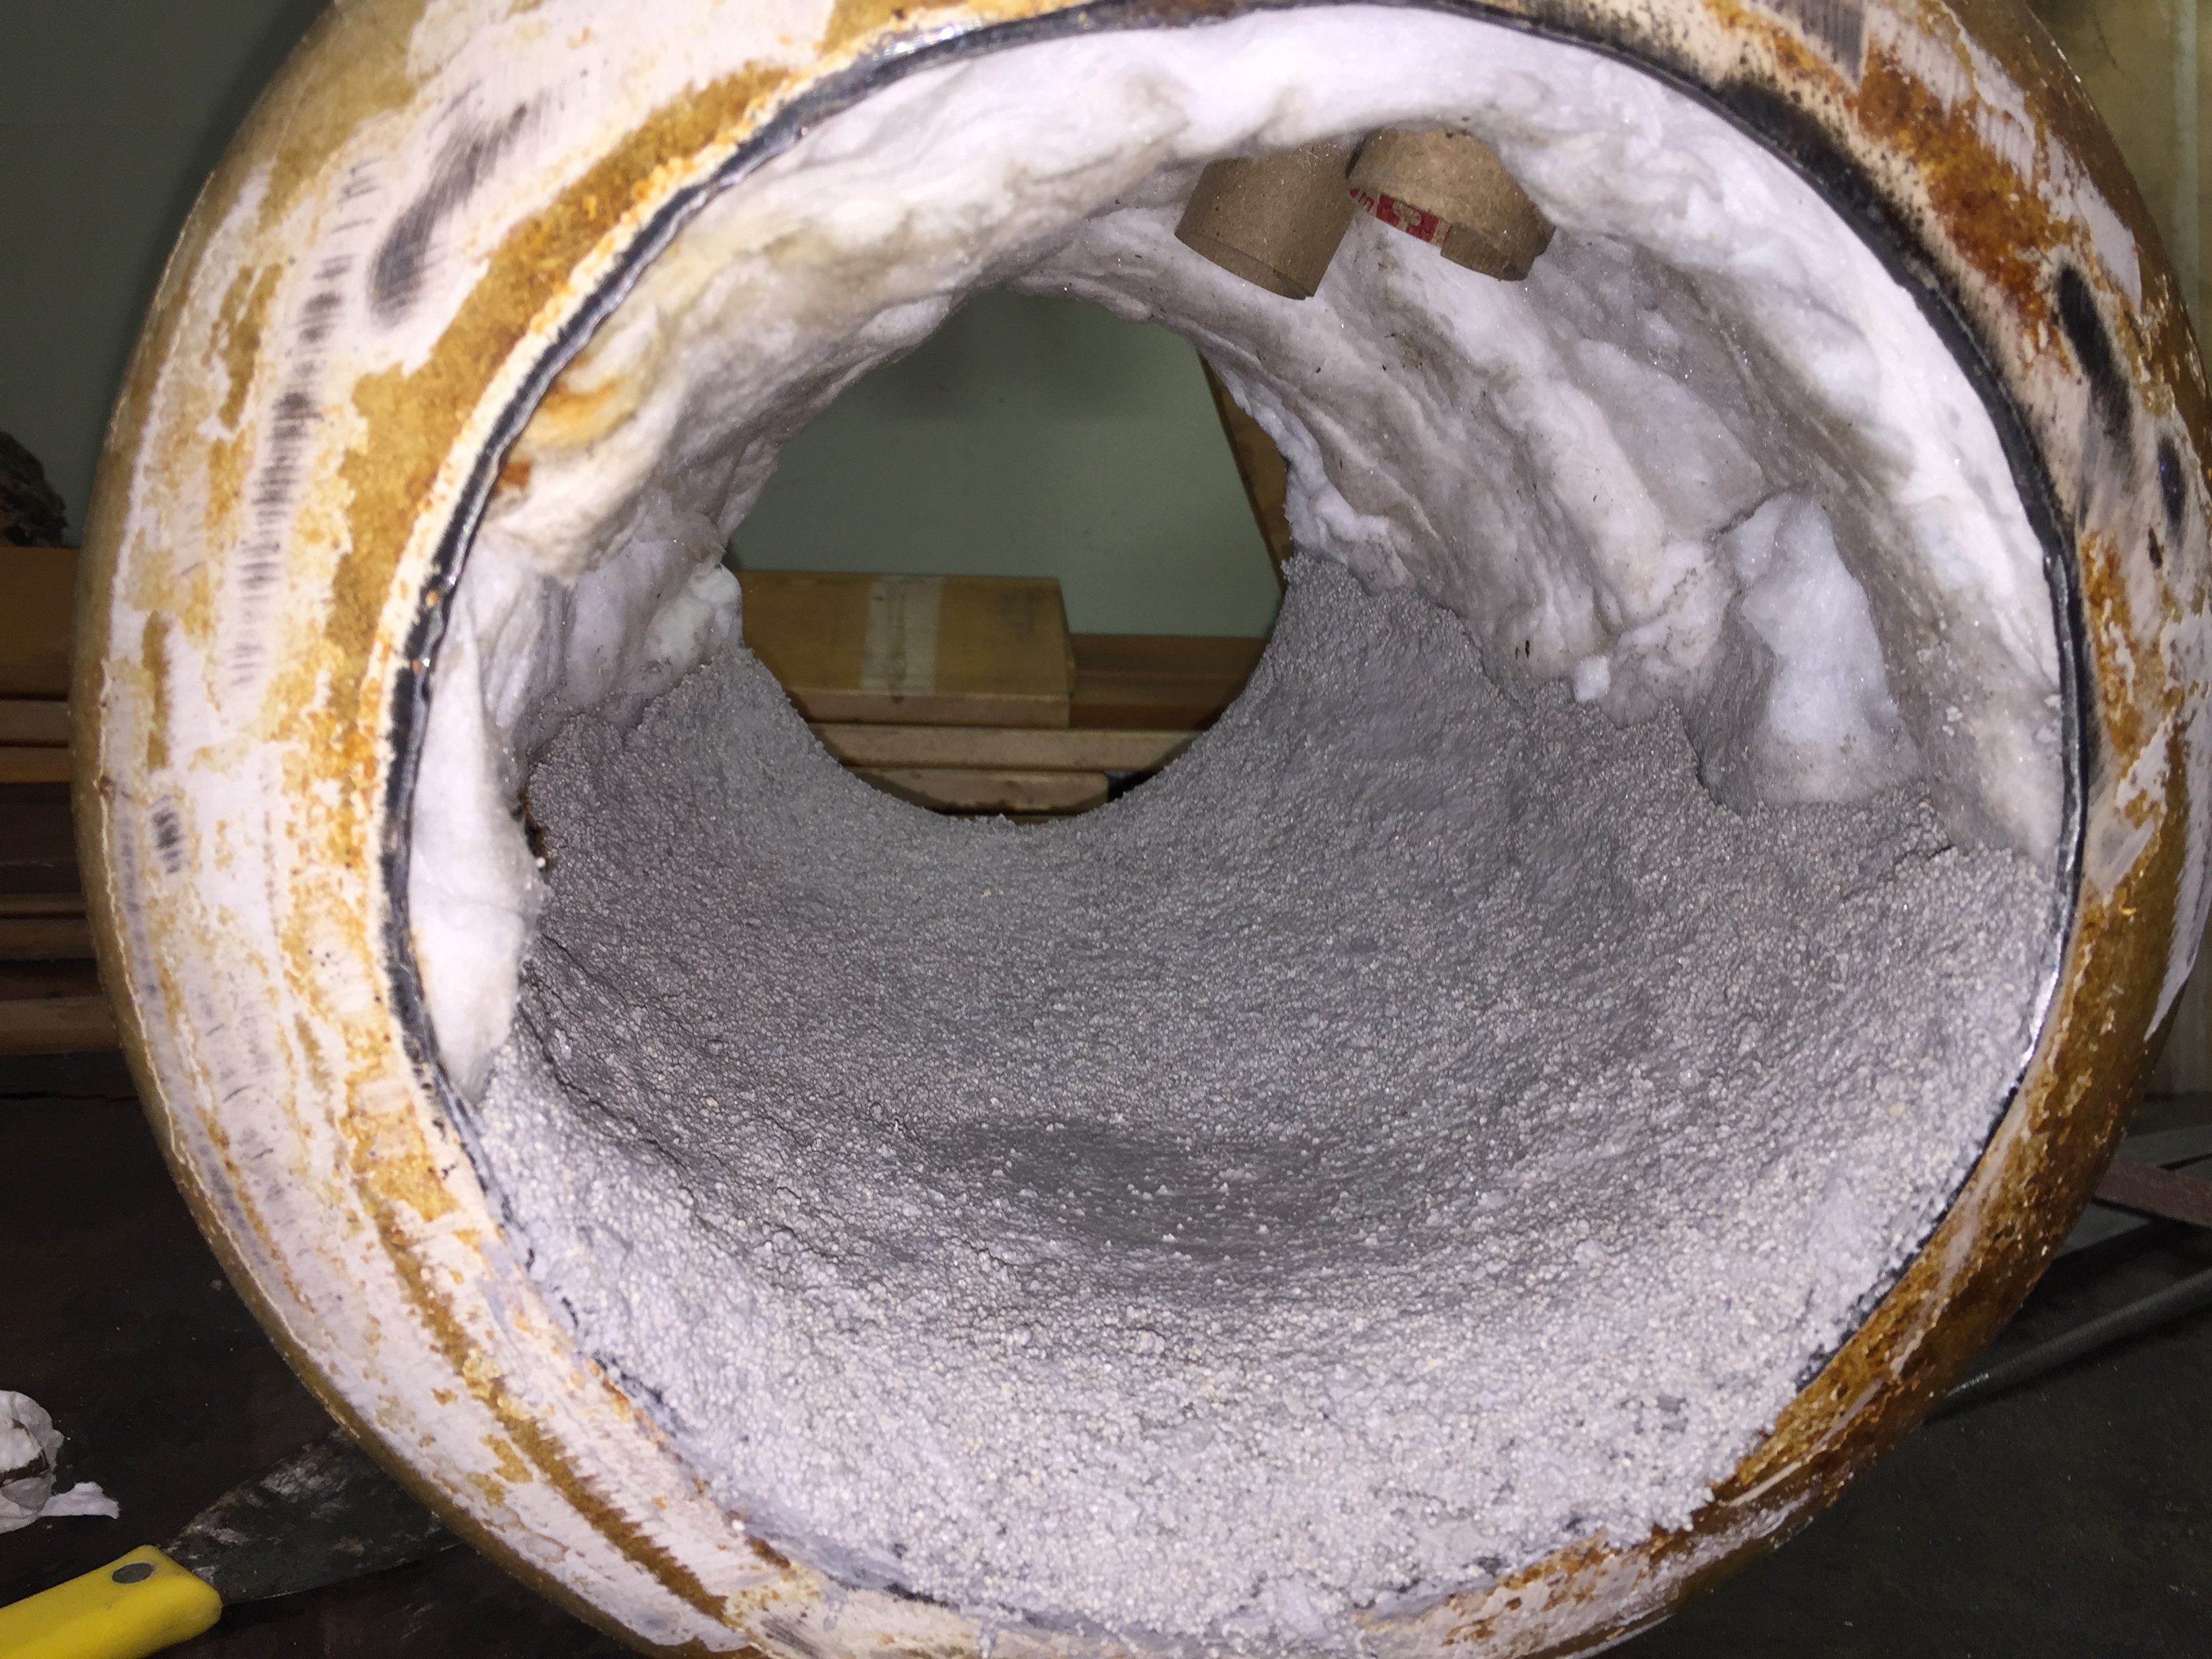
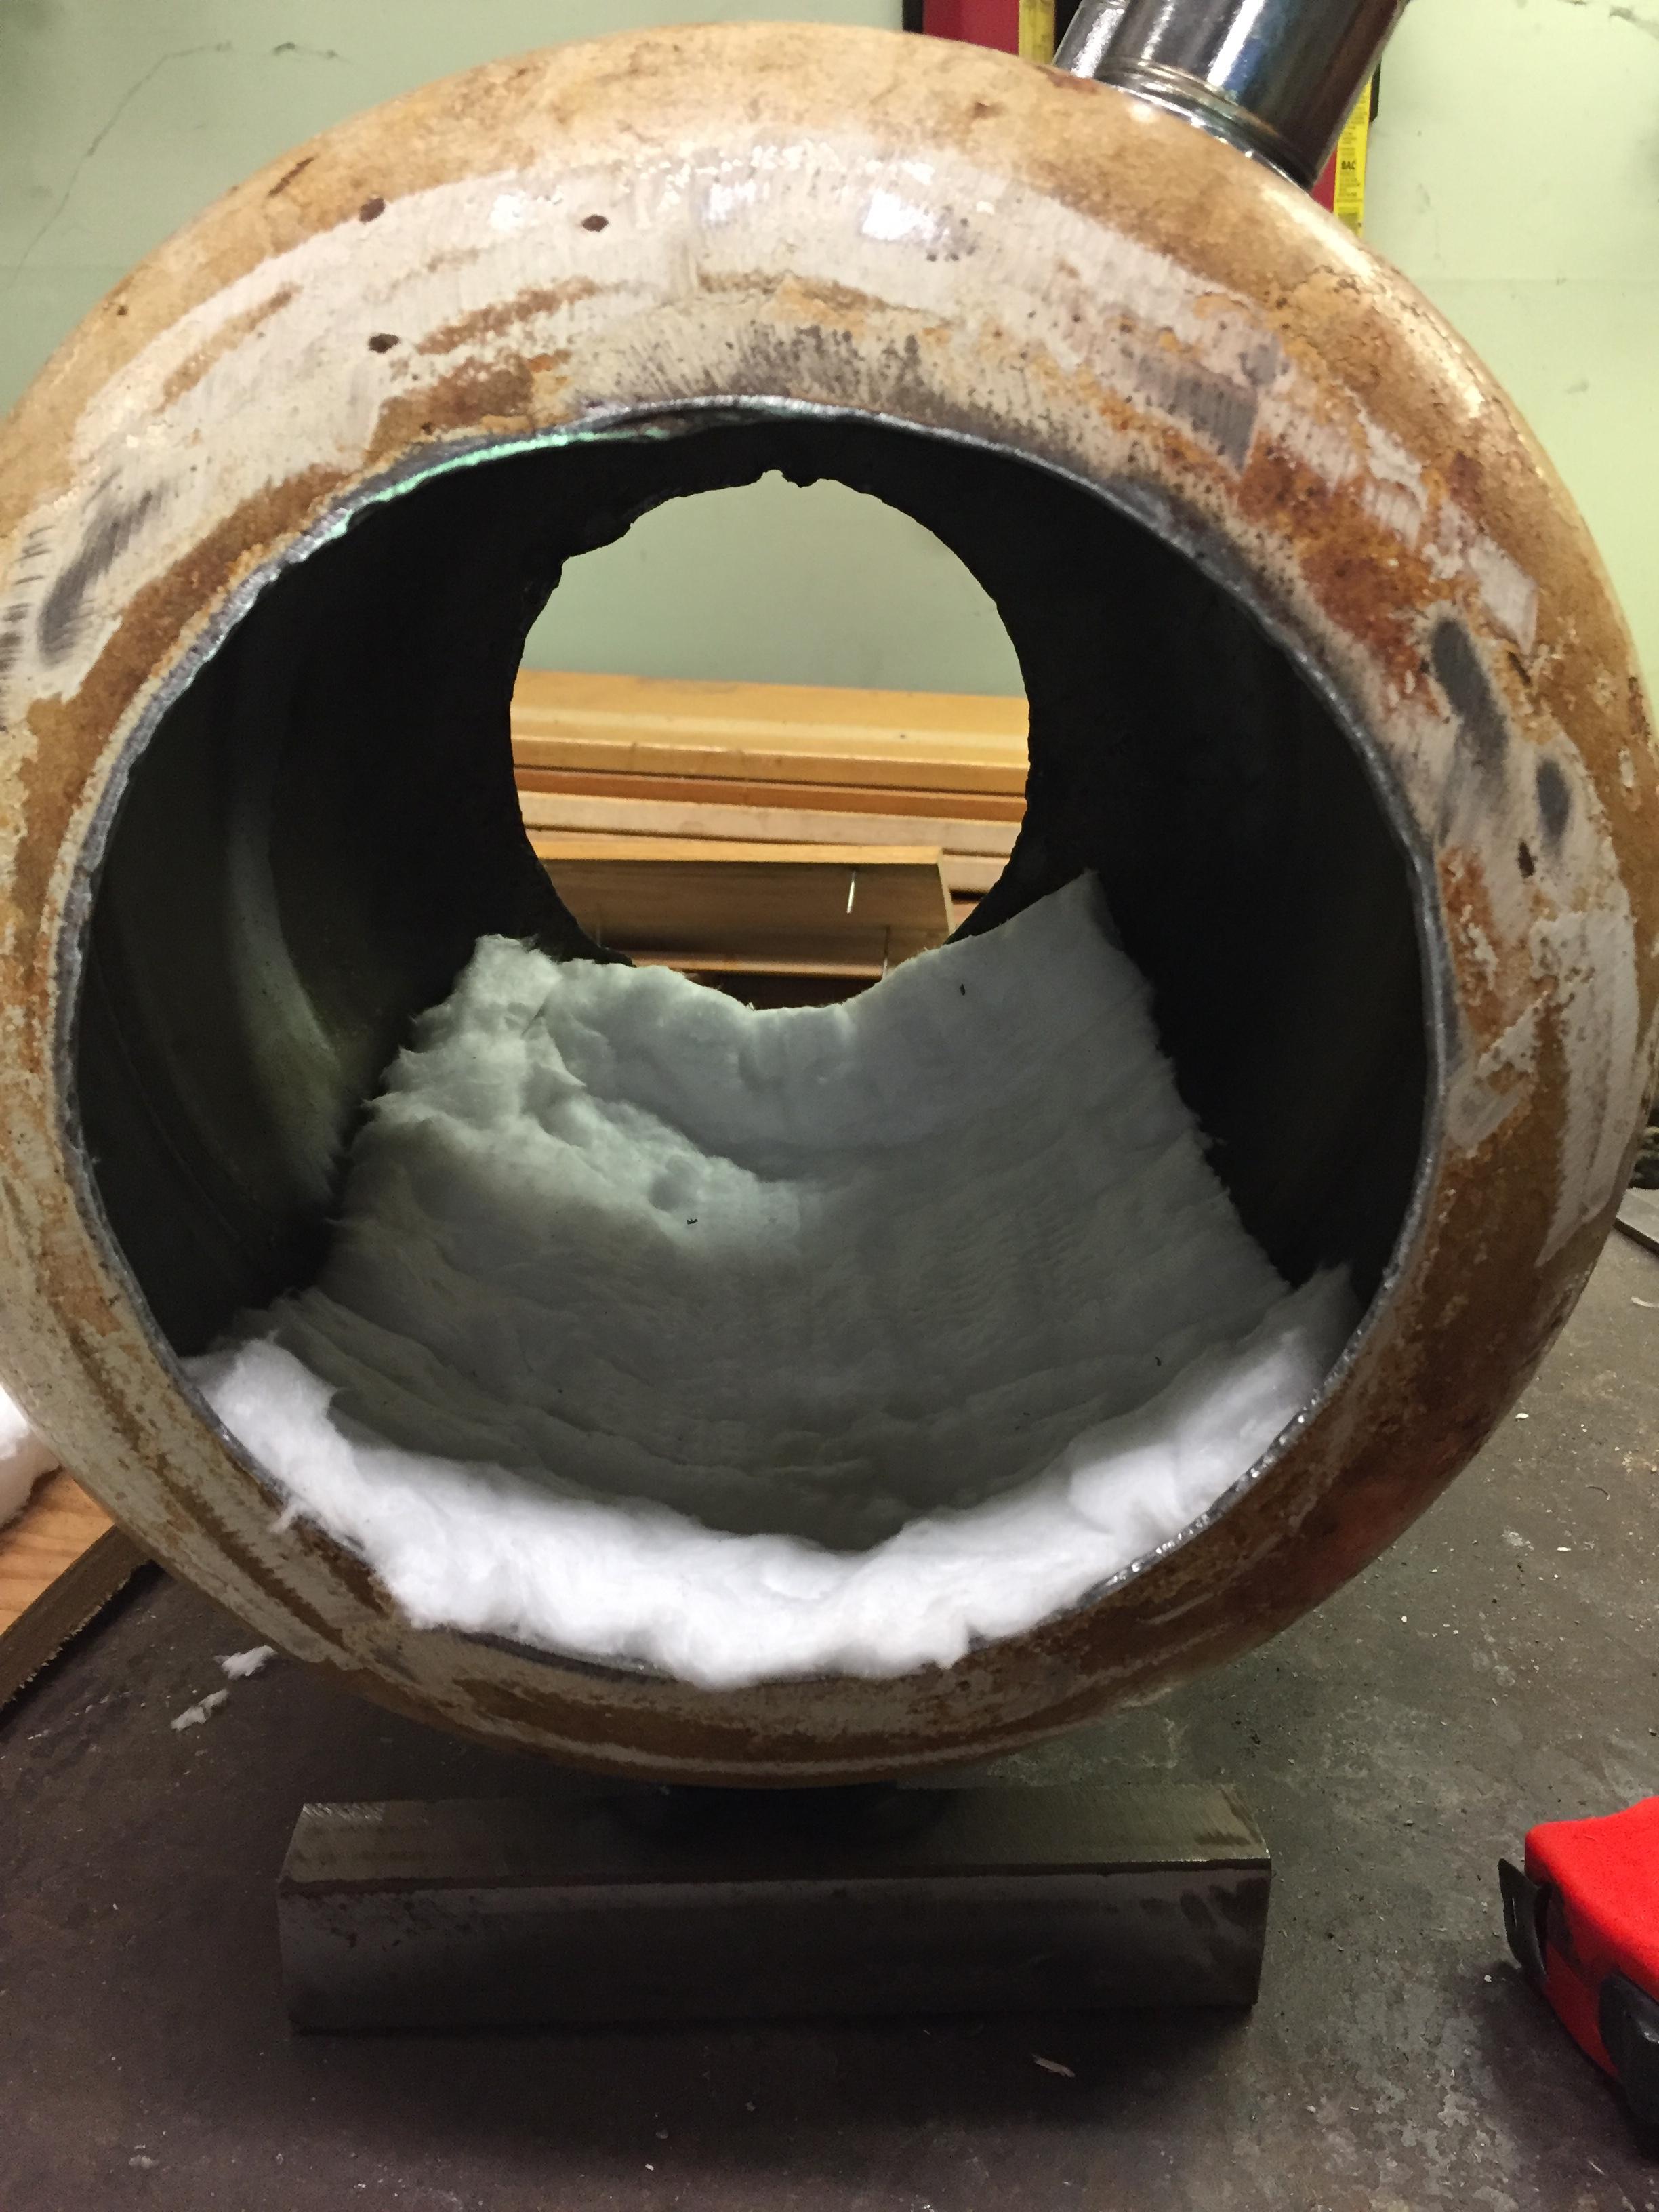
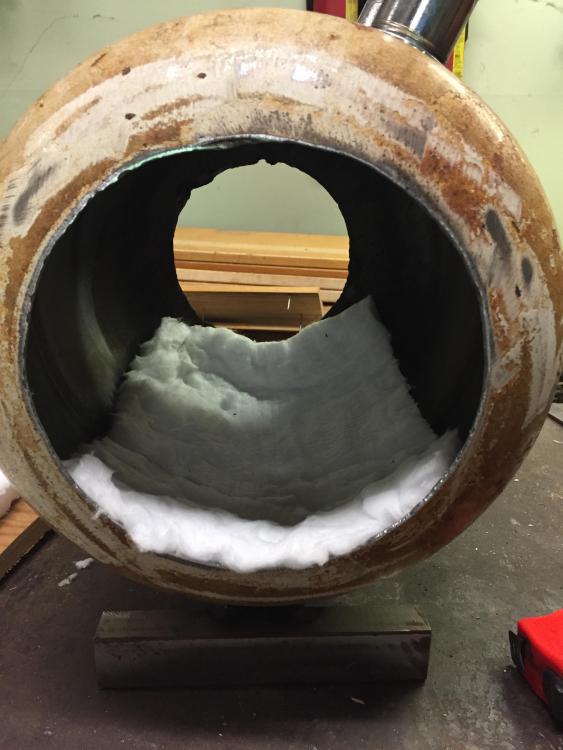
One more step done ! 2 inches bottom + 2 inches all around. Tomorrow : Kast-O-Lite !!!
-
Hello from Montreal south-shore
blacksmith-450 replied to blacksmith-450's topic in Introduce Yourself
Thanks, et côté brûleur pour te faire une forge, je peux t'aider. A+ Thanks, and side burner to make a forge, I can help you. -
C'est clair mais je vais aussi prendre la photo It is clear but I will also take the picture
-
Oh ! no, I didn't. But... maybe the weld draw it a little...
-
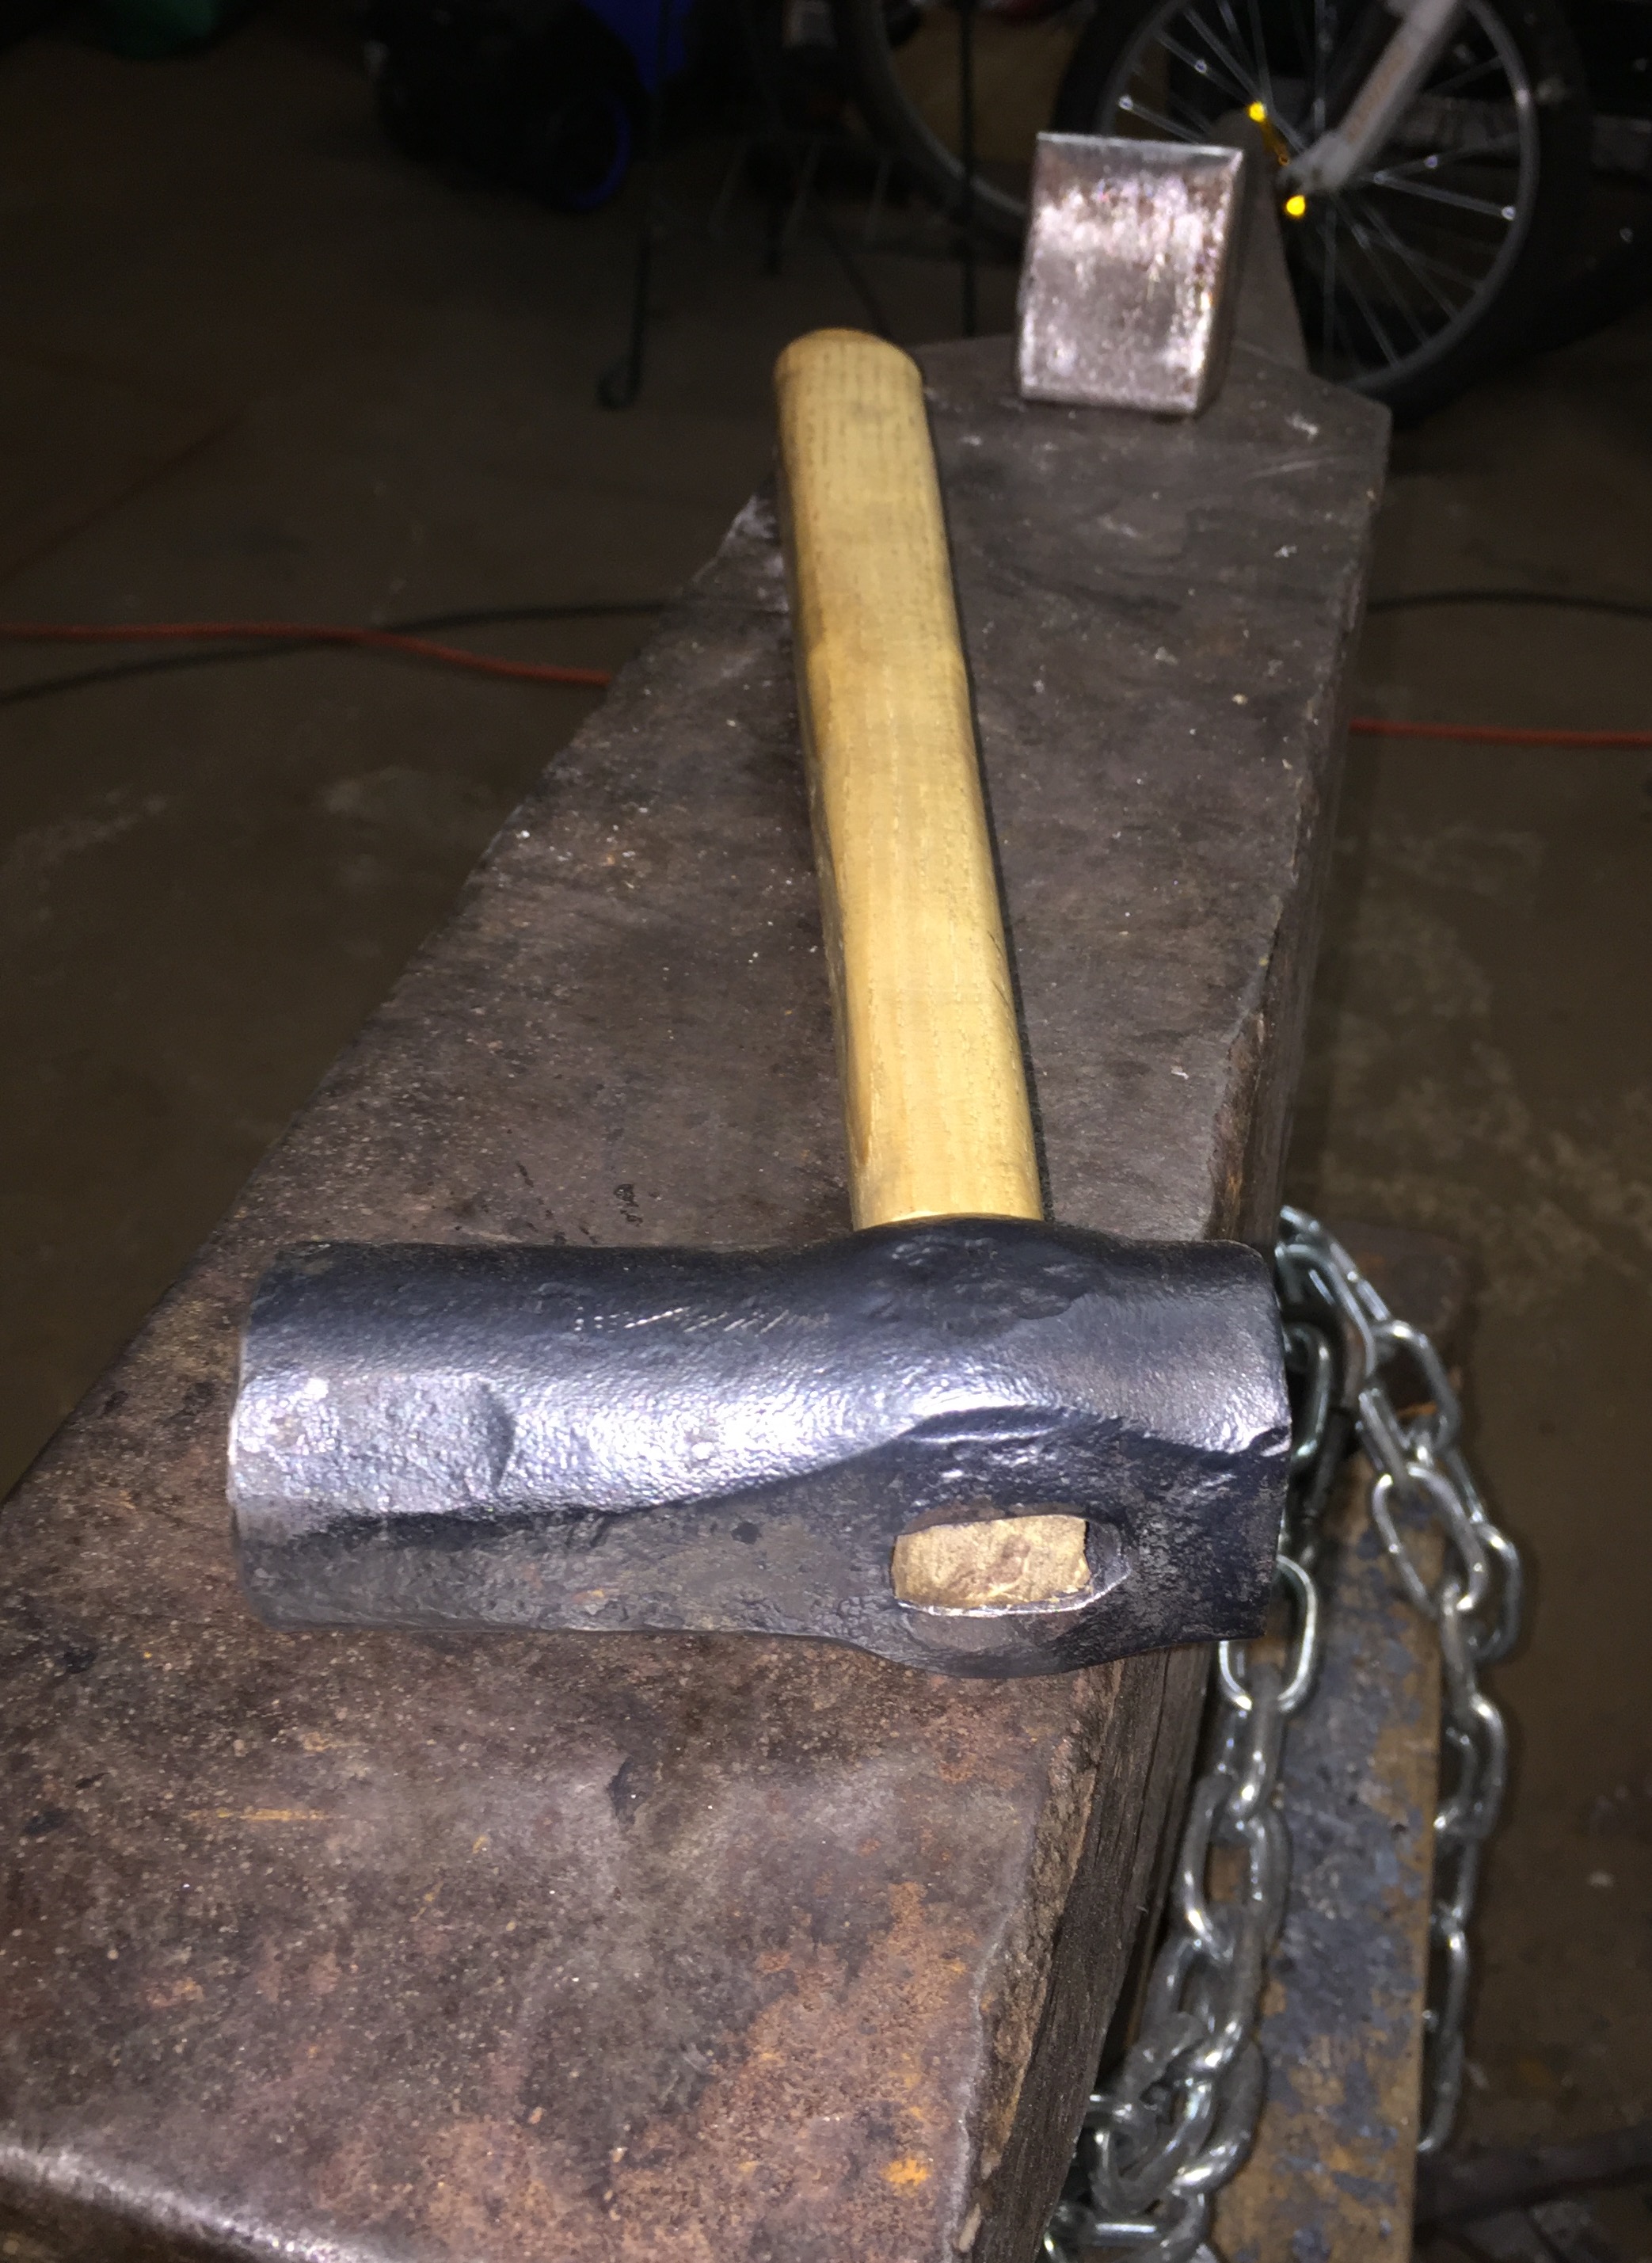
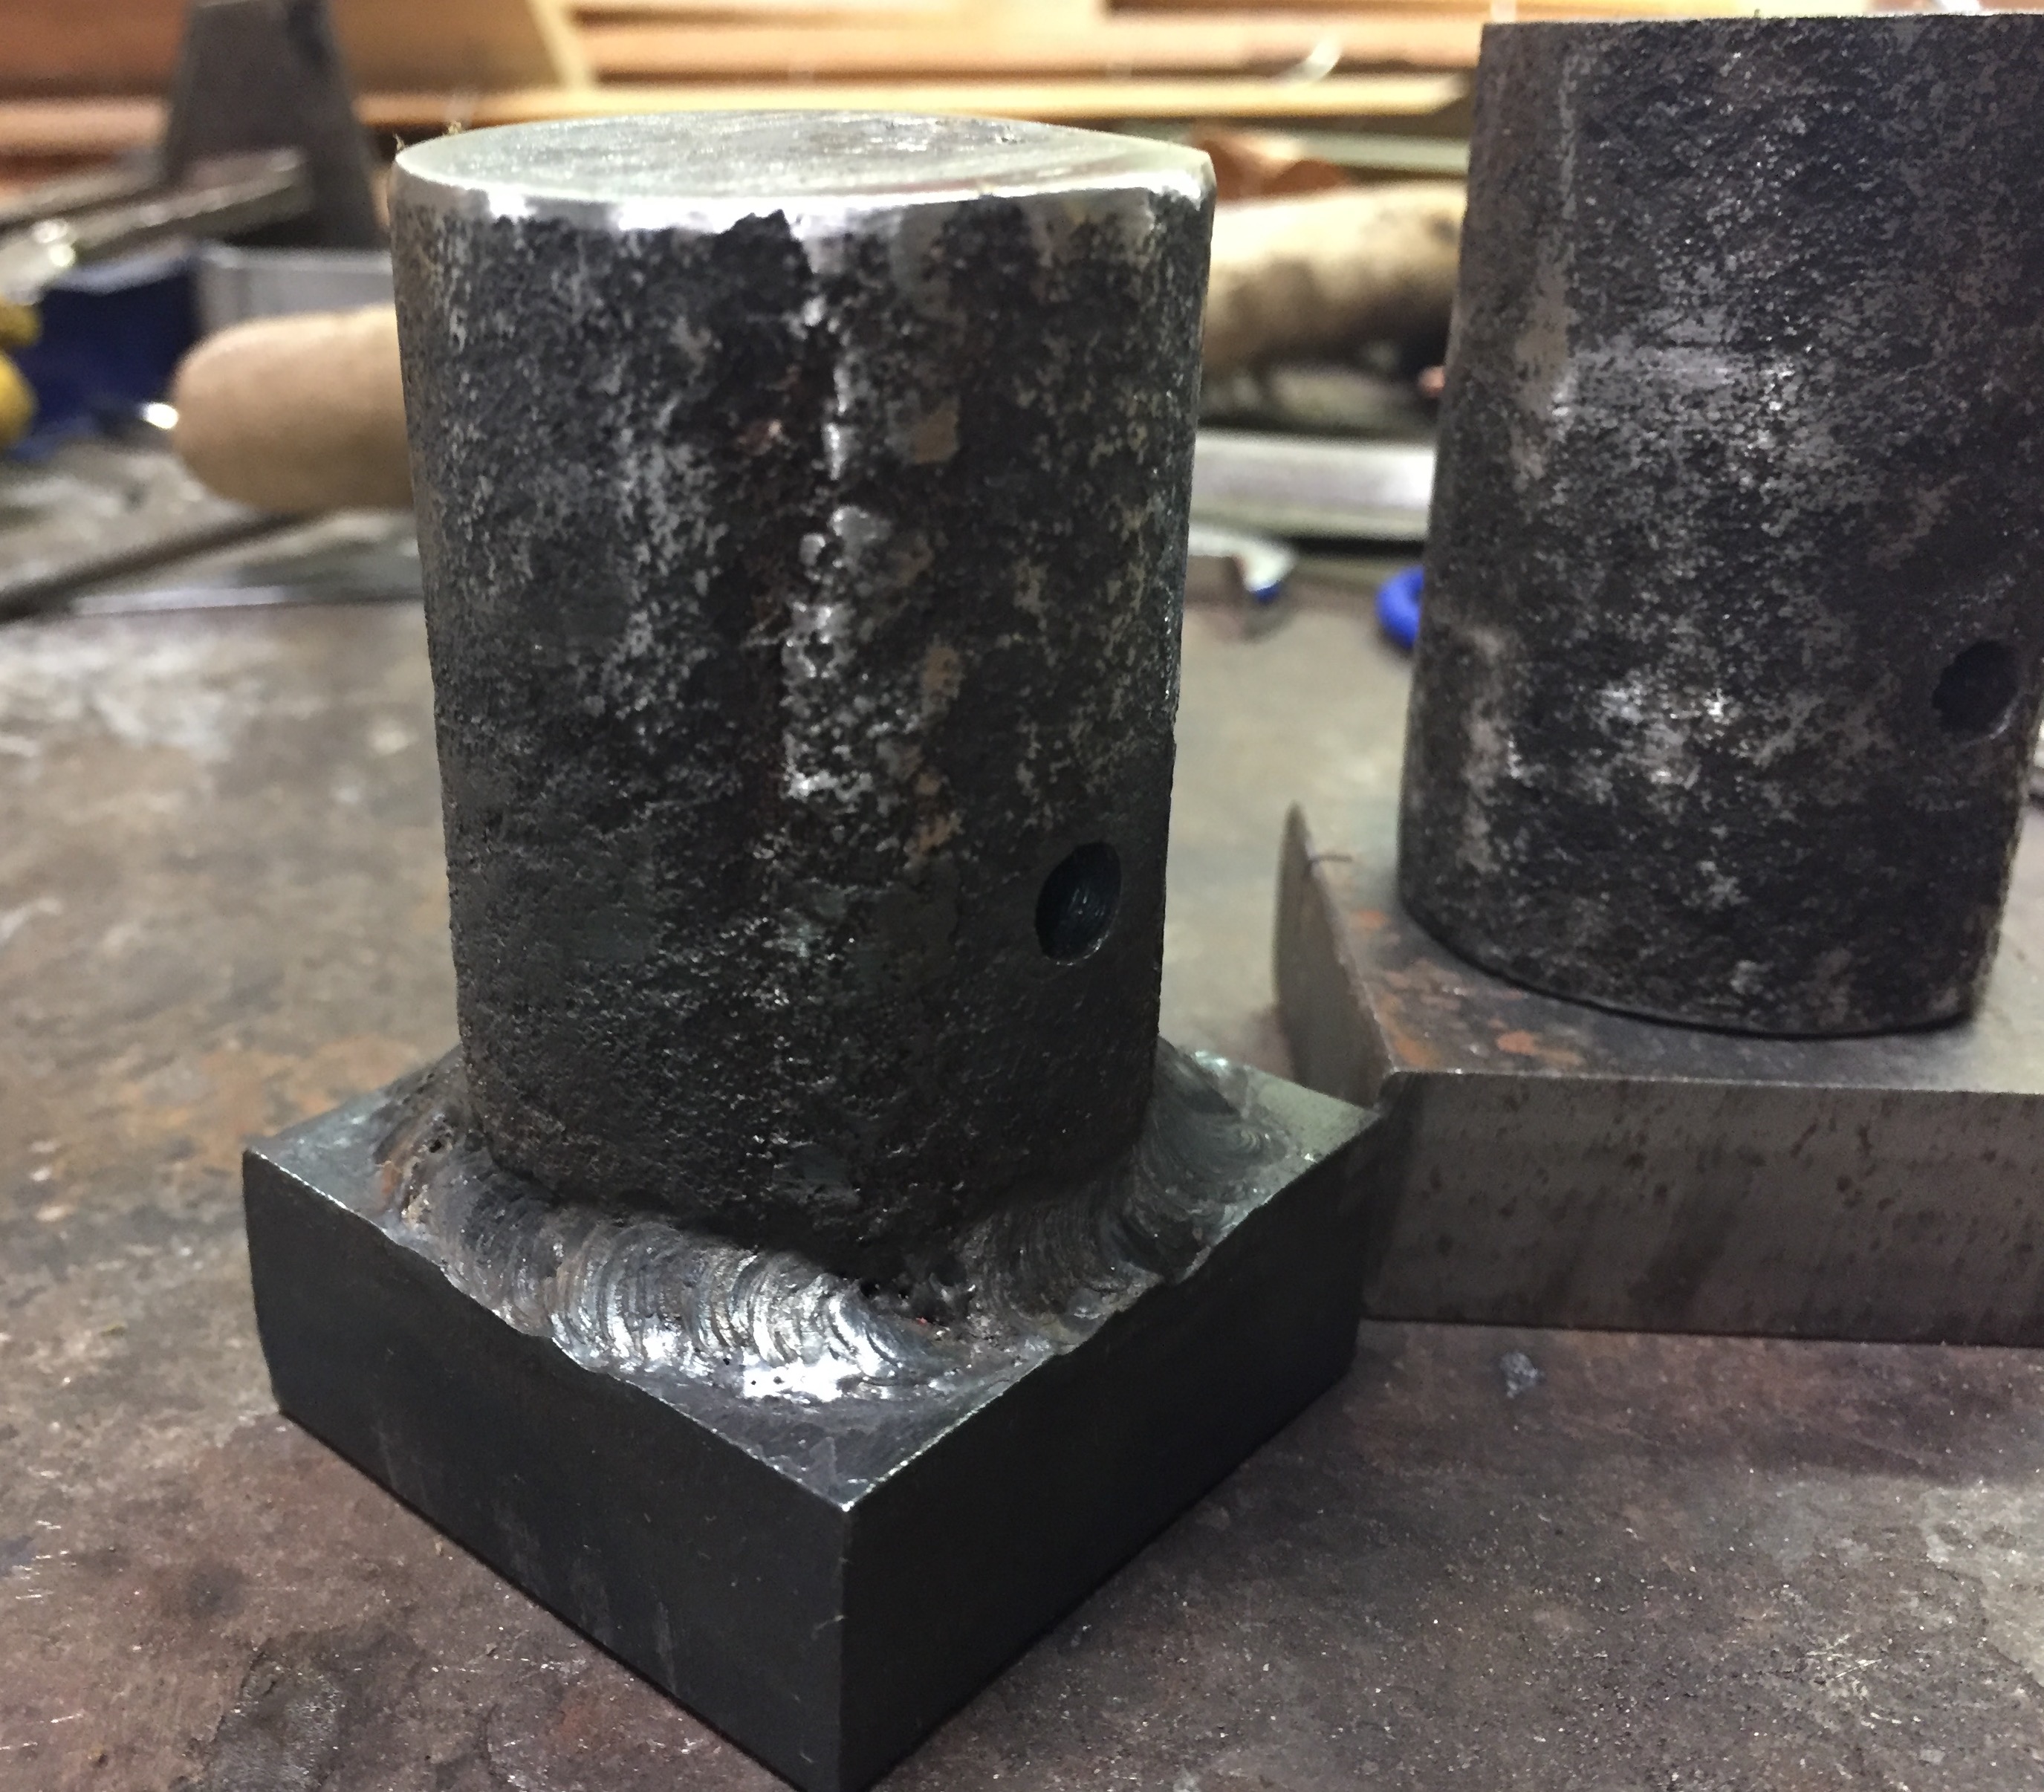
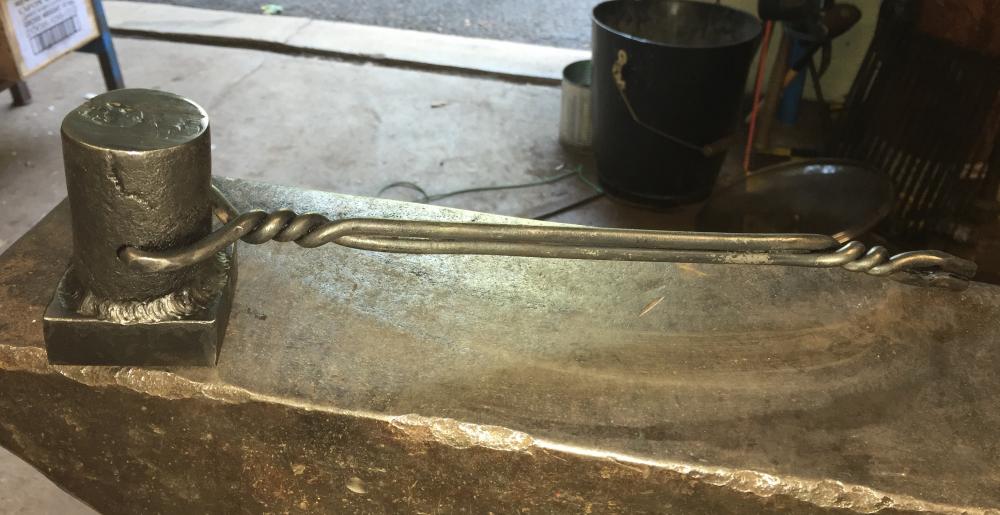
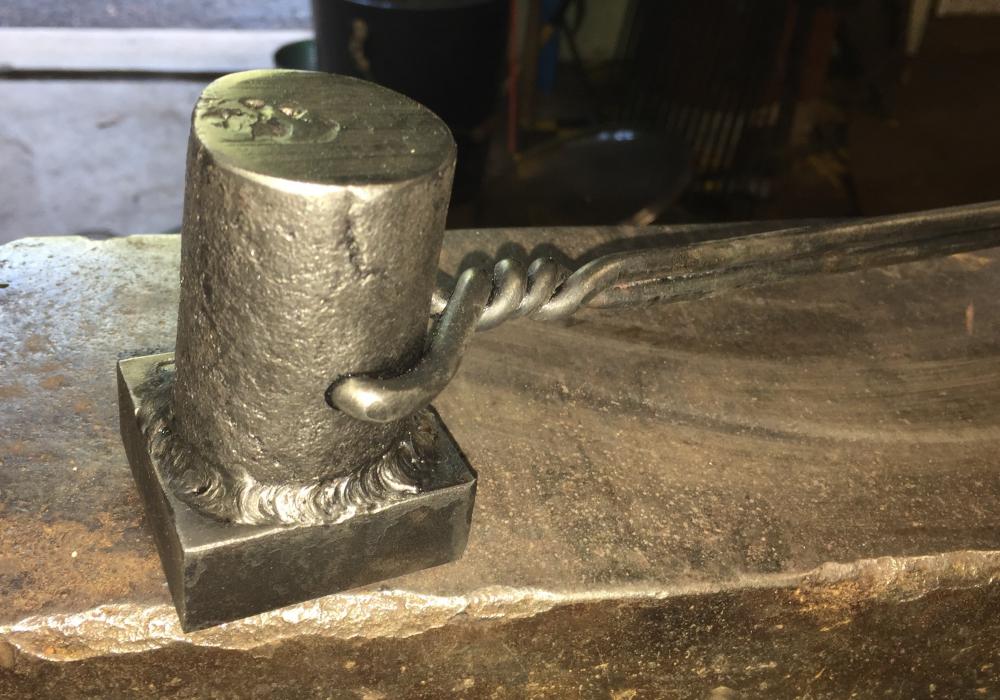
Yes i have put the edges on de sanding disk to prevent chip and mushroom effect J'ai légèrement brisé les arrêtes sur le disque à sabler. Si la tête se déforme et commence à faire un champignon je vais accentuer le biseau.
-
Don't worry, it will be
-
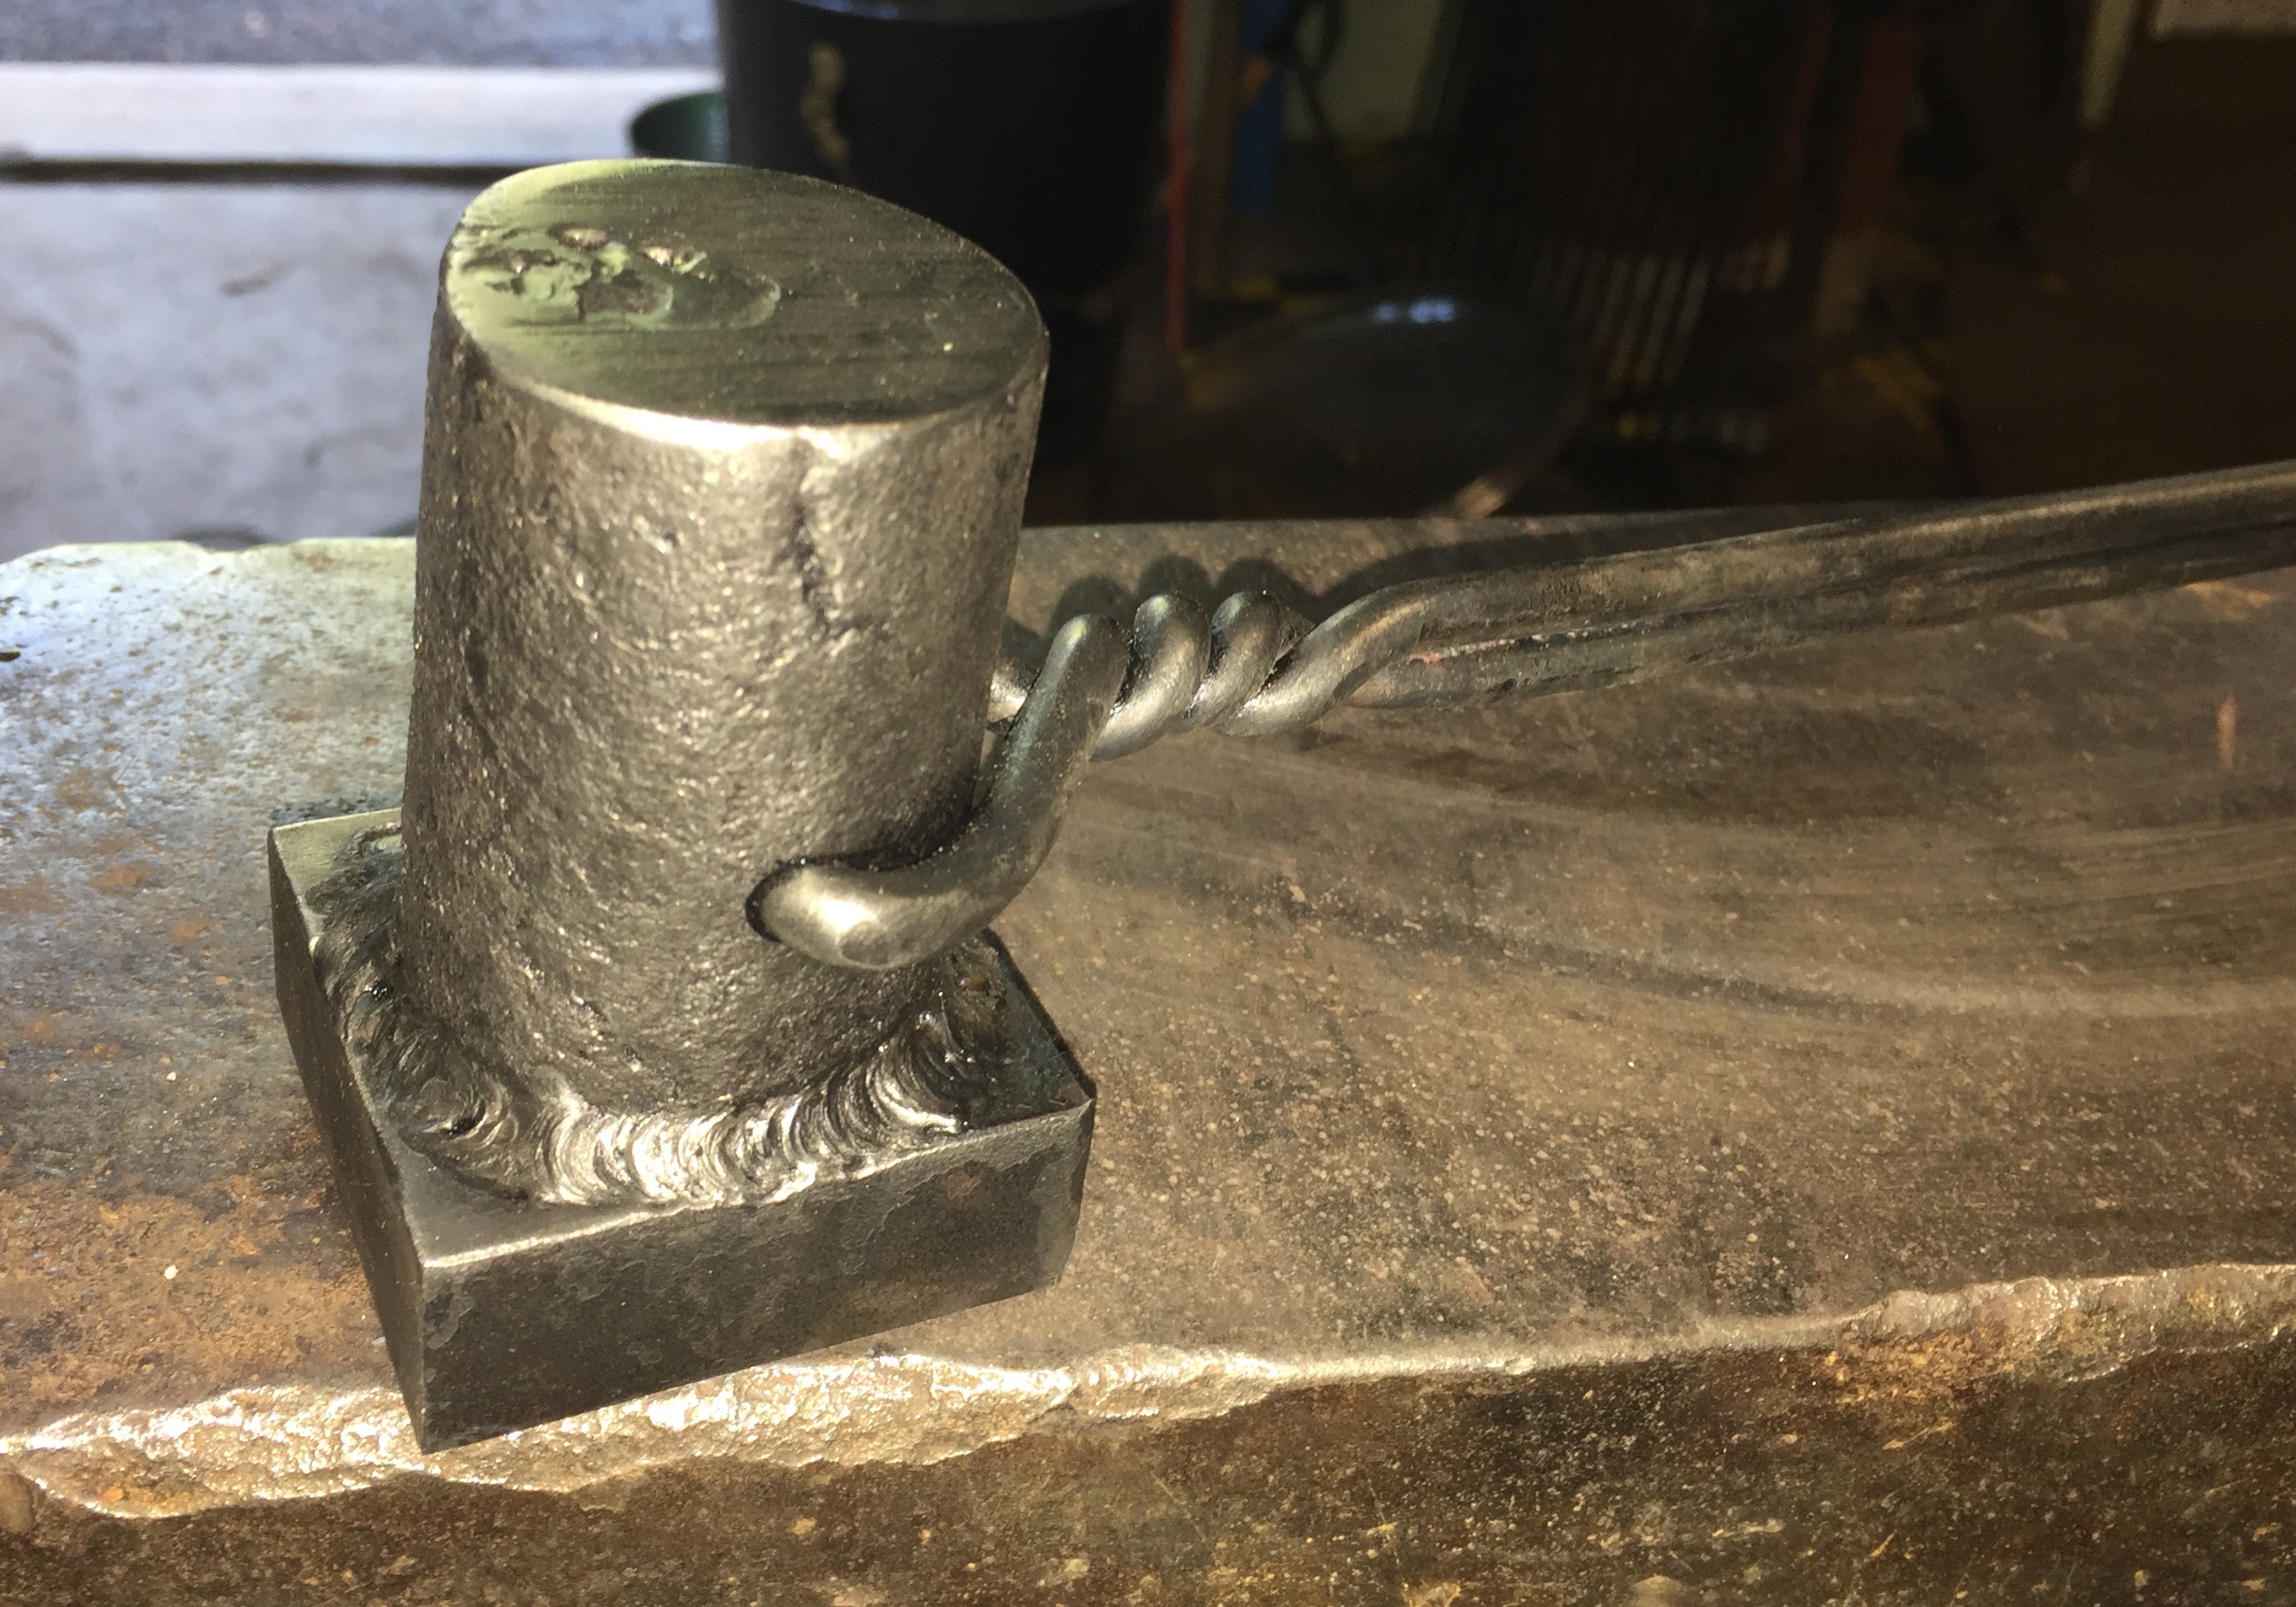
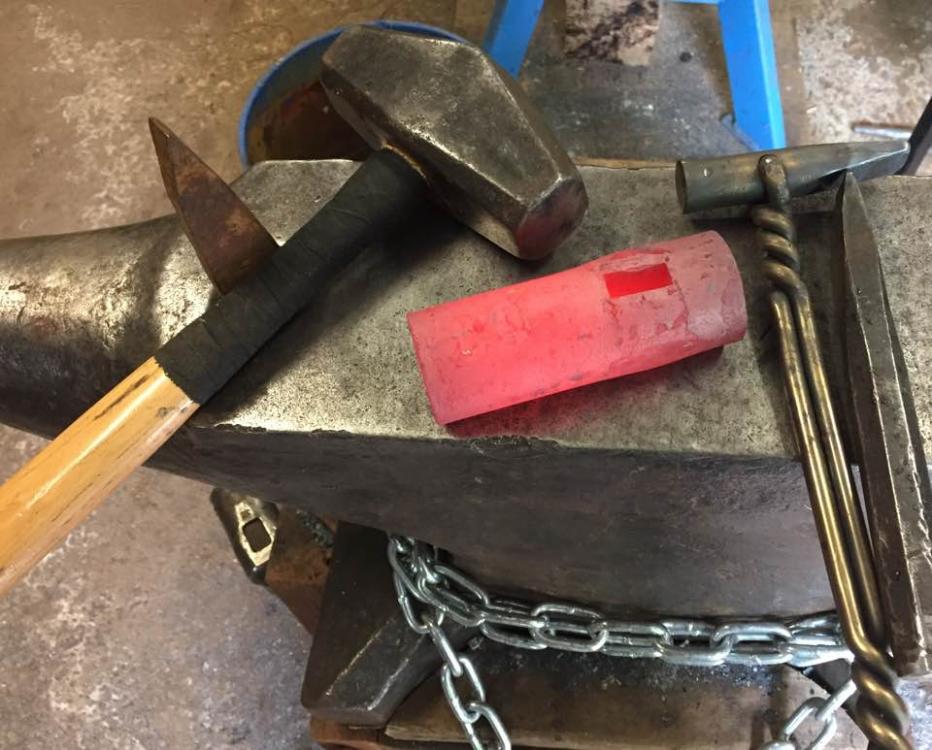
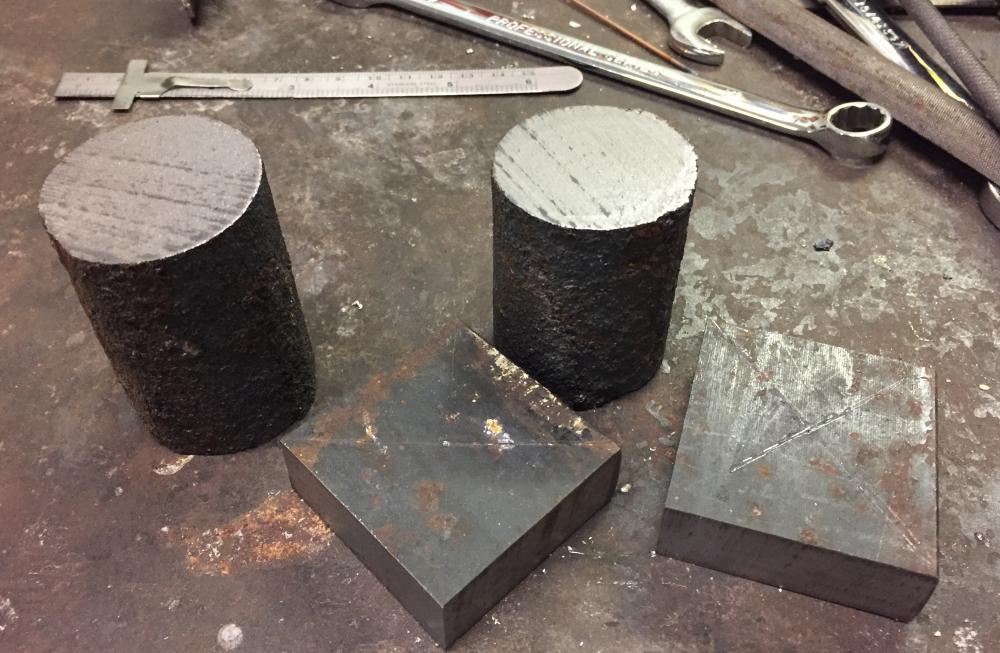
The plate is mild steel and the round stock mid carbon maybe 1040. It was an axle of ???
-
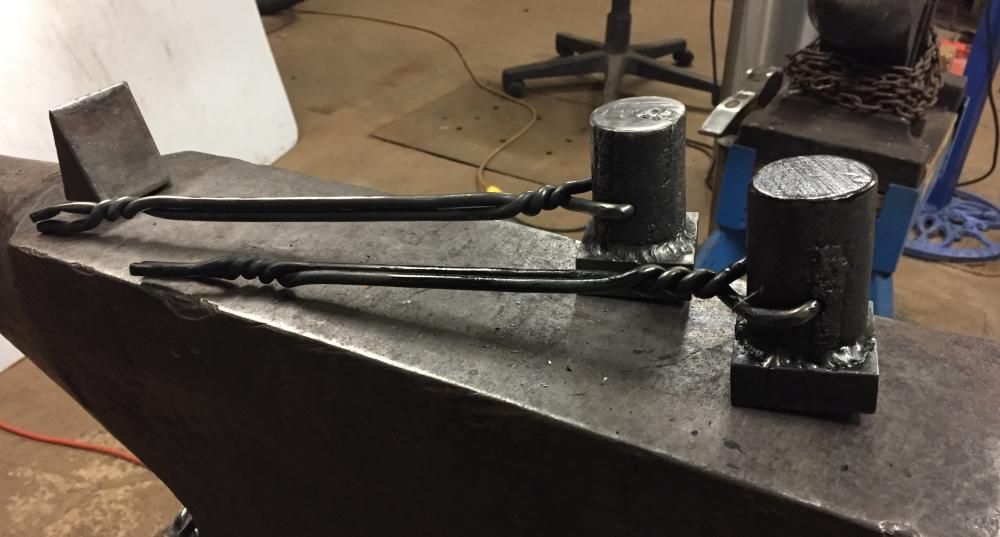
Nothing fancy but... will be good enough for my use

-
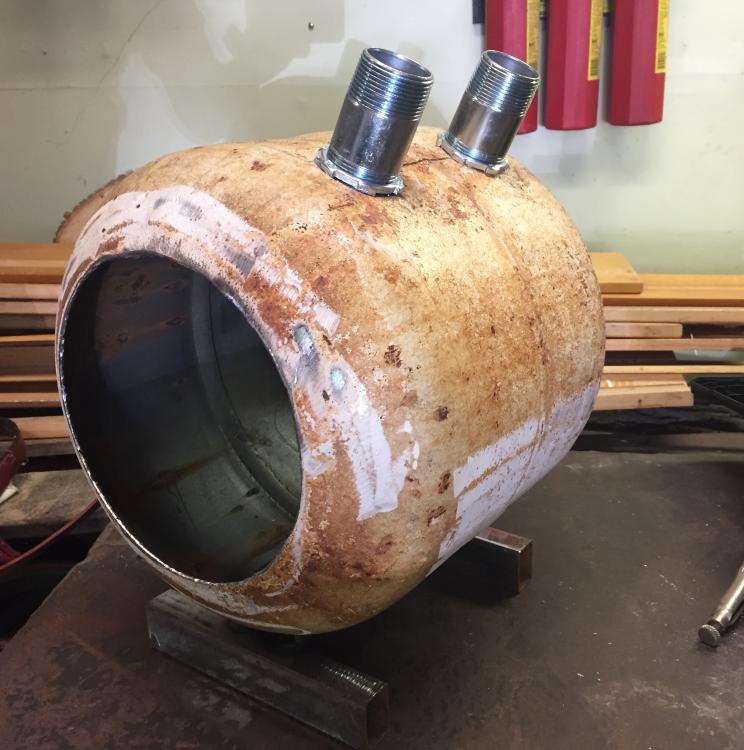
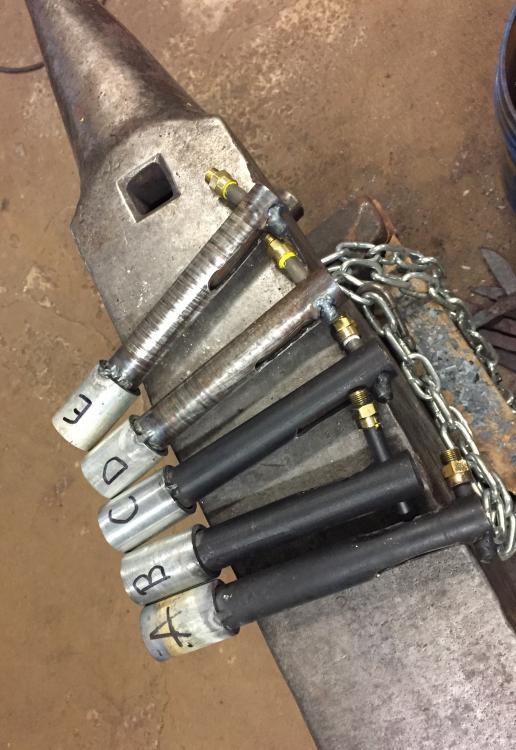
I do not have time to do all i want.... I only installed the burner ports. I use electric box nipple. To hold the burner, I take selftaping screw and once the hole drilled, I cut the tip and put the screw back. This holds everything in place.

-
How to : gaz line - tank to the burner
blacksmith-450 replied to blacksmith-450's topic in Gas Forges
Agree ! -
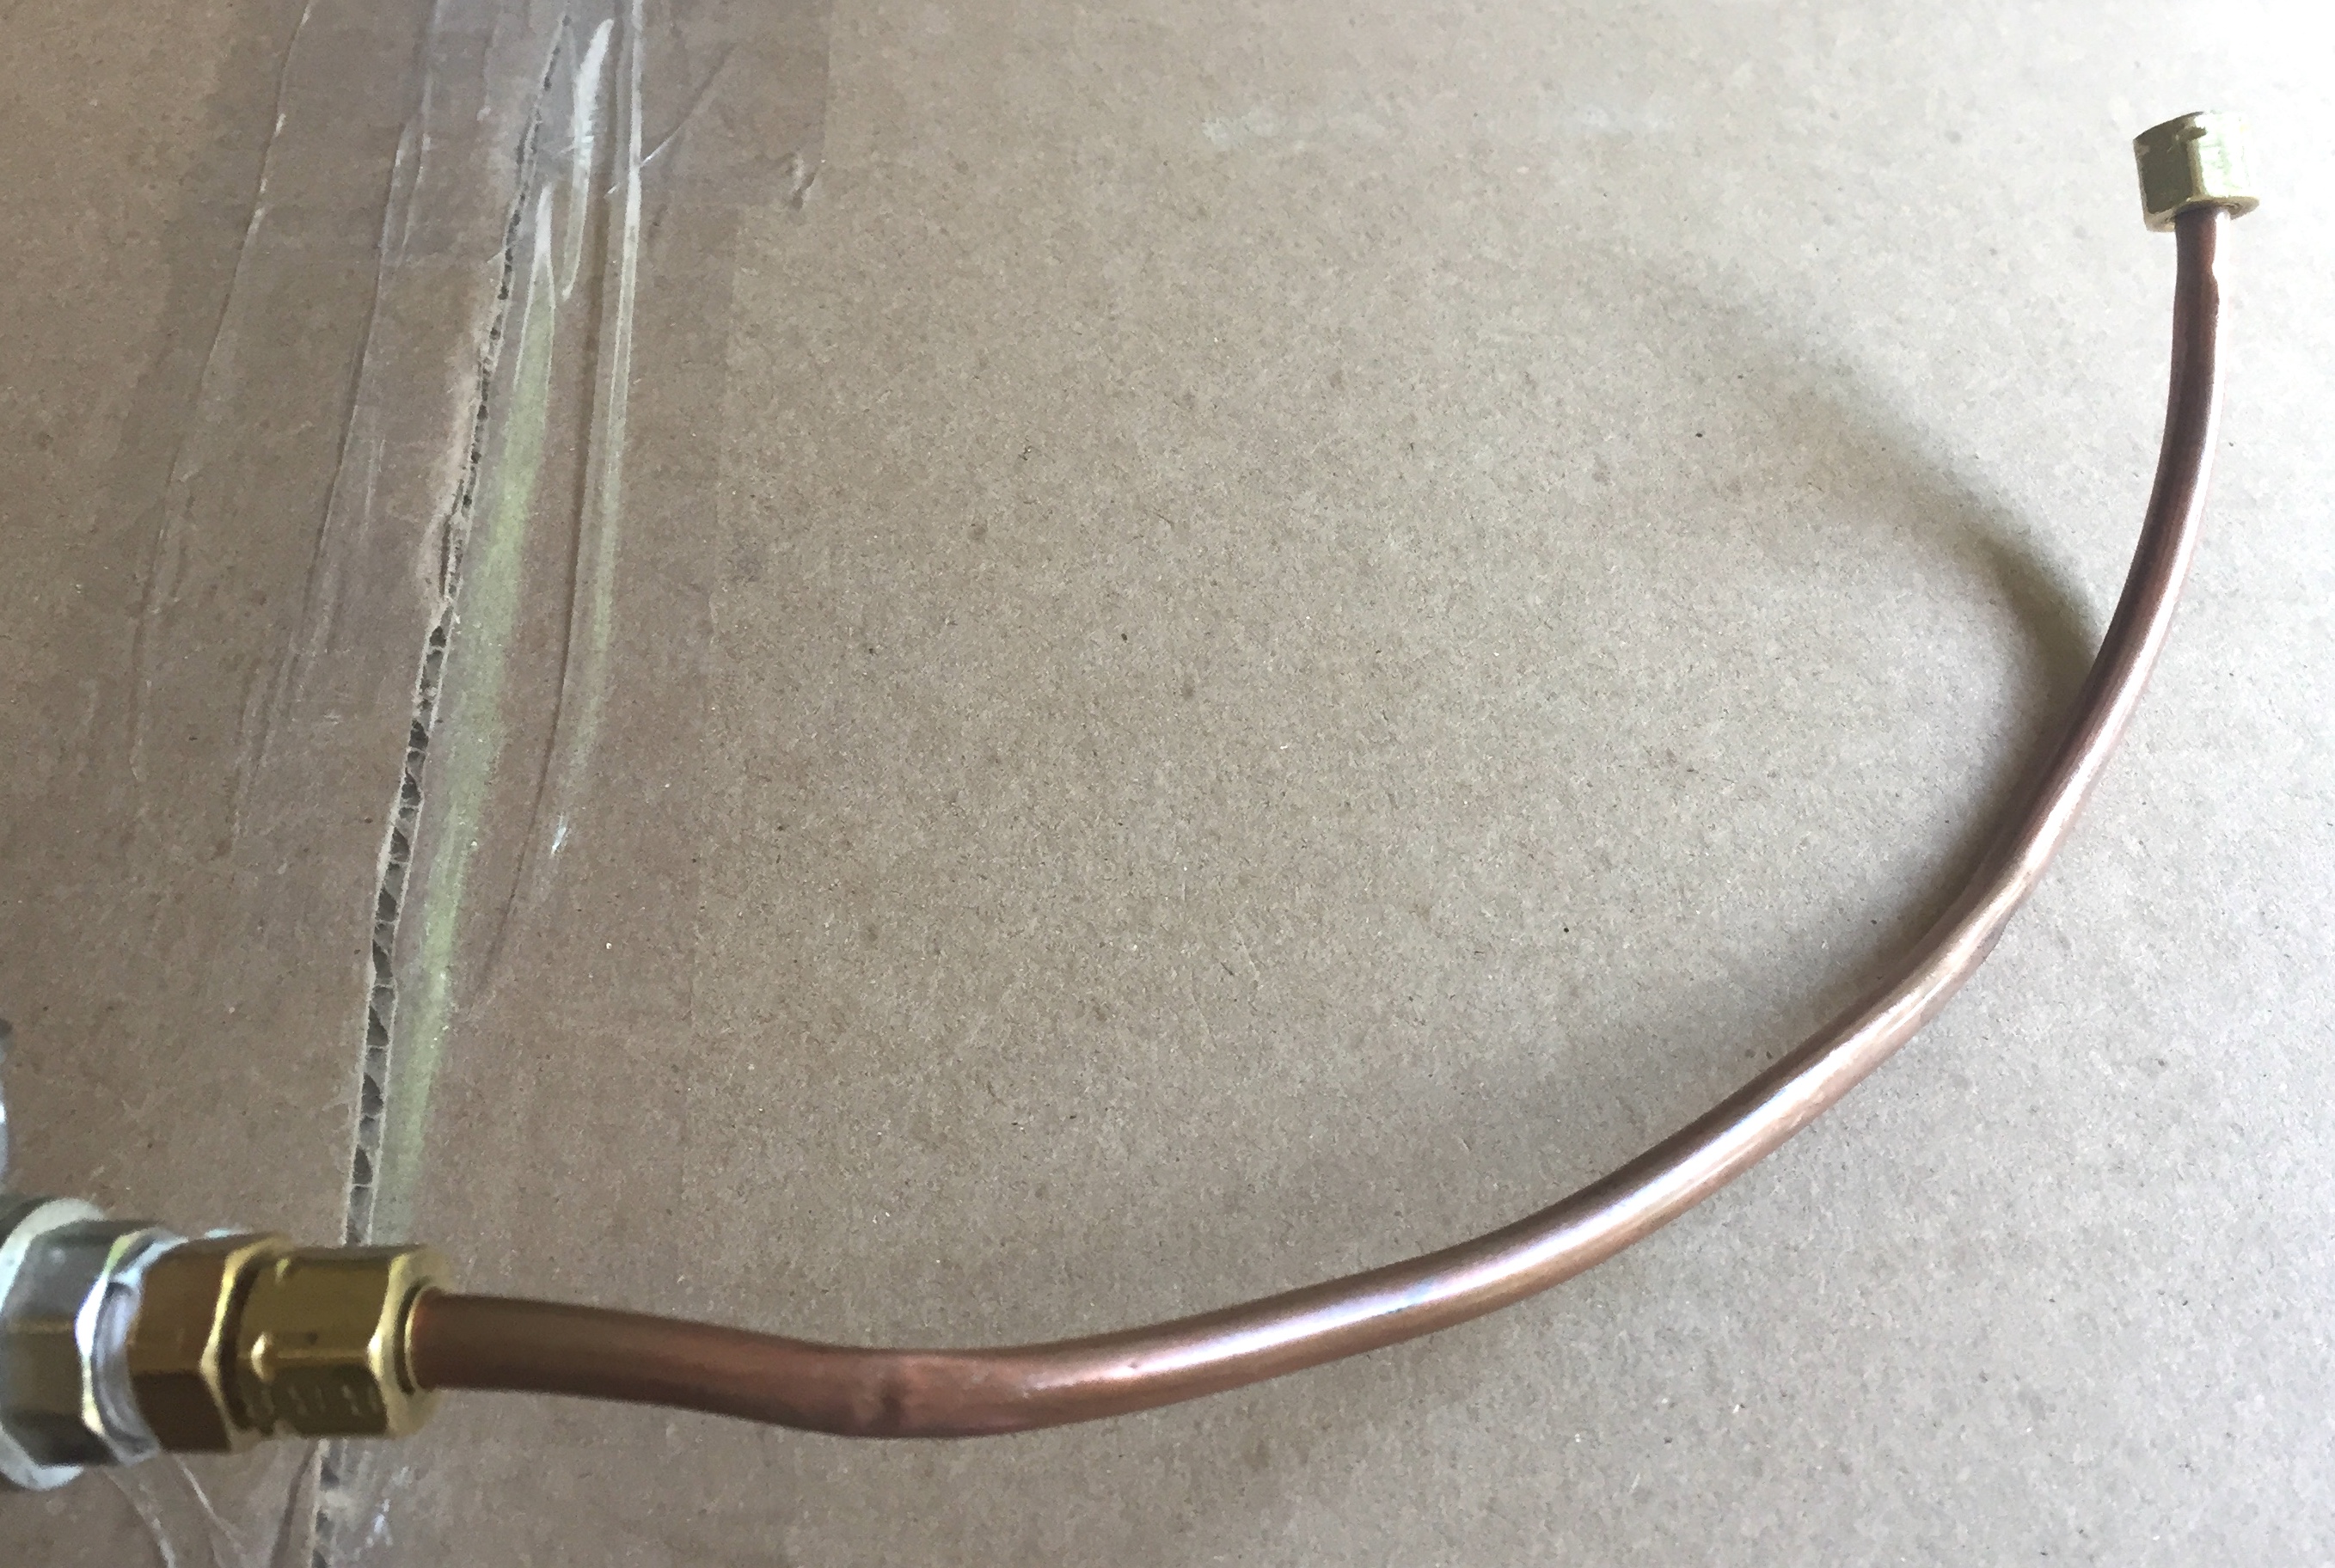
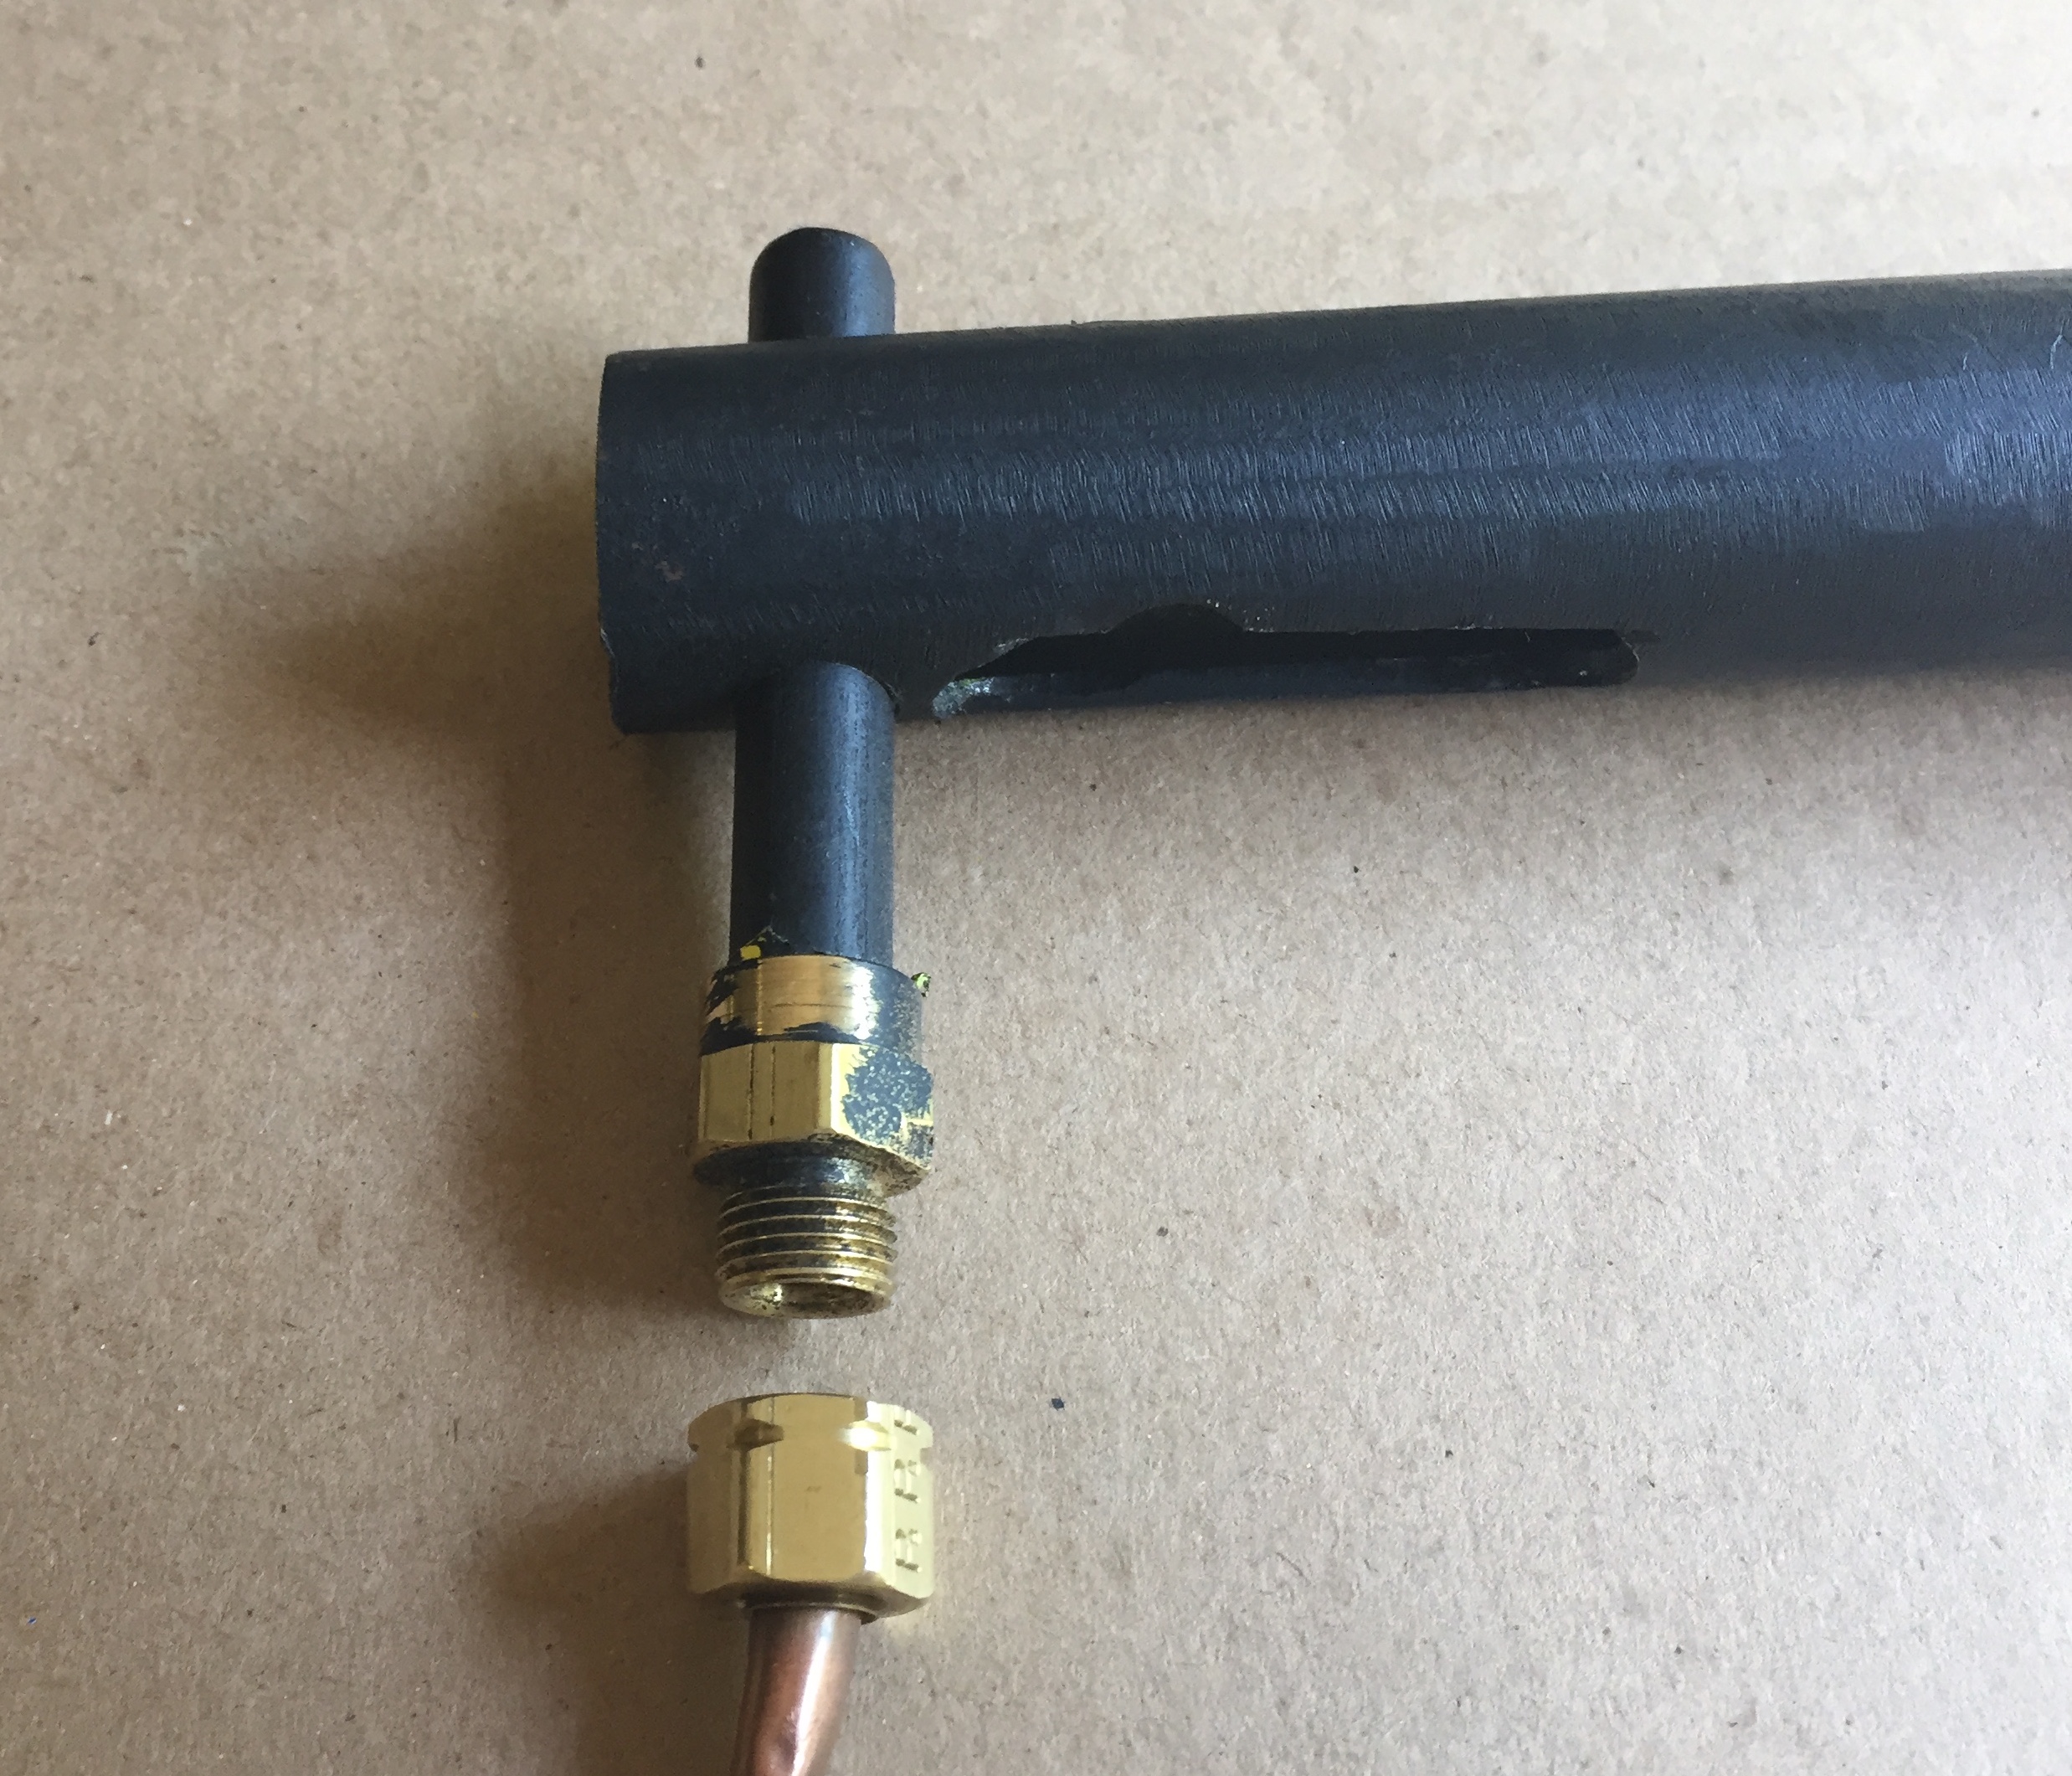
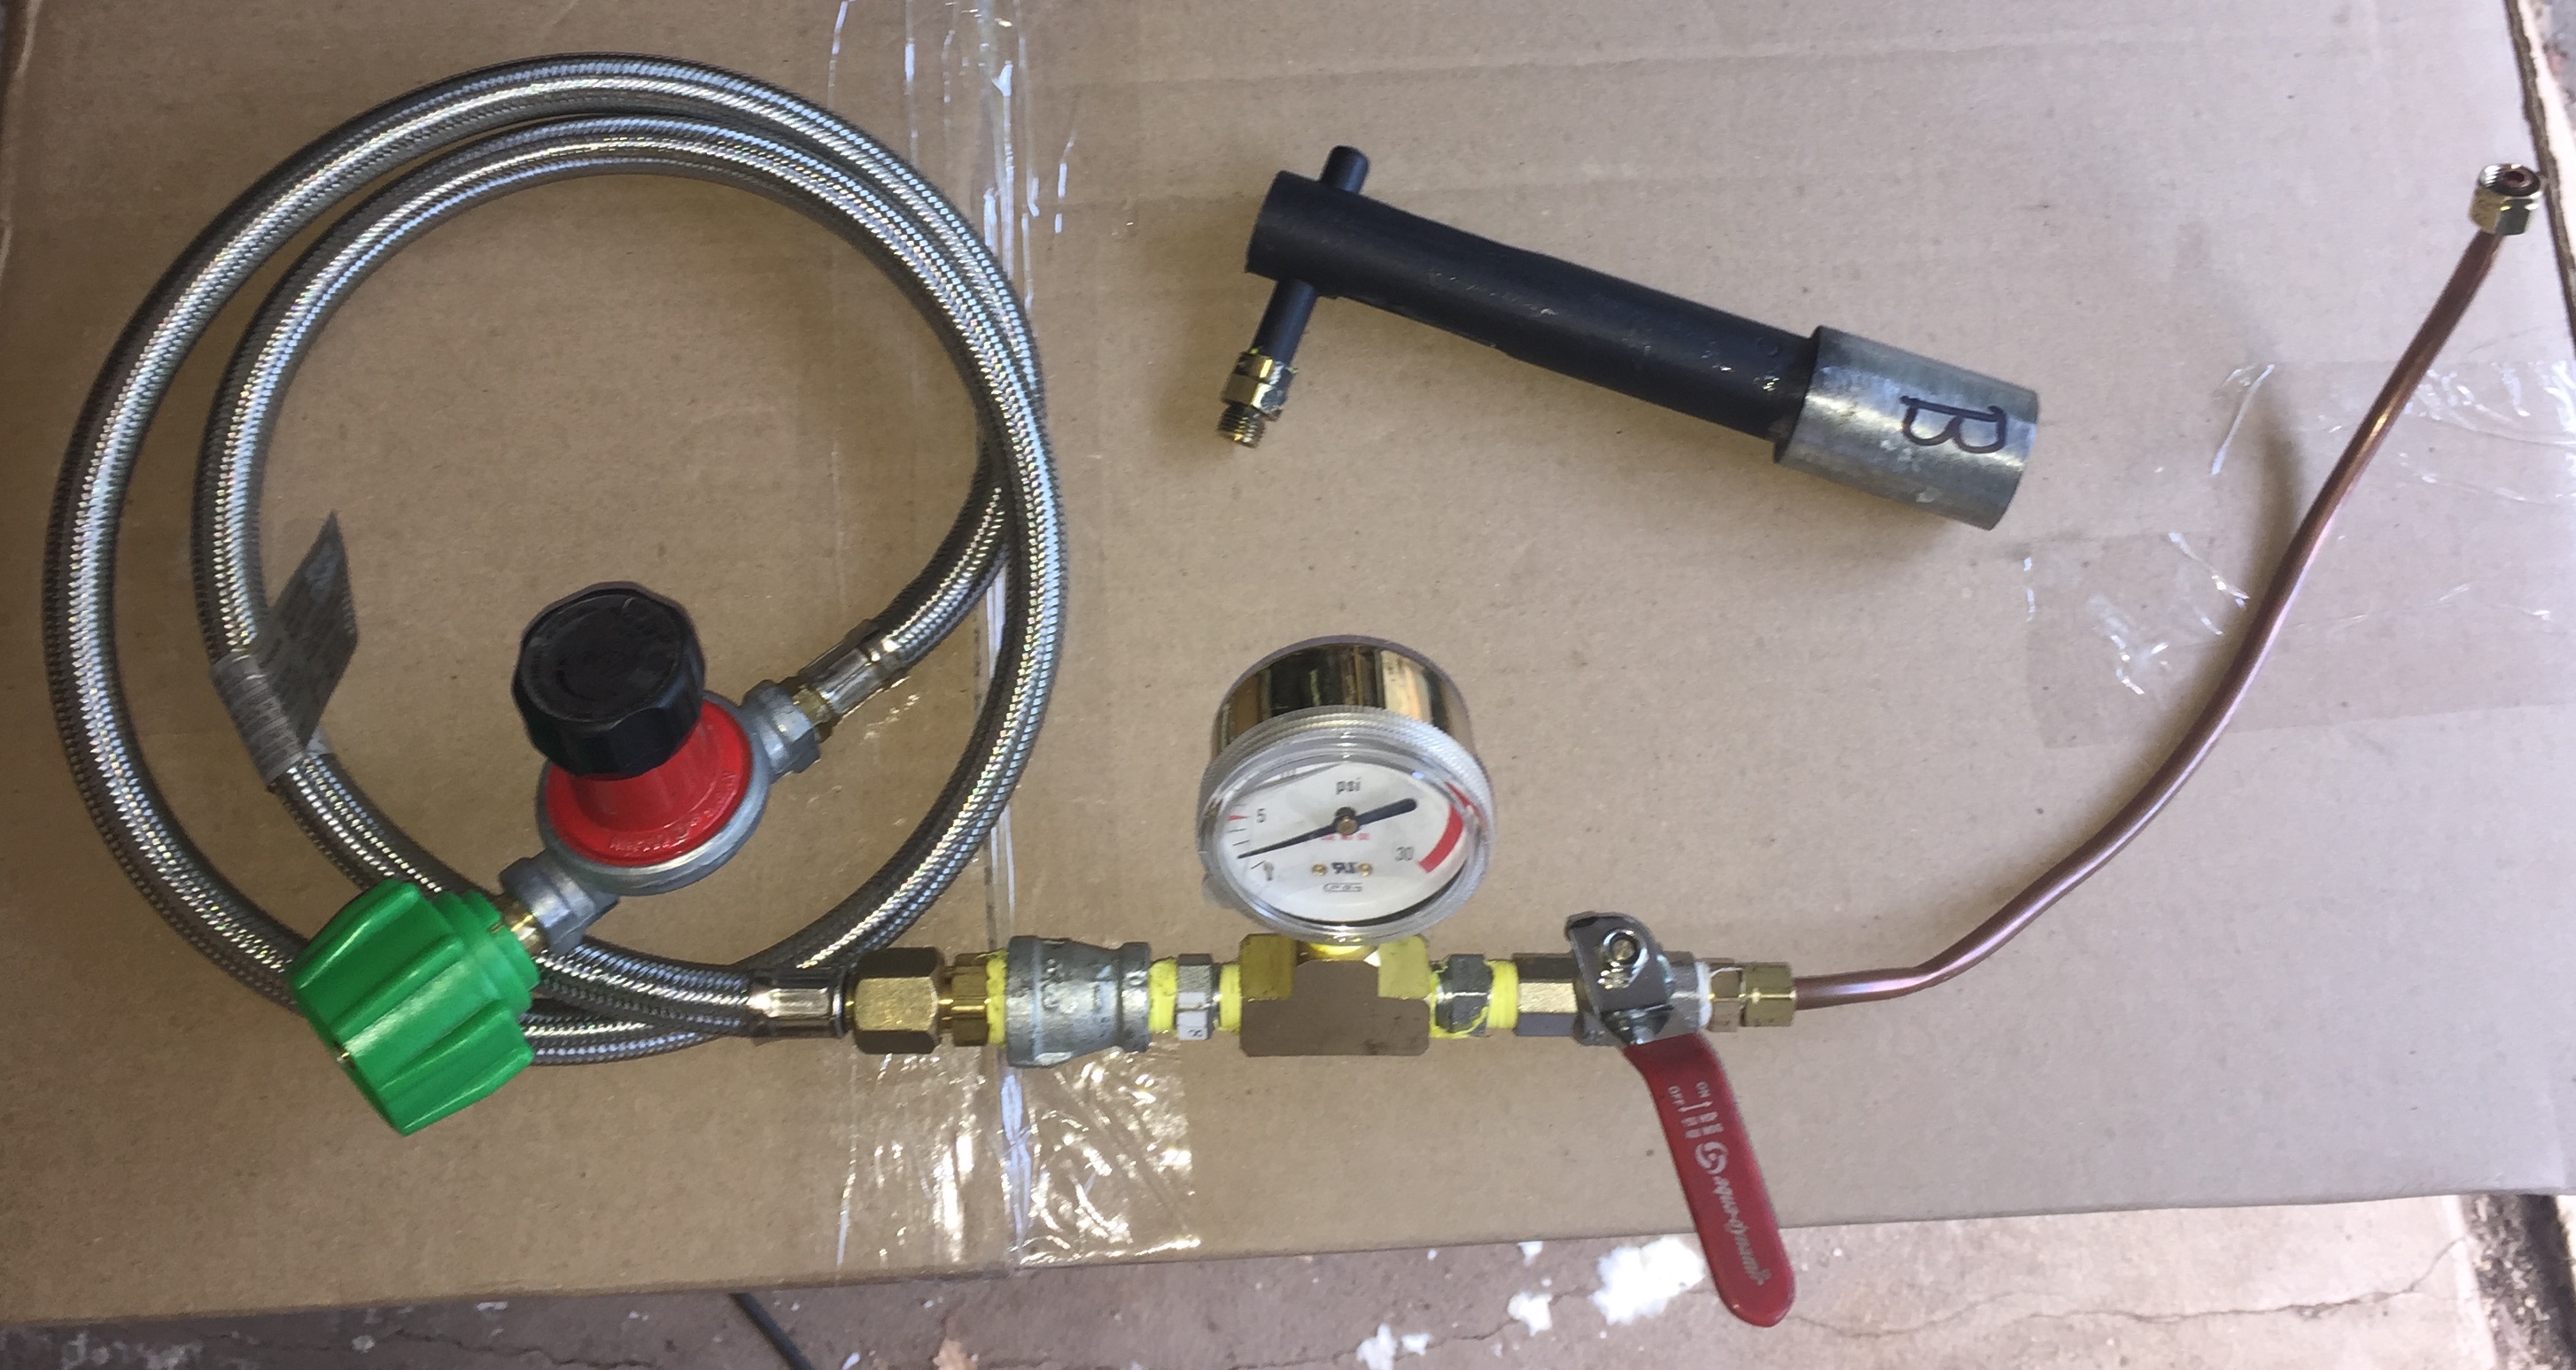
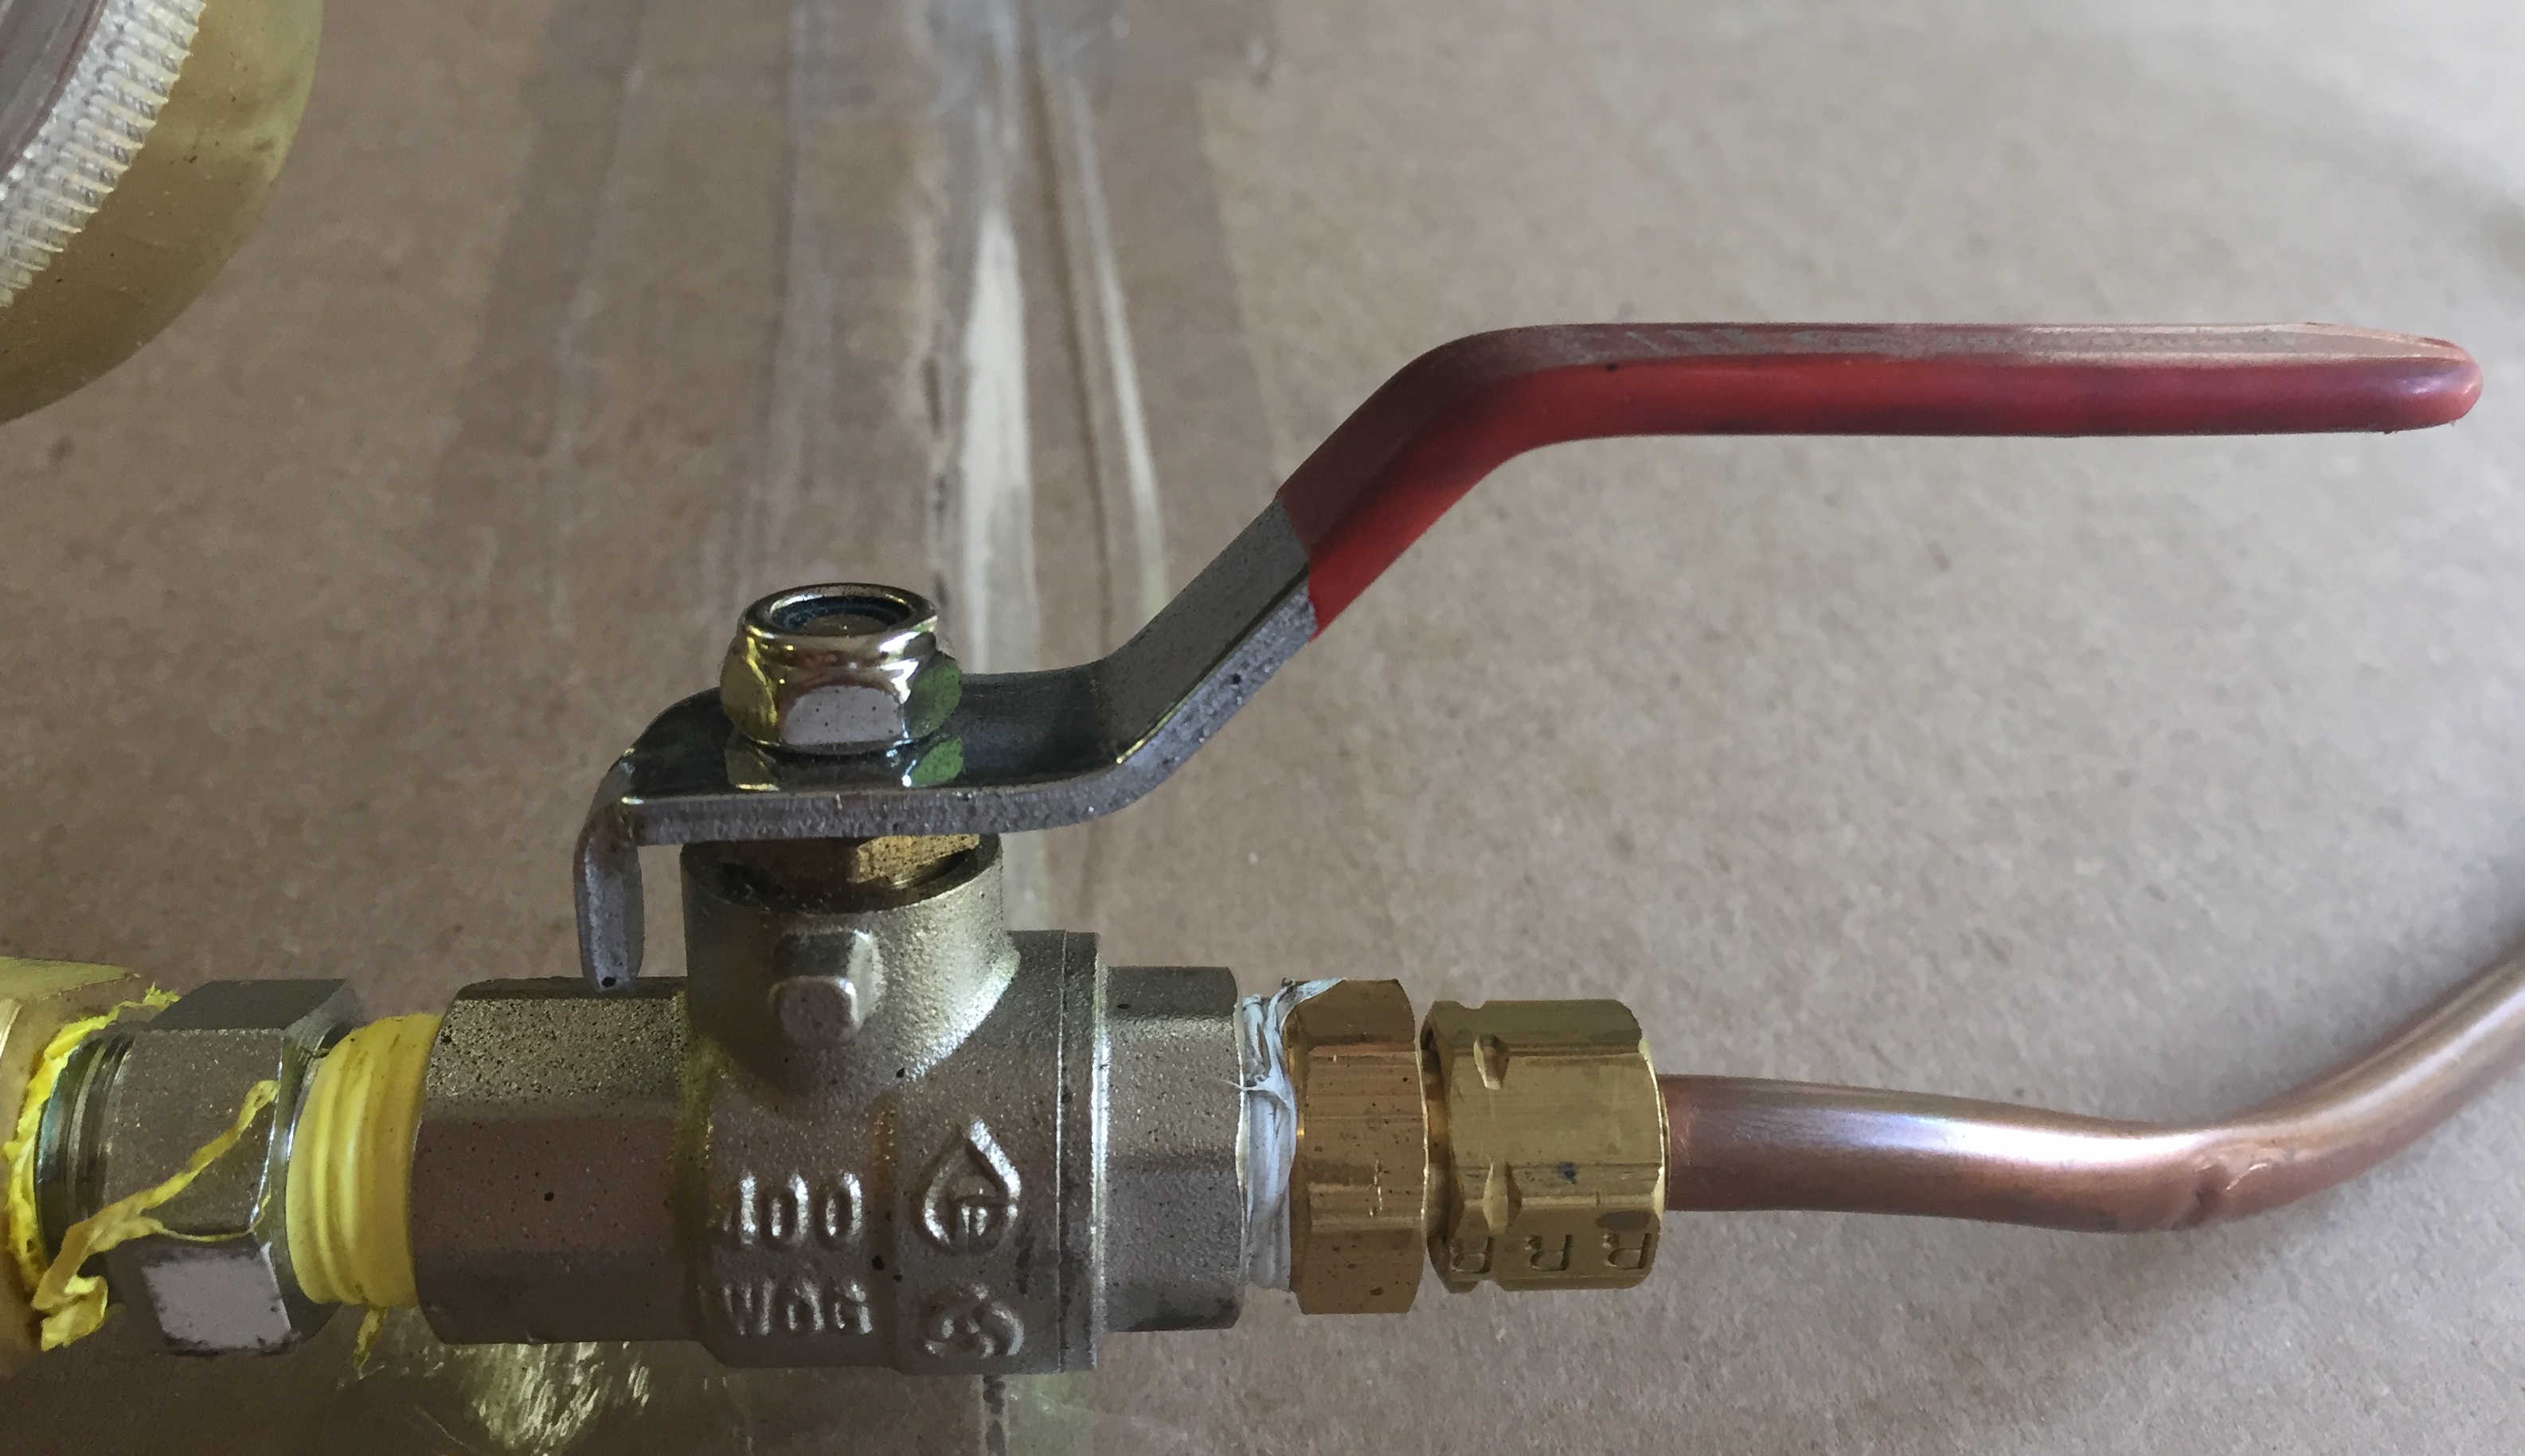
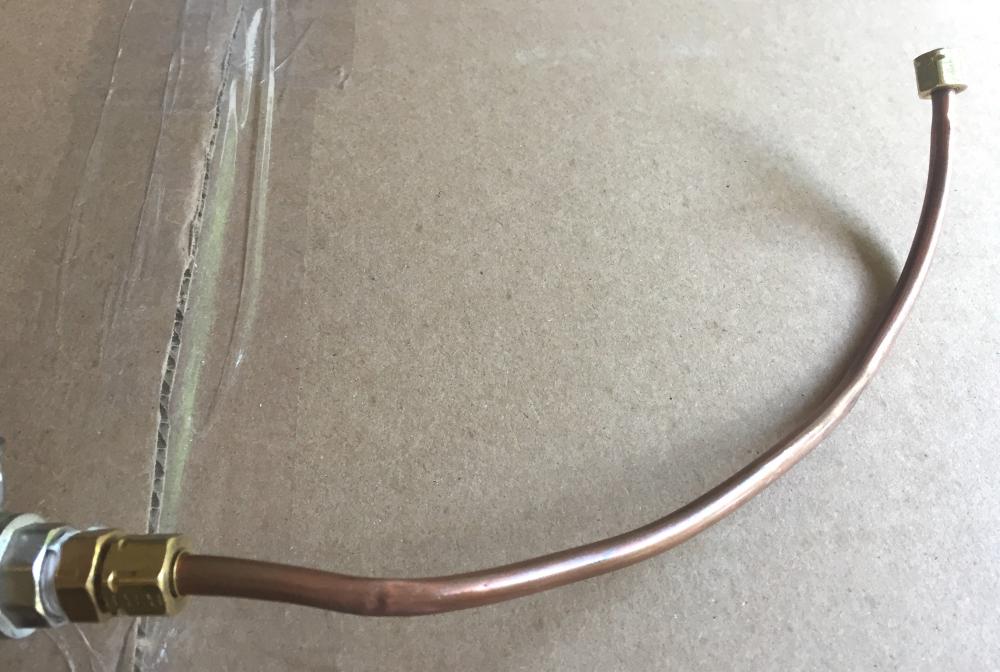
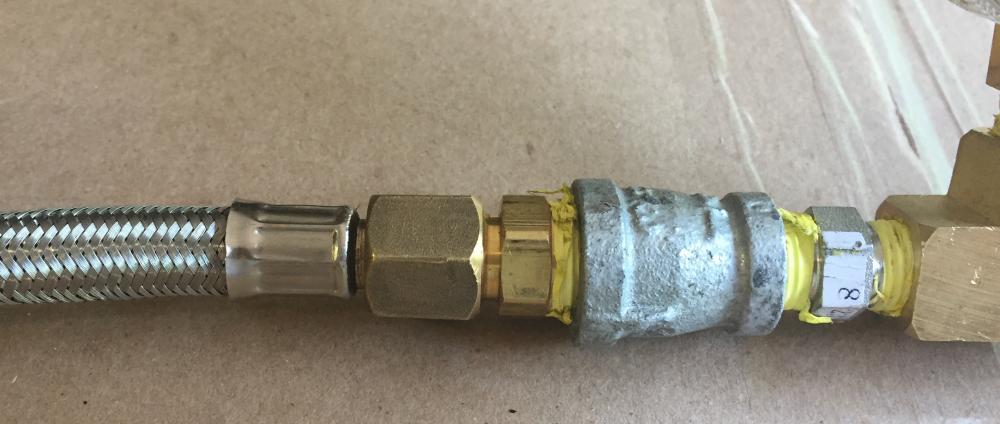
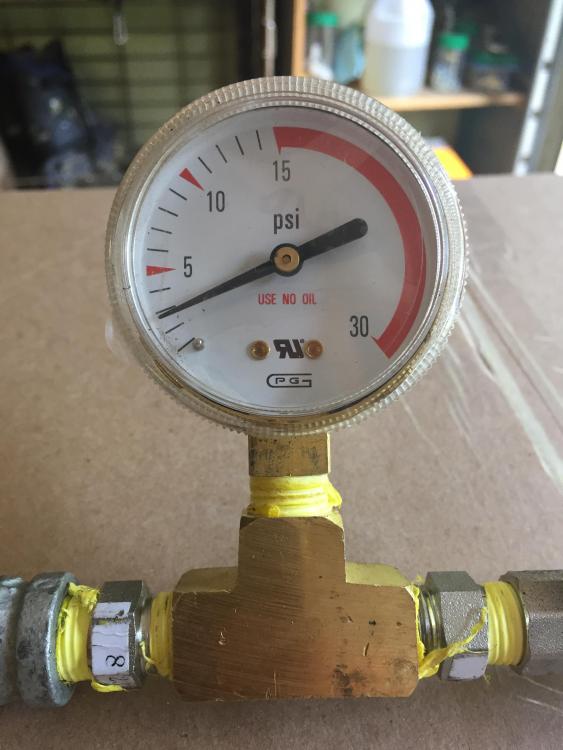
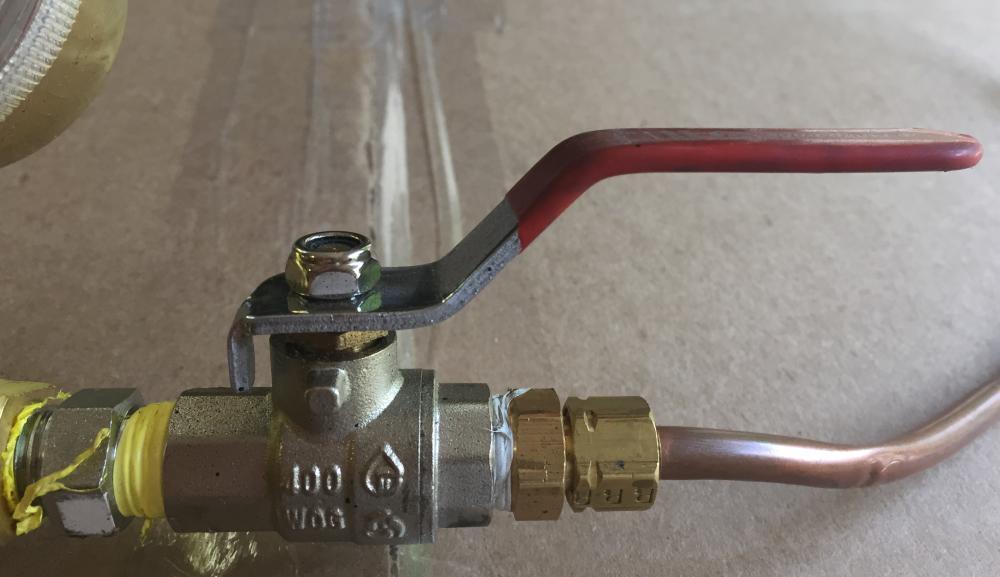
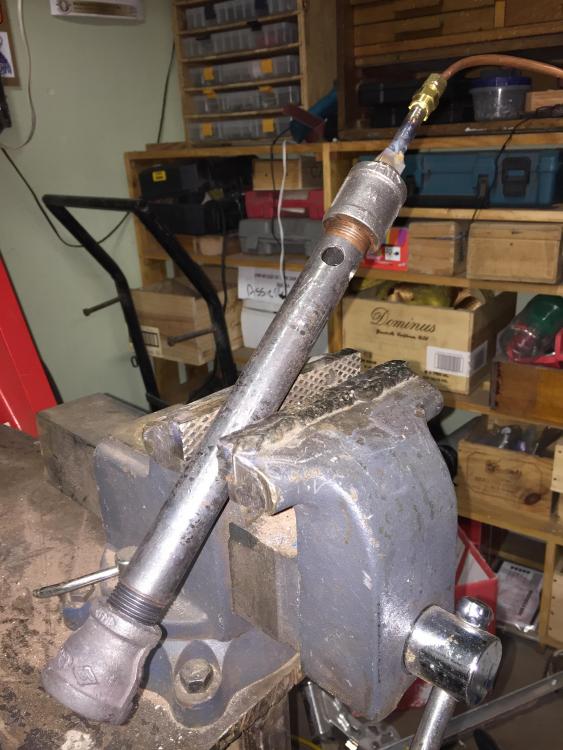
This is my very personal way to supply the burner. I give the list of required parts in their order of assembly: Parts list : 1 x propane regulator, best (cheapest) place to buy is Amazon (0-20 psi CND$ 30, 0-30 psi CND$ 60) 1 x coupler 3/8 OD Tube - 1/4 NPTF 1 x ball valve 1/4 1 x coupler 1/4 NPTF X 1/4 tube 1 x length of copper tube 1/4 1 x 1/4 nuts with compression ball 1 x burner Here is the whole in picture : Here on the picture we see the end of the hose of the regulator. Unfortunately, fitting 3/8 -1/4 was not available. So I took a fitting 3/8 - 3/8 and added a reducer 3/8-1/4. It's the gray steel piece. This assembly did not have to be, but after going to Rona, Home Depot, BMR and Canadian Tire, I took what I had available. The second step is to place the safety valve. It is essential and can serve as an adjustment to the burner by reducing the gas input. This is useful and it avoids playing with the regulator. The valve is 1/4 on both sides, so it must pass from 1/4 NPT to 1/4 tube. This is the fitting that you see on the right of the photo. The next picture is all 1/4 tube, from the valve outlet to the burner. Personally, I have a good length of copper pipe to avoid the hose being too close to the heat of the forge. The connection to the burner is done with a 1/4 tube compression nut. On my kit I put a pressure gauge. It is placed between the hose and the valve. I use it mainly to test and adjust my burners during assembly. It is a nice to have, but it raises the value of the line of $ 40-50 and does not bring anything more once you have mastered the heat you want to have your forge. Photo of a complete kit from tank to burner. It is worth to foresee between CND$ 65 and CND$ 100 to mount a gas line of base, without gauge, without burner. Good construction!


-
Good idea. I'll do that on my new forge.
-
Refractory cement and infrared reflective paint have arrived. Tomorrow, holes for burner supports, wool installation and cement layer. Thank you Wayne !
-
I made a small production of burners and like our children, there are not 2 of them identical. It would take a lot of file work to fine tune them all similar to one another, but I do not think that the result is worth the work.
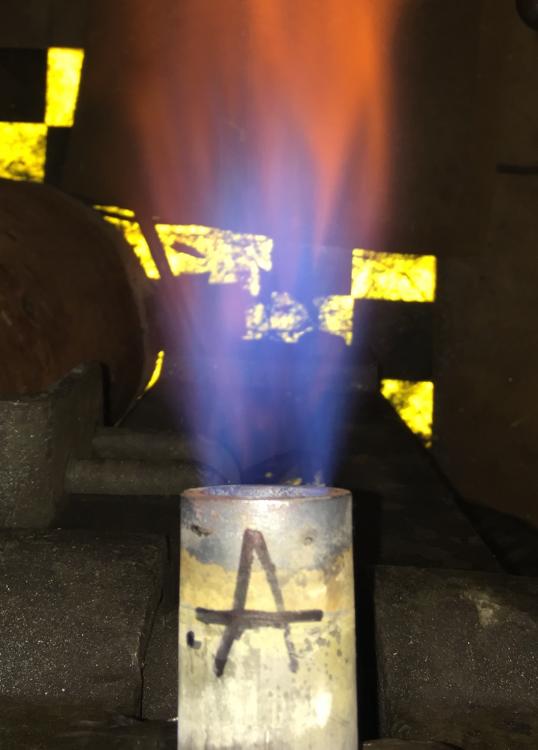
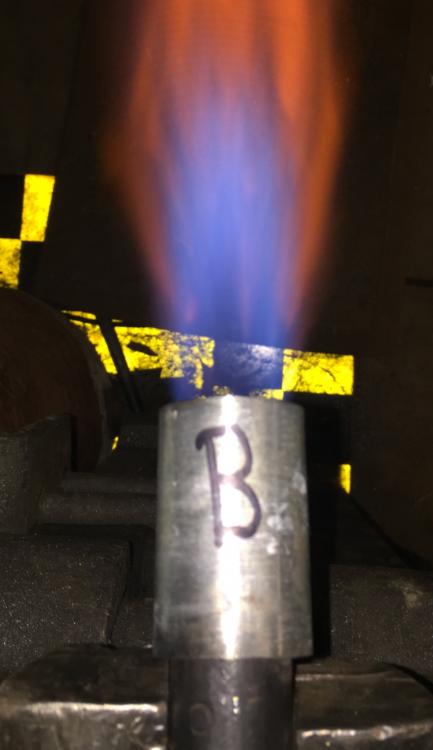
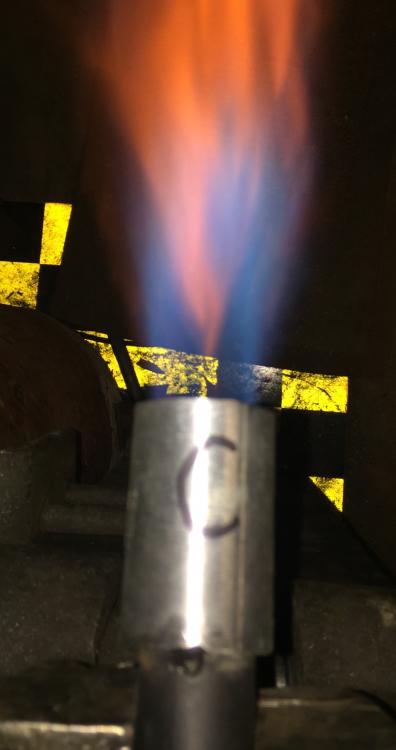
-
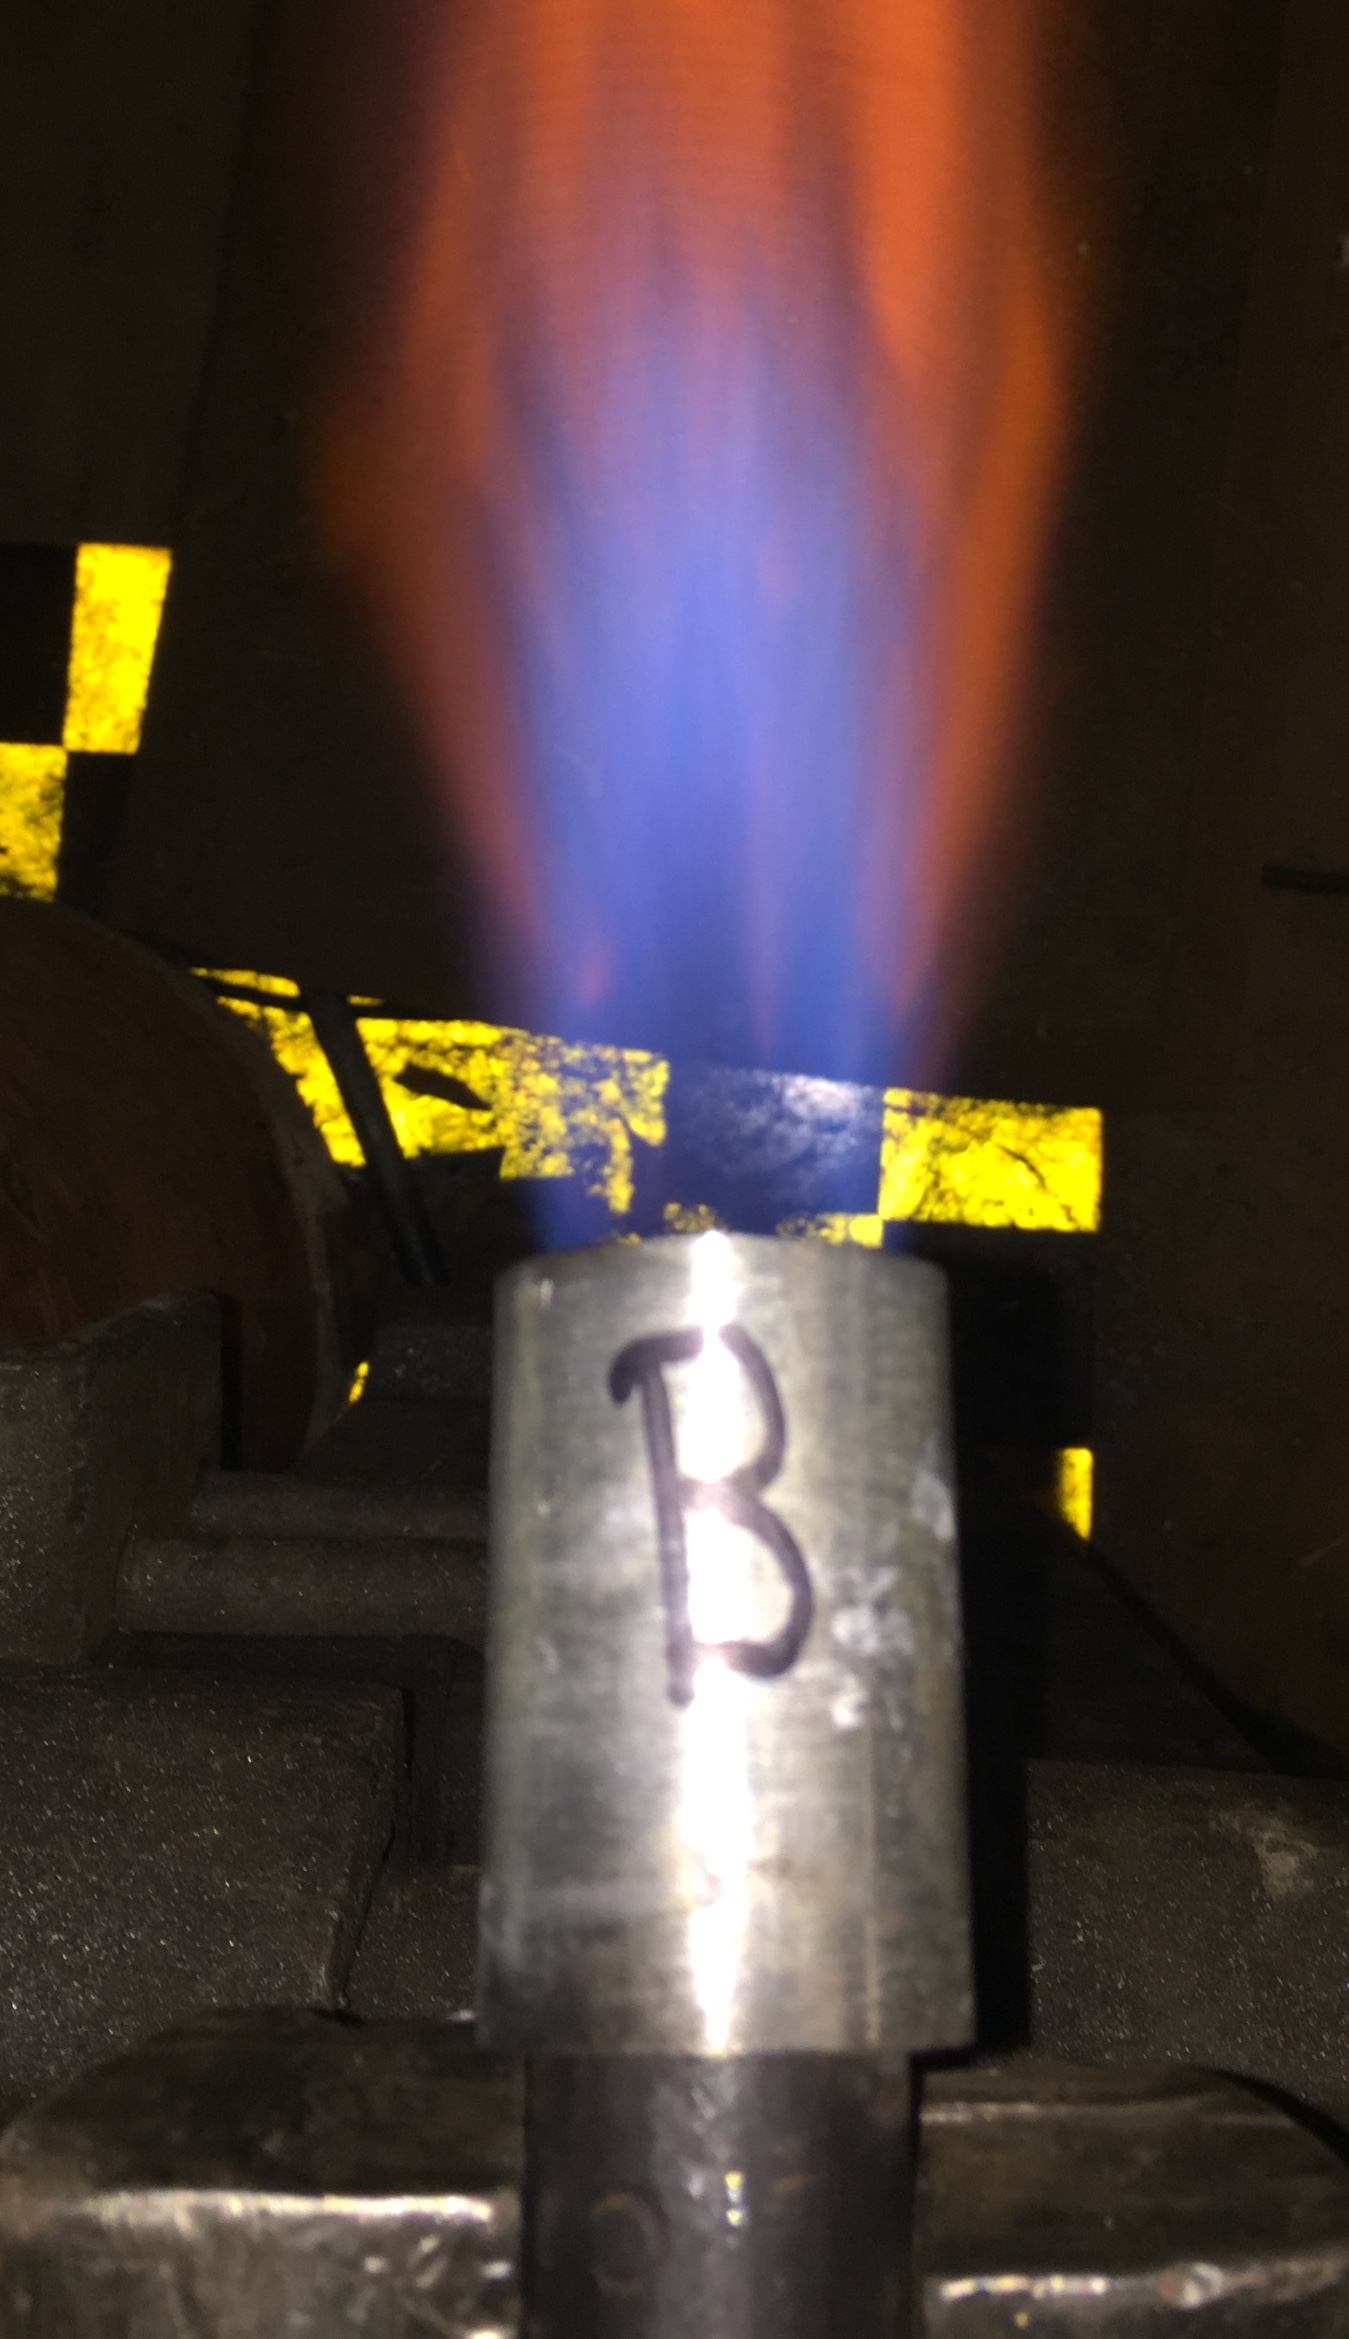
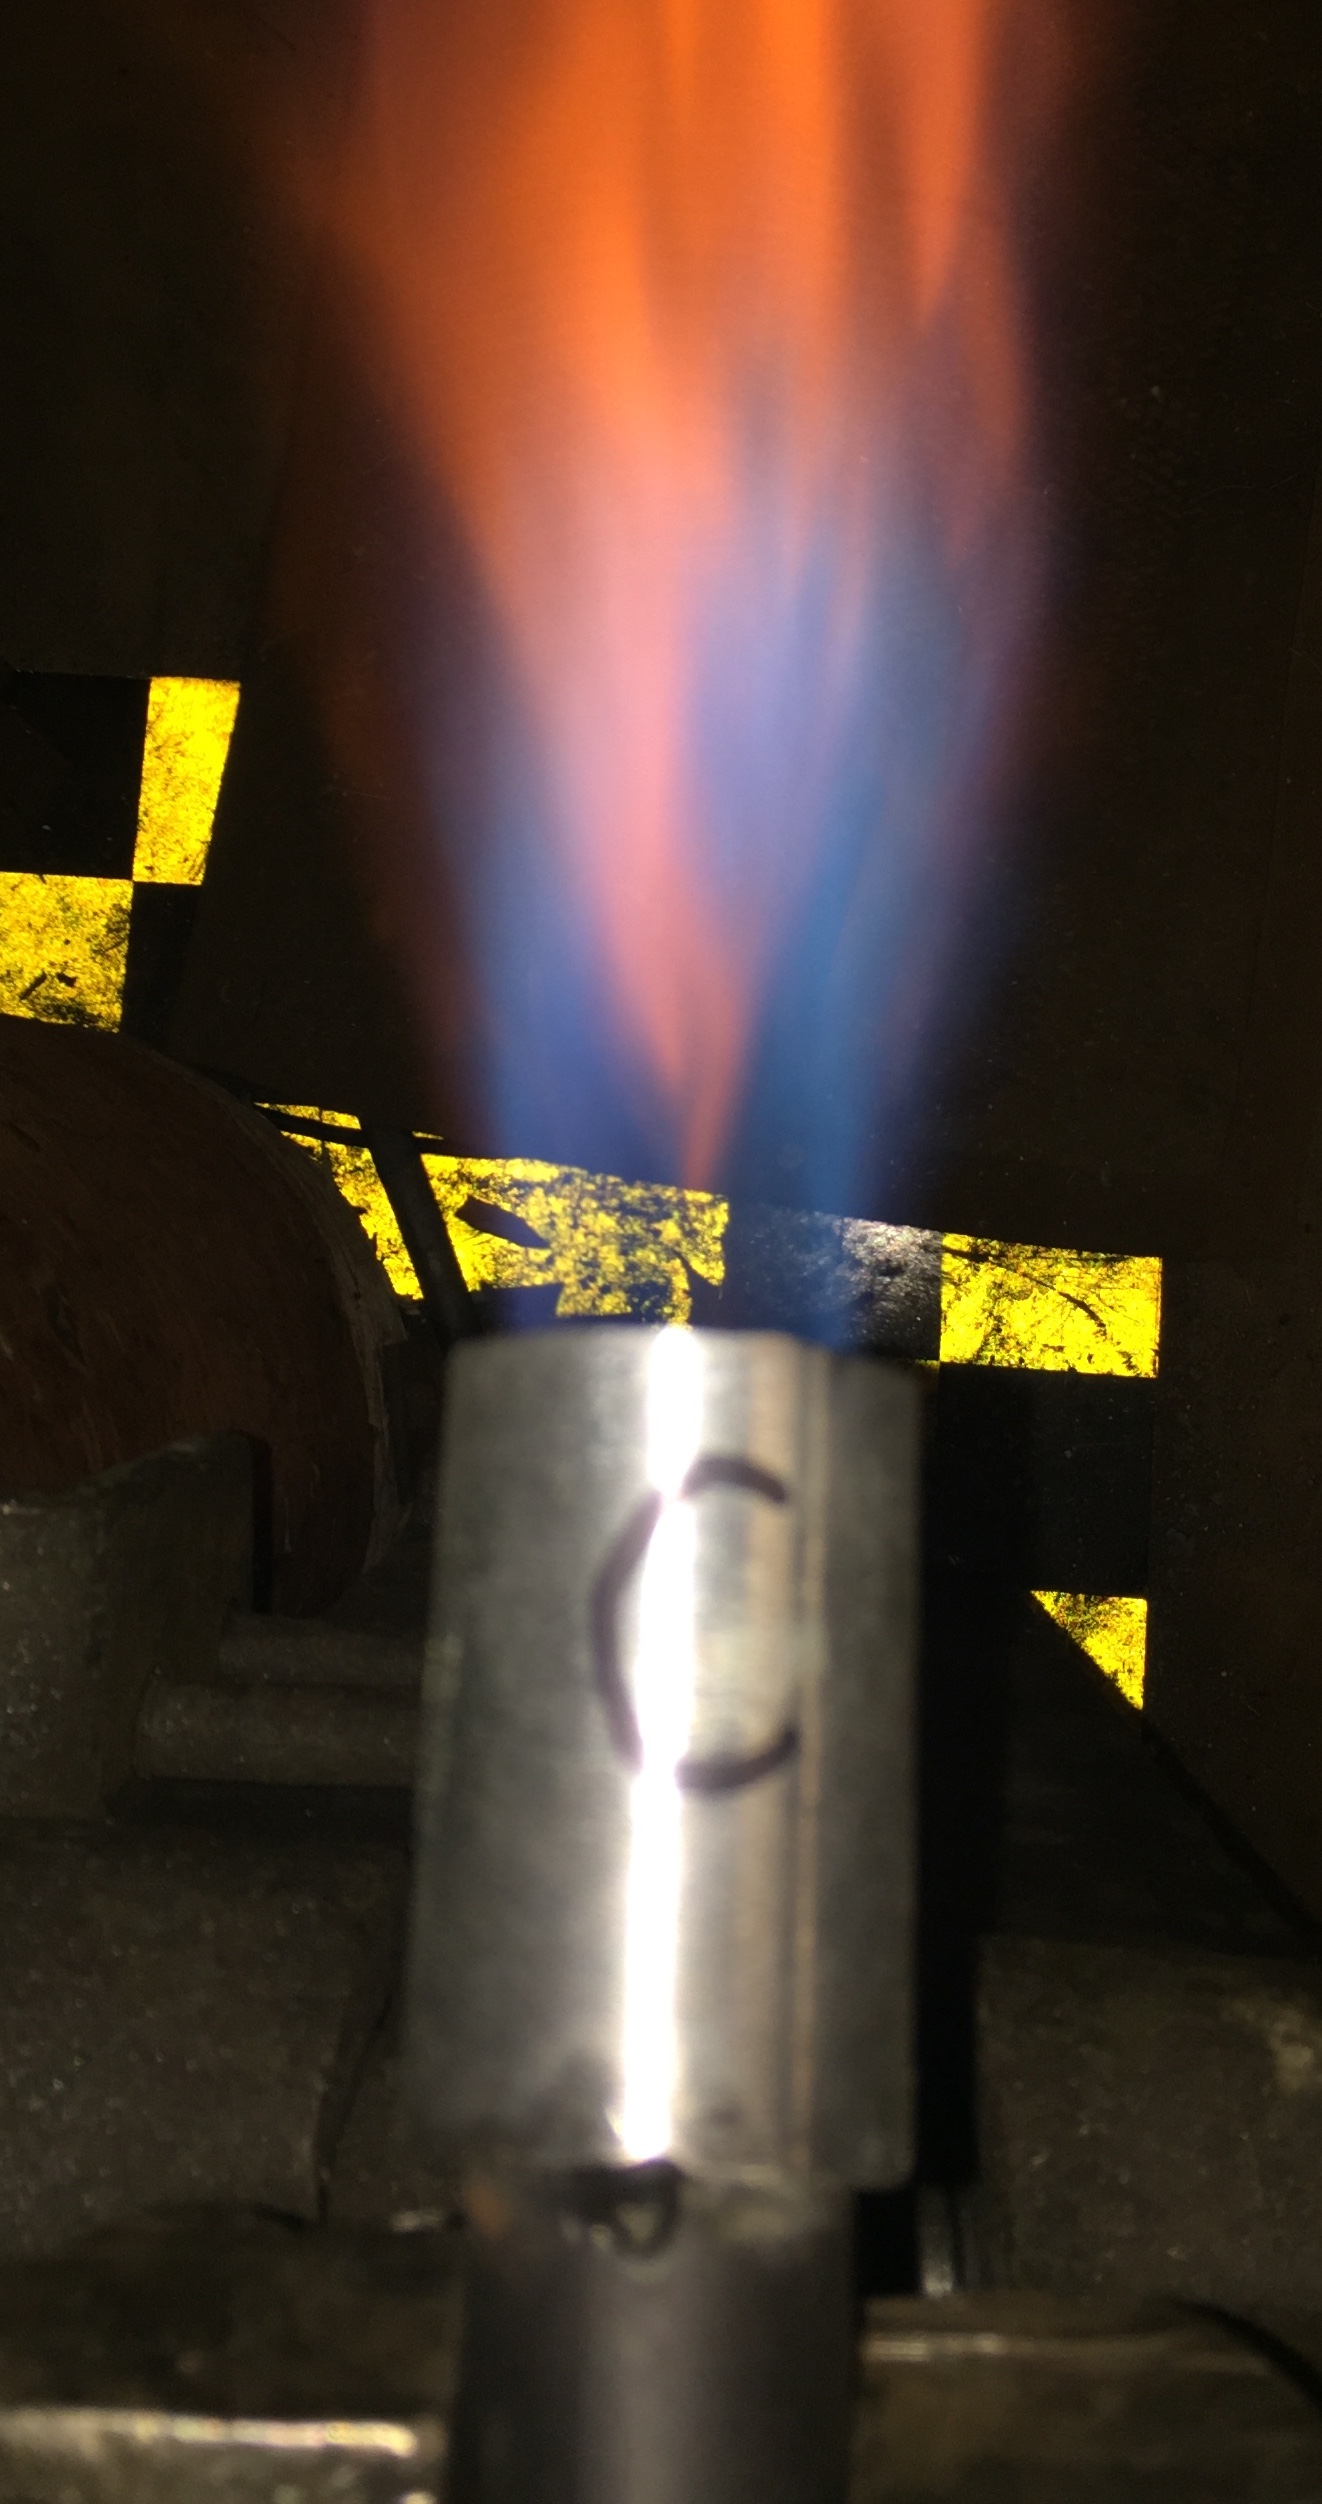
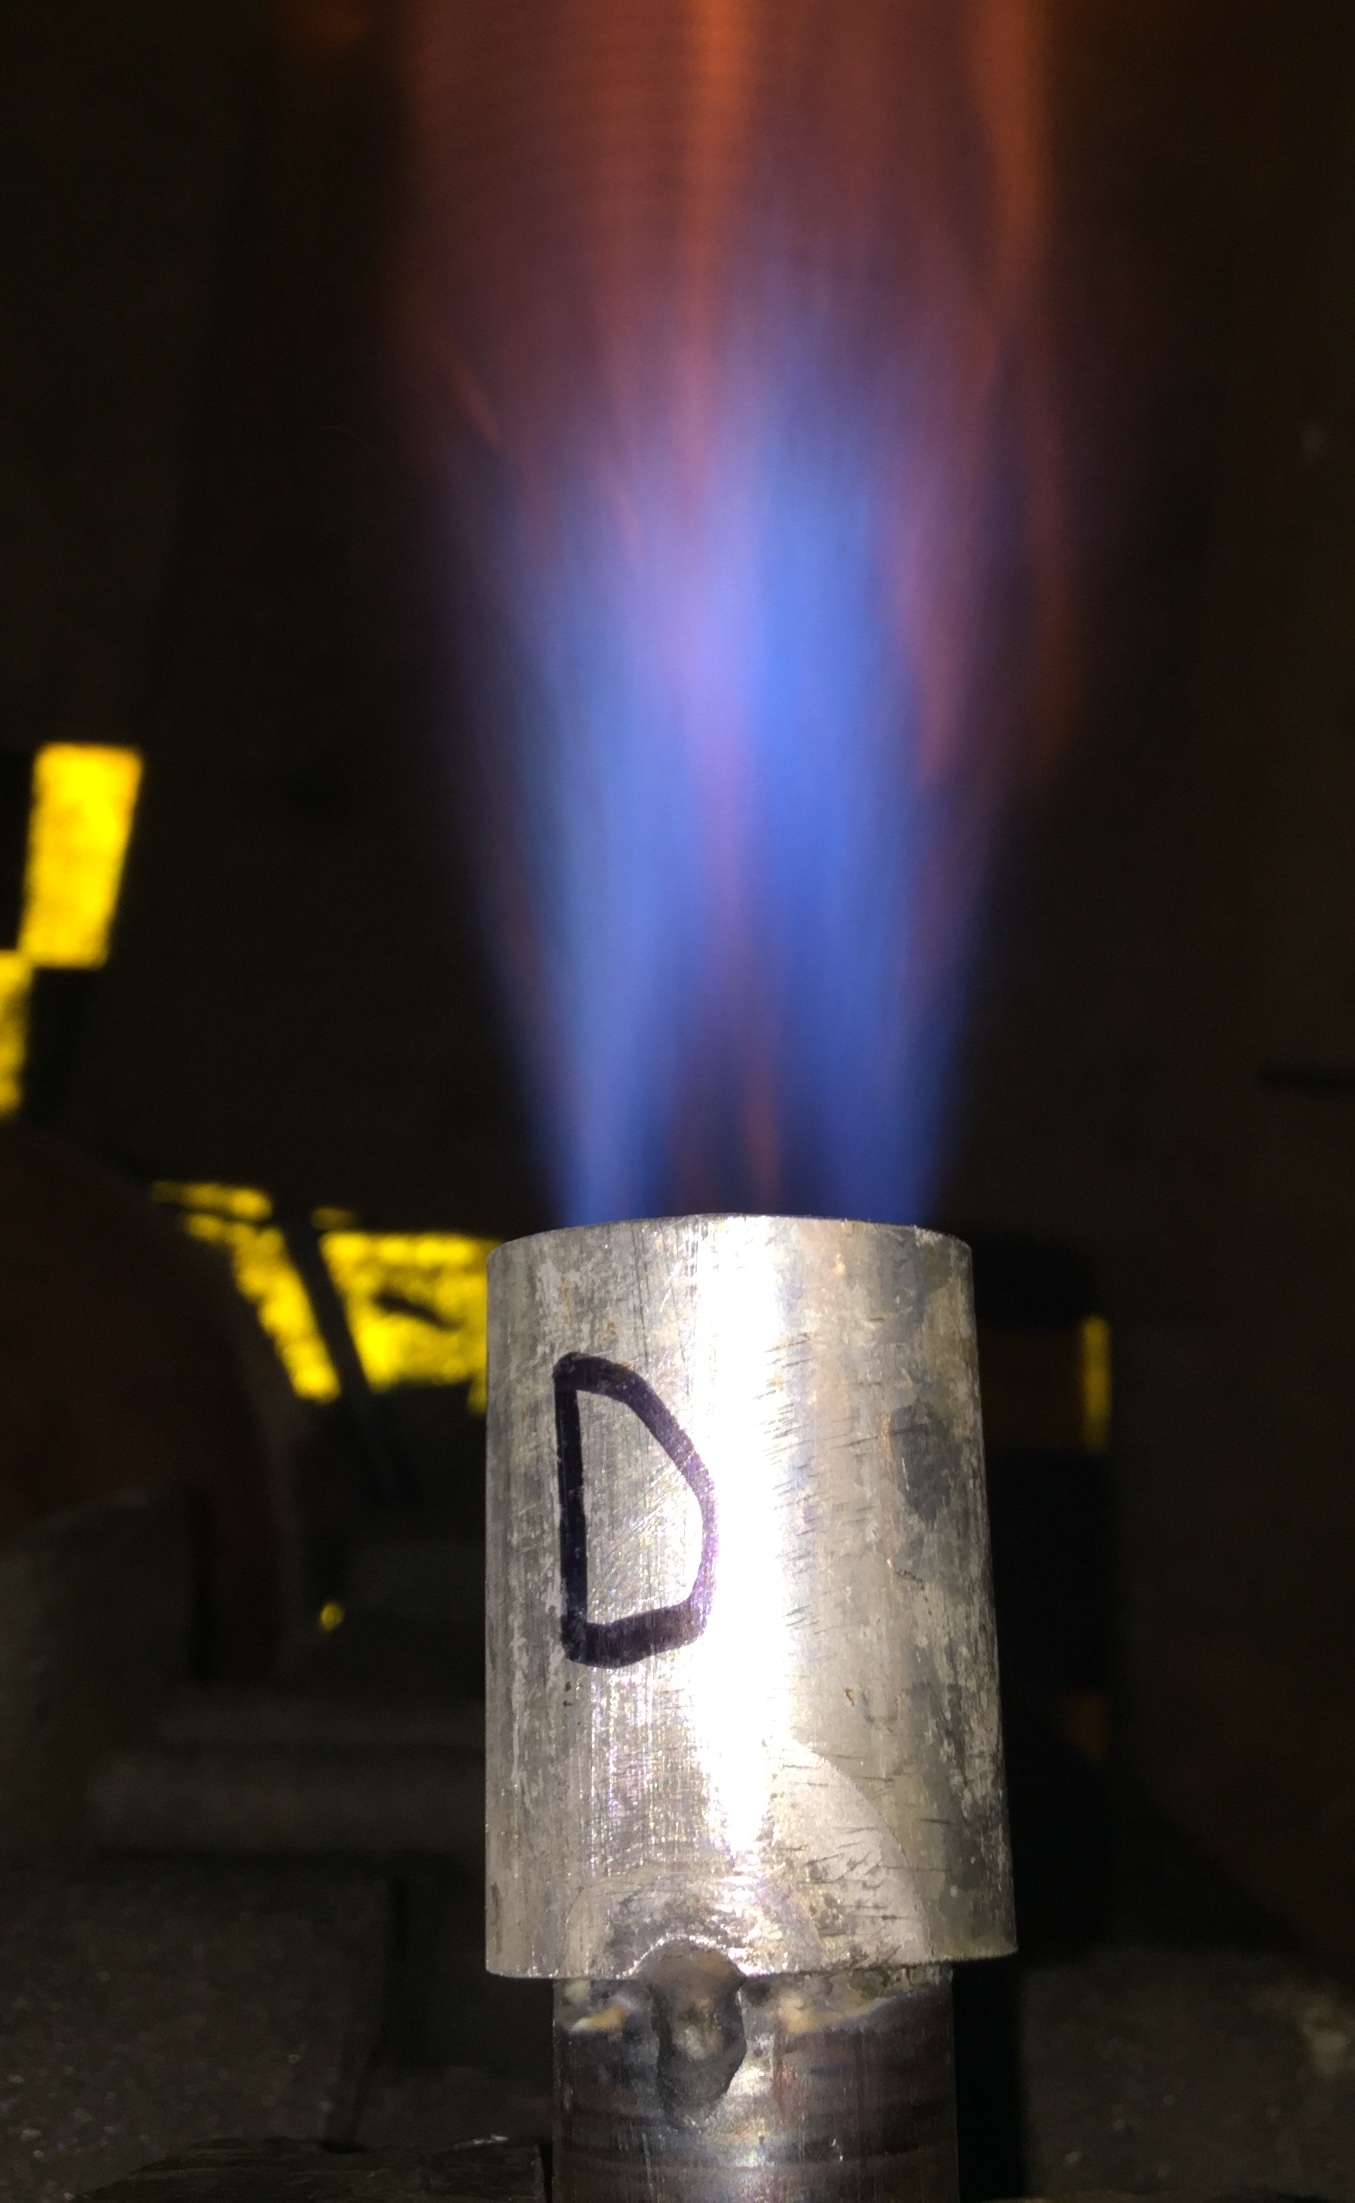
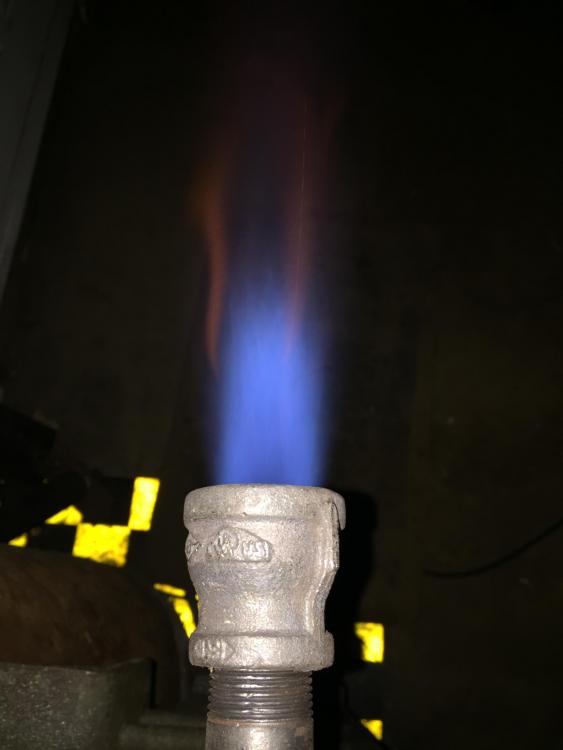
GrumpyBiker, your burner is different from the Mongo that I built mainly at the level of the air intake which is larger than mine. That's why you have to adjust your choke to reach an acceptable flame. That's the main issue. My burner is very simple with only 4 x 1/2 holes. At first I had made 3/8 holes of but it was clearly too rich. I switched to 1/2 and playing with the position of the Mig Tip, I got a neutral flame. I welded everything in place. For the flare, the bell reducer gives me an adequate result,... it does not come red too quickly and its thickness will ensure that it will last long enough. To replace it, I just need to unscrew it. The last pictures of your serie and the video seem ok to me. Your burner releases a lot of heat and a photo taken in the dark with a flash will give you a better idea of its true color. BTW, I'm not an expert !
-
It's in those moments that I would like to write in french.... I'll be back in a few hours/days...
-
Thanks for your help Wayne !
-
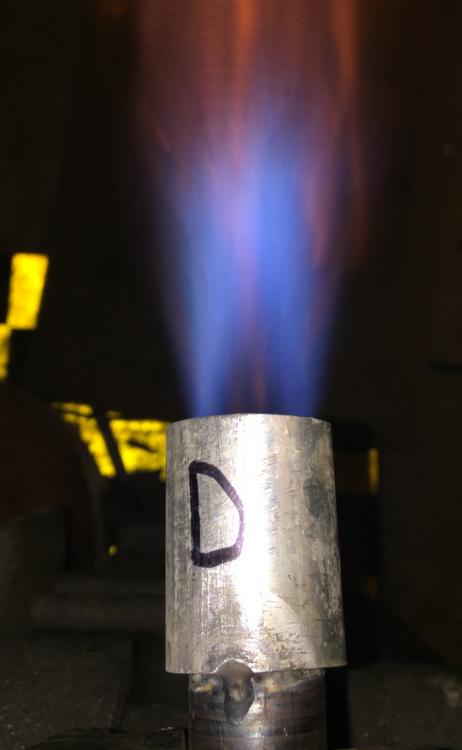
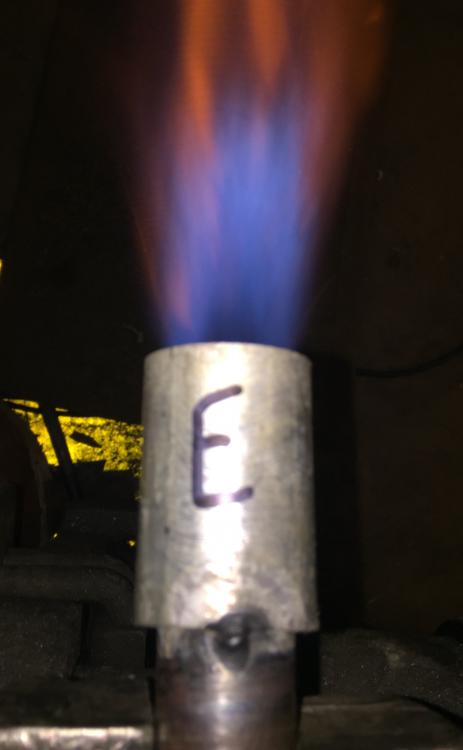
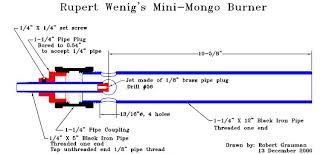
My Mongo Burner I started with the recipe of the mongo burner found on the WEB and adapted it to a 3/4 format. Parts List : 3/4 to 1 inch reducer 3/4 X 8 inches nipple 3/4 to 3/4 connector 3/4 cap 1/8 NPT nipple 2 or 3 inches 2 X Fitting 1/4 NPT 1/4 tube Mig Tip .023 (brass welded on fitting) I drilled 4 X 1/2 inch holes at 1/2 inch from the threads. When I had a neutral flame, I welded the 1/8 nipple in place rather than using a set screw... yes, I lose the possibility of adjusting it but.... ? If my flame is steady, why play with it ???
-
Hey GrumpyBiker, here a picture of my personal version of the Mongo Burner with its flame (@12psi).