Smokin' Coke Forge
Members
-
Joined
Everything posted by Smokin' Coke Forge
-
Thanks all for the replies. Charles - The tray is only warped along the length. It's still flat across the width, probably because there isn't enough metal in that direction to noticeably stretch. Thankfully, it did't twist along the diagonal length either. Biggundoctor - I'll probably try your suggestion first, since it seems to be the least aggressive solution. Are you suggesting that I evenly heat the entire bottom, or just a smaller section in the center? Neil - Great explanation about stretching the bottom side with a steel hammer vs shrinking the top side using a soft hammer. It sounds very similar to the stretching behavior that occurs on the outside of a bend vs the upsetting on the inside of the bend, but with much more finesse. It's the lack of finesse that got me into this mess in the first place, so a great suggestion that I use it when trying to get out of it. Thanks again. If I can get these techniques to work for me, I have a bunch of ideas for how I might be able to use the lesson to add some intersting "features" to some future designs. -Jim
-
Would it make sense then, to gently heat the plate from the high, top side, across the narrow width near the center of the tray, then cool just the top side? I'm thinking that if I do a little at a time - heating across the width of the high side, cooling, then repeating while gradually moving away from the middle, it might pull the far ends back up? Based on what's been described as the possible cause, and what I've read in another thread from back in May that contained some good information about "line heating" to straighten thick plate, it seems that I may be able to reverse the warp usng the same priinciple if I go slowly without applying too much heat. Barring any other ideas or suggestions to the contrary, I'll give that a shot tomorrow and reply back with the result. Thanks for the input! Much appeciated. -Jim
-
So, today I was working on finishing up a candle tray for holding 4, 3" pillar candles. The tray is 4 1/2" wide x 21" long, with a 1 1/2" rim welded around the circumference at a 45 degree angle to the base. The material is 3/32" thick. The legs are 3/16 thick by 3" wide, and will be riveted to the base of the tray where the scrolls meet. Before riveting the legs to the tray, I heated the tray, using a rosebud tip, to a black/dull red heat. Once heated, I applied a wax finish. Next I waxed the legs. The next step would have been to rivet the legs to the tray, however, I noticed that after waxing, the tray had warped about 1/2" from left to right along its length. (It was perfectly flat before heating for the wax finish) In this pic the tray is set on the legs but not riveted on. Here, the tray is upside down with a rod agross the length to illustrate the warp. Does anyone know of any way that I can correct the warp? I saw a post that suggested heating the convex portion of the curve, then applying a wet rag to cool just the top side of the plate, but I'm not sure if this would work considering the rim that's welded around the outside. I'm hoping that this can be salvaged, since it is supposed to be a Christmas gift, and I won't have enough time to make another. Thanks in advance for any suggestions. - Jim
-
Are you talking about installing a coal forge? You might want to consider that the chimey on a woodstove works a little different than one for a coal forge. Generally, a woodstove uses a 6"- 8" flue pipe, whereas a coal forge works best with a 10"-12"+ chimney. You'll likely find that the smaller pipe from the woodstove is inadequate for drawing the exhaust from a coal forge. Also, most building/fire codes that I have encountered don't permit sharing a flue pipe between 2 systems.
-
There isn't too much weather in our area of SE PA that keeps me from forging, except for 20+ mph wind. Rain & snow can be defeated with a pop-up sunshade. I did learn that MIG welding on my driveway in the rain was a really bad idea, though. I only had to try that once! Really bad experience. Forging in bad weather doesn't really compare. :^)
-
If you decide to plug weld from behind, you can remove the heat signature by using a torch, or reheating the entire piece in the forge to bright red/orange. After it cools to a black heat, you can apply wax or oil for an even black finish.
-
You can make a thousand nails for practice, and each one comes out perfectly . . . until you demo making a nail for a crowd - then it will jam itself in the nail header every time.
-
Ummm, coal?
-
My main/favorite anvil is a 200# Fisher. I also use a 225# Columbian, but i need to replace the stump, since it's sunken about 2 inches . I'm also in the hunt for a 100# portable anvil, since the other 2 are too heavy to take to demos on any type of regular basis. - Jim
-
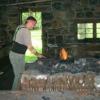
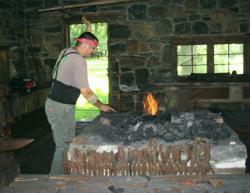
Very nice forge Dave! Mine is nearly exactly the same, except for the klinker breaker. I had drilled 16, 1/4 inch holes through the square plate before I welded it onto the handle, thinking that I'd get better airflow. Because of that, I'm not sure if I'm getting too much air now. Please let us know how you like the solid square one. I may have to change mine over to solid. The other forge I use is an orignal open hearth stone forge from 1730 (see my profile pic). It has a solid klinker breaker as well and still works like a dream. Maybe I overthought the design when i made mine? Thanks, - Jim
-
According to AIA, the top plate was pre-heated, then placed at the bottom of the casting mold before the cast iron for the base was pured in. The welding took place during the casting process as the molten cast iron was poured in, over the plate. Edit - Reference added: Anvils in America, Richard Postman, 1998, pg 148-149.
-
I prefer to keep it simple and objective - Merriam-Webster's Dictionary defines a smith as "a worker in metals" and a blacksmith as "a smith who forges iron." Do I work in metals? Yup. Do I forge iron (or some alloy made from iron)? Yup. Why make it more complicated than it needs to be? Call me what you want, but I'm a blacksmith by definition.
-
NIce Job! I've not seen that design before. Is it a Daniel C original? I usually make mine by punching and drifting then end of a RR Spike, then dimpling the near side of the hole to catch the edge of the cap. If you can duplicate these with any consistency, you should be able to sell them quite easily. The RR spike openers sell faster than I can make them, so I'll bet you would do well with this unusual design. One suggestion might be to try a little heavier stock next time for even more rigidity beween the jaw and the scroll. Even so, great job!
-
Hi, and welcome to IFI ! I'm from SE PA as well - Aston. Based on your description, I have a very similar setup to yours. 3 1/2'x4' outdoor forge table that I wanted a hood to keep the smoke from blowing into my face. I used the "Super Sucker Side Draft Forge Hood Plans" by Lester Beckman. I built mine over a weekend using 1/8' sheet metal for the hood. Rather than bending the top, back, and bottom as illustrated in the plans, I just cut the individual pieces out and Migged them all together. The Chimney is 12" diameter, made from 2 four foot sections of 6" black stovepipe opened up then joined and screwed along the seam for the section connecting to the hood. I used the same sized pieces of Galvanized HVAC pipe for the second 4 foot section to save money. Don't used Galvanized pipe to connect directly to the hood - It could get hot enough to burn off the zinc galvanization which could really ruin your day. The top section on mine has never gotten too hot to touch, so not a problem (at least for me). Even though the chimney isn't the optimal 10' high, it still draws very well. - Jim
-
Hi, and welcome. You should be able to find beeswax at your local arts & crafts supply store. I know that Michaels and AC Moore both sell it. Another popular finish is made with equal parts beeswax, boiled linseed oil, and turpentine or mineral spirits. Gently melt the three together, then pour into a metal container and let solidify. I like to rub it on the finished piece while still at a black heat, although you can apply it cold as well. I've also found that this finish also works well for waterproofing my leather boots! Enjoy - Jim
-
Holy Smokes!!! My wife said that I could have one if I was able to get it home in the back of my truck! Time for a bigger truck! (She said no to that) :^(
-
I am very saddened by the news that Grant is gone. In a year and a half, I have posted very little here, mostly because I try to spend most of my time reading and learning from the really knowledgeable folks on IFI like Grant. This weekend when I light my forge, in his honor, I'll ring my anvil, smoke a good cigar, and reflect on some simple but inspiring advice that he gave. When another noob like me asked a question about where to find a tool, he replied "why don't you just make one?" For some reason, that simple answer from someone who made and sold tools, inspired me to make nearly every tool that I've needed since. Funny how something so basic left such a lasting impression, probably because it came from someone as knowledgeable as Grant Sarver. He will be sorely missed. May God bless him and my prayers are with his family. - Jim
-
Hi Gles, welcome to IFI. You will find a wealth of information here, and lots of folks who are very knowledgable and willing to help. You'll also find that the more information you are able to provide about your anvil, the easier it will be for those who are knowlegable in this area to assist. Do you have any pictures that you can post? Quite often, a picture is enough to narrow down the field considerably. Any other distinctive markings, forging holes, measurements, or other characteristics will help. Purely as a guess, you may have an American Star anvil, made between the early 1850's and late 1860's, according to Anvils in America. A telltale characteristic of these anvils would be a cylindrical hole extending ~7 to 8 inches or so, up into the main body when viwed from under the base. Again, this is only a best guess based on the very limited information you've provided. Pictures (especially), or any other information will get you a much more definative answer.
-
When someone tells me about a relative who was a blacksmith, I usually ask them right off what type of stuff they worked on. When they answer, regardless of what it was, I tell them that that Im probably not a skilled as that yet, and that I try to stick to simpler stuff like nails, hooks, candle sticks and the like. Then I let my nearby display work speak for itself. When the horseshoing question comes up, I always state that even though blacksmiths can make horseshoes, nowadays its much cheaper to buy a steel blank and fit it to the horse. Thats usually done by a farrier now, a specialist who knows some blacksmithing, but is is actually closer to a veterinarian than a blacksmith. If their relative did horseshoing, I make sure to express my respect for that person, since shoing a horse involves so much more than just making a steel shoe. I the end, it doesnt matter to me if they are blowing smoke at me or not. I demo for fun, and to entertain whoever cares to watch. As long as they walk away happy, and take away a little more than they came with, it was worth it. I probably had more fun than they did anyway. :)
-
Nice job on the cross and tutorial. Much better directions than I had when learning to make my first cross. Are you planning to post any directions for projects that I haven't thought of yet? :rolleyes:
-
Thanks to all for your advice and suggestions. I've decided to stay away from the galvanized stuff altogether, and was able to find 6" Black pipe to piece together as recommended by DanBrassaw. That was a great idea that I hadn't considered before. I must say that I was intrigued by NRunals' suggestion to use muriatic acid and water to remove the galvanizing, as that suited my budget the best. My only hesitation was that if I didn't remove all or enough of the zinc, I'd still have some risk. Maybe I'm making too much it, but I'd rather be safe than sorry. Regardless, thanks to everyone for your advice. Hopefully the next person trying to figure out if galvanized chimneys are safe will land on this topic before spending as much time as I did trying to figure it out. Thanks again! - Jim
-
After a long winter of tool making and doing demo's at a local indoor forge/museum, I'm now finally ready to install my side draft chimney on my outdoor forge. One thing that I'm struggling with, though. I've probably read every post on side draft chimney construction on this site and on Metal Artist Forum, as well as on Avilfire, but there hasn't been one mention of whether it is safe to use galvanized pipe for the flue. Nearly every article recommends contacting a local HVAC contractor for the pipe, yet the only smoke, spiral, or ductwork pipe I can find in either 10" or 12" diameter, or have made, is galvanized or stainless. Stainless is way beyond my budget, but what I know about galvanize poisoning and metal fume fever makes me think that stainless is my only answer. Does anyone out there know for sure, or have any experience with whether or not the supersucker box will get hot enough to cause the zinc coating on the lower section of chimney pipe to burn? I'd hate to wake up dead because I tried to stay safe by drawing the coal smoke away with a galvanized chimney. I know better than to burn up galvanized stock in the forge. I'd also rather be viewed as really stupid by asking if it's OK to use it for the chimney, than to be found dead because I didn't ask. Thanks for your honest input. - Jim
-
I really enjoy making small, quick items as giveaways at demos. Anything like a Fredricks Cross, Twisted S-Hook, or Leaf Key Fob works for me. I've made enough of these that they don't take too much thought or planning, and I can talk and entertain folks while making them. Nothing better than seeing people's faces when I hand them a souvenir that they just watched me make, especially when they aren't expecting it. Next would be making my own tools. It's a real kick using something that I've made myself to help make something else.
-
Dave, Iv'e seen a lot of the work that you have posted on this site, and the overall impression always seems to be that you could be charging MORE for the quality of work that you are producing. You've also demonstrated that you have tried to be more than fair in your dealings with your customers, and in this case, went way beyond what could reasonably be expected. If this carpenter could have gotten the same type and quality of work from somewhere else at a cheaper price, you can bet that he would have. I'd be willing to gamble that he won't find a better price or product elsewhere. Don't be surprised if he reconsiders your original quote. If you're not concerned with losing his business again, that's when you take the opportunity to raise your price to meet the new market demand. You have the hammer, forge, talent and product. The customer needs to be willing to pay a fair price. If not, you don't need the headache. Keep up the good work!
-
Wow! Nice Rack. You mentioned that you made all of the rivets, but I don't see any. What am I missing? And how did you attach the cross pieces together? Unless you welded them from the back side, I'm stumped. Someday I hope to get to the point where my craftsmanship is such that it's not readily obvious how I was able to do something. Thanks for the inspiration. - Jim