
LDW
-
Posts
873 -
Joined
-
Last visited
Content Type
Profiles
Forums
Articles
Gallery
Downloads
Events
Everything posted by LDW
-
Brian, you are right about it practically making itself after putting it under the dies. The advantage you have over us is knowing which dies to put it under. This is the valuable information that you are so willing to share. The heat, the hold, and the hit. Man, that sounds simple.
-
I was at Brians Friday and he showed me how to make a feather. Here is a link to the pics http://picasaweb.google.com/brianbrazealblacksmith/LyleSFeathers# Karen was kind enough to create an album for me. She also added an album that shows the steps to making them http://picasaweb.google.com/brianbrazealblacksmith/BrianBrazealFeatherSteps# These are great items to make so far everyone that has seen them liked them. I cannot thank Brian enough for showing us how to do so many different things. The copper and silver both perform about the same in the forge. I am going to try some steel ones next.
-
Here is a link to the pictures. http://picasaweb.google.com/LDWynn/AprilMeeting2010MFC# We had a big turn-out and Jon and Woody demonstrated having an open mind to the resource pile. We got to watch them take objects and create yard art. We had a good time. I struck for Brian and he made his own version of yard art, a big beautiful bird.
-
Here is a link to the items Joseph took home with him. I have to do the link because I cannot get a picture to attach. I want ya'll to know Joseph worked from daylight till dark, hammering away. Brian said it would have been nice to take some pictures the first day and the last to show the improvement. I told Joseph if he can learn the steps Brian is showing him, he can practice them for years. He did excellent, and he was a pleasure to be around. http://picasaweb.google.com/LDWynn/JosephsPics#
-
I am making an anvil stand that is going to look like the brother to this vise stand.After listening to Brian and striking for and with him, he has shown me the importance of having a rigid and stationary stand. If this stand can encourage someone to make theirs sturdier you will make Brian happy, I assure you. I think we need a bigger concrete slab though, since Brians anvil is secured to the stand as well as anchored to the slab, He still knocks things off the shelves and walls.
-
Brian uses vegetable oil. In this case it is peanut oil, if the piece is hot enough it will turn it black, similar to seasoning an iron skillet. In the picture you can see that part of it was not hot enough that is why he returned it to the fire to heat it up some more. Did I get that right Brian?
-
Hey 2dogs here is a link to one of the earlier web albums when Brian first made it to Mississippi. I tried to get the steps so I could remember. This may not be completely accurate but I think it is a help. http://picasaweb.google.com/LDWynn/LDWSInterpretationOfBrianBrazealMakingAHammer#
-
A hopeful future blacksmith
LDW replied to tomcellwheel's topic in Blacksmithing, General Discussion
Here are the pics, I posted these on a new thread, but they belong here as well. You can see him striking for his hammer towards the end. We all had a blast. http://picasaweb.google.com/LDWynn/LAMACONFERENCE2010# -
If any of you ever get a chance to visit with the group in Louisiana, don't miss the oppurtunity. We had some of the best food there is, and met the friendliest people you can imagine. The first day was animal heads, everyone was able to follow the steps, Brian has a way of putting things in perspective, you cannot think of making the finished project, you learn the steps that make up the finished project. This way the metal will react the same way everytime and you can learn by repetition. The second day of the class was the forge welded bundle. It was great seeing the smiles on everyones faces, whether it was from making the forge weld, or the striking each one was doing to help each other draw out there bundles. Saturday and Sunday were very productive, Brian made a Hammer, a 3-D Horse Head from 1 1/4 inch stock, and His custom hot cut hardie, all by noon and did not really start hammering till around 9:30 Saturday morning. I can see now I will be making the trip back every year, Thanks for everything fellows. Here are the pics. http://picasaweb.google.com/LDWynn/LAMACONFERENCE2010#
-
I bought some wrought iron from this place one time. I looked back and flat bar was $4.00 a pound. http://www.oldglobewood.com/ There is also a guy in the MS Forge Council that is selling some that was left over from a big fence he did around the old capital in Jackson. It is in the last newsletter you can see it at http://www.msforgecouncil.com/ if you like.
-
That is a great video Brian, who was your videographer? I bet this would be something good to practice with clay. Thanks for all your inspiration.
-
Hey Junker, I have been making knives from cable for years and I have tried everything to etch cable with. People used to tell me all you have to sand to is 600 hundred grit and you can etch it with diluted PCB etchant from radio shack. I am not saying this is not true but I am saying it will be an all day process. I have found that if you hand sand it to at least a 1000 grit finish then etch with Muriatic acid it will be a 15 to 30 minute process including the final finish to the blade. Muriatic is some bad stuff so don,t get it on you, stay upwind and have water, and water with baking soda available so you can neutralize the blade when finished. Cable is the same metal, rather than different colored metal on "real damascus", therefore it requires a deeper etch to see the decarb lines. This is how it was explained to me. I left a blade in solution a lot longer than I meant to one time but it was beautiful when I buffed it.
-
We had a great time at Terrys Saturday. There was a large turnout and the blacksmiths and bladesmiths were a great compliment to each other. Brian demonstrated making a boarding axe, like the three he brought, there was a demonstration on making damascus, and then a cutting demonstration. Our bellies got filled because Ed Benton went to the trouble to prepare the meals, and we had an Iron in the hat, that someone got to win the boarding axe Brian made. This was a first time to combine an MFC meeting with Terry Vandeventers annual Hammer In and it was a big success. Here are the pics. http://picasaweb.google.com/LDWynn/FebruaryMeetingAtTerryVandeventersHammerIn#
-
Here are the pics of the Meeting. We had a good turn out and enjoyed our visit with the local hardware company that demonstrated a couple welding machines and a plasma cutter. http://picasaweb.google.com/brianbrazealblacksmith/JanuaryMeetingAtTheMFC
-
Was the MFC meeting cancelled last weekend?
LDW replied to Mark Wargo New2bs's topic in Mississippi Forge Council
The Meeting was cancelled last weekend and we will be meeting tomorrow. Hope to see you there. Lyle -
What I have seen is the same as 781 says. Here are some pics of when Jim Piggot made a skillet at one of our meetings. http://picasaweb.google.com/LDWynn/April2008MFCMeeting#
-
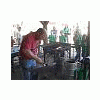
The MS ForgeCouncil meets on the second Saturday of each month, ath MS Agriculture and Forestry Museum. We meet in the Blacksmith shop, unless we plan a meeting at another location. The website is being worked on and will be up and running soon. A week from Saturday we will be meeting, and I am glad to invite you to come. I am Lyle and have welcomed several new members after meeting them here on Iforgeiron. We are going to have a local company do some demonstrations with some metal cutting equipment. We will have a green coal class for any new people that would like to get in the fire after the demonstration. We are fortunate to have Brian Brazeal staying with us and has been working at the Agriculture museum every day up until today, He is leaving on New Years Eve to go to Alabama and will not be back for about 10 days.
-
When you hammer the stock down to form the stem, take your time and keep the shoulder against the anvil. If you do not hold your stock as high it will cause you to work more on the stem and give you more material at the back of the leaf. If you only hammer on two sides of the stock you can reduce the stem easily. If you start with square stock turn the material on the diamond and hammer down this will make it spread further. http://www.iforgeiron.com/uploads/500/100_2998.JPG
-
GOT14U What part of the world are you in? I have helped many people weld cable the way I showed with no problems. The main thing is to get the end welded when you start. It is hard to tighten the end unless it is at a yellow heat. Sometimes it welds on the first heat after it has been fluxed. I burned up a lot of cable learning to weld the tip. If it does not weld cut it off and try again.
-
Zapsteel, I tried to weld some stainless cable one time and could not do it. I did some checking and was told it had to be done without any oxygen present and I looked around after your post and found there is a special flux for stainless. I ended up taking my cable apart and using the single strands to tie steel together with that was going to be forge welded. I think stainless can take the heat a little better than carbon steel. In all honesty, I know nothing about forge welding stainless.
-
If you use cable that is 1/2" or smaller the handle will flex. Stainless is a different ballgame. If you etch cable aggressively you will get a more defined pattern. Once the gallery gets going I will attach a pic here of an aggressive etch on a blade.
-
Here is the way I do it, Like Brian Brazeal says, It practiacally makes itself. I made 4 knives like this today, got 2 more to go then I will start cleaning them up. Picasa Web Albums - Lyle - Birth of a ca...
-
Pictures! The first few pics are Friday Night at the Agriculture Museum , Then the Party. http://picasaweb.google.com/LDWynn/MFCChristmasParty#
-
one heat horse head
LDW replied to brianbrazealblacksmith's topic in Blacksmithing, General Discussion
Divermike I have picasa and when I tried to download it, it says videos cannot be downloaded at this time. You may have to film it with your own camera from the screen. I have done that before.