

Glenn
-
Posts
17,325 -
Joined
-
Last visited
Content Type
Profiles
Forums
Articles
Gallery
Downloads
Events
Posts posted by Glenn
-
-
A discussion makes the original question more specific which results in a more specific answer. The site encourages differences of opinions and discussions as long as they are done in a respectful manner.
-
If you do now have the discretionary funds to purchase the anvil of your choice, then use what ever anvil you have now to earn the money you need to purchase the anvil you want. This is true for any other product you wish to purchase, tool, truck, house, land, what ever it is YOU want. There are a couple of threads that show you how to get the money, such as Anvils, rent-to-own and After all it is just a quarter.
-
The quote feature collects what you highlight and turns into into a quote. You can then edit the quote to additionally include or cut out what you want in the quote.
To make your post, scroll down below the quote to make the post. This does not then include it as part of the quote.
-
If you must have a sharp point on an anvil horn, cut an X in a tennis ball and attach it to the end of the horn with a bungee cord around the heel of the anvil to hold it in place.
-
Stand at the forge and take note of your visual needs to see the metal in the fire. Then take note of the physical needs of the metal to go into and move to use the fire. Now use whatever is handy (sheet metal, aluminum flashing, etc) to block off the remaining space as a test run. During testing, trim as needed to fit YOUR needs. As you are only allowing smoke from the fire into the chimney, the heat of the fire will increase the draft.
Now go outside and look to see how much smoke (exhaust) is going up the chimney. This is the amount of make-up air that you need to let into the room. Opening a window or door is all that is needed.
When you finish your test, you can leave the skirt in place knowing that as you forge different things and different shapes, you can fit the project in the forge by trimming as needed.
This is based on burning bituminous coal, which can produce lots of thick smoke. Burning charcoal, or other solid fuels, should take little or no adjustment.
-
A couple of sheets of newspaper set on fire is enough to get the drat going in a chimney.
To increase the draft in the chimney, add a skirt between the hood and the forge so more of the smoke and less of the room air goes up the chimney.
-
A 3 foot black snake passed through the shop today. He looked healthy, happy, and made it through the winter.
-
You can run the ash through a window screen to sift out all the chunks and pieces larger than the screen. Hardware cloth works if you want a larger size ash.
-
If peoples feet are moving, they appreciate the music.
-
That front pocket shirt simply means you have to move the main design to the back.
-
-
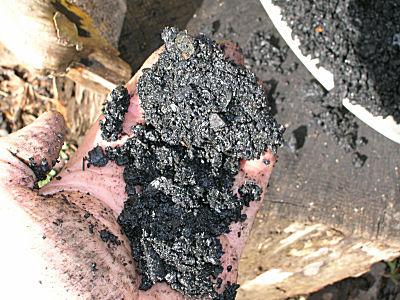
Sift the fuel through a screen to remove the coal dust. You can then add water to the coal dust to make a paste that can be used in the forge.
-
If you need a respirator in order to use coal as a forging fuel, you should look into how to avoid producing smoke with BOTH good fire maintenance and a chimney to remove the smoke from the work area.
-
My boss is a jerk… my pay is terrible… my working conditions could give an OSHA inspector a heart attack!!!
I’m self employed! Twistedwillow
-
You are already set up, so make as many of each item as you have stock to complete. 25 of each is a good number to start with. Think of it as shelf stock ready for sale at the next demo. Put each item in it's own box so you just need to grab a box and throw it in the vehicle.
Learn now to make each item more efficiently and more quickly. Select one using the longest length for that project. Grab a hand full of that ONE length and start making the item. As you make that item, you will find a method and rhythm so make a bunch of them. Then move on to the project that uses the next length and repeat. You will find that it gets easier because you have figured out how to make it and can now make it quicker.
Best thing is little or no waste as you use shorter and shorter stock.
With the roses, precut two leaf rods, and one flower rod. Make the leaf on the end of two rods, and the flower on the end of another rod. Put 3 pieces in a drill, and pull the trigger. Instant twisting.
-
First snake of the year showed up outside the forge, a Ringneck snake. Gentle little snakes. smaller than a wooden pencil, and about 6-8 inches long.
-
Before you do anything with strength, look at the pivot point of the moveable leg. Apply a penetrating oil and be sure it is free and working first. As you work on the moveable leg pivot point, apply the same penetrating oil to the screw and jaws. the penetrating oil soaks in, give it a tap (not a hit, a tap) with a hammer to help with the penetration. Once it moves, use more penetrating oil and move things only a little at a time. If it takes a day or a week to free things up, it is better to spend some time rather than break parts. No matter how long it tool to lock up, it will take less time to free up and start working again. Patience is your friend.
-
The mods have contacted me and the animated gif was removed because it as a stop sign as you read the forum demanding that you watch or at least look at the gif. This interrupts the flow of reading. The larger the gif, the larger the stop sign, and the greater the demand to stop.
This is also true for colored text. Dark gray, used by moderators, is close to the black color used for the forum text is so there is a small difference in colors, but enough so you can read right on pass the color change. The blue color text is reserved for explanations, if needed. Otherwise you can read the forum at full speed with little or no interruptions.
This does not address the issue of the copyright for Snoopy, the copyright by the person doing the animation, etc.
-
-
The reason they remove the tree bark at the saw mills before the process the log into lumber is to save wear on the saw blades.
Look up a log arch for less ground contact when moving the logs.
Leaving the logs out in the rain will wash some of the dirt out of the bark, debarking the log in the area of the saw cut, and pressure washing the area of the saw cuts works.
-
What's the medical term for a fear of chainsaws? Common sense! Rockstar.esq
-
I put the idea on the table so Charles and others can refine, improve, and adjust it as needed.
The idea of a lever in either the pritchel hole or hardie hole is used all the time. The lever makes lifting a swage block corner up from the floor, or running it through the swage block so two people can lift it is also very good. Does not matter how you make it easier, just that it IS easier.
-
Build the anvil stand to his height comfort. Put 2 wheels out in front of the stand, and a couple of receivers for pipe at the back. You only need to tilt the anvil stand just enough to engage (or shift the wheels to the ground) like a wheel borrow. The stand should not tip easily this way, but should be easy to move.
-
His custom tooling is very interesting.
Does my old Fisher have significant sale value?
in Repairing and Modification to Anvils
Posted
It is YOUR anvil and you can do what ever you wish with it, or to it.
Your anvil being marked 1883 means it is only 139 years old and has no doubt supported several blacksmiths and their families during that time.
In third world countries blacksmiths can turn out product and make a living on what ever is available to them, including a sledge hammer head, or just a piece of metal, be it square, rectangular, flat, etc. It is not the anvil or anvil shaped object but the blacksmith that is doing the work. Some videos will show the blacksmith working on just a block of metal being used as an anvil, with a London pattern anvil sitting in the background, not being used.
What is the value of your anvil as it stands now? That depends on what amount of money someone is willing to offer and what amount of money you are willing to accept.